Posted on

Easy Stuffed Poblano Peppers

stuffed poblano pepper

Easy, baked southwest stuffed pepper recipe with ground beef. Bold, savory flavors are served on top of a bright and colorful cilantro sweet potato and cauliflower rice.

stuffed poblano pepper

Southwest Stuffed Poblano Peppers

No ratings yet
Prep Time 5 minutes
Cook Time 20 minutes
Course dinner, Main Course
Cuisine American, Latin, Mexican, Southwest
Servings 2

Equipment

  • knife
  • cutting board
  • sheet pan
  • saute pan

Ingredients
  

  • 2 each poblano peppers (cut in half, seeds removed)
  • 12 oz lean ground beef
  • 1/4 cup red onions (diced)
  • 8 oz fire roasted diced tomatoes (drained)
  • 4 oz diced green chiles (drained)
  • 1/4 tsp chili powder
  • 1/4 tsp cumin
  • 1/4 tsp garlic powder
  • 1/4 tsp salt
  • 1 tbsp olive oil
  • 3 cups sweet potato and cauliflower rice (recommend Green Giant's brand)
  • 1/4 cup cherry tomatoes (sliced)
  • 1/4 cup cilantro (chopped)

Instructions
 

  • Pre-heat the oven to 350F
  • Arrange the poblano peppers in a single layer on a sheet pan and bake for 10-15 minutes
  • Meanwhile, add oil to a pan on medium high heat and saute the onions until they soften
  • Next, add the ground beef and season with chili powder, cumin, garlic powder, and salt. Continue to saute for about 5 to 8 minutes until the meat is browned and cooked through
  • Then, stir in the roasted diced tomatoes and diced green chilies
  • Heat the sweet potato and cauliflower rice in the microwave according to the packaged instructions
  • Once the peppers have cooked from the oven, let them cool for a few minutes and carefully spoon in the ground beef mixture into each pepper half
  • Serve the stuffed peppers on top of the sweet potato and cauliflower rice
  • Garnish with fresh diced tomatoes and chopped cilantro

Notes

Note: Feel free to add additional toppings such as shredded cheese, guacamole, or sour cream. You can also add beans, corn, or other veggies to your ground beef mixture. 
Posted on

Dec 20 Weekly Meal Plan

turkey taquitos

Make sure to go to How this page works first if you haven’t yet.

Set Your Pace

  • If you’re a beginner at meal prep: Be prepared to set aside 2-3 hours. Once mise en place is complete, all of these recipes can be completed one by one.
  • If you’re a meal prep pro, use the sequenced steps below: These steps give you the flexibility to cook items simultaneously in a sequence of events.
  • Be sure to set timers and check on food items to avoid overcooking. Sequencing will save you time and meal prep can be done in 1-2 hours.

Meal Prep Run Down

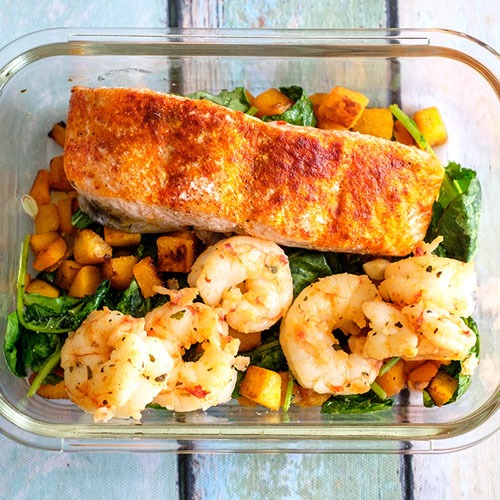
  1. First, prepare the items that require the oven such as the egg muffins and honey oat muffin bars.
  2. Next, prepare the items that require the air fryer such as the air fryer taquitos and chicken wings with brussels sprouts.
  3. Meanwhile, prepare the turkey sausage on the stove top.
  4. Then, assemble the pesto shrimp mini pizzas.
  5. When everything is finished cooking, plate everything up in containers, and let them cool before refrigerating.

If you’re sequencing your meal prep, be sure to keep an eye on everything! Make sure food is kept refrigerated under 40F degrees until ready to eat.

Assembly Tips

  • Evenly divide meals according to the serving size
  • Let all items cool before placing them in the refrigerator
  • Keep all items refrigerated under 40F until ready to eat or reheat
  • Breakfast: These meals can be reheated in the microwave. Serve the bluberries chilled
  • Lunch: The shrimp mini pizzas and salad can be served chilled. The air fryer taquitos can be reheated in the microwave
  • Dinner: Both meals can be reheated in the microwave

Extra Flavors and Substitutions

  • Pesto Mini Pizzas: You can use any kind of pesto such as tomato basil pesto, and instead of shrimp, you can use imitation crab meat or canned salmon
  • Turkey Deli Meat: You can use ham instead of turkey
  • Turkey Skillet: You can use ground chicken instead of ground chicken
  • Air Fryer Brussels Sprouts: You can use your choice of veggies such as broccoli or asparagus
  • Supplement meals with additional snacks such as fresh veggies and fruit for additional daily caloric needs. You can use lime/lemon and olive oil in place of salad dressing

Extra Leftover Ingredients Not Used

  • Protein: Freeze any uncooked meats and save for a later recipe, or you can cook the full amount, and freeze the portion that you do not eat, and save for later use.
  • Veggies: Freeze any leftover veggies for later use. Use leftover herbs in omelets or other dishes for the weekend

What Else

How This Page Works
Meal Prep 101
Weekly Meal Plans
Specialty Diets
Recipe Inspirations
Helpful Resources

Posted on

2 Day Reset Meal Plan

Beat the winter blues with this energy reset meal plan. Sometimes you just need to hit a quick “reset button” to get back on track. This 2 Day Reset Meal Plan will help you jump-start healthy habits and get you back to your best.

These meals fueled with nutrient-dense ingredients will give you the energy boost to help you recover from all of those holiday activities.

How to Use Our Meal Planner

Watch this video to get a quick tutorial on how to use the meal planning features. We will show you:

  • How to View the Menu
  • Access the Recipes
  • Adjust Serving Sizes
  • Customize Your Grocery List

Meal Prep Run Down

  1. First, pre-heat the oven and start boiling the water for the quinoa. Once the water comes to a boil, add the quinoa and let it simmer until it cooks.
  2. While the quinoa is cooking, prepare the items that require the oven such as the egg frittata and baked salmon with rutabaga.
  3. After the quinoa finishes cooking, assemble the Quinoa and Kale Salad.
  4. When everything is finished cooking, plate everything up in meal prep containers, and let them cool before refrigerating.

If you’re sequencing your meal prep, be sure to keep an eye on everything! Make sure food is kept refrigerated under 40F degrees until ready to eat.

Assembly Tips

  • Evenly divide meals according to the serving size
  • Let all items cool before placing them in the refrigerator
  • Keep all items refrigerated under 40F until ready to eat or reheat
  • We recommend eating the meals within 3 days of preparation for best quality
  • Breakfast: The egg frittata can be reheated in the microwave
  • Lunch: Quinoa and Kale Salad can be served chilled (set the dressing aside until you are ready to eat the salad so that it does not get too soggy)
  • Dinner: The salmon and rutabaga can be reheated in the microwave (set the dressing aside until you are ready to eat the salad so that it does not get too soggy)
  • Snacks: Serve chilled. For the AM snack, you can use any kind of raw veggies such as celery sticks or broccoli florets, for the PM Snack, you can use any kind of fruit such as blueberries and any kind of nuts such as almonds

Ready for More?

Start cooking more meals like this with our Premium Membership

Posted on

Dec 13 Weekly Meal Plan

salmon muffin

Make sure to go to How this page works first if you haven’t yet.

Set Your Pace

  • If you’re a beginner at meal prep: Be prepared to set aside 2-3 hours. Once mise en place is complete, all of these recipes can be completed one by one.
  • If you’re a meal prep pro, use the sequenced steps below: These steps give you the flexibility to cook items simultaneously in a sequence of events.
  • Be sure to set timers and check on food items to avoid overcooking. Sequencing will save you time and meal prep can be done in 1-2 hours.

Meal Prep Run Down

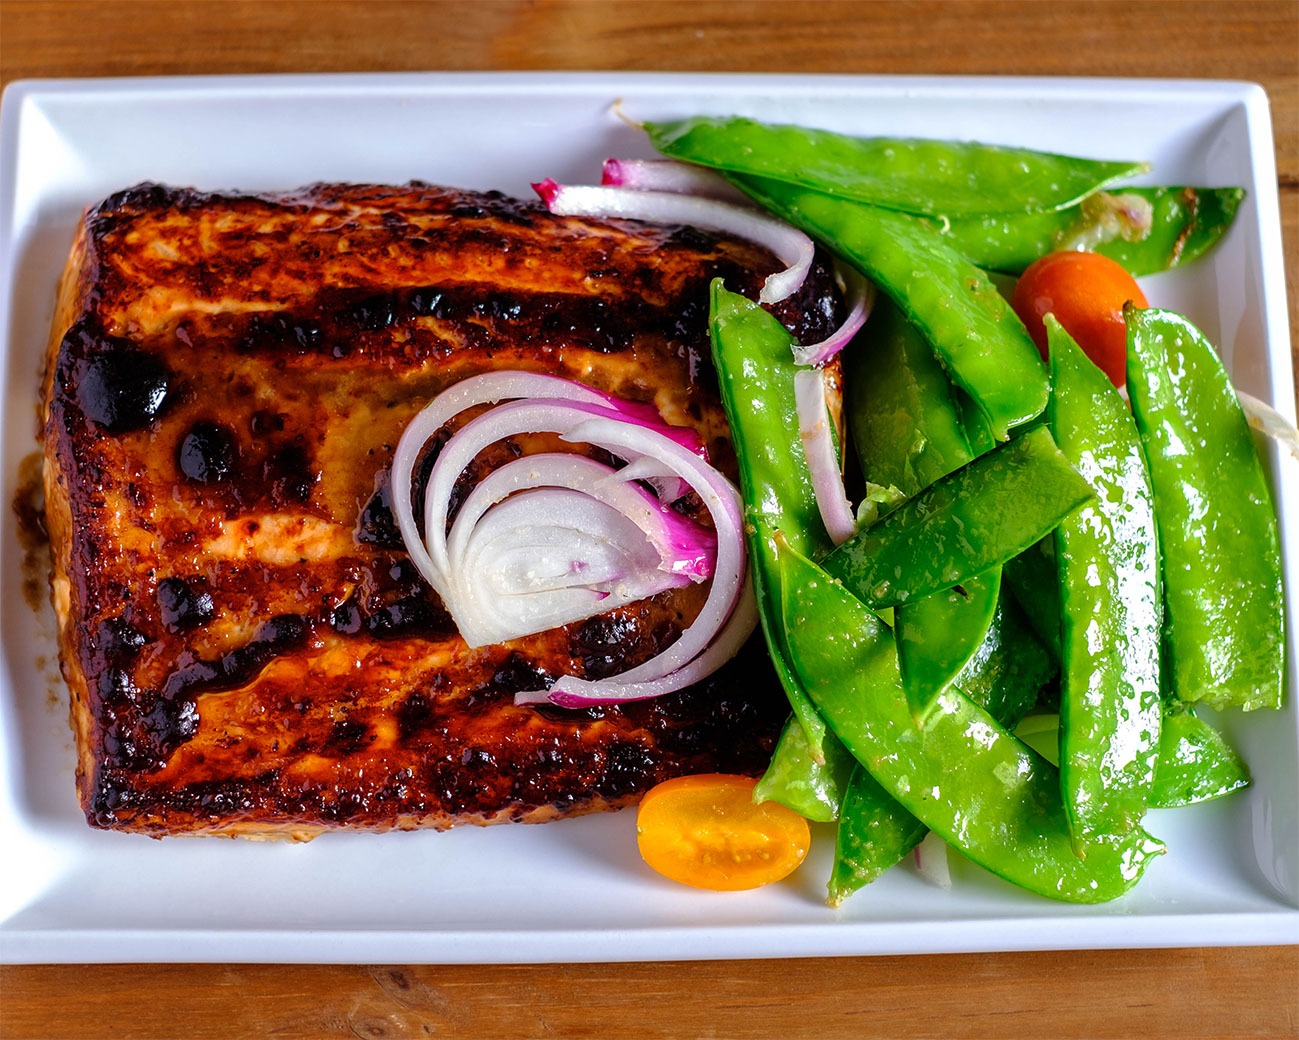
  1. First, prepare the items that require the oven such as the sheet pan sausage and veggies and the chicken and artichoke bake.
  2. Next, prepare the items that require the stove top such as basil beef stir fry and lime basil chicken stir fry.
  3. Then, assemble the breakfast english muffin recipes.
  4. When everything is finished cooking, plate everything up in containers, and let them cool before refrigerating.

If you’re sequencing your meal prep, be sure to keep an eye on everything! Make sure food is kept refrigerated under 40F degrees until ready to eat.

Assembly Tips

  • Evenly divide meals according to the serving size
  • Let all items cool before placing them in the refrigerator
  • Keep all items refrigerated under 40F until ready to eat or reheat
  • Breakfast: These meals can be served chilled. For the fruit muffin, you can keep the fruit separated from the muffin until you are ready to eat the meal to keep the muffin from getting soggy. For the salmon muffin, peel and slice the avocado when you are ready to eat the meal to keep the avocado from browning too early
  • Lunch: Both meals can be reheated in the microwave
  • Dinner: Both meals can be reheated in the microwave

Extra Flavors and Substitutions

  • Fruit for English Muffins: You can use any kind of fruit for your topping such as bananas
  • Basil Beef Stir Fry: You can use ground beef instead of the steak
  • Chicken stir fry: You can use ground chicken instead of the boneless chicken thighs
  • Sheet Pan Sausage: You can use your choice of sausage
  • Supplement meals with additional snacks such as fresh veggies and fruit for additional daily caloric needs. You can use lime/lemon and olive oil in place of salad dressing

Extra Leftover Ingredients Not Used

  • Protein: Freeze any uncooked meats and save for a later recipe, or you can cook the full amount, and freeze the portion that you do not eat, and save for later use.
  • Veggies: Freeze any leftover veggies for later use. Use leftover herbs in omelets or other dishes for the weekend
What Else

How This Page Works
Meal Prep 101
Weekly Meal Plans
Specialty Diets
Recipe Inspirations
Helpful Resources

Posted on

Dec 6 Weekly Meal Plan

Chicken & Green Beans

Make sure to go to How this page works first if you haven’t yet.

Set Your Pace

  • If you’re a beginner at meal prep: Be prepared to set aside 2-3 hours. Once mise en place is complete, all of these recipes can be completed one by one.
  • If you’re a meal prep pro, use the sequenced steps below: These steps give you the flexibility to cook items simultaneously in a sequence of events.
  • Be sure to set timers and check on food items to avoid overcooking. Sequencing will save you time and meal prep can be done in 1-2 hours.

Meal Prep Run Down

  1. First, prepare the barley on the stove top.
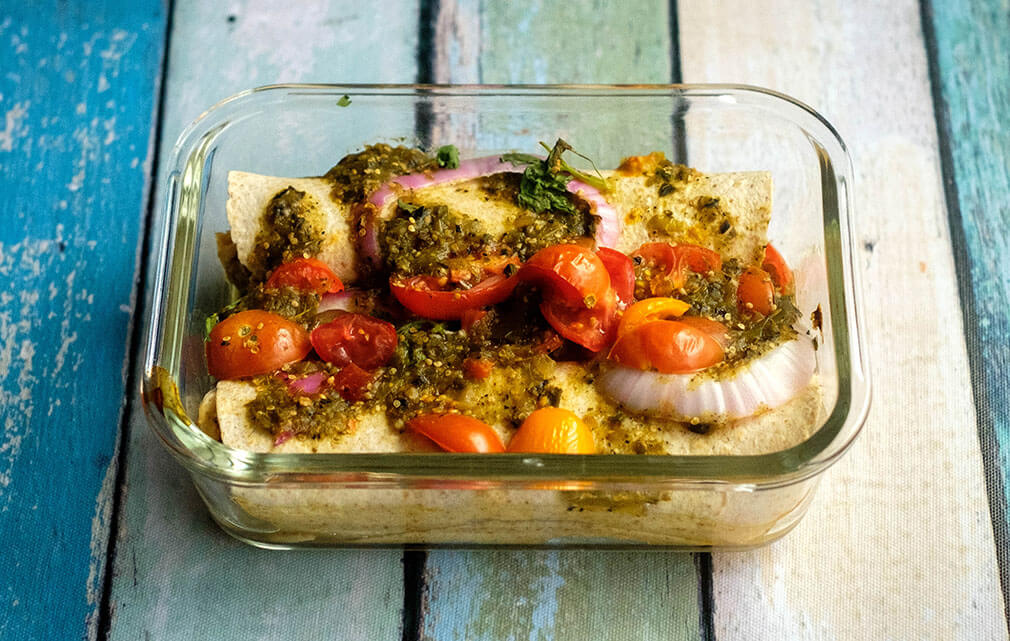
  2. Next, prepare the items that require the oven such as the bell peppers and diced potatoes, proscuitto wrapped chicken tenderloins, tilapia, and broccolini.
  3. Then, grill the chicken for the wrap followed by the italian chicken with green beans.
  4. Lastly, prepare the breakfast items such as the scrambled eggs and cinnamon balsamic pears.
  5. When everything is finished cooking, plate everything up in containers, and let them cool before refrigerating.

If you’re sequencing your meal prep, be sure to keep an eye on everything! Make sure food is kept refrigerated under 40F degrees until ready to eat.

Assembly Tips

  • Evenly divide meals according to the serving size
  • Let all items cool before placing them in the refrigerator
  • Keep all items refrigerated under 40F until ready to eat or reheat
  • Breakfast: The eggs and bell peppers with potatoes can be reheated in the oven. Serve the proscuitto and avocado chilled. Serve the yogurt chilled
  • Lunch: Both meals can be served chilled
  • Dinner: Both meals can be reheated in the microwave

Extra Flavors and Substitutions

  • Yogurt: You can use apples instead of pears and any kind of nuts for the toppings
  • Grilled Chicken Wrap: If you prefer not to grill the chicken, you can buy pre-cooked rotisserie chicken or replace the protein with proscuitto slices
  • Chicken Salad: Feel free to add other toppings such as cucumbers, or bell peppers
  • Tilapia: You can use salmon or shrimp in place of tilapia
  • Supplement meals with additional snacks such as fresh veggies and fruit for additional daily caloric needs. You can use lime/lemon and olive oil in place of salad dressing

Extra Leftover Ingredients Not Used

  • Protein: Freeze any uncooked meats and save for a later recipe, or you can cook the full amount, and freeze the portion that you do not eat, and save for later use.
  • Veggies: Freeze any leftover veggies for later use. Use leftover herbs in omelets or other dishes for the weekend
What Else

How This Page Works
Meal Prep 101
Weekly Meal Plans
Specialty Diets
Recipe Inspirations
Helpful Resources

Posted on

Nov 29 Weekly Meal Plan

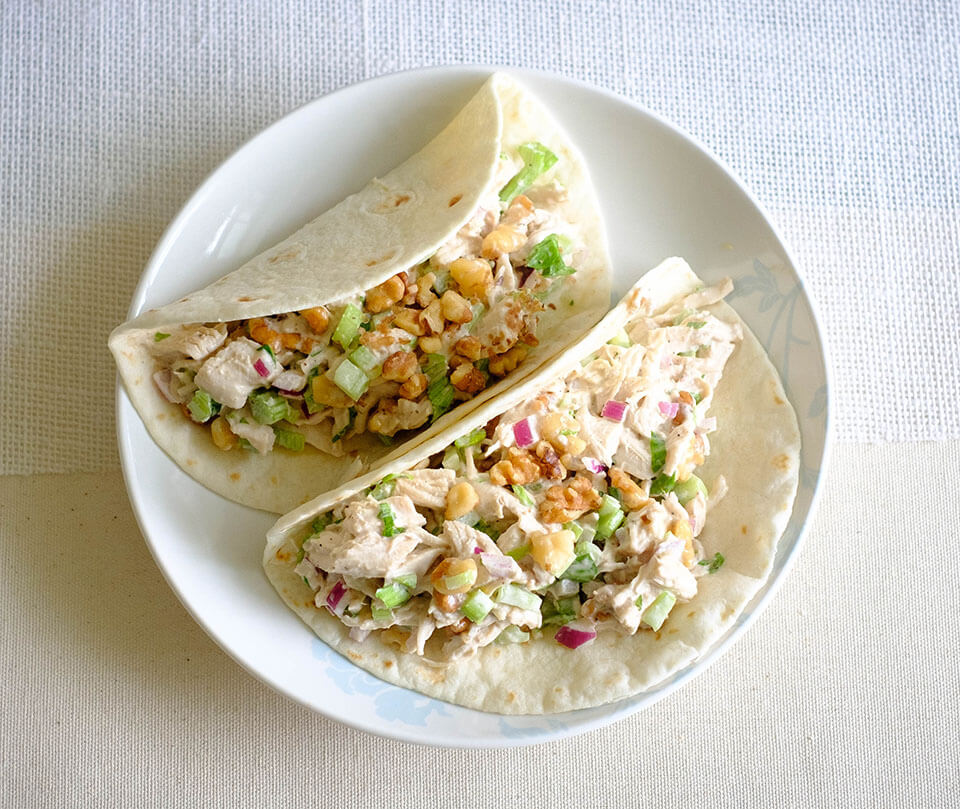
round plate with celery chicken salad wrapped in flour tortilla

Make sure to go to How this page works first if you haven’t yet.

Set Your Pace

  • If you’re a beginner at meal prep: Be prepared to set aside 2-3 hours. Once mise en place is complete, all of these recipes can be completed one by one.
  • If you’re a meal prep pro, use the sequenced steps below: These steps give you the flexibility to cook items simultaneously in a sequence of events.
  • Be sure to set timers and check on food items to avoid overcooking. Sequencing will save you time and meal prep can be done in 1-2 hours.

Meal Prep Run Down

  1. First, prepare the beef in the instant pot.
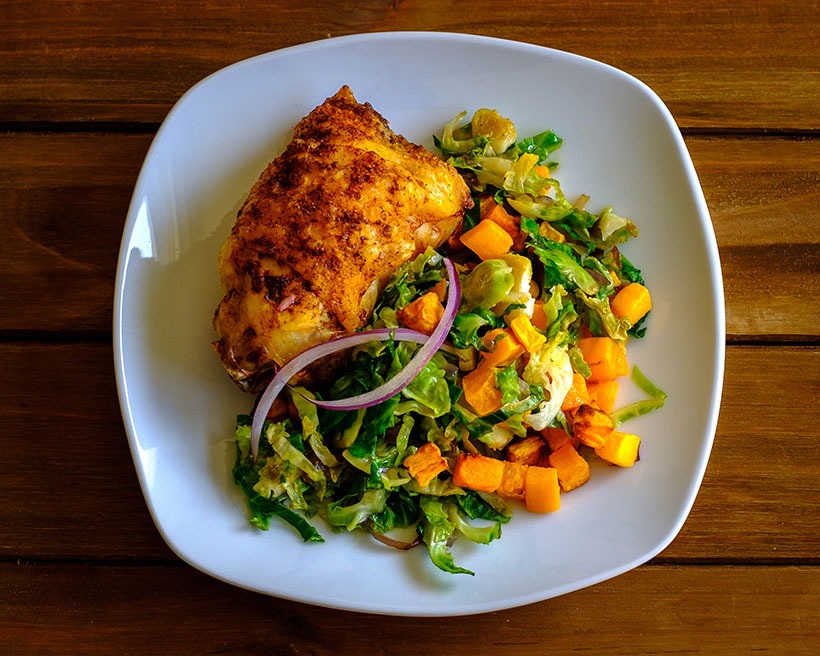
  2. Next, prepare the items that require the oven such as the egg muffins, pumpkin muffins, and honey mustard glazed chicken.
  3. Then, prepare chicken sausage pasta.
  4. Lastly, assemble the celery chicken salad.
  5. When everything is finished cooking, plate everything up in containers, and let them cool before refrigerating.

If you’re sequencing your meal prep, be sure to keep an eye on everything! Make sure food is kept refrigerated under 40F degrees until ready to eat.

Assembly Tips

  • Evenly divide meals according to the serving size
  • Let all items cool before placing them in the refrigerator
  • Keep all items refrigerated under 40F until ready to eat or reheat
  • Breakfast: Both meals can be reheated in the microwave.
  • Lunch: Both meals can be served chilled. (You can also reheat the honey mustard glazed chicken if you prefer it heated)
  • Dinner: Both meals can be reheated in the microwave

Extra Flavors and Substitutions

  • Egg muffins: You can use any veggies in the egg muffins, feel free to add shredded cheese on top
  • Pumpkin Muffins: If you can’t find pumpkin seeds, you can top it off with poppy seeds or sesame seeds
  • Chicken Salad and Beef Tacos: If you want to keep this low carb, you can substitute the flour tortillas with large lettuce wraps
  • Sausage pasta: You can use any kind of pasta, macaroni, rotini, penne, etc
  • Supplement meals with additional snacks such as fresh veggies and fruit for additional daily caloric needs. You can use lime/lemon and olive oil in place of salad dressing

Extra Leftover Ingredients Not Used

  • Protein: Freeze any uncooked meats and save for a later recipe, or you can cook the full amount, and freeze the portion that you do not eat, and save for later use.
  • Veggies: Freeze any leftover veggies for later use. Use leftover herbs in omelets or other dishes for the weekend
What Else

How This Page Works
Meal Prep 101
Weekly Meal Plans
Specialty Diets
Recipe Inspirations
Helpful Resources

Posted on

Nov 22 Weekly Meal Plan

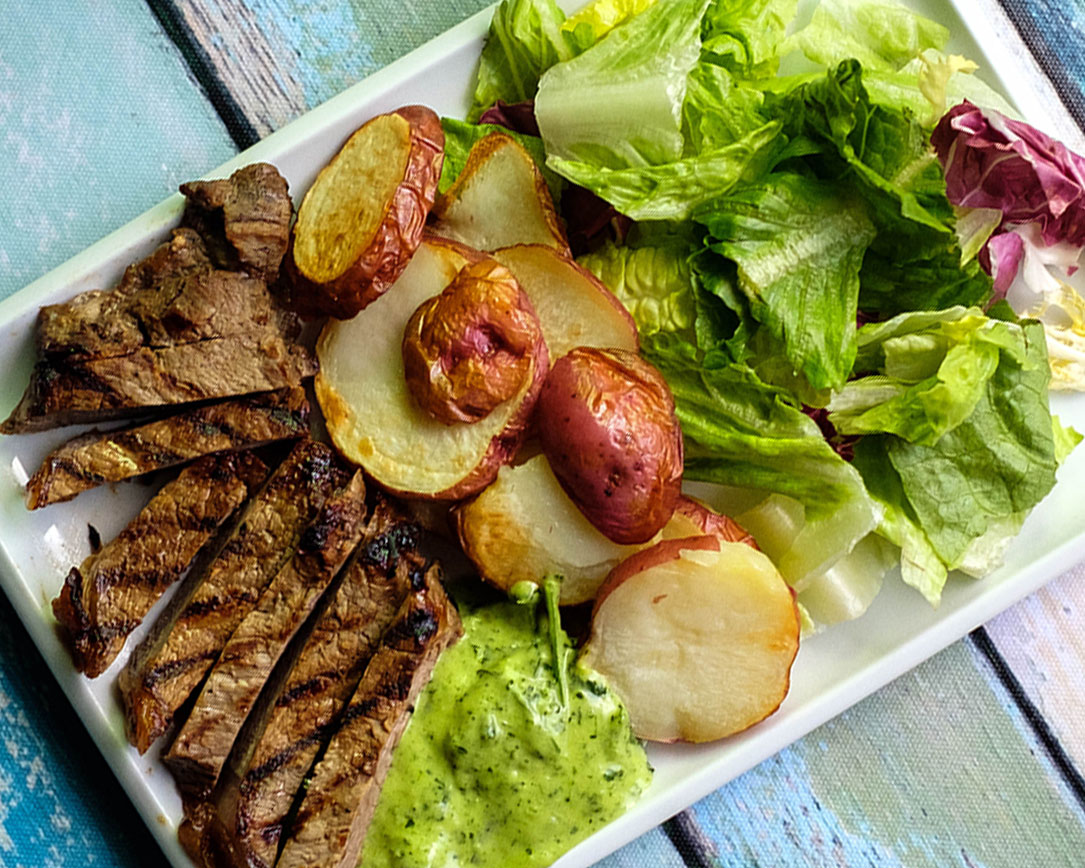
chicken and broccoli

Make sure to go to How this page works first if you haven’t yet.

Set Your Pace

  • If you’re a beginner at meal prep: Be prepared to set aside 2-3 hours. Once mise en place is complete, all of these recipes can be completed one by one.
  • If you’re a meal prep pro, use the sequenced steps below: These steps give you the flexibility to cook items simultaneously in a sequence of events.
  • Be sure to set timers and check on food items to avoid overcooking. Sequencing will save you time and meal prep can be done in 1-2 hours.

Meal Prep Run Down

  1. First, prepare the items that require the oven such as the sweet potato egg frittata, sweet potato slices, apples, shrimp with corn and cauliflower.
  2. Next, prepare the orange soy chicken and broccoli in the air fryer (note: if you don’t have an air fryer, you can also bake these items in the oven).
  3. Then, saute the bell peppers and red onions on the stove top, and assemble the deli sandwich.
  4. When everything is finished cooking, plate everything up in containers, and let them cool before refrigerating.

If you’re sequencing your meal prep, be sure to keep an eye on everything! Make sure food is kept refrigerated under 40F degrees until ready to eat.

Assembly Tips

  • Evenly divide meals according to the serving size
  • Let all items cool before placing them in the refrigerator
  • Keep all items refrigerated under 40F until ready to eat or reheat
  • Breakfast: Both meals can be reheated in the microwave.
  • Lunch: The deli sandwich and side salads can be served chilled, while the sweet potato BLT can be reheated in the microwave
  • Dinner: Both meals can be reheated in the microwave

Extra Flavors and Substitutions

  • Egg frittata: You can use any veggies in the egg frittata, feel free to add shredded cheese on top
  • Baked Apples: You can use any kind of fruit to bake such as pears
  • Sweet Potato BLT: Feel free to add additional toppings such as sliced cucumbers, or even avocado slices
  • Orange Soy Chicken: You can substitue the broccoli with any other type of veggies such as squash, or green beans, etc
  • Supplement meals with additional snacks such as fresh veggies and fruit for additional daily caloric needs. You can use lime/lemon and olive oil in place of salad dressing

Extra Leftover Ingredients Not Used

  • Protein: Freeze any uncooked meats and save for a later recipe, or you can cook the full amount, and freeze the portion that you do not eat, and save for later use.
  • Veggies: Freeze any leftover veggies for later use. Use leftover herbs in omelets or other dishes for the weekend
What Else

How This Page Works
Meal Prep 101
Weekly Meal Plans
Specialty Diets
Recipe Inspirations
Helpful Resources

Posted on

Easy to Make Thanksgiving Side Dishes

Thanksgiving Dinner wouldn’t be complete without all the side dishes. The turkey entree may be the star of the show, but for us, we look forward to piling up our plates with a variety of side dishes. We are including classics such as roasted vegetables, creamy casseroles, and comfort dishes like mac and cheese.

Tomato Mac and Cheese

If you love grilled cheese and tomato soup, this recipe transforms those same delicious flavors into a comforting mac and cheese dish.

mac and cheese
mac and cheese

Tomato Mac and Cheese

No ratings yet
Prep Time 5 minutes
Cook Time 40 minutes
Course Side Dish
Cuisine American
Servings 4

Equipment

  • knife
  • cutting board
  • soup pot
  • spatula
  • baking dish
  • oven

Ingredients
  

  • 2 cups uncooked rotini pasta
  • 1/4 cup butter
  • 3 tbsp flour
  • 2 cups half and half
  • 1 tsp italian seasoning
  • 1/2 tsp salt
  • 1/2 tsp pepper
  • 1.5 cups shredded cheddar cheese
  • 0.5 cups shredded parmesan cheese
  • 2 each roma tomatoes (thinly sliced)

Instructions
 

  • Pre-heat the oven to 350F. Grease a baking dish with oil or cooking spray
  • Cook the rotini pasta according to the package directions until tender. Once cooked, drain and set it aside
  • Meanwhile, melt the butter in a large saucepan over medium heat and whisk in the flour, salt, and pepper and stir until smooth
  • Slowly poor in the half and half and continue to whisk until the sauce has slightly thickened
  • Gradually add the cheddar and parmesan cheese and mix until the sauce is smooth
  • Add the rotini pasta to the cheese sauce and mix it well
  • Layer half of the pasta mixture into the baking dish and layer half of the sliced tomatoes on top
  • Then, add the rest of the pasta. Top it off with the rest of the pasta
  • Bake in the oven, uncovered, for 20 minutes until hot and bubbly
  • Remove from the oven and sprinkle the top with more shredded parmesan cheese if desired

Italian Sausage and Butternut Squash Stuffing

This delicious stuffing is made with green apples and butternut squash. It has all the flavors of traditional Thanksgiving dressing but is gluten-free and dairy-free. It is toasty, sweet, and savory all at the same time.

Italian Sausage & Butternut Squash Stuffing

No ratings yet
Prep Time 5 minutes
Cook Time 25 minutes
Course Side Dish
Cuisine American
Servings 6

Equipment

  • knife
  • cutting board
  • sheet pan
  • saute pan
  • spatula

Ingredients
  

  • 1 lb italian style turkey sausage
  • 1/4 cup red onions (diced)
  • 2 tbsp green onions (chopped)
  • 2 tbsp garlic (minced)
  • 1 each butternut squash (peeled, cut into 1/2 inch cubes, about 6 cups)
  • 2 each green apples (cored and diced)
  • 1/4 tsp garlic powder
  • 1/4 tsp salt
  • 1/4 tsp italian seasoning
  • 1 tbsp olive oil

Instructions
 

  • Pre-heat oven to 400F
  • Place the veggies and apples on a sheet pan
  • Sprinkle the seasonings and minced garlic on top. Coat everything with olive oil
  • Bake in the oven for 15-20 minutes
  • Meanwhile, add more oil to a saute pan on medium high heat and add the ground turkey
  • Break it up into small pieces and continue to stir it around the pan until it is fully cooked and golden brown (about 7 to 9 minutes). Make sure it cooks to an internal temperature of 165 F
  • Once the veggies and apples finish roasting in the oven, combine the sausage with the veggies in a serving dish

Cheesy Brussels Sprouts Bake

This hot and bubbly brussels sprouts casserole is packed with a creamy cheese sauce and makes for a simple Thanksgiving side dish.

Cheesy Brussels Sprouts Bake

No ratings yet
Prep Time 5 minutes
Cook Time 20 minutes
Course Side Dish
Cuisine American
Servings 6

Equipment

  • saute pan
  • spatula
  • baking dish

Ingredients
  

  • 20 oz brussels sprouts (shaved)
  • 2 each small shallots (minced)
  • 2 tbsp garlic (minced)
  • 3/4 cup heavy cream
  • 1/2 cup shredded sharp white cheddar
  • 1/2 cup shredded Gruyere
  • 1/2 tsp salt
  • 1/2 tsp pepper
  • 1 tbsp olive oil

Instructions
 

  • Pre-heat the oven to 375F. Add oil to a saute pan on medium heat and saute the shallots and cook for about 2 to 3 minutes. Next add the garlic and stir for about 10 seconds.
  • Add the shredded brussels sprouts and season with salt and pepper. Continue to stir until tender, about 5 to 6 minutes
  • Then, pour in the heavy cream and top with both cheese. Mix it all together
  • Transfer the brussels sprouts mixture into a greased baking dish
  • Bake in the oven for about 12-15 minutes until the cheese is hot and bubbly

Oven Baked Creamed Corn Casserole

This creamed corn casserole includes ingredients you probably already have in your pantry. Mix it all together, place it in a baking dish, and let it finish cooking in the oven.

Oven Baked Creamed Corn

No ratings yet
Prep Time 5 minutes
Cook Time 15 minutes
Course Side Dish
Cuisine American
Servings 6

Equipment

  • baking dish
  • oven

Ingredients
  

  • 5 cups frozen corn
  • 2 tbsp mayonnaise
  • 8 oz cream cheese
  • 1 tbsp green onions (chopped)
  • 2 tbsp garlic (minced)
  • 1/4 tsp paprika
  • 1/4 tsp salt
  • 1/4 tsp pepper

Instructions
 

  • Pre-heat the oven to 400F
  • In a mixing bowl, add all the ingredients and mix it all around until the cream cheese and mayonnaise fully coats the corn kernels
  • Grease a baking dish with oil and pour the corn mixture into the dish. Bake for about 12-15 minutes until hot, bubbly, and golden brown

Roasted Green Beans with Bacon and Mandarin Oranges

If you’re looking for a quick and easy roasted veggie dish, then you’ve got to try these roasted green beans. And we know what you’re thinking, oranges and green beans? Yes, it definitely works. The citrus burst of flavor pairs well with the saltiness of the bacon, sweetness of honey, and toastiness of the roasted green beans. And it takes less than 20 minutes to whip up this recipe!

Roasted Green Beans with Bacon and Mandarin Oranges

No ratings yet
Prep Time 5 minutes
Cook Time 15 minutes
Course Side Dish
Cuisine American
Servings 6

Equipment

  • knife
  • cutting board
  • sheet pan
  • oven

Ingredients
  

  • 2 lbs Fresh Green Beans (washed & trimmed)
  • 2 tbsp olive oil
  • 1/4 tsp salt
  • 1/4 tsp pepper
  • 5 slices bacon (uncooked, and chopped)
  • 2 tbsp honey
  • 1 cup mandarin oranges (drained)

Instructions
 

  • Pre-heat the oven to 425F
  • Place the green beans on a sheet pan and drizzle it with olive oil. Season with salt and pepper and toss it around making sure it is fully coated with the oil
  • Top it off with the chopped bacon pieces
  • Bake in the oven for 10 minutes, then remove it from the oven and flip the green beans ,and bake for another 10 minutes until the green beans are tender and the bacon is crispy
  • After it has finished baking, top it off with mandarain orange bits, and drizzle with honey

Oven Roasted Acorn Squash Slices

Brushed with olive oil and seasoned with simple seasoning, this roasted acorn squash recipe is a simple, cozy thanksgiving fare at its finest. Cutting the squash is really the only “work” this recipe calls for because it’s already tasty on its own and it really doesn’t need any other extra ingredients. Minimal effort, maximum yumminess.

acon squash
acon squash

Oven Roasted Acorn Squash Slices

No ratings yet
Prep Time 5 minutes
Cook Time 21 minutes
Course Side Dish
Cuisine American
Servings 6

Equipment

  • knife
  • cutting board
  • sheet pan

Ingredients
  

  • 2 each acorn squash
  • 1/4 tsp garlic powder
  • 1/4 tsp paprika
  • 1/4 tsp salt
  • 1/4 tsp pepper
  • 2 tbsp olive oil

Instructions
 

  • Preheat the oven to 400F
  • Cut the squash in half lengthwise. Use a spoon to scoop out the seeds. Then, cut them into 3/4 inch slices
  • Place them on a sheet pan and drizzle them with olive oil, sprinkle with the seasonings and toss them around until the squash is evenly coated
  • Roast in the oven for 25 minutes until golden brown and tender

Crispy Smashed Potatoes

These yummy smashed potato bites are easy to make and will be loved by all during your Thanksgiving feast. The potatoes are super crispy on the outside, but absolutely fluffy on the outside. 

Smashed Potatoes

No ratings yet
Prep Time 5 minutes
Cook Time 50 minutes
Servings 6

Equipment

  • boiling pot
  • masher
  • sheet pan

Ingredients
  

  • 12 each small red baby potatoes
  • 2 tbsp olive oil
  • 1/4 tsp garlic powder
  • 1/4 tsp onion powder
  • 1/4 tsp paprika
  • 1/4 tsp chili powder
  • 1/4 tsp salt

Instructions
 

  • Place the potatoes in a large soup pot and fill the pot with water until the potatoes are fully submerged under water. Add 1 tbsp of salt and turn the heat up to high until the water starts boiling
  • After the water boils, bring the water to medium and cook for about 20 minutes until they are tender and they are easily pierced with a fork
  • Meanwhile, pre-heat the oven to 425F and grease a sheet pan with olive oil. Spread the oil until it completely covers the pan
  • When the potates finish cooking, drain them and let them cool for a few minutes. Safely transfer them to a baking sheet
  • Spread the potatoes apart and use either a potato masher or the bottom of a cup to gently smash each potato to a thickness of 1/2 inches
  • Evenly drizzle olive oil over the mashed potatoes and sprinkle the seasonings on top
  • Bake the ptoatoes for about 25 minutes until they are golden brown and crispy

If you are looking for entrees to pair up with these thanksgiving side dishes, check out our quick and easy Stress-Free Thanksgiving Dinner Entree Recipes.

Free Weekly Meal Plans

Try out our weekly meal plans with tasty recipes. We make your shopping list and show you how to prep your meals.

Posted on

Stress-Free Thanksgiving Dinner Recipes

pot roast

Turkey, Ham, and Prime Rib normally steal the show when it comes to holiday feasts, but what about changing it up a bit and trying something a little different and a bit easier. These non-traditional entrees are a great alternative if you are wanting to try something new and also cut down time in the kitchen. Here are some secrets to a stress-free Thanksgiving!

Air Fryer BBQ Pork Ribs

These Air Fryer Pork Ribs are so quick to prepare, you’ll be amazed by how tender they are and crispy they can get on the outside. All it requires is a simple dry rub and your favorite bottled bbq sauce. And it cooks in less than 30 minutes. Serve it with a side of green beans or seasoned corn.

pork ribs
pork ribs

Air Fryer BBQ Pork Ribs

No ratings yet
Prep Time 5 minutes
Cook Time 25 minutes
Course dinner, Main Course
Cuisine American
Servings 6

Equipment

  • knife
  • cutting board
  • Air Fryer

Ingredients
  

  • 2 lbs baby back pork ribs
  • 1 tsp paprika
  • 1 tsp garlic powder
  • 1/2 tsp salt
  • 1 tsp pepper
  • 3/4 cup barbecue sauce

Instructions
 

  • In a small bowl, mix together the dry rub ingredients (paprika, garlic powder, salt, pepper)
  • Pat the ribs dry and rub the seasonings all over the ribs, making sure it is fully coated
  • Place the ribs in a single layer in the air fryer basket. Cook at 375F for 20 minutes
  • Remove the basket from the air fryer and brush the top of the ribs with the barbecue sauce
  • Place the basket in the air fryer and cook for another 5 minutes (or until the pork has reached an internal temperature of 145F)
  • Remove the ribs from the basket and let it rest for 5 minutes before slicing into individual ribs

Instant Pot Turkey Loin

While whole roasted turkey is usually the star of the show during Thanksgiving dinners, this tender turkey loin is sure to be a show stopper. No need to worry about the long hours of cooking meat to perfect tenderness, the Instant Pot will do the job for you. You can still pair this with your favorite homemade stuffing.

turkey loin
turkey loin

Instant Pot Turkey Tenderloin

No ratings yet
Prep Time 5 minutes
Cook Time 20 minutes
Course dinner, Main Course
Cuisine American
Servings 6

Equipment

  • knife
  • cutting board
  • Instant Pot

Ingredients
  

  • 2 lbs turkey breast tenderloin
  • 1 cup chicken broth
  • 1 tbsp rosemary (fresh, chopped)
  • 1/4 cup white onions (chopped)
  • 2 each garlic cloves (peeled)
  • 1 tsp salt
  • 1 tsp pepper
  • 1 tbsp worchestershire sauce

Instructions
 

  • Turn the instant pot on the saute setting and add oil to the instant pot
  • Place the tenderloin in the bottom and sear on all sides until golden brown (about 2 to 3 minutes on each side)
  • Next, pour in the broth, add onions and garlic cloves
  • Sprinkle in the rosemary, salt, and pepper, and worchestershire sauce
  • Cover the Instant Pot with the lid and set the manual setting to 20 minutes on high pressure, making sure the pressure valve is in the sealed position
  • When done, follow the manufacturer's instructions to carefully release the pressure
  • Remove the tenderloin from the pot and let it rest for 5 minutes before slicing into 1/2 inch thick slices. Serve with the extra broth

Oven Baked Mini Meatloafs

These beef patties may be mini, but they are full of flavor and can be made in portion sizes with half the baking time. They are perfect for an entree option or appetizer while your guests arrive. These go perfect with creamy mashed potatoes.

Oven Baked Mini Meatloafs

No ratings yet
Prep Time 5 minutes
Cook Time 40 minutes
Course dinner, Main Course
Cuisine American
Servings 6

Equipment

  • knife
  • cutting board
  • muffin tins
  • oven

Ingredients
  

Meatloaf patty

  • 1.5 lbs ground beef
  • 1 each egg
  • 2/3 cups panko bread crumbs
  • 1/2 cup white onions (diced)
  • 2 tbsp garlic (minced)
  • 1/4 cup ketchup
  • 1 tsp italian seasoning
  • 1/2 tsp salt
  • 1/2 tsp pepper

Meatloaf sauce

  • 1/2 cup ketchup
  • 1/3 cup brown sugar
  • 2 tsp dijon mustard
  • 1/4 tsp cinnamon
  • 1/4 tsp salt

Instructions
 

  • Preheat the oven to 350 F
  • In a large mixing bowl, add all of the meatloaf ingredients (beef, eggs, breadcrumbs, onion, garlic, ketchup, seasonings)
  • Use your hands or large spoon to mix it all together really well
  • Divide them into 12 equal portions. Grease the wells of the muffin pans with oil and place each portion into the bottom of the well. Be sure to press down to fill the cup
  • Bake in the oven for 15 minutes
  • Meanwhile, heat a sauce pan on medium heat and add the ingredients for the meatloaf sauce and mix it well until it reaches a smooth consistency
  • After the meatloaf has baked for 15 minutes, remove it from the pan (if needed, use a paper towel, carefully soak any excess liquid or grease from the muffin wells)
  • Evenly pour the meatloaf sauce onto each meatloaf patty and bake for another 10-15 minutes until the meat is cooked through an internal temperature of 165F

Oven Baked Tomato Basil Salmon

This baked salmon makes for a great Thanksgiving main course option and only requires simple ingredients that can be baked in less than 20 minutes. Serve this entree on top of rice pilaf, fluffy couscous, or pan-fried polenta cakes.

Oven Baked Tomato Basil Salmon

No ratings yet
Prep Time 5 minutes
Cook Time 15 minutes
Course lunch
Cuisine American, Italian
Servings 6

Equipment

  • knife
  • cutting board
  • sheet pan
  • oven

Ingredients
  

Salmon and seasonings

  • 1.5 lbs salmon
  • 2 each roma tomato (thinly sliced)
  • 6 each fresh basil leaves (thinly sliced)
  • 2 tbsp garlic (minced)
  • 1/4 tsp salt
  • 1/4 tsp pepper
  • 1 tbsp olive oil

Instructions
 

  • Pre-heat the oven to 400F
  • Place the salmon on a sheet pan. Season with salt and pepper
  • Sprinkle the minced garlic on top. Layer the tomato leaves and basil leaves evenly all over the salmon.
  • Drizzle with olive oil
  • Bake everything in the oven for 12 to 15 minutes until the salmon is fully cooked to an internal temperature of 145F

Honey Balsamic Baked Chicken

Here’s an Easy One Pan Baked Balsamic Chicken recipe that is easy to prepare, baked to perfection in the oven, and will make your tastebuds happy. They will go great with a winter salad or any roasted vegetable side dish.

balsamic chicken
balsamic chicken

Honey Balsamic Baked Chicken

No ratings yet
Prep Time 5 minutes
Cook Time 32 minutes
Course dinner, Main Course
Cuisine American, Italian
Servings 4

Equipment

  • mixing bowl
  • sheet pan
  • oven

Ingredients
  

  • 4 each bone in chicken thighs
  • 1/2 cup balsamic dressing
  • 2 tbsp honey
  • 1 tbsp olive oil
  • 1 tbsp rosemary (fresh, finley chopped)
  • 1/2 tsp garlic powder
  • 1/4 tsp salt
  • 1/4 tsp pepper

Instructions
 

  • Preheat the oven to 425F degrees
  • In a small bowl, whisk together the balsamic dressing, honey, garlic, salt, pepper, and rosemary
  • Place the chicken thighs in a baking dish and pour half of the balsamic marinade over the chicken and make sure it is fully coated
  • Cook the chicken for 20 minutes
  • After 20 minutes, pour the rest of the balsamic marinade on top and cook for another 10-15 minutes until the chicken is golden brown and fully cooked to an internal temperature of 165
  • Remove from the oven and place it on a serving dish and enjoy! Serve with a side salad or roasted veggies

Notes

Note: After the chicken cooks, you can split the recipe in half and shred half of the chicken meat, and use it as your protein for a lunch salad or in a sandwich.

Delicata Squash Lasagna

This low-carb lasagna is rich and delicious and layered with slices of delicata squash topped with savory meat sauce and shredded cheese. It may be low in carbs, but it definitely still brings that comfort we all crave in lasagna.

delicata lasagna
delicata lasagna

Delicata Squash Lasagna

No ratings yet
Prep Time 5 minutes
Cook Time 25 minutes
Course dinner, Main Course
Cuisine American, Italian
Servings 6

Equipment

  • knife
  • cutting board
  • spatula
  • saute pan
  • baking dish
  • oven

Ingredients
  

  • 2 lbs ground beef
  • 1/4 cup red onions (diced)
  • 2 cups marinara sauce
  • 1/4 tsp garlic powder
  • 1/4 tsp salt
  • 1 tbsp olive oil
  • 3 each delicata squash
  • 1.5 cup shredded mozzarella cheese

Instructions
 

  • Pre-heat the oven to 400F
  • Add 1 tbsp olive oil to a saute pan on medium high heat. Saute the onions until they soften (about 2 to 3 minutes)
  • Next, add the ground beef and seasonings and saute until it is fully cooked and golden brown (about 7 to 8 minutes)
  • Then, add the marinara sauce and stir it all together
  • Slice the delicata squash in half, lengthwise. Use a spoon to scoop out the flesh and seeds from the middle. Slice it into 1/4 inch thick slices
  • Grease a baking dish and add 1/3 of the meatsauce at the bottom. Layer it with 1/3 of the shredded mozzarella and delicata squash slices. Repeat this process two more times, until all ingredients have been used up
  • Place the baking dish in the oven and bake for 20-25 minutes

Instant Pot Beef Pot Roast

This delicious and hearty pot roast with savory gravy is tender and is perfect for a family feast. Serve with roasted potatoes or on top of cauliflower rice if you are trying to keep it low carb friendly.

pot roast
pot roast

Savory Instant Pot Beef Pot Roast

No ratings yet
Prep Time 10 minutes
Cook Time 40 minutes
Course dinner, Main Course
Cuisine American
Servings 6

Equipment

  • knife
  • cutting board
  • spatula
  • Instant Pot

Ingredients
  

  • 2.5 lbs boneless beef chuck roast
  • 4 each garlic cloves
  • 1/4 cup red onion (diced)
  • 2 cups baby carrots
  • 2 cups beef broth
  • 2 tbsp Worcestershire sauce
  • 2 tbsp cornstarch
  • 1/4 cup water
  • 1 tbsp rosemary (fresh, finely chopped)
  • 1/2 tsp salt
  • 1/2 tsp pepper
  • 1 tbsp olive oil

Instructions
 

  • Place the Instant Pot on the saute setting on high heat
  • Season the beef with salt and pepper and add oil to the Instant Pot
  • Add the beef and cook on all sides until evenly browned (about 3 to 4 minutes). Repeat until all sides are browned
  • Next, add the onions, garlic, and thyme. Stir it all around for 2 minutes
  • Pour in the broth and Worcestershire sauce and scrape any of the browned bits from the bottom of the pot
  • Turn off the saute setting and select the manual setting to adjust the pressure to high and set the time for 30 minutes. Make sure the valve is in the sealed position
  • After it has finished cooking, follow the manufacturer's directions for quick-release of the pressure
  • Remove the beef from the Instant Pot. Set the instant pot to the soup setting and add the baby carrots.
  • Mix together the water and corn starch until it makes a slurry. Once the broth is boiling, stir in the corn starch mixture until the sauce thickens
  • Slice the roast into 1/2 inch slices. Serve with gravy and add salt and pepper to taste, garnish with fresh thyme if desired

If you are looking for side dishes to pair up with these thanksgiving entrees, check out our recommendations for Easy to Make Thanksgiving Side Dishes.

Free Weekly Meal Plans

Try out our weekly meal plans with tasty recipes. We make your shopping list and show you how to prep your meals.

Posted on

Nov 15 Weekly Meal Plan

stuffed pepper

Make sure to go to How this page works first if you haven’t yet.

Set Your Pace

  • If you’re a beginner at meal prep: Be prepared to set aside 2-3 hours. Once mise en place is complete, all of these recipes can be completed one by one.
  • If you’re a meal prep pro, use the sequenced steps below: These steps give you the flexibility to cook items simultaneously in a sequence of events.
  • Be sure to set timers and check on food items to avoid overcooking. Sequencing will save you time and meal prep can be done in 1-2 hours.

Meal Prep Run Down

  1. First, prepare the items that require the oven such as the sausage and potato hash, peach granola muffin bar, salmon and veggies, and chicken enchilada stuffed peppers.
  2. Next, start preparing the soup.
  3. Lastly, assemble the salmon stuffed avocado.
  4. When everything is finished cooking, plate everything up in containers, and let them cool before refrigerating.

If you’re sequencing your meal prep, be sure to keep an eye on everything! Make sure food is kept refrigerated under 40F degrees until ready to eat.

Assembly Tips

  • Evenly divide meals according to the serving size
  • Let all items cool before placing them in the refrigerator
  • Keep all items refrigerated under 40F until ready to eat or reheat
  • Breakfast: Both meals can be reheated in the microwave.
  • Lunch: The stuffed avocado can be served chilled (wait to slice the avocado open until ready to eat to prevent from browning), the stuffed pepper can be reheated in the microwave (serve the salad ingredients chilled)
  • Dinner: Both meals can be reheated in the microwave

Extra Flavors and Substitutions

  • Sausage and Potato Hash: You can use sweet potato instead of regular potato
  • Peach Granola Muffin Bar: You can use any kind of fruit as your topping
  • Stuffed Avocado: You can use canned tuna instead of canned salmon
  • Salmon & Bok Choy: You can substitue the bokchoy with broccolini or any other type of veggies
  • Supplement meals with additional snacks such as fresh veggies and fruit for additional daily caloric needs. You can use lime/lemon and olive oil in place of salad dressing

Extra Leftover Ingredients Not Used

  • Protein: Freeze any uncooked meats and save for a later recipe, or you can cook the full amount, and freeze the portion that you do not eat, and save for later use.
  • Veggies: Freeze any leftover veggies for later use. Use leftover herbs in omelets or other dishes for the weekend
What Else

How This Page Works
Meal Prep 101
Weekly Meal Plans
Specialty Diets
Recipe Inspirations
Helpful Resources