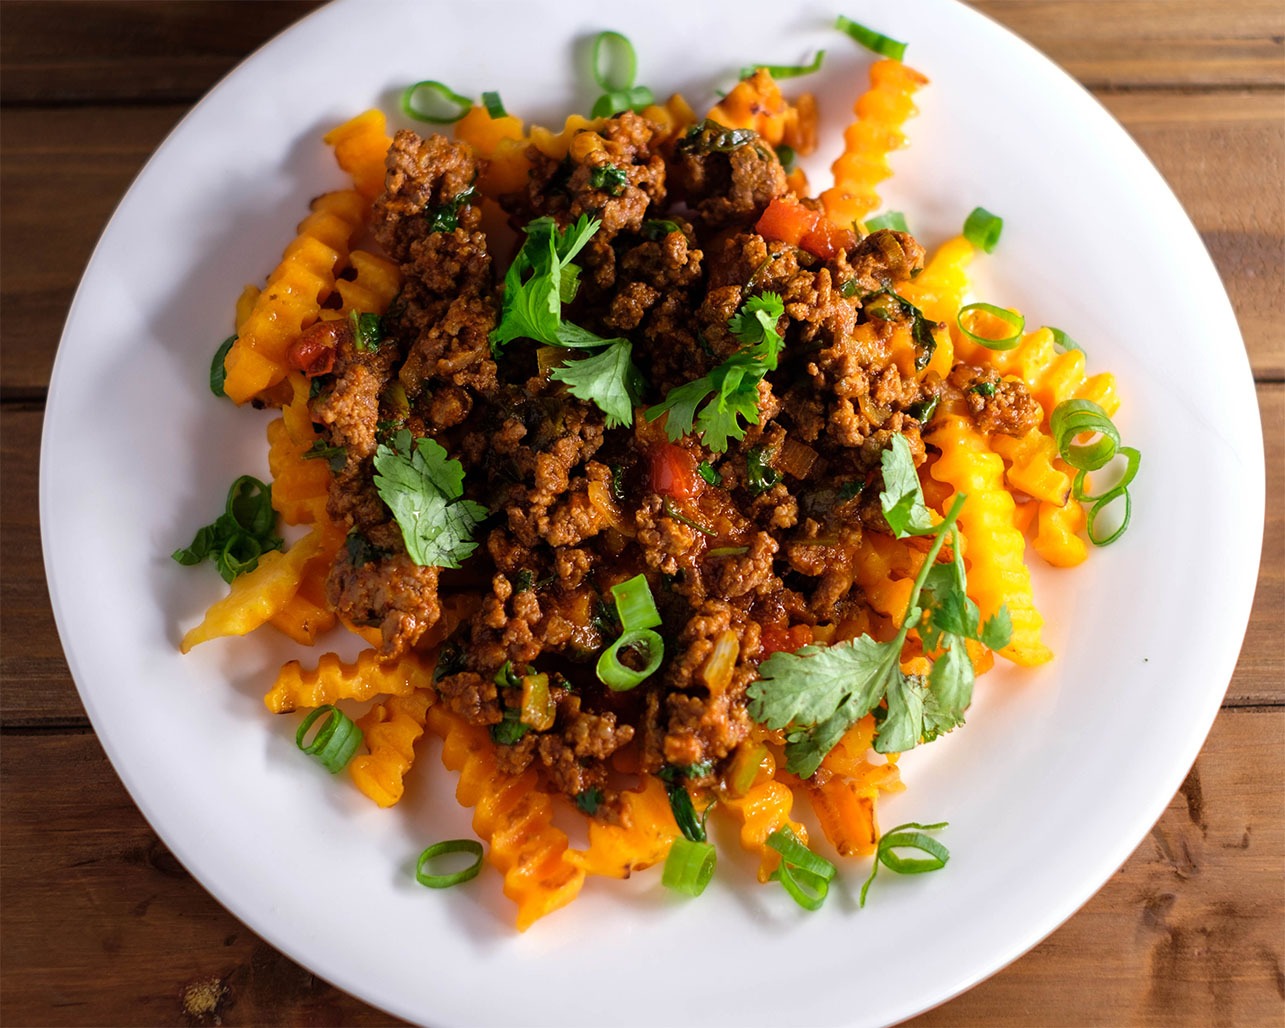
Turkey, Ham, and Prime Rib normally steal the show when it comes to holiday feasts, but what about changing it up a bit and trying something a little different and a bit easier. These non-traditional entrees are a great alternative if you are wanting to try something new and also cut down time in the kitchen. Here are some secrets to a stress-free Thanksgiving!
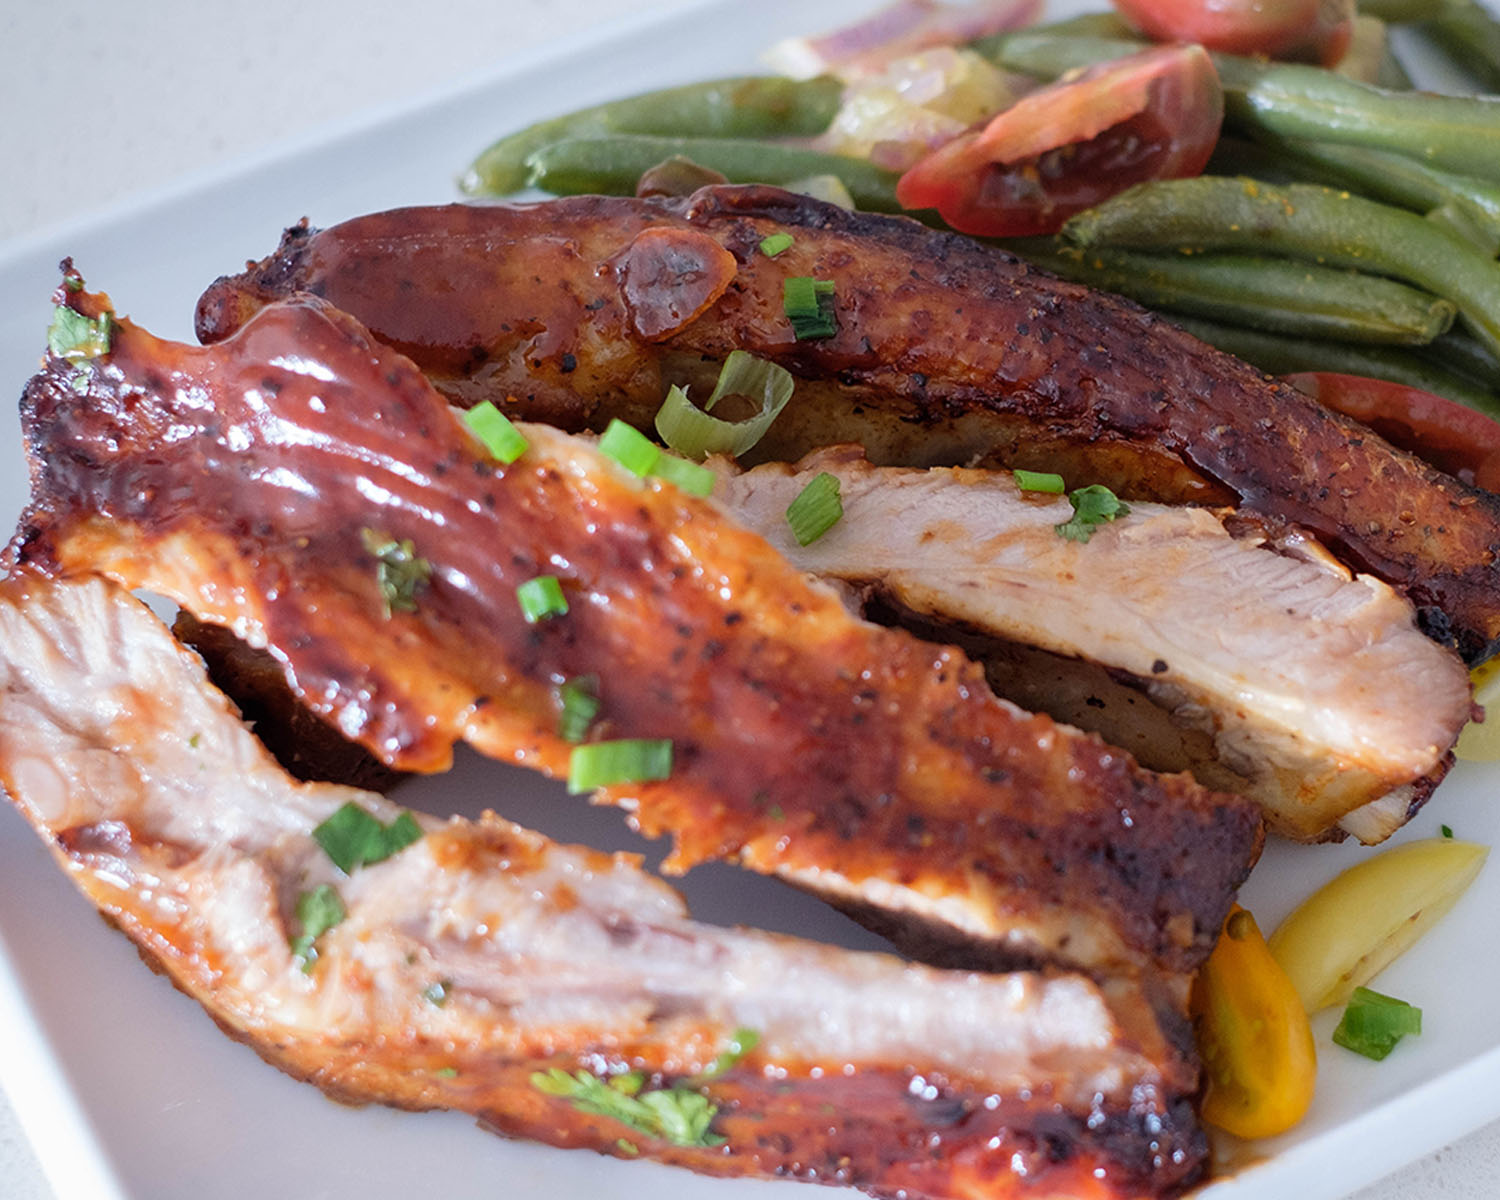
Air Fryer BBQ Pork Ribs
These Air Fryer Pork Ribs are so quick to prepare, you’ll be amazed by how tender they are and crispy they can get on the outside. All it requires is a simple dry rub and your favorite bottled bbq sauce. And it cooks in less than 30 minutes. Serve it with a side of green beans or seasoned corn.
Instant Pot Turkey Loin
While whole roasted turkey is usually the star of the show during Thanksgiving dinners, this tender turkey loin is sure to be a show stopper. No need to worry about the long hours of cooking meat to perfect tenderness, the Instant Pot will do the job for you. You can still pair this with your favorite homemade stuffing.
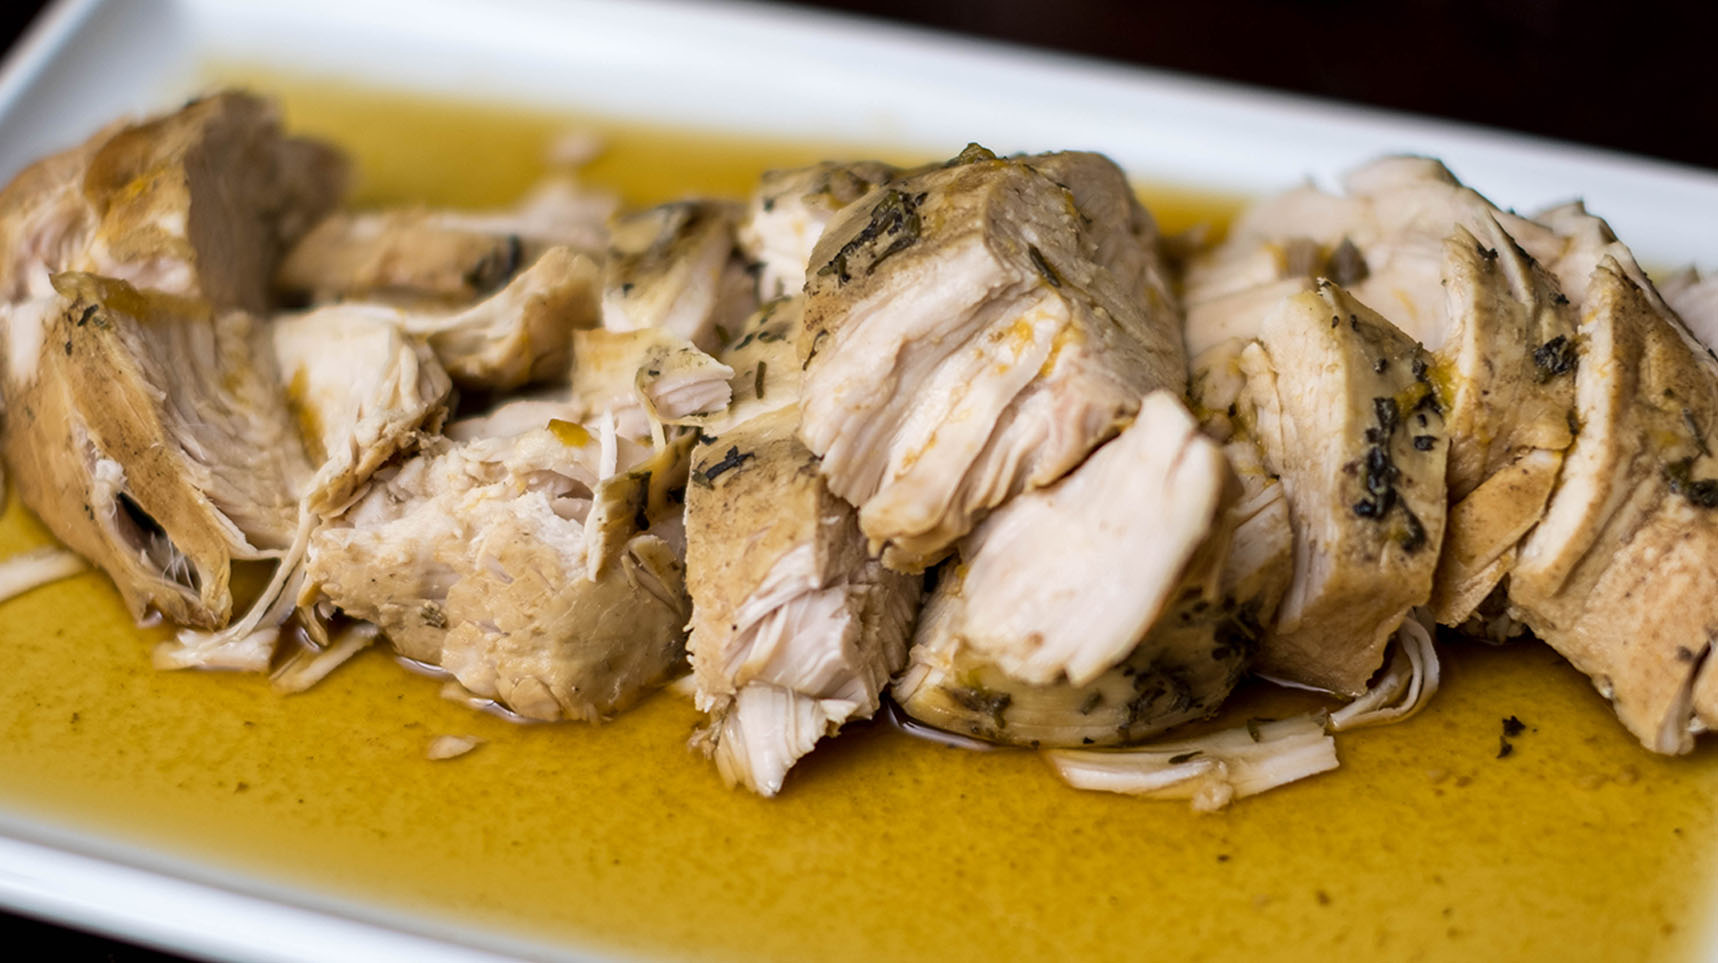
Instant Pot Turkey Tenderloin
Equipment
- knife
- cutting board
- Instant Pot
Ingredients
- 2 lbs turkey breast tenderloin
- 1 cup chicken broth
- 1 tbsp rosemary (fresh, chopped)
- 1/4 cup white onions (chopped)
- 2 each garlic cloves (peeled)
- 1 tsp salt
- 1 tsp pepper
- 1 tbsp worchestershire sauce
Instructions
- Turn the instant pot on the saute setting and add oil to the instant pot
- Place the tenderloin in the bottom and sear on all sides until golden brown (about 2 to 3 minutes on each side)
- Next, pour in the broth, add onions and garlic cloves
- Sprinkle in the rosemary, salt, and pepper, and worchestershire sauce
- Cover the Instant Pot with the lid and set the manual setting to 20 minutes on high pressure, making sure the pressure valve is in the sealed position
- When done, follow the manufacturer's instructions to carefully release the pressure
- Remove the tenderloin from the pot and let it rest for 5 minutes before slicing into 1/2 inch thick slices. Serve with the extra broth
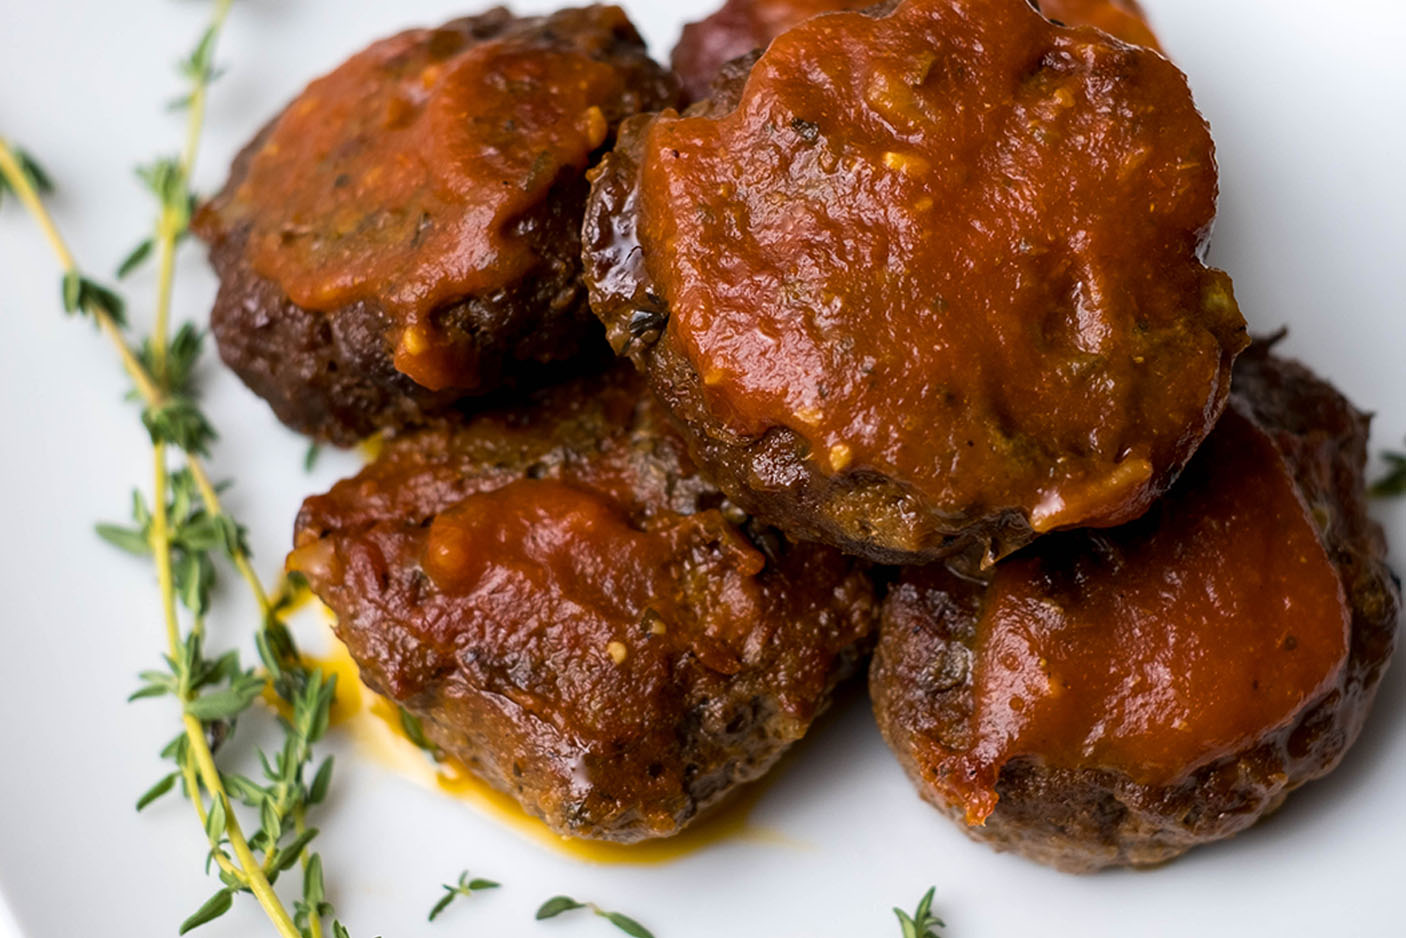
Oven Baked Mini Meatloafs
These beef patties may be mini, but they are full of flavor and can be made in portion sizes with half the baking time. They are perfect for an entree option or appetizer while your guests arrive. These go perfect with creamy mashed potatoes.
Oven Baked Mini Meatloafs
Equipment
- knife
- cutting board
- muffin tins
- oven
Ingredients
Meatloaf patty
- 1.5 lbs ground beef
- 1 each egg
- 2/3 cups panko bread crumbs
- 1/2 cup white onions (diced)
- 2 tbsp garlic (minced)
- 1/4 cup ketchup
- 1 tsp italian seasoning
- 1/2 tsp salt
- 1/2 tsp pepper
Meatloaf sauce
- 1/2 cup ketchup
- 1/3 cup brown sugar
- 2 tsp dijon mustard
- 1/4 tsp cinnamon
- 1/4 tsp salt
Instructions
- Preheat the oven to 350 F
- In a large mixing bowl, add all of the meatloaf ingredients (beef, eggs, breadcrumbs, onion, garlic, ketchup, seasonings)
- Use your hands or large spoon to mix it all together really well
- Divide them into 12 equal portions. Grease the wells of the muffin pans with oil and place each portion into the bottom of the well. Be sure to press down to fill the cup
- Bake in the oven for 15 minutes
- Meanwhile, heat a sauce pan on medium heat and add the ingredients for the meatloaf sauce and mix it well until it reaches a smooth consistency
- After the meatloaf has baked for 15 minutes, remove it from the pan (if needed, use a paper towel, carefully soak any excess liquid or grease from the muffin wells)
- Evenly pour the meatloaf sauce onto each meatloaf patty and bake for another 10-15 minutes until the meat is cooked through an internal temperature of 165F
Oven Baked Tomato Basil Salmon
This baked salmon makes for a great Thanksgiving main course option and only requires simple ingredients that can be baked in less than 20 minutes. Serve this entree on top of rice pilaf, fluffy couscous, or pan-fried polenta cakes.

Oven Baked Tomato Basil Salmon
Equipment
- knife
- cutting board
- sheet pan
- oven
Ingredients
Salmon and seasonings
- 1.5 lbs salmon
- 2 each roma tomato (thinly sliced)
- 6 each fresh basil leaves (thinly sliced)
- 2 tbsp garlic (minced)
- 1/4 tsp salt
- 1/4 tsp pepper
- 1 tbsp olive oil
Instructions
- Pre-heat the oven to 400F
- Place the salmon on a sheet pan. Season with salt and pepper
- Sprinkle the minced garlic on top. Layer the tomato leaves and basil leaves evenly all over the salmon.
- Drizzle with olive oil
- Bake everything in the oven for 12 to 15 minutes until the salmon is fully cooked to an internal temperature of 145F
Honey Balsamic Baked Chicken
Here’s an Easy One Pan Baked Balsamic Chicken recipe that is easy to prepare, baked to perfection in the oven, and will make your tastebuds happy. They will go great with a winter salad or any roasted vegetable side dish.
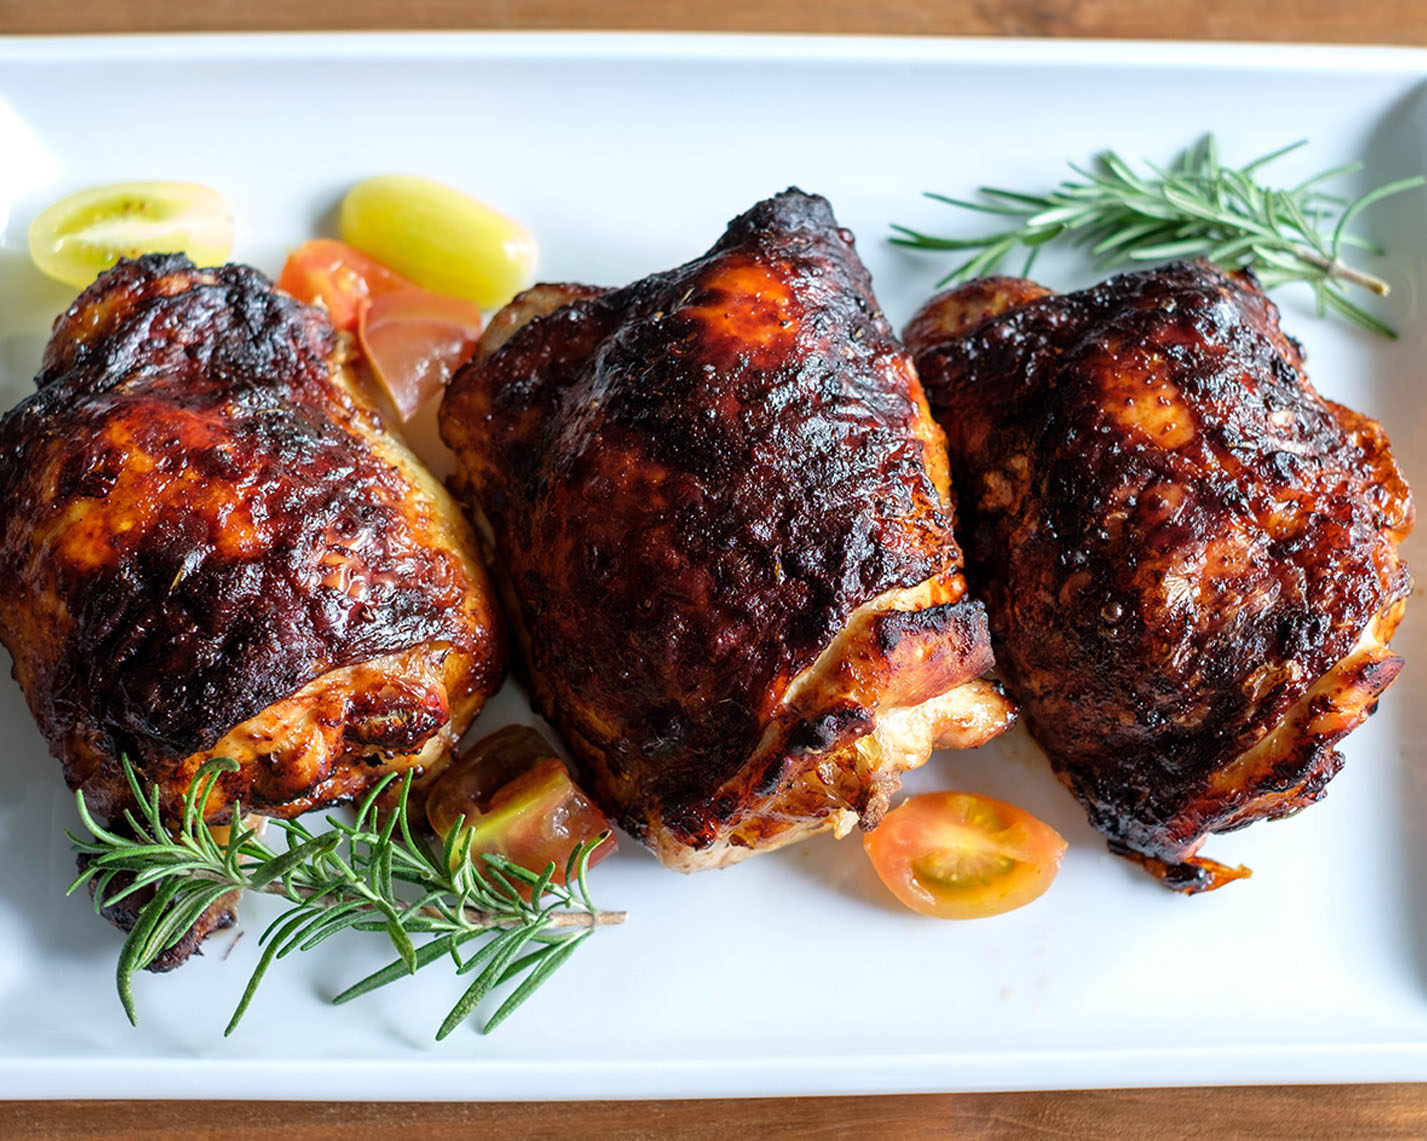
Honey Balsamic Baked Chicken
Equipment
- mixing bowl
- sheet pan
- oven
Ingredients
- 4 each bone in chicken thighs
- 1/2 cup balsamic dressing
- 2 tbsp honey
- 1 tbsp olive oil
- 1 tbsp rosemary (fresh, finley chopped)
- 1/2 tsp garlic powder
- 1/4 tsp salt
- 1/4 tsp pepper
Instructions
- Preheat the oven to 425F degrees
- In a small bowl, whisk together the balsamic dressing, honey, garlic, salt, pepper, and rosemary
- Place the chicken thighs in a baking dish and pour half of the balsamic marinade over the chicken and make sure it is fully coated
- Cook the chicken for 20 minutes
- After 20 minutes, pour the rest of the balsamic marinade on top and cook for another 10-15 minutes until the chicken is golden brown and fully cooked to an internal temperature of 165
- Remove from the oven and place it on a serving dish and enjoy! Serve with a side salad or roasted veggies
Notes
Delicata Squash Lasagna
This low-carb lasagna is rich and delicious and layered with slices of delicata squash topped with savory meat sauce and shredded cheese. It may be low in carbs, but it definitely still brings that comfort we all crave in lasagna.
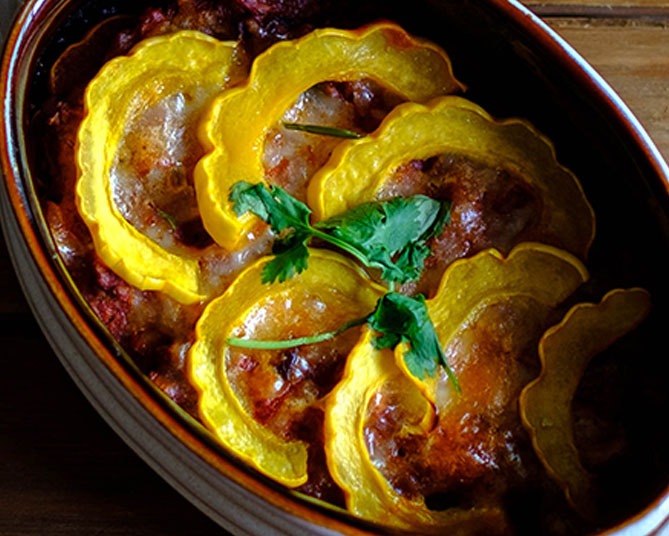
Delicata Squash Lasagna
Equipment
- knife
- cutting board
- spatula
- saute pan
- baking dish
- oven
Ingredients
- 2 lbs ground beef
- 1/4 cup red onions (diced)
- 2 cups marinara sauce
- 1/4 tsp garlic powder
- 1/4 tsp salt
- 1 tbsp olive oil
- 3 each delicata squash
- 1.5 cup shredded mozzarella cheese
Instructions
- Pre-heat the oven to 400F
- Add 1 tbsp olive oil to a saute pan on medium high heat. Saute the onions until they soften (about 2 to 3 minutes)
- Next, add the ground beef and seasonings and saute until it is fully cooked and golden brown (about 7 to 8 minutes)
- Then, add the marinara sauce and stir it all together
- Slice the delicata squash in half, lengthwise. Use a spoon to scoop out the flesh and seeds from the middle. Slice it into 1/4 inch thick slices
- Grease a baking dish and add 1/3 of the meatsauce at the bottom. Layer it with 1/3 of the shredded mozzarella and delicata squash slices. Repeat this process two more times, until all ingredients have been used up
- Place the baking dish in the oven and bake for 20-25 minutes
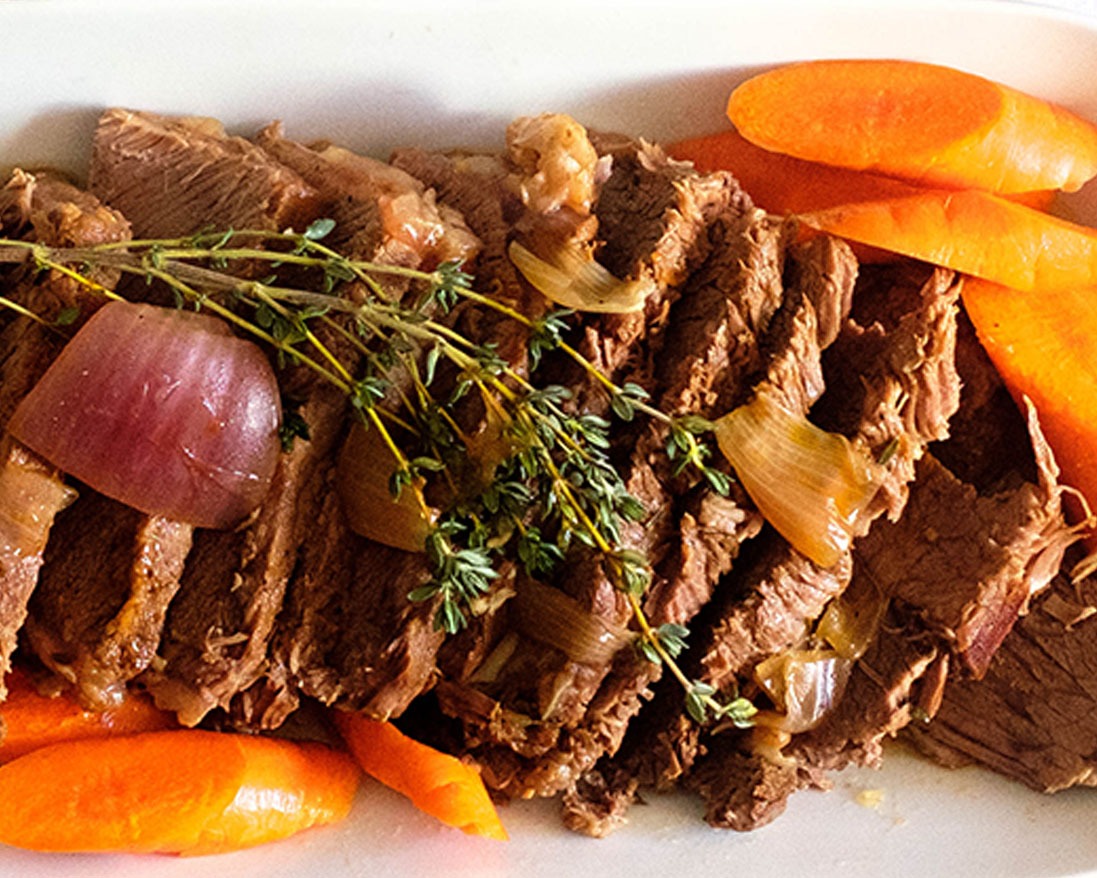
Instant Pot Beef Pot Roast
This delicious and hearty pot roast with savory gravy is tender and is perfect for a family feast. Serve with roasted potatoes or on top of cauliflower rice if you are trying to keep it low carb friendly.
Savory Instant Pot Beef Pot Roast
Equipment
- knife
- cutting board
- spatula
- Instant Pot
Ingredients
- 2.5 lbs boneless beef chuck roast
- 4 each garlic cloves
- 1/4 cup red onion (diced)
- 2 cups baby carrots
- 2 cups beef broth
- 2 tbsp Worcestershire sauce
- 2 tbsp cornstarch
- 1/4 cup water
- 1 tbsp rosemary (fresh, finely chopped)
- 1/2 tsp salt
- 1/2 tsp pepper
- 1 tbsp olive oil
Instructions
- Place the Instant Pot on the saute setting on high heat
- Season the beef with salt and pepper and add oil to the Instant Pot
- Add the beef and cook on all sides until evenly browned (about 3 to 4 minutes). Repeat until all sides are browned
- Next, add the onions, garlic, and thyme. Stir it all around for 2 minutes
- Pour in the broth and Worcestershire sauce and scrape any of the browned bits from the bottom of the pot
- Turn off the saute setting and select the manual setting to adjust the pressure to high and set the time for 30 minutes. Make sure the valve is in the sealed position
- After it has finished cooking, follow the manufacturer's directions for quick-release of the pressure
- Remove the beef from the Instant Pot. Set the instant pot to the soup setting and add the baby carrots.
- Mix together the water and corn starch until it makes a slurry. Once the broth is boiling, stir in the corn starch mixture until the sauce thickens
- Slice the roast into 1/2 inch slices. Serve with gravy and add salt and pepper to taste, garnish with fresh thyme if desired
If you are looking for side dishes to pair up with these thanksgiving entrees, check out our recommendations for Easy to Make Thanksgiving Side Dishes.


Air Fryer BBQ Pork Ribs
Equipment
Ingredients
Instructions