Posted on Leave a comment

Mise En Place: How to Organize Your Kitchen Space

glass meal prep containers with food

If you’ve ever found yourself overwhelmed in the kitchen or staring at a recipe with uncertainty, fear not – we’re here to unlock the secret to organize your kitchen and seamless meal preparation. Say hello to the art of mise en place, a game-changing concept that transforms your kitchen into a well-organized flow of meal prep. In this journey, we’ll explore not only the intricacies of mise en place but also how it can revolutionize your approach to meal prep, making it faster, stress-free, and downright enjoyable. Get ready to turn your kitchen into a culinary haven where every dish is a masterpiece, and the joy of cooking is your daily companion!

glass meal prep containers with food

Mise en Place-The Game Changer

First things first, let’s talk about the game-changing concept of mise en place. In French, it translates to “everything in its place,” and it sure does it make a difference! Mise en place is a culinary philosophy that emphasizes the importance of preparing and organizing all the necessary ingredients before starting the actual cooking process. It’s a technique that I learned in culinary school and is used by professional chefs to ensure efficiency, precision, and a smooth cooking experience.

The PrepYoSelf Newsletter

Tips for Mise En Place:

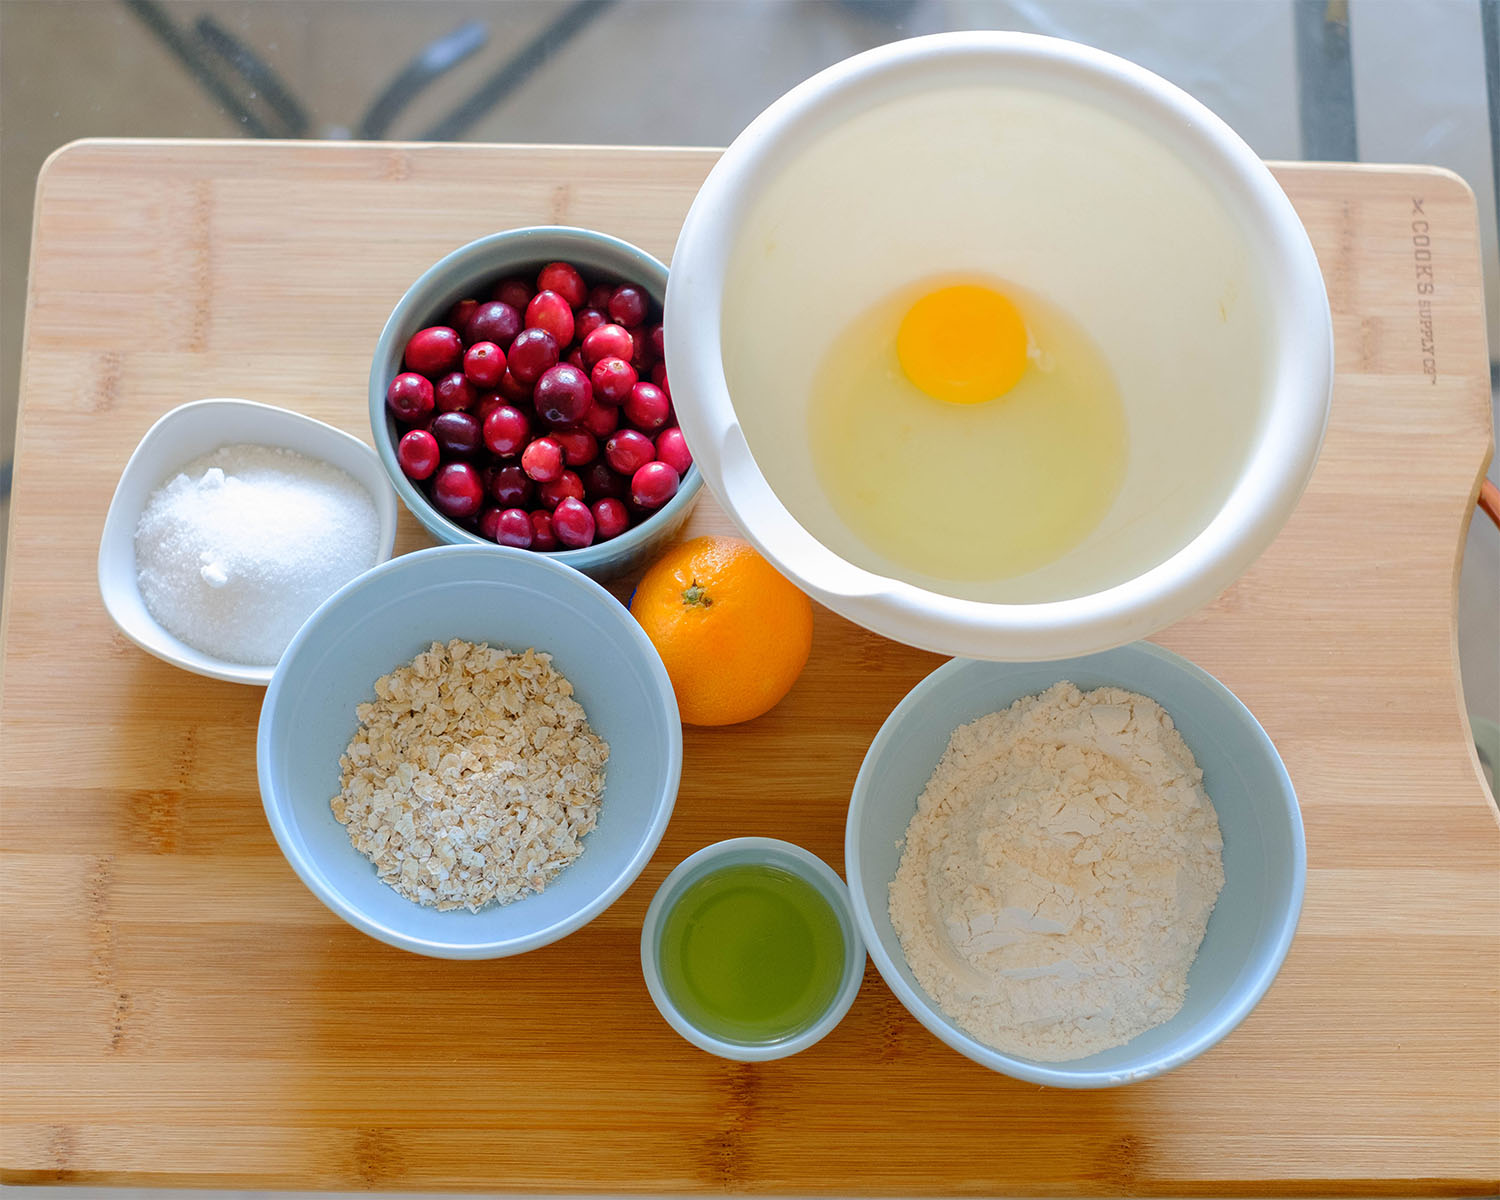
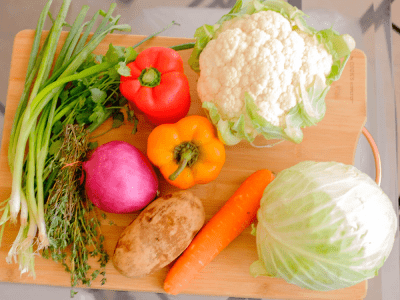
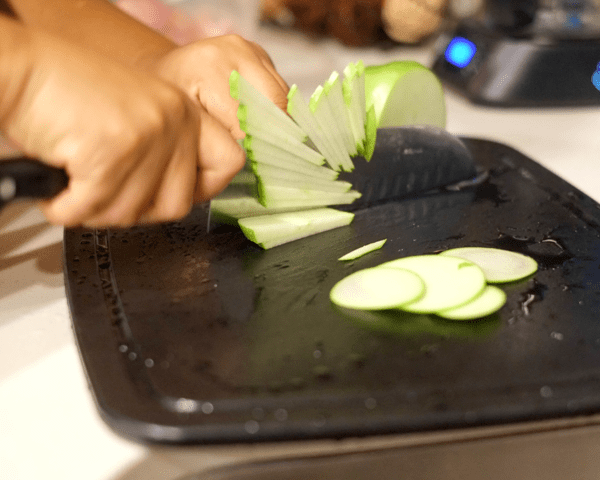
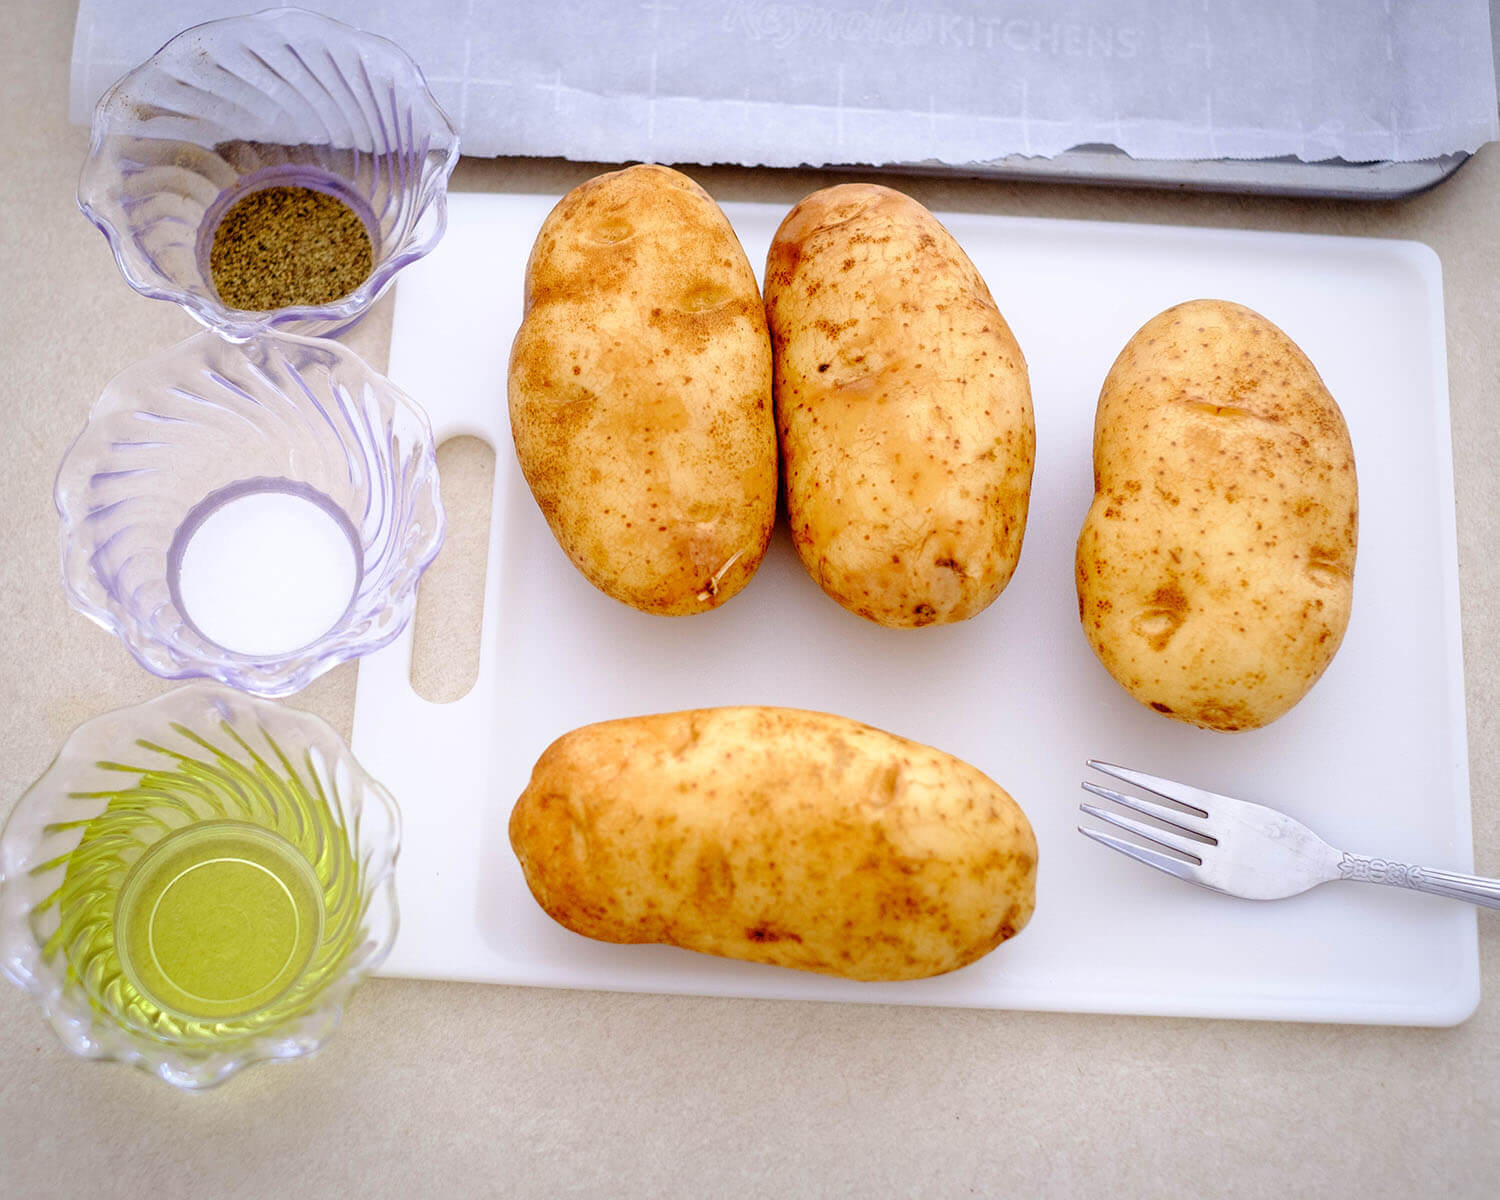
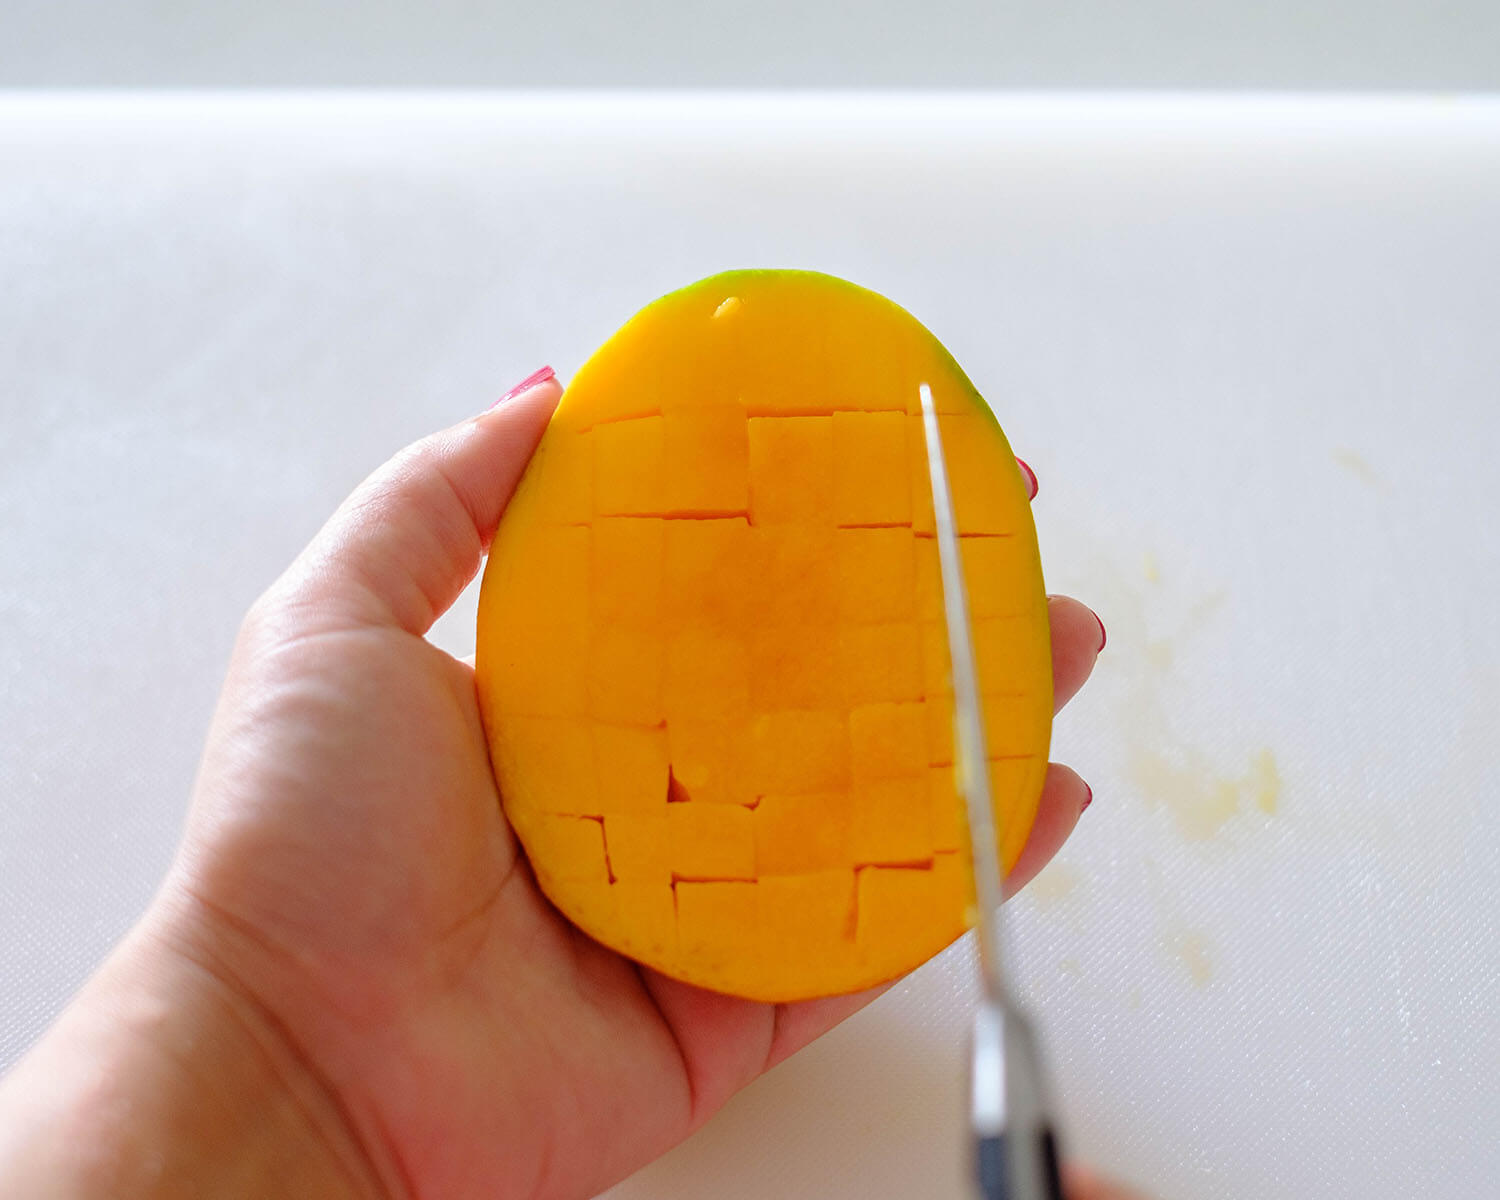
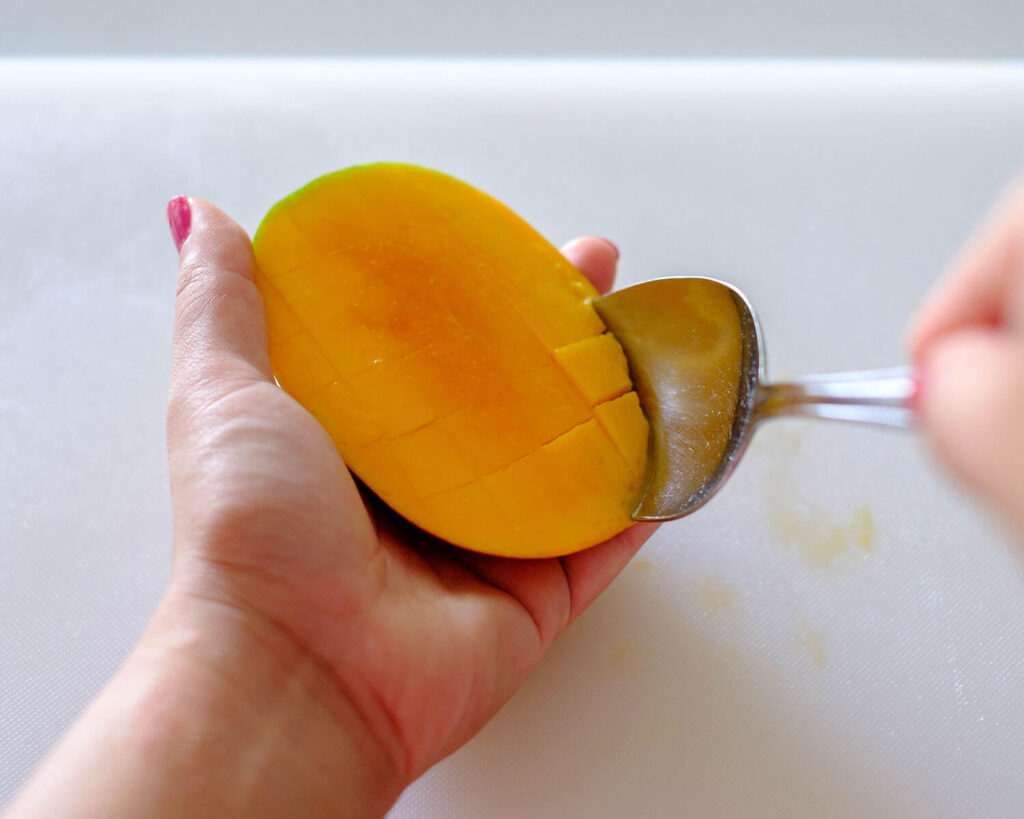
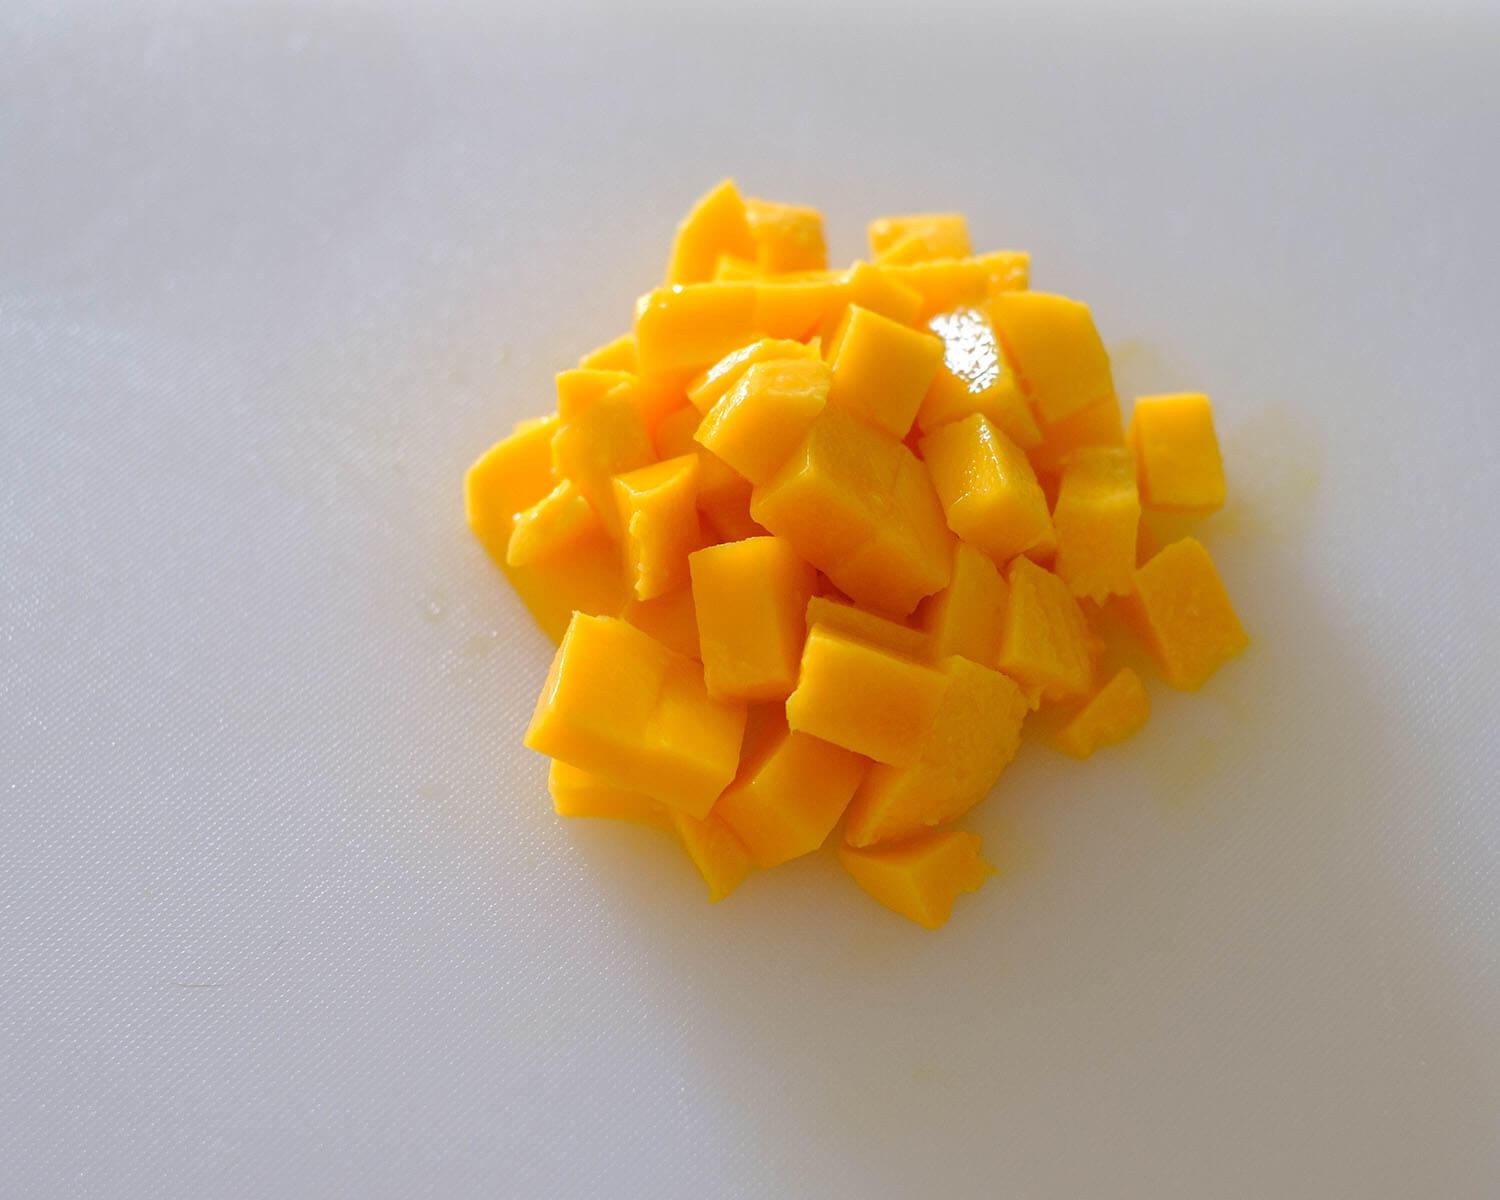
  • Prep Everything in Advance: Before you even think about turning on the stove, ensure all your ingredients are washed, chopped, and measured. This includes veggies, proteins, spices – everything! Having everything ready at your fingertips will organize your kitchen and minimizes stress during the cooking process. This will require you to read the recipe thoroughly and become familiar with the ingredients that you will meal prep.
  • Invest in Quality Tools: Upgrade your kitchen tools to make the prep work a breeze. Sharp knives, reliable cutting boards, measuring cups and spoons, and efficient kitchen gadgets can save you time and effort. Trust me; investing in quality tools is a game-changer! Read our article on Best Kitchen Tools for Meal Prepping.
  • Organize Your Workspace: Designate specific areas for different tasks. Set up a chopping station, a mixing area, and a space for your cooking utensils. Keep your ingredients grouped together based on when they’ll be used. You’ll want to make sure all of the ingredients you need for a recipe are within reach. Be sure that all of your kitchen pans and spatulas, etc are readily accessible. A clutter-free workspace enhances focus and efficiency.
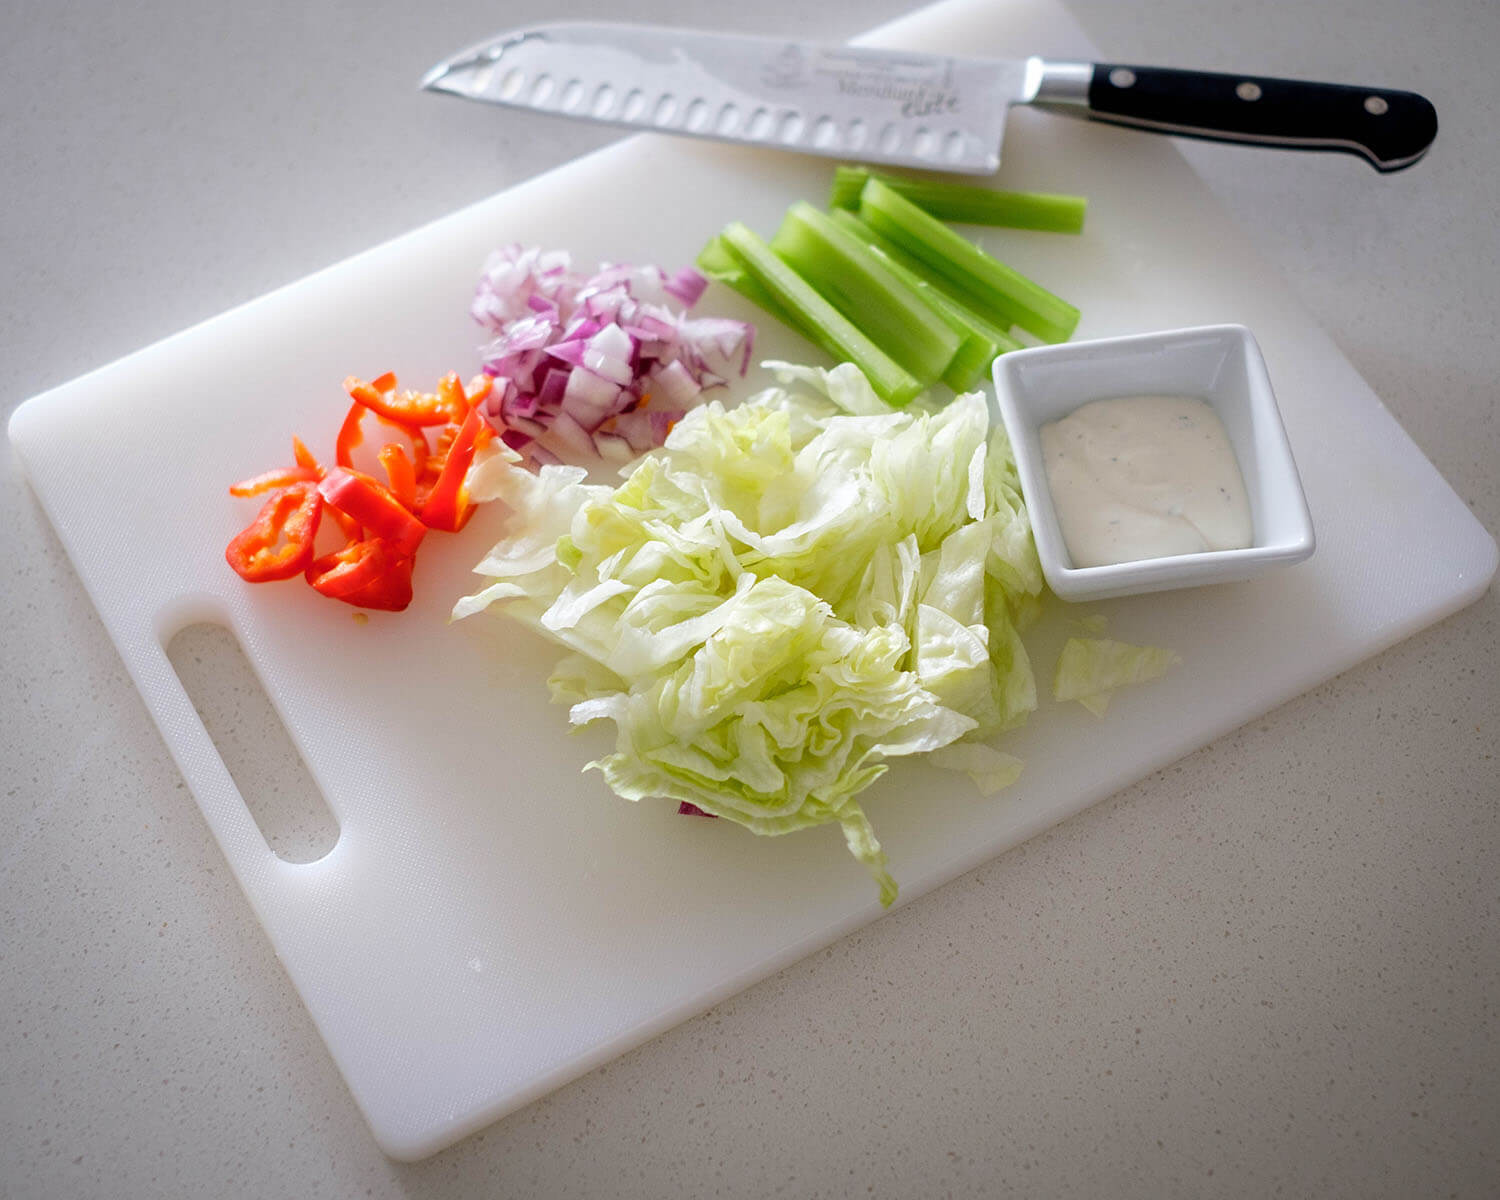
  • Use Bowls and Containers: Bowls and containers are your mise en place allies. Use small bowls to hold pre-measured spices, herbs, and other ingredients. This not only keeps things organized but also adds a touch of elegance to your kitchen space. Check out our recommended meal prep containers.
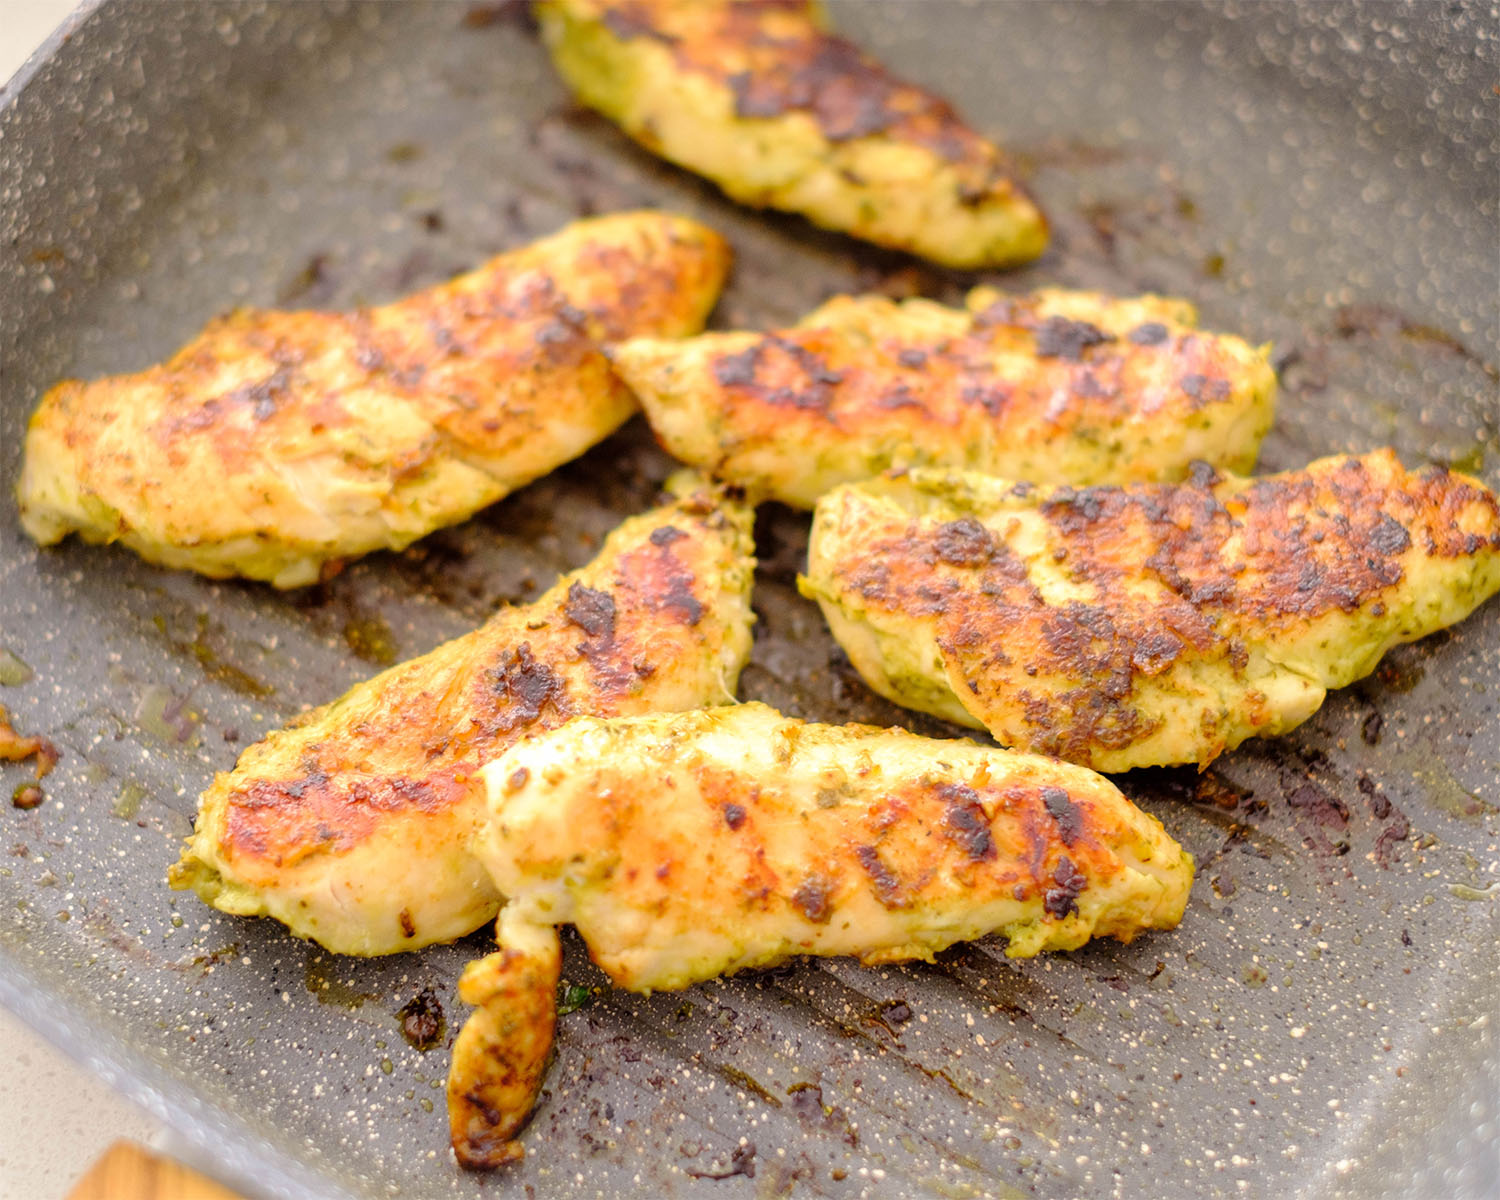
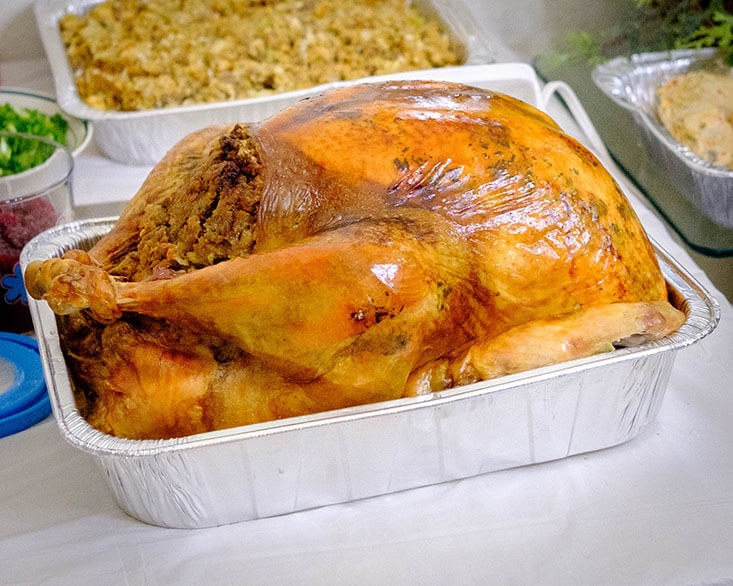
  • Prioritize the Cooking Order: Plan the order in which you’ll use your ingredients. Start with the items that take the longest to cook and work your way down the list. This ensures that everything finishes at the same time, creating a harmonious and well-coordinated meal.
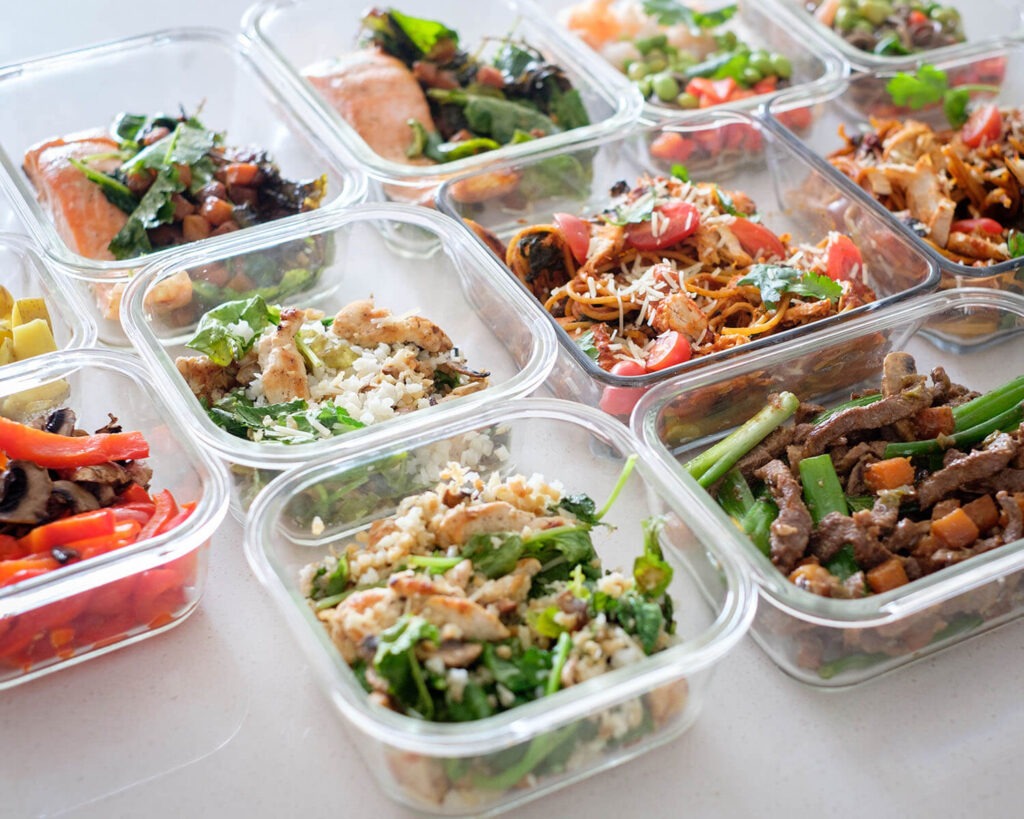
  • Label and Date: If you’re prepping meals for the entire week, label your containers with the name of the dish and the date of preparation. This not only helps you keep track of what’s in your fridge but also ensures you’re consuming your meals at their peak freshness.
  • Clean As You Go: One of the golden rules of mise en place is to clean as you go. Don’t let a mess accumulate; wash dishes and utensils as you finish using them. A clean and organized kitchen makes the entire cooking process more enjoyable.
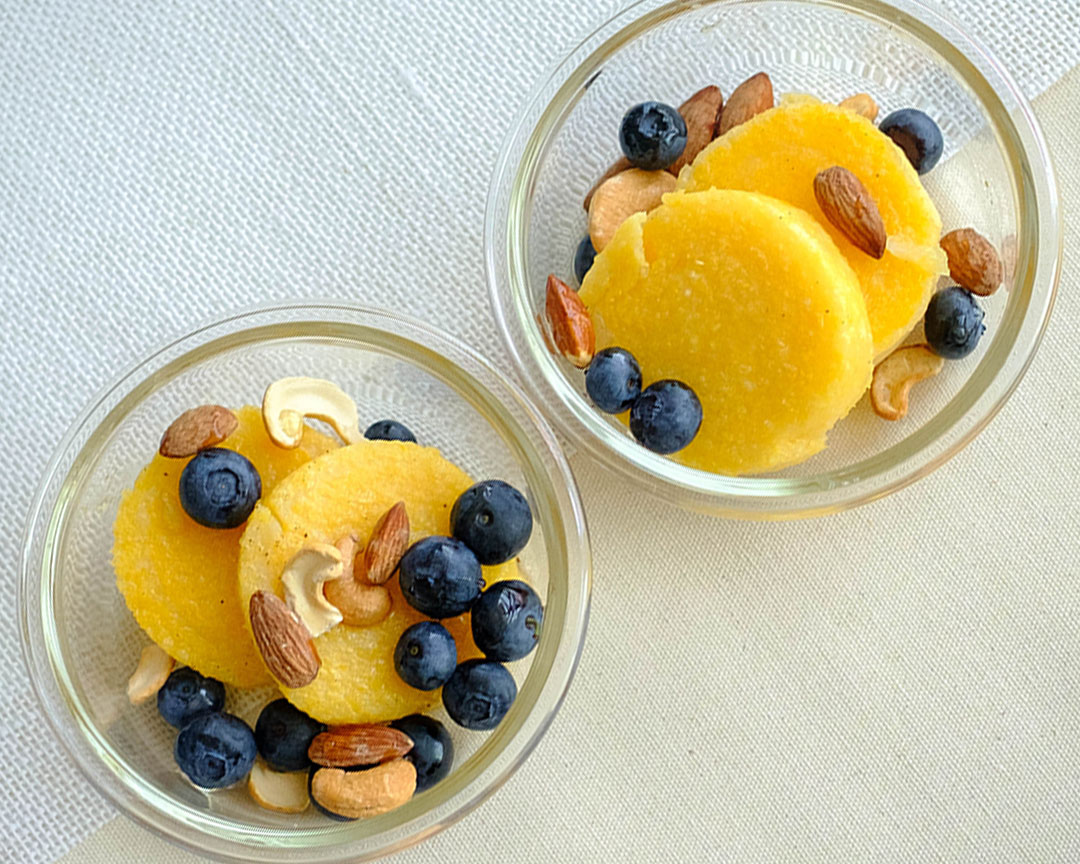
  • Enjoy the Process: Mise en place isn’t just a technique; it’s a mindset. Enjoy the process of prepping and cooking. Put on your favorite apron, play some tunes, and savor the joy of creating delicious, nutritious meals for yourself.

Why is Mise en Place important?

  • Confidence in the Kitchen: Mise en place instills confidence, especially for beginner cooks. Knowing that you have everything in order before starting to cook gives you the assurance to tackle new recipes and culinary challenges. It’s like having a safety net in the kitchen!
  • Adaptability and Flexibility: Life happens, and sometimes you need to adapt your cooking plans on the fly. Mise en place makes it easy to pivot. Need to adjust the cooking time for one component? No problem – everything else is prepped and patiently waiting for its turn.
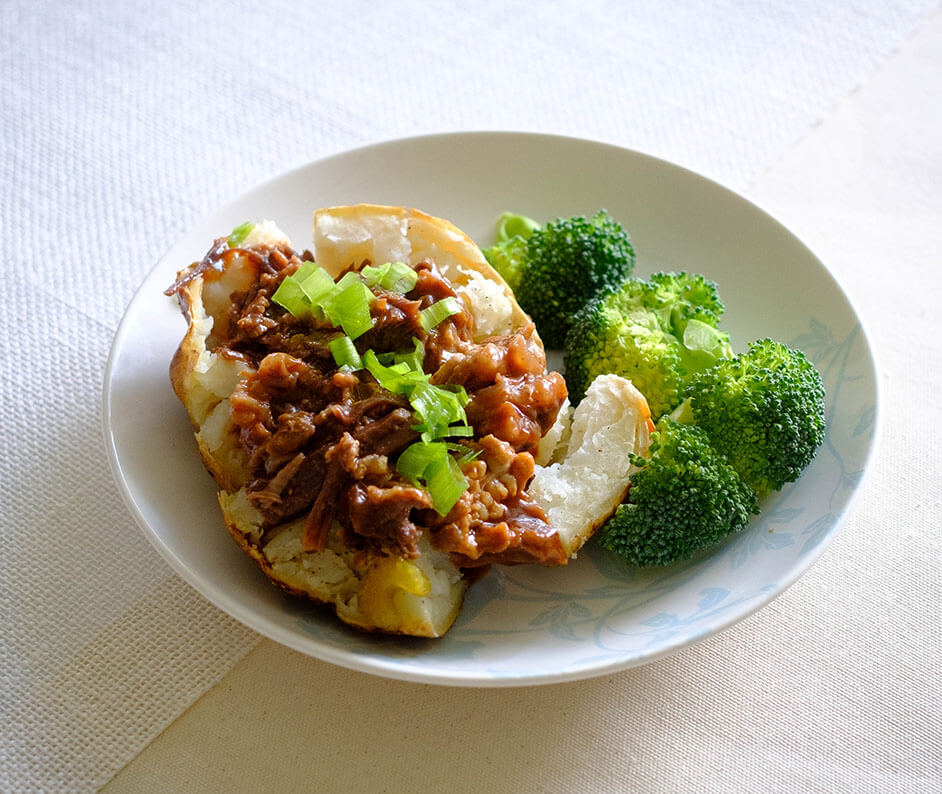
  • Enjoyable Cooking Experience: Perhaps the most crucial point – mise en place makes cooking an enjoyable experience. With the stress and uncertainty removed, you can focus on the creative and satisfying aspects of preparing a delicious meal. It turns cooking from a chore into a joyful ritual.

Remember that mise en place is more than just a technique; it’s a mindset that brings joy and efficiency to your kitchen. With your ingredients prepped, your tools at the ready, and the spirit of mise en place guiding you, you’ve unlocked the gateway to stress-free and delightful meal prep. Embrace the magic of organization, savor the process, and let your kitchen become the canvas for your culinary creations. Happy cooking!

Posted on Leave a comment

How to Stock a Pantry for a Fresh Start!

muffin ingredients

Hello, fabulous meal preppers! As we gear up for a healthier, more organized New Year, let’s dive into the exciting world of pantry stocking. This guide is tailor-made for those who are ready to conquer their wellness goals with a burst of positivity and practicality! So, buckle up for a delightful ride through the art of stocking a pantry with essentials that scream “fresh start” and “effortless wellness.” Whether you’re a seasoned meal prepper or just dipping your toes into this exciting world, get ready to unleash your inner kitchen magician and turn each meal into a masterpiece.

muffin ingredients

Before You Shop: A Smart Start

Before you embark on your pantry adventure, take a quick inventory of your kitchen. It’s like a treasure hunt – you might find some hidden gems! Utilize fresh ingredients first to minimize waste and kickstart your meal prepping journey with a clean slate.

As you craft your grocery list, think about what you and your family truly enjoy. No more dusty cans lingering at the back of your pantry! Choose a variety of items from different food groups to stock a pantry to ensure your meals are not only nutritious but also delicious.

The PrepYoSelf Newsletter

Building Your Meals: Protein Power! 

grilled chicken

Embrace variety in protein sources. Explore different cuts of frozen meats for variety in your meals. Ground turkey or chicken, for example, can be incredibly versatile. Include a mix of protein sources for versatility. Think about canned beans, both black and kidney beans, and consider tofu or tempeh for plant-based protein options.

If you’re buying fresh meat in bulk, portion them out in freezer bags and freeze them so that you can have easy access when you are ready to prep. Stock up on frozen options like poultry, seafood, and even deli meats. They’re not just convenient; they’re nutritional powerhouses.

Don’t forget about eggs, yogurt, and hard cheeses – they’re versatile, delicious, and can hang out in your fridge for weeks. And for a protein-packed pantry punch, embrace canned salmon or tuna, legumes like lentils and chickpeas, and the crunch of nuts or seeds.

Get Your Daily Dose of Fruits and Veggies: Fresh or Frozen, You Win!

vegetables to stock a pantry

Fresh veggies can last a while if stored right – think cabbage, Brussels sprouts, and colorful bell peppers. But guess what? Frozen veggies and fruits are superhero alternatives! Budget-friendly and long-lasting, they’re perfect for smoothies, stir-fries, and more.

Don’t let anything go to waste – freeze those about-to-spoil veggies for future recipes. And when choosing canned goods to stock a pantry with, aim for reduced sugar fruits and low-sodium vegetables to keep your meals as vibrant as your spirit.

Grains Galore: Mix It Up!

polenta pancakes

Experiment with a range of whole grains beyond the usual suspects. Explore barley, quinoa, couscous, orzo pasta, or polenta for a delightful change. And don’t forget about bread, bagels, muffins, and tortillas – freeze them for a longer shelf life.

Don’t forget about whole-grain snacks like popcorn or whole-grain crackers. They can be perfect for a quick and satisfying crunch.

Stock up on Healthy Fats:

Apples and fruit to stock a pantry

Opt for heart-healthy oils like olive oil and coconut oil for cooking and dressing. Keep a selection of nuts and seeds in your pantry – almonds, chia seeds, and flaxseeds are fantastic choices. They add texture and a nutritional boost to your meals.

Go Bold with Spices and Seasonings:

herbs and spices to stock a pantry

Elevate your meals with an array of herbs and spices. Stock up on essentials like garlic powder, cumin, paprika, and oregano. A well-stocked spice cabinet can transform simple ingredients into extraordinary dishes. Consider having a variety of vinegars and sauces (soy sauce, balsamic vinegar, hot sauce) to add depth and flavor to your meals.

Stay Hydrated with Smart Choices:

water with fruit

Keep a variety of teas on hand, both herbal and caffeinated, for a refreshing beverage option. Infused water is an excellent way to stay hydrated.

Keep citrus fruits, cucumber, and herbs like mint in your pantry for an instant spa-like hydration boost.

Download our Handy Grocery Pantry Guide now to stock a pantry like a pro! Packed with tips, tricks, and a dash of inspiration, it’s your go-to companion for a pantry that’s as vibrant as your wellness journey. 

Posted on Leave a comment

How to Cook Eggs

fried egg and sausage hash

Ready to crack the secret to a healthier and tastier lifestyle? Let’s talk about the incredible benefits of mastering the art of cooking eggs. We get it, the simplicity of how to cook eggs might seem overwhelming, but fear not! We’re here to sprinkle some culinary magic and arm you with meal prep hacks, tips, and techniques to become an egg-cooking pro in no time.

fried egg and sausage hash

Benefits of Eggs

First things first, why are eggs such a superstar when it comes to your health? Well, they’re packed with protein, which is the building block of your muscles and a fantastic way to keep you feeling full and satisfied. But that’s not all – eggs are also a powerhouse of essential vitamins and minerals like vitamin B12, vitamin D, and choline, which support brain health. Plus, they’re versatile little wonders that can jazz up any meal from breakfast to dinner!

The PrepYoSelf Newsletter

Learn Different Ways to Cook Eggs

Now, let’s tackle the egg-citing journey of turning those humble eggs into mouthwatering creations that’ll leave your taste buds dancing. Here are some egg-cellent tips and tricks to make you feel like a kitchen maestro:

Scramble with style

round white plate with scrambled eggs, tomatoes, onions, green onions, and turkey sausage

  • To make scrambled eggs, you’ll need a fork to beat the eggs until it is smooth, a non-stick skillet to prevent the eggs from sticking and allow even cooking, and a spatula to gently stir the scrambled eggs.
  • Let’s get started by cracking eggs into a bowl. To create the fluffiest scrambled eggs,  add a splash of milk or cream, and whisk until well mixed.
  • Next, heat a non-stick skillet over medium-low heat and add a bit of butter or oil.
  • Pour the egg mixture into the skillet and stir gently with a spatula as they cook, until they’re softly set but still slightly runny. Season with salt and pepper. Voilà, you’ve got a velvety, dreamy plate of scrambled goodness! 

Try our scrambled egg recipe: Breakfast Turkey Scramble and Veggie Scramble

Fry Eggs Like a Pro: 

fried egg and sausage hash

  • To make fried eggs, you’ll need a non-stick skillet to provide a smooth surface for easy flipping and prevent sticking. Use a spatula for flipping and removing the eggs from the pan.
  • Achieve that perfect fried egg by heating a non-stick skillet over medium heat and add a small amount of butter or oil.
  • Crack an egg into the skillet and cook until the egg white is set and the edges are crispy, but the yolk is still runny for sunny-side-up. Gently flip it over and cook it for another minute or two for over-easy/over-hard, depending on how runny/hard you like your eggs.

Try our fried egg recipe: Fried Egg with Apple Sausage Hash

Beautifully Boiled Eggs: 

round plate with deviled eggs and arugula salad

  • Soft or hard, boiled eggs are a breakfast staple. Unlike the non-stick skillet that you use for scrambled or fried eggs, you’ll need a boiling pot that is deep enough to submerge the eggs. You’ll definitely want a timer to keep track of the cook time to make sure you get the desired level of doneness for the yolk. Last but not least, save a bowl of ice water to rapidly cook the boiled eggs to make them easier to peel.
  • Place eggs in a single layer in a pot and cover with water.
  • Bring the water to a boil, then reduce the heat to a gentle simmer.
  • For soft-boiled eggs, cook for about 4-6 minutes, and for hard-boiled eggs, cook for about 9-12 minutes, depending on desired yolk consistency.
  • Immediately transfer boiled eggs to ice water to stop cooking and make them easier to peel.

Try our boiled egg recipe: Tuna Stuffed Deviled Eggs

Egg Baking Brilliance:

white rectangular baking dish with asparagus and tomato egg frittata

  • Baked Eggs are perfect for a fuss-free brunch or even a delightful dinner. And the best part is that you can set it and forget by using an oven safe dish or even an muffin pan.
  • Preheat the oven to around 400°F.
  • Grease a ramekin or oven-safe dish with butter or oil.
  • Crack eggs into a mixing bowl and whisk them until the egg whites and yolk are fully combined.
  • Then, pour the egg mixture into the oven safe dish and optionally adding some seasoning or toppings like cheese, spinach, vegetables, or ham.
  • Bake for about 10-15 minutes, or until the whites are set but the yolk is still runny.

Try our baked egg recipe: Baked Asparagus and Tomato Egg Frittata

Omelette Adventures:

Omelette

  • Whisk eggs in a bowl until well combined, then season with salt and pepper.
  • Heat a 6 or 8-inch non-stick skillet over medium heat and add butter or oil. 
  • Pour the egg mixture into the skillet, making sure it fully coats the bottom of the pan, and let it cook without stirring.
  • Once the edges are set, start adding your favorite fillings such as cheese, chopped vegetables, or meats on one half of the omelette.
  • Carefully fold the other half of the omelette over the fillings and cook for a bit longer until the cheese melts.
  • Then sprinkle it with herbs or a dash of sriracha or your choice of hot sauce for added flavor.

Try our omelette recipe for: Easy Cheese Omelette 

Remember, there’s no rush – cooking eggs can be a delightful experience, a journey of discovery in your own kitchen. Experiment with different methods, add your own flair, and make these techniques your own. Before you know it, you’ll be serving up egg-cellent dishes that are as healthy as they are delicious. So, get cracking, embrace the egg-citement, and cook up a storm! 

Plate with scrambled eggs topped with pork carnitas and pico de gallo

Frequently Asked Questions

What’s the best way to store eggs for cooking?

Store eggs in their original carton in the refrigerator, preferably on a shelf rather than the door. This helps maintain a consistent temperature and prevents the eggs from absorbing strong odors.


Can I microwave eggs for cooking?

Yes! You can microwave scrambled eggs, omelettes, and even poached eggs. Just remember to use microwave-safe containers, cover to prevent splattering, and adjust the cooking time to avoid overcooking.


Why does my scrambled egg turn out rubbery sometimes?

Overcooking eggs can cause them to become rubbery. Cook scrambled eggs over low to medium heat, stirring gently and frequently, until they are just set but still slightly runny. They’ll continue to cook a bit after you remove them from the heat.

Posted on

Basic Knife Skills and Safety

chopped vegetables

Hello my foodie friends, let’s dive into the world of slicing, dicing, and chopping and let’s master some basic knife skills. When it comes to conquering your kitchen, it all starts with safety and efficiency of basic knife skills. Here are some essential knife skills to focus on as a beginner.

Best Knives for Meal Prep

Using the right knife during meal prep is going to be a total game-changer. You’re less likely to encounter unexpected slips and cuts, making your kitchen experience much more enjoyable and accident-free.

slicing an apple with a knife on a cutting board

First up, we have the Chef’s Knife which should be your go-to for all things chopping, dicing, and slicing. Think of it as the jack-of-all-trades, ready to transform those veggies into picture-perfect cubes, slice through succulent meats like a breeze, and oh-so-gracefully mince herbs into aromatic confetti. The blade is around 8 to 10 inches long which is the perfect balance between power and precision. With its sturdy blade and rocking motion, you’ll conquer the kitchen like a culinary ninja, making prep work feel like a joyous dance.

Now, let’s talk about the dashing Paring Knife. The blade is usually around 3 to 4 inches long and is all about finesse and precision. This should be saved for more of those delicate tasks. This sleek blade is all about the finer things in life—peeling apples, coring tomatoes, and tackling intricate tasks like a seasoned pro. Its smaller size and nimble maneuverability make it a true companion for those small yet crucial jobs.

But why separate the two? It’s all about efficiency and safety, my foodie friends! Using a chef’s knife for delicate peeling might be like using a sledgehammer for a thumbtack—it’s just not the right tool for the job. On the flip side, attempting to dice an onion with a paring knife could turn into a finger-tango, and that’s not the kind of moves we’re aiming for in the kitchen!

Tips for Basic Knife Skills:

Now that you know what knives to use, here are some basic knife skills.

  • Hand Position and Grip: Hold the knife with a firm but not overly tight grip. Place your index finger and thumb on either side of the blade, while wrapping your other three fingers around the handle.
  • The Claw Technique: Curl your fingertips under and use your knuckles as a guide to hold the ingredient you’re cutting. This helps protect your fingers while ensuring precise cuts.
  • Guiding Hand: The hand holding the ingredient should guide the knife, moving it back as you cut. Your fingertips should be tucked in to prevent accidental cuts.

Basic Knife Cuts:

  • Slice: Use a gentle back-and-forth motion while moving the knife forward to create thin, even slices. Examples include cutting bell peppers and red onions for sizzling fajita toppings.
  • Dice: Cut the ingredient into small cubes of equal size. Start by making slices, then stack them and cut them into strips, and finally turn the strips and dice them. Dicing onions, celery, and carrots work well for soups so that they cook faster and soften really easily during the cooking process.
  • Chop: Use a rocking motion to cut larger ingredients into smaller pieces. Keep the tip of the knife on the cutting board and pivot the blade up and down. You may try this method for chopping broccoli into florets for stir-fry dishes or cabbage for coleslaws.
  • Mincing: For fine chopping, use a rocking motion with the tip of the knife, moving it back and forth over the ingredient. This technique is great for chopping garlic or herbs

Tips for Knife Safety

  • Safe Cutting Surfaces: Always use a stable cutting board made of wood, plastic, or bamboo. Avoid glass or hard surfaces that can damage your knife’s edge. Using a wet paper towel underneath the cutting board will also help keep the cutting board from slipping around the surface.
  • Knife Storage: Store knives in a knife block, magnetic strip, or knife sheaths to protect both the blade and your hands.
  • Honing and Sharpening: Regularly use a honing rod to realign the edge of your knife, keeping it sharp. Sharpen your knives occasionally using a sharpening stone or a professional sharpener.

So remember, practice makes perfect, so start with the basics and soon enough you’ll be conquering that kitchen with confidence. 

Try practicing your knife skills with these recipes:

Free Weekly Meal Plans

Have fun advancing your culinary skills with our chef-created recipes with our weekly meal plans.

Posted on

Learn to Bake a Potato

baked potato

Baked potatoes are the ultimate comfort food, and we enjoy them with a perfectly crispy skin on the outside and a steamy, fluffy middle on the inside. Potatoes are a cheap and versatile ingredient that is naturally simple, however, baking the potato in the oven does take some time to cook up. Once you learn to bake a potato, you’ll see that it is definitely worth the wait. 

Types of Potatoes

There are many types of potatoes available, all with their own characteristics in flavor and texture. Waxy potatoes tend to be smaller and more round with a thinner, skinnier, and smoother texture. Common waxy potatoes include red bliss, fingerlings, and new potatoes. They tend to stay intact when cooked, either sliced up or cubed and boiled or baked. This is due to their low starch and high moisture. Starchy potatoes tend to be higher in starch and lower in moisture, causing them to fall apart when boiled because the starches expand and harden causing the skin to split and the inside to crumble. These varieties include russets and Yukon gold potatoes.

What Potatoes Are Best for Baking?

Although technically you can bake any type of potato, the best way to make baked potatoes are with russet potatoes since the skins are nice and thick allowing them to perfectly crisp up in the oven. The high starch content allows you to have a soft and fluffy inside. They are also larger in size making them perfect for a meal topped with more veggies and your choice of protein. Alternatively, sweet potatoes are also a good choice.

How to Buy and Store Potatoes?

  • When you are buying potatoes, look for clean, smooth, and firm-textured potatoes. Avoid potatoes that have discoloration cuts, or bruises. 
  • Potatoes are best stored in a paper bag, out of light, and in a cool and well-ventilated place. 

Meal Prep Tips for Baking Potatoes

  • Always scrub the potatoes thoroughly under running water. Using a vegetable brush is great for this. Afterward, you’ll want to pat them dry.
  • If your potatoes have extra eyes or extra blemishes, you can use a paring knife to carefully remove them.
  • Potatoes also don’t need to be wrapped in foil when you bake them. Keeping them uncovered will allow their skins to get crispy.
  • To get a good crisp, you can also use a wire rack on top of your sheet pan so that the air and heat can circulate evenly all around the potatoes to give them an even crisp.
  • If you cook potatoes in advance for meal prep, it is best to refrigerate them in an airtight container for up to 3 days. You can reheat them in the microwave or back in the oven at 325F until they are warmed through.
  • If you have leftovers, you can always transform them into another dish such as cutting them into cubes and pan-frying them in a skillet with bell peppers and serving them with a side of eggs for breakfast.

How to Bake a Potato

potato ingredients

Step 1: Pre-heat your oven to 425F

Step 2: Gather all of your ingredients. All you need are the potatoes, olive oil, salt, and pepper

Step 3: Scrub the potatoes clean under running water and pat them dry with a paper towel.

Step 4: Use a pastry brush to brush olive oil all over the potatoes. 

Step 5: Sprinkle the potatoes with salt and pepper all around.

Step 6: Use a fork to prick the potatoes in a few places. This will allow steam to escape while baking.

Step 7: Place the potatoes on a sheet pan, and bake it in the oven for about 50 to 60 minutes.

Step 8: Use either a fork or a small pairing knife to check for doneness. The skins should be dry and crispy, and the knife should easily slide inside when pierced.

Step 9: Use a small knife to cut down the middle. Carefully squeeze them open, and fluff the insides with a fork.

What Can You Eat With a Baked Potato?

  • Classic toppings include cheddar cheese, sour cream, and green onions.
  • In the south, we love eating our baked potatoes topped with chili or shredded bbq meat such as chicken, beef, or pork.
  • You can also top it off with healthy fats such as guacamole along with fresh salsa.
  • For breakfast, top them off with eggs, either scrambled or sunny side up.

Here are other ways to enjoy potatoes:

Free Weekly Meal Plans

Have fun advancing your culinary skills with our chef-created recipes with our weekly meal plans.

Posted on

Learn to Cook Broccoli

roasted broccoli and spinach

If you’ve avoided broccoli your whole life, here are simple ways to cook and boost broccoli’s flavor so that you can enjoy this nutritious vegetable. 

Cruciferous vegetables like broccoli are packed with anti-inflammatory properties. It belongs to the same family as cabbage, kale, cauliflower, and brussels sprouts. Broccoli is a low carb food and often a staple in low carb or keto diets. Eating it raw and steaming broccoli may be the healthiest way to prepare broccoli, but it may also not be the most appetizing. Some may enjoy the earthy flavors of broccoli in its raw form, however, adding heat actually amplifies its flavor. Here are some other tasty ways to enjoy it and still get some of broccoli’s nutritional benefits.

How to Buy and Store Broccoli

  • When you are buying broccoli, you want to pick broccoli that has a uniform green color. Avoid broccoli with brown and yellowing spots. The broccoli stem should be firm and the crown should be tight and springy. 
  • You’ll want to store your broccoli in the fridge until you are ready to use it. Storing it in the fridge will help keep it fresh for up to a week. 

Meal Prep Tips for Broccoli

  • Before cooking your broccoli, you’ll want to slice through the broccoli stem and get close to the crown. This will allow the crown to break into the large florets. To create bite-size pieces, cut through the trunk of each floret.  
  • Don’t toss the stem. The large stem is edible and is packed with fiber and nutrients. Just be sure to use a peeler to remove the tough outer portions. Then you can use a grater to shred them and make them into broccoli slaw or thrown them into a food processor to make broccoli rice as a low-carb option. You can also add them to soups and stews which will make the broth more nutritious.
  • To wash the broccoli, rinse the stems and florets under running water to remove any dirt. 
  • To retain the maximum nutritional benefits of broccoli, you’ll want to avoid boiling it in excess. 

Simple Ways to Cook Broccoli

If you’re looking for a quick and no-stress way to cook broccoli, blanching and steaming broccoli will be the easiest method. Both of these methods are good for when you are trying to do some prep in advance. These two methods are also helpful if you bought too much broccoli and want to freeze them for later use. Blanching and steaming them before freezing will give you better tasting broccoli when you are ready to use them.

Blanching Broccoli

Boil water into a large pot and add a teaspoon of salt. While, you are waiting for the water to boil, create an ice water bath and set it aside. Then, carefully add the broccoli florets into the boiling water for about 1 to 2 minutes. Use a slotted spoon to remove the broccoli florets and place them into the ice water to stop the cooking process. Blanching broccoli will give it a bright green color and make it more appetizing to eat than raw broccoli. 

Steaming Broccoli

The easiest way to steam broccoli is to place the florets in a microwave-safe dish and add 2 to 3 tablespoons of water. Cover the dish with a lid and microwave on high for about 3 to 4 minutes. Be careful when removing the lid to avoid being burned from the steam. Use a fork to check if the broccoli is tender. The fork should easily poke through the broccoli without it falling apart.

Tasty Ways to Cook Broccoli

While blanching and steaming broccoli may be the easiest ways to broccoli, it doesn’t add much flavor. Here are three of our favorite ways to add flavor to boost the flavor of broccoli. These are three easy ways to incorporate broccoli into your weekly meal prep.

Bake them with Eggs

Making egg frittatas or egg muffins are often easy ways to incorporate vegetables for our morning breakfasts. We often use leftover veggies and herbs to our eggs, and adding broccoli to these meals is a great way to get this veggie into our diets. All you need to do is chop up the broccoli florets into smaller pieces. Scramble eggs in a mixing bowl and season with salt and pepper. Then, either use a greased baking dish, or greased muffin tins and evenly pour in the scrambled eggs. Top off the eggs with the broccoli florets, along with other veggies or choice of toppings. You can add tomatoes, diced sausage, and even a sprinkle of cheese. Bake it in the oven for about 10-12 minutes.

broccoli egg muffins

Roast Broccoli

If you are not a fan of the sulfurous flavors of broccoli, then roasting this cruciferous vegetable is a way to change those flavors to something that you may enjoy. All you have to do is season the broccoli with a bit of garlic powder and salt. Coat it with olive oil and place it on a sheet pan. Roast it in the oven at 425 for 20 to 25 minutes. After roasting, you get crispy golden brown broccoli that tastes amazing. Sprinkle it with lemon juice for some added freshness. 

broccoli and carrots

Stir Fry or Saute Broccoli

Before you saute the broccoli make sure that it is completely dry after rinsing. Add oil to a skillet or wok over medium-high heat. Toss in the florets and add your seasonings. Stir them frequently until the broccoli is bright green and tender. If you are making stir fry, add your sauce at the end so that broccoli florets can soak up the sauce. We often use a soy garlic sauce or a sesame ginger sauce.

broccoli beef stir fry

10 Ways to Enjoy Broccoli

Sheet Pan Salmon with Roasted Broccoli and Apples on top of Fresh Spinach Salad

salmon and broccoli

Grilled Steak with Oven Roasted Cheesy Broccoli

steak and broccoli

Sauteed Chicken Sausage with Fajita Bell Peppers and Broccoli Rice

sausage and broccoli rice

Boiled Eggs with Seasoned Oven Roasted Potatoes and Broccoli Hash

eggs and potatoes and broccoli

Oven-Baked Cheesy Broccoli Rice and Chicken

cheesy broccoli

Stir-Fried Cauliflower Fried Rice 

cauliflower fried rice

Ground Beef Stir Fry with Broccoli

ground beef and broccoli

Steamed Broccoli with BBQ Baked Potato

baked potato and broccoli

Air Fryer Broccoli with Orange Soy Glazed Chicken Thighs

air fryer broccoli and chicken

Fresh Broccoli Salad with Radish and Cherry Tomatoes

broccoli salad

Try out this simple stir fry recipe using broccoli:

Free Weekly Meal Plans

Have fun advancing your culinary skills with our chef-created recipes with our weekly meal plans.

Posted on

Learn to Cut a Mango

ginger lime chicken salad

Mango is a delicious and healthy tropical fruit. In some parts of the world, it is called the “king of fruits.” Mango is native to India and Southeast Asia, and there are hundreds of types of mango. Mango is low in calories but full of nutrients. Mango is delicious, versatile, and can easily be added to your weekly meals. However, cutting a mango can be difficult because of its tough skin and large pit. So we’re here to show you how to cut a mango so that you can enjoy this delicious fruit.

Types of Mango

There are many varieties of mango and each one has a unique flavor and texture. Tommy Atkins is the most widely grown variety in the US and the flavor is mild and sweet. The Kent is ideal for drying and juicing and has a dark green and occasional red blush. The Keitt is grown in Mexico and the US and has few fibers which make its flesh juicy and easy to cut. 

How to Buy and Store Mango

  • When you are at the grocery store, don’t just rely on the color as the indicator for ripeness. Gently squeeze the mango. If the mango slightly gives, then it is a ripe mango. 
  • If you buy a mango that is not ripe, store it at room temperature so that they continue to ripen and become sweeter and softer over several days. If you pick them ripe, you can move them to the refrigerator to slow the ripening if you are not going to use it for a couple of more days.

How to Cut a Mango

Step 1: Cut the sides of the mango

The mango has a large, flat oval stone (or seed) in the center of the fruit making it tricky to prepare. After you learn to work around the stone, the rest of the preparation is simple. You will want to use a sharp knife so that it cuts through easily and can pierce through the skin of the mango. Stand the mango upright on a chopping board and use a chef’s knife to cut vertically ¼ inch away from the midline. Cut all the way through the flesh, away from the center of the mango on each side. 

slice mango

Step 2: Cut the flesh in a grid

Cutting a grid into a mango is similar to cubing an avocado. Use a pairing knife to cut a grid pattern on each mango half. Make sure not to cut through the skin. Using your hands, push underneath the mango halves to push out the individual cubes. This will help separate the cubes and make it easier to cut out. 

cut mango

Step 3: Use a large spoon to scoop the flesh

Using a large spoon, scoop out the individual cubes from the mango skin. The individual cubes should easily scoop out from the skin.

scoop mango

diced mango

You will notice, there is quite a bit of fruit left around the stone. Most people throw this part away, but here at PrepYoSelf, we don’t waste food! You can easily use the knife to cut the peel off and eat the mango right off the stone. Or you can lay the mango slice on the cutting board and use a paring knife to cut the skin away and then use the knife to cut the flesh away from the stone. You should be able to get two thin strips of mango which can also be diced.

What can you eat with mango?

  • We love putting mango in pico de gallo with onions, tomatoes, cilantro, and lime.
  • You can also blend it in smoothies with other fruits and vegetables.
  • Mangoes can be pureed in a blender with other seasonings to make a sauce so that you can use it as a glaze for protein marinades or even drizzle it on as a sauce.

Here are some easy mango recipes that we think you might enjoy:

Free Weekly Meal Plans

Have fun advancing your culinary skills with our chef-created recipes with our weekly meal plans.

Posted on

How to Cook Turkey

stuffed turkey

The crispy-skinned, deep golden brown turkey is always the centerpiece of the Thanksgiving holiday. There are many ways to enjoy turkey whether it’s slow-cooked, grilled, and even deep-fried, but we are going to go with the traditional roasted method. It’s simple and brings delicious flavors. Here are some tips and techniques to consider when roasting a whole turkey.

What Kitchen Equipment do You Need to Cook a Turkey

  • A large roasting pan with handles to make it easy for you to carry your turkey in and out of the oven
  • A V rack for the roasting pan so that it keeps the turkey above the drippings so that it does not get soggy and allows the turkey to get a crispy skin
  • A baster to suction the drippings from the bottom of the pan and pour over the turkey
  • A thermometer that is oven proof or one of those instant-read thermometers to ensure it cooks to the correct internal temperature for turkey
  • Aluminum foil to make a tent over it and keep it warm while it is resting after roasting
  • A sharp knife and cutting board for carving

How to Prepare the Turkey

  • Thaw the turkey: The best way to thaw turkey safely is in the fridge. It typically takes about 24 hours for every 5 pounds of weight.
  • Remove the inner giblets which include the neck and internal organs such as the heart, liver, and gizzard. But don’t throw these things away, use these to enrich the flavor of your gravy.
  • There are several ways to season a turkey. You can coat it with a savory and acidic marinade, wet brine it overnight in liquid or dry brine with a dry seasoning mixture.

How to Cook a Turkey

  • Preheat the oven to 325F
  • After you have stuffed the turkey with stuffing or aromatics such as onions, carrots, and herbs, place the turkey breast side down in a large roasting rack
  • Brush the entire backside with melted butter and then turn it over and brush the entire side of the turkey breast with butter. You can even stuff butter and herbs in between the skin for extra flavor and moisture
  • For an unstuffed turkey, it takes about 15 minutes for every lb of turkey.
  • For a turkey that weighs about 12 to 14 lbs, roast the turkey uncovered for about 3 to 4 hours. Afterward, use a brush to baste it with pan drippings every 30 minutes until the turkey is completely cooked

What Temperature Is Turkey Done

Checking the temperature is the best way to check that it is cooked to kill off all the harmful bacteria. The temperature that the turkey should be cooked is 165F. It is recommended to check the turkey’s temperature in several parts. Examples include the thickest part of the turkey breast, the innermost part of the thigh, and the innermost part of the wing. 

How Long to Cook a Stuffed Turkey

Cooking turkey with stuffing will take longer to cook. Here are estimated times to cook stuffed turkey recommended by USDA

Approximate Cooking Times for Stuffed Turkeys at 325F

Turkey Size by weight (lbs) Time in Hours
8 to 12 lbs 3 to 3.5 hours
12 to 14 lbs 3.5 to 4 hours
14 to 18 lbs 4 to 4.25 hours
18 to 20 lbs 4.25 to 4.75 hours
20 to 24 lbs 4.75 to 5.25 hours

How to Carve a Turkey

  • Start with removing the legs by cutting through the joint with a Chef’s knife (we recommend an 8 to 10-inch knife). Separate the thigh from the drumsticks and cut through the joint as well.
  • Then remove the turkey breast by starting at the top of the bird and slicing along the breast bone on each side. From there separate the wing from the breast
  • Lastly, carefully slice the breast into horizontal slices.
  • Arrange the parts on a platter and garnish with fresh herbs, citrus slices, or fresh cranberries.

How Long Will Turkey Leftovers Keep?

You can keep leftover turkey for up to three to four days when properly stored in the refrigerator or freezer. It is important to ensure that it does not sit out at room temperature for more than two hours. 

If you need more Thanksgiving meal ideas, check out our Easy Thanksgiving Recipes.

Free Weekly Meal Plans

Have fun advancing your culinary skills with our chef-created recipes with our weekly meal plans.

Posted on

Learn to Cook Asparagus

salmon and asparagus

If you’re looking for an easy vegetable side dish, then cooking asparagus can’t get any easier. This vegetable is amazingly versatile and can be prepared in many ways: Asparagus can be cooked on the stove, oven, or on a grill. Grilling, roasting, and stir-frying asparagus are our favorite ways to enjoy it.

Types of Asparagus

  • Asparagus can come in three different colors: green, purple, and white. Green is the most common and available year-round. White asparagus has been covered in mulch to prevent chlorophyll from developing which gives plants their green color. Purple asparagus is purple when raw, however, turns dark green when cooked.
  • Asparagus also comes in different sizes: thin, medium, and thick. Thin is great for quick cooking methods such as sauteing or stirfries. The medium and thicker asparagus are great for roasting or grilling.

How to Buy and Store Asparagus

  • When you are at the grocery store, look for asparagus spears that are brightly colored, compact, and have tips that are tightly closed. Avoid spears that are dried out, brown, or have spears that are ridged.
  • If you are not cooking it right away, you can either wrap them in wet paper towels and cover with a plastic bag before refrigerating, or you can trim the bottoms and keep them standing up in a glass with about an inch of water. We recommend cooking them within 3 days.

Meal Prep Tips for Asparagus:

  • Before you cook, you will want to cut off the tough bottom ends of the asparagus. If you are using white asparagus, you will need to peel them from top to bottom. If you have really thick asparagus, you may also want to peel the lower end of the stalks starting about halfway and peel toward the root.
  • Asparagus also cooks quickly, so be sure to have your seasoning and other ingredients that you will be cooking with it readily available.

prep asparagus

Here are three of our favorite ways to cook asparagus.

Grilling Asparagus (either indoor or outdoor): Warm up the grill or indoor grill on medium-high heat. Coat the asparagus with olive oil, salt, and pepper. Place the asparagus spears on the girl and cook for about 3 to 5 minutes until it gets a good char. Flip them on the other side so that they crisp up all around. Once they are cooked, you can finish them with lemon zest for an extra fragrant flavor or you can drizzle them with a balsamic glaze.

grilled asparagus

Roasting Asparagus: Preheat the oven to 400F and drizzle the asparagus with olive oil, salt, and pepper. You can also add other spices such as paprika, cayenne, or red pepper flakes. Try adding nuts to roast alongside the asparagus. Spread the asparagus on a baking sheet and roast them for about 10 minutes until they are lightly golden brown and sizzling. After it cooks, top it off with shredded parmesan.

roast asparagus

Stir Fry or Saute Asparagus: Asparagus cooks quickly in a sauteed or stir-fried dish. Cut asparagus into 2-inch pieces. Add oil to a wok or skillet on medium-high heat. Cook the asparagus pieces for about 3 to 5 minutes until lightly browned and tender. Throw in some chopped herbs such as green onions, basil, or cilantro. In the end, season with soy sauce and a dash of sesame oil.

stir fry asparagus

What can you eat with asparagus?

  • Asparagus pairs well with many proteins such as a grilled steak, baked salmon, and roasted chicken.
  • You can also serve it alongside your choice of grains such as brown rice pilaf, couscous, pasta, and even quinoa 
  • Asparagus can be a great addition to salad and many other vegetable medleys such as stir fry veggies such as bell peppers or with other roasted veggies such as zucchini.

Here are some recipes that we think you might enjoy:

Free Weekly Meal Plans

Have fun advancing your culinary skills with our chef-created recipes with our weekly meal plans.

Posted on

How to Make a Meal Plan

Meal Plan Food

What is Meal planning?

Meal planning is a tool that helps you determine what you’re going to eat throughout the week instead of deciding day to day. Planning out your meals in advance helps you ensure that you are going to eat healthy and stay on track. It is a great way to choose foods that will be most helpful with your health. It is also a great way to help you save time and money by planning out what ingredients you need for the week. Just like anything in life, a little preparation goes a long way. 

When it comes to  deciding on a meal plan method, it is important to know what goals you want to achieve.

  • Do you want to lose weight? 
  • Do you want to eat healthier?
  • Do you want to save time or money? 

Knowing your goals will help you narrow down what kind of meals you will need to plan out.

1. Start with deciding how many meals and what meals you plan to cook and when you plan to eat out. 

meal prep containers

Start small and start with specific meals you want to plan out first. Look ahead at the week’s schedule and organize your meals around these days. For example, does Monday need to be a meal for a good sit down dinner, does today need to be something quick and easy right before.  Determine if you want to prepare all your ingredients from scratch or get pre-packaged items

2. Ensure cooking methods vary and consider what equipment you have available

wok and stir fry

Most people miss out on this important step and realize after the fact that they don’t have the appropriate cooking equipment, pots and pans,  or utensils readily available to prepare the food. Knowing what cooking equipment and utensils are available will determine the cooking methods and what ingredients you will need to buy. 

Meal prep tip: If you’re looking for efficiency in the kitchen, it’s important to know how to maximize the kitchen space. For example, you don’t want to cook all recipes that require a lot of attention such as cooking all stove top recipes. You’ll want to maximize the oven and cook what you can in the oven so that your hands are free to do other things while those items bake away.

3. Determine what kinds of food you like to eat and develop themes throughout the week.

meal plan dishes

When starting, stick to familiar foods that you like and your favorite types of meals. Choose different cuisines for different flavors to keep it fun and exciting. For example, you may want to do taco Tuesday, Italian Wednesday, or stir fry Thursday. Also, identify if you have any recipes that you pinned from the internet and use them as a starting point. Find a core set of recipes with capsule ingredients that you like. Be sure to also take stock of what you already have on hand and see if there is already something there you can use. For example, do you have any frozen meats/veggies, or canned beans, pasta sauces, grains, and beans?

4. If you are wanting to ensure you are planning healthy meals, you’ll want to incorporate multiple food groups to provide a variety of nutrients.

meal prep food

 If you are wanting to ensure you are planning healthy meals, it is important to incorporate foods from all major food groups such as carbohydrates, proteins, milk and dairy products, fruits and vegetables, and fats to compose healthy balanced meals. You’ll want to incorporate multiple food groups because it will provide a variety of nutrients.

Start with picking out your choice of proteins and mix them up in a variety such as chicken, lean beef, fish, and meatless options such as legumes.

Then, determine which side dishes will pair well with your proteins and always include a variety of colors. Incorporate a variety of fresh and colorful vegetables and fruits. Always look for seasonal items and nutrient-dense foods such as dark greens, bright red peppers, blueberries/ raspberries. Add complex carbs with high fiber such as whole grains, quinoa, oats to help complete your meals.

Always ensure that half of your plate should be composed of whole fruits/non-starchy vegetables, a quarter should be whole grains/starchy vegetables, and a quarter protein.

When picking your ingredients, plan leftovers and extras. If you have too much of one ingredient, determine how you can split up the amounts and overlap them in different recipes to avoid food waste. For example, you can use roast chicken and broccoli for a sheet pan recipe and also cook chicken and broccoli in a stir fry.  Cook them in a variety of ways to keep it interesting. Also keep in mind if you need to make larger batches for sides such as quinoa for monday and also in your soup for wednesday..

If you will plan meals weekly, prepare staple foods that you can do weekly that you enjoy such as egg muffins, taco meat, roasted chicken, etc.

Keep in mind to also stock up on nutritious snacks such as grab and go fruit, wash and chopped fresh veggie sticks such as celery, carrots, and sliced cucumbers, whole grain crackers, protein choices such as low-fat deli turkey slices, almonds or other nuts and seeds

5. Once you have a plan, pick a day of the week to do your groceries and do the shopping for all ingredients at once. Decide whether to do the shopping yourself in the store, order curbside or receive direct delivery to your house.

vegetables and eggs

Before you go grocery shopping, make a list of all the ingredients you need for your recipes. Be sure to check your pantry and fridge for ingredients that you already have on hands such as canned foods, grains, spices/seasonings, oils and vinegars. Be sure to stock up on grocery staples such as lunch meats, tortillas, tea, salad dressings, etc

 And if you are on a budget, many online grocers and online grocery apps can help you with pricing. You can get an estimate of your total grocery bill before even purchasing. This will help you determine if you need to swap out some ingredients for cheaper ingredients. For example, you may opt out baby kale for arugula if it’s cheaper. Or chicken tenderloins instead of chicken breasts. 

6. Schedule and set aside time to dedicate prep

chopped vegetables

Identify when you will prepare food and what kind of prep you will do. Will you meal prep in advance all in one day or will you prep daily. On prep day, focus first on foods that take the longest such as oven baked proteins, then move on to a quicker recipe while that item is baking. Ensure you have the proper storage containers readily available

If you are new to meal planning, it is good to keep a diary of what you planned, what meals you actually ate and enjoyed, and use that information to adjust for future weeks. Within time, you will learn to know what works well for you.

And if you are looking to incorporate healthier prep options during the week but don’t want to hassle with the meal planning, then check out our pre-set weekly meal plans filled with a variety of recipes, organized grocery lists, and step by step instructions.

Free Weekly Meal Plans

Have fun advancing your culinary skills with our chef-created recipes with our weekly meal plans.