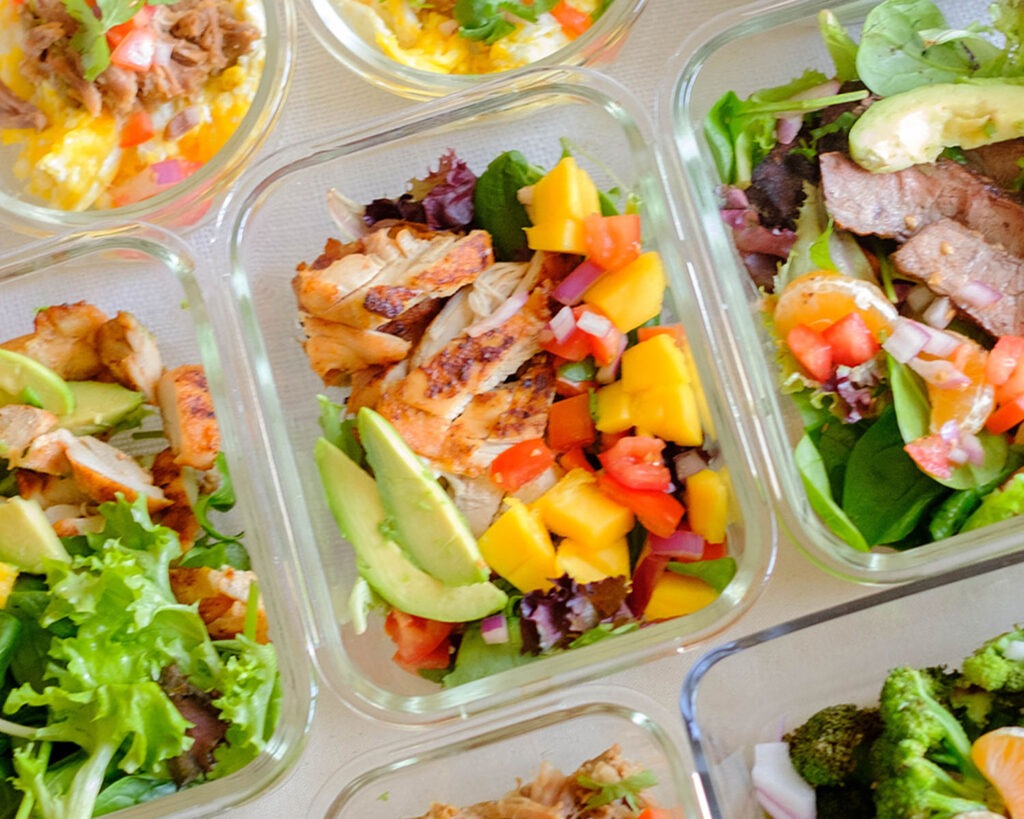
Posted on Leave a comment

Low Carb Sheet Pan Sausage and Zucchini Medley

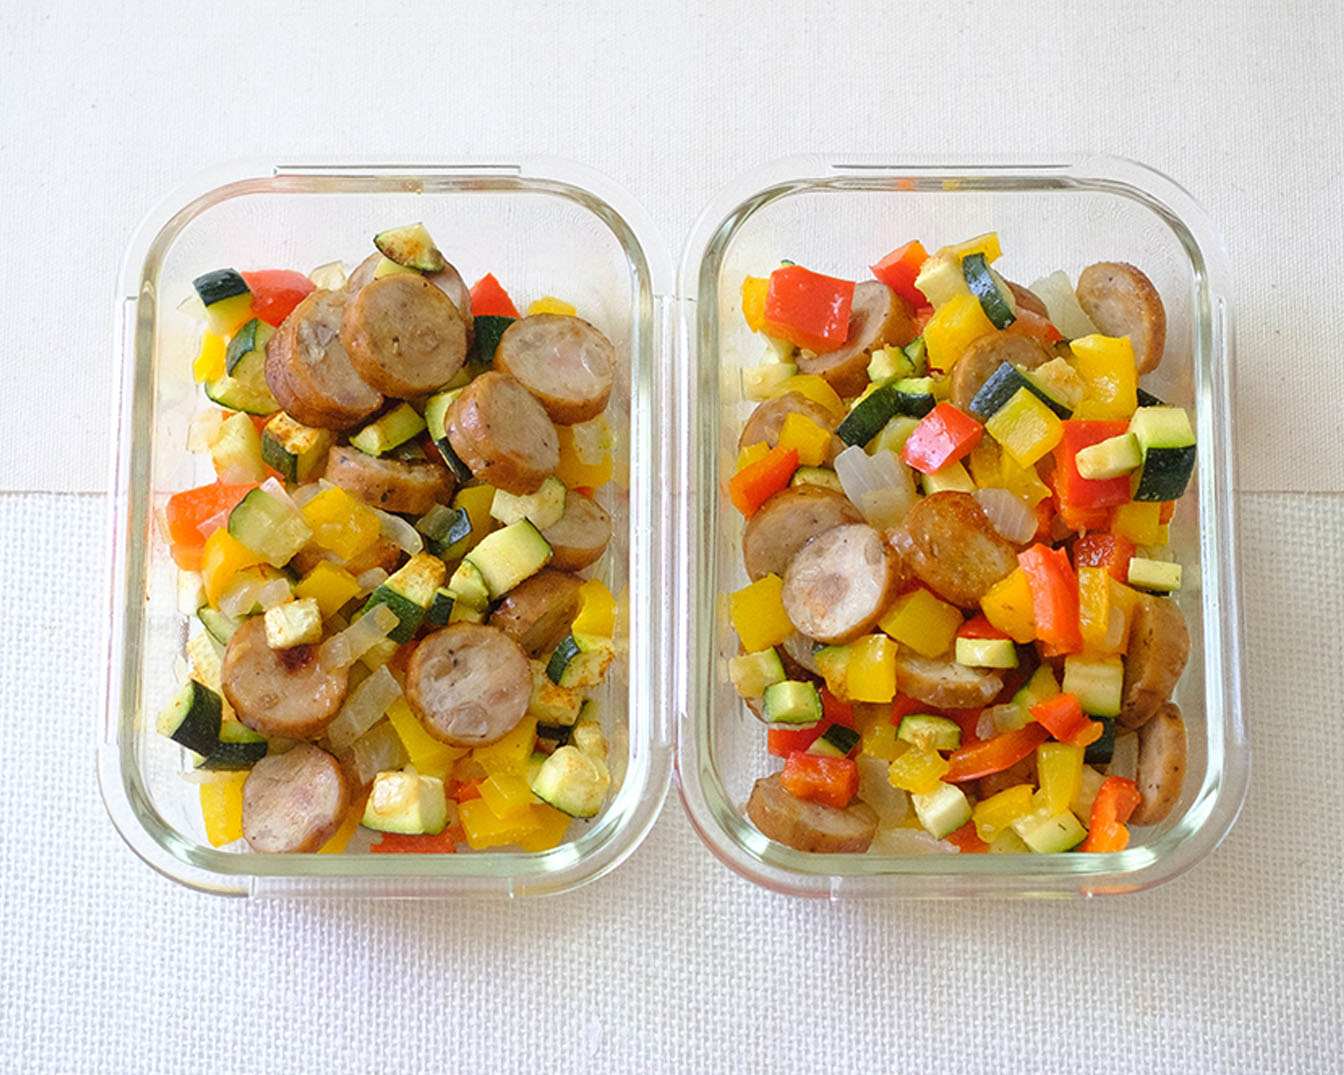
rectangular glass meal prep containers with sliced sausage and diced zucchini, bell peppers, and red onions

If you’re looking for a delicious, low-carb option that’s both convenient and budget-friendly, you’ve come to the right place. Packed with pre-cooked chicken sausage, vibrant veggies, and a medley of savory seasonings, this recipe is a game-changer for busy individuals striving to maintain a healthy lifestyle. With just a few simple steps and minimal prep time, you can have a satisfying meal ready to enjoy in no time. Whether you’re meal prepping for the week ahead or simply craving a quick and healthy lunch, this Sheet Pan Sausage and Zucchini Medley has got you covered.

This post may contain affiliate links. Please see our privacy policy for details.
Calories: 290kcal | Carbohydrates: 17g | Protein: 16g | Fat: 20g | Saturated Fat: 4g | Polyunsaturated Fat: 1g | Monounsaturated Fat: 5g | Cholesterol: 60mg | Sodium: 1174mg | Potassium: 548mg | Fiber: 3g | Sugar: 7g | Vitamin A: 2614IU | Vitamin C: 206mg | Calcium: 33mg | Iron: 2mg
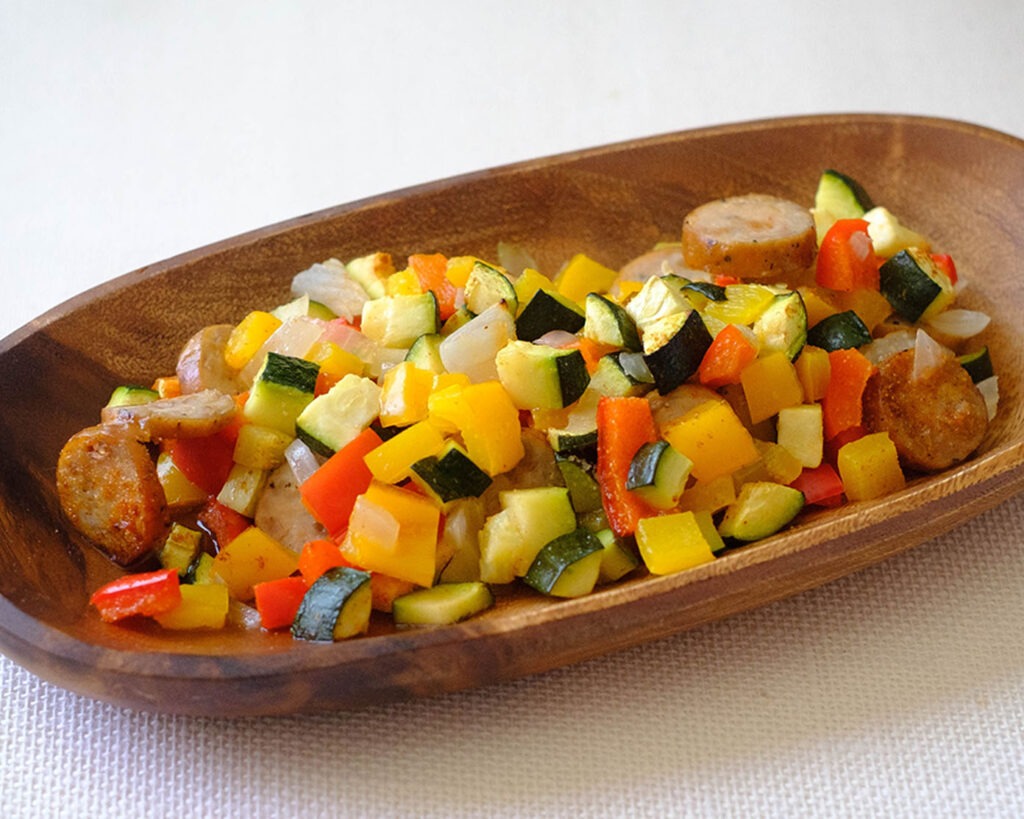
round wooden plate with a healthy lunch of sliced sausage and diced zucchini, bell peppers, and red onions

Why this recipe is great for easy and quick meal prep

  • Quick and Easy: With just a few simple steps, you’ll have a delicious and healthy lunch ready to go in no time. From prep to plate, this recipe takes minimal effort, perfect for those hectic weekdays.
  • Convenient Pre-cooked Sausage: Using pre-cooked sausage is a total lifesaver when it comes to meal prep. It cuts down on cooking time significantly, meaning you can have this healthy lunch on the table in a flash. Plus, it’s super convenient to have on hand for those last-minute meals.
  • Budget-Friendly: Let’s talk savings! By using affordable ingredients like chicken sausage and fresh veggies, you can enjoy a tasty, healthy lunch without spending a fortune.
  • Low-Carb Goodness: Staying on track with your low-carb lifestyle has never been tastier! This medley is packed with nutritious veggies and lean protein, making it the perfect healthy lunch option for those watching their carb intake.

The PrepYoSelf Newsletter

Ingredients You’ll Need

  • Chicken Sausage: Pre-cooked chicken sausage adds a delicious savory flavor, and it also provides a lean source of protein, making this dish both satisfying and nutritious. For a flavor twist, feel free to swap in turkey sausage or even plant-based sausage for a meatless option.
  • Zucchini: Zucchini adds a burst of freshness and color to this dish. It’s low in carbs and calories but high in vitamins and minerals, making it a fantastic choice for those looking to boost their veggie intake. If you’re not a fan of zucchini, you can swap it out for other low-carb veggies like broccoli, cauliflower, or asparagus.
  • White Onion: White onion adds a subtle sweetness and depth of flavor to the medley. It also provides important nutrients like vitamin C and antioxidants. If you prefer a milder onion flavor, you can swap white onion for yellow onion or even shallots.
  • Yellow and Red Bell Pepper: These vibrant bell peppers not only add a pop of color but also a hint of sweetness to the dish. They’re rich in vitamins A and C, as well as antioxidants, making them a nutritious addition to any meal. If you’re not a fan of bell peppers, you can swap them out for cherry tomatoes or sliced mushrooms for a different flavor profile.
  • Paprika, Thyme, Garlic Powder, Salt: These seasonings are the secret to adding depth and flavor to the medley. Paprika adds a smoky richness, thyme brings a subtle earthiness, garlic powder adds a savory kick, and salt helps to enhance all the flavors. Feel free to customize the seasonings to suit your taste preferences or swap them out for your favorite herbs and spices.
  • Olive Oil: Last but not least, olive oil helps to coat the ingredients evenly and adds a touch of richness to the dish. It also provides heart-healthy fats and antioxidants. If you prefer a different oil, you can swap olive oil for avocado oil or melted coconut oil.
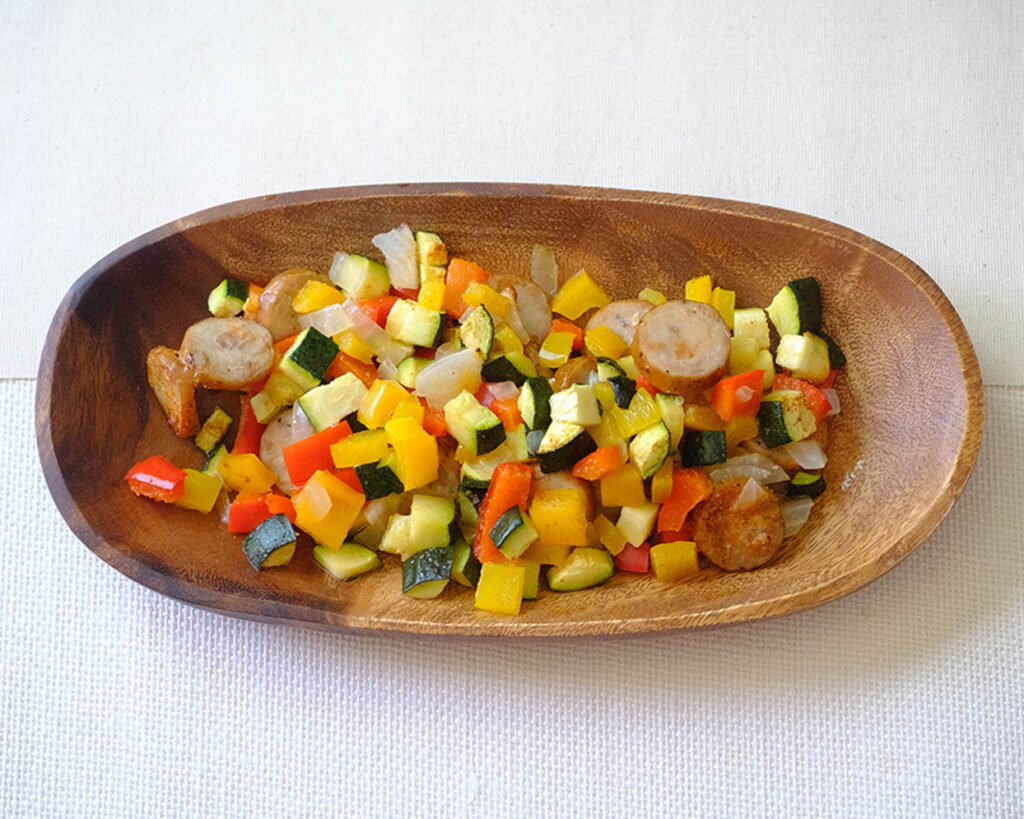
round wooden plate with a healthy lunch of sliced sausage and diced zucchini, bell peppers, and red onions

How to Meal Prep Sausage and Veggies

  1. Preheat the oven to 400°F (200°C).
  2. Grab your chicken sausage and give it a good slice into rounds. Now, let’s dice up those veggies – zucchini, white onion, yellow bell pepper, and red bell pepper. Chop chop!
  3. Lay out a sheet pan and place your sausage rounds and diced veggies on it. Spread them out evenly so everyone gets their time to shine.
  4. Time to add some flavor! Sprinkle on the paprika, thyme, garlic powder, and salt. Let’s give this medley a little kick!
  5. Grab that olive oil and give everything a nice, even drizzle. This’ll help bring out all those delicious flavors in the oven.
  6. Pop that sheet pan into the preheated oven and let the magic happen. Bake for around 15-20 minutes, or until your veggies are tender and begging to be devoured.

Reference the recipe card below for detailed instructions.
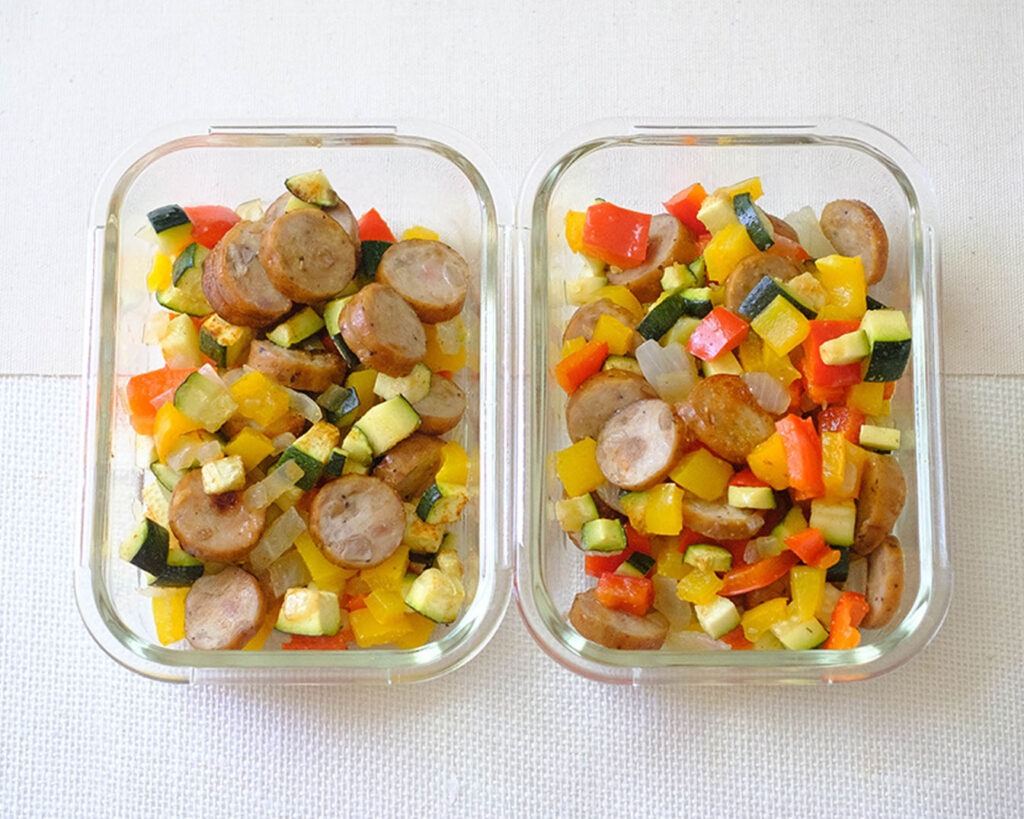
rectangular glass meal prep containers with a healthy lunch of sliced sausage and diced zucchini, bell peppers, and red onions

Meal Prep Pairing Tips:

  • Grain Options: Serve the medley over a bed of cooked quinoa, brown rice, or cauliflower rice for a wholesome and filling meal. The grains will soak up the flavorful juices from the sausage and veggies, adding an extra layer of deliciousness to each bite.
  • Leafy Greens: Add a side of leafy greens, such as a simple mixed salad or sautéed spinach, to balance out the richness of the sausage and zucchini. A light vinaigrette dressing with lemon or balsamic vinegar can provide a refreshing contrast to the savory flavors of the medley.
  • Creamy Dips: Whip up a creamy dip, such as tzatziki or hummus, to accompany the medley. The cool and tangy flavors of the dip will complement the warmth and spice of the sausage and veggies, creating a well-rounded and satisfying meal.
  • Crusty Bread: Serve the medley alongside a slice of crusty bread or a warm dinner roll to sop up the delicious juices. You can also toast the bread and rub it with garlic for extra flavor. The contrast in textures between the crispy bread and tender medley will make each bite irresistible.
  • Fresh Herbs: Garnish the medley with fresh herbs like parsley, cilantro, or basil to add a pop of color and freshness. The herbs will brighten up the dish and add a fragrant aroma that enhances the overall dining experience.
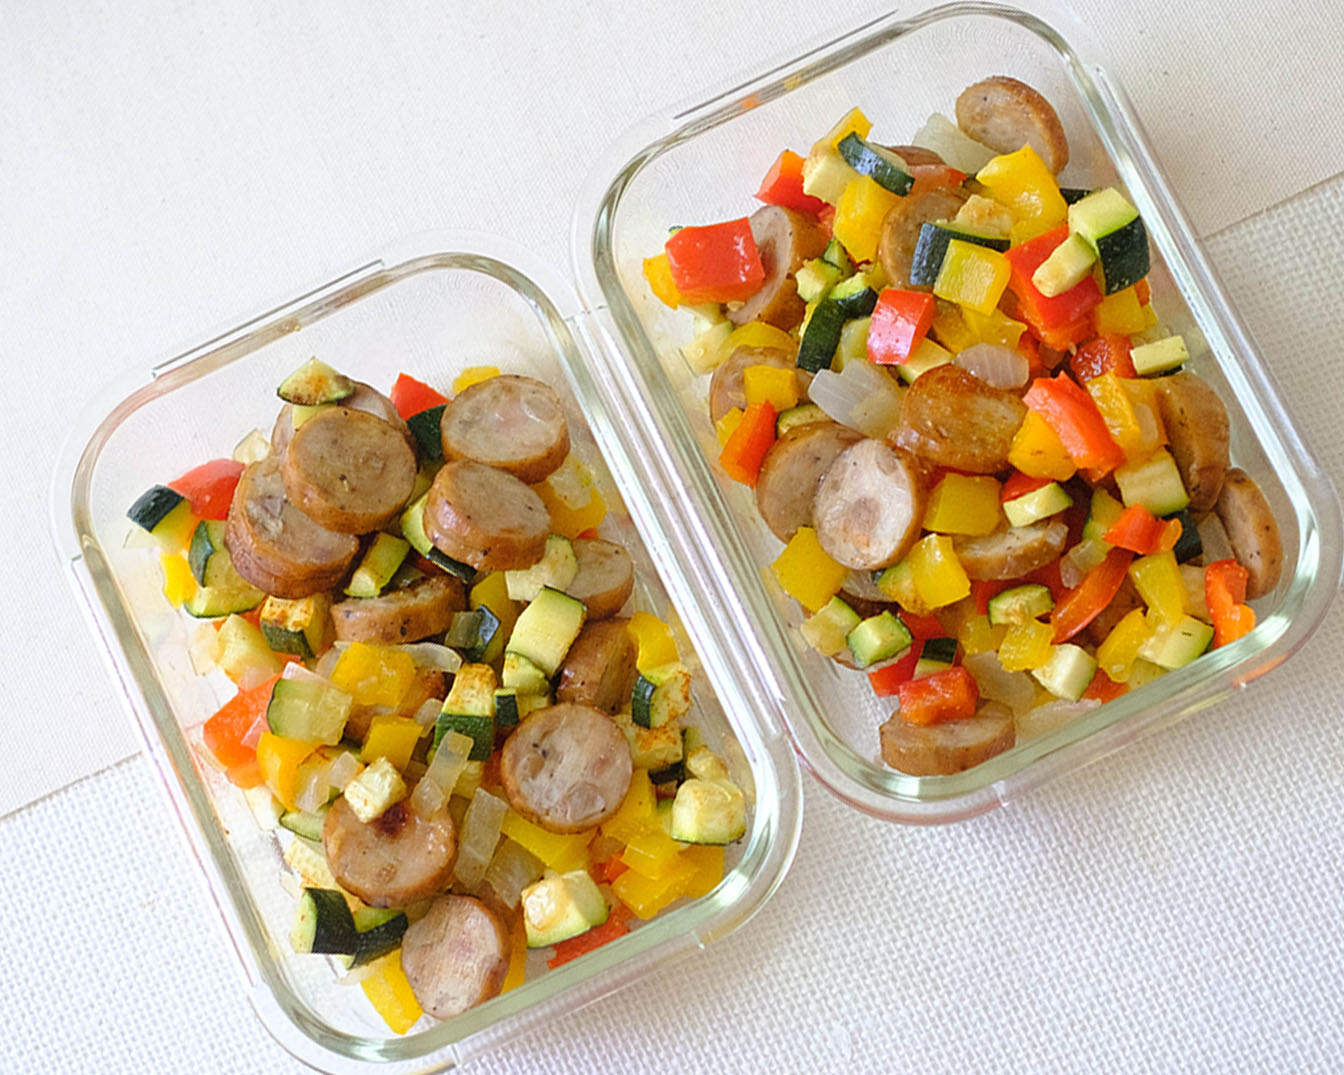
rectangular glass meal prep containers with a healthy lunch of sliced sausage and diced zucchini, bell peppers, and red onions
round wooden plate with sliced sausage and diced zucchini, bell peppers, and red onions

Low Carb Sheet Pan Sausage and Zucchini Medley

Enjoy a hassle-free, low-carb delight with our Sheet Pan Sausage and Zucchini Medley—bursting with flavor and ready in minutes!
No ratings yet
Course lunch
Cuisine American
Servings 2
Calories 290 kcal

Equipment

  • knife
  • cutting board
  • sheet pan
  • oven or air fryer

Ingredients
  

  • 6 oz chicken sausage (pre-cooked)
  • 1 zucchini (diced)
  • 1/4 cup white onion (diced)
  • 1 yellow bell pepper (diced)
  • 1 red bell pepper (diced)
  • 1/4 teaspoon paprika
  • 1/4 teaspoon thyme
  • 1/4 teaspoon garlic powder
  • 1/4 teaspoon salt
  • 1 tablespoon olive oil

Instructions
 

  • Pre-heat the oven to 400F. Slice the sausage into rounds and dice the veggies into small squares.
  • Place the sausage and veggies on a sheet pan and sprinkle them with the seasonings.
  • Drizzle everything with the olive oil and bake in the oven for 15-20 minutes until the veggies are tender.

Notes

Nutrition information provided is an estimate. It will vary based on cooking method and specific ingredients used. Please consult with your healthcare provider for specific dietary needs. To gain a better understanding, explore our nutrition disclaimer here

Nutrition

Calories: 290kcalCarbohydrates: 17gProtein: 16gFat: 20gSaturated Fat: 4gPolyunsaturated Fat: 1gMonounsaturated Fat: 5gCholesterol: 60mgSodium: 1174mgPotassium: 548mgFiber: 3gSugar: 7gVitamin A: 2614IUVitamin C: 206mgCalcium: 33mgIron: 2mg

Similar Recipes

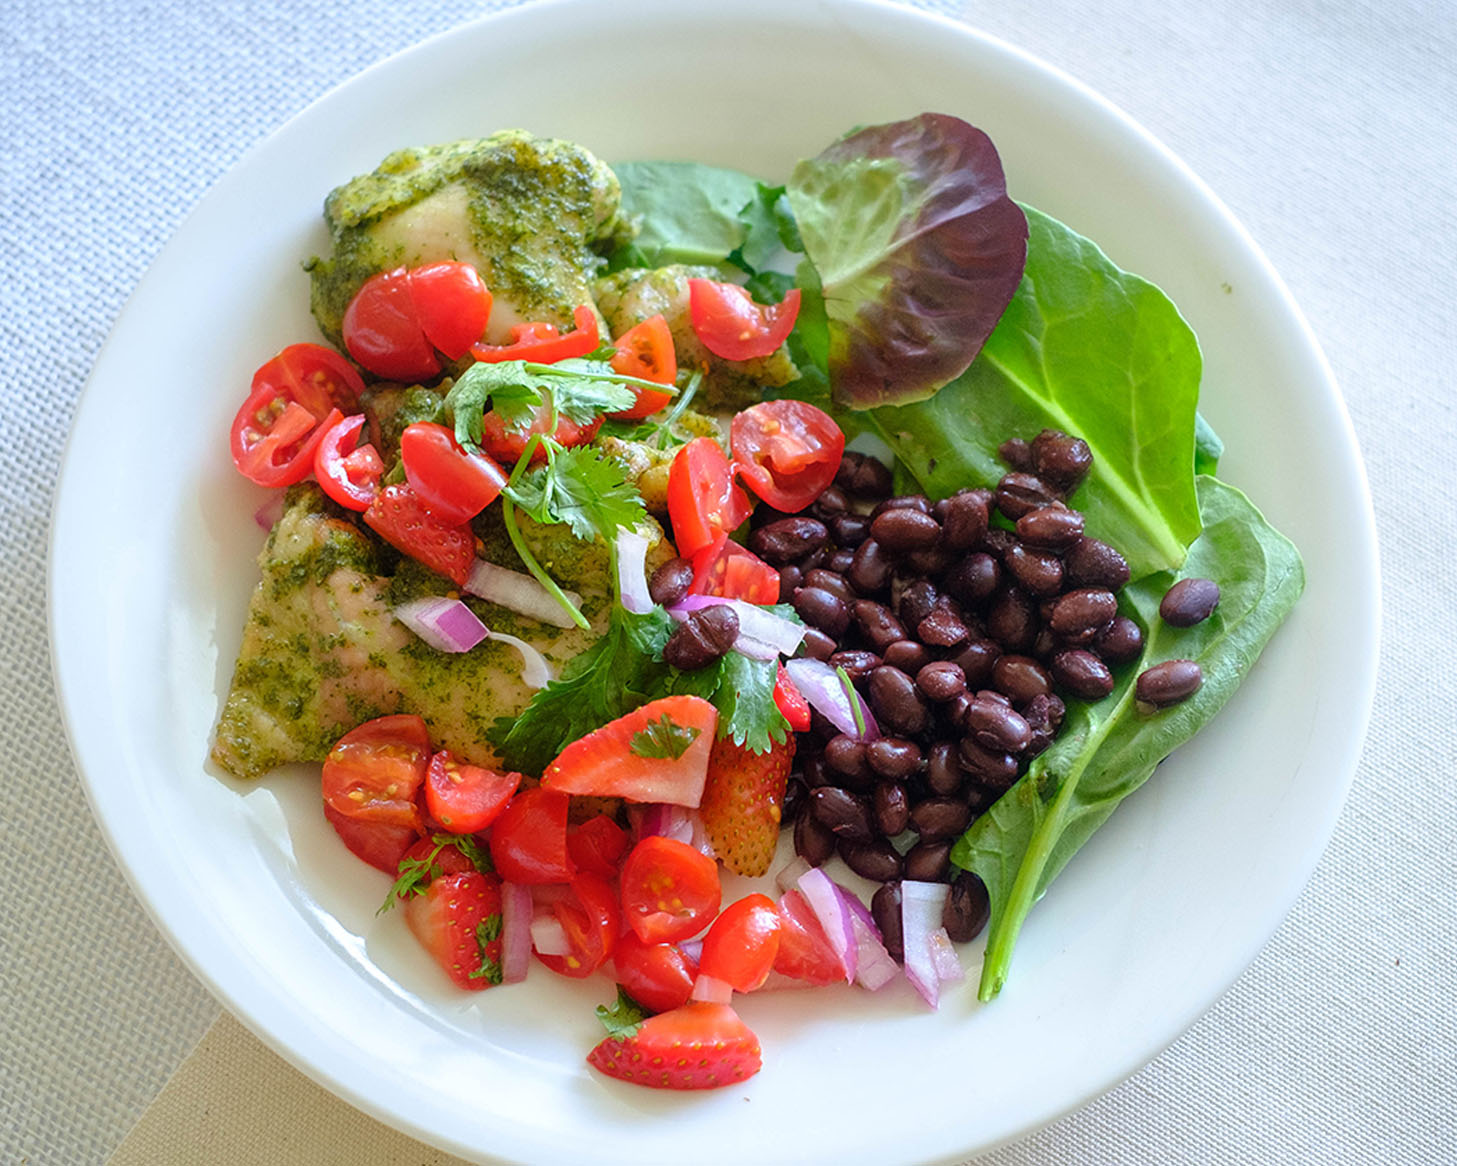
cilantro chicken

Cilantro Lime Chicken Salad with Strawberry Salsa

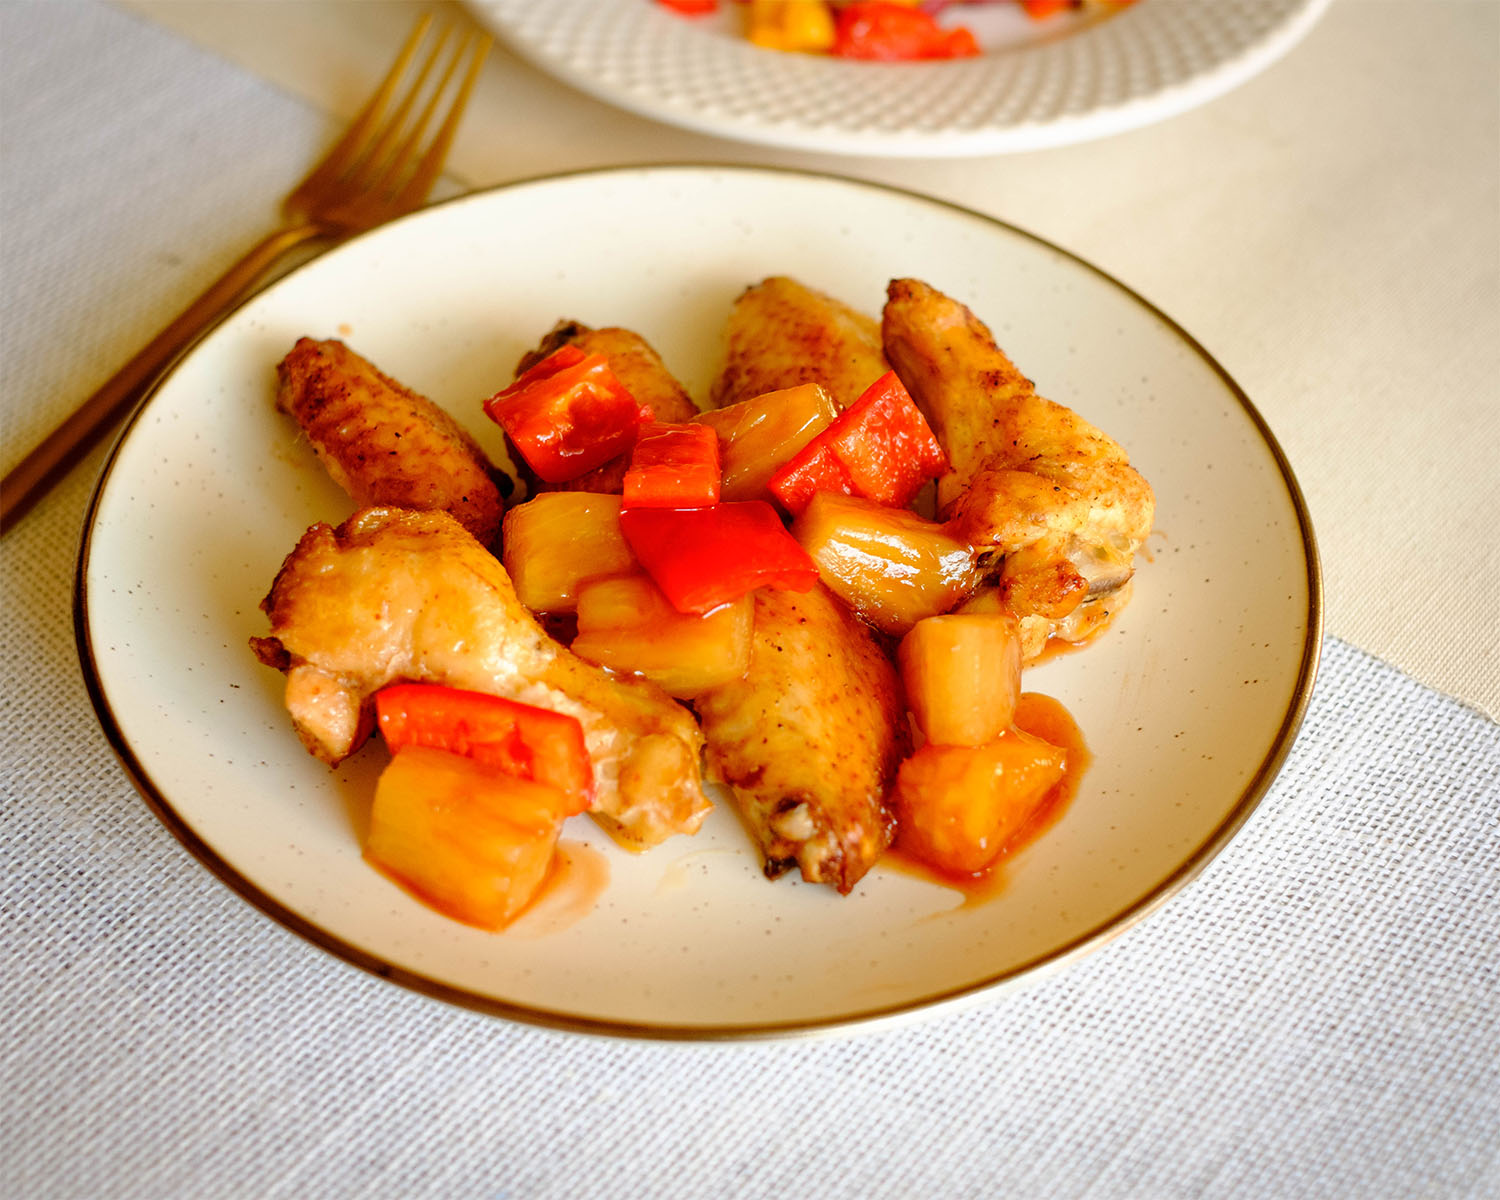
sweet and sour chicken wings

Air Fryer Sweet and Sour Chicken Wings

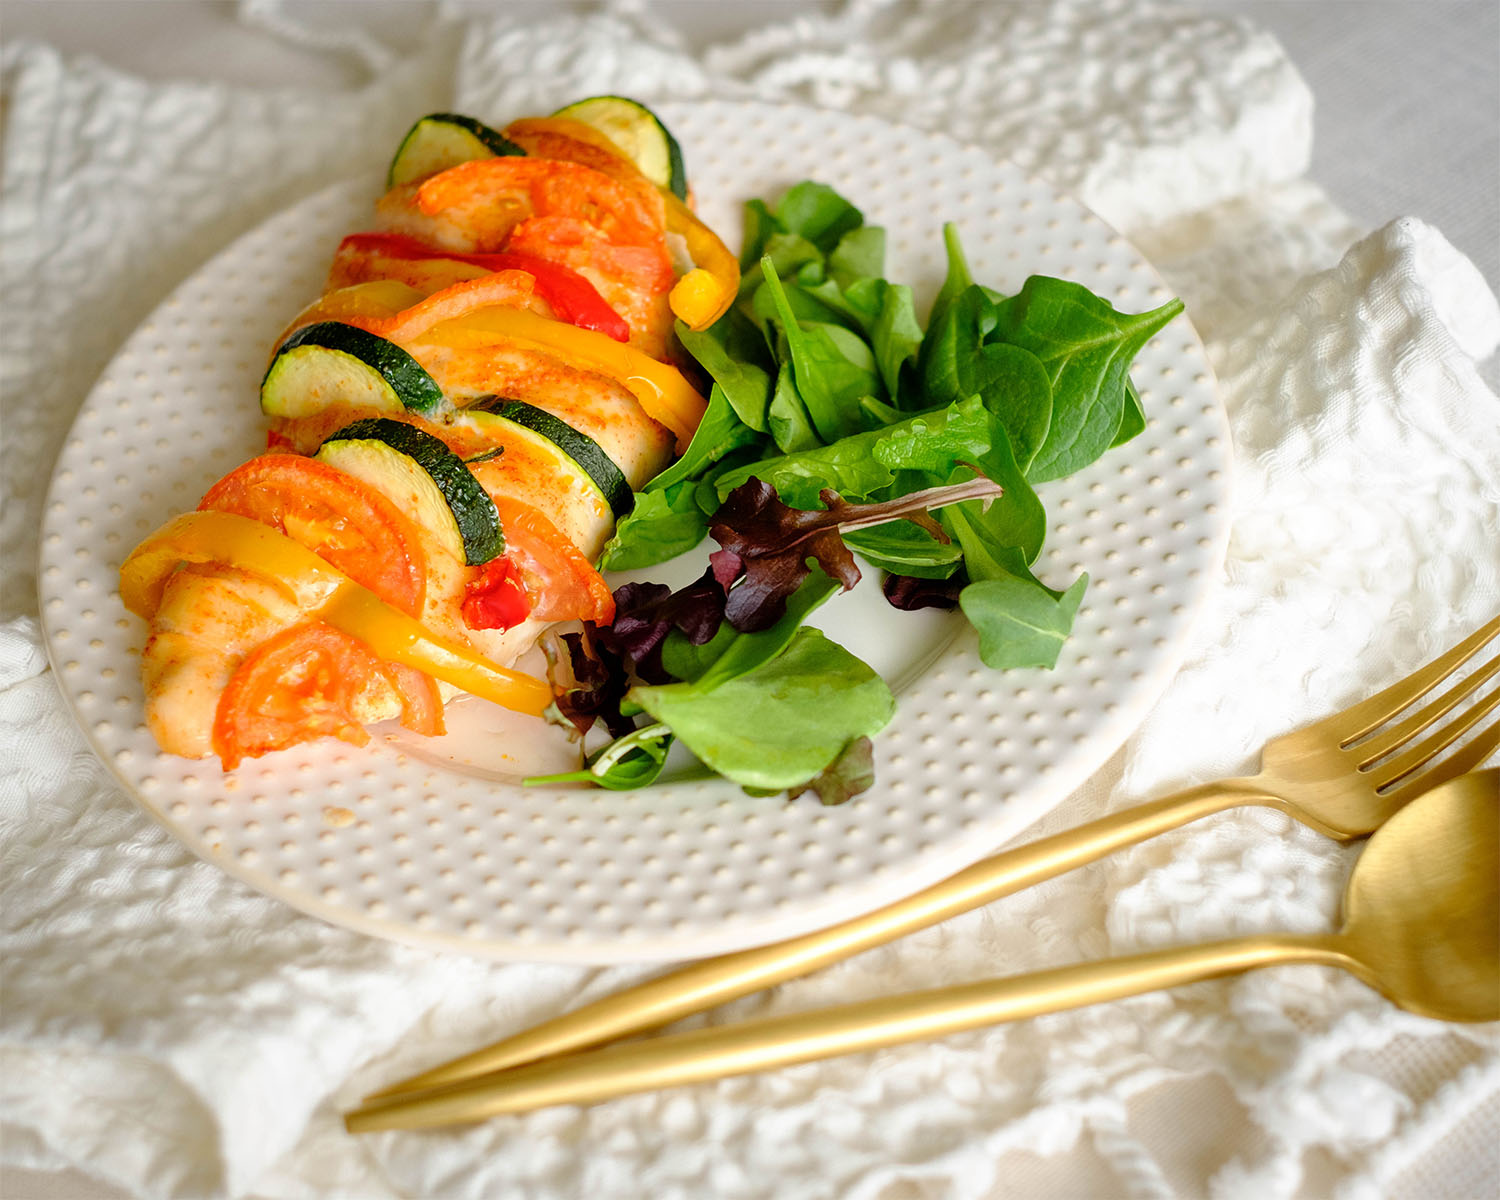
stuffed primavera chicken

Primavera Stuffed Chicken Breasts

You Might Also Like

Frequently Asked Questions

Can I use fresh sausage instead of pre-cooked sausage?

While pre-cooked sausage is recommended for this recipe to save on cooking time, you can certainly use fresh sausage if preferred. Just make sure to cook it thoroughly before adding it to the sheet pan with the veggies.


Can I use different cooking methods instead of baking in the oven?

Absolutely! While baking in the oven is the recommended method for this recipe, you can also cook the medley on the stovetop in a large skillet or on the grill in a grill basket. Just make sure to adjust the cooking time and temperature accordingly.


Can I use frozen vegetables instead of fresh ones?

While fresh vegetables are recommended for the best texture and flavor, you can use frozen vegetables in a pinch. Just be aware that frozen vegetables may release more moisture during cooking, which could affect the overall texture of the dish. If using frozen vegetables, thaw them before adding them to the sheet pan and pat them dry with a paper towel to remove excess moisture.

Posted on Leave a comment

Autumn Delight: Meal Prep Arugula Salad with Roasted Butternut Squash and Chicken Sausage

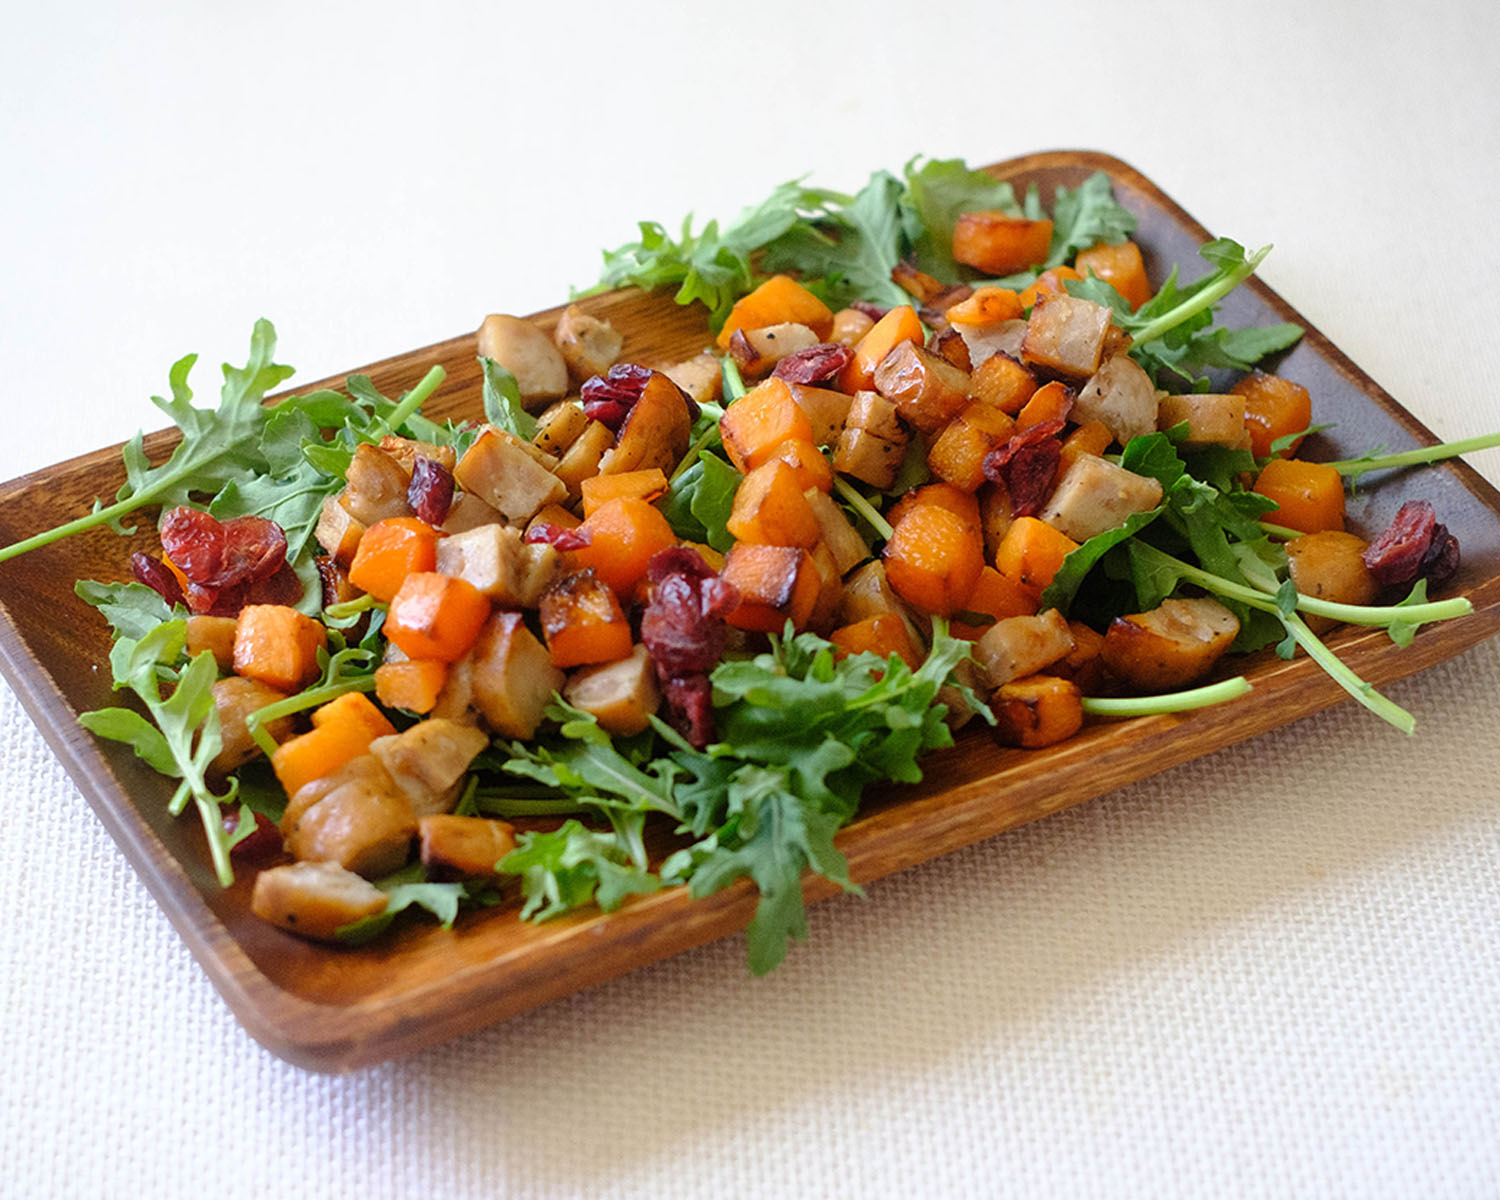
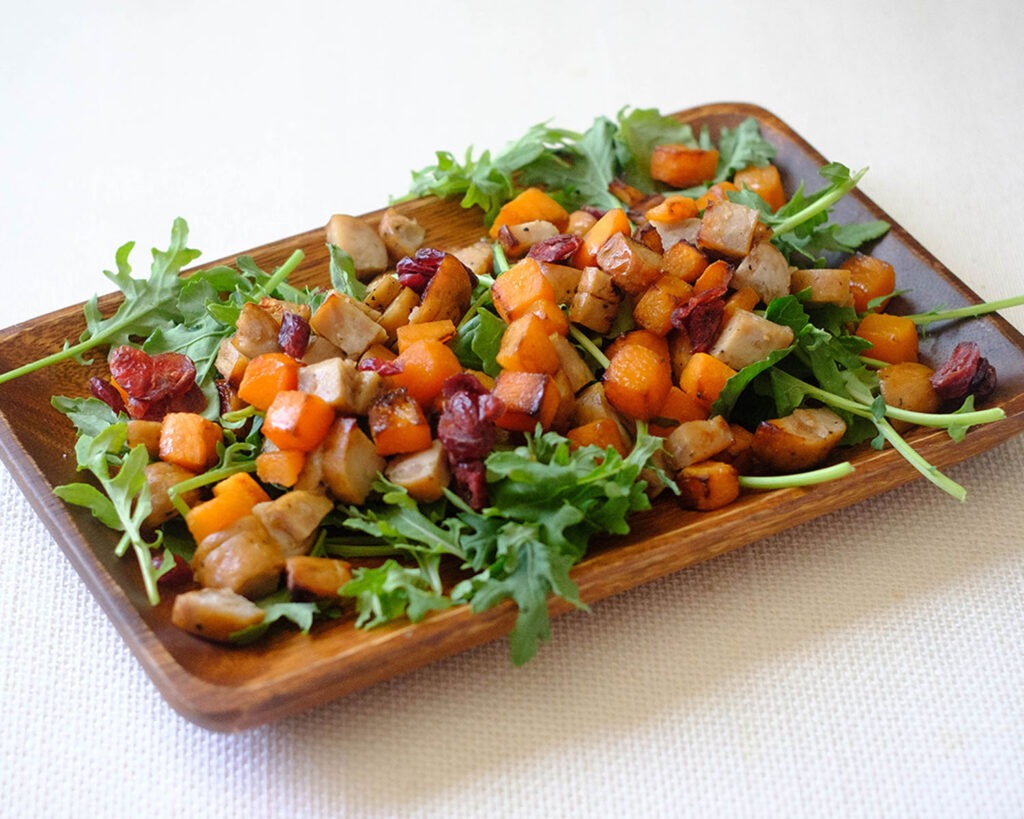
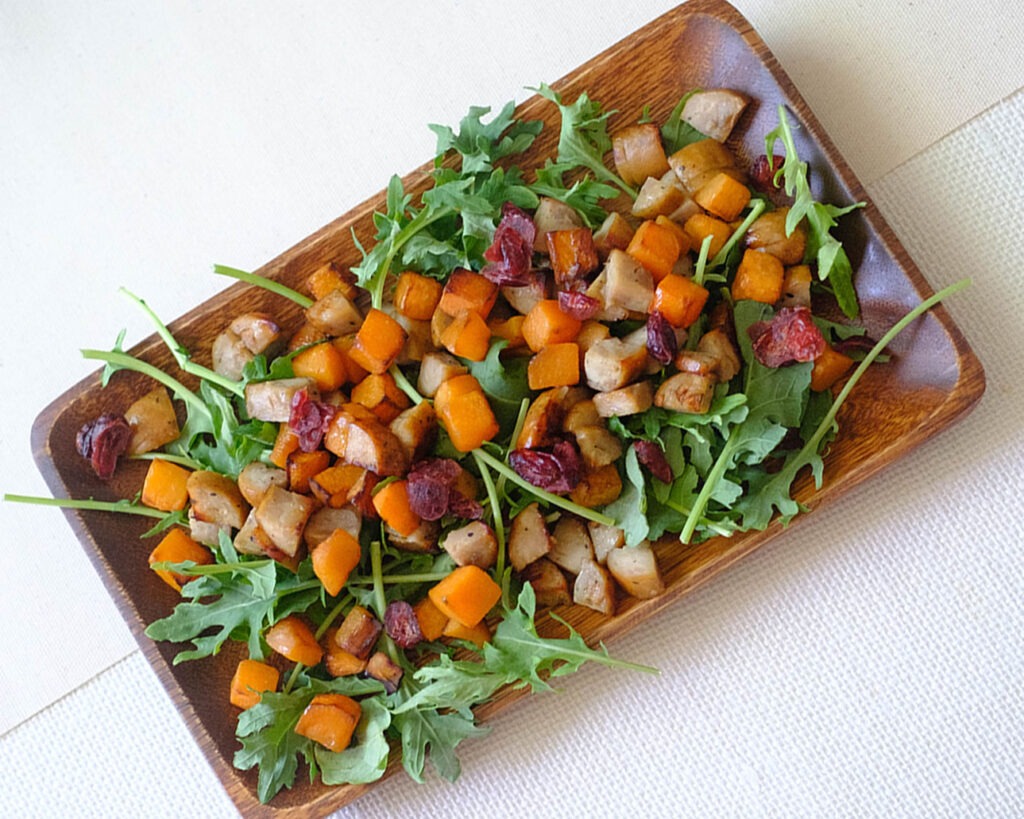
Rectangular wooden plate with diced sausage, diced butternut squash, dried cranberries, and green arugula salad.

In the world of meal prep, there’s no season quite like autumn to inspire creativity in the kitchen. The vibrant colors, rich flavors, and cozy aromas of fall ingredients make for a delightful culinary experience. If you’re on the lookout for a healthy and satisfying lunch option that embodies the essence of autumn, look no further than our Arugula Salad with Roasted Butternut Squash and Chicken Sausage. This dish not only tastes amazing but is also a perfect addition to your weekly meal prep rotation. Let’s dive into the details of this delicious and nutritious recipe while optimizing it for your healthy lunch salad meal prep needs.

This post may contain affiliate links. Please see our privacy policy for details.

Rectangular wooden plate with diced sausage, diced butternut squash, dried cranberries, and green arugula salad.

5 Reasons to Choose Arugula Salad with Roasted Butternut Squash and Chicken Sausage for Your Autumn Meal Prep:

  • Autumn brings us the best of seasonal produce, and this meal celebrates it beautifully. Butternut squash, with its sweet and nutty flavor, is at its peak in the fall. Pair it with peppery arugula, and you’ve got a salad that’s bursting with the flavors of the season.
  • Arugula, the star of this salad, is not only delicious but also incredibly nutritious. It’s rich in vitamins A, K, and C, and it adds a delightful peppery bite to your meal. The butternut squash offers a hearty dose of fiber, vitamins, and minerals, while the chicken sausage provides a lean protein source to keep you energized throughout the day.
  • Meal prep is all about making your life easier, and this recipe is no exception. By preparing a batch of Arugula Salad with Roasted Butternut Squash and Chicken Sausage ahead of time, you’ll have a delicious, ready-to-go lunch that requires minimal effort during busy weekdays.
  • The combination of savory chicken sausage, sweet roasted butternut squash, and the tartness of dried cranberries creates a delightful balance of flavors in every bite. This salad is a symphony of taste sensations that will keep you eagerly coming back for more.
  • While we’re sharing a specific recipe, feel free to customize it to suit your preferences. You can experiment with different types of sausage, add some toasted nuts for extra crunch, or even swap out the dried cranberries for pomegranate seeds for a refreshing twist.

The PrepYoSelf Newsletter

Ingredients You’ll Need

  • Arugula Salad: Arugula is a leafy green vegetable with deep green, lobed leaves. It has a distinctive peppery and slightly bitter flavor, making it a popular choice in salads and as a garnish. Arugula is packed with essential nutrients, including vitamins A, C, and K. Vitamin K, in particular, is crucial for bone health and blood clotting. Arugula is a low-calorie food, making it an excellent choice for those looking to maintain or lose weight while still getting essential nutrients.
  • Chicken Sausage: Chicken sausage is a flavorful and lean alternative to traditional pork sausage. It’s made from ground chicken meat and is often seasoned with herbs and spices.
  • Butternut Squash: Butternut squash is a type of winter squash characterized by its bell-like shape and pale orange flesh. It has a sweet and nutty flavor. Like arugula, butternut squash is relatively low in calories, making it an excellent choice for those looking to maintain a healthy weight.
  • Dried Cranberries: Dried cranberries are made from fresh cranberries that have been dried to preserve their tart and slightly sweet flavor. Cranberries, whether fresh or dried, are packed with antioxidants, including vitamin C and various phytochemicals, which may help protect against chronic diseases.

Rectangular wooden plate with diced sausage, diced butternut squash, dried cranberries, and green arugula salad.

How to Meal Prep this Healthy Lunch Salad

  1. Preheat the oven to 400°F (200°C). While the oven is preheating, prepare the sausage and butternut squash.
  2. Dice the chicken sausage and butternut squash into small, uniform squares. This ensures even cooking and a harmonious texture in your salad.
  3. Place the diced sausage and butternut squash on a baking sheet. Sprinkle them with garlic powder and a pinch of salt. Drizzle olive oil over the ingredients, making sure they are fully coated. Toss them gently to distribute the seasonings evenly.
  4. Bake in the preheated oven for approximately 15 minutes or until the butternut squash is tender and slightly caramelized, and the sausage is cooked through.
  5. Once the roasted butternut squash and chicken sausage are ready, let them cool for a few minutes. You can enjoy them warm or at room temperature.
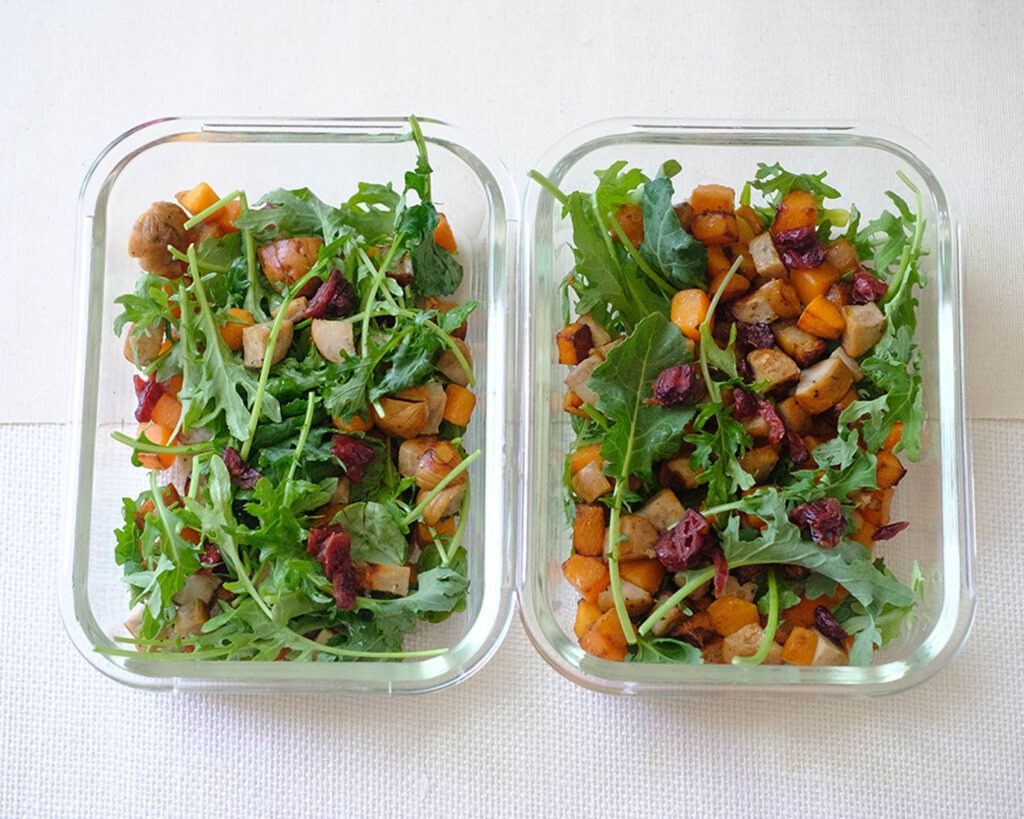
  6. To assemble your meal prep containers: Start with a generous bed of fresh arugula leaves. Top it with the roasted butternut squash and chicken sausage. Drizzle your favorite vinaigrette dressing over the salad and finish by sprinkling in the dried cranberries for a pop of color and sweetness.

Reference the recipe card below for detailed instructions.

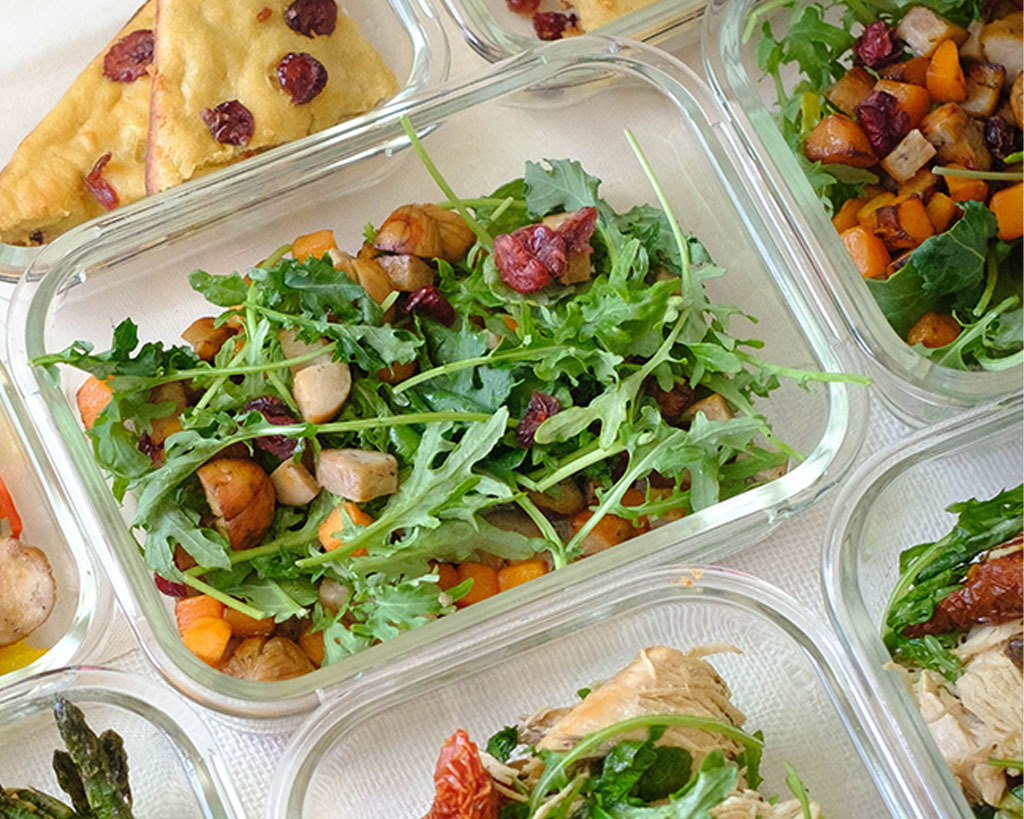
Glass meal prep container with diced sausage, diced butternut squash, dried cranberries, and green arugula salad.

Meal Prep Tips:

  • Keep Dressing Separate: Dress the Salad Just Before Eating: To prevent the salad from becoming soggy if you’re meal prepping for the week, store the dressing separately and add it to the salad just before eating.
  • Experiment with Spices: Customize the flavor of your chicken sausage and butternut squash by experimenting with different spices. Try paprika, thyme, rosemary, or cumin for added variety.
  • Add Nuts or Seeds: For added texture and nutrition, consider adding toasted nuts or seeds like almonds, walnuts, or pumpkin seeds to your healthy lunch salad.

Ingredient Swaps:

  • Arugula Salad: f you find arugula’s peppery taste too strong, you can replace it with fresh baby spinach. Spinach is milder in flavor but still rich in nutrients.
  • Chicken Sausage: If you’re vegetarian, consider using vegetarian or plant-based sausage alternatives made from ingredients like mushrooms, beans, or tofu. You can also substitute chicken sausage with lean turkey sausage or even grilled chicken breast for a lower-fat option.
  • Butternut Squash: If butternut squash isn’t your favorite, try using acorn squash, pumpkin, or sweet potatoes instead. They’ll provide a similar texture and sweetness.
  • Dried Cranberries: Swap dried cranberries for raisins, dried cherries, or chopped dried apricots if you prefer a different dried fruit.

Glass meal prep container with diced sausage, diced butternut squash, dried cranberries, and green arugula salad.

Rectangular wooden plate with diced sausage, diced butternut squash, dried cranberries, and green arugula salad.

Arugula Salad with Butternut Squash and Sausage

Create a taste of autumn with our Arugula Salad featuring roasted butternut squash, chicken sausage, dried cranberries, and a delightful vinaigrette – a nutritious and flavorful meal prep option for a healthy and convenient lunch.
No ratings yet
Prep Time 5 minutes
Cook Time 15 minutes
Course lunch
Cuisine American
Servings 2

Equipment

  • knife
  • cutting board
  • sheet pan

Ingredients
  

  • 2 chicken sausage links (3 oz each)
  • 2 cups butternut squash (diced)
  • 1 oz dried cranberries
  • 4 cups arugula
  • 4 tablespoon vinaigrette (your choice)
  • 1/4 teaspoon garlic powder
  • 1/4 teaspoon salt
  • 1 tablespoon olive oil

Instructions
 

  • Preheat the oven to 400F. Dice the sausage and butternut squash into small squares.
  • Place the sausage and butternut squash on a sheet pan and sprinkle them with garlic powder and salt. Drizzle the olive oil making sure the ingredients are fully coated.
  • Bake in the oven for 15 minutes. After it cooks, serve it on top of the arugula salad. Drizzle the vinaigrette on top and sprinkle in the dried cranberries.

Similar Recipes

cilantro chicken

Cilantro Lime Chicken Salad with Strawberry Salsa

sweet and sour chicken wings

Air Fryer Sweet and Sour Chicken Wings

stuffed primavera chicken

Primavera Stuffed Chicken Breasts

You Might Also Like

Frequently Asked Questions

Can I freeze the roasted butternut squash and chicken sausage for later use?

Yes, you can freeze the roasted butternut squash and chicken sausage in separate airtight containers for up to 2-3 months. Thaw in the refrigerator before reheating or using in salads.


What dressing goes best with this salad?

A balsamic vinaigrette or a honey mustard dressing complements this salad beautifully. You can also try a citrus-based dressing for a tangy twist.


What can I do with leftover roasted butternut squash and chicken sausage?

Leftovers can be used in various ways. Try adding them to omelets, grain bowls, or as toppings for pizza or pasta dishes.

Posted on Leave a comment

Beef Zucchini Nachos

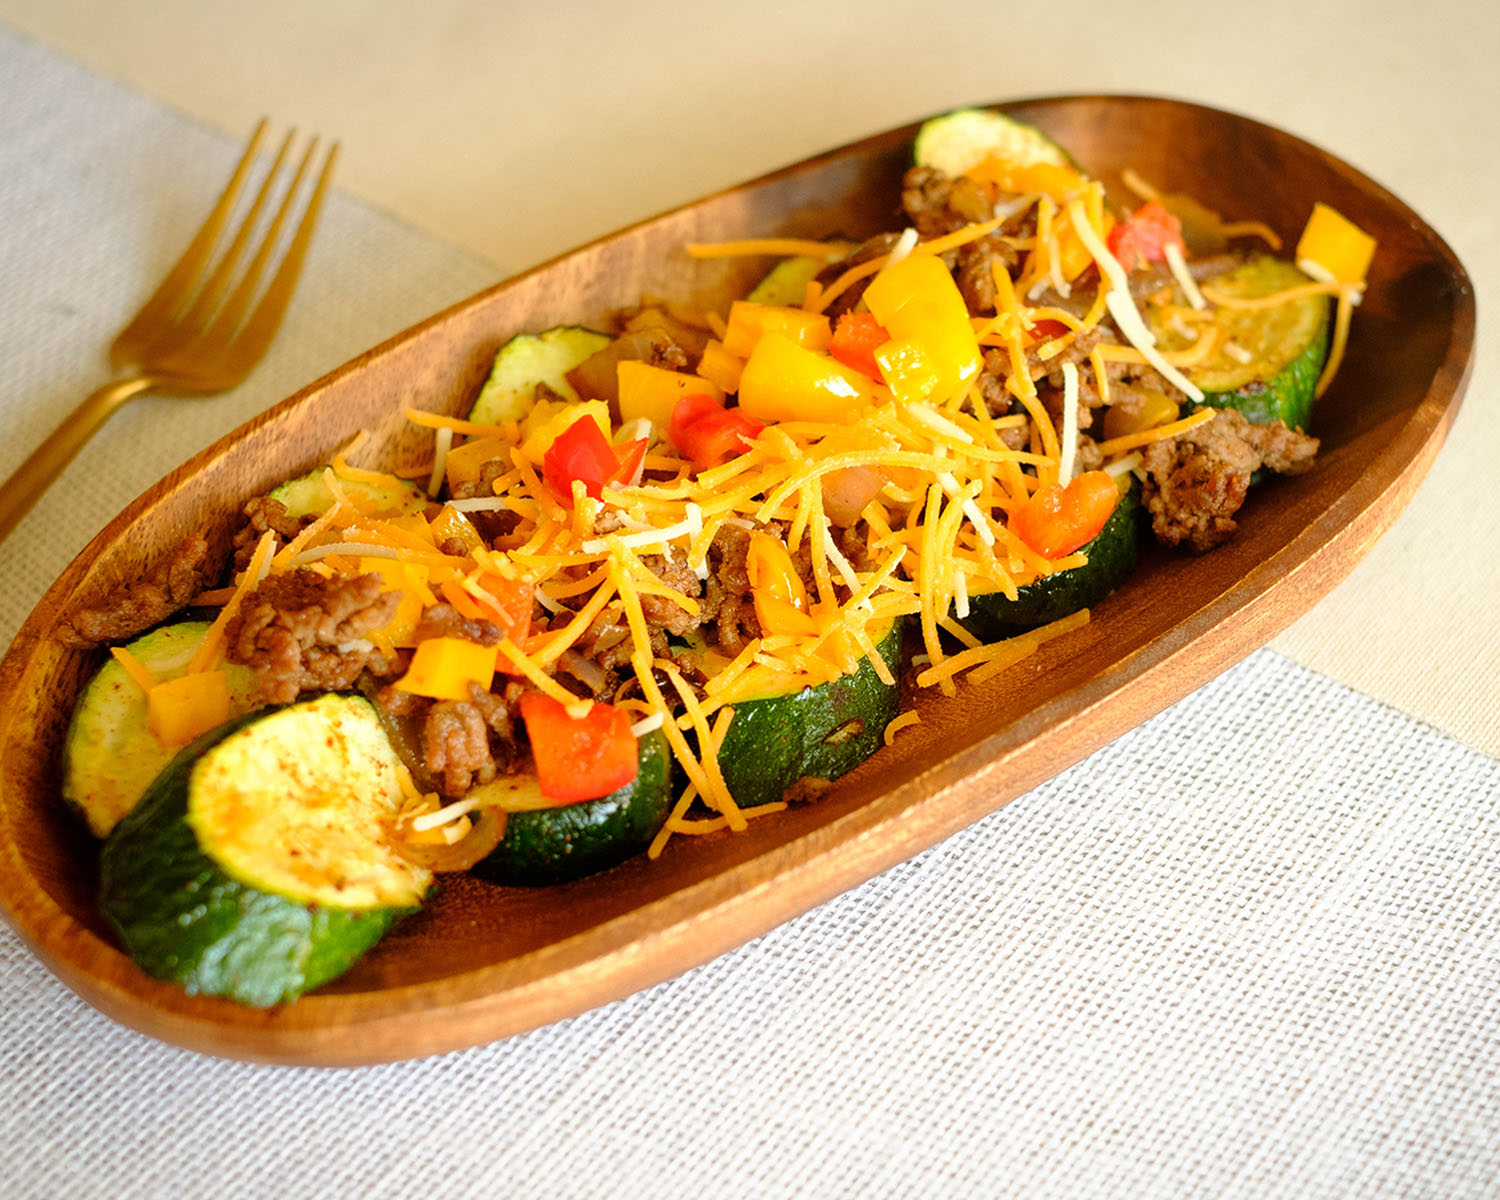
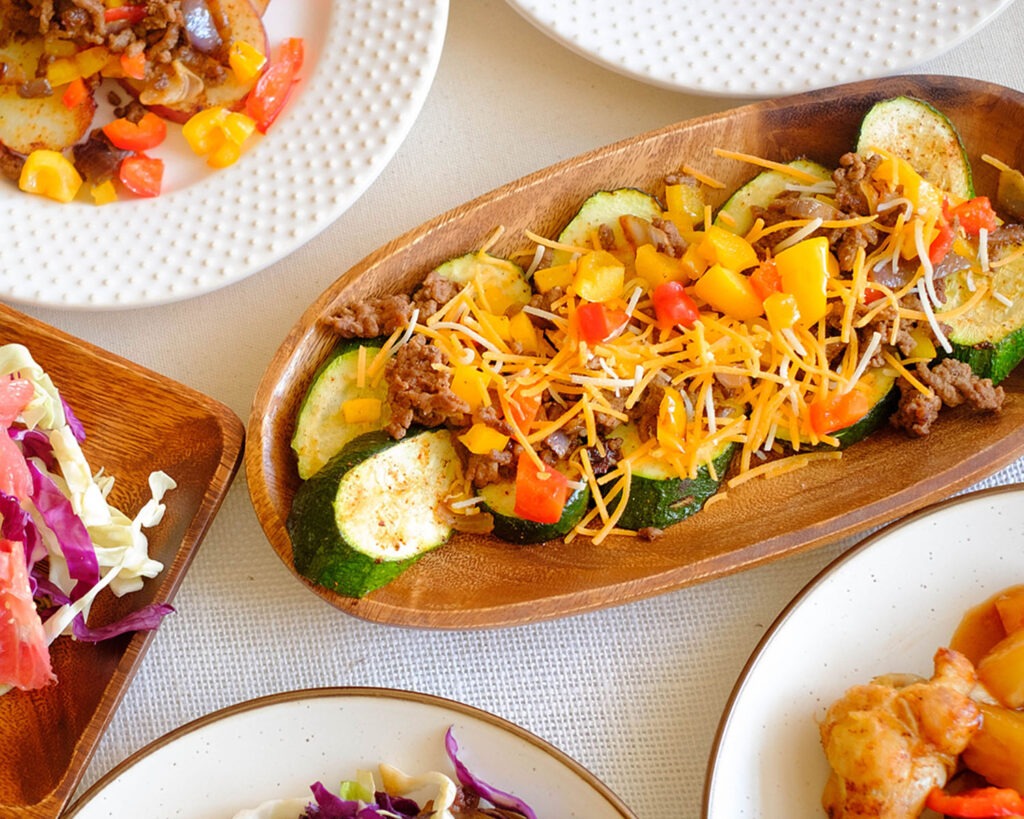
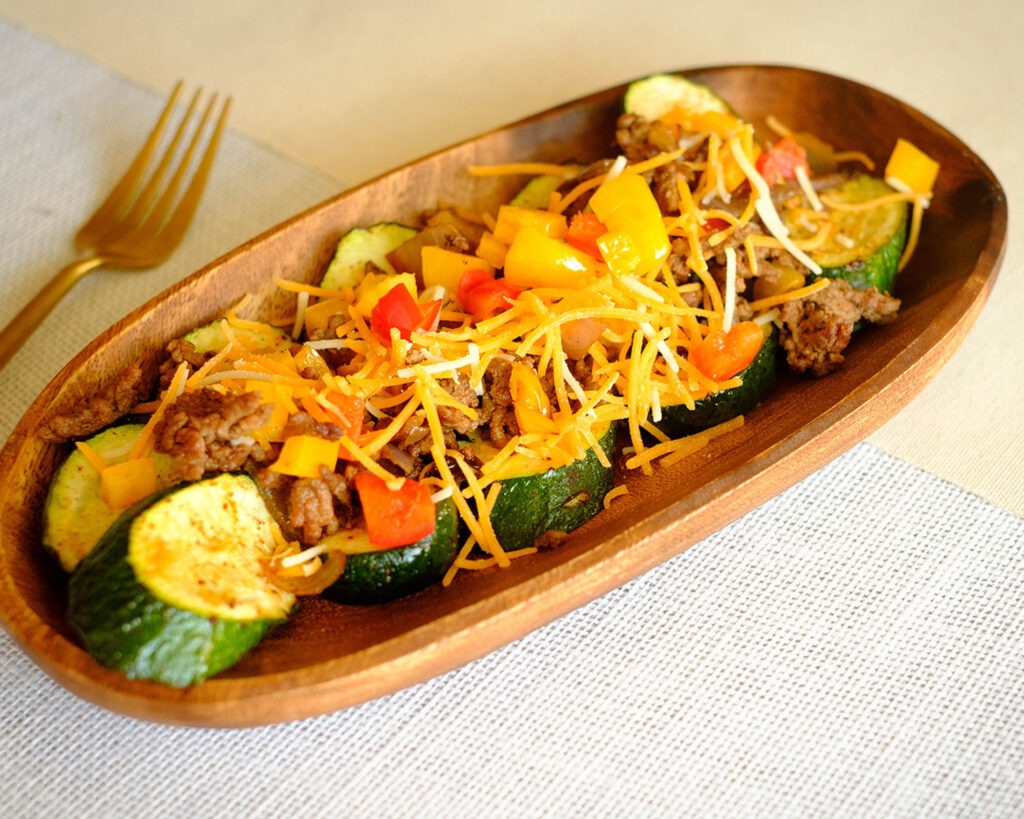
wooden plate with sliced zucchini topped with ground beef, bell peppers, tomatoes, and shredded cheese

Beef Zucchini Nachos, your new meal prep superheroes. It’s like getting all the joy of restaurant nachos without the guilt or the hit to your wallet. So go on, get cooking, and enjoy every delicious, crunchy, and flavor-packed bite!

This post may contain affiliate links. Please see our privacy policy for details.

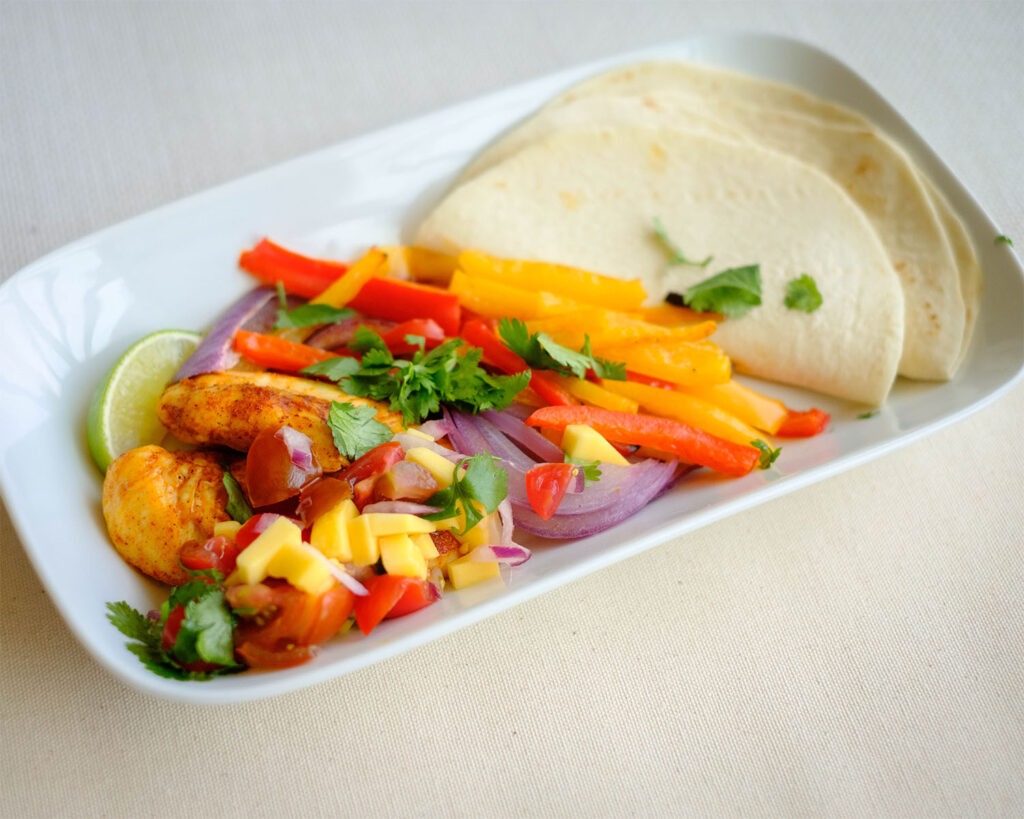
Plate with chicken fajitas, mango salsa, and colorful bell peppers and onions served with tortillas.

Why We Love These Beef Zucchini ‘Nachos’

Say hello to the marvelously delicious Beef Zucchini Nachos – your new go-to for meal prep magic! These babies are so incredible, you won’t even be tempted by those takeout temptations anymore.

Picture this: layers of flavor-packed ground beef, sautéed white onions and yellow bell peppers, and the vibrant pop of cherry tomatoes. Oh, and let’s not forget the star of the show – sliced zucchini, standing in as your crispy, guilt-free “chips.” And guess what? They taste just as good, if not better, than your favorite restaurant nachos.

The PrepYoSelf Newsletter

Simple Ingredients You’ll Need

  • Ground Beef: The hearty foundation of our nachos, bringing a savory kick to the party.
  • White Onions & Yellow Bell Peppers: Sautéed to perfection, these guys add a sweet crunch and a colorful twist.
  • Cherry Tomatoes: Bursting with juiciness and freshness, they add a delightful pop of flavor.
  •  Shredded Cheddar Cheese: Melted and ooey-gooey, this cheese takes your nachos to a whole new level.
  • Sliced Zucchini: The brilliant stand-in for traditional chips – crispy, satisfying, and oh-so-healthy.
  • Seasonings (Chili Powder, Cumin, Paprika, Garlic Powder, Salt, Olive Oil): This powerhouse combo is like a party in your mouth, turning every bite into a fiesta!

wooden plate with sliced zucchini topped with ground beef, bell peppers, tomatoes, and shredded cheese

Easy Step-by-Step Process:

  1. Preheat the Oven: Crank it up to 400°F (200°C) and let it get all warm and cozy.
  2. Slice & Season: Grab your zucchinis and slice them into 1/4 inch thick rounds. Sprinkle them with a dash of garlic powder and salt, then give them a loving coat of olive oil.
  3. Bake the Zucchini Slices: Lay those seasoned zucchini rounds onto a baking sheet and slide them into the preheated oven. Let them bake for about 12 to 15 minutes, until they’re golden and crisp.
  4. Sauté Veggies: While your zucchinis are getting their crunch on, heat up a sauté pan on medium-high and add a dash of olive oil. Toss in those onions and bell peppers, giving them a quick sauté for 2 to 3 minutes until they’re tender.
  5. Add Beef & Seasonings: Time to introduce the ground beef to the pan. Sprinkle in your magnificent mix of chili powder, cumin, paprika, garlic powder, and salt. Give it all a sauté dance until the beef turns a beautiful golden brown, about 6 to 7 minutes.
  6. Build the Magic: Take your zucchini slices out of the oven – they’re probably dancing with excitement now. Arrange them on a plate or serving dish, then heap on that glorious seasoned beef. Shower it all with shredded cheddar cheese and the vibrant cherry tomatoes.

Reference the recipe card below for detailed instructions.

wooden plate with sliced zucchini topped with ground beef, bell peppers, tomatoes, and shredded cheese

Meal Prep Tips for Baked Chicken Fajitas

  • Storage: If you somehow have leftovers (they’re so good, it’s a rare occurrence), store the components separately. Keep the beef and veggies in an airtight container in the fridge, and the zucchini slices in a separate container.
  • Reheating: To experience the nacho joy all over again, simply reheat the beef and veggies in a pan over medium heat until warm. As for the zucchini “chips,” a quick pop in the toaster oven will bring back their crispy charm.
  • Veggie Swap: Feeling adventurous? Swap out the ground beef for ground turkey or even black beans for a vegetarian twist. And don’t hesitate to toss in some sliced jalapeños for an extra kick of spice!

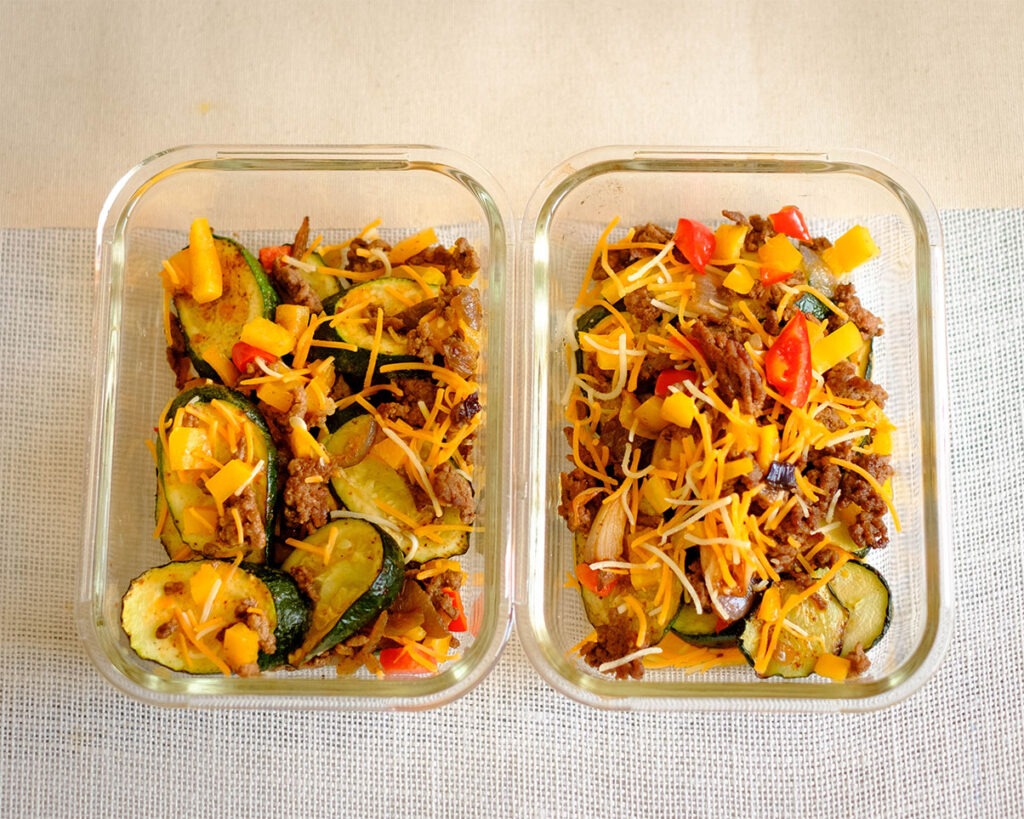
glass rectangular meal prep containers with sliced zucchini topped with ground beef, bell peppers, tomatoes, and shredded cheese

zucchini nachos

Beef Zucchini Nachos

These low carb zucchini nachos are delicious, crunchy, and have a flavor-packed bite!
No ratings yet
Prep Time 5 minutes
Cook Time 20 minutes
Course lunch, Main Course
Cuisine American, Mexican
Servings 2

Equipment

  • knife
  • cutting board
  • spatula
  • saute pan
  • sheet pan
  • oven

Ingredients
  

  • 10 oz ground beef
  • 2 each zucchini
  • 1/4 cup white onions (diced)
  • 1 each yellow bell pepper (diced)
  • 1/4 cup cherry tomatoes (sliced)
  • 1/2 cup shredded cheddar cheese
  • 1/8 tsp chili powder
  • 1/8 tsp cumin
  • 1/8 tsp paprika
  • 1/8 tsp garlic powder
  • 1/4 tsp salt
  • 1 tbsp olive oil

Zucchini

  • 1/4 tsp garlic powder
  • 1/4 tsp salt
  • 1 tbsp olive oil

Instructions
 

  • Pre-heat the oven to 400F
  • Slice the zucchini into 1/4 inch thick rounds. Season with garlic powder and salt. Coat with olive oil
  • Place the zucchini slices on a sheet pan and bake them in the oven for 12 to 15 minutes
  • Meanwhile, add olive oil to a saute pan on medium-high heat. Saute the onions and bell peppers until they soften (about 2 to 3 minutes)
  • Next, add the ground beef and seasonings and saute until it is fully cooked and golden brown (about 6 to 7 minutes)
  • Remove the zucchini slices from the oven and top them off with the taco meat. Top it off with shredded cheese and cherry tomatoes

Similar Recipes

cilantro chicken

Cilantro Lime Chicken Salad with Strawberry Salsa

sweet and sour chicken wings

Air Fryer Sweet and Sour Chicken Wings

stuffed primavera chicken

Primavera Stuffed Chicken Breasts

You Might Also Like

Frequently Asked Questions

Can I use a different type of meat?

Of course! While the original recipe features ground beef, you can easily switch it up. Try ground turkey, chicken, or even plant-based alternatives like crumbled tofu or tempeh for a vegetarian version.


Can I use pre-made taco seasoning?

Absolutely, using pre-made taco seasoning can save you time and effort. However, making your own seasoning blend from scratch as mentioned in the recipe allows you to customize the flavors to your liking.


Can I use different vegetables for sautéing?

Absolutely. The sautéed onions and bell peppers can be swapped with other veggies you enjoy, such as mushrooms, spinach, or even grated carrots. The goal is to add flavor and texture, so feel free to get creative!

Posted on Leave a comment

Grilled Ginger Lime Chicken Salad

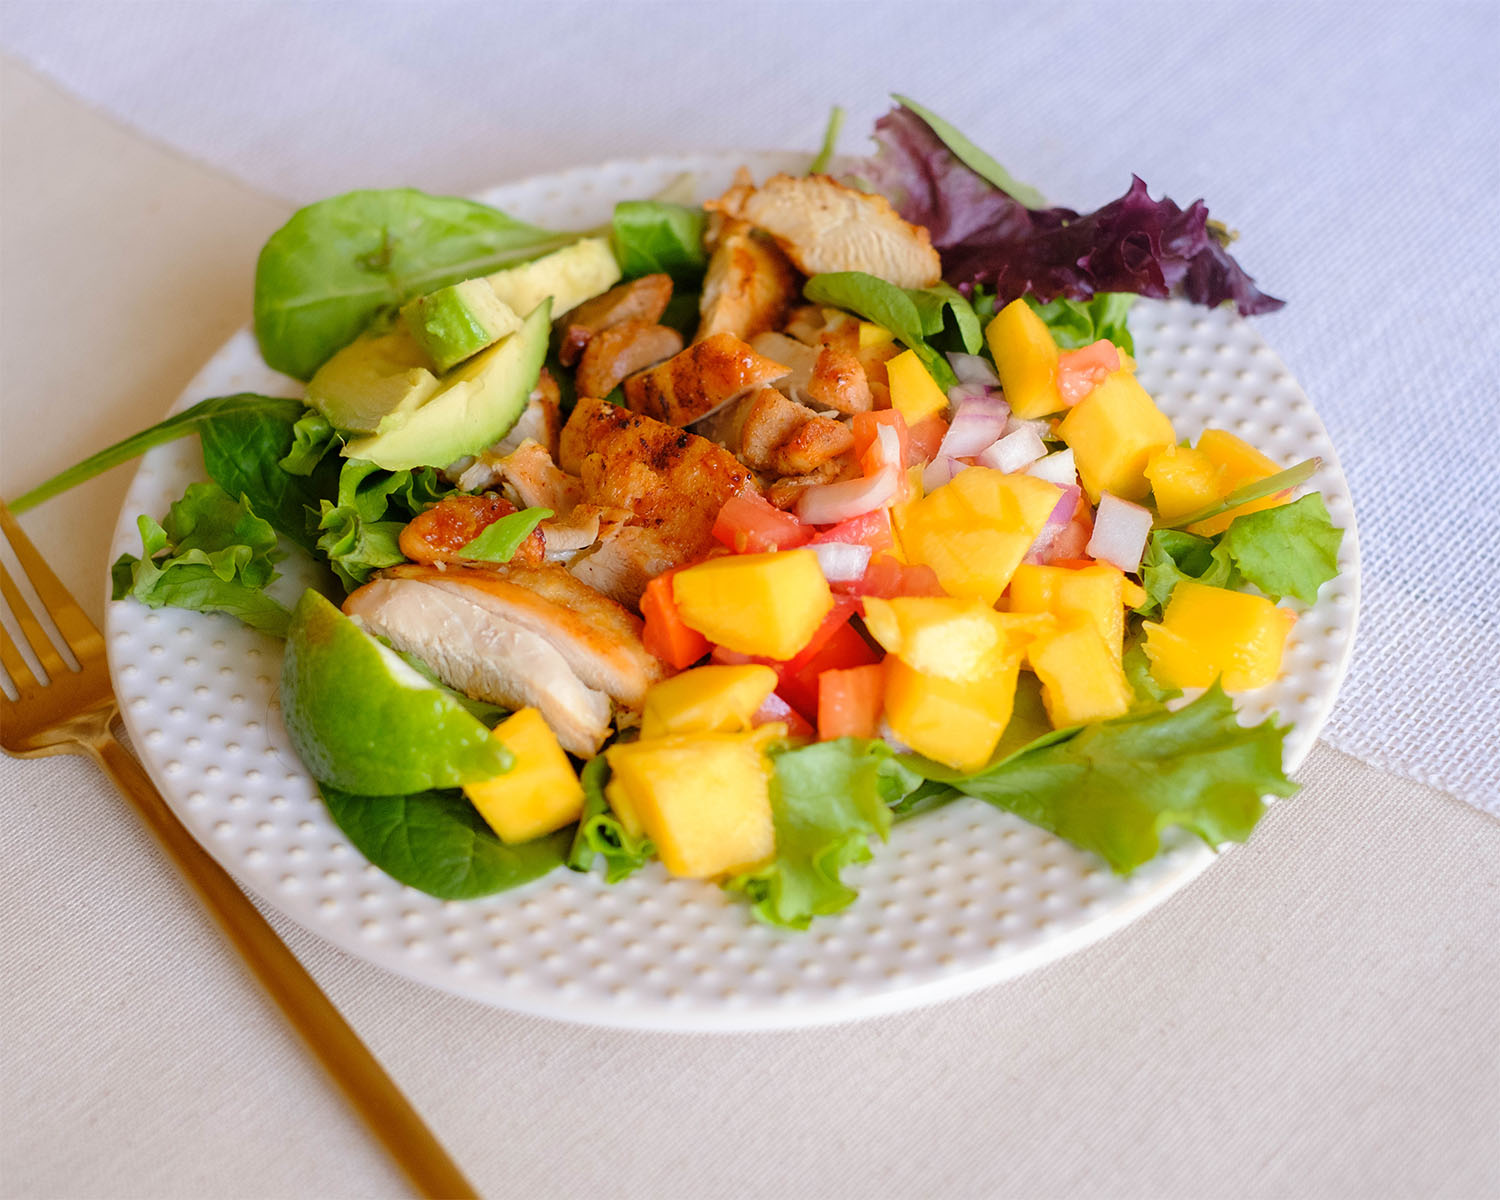
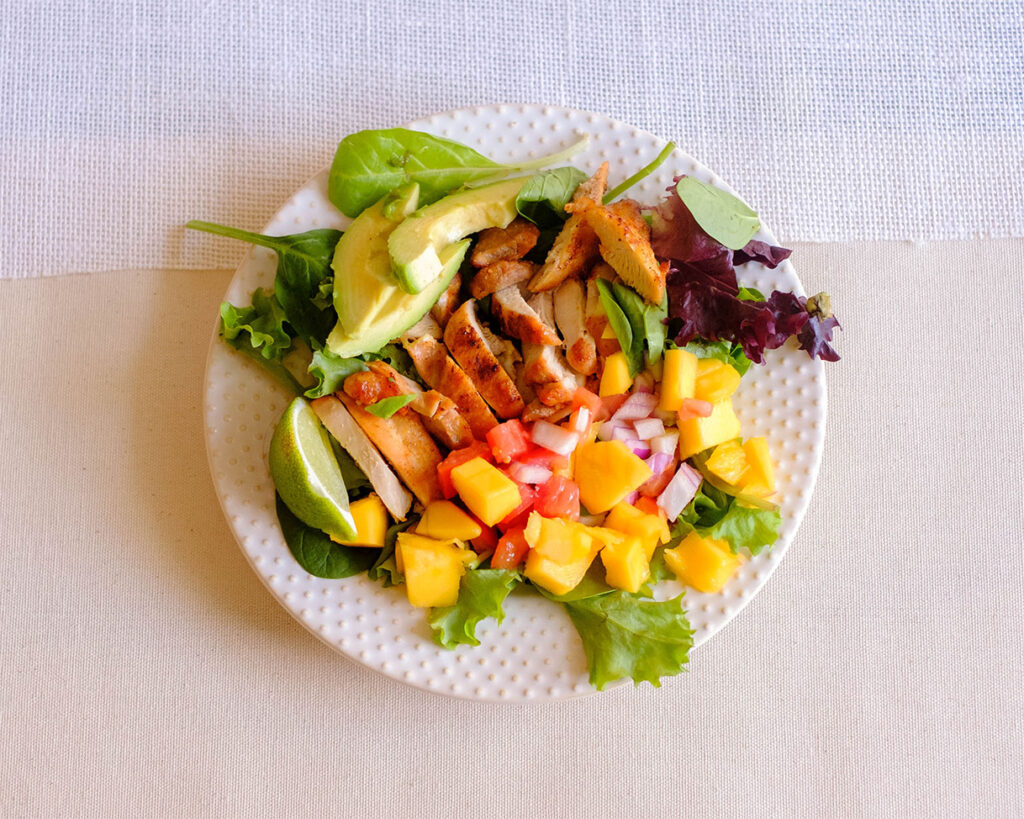
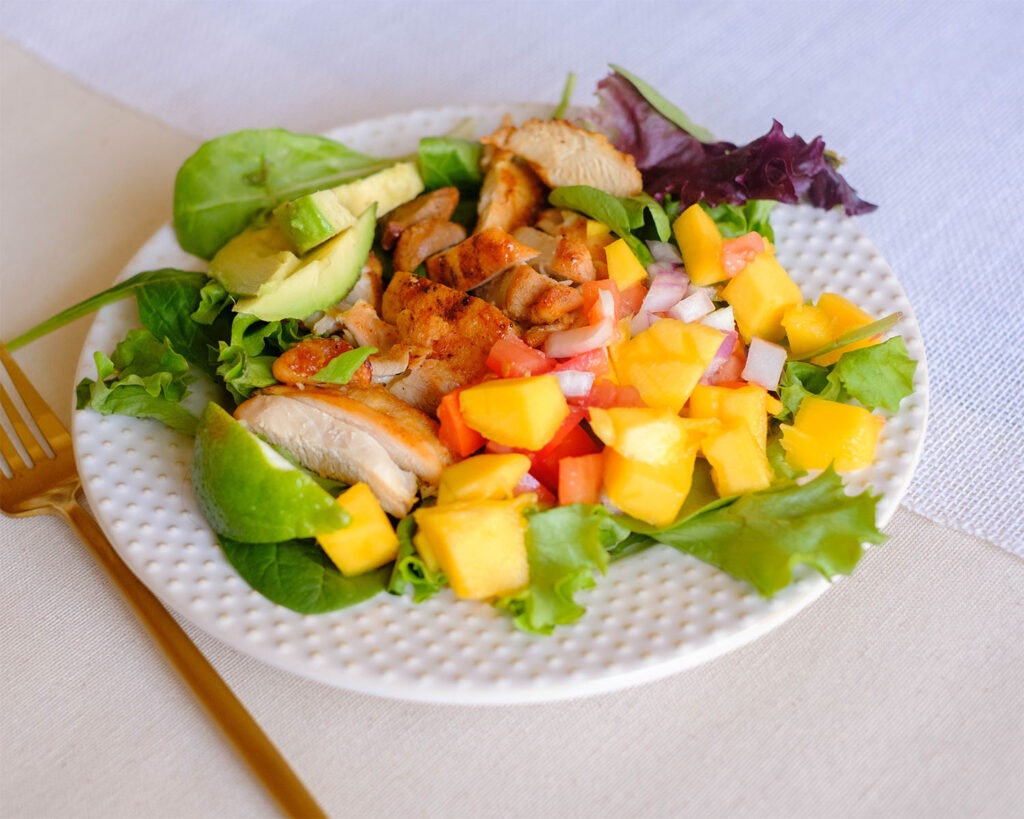
round plate with grilled chicken on top of lettuce with sliced avocado and mango salsa

Today, I’ve got a mouthwatering recipe that will turn your meal prep game into a flavor-packed fiesta: Grilled Ginger Lime Chicken Salad with Mango Salsa! It’s the ultimate lunchtime delight for those hot summer days when you need something refreshing and vibrant.

This post may contain affiliate links. Please see our privacy policy for details.

round plate with grilled chicken on top of lettuce with sliced avocado and mango salsa

Why You Need to Make This

  • Let’s talk meal prep magic. This dish is a game-changer because not only does it taste fantastic, but it’s also a breeze to make. Just whip up the marinade, let the chicken soak up all the goodness for a while, then grill it to perfection. And don’t worry, you don’t need a fancy grill— a stovetop grill pan works just fine.
  • As for budget-friendliness, fear not! The ingredients in this recipe are easily accessible and won’t break the bank. Plus, you’ll be saving money by meal prepping instead of eating out at restaurants.

The PrepYoSelf Newsletter

Ingredients You’ll Need

  • Picture this: tender, succulent grilled chicken infused with zesty lime juice, a touch of sweet honey, the warm embrace of olive oil, and the aromatic goodness of ginger and garlic powders. The flavors blend so harmoniously that each bite is a burst of pure joy!
  • But wait, there’s more! We take it to the next level with a sidekick that elevates this dish to restaurant-quality status—the tangy Mango Salsa! It’s a refreshing dance of sweet, juicy mangoes, juicy tomatoes, a sprinkle of cilantro, and the mild zing of red onions, all marinated in a delightful bath of lime juice. Your taste buds won’t know what hit them!

round plate with grilled chicken on top of lettuce with sliced avocado and mango salsa

How to Make Grilled Chicken Salad

  1. Mix together the chicken marinade in a bowl. Then, add the chicken and let it marinate for at least 10 minutes (best flavor if marinated overnight).
  2. Heat a stovetop indoor grill on medium-high heat and grill the chicken for a few minutes on each side until the chicken is fully cooked.
  3. Let the chicken rest for a few minutes before slicing it into bite-size pieces.
  4. Meanwhile, prepare the mango salsa ingredients in a small bowl.
  5. Serve the chicken on top of a bed of salad with sliced avocado and mango salsa.

Reference the recipe card below for detailed instructions.

round plate with grilled chicken on top of lettuce with sliced avocado and mango salsa

Meal Prep Tips for Grilled Ginger Lime Chicken

  • To make the salad heartier, you can add some cooked quinoa, couscous, or brown rice to the mix. It’ll add extra texture and make the salad even more satisfying.
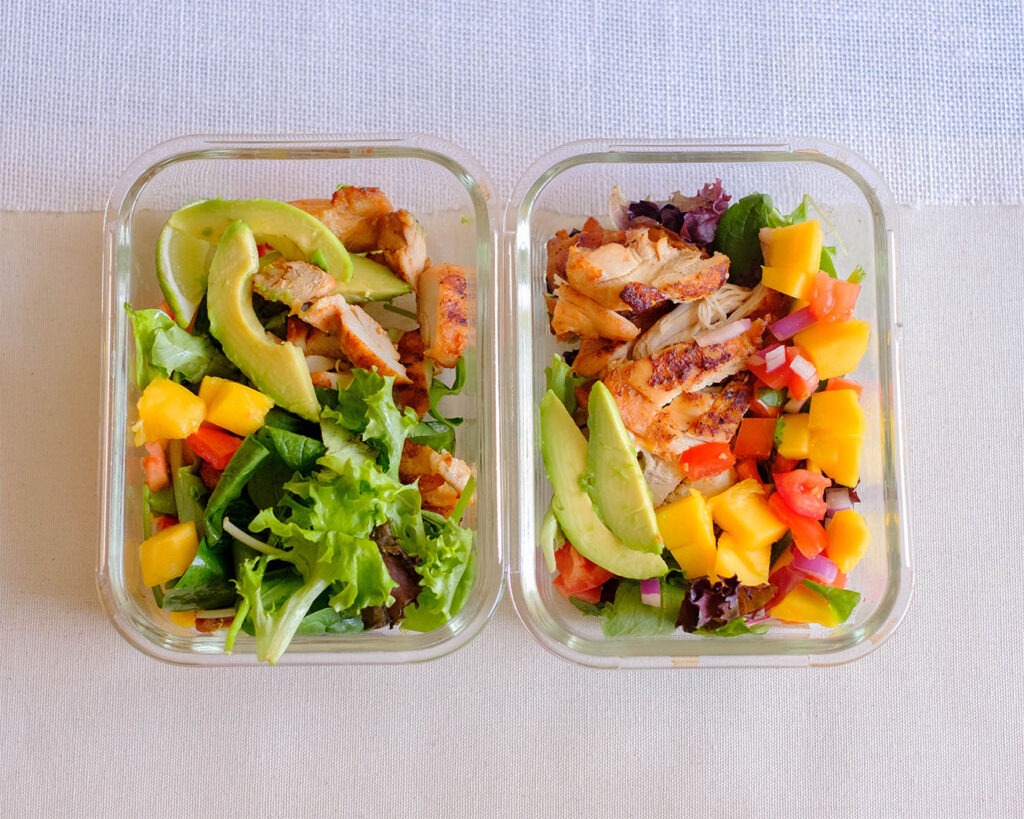
  • Now, let’s get practical. You’ve got a busy week ahead, but that’s no problem because this dish is your secret weapon. After preparing the chicken and mango salsa, simply store them separately in airtight containers. When it’s time for lunch, assemble your salad and drizzle on some of that leftover marinade as dressing—deliciousness guaranteed!
  • Concerned about reheating? Fear not, my friends! You can gently warm up the grilled chicken in the microwave or oven until it’s just the right temperature. And for those days when you need a quick meal on the go, this salad is equally delightful when served cold.
round plate with grilled chicken on top of lettuce with sliced avocado and mango salsa

ginger lime chicken salad

Grilled Ginger Lime Chicken Salad with Mango Salsa

Grilled Ginger Lime Chicken Salad with Mango Salsa is the way to go for a tasty, refreshing, and exciting meal prep adventure.
No ratings yet
Prep Time 5 minutes
Cook Time 20 minutes
Course lunch
Cuisine American, Mexican
Servings 2

Equipment

  • knife
  • cutting board
  • mixing bowls
  • indoor grill pan
  • tongs

Ingredients
  

Chicken and Marinade

  • 12 oz boneless chicken thighs
  • 2 tbsp lime juice
  • 1 tbsp honey
  • 1/2 tsp ginger powder
  • 1/4 tsp garlic powder
  • 1/4 tsp salt
  • 1/4 tsp pepper
  • 1 tbsp olive oil

Salad

  • 4 cups spring mix
  • 2 each small avocado

Mango Salsa

  • 1 each mango (diced)
  • 1/4 cup red onions (diced)
  • 1 each roma tomato (diced)
  • 1/4 cup cilantro (chopped)
  • 1 tbsp lime juice
  • 1/8 tsp salt

Instructions
 

  • In a mixing bowl, mix together the chicken marinade (lime juice, honey, ginger powder, garlic powder, salt, pepper, and olive oil). Add the chicken to the marinade and make sure it is fully coated with the marinade. Marinate for at least 10 minutes
  • Next, heat an indoor grill pan on medium-high heat and sear the chicken on each side for about 5 to 6 minutes until it is fully cooked and reaches an internal temperature of 165F
  • After the chicken cooks, let it rest before slicing it into bite-size pieces
  • Meanwhile, prepare the mango salsa. In a bowl, mix together the mango, red onions, diced tomatoes, chopped cilantro, lime juice, and salt
  • Serve the chicken on top of the spring mix with sliced avocado and mango salsa

Similar Recipes

cilantro chicken

Cilantro Lime Chicken Salad with Strawberry Salsa

sweet and sour chicken wings

Air Fryer Sweet and Sour Chicken Wings

stuffed primavera chicken

Primavera Stuffed Chicken Breasts

You Might Also Like

Frequently Asked Questions

Can I use a different protein instead of chicken?

Absolutely! While the recipe is tailored to chicken, you can easily swap it with other proteins like shrimp, pork, or even tofu. Just make sure to adjust the cooking time accordingly.


Can I use fresh ginger instead of ginger powder?

Certainly! Fresh ginger adds a lovely punch of flavor. Just grate about 1 tablespoon of fresh ginger and use it in place of the ginger powder.


Can I use frozen mango for the salsa?

Definitely! If fresh mangoes aren’t available, frozen mango chunks can be used for the salsa. Just thaw and drain any excess liquid before mixing with the other ingredients.

Posted on Leave a comment

Smoked Salmon Quesadilla with Strawberry Salsa

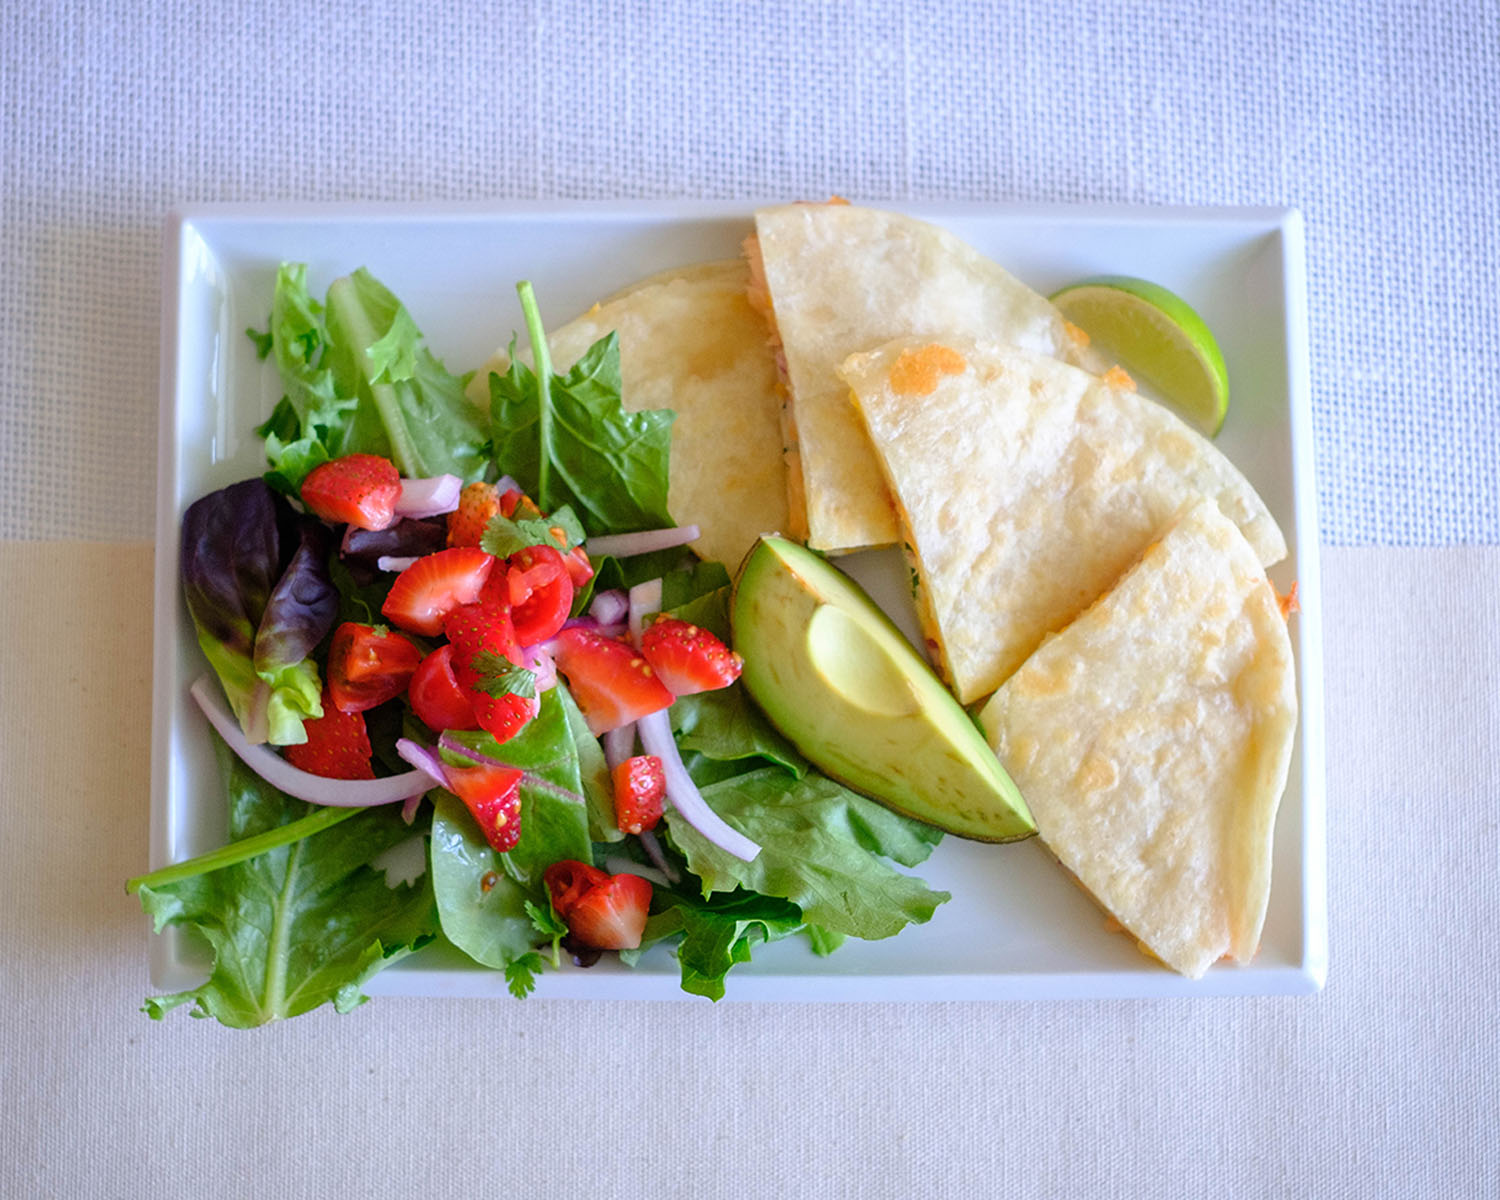
plate with salmon quesadilla and strawberry salsa salad

This post may contain affiliate links. Please see our privacy policy for details.

Smoked Salmon Quesadilla with Strawberry Salsa is a combination match made in culinary heaven that will take your meal prep game to a whole new level of deliciousness. With this exciting meal prep idea, you’ll have a delightful and restaurant-quality meal ready to go whenever hunger strikes. The combination of smoky salmon, melted cheese, and refreshing strawberry salsa is truly a taste sensation that will make your taste buds sing. So, why settle for boring meal prep when you can have a flavor-packed adventure right at your fingertips?

plate with salmon quesadilla and strawberry salsa salad

Why You Need to Make This

Let’s dive into why this restaurant-quality smoked salmon quesadilla with strawberry salsa is not only delicious but also healthy and budget-friendly.

  • Firstly, let’s talk about its health benefits. Smoked salmon is an excellent source of high-quality protein, omega-3 fatty acids, and various vitamins and minerals. Omega-3 fatty acids are known for their heart-healthy properties and can help reduce inflammation in the body. Additionally, the strawberry salsa adds a dose of antioxidants and vitamin C, while ingredients like avocado and cilantro provide healthy fats and beneficial nutrients.
  • Now, let’s talk about the budget-friendly aspect. Making restaurant-quality meals at home is often more cost-effective than dining out. Smoked salmon, while considered a gourmet ingredient, can be found at affordable prices, especially if you look for sales or discounts. Additionally, the quesadilla can be made using basic pantry staples like flour tortillas, shredded cheese, and onions, which are generally budget-friendly ingredients. You can also stretch your budget by using seasonal fruits and vegetables in the strawberry salsa, as they tend to be more affordable and flavorful
  • Meal prepping with this recipe can also help reduce food waste. You can portion out the quesadillas into individual servings and refrigerate or freeze them for later consumption. This way, you can avoid throwing away unused ingredients or having to order takeout on busy days, which can be both expensive and less healthy.

The PrepYoSelf Newsletter

Ingredients You’ll Need

  • Smoked Salmon is a rich, smoky flavor adds a delightful twist to the traditional quesadilla. Combined with the other ingredients, it creates a harmonious medley of flavors that will leave you craving more. Just imagine the creamy, slightly salty salmon blending with the gooey melted cheese. Are you salivating yet?
  • But wait, there’s more! We can’t forget about the refreshing strawberry salsa that elevates this dish to restaurant quality. Prepare the salsa by combining fresh, juicy strawberries, halved cherry tomatoes, finely chopped cilantro, creamy avocado chunks, and a squeeze of lime juice. The result is a vibrant, tangy salsa that perfectly complements the smoky richness of the quesadilla. It’s like a burst of summer in every bite!

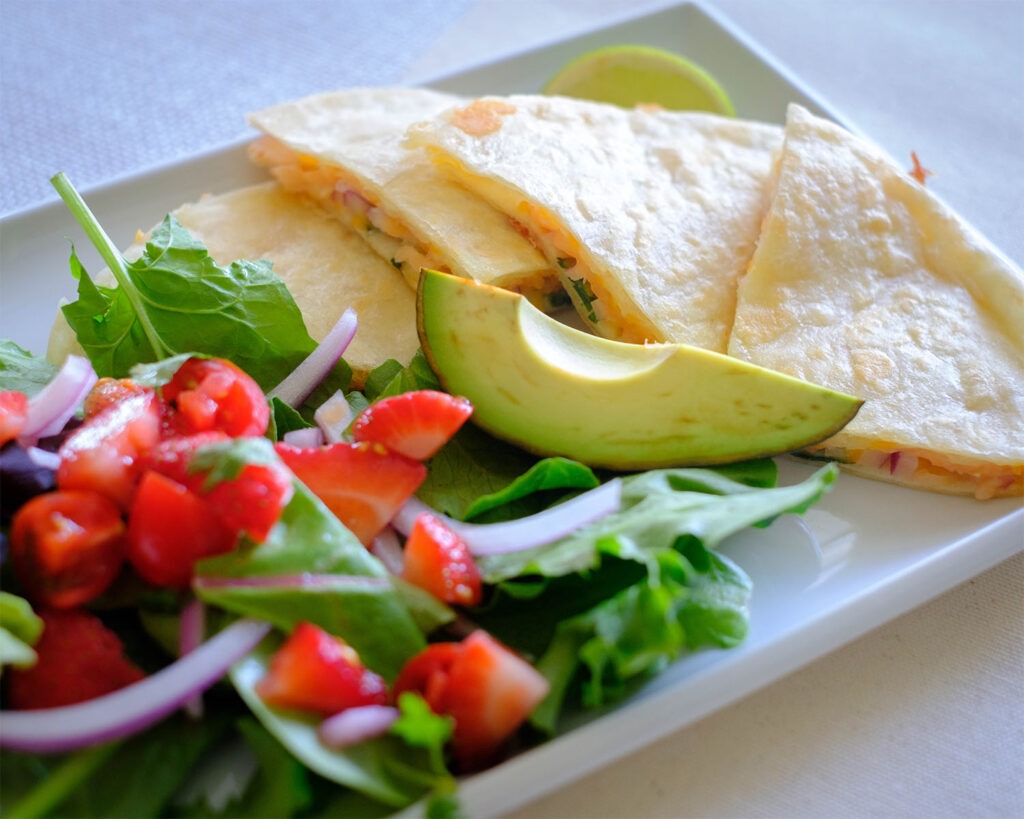
plate with salmon quesadilla and strawberry salsa salad

How to Make Smoked Salmon Quesadillas

  1. To assemble the quesadilla, start by laying a tortilla on a plate. Sprinkle a generous amount of shredded cheese evenly across the tortilla, then layer on some thinly sliced red onions. Now, it’s time for the star ingredient—place some delectable smoked salmon slices on top. Finally, top it all off with more cheese and another tortilla.
  2. Grill the quesadilla for a few minutes on each side until the tortilla turns a beautiful golden brown and the cheese melts into a glorious ooey-gooey goodness. The combination of crispy tortilla, melted cheese, and flavorful smoked salmon will have you drooling before you even take your first bite.

Reference the recipe card below for detailed instructions.

plate with salmon quesadilla and strawberry salsa salad

Meal Prep Tips for Salmon Quesadillas

  • The great thing about these smoked salmon quesadillas is that they can be prepared ahead of time and enjoyed throughout the week. Once cooked, allow them to cool completely before storing them in an airtight container in the refrigerator. When you’re ready to enjoy, simply reheat them in a skillet over medium-low heat until warmed through.
  • If you’re looking to freeze them for longer storage, wrap each quesadilla tightly in plastic wrap and place them in a freezer bag. They can be frozen for up to a month for best quality. To reheat, thaw them in the refrigerator overnight, and then follow the same skillet method mentioned earlier.

plate with salmon quesadilla and strawberry salsa salad

Quesadilla

Smoked Salmon Quesadilla with Strawberry Salsa and Salad

This smoked salmon quesadilla with strawberry salsa offers a burst of flavor and restaurant-quality experience.
No ratings yet
Prep Time 5 minutes
Cook Time 15 minutes
Course lunch, Main Course, Salad
Cuisine American, Mexican
Servings 2

Equipment

  • knife
  • cutting board
  • mixing bowls
  • saute pan
  • spatula

Ingredients
  

Quesadilla

  • 4 oz smoked salmon
  • 4 each flour tortillas
  • 1/2 cup shredded cheddar cheese
  • 1/2 cup shredded mozzarella cheese
  • 1/4 cup red onions (diced)
  • 1 tbsp olive oil

Salad and strawberry salsa

  • 4 cups spring mix salad
  • 1 each avocado (peeled and diced)
  • 1/2 cup strawberries (diced)
  • 1/2 cup cherry tomatoes (sliced)
  • 1/4 cup cilantro (chopped)
  • 1 each lime (juiced)
  • 1/4 tsp salt

Instructions
 

Quesadilla

  • For each quesadilla, layer the following ingredients on the bottom tortillas: bottom layer cheese, red onions, cilantro, smoked salmon, then top it off with the top layer cheese, and place another tortilla on top
  • Heat a pan on medium heat and add oil. Place the quesadilla on a pan and cook until the tortilla is golden brown and the cheese melts (about 1 to 2 minutes on each side)
  • Remove the quesadilla from the saute pan and cut into 4 wedges

Strawberry Salsa and Salad

  • In a bowl, mix together the strawberries, cherry tomatoes, cilantro, avocado, and juice of a lime. Season with salt and mix it all together
  • Serve it on top of the spring mix along with the quesadilla wedges

Similar Recipes

cilantro chicken

Cilantro Lime Chicken Salad with Strawberry Salsa

sweet and sour chicken wings

Air Fryer Sweet and Sour Chicken Wings

stuffed primavera chicken

Primavera Stuffed Chicken Breasts

You Might Also Like

Frequently Asked Questions

Can I use a different type of fish instead of smoked salmon?

Absolutely! While smoked salmon adds a unique flavor, you can experiment with other types of fish such as grilled or baked salmon, trout, or even shrimp for a different twist.


Can I use corn tortillas instead of flour tortillas?

Definitely! Corn tortillas can be a great alternative if you prefer their taste and texture. They will add a slightly different flavor profile to the quesadilla but will still pair well with the smoked salmon and strawberry salsa.


Can I freeze the strawberry salsa?

It’s not recommended to freeze the strawberry salsa, as the texture and freshness of the strawberries may be compromised upon thawing. It’s best enjoyed fresh or stored in the refrigerator for a couple of days

Posted on Leave a comment

Sheet Pan Chicken Fajita Lettuce Wraps

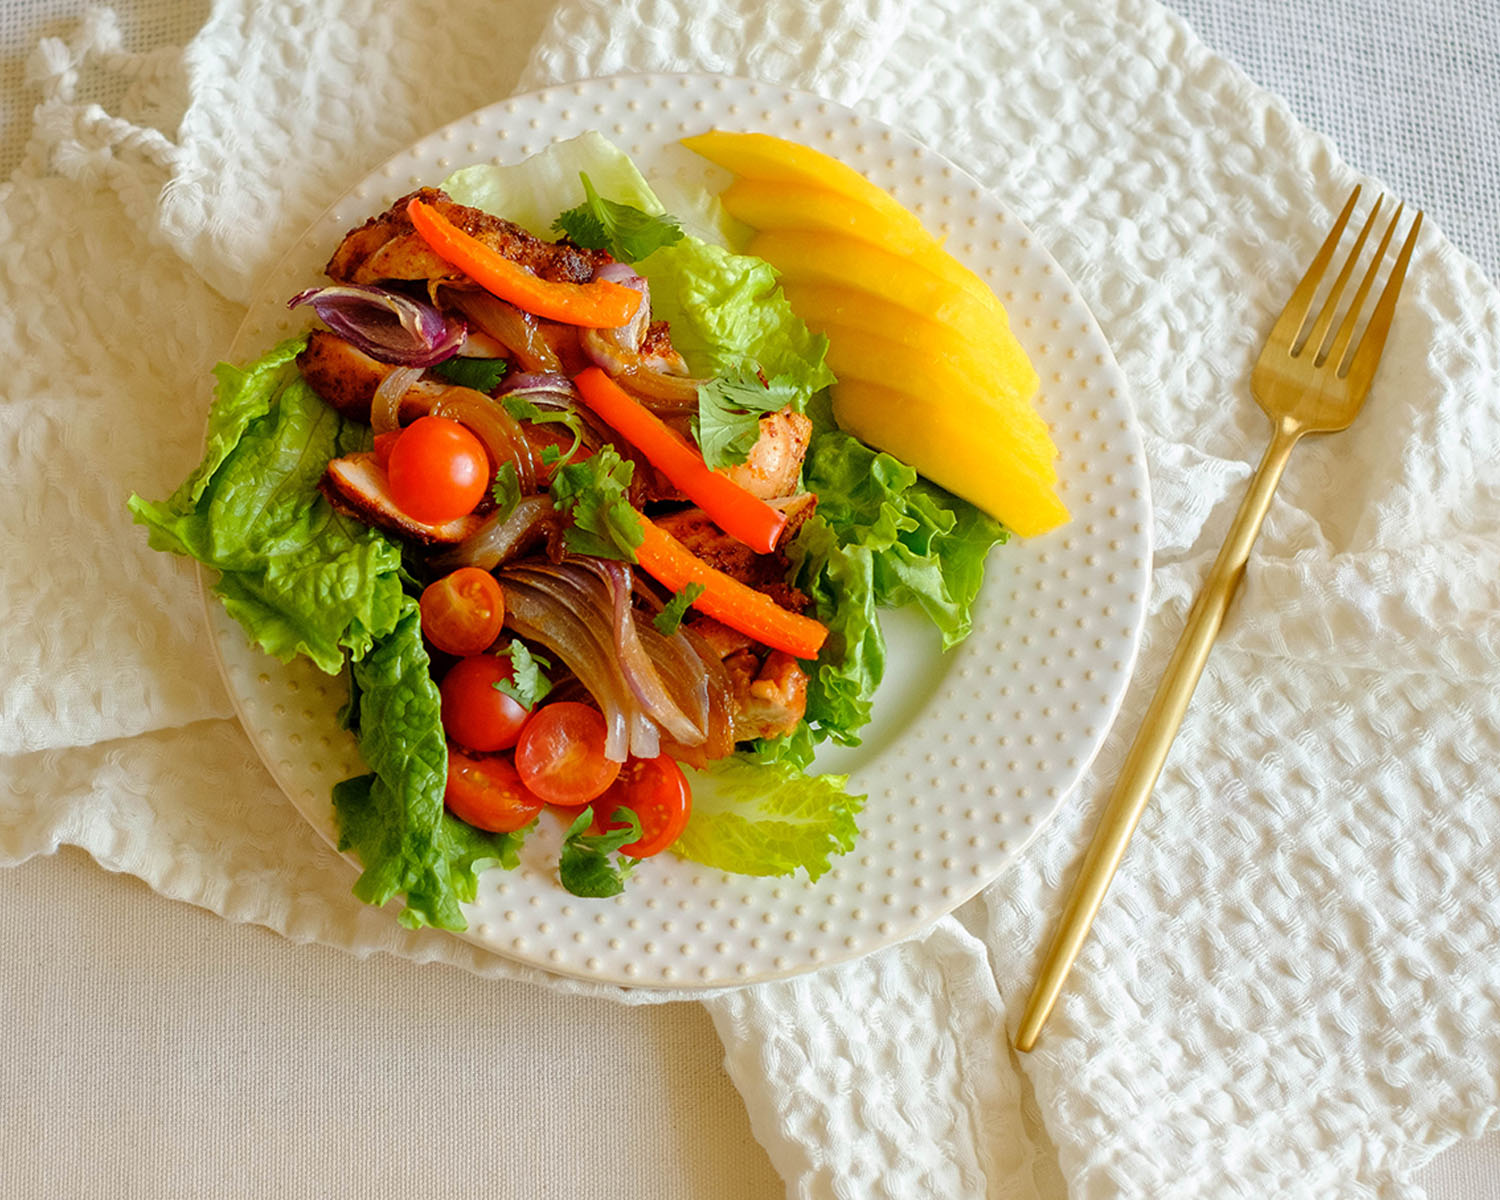
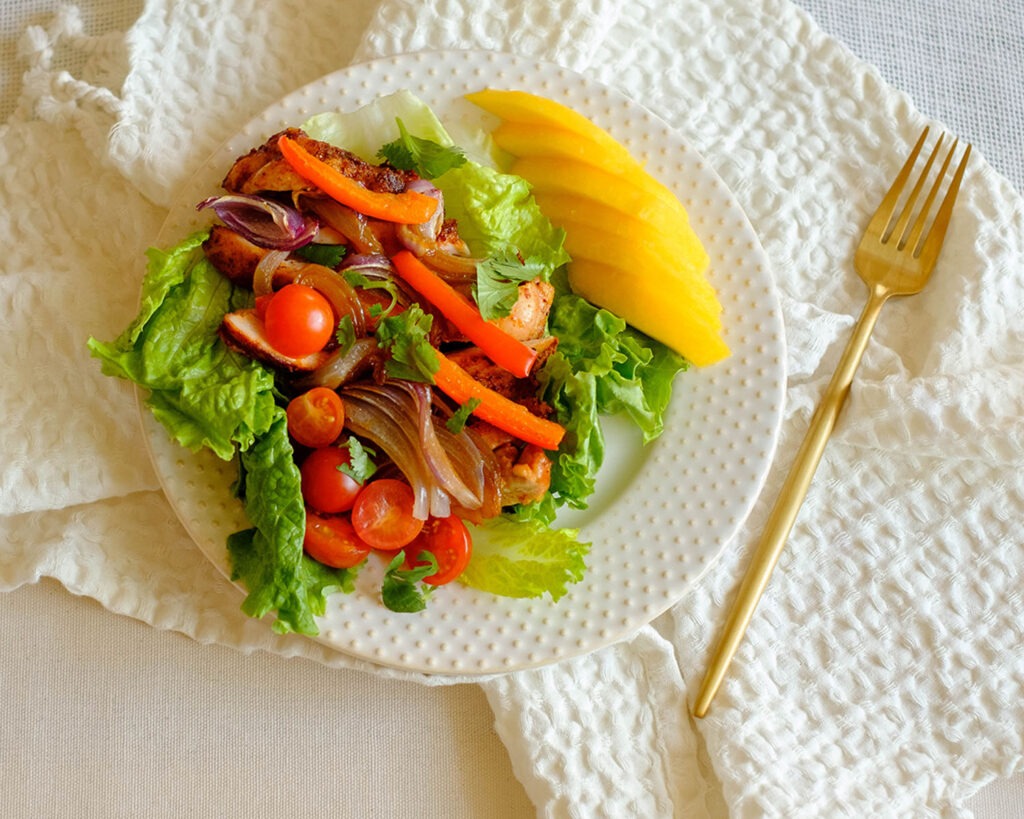
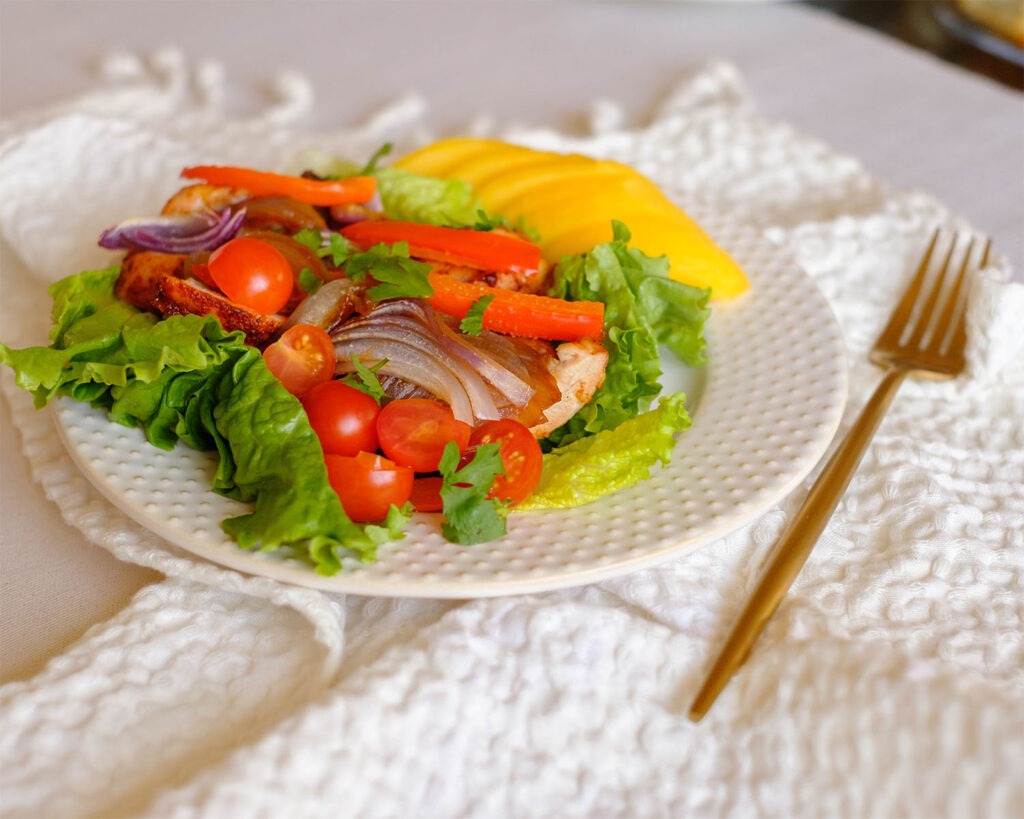
round plate with chicken fajita lettuce wrap and sliced mango

This post may contain affiliate links. Please see our privacy policy for details.

If you’re looking for a healthy lunch idea that also provides low cost meals, try these sheet pan chicken fajita lettuce wraps. They are easy to make and can be prepared quickly with just a few ingredients.

round plate with chicken fajita lettuce wrap and sliced mango - low cost meals

Why This Recipe Makes Low Cost Meals

Sheet pan chicken fajitas can be a low-cost meal that is great for meal prep for a few reasons:

  1. Simple budget-friendly ingredients: The ingredients needed for sheet pan chicken fajitas are generally affordable and easy to find. Chicken, bell peppers, onions, and basic spices are all relatively affordable, especially if purchased in bulk or on sale.
  2. Versatility: Sheet pan chicken fajitas can be customized to fit your budget and taste preferences. You can adjust the amount of chicken and vegetables you use, as well as the types of spices and herbs you like, depending on what you have on hand or what’s on sale at the grocery store.
  3. Simple cooking equipment: This recipe requires only a sheet pan and an oven, which are common kitchen items that most people already have. There is no need for any special equipment or appliances, which can help keep costs down.
  4. Leftovers: Sheet pan chicken fajitas also make great leftovers that can be repurposed into other meals such as salads, wraps, rice bowls, or quesadillas, which can help stretch your food budget even further.

The PrepYoSelf Newsletter

Ingredients for You’ll Need

Chicken fajita lettuce wraps can be a healthy lunch idea that provides a balanced mix of protein, fiber, vitamins and minerals, and healthy fats. By using fresh, whole ingredients and controlling the amount of added salt and fat, you can enjoy delicious and nutritious, low cost meals that supports overall health and well-being. Here are some ingredients that you’ll need to build this meal:

  1. Protein: Chicken is a great source of protein, which is important for building and repairing muscles, as well as for overall health.
  2. Vegetables: Chicken lettuce wraps typically include a variety of vegetables like bell peppers and red onions, which can provide fiber, vitamins, and minerals. Eating a variety of colorful vegetables can help support a healthy immune system, promote healthy digestion, and reduce the risk of chronic diseases.
  3. Low in carbohydrates: By using lettuce wraps, it can help lower carbohydrates. This can be beneficial for individuals who need to watch their carbohydrate intake due to health concerns like diabetes or insulin resistance.
  4. Low in saturated fat: By using minimal oil and healthy fats such as olive oil, in the cooking process, chicken fajita lettuce wraps can be low in saturated fat, which is important for heart health.
  5. Customizable: These lettuce wraps can be easily customized to fit your dietary needs and preferences. You can add or subtract ingredients based on your nutritional goals, and adjust the portion sizes to control calories.

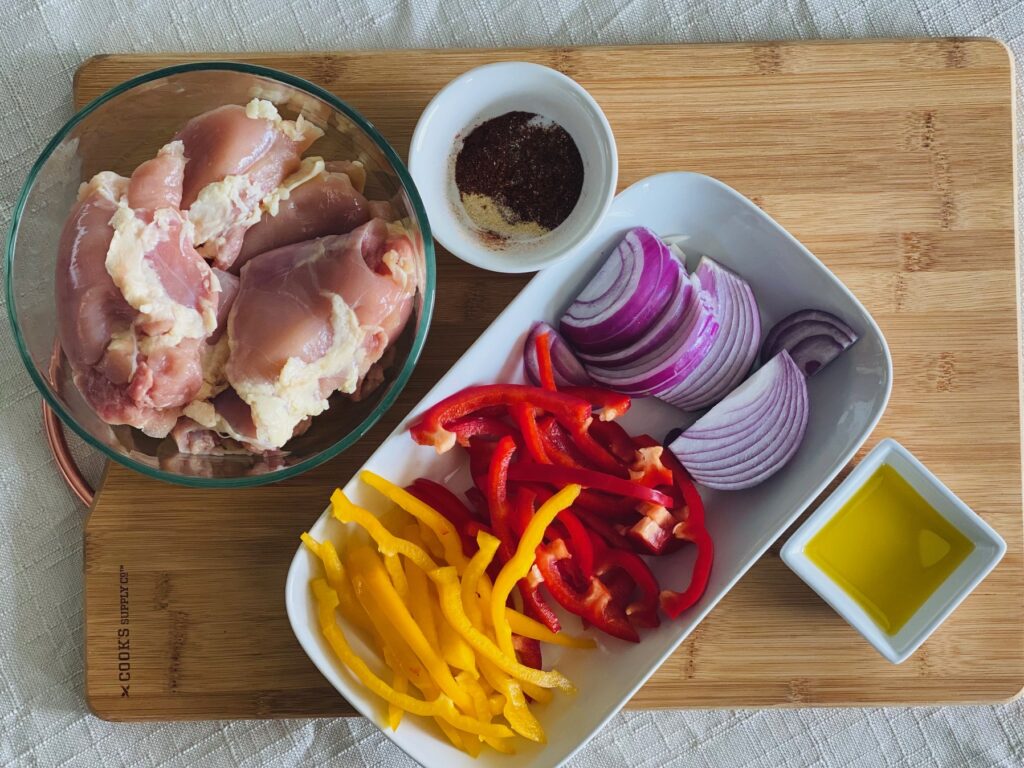
chicken fajita wrap ingredients - low cost meals

How to Cook Sheet Pan Chicken Fajitas

  1. Preheat the oven to 400°F.
  2. In a large mixing bowl, combine the chicken, seasonings, and olive oil. Toss until everything is well coated.
  3. Spread the chicken, bell peppers, and red onions, evenly on a large sheet pan and bake for 20-25 minutes, or until the chicken is fully cooked and the vegetables are tender.
  4. Remove the sheet pan from the oven and let it cool for a few minutes. Dice, the chicken into small bite-size pieces.
  5. To assemble the lettuce wraps, spoon the chicken fajita mixture on to of the lettuce wraps
  6. Top each wrap with the fajita veggies. Feel free to serve these with additional toppings such as avocado, salsa, shredded cheese, or sour cream.

Reference the recipe card below for detailed instructions.

round plate with chicken fajita lettuce wrap and sliced mango - low cost meals

Prep Tips – Low Cost Meals

Following these meal prep tips, you can save time and have a nutritious and delicious meal ready to go throughout the week.

  • Prep the vegetables ahead of time: To save time, you can cut the bell peppers and onions ahead of time and store them in an airtight container in the refrigerator. This will make it easier to assemble the sheet pan when you’re ready to cook.
  • Make the fajita seasoning in advance: You can make the fajita seasoning in advance or you can purchase a pre-made seasoning mix. This will save time when it comes to assembling the recipe, as you can simply sprinkle the seasoning over the chicken and vegetables and mix them together.
  • Use portion control containers: Consider using portion control containers to measure out the chicken and vegetable portions. This will ensure that you have a balanced meal and prevent overeating. 
  • Add toppings later: If you plan to eat the sheet pan chicken fajitas later during the week, separate the toppings, such as the avocado or salsa, to prevent them from getting soggy.

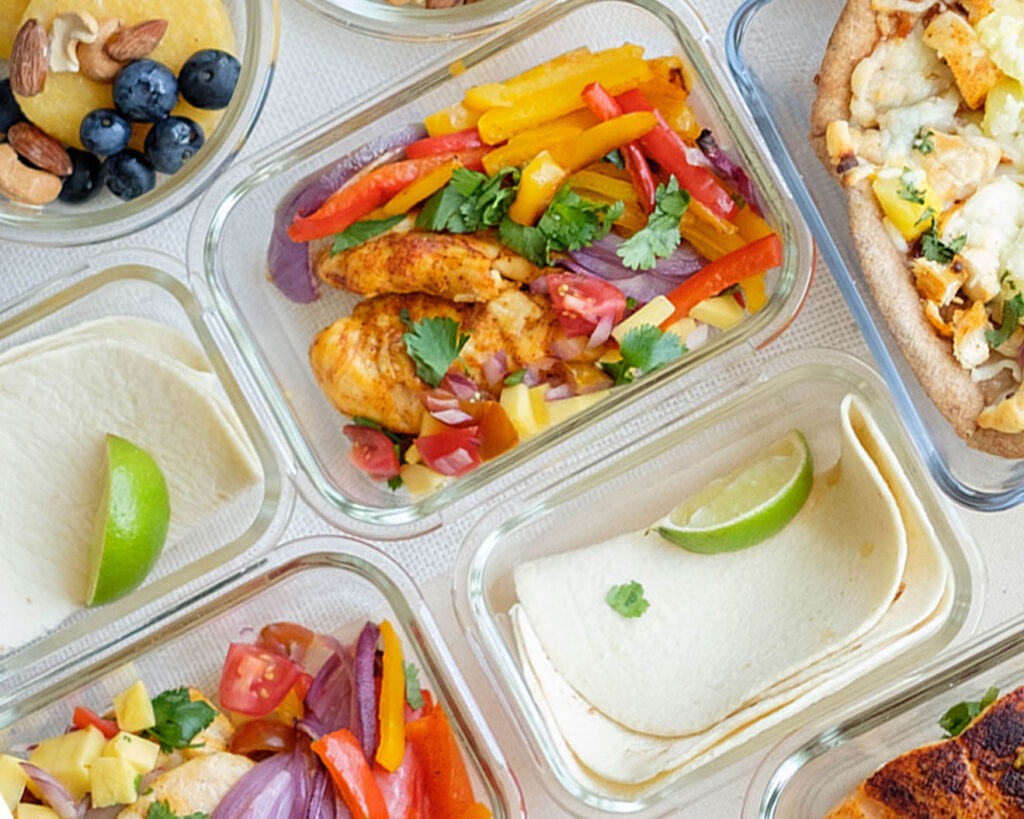
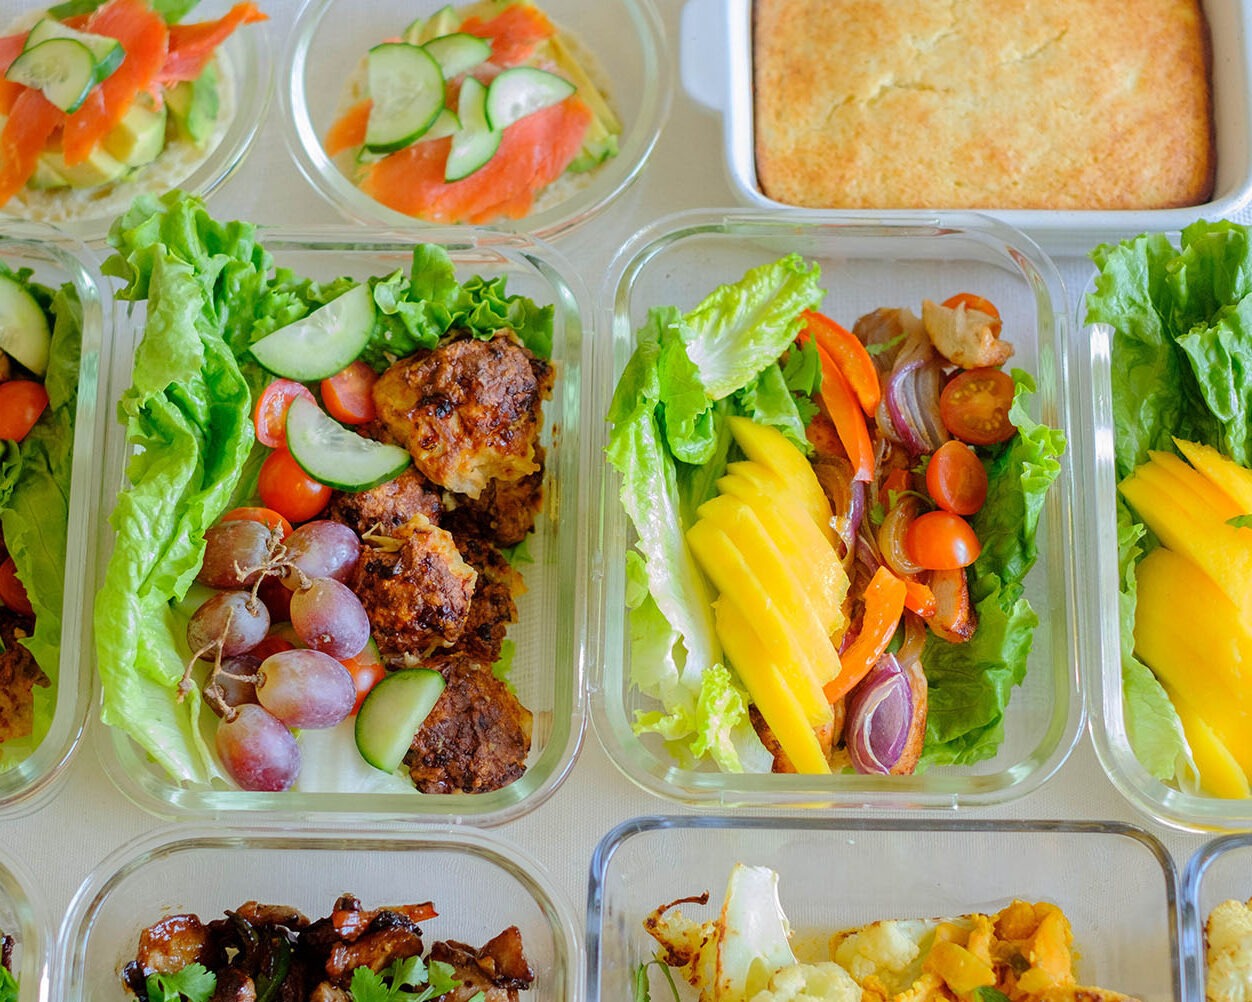
chicken fajita wraps meal prepped in containers for low cost meals

round plate with chicken fajita lettuce wrap and sliced mango

Sheet Pan Chicken Fajita Lettuce Wraps

Sheet pan chicken fajitas are a delicious and easy-to-make meal that can be prepared quickly with just a few ingredients.
No ratings yet
Prep Time 5 minutes
Cook Time 20 minutes
Course lunch, Main Course
Cuisine Mexican
Servings 2

Equipment

  • knife
  • cutting board
  • sheet pan
  • oven

Ingredients
  

Chicken & Seasoning

  • 12 oz chicken tenderloins
  • 1/4 teaspoon chili powder
  • 1/4 teaspoon cumin
  • 1/4 teaspoon garlic powder
  • 1/4 teaspoon paprika
  • 1/4 teaspoon salt
  • 1 tablespoon olive oil

Fajita Veggies & Seasoning

  • 1 red bell pepper (sliced)
  • 1/4 cup red onions (sliced)
  • 1/4 teaspoon paprika
  • 1/4 teaspoon garlic powder
  • 1/4 teaspoon salt
  • 1 tablespoon olive oil

Optional Sides and Garnish

  • 1 mango (peeled and sliced)
  • 1/4 cup cilantro (chopped)
  • 1/4 cup red onions (diced)
  • 1/2 cup cherry tomatoes (sliced)
  • 1 lime (juiced)

Instructions
 

  • Pre-heat the oven to 400F. In large mixing bowl, combine the chicken with the seasonings and olive oil. Toss to coat the chicken evenly. Place the chicken, sliced bell peppers, and sliced onions on a sheet pan. Sprinkle the veggies with the seasonings and coat them with olive oil.
  • Bake in the oven for 20 minutes until the chicken is fully cooked and reaches an internal temperature of 165F. (cook for an additional 5 minutes until it reaches the internal temperature of 165F). You will want to cook it through until the vegetables are tender and slightly charred.
  • After the chicken cooks, let it rest for a few minutes before dicing it into small bite size pieces. Layer the chicken in the middle of the lettuce wraps and top it off with the fajita veggies. Garnish with lime juice and chopped fresh cilantro and serve with freshly sliced mango.

Similar Recipes

cilantro chicken

Cilantro Lime Chicken Salad with Strawberry Salsa

sweet and sour chicken wings

Air Fryer Sweet and Sour Chicken Wings

stuffed primavera chicken

Primavera Stuffed Chicken Breasts

You Might Also Like

Frequently Asked Questions

Can you use different types of lettuce for the wraps?

Yes, you can use any type of lettuce that is sturdy enough to hold the filling, such as romaine or iceberg lettuce. Jicama tortillas are also a good vegetable option for wraps.


Can you make sheet pan chicken fajita lettuce wraps vegan?

Yes, you can make sheet pan fajita lettuce wraps vegan by substituting the chicken with tofu or a plant-based protein and omitting the cheese.


Are sheet pan chicken fajita lettuce wraps healthy?

Yes, sheet pan chicken fajita lettuce wraps are a healthy meal option. They are low in calories, high in protein, and packed with vegetables.

Posted on Leave a comment

Oven Baked Chicken Fajitas with Mango Salsa

chicken fajitas

This post may contain affiliate links. Please see our privacy policy for details.

Sheet pan chicken fajitas are the fastest dinner you can make with tender chicken, and colorful veggies, and it’s an easy clean-up!

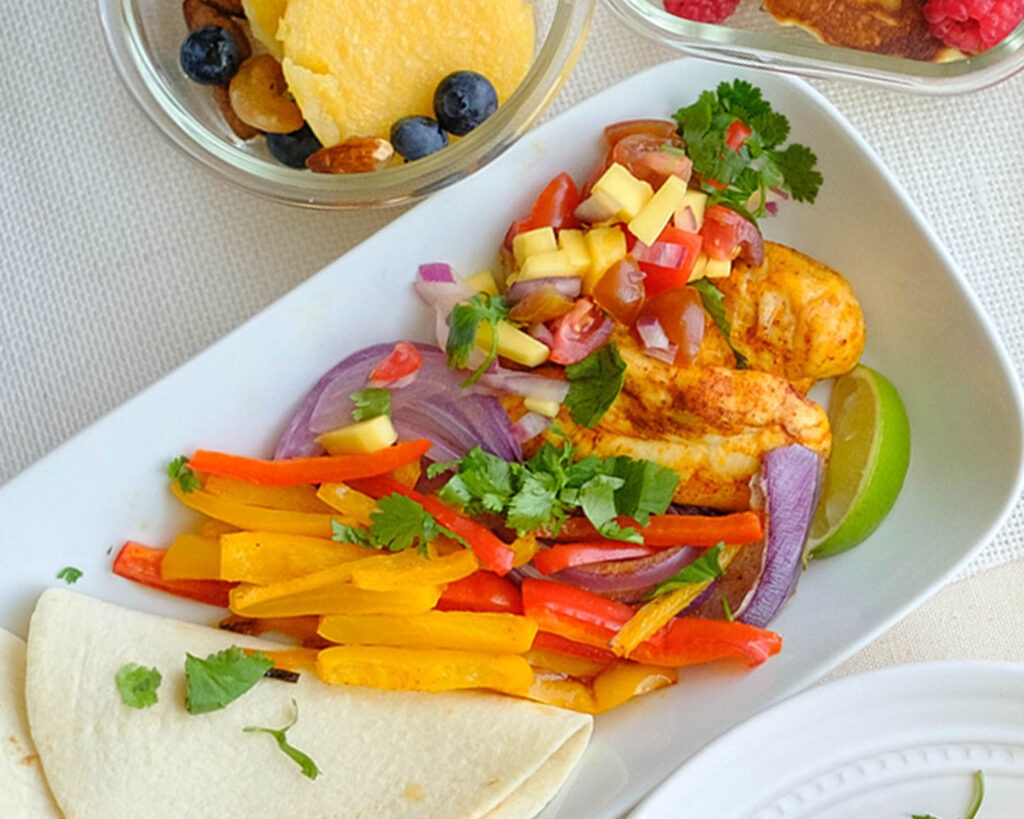
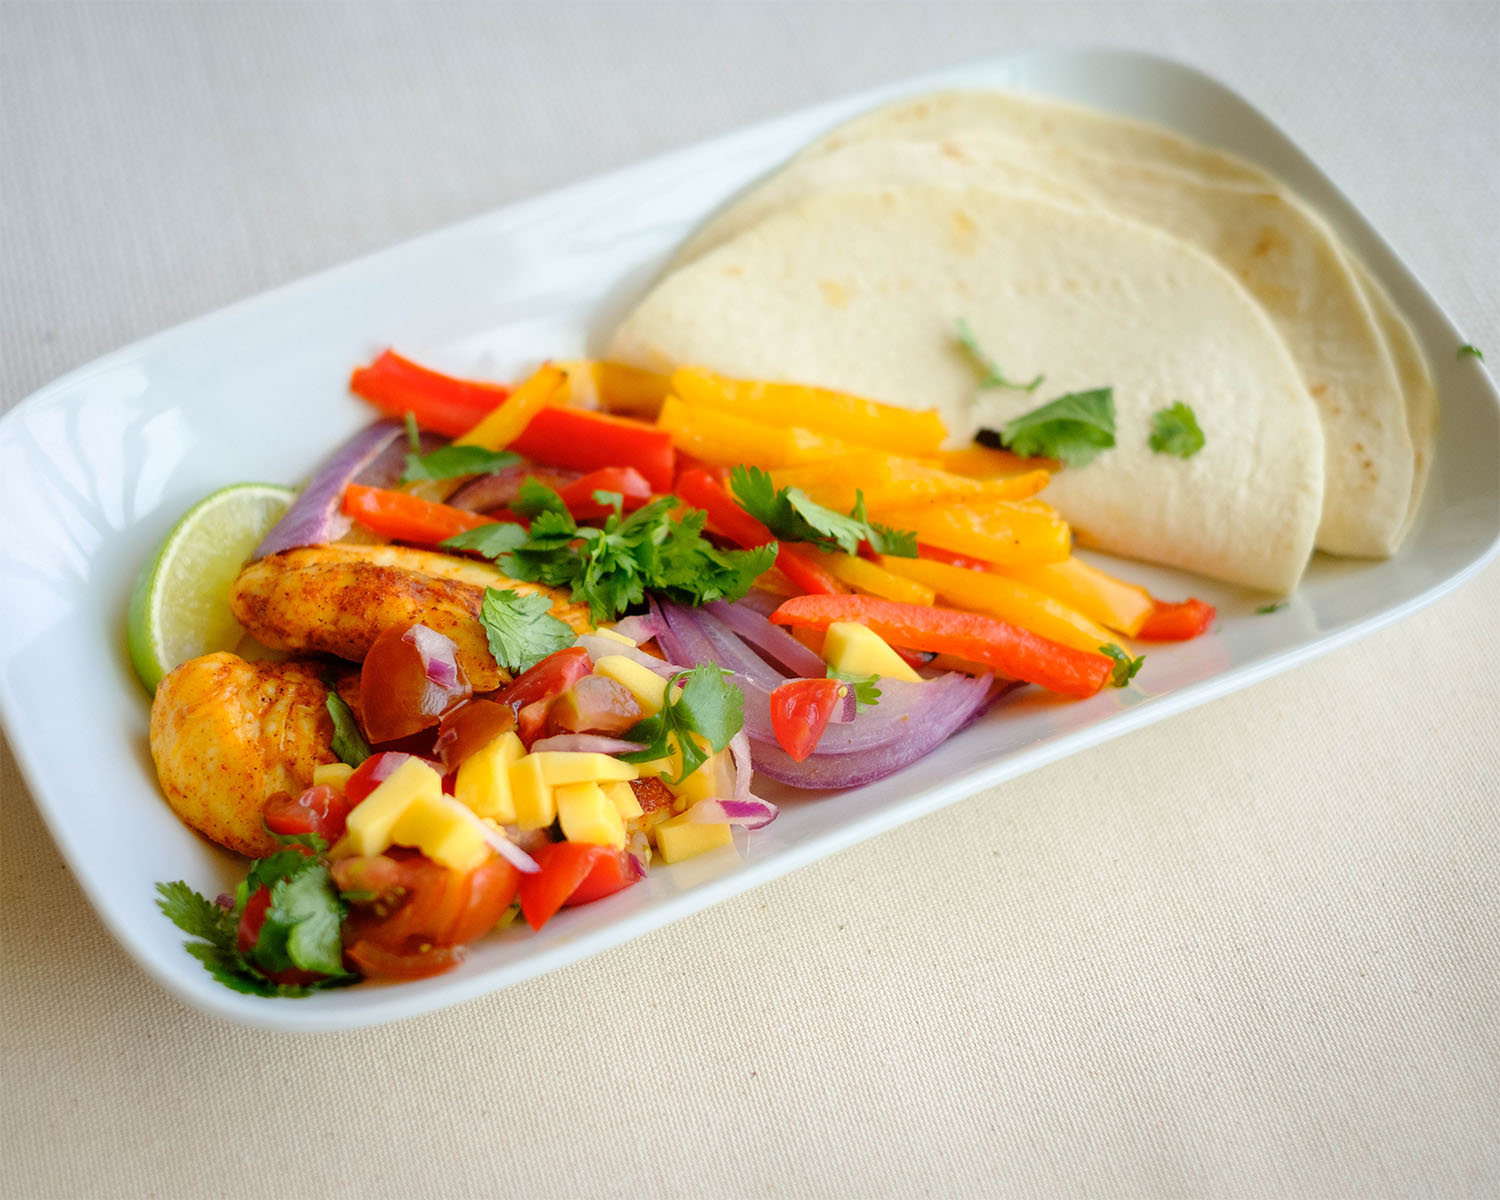
Plate with chicken fajitas, mango salsa, and colorful bell peppers and onions served with tortillas.

Why We Love This Oven Baked Chicken Fajitas

  • There is no need to spend extra dollars at a restaurant for your weeknight dinner.
  • This easy fajita dinner is budget-friendly and super tasty.
  • You can bake everything in one pan and you get juicy chicken with sweet roasted peppers and onions, and the oven does all the work.

The PrepYoSelf Newsletter

To Make Easy Baked Chicken Fajitas, You’ll Need

  • Chicken Tenderloins: You can also use chicken breasts or boneless chicken thighs
  • Bell Peppers and Onions: These ingredients add flavor and lots of color to the dish
  • Fajita Seasoning: We made our own mixture, however, you can also use pre-mixed seasonings
  • Tortillas: Serve it up with your flour tortillas or corn tortillas. There are also low-carb options and vegetable options such as jicama tortillas if you are keeping it keto-friendly
  • Mango Salsa: We love adding fruit to our salsa, especially if we have extra on hand. Other tasty toppings you can add are guacamole, pico de gallo, cheese, or sour cream

Plate with chicken fajitas, mango salsa, and colorful bell peppers and onions served with tortillas.

How to Cook Chicken Fajitas in the Oven

  1. Preheat the oven to 400F.
  2. Mix together your seasonings in a small bowl.
  3. Place the chicken tenderloins on one side of the sheet pan and the sliced peppers and onions on the other side.
  4. Coat all the ingredients with olive oil and sprinkle them with the seasonings.
  5. Bake everything in the oven until the chicken is fully cooked.
  6. Meanwhile, prepare the Mango Salsa and other toppings.

Reference the recipe card below for detailed instructions.

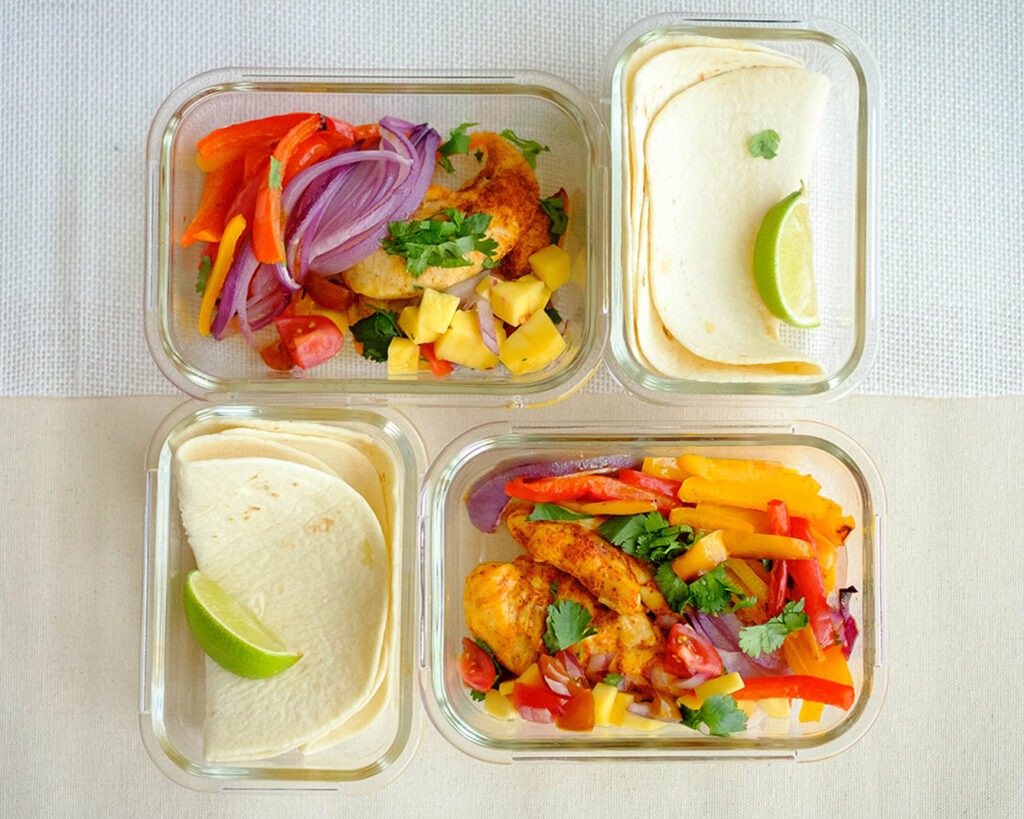
Glass meal prep container with chicken fajitas, mango salsa, and colorful bell peppers and onions served with tortillas.

Meal Prep Tips for Baked Chicken Fajitas

  • Large Batches: If you decide to increase the batch size, you can serve the fajita chicken and veggies on top of a salad or serve it in a lettuce wrap or with a side of Spanish rice and beans.
  • Other Recipe Ideas: You can also add veggie fajitas with breakfast tacos. Make pasta with the chicken and bell peppers simply by adding them to penne pasta, and adding shredded parmesan cheese.
  • Storage: Store in an airtight container in the refrigerator for up to 3 to 4 days for the best quality.

Glass meal prep containers with chicken fajitas, mango salsa, and colorful bell peppers and onions served with tortillas.

chicken fajitas

Oven Baked Chicken Fajitas with Mango Salsa

Budget-Friendly and flavorful chicken fajitas baked in the oven in less than 30 minutes!
No ratings yet
Prep Time 5 minutes
Cook Time 20 minutes
Course lunch, Main Course
Cuisine Mexican
Servings 2

Equipment

  • knife
  • cutting board
  • sheet pan
  • oven

Ingredients
  

Chicken & Seasoning

  • 12 oz chicken tenderloins
  • 1/4 teaspoon chili powder
  • 1/4 teaspoon cumin
  • 1/4 teaspoon garlic powder
  • 1/4 teaspoon paprika
  • 1/4 teaspoon salt
  • 1 tablespoon olive oil
  • 4 low carb tortillas

Fajita Veggies & Seasoning

  • 1 red bell pepper (sliced)
  • 1/4 cup red onions (sliced)
  • 1/4 teaspoon paprika
  • 1/4 teaspoon garlic powder
  • 1/4 teaspoon salt
  • 1 tablespoon olive oil

Mango Salsa

  • 1 mango (peeled and diced)
  • 1/4 cup cilantro (chopped)
  • 1/4 cup red onions (diced)
  • 1 cup cherry tomatoes (sliced)
  • 1 lime (juiced)
  • 1/4 teaspoon garlic powder
  • 1/4 teaspoon salt

Instructions
 

  • Pre-heat the oven to 400F. Place the chicken tenderloins, sliced bell peppers, and sliced onions on a sheet pan. Sprinkle them with the seasonings and coat them with olive oil
  • Bake in the oven for 20 minutes until the chicken is fully cooked and reaches an internal temperature of 165F. (cook for an additional 5 minutes until it reaches the internal temperature of 165F)
  • Meanwhile, add the diced mango, cilantro, red onion, and cherry tomatoes in a mixing bowl. Add the seasonings, juice of a lime, and mix everything together
  • After the chicken cooks, layer the chicken tenderloins in the middle of the tortillas and top it off with the fajita veggies and fresh mango salsa. Enjoy this beautiful colorful and tasty dish!

Similar Recipes

cilantro chicken

Cilantro Lime Chicken Salad with Strawberry Salsa

sweet and sour chicken wings

Air Fryer Sweet and Sour Chicken Wings

stuffed primavera chicken

Primavera Stuffed Chicken Breasts

You Might Also Like

Frequently Asked Questions

Is chicken fajita healthy?

Yes, baking it in the oven is one of the healthiest ways to make chicken fajitas because this recipe uses healthy fat, lean meat, and healthy vegetables.


What goes well with fajitas?

Serve it with a cilantro corn salad, avocado salad, or baked black beans.


How do you cut chicken breast for fajitas?

If you are using chicken breasts instead of tenderloins, you will want to let the cooked chicken rest before slicing it into thin strips. Slice it the chicken breasts horizontally into ½-inch thick slices.