Posted on Leave a comment

Air Fryer Lemongrass Pork Loin

pork loin slices with white rice and sliced tomatoes

Busy schedule? Craving bold flavors? This Air Fryer Lemongrass Pork Loin is about to become your new go-to meal prep protein. Juicy, fragrant, and full of Southeast Asian-inspired flavors, it’s the perfect dish for anyone who wants healthy meals without giving up excitement on the plate. With just a quick marinade and your air fryer, you’ll have savory, slightly sweet, and aromatic pork slices that taste restaurant-level good.

This post may contain affiliate links. Please see our privacy policy for details.

Calories: 467kcal | Carbohydrates: 12g | Protein: 34g | Fat: 29g | Saturated Fat: 5g | Polyunsaturated Fat: 4g | Monounsaturated Fat: 18g | Cholesterol: 89mg | Sodium: 1917mg | Potassium: 729mg | Fiber: 1g | Sugar: 5g | Vitamin A: 301IU | Vitamin C: 8mg | Calcium: 54mg | Iron: 2mg

pork loin slices with white rice and sliced tomatoes

Air Fryer Lemongrass Pork Loin

Quick, juicy air fryer lemongrass pork loin with bold, aromatic flavors—perfect for healthy, make-ahead meal prep.
No ratings yet
Prep Time 5 minutes
Cook Time 20 minutes
Course dinner, Main Course
Cuisine Asian
Servings 2
Calories 467 kcal

Equipment

  • knife
  • cutting board
  • mixing bowl
  • Air Fryer

Ingredients
  

  • 10 oz pork loin

Lemongrass Marinade:

  • 2 tablespoons lemongrass paste
  • 2 tablespoons ginger paste
  • 1 tablespoon garlic paste
  • 1 tablespoon soy sauce
  • 1 tablespoon fish sauce
  • 1 tablespoon oyster sauce
  • 1 tablespoon sweet chili sauce
  • 1 teaspoon sesame oil

Optional: Ginger Scallion Oil

  • 2 tablespoons ginger paste
  • 5 scallions (thinly sliced)
  • 3 tablespoons olive oil
  • 1/4 teaspoon salt

Instructions
 

Pork Loin

  • Mix the Marinade: In a small bowl, whisk together lemongrass paste, ginger paste, soy sauce, fish sauce, oyster sauce, sweet chili sauce, and sesame oil.
  • Prep the Pork: Slice the pork loin into thin ¼-inch rounds. Place in a mixing bowl and pour over the marinade. Toss until fully coated. Cover and refrigerate overnight (or at least 1 hour).
  • Cook in the Air Fryer: Preheat your air fryer to 400°F. Arrange pork slices on the tray in a single layer (avoid overcrowding). Cook for 12–16 minutes, flipping halfway. The pork should reach an internal temperature of 145°F for safe doneness.
  • Serve & Enjoy: Pair with steamed rice and crisp veggies (like cucumbers, carrots, or bok choy) for a balanced, meal-prep-ready plate. Feel free to also enjoy it with the Ginger Scallion Sauce referenced below.
  • Optional: Ginger Scallion Sauce
  • Prep the Scallions and Ginger: Thinly chop the scallions and measure out the ginger paste
  • Heat the Oil: In a small saucepan, heat the olive oil over medium heat.
  • Cook the Aromatics: Add teh ginger paste and chopped scallions to the hot oil and stir for 1-2 minutes. Make sure you don't let it brown or burn, you just want the flavors to infuse. Season with sal.
  • Cool and Store: Let the oil cool and transfer to a condiment container.

Video

Notes

Nutrition information provided is an estimate. It will vary based on cooking method and specific ingredients used. Please consult with your healthcare provider for specific dietary needs. To gain a better understanding, explore our nutrition disclaimer here

Nutrition

Calories: 467kcalCarbohydrates: 12gProtein: 34gFat: 29gSaturated Fat: 5gPolyunsaturated Fat: 4gMonounsaturated Fat: 18gCholesterol: 89mgSodium: 1917mgPotassium: 729mgFiber: 1gSugar: 5gVitamin A: 301IUVitamin C: 8mgCalcium: 54mgIron: 2mg

Reasons Pork Loin is Perfect for Healthy Meal Prep:

  • Lean & Protein-Packed: Pork loin is naturally lean, offering lots of protein without excess fat.
  • Budget-Friendly: Compared to chicken or beef, pork loin is often more affordable for weekly meal preps.
  • Quick Cooking: Thin slices cook fast in the air fryer, which is a lifesaver on busy weeknights.
  • Flavor Sponge: Pork loin absorbs marinades like a champ, so bold flavors (like lemongrass and ginger) shine through.
  • Versatile Pairing: It pairs well with rice, noodles, or even salads—so you can switch up your weekly prep easily.
  • Low Maintenance: Minimal prep, no fancy equipment, and short cook time = meal prep made simple.
  • Meal Prep Hero: Stays juicy when reheated, so your lunch tastes just as good on Thursday as it did on Monday.

The PrepYoSelf Newsletter

Flavor Breakdown: Why These Ingredients Shine

  • Lemongrass Paste: Fresh, citrusy, and slightly floral—lemongrass adds a bright punch that balances out richer flavors. It instantly gives the pork a Southeast Asian vibe that feels refreshing, not heavy.
  • Ginger Paste: Warm, zesty, and slightly spicy. Ginger cuts through the richness of pork and pairs beautifully with lemongrass. It also brings digestive benefits, making your meal prep feel light yet satisfying.
  • Soy Sauce: Savory and salty, soy sauce is the foundation of umami here. It ties all the flavors together and helps tenderize the pork as it marinates.
  • Fish Sauce: A little goes a long way! Fish sauce adds deep, funky umami that makes the dish taste restaurant-level. When combined with lemongrass and ginger, it layers the flavor without overpowering.
  • Oyster Sauce: Thick, glossy, and slightly sweet, oyster sauce helps the marinade cling to the pork slices. It also adds richness and a subtle caramel-like undertone that balances the salty notes.
  • Sweet Chili Sauce: Sweet with a gentle heat, this ingredient adds brightness and a touch of stickiness. It keeps the marinade from tasting too savory while giving your pork that crave-worthy sweet-spicy kick.
  • Sesame Oil: Nutty and aromatic, sesame oil is the finishing touch that rounds out the marinade. A teaspoon is all you need to add depth and a subtle roasted flavor.
pork loin slices with white rice and sliced tomatoes

How to Meal Prep Lemongrass Pork Loin

  1. Make the Marinade: In a small bowl, stir together the lemongrass paste, ginger paste, soy sauce, fish sauce, oyster sauce, sweet chili sauce, and sesame oil. Mix until smooth—this will be your flavor base.
  2. Slice the Pork: Take your pork loin and cut it into thin rounds about ¼-inch thick. Thinner slices help the meat cook quickly and evenly in the air fryer.
  3. Marinate the Pork: Place the sliced pork in a medium mixing bowl. Pour the marinade over the top and use tongs or clean hands to coat each piece well. Cover the bowl with plastic wrap or a lid and refrigerate for at least 1 hour. (Overnight is even better—it lets the flavors really soak in.
  4. Preheat the Air Fryer: Set your air fryer to 400°F and let it preheat for about 3–5 minutes. Preheating helps give the pork a nice sear and keeps it juicy.
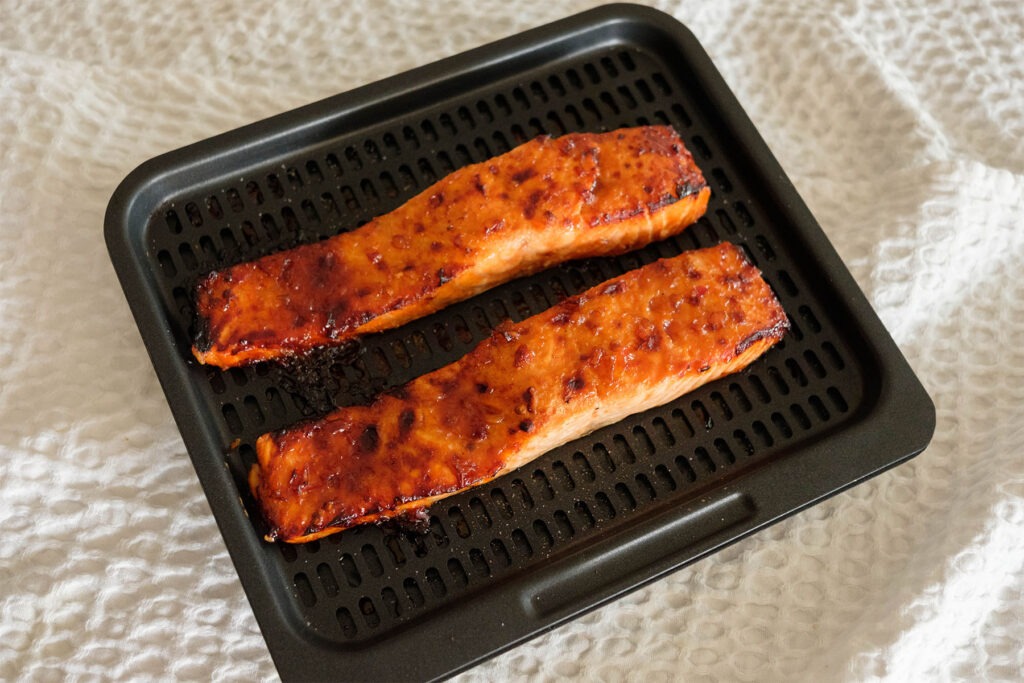
  5. Cook the Pork: Arrange the pork slices in a single layer on the air fryer tray or basket. Don’t overlap them—overcrowding can lead to uneven cooking. Cook for 12–16 minutes, flipping halfway through. Use a meat thermometer to check that the pork has reached 145°F in the thickest part for safe doneness.
  6. Optional Ginger Scallion Oil: While the pork is cooking, heat the olive oil in a small skillet over medium heat. Stir in the ginger paste, chopped scallions, and salt. Cook for 1–2 minutes until fragrant but not browned. Drizzle over the pork once it’s done for an extra layer of flavor.
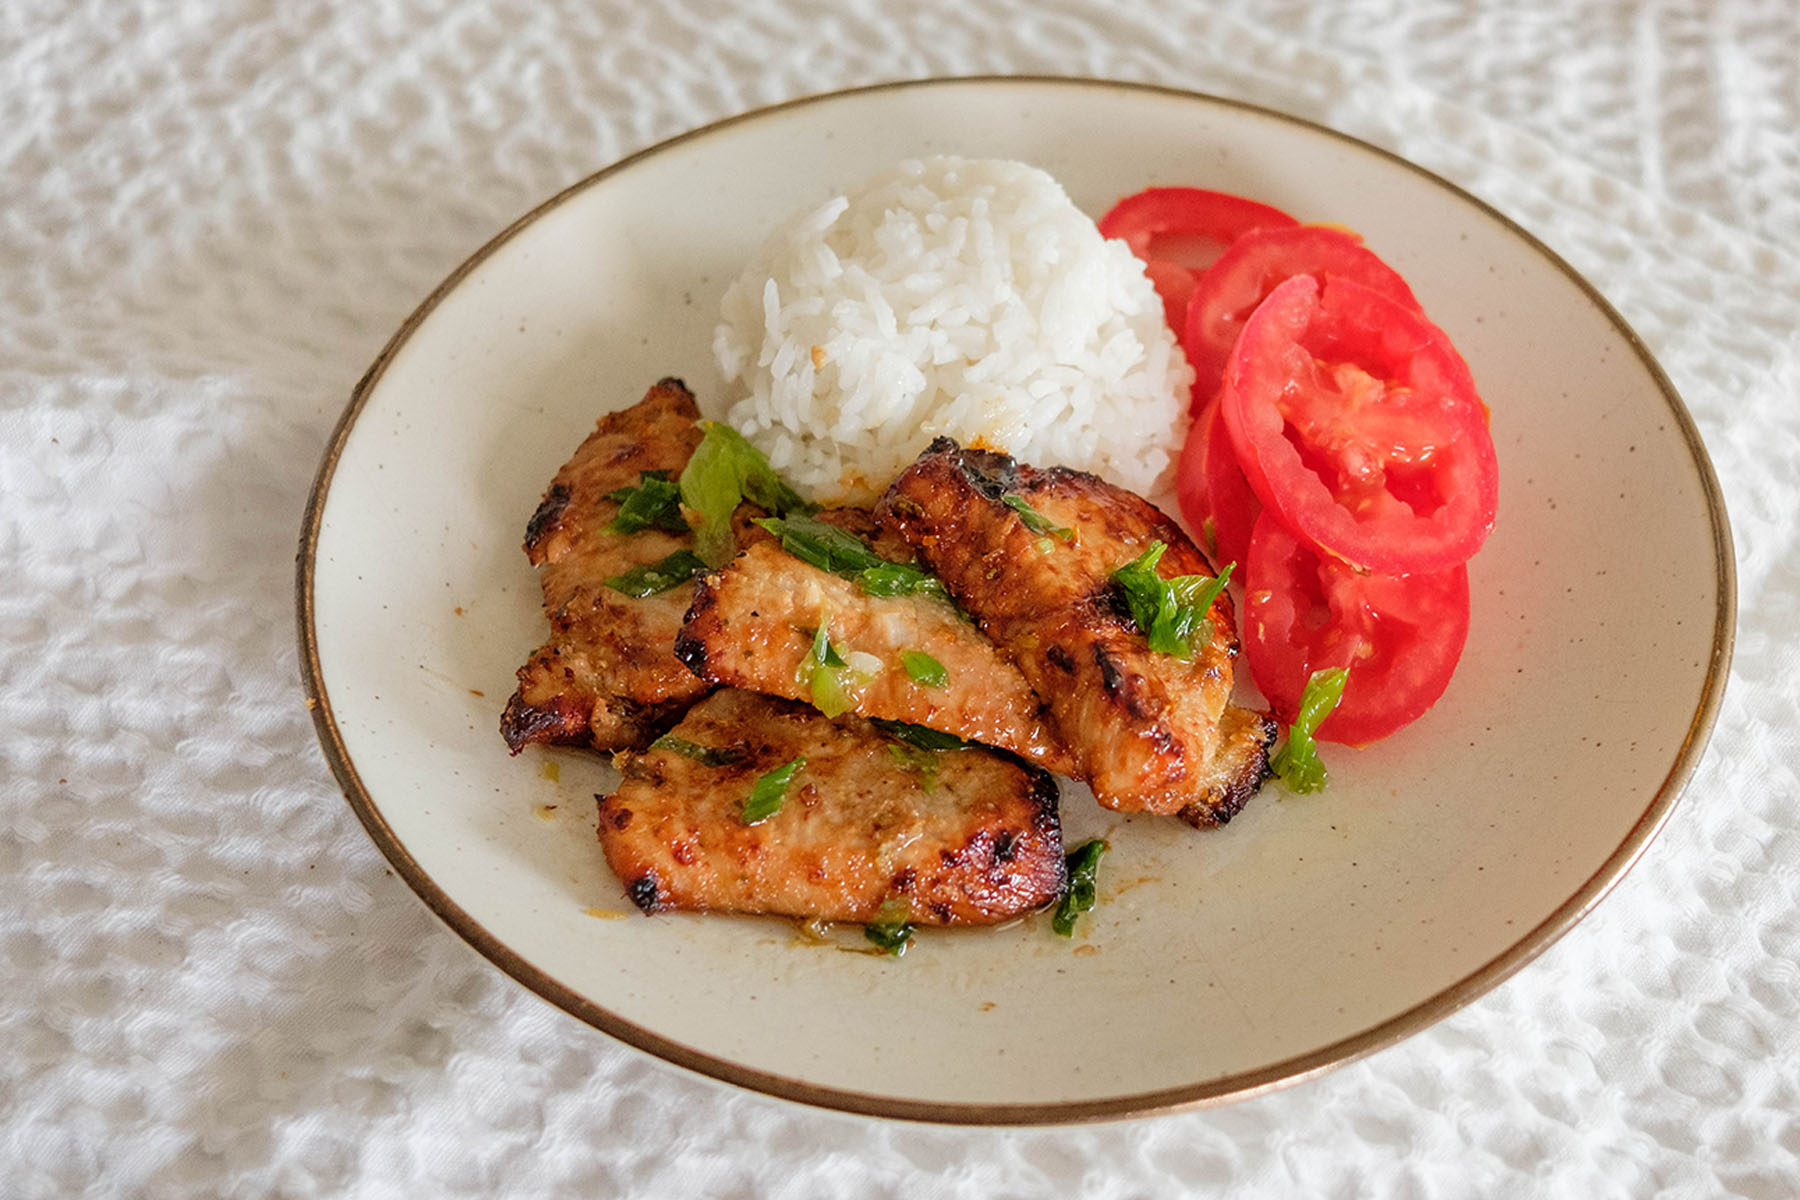
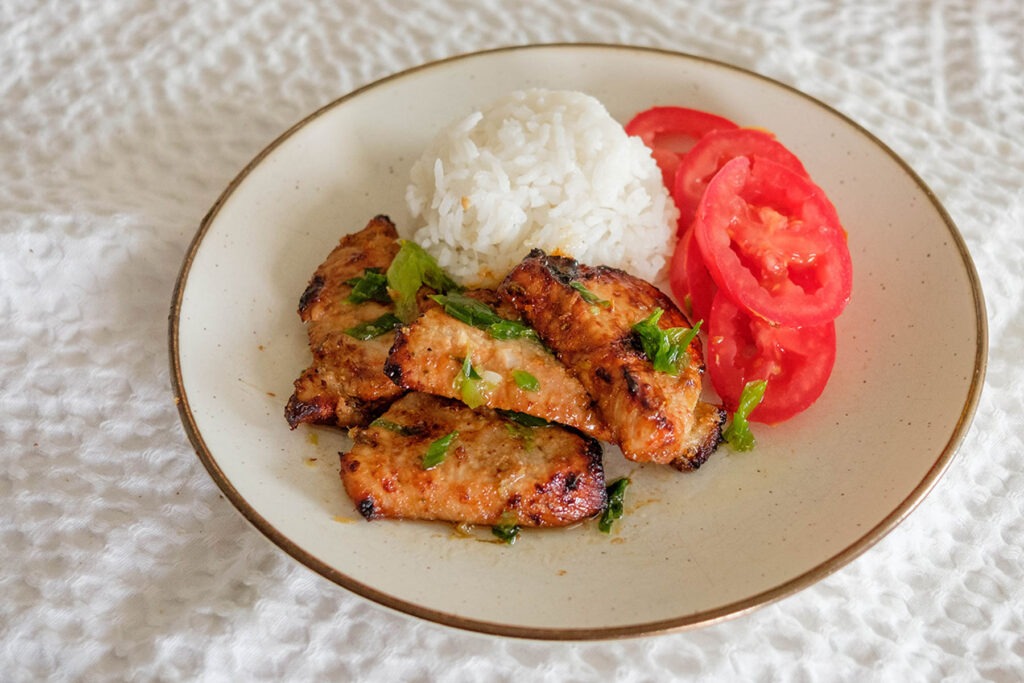
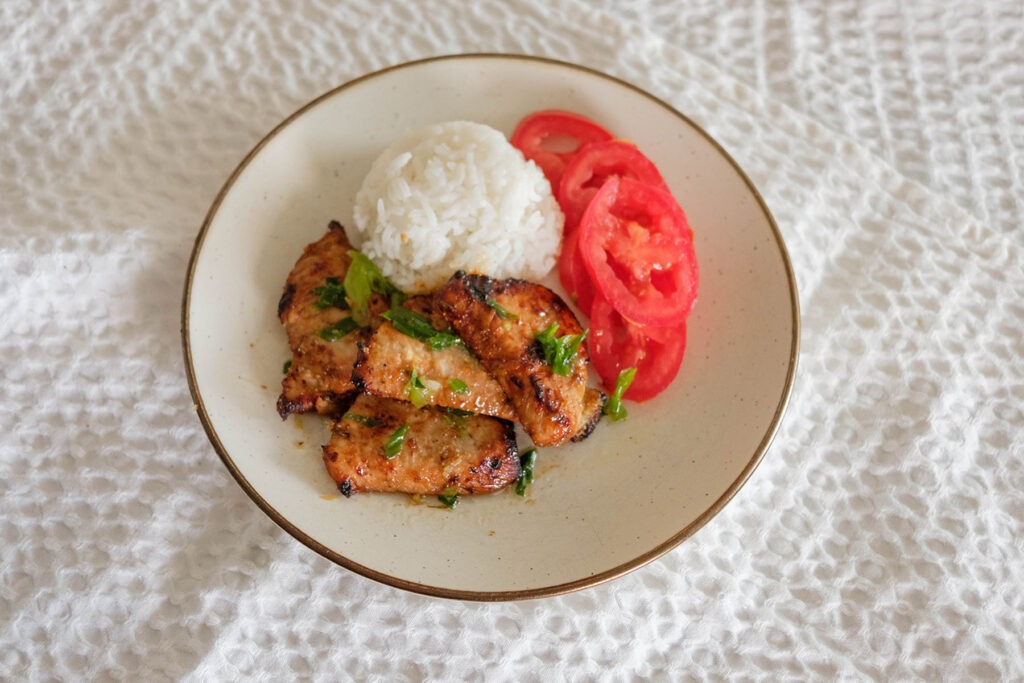
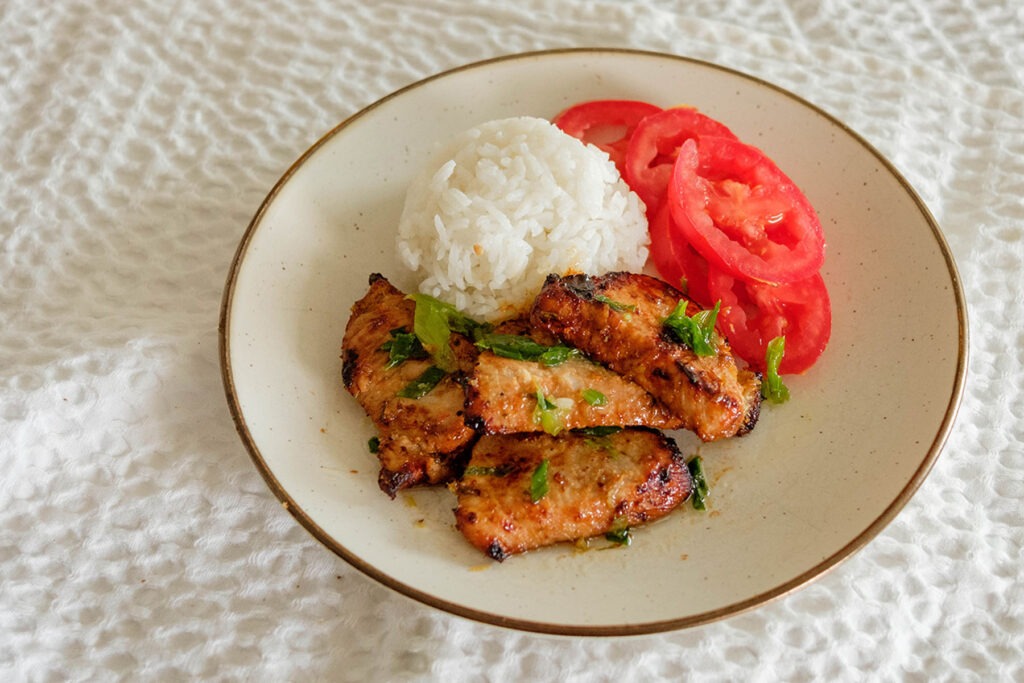
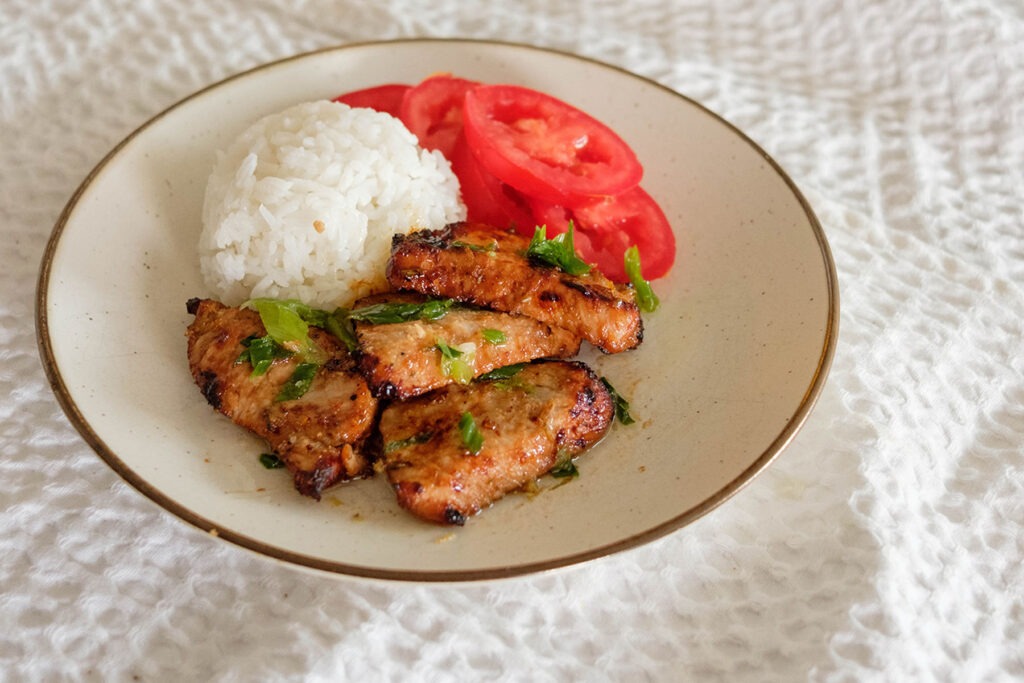
  7. Serve & Store: Enjoy immediately with steamed rice and fresh veggies. For meal prep, let the pork cool slightly, then portion it into containers with rice and veggies. Store in the fridge for up to 4 days.

Reference the recipe card below for detailed instructions.

pork loin slices with white rice and sliced tomatoes

Meal Prep Pairing Tips:

  • Steamed Jasmine Rice: classic, fluffy, and perfect for soaking up the marinade flavors.
  • Brown Rice or Quinoa: adds extra fiber and longer-lasting fullness.
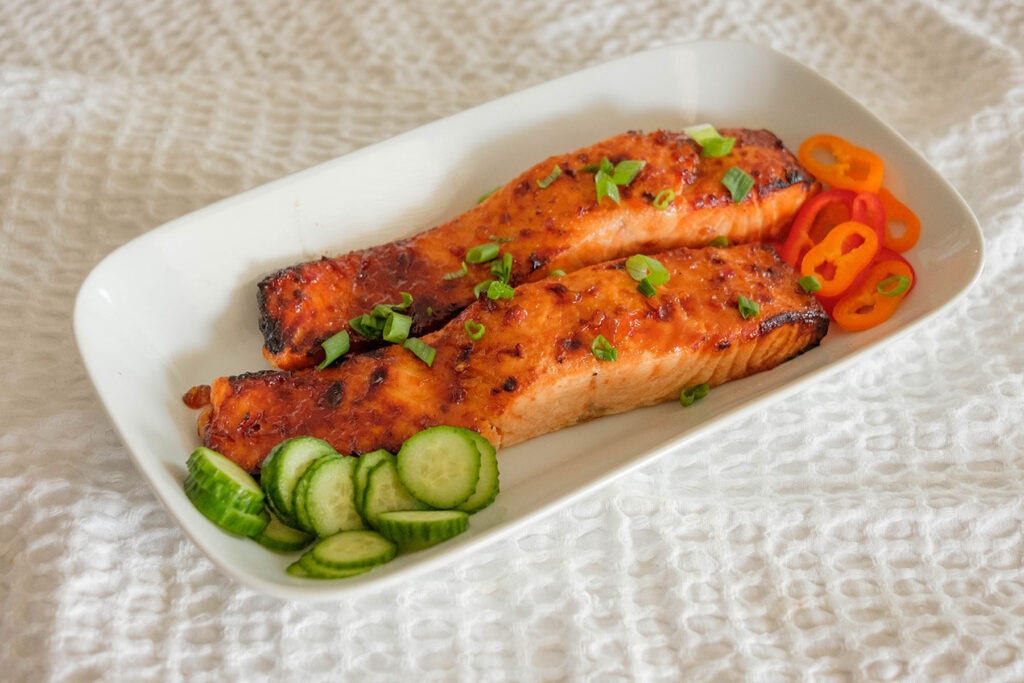
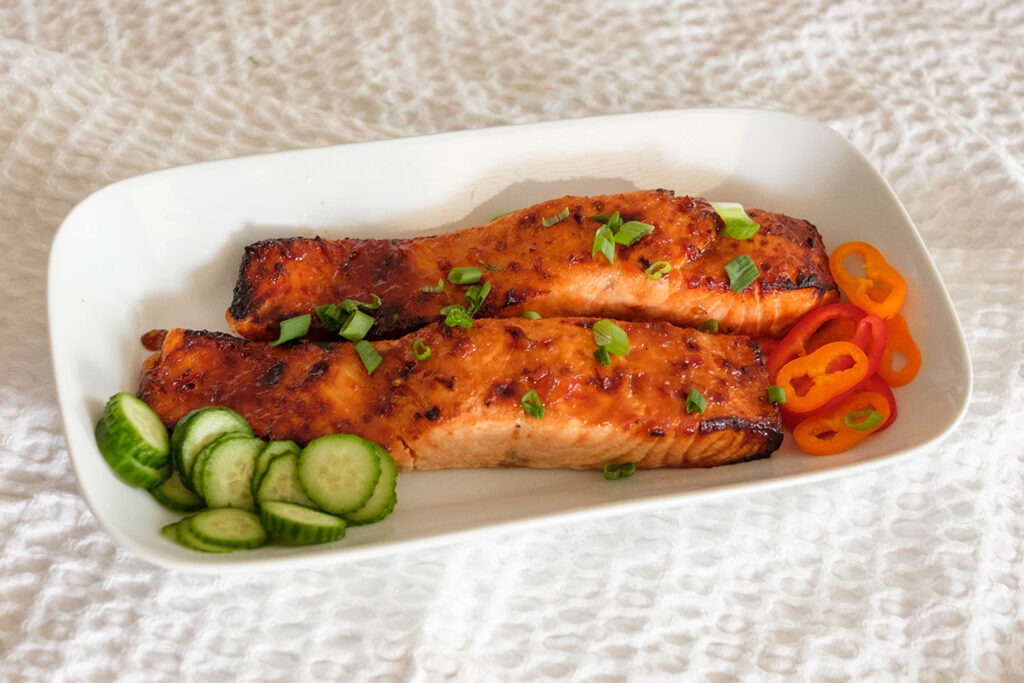
  • Fresh Veggies (cucumbers, carrots, bell peppers, snap peas): crisp, refreshing, and balance the rich pork.
  • Lightly Pickled Veggies: quick pickle in rice vinegar for tangy crunch
  • Leafy Greens (spinach, mixed greens, shredded cabbage): refreshing and meal-prep friendly
  • Roasted or Steamed Veggies (broccoli, green beans, bok choy): mild and complementary to bold lemongrass flavors
  • Optional Ginger Scallion Oil: drizzle over pork to keep it juicy and flavorful when reheated
  • Dipping Sauces (chili crisp, sriracha mayo): add variety and a customizable heat level
  • Carb Swaps (cauliflower rice, zucchini noodles): lighter low-carb options
  • Energy Boost (rice noodles, soba noodles): for a heartier, high-energy meal
  • Fresh Fruit (pineapple, mango): bright sweetness that pairs beautifully with lemongrass and ginger
pork loin slices with white rice and sliced tomatoes

Similar Recipes

chicken soup

One Pot Mexican Chicken Soup

sweet potato blt

Sweet Potato BLT Sandwich

Grilled Honey Dijon Chicken Kale Salad

You Might Also Like

Frequently Asked Questions

Can I use fresh lemongrass instead of paste?

Yes! Chop fresh lemongrass very finely or bruise the stalks and blend them into the marinade. The paste just saves time and is more meal-prep friendly.


What if I don’t have an air fryer?

No problem. You can bake the pork slices in the oven at 400°F for 18–20 minutes or pan-sear them on medium-high heat for 3–4 minutes per side.


Can I make this spicy?

For sure! Add a teaspoon of chili flakes to the marinade or drizzle chili crisp on top when serving.

Posted on Leave a comment

Air Fryer Sweet Chili Glazed Salmon

sweet chili glazed salmon

Busy workweeks don’t mean you have to sacrifice flavor or nutrition. This Air Fryer Sweet Chili Glazed Salmon is the ultimate proof! With just a handful of pantry staples, a quick whisk of sauce, and less than 15 minutes of cook time, you’ve got a meal prep superstar that looks (and tastes) like it came from a restaurant.

This post may contain affiliate links. Please see our privacy policy for details.

Calories: 225kcal | Carbohydrates: 10g | Protein: 24g | Fat: 9g | Saturated Fat: 1g | Polyunsaturated Fat: 4g | Monounsaturated Fat: 3g | Cholesterol: 62mg | Sodium: 724mg | Potassium: 593mg | Fiber: 0.3g | Sugar: 8g | Vitamin A: 75IU | Vitamin C: 1mg | Calcium: 22mg | Iron: 1mg

sweet chili glazed salmon

sweet chili glazed salmon

Air Fryer Sweet Chili Glazed Salmon

Air Fryer Sweet Chili Glazed Salmon is a quick, healthy, and flavorful dish that’s perfect for easy weeknight dinners or meal prep.
No ratings yet
Prep Time 5 minutes
Cook Time 10 minutes
Course Main Course
Cuisine Asian
Servings 2
Calories 225 kcal

Equipment

  • Air Fryer

Ingredients
  

  • 8 oz salmon (2, 4 oz fillets)
  • 2 tablespoons sweet chili sauce
  • 1 tablespoon soy sauce
  • 1 teaspoon ginger paste
  • 1 teaspoon garlic paste
  • 1 teaspoon sesame oil
  • 1 tablespoon green onions (chopped)

Instructions
 

  • Preheat your air fryer to 400°F.
  • In a small bowl, whisk together the sweet chili sauce, soy sauce, ginger paste, garlic paste, and sesame oil.
  • Pat the salmon fillets dry with a paper towel and place them on the air fryer rack.
  • Brush or spoon the glaze generously over each fillet.
  • Air fry for 8–10 minutes until the salmon flakes easily with a fork.

Video

Notes

Nutrition information provided is an estimate. It will vary based on cooking method and specific ingredients used. Please consult with your healthcare provider for specific dietary needs. To gain a better understanding, explore our nutrition disclaimer here

Nutrition

Calories: 225kcalCarbohydrates: 10gProtein: 24gFat: 9gSaturated Fat: 1gPolyunsaturated Fat: 4gMonounsaturated Fat: 3gCholesterol: 62mgSodium: 724mgPotassium: 593mgFiber: 0.3gSugar: 8gVitamin A: 75IUVitamin C: 1mgCalcium: 22mgIron: 1mg

Why This Recipe Is Perfect for Busy Individuals

  • Fast & Fuss-Free: Ready in under 15 minutes, perfect for hectic weekdays.
  • Minimal Cleanup: Just one bowl for the glaze and the air fryer basket—done!
  • Pantry-Friendly: Uses simple sauces and pastes you likely already have stocked.
  • Meal Prep Friendly: Reheats beautifully without losing flavor or texture.
  • Nutritious & Balanced:  Salmon is packed with protein and omega-3s, fueling your brain and body.
  • Customizable Sides: Pair with rice, roasted veggies, or even a fresh salad—whatever you’ve got on hand.
  • Restaurant Vibes at Home: The sweet, tangy glaze makes it feel gourmet with zero extra effort.

The PrepYoSelf Newsletter

The Ingredients You’ll Need

  • Salmon: Naturally rich in protein and omega-3 fatty acids, salmon is the star of the dish. It’s hearty, flavorful, and absorbs marinades beautifully, making it a perfect canvas for bold glazes
  • Sweet Chili Sauce: Brings a balance of sweet, tangy, and mild heat. It caramelizes slightly in the air fryer, creating a glossy glaze that locks in moisture
  • Soy Sauce: Adds savory depth and umami that balances the sweetness of the chili sauce, rounding out the flavor profile
  • Ginger Paste: Offers a zesty brightness and warmth that cuts through the richness of salmon, keeping the dish light and refreshing
  • Garlic Paste: Provides a robust, aromatic base that pairs seamlessly with both sweet and savory elements in the glaze
  • Sesame Oil: Infuses a nutty, toasty flavor that enhances the Asian-inspired profile of the dish while adding a silky finish
  • Green Onions: Add a crisp, fresh bite that complements the glaze and provides a pop of color for presentation.

sweet chili glazed salmon

Easy Recipe Steps for Air Fryer Sweet Chili Glazed Salmon

  1. Preheat your air fryer to 400°F so it’s hot and ready when you place the salmon inside
  2. In a small mixing bowl, combine the sweet chili sauce, soy sauce, ginger paste, garlic paste, and sesame oil, stirring until the glaze is smooth and well blended
  3. Use a paper towel to pat the salmon fillets dry, which helps the glaze stick better and ensures the salmon cooks evenly. Place the fillets skin-side down on the air fryer rack or basket
  4. Spoon or brush the glaze generously over the salmon fillets, making sure each piece is evenly coated
  5. Insert the rack into the air fryer and cook for 8 to 10 minutes, depending on the thickness of your fillets, until the salmon flakes easily with a fork and reaches an internal temperature of 145°F
  6. Carefully remove the salmon from the air fryer, garnish with freshly sliced green onions, and serve with your choice of sides.

sweet chili glazed salmon

Meal Prep Pairing Tips

  • Grain Base Options: Pair the salmon with brown rice, jasmine rice, quinoa, or farro for a satisfying and filling base
  • Vegetable Sides: Add steamed broccoli, roasted asparagus, air-fried Brussels sprouts, or sautéed zucchini for fiber and nutrients
  • Fresh Salads: Include a cucumber salad, cabbage slaw, or mixed greens with a light vinaigrette to balance the rich glaze
  • Legume Additions: Consider lentils, chickpeas, or edamame for an extra boost of plant-based protein and texture variety.

sweet chili glazed salmon

Similar Recipes

salmon beet salad

Citrus Ginger Salmon with Roasted Beets

salmon and watermelon salad

Grilled Salmon with Watermelon Salad

salmon salad

Salmon Stuffed Avocado Salad

You Might Also Like

Frequently Asked Questions

Can I make the glaze ahead of time?

Yes. Mix the glaze up to 3 days in advance and keep it in a sealed container in the refrigerator until ready to use


Can I substitute fresh garlic and ginger for the paste?

Absolutely. Use about 1 teaspoon each of freshly grated ginger and minced garlic in place of the pastes.


What if I don’t have sesame oil?

You can skip it or replace it with olive oil. The flavor will be slightly different, but the glaze will still be delicious

Posted on Leave a comment

Air Fryer Mango Glazed Salmon

salmon with spinach

Looking for an easy, delicious meal prep recipe that you can throw together in under 20 minutes? This Air Fryer Mango-Glazed Salmon is the perfect solution for busy weeknights or make-ahead lunches. It’s a healthy, protein-packed air fryer recipe that’s ideal for beginner cooks who want big flavor without complicated steps. The real star of this dish is the homemade mango glaze—a naturally sweetened sauce made with fresh fruit. By using mango to sweeten the glaze, this recipe cuts down on added sugars while delivering restaurant-quality flavor.

This post may contain affiliate links. Please see our privacy policy for details.

salmon with spinach

salmon with spinach

Air Fryer Mango Glazed Salmon

This Air Fryer Mango Glazed Salmon is everything you want in a meal prep recipe: fast, flavorful, and made with real, wholesome ingredients. It's a little sweet, a little tangy, and totally satisfying.
No ratings yet
Prep Time 5 minutes
Cook Time 10 minutes
Course dinner, lunch, Main Course
Cuisine Asian
Servings 2

Equipment

  • blender
  • Air Fryer

Ingredients
  

  • 8 oz salmon (2 fillets)
  • 1/4 cup mango
  • 1 tablespoon honey
  • 1 tablespoon soy sauce
  • 1 tablespoon garlic
  • tablespoon lime juice
  • 1/4 teaspoon salt

Instructions
 

  • Preheat the air fryer to 400°F.
  • Toss the mango, honey, soy sauce, garlic, lime juice, and salt into a blender and blend until silky smooth.
  • Place your salmon fillets on the air fryer rack (skin-side down if they have skin), then generously spoon or brush the mango glaze on top.
  • Pop the rack into your air fryer and cook for 8 to 10 minutes until the salmon is fully cooked and flakes easily with a fork. You're aiming for an internal temp of 145°F.
  • Serve it hot with your fave sides.

Video

Notes

Nutrition information provided is an estimate. It will vary based on cooking method and specific ingredients used. Please consult with your healthcare provider for specific dietary needs. To gain a better understanding, explore our nutrition disclaimer here

Why This Recipe Is Perfect for Busy Individuals

  • Cooks quickly in under 15 minutes, making it ideal for busy schedules.
  • Uses simple, whole ingredients that are easy to find and budget-friendly.
  • The homemade mango glaze keeps the salmon moist and flavorful even after reheating.
  • Can be made in batches to cover multiple meals throughout the week.
  • Pairs well with a variety of sides like rice, roasted vegetables, or salads for versatile meals.
  • Stores well in the fridge for up to 3–4 days without losing texture or taste.
  • Designed for beginner cooks—no advanced skills or fancy equipment needed.

The PrepYoSelf Newsletter

The Ingredients You’ll Need

  • Salmon is a great protein choice for meal prep because it’s rich in omega-3 fatty acids, high in protein, and cooks quickly in the air fryer. It absorbs marinades and glazes well, making it the perfect base for bold flavors like this mango glaze. Its natural richness is balanced beautifully by the brightness of the glaze ingredients.
  • Mango acts as the natural sweetener and base for the glaze. It’s naturally juicy and slightly tangy, which pairs perfectly with savory ingredients like soy sauce and garlic. It blends into a smooth, sticky consistency that helps coat the salmon evenly without the need for added refined sugar or thickeners.
  • Honey enhances the natural sweetness of the mango while also helping the glaze caramelize slightly during cooking. It adds a subtle depth and richness to the sauce, making it taste more balanced and satisfying without being overly sweet.
  • Soy sauce provides a salty, umami contrast to the sweetness of the mango and honey. It grounds the flavor profile and adds complexity to the glaze, making each bite more savory and satisfying. A little goes a long way to balance the dish.
  • Garlic brings bold, aromatic flavor and keeps the glaze from tasting too sweet or one-dimensional. When cooked, the garlic mellows and blends beautifully with the fruit and soy sauce for a well-rounded glaze that complements the salmon.
  • Lime juice adds acidity and brightness to the glaze, which cuts through the richness of the salmon and enhances the tropical notes of the mango. It keeps the dish fresh-tasting and helps all the flavors pop.
  • Just a touch of salt enhances all the other ingredients and helps bring the flavors into balance. It’s especially important when working with naturally sweet ingredients like mango to ensure the dish stays savory and meal-worthy.

salmon

Easy Recipe Steps for Air Fryer Mango Glazed Salmon

  1. Preheat your air fryer to 400°F. This helps the salmon cook evenly and gives it a slightly crisp edge. Most air fryers take about 3–5 minutes to preheat, so turn it on before you start preparing your glaze.
  2. Make the mango glaze. In a blender or food processor, combine the mango, honey, soy sauce, minced garlic, lime juice, and salt. Blend until the mixture is completely smooth and no chunks remain. This will be your sweet and savory glaze.
  3. Prepare the salmon. Place the salmon fillets on the air fryer rack or tray, skin-side down if they have skin. Use a spoon or brush to coat the top of each fillet generously with the mango glaze. Make sure the glaze is spread evenly for the best flavor.
  4. Cook the salmon. Carefully place the rack or tray into the preheated air fryer. Cook the salmon for 8 to 10 minutes, depending on thickness. It’s done when the salmon flakes easily with a fork and reaches an internal temperature of 145°F. Use a meat thermometer to check if you’re unsure.
  5. Serve or store. Once cooked, remove the salmon from the air fryer and let it rest for a minute or two. Serve it right away with your favorite sides, or let it cool completely and store it in an airtight container in the refrigerator for up to 3–4 days for easy meal prep.

salmon with spinach

Meal Prep Pairing Tips

  • For a balanced meal, pair the mango-glazed salmon with a serving of complex carbs like jasmine rice, brown rice, or quinoa—these grains soak up the extra glaze and reheat well throughout the week. 
  • If you’re looking for a low-carb option, cauliflower rice or steamed greens make a great base. 
  • Add a colorful veggie side such as roasted broccoli, bell peppers, or sauteed spinach to round out the plate with fiber and crunch. 
  • You can also prep a simple slaw with cabbage, carrots, and lime juice for a fresh, zesty contrast to the rich salmon.

salmon

Similar Recipes

salmon beet salad

Citrus Ginger Salmon with Roasted Beets

salmon and watermelon salad

Grilled Salmon with Watermelon Salad

salmon salad

Salmon Stuffed Avocado Salad

You Might Also Like

Frequently Asked Questions

What if I don’t have a blender—can I make the glaze another way?

You can mash the mango with a fork and finely mince the garlic, then whisk all ingredients together until well combined. The texture will be chunkier but still tasty.


Can I use bottled mango puree instead of fresh mango?

Fresh or thawed frozen mango works best for natural sweetness and texture, but you can substitute mango puree if needed. Just check the label to avoid added sugars.


Can I use frozen salmon fillets for this recipe?

Yes! Just make sure to thaw the salmon completely before glazing and cooking. Cooking from frozen can result in uneven cooking.

Posted on Leave a comment

Filipino Flavor, Air Fryer Style: Bistek Tagalog-Inspired Steak Bites for Meal Prep!

Steak Bites and Sliced Red onions with jicama slaw

Hey friends! If you’re looking to shake up your weekly meal prep with BIG flavor and minimal effort, I’ve got just the thing: Air Fryer Steak Bites inspired by the bold, tangy, and savory flavors of Filipino bistek tagalog! This twist on a classic dish gives you tender, juicy steak cubes with that signature calamansi-soy-garlic kick and caramelized red onions—all made quick and easy in the air fryer!

This post may contain affiliate links. Please see our privacy policy for details.

Calories: 353kcal | Carbohydrates: 11g | Protein: 43g | Fat: 15g | Saturated Fat: 4g | Polyunsaturated Fat: 1g | Monounsaturated Fat: 8g | Cholesterol: 104mg | Sodium: 2261mg | Potassium: 786mg | Fiber: 1g | Sugar: 2g | Vitamin A: 6IU | Vitamin C: 13mg | Calcium: 92mg | Iron: 4mg

Steak Bites and Sliced Red onions with jicama slaw

Steak Bites and Sliced Red onions with jicama slaw

Air Fryer Steak Bites (Filipino Bistek Inspired)

These Air Fryer Bistek Steak Bites bring bold Filipino flavor to your weekly meal prep with simple ingredients!
No ratings yet
Prep Time 1 hour
Cook Time 10 minutes
Course dinner
Cuisine Asian
Servings 2
Calories 353 kcal

Equipment

  • knife
  • cutting board
  • mixing bowl
  • Air Fryer

Ingredients
  

  • 12 oz sirloin steak (cut into 1 inch cubes)
  • 2 tablespoons garlic paste
  • 1/3 cup soy sauce
  • 3 pieces calamansi (or lemon juice)
  • 1/2 teaspoon pepper
  • 1/2 red onion (siced into rings)
  • 1 tablespoon olive oil (or cooking spray)

Instructions
 

  • Make the marinade: In a small bowl, combine garlic paste, soy sauce, calamansi (or lemon) juice, and pepper.
  • Marinate the steak: Toss steak cubes in a bowl with the marinade. Cover and refrigerate for 1 hour to let the flavors soak in.
  • Prep to cook: After marinating, remove the steak cubes and pat them dry with paper towels to help them get a nice sear. Preheat your air fryer to 400°F.
  • Load the air fryer: Arrange steak cubes and sliced onions on your air fryer tray. Spray or drizzle with olive oil.
  • Serve it up: Enjoy as-is, or pair with garlic rice, quinoa, sautéed green beans, or even a side salad for a balanced meal!

Video

Notes

Nutrition information provided is an estimate. It will vary based on cooking method and specific ingredients used. Please consult with your healthcare provider for specific dietary needs. To gain a better understanding, explore our nutrition disclaimer here

Nutrition

Calories: 353kcalCarbohydrates: 11gProtein: 43gFat: 15gSaturated Fat: 4gPolyunsaturated Fat: 1gMonounsaturated Fat: 8gCholesterol: 104mgSodium: 2261mgPotassium: 786mgFiber: 1gSugar: 2gVitamin A: 6IUVitamin C: 13mgCalcium: 92mgIron: 4mg

Why These Air Fryer Steak Bites Are Meal Prep GOLD:

  • Quick cook time – Just 10 minutes in the air fryer and you’re done!
  • Marinate in advance – Do it the night before, and all that flavor just gets better.
  • Balanced macros – Lean protein, healthy fats, and low-carb friendly depending on your sides.
  • Freezer-friendly – Store leftovers in freezer-safe containers and reheat when you need them.
  • Budget-friendly – Cheaper than takeout and uses simple pantry staples.
  • Easy portion control – Steak bites make it easy to pre-portion meals for the week.
  • Filipino flavor fix – A delicious way to stay connected to heritage or explore new cuisines!

The PrepYoSelf Newsletter

Bistek Tagalog is traditionally made with thin slices of beef simmered in soy sauce, calamansi (our tiny but mighty Filipino citrus fruit), garlic, and heaps of onions. It’s a nostalgic comfort food in many Filipino homes (mine included!). But in this version, we’re turning those same flavors into air-fried steak bites that are perfect for meal prep—still satisfying, but faster and a little lighter. 

    Steak Bites and Sliced Red onions

    How to Meal Prep Filipino “Bistek” Steak Bites

    1. Make the marinade: In a small bowl, stir together the garlic paste, soy sauce, calamansi juice (or lemon juice), and ground pepper until well combined.
    2. Marinate the steak: Place the steak cubes in a medium mixing bowl. Pour the marinade over the steak and mix to coat each piece evenly. Cover the bowl with a lid or plastic wrap and place it in the refrigerator to marinate for at least 1 hour. This helps the steak absorb all the delicious flavors.
    3. Prepare for cooking: After marinating, remove the steak from the bowl and lay the pieces on a few paper towels. Gently pat them dry—this helps them brown better in the air fryer instead of steaming.
    4. Preheat your air fryer: Set your air fryer to 400°F (about 200°C) and let it preheat for a few minutes. Meanwhile, slice your red onion into thin rings.
    5. Arrange in the air fryer: Place the steak bites and onion rings in a single layer on the air fryer basket or tray. Spray lightly with cooking spray or drizzle with olive oil to help them crisp up and prevent sticking.
    6. Air fry: Cook the steak and onions for 8–10 minutes total. At the halfway point (around 4–5 minutes), open the air fryer and gently shake the basket or use tongs to flip the pieces for even cooking. The steak should be browned on the outside and cooked to your preferred doneness.
    7. Serve and enjoy: Let the steak bites rest for a minute or two after cooking, then serve them hot with your favorite sides like rice, salad, or veggies.

    Steak Bites and Sliced Red onions with jicama slaw

    Meal Prep Pairing Tips

    • Pair with garlic cauliflower rice and steamed broccoli for a low-carb option.
    • Serve over brown rice and top with a fried egg for a hearty lunch.
    • Add to a salad with tomatoes, cucumber, and a calamansi vinaigrette.
    • Serve with a refreshing slaw with jicama, bell peppers, and tomatoes.
    • Tuck into a whole wheat wrap with fresh greens and a drizzle of Greek yogurt.
    • Mix with stir-fried bell peppers for a quick rice bowl.
    • Eat cold with a squeeze of lime and avocado for a quick protein-packed snack.
    • Portion into bento boxes with pickled veggies for a fun meal prep twist!

    Steak Bites and Sliced Red onions with jicama slaw

    Similar Recipes

    sweet potato blt

    Sweet Potato BLT Sandwich

    balsamic chicken salad

    Oven Baked Balsamic Chicken Salad

    chicken salad

    Oven Baked Honey Mustard Glazed Chicken Salad

    You Might Also Like

    Frequently Asked Questions

    Can I use a different cut of steak for this recipe?

    Yes! Ribeye or NY strip works too—just trim the fat and cube it up.


    Can I use bottled calamansi juice?

    Absolutely! Look for it in Asian or Filipino markets. Lemon juice also works as a backup.


    How long can I store it?

     In the fridge: up to 4 days. In the freezer: up to 2 months. Reheat in the air fryer or skillet!

    Posted on Leave a comment

    Baked Cilantro Chicken

    roasted chicken in a cilantro pesto sauce with fajita vegetables

    When it comes to meal prep, we’re all about keeping it simple, juicy, and downright delicious—and this Baked Cilantro Chicken Thighs recipe checks every box. Think: herbaceous cilantro, zesty lime, sweet honey, and a golden roasted finish that will make your taste buds sing (yes, sing). This recipe is perfect for busy folks who want big flavor without spending hours in the kitchen.

    Let’s get right into it—and don’t worry, this is meal prep made easy with a whole lot of flair.

    This post may contain affiliate links. Please see our privacy policy for details.

    Calories: 456kcal | Carbohydrates: 12g | Protein: 24g | Fat: 35g | Saturated Fat: 8g | Polyunsaturated Fat: 6g | Monounsaturated Fat: 18g | Trans Fat: 0.1g | Cholesterol: 142mg | Sodium: 232mg | Potassium: 410mg | Fiber: 1g | Sugar: 9g | Vitamin A: 1130IU | Vitamin C: 36mg | Calcium: 24mg | Iron: 1mg

    roasted chicken in a cilantro pesto sauce with fajita vegetables

    roasted chicken in a cilantro pesto sauce with fajita vegetables

    Baked Cilantro Chicken

    This baked cilantro chicken thigh recipe is a zesty, juicy, and easy-to-make meal prep favorite, paired with roasted veggies for a balanced, flavorful dish.
    No ratings yet
    Prep Time 5 minutes
    Cook Time 45 minutes
    Course dinner
    Cuisine Latin
    Servings 5
    Calories 456 kcal

    Equipment

    • knife
    • cutting board
    • baking dish
    • blender

    Ingredients
      

    Chicken and Vegetables

    • 5 chicken thighs (bone in, skin on)
    • 1 red bell pepper (sliced)
    • 1/2 red onion (sliced)

    Cilantro Marinade

    • 1 cup cilantro (washed and chopped)
    • 3 garlic cloves (peeled)
    • 1/4 cup olive oil
    • 1/4 cup lime juice
    • 2 tablespoons honey
    • 1/4 teaspoon salt
    • 1/4 teaspoon garlic powder
    • 1/4 teaspoon paprika
    • 1/4 teaspoon pepper

    Instructions
     

    • Preheat your oven to 400°F.
    • Blend up the marinade: cilantro, garlic, olive oil, lime juice, honey, and spices go into the blender. Blend until smooth and vibrant.
    • Marinate: Place your chicken thighs in a baking dish and pour ¾ of the marinade over them. Brush it all over to coat thoroughly. Save the remaining ¼ as a dipping sauce (trust me, you’ll want it)
    • Top with Veggies: Add the red bell pepper and red onion on top of and around the chicken. Drizzle with that extra tablespoon of olive oil.
    • Bake for 35–45 minutes until the chicken hits 165°F internally and the skin (if using skin-on) is golden and crispy.
    • Cool & Portion: Let it cool slightly, then portion into meal prep containers with your favorite sides—think brown rice, roasted potatoes, greens, or warm tortillas!

    Video

    Notes

    Nutrition information provided is an estimate. It will vary based on cooking method and specific ingredients used. Please consult with your healthcare provider for specific dietary needs. To gain a better understanding, explore our nutrition disclaimer here

    Nutrition

    Calories: 456kcalCarbohydrates: 12gProtein: 24gFat: 35gSaturated Fat: 8gPolyunsaturated Fat: 6gMonounsaturated Fat: 18gTrans Fat: 0.1gCholesterol: 142mgSodium: 232mgPotassium: 410mgFiber: 1gSugar: 9gVitamin A: 1130IUVitamin C: 36mgCalcium: 24mgIron: 1mg

    Why You’ll Love This Cilantro Chicken for Meal Prep:

    • Bold Flavor, Zero Boredom: No dry or bland chicken here! That cilantro-lime-honey combo is magic.
    • Easy to Make: One marinade. One pan. Minimal cleanup. Maximum payoff.
    • Stays Juicy All Week: Chicken thighs are forgiving—they stay tender even days later.
    • Flexible Pairings: Serve in tacos, wraps, salads, or grain bowls. It’s your call!
    • Meal Prep Friendly: Makes 4–5 portions, perfect for weekday lunches or dinner.
    • Veggie Built-In: Bell peppers and onions roast beautifully right with the chicken.
    • Great for Freezing: Make an extra batch and freeze for a flavor-packed future meal.

    The PrepYoSelf Newsletter

    roasted chicken in a cilantro pesto sauce with fajita vegetables

    Recipe Ingredients for Cilantro Chicken:

    • Olive Oil: Olive oil acts as the carrier of flavor, helping the marinade stick to the chicken and penetrate it deeply. It also gives everything a luscious, roasted finish and keeps the chicken and veggies from drying out in the oven.
    • Lime Juice: Lime brings the zing! It tenderizes the chicken slightly, balances out the honey’s sweetness, and enhances the natural flavors of the herbs and spices. That fresh citrus flavor pops after baking, too.
    • Honey: This touch of sweetness helps balance the acidity from the lime and rounds out the herbal sharpness from the cilantro and garlic. It also helps caramelize the chicken and veggies as they roast, adding color and a subtle glaze.
    • Salt: It’s simple, but essential. Salt enhances every other flavor in the dish and brings out the natural umami in the chicken.
    • Garlic Powder + Paprika + Black Pepper: These spices add background warmth, smokiness, and complexity. Garlic powder boosts the garlicky depth, paprika brings a soft smokiness and beautiful color, and black pepper adds a subtle kick.
    • Red Bell Pepper: These colorful strips roast into sweet, tender bites that contrast beautifully with the savory chicken. They’re not only delicious, but also boost your meal prep with extra fiber, antioxidants, and vitamin C.
    • Red Onion: Red onion becomes sweet and caramelized when roasted—adding another layer of flavor and a bit of texture to each bite. When it mixes with the chicken juices and marinade, it soaks up that flavor and brings a touch of magic.

    roasted chicken in a cilantro pesto sauce with fajita vegetables

    Easy Steps for Baked Cilantro Chicken

    1. Preheat your oven to 400°F (200°C). This ensures it’s hot and ready by the time you’ve prepped everything.
    2. Make the marinade: In a blender or food processor, combine the chopped cilantro, garlic cloves, ¼ cup olive oil, lime juice, honey, salt, garlic powder, paprika, and black pepper. Blend until everything is well combined and forms a smooth green marinade. Set aside.
    3. Prepare the chicken: Place the chicken thighs in a large baking dish or casserole dish, skin side up if using skin-on. Pour about ¾ of the marinade over the chicken. Use a basting brush or spoon to spread the marinade all over the surface of the chicken so it’s fully coated. Reserve the remaining ¼ of the marinade in a small bowl—this will be your dipping sauce after baking.
    4. Add vegetables: Slice the red bell pepper and red onion into thin strips. Scatter them over and around the chicken in the baking dish. Drizzle the vegetables with the remaining 1 tablespoon of olive oil to help them roast and caramelize.
    5. Bake the dish: Place the baking dish on the middle rack of your preheated oven. Bake for 35 to 45 minutes, or until the chicken is cooked through and the internal temperature reaches 165°F (use a meat thermometer to check). The chicken should be golden brown, and the vegetables should be tender.
    6. Rest and serve: Once baked, let the chicken rest for about 5 minutes before serving. This helps keep the juices inside. You can drizzle the extra reserved marinade over the chicken when serving or use it as a dipping sauce.
    7. Portion for meal prep: Once the dish has cooled slightly, divide the chicken and vegetables into your meal prep containers. Pair with your favorite side dishes like rice, roasted veggies, or tortillas.

    roasted chicken in a cilantro pesto sauce with fajita vegetables

    Serving Tips for Cilantro Chicken

    • Cilantro Chicken + Mexican Rice + Black Beans: A fiesta in a container! Add some pico de gallo or shredded cheese if you’re feeling fancy.
    • Cilantro Chicken + Quinoa Salad with Corn, Cherry Tomatoes & Queso Fresco: Make a big batch of this refreshing salad and spoon it right next to your chicken.
    • Cilantro Chicken + Brown Rice + Pineapple Salsa: That sweet + savory + spicy combo? Chef’s kiss. Add lime wedges for extra zing.
    • Cilantro Chicken Wraps: Shred the chicken and roll it into a whole wheat wrap with shredded cabbage, sliced avocado, and a drizzle of the reserved marinade.
    • Cilantro Chicken +Tortillas +  Elote-Style Corn (Mexican Street Corn): Juicy, zesty chicken thighs paired with warm tortillas and creamy, cheesy, chili-lime street corn. It’s the perfect combo of fresh, savory, and a little smoky

    Similar Recipes

    stuffed primavera chicken

    Primavera Stuffed Chicken Breasts

    pineapple bbq chicken

    Oven Baked Pineapple BBQ Chicken

    rosemary chicken

    Rosemary Baked Chicken and Potatoes

    You Might Also Like

    Frequently Asked Questions

    Can I use chicken breasts instead of thighs?

    Yes, you can! Chicken breasts are leaner but tend to dry out faster. If you use them, reduce the bake time slightly (check for doneness around 25–30 minutes). Brining or marinating them for a bit longer can help keep them juicy.


    Is the marinade safe to use as a dipping sauce?

    Only the reserved portion of the marinade (the ¼ you set aside before touching raw chicken) should be used as a dipping sauce. Never use leftover marinade that has touched raw chicken unless you cook it first.


    Can I add other vegetables?

    Definitely! Zucchini, cherry tomatoes, or sliced carrots roast beautifully with this dish. Just be mindful of cooking times—some veggies may cook faster or slower than bell pepper and onion.

    Posted on Leave a comment

    Chicken and Mushroom Zucchini Stir Fry

    chicken stir fry with mushroom and zucchini

    This Chicken and Mushroom Zucchini Stir Fry is about to be your new go-to! Inspired by the Panda Express favorite (but way better for your body), this dish brings that crave-worthy takeout vibe right into your kitchen, in under 15 minutes. 

    Whether you’re meal prepping lunches for the week or looking for a quick weeknight dinner, this high-protein, veggie-packed recipe has you covered. Plus, it’s super flexible — serve it over brown rice, jasmine rice, cauliflower rice, or even in lettuce wraps for a low-carb twist.

    This post may contain affiliate links. Please see our privacy policy for details.

    Calories: 413kcal | Carbohydrates: 16g | Protein: 25g | Fat: 28g | Saturated Fat: 6g | Polyunsaturated Fat: 6g | Monounsaturated Fat: 14g | Trans Fat: 0.1g | Cholesterol: 111mg | Sodium: 1610mg | Potassium: 789mg | Fiber: 3g | Sugar: 6g | Vitamin A: 410IU | Vitamin C: 23mg | Calcium: 52mg | Iron: 2mg

    chicken stir fry with mushroom and zucchini

    The PrepYoSelf Newsletter

    chicken stir fry with mushroom and zucchini

    Chicken and Mushroom Zucchini Stir Fry

    This Chicken and Mushroom Zucchini Stir Fry is a quick, flavorful, and protein-packed meal prep recipe inspired by Panda Express that’s ready in just 15 minutes.
    No ratings yet
    Prep Time 5 minutes
    Cook Time 15 minutes
    Course dinner, Main Course
    Cuisine Asian
    Servings 2
    Calories 413 kcal

    Equipment

    • knife
    • cutting board
    • wok

    Ingredients
      

    For the Chicken:

    • 8 oz boneless chicken thighs (cut into 1 inch chunks)
    • 1 tablespoon cornstarch
    • 1 tablespoon olive oil

    For the Vegetables:

    • 1/4 cup red onions (sliced)
    • 1 cup mushrooms (sliced)
    • 1 zucchini (cut into 1/2 inch half coins)
    • 2 garlic cloves (peeled and thinly sliced)
    • 1/4 cup green onions (chopped, for garnish)

    For the Sauce:

    • 3 tablespoons soy sauce
    • 1 tablespoon rice wine vinegar
    • 1/4 teaspoon sugar
    • 1 teaspoon sesame oil
    • 1 teaspoon cornstarch
    • 1 tablespoon minced ginger

    Instructions
     

    • Toss the chicken with cornstarch. In a small bowl, mix all the sauce ingredients and set aside.
    • Heat olive oil in a wok or large pan over medium-high heat and add the chicken. Sear both sides (about 3-4 minutes) until browned and cooked through. Remove and set aside.
    • Crank the heat to high and add your red onions, mushrooms, zucchini, and garlic. Stir-fry for 2-3 minutes until just browned and slightly tender.
    • Turn the heat down slightly, return the chicken to the pan, and pour in the sauce.
    • Toss everything together until it’s glossy and the sauce thickens up.
    • Garnish with green onions, serve with your side of choice, and boom — instant weeknight win.

    Video

    Notes

    Nutrition information provided is an estimate. It will vary based on cooking method and specific ingredients used. Please consult with your healthcare provider for specific dietary needs. To gain a better understanding, explore our nutrition disclaimer here

    Nutrition

    Calories: 413kcalCarbohydrates: 16gProtein: 25gFat: 28gSaturated Fat: 6gPolyunsaturated Fat: 6gMonounsaturated Fat: 14gTrans Fat: 0.1gCholesterol: 111mgSodium: 1610mgPotassium: 789mgFiber: 3gSugar: 6gVitamin A: 410IUVitamin C: 23mgCalcium: 52mgIron: 2mg

    Why You’ll Love This:

    • Under 15 Minutes, Start to Finish: Yep — from prep to plate, this dish is lightning fast. Perfect for busy workweeks when time (and patience) is limited.
    • Whole, Simple Ingredients: No hard-to-find items here! Just pantry staples, fresh veggies, and lean protein — the kind of ingredients that make you feel good inside and out.
    • High-Protein Powerhouse: Chicken thighs give you juicy flavor and protein to help you stay full, support muscle recovery, and avoid that dreaded mid-afternoon crash.
    • One Pan, Zero Stress: Minimal cleanup = major win. This entire recipe comes together in one wok or skillet.
    • Versatile: Serve it with rice, noodles, quinoa, or wrap it up in lettuce leaves for a fresh low-carb meal. You can even bulk it up with extra veggies if you’re feeling it.
    • Way Healthier Than Takeout: Less sodium, zero mystery oils, and no additives. You’re in control of the flavor and nutrition here, and trust me — you won’t miss the drive-thru version.
    • Meal Prep Friendly & Reheats Like a Dream: Make a batch, portion it into containers, and enjoy flavorful, homemade lunches all week long. The sauce holds up beautifully, and the zucchini stays tender-crisp!

    chicken stir fry with mushroom and zucchini

    Ingredients you’ll need for this Chicken Stir Fry

    • Chicken Thighs: Chicken thighs are juicy, tender, and full of flavor — more forgiving than chicken breast, especially when reheated. They hold up well in meal prep because they stay moist even after a few days in the fridge.
    • Cornstarch (for coating + in the sauce): Coating the chicken in cornstarch helps it sear up with a light crisp exterior, almost like a velvety crust. When added to the sauce, it thickens things up for that classic stir fry glaze.
    • Olive Oil: Olive oil has a neutral taste that complements Asian flavors and provides healthy fats. It also helps the chicken and veggies brown nicely.
    • Red Onions: Red onions bring just a hint of sweetness and a vibrant pop of color. When lightly cooked, they soften and mellow, adding depth to the dish.
    • Mushrooms: Mushrooms add umami — that deep, savory flavor that makes dishes taste richer. They also soak up the sauce like little flavor sponges!
    • Zucchini: Zucchini adds a fresh, light contrast to the savory chicken and mushrooms. It also gives you a boost of fiber and hydration.
    • Garlic (sliced): Slicing instead of mincing gives you mellow garlic notes that perfume the oil and add flavor without overpowering.
    • Green Onions (garnish): These brighten everything up at the end, adding a fresh crunch and pop of color.
    • Soy Sauce: The salty, umami base of your stir fry sauce. It ties everything together and makes it taste like takeout — but better.
    • Rice Wine Vinegar: Adds just enough tang to balance the richness of the soy sauce and chicken. It’s bright, light, and keeps things from feeling heavy.
    • Sugar (just a touch): A tiny amount of sugar balances the savory and acidic notes in the sauce without making it sweet. It’s all about harmony.
    • Sesame Oil: This is your stir fry secret weapon. Just a teaspoon adds incredible toasty depth and gives you that restaurant-style aroma.
    • Minced Ginger: Ginger adds a gentle warmth and zing that brightens the entire dish. It’s also great for digestion!

    chicken stir fry with mushroom and zucchini

    How to Meal Prep Chicken Stir Fry

    1. Start by prepping your chicken. Place the cut chicken thigh pieces in a bowl and toss them with 1 tablespoon of cornstarch until each piece is evenly coated. This will help the chicken get a nice golden crust when cooked and give the sauce something to cling to.
    2. In a small bowl, make your sauce. Combine the soy sauce, rice wine vinegar, sugar, sesame oil, cornstarch, and minced ginger. Stir it well until the cornstarch is fully dissolved. Set the sauce aside for later.
    3. Heat a large wok or skillet over medium-high heat. Once it’s hot, add 1 tablespoon of olive oil. Carefully add the chicken to the pan in a single layer and cook it for about 3 to 4 minutes, turning the pieces occasionally until all sides are browned and the chicken is fully cooked through. Then, remove the chicken from the pan and set it on a plate.
    4. Increase the heat to high and add the sliced red onions, mushrooms, zucchini, and garlic to the same pan. Stir-fry the vegetables for about 2 to 3 minutes, moving them around frequently so they cook evenly. You’ll want them to start browning slightly while still staying crisp-tender.
    5. Turn the heat back down to medium-high and return the cooked chicken to the pan with the vegetables. Give everything a quick toss to combine.
    6. Pour the sauce over the chicken and veggies. Stir continuously for another 1 to 2 minutes, making sure everything gets coated evenly. The sauce will begin to bubble and thicken — that’s exactly what you want!
    7. Once the sauce has thickened and everything is hot, remove the pan from heat. Sprinkle chopped green onions on top for a burst of fresh flavor.
    8. Serve immediately with a side of your choice — rice, quinoa, or even wrapped in lettuce for a low-carb option. Enjoy!

    chicken stir fry with mushroom and zucchini

    Meal Prep Tips and Pairing Tips for Chicken Stir Fry

    • Pair with brown rice or quinoa for a fiber-rich, slow-digesting carb that keeps you full and energized through busy workdays. Cook a big batch at the start of the week to portion out easily.
    • Serve over cauliflower rice or in lettuce wraps if you’re aiming for a low-carb or lighter option — it keeps the meal fresh and crisp without sacrificing flavor.
    • Add a side of roasted sweet potatoes or stir-fried green beans for a colorful, antioxidant-packed veggie boost that balances the savory stir fry with a touch of sweetness or crunch.
    • Pack with a small cup of pineapple or mandarin oranges for a refreshing contrast and a natural source of vitamin C — it gives that classic Panda Express sweet-and-savory vibe!
    • Top with toasted sesame seeds or crushed peanuts before serving to add texture, healthy fats, and a satisfying crunch that levels up the dish.
    • Rotate your carb base through the week (rice one day, soba noodles the next, cauliflower rice later) to keep your meals exciting while using the same main dish.

    Similar Recipes

    broccoli beef

    Ground Beef and Broccoli Stir Fry

    tofu stir fry

    Tofu and Veggie Stir Fry

    beef and chinese broccoli

    Garlicky Beef Stir Fry

    You Might Also Like

    Frequently Asked Questions

    Can I use chicken breast instead of thighs?

    Yes! Chicken breast is leaner and still works great. Just be careful not to overcook it — breast meat can dry out faster than thighs, especially when reheated.


    Can I add more vegetables?

    Absolutely! This recipe is flexible. You can add snap peas, bell peppers, broccoli, or baby corn — just make sure not to overcrowd the pan so everything cooks evenly.


    How can I make the dish spicier?

    Add crushed red pepper flakes, a sliced Thai chili, or a dash of sriracha to the sauce. You can also stir in chili oil just before serving for a little kick.

    Posted on Leave a comment

    Air Fryer Crispy Parmesan Chicken Bites

    Parmesan Chicken Bites with spinach and tomatoes

    Hi friends! If you’re trying to level up your weekday meals with something easy, protein-packed, and totally delish, let me introduce you to your new go-to: Air Fryer Parmesan Chicken Bites. These juicy little bites come together in under 15 minutes with simple ingredients you probably already have in your pantry. They’re perfect for meal prep and pair with just about anything—salads, roasted veggies, noodles, or even wrapped in a tortilla for a quick lunch wrap. Let’s get into it!

    This post may contain affiliate links. Please see our privacy policy for details.

    Calories: 415kcal | Carbohydrates: 2g | Protein: 20g | Fat: 36g | Saturated Fat: 8g | Polyunsaturated Fat: 6g | Monounsaturated Fat: 20g | Trans Fat: 0.1g | Cholesterol: 115mg | Sodium: 466mg | Potassium: 261mg | Fiber: 0.2g | Sugar: 0.2g | Vitamin A: 138IU | Vitamin C: 3mg | Calcium: 59mg | Iron: 1mg

    Parmesan Chicken Bites with spinach and tomatoes

    Parmesan Chicken Bites with spinach and tomatoes

    Air Fryer Parmesan Chicken Bites

    These crispy Air Fryer Parmesan Chicken Bites are a quick, protein-packed meal prep favorite made with simple ingredients and bold, cheesy flavor.
    No ratings yet
    Prep Time 5 minutes
    Cook Time 15 minutes
    Course dinner, lunch, Main Course
    Cuisine American, Italian
    Servings 2
    Calories 415 kcal

    Equipment

    • knife
    • cutting board
    • mixing bowl
    • sauce pan
    • Air Fryer

    Ingredients
      

    For the Chicken:

    • 8 oz boneless chicken thighs (cut into 1 inch cubes)
    • 1/4 teaspoon garlic powder
    • 1/4 teaspoon salt
    • 1/4 teaspoon pepper
    • 1 teaspoon olive oil

    For the Parmesan Sauce:

    • 2 tablespoons olive oil
    • 1 tablespoon lemon juice
    • 2 tablespoons grated parmesan cheese
    • 1/4 teaspoon Italian Seasoning

    Instructions
     

    • Preheat your air fryer to 400°F.
    • Prep your chicken: Add cubed chicken to a bowl, drizzle with olive oil, and sprinkle in garlic powder, salt, and pepper. Mix until evenly coated.
    • Air fry: Spread the chicken bites in a single layer in your air fryer basket or rack. Cook for 8–10 minutes, shaking halfway through, until golden and the internal temp hits 165°F
    • Make the parmesan sauce: While the chicken cooks, heat olive oil in a small pan over medium-low. Stir in lemon juice, parmesan, and Italian seasoning until it forms a thick, gritty paste. Turn off the heat and set aside.
    • Toss & serve: Once the chicken is done, toss it in that dreamy parmesan sauce until every piece is fully coated.
    • Pair it up: Enjoy right away or store in the fridge for the week! Pairs perfectly with leafy greens, steamed broccoli, whole grain pasta, or even some quinoa for a balanced meal.

    Video

    Notes

    Nutrition information provided is an estimate. It will vary based on cooking method and specific ingredients used. Please consult with your healthcare provider for specific dietary needs. To gain a better understanding, explore our nutrition disclaimer here.

    Nutrition

    Calories: 415kcalCarbohydrates: 2gProtein: 20gFat: 36gSaturated Fat: 8gPolyunsaturated Fat: 6gMonounsaturated Fat: 20gTrans Fat: 0.1gCholesterol: 115mgSodium: 466mgPotassium: 261mgFiber: 0.2gSugar: 0.2gVitamin A: 138IUVitamin C: 3mgCalcium: 59mgIron: 1mg

    Why This Recipe is a Weeknight Meal Prep Hero:

    • Fast and Easy: We’re talkin’ under 15 minutes start to finish. Your future self will thank you. 
    • Pantry-friendly ingredients: Nothing fancy here—just your everyday kitchen staples doing the most.
    • Customizable sides: Serve it up with literally anything—salad, roasted veggies, grains, or wraps.
    • Great source of protein: Chicken thighs are juicy, flavorful, and packed with protein to keep you fueled.
    • Big flavor, little effort: That parmesan sauce? Tangy, cheesy, herby magic in every bite.
    • Meal prep friendly: Make a double batch and stash it in the fridge for easy weekday lunches or quick dinners.
    • Supports your goals: Eating more home-cooked meals is one of the easiest ways to stay on track with your health goals—and this recipe proves that healthy can also be delicious!

    The PrepYoSelf Newsletter

    Simple Ingredients

    • Chicken Thighs: Chicken thighs are juicy, flavorful, and stay tender even at high heat—perfect for the air fryer. They hold up beautifully with bold seasonings and absorb the parmesan sauce like a dream. Swap it out with chicken breast for a learner option or tofu for a vegetarian option.
    • Garlic Powder: Garlic adds that irresistible savory base flavor. A little goes a long way and it ties the whole dish together with umami-rich goodness. Use onion powder for a milder, sweeter profile.
    • Salt and pepper: Classic seasoning essentials. Salt enhances all the other flavors, and pepper brings just a touch of warmth without being spicy.
    • Olive Oil: Olive oil locks in moisture, crisps up the chicken in the air fryer, and gives the parmesan sauce a silky richness. It’s heart-healthy and adds subtle depth.
    • Lemon Juice: Adds brightness and cuts through the richness of the chicken and cheese. It balances the dish and makes the flavors pop.
    • Grated Parmesan Cheese: The MVP of the sauce. Parmesan brings that salty, nutty, cheesy punch that turns simple chicken bites into crave-worthy, flavor-loaded bites.
    • Italian Seasoning: A cozy blend of herbs like oregano, basil, and thyme that infuses the sauce with a Mediterranean flair. It gives a rustic, homey vibe.

    Parmesan Chicken Bites with spinach and tomatoes

    How to Meal Prep Air Fryer Parmesan Chicken Bites

    1. Preheat your air fryer to 400°F so it’s hot and ready by the time your chicken is prepped—this helps it cook evenly and crisp up nicely.
    2. Cut the chicken thighs into 1-inch cubes using a sharp knife and place them in a mixing bowl. This small size helps them cook faster and stay juicy inside.
    3. Drizzle 1 tablespoon of olive oil over the chicken, then sprinkle on the garlic powder, salt, and pepper. Use clean hands or a spoon to mix everything together until each piece is evenly coated.
    4. Spread the chicken pieces out in a single layer on your air fryer rack or basket. Make sure they’re not overlapping—this helps them crisp up instead of steaming.
    5. Air fry the chicken at 400°F for 8 to 10 minutes, shaking the basket or flipping the pieces halfway through. Cook until the chicken is golden and reaches an internal temperature of 165°F (you can use a meat thermometer to check).
    6. While the chicken is cooking, make the parmesan sauce. In a small pan over low to medium heat, add 2 tablespoons of olive oil, 1 tablespoon of lemon juice, the grated parmesan cheese, and Italian seasoning.
    7. Stir the sauce continuously as it warms up, just until it forms a slightly thick, gritty paste. This should only take 2–3 minutes. Once done, turn off the heat and set it aside.
    8. When the chicken is cooked through, transfer it to a bowl and pour the warm parmesan sauce over it. Use tongs or a spoon to toss the chicken until each piece is coated in that flavorful sauce.
    9. Serve it up right away or let it cool before packing it into meal prep containers. These bites go great with a side salad, steamed veggies, or even tossed into pasta or rice bowls.

    Parmesan Chicken Bites with spinach and tomatoes

    Meal Pairing Tips for Air Fryer Parmesan Chicken Bites

    • Pair with roasted or steamed vegetables like broccoli, zucchini, or green beans to add fiber and color to your plate—plus, they reheat well and keep their texture.
    • Serve over a bed of brown rice, quinoa, or orzo for a hearty, satisfying base that soaks up the flavorful parmesan sauce beautifully.
    • Add a fresh side salad with mixed greens, cherry tomatoes, and cucumbers, then drizzle with a light vinaigrette to balance out the richness of the chicken.
    • Toss the chicken bites into a whole grain wrap or pita with arugula and a yogurt-based sauce or hummus for an easy grab-and-go lunch.
    • Pair with mashed sweet potatoes or garlic cauliflower mash for a comforting side that’s both filling and packed with nutrients.
    • Include fresh fruit like apple slices, berries, or orange segments on the side to brighten up your meal and satisfy any sweet cravings.
    • Make it a power bowl by layering greens, grains, roasted veggies, and chicken bites, then topping with a sprinkle of feta or a squeeze of lemon for extra flavor.

    Parmesan Chicken Bites with spinach and tomatoes

    Similar Recipes

    chicken fajitas

    Sheet Pan Chicken Fajitas with Mango Salsa

    sausage squash

    Spaghetti Squash with Sausage and Peppers

    pineapple bbq chicken

    Oven Baked Pineapple BBQ Chicken

    You Might Also Like

    Frequently Asked Questions

    What if I don’t have an air fryer?

    No problem! Bake the chicken bites in a preheated oven at 425°F for about 15–18 minutes, flipping halfway through. You still want the chicken to reach 165°F internally.


    The sauce turned into a paste—did I do something wrong?

    Not at all! That gritty paste texture is exactly what you want—it clings to the chicken and packs a punch of flavor. Just be sure to heat it gently and stir consistently.


    Can I use chicken breast instead of chicken thighs?

    Yes! Chicken breast works great—just be careful not to overcook it, as it’s leaner and can dry out more quickly. Cut it into even-sized cubes and check for doneness at the 8-minute mark.

    Posted on Leave a comment

    Roasted Sambal and Honey Glazed Chicken

    Roasted Sambal and Honey Glazed chicken

    Hey hey, beginner home cooks! If you’re trying to eat healthier without giving up bold, delicious flavors (because who wants boring chicken, right?), then this Roasted Sambal & Honey Glazed Chicken is about to rock your meal prep world. It’s savory, spicy, sweet, and totally satisfying—just like your favorite takeout, but made at home with fresh ingredients and good-for-you vibes.

    This post may contain affiliate links. Please see our privacy policy for details.

    Calories: 382kcal | Carbohydrates: 15g | Protein: 26g | Fat: 24g | Saturated Fat: 6g | Polyunsaturated Fat: 5g | Monounsaturated Fat: 10g | Trans Fat: 0.1g | Cholesterol: 142mg | Sodium: 1279mg | Potassium: 420mg | Fiber: 0.5g | Sugar: 10g | Vitamin A: 201IU | Vitamin C: 6mg | Calcium: 30mg | Iron: 2mg

    Roasted Sambal and Honey Glazed chicken

    Roasted Sambal and Honey Glazed chicken with sliced cucumbers

    Roasted Sambal and Honey Glazed Chicken

    This chicken recipe is sweet, spicy, tangy, and roasts to golden perfection in under an hour. Beginner-friendly and better-than-takeout vibes.
    No ratings yet
    Prep Time 5 minutes
    Cook Time 50 minutes
    Course dinner, Main Course
    Cuisine Asian
    Servings 4
    Calories 382 kcal

    Equipment

    • mixing bowl
    • baking pan

    Ingredients
      

    • 4 chicken thighs (bone in)
    • 1/4 cup soy sauce
    • 1 tablespoon fish sauce
    • 2 tablespoon lime juice
    • 2 tablespoon honey
    • 1 tablespoon ginger paste
    • 2 tablespoons minced garlic
    • 2 tablespoons sambal chili paste
    • 1/4 cup red onions (sliced)
    • 1/4 cup cilantro (chopped)

    Instructions
     

    • Mix up that flavor bomb marinade: In a medium mixing bowl, whisk together the soy sauce, fish sauce, lime juice, honey, ginger paste, garlic, sambal chili paste, and chopped cilantro. This combo brings the perfect balance of sweet, savory, tangy, and spicy.
    • Marinate the chicken: Add the chicken thighs to the bowl, toss them around until they’re fully coated, and let them soak in all that goodness. Pop it in the fridge for at least 30 minutes (or up to overnight if you’re planning ahead).
    • Roast it up: Preheat your oven to 400°F. Arrange the marinated chicken on a foil-lined or parchment-lined baking sheet. Top it off with sliced red onions. Roast for 40–45 minutes, until the chicken is cooked through and slightly caramelized (internal temp: 165°F).
    • Serve and store: Serve it up with your favorite side—like a crisp cucumber salad, jasmine rice, or even roasted veggies. Store leftovers in airtight containers for the week.

    Video

    Notes

    Nutrition information provided is an estimate. It will vary based on cooking method and specific ingredients used. Please consult with your healthcare provider for specific dietary needs. To gain a better understanding, explore our nutrition disclaimer here.

    Nutrition

    Calories: 382kcalCarbohydrates: 15gProtein: 26gFat: 24gSaturated Fat: 6gPolyunsaturated Fat: 5gMonounsaturated Fat: 10gTrans Fat: 0.1gCholesterol: 142mgSodium: 1279mgPotassium: 420mgFiber: 0.5gSugar: 10gVitamin A: 201IUVitamin C: 6mgCalcium: 30mgIron: 2mg

    Why This Recipe is a Perfect Meal Prep:

    • Simple Ingredients, Big Flavor: You don’t need a long list of fancy ingredients—just pantry basics with a few flavorful upgrades like sambal and fish sauce.
    • Marinade Magic = Maximum Flavor: The marinade does all the heavy lifting. You mix, marinate, roast, and DONE. So easy!
    • Perfect for Meal Prep: This chicken reheats like a dream, making it perfect for weekday lunches or quick dinners.
    • Healthier than Takeout: Less oil, less sugar, more control—without sacrificing the flavors you love from your favorite Asian takeout spot.
    • Customizable Heat Level: Want it milder? Use 1 tablespoon of sambal. Craving more spice? Go bold with 3 tablespoons. You’re the boss.
    • Beginner-Friendly Cooking Method: Roasting is super forgiving—just marinate and bake. No stovetop juggling required.
    • Build Confidence in the Kitchen: Recipes like this help you get comfortable with balancing flavors and working with marinades. You’ll feel like a pro after one round!

    The PrepYoSelf Newsletter

    Roasted Sambal and Honey Glazed chicken with sliced cucumbers

    Recipe Ingredients for Roasted Chicken:

    • Soy Sauce: Soy sauce is the salty, umami-rich base of the marinade. It brings depth and that “savory” satisfaction to the dish—like the comforting flavor you get in stir-fried takeout. It also helps to tenderize the chicken and lock in moisture during roasting.
    • Fish Sauce: Fish sauce adds a punch of umami (that deep, complex savoriness) with just a touch of funk. Don’t let the smell scare you—when it’s cooked, it blends right in and enhances the other ingredients without standing out on its own. It’s like the secret weapon of Southeast Asian cooking!
    • Lime Juice: This gives the marinade a bright, citrusy tang that balances the richness of the chicken and the sweetness from the honey. The acid also helps tenderize the chicken and keeps it juicy and flavorful.
    • Honey: Honey adds natural sweetness and creates that sticky-glazed finish when the chicken roasts. It caramelizes beautifully in the oven and balances out the spice from the sambal chili paste.
    • Ginger Paste: Ginger brings a zesty, slightly peppery note that adds warmth and brightness. It also helps cut through the richness of the soy sauce and chicken, making every bite taste clean and fresh.
    • Minced Garlic: Garlic gives the dish a bold, savory backbone and layers in even more depth. When it roasts with the chicken, it becomes mellow and slightly sweet—pure flavor heaven.
    • Sambal Chili Paste: Sambal is where the heat comes in! It’s a chili-based condiment that’s spicy, tangy, and just a little garlicky. It gives this dish that fiery edge and makes it super satisfying for anyone who loves a kick of spice (think spicy takeout wings or Korean BBQ).
    • Red Onions (Sliced): Red onions add a sweet, mellow sharpness once roasted. They soften up beautifully in the oven and soak up the marinade flavors, adding a subtle crunch and color to each bite.
    • Cilantro (Chopped): Fresh cilantro adds an herby, slightly citrusy pop of freshness that brightens the whole dish. It’s the perfect contrast to the sweet, salty, and spicy marinade, and it ties everything together with a fresh finish.

    Roasted Sambal and Honey Glazed chicken

    How to Make Roasted Sambal and Honey Glazed Chicken

    1. Make the marinade: In a medium mixing bowl, combine the soy sauce, fish sauce, lime juice, honey, ginger paste, minced garlic, sambal chili paste, and chopped cilantro. Stir everything together until it’s well mixed—this is your marinade, and it’s packed with flavor!
    2. Marinate the chicken: Place the chicken thighs into the bowl with the marinade. Use a spoon or clean hands to coat each piece of chicken thoroughly, making sure every part is covered. Cover the bowl with a lid or plastic wrap and place it in the refrigerator. Let it marinate for at least 30 minutes, but if you have time, let it sit for a few hours or even overnight for deeper flavor.
    3. Prep for roasting: When you’re ready to cook, preheat your oven to 400°F. Line a baking sheet with parchment paper or foil (this makes cleanup easier), and lightly coat it with oil or nonstick spray to prevent sticking.
    4. Roast the chicken: Remove the chicken from the marinade and arrange the pieces on the baking sheet, leaving a little space between each piece so they cook evenly. Pour a little extra marinade over the top if you’d like extra glaze. Top it off with sliced red onions. Place the tray in the oven and roast for 40 to 45 minutes, or until the chicken is golden brown on the outside and reaches an internal temperature of 165°F (you can check this with a meat thermometer inserted into the thickest part of the thigh).
    5. Serve and store: Once done, let the chicken rest for about 5 minutes before serving—this helps keep it juicy. Enjoy it right away with your favorite side dish like a cucumber salad, steamed rice, or roasted veggies. If you’re meal prepping, let the chicken cool before storing it in airtight containers in the fridge. It will stay fresh for up to 4 days.

    Roasted Sambal and Honey Glazed chicken with sliced cucumbers

    Meal Prep Pairing Tips for Sambal Glazed Roasted Chicken

    • Fresh Cucumber Salad: This dish loves a cooling side to balance the heat from the sambal. Slice up some cucumbers, toss with a splash of rice vinegar, a pinch of sugar, and a sprinkle of sesame seeds or chopped herbs like mint or cilantro. Boom—fresh, crunchy, and refreshing!
    • Roasted or Steamed Veggies: Think broccoli, carrots, green beans, or bell peppers. Roasting veggies with a little olive oil and salt brings out their natural sweetness, which pairs perfectly with the bold, spicy chicken.
    • Mixed Greens Salad with Asian-Inspired Dressing: Keep it light and crunchy with a simple salad of spring greens, shredded cabbage, or spinach. Whisk up a dressing using lime juice, honey, soy sauce, and olive oil.
    • Top with Crunch – Crushed Peanuts or Toasted Sesame Seeds: Sprinkle your bowls with some chopped peanuts or sesame seeds for added texture and nutty flavor.

    Similar Recipes

    stuffed primavera chicken

    Primavera Stuffed Chicken Breasts

    pineapple bbq chicken

    Oven Baked Pineapple BBQ Chicken

    rosemary chicken

    Rosemary Baked Chicken and Potatoes

    You Might Also Like

    Frequently Asked Questions

    What is sambal chili paste, and where can I find it?

    Sambal is a spicy Southeast Asian chili paste made from ground chilies, garlic, vinegar, and salt. It adds a bold kick of heat and flavor to this recipe. You can usually find it in the international or Asian section of your grocery store, or at any Asian market.


    Can I use boneless, skinless chicken instead of thighs with bone and skin?

    Yes! Boneless, skinless chicken thighs or breasts will work just fine. Just adjust the cooking time slightly—boneless cuts usually take about 25–30 minutes to cook through at 400°F. Always check for doneness with a meat thermometer (aim for 165°F internal temp).


    Can I make this chicken in the air fryer instead of the oven?

    Yes, and it turns out amazing! The air fryer gives the chicken a beautifully crisp outside while keeping it juicy inside—plus it cooks faster than the oven. Set your air fryer to 360°F (190°C). This is the sweet spot for cooking chicken thighs evenly without burning the glaze. Cook the marinated chicken thighs for 18–22 minutes, flipping halfway through. Start checking at 18 minutes, and make sure the internal temperature reaches 165°F.

    Posted on Leave a comment

    Easy Sausage and Cabbage Skillet

    sausage and cabbage skillet

    If you’re looking for a quick, beginner-friendly meal that’s full of flavor and nutrients, this Sausage and Cabbage Skillet is a must-try! Using pre-cooked chicken sausage and thinly sliced veggies keeps the prep simple and the cook time fast. It’s packed with protein, fiber, and comforting spices to keep you full and energized. Whether you’re meal prepping for the week or whipping up a fast dinner, this one-pan dish makes healthy eating easy and delicious.

    This post may contain affiliate links. Please see our privacy policy for details.

    Calories: 322kcal | Carbohydrates: 13g | Protein: 19g | Fat: 23g | Saturated Fat: 4g | Polyunsaturated Fat: 1g | Monounsaturated Fat: 5g | Cholesterol: 80mg | Sodium: 1480mg | Potassium: 197mg | Fiber: 3g | Sugar: 5g | Vitamin A: 2681IU | Vitamin C: 29mg | Calcium: 45mg | Iron: 2mg

    sausage and cabbage skillet

    sausage and cabbage skillet

    Easy Sausage and Cabbage Skillet

    This easy sausage and cabbage skillet is a quick, beginner-friendly meal prep recipe packed with protein, veggies, and bold flavor.
    No ratings yet
    Prep Time 5 minutes
    Cook Time 10 minutes
    Course Main Course
    Cuisine American
    Servings 2
    Calories 322 kcal

    Equipment

    • knife
    • cutting board
    • skillet

    Ingredients
      

    • 8 oz pre-cooked chicken sausage (Marketside Chipotle and Monterey Jack Cheese Chicken Sausage, 2 links)
    • 1/4 cup white onions (diced)
    • 1/4 cup baby carrots (thinly sliced)
    • 2 cup green cabbage (sliced)
    • 1/2 cup water
    • 1/4 teaspoon garlic powder
    • 1/4 teaspoon Italian seasoning
    • 1/4 teaspoon salt
    • 1/4 teaspoon pepper
    • 1 tablespoon olive oil

    Instructions
     

    • Prep first! Chop your onions, slice the carrots thin so they cook fast, slice up the cabbage, and cut the sausage into rounds. Pro tip: thinner slices = faster cooking = less time in the kitchen.
    • Heat up a skillet on medium-high heat and drizzle in your olive oil.
    • Toss in the diced onions and thinly sliced carrots. Sauté them for 2–3 minutes until they start to soften and smell amazing.
    • Sprinkle in your garlic powder, Italian seasoning, salt, and pepper. Add the sliced cabbage and pour in the water to help everything steam. Stir it up!
    • Cook the cabbage until it softens and becomes tender (about 5–7 minutes).
    • Finally, toss in the pre-cooked chicken sausage slices and stir for another 3–5 minutes until the sausage is warmed through and your skillet is bursting with flavor.
    • Serve it up or pack it into your meal prep containers for later!

    Video

    Notes

    Nutrition information provided is an estimate. It will vary based on cooking method and specific ingredients used. Please consult with your healthcare provider for specific dietary needs. To gain a better understanding, explore our nutrition disclaimer here

    Nutrition

    Calories: 322kcalCarbohydrates: 13gProtein: 19gFat: 23gSaturated Fat: 4gPolyunsaturated Fat: 1gMonounsaturated Fat: 5gCholesterol: 80mgSodium: 1480mgPotassium: 197mgFiber: 3gSugar: 5gVitamin A: 2681IUVitamin C: 29mgCalcium: 45mgIron: 2mg

    Why This Recipe Is PERFECT For Beginner Meal Preppers:

    Pre-cooked sausage = timesaver!  No need to worry about undercooked meat — it’s already cooked, you’re just heating it up.
    Thinly sliced veggies cook FAST. Thin carrots and cabbage soften in minutes, cutting down your cooking time big time.
    Minimal chopping required. We’re keeping it simple with just a few easy-to-handle ingredients.
    One pan wonder. Fewer dishes = less cleanup = a happier you.
    Big on flavor, light on effort. Thanks to that chipotle sausage and Italian seasoning, you get bold, smoky, and savory vibes without fancy techniques.
    Meal prep-friendly! This dish stores and reheats like a dream. Make it once, enjoy it all week.
    Balanced and nourishing. Protein + fiber-packed veggies + healthy fats from olive oil = a meal that fuels your day and keeps you satisfied.

    The PrepYoSelf Newsletter

    Ingredient Breakdown: Why This Combo Works (For Flavor and Health!)

    • Pre-cooked Chicken Sausage: Since it’s already cooked, this saves you tons of time and cooking steps! Just slice and heat. It’s a good source of protein to keep you feeling full and satisfied. Plus, this variety has a little spicy kick from the chipotle and extra flavor from the cheese, so you get bold taste without needing a complicated sauce.
    • White Onions: Onions add natural sweetness and depth of flavor to balance the spice of the sausage. Onions are low in calories but rich in antioxidants and compounds that may support heart health and immunity. Plus, they make your kitchen smell amazing when cooking!
    • Baby Carrots: Carrots add a natural sweetness and a pop of color. Slicing them thinly helps them cook faster and evenly. Loaded with beta-carotene (hello, Vitamin A!), carrots are great for supporting healthy vision and skin.
    • Cabbage: Cabbage bulks up the dish, making it super hearty and filling, without being heavy. It soaks up the flavors of the sausage and seasoning beautifully. Cabbage is rich in fiber for digestive health, plus vitamins C and K for immune support and bone health.
    • Water: Helps steam the cabbage and carrots so they cook through faster and become tender. Okay, water isn’t adding nutrients, but it’s helping you cook with less oil and maintain moisture in the dish!
    • Garlic Powder: Brings in a warm, savory flavor that compliments both the sausage and the veggies. Garlic contains compounds that support heart health and immune function. Plus, it adds flavor without extra calories.
    • Italian Seasoning: A simple, all-in-one herb blend that brightens the dish and adds depth.

    sausage and cabbage skillet

    Easy Steps to Make Sausage and Cabbage Skillet

    1. Chop and prep your ingredients first. Dice your white onions into small pieces for even cooking. Slice the baby carrots thinly — this helps them soften quicker in the pan.
      Slice the cabbage into thin strips. Cut your pre-cooked chicken sausage into round slices about ¼ inch thick.
    2. Heat up your skillet. Place your skillet on the stove over medium-high heat. Add 1 tablespoon of olive oil and let it warm up for about 30 seconds until it shimmers. This means it’s ready!
    3. Sauté the onions and carrots. Add the diced onions and sliced carrots to the skillet.
      Stir occasionally and cook for about 2–3 minutes, until the onions turn slightly translucent and the carrots start to soften.
    4. Add seasoning and cabbage. Sprinkle in the garlic powder, Italian seasoning, salt, and pepper. Add the sliced cabbage on top.
      Pour in the ½ cup of water to help steam the veggies and keep them from sticking.
      Stir everything together well so the seasonings coat all the veggies evenly.
    5. Cook the cabbage. Let the mixture cook for about 5–7 minutes, stirring occasionally.
      You’ll see the cabbage soften and shrink down as it cooks — that’s perfect!
    6. Add your sliced chicken sausage to the skillet. Stir well and cook for another 3–5 minutes, just until the sausage is heated through. Since it’s pre-cooked, you’re just warming it up and letting the flavors come together.
    7. Serve and enjoy! Once everything is hot and the veggies are tender, remove from heat.

    sausage and cabbage skillet

    Healthy Meal Prep Pairing Tips for Your Sausage & Cabbage Skillet

    • Add a Complex Carb for Energy: Your body needs carbs for energy, especially if you’re prepping lunches to power through busy days. Ideas: Brown rice, quinoa, whole grain pasta, or roasted sweet potatoes. These will soak up the tasty juices from the skillet and keep you full longer.
    • Include a Fresh Side Salad or Crunchy Veggies: Adding fresh veggies boosts fiber, hydration, and gives your meal a refreshing crunch. Ideas: Pair with a simple cucumber and tomato salad, or snack on raw bell peppers, celery, or sugar snap peas on the side.
    • Top with a Healthy Fat Boost (Optional but Awesome): Healthy fats help with nutrient absorption (especially all that vitamin A from the carrots!). Ideas: Add sliced avocado when you’re ready to eat, sprinkle some sunflower seeds, or drizzle a little extra olive oil.
    • Add a Simple Sauce or Dressing for Variety: It keeps things exciting so you don’t get bored mid-week! Ideas: A light vinaigrette, a squeeze of lemon juice, or even a little mustard-based dressing can brighten up the dish

    sausage and cabbage skillet

    Similar Recipes

    chicken pesto

    Sauteed Chicken Pesto with Bell Peppers

    pepper sandwich

    Roasted Red Pepper and Cheese Sandwich

    sheet pan sausage

    Sheet Pan Sausage with Roasted Vegetables

    You Might Also Like

    Frequently Asked Questions

    Can I add more vegetables?

    Heck yes! This recipe is super flexible. Try adding bell peppers, zucchini, mushrooms, or spinach. Just slice them thinly so they cook at the same speed.


    How do I know when the cabbage is cooked?

    Great question! The cabbage is ready when it turns soft, slightly translucent, and easy to chew. It should still have a tiny bit of bite for texture.


    Is this recipe spicy?

    The sausage has a gentle kick from the chipotle, but it’s not overwhelmingly spicy. If you prefer no heat, go with a milder sausage. If you love spice, feel free to add red pepper flakes!

    Posted on Leave a comment

    One Pot Chicken Cilantro Stew

    cilantro chicken thigh stew

    Nothing beats the cozy feeling of a warm, home-cooked meal, especially when it’s as easy and flavorful as this One-Pot Chicken Cilantro Stew. This dish is perfect for beginner cooks looking to make something hearty and delicious while embracing the simplicity of meal prepping. With tender, bone-in chicken thighs infused with aromatic spices, fresh cilantro, and a light, comforting broth, this stew is a must-have for your weekly meal plan. Plus, it’s versatile enough to pair with rice, tortillas, or even a side of roasted vegetables for a well-balanced meal. Let’s get cooking!

    This post may contain affiliate links. Please see our privacy policy for details.

    Calories: 356kcal | Carbohydrates: 2g | Protein: 24g | Fat: 28g | Saturated Fat: 7g | Polyunsaturated Fat: 5g | Monounsaturated Fat: 13g | Trans Fat: 0.1g | Cholesterol: 142mg | Sodium: 265mg | Potassium: 365mg | Fiber: 1g | Sugar: 1g | Vitamin A: 439IU | Vitamin C: 3mg | Calcium: 21mg | Iron: 1mg

    cilantro chicken thigh stew

    cilantro chicken thigh stew

    One Pot Chicken Cilantro Stew

    Juicy, tender chicken simmered in a flavorful broth with fresh cilantro, tomatoes, and warm spices—all in ONE pot! Perfect for meal prep, beginner-friendly, and ridiculously delicious.
    No ratings yet
    Prep Time 5 minutes
    Cook Time 28 minutes
    Course Main Course
    Cuisine American, Latin
    Servings 4
    Calories 356 kcal

    Equipment

    • knife
    • cutting board
    • pot

    Ingredients
      

    • 4 chicken thighs (bone in)
    • 1/4 cup red onions (diced)
    • 1 Roma tomato (diced)
    • 1/2 cup cilantro (fresh and chopped)
    • 1/4 teaspoon salt
    • 1/4 teaspoon paprika
    • 1/4 teaspoon garlic powder
    • 1/4 teaspoon pepper
    • 2 cups water
    • 1 tablespoon olive oil

    Instructions
     

    • Heat a large pot over medium-high heat and add the olive oil.
    • Place the chicken thighs in the pot, skin-side down, and sear for 3 to 5 minutes until golden brown. Flip and sear the other side for another 2 to 3 minutes.
    • Add the diced onions, tomato, cilantro, salt, paprika, garlic powder, and black pepper to the pot.
    • Pour in the water and stir to ensure the chicken is submerged in the broth.
    • Cover the pot with a lid, reduce the heat to low-medium, and let it simmer for 25 to 30 minutes, or until the chicken reaches an internal temperature of 165°F and is fork-tender.
    • Serve with rice or warm tortillas. You can also shred the chicken and use it for tacos or burrito bowls!

    Video

    Notes

    Nutrition information provided is an estimate. It will vary based on cooking method and specific ingredients used. Please consult with your healthcare provider for specific dietary needs. To gain a better understanding, explore our nutrition disclaimer here

    Nutrition

    Calories: 356kcalCarbohydrates: 2gProtein: 24gFat: 28gSaturated Fat: 7gPolyunsaturated Fat: 5gMonounsaturated Fat: 13gTrans Fat: 0.1gCholesterol: 142mgSodium: 265mgPotassium: 365mgFiber: 1gSugar: 1gVitamin A: 439IUVitamin C: 3mgCalcium: 21mgIron: 1mg

    Why This Chicken Cilantro Stew Recipe is Great for Meal Prep

    • One-Pot Wonder – Fewer dishes, less cleanup, and all the flavors come together beautifully in one pot.
    • Beginner-Friendly – Simple steps and basic ingredients make this an easy meal to cook and master.
    • Perfect for Meal Prep – Make a batch and enjoy flavorful, protein-packed meals throughout the week.
    • Budget-Friendly – Chicken thighs are an affordable cut of meat that remains juicy and flavorful.
    • Healthy & Nourishing – Packed with protein, fresh herbs, and a light broth that’s satisfying without being heavy.
    • Comfort Food with a Twist – Warm spices and fresh cilantro make this dish both cozy and refreshing.
    • Customizable – Serve with rice, quinoa, tortillas, or roasted veggies for a variety of meal options.

    The PrepYoSelf Newsletter

    Ingredient Breakdown:

    • Chicken Thighs – Juicy, flavorful, and perfect for slow cooking. The bone adds extra depth to the broth.
    • Red Onion & Roma Tomato – Adds a natural sweetness and depth to the stew.
    • Cilantro – Brightens up the dish with fresh herbal notes.
    • Spices (Paprika, Garlic Powder, Black Pepper, Salt) – A simple yet effective spice blend that enhances the chicken’s natural flavor without overpowering it.
    • Olive Oil – Helps sear the chicken, locking in moisture and flavor.
    • Water – Forms a light, comforting broth that allows all the flavors to meld together beautifully.o the dish.

    cilantro chicken thigh stew

    Instructions for Easy Chicken Dinner Meal Prep

    1. Heat the pot & sear the chicken: Place a large pot over medium-high heat and add the olive oil. Once the oil is shimmering, carefully place the chicken thighs in the pot, skin-side down. Let them sear for about 3 to 5 minutes without moving them—this helps develop a golden, crispy skin. Flip them over using tongs and sear the other side for another 2 to 3 minutes.
    2. Add the flavor boosters: Sprinkle in the diced onions, tomato, and half of the chopped cilantro. Then, season with salt, paprika, garlic powder, and black pepper. Stir gently to coat the chicken with the seasonings.
    3. Simmer to perfection: Pour in the water, making sure the chicken is mostly submerged. Give everything a light stir, cover the pot with a lid, and lower the heat to a gentle simmer. Let it cook for 25 to 30 minutes, or until the chicken is fully cooked (it should reach an internal temperature of 165°F) and is tender enough to pull apart with a fork.
    4. Serve & enjoy: Garnish with the remaining cilantro and serve with rice, tortillas, or your favorite side. You can also shred the chicken and use it for tacos or burrito bowls!

    cilantro chicken thigh stew

    Meal Prep and Pairing Tips for Chicken Cilantro Stew

    • Pair with: Steamed white or brown rice, roasted sweet potatoes, or a side of sautéed greens for a well-rounded meal.
    • Swap it up: If you don’t have chicken thighs, you can use drumsticks or boneless chicken breast (just reduce the cooking time slightly).
    • Add some heat: Toss in a diced jalapeño or a pinch of red pepper flakes if you love a little spice.
    • Boost the veggies: Add bell peppers, zucchini, or carrots for extra color and nutrients.
    • Make it creamy: Stir in a splash of coconut milk at the end for a richer, slightly tropical flavor twist.

    cilantro chicken thigh stew

    Similar Recipes

    chicken soup

    One Pot Mexican Chicken Soup

    sweet potato blt

    Instant Pot Beef Ragu

    pork carnitas

    Instant Pot Pork Carnitas

    You Might Also Like

    Frequently Asked Questions

    Can I add more spices?

    Of course! Feel free to add cumin, chili powder, or even a squeeze of lime for an extra kick.


    What if my stew is too watery?

    Let it simmer uncovered for a few extra minutes to reduce the liquid, or mash some of the tomatoes into the broth to thicken it naturally.


    Can I make this in a slow cooker?

    Yes! Sear the chicken first, then transfer everything to a slow cooker and cook on low for 4 to 6 hours or high for 2 to 3 hours.