Posted on Leave a comment

Trader Joe’s Sun-Dried Tomato Focaccia Chicken Sandwich

Focaccia Chicken sandwich

Hey meal preppers! If you’re short on time but still crave something hearty and wholesome, this is your next go-to recipe. We’re turning up the flavor with Trader Joe’s viral Sun-Dried Tomato Focaccia Ultimate Sandwich, using some simple yet delicious ingredients you can find at your local Trader Joe’s. The best part? You don’t need to spend hours in the kitchen—this recipe is all about using pre-made, quality ingredients that pack a punch in both flavor and nutrition!

This post may contain affiliate links. Please see our privacy policy for details.

Focaccia Chicken sandwich

Why You’ll Love This Recipe:

  • Wholesome Ingredients: No need to make everything from scratch! The key is to source quality ingredients that do the heavy lifting for you. Trader Joe’s Sun-Dried Tomato Focaccia is packed with flavor and texture, giving your sandwich that “homemade” touch without the extra work.
  • Big Flavors, Minimal Effort: The red pepper spread is a game-changer—it’s savory, slightly sweet, and full of depth. Pair that with the gouda, juicy heirloom tomatoes, and chicken, and you’ve got a seriously satisfying sandwich.
  • Meal Prep Made Easy: You’ll have six delicious sandwiches ready to go. Perfect for busy individuals who want something tasty, nutritious, and quick to pack for lunch.

Remember, meal prepping doesn’t have to be complicated. It’s all about smart choices—picking ingredients that make your life easier and your meals more enjoyable.

The PrepYoSelf Newsletter

Ingredient Spotlight: Why These Flavors Work So Well Together

  • Trader Joe’s Sun-Dried Tomato Focaccia Bread: This bread is the heart of the sandwich, bringing a rich, tangy flavor with every bite. The sun-dried tomatoes give it a slightly sweet, savory kick that pairs perfectly with the other ingredients. The focaccia’s light and airy texture, with just the right amount of chew, makes it feel homemade and comforting—without all the work. Plus, it crisps up beautifully in the oven or air fryer, adding a satisfying crunch to every bite.
  • Trader Joe’s Red Pepper Spread with Eggplant and garlic: Talk about a flavor powerhouse! This spread is savory and full of depth, thanks to the red pepper, eggplant and garlic. The sweet red peppers add a hint of sweetness that balances the earthy richness of the eggplant. It’s a perfect match for the tangy sun-dried tomato focaccia, as it enhances the flavors without overpowering them. Plus, it’s a healthier, veggie-packed alternative to heavier spreads, giving your sandwich an extra layer of nutrition.
  • Chicken Deli Slices: The protein of the sandwich, these chicken deli slices are light but flavorful, adding a subtle savory note that complements the bolder flavors from the focaccia and spread. Chicken is versatile and pairs well with almost anything, making it the ideal ingredient to bring balance to this ultimate sandwich. It’s also a great option for those looking for lean protein to keep them full and energized throughout the day.
  • Heirloom Tomato, Thinly Sliced: Nothing beats the fresh, juicy taste of a ripe heirloom tomato. These tomatoes are known for their vibrant colors and rich, complex flavors. When thinly sliced, they add a burst of freshness and sweetness that cuts through the richness of the red pepper spread and cheese. They also add a lovely contrast in texture, making every bite refreshing and balanced.
  • Gouda Cheese: Gouda is a creamy, mildly sweet cheese with a buttery finish, making it a perfect partner for the savory red pepper spread and juicy tomatoes. Its meltability adds a layer of indulgence to the sandwich, and its subtle nuttiness complements the tangy notes from the sun-dried tomato focaccia. The gouda ties all the ingredients together, creating a satisfying, well-rounded flavor profile that makes this sandwich feel indulgent yet wholesome.
Focaccia Chicken sandwich

How to Make Trader Joe’s Focaccia Chicken Sandwich

  1. Preheat: Set your oven to 400°F, or if you’re using an air fryer, 300°F. Time-saving tip: The air fryer gives the bread that perfect crispy texture in just 4-5 minutes!
  2. Toast: Place the focaccia in the oven for 5-8 minutes until it’s golden and slightly crispy. It’ll smell like homemade comfort food straight from an Italian bakery!
  3. Slice: Keeping the focaccia flat on a cutting board, use a serrated knife to carefully slice through the center of the loaf horizontally. Don’t worry—this part’s easy! Just keep the top flat and set it aside.
  4. Layer: Now for the fun part. Spread the red pepper spread over the bottom half of the focaccia. This spread is like a flavor bomb—it adds a rich, savory touch with sweet notes from the red peppers. Next, layer on the chicken deli slices, followed by those creamy slices of Gouda cheese. Finish with thinly sliced heirloom tomatoes for a burst of freshness.
  5. Assemble: Gently press the top half of the focaccia back onto your loaded sandwich. Make sure it’s secure—this is one epic sandwich, after all!
  6. Slice & Serve: Use a large knife to slice the sandwich into six pieces. It’s perfect for grab-and-go lunches or quick dinners throughout the week.

Reference the recipe card below for detailed instructions.

Focaccia Chicken sandwich

Meal Prep Tips, Swaps, and Additions for the Ultimate Focaccia Sandwich

  • Avoid Soggy Bread: To prevent the focaccia from getting soggy, consider spreading the red pepper spread in between the chicken slices rather than directly on the bread. This creates a moisture barrier and keeps your focaccia crisp for longer.
  • Swap Chicken Deli for Turkey or Tofu: If you’re not into chicken or prefer a different protein, try turkey deli slices for a similar texture with a slightly different flavor. For a vegetarian option, marinated tofu or grilled portobello mushrooms make great substitutes while keeping the sandwich hearty and satisfying.
  • Use a Different Spread: Not into red peppers? No problem! You can swap the red pepper spread with Trader Joe’s Hummus or their Vegan Kale, Cashew, and Basil Pesto. These spreads will bring different flavor profiles but still pair beautifully with the other ingredients.
  • Cheese Alternatives: Gouda is creamy and delicious, but you can easily swap it for provolone, mozzarella, or even a vegan cheese if you’re looking for a dairy-free option. These cheeses still offer that melty, satisfying texture but with a different taste experience.
  • Add Fresh Greens: Boost the nutrition by adding a layer of arugula, spinach, or mixed greens to your sandwich. This adds a fresh, peppery crunch that complements the rich flavors of the sandwich while packing in extra vitamins and fiber.
  • Pickled Veggies: Want to add a bit of zing? Layer in some pickled red onions, cucumbers, or even Trader Joe’s Spicy Pickled Vegetables. The tanginess will add a whole new dimension to the sandwich, cutting through the richness and adding a burst of flavor.
  • Avocado: For an extra creamy and nutritious touch, add slices of avocado. It will pair perfectly with the gouda and chicken, making the sandwich even more satisfying and filling.
Focaccia Chicken sandwich

Trader Joe’s Sun-Dried Tomato Focaccia Chicken Sandwich

This easy-to-make sandwich combines Trader Joe’s sun-dried tomato focaccia, savory red pepper spread, deli chicken, gouda cheese, and fresh heirloom tomatoes for a delicious, meal prep-friendly lunch option.
No ratings yet
Prep Time 5 minutes
Cook Time 10 minutes
Course lunch, Main Course
Cuisine American
Servings 6

Equipment

  • serrated knife
  • oven (or Air Fryer)
  • cutting board

Ingredients
  

  • 1 loaf Trader Joe's Sun-Dried Tomato Focaccia Bread
  • 1/2 cup Trader Joe's Red Pepper Spread with Eggplant and Garlic
  • 7 oz chicken deli
  • 1 large heirloom tomato (thinly sliced)
  • 4 slices gouda cheese

Instructions
 

  • Preheat: Set the oven to 400°F or the air fryer to 300°F. Toast the focaccia in the oven for 5-8 minutes or in the air fryer for 4-5 minutes.
  • Slice: Place the focaccia flat on a cutting board and slice horizontally through the center with a serrated knife. Set the top piece aside.
  • Layer: Spread the red pepper spread on the bottom half of the focaccia. Add chicken deli slices, Gouda cheese, and sliced heirloom tomatoes.
  • Assemble: Place the top half of the focaccia back on the sandwich, pressing gently to secure.
  • Cut: Use a large knife to cut the sandwich into six pieces by cutting it down the middle and then across three times

Similar Recipes

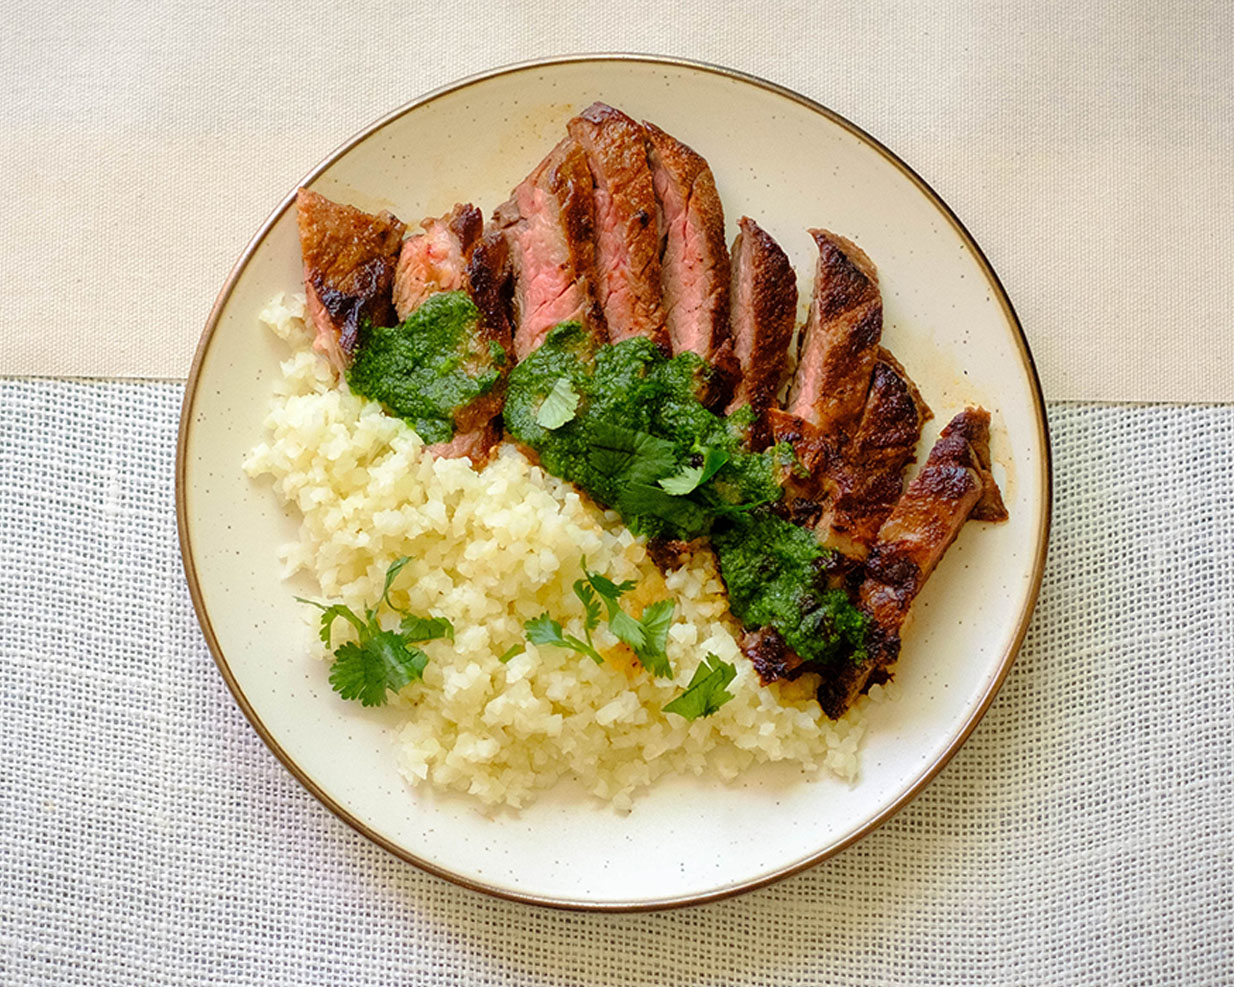
cilantro steak

Grilled Cilantro Skirt Steak with Cauliflower Rice

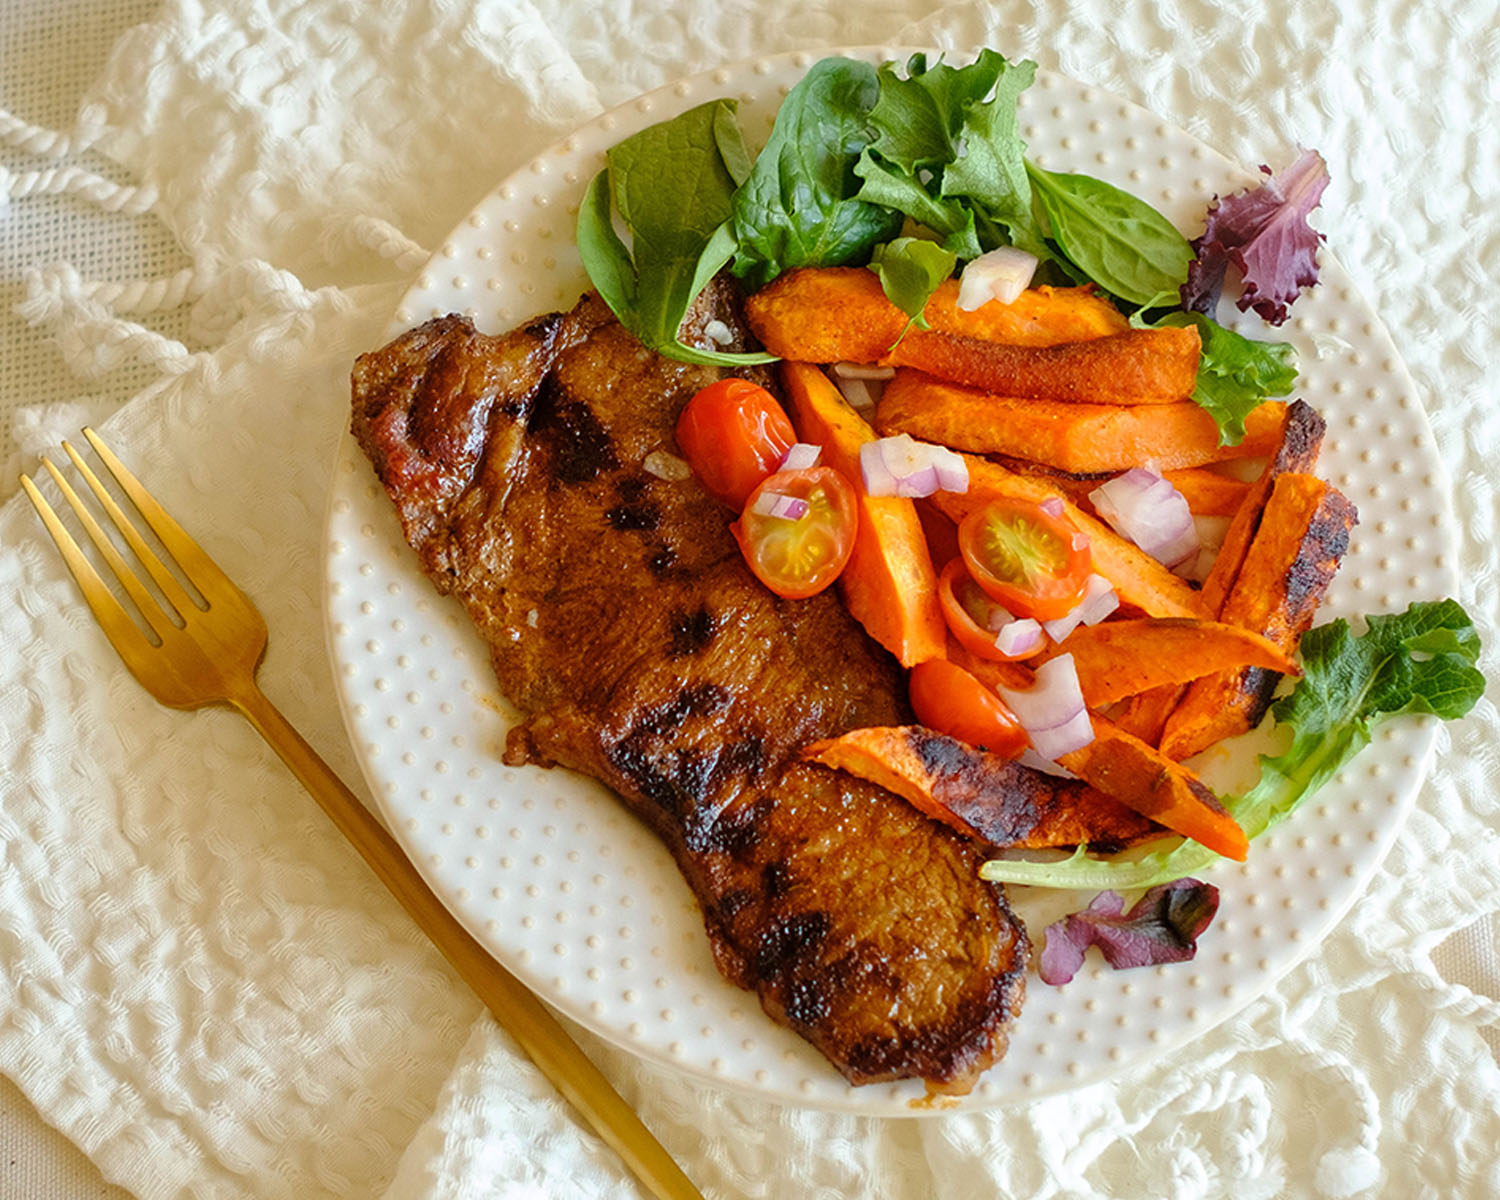
balsamic steak

Grilled Steak with Sweet Potato Wedges

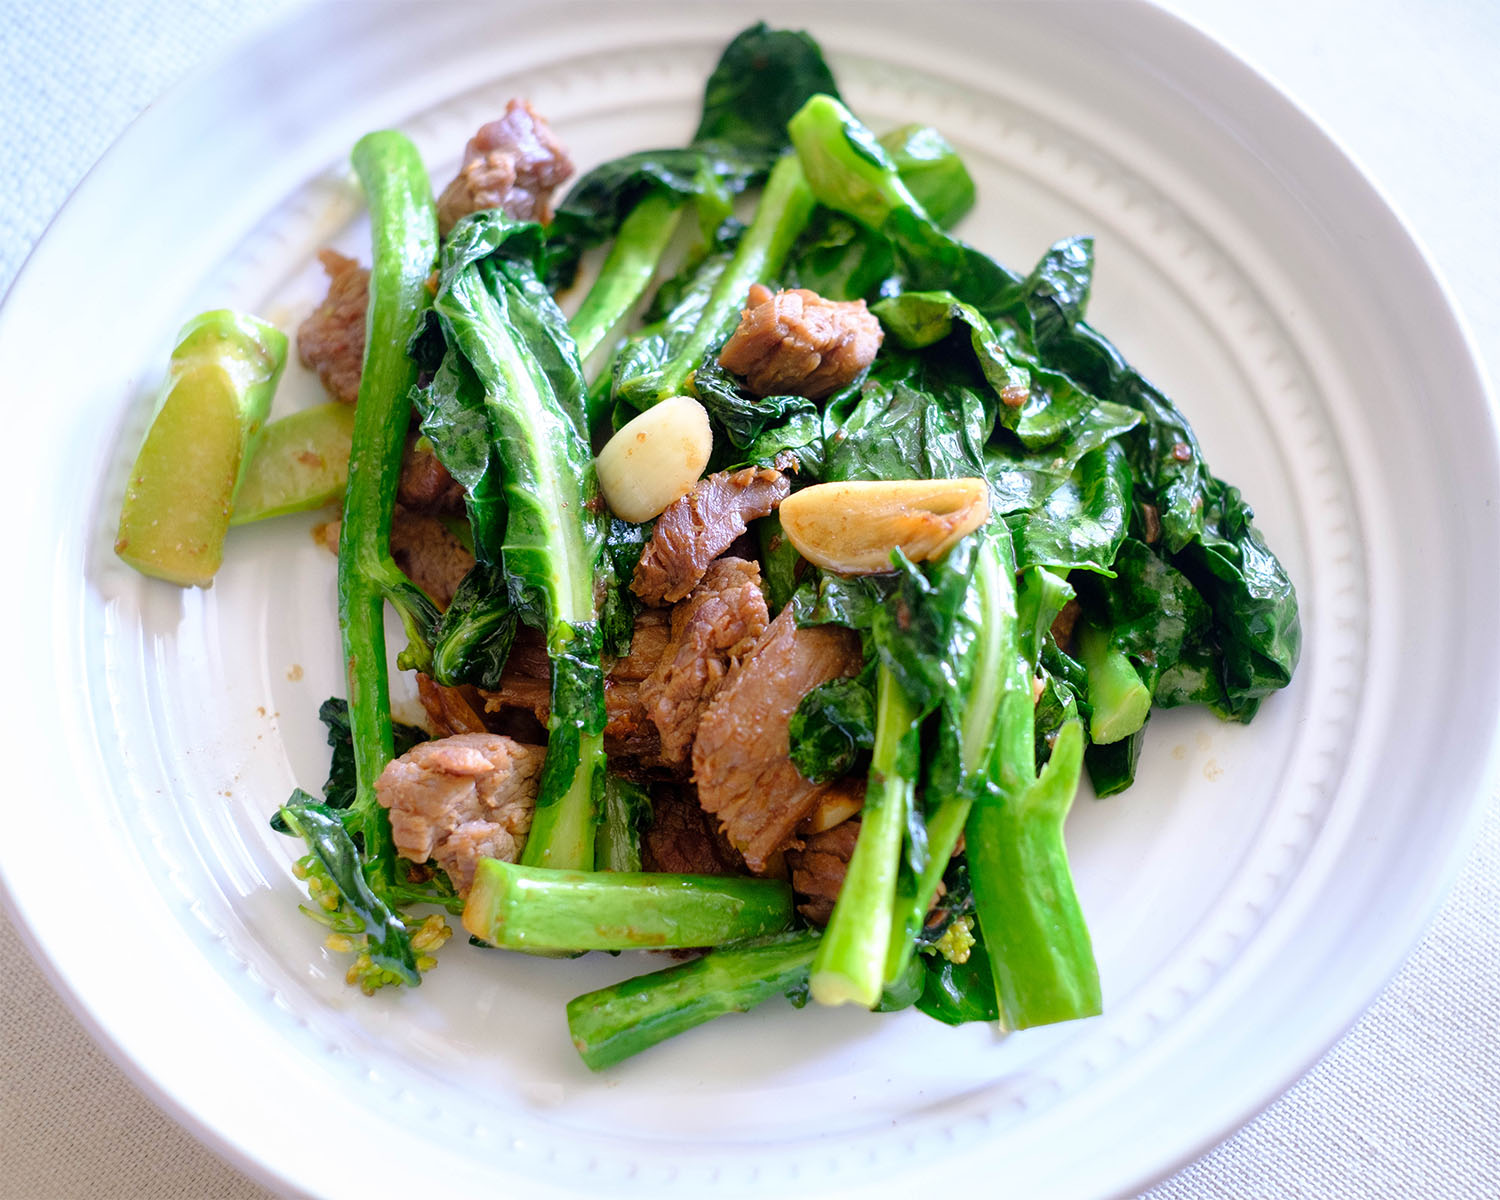
beef and chinese broccoli

Garlicky Beef Stir Fry with Chinese Broccoli

You Might Also Like

Frequently Asked Questions

Can I freeze the sandwiches? 

While it’s possible to freeze the sandwiches, the texture of the focaccia may change when thawed, becoming less crispy. If you do freeze them, don’t include the sliced tomatoes, and wrap each sandwich tightly in plastic wrap and then place them in a freezer-safe bag or container. Thaw in the fridge overnight and reheat in the oven or air fryer to restore some crispiness.


How do I reheat the sandwich?

To reheat your sandwich, preheat your oven to 350°F and warm it for about 5-7 minutes, or use an air fryer at 300°F for 3-4 minutes. This will bring back some of the focaccia’s crispiness and melt the cheese.


How long will the sandwiches last in the fridge?

The sandwiches will stay fresh for up to 3 days in the fridge when stored properly in an airtight container. For best results, keep them wrapped tightly in parchment paper or foil to prevent the bread from drying out.

Posted on Leave a comment

Smoked Salmon Omelette with Asparagus and Greek Yogurt

omelette with smoked salmon, tomatoes and asparagus

Looking for a satisfying, nutritious meal that’s easy to prep and will keep you energized? Say hello to this smoked salmon omelette with asparagus, Greek yogurt, and a fresh burst of tomatoes! This is the ultimate brunch-for-lunch recipe that not only feels indulgent but is also packed with healthy goodness. And the best part? It’s meal-prep friendly, meaning you can make it ahead of time and enjoy a balanced, protein-rich meal on the go!

This post may contain affiliate links. Please see our privacy policy for details.

Calories: 288kcal | Carbohydrates: 6g | Protein: 25g | Fat: 18g | Saturated Fat: 4g | Polyunsaturated Fat: 3g | Monounsaturated Fat: 9g | Trans Fat: 0.04g | Cholesterol: 341mg | Sodium: 870mg | Potassium: 512mg | Fiber: 2g | Sugar: 3g | Vitamin A: 1501IU | Vitamin C: 11mg | Calcium: 101mg | Iron: 4mg

omelette with smoked salmon, tomatoes and asparagus

Why You’ll Love This Recipe:

This omelette is a dream for anyone looking to eat healthier while still enjoying a flavorful and satisfying meal. The smoked salmon provides a rich source of omega-3 fatty acids, which are great for heart health and reducing inflammation. Paired with protein-packed eggs, creamy Greek yogurt, and nutrient-dense asparagus, this meal offers a powerhouse of essential nutrients

  • Eggs: Full of high-quality protein to keep you full and fueled throughout the day.
  • Smoked Salmon: A delicious way to get your omega-3s, supporting brain health and overall well-being.
  • Greek Yogurt: Adds a creamy texture while boosting the protein content without unnecessary fats. It also pairs well with the smoked salmon to even out the salty flavors.
  • Asparagus & Tomatoes: Loaded with fiber, vitamins, and antioxidants, adding a fresh and light contrast to the richness of the salmon and eggs.

The PrepYoSelf Newsletter

Ingredient Substituions

  • Smoked Salmon: If you don’t like smoked salmon, swap it out with cooked chicken breasts or turkey bacon.
  • Greek Yogurt: Low-Fat Sour cream is a great tangy and creamy alternative, or serve it with mashed avocados for the same creamy texture without the dairy.
  • Asparagus: Use sautéed spinach for a different green vegetable or roasted broccoli for a nutrient-packed swap.
  • Green Onions: Chives are a milder flavor, great for a subtle onion taste.
  • Sliced Tomatoes: Use Sun-Dried Tomatoes for a more intense tomato flavor or roasted Red Peppers for a different flavor and a touch of sweetness.

omelette with smoked salmon, tomatoes and asparagus

How to Prepare Smoked Salmon Omelette

  1. Cook the Asparagus: Preheat your air fryer to 400°F. Drizzle the asparagus spears with olive oil and season with a pinch of salt and pepper. Arrange them in the air fryer basket and cook for 3-4 minutes until they’re tender and slightly crispy. Set them aside.
  2. Whisk the Eggs: In a bowl, crack the eggs and whisk them well with a pinch of salt and pepper.
  3. Cook the Omelette: Heat a medium-sized frying pan with a drizzle of olive oil over medium-high heat. Pour in half the eggs and let them cook for 30-45 seconds. As the edges set, gently pull the eggs toward the center using a fork, allowing uncooked eggs to spread to the edges. Repeat until the eggs are almost fully cooked. Use a lid to help speed up the cooking process if needed.
  4. Top with Flavor: Once the omelette is cooked, add a dollop of Greek yogurt on top, followed by the smoked salmon, a few asparagus spears, and some fresh tomatoes.
  5. Repeat: Repeat the process for the second omelette or save the rest of the ingredients for a quick reheat-and-eat later in the week.

Reference the recipe card below for detailed instructions.

omelette with smoked salmon, tomatoes and asparagus

Meal Prep Pairings

  • Greek Yogurt Fruit Parfait: Fruit parfait adds a touch of sweetness and provides a balance of protein, fiber, and antioxidants. It’s a great option for a balanced breakfast or snack.
  • Whole Grain Toast: Toast adds a satisfying crunch and pairs well with the omelette. Whole grains offer more fiber and nutrients compared to white bread.
  • Sweet Potato Wedges: Sweet potatoes add a satisfying, slightly sweet flavor and are rich in fiber and vitamins. They make a hearty and nutritious side.

omelette with smoked salmon, tomatoes and asparagus

omelette with smoked salmon, tomatoes and asparagus

Healthy Smoked Salmon Omelette with Asparagus

A delicious smoked salmon omelette topped with Greek yogurt, asparagus, and fresh tomatoes, perfect for a healthy and satisfying meal.
No ratings yet
Prep Time 5 minutes
Cook Time 15 minutes
Course Breakfast, lunch
Cuisine American
Servings 2
Calories 288 kcal

Equipment

  • knife
  • cutting board
  • saute pan
  • Air Fryer

Ingredients
  

  • 4 oz smoked salmon
  • 4 large eggs
  • 2 tablespoons green onions (chopped)
  • 2 tablespoons Greek yogurt
  • 1/2 cup tomatoes (sliced)
  • 10 asparagus spears
  • 1/4 teaspoon salt
  • 1/4 teaspoon pepper
  • 1 tablespoon olive oil

Instructions
 

  • Cook the Asparagus: Preheat the air fryer to 400°F. Drizzle the asparagus with olive oil, salt, and pepper. Air fry for 3-4 minutes until tender and slightly crispy. Set aside.
  • Whisk the Eggs: Crack the eggs into a bowl. Add a pinch of salt and pepper, then whisk well.
  • Cook the Omelette: Heat a frying pan over medium-high heat with a drizzle of olive oil. Pour in half of the eggs. After 30-45 seconds, as the edges set, pull the eggs toward the center with a fork. Repeat until almost fully cooked. Cover with a lid if needed to speed up cooking.
  • Top with Flavor: Once the omelette is done, top with a dollop of Greek yogurt, smoked salmon, a few asparagus spears, and fresh tomatoes.
  • Repeat: Repeat for the second omelette, or save the ingredients for later.

Notes

Nutrition information provided is an estimate. It will vary based on cooking method and specific ingredients used. Please consult with your healthcare provider for specific dietary needs. To gain a better understanding, explore our nutrition disclaimer here

Nutrition

Calories: 288kcalCarbohydrates: 6gProtein: 25gFat: 18gSaturated Fat: 4gPolyunsaturated Fat: 3gMonounsaturated Fat: 9gTrans Fat: 0.04gCholesterol: 341mgSodium: 870mgPotassium: 512mgFiber: 2gSugar: 3gVitamin A: 1501IUVitamin C: 11mgCalcium: 101mgIron: 4mg

Similar Recipes

shrimp quinoa salad

Citrus Shrimp Quinoa and Spinach Salad

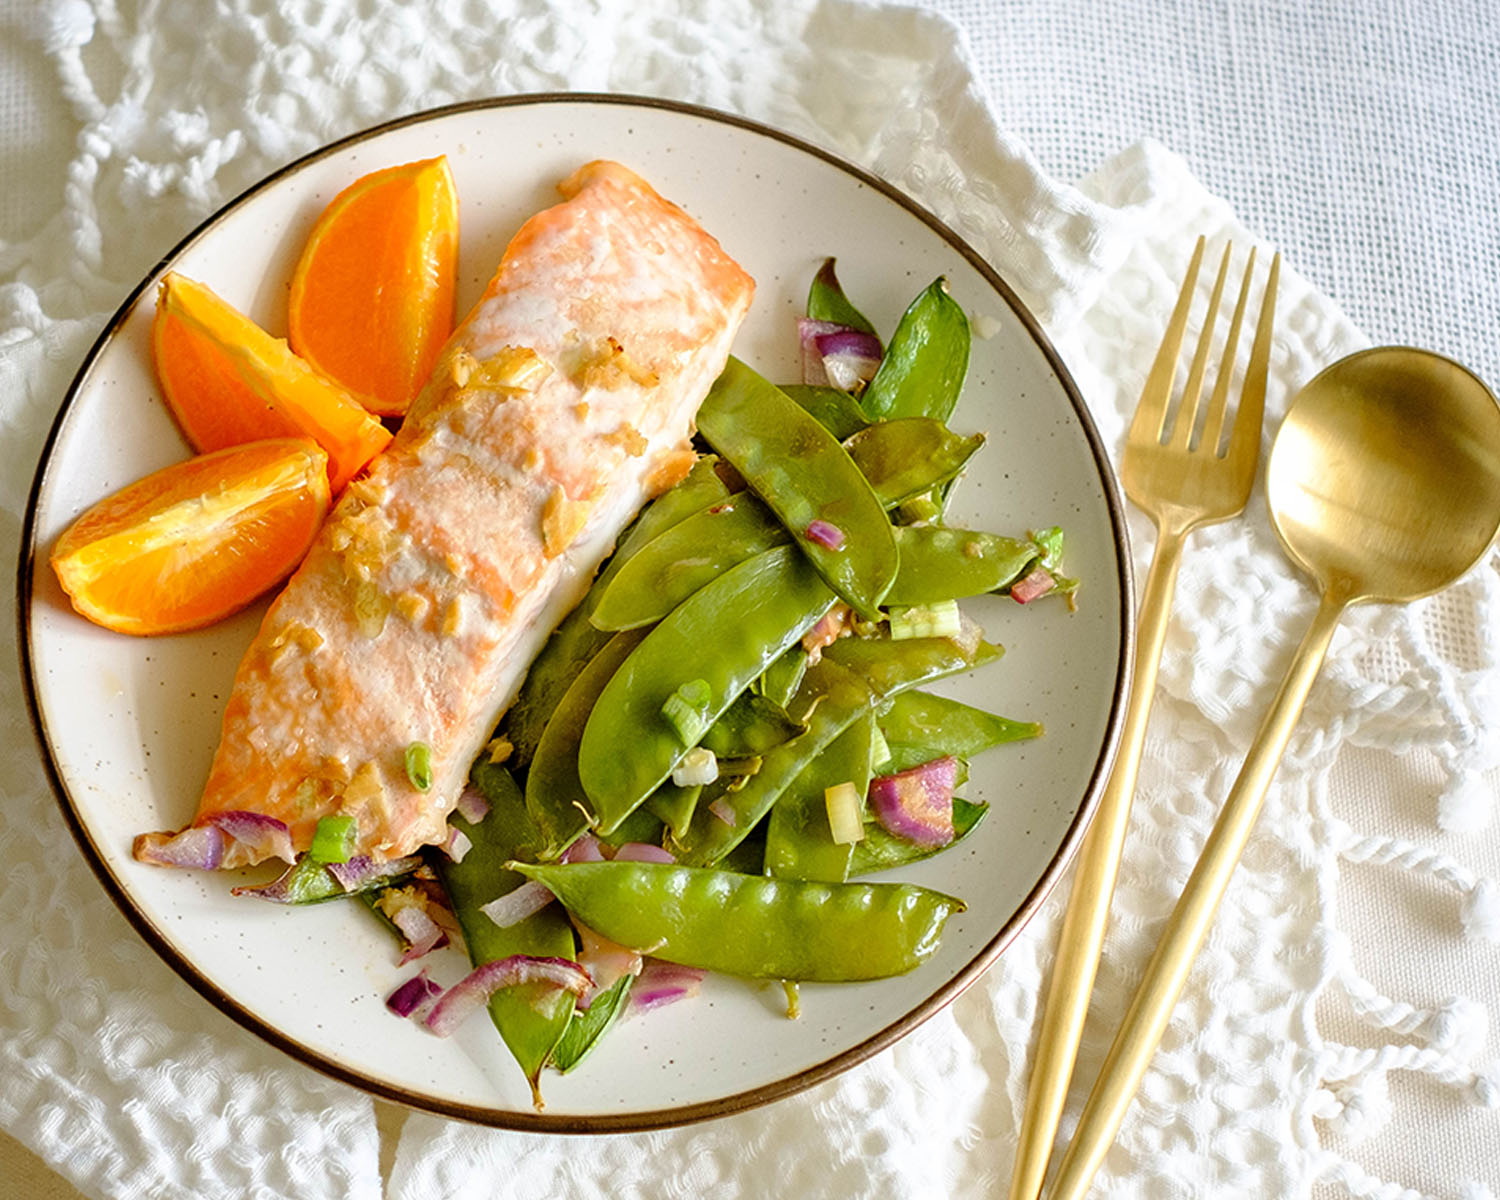
ginger salmon

Baked Orange Ginger Salmon with Snow Peas

salmon and watermelon salad

Grilled Salmon with Watermelon Salad

You Might Also Like

Frequently Asked Questions

Can I use egg whites only for this recipe?

Yes, you can use egg whites only if you prefer a lower-fat option. Substitute the 4 whole eggs with 8 egg whites. The cooking process remains the same.


How do I know when the omelette is fully cooked?

The omelette is done when the eggs are set and no longer runny. The edges should be slightly golden, and the center should be firm but still moist.


How can I adjust the recipe for larger batches?

To make a larger batch, simply multiply the ingredients as needed. Cook the omelettes in batches to avoid overcrowding the pan, and keep cooked omelettes warm in a low oven until ready to serve.

Posted on Leave a comment

Low Carb Shrimp Zucchini Boats

shrimp zucchini boats

If you’re on the hunt for a quick, budget-friendly, and incredibly tasty dish that’s low carb and high in protein, you’ve hit the jackpot with these Shrimp & Artichoke Zucchini Boats! Picture this: tender zucchini filled with a savory shrimp and artichoke mixture, all topped with a sprinkle of Parmesan and fresh Roma tomatoes. Not only is this meal a breeze to prepare, but it also packs a flavorful punch that will make you forget you’re eating healthy. Whether you’re meal prepping for the week or whipping up a quick dinner after a long day, this recipe is sure to become a staple in your kitchen. Ready to dive in? Let’s get cooking!

This post may contain affiliate links. Please see our privacy policy for details.

Calories: 251kcal | Carbohydrates: 13g | Protein: 21g | Fat: 13g | Saturated Fat: 2g | Polyunsaturated Fat: 1g | Monounsaturated Fat: 5g | Trans Fat: 0.01g | Cholesterol: 139mg | Sodium: 354mg | Potassium: 846mg | Fiber: 4g | Sugar: 6g | Vitamin A: 1173IU | Vitamin C: 52mg | Calcium: 136mg | Iron: 2mg

shrimp zucchini boats

5 Reasons You’ll Love This Recipe:

  • Quick and Easy: With just a few simple steps, you can have this delicious meal prepped and ready to go in under 30 minutes. Perfect for busy weeknights!
  • Low Carb, High Protein: This dish is a fantastic way to keep your carbs low while still packing in plenty of protein, thanks to the shrimp.
  • Budget-Friendly: Zucchini and shrimp are affordable, and by using marinated artichokes, you’re adding tons of flavor without the need for extra ingredients.
  • Meal Prep Magic: These zucchini boats reheat beautifully, making them an excellent choice for meal prepping your lunches or dinners for the week.
  • Flavor Explosion: The marinated artichokes add a zesty, tangy kick that elevates the whole dish, turning simple ingredients into something extraordinary.

Why Marinated Artichokes Are a Meal Prep Hack:

Using marinated artichokes is a genius way to amp up the flavor in your meals without any extra fuss. They come pre-seasoned, so you’re saving time on chopping and seasoning while still getting a burst of flavor. Plus, they add a great texture and an extra serving of veggies to your dish, making it even more nutritious. Toss them into salads, pasta, or like in this recipe, as part of a tasty filling for your zucchini boats. It’s an easy way to add a gourmet touch to your meals with minimal effort!

The PrepYoSelf Newsletter

Ingredient Breakdown

  • Zucchini is the perfect low-carb vessel for our savory filling. Its mild flavor allows the other ingredients to shine while providing a tender, slightly sweet base. When hollowed out and air-fried, it becomes soft yet firm enough to hold the delicious shrimp and artichoke mixture. Plus, zucchini is rich in vitamins and minerals, adding a nutritious element to the dish.
  • Shrimp is a lean source of protein that cooks quickly and has a delicate flavor, making it an ideal pairing with both zucchini and artichokes. Its slightly sweet, briny taste enhances the dish without overpowering it, and it absorbs the flavors of the garlic and marinade beautifully. The shrimp adds texture and heartiness, making the dish more filling while keeping it light.
  • Marinated artichokes are the secret ingredient that takes this recipe to the next level. They bring a tangy, zesty flavor that contrasts nicely with the mild zucchini and the tender shrimp. The marination adds depth and complexity to the dish without the need for extra seasoning. Plus, artichokes are a good source of fiber, making the meal more satisfying and nutritious.
  • Garlic is the flavor powerhouse of the recipe. Its pungent, savory taste adds warmth and aroma, enhancing both the shrimp and artichokes. Garlic pairs especially well with seafood, drawing out the natural sweetness of the shrimp while adding a savory kick that ties all the ingredients together.
  • Parmesan adds a salty, nutty flavor that complements the tanginess of the artichokes and the sweetness of the shrimp. It melts slightly over the hot shrimp mixture, creating a creamy, savory topping that pulls the entire dish together. A little Parmesan goes a long way in enhancing the overall flavor profile of the meal.
  • The Roma tomato adds a fresh, juicy element that brightens up the dish. Its slight acidity cuts through the richness of the Parmesan and the olive oil, providing a refreshing contrast. Diced Roma tomatoes also add color and texture, making the zucchini boats visually appealing as well as delicious.

shrimp zucchini boats

How to Make Shrimp Zucchini Boats

  1. Hollow out the insides of the zucchini and save them for later. (Tip: Use a melon baller for easy scooping!)
  2. Drizzle the zucchini boats with a little bit of olive oil and place them flesh side down in the Air Fryer. Air fry at 350°F for about 5 to 7 minutes. Depending on the thickness of your zucchini, you may need to cook for an additional 2 to 3 minutes until tender.
  3. Meanwhile, in a large skillet over medium heat, add olive oil. Add the shrimp, minced garlic, marinated artichokes, and about 2 tablespoons of the marinade from the jar. Cook until the shrimp are pink and cooked through, about 3 to 4 minutes.
  4. Remove the shrimp and artichokes from the heat. Scoop the shrimp mixture into the zucchini boats, garnish with grated Parmesan and diced tomatoes.
  5. Serve immediately or pack them up for a perfect meal-prep option. Enjoy!

Reference the recipe card below for detailed instructions.

shrimp zucchini boats

Ingredient Swaps and Additions:

  • Swap Shrimp for Chicken: If you’re not a fan of shrimp or want to switch it up, diced chicken breast or thighs work great. Cook them the same way as the shrimp, making sure they’re fully cooked through before adding them to the zucchini boats
  • Use Fresh Artichokes: If you prefer a more subtle artichoke flavor, you can use steamed or roasted fresh artichokes instead of marinated ones. This will give the dish a more delicate taste, allowing the other ingredients to shine.
  • Replace Parmesan with Feta: For a different flavor profile, swap the Parmesan with crumbled feta cheese. Feta adds a tangy, creamy element that pairs well with the other ingredients, especially if you enjoy Mediterranean-inspired dishes.
  • Try Different Vegetables: If zucchini isn’t your favorite, you can use bell peppers, eggplant, or even large tomatoes as the base for your filling. Just adjust the cooking time to ensure your chosen vegetable is tender.
  • Spice it Up: If you like a little heat, sprinkle some crushed red pepper flakes or add a dash of hot sauce to the shrimp and artichoke mixture. It will give the dish a spicy kick that balances well with the tangy artichokes and sweet zucchini.

shrimp zucchini boats

shrimp zucchini boats

Shrimp Zucchini Boats

These Shrimp & Artichoke Zucchini Boats are a quick, low-carb, high-protein dish packed with flavor and perfect for busy individuals looking for a healthy, budget-friendly meal.
No ratings yet
Prep Time 5 minutes
Cook Time 15 minutes
Course Main Course
Cuisine American, Mediterranean
Servings 2
Calories 251 kcal

Equipment

  • knife
  • cutting board
  • melon baller
  • Air Fryer
  • saute pan

Ingredients
  

  • 2 zucchini (cut in half lengthwise)
  • 6 oz shrimp (peeled, deveined)
  • 1/2 cup marinated artichokes
  • 2 tablespoons garlic (minced)
  • 1 tablespoon olive oil
  • 1 tablespoon grated parmesan cheese
  • 1 roma tomato (diced)

Instructions
 

  • Prep the Zucchini: Hollow out the zucchini using a melon baller (save the insides for later).
  • Cook the Zucchini: Drizzle a bit of olive oil over the zucchini boats. Place them flesh side down in the Air Fryer and cook at 350°F for 5-7 minutes. If needed, add an extra 2-3 minutes until tender.
  • Cook the Shrimp: While the zucchini cooks, heat olive oil in a large skillet over medium heat. Add shrimp, minced garlic, marinated artichokes, and 2 tablespoons of the marinade. Cook until the shrimp are pink and done, about 3-4 minutes.
  • Assemble & Serve: Fill the zucchini boats with the shrimp mixture. Garnish with grated Parmesan and diced tomatoes. Serve immediately or pack for a meal prep option. Enjoy!

Notes

Nutrition information provided is an estimate. It will vary based on cooking method and specific ingredients used. Please consult with your healthcare provider for specific dietary needs. To gain a better understanding, explore our nutrition disclaimer here.

Nutrition

Calories: 251kcalCarbohydrates: 13gProtein: 21gFat: 13gSaturated Fat: 2gPolyunsaturated Fat: 1gMonounsaturated Fat: 5gTrans Fat: 0.01gCholesterol: 139mgSodium: 354mgPotassium: 846mgFiber: 4gSugar: 6gVitamin A: 1173IUVitamin C: 52mgCalcium: 136mgIron: 2mg

Similar Recipes

pepper sandwich

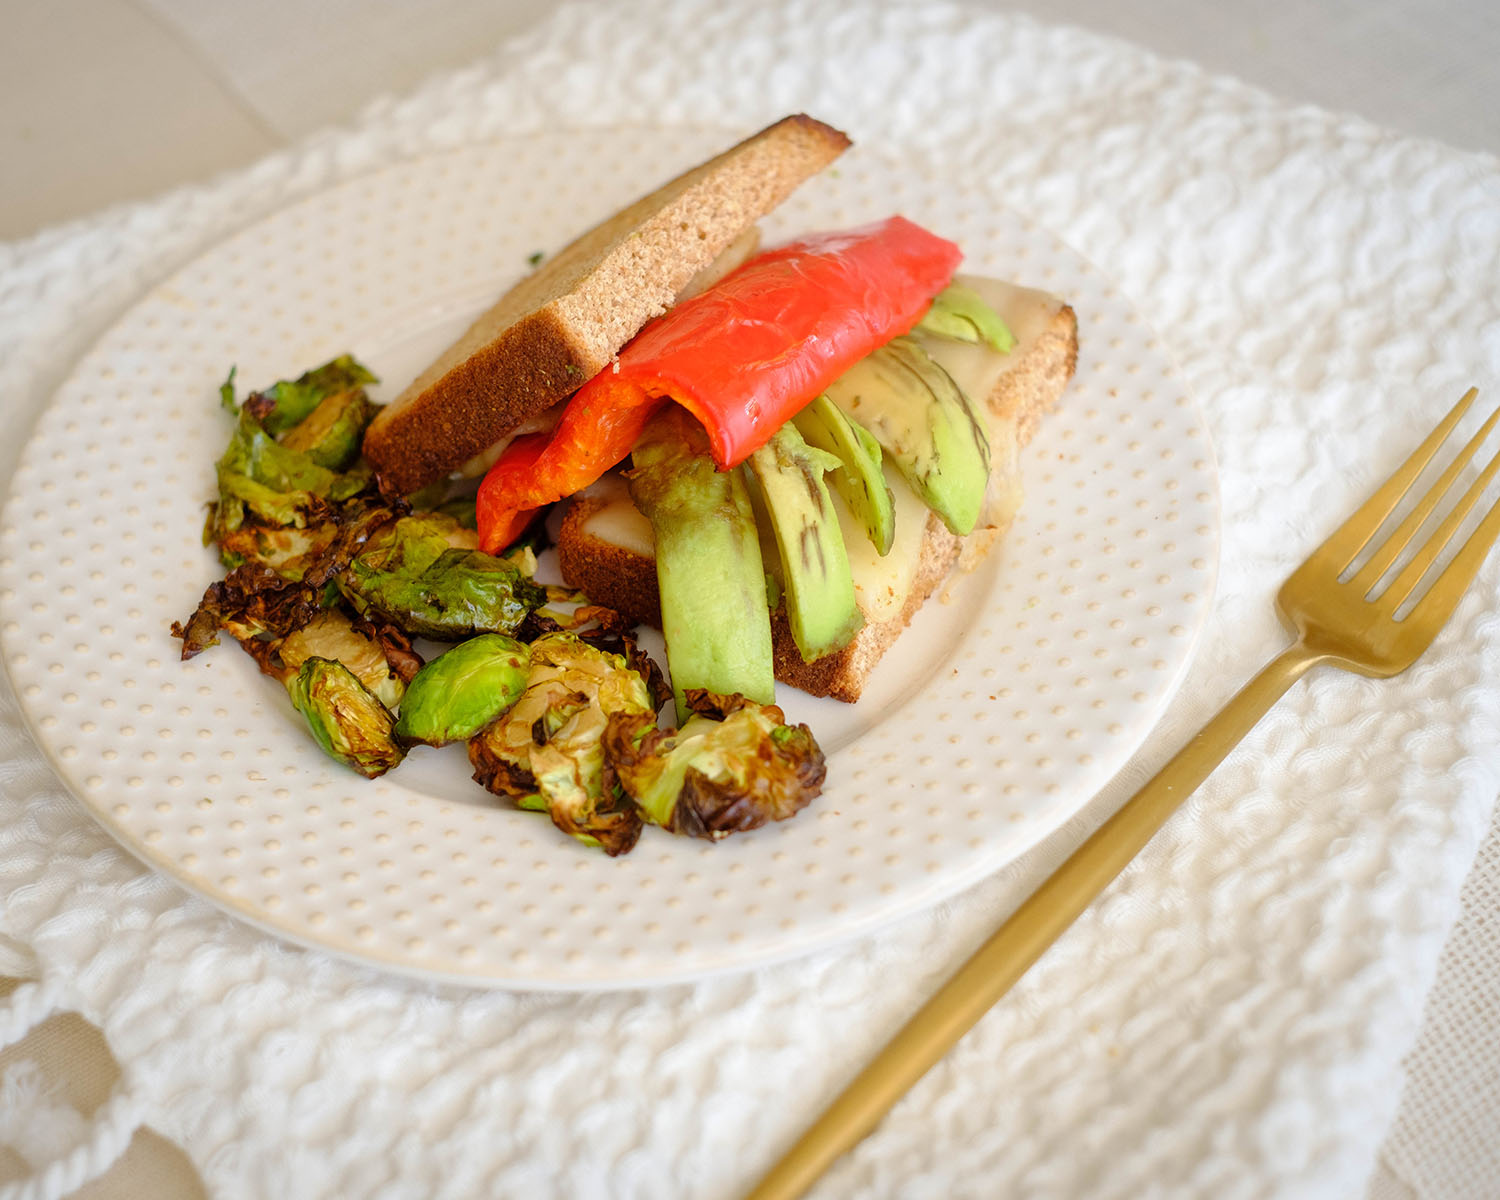
Roasted Red Pepper and Cheese Sandwich

bean and corn taco

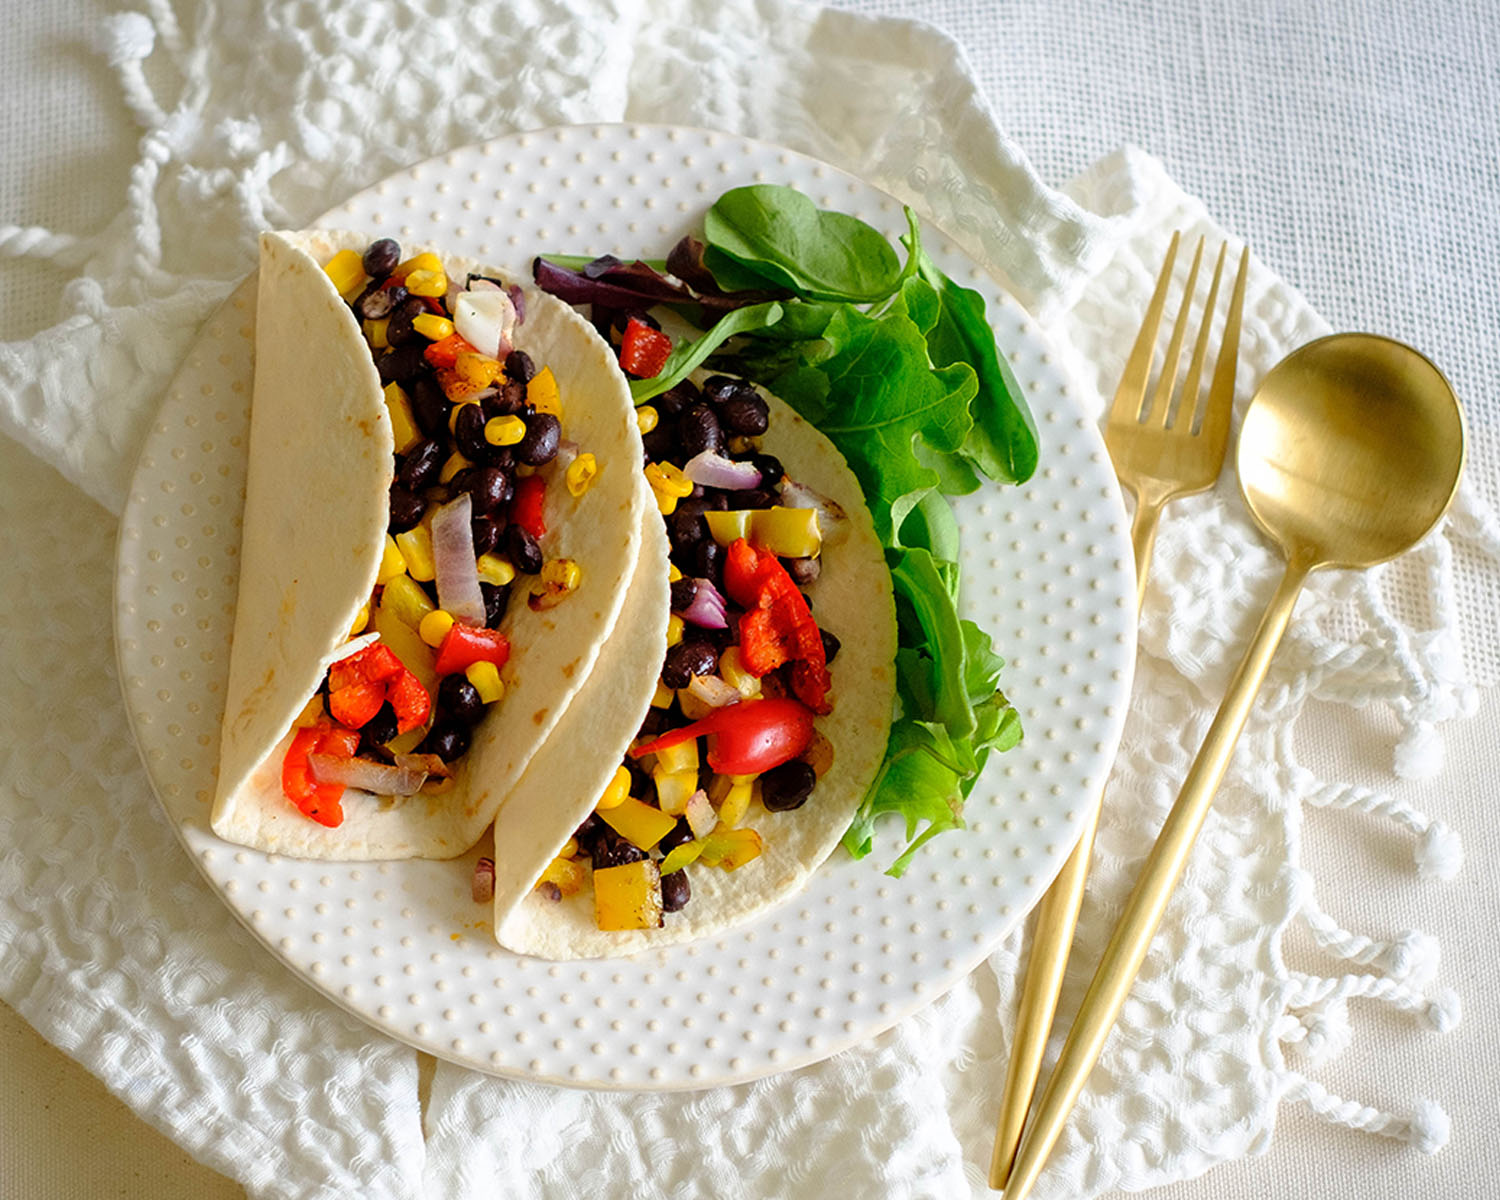
Vegetarian Black Bean and Corn Soft Tacos

eggplant

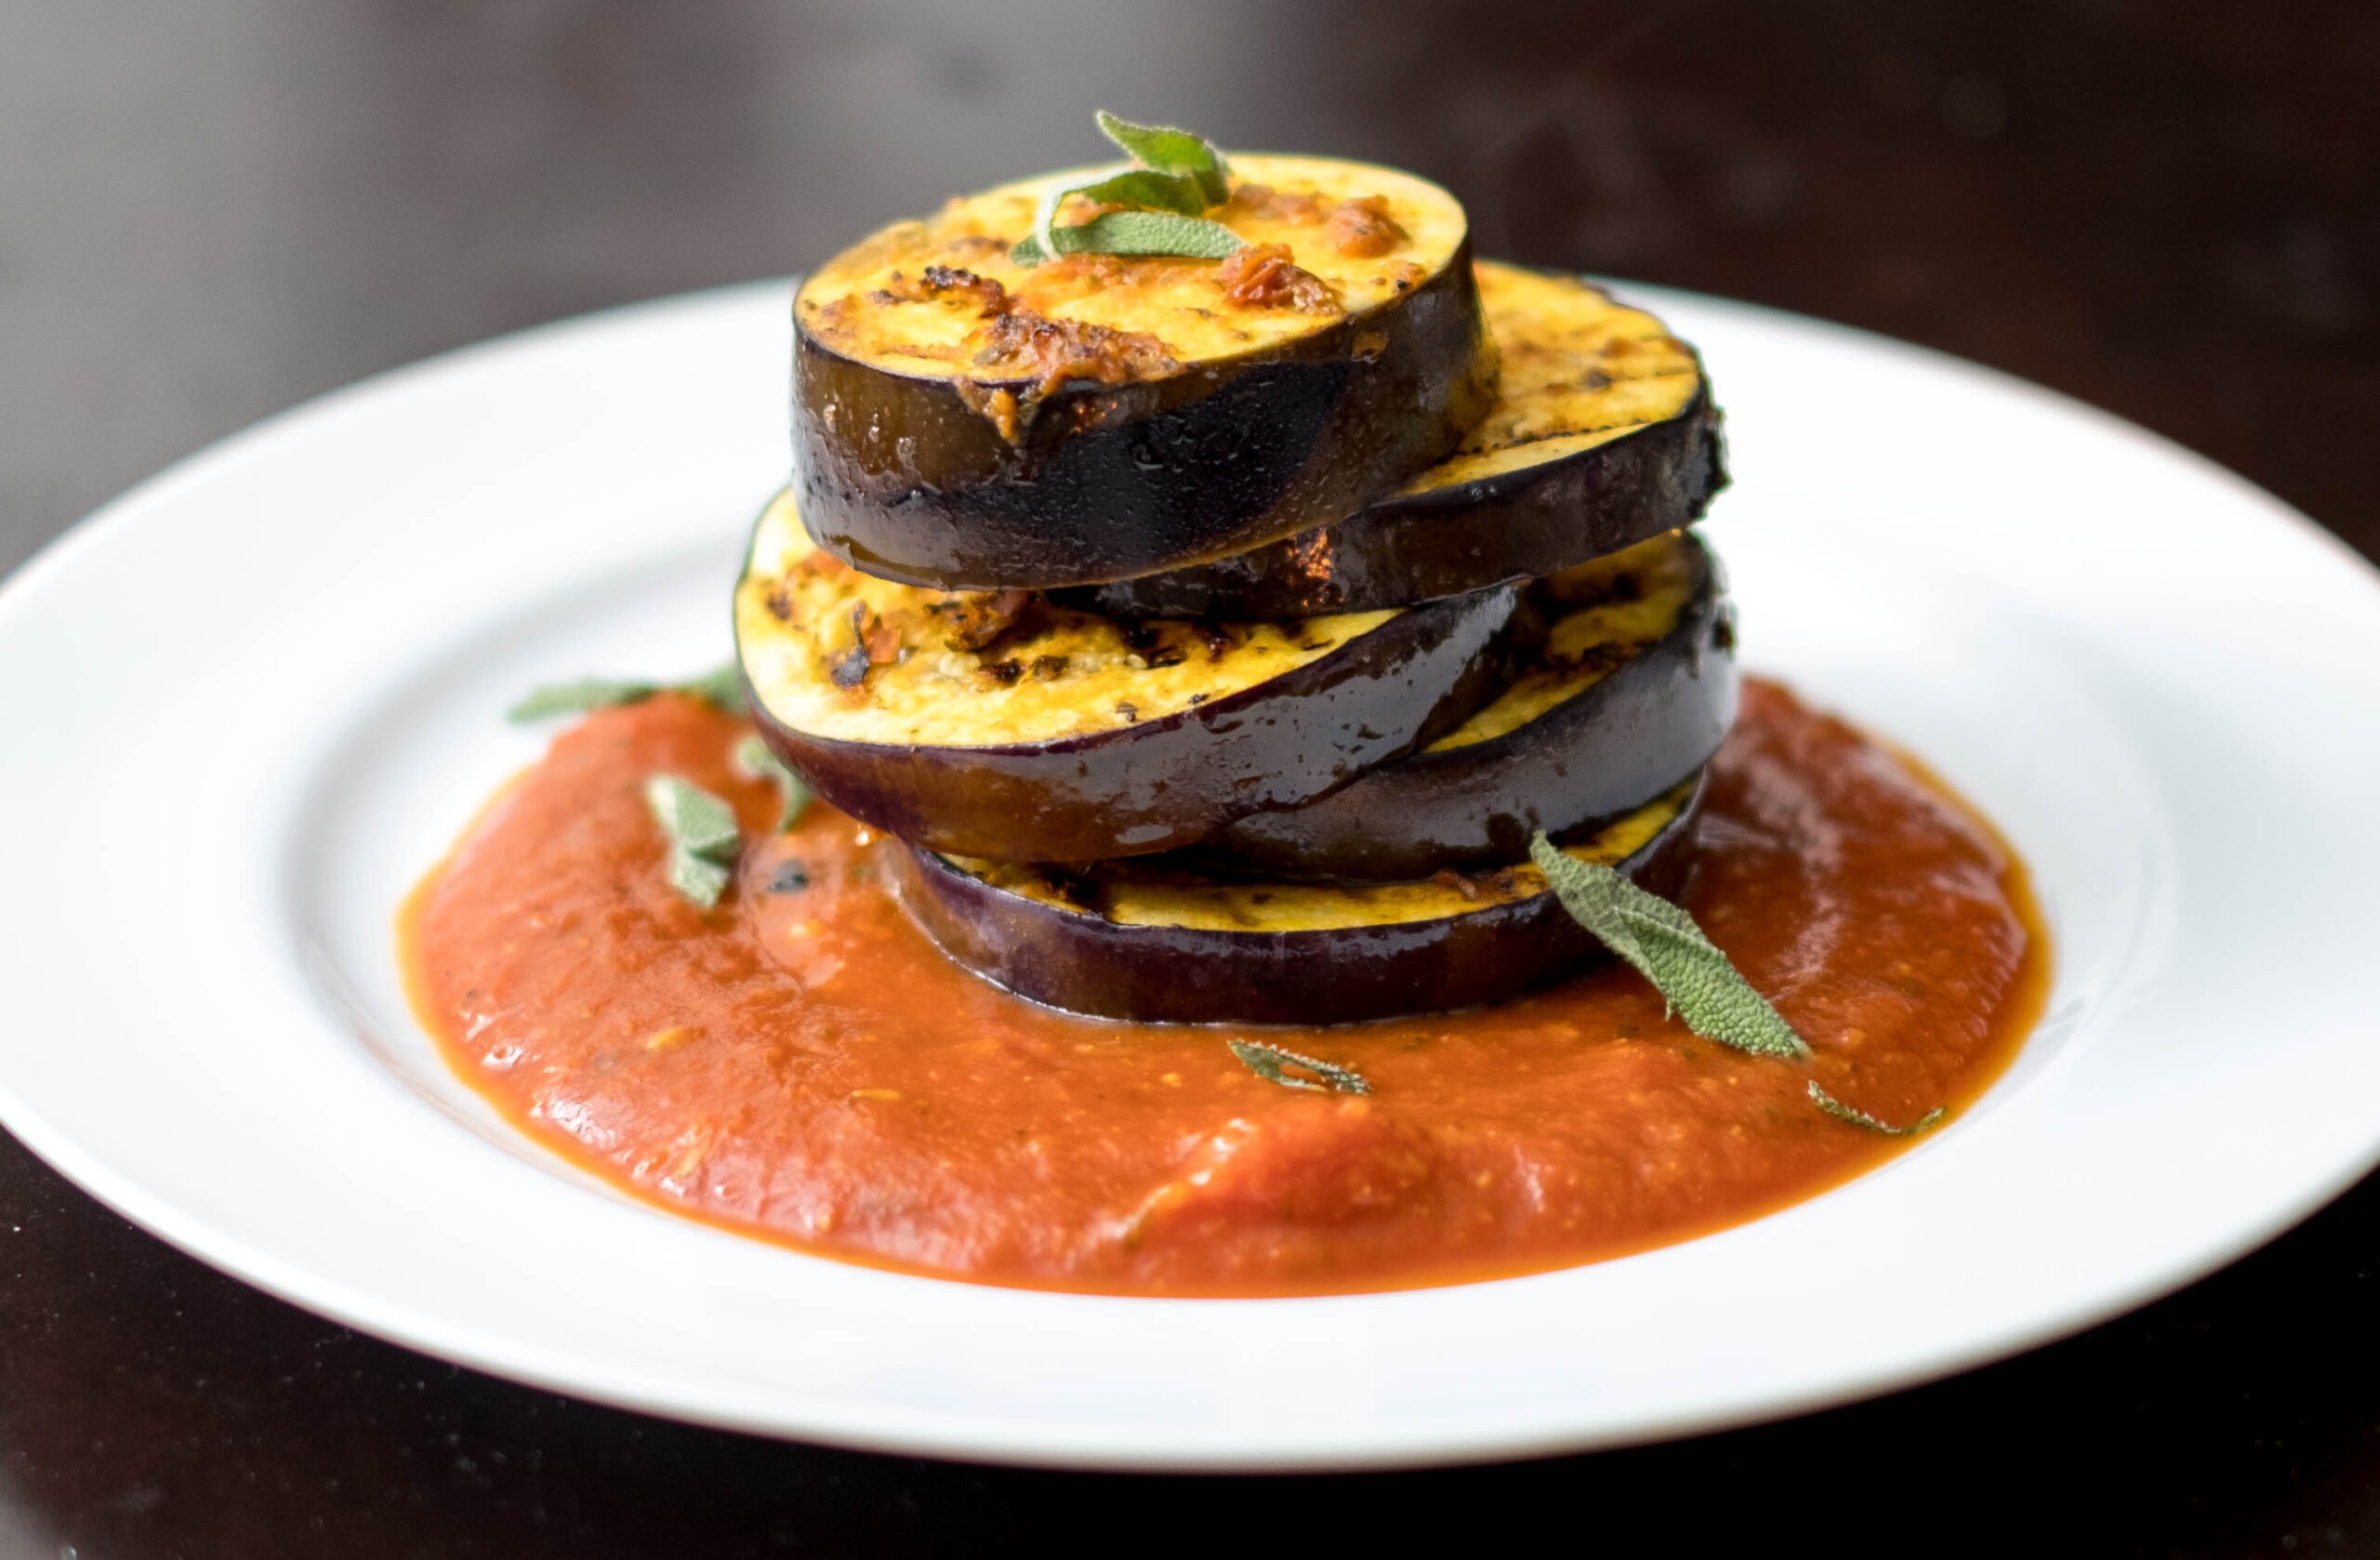
Grilled Eggplant Steaks with Marinara Sauce

You Might Also Like

Frequently Asked Questions

Can I make this recipe without an air fryer?

Absolutely! If you don’t have an air fryer, you can bake the zucchini boats in a preheated oven at 375°F (190°C) for about 10-12 minutes or until tender. You can also lightly sauté the zucchini halves in a skillet with a bit of olive oil before stuffing them.


Can I use frozen shrimp for this recipe?

Yes, frozen shrimp works well. Just be sure to thaw them completely and pat them dry before cooking to prevent excess water from diluting the flavors.


What can I do with the zucchini flesh I scooped out?

Don’t let the zucchini flesh go to waste! You can chop it up and sauté it with the shrimp and artichoke mixture, or save it for another dish like a stir-fry, omelet, or even a smoothie for an added veggie boost.

Posted on Leave a comment

Summer Meal Prep – Seasonal Produce

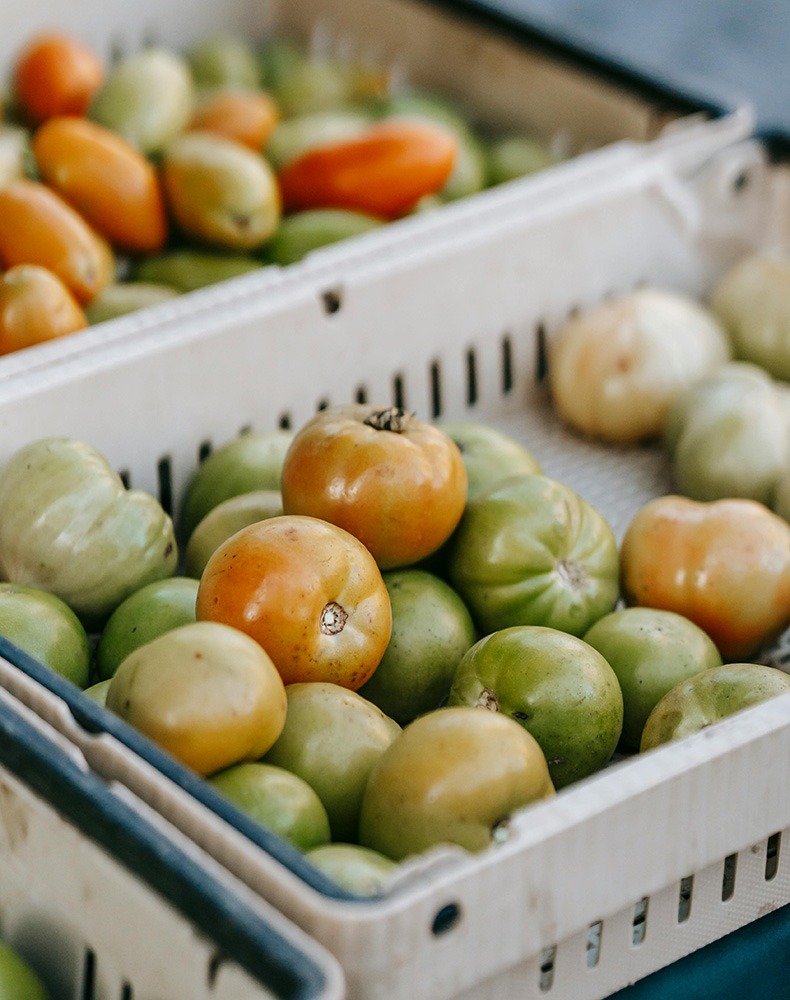
box of unripe tomatoes for summer meal prep

One of the best ways to enjoy cooking and eating is by incorporating seasonal produce. Liven up your summer meal prep with new recipes and twists on old recipes. The summer selection is vast, colorful, and delicious. This is one of the best seasons for trying new produce. Fresh berries, ripe tomatoes, delicious apples, all are amazing and can be used in so many different styles.

Meal prepping with seasonal produce is not only more affordable but the veggies and fruits are more nutritious and you can support small, local farms. Out of season vegetables have to be grown in greenhouses and tend to require larger companies. Seasonal vegetables also tend to be easier on the environment and more in sync with natural processes.

Starting your summer meal prep journey can be made easier by identifying the vegetables you want to cook with and working backwards, or the flavor. Everyone tends to start with the protein and then matches veggies and herbs that pair well. Flipping this on its head and picking a veggie or two first can really open up new perspectives and experiences.

Summer Seasonal Fruits

oranges on a tree summer produce

  • Apples
  • Apricots
  • Bananas
  • Blackberries
  • Blueberries
  • Cantaloupe
  • Cherries
  • Cucumbers
  • Honeydew Melon
  • Lemons
  • Limes
  • Mangos
  • Peaches
  • Plums
  • Raspberries
  • Strawberries
  • Tomatoes
  • Watermelon

Summer Seasonal Vegetables

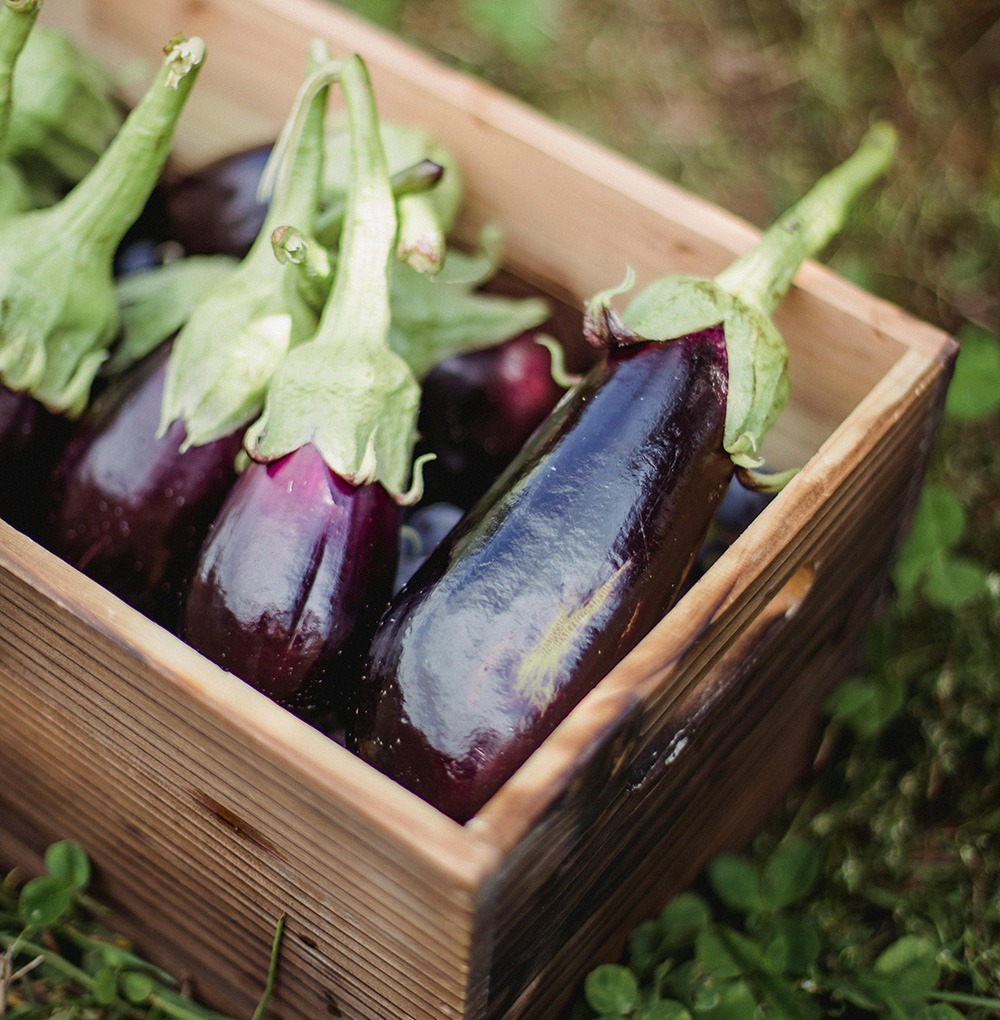
box of eggplants for summer meal prep

  • Asparagus
  • Eggplant
  • Garlic
  • Beets
  • Bell Peppers
  • Zucchini
  • Summer Squash
  • Tomatillos
  • Avocados
  • Carrots
  • Celery
  • Okra
  • Green Beans
  • Corn

Other Summer Seasonal Produce

  • Lima Beans
  • Herbs
  • Parsley
  • Mint
  • Basel
  • Oregano
  • Cilantro
  • Thyme
  • Lemon balm
  • Chives

Summer Food & Flavor Combinations

Tomato & Basil

Tomato and Basil is a classic combination of flavors especially in mediterranean cuisine. The aromatic sweet flavor of basil pairs perfectly with the acidic taste of tomato complimenting both and providing a harmonious balance. Often used in sauces or soups, these two ingredients are easy to use, easy to balance, and brings out the best in so many other ingredients.

Fish & Citrus

Citrus is a great way to enhance the flavor of fish or seafood. Summer meal prep with fish and citrus is light and refreshing which is great for hot, sunny days. The zesty flavor from lemons, limes, or oranges, compliment the richness of the fish. The citrus can be used as a drizzle after cooking, a glaze, a zest, or cooked with the seafood. Ceviche is a perfect option for no-cook meals. The vibrant flavors will add something special to any summer meal prep.

Avocado & Eggs

The creamy combination of avocado and eggs provides a nutrient-dense and versatile addition to a meal. The velvety texture of the avocados pairs well with eggs that are scrambled, poached, or fried. Avocados are full of healthy fats while the eggs offer protein and other vitamins. The fats and protein together will fill you up quickly and leave you feeling full longer, which is why it’s popular for breakfast but it’s far more than that. You can add it to salads, make a sandwich out of it, or pair it with chicken and veggies for a full meal. 

Berries & Yogurt

No all summer meal prep has to be savory. Adding berries to yogurt is a fantastic sweet treat that is also nutritious. Plain or honey greek yogurt is a good base and pairs well with many different types of fruit, although berries tend to be the go-to option. Yogurt is a good source of protein and probiotics while the berries provide antioxidants and vitamins. Add a bit of granola for some fiber or fresh honey for a slightly sweeter taste. This is a desert that you can have for breakfast and be set up for a great day.

Zucchini & Lemon

As a side or as a place to start for a vegetarian meal, zucchini and lemon is delicious and pairs well with tons of other food. The light, fresh flavors of both will elevate other ingredients and offer a healthy side option. The sweet taste of the zucchini and acidic flavor of lemon lifts the flavors of both for a balanced combination. Add zucchini and lemon to noodles with olive oil for a delicious and easy meal. You can add chicken for a bit of protein as well. Perfect for summer meal prep on hot days that need a fresh dinner.

Cucumbers & Dill

Most commonly used with pickles, cucumber and dill doesn’t have to be pickled to be delicious together. The light, sweet flavor of cucumbers is balanced with the slightly tangy notes of dill for a flavor combination that is invigorating. Most commonly used in salads or sauces like tzatziki but it can work as a side or as a garnish. This will add depth to a dish elevating the other ingredients and highlighting flavors you may have otherwise not noticed. Try it with grilled chicken or fish and enhance your summer meal prep.

View all of our meal prep recipes

Posted on Leave a comment

Asian Crispy Cabbage Rolls: The Perfect High-Protein Meal Prep

cabbage roll

If you’re all about quick, healthy, and oh-so-tasty meal prep, I’ve got a recipe that’s going to change your game: Asian Crispy Cabbage Rolls. These rolls are packed with lean protein, fresh veggies, and savory flavors that will keep you fueled and satisfied without any fuss. Let’s dive into why this recipe rocks and how it can support your health goals!

This post may contain affiliate links. Please see our privacy policy for details.

Calories: 276kcal | Carbohydrates: 10g | Protein: 24g | Fat: 16g | Saturated Fat: 4g | Polyunsaturated Fat: 3g | Monounsaturated Fat: 9g | Trans Fat: 0.1g | Cholesterol: 98mg | Sodium: 1335mg | Potassium: 913mg | Fiber: 2g | Sugar: 4g | Vitamin A: 5223IU | Vitamin C: 8mg | Calcium: 44mg | Iron: 2mg

cabbage roll

What Makes These Cabbage Rolls Awesome?

First off, these rolls are a high-protein powerhouse. Ground chicken is the star of the show, offering lean protein that helps build and repair muscle, keeps you feeling full, and supports your overall health. Paired with crunchy veggies like carrots, mushrooms, and onions, you’re getting a dose of vitamins and minerals that are just as important as your protein intake.

The napa cabbage leaves are not only a light and healthy alternative to traditional wraps, but they also add a subtle sweetness and crunch. Plus, cabbage is loaded with antioxidants and fiber, making it a fantastic choice for your gut health.

The PrepYoSelf Newsletter

Ingredient Breakdown: Why These Flavors Work So Well Together

When it comes to creating a dish that’s both flavorful and balanced, every ingredient plays its part. Let’s take a closer look at the star players in these Asian Crispy Cabbage Rolls and why they pair so perfectly together.

  • Ground Chicken: Ground chicken is lean, mild, and absorbs flavors beautifully. It’s a fantastic base for the savory soy sauce and fish sauce, giving you a protein-rich filling that’s light yet satisfying. Chicken’s versatility allows it to blend seamlessly with the other ingredients, letting them shine while still providing that essential protein boost.
  • Garlic (Minced): Garlic adds a punch of aromatic flavor to the dish. It’s a classic ingredient in Asian cuisine, known for its ability to enhance the taste of meats and vegetables. When sautéed, garlic becomes fragrant and slightly sweet, perfectly complementing the earthiness of the mushrooms and the sweetness of the carrots.
  • Carrot (Grated): Carrots bring a subtle sweetness and a satisfying crunch to the mix. They balance the savory notes from the soy sauce and fish sauce while adding a pop of color and texture. Carrots are also rich in beta-carotene, a powerful antioxidant, making them a nutritious addition to this dish.
  • Mushrooms (Diced): Mushrooms are the umami heroes of this recipe. They have a meaty texture that pairs well with the ground chicken, adding depth and richness to the filling. Mushrooms soak up the soy and fish sauces, amplifying their flavor while contributing their own earthy, savory taste that ties the dish together.
  • White Onions (Diced): White onions provide a sharp, sweet flavor that enhances the overall taste of the filling. When sautéed, they soften and become slightly caramelized, adding a subtle sweetness that balances the savory elements. Onions also add a nice texture contrast, keeping the filling from being too uniform.
  • Green Onions (Diced): Green onions bring a fresh, slightly pungent flavor that lightens up the dish. They’re milder than white onions and add a bit of crunch and brightness, making the filling taste more complex and layered. Their fresh, herbaceous notes are a great match for the richness of the chicken and mushrooms.
  • Soy Sauce: Soy sauce is the backbone of this dish’s flavor profile. It’s salty, savory, and rich in umami, making it the perfect seasoning for the ground chicken and vegetables. Soy sauce brings all the ingredients together, creating a cohesive taste that’s distinctly Asian and deeply satisfying.
  • Fish Sauce: Fish sauce adds a complex, salty depth that enhances the umami from the soy sauce and mushrooms. It’s a key ingredient in many Asian dishes, known for its ability to boost flavor without overpowering the other ingredients. Just a tablespoon brings an extra layer of richness and complexity to the filling.
  • Napa Cabbage Leaves: Napa cabbage leaves are the perfect wrap for this filling. They’re sturdy enough to hold everything together but tender enough to eat easily. Blanching them softens the leaves and brings out their natural sweetness, which complements the savory filling. When fried, the cabbage leaves get a delightful crispy texture that contrasts beautifully with the soft, flavorful interior.
cabbage rolls

Easy Recipe Steps for Cabbage Rolls

Imagine the aromas wafting through your kitchen as the stir fry sizzles in the pan. The fragrance of the shrimp mingling with the earthy undertones of the cabbage creates an olfactory symphony that heightens the anticipation of the feast to come. Here’s how you can enjoy this dish in less than 10 minutes:

  1. Prep Your Cabbage Leaves: Start by blanching those vibrant nappa cabbage leaves in boiling water for a few minutes until the stems soften. This makes them pliable and easy to roll, plus it brings out their beautiful, fresh flavor. Once they’re soft, let them cool down.
  2. Sauté & Stir: In a hot sauté pan, start with your diced onions and green onions for that aromatic base. Add in your ground chicken, grated carrots, and diced mushrooms. Stir everything together until the chicken is fully cooked and the veggies are tender. A splash of soy sauce and fish sauce will bring all those flavors together in a delicious umami blend.
  3. Roll It Up: Now that your filling is ready and your cabbage leaves are cool, it’s time to assemble! Place a spoonful of the chicken mixture onto the white stem area of each cabbage leaf and roll it up nice and tight. If you’ve got any cabbage left over, don’t waste it—just slice it up and stir-fry it as a side dish for another meal.
  4. Get Crispy: Heat up a non-stick frying pan with a little oil, and gently fry your cabbage rolls until they’re crispy on both sides. It only takes a few minutes, and the result is golden-brown perfection. Serve them up with your favorite dipping sauce and a sprinkle of sesame seeds for that final touch.

Reference the recipe card below for detailed instructions.

cabbage rolls

Why This Recipe is Perfect for Meal Prep

These Asian Crispy Cabbage Rolls are not just tasty—they’re perfect for meal prep. You can make a batch ahead of time, store them in the fridge, and enjoy them throughout the week. They’re easy to reheat, and that crispy texture holds up beautifully, making each bite as satisfying as the first.

With these rolls, you’re getting a balanced meal that’s low in carbs, high in protein, and full of flavor. Whether you’re looking to maintain a healthy lifestyle, fuel up after a workout, or simply enjoy a delicious meal, these cabbage rolls have got you covered.

So go ahead, give these Asian Crispy Cabbage Rolls a try, and watch how easy (and tasty!) healthy eating can be. Enjoy!

cabbage rolls
cabbage rolls

Asian Crispy Cabbage Rolls

Asian Crispy Cabbage Rolls: Savory ground chicken and veggies wrapped in tender nappa cabbage, then pan-fried to golden perfection for a delicious, high-protein meal prep.
No ratings yet
Prep Time 5 minutes
Cook Time 30 minutes
Course dinner, Main Course
Cuisine Asian
Servings 2
Calories 276 kcal

Equipment

  • knife
  • cutting board
  • saute pan
  • boiling pot

Ingredients
  

  • 8 oz ground chicken
  • 1 garlic clove (minced)
  • 1 carrot (grated)
  • 1/2 cup mushroom (finely diced)
  • 1/2 cup white onions (diced)
  • 1/4 cup green onions (diced)
  • 2 tablespoons soy sauce
  • 1 teaspoon fish sauce
  • 1 bunch napa cabbage (use 6 pieces)
  • 1 tablespoon olive oil

Instructions
 

  • Place a pan of boiling water on high heat. Add in your cabbage leaves. Blanch for a few minutes or until the white parts of the cabbage are soft. Remove from the pan and gently set aside to cool.
  • Meanwhile, add oil to a saute pan on high heat and saute the onions and green onions. Add the ground chicken, carrots, and mushrooms, and stir them around until the chicken fully cooks. Finally season with soy sauce and fish sauce and mix well. Once the ground chicken mixture is cooked, set it aside and let it cool.
  • Once your cabbage is drained and cooled, place one leaf on a clean surface. Add a spoonful of the filling mixture at the bottom of your cabbage leaf (on the white stem area). Roll up your cabbage leaf into a cabbage roll. Set the cabbage roll aside, and repeat this step. If you have any cabbage left, simply slice them and saute them in a wok with your choice of seasonings and enjoy them as a side dish for other meals.
  • Place a non-stick frying pan on medium heat and drizzle with a bit of oil. Add in your cabbage rolls . Fry for 2-3 minutes on each side. Then, flip the cabbage rolls and fry for another 1 to 2 minutes until both sides are crispy. Enjoy with your choice of dipping sauce and a sprinkle of sesame seeds.

Notes

Nutrition information provided is an estimate. It will vary based on cooking method and specific ingredients used. Please consult with your healthcare provider for specific dietary needs. To gain a better understanding, explore our nutrition disclaimer here

Nutrition

Calories: 276kcalCarbohydrates: 10gProtein: 24gFat: 16gSaturated Fat: 4gPolyunsaturated Fat: 3gMonounsaturated Fat: 9gTrans Fat: 0.1gCholesterol: 98mgSodium: 1335mgPotassium: 913mgFiber: 2gSugar: 4gVitamin A: 5223IUVitamin C: 8mgCalcium: 44mgIron: 2mg

Similar Recipes

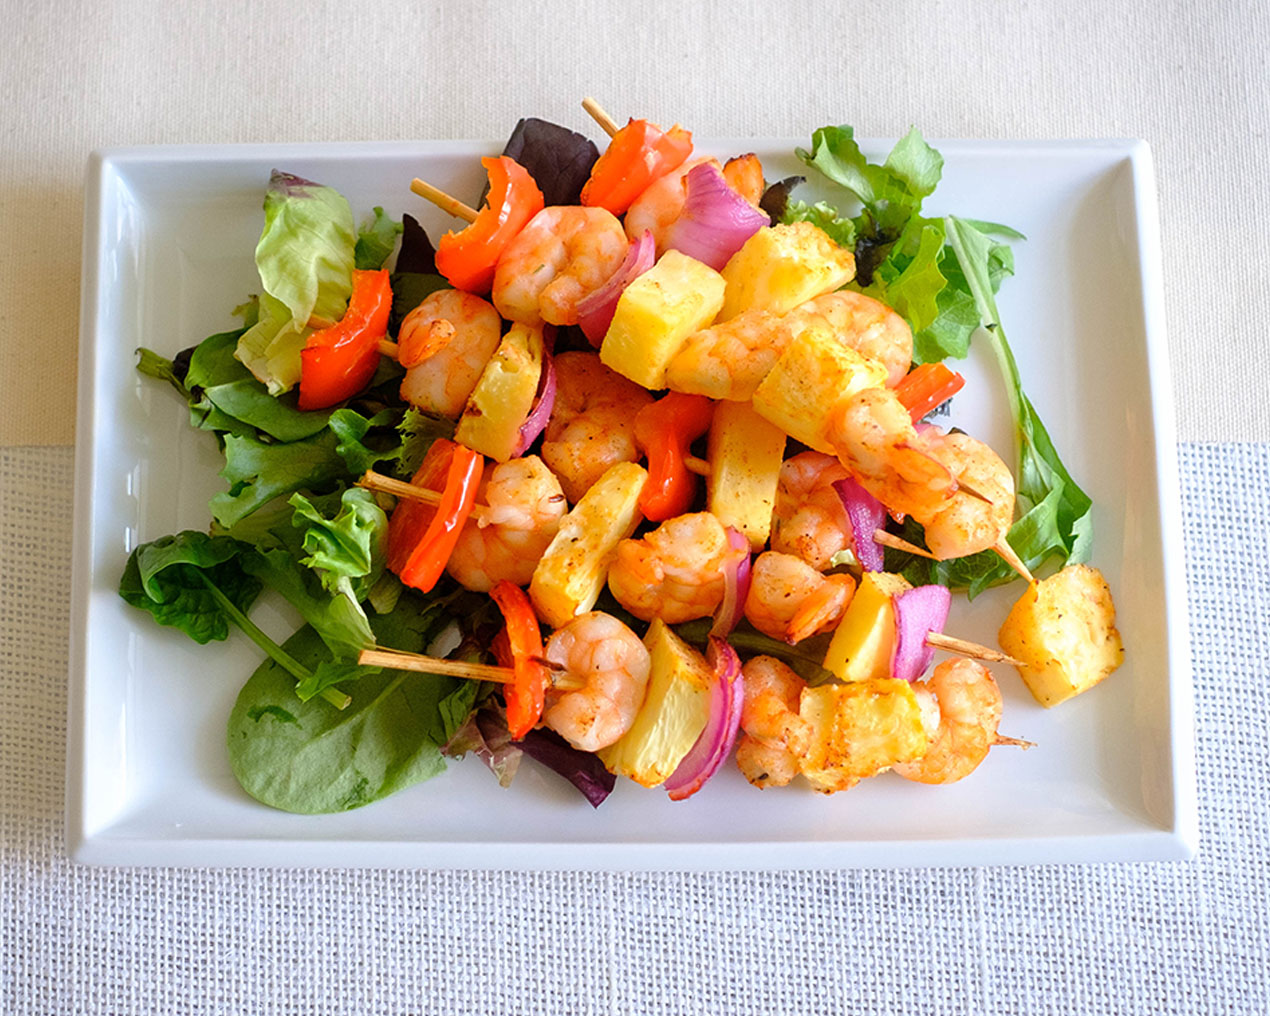
shrimp kebab

Air Fryer Shrimp and Pineapple Kebabs

shrimp and corn

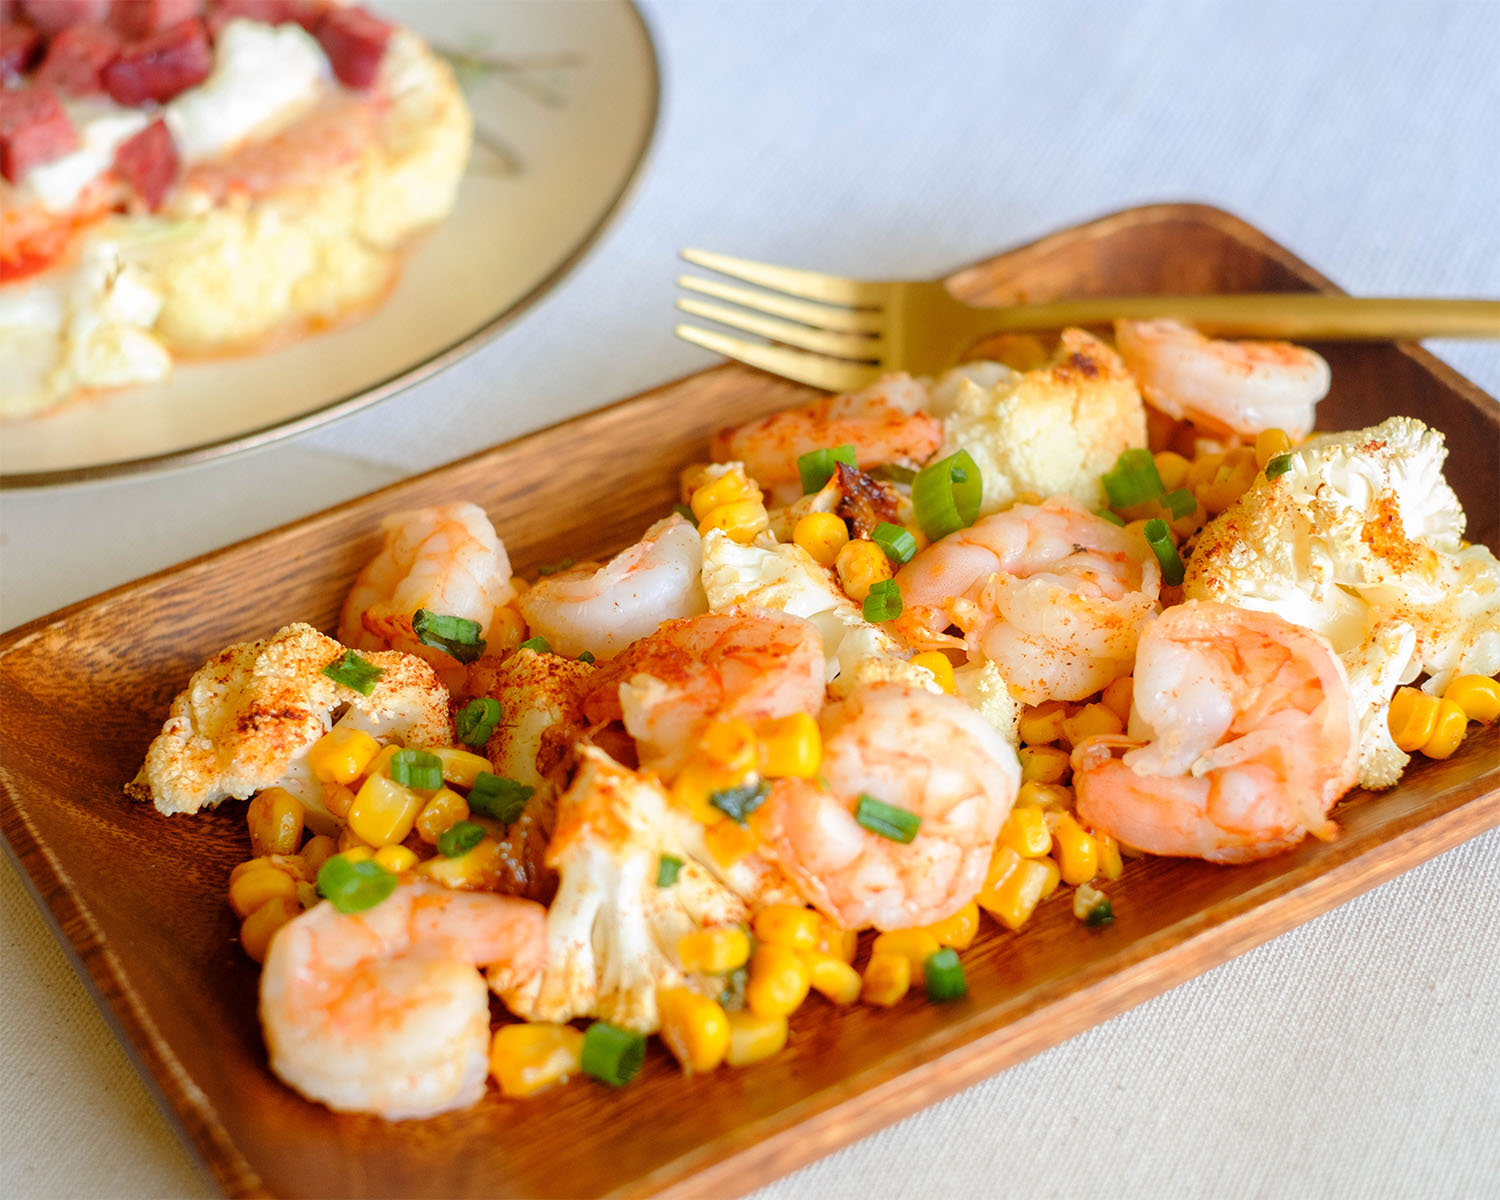
Sheet Pan Shrimp with Cauliflower and Corn

salmon salad

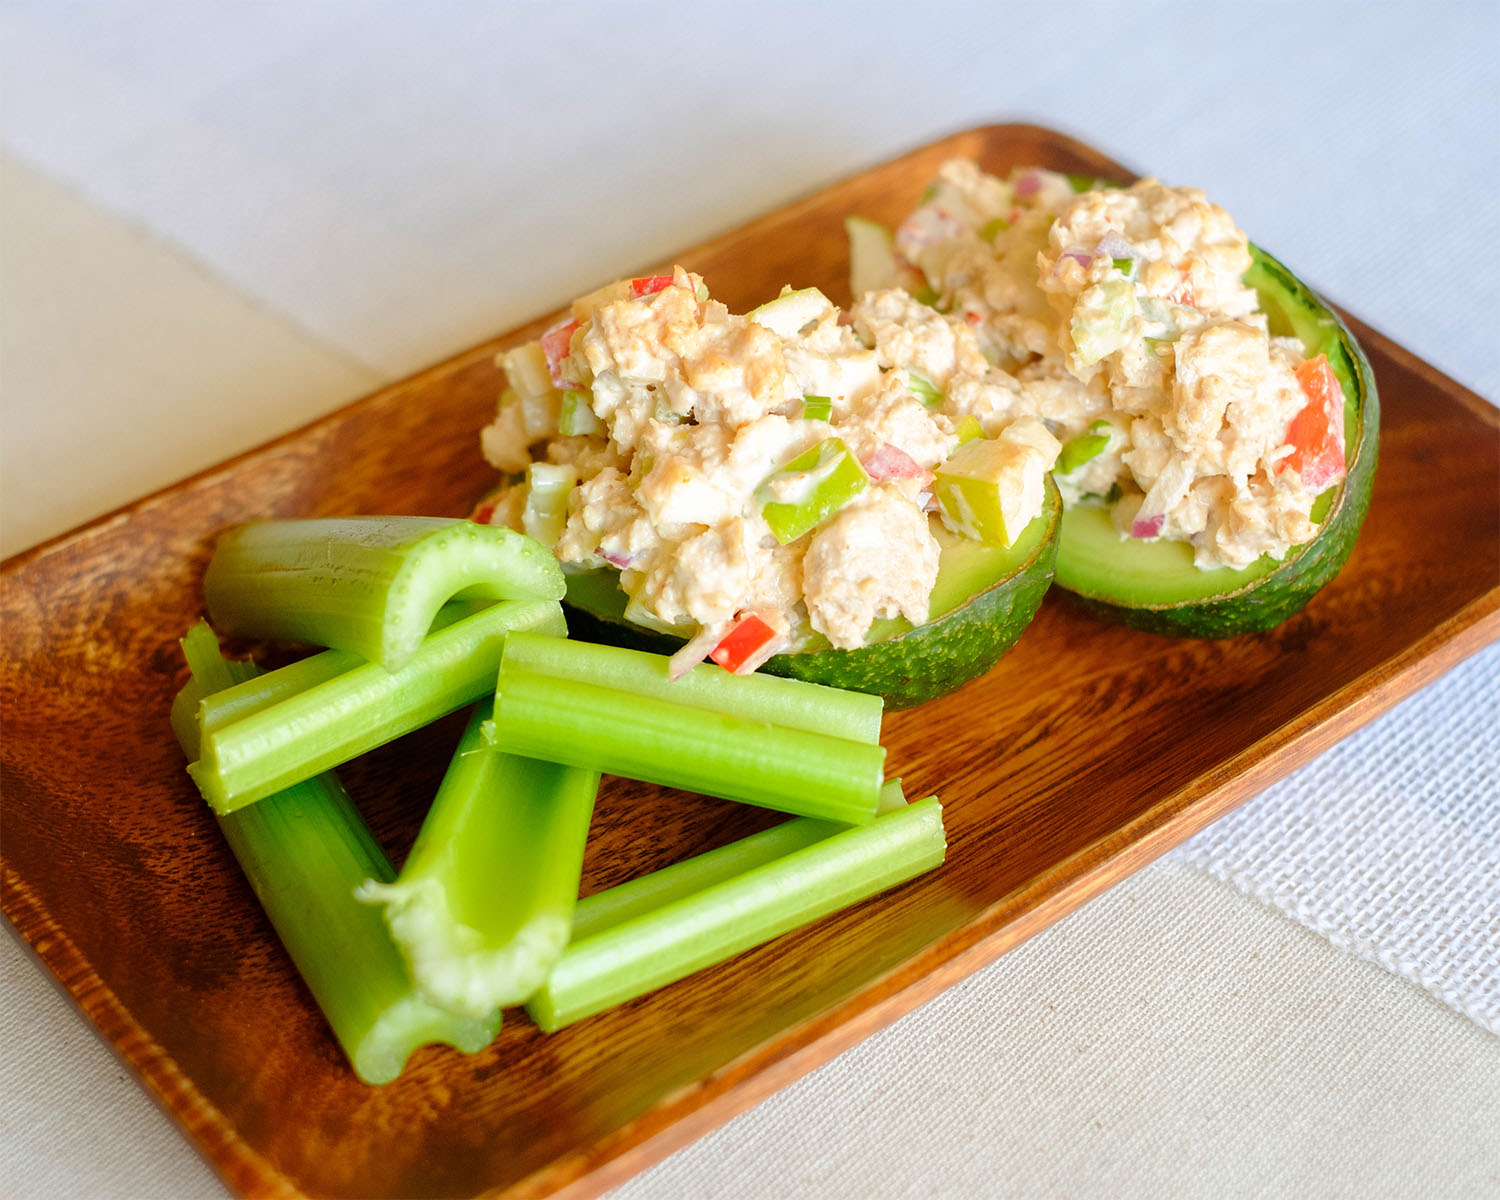
Salmon Salad Stuffed Avocado

You Might Also Like

Frequently Asked Questions

Can I use a different type of meat instead of ground chicken?

Absolutely! Ground turkey, pork, or even beef would work well in this recipe. If you prefer a vegetarian option, you can substitute the meat with crumbled tofu or a meat alternative like tempeh.


How do I keep the cabbage rolls from falling apart?

The key is to blanch the cabbage leaves just enough to make them pliable but still sturdy. When rolling, make sure to tuck in the sides of the cabbage tightly around the filling. Frying them gently helps seal the rolls and keeps them intact.


What dipping sauce pairs well with these cabbage rolls?

A simple soy sauce mixed with a little rice vinegar, sesame oil, and a pinch of red pepper flakes makes a great dipping sauce. You could also try sweet chili sauce or even a peanut sauce for a different flavor profile

Posted on Leave a comment

Meal Prep Smoothies

In the throes of summer heat, a cool smoothie can make all the difference. Whether as a meal replacement or as a snack, meal prep smoothies are a nutritious, delicious, and nice change of pace for meals. The flavor combinations and cool temperature make for a different experience than the usual lunch. Meal prep smoothies take it a step further, planning and portioning out the ingredients in advance to make smoothies even easier.

three bottles of meal prep smoothie

Meal prep smoothies can also help with lunch smoothies. You can pre-make the smoothies and take it with you in a bottle, keep it in the fridge, and mix it up before drinking. If you are making more of a juice smoothie this is an option that works. If, on the other hand, you’re making more of a frozen fruit smoothie, it may be better to meal prep the smoothie instead.

green super food meal prep smoothie with kale and two straws

To meal prep smoothies, combine freezable ingredients together in a ziploc bag. Pretty much all fruits and some veggies. Carrots and cucumbers freeze well, however spinach, kale, and avocado do not so much. Chia seed and flaxseed can both be frozen well too. Measuring all of these out into a single or double portion and bagging them together is a great way to shorten your prep time later. The rest of the ingredients that don’t freeze well can be portioned out and kept in the fridge or pantry. Most of these can be pre-cut or pre-combined separately from the frozen ingredients so that you only need to grab two containers in the morning before you head out for work or school. Another option is to combine them together the morning you plan to use them. The frozen ingredients may defrost a bit before you’re ready to consume them but that can be for the best as often smoothies come out too frozen. 

Meal prep smoothies can be a great meal replacement option. Your nutritional balance needs to be considered. If you’re lacking fruits and veggies in your diet, smoothies are a great way to fit them in. Don’t think it’s always healthy to replace meals with smoothies though. In some cases you may be lacking calories in your diet or in other cases you may find yourself snacking constantly to make up for the calories you didn’t get at lunch, ultimately consuming more than you saved at lunch.

1. Balanced nutrition

Balance your protein, healthy fats, and carbohydrates in smoothies. These ingredients can help you feel full and provide huge health benefits.

2. Avoid high sugar ingredients

Avoid high sugar ingredients like off the shelf juices. Even fresh fruit and vegetables can be high in sugar. Depending on your diet you may need to avoid certain ingredients even if they are healthy.

3. Add fiber

Most people struggle to achieve adequate levels of fiber and a smoothie can be a great opportunity to add this to your diet. Fiber aids in digestion and increases the feeling of fullness.

4. Use whole, fresh ingredients

Whenever possible, use whole, fresh, and organic ingredients. This ensures you’re getting the maximum nutritional benefits without added preservatives or chemicals.

5. Control portion sizes

Be mindful of portion sizes to avoid overconsumption of calories. A meal-replacement smoothie should generally be between 300-500 calories, depending on your individual needs and activity level.

6. Include greens

Leafy greens like spinach or kale can boost the nutrient content without significantly altering the flavor. This is a fantastic method for getting your greens in if you don’t like salads. You’ll barely taste the greens.

Popular Meal Prep Smoothie Ingredients

Fruits

  • Strawberries
  • Mango
  • Banana
  • Peach
  • Pineapple
  • Apricot
  • Melon
  • Cherries

Vegetables

  • Carrots
  • Kale
  • Spinach
  • Avocado
  • Cucumber
  • Pumpkin

Healthy Fats & Nutrients

  • Chia seed
  • Flaxseed

High Protein

  • Greek yogurt plain
  • Almond butter
  • Peanut butter
  • Soymilk plain
  • Milk plain
  • Oat milk plain
  • Protein powder (whey, pea, hemp)

Juices

  • Coconut water
  • V8
  • Apple juice unsweetened
  • Orange juice unsweetened
  • Water

Smoothie Meal Prep Tips

strawberry meal prep smoothie in a glass with strawberries

Choose a High-Quality Blender

Start with a Liquid Base

  • Always start by adding your liquid first. This helps to create a vortex that pulls the other ingredients down into the blades for even blending.

Balance Your Ingredients

  • Aim for a balanced ratio of fruits, vegetables, protein, and healthy fats to create a nutritious smoothie. Sometimes this takes trial and error

Use Frozen Fruits and Vegetables

  • Using frozen fruits and vegetables can give your smoothie a thick, creamy texture without needing to add ice, which can water it down.

Add a Natural Sweetener Sparingly

Blend in Steps

  • To achieve a smooth texture, start by blending your liquid and greens first, then add softer ingredients like fruits and yogurt, and finally, blend in any hard or frozen items.

Taste and Adjust

  • After blending, taste your smoothie and adjust as needed. You might need to add a bit more sweetener, a squeeze of citrus for brightness, or more liquid to reach the desired consistency.

Don’t Overfill Your Blender

  • Avoid overloading your blender, as this can lead to uneven blending. Fill it about three-quarters full for the best results.

Clean Your Blender Immediately

Posted on Leave a comment

Dragon Fruit Salsa with Shrimp

shrimp with dragon fruit salsa

This Dragon Fruit Salsa with Shrimp is the perfect way to level up your salsa game. It’s not only vibrant and flavorful but also a nutrient-rich addition to your healthy lifestyle. Get ready to enjoy a dish that’s as beneficial for your body as it is delightful for your taste buds

This post may contain affiliate links. Please see our privacy policy for details.

Calories: 121kcal | Carbohydrates: 10g | Protein: 18g | Fat: 1g | Saturated Fat: 0.1g | Polyunsaturated Fat: 0.2g | Monounsaturated Fat: 0.1g | Trans Fat: 0.01g | Cholesterol: 137mg | Sodium: 423mg | Potassium: 291mg | Fiber: 2g | Sugar: 5g | Vitamin A: 70IU | Vitamin C: 11mg | Calcium: 72mg | Iron: 1mg

shrimp with dragon fruit salsa

Why This Salsa is a Game-Changer:

  • Refreshing & Nourishing: Dragon fruit is not only beautiful with its speckled flesh, but it’s also packed with antioxidants and vitamin C, boosting your immunity and keeping your skin glowing. Paired with shrimp, a lean source of protein, this dish is as nourishing as it is refreshing.
  • Budget-Friendly: With just a few simple ingredients, this recipe is easy on your wallet. The dragon fruit adds a touch of exotic flair without breaking the bank, and pre-cooked shrimp saves you time and effort.
  • Simple & Quick: This salsa comes together in minutes! It’s perfect for a quick lunch, a light dinner, or even as an appetizer at your next gathering.
  • Powerhouse ingredients: You’re not just making salsa—you’re creating a dish that nourishes your body from the inside out. Each ingredient plays a vital role in boosting your health, from providing essential vitamins and minerals to delivering antioxidants and anti-inflammatory benefits.

The PrepYoSelf Newsletter

Level Up Your Salsa Game: The Nutrient Powerhouse in Every Bite!

  • Dragon Fruit: Dragon fruit is the star of this salsa, and for good reason! This exotic fruit isn’t just pretty; it’s packed with fiber, antioxidants, and vitamin C. Fiber helps keep your digestive system running smoothly, while the antioxidants fight off free radicals, keeping your cells healthy. Vitamin C boosts your immune system and promotes glowing skin. By adding dragon fruit to your salsa, you’re infusing your meal with a refreshing sweetness and a vibrant dose of nutrition.
  • Shrimp: Shrimp is a lean, low-calorie source of high-quality protein, making it a fantastic addition to this dish. Protein is essential for muscle repair, hormone production, and overall body maintenance. Plus, shrimp is rich in selenium, an important mineral that acts as a powerful antioxidant, supporting your immune system and thyroid function. With shrimp in your salsa, you’re not only adding a savory element but also giving your body the building blocks it needs to stay strong and energized.
  • Fresh Basil: Basil brings a burst of fresh, herbaceous flavor to this salsa, but it’s also loaded with health benefits. This aromatic herb is rich in vitamin K, which plays a key role in blood clotting and bone health. Basil also contains compounds that have anti-inflammatory and antimicrobial properties, helping to support your overall well-being. Adding basil to your salsa not only elevates the flavor but also adds a layer of health-boosting goodness.
  • Red Onions: Red onions add a sharp, tangy bite to your salsa, and they’re packed with nutrients like vitamin C, fiber, and antioxidants. The quercetin in red onions is known for its anti-inflammatory properties, which can help reduce inflammation in the body. Additionally, the sulfur compounds in onions support heart health by improving cholesterol levels and lowering blood pressure. Red onions are a simple way to level up the nutritional profile of your salsa while adding depth to the flavor.
  • Lime Juice: Lime juice not only adds a zesty, citrusy kick to your salsa but also brings a ton of vitamin C to the table. This essential vitamin boosts your immune system, aids in iron absorption, and supports healthy skin. Lime juice also has natural detoxifying properties, helping to cleanse your body and support digestive health. A squeeze of lime is all it takes to brighten up the flavors of your salsa while giving your body a nutrient boost.
  • Salt: A pinch of salt ties all the flavors together and enhances the natural sweetness of the dragon fruit while balancing the acidity of the lime. Just a small amount can elevate the entire dish, making each bite more satisfying.
dragon fruit salsa

How to Make Dragon Fruit Salsa with Shrimp

  1. Prep the Shrimp: If your shrimp is frozen, defrost it according to the package instructions. Pat dry.
  2. Mix the Salsa: In a mixing bowl, combine the diced dragon fruit, fresh basil, chopped red onions, lime juice, and salt. Toss everything together gently to marry the flavors.
  3. Serve: Lay the shrimp on a plate and top with the vibrant dragon fruit salsa. Serve immediately and enjoy the burst of fresh flavors!

Reference the recipe card below for detailed instructions.

shrimp with dragon fruit salsa

Meal Prep Tips:

  • Avocado: Add diced avocado for a creamy texture and an extra dose of healthy fats.
  • Jalapeño: For a bit of heat, finely chop a jalapeño or another chili pepper and mix it into the salsa.
  • Cucumber: Add diced cucumber for extra crunch and hydration, making the salsa even more refreshing.
  • Mint: Swap half of the basil for fresh mint to give the salsa a bright, cooling flavor.
  • Protein Swap: Instead of shrimp, try grilled chicken, tofu, or even black beans for a different source of protein.
  • Fruit Swap: Swap dragon fruit with diced mango, pineapple, or even kiwi for a different but equally delicious flavor profile.
  • Red Onion Swap: If you prefer a milder flavor, swap red onions for thinly sliced green onions or shallots.
shrimp with dragon fruit salsa

Dragon Fruit Salsa with Shrimp

A vibrant and nutrient-packed Dragon Fruit Salsa with Shrimp, combining sweet and savory flavors for a refreshing and health-boosting dish.
No ratings yet
Course lunch
Cuisine American
Servings 2
Calories 121 kcal

Equipment

  • knife
  • cutting board
  • mixing bowl

Ingredients
  

  • 6 oz shrimp (pre-cooked, peeled, deveined)
  • 1 dragon fruit (peeled and diced)
  • 2 tabelspoons fresh basil (thinly sliced)
  • 1/4 cup red onions (finely diced)
  • 1 lime (juiced)
  • 1/4 teaspoon salt

Instructions
 

  • If the shrimp is frozen, defrost it according to packaged instructions.
  • Combine the diced dragon fruit, basil, onions, lime juice, and salt in a mixing bowl.
  • Top the shrimp with the dragon fruit salsa.

Notes

Nutrition information provided is an estimate. It will vary based on cooking method and specific ingredients used. Please consult with your healthcare provider for specific dietary needs. To gain a better understanding, explore our nutrition disclaimer here

Nutrition

Calories: 121kcalCarbohydrates: 10gProtein: 18gFat: 1gSaturated Fat: 0.1gPolyunsaturated Fat: 0.2gMonounsaturated Fat: 0.1gTrans Fat: 0.01gCholesterol: 137mgSodium: 423mgPotassium: 291mgFiber: 2gSugar: 5gVitamin A: 70IUVitamin C: 11mgCalcium: 72mgIron: 1mg

Similar Recipes

shrimp kebab

Air Fryer Shrimp and Pineapple Kebabs

shrimp and corn

Sheet Pan Shrimp with Cauliflower and Corn

salmon salad

Salmon Salad Stuffed Avocado

You Might Also Like

Frequently Asked Questions

Can I use raw shrimp instead of pre-cooked shrimp?

Absolutely! If you prefer to use raw shrimp, just cook them first by sautéing or grilling until they’re pink and opaque. Let them cool before adding to the salsa


What can I serve with this salsa?

This salsa is versatile! Serve it as an appetizer with tortilla chips, as a topping for tacos, or over a bed of greens for a light salad. It also pairs well with grilled fish or chicken.

Can I use other fruits along with dragon fruit?

Yes, you can mix in other fruits like diced mango, pineapple, or even strawberries to create a more complex and fruity salsa. It’s a great way to experiment with flavors!

Posted on Leave a comment

Mango Salsa with Crab Cake and Spinach

mango salsa with crab cake and spinach

This recipe is a game-changer for busy individuals who crave fresh, high-quality meals without spending hours in the kitchen. Imagine biting into a perfectly cooked crab cake topped with a zesty mango salsa, all nestled on a bed of nutritious sautéed spinach. The best part? It’s incredibly easy to make, thanks to pre-cooked crab cakes and a few fresh ingredients!

This post may contain affiliate links. Please see our privacy policy for details.

crab cake with pineapple salsa and spinach

Why You’ll Love This Recipe:

  • Fresh & Flavorful: The mango salsa is a burst of tropical freshness with every bite, perfectly complementing the savory crab cakes.
  • Quick & Easy: Using pre-cooked crab cakes means you can whip up this gourmet meal in no time.
  • Nutritious: Sautéed spinach adds a nutritious and delicious base to this dish, ensuring you’re getting a good dose of greens.
  • Impressive Presentation: This dish looks as good as it tastes, making it perfect for impressing guests or treating yourself to a fine dining experience at home.

The PrepYoSelf Newsletter

Why the Ingredients Work Well Together:

The combination of these ingredients creates a harmonious balance of flavors and textures. The sweet, juicy mango contrasts beautifully with the crunchy red onion and zesty lime juice, while the fresh cilantro and garlic powder add depth and complexity. This vibrant salsa sits atop the rich, savory crab cakes, which are perfectly complemented by the earthy, garlicky sautéed spinach.

For busy individuals who love high-quality, fresh food, this recipe offers a quick and easy way to enjoy a gourmet meal at home. Each ingredient is thoughtfully chosen to contribute to a balanced, nutritious, and delightful dish that feels indulgent yet wholesome. Enjoy this meal prep delight that not only satisfies your taste buds but also supports a healthy lifestyle!

crab cake with pineapple salsa and spinach

How to make mango salsa with crab cakes:

  1. Cook the Crab Cakes: Remove the pre-cooked crab cakes from the package and place them in the Air Fryer basket. Cook according to the packaged instructions. Typically, this will take about 8-10 minutes at 375°F, until they’re golden and crispy.
  2. Sauté the Spinach: While the crab cakes are cooking, add a drizzle of olive oil to a sauté pan over medium-high heat. Add the baby spinach, garlic powder, and salt. Sauté until the spinach wilts, which should take about 3-4 minutes. Remove from heat.
  3. Prepare the Mango Salsa: In a mixing bowl, combine the diced mango, red onion, lime juice, chopped cilantro, garlic powder, and salt. Mix well until all the ingredients are evenly distributed.
  4. Plate and Serve: Place the sautéed spinach in the center of a plate. Top with a crispy crab cake. Generously spoon the fresh mango salsa over the crab cake.
Reference the recipe card below for detailed instructions.

crab cake with pineapple salsa and spinach

Ingredient Swaps:

  • Mango: If fresh mango is unavailable, use canned mango chunks (drained) or frozen mango (thawed). Both options still provide a sweet and tangy flavor.
  • Red Onion: Swap red onion with green onions or shallots for a milder taste. Green onions offer a fresh, crisp texture, while shallots add a delicate sweetness.
  • Cilantro: If you’re not a fan of cilantro, try using fresh parsley or basil. Parsley adds a subtle freshness, while basil introduces a sweet, aromatic flavor.
  • Crab Cakes: For a different protein, use pre-cooked shrimp or salmon cakes. Both options work well with the mango salsa and sautéed spinach, offering a delightful seafood alternative.
  • Spinach: Swap baby spinach with kale or Swiss chard for a heartier green. Both are nutrient-dense and provide a slightly different texture and flavor profile.
  • Add a Crunch: Top the dish with some toasted nuts or seeds, such as sliced almonds or sunflower seeds, for added texture and a nutty flavor.
  • Serve with a Side: Pair the dish with a simple side like quinoa or brown rice to make it more filling and add a whole grain component to your meal.
  • Make it Spicy: Add a diced jalapeño or a pinch of red pepper flakes to the mango salsa for a spicy kick.

crab cake with pineapple salsa and spinach

mango salsa with crab cake and spinach

Mango Salsa with Crab Cake

Indulge in a gourmet meal with pre-cooked crab cakes topped with zesty mango salsa, served on a bed of nutritious sautéed spinach.
No ratings yet
Prep Time 5 minutes
Cook Time 15 minutes
Course dinner
Cuisine American
Servings 2

Equipment

  • knife
  • cutting board
  • Air Fryer
  • saute pan

Ingredients
  

For the Mango Salsa

  • 1 cup mango (diced)
  • 1/4 cup red onion (diced)
  • 1 lime (juiced)
  • 1/4 cup fresh cilantro (chopped)
  • 1/4 teaspoon garlic powder
  • 1/4 teaspoon salt

For the Crab Cake and Spinach

  • 2 crab cakes (pre-cooked)
  • 10 oz baby spinach
  • 1 tablespoon olive oil
  • 1/4 teaspoon garlic powder
  • 1/4 teaspoon salt

Instructions
 

  • Remove the pre-cooked crab cakes from the package and place it in the Air Fryer basket. Cook it according to the packaged instructions.
  • Meanwhile, add a drizzle of olive oil to a saute pan on medium high heat and saute the baby spinach until it wilts.
  • Next, combine the mango salsa ingredients in a mixing bowl.
  • To plate, place the sauteed spinach in the center of a plate and place the crab cake on top. Top off the dish with the fresh mango salsa and enjoy.

Similar Recipes

shrimp kebab

Air Fryer Shrimp and Pineapple Kebabs

shrimp and corn

Sheet Pan Shrimp with Cauliflower and Corn

salmon salad

Salmon Salad Stuffed Avocado

You Might Also Like

Frequently Asked Questions

Can I use canned mango for the salsa?

Yes, you can use canned mango. Just make sure to drain it well before dicing. Fresh mango is preferred for its crisp texture and vibrant flavor, but canned mango works in a pinch.


What if I don’t have an air fryer?

If you don’t have an air fryer, you can bake the crab cakes in a conventional oven. Preheat the oven to 375°F (190°C) and bake for about 10-15 minutes, or until they are heated through and crispy.


Is it okay to use dried herbs instead of fresh?

Fresh herbs are preferred for their vibrant flavor, but if you must use dried herbs, reduce the quantity by half since dried herbs are more concentrated.

Posted on Leave a comment

Shrimp Rice Paper Spring Rolls

shrimp rice paper rolls

Let me introduce you to the ultimate Shrimp Rice Paper Rolls! These little gems are light, refreshing, and packed with deliciousness. Perfect for a quick lunch or a delightful snack, they’re a must-try! Let’s dive into the recipe!

This post may contain affiliate links. Please see our privacy policy for details.

Calories: 372kcal | Carbohydrates: 59g | Protein: 29g | Fat: 3g | Saturated Fat: 0.4g | Polyunsaturated Fat: 1g | Monounsaturated Fat: 0.4g | Trans Fat: 0.01g | Cholesterol: 145mg | Sodium: 1207mg | Potassium: 670mg | Fiber: 4g | Sugar: 9g | Vitamin A: 5235IU | Vitamin C: 18mg | Calcium: 161mg | Iron: 4mg

shrimp rice paper spring rolls

Why You’ll Love It:

  • Light and Refreshing: Perfect for a hot day or when you want something satisfying but not too heavy.
  • Packed with Flavor: The combination of shrimp, creamy yogurt, sweet chili, and a hint of sriracha creates a taste explosion in every bite!
  • Nutritious and Healthy: High in protein, low in calories, and loaded with fresh veggies. It’s a win-win!
  • Easy to Make: With just a few simple steps, you’ll have a gourmet meal ready in no time.

The PrepYoSelf Newsletter

Ingredient Breakdown: Why They Shine in Our Shrimp Rice Paper Rolls

  • Shrimp: Shrimp is the star of the show! Pre-cooked shrimp is not only convenient but also a fantastic source of lean protein. Its mild, sweet flavor pairs beautifully with the tangy and spicy sauces, creating a perfect balance in every bite.
  • High-Protein Greek Yogurt: Greek yogurt brings a creamy texture to the filling while adding a protein boost. It’s tangy and rich, providing a healthy alternative to mayonnaise or cream-based sauces. Plus, it helps bind the ingredients together, ensuring each roll is packed with flavor.
  • Sweet Chili Sauce: This sauce adds a delightful sweetness with a hint of heat, enhancing the shrimp’s natural sweetness. It blends perfectly with the yogurt, creating a balanced, flavorful filling that’s neither too spicy nor too sweet.
  • Soy Sauce: Soy sauce introduces a savory, umami depth to the rolls. It complements the sweet chili and sriracha, adding a rich, salty undertone that enhances the overall taste. Just a tablespoon brings out the best in the shrimp and yogurt mixture.
  • Sriracha Sauce: Sriracha gives our rolls that irresistible kick! Its heat is perfectly balanced with garlic and vinegar, adding a spicy, tangy note that livens up the entire dish. You can always adjust the amount based on your heat preference.
  • Lime Wedge: A squeeze of fresh lime juice brightens up the filling, cutting through the richness of the yogurt and balancing the sweet and spicy elements. Lime adds a zesty freshness that elevates all the flavors.
  • Rice Spring Roll Wrappers: These delicate, translucent sheets are the perfect vessel for our delicious filling. They’re light and allow the vibrant colors and textures of the ingredients to shine through. Plus, they’re fun and easy to work with once you get the hang of it!
  • Carrot: Shredded carrot adds a sweet crunch and a burst of color to the rolls. It’s packed with vitamins and provides a nice contrast to the soft shrimp filling, making each bite more exciting.
  • Cucumber: Crisp, cool cucumber slices bring a refreshing crunch and a mild, fresh flavor that complements the shrimp perfectly. It’s hydrating and adds a lovely texture to the rolls.
  • Sesame Seeds: A sprinkle of sesame seeds adds a subtle nutty flavor and a slight crunch. They also bring an extra touch of visual appeal, making the rolls look even more appetizing.

shrimp rice paper spring rolls

How to Make Shrimp Spring Rolls

  1. Prep the Shrimp: Chop those succulent shrimp into small pieces. If they’re frozen, defrost them in the refrigerator or follow the package instructions. We want them ready to mingle with our zesty flavors!
  2. Veggie Time: Slice the cucumber into matchsticks and shred the carrots. Fresh and crisp, these veggies add the perfect crunch!
  3. Mix It Up: Combine the Greek yogurt, sweet chili sauce, sriracha, soy sauce, and a squeeze of lime. Toss in the chopped shrimp and mix it all up. This creamy, tangy filling is the heart of our rolls!
  4. Roll Call: Lightly wet 4 rice paper sheets and lay them down, slightly overlapping. These sheets are like a blank canvas, ready to be filled with goodness.
  5. Assemble: Top the rice paper with cucumber slices, shrimp filling, shredded carrot, and a sprinkle of sesame seeds. Feel free to add a bit more sriracha if you’re feeling spicy!
  6. Roll and Enjoy: Fold the sides of the rice paper inward and roll them up tightly. Slice into 1-inch thick pieces. Voila! You have beautiful, bite-sized rolls ready to be devoured.

Reference the recipe card below for detailed instructions.

shrimp rice paper spring rolls

Meal Pairing Tips:

  • Fresh Salad: Pair your rolls with a light, fresh salad. A simple mixed greens salad with a tangy vinaigrette complements the flavors perfectly and adds extra veggies to your meal.
  • Light Soup: A bowl of miso soup or a light broth-based soup works great as a side dish. It’s warm and comforting, balancing the cool, crisp rolls.
  • Fruit Side Dish: Fresh fruit like pineapple, mango, or watermelon adds a sweet, refreshing touch. The natural sweetness of the fruit complements the savory and spicy rolls.
  • Herbal Tea: Enjoy your rolls with a cup of herbal tea. Mint or ginger tea adds a soothing, aromatic element that pairs well with the flavors in the rolls.

shrimp rice paper spring rolls

shrimp rice paper spring rolls

Shrimp Rice Paper Spring Rolls

Light and refreshing Shrimp Rice Paper Rolls packed with flavorful shrimp, fresh veggies, and a zesty yogurt-based sauce, perfect for a healthy lunch or snack.
No ratings yet
Prep Time 5 minutes
Cook Time 10 minutes
Course lunch
Cuisine Asian
Servings 2
Calories 372 kcal

Equipment

  • knife
  • cutting board

Ingredients
  

  • 6 oz shrimp (pre-cooked, peeled, deveined)
  • 2 tablespoon greek yogurt
  • 1 tablespoon sweet chili sauce
  • 1 tablespoon soy sauce
  • 1 teaspoon sriracha sauce
  • 1 lime (wedged)
  • 8 spring roll wrappers
  • 1 carrot thinly shredded
  • 1 cucumber julienne cut
  • 1 teaspoon sesame seeds

Instructions
 

  • Chop the shrimp into small pieces (if frozen, defrost it in the refrigerator or according to the packaged instructions).
  • Meanwhile, slice the cucumber into matchsticks and shred the carrots.
  • Combine the Greek yogurt, sweet chilli, sriracha, soy sauce and squeeze of lime and mix in the shrimp.
  • Lightly wet and place down 4 rice paper sheets, slightly overlapping.
  • Top the rice paper with sliced cucumber, shrimp filling,  carrot, spring onion and sesame seeds.
  • Fold and tuck in the sides inwards to create a roll. Slice into 1 inch thick pieces and enjoy!

Notes

Nutrition information provided is an estimate. It will vary based on cooking method and specific ingredients used. Please consult with your healthcare provider for specific dietary needs. To gain a better understanding, explore our nutrition disclaimer here

Nutrition

Calories: 372kcalCarbohydrates: 59gProtein: 29gFat: 3gSaturated Fat: 0.4gPolyunsaturated Fat: 1gMonounsaturated Fat: 0.4gTrans Fat: 0.01gCholesterol: 145mgSodium: 1207mgPotassium: 670mgFiber: 4gSugar: 9gVitamin A: 5235IUVitamin C: 18mgCalcium: 161mgIron: 4mg

Similar Recipes

pepper sandwich

Roasted Red Pepper and Cheese Sandwich

bean and corn taco

Vegetarian Black Bean and Corn Soft Tacos

eggplant

Grilled Eggplant Steaks with Marinara Sauce

You Might Also Like

Frequently Asked Questions

Can I use fresh shrimp instead of pre-cooked shrimp?

Absolutely! Just cook the shrimp in advance and let them cool before chopping and mixing with the other ingredients. This ensures your rolls stay fresh and flavorful.


How do I keep the rice paper rolls from sticking together?

To prevent sticking, separate the rolls with parchment paper or lightly damp paper towels in between layers. This helps maintain their texture and prevents them from tearing.


Are there other protein options besides shrimp?

Definitely! You can use cooked chicken, tofu, or even tempeh as a substitute for shrimp. Just chop them into small pieces and mix with the sauce.

Posted on Leave a comment

Best Meal Prep Dips

Meal prep dips can be a delicious and nutritious addition to your meal. Dips add moisture to otherwise dry foods and a kick of flavor to the bland. The tricks to meal prep dips is keeping the calories, sodium, and sugar low while keeping it taste good and of course storing the dip effectively. Often dips need to be stored separately to avoid over saturating your foods or because you may not necessarily want to completely cover every bit of your meal. 

Why Include Dips in Your Meal Prep

meal prep dip with veggies on a plate

Dips can be a great addition to your meal prep routine. The wide variety of dips that you can easily make and mix and match with other meals can add a new dimension of flavors. Versatile dips like hummus and guacamole work with a ton of different recipes and flavor combinations. Meal prep dips are an excellent way to spice up bland recipes especially chicken and tofu. Dips can serve as satisfying snacks with cut vegetables, spreads for sandwiches, or accompaniments to main dishes.

Meal prep dips can be incredibly convenient. Keep a jar of extra dip on hand and just air fry some chicken or cook up some strips of beef or ground beef, or just cut up a few vegetables and you’re good to go. 

The typical dips or store bought dips are high in calories and other unhealthy ingredients. Homemade meal prep dips are not only healthy options but can help you lose weight by making meals more satisfying. You’re more inclined to stick with your meal prep if you have a delicious dip to go with it rather than going out for food. Most fast food is good because of their sauce anyways. Dips made from wholesome ingredients like vegetables, beans, nuts, and herbs, offer a nutrient-dense option that can boost your intake of vitamins, minerals, and antioxidants.

Save money by making your own meal prep dips. Dips often cost a premium even if the ingredients individually are affordable. Meal prep dips in bulk and store for future use.

Having pre-made dips on hand encourages healthier snacking and meal choices, making it easier to stick to your dietary goals while adding variety and taste to your meals. Additionally, homemade dips are cost-effective and allow you to avoid unhealthy additives and preservatives commonly found in store-bought versions. By integrating healthy dips into your meal prep routine, you ensure that quick, nutritious options are always within reach, supporting a balanced and enjoyable eating experience.

Meal Prep Containers for Dips

meal prep dip of hummus with pita

Meal prep dips generally need to be stored in airtight, durable, and leak-proof containers. You don’t want them dripping all over the place as your transport them to work or school. Glass is highly recommended due to their non-porous nature, which prevents stains and odors from being absorbed. These containers will last longer and store food better. Glass also manages temperature changes better as well so you can go from the fridge to the microwave without fear of warping if you do need to heat up the sauce. We also recommend containers of various sizes so that you don’t find yourself using a bunch of large containers to carry small amounts of dip, veggies, and anything else. Stackable containers can also help save space in the fridge and make it easier to portion out lunches days in advance. Invest in quality containers if you meal prep daily. It’ll save you a lot of headaches down the road with containers cracking and leaking. 

Don’t know where to start with containers. Follow our favorite container articles for some of the best containers on the market.

How to Store Dips

Most meal prep dips are going to be made in bulk. Maybe enough for a few days or for the week. The shelf life of dips depends on the ingredients, the environment and the containers themselves. Store meal prep dips in airtight containers and refrigerate to avoid spoilage and food waste. Glass containers with seals and lid locks are preferred to ensure that no odors get in and or out. This can turn your dip or the foods around them. Remember to portion out dips that you are using to avoid contaminating them by dipping food in them and letting them warm up before being cooled again.

After preparing the dips, immediately refrigerate them and consume within 5-7 days to ensure optimal taste and safety. For longer storage, some dips can be frozen in small portions or ice cube trays, which allows for easy thawing and use as needed. 

Stir the dips before serving to recombine any separated ingredients and maintain a smooth, appetizing consistency. 

Here are some general guidelines:

  1. Hummus: Typically lasts 5-7 days when stored in an airtight container.
  2. Guacamole: Best consumed within 2-3 days due to the avocado browning, even with lime or lemon juice added. To extend freshness, store with a layer of plastic wrap directly on the surface before sealing the container.
  3. Greek Yogurt Tzatziki: Can last up to 3-4 days in the fridge when kept in an airtight container.
  4. Roasted Red Pepper Hummus: Similar to classic hummus, it can last 5-7 days in an airtight container.

Spinach and Artichoke Dip: Typically lasts 3-4 days in the fridge when stored properly in an airtight container.

Healthy meal prep dips

Classic Hummus

Use as a spread for sandwiches, a dip for veggies, or a topping for grain bowls.

hummus meal prep dip and veggies

Ingredients:
1 can of chickpeas, drained and rinsed
1/4 cup tahini
2 tablespoons olive oil
1 lemon, juiced
2 cloves garlic, minced
1/2 teaspoon cumin
Salt to taste
Water, as needed

Instructions:
Combine chickpeas, tahini, olive oil, lemon juice, garlic, cumin, and salt in a food processor.
Blend until smooth, adding water gradually to achieve desired consistency.
Adjust seasoning if necessary.

Guacamole

Perfect for dipping chips, spreading on toast, or adding to wraps and salads.

guacamole ingredients on a cutting board

Ingredients:
3 ripe avocados
1 small red onion, finely chopped
1 tomato, diced
1 jalapeño, seeded and finely chopped
1/4 cup cilantro, chopped
2 tablespoons lime juice
Salt and pepper to taste

Instructions:
Mash avocados in a bowl.
Add red onion, tomato, jalapeño, cilantro, lime juice, salt, and pepper.
Mix well until combined.

Greek Yogurt Tzatziki

Use as a dip for vegetables or pita bread, a sauce for grilled meats, or a dressing for salads.

tzatziki meal prep dip in a bowl

Ingredients:
1 cup Greek yogurt
1 cucumber, grated and excess water squeezed out
2 cloves garlic, minced
1 tablespoon olive oil
1 tablespoon lemon juice
1 tablespoon fresh dill, chopped
Salt and pepper to taste

Instructions:
Combine Greek yogurt, grated cucumber, garlic, olive oil, lemon juice, dill, salt, and pepper in a bowl.
Mix until well combined.
Chill in the refrigerator for at least 30 minutes before serving.

Roasted Red Pepper Hummus

Serve with raw vegetables, use as a sandwich spread, or dollop on grain bowls.

Ingredients:
1 can of chickpeas, drained and rinsed
2 roasted red bell peppers, peeled and chopped
1/4 cup tahini
2 tablespoons olive oil
1 lemon, juiced
2 cloves garlic, minced
Salt to taste

Instructions:
Combine chickpeas, roasted red peppers, tahini, olive oil, lemon juice, garlic, and salt in a food processor.
Blend until smooth.
Adjust seasoning if necessary.

Spinach and Artichoke Dip

Great for dipping with whole-grain crackers, spreading on toast, or as a side dish.

Ingredients:
1 can of artichoke hearts, drained and chopped
1 cup fresh spinach, chopped
1 cup Greek yogurt
1/2 cup grated Parmesan cheese
1/2 cup mozzarella cheese, shredded
2 cloves garlic, minced
Salt and pepper to taste

Instructions:
Preheat the oven to 375°F (190°C).
In a bowl, combine artichoke hearts, spinach, Greek yogurt, Parmesan cheese, mozzarella cheese, garlic, salt, and pepper.
Transfer the mixture to a baking dish.
Bake for 20-25 minutes, until the cheese is melted and bubbly.