
Hey meal prep fam! Today, I’m sharing one of my favorite easy, high-protein, veggie-packed recipes — a chicken & cabbage pancake inspired by the flavors of Japanese Okonomiyaki! It’s perfect for your weekly meal prep. Savory, satisfying, and totally customizable. Let’s get into it!
This post may contain affiliate links. Please see our privacy policy for details.

What Makes These Cabbage Pancakes Great for Meal Prep?
Leftover Makeover Magic: Got random cooked ground chicken? Half a bell pepper? A sad bag of shredded cabbage? Boom. This recipe gives your leftovers a delicious second life. Nothing wasted, everything elevated!
Veggie Drawer Clean-Out Champion: Let’s be real — we all have those lonely veggies in the fridge. This dish is the perfect way to toss in whatever you’ve got: carrots, bell peppers, even a handful of spinach or zucchini. Flexibility is the name of the game.
Protein-Packed for the Win: Thanks to the eggs and chicken, these pancakes are seriously satisfying. They’ll keep you full and energized, whether it’s a quick lunch between meetings or post-workout fuel.
Global Flavors: Inspired by Japanese Okonomiyaki, this recipe is an easy way to explore international flavors right from your own kitchen. That little splash of fish sauce brings all the umami goodness!
Elevates Your Cooking Skills: If you’re looking to build your kitchen confidence, this recipe is perfect. You’ll master basic sautéing, whisking, and pan-frying — all while impressing yourself with a globally-inspired dish!

Let’s Talk Ingredients (and a Bite of Okonomiyaki History!):
Okonomiyaki is a beloved Japanese savory pancake, often called a “Japanese pizza” or “Japanese pancake,” but honestly — it’s in a category of its own! The word okonomi means “how you like it,” and yaki means “grilled” or “cooked.” So it’s a totally customizable dish, born out of using what’s on hand. Our version keeps that spirit alive but makes it meal-prep friendly! Now, let’s get into why each ingredient works so well together in this dish:
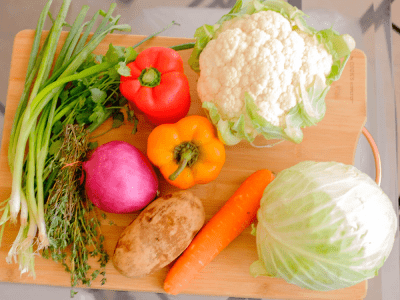
- Baby Carrots (Thinly Sliced): Carrots add a subtle sweetness and a nice bite to balance the savory elements. Plus, they’re full of color and crunch, which makes these pancakes extra satisfying — and they hold up well in the fridge, making them perfect for meal prep.
- Red Bell Peppers (Thinly Sliced): Not only do bell peppers brighten up the pancake with their vibrant color, but they also bring a mild sweetness and a little natural moisture that keeps the pancakes from feeling too heavy. Bonus: they’re loaded with vitamin C!
- Shredded Cabbage: Cabbage is the heart and soul of traditional okonomiyaki! It gives the pancake structure, adds bulk without heaviness, and turns wonderfully tender when cooked. Plus, it’s budget-friendly and great for clearing out your veggie drawer.
- Cooked Ground Chicken: This is where we bring in a hearty dose of protein. Using pre-cooked ground chicken saves time, and it absorbs all the flavors from the veggies and seasonings beautifully. You can also swap in whatever cooked meat you have on hand!
- Eggs: Eggs act as the binder that holds everything together. They give the pancakes structure and a light, fluffy texture on the inside while helping them crisp up perfectly on the outside.
- Flour: A little bit of flour helps thicken the batter just enough to keep the pancakes cohesive. It gives them that lovely chewy bite, reminiscent of the classic okonomiyaki texture.
- Fish Sauce: Fish sauce is the secret umami bomb in this dish! Just a teaspoon brings depth and a savory note that makes these pancakes taste like they’ve been cooking for hours. If you’re new to it, trust the process — it won’t taste fishy, just deliciously rich.
- Olive Oil: We use olive oil to sauté the veggies and cook the pancakes to a beautiful golden brown. It adds a light, fruity flavor and ensures a crispy edge that makes each bite super satisfying.
- Cilantro (Optional Garnish): Cilantro adds a burst of freshness that contrasts beautifully with the warm, savory flavors of the pancake. Totally optional, but highly recommended if you love a fresh herbal finish!

Easy Recipe Steps for Cabbage Pancakes
- Heat a non-stick pan over medium-high heat and add the olive oil. Once the oil is hot, add the sliced baby carrots, red bell peppers, and shredded cabbage. Sauté the vegetables for about 3 to 5 minutes, stirring occasionally, until they soften and the cabbage starts to wilt. Remove the cooked vegetables from the pan and let them cool to room temperature on a plate or in a bowl.
- In a large mixing bowl, crack the eggs and whisk them until the yolks and whites are fully combined. Add the cooked ground chicken, the cooled vegetable mixture, fish sauce, and flour to the bowl. Stir everything together well until you have a thick, evenly combined batter.
- Heat the same pan again over medium-high heat, and if needed, add a little more oil to lightly coat the bottom. Use a small ladle or about ½ cup of the batter and pour it into the pan. Gently spread it out to form a circle about 4 inches in diameter.
- Let the pancake cook undisturbed for about 3 to 4 minutes, or until the bottom is golden brown and you see the edges starting to set. Carefully flip the pancake using a spatula, and cook for another 1 to 2 minutes until the other side is golden brown and the pancake is cooked through.
- Repeat the process with the remaining batter, adding a little more oil to the pan as needed to prevent sticking and ensure even browning.
- Serve warm, and if you like, garnish with fresh cilantro for a bright, herby finish!

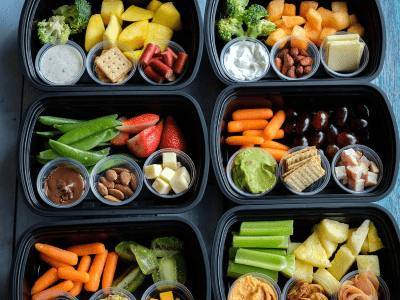
Meal Prep Pairing Tips:
Add a Simple Grain for Balance: Pair your pancakes with a side of steamed rice (white, brown, or even cauliflower rice for a lower-carb option). The rice soaks up any sauces you drizzle and rounds out the meal with comforting carbs.
Sauce It Up: Okonomiyaki is traditionally topped with a tangy, sweet-savory sauce. For meal prep, pack a little container of soy sauce, sriracha mayo, or a quick mix of ketchup + Worcestershire + a touch of honey for that signature flavor boost!
Fresh Crunch on the Side: Add some pickled veggies or a quick cucumber salad. The acidity and freshness balance the richness of the pancakes and help cleanse your palate between bites.
Boost with Extra Protein: If you want to up the protein game, toss in a boiled egg or a few edamame pods on the side. Great for keeping you full and energized, especially for lunch!
Add Citrus or Herbs for Brightness: Pack a wedge of lime or sprinkle fresh cilantro or green onions over your pancakes before eating. That fresh hit of citrus or herbs will wake up the flavors beautifully.
Portion for Grab-and-Go: Store the pancakes in single-serving containers so you can just grab one or two for a snack or pack them as a main for lunch. They reheat well in a pan or microwave!
Pair with a Light Broth Soup:If you’re into a cozy combo, pair your pancakes with a light miso soup or a clear vegetable broth. It makes the meal feel complete and super comforting — like a bento box at home.


Frequently Asked Questions
How long do these pancakes last in the fridge?
They’ll stay fresh for about 3–4 days when stored in an airtight container. Pro tip: Place a small sheet of parchment between them to prevent sticking!
Can I make this gluten-free?
Absolutely! Swap the all-purpose flour for a gluten-free blend or even rice flour, which keeps it light and crispy — bonus, rice flour is closer to traditional Japanese okonomiyaki style.
What other proteins work besides ground chicken?
Tons of options! Try cooked shrimp, shredded rotisserie chicken, turkey, or even crumbled tofu. It’s a great way to use up leftovers.


Chicken and Cabbage Pancakes (Okonomiyaki)
Equipment
Ingredients
Instructions
Video
Notes
Nutrition