Posted on Leave a comment

Quinoa and Kale Salad

quinoa salad

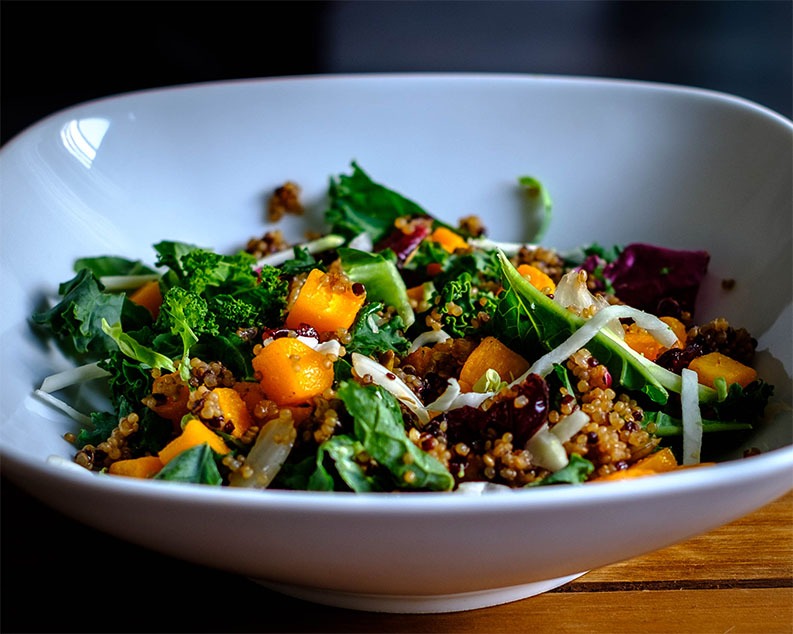
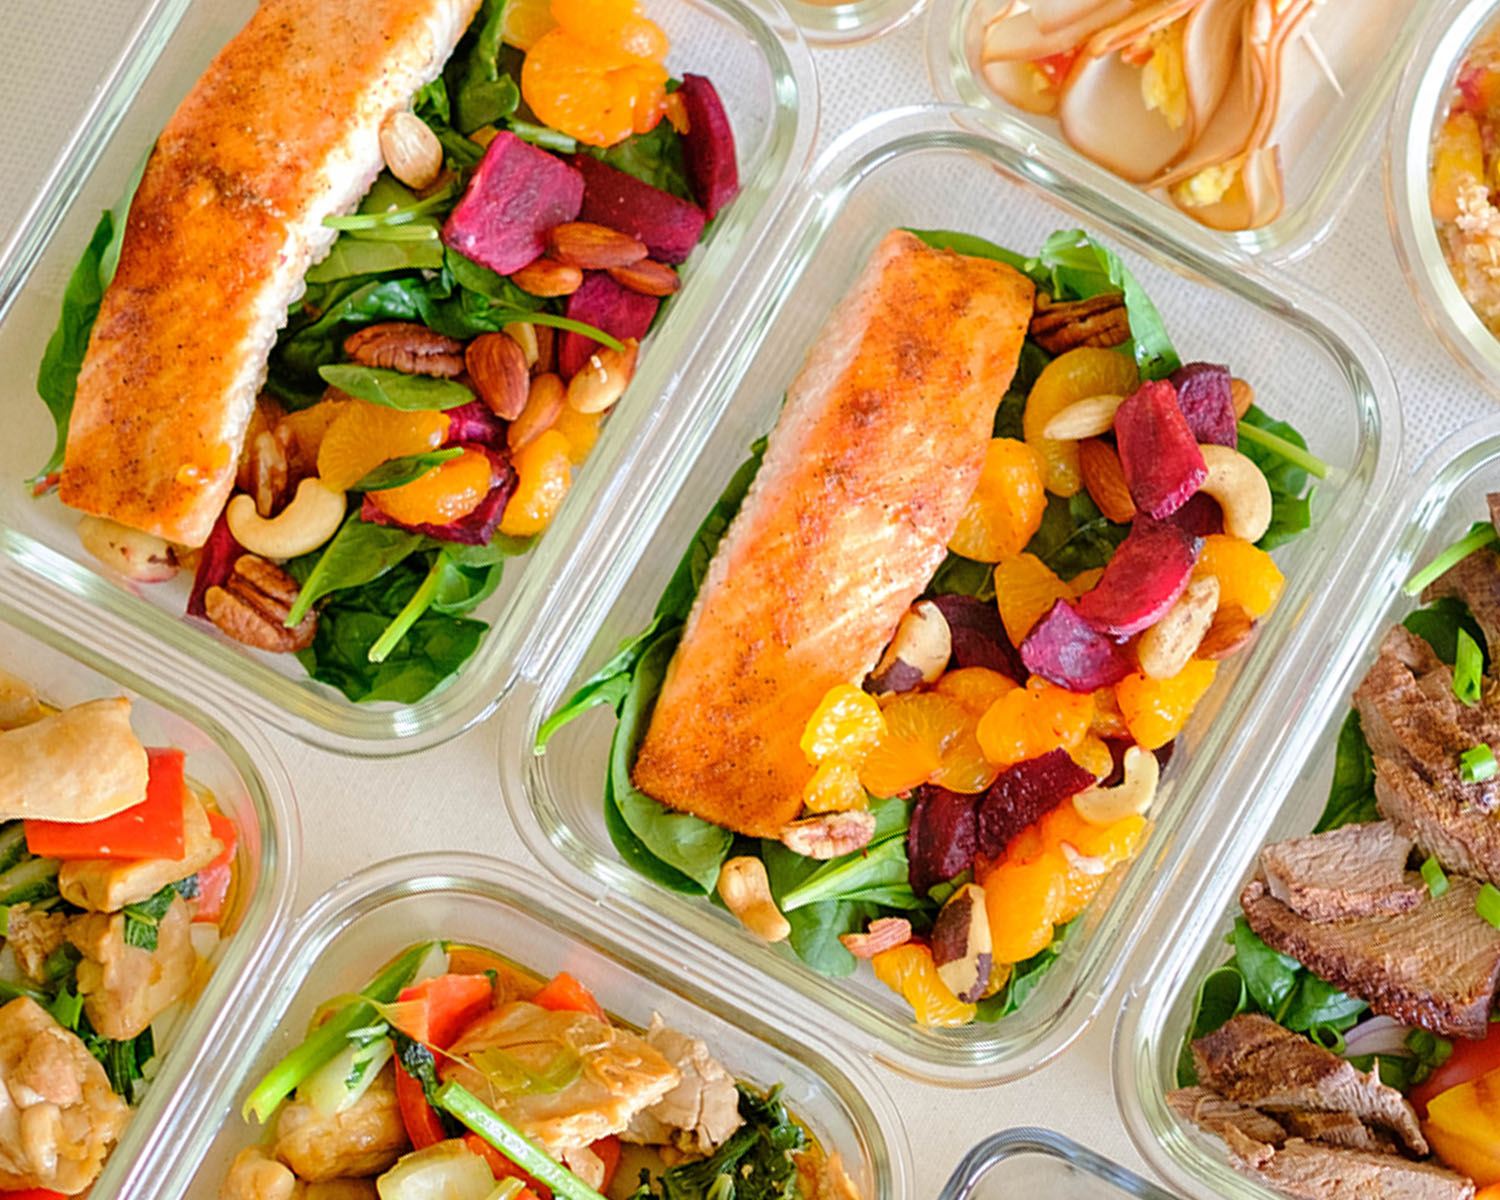
This quinoa and kale salad recipe is a powerhouse of ingredients you should add to your weekly meal prep.

This post may contain affiliate links. Please see our privacy policy for details.

Bowl of quinoa salad with kale and butternut squash.

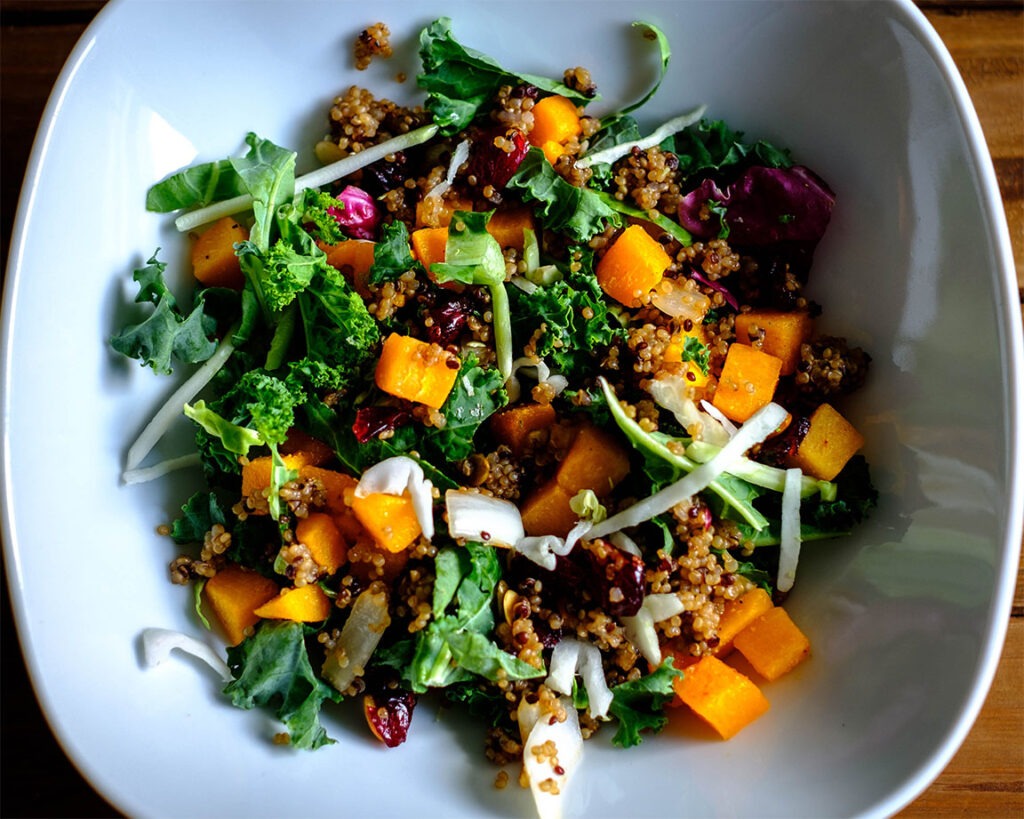
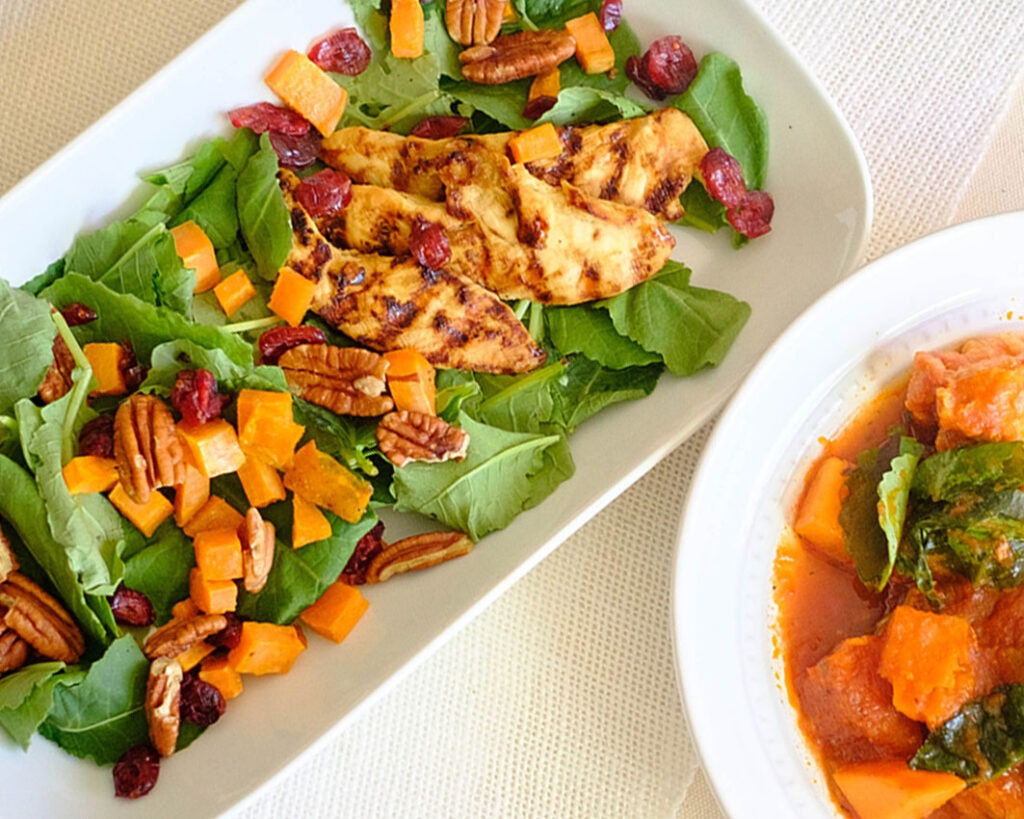
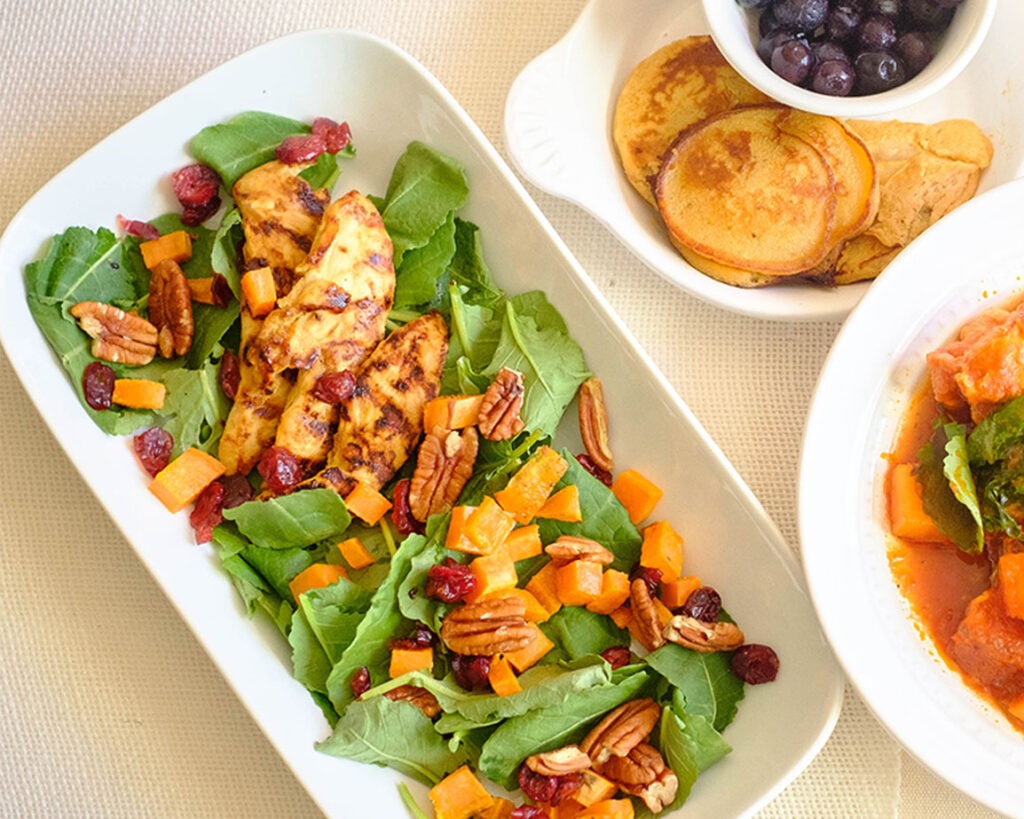
The combination of all these ingredients in this salad is not only colorful and flavorful but it’s also packed with nutrition. Both quinoa and kale are nutrient-dense, and the addition of butternut squash, shredded cabbage, and dried cranberries add healthy fiber and vitamins.

The PrepYoSelf Newsletter

Here’s What You Need for This High-Protein Quinoa Salad

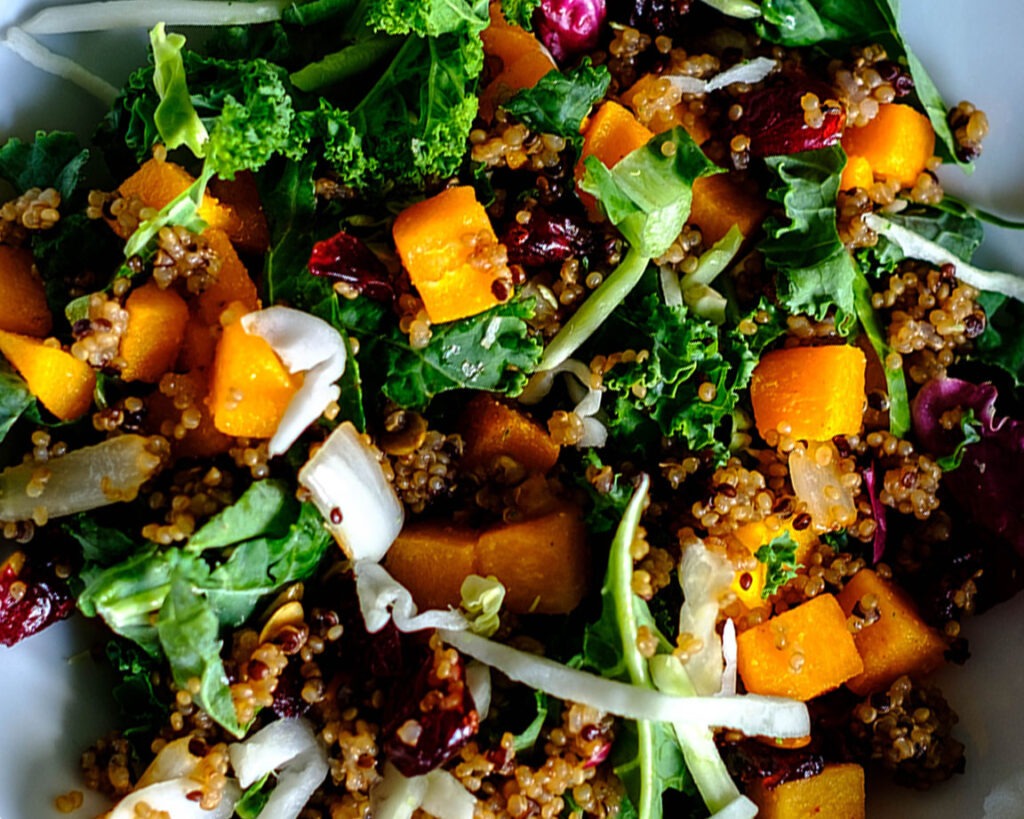
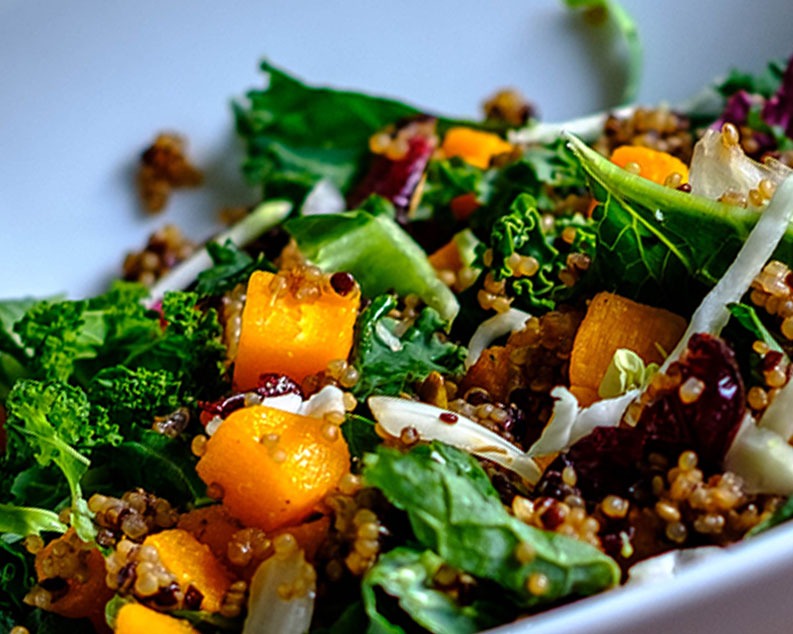
  • Quinoa: There are different types of quinoa, but we used a tri-color quinoa
  • Kale: You can also swap this out with other greens such as arugula or spinach
  • Butternut squash: Another option is acorn squash or delicata squash
  • Red cabbage: We love the purple colors of red cabbage, but you can also use regular green cabbage
  • Dried cranberries: Feel free to use whatever dried fruit you have on hand such as raisins
  • Seasonings: We seasoned this salad with a homemade lemon honey dijon vinaigrette
Bowl of quinoa salad with kale and butternut squash.

Easy Steps to Make this Nutritious Kale Salad Recipe

  1. Boil water in a pot and add the quinoa. Cover the pot with a lid and lower the heat and let it simmer until it fully cooks.
  2. Meanwhile, blend together the ingredients for the homemade salad dressing.
  3. After the quinoa cooks, place it in a bowl and add the butternut squash, kale, shredded cabbage, and dried cranberries.
  4. Pour in the dressing and mix it all together.

Reference the recipe card below for detailed instructions.

Bowl of quinoa salad with kale and butternut squash.

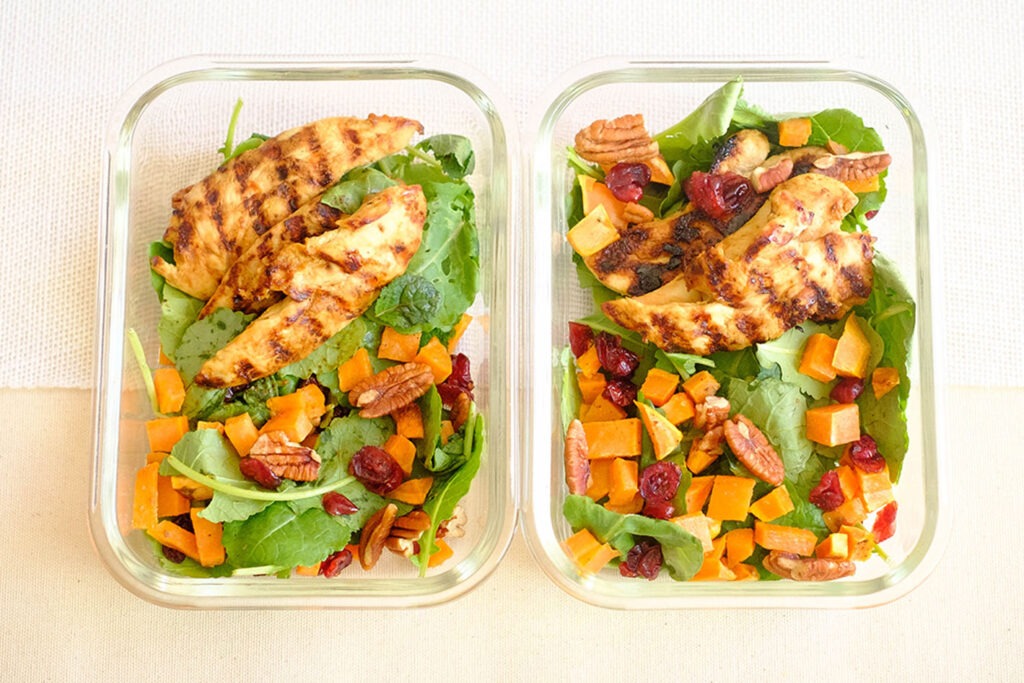
Meal Prep Tips for Quinoa and Kale Salad

  • Ingredient Tips: Feel free to add diced avocado for some healthy fat
  • Nuts: You can also add nuts for more protein such as walnuts, almonds, or pecans
  • To Store: Store in an airtight container in the refrigerator for up to 3 to 4 days
Bowl of quinoa salad with kale and butternut squash.
Quinoa and Kale

Quinoa and Kale Salad

Here's a tasty kale salad with quinoa tossed in a homemade vinaigrette dressing.
No ratings yet
Prep Time 5 minutes
Cook Time 15 minutes
Course lunch, Main Course
Cuisine American, Mediterranean
Servings 2

Equipment

  • knife
  • cutting board
  • mixing bowls
  • boiling pot

Ingredients
  

Quinoa

  • 1/3 cup dried quinoa
  • 1 cup water

Salad Components

  • 1 cup butternut squash (diced)
  • 4 cups Baby kale
  • 1/4 cup shredded red cabbage
  • 2 tablespoons dried cranberries

Salad Dressing

  • 2 lemon (juiced)
  • 4 tablespoons olive oil
  • 1 tablespoon dijon mustard
  • 1 tablespoon honey
  • 1/4 teaspoon garlic powder
  • 1/4 teaspoon salt

Instructions
 

Quinoa

  • Bring 1 cup of water to a boil in a boiling pot. Add the quinoa and lower the heat to medium. Cover the pot with a lid and cook for 15 minutes. After it cooks, fluff with a fork and let it cool.

Salad Dressing

  • In a mixing bowl, add the juice of two lemons with olive oil, dijon mustard, honey, and the seasonings. Whisk together until the dressing is well blended.

Salad Assembly

  • In a bowl, add the butternut squash, quinoa, kale, shredded red cabbage, and dried cranberries.
  • Pour over the dressing and mix all the components together.

Similar Recipes

shrimp quinoa salad

Citrus Shrimp Quinoa and Spinach Salad

Honey Dijon Chicken with Kale and Sweet Potato Salad

salmon beet salad

Citrus Ginger Salmon Salad

You Might Also Like

Bubo, Pinot Noir

Trader Joe’s Meyer Lemon Cookie Thins

Amazon Affiliate TAlessi Autentico – Italian Crispy Breadsticksitle

Frequently Asked Questions

Do you serve this quinoa salad cold or hot?

You’ll want to let the quinoa cool before you mix it in with the other salad ingredients.


Is kale salad good for weight loss?

Kale is a nutrient-dense food that is a good source of fiber and protein which helps you keep full longer.


Can you eat quinoa raw?

It’s best to cook the dried quinoa prior to eating it, because it may cause digestive comfort, plus it tastes better!

Posted on Leave a comment

Vegetarian Red Pepper and Cheese Sandwich

roasted pepper sandwich with sliced avocado and roasted brussels sprouts

Toasted cheese sandwiches are the best, and for this recipe, we added an extra layer of flavor and nutrients with roasted bell peppers and creamy avocado slices.

This post may contain affiliate links. Please see our privacy policy for details.

Round plate with a grilled cheese and vegetable sandwich with roasted brussels sprouts.

Who craves comfort food for lunch? I know we do! And it can’t get any more comforting than a toasted cheese sandwich.

But this is not your average cheese sandwich. We leveled it up with roasted red peppers, and sliced avocado, and served it with crispy balsamic brussel sprout chips. And the best part is that we made it all in our Air Fryer Basket!

The PrepYoSelf Newsletter

Ingredients You’ll Need to Make This Tasty Vegetarian Cheese Sandwich

  • Sliced Bread: We used wheat bread, but you can choose any kind of bread that you like such as sourdough, rye bread, and even gluten-free freed
  • Red Bell Peppers: We used red peppers, but you can use any kind of roasted vegetables such as sliced zucchini, sliced eggplant, or sliced portobello mushrooms. We always try to incorporate any veggies when we can
  • Sliced Cheese: We used provolone cheese, muenster cheese, gruyere cheese, and swiss cheese are tasty options
  • Sliced Avocado: Instead of using mayo spread, we opted for healthy fat and used sliced avocado. This is a great option to add the creaminess that we enjoy from using mayo
  • Brussels Sprouts: We glazed our brussels sprouts with balsamic concentrate which added flavor and helped crisp it up during the cooking process

Round plate with a grilled cheese and vegetable sandwich with roasted brussels sprouts.

Easy steps for this Roasted Red Pepper and Cheese Sandwich

When it comes to the classic cheese sandwich, we often make it on the stove top or use a panini grill, but we actually used the Air Fryer to cook the whole meal. Here’s how we did it:

  1. In a bowl, marinate the brussels sprouts and bell peppers with balsamic concentrate, garlic powder, salt, and olive oil.
  2. Next, place the vegetables in the Air Fryer basket and cook at 350F for 7 minutes.
  3. Then, remove the vegetables from the basket and place the bread slices topped with sliced cheese into the basket.
  4. Toast them until the cheese melts.
  5. Assemble the sandwich by layering the roasted red peppers, cheese, and avocado.
  6. Enjoy with a side of roasted balsamic Brussels sprouts.

Reference the recipe card below for detailed instructions.

Glass meal prep container with a grilled cheese and vegetable sandwich with roasted brussels sprouts.

Meal Prep Tips for Roasted Pepper Cheese Sandwich

  • To Serve: Serve with a side salad, soup, or regular chips instead of the brussels sprouts.
  • Prep Tip: If you are prepping this meal in advance, cook only the bell peppers and brussels sprouts in advance. Then, when you are ready to eat the meal, toast the bread and slice the avocado fresh. If you assemble the sandwich too early, the avocado will brown and the sandwich might get too soggy

Glass meal prep containers with a grilled cheese and vegetable sandwich with roasted brussels sprouts.

roasted pepper sandwich with sliced avocado and roasted brussels sprouts

Vegetarian Roasted Red Pepper, Avocado and Cheese Sandwich

Here's a veggie packed cheese sandwich that you can easily prep in your Air Fryer.
No ratings yet
Prep Time 5 minutes
Cook Time 15 minutes
Course lunch, Main Course
Cuisine American
Servings 2

Equipment

  • knife
  • cutting board
  • mixing bowl
  • Air Fryer

Ingredients
  

  • 1 each red bell pepper
  • 2 cups brussels sprouts
  • 1 tablespoon balsamic concentrate
  • 1/4 teaspoon garlic powder
  • 1/4 teaspoon salt
  • 1 tablespoon olive oil
  • 4 slices wheat bread
  • 2 slices cheese (your choice)
  • 1 avocado

Instructions
 

  • Slice the brussels sprouts into thin slices. Cut the bell pepper in half and remove the inner seeds. In a bowl, marinate the vegetables with balsamic concentrate, garlic powder, salt, and olive oil.
  • Place the brussels sprouts and bell pepper in the Air Fryer and cook at 350F for 7 minutes. After the veggies cook, remove them from the Air Fryer basket.
  • Place the bread slices in the basket and top each slice with cheese. Toast the bread at 370F for 1 minute (or until the cheese melts)
  • Then, assemble the sandwich by adding avocado slices, and the bell pepper, and serve with a side of the roasted brussels sprouts.

Similar Recipes

sweet potato blt

Sweet Potato BLT Sandwich

balsamic chicken salad

Baked Balsamic Baked Chicken Spinach Salad

balsamic steak

Grilled Balsamic Steak with Sweet Potato Wedges

You Might Also Like

Frequently Asked Questions

I don’t have an Air Fryer, can I make this in the oven?

Yes! Just roast your veggies at 400F for 10-12 minutes. You can also toast your bread with the sliced cheese in the oven for about 2 to 3 minutes until the bread gets toasted and the cheese melts.


Do avocado and cheese go together?

Cheese and avocado are one of our favorite combos. In hot dishes, you can use any kind of cheese that melts well such as mozzarella, gruyere, provolone, and even swiss cheese. For cold dishes such as salads, combine them with feta cheese.


What else can you put on a grilled cheese sandwich?

You can add caramelized onions, pesto sauce, sauteed mushrooms, spinach, or olive tapenade. All these can add great flavors to your cheese sandwich. It’s also a great way to use up what you have in the kitchen. It’s all about being creative!

Posted on Leave a comment

Cajun Tilapia with Broccolini and Baby Potatoes

round white plate with cajun tilapia, broccolini, and baby potatoes

Pan-fried, flaky tilapia with roasted broccolini and buttery potatoes is a simple, but elegant way to make dinner for your busy weeknights.

This post may contain affiliate links. Please see our privacy policy for details.

Round plate with seasoned tilapia and roasted broccolini with baby potatoes.

Sometimes it can be overwhelming trying to decide what to eat during the week. Well, let me help you out with this easy and healthy, and not to mention budget-friendly dinner idea.

The PrepYoSelf Newsletter

Ingredients You’ll Need

  • Tilapia: We like using pan-fried tilapia for this recipe because it cooks fast, but you can use any other kind of white fish.
  • Broccolini: You can also swap this out with broccoli or asparagus
  • Baby Potatoes: We used baby potatoes because we don’t need to peel them which makes it easier to prep
  • Seasonings: We’re seasoning this meal with cajun flavors such as cayenne pepper, paprika, and garlic powder

Round plate with seasoned tilapia and roasted broccolini with baby potatoes.

Simple Steps to Make Tilapia with Roasted Vegetables

  1. Pre-heat the oven to 400F.
  2. Start prepping the baby potatoes and broccolini spears on a sheet pan.
  3. Bake the seasoned vegetables in the oven until they are tender and the potatoes are golden and crispy.
  4. Meanwhile, season the tilapia and pan-fry it in a saute pan until the fish turns opaque and flakes easily with a fork.

Reference the recipe card below for detailed instructions.

Glass meal prep container with seasoned tilapia and roasted broccolini with baby potatoes.

Meal Prep Tips for this Tilapia Recipe

  • Cook Method: If you don’t want to mess with the stovetop, you can also cook the whole dish in the oven. Place the tilapia along with the vegetables and bake everything in the oven.
  • Air Fryer Tip: You can also cook the fish and vegetables in an Air Fryer. Cook it at 400F for 7-9 minutes
  • Flavor Tip: If you have a lemon on hand, sprinkle the juice of the lemon over the dish. This will brighten up the flavors
  • To Store: Store in an airtight container in the refrigerator for up to 3 to 4 days.

Glass meal prep containers with seasoned tilapia and roasted broccolini with baby potatoes.

Tilapia and Veggies

Cajun Tilapia with Roasted Broccolini and Baby Potatoes

Make this delicious pan-fried tilapia with crispy broccolini and golden brown potatoes for your next dinner meal prep.
No ratings yet
Prep Time 5 minutes
Cook Time 20 minutes
Course dinner, Main Course
Cuisine American
Servings 2

Equipment

  • knife
  • cutting board
  • saute pan
  • spatula
  • sheet pan
  • oven

Ingredients
  

Tilapia and Seasonings

  • 12 oz Tilapia fillets
  • 1/4 teaspoon paprika
  • 1/4 teaspoon garlic powder
  • 1/4 teaspoon cayenne pepper
  • 1/4 teaspoon salt
  • 1/4 teaspoon pepper
  • 1 tablespoon olive oil

Broccolini and Baby Potatoes

  • 6 broccolini spears
  • 1/4 teaspoon garlic powder
  • 1/4 teaspoon salt
  • 1 tablespoon olive oil
  • 1 cup baby potatoes

Instructions
 

  • Pre-heat the oven to 400F. Slice the baby potatoes in half. Place the broccolini spears and baby potatoes on a sheet pan and season with garlic powder and salt. Then, coat it with olive oil and bake for about 15-20 minutes (if the potatoes are still not tender, cook for additional 5 minute increments)
  • Then, season the tilapia with the seasonings. Add oil to a saute pan on medium high heat and sear the tilapia on each side for about 4 to 5 minutes until it is fully cooked and golden brown. The fish should turn opaque and flake easily with a fork
  • Serve the fish with the roasted veggies.

Notes

Note: Instead of searing the tilapia in a saute pan, you can also bake it with the veggies all on one sheet pan

Similar Recipes

rosemary chicken

Rosemary Baked Chicken and Potatoes

salmon beet salad

Citrus Ginger Salmon Salad with Roasted Beets

shrimp and corn

Sheet Pan Shrimp with Cauliflower and Corn

You Might Also Like

Frequently Asked Questions

Is this dish healthy?

Yes, it has a good balance of protein, complex carbs, and fiber. Fish is typically also less caloric than beef and chicken if you’re looking for a low calorie option.


What is the best fish to pan fry?

Other than tilapia, flounder, sole, or cod are good options because they are all thin and can cook quickly.


Do you season fish before frying?

Yes, season with herbs and spices to enhance the fish’s flavor.

Posted on

Balsamic Baked Chicken

This balsamic baked chicken recipe combines succulent bone-in chicken thighs with a flavorful marinade for a delicious and easy-to-make dish. The marinade, consisting of balsamic dressing, honey, olive oil, rosemary, garlic powder, salt, and pepper, infuses the chicken with rich and aromatic flavors. To prepare, preheat the oven to 425°F and whisk together the marinade ingredients. Arrange the chicken thighs in a baking dish, coat them with half of the marinade, and bake for 20 minutes. Then, add the remaining marinade and continue baking for 10-15 minutes until the chicken reaches a golden brown color and an internal temperature of 165°F. Once cooked, transfer the chicken to a serving dish and enjoy, pairing it with a side salad or roasted vegetables for a complete meal.

balsamic chicken

Honey Balsamic Baked Chicken

No ratings yet

Prep Time 5 minutes
Cook Time 32 minutes

Course dinner, Main Course
Cuisine American, Italian

Servings 4

Equipment

  • mixing bowl
  • sheet pan
  • oven

Ingredients


  • 4 each bone in chicken thighs
  • 1/2 cup balsamic dressing
  • 2 tbsp honey
  • 1 tbsp olive oil
  • 1 tbsp rosemary (fresh, finley chopped)
  • 1/2 tsp garlic powder
  • 1/4 tsp salt
  • 1/4 tsp pepper

Instructions


  • Preheat the oven to 425F degrees
  • In a small bowl, whisk together the balsamic dressing, honey, garlic, salt, pepper, and rosemary
  • Place the chicken thighs in a baking dish and pour half of the balsamic marinade over the chicken and make sure it is fully coated
  • Cook the chicken for 20 minutes
  • After 20 minutes, pour the rest of the balsamic marinade on top and cook for another 10-15 minutes until the chicken is golden brown and fully cooked to an internal temperature of 165
  • Remove from the oven and place it on a serving dish and enjoy! Serve with a side salad or roasted veggies

Notes

Note: After the chicken cooks, you can split the recipe in half and shred half of the chicken meat, and use it as your protein for a lunch salad or in a sandwich.
Posted on Leave a comment

Grilled Honey Dijon Chicken Kale Salad

chicken kale salad

This delicious and gorgeous roasted sweet potato and kale salad with grilled chicken is full of flavor. It’s a nutrient-packed lunch for the week.

This post may contain affiliate links. Please see our privacy policy for details.

Plate with chicken served on top of baby kale salad with sweet potato, cranberries, and pecans.

Why This Kale Salad is Healthy

  • Complete Meal: This recipe has lean protein, complex carbs, vegetables, fruit, and healthy fats.
  • Benefits of Kale: Kale is a green, leafy, cruciferous veggie that is rich in nutrients such as fiber, antioxidants, calcium, Vitamin C, K, and Iron.
  • Benefits of Sweet Potato: This sweet and starchy root vegetable is great for meal prep because it comes in a variety of sizes and colors. It is also a great source of fiber, vitamins, and minerals that help promote gut health.

The PrepYoSelf Newsletter

Ingredients You’ll Need

  • Chicken and Marinade: For this recipe, we used chicken tenderloins because they cook fast, but you can also use boneless chicken thighs or chicken breast. We also marinated the chicken in a honey dijon sauce before grilling it.
  • Sweet Potato & Seasonings: Other orange vegetable options you can use are diced butternut squash or acorn squash.
  • Salad Ingredients: For our salad mix, we incorporated a dark leafy green such as baby kale mix, but you can also use baby spinach.
  • Toppings: We topped off the salad with crunchy components such as pecan halves and dried cranberries.
  • Salad Dressing: To streamline the ingredients, we made our own homemade vinaigrette using the same ingredients used for the chicken marinade.
Plate with chicken served on top of baby kale salad with sweet potato, cranberries, and pecans.

How to Prepare Grilled Honey Dijon Chicken Kale Salad

  1. Preheat the oven to 400F.
  2. Cut the sweet potato into small pieces and place them on a baking sheet. Season the diced sweet potato and coat with olive oil.
  3. Bake the sweet potato in the oven until they are tender and golden brown.
  4. Meanwhile, marinate the chicken and cook it on the indoor grill.
  5. Afterward, toss together the chicken with the baby kale salad, sweet potatoes, dried fruit, and nuts, and drizzle the salad dressing on top.

Reference the recipe card below for detailed instructions.

Plate with chicken served on top of baby kale salad with sweet potato, cranberries, and pecans.

Meal Prep Tips for Kale Salad

  • Other Flavors: To make kale taste good, add citrus flavors. Kale leaves are crunchy and have a strong taste. Therefore, acidic flavors can cut through the tough flavors of raw kale.
  • Ingredient Variations: You can also a balsamic vinaigrette or Italian dressing to marinate your chicken if you don’t want to make your own homemade dressing.
  • Storage: Store in an airtight container in the refrigerator for up to 3 to 4 days for the best quality.
Glass meal prep containers with chicken served on top of baby kale salad with sweet potato, cranberries, and pecans.
chicken kale salad

Grilled Honey Dijon Chicken Kale Salad

Here's a nutrient packed salad filled with lean protein, dark leafy kale mix, and roasted sweet potato tossed in a sweet and tangy honey dijon vinaigrette dressing
No ratings yet
Prep Time 5 minutes
Cook Time 15 minutes
Course lunch
Cuisine American
Servings 2

Equipment

  • knife
  • cutting board
  • mixing bowls
  • tongs
  • sheet pan
  • indoor grill
  • oven

Ingredients
  

Chicken and Marinade

  • 12 oz chicken tenderloins
  • 2 tablespoons worcestershire sauce
  • 1 tablespoon dijon mustard
  • 2 tablespoons honey
  • 1/4 teaspoon paprika
  • 1/4 teaspoon garlic powder
  • 1/4 teaspoon salt
  • 1 tablespoon olive oil

Sweet Potato & Seasonings

  • 1 sweet potato
  • 1/4 teaspoon garlic powder
  • 1/4 teaspoon onion powder
  • 1/4 teaspoon salt
  • 1 tablespoon olive oil

Salad Ingredients

  • 4 cups baby kale
  • 2 tablespoons pecan halves
  • 2 tablespoons dried cranberries

Honey Dijon Vinaigrette

  • 3 tablespoons olive oil
  • 1 tablespoon dijon mustard
  • 2 tablespoons honey
  • 2 tablespoons apple cider vinegar
  • 1/2 teaspoon garlic powder
  • 1/2 teaspoon salt

Instructions
 

  • Preheat the oven to 400F. Peel the sweet potato and cut it into small dices. Place the sweet potato on a sheet pan and sprinkle them with the seasonings. Coat the sweet potato with olive oil. Bake in the oven for 15 minutes.
  • Meanwhile, in a mixing bowl, mix together the chicken marinade. Add the chicken in the bowl and make sure it is fully coated with the marinade.
  • Heat an indoor grill on medium high heat and grill the chicken tenders on each side for about 4 to 5 minutes until they are fully cooked and reach an internal temperature of 165F.
  • Enjoy the grilled chicken tenders with the baby kale salad topped with the roasted sweet potatoes, dried cranberries, pecan halves, and a drizzle of the vinaigrette.

Similar Recipes

cilantro chicken

Cilantro Lime Chicken Salad with Strawberry Salsa

stuffed primavera chicken

Primavera Stuffed Chicken Breasts

chicken fajitas

Sheet Pan Chicken Fajitas with Mango Salsa

You Might Also Like

Frequently Asked Questions

How to store kale?

Bagged kale can keep in the fridge for up to 5 to 7 days


What is massaged kale?

Massaging kale usually involves adding an acid such as lemon juice with olive oil to chopped kale. Use your hands to massage it for a few minutes to soften the leaves. It results in a glossed and reduced volume. Massaging kale helps break down the tough cell structure and allows for a softer texture and a more appetizing flavor. 


Is it better to eat kale raw or cooked?

 Raw kale is more beneficial than cooked, however, some people find it hard to digest and dislike the bittern flavors, therefore heating it softens some of the tough fibers and make it more appealing to consume.

Posted on Leave a comment

Celery Chicken Salad Wrap

round plate with celery chicken salad wrapped in flour tortilla

Here’s a twist on the classic chicken salad. We’ve got shredded chicken tossed in a creamy and tangy mayo and dijon mustard dressing with crisp, diced veggies and crunchy nuts.

This post may contain affiliate links. Please see our privacy policy for details.

Round plate with celery chicken salad served in tortilla wraps.

Reasons We Love This Chicken Salad With Celery

  • It is filling and full of fresh and bright ingredients
  • It is high in protein
  • You can make it into a healthy wrap or serve it as a healthy chicken salad topping with baby spinach or spring mix

The PrepYoSelf Newsletter

Chicken salad is usually a blank canvas for whatever you want to add to it. Our goal was to make it easy with basic ingredients that you can easily have on hand.

To make this easy chicken salad recipe, you’ll need

  • Shredded Chicken: You can use leftover chicken breast from a pre-cooked rotisserie chicken or boil it yourself.
  • Celery: This ingredient adds a nice crisp, fresh texture to the salad. If you don’t like celery, you can use other crips veggies such as diced bell peppers.
  • Red Onions: You can use any kind of onions.
  • Green Onions: You can other herbs such as tarragon or basil.
  • Walnuts: Use any kind of nuts that you have such as pecans or almonds.
  • Mayo: If you want more added protein you can also use greek yogurt.
  • Dijon Mustard: You can also use regular mustard or spicy mustard.
  • Sugar: The sweetness adds a balance to the savory flavors of this dish.
  • Flour Tortillas: Use any kind of tortilla for your wrap. You can also use lettuce wraps for a low-carb option

Round plate with celery chicken salad served in tortilla wraps.

Basic Steps to Prepare Celery Chicken Salad

  1. In a mixing bowl, add the shredded chicken, diced vegetables, nuts, mayo, dijon mustard, salt, pepper, and sugar.
  2. Mix it all together until the ingredients are well blended.
  3. Scoop small portions of the chicken salad into each tortilla wrap (about 1/2 cup scoop per tortilla).

Reference the recipe card below for detailed instructions.

Glass meal prep containers storing celery chicken salad served in tortilla wraps.

Meal Prep Tips for A Celery Chicken Salad Wrap

  • Other Cook Methods: If you don’t have pre-cooked rotisserie chicken, you can boil chicken breasts for about 15 to 20 minutes. After it cooks, use two forks to shred the chicken and let it cool.
  • Ingredient Variations: Instead of using shredded chicken, you can use boiled eggs or canned tuna.
  • Additional Ingredients: In addition to vegetables and herbs, you can also add common fruits such as sliced grapes, diced pears or apples, and even dried fruit such as dried cranberries.
  • Storage: Store in an airtight container in the refrigerator for up to 3 to 4 days for the best quality. If you’re not eating the meal right away, keep the tortillas separate from the chicken salad mixture to prevent the tortillas from getting soggy.

Glass meal prep containers storing celery chicken salad served in tortilla wraps.

round plate with celery chicken salad wrapped in flour tortilla

Celery Chicken Salad Wrap

This serving of chicken salad is great to utilize leftover chicken from another meal. It's filled with fresh veggies, crunchy nuts, and a creamy dressing.
No ratings yet
Prep Time 5 minutes
Cook Time 15 minutes
Course lunch, Main Course
Cuisine American
Servings 2

Equipment

  • knife
  • cutting board
  • mixing bowl

Ingredients
  

  • 1.5 cups shredded chicken (pre-cooked)
  • 2 tablespoons mayo
  • 2 tablespoons dijon mustard
  • 2 tablespoons green onions (chopped)
  • 1/2 cup celery (diced)
  • 1/4 cup red onions (diced)
  • 1/4 cup walnuts (chopped)
  • 1 teaspoon salt
  • 1/4 teaspoon pepper
  • 1 teaspoon sugar
  • 4 flour tortillas

Instructions
 

  • In a bowl, mix together the chicken, green onions, celery, red onions, walnuts, mayo, dijon mustard, salt, pepper, and sugar.
  • Scoop the chicken salad into a tortilla wrap.

Notes

Note: if you don’t have pre-cooked chicken, bring water to a boil and boil chicken breast in a pot for about 20 minutes until it fully cooks. Once it cooks, use two forks to shred it into pieces. Let it cool before mixing it with the other ingredients.

Similar Recipes

chicken kale salad

Grilled Honey Dijon Chicken and Kale Salad

chicken fajitas

Sheet Pan Chicken Fajitas with Mango Salsa

peanut chicken

Peanut Chicken Stir Fry

You Might Also Like

Frequently Asked Questions

What to eat with chicken salad?

You can serve this with sandwich bread, in a croissant, or with lettuce wraps.


What can I use instead of celery in chicken salad?

If you need a crunch, you can use jicama, carrots, and even radish.


Can I use grilled chicken for chicken salad?

Yes! Any leftover cooked chicken works well. Just be sure to chop it up into small pieces so that it can mix well with the other ingredients.

Posted on Leave a comment

Butternut Squash and Black Bean Soft Taco

bean taco

If you’re trying to incorporate more protein into your plant-based diet, here’s an easy vegetarian taco lunch recipe that you can enjoy!

This post may contain affiliate links. Please see our privacy policy for details.

Plate with butternut squash and black bean taco topped with arugula.

Sometimes it’s a challenge trying to get protein into your diet when you’re incorporating more plant-based meals. However, this vegetarian taco, butternut squash and black bean recipe is delish and tastes just as savory as a meat taco, and provides good protein as well.

The PrepYoSelf Newsletter

Ingredients You’ll Need

  • Tortillas: You can use flour or corn tortillas for these tacos. If you want to keep it low-carb, use jicama tortillas
  • Butternut squash: This ingredient adds a nutty, earthy, and slightly sweet flavor to the dish and is full of ingredients.
  • Black beans: We used black beans, but you can also use any kind of beans such as  pinto beans
  • Bell pepper: You can use any color, we prefer red bell peppers for this recipe because of the sweetness of the red peppers
  • Arugula: Adding fresh greens keeps this recipe light and also adds another layer of nutrition. You can also use spring mix, baby spinach, or even baby kale
  • White onions: you can also use red onions or yellow onions
  • Seasonings: chili powder, paprika, garlic powder, salt

Plate with butternut squash and black bean taco topped with arugula.

How to Prepare Butternut Squash and Black Bean Soft tacos

  • Dice up all of your veggies.
  • Add oil to a heated skillet and start first with the onions and bell peppers.
  • Next add the seasonings, black beans, and squash, and mix everything together.
  • Serve the black bean filling inside flour tortillas.
  • Top it off with fresh arugula.

Reference the recipe card below for detailed instructions.

Plate with butternut squash and black bean taco topped with arugula.

Meal Prep Tips for Vegetarian Tacos

  • To Serve: Feel free to add sliced avocado on top
  • Flavor Tip: Top them off with chopped cilantro and the juice of a lime to freshen up the meal
  • To Store: Store in an airtight container in the refrigerator for up to 3 to 4 days. Keep the black bean filling separate from the tortillas so that they don’t get soggy

Glass meal prep container with butternut squash and black bean taco topped with arugula.

Black Bean Taco

Butternut Squash and Black Bean Soft Taco

These butternut squash and black bean tacos are a high-protein and healthy vegetarian lunch meal that can be ready in less than 15 minutes.
No ratings yet
Prep Time 5 minutes
Cook Time 15 minutes
Course lunch, Main Course
Cuisine American, Latin
Servings 2

Equipment

  • knife
  • cutting board
  • saute pan
  • spatula

Ingredients
  

  • 1/4 cup white onions (diced)
  • 1 cup butternut squash (diced)
  • 1 red bell pepper (diced)
  • 1 cup black beans (drained and rinsed)
  • 1/4 teaspoon chili powder
  • 1/4 teaspoon paprika
  • 1/4 teaspoon garlic powder
  • 1/4 teaspoon salt
  • 1 tablespoon olive oil
  • 4 flour tortillas
  • 1 cup arugula

Instructions
 

  • Add oil to a saute pan on medium-high heat and saute the onions, bell peppers, and butternut squash until they soften (about 4 to 5 minutes).
  • Next, add the black beans and sprinkle them with the seasonings. Mix everything together for another 2 to 3 minutes.
  • Serve the veggies inside the flour tortillas and top it off with fresh arugula.

Similar Recipes

bean and corn taco

Black Bean and Corn Soft Tacos

lentil taco

Vegetarian Lentil Soft Tacos

chicken fajitas

Sheet Pan Chicken Fajitas with Mango Salsa

You Might Also Like

Bubo, Pinot Noir

Trader Joe’s Unsalted, Dry Toasted Slivered Almonds

Saucy Lips – Handcrafted Gourmet Sauces and Marinades

Frequently Asked Questions

Is butternut squash good for weight loss?

It is low in calories and a great source of fiber which helps you keep full, therefore it helps promote weight loss with a balanced diet.


Is butternut squash a healthy carb?

Butternut squash only has 22 g of carbs per cup of cooked squash. It is a complex carb that is rich in vitamins A, C, and B vitamins, potassium, and magnesium.


Is butternut squash anti-inflammatory?

It does have a high antioxidant content which can help promote anti-inflammatory benefits along with a balanced diet.

Posted on Leave a comment

Oven Baked Balsamic Chicken with Strawberries

balsamic chicken salad

Juicy and tender chicken breast baked in sweet honey and tangy balsamic glaze. This delicious salad makes for an easy chicken lunch meal prep or weeknight dinner meal.

This post may contain affiliate links. Please see our privacy policy for details.

White round plate with baked balsamic chicken served with spinach, strawberries, and walnuts.

Why You’ll Enjoy This Tasty Balsamic Marinade

  • You can use this marinade for any kind of protein. It goes well with grilled pork or makes a great glaze for an Air Fryer Salmon
  • You can drizzle the marinade on top of pasta or salad
  • It also helps give a caramelized flavor to roasted veggies

The PrepYoSelf Newsletter

What You Need to Make This Balsamic Glazed Chicken

  • Chicken: We use boneless chicken breasts, but you can swap it out with other cuts of chicken such as boneless chicken thighs or chicken tenderloins.
  • Balsamic Glaze: You can find this glaze either in the condiment aisle near the salad dressings or vinegar.
  • Soy Sauce: Adding a little bit of soy sauce gives a savory and salty flavor, but you can also substitute it with regular salt.
  • Strawberries: Balsamic vinegar pairs well with strawberries giving it a sweet and tangy combination
  • Walnuts: Adding nuts to your meals is a great opportunity to add healthy fat and also provides a nice crunchy component to the salad
  • Spinach: These dark leafy greens are such a superfood that provides great nutrients and vitamins. You can also use baby kale or arugula.
  • Olive oil: You can also swap this out with avocado oil.

White round plate with baked balsamic chicken served with spinach, strawberries, and walnuts.

Simple Basic Steps to Make this Oven Baked Balsamic Chicken Breast

  1. Preheat the oven to 400F.
  2. In a bowl, mix together the ingredients for the marinade. Add the chicken to the bowl and let it marinate for at least 10 minutes.
  3. Meanwhile, prepare your salad ingredients. After the oven pre-heats, place the chicken on a sheet pan and bake it in the oven, flipping it over halfway through the process.
  4. After it cooks, let it rest before cutting them into thin strips.
  5. Enjoy the chicken with fresh spinach salad, topped with strawberries and walnuts.

Reference the recipe card below for detailed instructions.

Glass meal prep containers storing baked balsamic chicken served with spinach, strawberries, and walnuts.

Meal Prep Tips for Baked Balsamic Chicken Salad

  • Cook Method Options: You can also bake the chicken in a small toaster oven or cook it in the Air Fryer (cook at 360F for 20 minutes). You can also grill the chicken on an indoor grill. Just be sure to monitor the heat level because the balsamic glaze will burn fast and may create some smoke.
  • Prep Tips: If you don’t want to wait 10 minutes to marinate the chicken, you can always marinate it the night before. Place it in the refrigerator overnight. The longer you marinate the chicken, the more flavorful and tender it will be.
  • Storage: Cooked chicken can be stored in an air-tight container in the refrigerator for up to 3 to 4 days. You can also store the chicken in a freezer-safe container or bag for up to 3 months for the best quality.
  • To Reheat: Heat them in the microwave until they warm through. However, you can also enjoy the chicken chilled.
  • Extra Ingredients: If you have leftover strawberries, freeze them and save them for smoothies or use them as a topping for your breakfast yogurt or oatmeal. Walnuts can also be eaten for afternoon snacks or you can add them to baked goods and granola.

Glass meal prep containers storing baked balsamic chicken served with spinach, strawberries, and walnuts.

baked chicken salad

Oven Baked Balsamic Chicken with Strawberries and Walnuts

This simple balsamic marinated chicken is perfect on top of a salad, with roasted veggies, or a side of rice pilaf.
No ratings yet
Prep Time 10 minutes
Cook Time 30 minutes
Course lunch, Main Course
Cuisine American, Italian
Servings 2

Equipment

  • knife
  • cutting board
  • mixing bowl
  • sheet pan
  • oven

Ingredients
  

Chicken and Marinade

  • 12 oz chicken breasts
  • 2 tabelspoons balsamic glaze
  • 1 tablespoon soy sauce
  • 1/4 teaspoon garlic powder
  • 1/4 teaspoon onion powder
  • 1/4 teaspoon italian seasoning
  • 1 tablespoon olive oil

Salad Ingredients

  • 4 cups baby spinach
  • 1/2 cup cherry tomatoes (sliced)
  • 2 tablespoon walnuts (chopped)

Balsamic Vinaigrette

  • 3 tablespoons olive oil
  • 2 tablespoons balsamic glaze
  • 1 tablespoon honey
  • 1 tablespoon apple cider vinegar
  • 1/2 teaspoon garlic powder
  • 1/2 teaspoon salt

Instructions
 

  • Preheat the oven to 400F. In a mixing bowl, whisk together the chicken marinade until well blended. Add the chicken breast into the bowl and marinate the chicken for at least 10 minutes.
  • Meanwhile, wash the strawberries, remove the green stems, and cut the strawberries into quarters. Go ahead and blend together the balsamic vinaigrette in a small bowl.
  • After the oven has pre-heated, place the chicken on a sheet pan and bake in the oven for 25-30 minutes until it reaches an internal temperature of 165F.
  • After the chicken cooks, let it rest and cool for a few minutes before slicing it into bite-size pieces. Enjoy the chicken with the spinach salad, topped with strawberries and walnuts, and a drizzle of the vinaigrette.

Similar Recipes

italian chicken

Italian Chicken with Green Beans and Almonds

stuffed primavera chicken

Primavera Stuffed Chicken Breasts

cilantro chicken

Cilantro Lime Chicken Salad with Strawberry Salsa

You Might Also Like

Frequently Asked Questions

Is there a difference between balsamic glaze and balsamic vinegar?

Balsamic glaze is the reduction of balsamic vinegar. This is done by simmering the vinegar in a saucepan until it thickens and reduces in half to achieve the thick consistency of syrup.


What else can I use balsamic glaze on?

You can drizzle balsamic glaze on slices of bruschetta, Caprese salads, roasted veggies, and even on summer berries or vanilla ice cream.


What does balsamic glaze taste like?

It has an intense sweet and tangy flavor, therefore, ad it slowly to recipes because just a little bit goes a long way.

Posted on Leave a comment

Pan-Fried Tilapia with Corn and Green Beans

fish and creamed corn

This easy pan-fried tilapia with green beans is a delicious weekday meal that can be made in less than 20 minutes.

This post may contain affiliate links. Please see our privacy policy for details.

Round plate with pan-fried fish, green beans, and creamed corn - healthy fish and chips on a plate.

Cooking your own meals and planning what to eat in advance can help you gain control of your health. It’s also a great way to help ensure you have healthy options always available without compromising the foods you love.

A perfect example is this Pan-Fried Tilapia dish that we made. We love ordering fish and chips at restaurants, but sometimes the meal can be too greasy, so we created a version of healthy fish and chips.

Why You’ll Enjoy this Recipe

  • The fish is moist and flaky on the inside with nice golden crispiness on the outside
  • It is made with a flavorful homemade rub and paired with crispy, garlicky green beans and creamed corn

The PrepYoSelf Newsletter

Simple Ingredients for Healthy “Fish and Chips”

  • Tilapia: We used tilapia because it’s budget-friendly, but you can also use catfish or cod
  • Corn Starch: This will help give the crispiness that we enjoy in fish in chips instead of dipping it in a batter that can become too caloric.
  • Creamed Corn: If you’re not a fan of creamed corn, you can use regular corn kernels.
  • Green Beans: We used green beans instead of potatoes for our “chips” because they can be cooked to a crisp that can still give us that crunchy texture of chips

Round plate with pan-fried fish, green beans, and creamed corn - healthy fish and chips on a plate

How to Prepare This Healthy “Fish and Chips”

  1. Prepping the Tilapia: Season the tilapia and sprinkle it with corn starch. Make sure they are fully coated
  2. Cooking the Tilapia: Add oil to a heated saute pan and cook the filet on each side until it fully cooks and turns golden brown
  3. Green Beans: Remove the tilapia from the pan and add the green beans. Cook until crispy and add the seasonings
  4. Corn: Heat up the creamed corn in the microwave

Reference the recipe card below for detailed instructions.

Glass meal prep containers with pan-fried fish, green beans, and creamed corn - healthy fish and chips on a plate.

Meal Prep Tips for “Fish and Chips”

  • To Serve: We love dips with our fish and chips. Serve it with tartar sauce, a creamy sour cream horseradish sauce, or a dash of malt vinegar
  • To Store: Store in an airtight container in the refrigerator for up to 3 to 4 days.

Glass meal prep containers with pan-fried fish, green beans, and creamed corn - healthy fish and chips.

fish and green beans

Pan-Fried Tilapia with Creamed Corn and Sauteed Green Beans

This crispy pan-fried tilpia is light, healthy, and super easy. It is paired with crispy green beans and creamed corn.
No ratings yet
Prep Time 5 minutes
Cook Time 20 minutes
Course dinner, Main Course
Cuisine American
Servings 2

Equipment

  • knife
  • cutting board
  • mixing bowl
  • spatula
  • saute pan

Ingredients
  

Tilapia

  • 12 oz tilapia filets
  • 1/4 teaspoon paprika
  • 1/4 teaspoon garlic powder
  • 1/4 teaspoon salt
  • 1/4 teaspoon pepper
  • 1/4 cup corn starch
  • 1 tablespoon olive oil

Creamed Corn and Green Beans

  • 1.5 cups canned creamed corn
  • 2 cups green beans
  • 1/4 teaspoon garlic powder
  • 1/4 teaspoon salt
  • 1 tablespoon olive oil

Instructions
 

  • Season the tilapia filets with garlic powder, paprika and salt. Then, sprinkle tilapia fillets with a little bit of corn starch and make sure they are fully coated.
  • Add the oil to a saute pan on medium-high heat and cook the filet on each side for about 3 to 4 minutes until the filet is golden brown and flakes easily with a fork.
  • Then, remove the tilapia from the pan. In the same pan, add the green beans and saute for about 3 to 4 minutes until they are tender. Season with garlic powder and salt.
  • Meanwhile, heat up the creamed corn in the microwave. Serve the tilapia with green beans and a side of creamed corn.

Similar Recipes

italian chicken

Italian Chicken with Green Beans and Almonds

meatloaf patties

Oven Baked Meatloaf Patties and Roasted Green Beans

shrimp and corn

Sheet Pan Shrimp with Cauliflower and Corn

You Might Also Like

Frequently Asked Questions

Is tilapia healthy?

Tilapia is a great source of protein and also a good source of omega-3 fatty acids, which are healthy fats that helps your body function.


What is the difference between corn starch and flour?

Cornstarch is a pure starch that lacks gluten which makes it more efficient in thickening. It is a fine white powder that comes from the white heart of the corn while flour is made from wheat.


Can I use flour if I don’t have corn starch?

Yes, the only difference is that cornstarch makes a crispier finish because it absorbs moisture from the food and expands, giving a crackly, puffy coating on the outside.

Posted on Leave a comment

Grilled Cilantro Skirt Steak and Cauliflower Rice

cilantro steak

For all the low carb, keto foodies, or just steak lovers, here’s an easy Steak Dinner with Cilantro Pesto and Cauliflower Rice recipe that you can incorporate into your weekly meal prep.

This post may contain affiliate links. Please see our privacy policy for details.

Round plate with grilled steak with cilantro pesto and cauliflower rice.

We’re using tasty and wholesome ingredients to help you meet your low-carb lifestyle, or if you just want a delicious steak dinner. We’ve got you covered either way.

Why You’ll Enjoy this Cilantro Pesto Sauce

  • This Cilantro Pesto sauce is made with simple and whole ingredients that come together really well bringing tons of flavor.
  • The pesto sauce can be used as a sauce, salad dressing, dipping sauce, and even a marinade.
  • It’s also a great way to use up leftover cilantro herbs, and you can freeze it too!

The PrepYoSelf Newsletter

Ingredients Needed to Make this Low Carb Steak Dinner

  • Cilantro Pesto: We use fresh cilantro herbs lime juice, pine nuts, garlic cloves, olive oil, and salt
  • Steak: We grilled skirt steak, but you can also use flank steak or any kind of steak of your choice
  • Seasonings: We used chili powder, cumin, paprika, garlic powder, and salt
  • Cauliflower Rice: We used frozen cauliflower rice because you can easily just throw it in the microwave to cook and steam. You can serve this dish with any other low-carb vegetable such as roasted zucchini, green beans, or broccoli

Round plate with grilled steak with cilantro pesto and cauliflower rice.

How to Make Grilled Skirt Steak

  1. Season the steak with the dry rub, then coat it with olive oil.
  2. Heat an indoor grill on medium-high heat and sear the steak on each side until it cooks to your desired doneness.
  3. While the steak is grilling, blend together your cilantro pesto.
  4. After the steak cooks, let it rest before slicing it into strips.
  5. Microwave the cauliflower rice according to the packaged instructions.
  6. Drizzle the Cilantro Pesto on top of the steak.

Reference the recipe card below for detailed instructions.

Round plate with grilled steak with cilantro pesto and cauliflower rice.

Meal Prep Tips for Cilantro Pesto Sauce

  • If you don’t have a blender, you can still make a cilantro dressing by chopping the cilantro and pine nuts into fine pieces. Then, whisk it together with the lime juice, and olive oil, and season with salt.
  • If the pesto flavor is too strong as a sauce, you can just use it as a marinade for the steak before grilling it.
  • To add flavor to the plain cauliflower rice, saute it with the pesto sauce to incorporate the flavors.

Glass meal prep containers with grilled steak with cilantro pesto and cauliflower rice.

steak

Grilled Skirt Steak with Cilantro Pesto and Cauliflower Rice

Easy, low-carb grilled skirt steak dinner with a flavorful cilantro pesto and steamed cauliflower rice.
No ratings yet
Prep Time 5 minutes
Cook Time 20 minutes
Course lunch, Main Course
Cuisine American, Mexican
Servings 2

Equipment

  • knife
  • cutting board
  • blender
  • indoor grill pan
  • tongs
  • spatula
  • saute pan

Ingredients
  

Steak and Seasoning

  • 12 oz skirt steak
  • 1/4 teaspoon chili powder
  • 1/4 teaspoon cumin
  • 1/4 teaspoon paprika
  • 1/4 teaspoon garlic powder
  • 1/4 teaspoon salt
  • 1 tablespoon olive oil

Cilantro Pesto

  • 1 cup cilantro (chopped)
  • 1 lime (juiced)
  • 1/4 cup olive oil
  • 2 tablespoons pine nuts
  • 2 garlic clove (peeled)
  • 1/4 teaspoon salt
  • 4 cups cauliflower rice (frozen, pre-cooked, recommend Green Giant Brand)

Instructions
 

  • Season the steak and coat it with olive oil. Heat an indoor grill pan on medium high heat and sear the steak on each side for about 5 to 6 minutes until it cooks to your desired doneness.
  • Meanwhile, place the cilantro, pine nuts, juice of a lime, olive oil, garlic, and salt in a blender and blend until smooth.
  • Microwave the frozen cualiflower rice according to the packaged instructions (usually about 4 to 5 minutes).
  • After the steak cooks, let it rest before slicing into strips. Serve the steak on top of the cauliflower rice and drizzle it with the yummy cilantro pesto sauce.

Similar Recipes

pineapple bbq chicken

Pineapple BBQ Chicken and Coconut Cauliflower Rice

cilantro chicken

Cilantro Lime Chicken and Strawberry Salsa

steak wrap

Steak Wrap with Air Fryer Eggplant Fries

You Might Also Like

Frequently Asked Questions

How long will fresh pesto last in the fridge?

It’s best to use it up within 5 days in the fridge for the best flavor and freshness.


Can I freeze pesto?

Yes, we recommend putting them in ice cube trays or in small freezer-safe containers. It can keep in the freezer for up to 6 months.


Is pesto healthy?

If used in moderation, it can be a healthy way to add flavor to your meals such as a sauce or a marinade. However, because the ingredients do include olive oil, nuts, and sometimes cheese, these ingredients can be high in calories and fat. Therefore, you would want to make sure you incorporate them in balanced portions to your meals. For this recipe, we used olive oil which is primarily unsaturated and can contribute to some heart health benefits.