Posted on Leave a comment

Honey Lemon Chicken Stir Fry

Chicken Stir Fry with Bok Choy and Bell Peppers

Hey, busy foodies! Are you ready to whip up something absolutely delicious, super easy, and totally budget-friendly? Let’s get your meal prep game on with a fantastic Honey Lemon Chicken Stir Fry that’ll make your tastebuds sing and keep your wallet happy. This dish is a perfect blend of tangy, sweet, and savory flavors that come together faster than you can say “yum”!

This post may contain affiliate links. Please see our privacy policy for details.

Calories: 530kcal | Carbohydrates: 28g | Protein: 33g | Fat: 33g | Saturated Fat: 8g | Polyunsaturated Fat: 7g | Monounsaturated Fat: 14g | Trans Fat: 0.1g | Cholesterol: 167mg | Sodium: 1719mg | Potassium: 866mg | Fiber: 3g | Sugar: 22g | Vitamin A: 6887IU | Vitamin C: 132mg | Calcium: 147mg | Iron: 3mg
Chicken Stir Fry with Bok Choy and Bell Peppers

The PrepYoSelf Newsletter

Why You’ll Love This:

  • Quick & Easy: Less than 30 minutes and your meal prep for a few days is sorted.
  • Flavor-packed: Each bite is a blend of honey sweetness, zesty lemon, and just the right kick from the chili flakes.
  • Healthy & Satisfying: Packed with protein-rich chicken and fiber-loaded veggies, it’s balanced, filling, and keeps you charged.
  • Quick Cleanup: Since this recipe requires just a wok or large skillet, you won’t have a pile of pots and pans to clean up afterward. This one-pan wonder not only simplifies cooking but also makes cleanup a breeze, so you can enjoy your meal and your evening without the looming dread of dishes.
  • Perfect for All Seasons: The light and zesty flavors of lemon and honey make this dish refreshing enough for summer, while the hearty addition of chicken and warming spices like garlic and chili flakes make it comforting in the colder months. It’s a versatile recipe that adapts to any season.
Chicken Stir Fry with Bok Choy and Bell Peppers

Ingredients you’ll need for this Chicken Stir Fry

  • Chicken Thighs: Chicken thighs are chosen for their juiciness and flavor, which surpass that of chicken breasts. They are also more affordable and forgiving during the cooking process, remaining tender and moist. Rich in protein, they provide the necessary nutritional value to keep you satiated and energized.
  • Red Bell Pepper: These add a sweet, almost fruity component to the stir fry. Not only do they bring vibrant color to the dish, but they’re also packed with vitamins A and C, which are great for immunity and skin health. Red bell peppers are relatively inexpensive, especially when bought in season or on sale, and contribute to the budget-friendly nature of the recipe.
  • Bok Choy: This leafy green is a staple in Asian cuisine and brings a subtle peppery flavor to the dish. It’s an excellent source of vitamins K, C, and A, and adds fiber to the meal, enhancing digestive health. Bok choy is also typically cheaper than other leafy greens like kale and spinach, making it a cost-effective option for adding volume and nutrition.
  • Green Onions: These add a mild, crunchy onion flavor that isn’t overpowering. Green onions are inexpensive and work as a flavorful garnish that enhances the visual appeal and taste complexity of the dish.
  • Olive Oil & Sesame Oil: Olive oil is used for its health benefits and high smoke point, making it ideal for stir-frying. Sesame oil, on the other hand, is used sparingly for its intense flavor. Just a drizzle adds a nutty aroma and richness that elevates the dish from simple to special without adding much to the cost.
  • Honey and Lemon Juice: These ingredients are key to creating the sweet and tangy profile of the sauce. Honey brings natural sweetness, balancing the zesty lemon juice that provides a refreshing burst of flavor, which can invigorate the palate. Both are affordable and packed with health benefits—lemon juice for its vitamin C and honey for its antioxidants.
  • Soy Sauce: This adds the umami flavor, depth, and saltiness to the sauce, eliminating the need for additional salt. It’s a staple in Asian cooking and very budget-friendly, especially when bought in larger quantities.
  • Garlic Powder and Red Pepper Chili Flakes: These spices introduce heat and complexity to the stir fry. Garlic powder offers a convenient and milder alternative to fresh garlic, and chili flakes add a manageable heat that can be adjusted to taste. Both are inexpensive and have a long shelf life, making them pantry essentials for adding flavor without fuss.
Chicken Stir Fry with Bok Choy and Bell Peppers

How to Meal Prep Honey Lemon Chicken Stir Fry

  1. Start with the sauce because, let’s face it, that’s where the magic happens! In a small bowl, dissolve the cornstarch in water. Stir in soy sauce, lemon juice, honey, garlic powder, and chili flakes. Mix until smooth and set aside to mingle those flavors.
  2. Heat a wok or large skillet over medium-high heat and drizzle in the olive oil. Toss in those chicken chunks and let them sizzle! Cook for about 6 to 7 minutes, turning occasionally, until they’re beautifully golden and cooked through to 165°F. Patience here — that perfect sear adds so much flavor!
  3. Throw in the red bell pepper and bok choy to the party. Stir fry these crunchy delights for about 3 to 4 minutes until they just start to soften but still retain some bite. We’re all about textures!
  4. Pour that delightful honey lemon soy sauce over your chicken and veggies. Keep everything moving in the wok for another 2 to 3 minutes until the sauce thickens and gloriously coats everything. This is where it all comes together!
  5. Sprinkle with sesame oil and give it a final stir. This last drizzle is like adding a splash of magic, enhancing the flavors to their peak!
  6. Top off with chopped green onions for a fresh, colorful finish. There! You’ve got a mouth-watering dish that’s ready to divide into containers for the week ahead or serve up right now for a satisfying meal.

Reference the recipe card below for detailed instructions.

Chicken Stir Fry with Bok Choy and Bell Peppers

Meal Prep Tips and Pairing Tips for Honey Lemon Chicken Stir Fry

  • Double the sauce recipe: If you’re a fan of extra saucy stir-fry, cook a larger batch. It freezes well, so you can always have some on hand for a quick meal fix! It goes well with any stir fry dish.
  • Grains: Serve your Honey Lemon Chicken Stir Fry over a bed of brown rice, jasmine rice, or even quinoa for a hearty and fulfilling meal. These grains complement the Asian flavors of the dish and provide a good source of complex carbohydrates.
  • Noodles: Pairing this stir fry with noodles can make for an exciting meal. Consider options like soba noodles, udon, or even whole wheat spaghetti. Toss the noodles with some of the stir fry sauce for extra flavor.
  • Soup: Start your meal with a miso soup or a clear vegetable soup. These light soups can act as a great appetizer without overshadowing the main dish.
  • Appetizers: If you’re turning the stir fry into a more elaborate meal, consider simple appetizers like spring rolls, edamame, or dumplings. These can be prepared ahead and quickly served alongside your main dish.
Chicken Stir Fry with Bok Choy and Bell Peppers

Honey Lemon Chicken Stir Fry

Enjoy a quick and delightful meal with this Honey Lemon Chicken Stir Fry recipe, featuring juicy chicken thighs, crisp bell peppers, and bok choy, all tossed in a tangy honey lemon soy sauce, ready in just 30 minutes
No ratings yet
Prep Time 5 minutes
Cook Time 15 minutes
Course dinner, Main Course
Cuisine Asian
Servings 2
Calories 530 kcal

Equipment

  • knife
  • cutting board
  • wok
  • spatula

Ingredients
  

  • 12 oz boneless chicken thighs
  • 1 red bell pepper (cubed)
  • 3 cups bok choy (chopped)
  • 1/4 cup green onions (chopped)
  • 1 teaspoon olive oil
  • 1 teaspoon sesame oil

Honey Lemon Soy Sauce

  • 1/4 cup water
  • 1 teaspoon cornstarch
  • 3 tablespoon soy sauce
  • 2 tablespoon honey
  • 2 tablespoon lemon juice
  • 1/4 teaspoon garlic powder
  • 1/4 teaspoon red pepper chili flakes

Instructions
 

  • In a small bowl, mix together the corn starch and water. Then add the soy sauce, lemon juice, honey, garlic powder, and red pepper chili flakes and mix it well. Set the sauce aside.
  • Next, cut the chicken thighs in one inch chunks.
  • Add olive oil to a heated wok on medium high heat and add the chicken. Sear the chicken on all sides and cook it for about 6 to 7 minutes until it reaches an internal temperature of 165F.
  • Then, add the bell peppers and bok choy and stir fry it for about 3 to 4 minutes until they soften.
  • Finally, pour in the honey lemon soy sauce and stir everything around for about 2 to 3 minutes until the sauce thickens. In the end, sprinkle everything with sesame oil for extra flavor.

Notes

Nutrition information provided is an estimate. It will vary based on cooking method and specific ingredients used. Please consult with your healthcare provider for specific dietary needs. To gain a better understanding, explore our nutrition disclaimer here

Nutrition

Calories: 530kcalCarbohydrates: 28gProtein: 33gFat: 33gSaturated Fat: 8gPolyunsaturated Fat: 7gMonounsaturated Fat: 14gTrans Fat: 0.1gCholesterol: 167mgSodium: 1719mgPotassium: 866mgFiber: 3gSugar: 22gVitamin A: 6887IUVitamin C: 132mgCalcium: 147mgIron: 3mg

Similar Recipes

broccoli beef

Ground Beef and Broccoli Stir Fry

tofu stir fry

Tofu and Veggie Stir Fry

beef and chinese broccoli

Garlicky Beef Stir Fry

You Might Also Like

Frequently Asked Questions

What can I substitute for honey in the sauce?

If you prefer not to use honey, maple syrup or agave nectar are excellent alternatives. These will maintain the sweetness balance while offering their unique flavors.


What other types of protein can I use in this recipe?

Besides chicken, you can use beef strips, pork loin slices, shrimp, or even fish like salmon or tilapia. Each protein choice brings its unique flavor and might need slight adjustments in cooking time.


What are the best ways to add a crunchy texture to this stir fry? 

For an added crunch, you can toss in some roasted peanuts or cashews just before serving. Alternatively, adding water chestnuts or bamboo shoots during the cooking process can also provide a nice contrast to the tender chicken and vegetables.

Posted on Leave a comment

Sweet Potato Pancakes with Blueberries

sweet potato pancakes and blueberries

Welcome to your new favorite breakfast recipe – Sweet Potato Pancakes! If you’re a busy individual who craves restaurant-quality food without compromising your health or budget, then you’re in for a treat. These pancakes are a delightful fusion of sweet potato goodness, protein-packed eggs, and a hint of cinnamon, all cooked up to fluffy perfection. Not only are they incredibly tasty, but they’re also packed with nutrients to power you through your day. Plus, with simple ingredients and easy prep, you can whip up a batch in no time and enjoy them throughout the week. Get ready to elevate your breakfast game and satisfy your cravings with these delicious and nutritious sweet potato pancakes!

This post may contain affiliate links. Please see our privacy policy for details.

Calories: 360kcal | Carbohydrates: 51g | Protein: 11g | Fat: 14g | Saturated Fat: 3g | Polyunsaturated Fat: 2g | Monounsaturated Fat: 8g | Trans Fat: 0.03g | Cholesterol: 246mg | Sodium: 158mg | Potassium: 541mg | Fiber: 5g | Sugar: 30g | Vitamin A: 16428IU | Vitamin C: 10mg | Calcium: 79mg | Iron: 2mg

sweet potato pancakes and blueberries

Why This Recipe is Great for Meal Prep

  • Delicious Flavor Fusion: These pancakes marry the natural sweetness of sweet potatoes with the warm, comforting flavor of cinnamon and the delightful burst of freshness from blueberries. Each bite is a party for your taste buds!
  • Quick and Easy Prep: With just a few simple ingredients and minimal prep time, these pancakes are a breeze to whip up – ideal for busy mornings or Sunday meal prep sessions. You can even make a big batch and freeze them for later!
  • Budget-Friendly Brilliance: Eating healthy shouldn’t break the bank, and these sweet potato pancakes prove it. With affordable ingredients that are easy to find at any grocery store, you can enjoy restaurant-quality food without blowing your budget.
  • Versatile and Customizable: While these pancakes are fantastic as-is, feel free to get creative and customize them to suit your taste. Add a sprinkle of nuts or seeds for extra crunch, drizzle with a dollop of Greek yogurt or nut butter for added creaminess, or swap out the blueberries for your favorite fruit – the possibilities are endless!
  • Healthier Alternative: Traditional pancakes can be heavy on refined flour and sugar, but these sweet potato pancakes offer a healthier alternative without sacrificing flavor or texture. With natural sweetness from honey and the nutritional boost from sweet potatoes, you can indulge guilt-free knowing you’re nourishing your body with wholesome ingredients.

The PrepYoSelf Newsletter

Simple Ingredients for Sweet Potato Pancakes

  • Sweet Potato: The star of the show! Sweet potatoes are not only deliciously sweet but also incredibly nutritious. Packed with vitamins A and C, fiber, and antioxidants, sweet potatoes provide a hefty dose of essential nutrients. Plus, they add natural sweetness and a creamy texture to the pancakes without the need for added sugar or excessive fats.
  • Eggs: These protein powerhouses are essential for giving the pancakes structure and providing a hefty dose of satiating protein. Not only do eggs contribute to the fluffy texture of the pancakes, but they also help keep you feeling full and satisfied throughout the morning. Plus, eggs are an affordable source of high-quality protein, making them a budget-friendly addition to any meal.
  • Honey: A touch of honey adds just the right amount of sweetness to the pancakes without overwhelming the natural flavors of the sweet potato and cinnamon. Unlike refined sugars, honey offers trace amounts of vitamins, minerals, and antioxidants, making it a healthier sweetener option. Plus, a little goes a long way, making it a budget-friendly way to add sweetness to your pancakes.
  • Cinnamon Powder: This warm and cozy spice not only adds a delightful flavor to the pancakes but also boasts numerous health benefits. Cinnamon is rich in antioxidants and has anti-inflammatory properties, making it a great addition to any diet. Plus, its aromatic flavor complements the sweetness of the sweet potato and honey perfectly, creating a harmonious flavor profile that’s both comforting and delicious.
  • Blueberries: Bursting with flavor and nutrients, blueberries are the perfect topping for these sweet potato pancakes. Not only do they add a pop of color and freshness, but they also provide a host of health benefits. Blueberries are rich in antioxidants, vitamins, and fiber, making them a nutritious addition to any meal. Plus, they’re budget-friendly and readily available year-round, making them an affordable and convenient choice for topping your pancakes.

sweet potato pancakes and blueberries

How to Meal Prep Sweet Potato Pancakes

  1. Wash your sweet potato and give it a good poke all over with a fork. This step is not just for fun – it helps the steam escape while it cooks.
  2. Pop that spud in the microwave for about 5 minutes. After that, give it a little poke with a knife – if it slides in like butter, you’re good to go! If not, just give it another 30 seconds or so.
  3. Let your sweet potato cool for a bit, then peel off that skin like a pro. Now, mash it up real good in a bowl with a fork. Add in those eggs, honey, and cinnamon powder, and mix it all up until it’s smooth as silk. If you’ve got a blender handy, feel free to give it a whirl in there for an extra smooth batter.
  4. Heat up a drizzle of olive oil in a pan over medium heat. Use a 1/4 cup scoop to pour out your pancake batter – aim for pancakes that are about 3 inches wide. Cook ’em up for 2 to 3 minutes on each side, until they’re golden brown and cooked through.
  5. Serve up those golden beauties with a generous handful of fresh blueberries on top. Voila! You’ve just whipped up a batch of restaurant-quality sweet potato pancakes that are as easy on the wallet as they are on the taste buds.

Reference the recipe card below for detailed instructions.

sweet potato pancakes and blueberries

Meal Prep Tips for Sweet Potato Pancakes

  • Batch Cooking: Whip up a big batch of sweet potato pancake batter and cook them all at once. Once cooled, store the pancakes in an airtight container in the refrigerator for up to 3-4 days. This way, you’ll have a quick and convenient breakfast option ready to go whenever hunger strikes.
  • Freeze for Later: If you want to prep even further ahead, these pancakes freeze beautifully. Simply place cooked and cooled pancakes in a single layer on a baking sheet and freeze until solid. Once frozen, transfer them to a freezer bag or container, separating each pancake with parchment paper to prevent sticking. They can be reheated in the microwave or toaster for a quick and easy breakfast on busy mornings.
  • Portion Control: Use a measuring cup or scoop to portion out the pancake batter evenly for consistent pancake sizes. This ensures even cooking and makes it easier to track your serving sizes for portion control.
  • Customize Individual Servings: If you’re meal prepping for multiple people with different preferences, consider customizing individual servings. Add extra toppings like nuts, seeds, or extra fruit on top of individual portions to cater to everyone’s tastes.
  • Protein Boost: While these sweet potato pancakes already pack a protein punch thanks to the eggs, you can boost the protein content even further by serving them with a side of Greek yogurt or a drizzle of nut butter. This will help keep you feeling full and satisfied until your next meal.
  • Healthy Fats: Add some healthy fats to round out your meal by topping your pancakes with a sprinkle of chopped nuts or seeds. Alternatively, serve them alongside a small handful of avocado slices or a dollop of coconut whipped cream for an extra creamy touch.
  • Fiber-Rich Additions: For an extra fiber boost, add a handful of chia seeds or ground flaxseeds to the pancake batter for added fiber and texture.

sweet potato pancakes and blueberries

Pancakes

Sweet Potato Pancakes & Blueberries

Whip up these nutrient-packed Sweet Potato Pancakes for a delicious, budget-friendly breakfast that's perfect for busy mornings!
No ratings yet
Prep Time 5 minutes
Cook Time 10 minutes
Course Breakfast
Cuisine American
Servings 2
Calories 360 kcal

Equipment

  • bowl
  • fork
  • scoop
  • saute pan
  • spatula
  • microwave

Ingredients
  

  • 1 each sweet potato
  • 3 each large eggs
  • 2 tbsp honey
  • 1/4 tsp cinnamon powder
  • 1 cup blueberries
  • 1 tbsp olive oil

Instructions
 

  • Wash the sweet potato and poke holes all around it with a fork
  • Microwave for 5 minutes. Check for doneness with a pairing knife. The knife should cut through easily (cook for an additional 30 seconds if still not tender)
  • Next, let it cool and remove the peel. Place it in a bowl and use the fork to mash it. Afterwards, add the eggs, cinnamon powder, and honey. Mix it all together until it is a smooth consistency like batter (you can also use a blender)
  • Add oil to a pan on medium heat and use a 1/4 cup scoop to pour each pancake (should make 3 inch pancakes)
  • Cook on each side for about 2 to 3 minutes
  • Serve with blueberries

Notes

Nutrition information provided is an estimate. It will vary based on cooking method and specific ingredients used. Please consult with your healthcare provider for specific dietary needs. To gain a better understanding, explore our nutrition disclaimer here

Nutrition

Calories: 360kcalCarbohydrates: 51gProtein: 11gFat: 14gSaturated Fat: 3gPolyunsaturated Fat: 2gMonounsaturated Fat: 8gTrans Fat: 0.03gCholesterol: 246mgSodium: 158mgPotassium: 541mgFiber: 5gSugar: 30gVitamin A: 16428IUVitamin C: 10mgCalcium: 79mgIron: 2mg

Similar Recipes

baked oatmeal

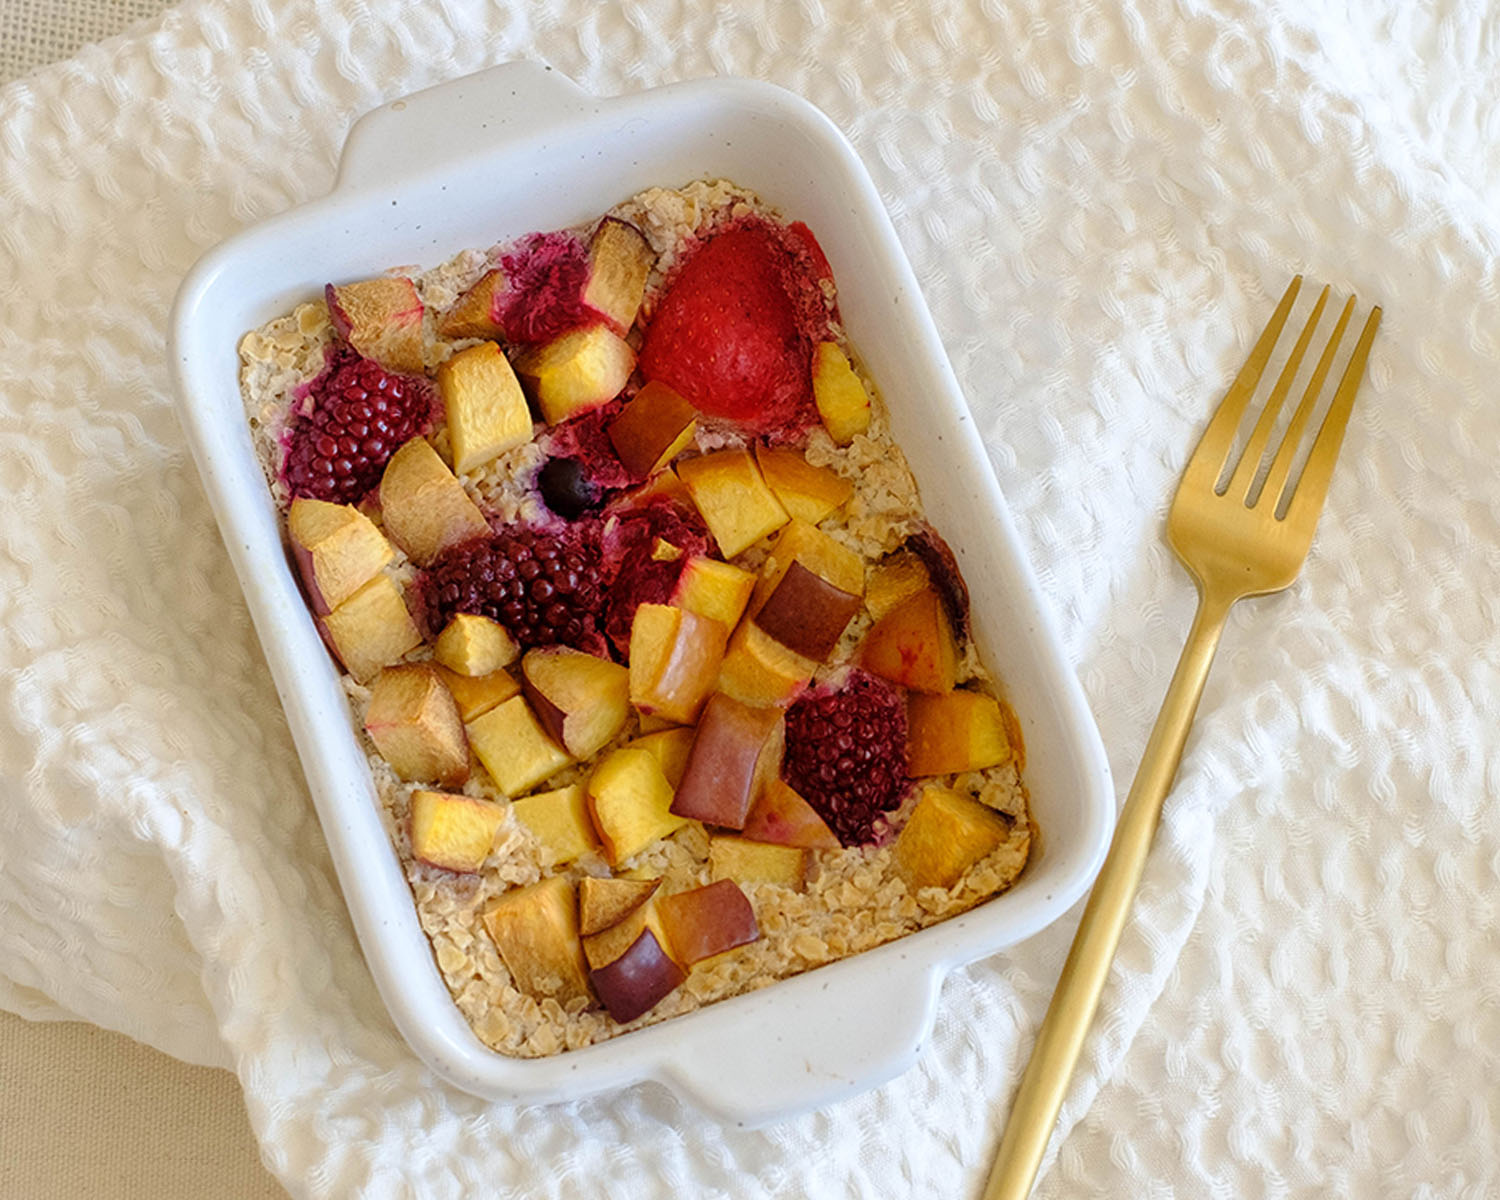
Oven Baked Oats with Apricots and Berries

ricotta apple

Oven Baked Apple with Ricotta and Walnuts

french toast 2

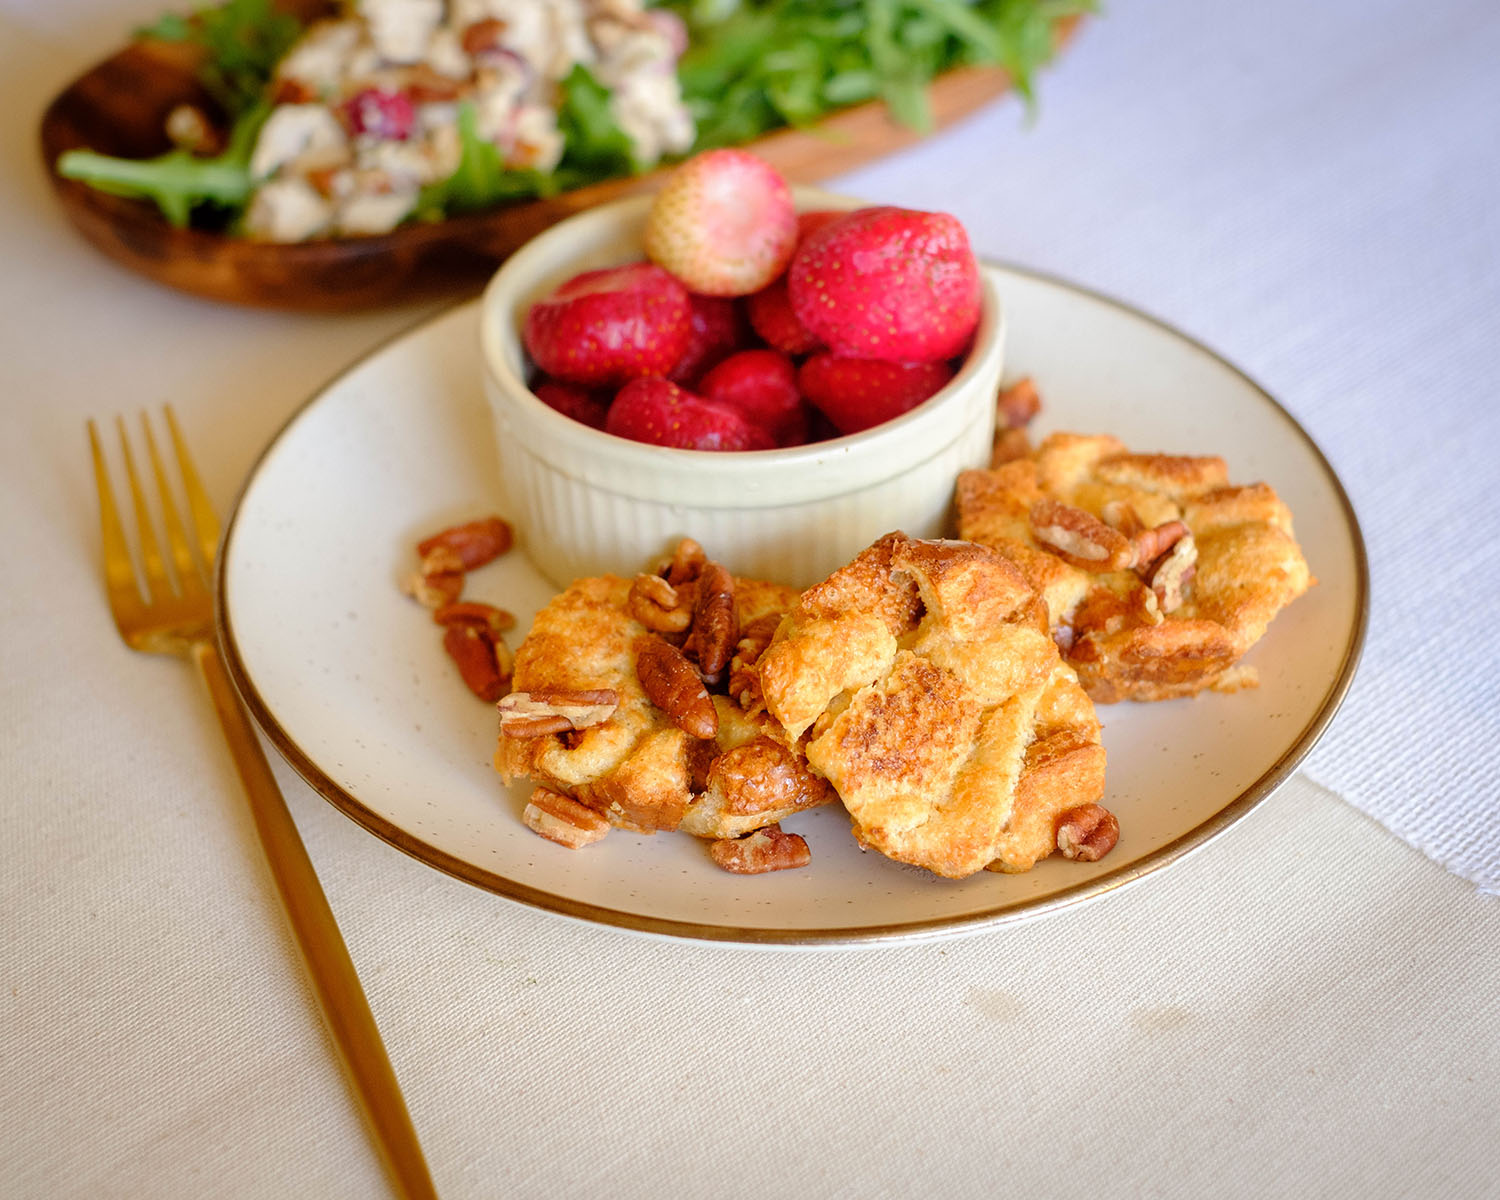
Oven Baked French Toast Muffins with Strawberries

You Might Also Like

Smartfruit Mellow Mango + Immunity, 100% Real Fruit Purée

Trader Joe’s Unsalted, Dry Toasted Slivered Almonds

Trader Joe’s the Dark Chocolate Lover’s Chocolate Bar

Frequently Asked Questions

Can I use mashed sweet potatoes from a can instead of microwaving a fresh sweet potato?

Absolutely! Using canned sweet potato puree is a convenient alternative to microwaving and mashing a fresh sweet potato. Just be sure to check the ingredients list to ensure there are no added sugars or other unwanted additives.


Can I substitute the honey with another sweetener, like maple syrup or agave nectar?

Definitely! Feel free to swap out the honey for your preferred sweetener. Maple syrup and agave nectar are both delicious alternatives that will add a touch of sweetness to the pancakes. Just keep in mind that different sweeteners may vary in sweetness, so you may need to adjust the amount to taste.


Can I use frozen blueberries instead of fresh ones?

Yes, you can use frozen blueberries if fresh ones aren’t available. Just make sure to thaw them before using and drain off any excess liquid to prevent the polenta from becoming too soggy.

Posted on Leave a comment

Chicken Mole Tacos

Shredded Chicken in Mole Sauce with Corn Tortillas

Our restaurant-quality Chicken Mole Street Tacos are ready to rock your taste buds. These babies are not only bursting with flavor but also budget-friendly and perfect for busy individuals like you who crave delicious meals without the hassle. So go ahead, dig in, and savor every bite of these delightful tacos. Happy meal prepping!

This post may contain affiliate links. Please see our privacy policy for details.

Calories: 660kcal | Carbohydrates: 64g | Protein: 27g | Fat: 36g | Saturated Fat: 11g | Polyunsaturated Fat: 6g | Monounsaturated Fat: 14g | Trans Fat: 0.1g | Cholesterol: 116mg | Sodium: 1539mg | Potassium: 1183mg | Fiber: 12g | Sugar: 27g | Vitamin A: 5376IU | Vitamin C: 25mg | Calcium: 120mg | Iron: 4mg

Shredded Chicken in Mole Sauce with Corn Tortillas

Why You’ll Enjoy This!

  • Flavor Explosion: With the bold flavors of the mole sauce infused into every tender bite of chicken, these tacos are anything but boring. Say goodbye to bland meal prep meals and hello to a fiesta of flavors that will keep you excited for lunchtime!
  • Easy Peasy Prep: Our recipe is designed with busy individuals in mind. With simple instructions and minimal ingredients, you can whip up a batch of these tacos in no time. Perfect for those hectic weekday evenings when you need something quick and satisfying.
  • Budget-Friendly: Our Chicken Mole Street Tacos are made with affordable ingredients that won’t bust your budget. Save money without sacrificing flavor – it’s a win-win!
  • Versatile and Customizable: Don’t be afraid to get creative with your taco toppings! Whether you prefer a little extra heat with some sliced jalapeños or want to add some creamy avocado slices, these tacos are the perfect canvas for your culinary imagination.
  • Portion Control Made Easy: With each taco neatly packed and ready to go, portion control becomes a breeze. Say goodbye to the temptation of overeating – simply grab a prepped taco and enjoy a perfectly portioned meal that keeps you on track with your health goals.
  • Meal Prep Magic: Perhaps the best reason of all – these tacos are meal prep superheroes! Whip up a batch on Sunday evening and enjoy delicious, restaurant-quality meals throughout the week. No more last-minute scrambles or unhealthy takeout – just grab and go for a stress-free week of tasty eats.

The PrepYoSelf Newsletter

Gather the Following Ingredients

  • Boneless Chicken Thighs: Chicken thighs are used for their succulent flavor and tenderness. They’re also budget-friendly compared to other cuts of meat. By using boneless thighs, we make the prep process easier and quicker while still delivering that juicy texture.
  • Corn Tortillas: Corn tortillas provide the perfect vessel for our tacos. Not only are they gluten-free and lower in calories compared to flour tortillas, but they also add a deliciously rustic flavor that complements the richness of the mole sauce.
  • White Onions: Sliced white onions add a sweet and slightly pungent flavor to the dish. They also provide a nice texture contrast to the tender chicken and creamy mole sauce. Onions are a budget-friendly ingredient that adds depth and complexity to the overall flavor profile.
  • Chicken Broth: Chicken broth serves as the base for our sauce, infusing it with savory flavor and moisture. It’s also a cost-effective way to add depth to the dish without the need for expensive ingredients.
  • Mole Base Ingredients: This combination of tomato sauce, dried ancho chile, chipotle pepper, garlic powder, cumin, and chocolate chips forms the heart and soul of our dish. Each ingredient contributes to the complex flavor profile of the mole sauce – the tomato sauce provides acidity and sweetness, the dried ancho chile and chipotle pepper add smoky heat, the garlic powder and cumin lend aromatic depth, and the chocolate chips bring richness and depth. 
  • Garnishes (Lime and Cilantro): Fresh lime slices and chopped cilantro add brightness and freshness to the tacos. The tangy citrus of the lime cuts through the richness of the mole sauce, while the herbal notes of cilantro provide a refreshing contrast. These garnishes not only enhance the flavor of the dish but also add a vibrant pop of color, making our tacos as visually appealing as they are delicious.

Shredded Chicken in Mole Sauce with Corn Tortillas

How to Meal Prep Chicken Mole Tacos:

  1. In a blender, combine the tomato sauce, dried ancho chile, chipotle pepper, garlic powder, cumin, and salt. Blend until smooth and set aside. This luscious mole sauce is the secret to our tacos’ rich flavor!
  2. Heat olive oil in a soup pan over medium-high heat. Sear the chicken thighs on each side for about 3 to 4 minutes until they are golden brown and delicious. Add the sliced white onions and sauté until they soften and become fragrant.
  3. Pour in the chicken broth and the prepared Mole Base. Give it a good stir, bring it to a boil, then reduce the heat to low-medium. Cover the pan with a lid and let it simmer for approximately 25 minutes until the chicken is tender and the flavors have melded together beautifully.
  4. Once the chicken is cooked through, uncover the pan and add those decadent chocolate chips. Stir until they melt into the sauce, infusing it with a luxurious richness. Continue to simmer the sauce uncovered until it thickens to perfection.
  5. Now for the fun part! Use two forks to shred the tender chicken directly in the pan. Grab your corn tortillas and fill them generously with the mouthwatering chicken filling. Top each taco with a sprinkle of fresh cilantro and a squeeze of zesty lime juice for that extra pop of flavor.

Reference the recipe card below for detailed instructions.

Shredded Chicken in Mole Sauce with Corn Tortillas

Meal Prep Tips for Chicken Mole Tacos:

  • Fresh Sides: Serve your Chicken Mole Street Tacos with fresh, vibrant sides like a crisp green salad, pico de gallo, or a refreshing fruit salsa. The bright flavors will complement the richness of the tacos and provide a balanced meal.
  • Mexican Rice: Pair your tacos with some fluffy Mexican rice for a complete and satisfying meal. The rice absorbs the flavors of the mole sauce and serves as a delicious side dish.
  • Black Beans: Add a side of seasoned black beans for extra protein and fiber. The earthy flavors of the beans complement the smoky richness of the mole sauce perfectly.
  • Corn and Avocado Salad: A light and refreshing corn and avocado salad is the perfect accompaniment to the bold flavors of the tacos. The creamy avocado and sweet corn provide a lovely contrast to the savory chicken mole filling.
  • Tortilla Chips and Guacamole: For a casual and fun meal, serve your tacos with crispy tortilla chips and homemade guacamole. The crunchy chips and creamy guac are the perfect accompaniments to the indulgent flavors of the tacos.

round plate with 3 corn tortilla tacos topped with shredded chicken and fresh cilantro

Chicken Mole Street Tacos

Deliciously tender chicken thighs simmered in a rich mole sauce, stuffed into warm corn tortillas and topped with fresh cilantro and a squeeze of lime – our Chicken Mole Street Tacos are a flavor-packed fiesta in every bite!
No ratings yet
Prep Time 5 minutes
Cook Time 35 minutes
Course lunch, Main Course
Cuisine Mexican
Servings 2
Calories 660 kcal

Equipment

  • knife
  • cutting board
  • blender
  • spatula
  • soup pot with a lid

Ingredients
  

  • 4 small corn tortillas
  • 8 oz boneless chicken thighs
  • 1/4 cup white onions (sliced)
  • 2 cups chicken broth
  • 1 tablespoon olive oil

Mole Base

  • 8 oz tomato sauce
  • 1 dried ancho chile
  • 1 chipotle pepper in adobo sauce
  • 1/4 teaspoon garlic powder
  • 1/4 teaspoon cumin
  • 1/4 teaspoon salt
  • 1/4 cup semi bittersweet chocolate chips

Garnish

  • 1 lime (sliced)
  • 1/4 cup cilantro (chopped)

Instructions
 

  • Blend together the ingredients of the mole base (minus the chocolate chips) until it is smooth and set it aside.
  • Add oil to a soup pan on medium high heat and sear the chicken thighs on each side for about 3 to 4 minutes until they are golden brown. Next add the white onions and saute until they soften.
  • Then, pour in the broth and mole base and stir it all around. Bring the soup to a boil, then lower the heat to low medium and cover the soup pan with a lid.Let it simmer for about 25 minutes until the chicken is tender.
  • After the chicken cooks, remove the lid and add the chocolate chips and stir until it fully melts. Continue to simmer the sauce until it thickens.
  • Finally use two forks to shred the chicken and stuff each tortilla with the chicken filling. Top it off with fresh cilantro and lime juice.

Notes

Nutrition information provided is an estimate. It will vary based on cooking method and specific ingredients used. Please consult with your healthcare provider for specific dietary needs. To gain a better understanding, explore our nutrition disclaimer here

Nutrition

Calories: 660kcalCarbohydrates: 64gProtein: 27gFat: 36gSaturated Fat: 11gPolyunsaturated Fat: 6gMonounsaturated Fat: 14gTrans Fat: 0.1gCholesterol: 116mgSodium: 1539mgPotassium: 1183mgFiber: 12gSugar: 27gVitamin A: 5376IUVitamin C: 25mgCalcium: 120mgIron: 4mg

Similar Recipes

bean and corn taco

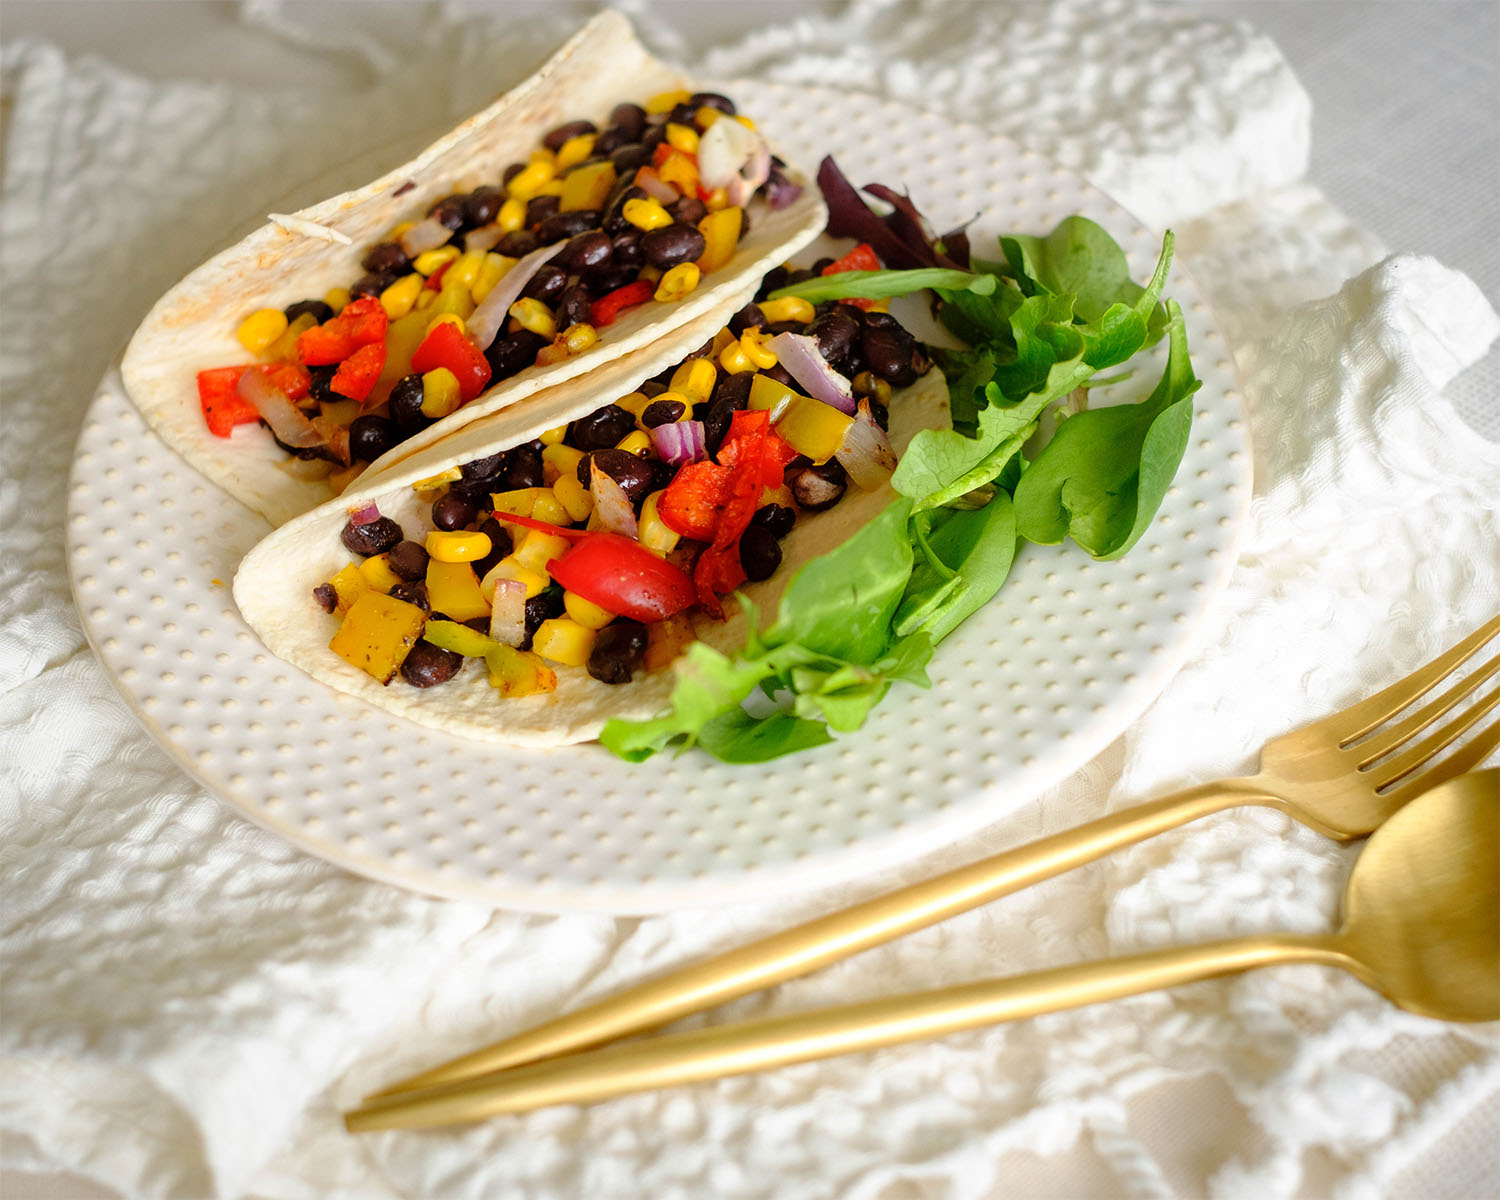
Vegetarian Black Bean and Corn Soft Tacos

chicken salad

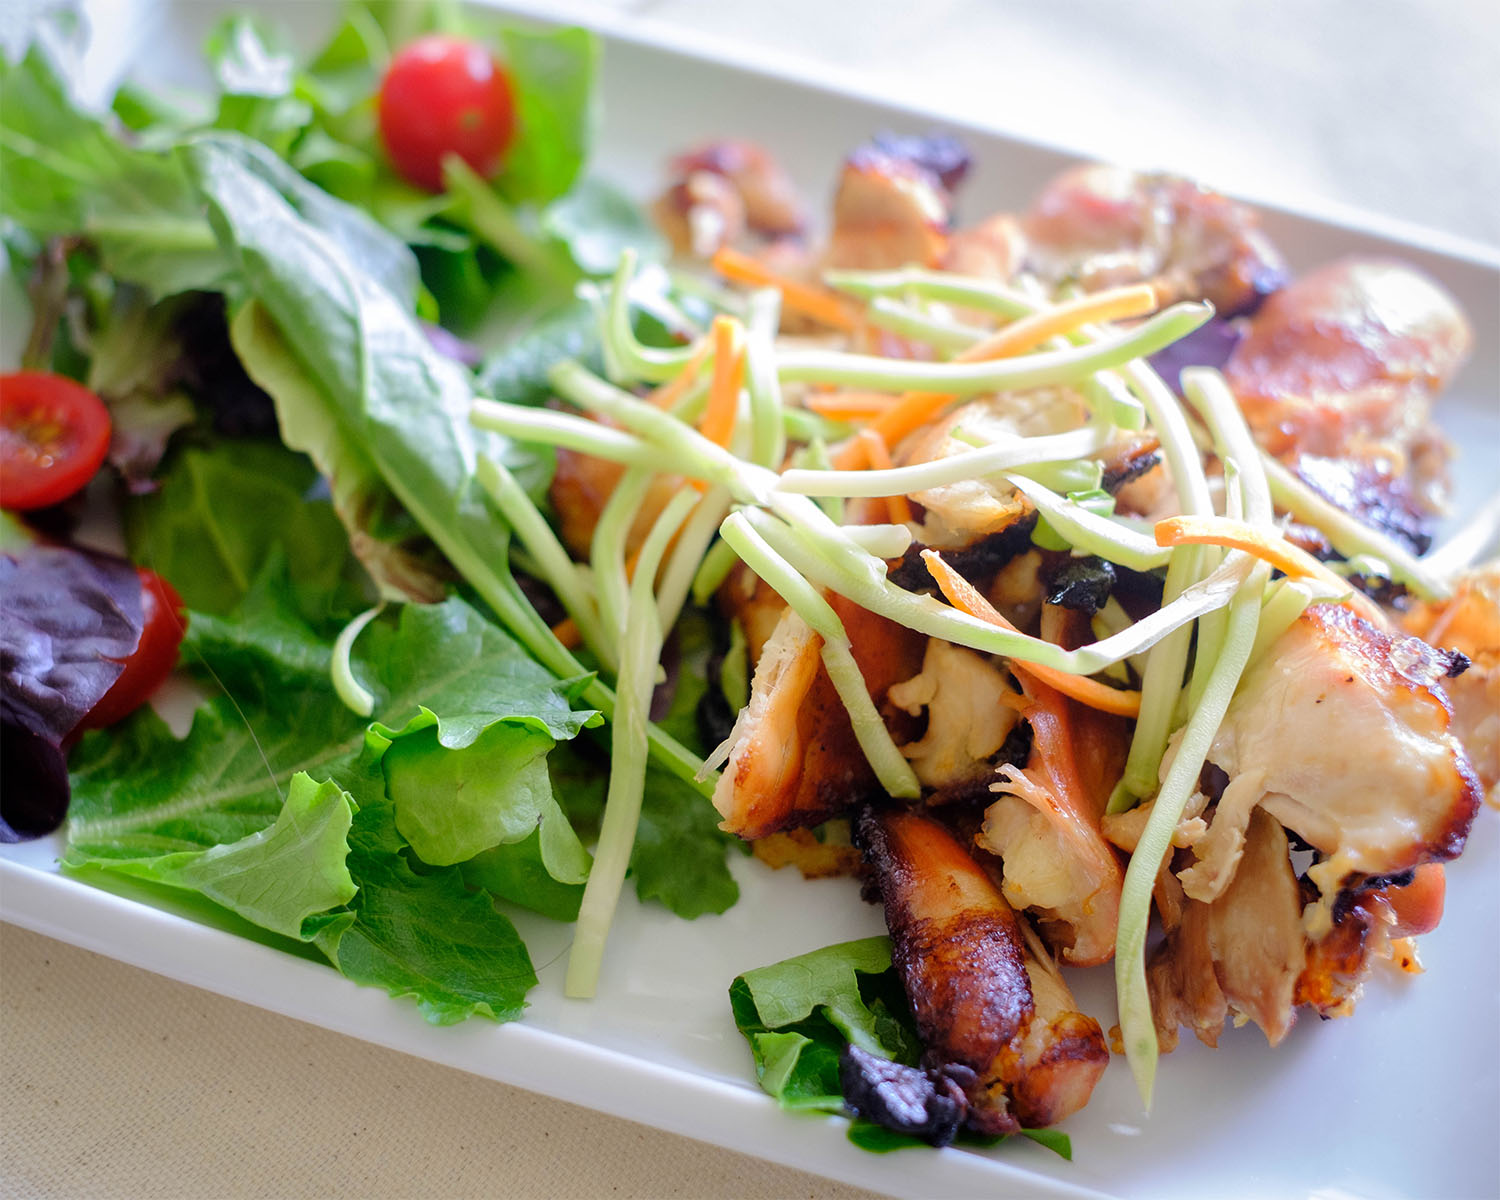
Oven Baked Honey Mustard Glazed Chicken Salad

balsamic chicken salad

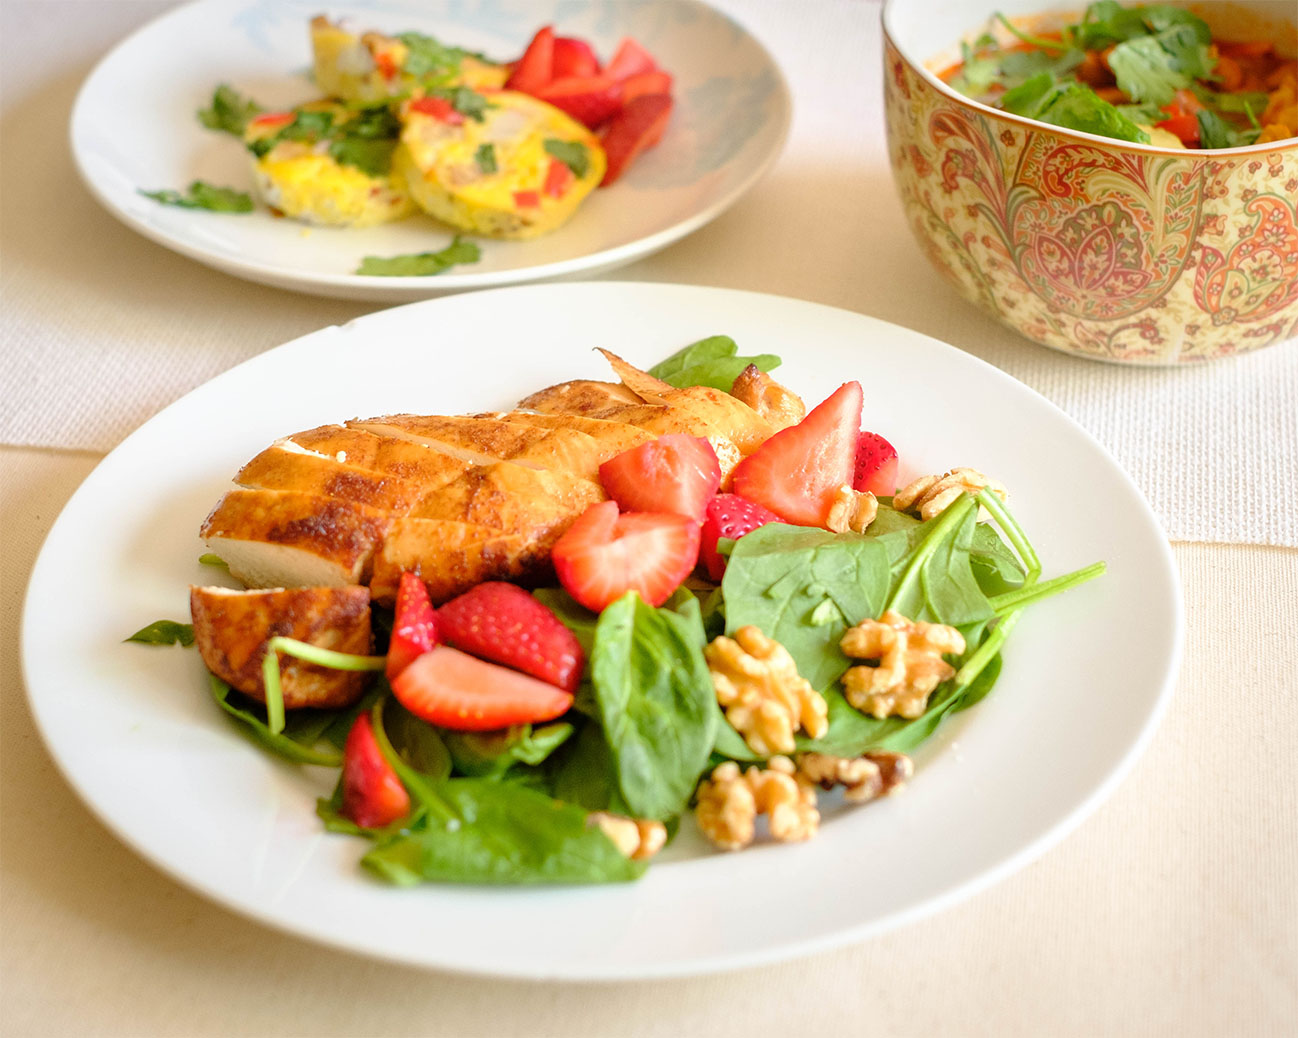
Oven Baked Balsamic Chicken Salad with Strawberries

You Might Also Like

Frequently Asked Questions

Can I use chicken breast instead of chicken thighs?

While chicken thighs are preferred for their tenderness and flavor, you can certainly use chicken breast if you prefer. Just be mindful that chicken breast tends to be leaner and may require shorter cooking time to avoid drying out.


Is it necessary to use both dried ancho chile and chipotle pepper in adobo sauce?

The combination of dried ancho chile and chipotle pepper adds depth and complexity to the mole sauce, but if you can’t find one of the ingredients or prefer a milder heat, you can adjust the recipe accordingly. You can also substitute with other dried chiles or adjust the amount of chipotle pepper to suit your taste preferences.


Can I freeze the chicken mole filling?

Yes, you can freeze the cooked chicken mole filling for later use. Store it in a freezer-safe container for up to 2-3 months. Thaw it overnight in the refrigerator before reheating, and add a splash of chicken broth or water if needed to revive the sauce.

Posted on Leave a comment

Air Fryer Chicken Wings in Red Pepper Sauce

chicken wings in a red pepper sauce

Get ready to elevate your meal prep game with these irresistible Air Fryer Chicken Wings in a delectable red pepper sauce! Bursting with flavor and goodness, this recipe is perfect for busy individuals who crave restaurant-quality taste without compromising on health or budget. With just a handful of simple ingredients, you can whip up a batch of crispy, juicy wings that are sure to impress. The combination of smoky roasted red peppers, tangy Tabasco sauce, and savory Parmesan is guaranteed to steal the show!

This post may contain affiliate links. Please see our privacy policy for details.

Calories: 450kcal | Carbohydrates: 5g | Protein: 32g | Fat: 34g | Saturated Fat: 10g | Polyunsaturated Fat: 6g | Monounsaturated Fat: 15g | Trans Fat: 0.3g | Cholesterol: 120mg | Sodium: 2105mg | Potassium: 393mg | Fiber: 1g | Sugar: 0.3g | Vitamin A: 897IU | Vitamin C: 50mg | Calcium: 203mg | Iron: 2mg

chicken wings in a red pepper sauce

Why We Love These Air Fryer Chicken Wings

  • Flavor Explosion: These wings are coated in a mouthwatering red pepper sauce that’s packed with flavor. With a perfect balance of smokiness from the roasted red peppers and a kick of heat from the Tabasco sauce, every bite is a flavor explosion that rivals your favorite takeout joint.
  • Crispy Perfection: Thanks to the magic of the air fryer, these wings come out perfectly crispy on the outside while remaining juicy and tender on the inside. That irresistible crunch is on par with the best wings you’ve ever ordered – no deep frying required!
  • Healthier Option: Unlike traditional deep-fried wings, which can be loaded with unhealthy fats and calories, these air-fried beauties are much healthier. By using minimal oil and lean chicken, you can indulge in the deliciousness without any guilt. It’s a win-win for your taste buds and your waistline!
  • Convenience Factor: Let’s face it – sometimes, the thought of ordering takeout can be tempting simply because it’s easy. But with this recipe, you can enjoy restaurant-quality wings in the comfort of your own home, and it’s just as convenient! Plus, with a little bit of meal prep, you can have these wings ready to go whenever hunger strikes.
  • Customizable and Budget-Friendly: One of the best things about making your own wings at home is that you can customize them to your heart’s content. Whether you want to adjust the level of spiciness, swap out the cheese for your favorite variety, or experiment with different dipping sauces, the possibilities are endless! Plus, buying ingredients in bulk and meal prepping saves you money in the long run, making this homemade meal a budget-friendly option compared to constantly ordering takeout.

The PrepYoSelf Newsletter

Ingredients You’ll Need

  • Chicken Wings: These are the star of the show! Chicken wings are not only delicious but also an affordable protein option. They’re juicy, flavorful, and perfect for soaking up all the delicious sauce. Plus, they’re a great source of lean protein, making them a healthy choice for satisfying your hunger.
  • Roasted Red Pepper: The roasted red pepper serves as the base for our flavorful sauce. It brings a rich, smoky sweetness to the dish that complements the savory chicken perfectly. Using jarred roasted red peppers is not only convenient but also budget-friendly compared to buying fresh peppers and roasting them yourself. Plus, red peppers are loaded with vitamins and antioxidants, adding a healthy boost to your meal.
  • Tabasco Sauce: Tabasco sauce adds a kick of heat and tanginess to the red pepper sauce. It’s a pantry staple that packs a punch of flavor without adding extra calories or fat. A little goes a long way, so it’s a cost-effective way to add bold flavor to your dish.
  • Shredded Parmesan Cheese: Parmesan cheese adds a creamy, cheesy richness to the sauce while also providing a hint of saltiness. Using shredded Parmesan is a budget-friendly alternative to other cheeses, and a little goes a long way in terms of flavor. Plus, Parmesan cheese is lower in fat compared to other cheeses, making it a healthier choice.
  • Paprika, Garlic Powder, Salt, and Pepper: These seasonings are the backbone of flavor for the chicken wings. Paprika adds a subtle smokiness, garlic powder brings aromatic depth, and salt and pepper enhance the overall taste. Using a combination of spices allows you to create a complex flavor profile without relying on excessive amounts of salt or fat, keeping the dish both delicious and healthy.
  • Olive Oil: Olive oil is used to coat the chicken wings before air frying, helping to crisp them up and lock in moisture. It’s a heart-healthy fat that adds richness to the dish without weighing it down. Using a small amount of olive oil keeps the dish light and healthy while still achieving that crave-worthy crispy texture.

chicken wings in a red pepper sauce

How to Meal Prep Air Fryer Chicken Wings

  1. First up, let’s get that flavorful red pepper sauce ready. In your trusty blender, combine the roasted red pepper (including the oil from the jar) and Tabasco sauce. Blend it up until it’s beautifully smooth. Set this tasty sauce aside for later.
  2. Now, onto the star of the show – the chicken wings! In a mixing bowl, toss your chicken wings with paprika, garlic powder, salt, pepper, and a drizzle of olive oil. Make sure those wings get coated in all those delicious seasonings.
  3. Pop those seasoned wings into your air fryer basket and cook them at 360°F for about 22-23 minutes. We’re aiming for that perfect golden crispiness, so keep an eye on them!
  4. Once your wings are cooked to crispy perfection, transfer them to a mixing bowl. Now, here’s where the magic happens – toss those wings in the red pepper sauce you made earlier, along with a generous sprinkle of shredded parmesan cheese. Coat those wings until they’re glistening with flavor.
  5. Want to add a fresh, crunchy element to your meal? Serve up your saucy wings with a side of veggie sticks like celery or carrots, or even a crisp side salad. It’s the perfect complement to these savory delights!

Reference the recipe card below for detailed instructions.

chicken wings in a red pepper sauce

Meal Prep Tips for Air Fryer Chicken Wings

  • Corn on the Cob: Roast or grill some corn on the cob as a tasty and seasonal side dish. The sweetness of the corn pairs beautifully with the savory flavors of the wings.
  • Crispy Potato Wedges: Whip up some crispy potato wedges seasoned with herbs and spices for a delicious and satisfying accompaniment to your wings. They’re sure to be a crowd-pleaser!
  • Roasted Vegetables: Opt for budget-friendly seasonal vegetables like broccoli, cauliflower, zucchini, and bell peppers. Simply toss them with olive oil, salt, and pepper, then roast them in the oven alongside your chicken wings for a nutritious and flavorful side dish.
  • Mixed Bean Salad: Create a colorful mixed bean salad using affordable canned beans such as black beans, chickpeas, and kidney beans. Toss them with diced bell peppers, onions, cilantro, and a simple vinaigrette for a protein-packed side dish that’s both nutritious and budget-friendly.
  • Greek Yogurt Dip: Whip up a quick and creamy Greek yogurt dip seasoned with garlic, lemon juice, and herbs like dill or parsley. Greek yogurt is high in protein and low in fat, making it a healthier alternative to traditional sour cream-based dips. Serve it alongside your wings for a refreshing contrast to the spicy sauce.
  • Quinoa Salad: Prepare a simple quinoa salad by combining cooked quinoa with diced cucumbers, cherry tomatoes, red onion, and fresh herbs like parsley or mint. Dress it with a squeeze of lemon juice and a drizzle of olive oil for a light and refreshing side dish that’s packed with protein and fiber.

chicken wings in a red pepper sauce

chicken wings in a red pepper sauce

Air Fryer Wings with Red Pepper Sauce

Juicy air-fried chicken wings tossed in a zesty roasted red pepper sauce, sprinkled with Parmesan cheese, perfect for a budget-friendly, healthy meal prep option bursting with flavor!
No ratings yet
Prep Time 5 minutes
Cook Time 28 minutes
Course dinner, Main Course
Cuisine American
Servings 2
Calories 450 kcal

Equipment

  • Air Fryer
  • blender
  • mixing bowl

Ingredients
  

  • 6 chicken wings
  • 6 oz roasted red pepper (in a jar)
  • 2 tablespoons tabasco sauce
  • 1/4 cup shredded parmesan chesee
  • 1/4 teaspoon paprika
  • 1/4 teaspoon garlic powder
  • 1/4 teaspoon salt
  • 1/4 teaspoon pepper
  • 1 tablespoon olive oil

Instructions
 

  • In a blender, add the roasted red pepper and tobasco sauce (including the oil in the jar) and blend it until it is a smooth sauce. Set it aside until the chicken is cooked.
  • In a mixing bowl, add the chicken wings and season it with paprika, garlic powder, salt, and pepper. Make sure it gets fully coated with olive oil.
  • Place the chicken in the air fryer and cook it at 360F for 22-23 minutes until it reaches an internal temperature of 165F.
  • Once the chicken is cooked, place it in a mixing bowl and toss i the red pepper sauce along with the shredded parmesan cheese until it is fully coated. Optional: Enjoy with a side of fresh veggie sticks such as celery, carrots, or a side salad.

Notes

Nutrition information provided is an estimate. It will vary based on cooking method and specific ingredients used. Please consult with your healthcare provider for specific dietary needs. To gain a better understanding, explore our nutrition disclaimer here

Nutrition

Calories: 450kcalCarbohydrates: 5gProtein: 32gFat: 34gSaturated Fat: 10gPolyunsaturated Fat: 6gMonounsaturated Fat: 15gTrans Fat: 0.3gCholesterol: 120mgSodium: 2105mgPotassium: 393mgFiber: 1gSugar: 0.3gVitamin A: 897IUVitamin C: 50mgCalcium: 203mgIron: 2mg

Similar Recipes

chicken fajitas

Sheet Pan Chicken Fajitas with Mango Salsa

sausage squash

Spaghetti Squash with Sausage and Peppers

pineapple bbq chicken

Oven Baked Pineapple BBQ Chicken

You Might Also Like

Frequently Asked Questions

Can I use fresh red peppers instead of roasted red peppers?

Yes, you can roast fresh red peppers yourself or use them raw, but the flavor profile may vary slightly.


How can I make this recipe spicier?

Increase the amount of Tabasco sauce or add a pinch of cayenne pepper to the sauce for an extra kick.


Can I bake the wings instead of using an air fryer?

Yes, you can bake the wings in a preheated oven at 400°F (200°C) for approximately 30-35 minutes or until crispy and cooked through.

Posted on Leave a comment

Crispy Panko Breaded Chicken Tender Salad

crispy panko breaded chicken tender with salad, sliced cucumbers, tomatoes, and red onions

We’ve crafted a recipe specifically tailored to the needs of busy individuals who crave delicious, budget-friendly options without compromising on taste. Imagine tender chicken breasts, thinly sliced and perfectly breaded with crispy Panko breadcrumbs, seasoned to perfection with paprika, garlic powder, and a hint of salt. Paired with a vibrant spring mix salad featuring juicy Roma tomatoes, crisp cucumbers, and tangy red onions, this dish is a symphony of textures and flavors. Whether you’re meal prepping for the week ahead or looking for a quick and satisfying dinner option, this recipe has you covered.

This post may contain affiliate links. Please see our privacy policy for details.

Calories: 469kcal | Carbohydrates: 32g | Protein: 42g | Fat: 19g | Saturated Fat: 3g | Polyunsaturated Fat: 5g | Monounsaturated Fat: 8g | Trans Fat: 0.04g | Cholesterol: 111mg | Sodium: 1191mg | Potassium: 909mg | Fiber: 2g | Sugar: 5g | Vitamin A: 1470IU | Vitamin C: 22mg | Calcium: 61mg | Iron: 3mg

crispy panko breaded chicken tender with salad, sliced cucumbers, tomatoes, and red onions

Why This is Great for Meal Prep

  • Quick and Easy Preparation: With simple instructions and minimal ingredients, this recipe is a breeze to prepare, even for those with the busiest of schedules. The thinly sliced chicken cooks up in just a few minutes, while the salad assembly is quick and straightforward. It’s a time-saving meal prep option that won’t leave you stuck in the kitchen for hours.
  • Nutrient-Rich Ingredients: This meal is packed with wholesome ingredients like lean chicken breast, fresh vegetables, and nutrient-rich greens. The chicken provides a healthy dose of protein to keep you feeling satisfied and energized throughout the day, while the salad veggies offer essential vitamins, minerals, and fiber to support overall health and well-being.
  • Balanced and Satisfying: Our Crispy Panko Breaded Chicken Tender Salad strikes the perfect balance between protein, carbs, and healthy fats, making it a satisfying and well-rounded meal. The combination of crispy chicken tenders and crunchy veggies keeps your taste buds happy, while the addition of complex carbs from the salad greens provides long-lasting energy to power you through your busy day.
  • Versatile and Customizable: One of the best things about this meal prep recipe is its versatility. While we’ve provided a basic salad combination, feel free to get creative and customize it to suit your taste preferences and dietary needs. Swap out the veggies, experiment with different salad dressings, or add your favorite toppings to make each meal uniquely yours.
  • Portion-Controlled and Budget-Friendly: By prepping individual servings ahead of time, you can easily control portion sizes and avoid overeating throughout the week. Plus, by buying ingredients in bulk and prepping multiple meals at once, you’ll save both time and money in the long run. It’s a budget-friendly meal prep solution that helps you stay on track with your health and wellness goals without breaking the bank.

The PrepYoSelf Newsletter

Ingredients You’ll Need

  • Chicken Breast: Chicken breast is a lean source of protein that’s not only affordable but also versatile and easy to cook. By using thinly sliced chicken breast, we ensure that it cooks quickly and evenly, making it perfect for meal prep. Protein is essential for muscle repair and growth, as well as for keeping you feeling full and satisfied between meals.
  • Panko Breadcrumbs: Panko breadcrumbs are light and airy, resulting in an incredibly crispy and crunchy coating for our chicken tenders. Unlike traditional breadcrumbs, panko creates a thicker and more textured crust, adding an extra layer of flavor and texture to the dish. Plus, using breadcrumbs instead of a heavier batter keeps the dish lighter and healthier without sacrificing that satisfying crunch.
  • Seasonings (Paprika, Garlic Powder, Salt): These simple yet flavorful seasonings add depth and complexity to the dish without the need for excess salt or unhealthy additives. Paprika provides a subtle smokiness and mild heat, while garlic powder adds savory flavor. Salt enhances the overall taste of the dish and helps to balance out the other flavors. Together, these seasonings elevate the chicken tenders from basic to extraordinary.
  • Egg: The egg serves as a binding agent for the breadcrumbs, helping them adhere to the chicken and creating a crispy coating when cooked. It also adds moisture and richness to the chicken tenders, ensuring they stay juicy and flavorful. Eggs are an affordable and nutritious ingredient that adds both structure and texture to the dish.
  • Olive Oil: Olive oil is used for pan-frying the chicken tenders, providing a healthy source of monounsaturated fats and adding a deliciously rich flavor to the dish. It’s a budget-friendly option that’s readily available and adds a luxurious touch to the crispy chicken tenders. Plus, pan-frying allows us to achieve that golden-brown crust without the need for deep frying, making it a healthier cooking method.
  • Spring Mix: Spring mix is a blend of tender baby greens like spinach, arugula, and lettuce, providing a nutritious and flavorful base for our salad. It’s packed with vitamins, minerals, and antioxidants, making it a nutrient-rich addition to any meal. Plus, spring mix adds a variety of textures and flavors to the salad, from peppery arugula to buttery lettuce, creating a more interesting and satisfying eating experience.
  • Tomato, Cucumber, Red Onion: These fresh vegetables add color, crunch, and flavor to our salad, making it a vibrant and delicious side dish. Tomatoes provide sweetness and acidity, cucumbers add a refreshing crunch, and red onions lend a mild tanginess. Together, they create a well-balanced salad that complements the crispy chicken tenders perfectly.
  • Salad Dressing: A choice of salad dressing adds the finishing touch to our meal prep masterpiece, tying all the flavors together and adding a burst of tangy or creamy goodness. Whether you prefer a classic balsamic vinaigrette, a zesty Italian dressing, or a creamy ranch, the dressing adds moisture and flavor to the salad without overpowering the other ingredients. Plus, by choosing a store-bought dressing or making your own at home, you can control the ingredients and customize the flavor to suit your taste preferences.

crispy panko breaded chicken tender with salad, sliced cucumbers, tomatoes, and red onions

How to Meal Prep Crispy Panko Chicken Tenders

  1. If you can’t find thinly sliced chicken breast at your local store, fear not! Simply filet your chicken breast and slice it in half sideways. Want it even flatter? Place it between two layers of plastic wrap and give it a good pound with a meat pounder or a small frying pan. This step not only makes your chicken cook faster but also ensures maximum crispiness!
  2. In three separate bowls, set up your breading station. Whisk the egg in one bowl, place the flour in another, and combine the panko breadcrumbs with paprika, garlic powder, and salt in the third bowl.
  3. First, dip each chicken slice into the flour, making sure it’s fully coated. Shake off any excess flour. Next, dip it into the egg wash, ensuring it’s nicely covered. Finally, coat the chicken in the seasoned panko breadcrumbs, pressing gently to adhere.
  4. Heat a skillet with olive oil over medium-high heat. Once hot, add your breaded chicken tenders and cook for about 3 to 5 minutes on each side, or until they’re golden brown and cooked through. Pro tip: Check for an internal temperature of 165°F to ensure they’re perfectly done.
  5. While your chicken is sizzling away, it’s time to prep your salad. Toss together the spring mix, sliced tomato, cucumber, and red onions in a large bowl. Divide the salad into meal prep containers and top each with a crispy chicken tender.
  6. Don’t forget the finishing touch! Drizzle each salad with your favorite salad dressing. Whether you’re into balsamic vinaigrette, honey mustard, or creamy ranch, the choice is yours!

Reference the recipe card below for detailed instructions.

crispy panko breaded chicken tender with salad, sliced cucumbers, tomatoes, and red onions

Meal Prep Tips for Crispy Panko Chicken Tenders

  • Healthy Dips: Pair your crispy chicken tenders with a variety of healthy dipping sauces, such as hummus, tzatziki, or guacamole. These flavorful dips add extra moisture and flavor to the chicken without piling on extra calories or unhealthy fats.
  • Soup or Soup Starter: Kick off your meal with a light soup or broth-based starter, such as vegetable soup or miso soup. Not only does this help to increase your vegetable intake, but it also fills you up with low-calorie, nutrient-rich foods, making you less likely to overindulge on the main course.
  • Fruit Dessert: End your meal on a sweet note with a serving of fresh fruit or a fruit salad. Not only does this provide a refreshing and naturally sweet treat, but it also adds extra vitamins, minerals, and antioxidants to your meal. Try pairing your salad with seasonal fruits like berries, melon, or citrus for a burst of flavor.
  • Hydration: Don’t forget to stay hydrated throughout the day by drinking plenty of water or herbal tea. Hydration is key for overall health and well-being, and it helps to support digestion, energy levels, and cognitive function. Consider infusing your water with fresh fruit or herbs for a flavorful twist.

crispy panko breaded chicken tender with salad, sliced cucumbers, tomatoes, and red onions

pan-fried chicken salad

Crispy Panko Breaded Chicken Tender Salad

Enjoy crispy Panko-breaded chicken tenders atop a bed of fresh greens, perfect for a flavorful and convenient meal prep option.
No ratings yet
Prep Time 5 minutes
Cook Time 20 minutes
Course lunch, Main Course
Cuisine American
Servings 2
Calories 469 kcal

Equipment

  • knife
  • cutting board
  • saute pan
  • tongs

Ingredients
  

Chicken and Breading

  • 12 oz chicken breasts (thinly sliced)
  • 1/4 cup flour
  • 1/2 cup panko breadcrumbs
  • 1 tsp paprika
  • 1 tsp garlic powder
  • 1/2 tsp salt
  • 1 each large egg
  • 1 tbsp olive oil

Salad

  • 4 cups spring mix
  • 1 each roma tomato (sliced)
  • 1/2 each cucumber (sliced)
  • 1/4 cup red onions (sliced
  • 4 tbsp choice of salad dressing

Instructions
 

  • If you can't find thinly sliced chicken breast, filet your chicken breast and slice it in half sideways. If you want it even flatter and thinner, lay it in between two layers of plastic wrap and use a meat pounder or a small frying pan to pound it out flat. This will help the chicken cook faster.
  • Whisk the egg in a large bowl. Place the flour in another bowl. Then, place the panko breadcrumbs and seasonings in another bowl
  • First dip the chicken in the flour making sure it is fully coated. Then shake off the excess
  • Next, dip the chicken in the egg wash. Then, drip it into the seasoned panko breadcrumbs. Make sure it is fully coated
  • Heat a skillet with olive oil on medium high heat. Then, pan fry the chicken breast on each side until golden brown and fully cooked (about 3 to 5 minutes on each side-check for an internal temperature of 165F).
  • Serve the chicken with a side salad.

Notes

Nutrition information provided is an estimate. It will vary based on cooking method and specific ingredients used. Please consult with your healthcare provider for specific dietary needs. To gain a better understanding, explore our nutrition disclaimer here

Nutrition

Calories: 469kcalCarbohydrates: 32gProtein: 42gFat: 19gSaturated Fat: 3gPolyunsaturated Fat: 5gMonounsaturated Fat: 8gTrans Fat: 0.04gCholesterol: 111mgSodium: 1191mgPotassium: 909mgFiber: 2gSugar: 5gVitamin A: 1470IUVitamin C: 22mgCalcium: 61mgIron: 3mg

Similar Recipes

orange chicken

Air Fryer Orange Soy Glazed Chicken and Broccoli

roasted chicken and rutabaga

Roasted Lemon Italian Chicken with Rutabaga

rosemary chicken

Rosemary Baked Chicken and Potatoes

You Might Also Like

Frequently Asked Questions

Can I use a different type of protein instead of chicken breast?

Absolutely! While chicken breast is the star of this recipe, you can easily swap it out for other proteins like turkey breast, pork loin, tofu, or even fish fillets. Adjust cooking times accordingly based on the protein you choose.


Can I make this recipe gluten-free?

Yes! You can easily make this recipe gluten-free by using gluten-free breadcrumbs or almond flour instead of traditional flour and panko breadcrumbs. Be sure to check that all seasonings and salad dressing are also gluten-free.


How long will the chicken tenders stay crispy?

While the chicken tenders are best enjoyed fresh, you can help them stay crispy by storing them separately from the salad components. Store the chicken tenders in an airtight container in the refrigerator for up to 3-4 days. Reheat in a toaster oven or oven to maintain crispiness.

Posted on Leave a comment

Cashew Chicken and Eggplant Stirfry

Chicken Stir Fry with cashews, red bell peppers, eggplant, and green onions

This Cashew Chicken and Eggplant Stir Fry recipe is the epitome of flavor meets efficiency, perfect for busy individuals seeking a nutritious yet budget-friendly meal prep option. Picture succulent boneless chicken thighs, velvety eggplant, and vibrant bell peppers dancing in a symphony of savory sauces, all topped off with crunchy cashews for that extra dose of texture and taste. With just a handful of simple ingredients and easy-to-follow instructions, you’ll be amazed at how effortlessly this dish comes together, leaving you with ample time to conquer your day.

This post may contain affiliate links. Please see our privacy policy for details.

Calories: 578kcal | Carbohydrates: 25g | Protein: 30g | Fat: 41g | Saturated Fat: 9g | Polyunsaturated Fat: 8g | Monounsaturated Fat: 20g | Trans Fat: 0.1g | Cholesterol: 139mg | Sodium: 1383mg | Potassium: 843mg | Fiber: 6g | Sugar: 12g | Vitamin A: 2119IU | Vitamin C: 83mg | Calcium: 57mg | Iron: 3mg

Chicken Stir Fry with cashews, red bell peppers, eggplant, and green onions

The PrepYoSelf Newsletter

Why you’ll enjoy this?

  • Quick and Easy: With simple ingredients and straightforward instructions, this recipe is a breeze to whip up, perfect for those hectic days when time is of the essence.
  • Nutritious and Balanced: Packed with lean protein from chicken thighs, plenty of veggies like eggplant and bell peppers, and healthy fats from cashews and sesame oil, this stir fry provides a well-rounded and nutritious meal that keeps you energized throughout the day.
  • Budget-Friendly: Utilizing affordable ingredients like boneless chicken thighs, eggplant, and bell peppers, this recipe proves that eating healthy doesn’t have to break the bank. Plus, by preparing meals at home, you’ll save money compared to dining out or ordering takeout.
  • Versatile: Don’t be afraid to get creative! This stir fry is incredibly versatile, so feel free to swap in your favorite veggies or add extra ingredients like broccoli, snap peas, or even pineapple for a personalized touch.
  • Flavorful and Satisfying: With a combination of savory soy sauce, sweet hoisin sauce, and aromatic sesame oil, every bite of this stir fry bursts with irresistible flavor. Plus, the addition of crunchy cashews adds a delightful texture that keeps you coming back for more.
  • Healthy Lifestyle Support: Whether you’re trying to eat more veggies, cut back on processed foods, or simply maintain a balanced diet, this recipe aligns perfectly with your health and wellness goals, making it easy to stay on track without sacrificing taste or convenience.

Chicken Stir Fry with cashews, red bell peppers, eggplant, and green onions

Ingredients you’ll need for this Peanut Chicken Stir Fry

  • Boneless Chicken Thighs: Chicken thighs are not only budget-friendly but also pack a flavorful punch. They’re juicier and more tender compared to chicken breasts, making them perfect for stir-frying. Plus, they’re an excellent source of protein, helping to keep you feeling full and satisfied.
  • Eggplant: Eggplant adds a hearty texture and mild flavor to the stir fry. It’s also incredibly budget-friendly and loaded with nutrients like fiber, vitamins, and minerals. Eggplant soaks up the flavors of the sauce beautifully while providing a satisfying bite in every mouthful.
  • Red Bell Pepper: Not only does red bell pepper bring vibrant color to the dish, but it also adds a subtle sweetness and crunch. Rich in vitamin C and antioxidants, red bell peppers boost the nutritional value of the stir fry without breaking the bank.
  • Garlic: A staple in many cuisines, garlic infuses the stir fry with a robust, aromatic flavor. It’s also praised for its numerous health benefits, including immune-boosting properties and potential heart health benefits. Plus, a little garlic goes a long way, making it a cost-effective way to elevate the dish.
  • Red Onion: Red onions lend a touch of sweetness and a hint of spice to the stir fry. They’re also more budget-friendly compared to other onion varieties. Packed with antioxidants and flavonoids, red onions not only enhance the flavor but also contribute to overall health and wellness.
  • Green Onions: Also known as scallions, green onions add a fresh, oniony flavor and a pop of color to the dish. They’re a wallet-friendly ingredient that adds brightness and depth to the stir fry. Plus, they’re low in calories but high in vitamins and minerals, making them a nutritious addition to any meal.
  • Cashews: Crunchy cashews provide a delightful texture contrast to the tender chicken and veggies. They’re a budget-friendly nut option that adds richness and nuttiness to the dish. Cashews also offer healthy fats, protein, and essential nutrients like magnesium and copper, making them a wholesome addition to this stir fry.
  • Soy Sauce: A pantry staple in many households, soy sauce adds depth of flavor and a savory umami kick to the stir fry. It’s an affordable way to season the dish while providing a satisfying saltiness without the need for additional seasoning.
  • Hoisin Sauce: Sweet and tangy hoisin sauce brings a touch of sweetness and complexity to the stir fry sauce. It’s a budget-friendly condiment that adds depth of flavor and richness to the dish, elevating it to new heights of deliciousness.
  • Olive Oil and Sesame Oil: These oils provide a flavorful base for sautéing the ingredients and impart a subtle richness to the stir fry. Olive oil is a heart-healthy option that’s readily available and budget-friendly. Sesame oil adds a distinctive nutty aroma and flavor that complements the other ingredients perfectly.

Chicken Stir Fry with cashews, red bell peppers, eggplant, and green onions

How to Meal Prep Cashew Chicken Stir Fry

  1. Start by cutting your chicken, eggplant, and red bell peppers into adorable little one-inch cubes. Mince up those garlic cloves, dice the red onions, and give those green onions a good chop. We’re getting ready to rock and roll!
  2. Heat up a wok on high heat and drizzle in that olive oil. Toss in the red onions and chicken, and let the magic happen. Stir and sizzle until your chicken is golden brown and cooked through, about 5 to 6 minutes. Trust us, your kitchen is about to smell AMAZING!
  3. Now, it’s time to add some color and flavor. Throw in the garlic, eggplant, and bell peppers, and give everything a good mix. Let those veggies soften up and mingle with the chicken for about 3 to 4 minutes. Can you smell that deliciousness wafting through the air?
  4. This is where the magic truly happens. Pour in the soy sauce, hoisin sauce, and sesame oil, and watch as your stir-fry transforms into a symphony of flavors. Give it all a good stir to ensure every morsel is coated in that savory goodness.
  5. Sprinkle on those crunchy cashews and vibrant green onions like the culinary artist you are. Not only do they add a delightful crunch and pop of color, but they also take this dish to the next level of deliciousness!

Reference the recipe card below for detailed instructions.

Chicken Stir Fry with cashews, red bell peppers, eggplant, and green onions

Meal Prep Tips for Cashew Chicken Stir Fry

  • Customize to Taste: Feel free to customize the stir fry to suit your preferences. Add extra veggies like broccoli, carrots, or snap peas for added nutrition and variety. You can also adjust the seasonings and sauces to your liking for a personalized touch.
  • Reheat with Care: When reheating the stir fry, use a microwave-safe container or reheat it gently on the stovetop to prevent drying out the chicken and vegetables. Add a splash of water or broth if needed to maintain moisture and freshness.
  • Serve with Rice or Noodles: Cashew Chicken and Eggplant Stir Fry pairs beautifully with steamed white or brown rice, or even noodles like rice noodles or udon noodles. The starch helps soak up the flavorful sauce and adds heartiness to the meal.
  • Add a Side Salad: Fresh, crisp salad greens with a tangy vinaigrette make a refreshing accompaniment to the stir fry. Try a simple mix of mixed greens, cherry tomatoes, cucumber, and shredded carrots for a burst of color and freshness. You can also serve this up in lettuce wraps.
  • Incorporate Fermented Foods: Fermented foods like kimchi or pickled vegetables add a zesty kick and probiotic goodness to your meal. Enjoy them as a side dish or incorporate them into the stir fry for extra flavor and gut health benefits.

Chicken Stir Fry with cashews, red bell peppers, eggplant, and green onions

Cashew Chicken and Eggplant Stir Fry

Deliciously flavorful Cashew Chicken and Eggplant Stir Fry, packed with tender chicken, vibrant veggies, and crunchy cashews, perfect for easy meal prep and budget-friendly weeknight dinners!
No ratings yet
Prep Time 5 minutes
Cook Time 15 minutes
Course dinner, Main Course
Cuisine Asian
Servings 2
Calories 578 kcal

Equipment

  • knife
  • cutting board
  • wok

Ingredients
  

  • 10 oz boneless chicken thighs
  • 2 cup eggplant
  • 1 red bell pepper
  • 2 garlic cloves
  • 1/4 cup red onion
  • 1/4 cup green onions
  • 1/4 cup cashews
  • 2 tablespoons soy sauce
  • 2 tablespoons hoisin sauce
  • 1 tablespoon olive oil
  • 1 teaspoon sesame oil

Instructions
 

  • Cut the chicken, eggplant, and red bell peppers into one inch cubes. Peel and mince the garlic, dice the red onions, and chop the green onions.
  • Add olive oil to a wok on high heat and saute the red onions and chicken until the chicken is fully cooked and golden brown (about 5 to 6 minutes).
  • Next, add the garlic, eggplant, and bell peppers. Mix thoroughly until the veggies soften (about 3 to 4 minutes).
  • Then, season everything with the soy sauce, hoisin sauce, and sesame oil and stir it all together.
  • Finally, garnish with the cashews and green onions.

Notes

Nutrition information provided is an estimate. It will vary based on cooking method and specific ingredients used. Please consult with your healthcare provider for specific dietary needs. To gain a better understanding, explore our nutrition disclaimer here

Nutrition

Calories: 578kcalCarbohydrates: 25gProtein: 30gFat: 41gSaturated Fat: 9gPolyunsaturated Fat: 8gMonounsaturated Fat: 20gTrans Fat: 0.1gCholesterol: 139mgSodium: 1383mgPotassium: 843mgFiber: 6gSugar: 12gVitamin A: 2119IUVitamin C: 83mgCalcium: 57mgIron: 3mg

Similar Recipes

broccoli beef

Ground Beef and Broccoli Stir Fry

tofu stir fry

Tofu and Veggie Stir Fry

beef and chinese broccoli

Garlicky Beef Stir Fry

You Might Also Like

Frequently Asked Questions

Can I use chicken breast instead of chicken thighs?

Absolutely! While chicken thighs provide extra juiciness and flavor, you can definitely use chicken breast if you prefer. Just be mindful not to overcook it to prevent it from drying out.


Can I make this dish vegetarian or vegan?

Definitely! You can easily make this dish vegetarian or vegan by omitting the chicken and using tofu or tempeh instead. Simply cube the tofu or tempeh and stir-fry it along with the veggies as directed in the recipe.


Can I make this dish spicy?

Of course! If you like a bit of heat, you can add a sprinkle of red pepper flakes or a drizzle of sriracha sauce to the stir fry when adding the sauces. Adjust the amount to your desired level of spiciness.

Posted on Leave a comment

Instant Pot Beef Teriyaki

rectangle glass meal prep containers with teriyaki beef stew, white rice, cucumber, and sliced tomato

This Instant Pot Beef Teriyaki meal prep recipe is a flavorful and wholesome dish that’s perfect for busy individuals craving convenience without compromising on flavor. Picture succulent pieces of lean beef stew meat simmered in a rich and savory teriyaki sauce, infused with the aromatic flavors of garlic, ginger, and sesame oil. But that’s not all – we’re taking things up a notch by adding a medley of vibrant vegetables, including onions, bell peppers, and crushed pineapple, for a burst of freshness and nutrition. The beauty of this recipe lies in its simplicity and versatility – whether you’re meal prepping for the week ahead or looking for a quick and satisfying dinner option, Instant Pot Beef Teriyaki has got you covered.

This post may contain affiliate links. Please see our privacy policy for details.

Calories: 506kcal | Carbohydrates: 51g | Protein: 47g | Fat: 12g | Saturated Fat: 4g | Polyunsaturated Fat: 1g | Monounsaturated Fat: 5g | Cholesterol: 105mg | Sodium: 2582mg | Potassium: 1068mg | Fiber: 3g | Sugar: 11g | Vitamin A: 556IU | Vitamin C: 16mg | Calcium: 85mg | Iron: 5mg

round plate with instant pot beef teriyaki stew, white rice, cucumber, and sliced tomato

Why this Instant Pot Beef Recipe is Great for Meal Prep

  • Quick and Easy Prep: With simple ingredients and straightforward instructions, this recipe won’t have you spending hours in the kitchen. It’s designed for those on the go who need a meal prep solution that fits into their busy schedule.
  • Instant Pot Magic: The Instant Pot is a lifesaver for busy folks. It cooks food faster than traditional methods, meaning you can have a delicious meal on the table in a fraction of the time. It’s the ultimate kitchen multitasker!
  • Nutritious and Balanced: Lean beef stew meat, fresh vegetables, and wholesome grains make this dish a nutritional powerhouse. It’s packed with protein, vitamins, and minerals to fuel your body and keep you going throughout the day.
  • Budget-Friendly: Eating well shouldn’t break the bank, and this recipe proves just that. By using affordable ingredients like beef stew meat, onions, and bell peppers, you can enjoy a satisfying meal without overspending.
  • Delicious and Satisfying: Last but certainly not least, let’s talk about flavor. This Instant Pot Beef Teriyaki is an explosion of taste in every bite. From the tender beef to the savory teriyaki sauce, it’s a meal that’s sure to satisfy your cravings and leave you feeling nourished and satisfied.

The PrepYoSelf Newsletter

Ingredient Breakdown

  • Lean Beef Stew Meat: Lean beef stew meat is the protein powerhouse of this dish. It’s not only rich in protein, which helps keep you feeling full and satisfied, but it also adds a hearty flavor to the dish. By opting for lean cuts, we keep the dish healthy without sacrificing taste.
  • Onions: Onions are a kitchen staple for a reason. They add a delicious depth of flavor to any dish and are packed with nutrients like vitamins C and B6, as well as antioxidants. Plus, they’re super affordable, making them a budget-friendly choice that adds both flavor and nutrition to our beef teriyaki.
  • Bell Peppers: Not only do bell peppers add a pop of color to our dish, but they also bring a subtle sweetness and crunch. They’re loaded with vitamins A and C, as well as fiber, making them a nutritious addition to our meal. Plus, they’re relatively inexpensive, especially when in season, making them a wallet-friendly choice.
  • Garlic and Ginger: These aromatic ingredients are the flavor powerhouses of our dish. Garlic adds a savory depth, while ginger brings a zesty, slightly spicy kick. Both are known for their anti-inflammatory and immune-boosting properties, adding both flavor and health benefits to our meal.
  • Crushed Pineapple: Crushed pineapple adds a touch of sweetness and acidity to our teriyaki sauce. It helps balance out the savory flavors and adds a tropical twist to the dish. Plus, canned pineapple is an affordable option that’s available year-round, making it a budget-friendly choice.
  • Beef Broth: Beef broth not only serves as the liquid base for our dish but also adds depth and richness to the flavor. It helps tenderize the beef and infuses it with savory goodness. Using store-bought beef broth is a convenient and budget-friendly option, but you can also make your own using leftover beef bones for an even thriftier choice.
  • Soy Sauce: Soy sauce is the star of our teriyaki sauce, adding that classic umami-rich flavor. It’s salty, savory, and adds a depth of flavor that ties everything together. Plus, it’s a pantry staple that’s relatively inexpensive and adds a ton of flavor to dishes without breaking the bank.
  • Sesame Oil: Sesame oil adds a nutty richness to our dish and helps round out the flavors of our teriyaki sauce. A little goes a long way, so even though it may be a bit pricier than other oils, you only need a small amount to add a big punch of flavor.

rectangle glass meal prep containers with instant pot beef teriyaki stew, white rice, cucumber, and sliced tomato

How to Meal Prep Instant Pot Beef Teriyaki

  1. Gather up all your ingredients and let’s prep like a pro! Slice those onions, cube the bell pepper, peel those garlic cloves, and grate that ginger. We’re about to create magic in the kitchen!
  2. Now, it’s time to bring out the Instant Pot, our trusty sidekick in the kitchen. Add in the beef, onions, garlic, ginger, bell peppers, crushed pineapple, beef broth, soy sauce, salt, pepper, garlic powder, and sesame oil. It’s like a party in there!
  3. Close the lid of your Instant Pot and set the valve to “sealing”. We’re about to embark on a flavor-filled journey! Set it to cook on high pressure for 25 minutes. Go ahead, take a moment to revel in the anticipation.
  4. Once the cooking cycle is complete, let the pressure naturally release for 5 to 10 minutes. It’s like giving our dish a little time to relax and soak up all those delicious flavors before the big reveal.
  5. Open the lid of your Instant Pot and get ready for the grand finale! Ladle that mouthwatering beef teriyaki over a generous bowl of cooked rice. The aroma alone is enough to make your taste buds dance with joy!
  6. ow, let’s add some flair to our masterpiece! Top off your dish with some fresh sliced cucumbers and tomatoes. Not only does it add a pop of color, but it also adds a refreshing crunch that takes this dish to the next level!

Reference the recipe card below for detailed instructions.

round plate with instant pot beef teriyaki stew, white rice, cucumber, and sliced tomato

Meal Prep and Pairing Tips

  • Rice Varieties: While white rice is the classic pairing for beef teriyaki, you can mix things up by using brown rice, jasmine rice, or even cauliflower rice for a lower-carb option. Each variety brings its own unique texture and flavor to the dish.
  • Side Salad: Pair your beef teriyaki with a simple side salad for added freshness and crunch. Mix together your favorite greens with some sliced cucumbers, cherry tomatoes, and a drizzle of sesame ginger dressing for a flavor-packed accompaniment.
  • Stir-Fried Vegetables: Serve your beef teriyaki alongside a medley of stir-fried vegetables for a complete meal. You can quickly sauté broccoli, bell peppers, snap peas, and carrots in a hot skillet with a splash of soy sauce and sesame oil for a delicious and nutritious side dish.
  • Asian Slaw: For a refreshing twist, serve your beef teriyaki with a side of Asian slaw. Shred cabbage, carrots, and bell peppers, and toss them with a tangy sesame ginger dressing for a crunchy and flavorful accompaniment.
  • Fresh Fruit: Round out your meal with some fresh fruit for dessert. Sliced pineapple, mango, or watermelon make a sweet and refreshing way to end your meal on a high note.

rectangle glass meal prep containers with instant pot beef teriyaki stew, white rice, cucumber, and sliced tomato

Round plate with rice, beef, cucumber and tomato

Instant Pot Pineapple Beef Teriyaki

Tender beef paired with tangy, pineapple and a savory teriyaki sauce that is quick to prep on a busy week night.
No ratings yet
Prep Time 5 minutes
Cook Time 35 minutes
Course dinner, Main Course
Cuisine Asian
Servings 2
Calories 506 kcal

Equipment

  • knife
  • cutting board
  • Instant Pot

Ingredients
  

  • 12 oz lean beef stew meat
  • 1/2 each white onions (sliced)
  • 1 each yellow bell pepper (cubed)
  • 2 each garlic cloves (peeled)
  • 1 tablespoon ginger (grated)
  • 1/2 cup crushed pineapple
  • 2 cups beef broth
  • 2 tablespoon soy sauce
  • 1/2 teaspoon salt
  • 1/4 teaspoon pepper
  • 1/4 teasponn garlic powder
  • 1 teaspoon sesame oil

Optional Sides

  • 1.5 cups rice (cooked)
  • 1/4 cup cucumber (sliced)
  • 1 tomato (sliced)

Instructions
 

  • Add the beef, onions, garlic, ginger, bell peppers, crushed pineapple, broth, sesame oil, soy sauce, salt, and pepper to the pot.
  • Close the lid of the Instant Pot and set the valve to "sealing". Cook on high pressure for 25 minutes
  • Once the cooking cycle is complete, allow the pressure to naturally release for 5 to 10 minutes before manually releasing any remaining pressure.
  • Open the lid and ladle the soup over a bowl of rice. Garnish with sliced cucumbers and tomatoes.
  • Note: If you don't have an instant pot, you can use a slow cooker and cook it on high for 4 to 6 hours

Notes

Nutrition information provided is an estimate. It will vary based on cooking method and specific ingredients used. Please consult with your healthcare provider for specific dietary needs. To gain a better understanding, explore our nutrition disclaimer here

Nutrition

Calories: 506kcalCarbohydrates: 51gProtein: 47gFat: 12gSaturated Fat: 4gPolyunsaturated Fat: 1gMonounsaturated Fat: 5gCholesterol: 105mgSodium: 2582mgPotassium: 1068mgFiber: 3gSugar: 11gVitamin A: 556IUVitamin C: 16mgCalcium: 85mgIron: 5mg

Similar Recipes

chicken soup

One Pot Mexican Chicken Soup

sweet potato blt

Instant Pot Beef Ragu

pork carnitas

Instant Pot Pork Carnitas

You Might Also Like

Frequently Asked Questions

Can I use a different cut of beef for this recipe?

Absolutely! While lean beef stew meat works well in this recipe, you can also use other cuts like flank steak, sirloin, or even beef chuck. Just make sure to adjust the cooking time accordingly based on the cut you choose.


Can I make this recipe without an Instant Pot?

Yes, you can! If you don’t have an Instant Pot, you can still make this recipe on the stovetop or in a slow cooker. Simply follow the same instructions, adjusting the cooking time and method as needed.


Can I use fresh pineapple instead of crushed pineapple?

Of course! Fresh pineapple will add a wonderful burst of flavor to the dish. Simply chop it into small pieces and use it in place of the crushed pineapple. You may want to adjust the sweetness to taste by adding a bit of honey or brown sugar if needed.

Posted on Leave a comment

Salmon Piccata with Asparagus

glass rectangle meal prep containers with salmon fillet topped with lemon, capers, and asparagus

Welcome to your new go-to meal prep solution that’s as delicious as it is convenient: Salmon Piccata Meal Prep! If you’re a busy individual looking to stay on track with your healthy eating goals without sacrificing flavor or breaking the bank, then you’ve come to the right place. This recipe combines tender salmon fillets, crisp asparagus, and a tangy lemon caper sauce for a gourmet experience that’s ready in a flash. With just a handful of ingredients and minimal prep time, you’ll have a week’s worth of nutritious and satisfying meals at your fingertips. Get ready to impress your taste buds and streamline your meal prep routine with this flavor-packed dish. So, let’s roll up our sleeves and dive into the kitchen – your taste buds will thank you!

This post may contain affiliate links. Please see our privacy policy for details.

Calories: 370kcal | Carbohydrates: 6g | Protein: 36g | Fat: 22g | Saturated Fat: 9g | Polyunsaturated Fat: 5g | Monounsaturated Fat: 7g | Trans Fat: 0.5g | Cholesterol: 124mg | Sodium: 680mg | Potassium: 1043mg | Fiber: 2g | Sugar: 2g | Vitamin A: 1073IU | Vitamin C: 12mg | Calcium: 56mg | Iron: 3mg

round plate with salmon fillet topped with lemon, capers, and asparagus

Why This Recipe is Great for Meal Prep

  • Quick and Easy: With just a few simple steps and minimal prep time, this recipe fits perfectly into your busy schedule. No need to spend hours in the kitchen – you’ll have delicious meals ready to go in no time!
  • Healthy and Nutritious: Salmon is packed with omega-3 fatty acids, protein, and essential vitamins, making it a nutritious choice for fueling your body. Paired with nutrient-rich asparagus, this meal provides a wholesome balance of nutrients to keep you energized throughout the day.
  • Budget-Friendly: Eating healthy doesn’t have to break the bank! This recipe utilizes affordable ingredients like salmon and asparagus, allowing you to enjoy a gourmet meal without overspending.
  • Flavor Explosion: The tangy lemon sauce infused with butter, garlic, and capers adds a burst of flavor to every bite. It’s a deliciously satisfying meal that will leave your taste buds dancing with joy.
  • Versatile: While this recipe is designed for meal prep, it’s also versatile enough to be enjoyed for dinner parties or weeknight meals. Impress your guests or treat yourself to a gourmet dinner without the hassle.

The PrepYoSelf Newsletter

To Meal Prep This Salmon Recipe You’ll Need

  • Salmon: Salmon is the star of this dish for a good reason. Not only is it rich in omega-3 fatty acids, which are beneficial for heart health and brain function, but it’s also an excellent source of protein. Protein helps to keep you feeling full and satisfied, making it an essential component of any meal. Additionally, salmon has a naturally rich and buttery flavor that pairs beautifully with the tangy lemon sauce, creating a harmonious balance of flavors.
  • Asparagus: Asparagus not only adds vibrant color to the dish but also contributes a host of nutrients. It’s packed with vitamins, minerals, and antioxidants, including vitamins A, C, E, and K. Asparagus is also high in fiber, which aids in digestion and promotes gut health. Its slightly bitter flavor complements the richness of the salmon and adds a delightful crunch to each bite.
  • Lemon Juice: Lemon juice serves as the primary acidic component in the sauce, lending a bright and tangy flavor to the dish. It adds a refreshing zing that cuts through the richness of the butter and enhances the natural flavors of the salmon and asparagus. Additionally, lemon juice is a great source of vitamin C, which boosts the immune system and aids in iron absorption.
  • Butter: Melted butter adds a luxurious richness to the sauce, creating a velvety texture that coats the salmon and asparagus. While butter is often associated with indulgence, using it in moderation adds depth of flavor without compromising on health. Opting for unsalted butter allows you to control the sodium content of the dish.
  • Capers: Capers are small, briny buds that pack a punch of flavor. They add a unique, slightly tangy taste to the sauce, balancing out the richness of the butter and adding depth to the overall flavor profile. Capers are also low in calories and high in antioxidants, making them a healthy and flavorful addition to the dish.
  • Minced Garlic: Garlic is a kitchen staple known for its pungent flavor and numerous health benefits. It adds a savory depth to the sauce, enhancing the overall complexity of flavors. Garlic is also rich in sulfur compounds that have been shown to have anti-inflammatory and immune-boosting properties, making it a nutritious addition to any meal.

round plate with salmon fillet topped with lemon, capers, and asparagus

Easy Recipe Steps to Meal Prep Oven Roasted Salmon

  1. First things first, preheat your oven to 400F. We’re getting ready to create some magic!
  2. Rinse the baby bok choy halves thoroughly to ensure they’re dirt-free. No one wants extra crunch from the soil!
  3. While the oven is heating up, let’s whip together that amazing sauce. In a small bowl, mix together the lemon juice, melted butter, capers, minced garlic, and a pinch of salt. Give it a good stir until everything is nicely combined. This sauce is going to be the star of the show!
  4. Now, grab a sheet pan and lay out your salmon fillets and asparagus. It’s like creating a canvas for a masterpiece!
  5. Next, pour that delectable sauce you just made all over the salmon and asparagus. Be generous! We want every bite to be bursting with flavor.
  6. Once your oven is nice and toasty, pop the sheet pan in and let the magic happen. Bake for 10-12 minutes, or until the salmon is cooked to perfection and the asparagus is tender. Trust me, your kitchen is going to smell amazing!
  7. Once the timer goes off, carefully remove the sheet pan from the oven. Let it cool for a moment before portioning out your servings into containers.

Reference the recipe card below for detailed instructions.

rectangle glass meal prep containers with salmon fillet topped with lemon, capers, and asparagus

Meal Prep and Pairing Tips

  • Grains: Pairing this dish with a whole grain such as quinoa, brown rice, or farro can add texture, substance, and extra nutrients to your meal. Cook a batch of grains during your meal prep session and portion them into containers alongside the salmon and asparagus.
  • Fresh Fruit: Adding fresh fruit like berries, sliced apples, or grapes to your meal prep containers provides a refreshing and sweet contrast to the savory flavors of the salmon piccata. It’s a simple and nutritious way to round out your meal.
  • Healthy Fat Sources: Consider adding sources of healthy fats such as avocado slices, nuts, or seeds to your meal prep containers. These ingredients not only add flavor and texture but also help to keep you feeling full and satisfied.
  • Herbs: Garnishing your meal prep containers with fresh herbs like parsley, dill, or basil adds a pop of color and freshness. 
  • Sauce Options: While the lemon caper sauce is delicious on its own, you can also consider pairing the salmon piccata with additional sauce options such as pesto, tzatziki, or salsa verde for variety. Portion the sauce into small containers or drizzle it directly over the meal prep containers before serving.

glass rectangle meal prep containers with salmon fillet topped with lemon, capers, and asparagus

glass meal prep containers with salmon, asparagus, topped with lemon slice and capers

Oven Baked Salmon Piccata with Roasted Asparagus

Effortlessly flavorful Salmon Piccata Meal Prep: succulent salmon and crisp asparagus bathed in a tangy lemon caper sauce, perfect for busy days!
No ratings yet
Prep Time 5 minutes
Cook Time 10 minutes
Course dinner, lunch, Main Course
Cuisine American
Servings 2
Calories 370 kcal

Equipment

  • sheet pan
  • oven

Ingredients
  

Salmon and Asparagus

  • 12 oz salmon
  • 6 oz asparagus

Sauce

  • 2 tablespoons lemon juice
  • 2 tablespoons melted butter
  • 2 tablespoons capers
  • 1 tablespoons minced garlic
  • 1/4 teaspoon salt

Instructions
 

  • Pre-heat the oven to 400F. Mix together the sauce in a small bowl.
  • Place the salmon and asparagus on a sheet pan and evenly pour the sauce over the salmon and asparagus.
  • Bake in the oven for 10-12 minutes until the salmon is fully cooked.

Notes

Nutrition information provided is an estimate. It will vary based on cooking method and specific ingredients used. Please consult with your healthcare provider for specific dietary needs. To gain a better understanding, explore our nutrition disclaimer here

Nutrition

Calories: 370kcalCarbohydrates: 6gProtein: 36gFat: 22gSaturated Fat: 9gPolyunsaturated Fat: 5gMonounsaturated Fat: 7gTrans Fat: 0.5gCholesterol: 124mgSodium: 680mgPotassium: 1043mgFiber: 2gSugar: 2gVitamin A: 1073IUVitamin C: 12mgCalcium: 56mgIron: 3mg

Similar Recipes

salmon beet salad

Citrus Ginger Salmon with Roasted Beets

salmon and watermelon salad

Grilled Salmon with Watermelon Salad

salmon salad

Salmon Stuffed Avocado Salad

You Might Also Like

Frequently Asked Questions

Can I use frozen salmon instead of fresh?

Yes, frozen salmon can be used in this recipe. Just make sure to thaw it completely before cooking. You may need to adjust the cooking time slightly depending on the thickness of the fillets


Can I substitute a different type of fish for the salmon?

While salmon works beautifully in this recipe, you can certainly experiment with other types of fish such as trout, cod, or tilapia. Just be mindful of variations in cooking times and adjust accordingly.


I’m not a fan of asparagus. Can I use a different vegetable?

Absolutely! Feel free to swap out the asparagus for your favorite vegetable or a medley of veggies. Broccoli, green beans, or Brussels sprouts would all be delicious alternatives.

Posted on Leave a comment

Peanut Butter and Banana Muffin Bars

rectangle baking dish with peanut butter muffin with banana slice topping

Wake up to the delightful aroma of freshly baked Peanut Butter Banana Muffin Bars, a nutritious and convenient breakfast option that will kickstart your day with a burst of flavor. This recipe combines the timeless duo of peanut butter and bananas into moist and tender muffin bars, sweetened with a touch of honey for the perfect balance of sweetness. With just a handful of pantry staples and simple instructions, you can easily whip up a batch of these delicious bars in no time, making them ideal for busy mornings or meal prepping ahead of time. Whether enjoyed warm out of the oven or packed for an on-the-go breakfast, these muffin bars are sure to become a favorite in your household. Customize them with your favorite mix-ins or enjoy them as is for a satisfying and wholesome start to your day.

This post may contain affiliate links. Please see our privacy policy for details.

Calories: 310kcal | Carbohydrates: 39g | Protein: 12g | Fat: 13g | Saturated Fat: 3g | Polyunsaturated Fat: 3g | Monounsaturated Fat: 5g | Trans Fat: 0.01g | Cholesterol: 89mg | Sodium: 177mg | Potassium: 251mg | Fiber: 2g | Sugar: 13g | Vitamin A: 218IU | Vitamin C: 0.1mg | Calcium: 130mg | Iron: 2mg

viewed from an angle a rectangle baking dish with peanut butter muffin bars with banana slice topping

Why are these muffin bars great for meal prep?

  • Convenience Factor: With just a handful of ingredients and simple instructions, these muffin bars are incredibly easy to whip up. Plus, they’re perfect for meal prepping ahead of time, saving you valuable minutes during busy mornings
  • Versatile and Customizable: While the base recipe is delicious on its own, you can easily customize these muffin bars to suit your taste preferences. Add in extras like chocolate chips, chopped nuts, or a sprinkle of cinnamon for a flavor twist.
  • Portability: Whether you’re rushing out the door or enjoying a leisurely breakfast at home, these muffin bars are the perfect grab-and-go option. Simply wrap them up individually and take them with you wherever you go.
  • Kid-Friendly: Picky eaters won’t be able to resist the sweet combination of peanut butter and bananas in these muffin bars. They’re a great way to sneak in some extra nutrients for the little ones while keeping them satisfied until lunchtime.
  • Freezer-Friendly: Make a big batch of these muffin bars and stash them in the freezer for future breakfasts. They’ll stay fresh for weeks, making them a convenient option for busy mornings or last-minute meals.

The PrepYoSelf Newsletter

Simple Ingredients for Peanut Butter and Banana Muffin Bars

  • Bananas: Bananas serve as the primary fruit component in this recipe. They not only add natural sweetness but also contribute moisture and texture to the muffin bars. Bananas are rich in potassium, which supports heart health, and fiber, which aids digestion. Additionally, bananas are typically inexpensive year-round, making them a budget-friendly choice for adding flavor and nutrients to the recipe.
  • Peanut Butter: Peanut butter not only adds a rich, nutty flavor but also brings healthy fats and protein to the table. It helps to make the muffin bars more filling and satisfying, keeping hunger at bay throughout the morning. Peanut butter is also a budget-friendly pantry staple, offering a great bang for your buck in terms of nutritional value and versatility in various recipes.
  • Egg: The egg serves as a binding agent in this recipe, helping to hold the ingredients together and providing structure to the muffin bars. Eggs are an excellent source of high-quality protein, vitamins, and minerals, including vitamin B12 and selenium. They’re also relatively affordable, especially when purchased in larger quantities, making them a budget-friendly ingredient that adds nutritional value to the recipe.
  • Milk: Milk adds moisture and richness to the muffin bars while also contributing to their tender texture. It provides essential nutrients such as calcium, vitamin D, and protein, promoting bone health and overall wellness. Milk is often an affordable staple in most households, making it a budget-friendly ingredient that enhances both the flavor and nutritional profile of the recipe.
  • Honey: Honey serves as a natural sweetener in this recipe, providing a touch of sweetness without the need for refined sugars. It also adds moisture and helps to enhance the flavors of the other ingredients. Honey contains antioxidants and has antimicrobial properties, making it a healthier alternative to processed sugars. While honey may be slightly more expensive than granulated sugar, a little goes a long way, making it a cost-effective option for adding sweetness to the muffin bars.
  • Flour: Flour serves as the base ingredient in this recipe, providing structure and volume to the muffin bars. While all-purpose flour is used here, you can also opt for whole wheat flour for added fiber and nutrients. Flour is a pantry staple that is relatively inexpensive, making it a budget-friendly option for baking a variety of recipes.
  • Baking Powder: Baking powder acts as a leavening agent in this recipe, helping the muffin bars to rise and achieve a light and fluffy texture. It ensures that the bars have the perfect amount of lift and tenderness. Baking powder is a cost-effective ingredient commonly used in baking, making it a budget-friendly addition to this recipe.

rectangle baking dish with peanut butter muffin bars with banana slice topping

How to Meal Prep Peanut Butter and Banana Muffin Bars:

  1. First things first, preheat your oven to 400°F (200°C). This ensures that it’s ready to go when your muffin bars are all set to bake.
  2. In a mixing bowl, crack open your egg and pour in the milk, honey, and peanut butter. Whisk these ingredients together until they are well combined and form a smooth mixture.
  3. Now, it’s time to add the flour and baking powder to the wet mixture. Stir everything together until you achieve a smooth batter. Make sure there are no lumps, as we want our muffin bars to be perfectly fluffy.
  4. Grease a baking dish to prevent sticking, then transfer your batter into it. Spread the batter evenly using a spatula to ensure uniform baking.
  5. lace the baking dish in the preheated oven and let your muffin bars bake for approximately 15 minutes, or until the center is fully cooked. You can test this by inserting a toothpick into the center—if it comes out clean, your bars are ready to go!
  6. Once your muffin bars are out of the oven and cooling down, it’s time to add the finishing touch. Slice some fresh bananas and place them on top of your bars for a delicious and nutritious topping.

Reference the recipe card below for detailed instructions.

rectangle baking dish with peanut butter muffin bars with banana slice topping

Meal Prep and Pairing Tips:

  • Coffee or Tea: Start your morning right by enjoying a warm cup of coffee or tea alongside your muffin bar. The slight bitterness of coffee or the soothing qualities of tea can balance the sweetness of the muffin bars, creating a harmonious breakfast duo.
  • Greek Yogurt: Serve your muffin bar with a side of creamy Greek yogurt for added protein and texture. You can even drizzle some honey on top of the yogurt for extra sweetness.
  • Granola: Sprinkle some crunchy granola over your muffin bar to add texture and a hint of sweetness. It’s a great way to add a satisfying crunch to your breakfast.
  • Maple Syrup: Drizzle a touch of maple syrup over your muffin bar for an extra layer of sweetness. The rich, caramel-like flavor of maple syrup pairs beautifully with the nuttiness of peanut butter and the natural sweetness of bananas.
  • Hard-Boiled Eggs: For a balanced breakfast with added protein, serve your muffin bar with a side of hard-boiled eggs. It’s a filling combination that will keep you satisfied until your next meal.

rectangle baking dish with peanut butter muffin bars with banana slice topping

rectangle baking dish with peanut butter muffin with banana slice topping

Peanut Butter Banana Muffin Bar

Wholesome Peanut Butter Banana Muffin Bars, bursting with natural sweetness and packed with nutrients, perfect for a quick and satisfying breakfast on-the-go!
No ratings yet
Prep Time 5 minutes
Cook Time 15 minutes
Course Breakfast
Cuisine American
Servings 2
Calories 310 kcal

Equipment

  • whisk
  • mixing bowl
  • baking dish
  • oven

Ingredients
  

  • 1 large egg
  • 1/2 cup milk
  • 1 tablespoon honey
  • 2 tablespoon peanut butter
  • 1/2 cup flour
  • 1/4 teaspoon baking powder

Instructions
 

  • Preheat the oven to 400F
  • Add the egg, milk, honey, and peanut butter to a mixing bowl.
  • Next, add the flour and baking powder and mix all the ingredients together until you get a smooth batter.
  • Transfer the batter into a greased baking dish. Bake in the oven for 15 minutes until the center is fully cooked.
  • After the muffin cooks, top it off with sliced bananas.

Notes

Nutrition information provided is an estimate. It will vary based on cooking method and specific ingredients used. Please consult with your healthcare provider for specific dietary needs. To gain a better understanding, explore our nutrition disclaimer here

Nutrition

Calories: 310kcalCarbohydrates: 39gProtein: 12gFat: 13gSaturated Fat: 3gPolyunsaturated Fat: 3gMonounsaturated Fat: 5gTrans Fat: 0.01gCholesterol: 89mgSodium: 177mgPotassium: 251mgFiber: 2gSugar: 13gVitamin A: 218IUVitamin C: 0.1mgCalcium: 130mgIron: 2mg

Similar Recipes

baked oatmeal

Oven Baked Oats with Apricots and Berries

ricotta apple

Oven Baked Apple with Ricotta and Walnuts

french toast 2

Oven Baked French Toast Muffins with Strawberries

You Might Also Like

Smartfruit Mellow Mango + Immunity, 100% Real Fruit Purée

Trader Joe’s Unsalted, Dry Toasted Slivered Almonds

Trader Joe’s the Dark Chocolate Lover’s Chocolate Bar

Frequently Asked Questions

How should I store the muffin bars?

Allow the muffin bars to cool completely before storing them. You can store them in an airtight container at room temperature for up to 3 days, in the refrigerator for up to 1 week, or in the freezer for up to 3 months. If storing in the freezer, individually wrap the bars in plastic wrap or aluminum foil before placing them in a freezer-safe bag or container.


Can I add other mix-ins to the batter?

Absolutely! Feel free to customize your muffin bars by adding your favorite mix-ins such as chocolate chips, chopped nuts, shredded coconut, or dried fruit. Just be mindful of the additional moisture content and adjust the baking time accordingly if needed.


Can I omit the peanut butter if I have an allergy or preference?

Yes, you can omit the peanut butter if necessary. You can replace it with almond butter, cashew butter, or sunflower seed butter if you prefer or if you have a peanut allergy.

Posted on Leave a comment

Apple Oatmeal Muffin Bars

glass meal prep containers with apple oatmeal muffin bar

Our delectable Banana Apple Baked Oatmeal breakfast muffin bars are bursting with flavor and nutrition. This budget-friendly recipe combines the sweetness of ripe bananas with the refreshing crunch of diced apples, all nestled in a hearty bed of rolled oats. Perfectly balanced with protein from eggs and a touch of olive oil for moisture, each bite is a wholesome delight that will keep you fueled throughout the day. So, grab your ingredients and get ready to enjoy a breakfast that’s as nutritious as it is delicious. Let’s bake up some goodness together!

This post may contain affiliate links. Please see our privacy policy for details.

Calories: 188kcal | Carbohydrates: 33g | Protein: 5g | Fat: 5g | Saturated Fat: 1g | Polyunsaturated Fat: 1g | Monounsaturated Fat: 2g | Trans Fat: 0.01g | Cholesterol: 82mg | Sodium: 86mg | Potassium: 376mg | Fiber: 5g | Sugar: 17g | Vitamin A: 206IU | Vitamin C: 9mg | Calcium: 55mg | Iron: 1mg

rectangular baking dish with apple oatmeal breakfast muffin bars

Here’s why this recipe rocks:

  • Nutrient-packed Ingredients: Starting your day with a balance of carbs, protein, and healthy fats is essential, and this baked oatmeal delivers just that. Bananas provide a natural sweetness along with potassium and fiber, while eggs add protein to keep you feeling full and focused.
  • Fiber-Filled Oats: Rolled oats are loaded with fiber, which helps regulate digestion, keeps your energy levels stable, and keeps those hunger pangs at bay until your next meal.
  • No-Fuss Preparation: Busy mornings call for quick and easy recipes, and this one fits the bill perfectly. With just a few simple steps, you’ll have a nutritious breakfast ready to go in no time. Blend, mix, pour, bake – it’s that simple!
  • Versatility Galore: Don’t limit yourself to just one variation of this baked oatmeal breakfast muffin bars recipe. Feel free to get creative with your toppings! Swap out the apple for berries, add a sprinkle of nuts or seeds, or drizzle on some honey for extra sweetness. The possibilities are endless!

The PrepYoSelf Newsletter

Budget-Friendly Breakfast Muffin Bars Ingredients:

  • Banana: The star of the show! Ripe bananas bring natural sweetness to the recipe without the need for added sugars. Plus, they’re loaded with potassium, fiber, and vitamins, making them a nutrient-packed addition that keeps our baked oatmeal moist and flavorful.
  • Apple: Adding diced apple not only provides a burst of fresh flavor but also brings in additional fiber, vitamins, and antioxidants. It’s a budget-friendly fruit that adds a lovely texture and sweetness to the dish, complementing the banana beautifully.
  • Rolled Oats: Ah, the humble hero of breakfast foods! Rolled oats are not only inexpensive but also incredibly nutritious. They’re high in fiber, which aids in digestion and helps keep you feeling full and satisfied. Plus, oats provide a hearty texture and nutty flavor that pairs perfectly with the fruity sweetness of the banana and apple.
  • Egg: One large egg adds protein to our baked oatmeal, helping to keep you fueled and energized throughout the morning. Eggs are also relatively inexpensive and versatile, making them a budget-friendly way to boost the nutritional content of our breakfast dish.
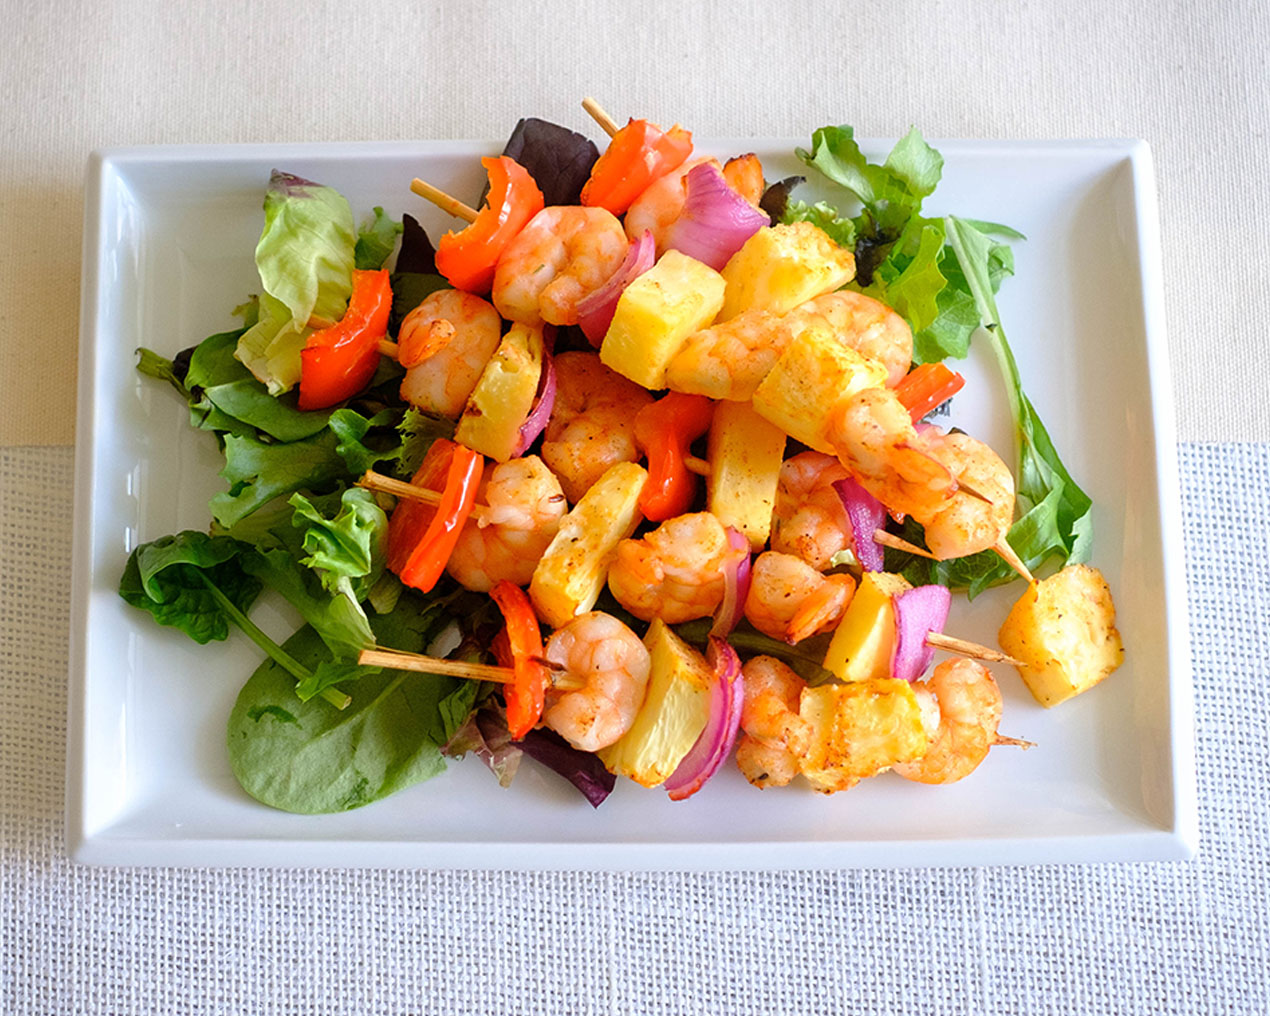
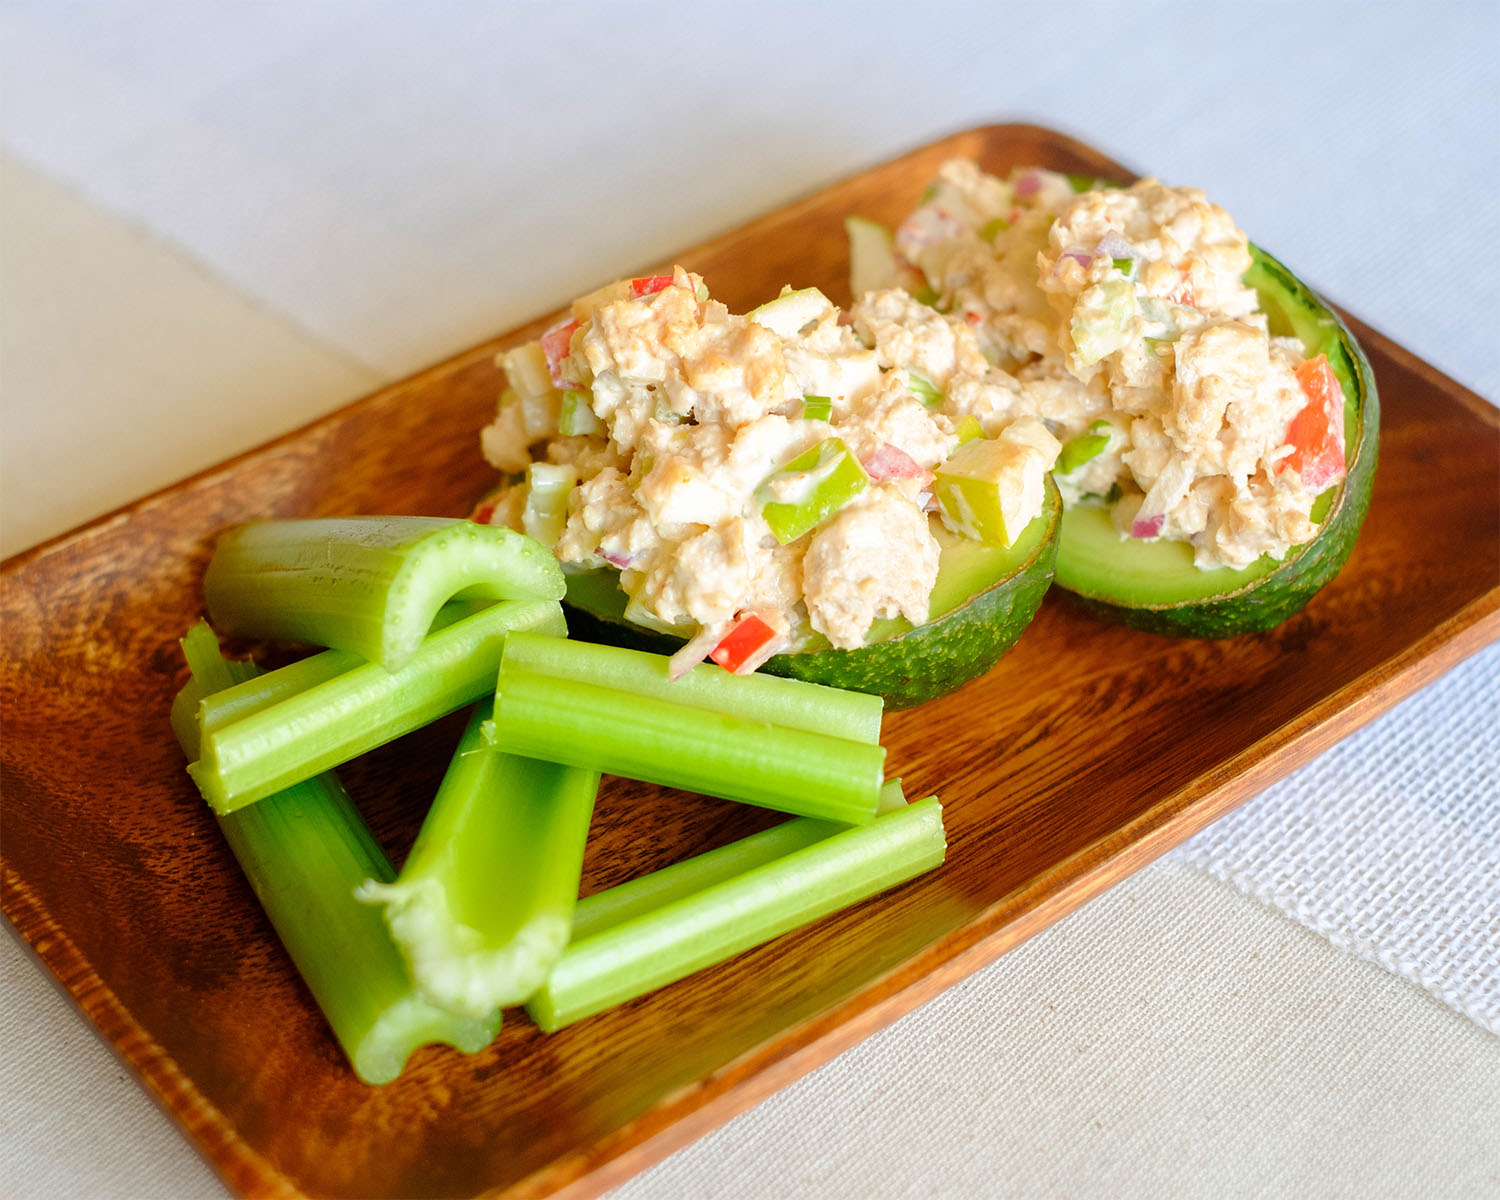
  • Baking Powder: A small amount of baking powder helps our baked oatmeal rise and become light and fluffy. It ensures that the texture is just right – not too dense or heavy – creating a delightful breakfast treat that’s both satisfying and budget-friendly.

rectangular baking dish with apple oatmeal breakfast muffin bars

How to Meal Prep Apple Oatmeal Breakfast Muffin Bars

  1. Preheat your oven to 400°F (200°C).
  2. In a blender or mixing bowl, mash up your ripe banana and egg until it’s smooth and creamy. No blender? No problem! A fork works just as well.
  3. Add in the rolled oats and baking powder, giving everything a good mix until it’s nicely combined.
  4. Grease up a baking dish and pour in your oatmeal batter.
  5. Time to add a little fruity flair! Dice up your apple into small pieces and scatter them on top of the batter.
  6. Pop that dish into the oven and bake for 15-20 minutes until it’s golden and cooked through.

Reference the recipe card below for detailed instructions.

glass meal prep containers with apple oatmeal breakfast muffin bars

Meal Prep Tips:

  • Yogurt: Serve your baked oatmeal with a dollop of Greek yogurt for a creamy contrast to the fruity flavors. Add a drizzle of honey or a sprinkle of cinnamon for extra indulgence.
  • Nuts and Seeds: Sprinkle chopped nuts or seeds (such as almonds, walnuts, or pumpkin seeds) on top of your baked oatmeal for added crunch and a boost of healthy fats and protein.
  • Coffee or Tea: Enjoy your Banana Apple Baked Oatmeal with a cup of your favorite hot beverage, such as coffee or tea, for a comforting and satisfying breakfast experience.
  • Spice it Up: Add a pinch of ground cinnamon, nutmeg, or vanilla extract to the batter for extra warmth and flavor.

glass meal prep containers with apple oatmeal breakfast muffin bars

rectangular baking dish with apple oatmeal muffin bar

Apple Oatmeal Muffin Bars

Wholesome and budget-friendly, our Banana Apple Baked Oatmeal combines ripe bananas, diced apples, and hearty rolled oats for a nutritious and delicious breakfast treat!
No ratings yet
Prep Time 5 minutes
Cook Time 15 minutes
Course Breakfast, Snack
Cuisine American
Servings 2
Calories 188 kcal

Equipment

  • blender
  • spatula
  • cutting board
  • oven

Ingredients
  

  • 1 large banana (ripe)
  • 1 large egg
  • 1/4 cup rolled oats
  • 1/4 teaspoon baking powder
  • 1 small apple
  • 1 teaspoon olive oil

Instructions
 

  • Preheat the oven to 400F.
  • Blend together the banana and egg until it is smooth (or you can use a fork to mash it in a mixing bowl)
  • Add the rolled oats and baking powder and mix it all together.
  • Pour the batter into a greased baking dish. Dice the apple into small pieces, and place it on top of the batter.
  • Bake it in the oven for 15 to 20 minutes until the center is fully cooked.

Notes

Nutrition information provided is an estimate. It will vary based on cooking method and specific ingredients used. Please consult with your healthcare provider for specific dietary needs. To gain a better understanding, explore our nutrition disclaimer here

Nutrition

Calories: 188kcalCarbohydrates: 33gProtein: 5gFat: 5gSaturated Fat: 1gPolyunsaturated Fat: 1gMonounsaturated Fat: 2gTrans Fat: 0.01gCholesterol: 82mgSodium: 86mgPotassium: 376mgFiber: 5gSugar: 17gVitamin A: 206IUVitamin C: 9mgCalcium: 55mgIron: 1mg

Similar Recipes

baked oatmeal

Oven Baked Oats with Apricots and Berries

ricotta apple

Oven Baked Apple with Ricotta and Walnuts

french toast 2

Oven Baked French Toast Muffins with Strawberries

You Might Also Like

Smartfruit Mellow Mango + Immunity, 100% Real Fruit Purée

Trader Joe’s Unsalted, Dry Toasted Slivered Almonds

Trader Joe’s the Dark Chocolate Lover’s Chocolate Bar

Frequently Asked Questions

Can I use instant oats instead of rolled oats?

While instant oats can be used in a pinch, rolled oats are preferred for their texture and heartiness in this recipe. Instant oats may result in a softer texture, but the overall flavor should remain similar.


Can I freeze the baked oatmeal muffin?

Yes, you can freeze baked oatmeal muffins for longer storage. Once cooled, wrap individual portions tightly in plastic wrap or aluminum foil, then place them in a freezer-safe bag or container. Freeze for up to 3 months. Thaw overnight in the refrigerator or reheat from frozen in the microwave or oven.


Can I omit the egg to make it vegan?

Absolutely! You can substitute the egg with a flax or chia egg (1 tablespoon ground flaxseed or chia seeds mixed with 3 tablespoons of water, let sit for 5 minutes to gel) to make this recipe vegan-friendly.