Posted on

Nov 10 Weekly Meal Plan

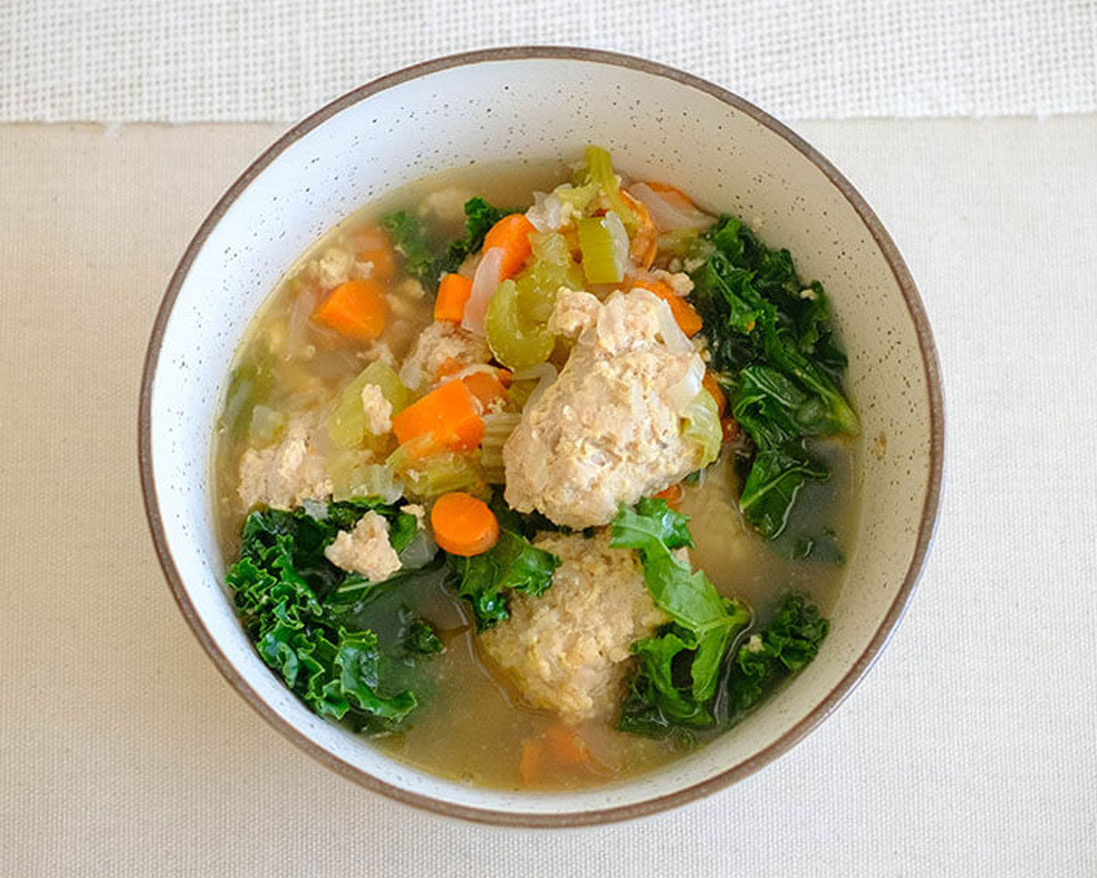
balsamic glazed porkchops with persimmons and baby spinach

Learn to Use Our Meal Plan Tool

Discover how to simplify your meal planning process!

Welcome aboard if you’re new! Our meal planning tool is your personalized meal prep assistant –  you can tweak your serving sizes or skip some recipe options, it’s all in your hands! Our meal plans are meant to be a guide, so feel free to use all recipes or just a few to get you started!  Click on each recipe to learn more prep tips. Enjoy the meals at your pleasure, but here’s an example of how we plan out the meals during the week:

BreakfastLunchDinner
Mon

Sweet Potato Egg FrittataBalsamic Pork ChopsBeef Tomatillo Soup
TuesPersimmon MuffinsChicken Enchilada Stuffed PeppersMoroccan Chicken and Couscous
WedSweet Potato Egg FrittataBalsamic Pork ChopsBeef Tomatillo Soup
ThursPersimmon MuffinsChicken Enchilada Stuffed PeppersMoroccan Chicken and Couscous
The meal plans are designed to serve one person and account for 4 days. This is so that you can enjoy it at it’s best quality and also allows room for flexibility just in case you get takeout or eat out during the week.

Set Your Pace

  • If you’re a beginner at meal prep: Be prepared to set aside 2-3 hours. Once mise en place is complete, all of these recipes can be completed one by one.
  • If you’re a meal prep pro, use the sequenced steps below: These steps give you the flexibility to cook items simultaneously in a sequence of events.
  • Be sure to set timers and check on food items to avoid overcooking. Sequencing will save you time and meal prep can be done in 1-2 hours.

Meal Prep Run Down

Chopping and Prepping Ingredients:

  1. Gather all ingredients, spices, tools, and equipment in advance and review the recipes to ensure a smooth, stress-free meal prep.

Cooking Phase 1: Oven Recipes:

  1. Sweet Potato Egg Frittata: Preheat the oven to 400°F, slice the peeled sweet potato into 1/4-inch rounds, whisk the eggs with salt, grease a baking dish with olive oil, layer in the sweet potato, pour the eggs over top, sprinkle with green onions, and bake for 10–15 minutes until set.
  2. Persimmon Muffins: Peel and puree the persimmons with olive oil, whisk in the egg, brown sugar, and cinnamon, then add the dry ingredients until smooth, pour the batter into a greased muffin pan, top with sliced almonds, and bake for 15–20 minutes.

Cooking Phase 2: Stove Top Recipes:

  1. Balsamic Pork Chops: Slice the persimmons, season and sear the pork chops with balsamic and spices until they reach 145°F, then sauté the persimmons in the same pan and serve together with a side salad.
    Stuffed Chicken Enchilada Peppers: Halve and core the bell peppers, mix the shredded chicken with red onions, cilantro, and enchilada sauce, fill the peppers, bake for 20–25 minutes until tender, then top with sliced avocado and serve with a side salad.
  2. Beef Tomatillo Soup: Sauté the onions in oil, add and cook the ground beef with garlic, then stir in the broth, tomatillo sauce, vegetables, and seasonings, simmer for 10 minutes, and finish with cilantro, red onions, and jalapeños.
  3. Moroccan Chicken and Couscous: Sauté the onions, then cook the seasoned chicken, deglaze with water, stir in garlic, ginger, and tomatoes, cook the couscous separately according to package instructions, and serve the chicken over the fluffed couscous.

Final Steps:

  1. Storage: Once all the dishes are fully cooked, plate everything into individual containers. Allow them to cool to room temperature before placing them in the refrigerator for storage. This will keep your meals fresh and ready to enjoy throughout the week.

If you’re sequencing your meal prep, be sure to keep an eye on everything! Make sure food is kept refrigerated under 40F degrees until ready to eat.

Assembly Tips

  • Evenly divide meals according to the serving size
  • Let all items cool before placing them in the refrigerator
  • Keep all items refrigerated under 40°F until ready to eat or reheat
  • Breakfast: Both meals can be reheated in the microwave
  • Lunch: Both meals can be reheated quickly in the microwave.
  • Dinner: Both meals can be reheated quickly in the microwave.

Extra Flavors and Substitutions

  • Egg Frittata: Serve with a side of mixed greens or sliced tomatoes for added freshness and color.
  • Persimmon Muffins: If persimmons aren’t available, swap with mashed ripe pears or bananas for similar sweetness and moisture.
  • Pork Chops: Serve alongside roasted Brussels sprouts or steamed green beans to balance the sweetness of the persimmons.
  • Chicken Enchilada Peppers: Replace shredded chicken with black beans or lentils for a high-protein vegetarian option.
  • Beef Tomatillo Soup: Enjoy with warm corn tortillas or a side of rice to soak up the flavorful broth.
  • Moroccan Chicken: Swap couscous for quinoa or brown rice if you want a gluten-free or higher-fiber base.

Extra Leftover Ingredients Not Used

  • Protein: Freeze any uncooked meats and save for a later recipe, or you can cook the full amount, and freeze the portion that you do not eat, and save for later use.
  • Fruit: Use leftover fruit in smoothies, on top of yogurt, or with your cereal
  • Veggies: Freeze any leftover veggies for later use. Use leftover herbs in omelets or other dishes for the weekend

Helpful Resources
Showcase 1

Supplemental
Snacks

Snacks to fuel you throughout the day

Showcase 2

Kitchen
Equipment

Recommended Kitchen Tools & Cooking Utensils
Showcase 3

Grocery Pantry
Staples

Always be ready by stocking up on these items
Common Kitchen Terms

Common Kitchen Terms

Get up to speed with those fancy cooking terms

Posted on

Nov 3 Weekly Meal Plan

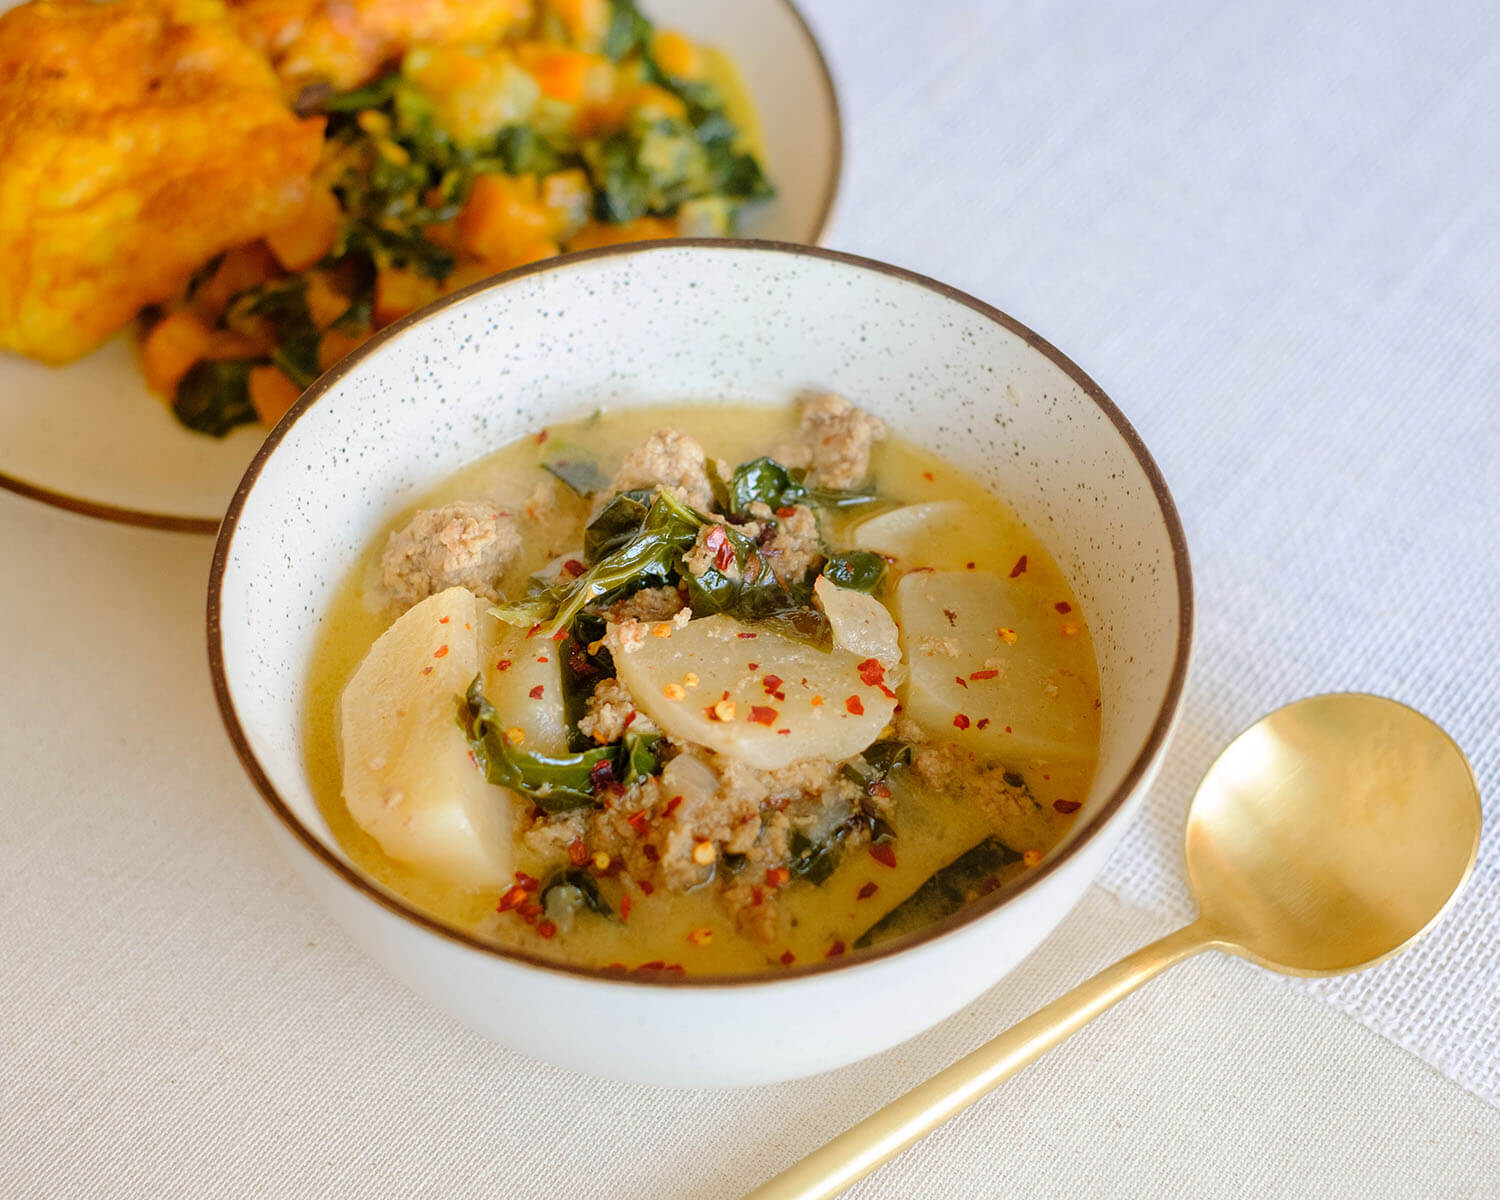
turkey toscana soup

Learn to Use Our Meal Plan Tool

Discover how to simplify your meal planning process!

Welcome aboard if you’re new! Our meal planning tool is your personalized meal prep assistant –  you can tweak your serving sizes or skip some recipe options, it’s all in your hands! Our meal plans are meant to be a guide, so feel free to use all recipes or just a few to get you started!  Click on each recipe to learn more prep tips. Enjoy the meals at your pleasure, but here’s an example of how we plan out the meals during the week:

BreakfastLunchDinner
Mon

Egg Deli Roll UpsSalmon Salad Stuffed AvocadoRosemary Chicken and Potatoes
TuesApple Muffin BarTurkey Toscana SoupIsland Spiced Pork
WedEgg Deli Roll UpsSalmon Salad Stuffed AvocadoRosemary Chicken and Potatoes
ThursApple Muffin BarTurkey Toscana SoupIsland Spiced Pork
The meal plans are designed to serve one person and account for 4 days. This is so that you can enjoy it at it’s best quality and also allows room for flexibility just in case you get takeout or eat out during the week.

Set Your Pace

  • If you’re a beginner at meal prep: Be prepared to set aside 2-3 hours. Once mise en place is complete, all of these recipes can be completed one by one.
  • If you’re a meal prep pro, use the sequenced steps below: These steps give you the flexibility to cook items simultaneously in a sequence of events.
  • Be sure to set timers and check on food items to avoid overcooking. Sequencing will save you time and meal prep can be done in 1-2 hours.

Meal Prep Run Down

Chopping and Prepping Ingredients:

  1. Gather all ingredients, spices, tools, and equipment, and review the recipes in advance to make meal prep easy and stress-free.

Cooking Phase 1: Oven Recipes:

  1. Apple Muffin Bar: Preheat the oven to 400°F, mix banana and egg until smooth, stir in oats and baking powder, pour into a greased dish, top with diced apple, and bake 15–20 minutes until cooked through.
  2. Rosemary Chicken: Preheat the oven to 400°F, cube the potatoes and artichokes, toss them with chicken, seasonings, and olive oil in a baking dish, bake 35–40 minutes until chicken reaches 165°F, then serve with arugula salad and lemon vinaigrette.
  3. Island Spiced Pork: Preheat the oven to 400°F, roast butternut squash, apples, and red onions with olive oil and seasonings for 15–20 minutes, marinate and sear the pork tenderloin, finish cooking it in the oven until 145°F, let rest, and serve with the roasted vegetables.

Cooking Phase 2: Stove Top Recipes:

  1. Egg Deli Roll Ups: Sauté bell peppers in oil until soft, stir in eggs until set, then place eggs on layered turkey slices, fold, and secure with a toothpick.
  2. Turkey Toscana Soup: Sauté onions and garlic in oil, brown the turkey, then add broth, collard greens, potatoes, and seasonings, simmer until tender, and finish with coconut milk and red pepper flakes.

Final Steps:

  1. Salmon Stuffed Avocado: Dice the onions, peppers, and apple, chop the green onions, mix with salmon, mustard, mayo, sriracha, and seasonings, then fill avocado halves with the salad and serve with celery sticks.
  2. Storage: Once all the dishes are fully cooked, plate everything into individual containers. Allow them to cool to room temperature before placing them in the refrigerator for storage. This will keep your meals fresh and ready to enjoy throughout the week.

If you’re sequencing your meal prep, be sure to keep an eye on everything! Make sure food is kept refrigerated under 40F degrees until ready to eat.

Assembly Tips

  • Evenly divide meals according to the serving size
  • Let all items cool before placing them in the refrigerator
  • Keep all items refrigerated under 40°F until ready to eat or reheat
  • Breakfast: Both meals can be reheated in the microwave
  • Lunch: Salmon stuffed avocado can be served chilled. Both meals can be reheated quickly in the microwave.
  • Dinner: Both meals can be reheated quickly in the microwave.

Extra Flavors and Substitutions

  • Breakfast Egg Deli Roll Ups: Serve with a side of roasted sweet potato or a small fresh fruit salad for a balanced breakfast or lunch.
  • Apple Muffin Bars: Use pears instead of apples, or add cinnamon and walnuts for added flavor and crunch.
  • Salmon Stuffed Avocado: Use canned tuna instead of salmon, or swap the green apple for diced mango for a tropical twist.
  • Turkey Toscana Soup: Pair with a slice of whole-grain bread or a side salad for a complete meal.
  • Baked Rosemary Chicken: Swap artichokes for asparagus or green beans, and use thyme instead of rosemary for a different flavor profile.
  • Island Spiced Pork: Swap pork for chicken breast or turkey tenderloin, and swap red onion for shallots if you prefer a milder taste.

Extra Leftover Ingredients Not Used

  • Protein: Freeze any uncooked meats and save for a later recipe, or you can cook the full amount, and freeze the portion that you do not eat, and save for later use.
  • Fruit: Use leftover fruit in smoothies, on top of yogurt, or with your cereal
  • Veggies: Freeze any leftover veggies for later use. Use leftover herbs in omelets or other dishes for the weekend

Helpful Resources

Showcase 1

Supplemental
Snacks

Snacks to fuel you throughout the day

Showcase 2

Kitchen
Equipment

Recommended Kitchen Tools & Cooking Utensils

Showcase 3

Grocery Pantry
Staples

Always be ready by stocking up on these items

Common Kitchen Terms

Common Kitchen Terms

Get up to speed with those fancy cooking terms

Posted on

Oct 27 Weekly Meal Plan

Learn to Use Our Meal Plan Tool

Discover how to simplify your meal planning process!

Welcome aboard if you’re new! Our meal planning tool is your personalized meal prep assistant –  you can tweak your serving sizes or skip some recipe options, it’s all in your hands! Our meal plans are meant to be a guide, so feel free to use all recipes or just a few to get you started!  Click on each recipe to learn more prep tips. Enjoy the meals at your pleasure, but here’s an example of how we plan out the meals during the week:

BreakfastLunchDinner
Mon

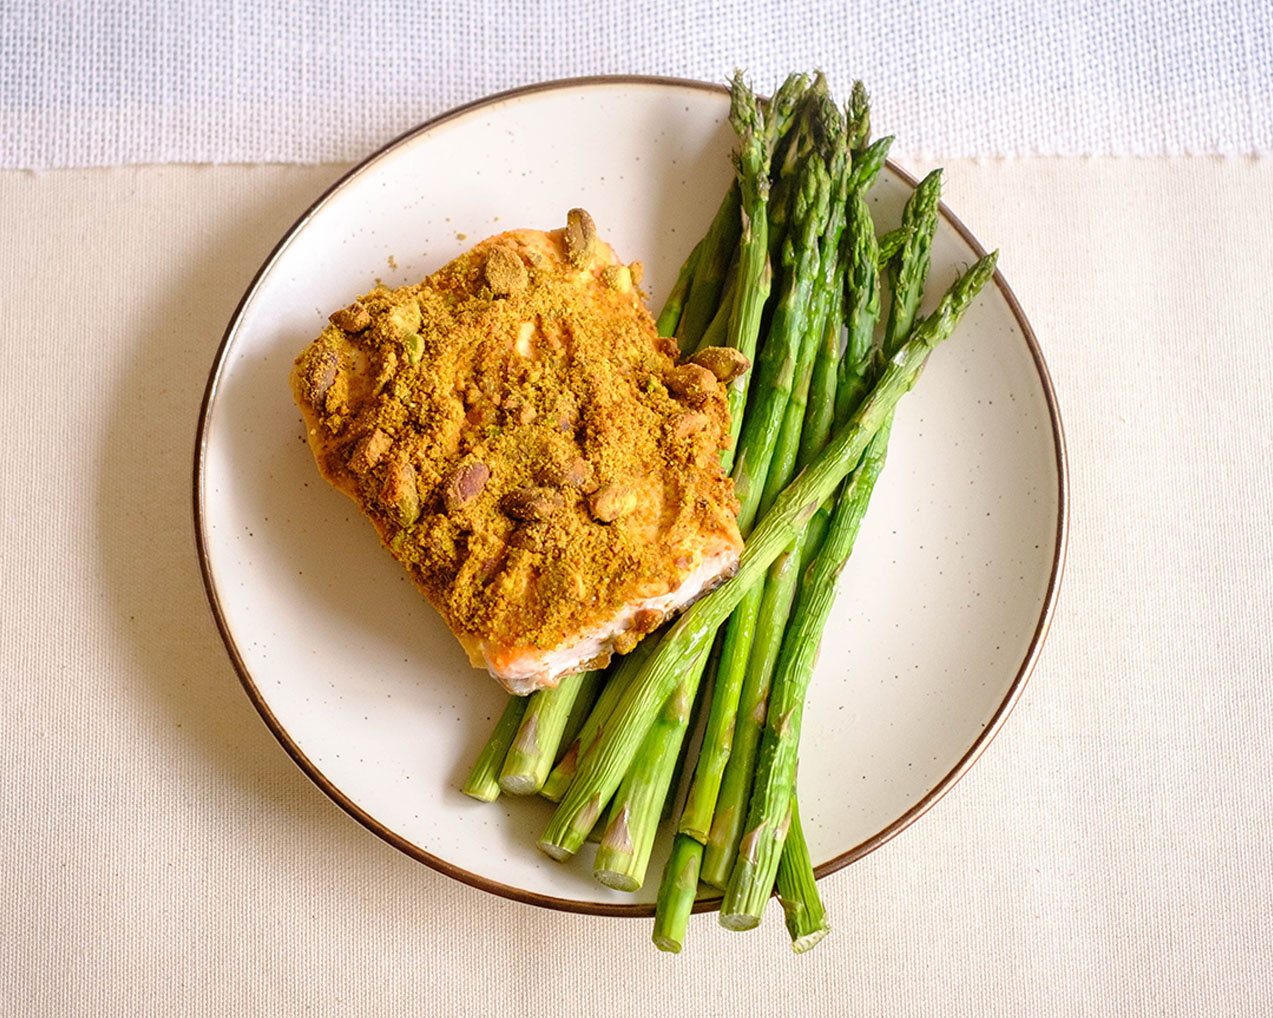
Egg Stuffed PeppersHarissa Chicken TendersPistachio Crusted Salmon
TuesPomegranate CrispHot and Sour SoupHarissa Beef Stew
WedEgg Stuffed PeppersHarissa Chicken TendersPistachio Crusted Salmon
ThursPomegranate CrispHot and Sour SoupHarissa Beef Stew
The meal plans are designed to serve one person and account for 4 days. This is so that you can enjoy it at it’s best quality and also allows room for flexibility just in case you get takeout or eat out during the week.

Set Your Pace

  • If you’re a beginner at meal prep: Be prepared to set aside 2-3 hours. Once mise en place is complete, all of these recipes can be completed one by one.
  • If you’re a meal prep pro, use the sequenced steps below: These steps give you the flexibility to cook items simultaneously in a sequence of events.
  • Be sure to set timers and check on food items to avoid overcooking. Sequencing will save you time and meal prep can be done in 1-2 hours.

Meal Prep Run Down

Chopping and Prepping Ingredients:

  1. Collect all ingredients, spices, tools, and equipment, and review the recipes beforehand to ensure meal prep goes smoothly and stress-free.

Cooking Phase 1: Instant Pot and Oven Recipes:

  1. Harissa Beef Stew: Peel and cube turnips, layer beef in a pot with chicken broth, harissa, bay leaf, salt, onions, garlic, carrots, turnips, and bell peppers, then cook in an Instant Pot on medium for 45 minutes (or slow cooker on high 4–6 hours) before naturally releasing the steam.
  2. Egg Stuffed Peppers: Halve and deseed bell peppers, crack an egg into each, bake 12–15 minutes until set, then top with harissa, pistachio pesto, and avocado slices.
  3. Pomegranate Crisp: Grease a baking dish, toss thinly sliced apple and pear with orange juice and zest, sugar, cinnamon, cornstarch, and pomegranate seeds, top with a crumbly oat-butter streusel, bake 25–30 minutes until golden, and serve warm with pomegranate seeds and honey.
  4. Harissa Chicken Tenders: Toss peeled and diced turnips with chicken, harissa, seasonings, and olive oil, bake 20–25 minutes until chicken reaches 165°F, then serve with pomegranate seeds and pepperoncini.
  5. Pistachio Crusted Salmon and Asparagus: Chop pistachios, spread Dijon on salmon, season salmon and asparagus with garlic and salt, coat salmon with pistachios, drizzle with olive oil, bake 12–15 minutes until 145°F, and finish with fresh lemon juice.

Cooking Phase 2: Stove Top Recipes:

  1. Hot and Sour Soup: Sauté onions, garlic, and mushrooms in oil, add chicken stock, soy sauce, vinegar, and brown sugar, stir in whisked eggs to form ribbons, simmer 2–3 minutes, then finish with sesame oil, red pepper flakes, and green onions.

Final Steps:

  1. Storage: Once all the dishes are fully cooked, plate everything into individual containers. Allow them to cool to room temperature before placing them in the refrigerator for storage. This will keep your meals fresh and ready to enjoy throughout the week.

If you’re sequencing your meal prep, be sure to keep an eye on everything! Make sure food is kept refrigerated under 40F degrees until ready to eat.

Assembly Tips

  • Evenly divide meals according to the serving size
  • Let all items cool before placing them in the refrigerator
  • Keep all items refrigerated under 40°F until ready to eat or reheat
  • Breakfast: Both meals can be reheated in the microwave
  • Lunch: Both meals can be reheated quickly in the microwave.
  • Dinner: Both meals can be reheated quickly in the microwave.

Extra Flavors and Substitutions

  • Egg Stuffed Peppers: Serve with a side of quinoa or whole-grain toast to make it a complete breakfast or light lunch.
  • Pomegranate Crisp: Serve alongside Greek yogurt for added protein in meal prep portions.
  • Baked Harissa Chicken Tenders: Add roasted sweet potatoes or a simple green salad for a balanced meal prep bowl.
  • Hot and Sour Soup: Pair with a small side of brown rice or veggie spring rolls for a quick, light lunch.
  • Baked Pistachio Crusted Salmon: Pair with roasted baby potatoes or cauliflower rice for a complete meal prep plate.
  • Harissa Beef Stew: Pair with a side of couscous or brown rice to soak up the flavorful broth.

Extra Leftover Ingredients Not Used

  • Protein: Freeze any uncooked meats and save for a later recipe, or you can cook the full amount, and freeze the portion that you do not eat, and save for later use.
  • Fruit: Use leftover fruit in smoothies, on top of yogurt, or with your cereal
  • Veggies: Freeze any leftover veggies for later use. Use leftover herbs in omelets or other dishes for the weekend

Helpful Resources

Showcase 1

Supplemental
Snacks

Snacks to fuel you throughout the day

Showcase 2

Kitchen
Equipment

Recommended Kitchen Tools & Cooking Utensils

Showcase 3

Grocery Pantry
Staples

Always be ready by stocking up on these items

Common Kitchen Terms

Common Kitchen Terms

Get up to speed with those fancy cooking terms
Posted on Leave a comment

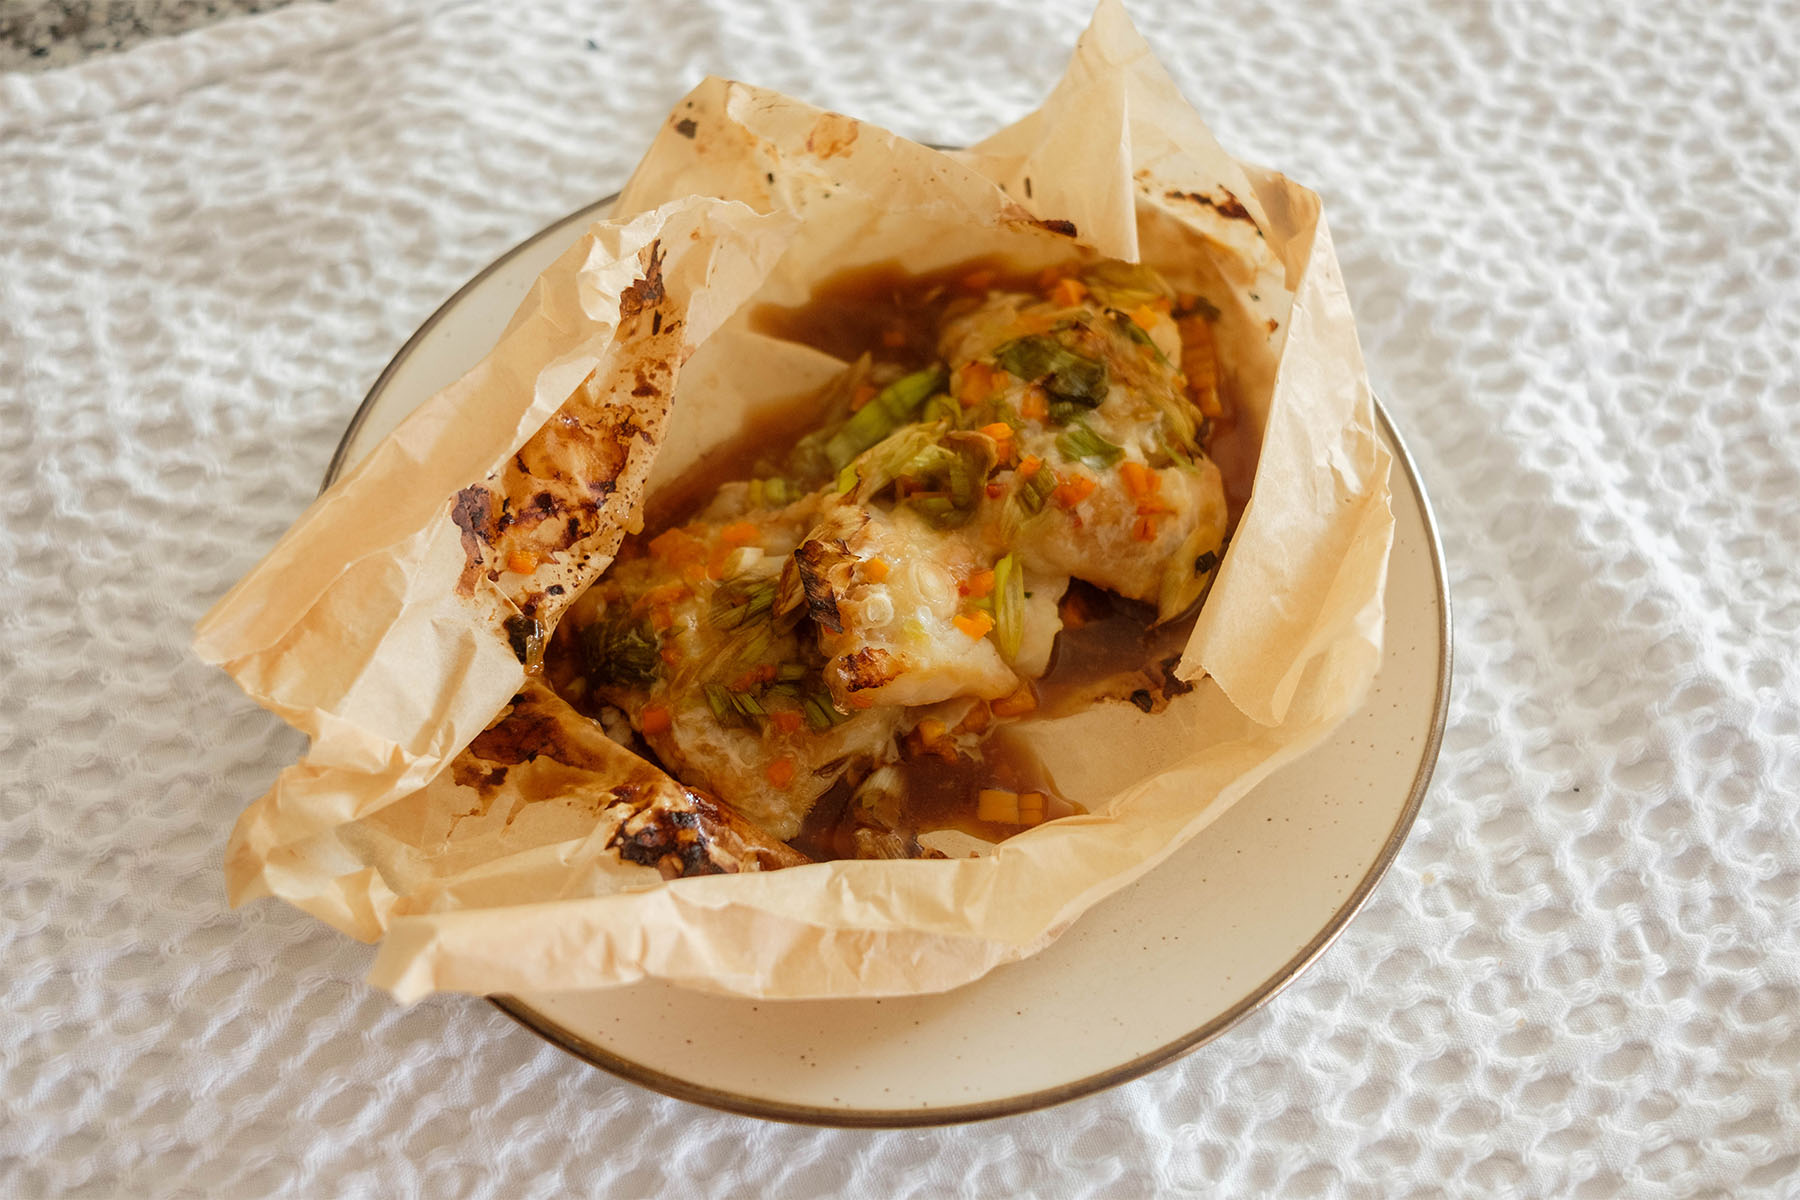
Air Fryer Asian Style Fish En Papillote

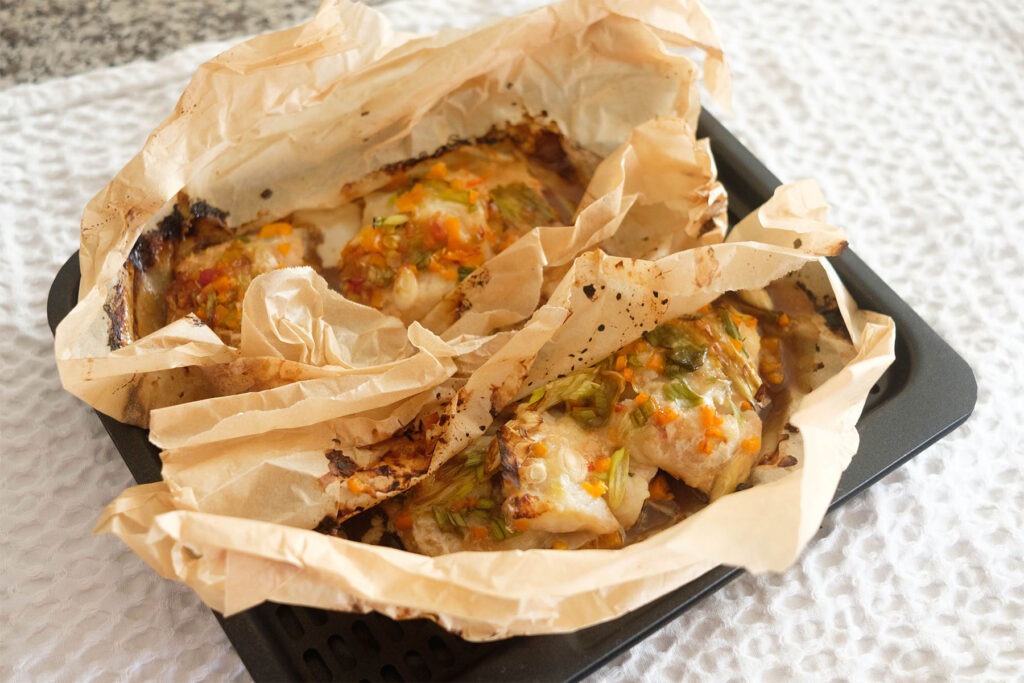
fish wrapped in parchment paper

Hey there, flavor seekers and meal prep newbies! If you’ve been craving something healthy, light, and totally bursting with flavor but don’t want to spend hours in the kitchen, this Air Fryer Fish en Papillote is your new go-to recipe. “En papillote” (pronounced ahn pah-pee-YOHT) might sound fancy, but it simply means cooking your food in parchment paper. The parchment traps steam, infusing the fish with all the aromatic goodness of your ingredients so you get a perfectly tender, flaky fillet every time without any mess or stress.

This post may contain affiliate links. Read the disclosure policy.

Calories: 212kcal | Carbohydrates: 4g | Protein: 28g | Fat: 8g | Saturated Fat: 1g | Polyunsaturated Fat: 3g | Monounsaturated Fat: 3g | Cholesterol: 61mg | Sodium: 1090mg | Potassium: 717mg | Fiber: 1g | Sugar: 2g | Vitamin A: 1058IU | Vitamin C: 40mg | Calcium: 38mg | Iron: 1mg

fish wrapped in parchment paper

Air Fryer Asian Style Fish en Papillote

A quick and easy air fryer fish en papillote recipe that’s healthy, flavorful, and perfect for beginner-friendly meal prep.
No ratings yet
Prep Time 5 minutes
Cook Time 10 minutes
Course dinner, Main Course, main dish
Cuisine Asian
Servings 2
Calories 212 kcal

Equipment

  • knife
  • cutting board
  • Air Fryer

Ingredients
  

  • 10 oz cod fillets (thawed)
  • 2 tablespoons ginger paste
  • 2 mini bell peppers (finely diced)
  • 1/4 cup green onions (thinly sliced)
  • 2 tablespoons soy sauce
  • 1 tablespoon mirin rice vinegar
  • 1 tablespoon sesame oil

Instructions
 

  • Preheat your air fryer to 400°F.
  • Lay out the parchment paper sheets (13 x 15 inches each) and place each cod fillet in the upper half of the paper.
  • Coat each fillet with the ginger paste.
  • Top with diced mini bell peppers and sliced green onions.
  • Whisk together soy sauce, mirin, and sesame oil, then drizzle this savory mix over the fish.
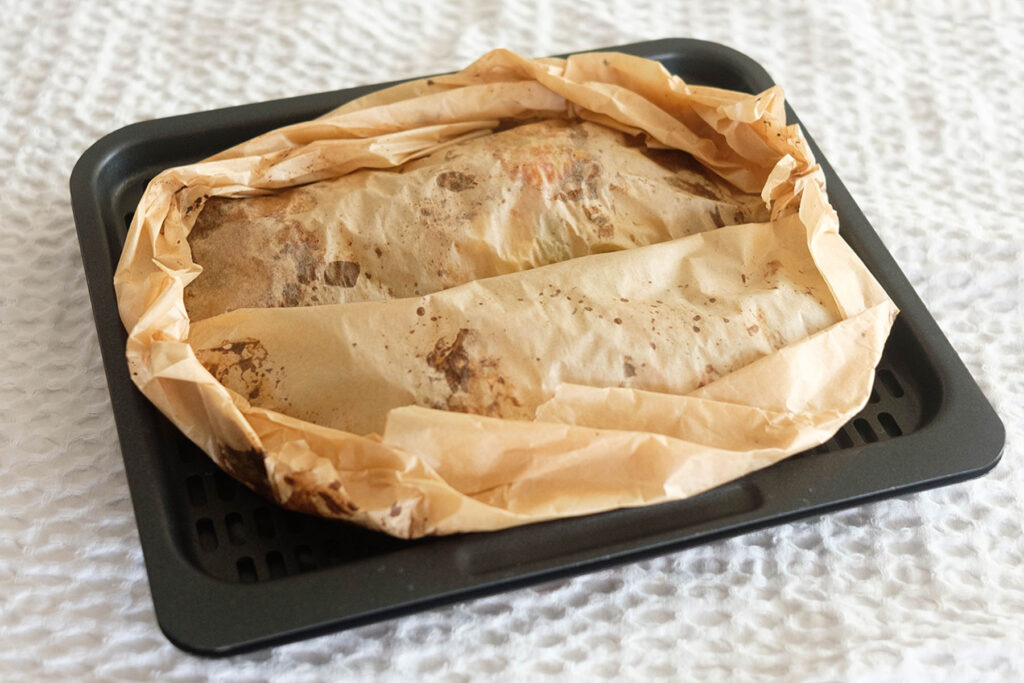
  • Fold the lower half of the parchment over the top to create a packet, then seal the edges with small overlapping folds to trap the steam inside.
  • Cook in the air fryer for about 10 minutes, or until the fish easily flakes with a fork.
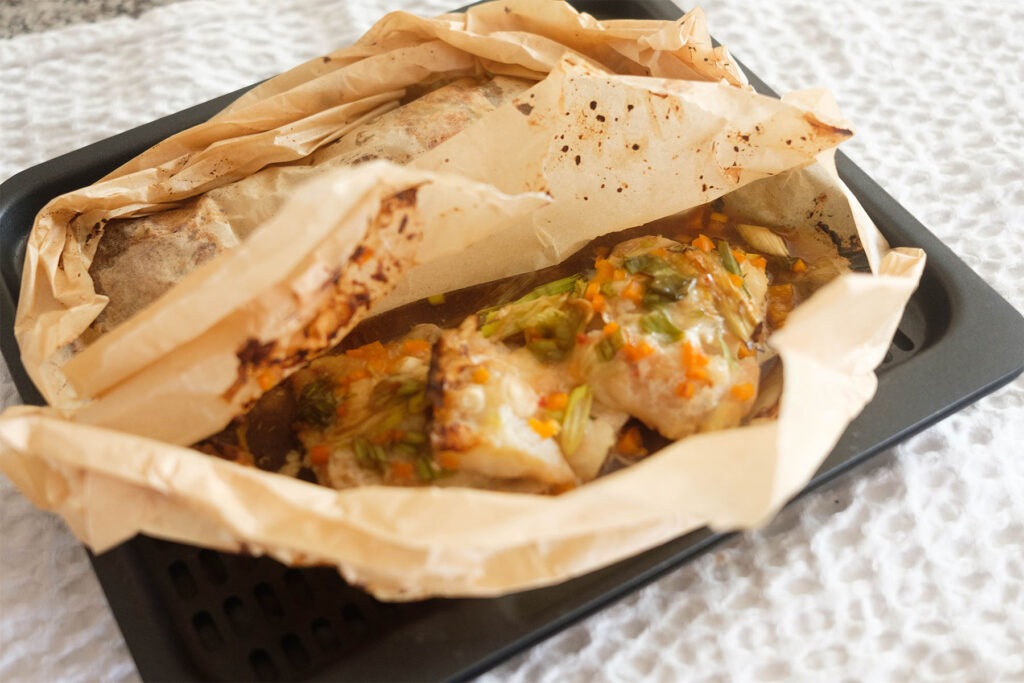
  • Carefully open the parchment (watch out for the hot steam!) and enjoy the most aromatic, flavor-packed fish you’ve ever made.

Video

Notes

Nutrition information provided is an estimate. It will vary based on cooking method and specific ingredients used. Please consult with your healthcare provider for specific dietary needs. To gain a better understanding, explore our nutrition disclaimer here.

Nutrition

Calories: 212kcalCarbohydrates: 4gProtein: 28gFat: 8gSaturated Fat: 1gPolyunsaturated Fat: 3gMonounsaturated Fat: 3gCholesterol: 61mgSodium: 1090mgPotassium: 717mgFiber: 1gSugar: 2gVitamin A: 1058IUVitamin C: 40mgCalcium: 38mgIron: 1mg

Reasons Why This Recipe Is Perfect for Your Meal Prep:

  • No Cleanup Drama: Everything cooks neatly in parchment paper. That’s right, no greasy pans, no sticky air fryer basket. Just flavor and done!
  • Bold, Balanced Flavors: The combo of soy sauce, ginger, and sesame oil gives major umami vibes with a hint of freshness from the peppers and onions.
  • Quick & Easy: From start to finish, you’re eating in 20 minutes. That’s faster than waiting for takeout!
  • Perfect for Meal Prep: Cook multiple packets at once and store them in the fridge. Just reheat in the air fryer or oven for an instant, gourmet-level lunch or dinner.
  • Foolproof for Beginners: Cod is super forgiving. If you can fold parchment paper, you can master this dish.
  • Light but Satisfying: It’s packed with protein and heart-healthy fats, making it ideal for anyone trying to eat clean without feeling deprived.
  • Customizable: Swap the veggies, add a squeeze of lime, or throw in a sprinkle of chili flakes for extra heat. You can make it your own every time!

The PrepYoSelf Newsletter

Here’s What You Need

  • Cod Fillets: Cod is a mild, flaky white fish that acts as a perfect blank canvas for bold, aromatic flavors. Its delicate texture cooks beautifully in parchment paper, staying moist and tender while absorbing all the surrounding seasonings. Because it’s lean and light, it pairs well with savory, umami-based sauces without feeling heavy.
  • Ginger Paste: Ginger brings a warm, slightly spicy note that instantly livens up the dish. Using paste instead of fresh ginger makes it beginner-friendly and ensures an even coating across the fish. It also helps to balance the richness of the sesame oil and enhances the savory depth of the soy sauce.
  • Mini Bell Peppers: These colorful peppers add a natural sweetness and crisp texture that contrast beautifully with the tender fish. They also provide visual appeal and a nutritional boost, being rich in vitamin C and antioxidants. Their mild flavor doesn’t overpower the dish, making them perfect for layering freshness and crunch.
  • Green Onions: Green onions offer a subtle onion flavor without the sharpness of raw onions. They add brightness and a fresh finish, which balances the umami sauce. The green tops also lend a nice pop of color once the fish is cooked.
  • Soy Sauce: Soy sauce is the umami backbone of this recipe. It brings saltiness, depth, and a hint of caramelized richness that complements the mild cod. It also ties together the ginger, sesame oil, and mirin for a well-rounded Asian-inspired flavor profile.
  • Mirin Rice Vinegar: Mirin adds a delicate sweetness and acidity that brightens the entire dish. It helps cut through the saltiness of the soy sauce and balances the sesame oil’s richness. Together, they create a sauce that’s both savory and light, enhancing the natural flavor of the fish.
  • Sesame Oil: Sesame oil contributes a nutty aroma and silky texture that elevates the dish from simple to restaurant-worthy. A small amount goes a long way, coating the fish and vegetables with a rich, toasty finish. It ties all the ingredients together, rounding out the flavors with warmth and depth.
fish wrapped in parchment paper

How to Meal Prep Fish en Papillote

  1. Preheat the air fryer to 400°F. While it heats up, get your parchment paper ready. This recipe uses the “en papillote” method, which means you’ll be folding the fish inside parchment packets to steam it in its own juices and flavor
  2. Lay out the parchment paper sheets. Place each piece on a flat surface. Set one cod fillet on the upper half of each sheet. This will make folding easier later
  3. Season the fish with ginger paste. Spread about 1 tablespoon of ginger paste evenly over each fillet using the back of a spoon or a brush. This adds flavor and a subtle heat to the fish
  4. Add the vegetables. Sprinkle the finely diced mini bell peppers and sliced green onions evenly over the top of each fillet. The vegetables will soften as they cook and add color and crunch
  5. Make the sauce. In a small bowl, combine the soy sauce, mirin rice vinegar, and sesame oil. Stir until well mixed. Pour the sauce evenly over the two fillets, letting it soak into the vegetables and fish
  6. Fold the parchment packets. Fold the lower half of the parchment paper up over the fish so the edges meet. Starting at one corner, make small overlapping folds all the way around the edges to seal the packet. The goal is to trap steam inside while the fish cooks—this keeps it tender and flavorful
  7. Cook in the air fryer. Place both packets in the air fryer basket, leaving some space between them for air circulation. Cook for about 10 minutes. The fish is done when it flakes easily with a fork and appears opaque in the center
  8. Serve carefully. Use tongs to remove the packets from the air fryer. Let them rest for about a minute before opening. Steam will escape quickly, so open them slowly and away from your face
  9. Plate and enjoy. Serve the fish straight from the parchment for easy cleanup, or transfer to a plate and drizzle any juices from the packet on top for extra flavor.

fish wrapped in parchment paper

Pairing Tips for Fish en Papillote

  • Proper Portioning & Storage: Divide meals into airtight containers, refrigerate up to 3 days, and reheat
  • Whole Grain Base: Pair the fish with brown rice, quinoa, jasmine rice, or farro to create a hearty, fiber-rich base that soaks up the sauce
  • Roasted or Steamed Vegetables: Add broccoli, bok choy, roasted carrots, sweet potatoes, or zucchini for color, nutrients, and texture
  • Fresh Element: Include cucumber salad, pickled vegetables, edamame, or cabbage slaw to brighten meals and provide crunch
  • Healthy Fats or Garnishes: Finish with toasted sesame seeds, cilantro, lime, sriracha, or avocado slices for flavor and healthy fats.
fish wrapped in parchment paper

Similar Recipes

ginger salmon

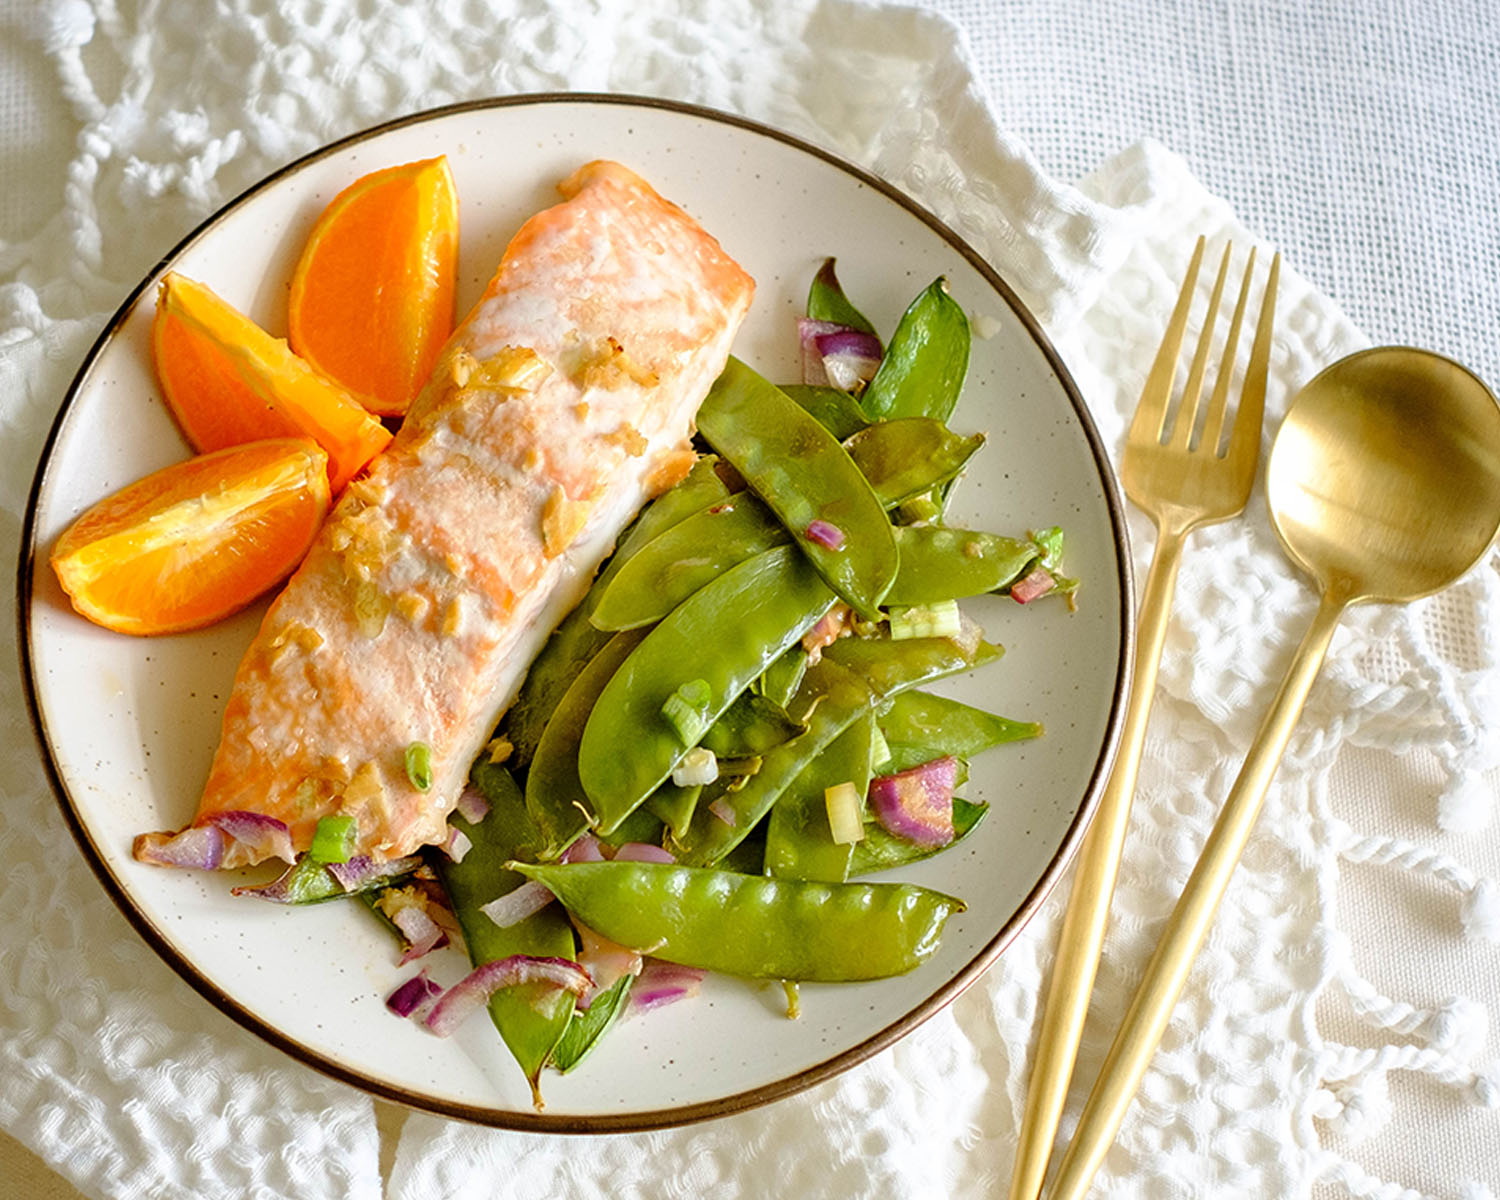
Oven Baked Orange Ginger Salmon and Snow Peas

shrimp and asparagus

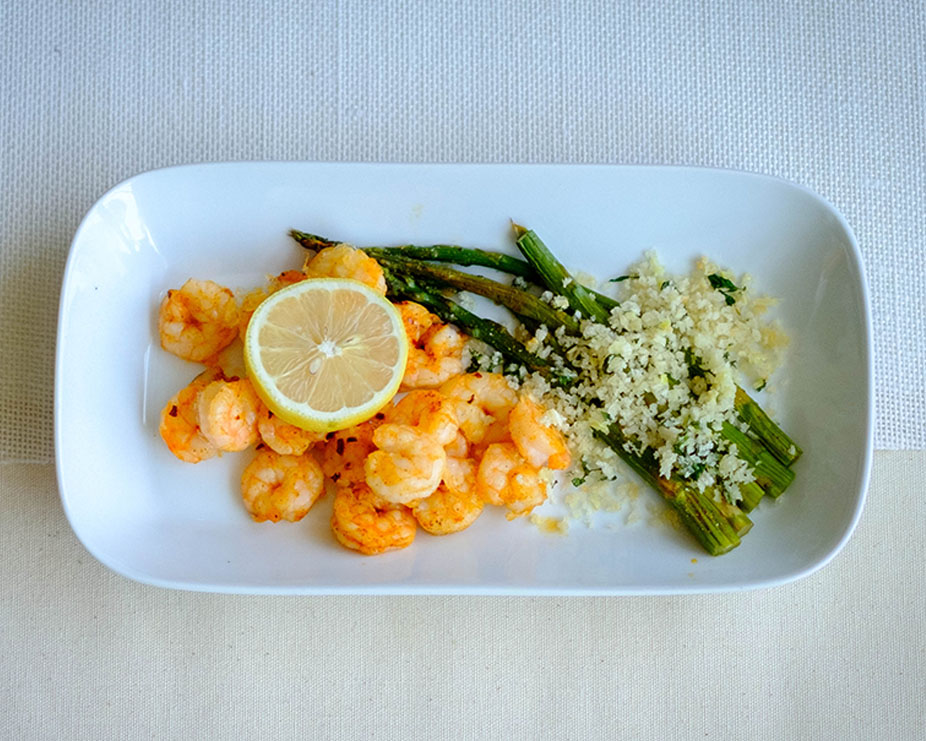
Oven Baked Shrimp with Panko Breaded Asparagus

salmon beet salad

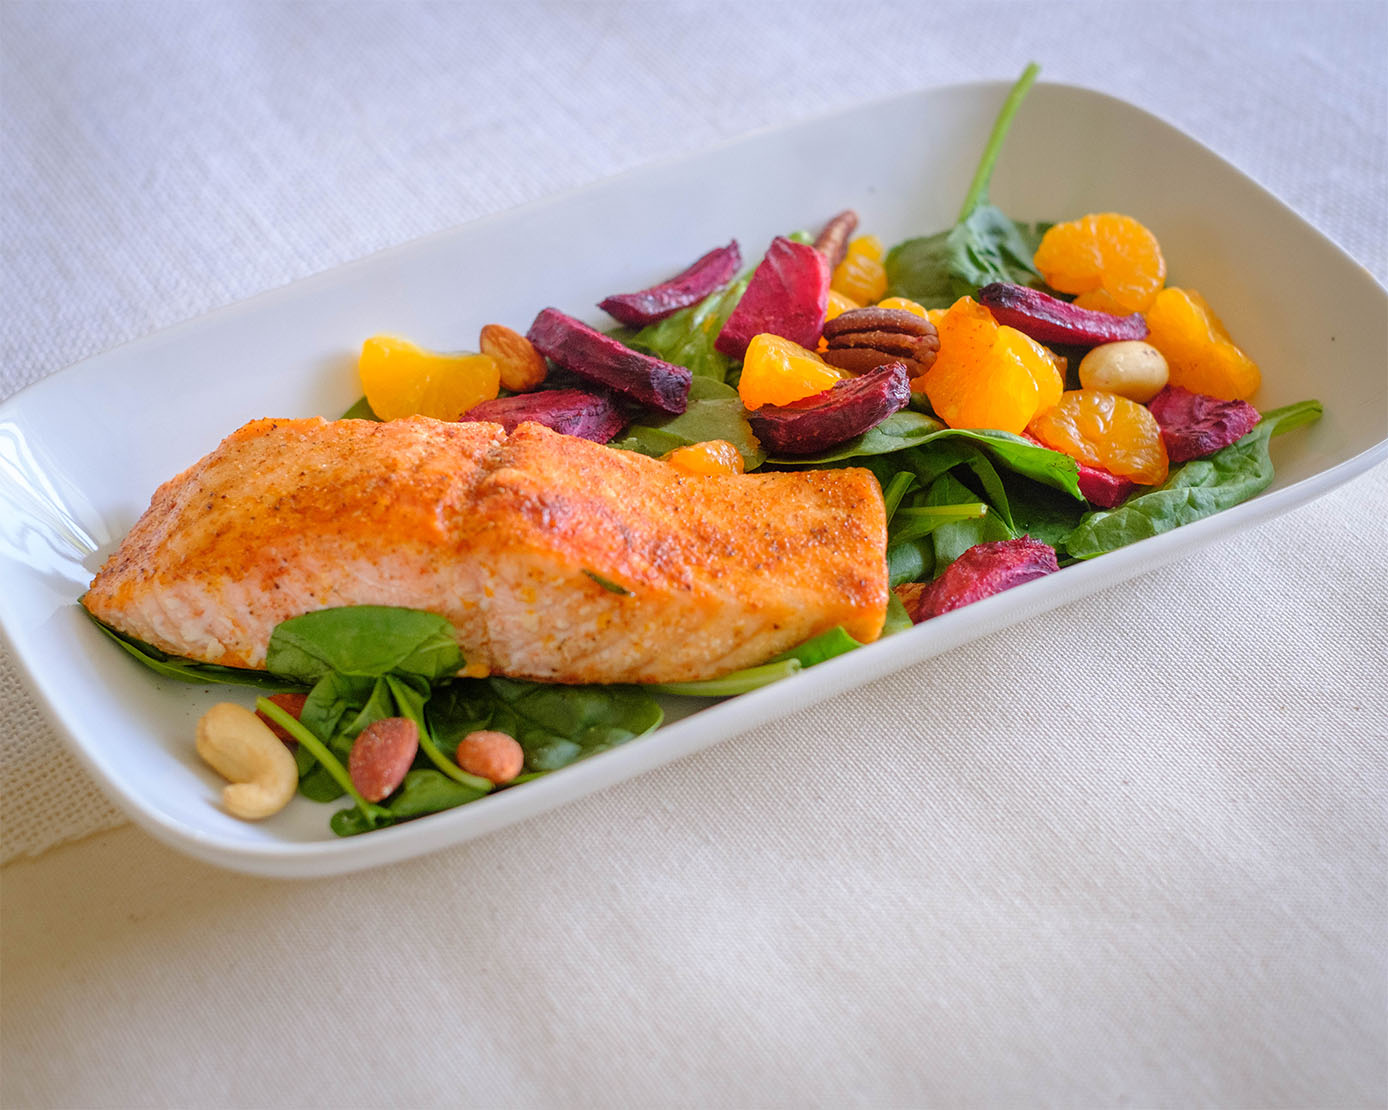
Citrus Ginger Salmon Spinach Salad with Roasted Beets

You Might Also Like

Frequently Asked Questions

Can I use other types of fish instead of cod?

Yes! Mild, flaky fish like tilapia, haddock, or halibut work well. Avoid very oily fish like salmon, which may release too much oil and change the cooking time.


Can I prepare the packets in advance?

Absolutely! Assemble the packets and store them in the fridge for up to a day. Cook them in the air fryer when ready to eat.


How do I know when the fish is done?

The fish is fully cooked when it flakes easily with a fork and appears opaque throughout. Cooking in parchment traps steam, so it will stay tender.

Posted on Leave a comment

Air Fryer Hot Honey Gochujang Chicken

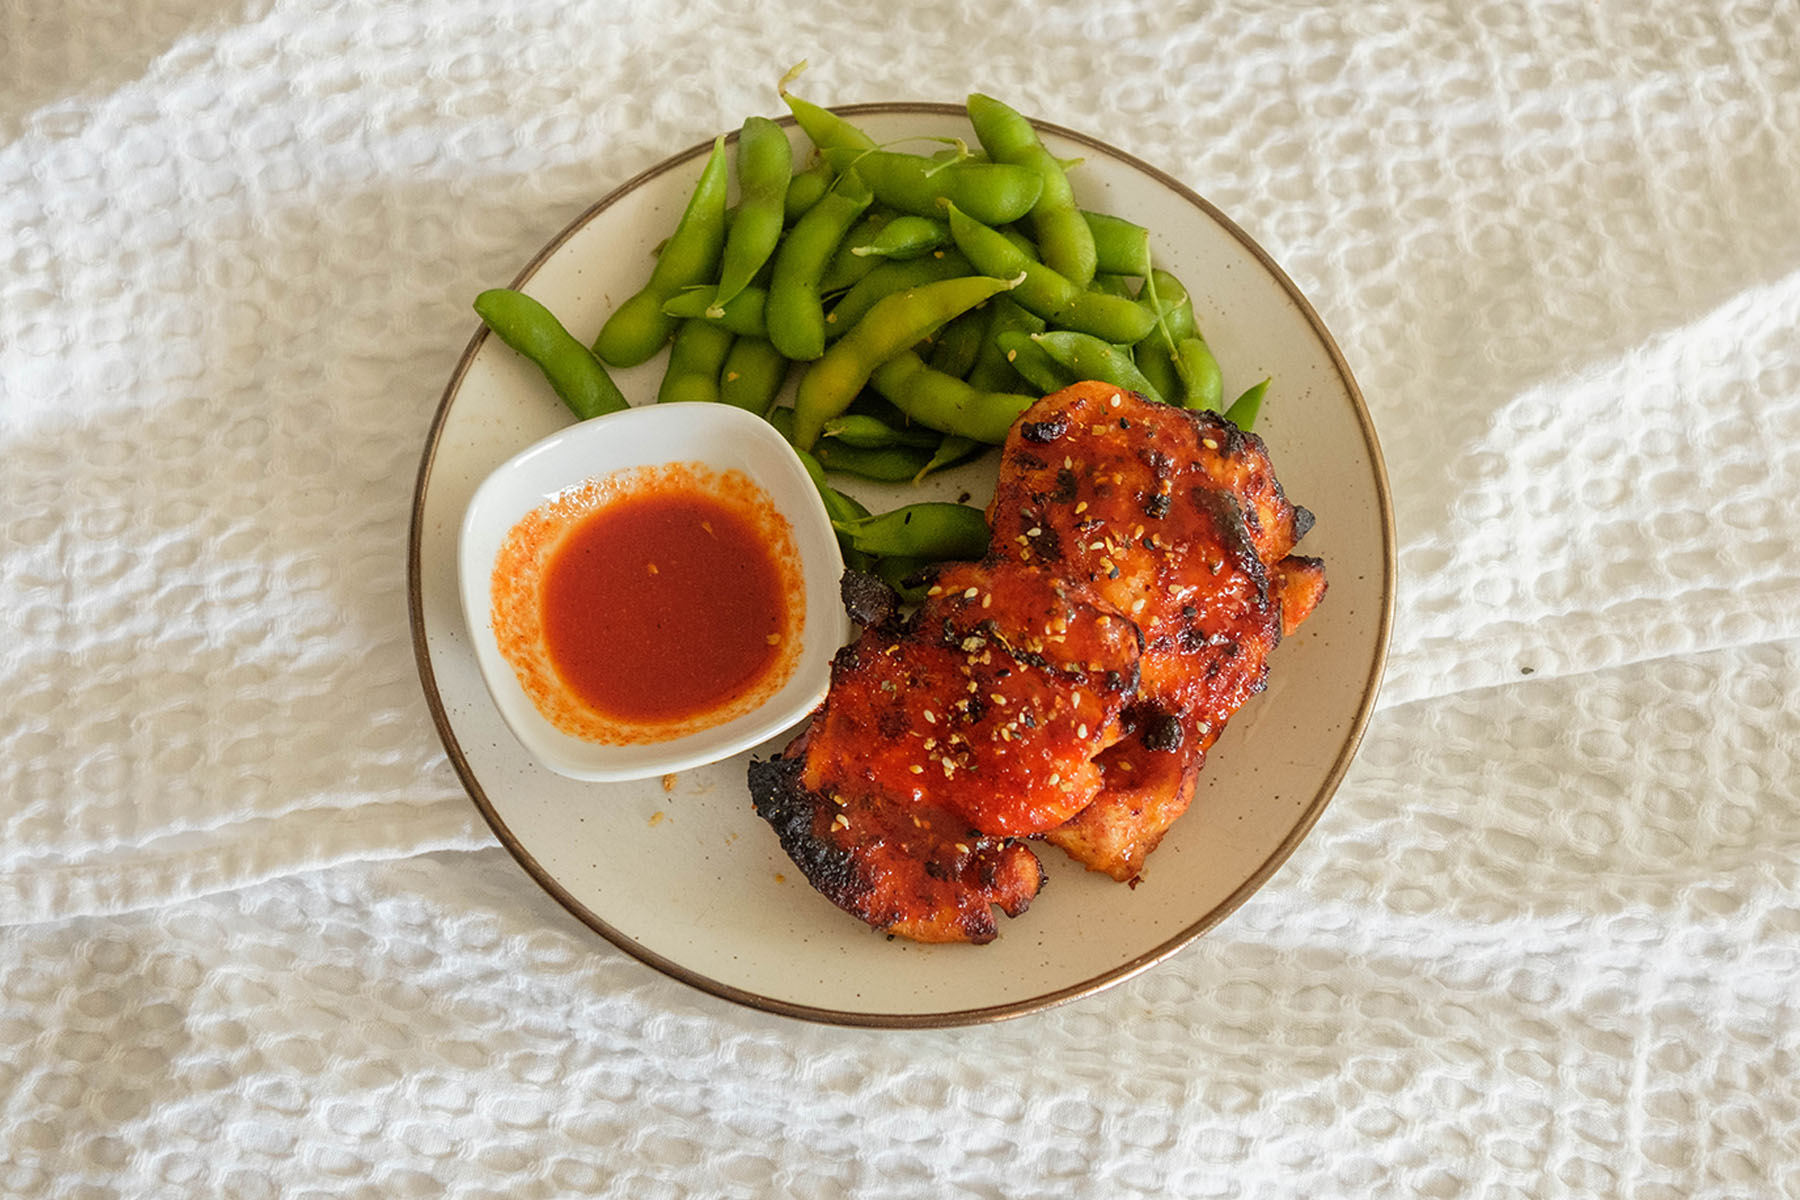
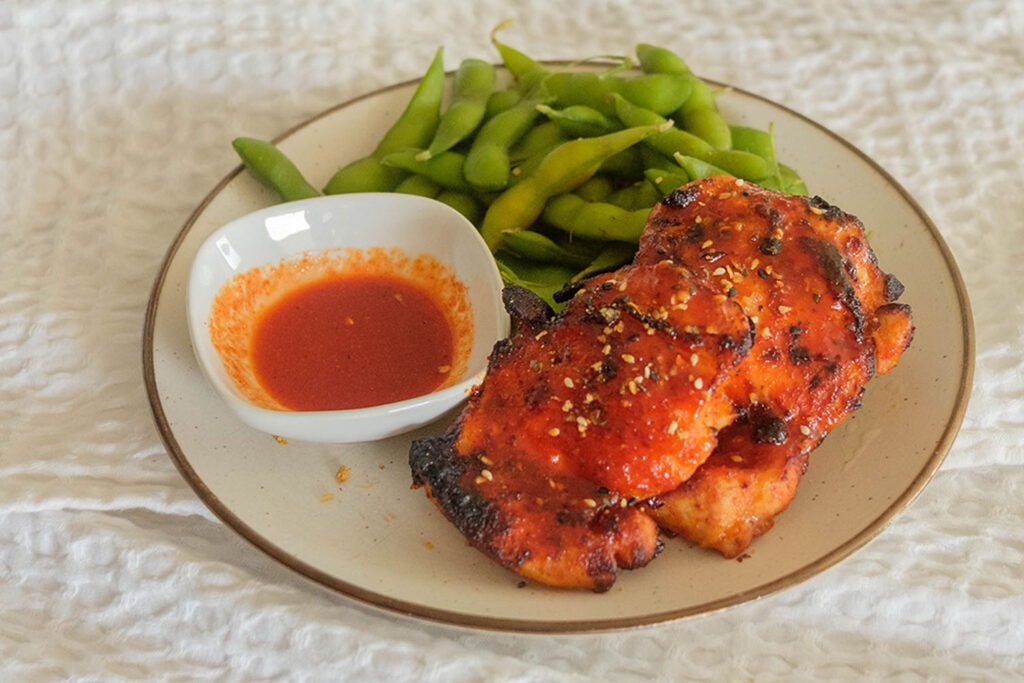
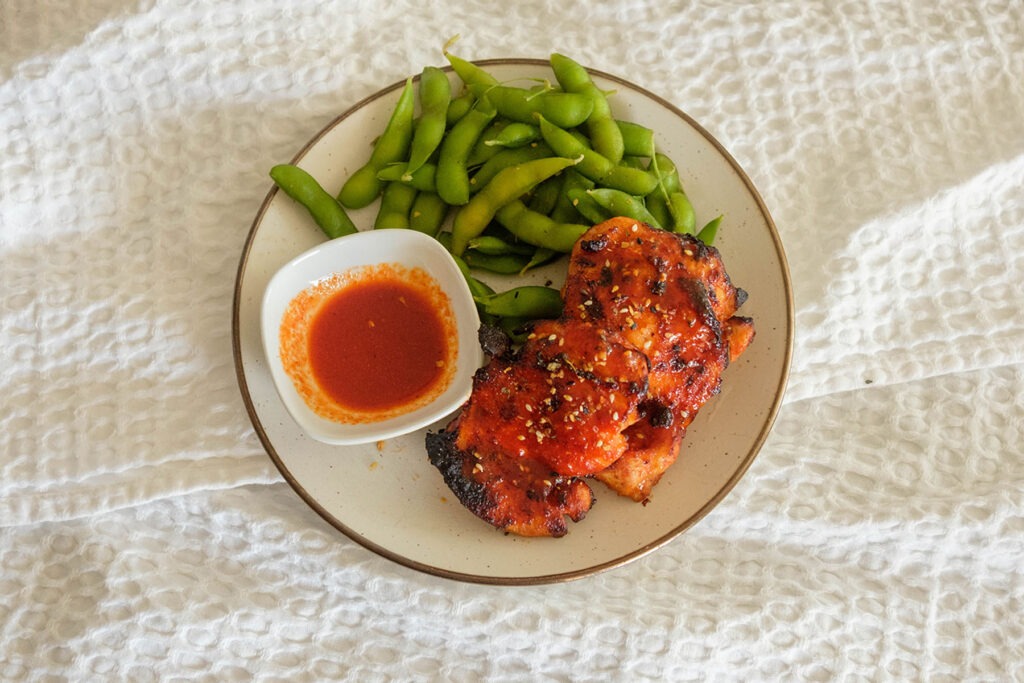
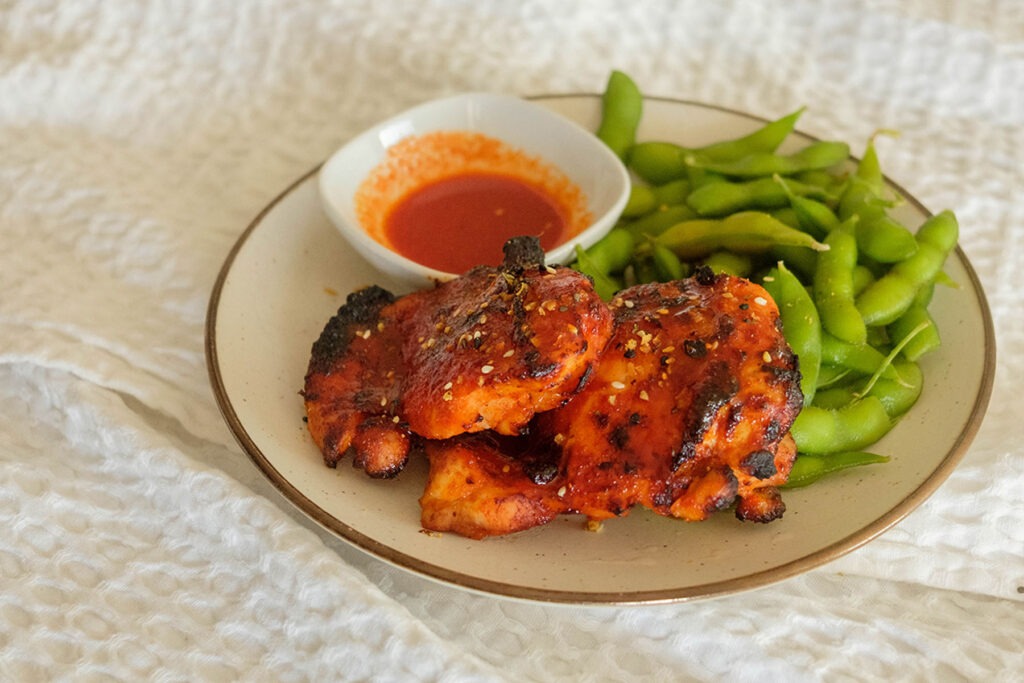
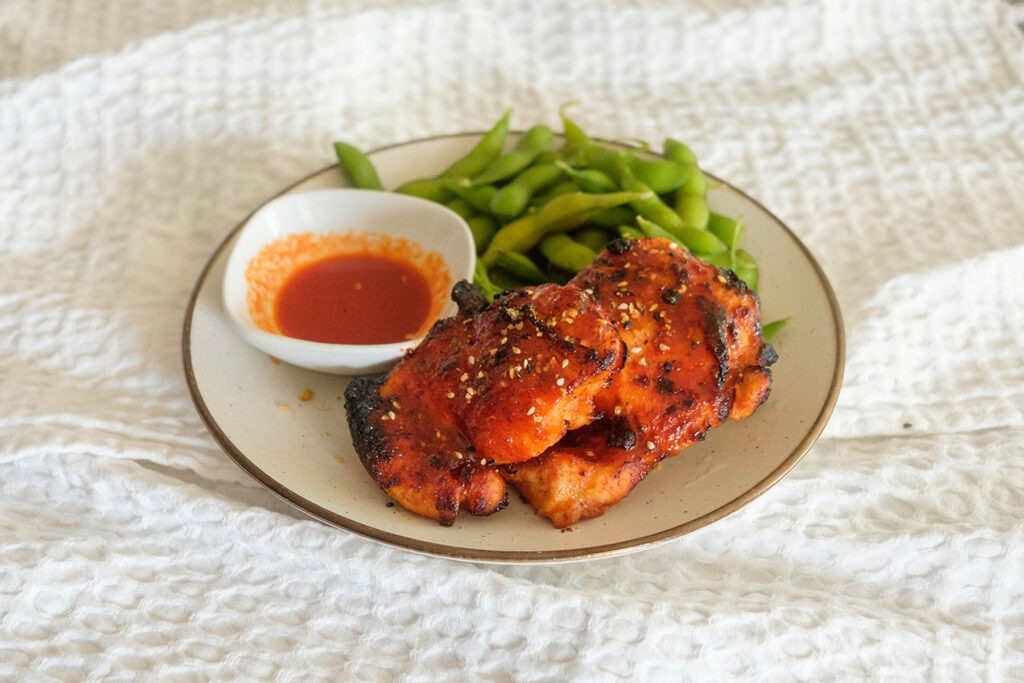
Air Fryer Chicken with edamame and hot honey gochujang sauce

Looking for a meal prep recipe that’s quick, easy, and packs a punch of flavor? You’ll need to try this Air Fryer Hot Honey Gochujang Chicken which is a  healthy take on the classic hot honey chicken with bold Asian-inspired flavors that will make your taste buds dance! Perfect for busy professionals who want tasty, nutritious meals ready to go.

This post may contain affiliate links. Please see our privacy policy for details.

Calories: 420kcal | Carbohydrates: 23g | Protein: 24g | Fat: 26g | Saturated Fat: 7g | Polyunsaturated Fat: 6g | Monounsaturated Fat: 11g | Trans Fat: 0.1g | Cholesterol: 139mg | Sodium: 1111mg | Potassium: 402mg | Fiber: 0.3g | Sugar: 19g | Vitamin A: 146IU | Vitamin C: 3mg | Calcium: 31mg | Iron: 1mg

Air Fryer Chicken with edamame and hot honey gochujang sauce

Air Fryer Chicken with edamame and hot honey gochujang sauce

Air Fryer Hot Honey Gochujang Chicken

Air Fryer Hot Honey Gochujang Chicken is a quick, flavorful meal prep favorite with sweet, spicy, and savory Asian-inspired flavors.
No ratings yet
Prep Time 5 minutes
Cook Time 10 minutes
Course Main Course
Cuisine Asian
Servings 2
Calories 420 kcal

Equipment

  • mixing bowl
  • Air Fryer

Ingredients
  

  • 10 oz boneless chicken thighs
  • 2 tablespoons gochujang sauce
  • 2 tablespoons honey
  • 1 teaspoon sesame oil
  • 1 tablespoon fish sauce
  • 1 teaspoon lime juice
  • 1/4 teaspoon garlic powder
  • 1/4 teaspoon black pepper
  • 1/4 teaspoon salt
  • 1 teaspoon sesame seeds (optional garnish)

Instructions
 

  • Make the marinade: In a mixing bowl, whisk together gochujang, honey, sesame oil, fish sauce, lime juice, garlic powder, black pepper, and salt. Set aside 2 tablespoons of this sauce for dipping later.
  • Marinate the chicken: Add the chicken thighs to the bowl and coat thoroughly in the sauce. Let it marinate for at least 10 minutes—this gives the flavors time to really shine.
  • Air fry to perfection: Place the marinated chicken on your air fryer rack. Cook at 400°F for 8–10 minutes, flipping halfway through. The result? Crispy edges, juicy inside, and a sticky, spicy-sweet glaze.
  • Serve and garnish: Sprinkle with sesame seeds if desired, and pair with your favorite sides—think steamed edamame, roasted veggies, or a simple grain bowl.

Video

Notes

Nutrition information provided is an estimate. It will vary based on cooking method and specific ingredients used. Please consult with your healthcare provider for specific dietary needs. To gain a better understanding, explore our nutrition disclaimer here

Nutrition

Calories: 420kcalCarbohydrates: 23gProtein: 24gFat: 26gSaturated Fat: 7gPolyunsaturated Fat: 6gMonounsaturated Fat: 11gTrans Fat: 0.1gCholesterol: 139mgSodium: 1111mgPotassium: 402mgFiber: 0.3gSugar: 19gVitamin A: 146IUVitamin C: 3mgCalcium: 31mgIron: 1mg

Why You’ll Love this Meal Prep Recipe

  • Quick and fuss-free: Air fryer magic cuts cooking time while delivering crispy, juicy chicken.
  • Bold flavor, minimal effort: The gochujang-honey marinade gives maximum flavor with minimal ingredients.
  • Healthy twist: Uses lean chicken thigh and just enough sauce to keep it flavorful but not overly heavy.
  • Scalable: Double or triple the recipe for multiple meals in one go.
  • Versatile for sides: Pairs with grains, greens, or veggies for a complete meal prep option.
  • Dippable sauce: Reserve a little marinade as a dipping sauce for lunches or snack-time protein hits.
  • Meal prep-friendly storage: Keeps well in the fridge for 3–4 days, making weekday lunches or dinners stress-free.

The PrepYoSelf Newsletter

Simple Ingredients You’ll Need:

  • Boneless Chicken Thigh (10 oz): Chicken thighs are juicy and tender, which makes them perfect for air frying. Unlike chicken breast, they stay moist even with high heat, so every bite is succulent and flavorful.
  • Gochujang Sauce (2 tbsp): This Korean chili paste adds a bold, umami-packed heat with a subtle sweetness. It’s the flavor powerhouse of the dish, giving it that signature kick without being overpowering.
  • Honey (2 tbsp): Honey balances out the spicy heat of the gochujang, creating that addictive sweet-spicy glaze. It also caramelizes beautifully in the air fryer, giving the chicken a slightly sticky, golden finish.
  • Sesame Oil (1 tsp): Just a hint of sesame oil adds a rich, nutty aroma that rounds out the flavor profile and brings a true Asian flair to the dish.
  • Fish Sauce (1 tbsp): Fish sauce might sound intimidating, but it’s a secret weapon here. It adds depth and umami, enhancing all the other flavors without tasting fishy.
  • Lime Juice (1 tsp): Lime juice adds a bright, acidic pop that cuts through the richness of the chicken and honey glaze. It keeps the dish fresh and vibrant.
  • Garlic Powder (¼ tsp): Garlic powder adds subtle savory notes, giving the chicken a warm and comforting background flavor.
  • Black Pepper (¼ tsp): A small amount of black pepper provides gentle heat and complexity without competing with the gochujang.
  • Salt (¼ tsp): Salt enhances all the flavors and ensures the chicken is perfectly seasoned.
  • Optional: Sesame Seeds (1 tsp): Sprinkled on top, sesame seeds add a little crunch and a nutty accent that makes each bite more interesting and visually appealing.

Air Fryer Chicken with edamame and hot honey gochujang sauce

How to Make Air Fryer Hot Honey Gochujang Chicken:

  1. Make the marinade: In a medium mixing bowl, combine the gochujang sauce, honey, sesame oil, fish sauce, lime juice, garlic powder, black pepper, and salt. Whisk everything together until smooth. Set aside about 2 tablespoons of the sauce to use later as a dipping sauce.
  2. Marinate the chicken: Add the chicken thighs to the bowl and use a spoon or your hands to coat each piece evenly with the sauce. Cover the bowl with plastic wrap or a lid and let the chicken marinate for at least 10 minutes. The longer you marinate, the more flavorful it will be.
  3. Prepare the air fryer: Preheat your air fryer to 400°F (if your model requires preheating). Lightly spray or brush the air fryer basket with cooking spray to prevent sticking.
  4. Cook the chicken: Place the marinated chicken thighs on the air fryer rack in a single layer, making sure they aren’t overlapping. Cook for 8–10 minutes, flipping the chicken halfway through so it cooks evenly on both sides. Chicken is done when it reaches an internal temperature of 165°F and the outside is slightly caramelized.
  5. Serve and garnish: Remove the chicken from the air fryer and sprinkle with sesame seeds, if using. Serve with your favorite sides like steamed edamame, roasted veggies, or rice. Use the reserved sauce as a dipping sauce for extra flavor.

Air Fryer Chicken with edamame and hot honey gochujang sauce

Pairing Tips for a Complete Meal

  • ​​Steamed or roasted veggies: Broccoli, cauliflower, or snap peas add fiber, crunch, and color to your meal prep containers
  • Whole grains: Brown rice, quinoa, or farro make a filling, nutritious base that soaks up the sauce nicely
  • Leafy greens: Baby spinach or arugula adds freshness and balances the bold flavors of the chicken
  • Edamame: High in protein and pairs beautifully with the Asian-inspired flavors of the chicken
  • Cauliflower rice: A low-carb, quick-cooking option that keeps meals light and nutrient-dense
  • Pickled vegetables: Kimchi, pickled carrots, or cucumbers add tang and help cut through the sweetness of the honey glaze.
  • Avocado slices: Creamy texture that balances the spice and adds healthy fats for satiety.

Air Fryer Chicken with edamame and hot honey gochujang sauce

Similar Recipes

chicken soup

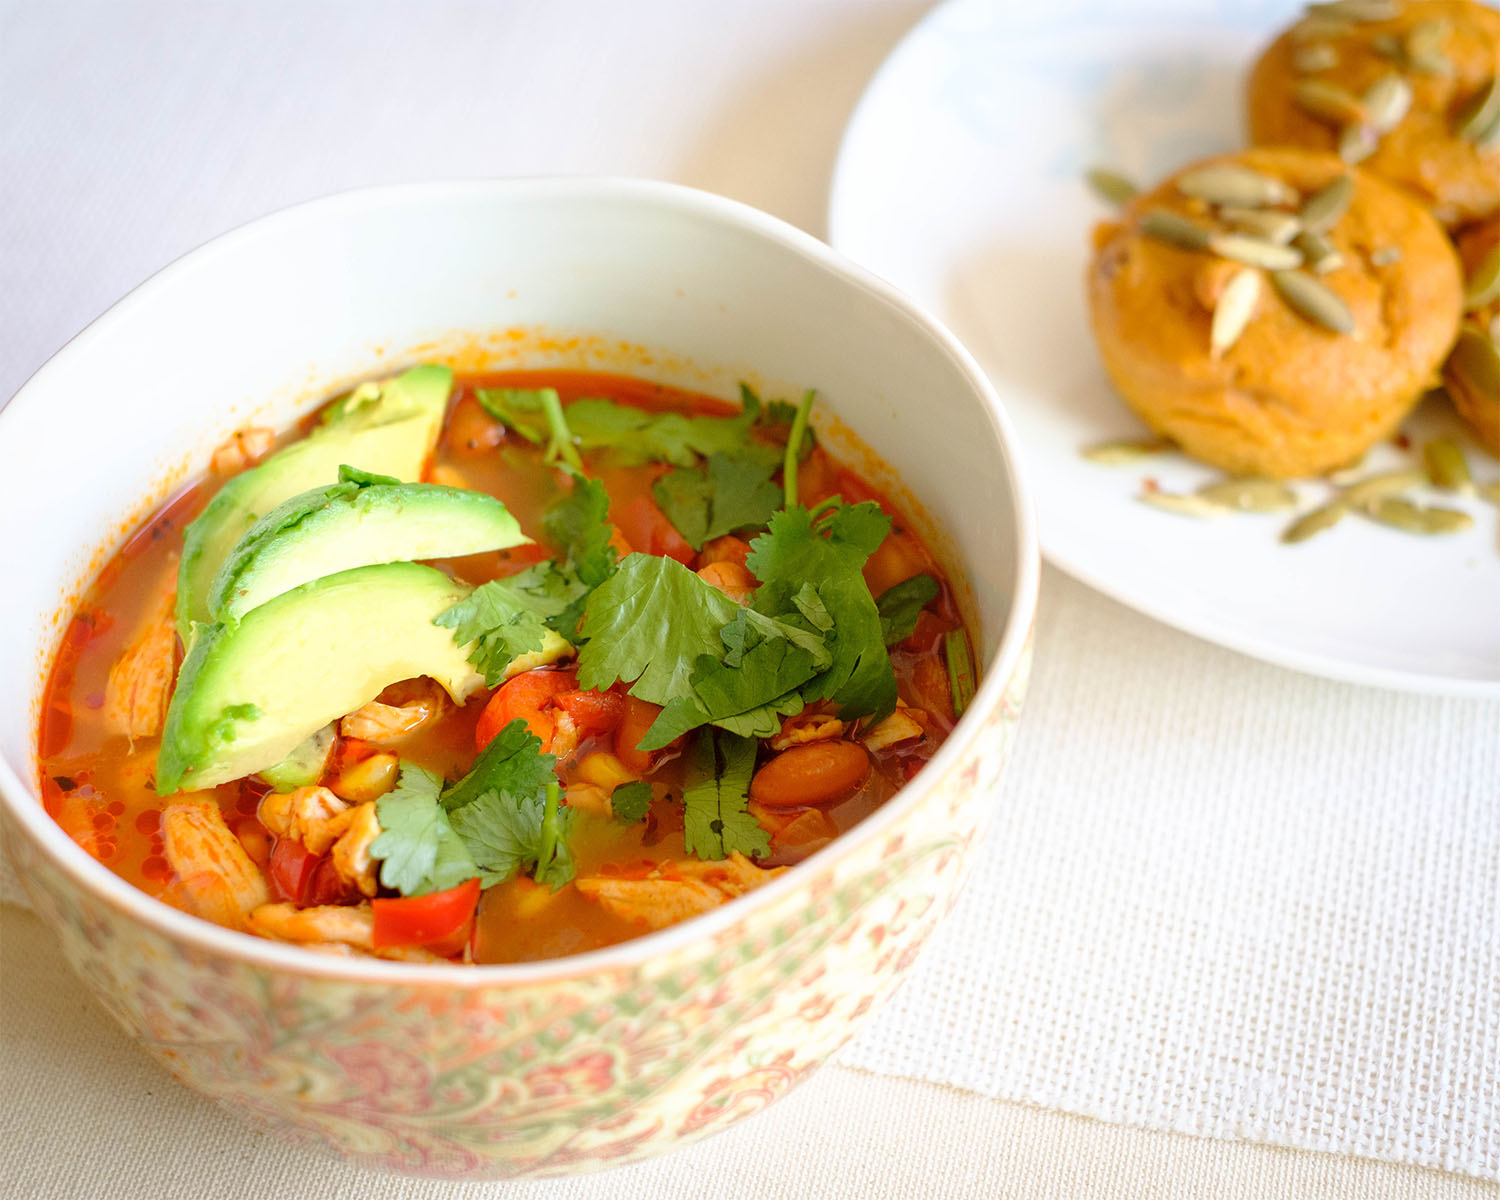
One Pot Mexican Chicken Soup

sweet potato blt

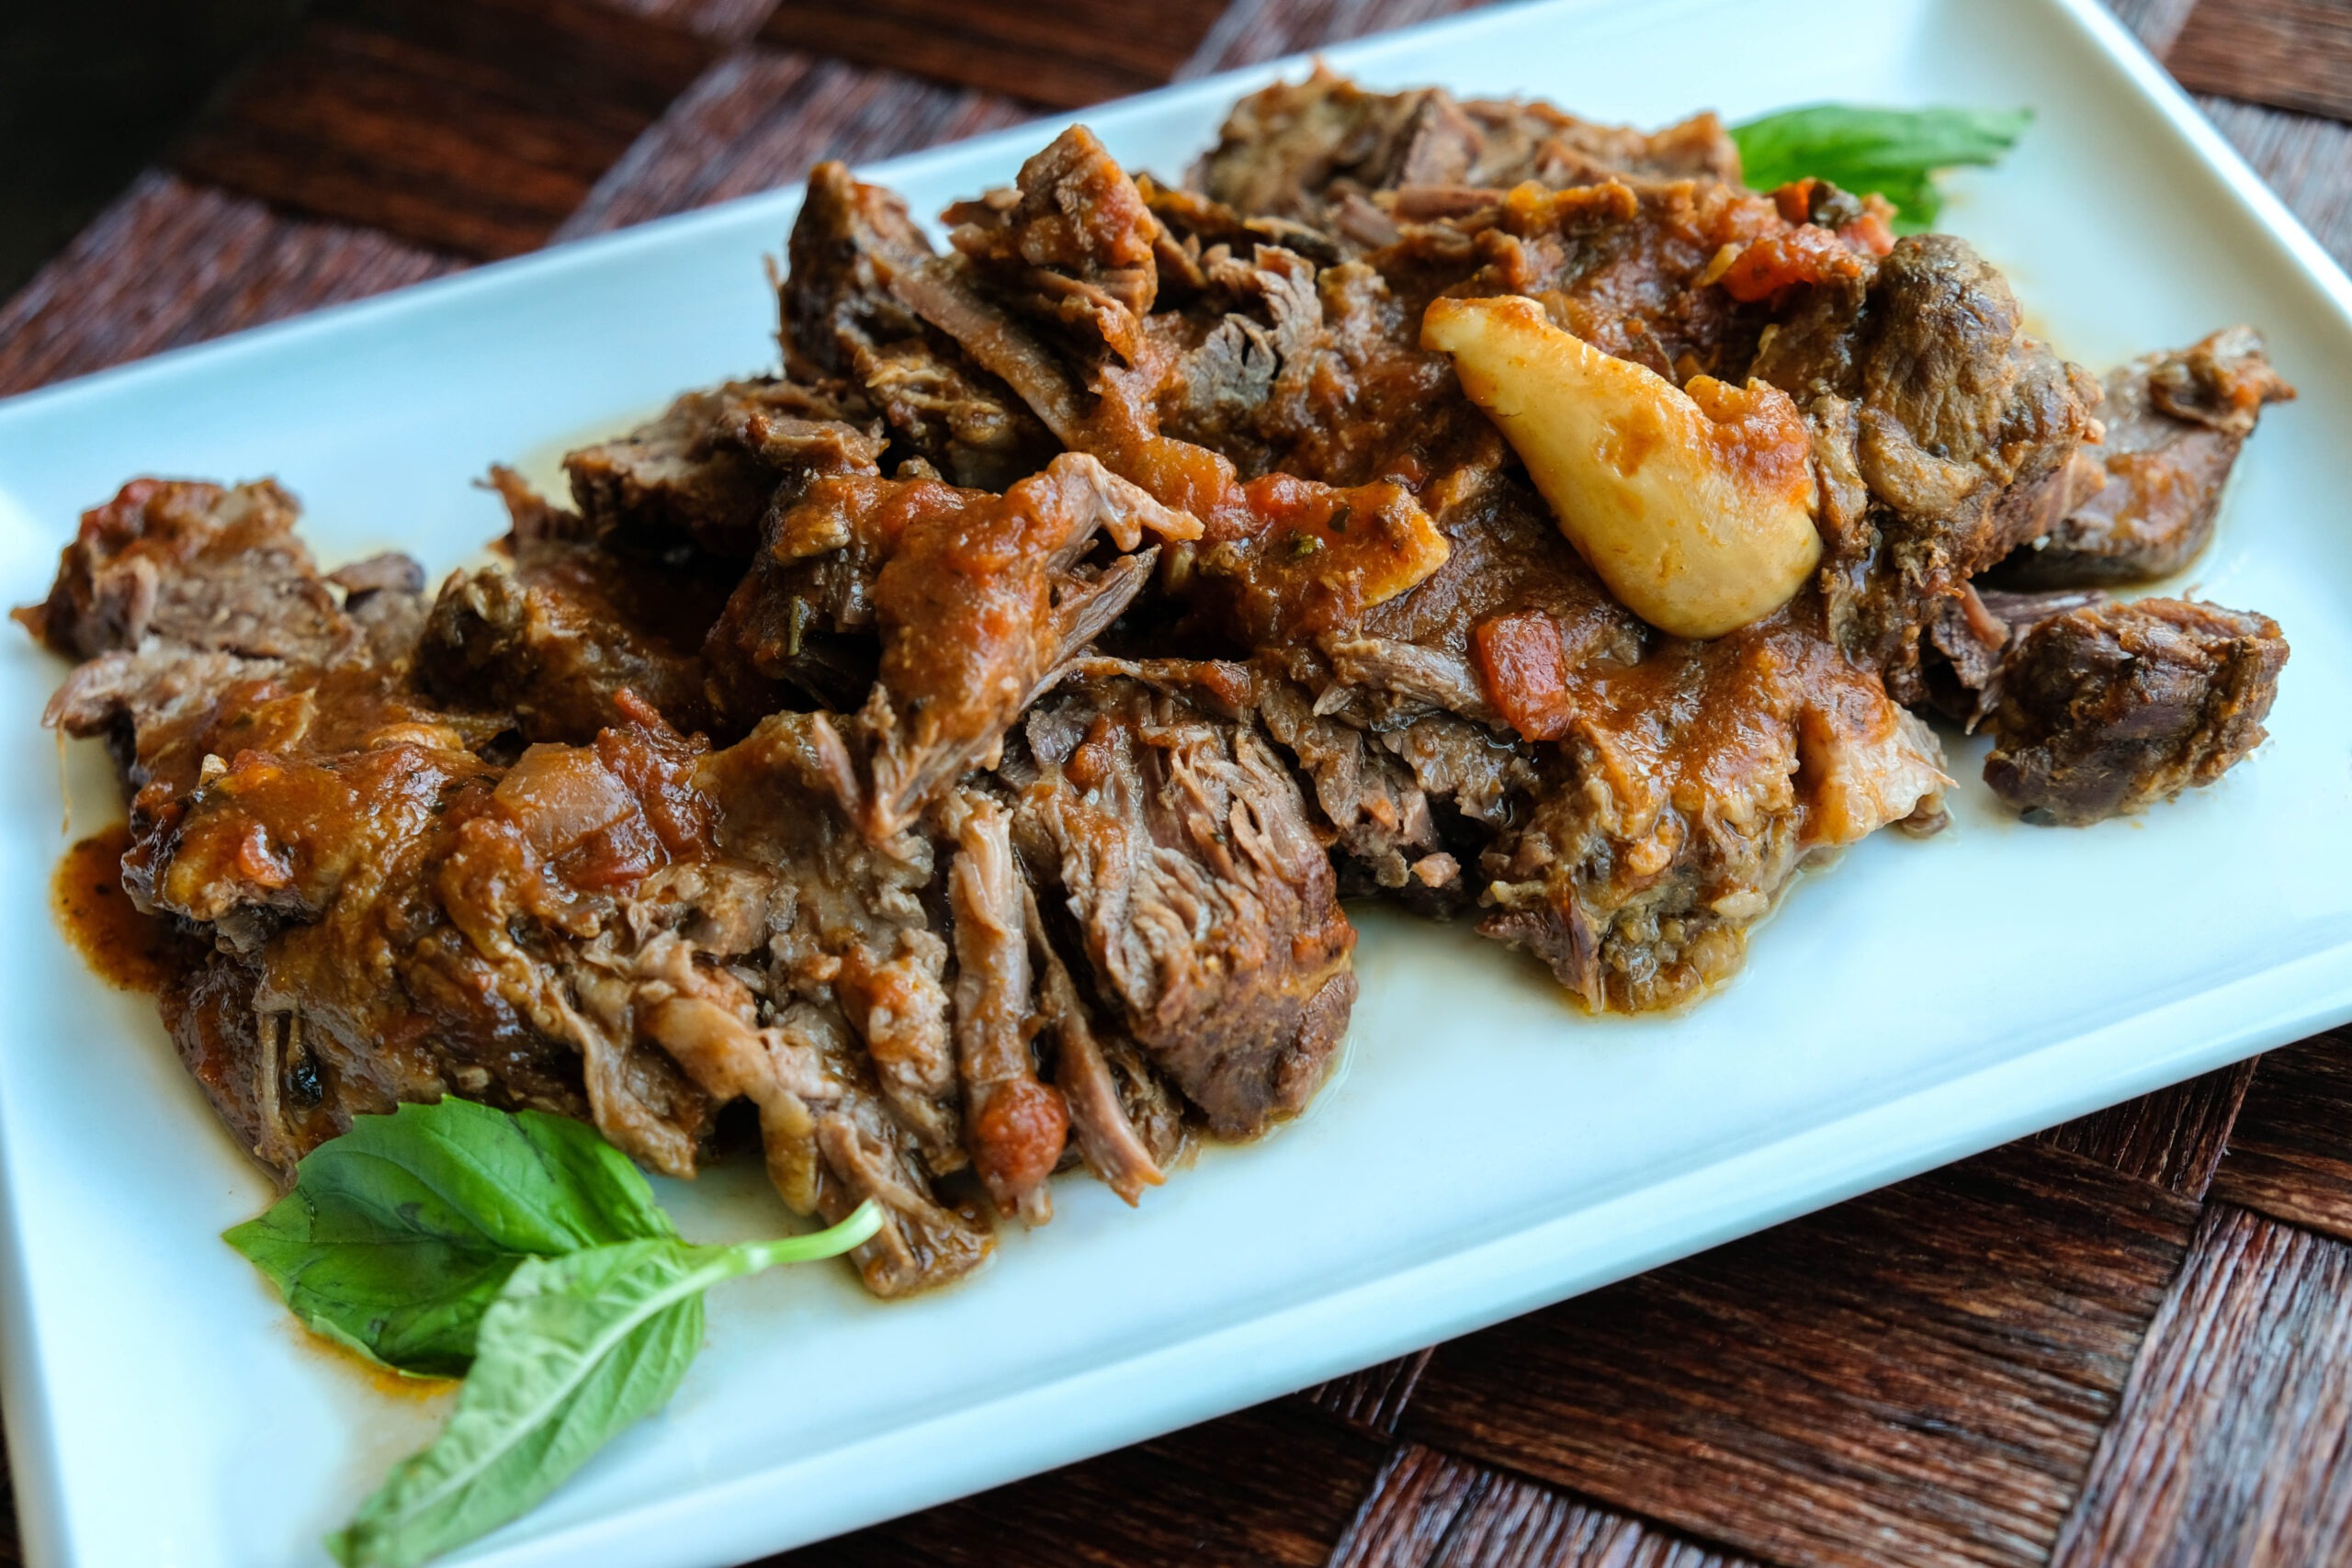
Instant Pot Beef Ragu

pork carnitas

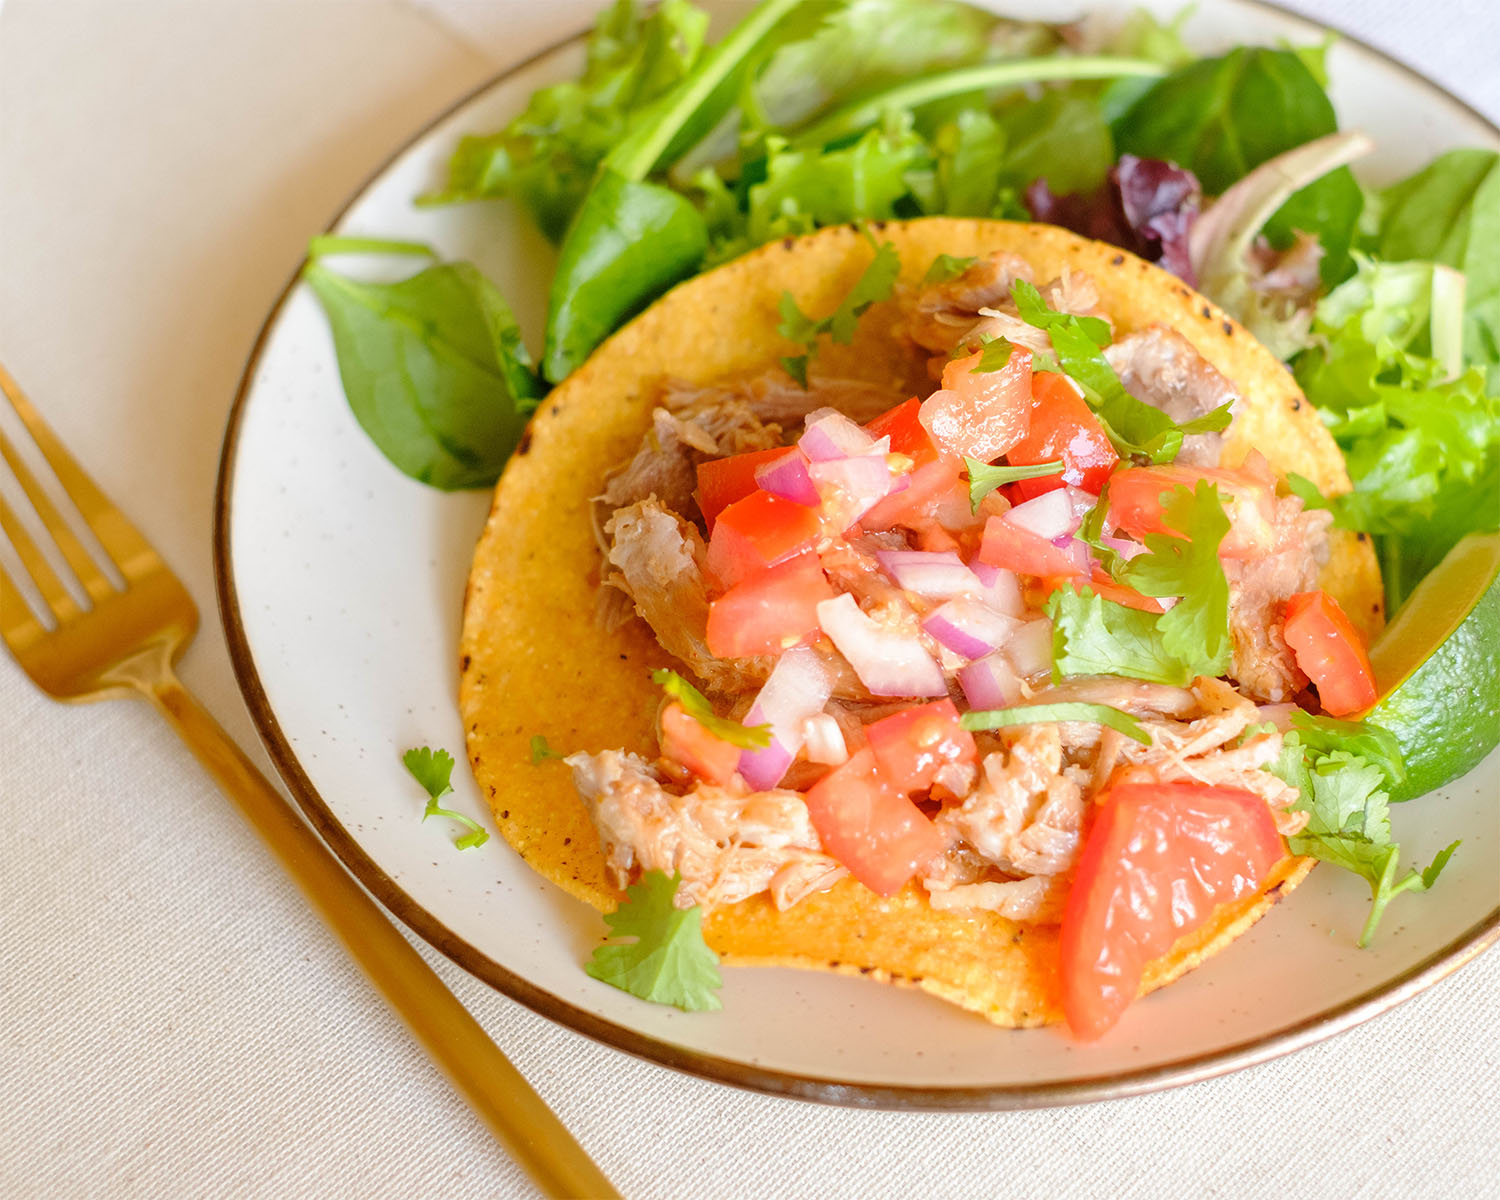
Instant Pot Pork Carnitas

You Might Also Like

Frequently Asked Questions

How spicy is this recipe?

The gochujang adds a mild to medium heat. If you prefer less spice, reduce the amount of gochujang or add a little more honey.


Can I adjust the sweetness or heat?

Yes! Add more honey if you like it sweeter or reduce the gochujang for a milder spice. You can also add a dash of sriracha for extra heat.


Can I make this recipe without an air fryer?

Yes! Bake in a preheated oven at 400°F for 12–15 minutes, flipping halfway through, until chicken reaches 165°F internally.

Posted on

Oct 20 Weekly Meal Plan

Learn to Use Our Meal Plan Tool

Discover how to simplify your meal planning process!

Welcome aboard if you’re new! Our meal planning tool is your personalized meal prep assistant –  you can tweak your serving sizes or skip some recipe options, it’s all in your hands! Our meal plans are meant to be a guide, so feel free to use all recipes or just a few to get you started!  Click on each recipe to learn more prep tips. Enjoy the meals at your pleasure, but here’s an example of how we plan out the meals during the week:

Breakfast Lunch Dinner
Mon

Sausage and Potato Hash Sheet Pan Shrimp with Cauliflower and Corn Stuffed Poblano Peppers
Tues Baked Apples and Ricotta Ground Beef Cabbage Stir Fry Cauliflower Pizza
Wed Sausage and Potato Hash Sheet Pan Shrimp with Cauliflower and Corn Stuffed Poblano Peppers
Thurs Baked Apples and Ricotta Ground Beef Cabbage Stir Fry Cauliflower Pizza
The meal plans are designed to serve one person and account for 4 days. This is so that you can enjoy it at it’s best quality and also allows room for flexibility just in case you get takeout or eat out during the week.

Set Your Pace

  • If you’re a beginner at meal prep: Be prepared to set aside 2-3 hours. Once mise en place is complete, all of these recipes can be completed one by one.
  • If you’re a meal prep pro, use the sequenced steps below: These steps give you the flexibility to cook items simultaneously in a sequence of events.
  • Be sure to set timers and check on food items to avoid overcooking. Sequencing will save you time and meal prep can be done in 1-2 hours.

Meal Prep Run Down

Chopping and Prepping Ingredients:

  1. Gather all ingredients, spices, utensils, and equipment, and review the recipes in advance to ensure a smooth, stress-free meal prep.

Cooking Phase 1: Oven Recipes:

  1. Sausage and Potato Hash: Preheat the oven to 400°F, toss diced potatoes, bell peppers, sausage rounds, and chopped green onions with olive oil and salt in a baking dish, then bake for 15 minutes.
  2. Baked Apples with Ricotta: Preheat the oven to 400°F, core the apples and place them in a baking dish, pour a mixture of water, lemon juice, and honey over them to steam while baking for 25 minutes, then serve with ricotta, walnuts, cinnamon, and a drizzle of honey.
  3. Sheet Pan Shrimp with Roasted Corn and Cauliflower: Preheat the oven to 400°F, arrange shrimp and vegetables on a sheet pan, toss with olive oil, seasonings, and garlic, then bake for 12–15 minutes.
  4. Cauliflower Pizza: Preheat the oven to 400°F, slice the cauliflower into 1-inch “steaks,” coat with olive oil, and bake for 25 minutes; meanwhile, mix tomato sauce with thyme and salt and dice the sausage, then top the roasted cauliflower with sauce, garlic, mozzarella, ricotta, and sausage, and bake another 5–10 minutes until heated and melted.
  5. Stuffed Poblano Peppers: Pre-heat the oven to 350F. Arrange the poblano peppers in a single layer on a sheet pan and bake for 10-15 minutes. Meanwhile, prepare the stuffing on the stove top.

Cooking Phase 2: Stove Top Recipes:

  1. Ground Beef and Cabbage Stir Fry: Heat olive oil in a wok over medium-high heat, sauté red onions for 2–3 minutes, add and brown ground beef with garlic powder for 5–6 minutes, stir in shredded cabbage and soy sauce until softened, then finish with a drizzle of sesame oil.
  2. Cranberry Muffin Bars: Preheat the oven to 400°F, mix eggs, sugar, orange juice, flour, oats, baking powder, and baking soda, fold in cranberries, pour into a greased dish, and bake 15–20 minutes.
  3. Stuffing for Poblano Peppers: Sauté onions in oil over medium-high heat, cook and season ground beef for 5–8 minutes, stir in roasted tomatoes and green chilies, then fill roasted peppers with the mixture, serve over heated sweet potato–cauliflower rice, and garnish with diced tomatoes and cilantro.

Final Steps:

  1. Storage: Once all the dishes are fully cooked, plate everything into individual containers. Allow them to cool to room temperature before placing them in the refrigerator for storage. This will keep your meals fresh and ready to enjoy throughout the week.

If you’re sequencing your meal prep, be sure to keep an eye on everything! Make sure food is kept refrigerated under 40F degrees until ready to eat.

Assembly Tips

  • Evenly divide meals according to the serving size
  • Let all items cool before placing them in the refrigerator
  • Keep all items refrigerated under 40°F until ready to eat or reheat
  • Breakfast: Both meals can be reheated in the microwave, serve the ricotta chilled
  • Lunch: Both meals can be reated quickly in the microwave.
  • Dinner: Both meals can be reheated quickly in the microwave.

Extra Flavors and Substitutions

  • Sausage and Potato Hash: Serve with a side of eggs.
  • Baked Apples with Ricotta: Prepare a few extra baked apples and store them individually in airtight containers for quick grab-and-go breakfasts.
  • Sheet Pan Shrimp with Cauliflower and Corn: Cook extra shrimp and veggies to toss into salads or wraps later in the week.
  • Ground Beef and Cabbage Stir Fry: Serve over cooked rice, noodles, or zoodles for a filling meal.
  • Stuffed Poblano Peppers: Serve alongside a simple green salad for added fiber and freshness.
  • Cauliflower Pizza: Pair with a side of roasted or sautéed greens, like spinach or kale, for a nutrient boost.

Extra Leftover Ingredients Not Used

  • Protein: Freeze any uncooked meats and save for a later recipe, or you can cook the full amount, and freeze the portion that you do not eat, and save for later use.
  • Fruit: Use leftover fruit in smoothies, on top of yogurt, or with your cereal
  • Veggies: Freeze any leftover veggies for later use. Use leftover herbs in omelets or other dishes for the weekend

Helpful Resources

Showcase 1

Supplemental
Snacks

Snacks to fuel you throughout the day

Showcase 2

Kitchen
Equipment

Recommended Kitchen Tools & Cooking Utensils

Showcase 3

Grocery Pantry
Staples

Always be ready by stocking up on these items

Common Kitchen Terms

Common Kitchen Terms

Get up to speed with those fancy cooking terms
Posted on Leave a comment

Air Fryer Chicken Curry Skewers

Air Fryer Chicken Curry Skewers with rice, cucumbers, and yogurt sauce.

If you’re juggling work, life, and trying to eat healthier without sacrificing flavor, this Air Fryer Chicken Curry Skewers recipe is about to become your new best friend. Think bold, restaurant-worthy flavors, minimal fuss, and perfectly portioned meals for the week ahead. Let’s give it a try!

This post may contain affiliate links. Please see our privacy policy for details.

Calories: 443kcal | Carbohydrates: 12g | Protein: 31g | Fat: 29g | Saturated Fat: 8g | Polyunsaturated Fat: 6g | Monounsaturated Fat: 12g | Trans Fat: 0.1g | Cholesterol: 168mg | Sodium: 1138mg | Potassium: 430mg | Fiber: 1g | Sugar: 11g | Vitamin A: 2499IU | Vitamin C: 1mg | Calcium: 69mg | Iron: 2mg

Air Fryer Chicken Curry Skewers with rice, cucumbers, and yogurt sauce.

Air Fryer Chicken Curry Skewers with rice, cucumbers, and yogurt sauce.

Air Fryer Chicken Curry Skewers

Juicy, flavorful chicken thighs marinated in a bold curry yogurt sauce and air-fried to perfection, perfect for easy meal prep.
No ratings yet
Prep Time 5 minutes
Cook Time 15 minutes
Course dinner, lunch, Main Course
Cuisine Asian
Servings 2
Calories 443 kcal

Equipment

  • Air Fryer
  • mixing bowl

Ingredients
  

  • 12 oz boneless chicken thighs (cut into 1 inch cubes)
  • 1/4 cup Greek yogurt
  • 1 tablespoon honey
  • 2 tablespoons red curry paste
  • 1 tablespoon fish sauce
  • 1/4 teaspoon turmeric powder
  • 1/4 teaspoon garlic powder
  • 1/4 teaspoon black pepper
  • 1/4 teaspoon salt

Instructions
 

  • Prep the skewers: Soak your wooden skewers in water for at least 10 minutes—this keeps them from burning in the air fryer.
  • Make the marinade: In a small bowl, whisk together Greek yogurt, honey, red curry paste, fish sauce, turmeric, garlic powder, black pepper, and salt
  • Marinate the chicken: Toss the chicken cubes in the yogurt mixture until fully coated. For maximum flavor, marinate overnight—or if you’re short on time, at least 30 minutes.
  • Cook: Preheat your Air Fryer to 400°F. Thread the marinated chicken onto the skewers. Place them in the Air Fryer basket and cook for 8–10 minutes, flipping halfway through, until golden brown and cooked to an internal temperature of 165°F.
  • Serve & enjoy: Pair with fluffy rice, fresh cucumber slices, and a dollop of yogurt sauce for a refreshing balance.

Video

Notes

Nutrition information provided is an estimate. It will vary based on cooking method and specific ingredients used. Please consult with your healthcare provider for specific dietary needs. To gain a better understanding, explore our nutrition disclaimer here

Nutrition

Calories: 443kcalCarbohydrates: 12gProtein: 31gFat: 29gSaturated Fat: 8gPolyunsaturated Fat: 6gMonounsaturated Fat: 12gTrans Fat: 0.1gCholesterol: 168mgSodium: 1138mgPotassium: 430mgFiber: 1gSugar: 11gVitamin A: 2499IUVitamin C: 1mgCalcium: 69mgIron: 2mg

Reasons This Recipe is Great for Meal Prep:

  • Quick and easy: Minimal hands-on time—marinate, skewer, and air fry. Perfect for weeknight prep.
  • Bold flavors: You get all the taste of your favorite Thai curry dishes without waiting for a restaurant table.
  • Protein-packed: Chicken thighs are tender and full of flavor, keeping you full and energized during busy workdays.
  • Air Fryer magic: Crispy edges without extra oil—less mess, fewer calories, all flavor.
  • Flexible servings: Make a batch and portion into containers with rice and veggies—ready-to-go lunches for the week.
  • Customizable: Swap red curry paste for green or yellow curry, or add veggies to the skewers for a nutrient boost.
  • Balanced meals: Combine protein, healthy fats from the yogurt, and complex carbs from rice for a complete, satisfying meal.

The PrepYoSelf Newsletter

Simple Ingredients You’ll Need:

  • Chicken thighs (12 oz, cut into 1-inch cubes): Juicy and tender, chicken thighs stay flavorful during cooking and pair perfectly with bold spices, making them ideal for meal prep
  • Greek yogurt (¼ cup): Adds creaminess to the marinade, tenderizes the chicken, and balances the heat of the curry paste with a subtle tang
  • Honey (1 tablespoon): Provides a natural sweetness that complements the savory and spicy flavors, while helping the chicken caramelize slightly in the air fryer
  • Red curry paste (2 tablespoons): Brings bold, authentic Thai flavor with a mix of spices and chili, giving the dish its signature aromatic punch
  • Fish sauce (1 tablespoon): Adds depth and umami, enhancing the overall flavor without making the dish taste fishy when used in small amounts
  • Turmeric powder (¼ teaspoon): Provides a warm, earthy undertone and a vibrant golden color, while offering subtle anti-inflammatory benefits
  • Garlic powder (¼ teaspoon): Adds a mild garlicky aroma and depth of flavor without overpowering the curry notes
  • Black pepper (¼ teaspoon): Adds a gentle heat and sharpness that balances the richness of the yogurt and sweetness of the honey
  • Salt (¼ teaspoon): Enhances all the flavors in the marinade, helping each ingredient shine and ensuring the chicken is perfectly seasoned

Air Fryer Chicken Curry Skewers

How to Make Air Fryer Chicken Curry Skewers:

  1. Prep the skewers: Soak your wooden skewers in water for at least 10 minutes before cooking. This prevents them from burning in the Air Fryer
  2. Make the marinade: In a small bowl, combine Greek yogurt, honey, red curry paste, fish sauce, turmeric, garlic powder, black pepper, and salt. Mix thoroughly until everything is smooth and well blended
  3. Marinate the chicken: Add your chicken cubes to the bowl and toss until each piece is fully coated with the yogurt mixture. Cover the bowl with plastic wrap or a lid and refrigerate. Marinate overnight for maximum flavor, or at least 30 minutes if you’re short on time
  4. Assemble the skewers: Thread the marinated chicken onto the soaked skewers, leaving a little space between each piece so they cook evenly
  5. Cook in the Air Fryer: Preheat your Air Fryer to 400°F. Place the skewers in the basket in a single layer, making sure they aren’t crowded. Cook for 8–10 minutes, flipping halfway through, until the chicken is golden brown and reaches an internal temperature of 165°F
  6. Serve: Remove the skewers carefully (they’ll be hot!) and enjoy with rice, fresh cucumber slices, and a spoonful of yogurt sauce for a balanced, flavorful meal.

Air Fryer Chicken Curry Skewers with rice, cucumbers, and yogurt sauce.

Pairing Tips for a Complete Meal

  • ​​Rice or Grain Base: Pair with jasmine rice, brown rice, or quinoa to soak up the curry flavors and provide complex carbs for sustained energy.
  • Fresh Veggies: Include cucumber slices, cherry tomatoes, bell peppers, or shredded carrots for crunch, color, and extra vitamins.
  • Leafy Greens: Add a side of spinach, arugula, or mixed greens for fiber and freshness that balances the richness of the chicken.
  • Yogurt Sauce: A simple yogurt dip or raita adds creaminess, cooling contrast, and extra protein.
  • Pickled Veggies: Quick-pickled onions or carrots add acidity and brightness, elevating the flavor profile.
  • Roasted or Steamed Veggies: Broccoli, zucchini, or cauliflower make a hearty, nutrient-rich side that keeps well in meal prep containers.
  • Healthy Fats: Add avocado slices or a sprinkle of toasted nuts/seeds for texture and heart-healthy fats.

Air Fryer Chicken Curry Skewers with rice, cucumbers, and yogurt sauce.

Similar Recipes

chicken soup

One Pot Mexican Chicken Soup

sweet potato blt

Instant Pot Beef Ragu

pork carnitas

Instant Pot Pork Carnitas

You Might Also Like

Frequently Asked Questions

Can I use chicken breast instead of thighs?

Yes! Chicken breast is leaner but can dry out more easily. Marinate longer and check internal temperature carefully to ensure it stays juicy.


Can I freeze the skewers?

 Yes! Freeze cooked chicken in a freezer-safe container for up to 2 months. Just be sure to remove the chicken from the skewers. Reheat in the Air Fryer or oven before serving.


Can I add vegetables to the skewers?

Yes! Bell peppers, zucchini, or cherry tomatoes work well. Just make sure the pieces are similar in size to the chicken so they cook evenly.

Posted on

Oct 13 Weekly Meal Plan

pork tostadas

Learn to Use Our Meal Plan Tool

Discover how to simplify your meal planning process!

Welcome aboard if you’re new! Our meal planning tool is your personalized meal prep assistant –  you can tweak your serving sizes or skip some recipe options, it’s all in your hands! Our meal plans are meant to be a guide, so feel free to use all recipes or just a few to get you started!  Click on each recipe to learn more prep tips. Enjoy the meals at your pleasure, but here’s an example of how we plan out the meals during the week:

Breakfast Lunch Dinner
Mon

Scrambled Eggs with Carnitas Ginger Lime Chicken Salad Instant Pot Carnitas Tostadas
Tues Cranberry Muffin Bars Chili Steak Salad with Orange Salsa Air Fryer Orange Glazed Chicken with Broccoli
Wed Scrambled Eggs with Carnitas Ginger Lime Chicken Salad Instant Pot Carnitas Tostadas
Thurs Cranberry Muffin Bars Chili Steak Salad with Orange Salsa Air Fryer Orange Glazed Chicken with Broccoli
The meal plans are designed to serve one person and account for 4 days. This is so that you can enjoy it at it’s best quality and also allows room for flexibility just in case you get takeout or eat out during the week.

Set Your Pace

  • If you’re a beginner at meal prep: Be prepared to set aside 2-3 hours. Once mise en place is complete, all of these recipes can be completed one by one.
  • If you’re a meal prep pro, use the sequenced steps below: These steps give you the flexibility to cook items simultaneously in a sequence of events.
  • Be sure to set timers and check on food items to avoid overcooking. Sequencing will save you time and meal prep can be done in 1-2 hours.

Meal Prep Run Down

Chopping and Prepping Ingredients:

  1. Gather all ingredients, spices, utensils, and equipment, and review the recipes in advance to ensure a smooth, stress-free meal prep.

Cooking Phase 1: Instant Pot Recipes:

  1. Instant Pot Pork Carnitas: Place pork shoulder in the Instant Pot with seasonings, onions, garlic, cilantro, orange and lime juice, and water, cook 45 minutes (or 4–6 hours in a slow cooker), shred, and serve on tostadas with pico de gallo and a side salad. Save a portion of the cooked carnitas for the scrambled eggs recipe below.

Cooking Phase 2: Air Fryer Recipes and Oven Recipes:

  1. Air Fryer Orange Soy Glazed Chicken with Broccoli: Toss chicken thighs in soy sauce, orange juice, honey, garlic powder, and sesame oil, air fry at 360°F for 23–25 minutes until 165°F, then air fry seasoned broccoli at 360°F for 5 minutes.
  2. Cranberry Muffin Bars: Preheat the oven to 400°F, mix eggs, sugar, orange juice, flour, oats, baking powder, and baking soda, fold in cranberries, pour into a greased dish, and bake 15–20 minutes.

Cooking Phase 3: Stove Top Recipes

  1. Scrambled Eggs with Pork Carnitas: Heat oil in a pan over medium heat, scramble the eggs, add pork carnitas until warmed, and finish with fresh pico de gallo.
  2. Grilled Ginger Lime Chicken Salad: Marinate chicken in a lime, honey, and spice mixture for at least 10 minutes, grill until cooked through, let rest and slice, then serve over spring mix with avocado and mango salsa made from mango, red onion, tomato, cilantro, lime juice, and salt.
  3. Grilled Chili Steak with Orange Salsa: Marinate steak for at least 10 minutes, grill to desired doneness, let rest and slice, then serve over spring mix with avocado and orange salsa.

Final Steps:

  1. Storage: Once all the dishes are fully cooked, plate everything into individual containers. Allow them to cool to room temperature before placing them in the refrigerator for storage. This will keep your meals fresh and ready to enjoy throughout the week.

If you’re sequencing your meal prep, be sure to keep an eye on everything! Make sure food is kept refrigerated under 40F degrees until ready to eat.

Assembly Tips

  • Evenly divide meals according to the serving size
  • Let all items cool before placing them in the refrigerator
  • Keep all items refrigerated under 40°F until ready to eat or reheat
  • Breakfast: Both meals can be reheated in the microwave
  • Lunch: Proteins can be reheated in the microwave, while the salad can be served chilled
  • Dinner: Both meals can be reheated quickly in the microwave.

Extra Flavors and Substitutions

  • Scrambled Eggs with Carnitas: Serve with a side of whole-grain tortillas.
  • Cranberry Muffin Bars: Pair with Greek yogurt or cottage cheese for added protein, or add a handful of nuts for crunch and healthy fats to make it a complete breakfast or snack.
  • Grilled Ginger Lime Chicken Salad: Use your choice of deli meat and cheese.
  • Grilled Chili Steak with Orange Salsa: Pair with a side of crunchy veggie sticks or a light soup for a balanced, satisfying lunch.
  • Instant Pot Carnitas: Serve with a slice of whole-grain bread or a small quinoa salad to round out the meal with fiber and carbs.
  • Air Fryer Orange Soy Glazed Chicken: Pair with brown rice, quinoa, or a whole-grain pasta for a balanced meal prep.

Extra Leftover Ingredients Not Used

  • Protein: Freeze any uncooked meats and save for a later recipe, or you can cook the full amount, and freeze the portion that you do not eat, and save for later use.
  • Fruit: Use leftover fruit in smoothies, on top of yogurt, or with your cereal
  • Veggies: Freeze any leftover veggies for later use. Use leftover herbs in omelets or other dishes for the weekend

Helpful Resources

Showcase 1

Supplemental
Snacks

Snacks to fuel you throughout the day

Showcase 2

Kitchen
Equipment

Recommended Kitchen Tools & Cooking Utensils

Showcase 3

Grocery Pantry
Staples

Always be ready by stocking up on these items

Common Kitchen Terms

Common Kitchen Terms

Get up to speed with those fancy cooking terms

Posted on

Oct 6 Weekly Meal Plan

turkey toscana soup

Learn to Use Our Meal Plan Tool

Discover how to simplify your meal planning process!

Welcome aboard if you’re new! Our meal planning tool is your personalized meal prep assistant –  you can tweak your serving sizes or skip some recipe options, it’s all in your hands! Our meal plans are meant to be a guide, so feel free to use all recipes or just a few to get you started!  Click on each recipe to learn more prep tips. Enjoy the meals at your pleasure, but here’s an example of how we plan out the meals during the week:

Breakfast Lunch Dinner
Mon

Turkey Breakfast Scramble Roast Beef Deli Sandwich Toscana Soup
Tues Peanut Butter and Apple Quesadillas Air Fryer Turkey Taquitos One Pot Cabbage and Beef Stew
Wed Turkey Breakfast Scramble Roast Beef Deli Sandwich Toscana Soup
Thurs Peanut Butter and Apple Quesadillas Air Fryer Turkey Taquitos One Pot Cabbage and Beef Stew
The meal plans are designed to serve one person and account for 4 days. This is so that you can enjoy it at it’s best quality and also allows room for flexibility just in case you get takeout or eat out during the week.

Set Your Pace

  • If you’re a beginner at meal prep: Be prepared to set aside 2-3 hours. Once mise en place is complete, all of these recipes can be completed one by one.
  • If you’re a meal prep pro, use the sequenced steps below: These steps give you the flexibility to cook items simultaneously in a sequence of events.
  • Be sure to set timers and check on food items to avoid overcooking. Sequencing will save you time and meal prep can be done in 1-2 hours.

Meal Prep Run Down

Chopping and Prepping Ingredients:

  1. Prepare all your ingredients, gather your spices, utensils, and equipment, and read through the recipes ahead of time so you’re fully ready for smooth, stress-free meal prep.

Cooking Phase 1: Air Fryer Recipe

  1. Air Fryer Turkey Taquitos: Layer cheese and turkey on each tortilla, roll tightly, brush with olive oil, air fry at 400°F for 5–6 minutes until crispy, then serve with a side salad topped with pico de gallo and avocado.

Cooking Phase 2: Stove Top Recipes

  1. One Pot Beef and Cabbage Stew: Sauté onions, sear beef until golden, add mushrooms, tomato sauce, and broth, then stir in napa and red cabbage, bring to a boil, cover, and simmer for 25 minutes or until the beef is tender.
  2. One Pot Toscana Soup: Sauté onions and garlic, brown the ground turkey, then add broth, collard greens, potatoes, and seasonings; simmer until the potatoes are tender, finish with coconut milk, and sprinkle with red pepper flakes.
  3. Turkey Breakfast Scramble: Whisk the eggs, cook the turkey sausage until golden, pour in the eggs and cook until set, season with salt and garlic powder, then top with fresh tomatoes, red onions, and green onions.
  4. Peanut Butter and Apple Quesadillas: Spread nut butter on tortillas, layer with sliced apples, pecans, and cinnamon, top with another tortilla, cook on both sides until golden and melty, slice into quarters, and serve with fresh apple slices.
  5. Roast Beef Deli Sandwich: Sauté bell peppers and onions until soft, layer cheese, roast beef, tomatoes, and the sautéed veggies between sandwich bread, then slice in half and serve with a side salad and dressing.

Final Steps:

  1. Storage: Once all the dishes are fully cooked, plate everything into individual containers. Allow them to cool to room temperature before placing them in the refrigerator for storage. This will keep your meals fresh and ready to enjoy throughout the week.

If you’re sequencing your meal prep, be sure to keep an eye on everything! Make sure food is kept refrigerated under 40F degrees until ready to eat.

Assembly Tips

  • Evenly divide meals according to the serving size
  • Let all items cool before placing them in the refrigerator
  • Keep all items refrigerated under 40°F until ready to eat or reheat
  • Breakfast: Both meals can be reheated in the microwave
  • Lunch: Both meals can be reheated in the microwave, serve the pico and avocado chilled
  • Dinner: Both meals can be reheated quickly in the microwave.

Extra Flavors and Substitutions

  • Turkey Breakfast Scramble: Pair with a side of roasted sweet potatoes or a whole-grain toast to balance protein with complex carbs for a filling breakfast.
  • Peanut Butter and Apple Quesadilla: Serve with a small Greek yogurt dip or a handful of berries for added protein and freshness.
  • Air Fryer Turkey Taquitos: Use your choice of deli meat and cheese.
  • Roast Beef Deli Sandwich: Pair with a side of crunchy veggie sticks or a light soup for a balanced, satisfying lunch.
  • Toscana Soup: Serve with a slice of whole-grain bread or a small quinoa salad to round out the meal with fiber and carbs.
  • Beef and Cabbage Stew: Pair with a fresh side salad.

Extra Leftover Ingredients Not Used

  • Protein: Freeze any uncooked meats and save for a later recipe, or you can cook the full amount, and freeze the portion that you do not eat, and save for later use.
  • Fruit: Use leftover fruit in smoothies, on top of yogurt, or with your cereal
  • Veggies: Freeze any leftover veggies for later use. Use leftover herbs in omelets or other dishes for the weekend

Helpful Resources

Showcase 1

Supplemental
Snacks

Snacks to fuel you throughout the day

Showcase 2

Kitchen
Equipment

Recommended Kitchen Tools & Cooking Utensils

Showcase 3

Grocery Pantry
Staples

Always be ready by stocking up on these items

Common Kitchen Terms

Common Kitchen Terms

Get up to speed with those fancy cooking terms

Posted on Leave a comment

Air Fryer Lemongrass Pork Loin

pork loin slices with white rice and sliced tomatoes

Busy schedule? Craving bold flavors? This Air Fryer Lemongrass Pork Loin is about to become your new go-to meal prep protein. Juicy, fragrant, and full of Southeast Asian-inspired flavors, it’s the perfect dish for anyone who wants healthy meals without giving up excitement on the plate. With just a quick marinade and your air fryer, you’ll have savory, slightly sweet, and aromatic pork slices that taste restaurant-level good.

This post may contain affiliate links. Please see our privacy policy for details.

Calories: 467kcal | Carbohydrates: 12g | Protein: 34g | Fat: 29g | Saturated Fat: 5g | Polyunsaturated Fat: 4g | Monounsaturated Fat: 18g | Cholesterol: 89mg | Sodium: 1917mg | Potassium: 729mg | Fiber: 1g | Sugar: 5g | Vitamin A: 301IU | Vitamin C: 8mg | Calcium: 54mg | Iron: 2mg

pork loin slices with white rice and sliced tomatoes

pork loin slices with white rice and sliced tomatoes

Air Fryer Lemongrass Pork Loin

Quick, juicy air fryer lemongrass pork loin with bold, aromatic flavors—perfect for healthy, make-ahead meal prep.
No ratings yet
Prep Time 5 minutes
Cook Time 20 minutes
Course dinner, Main Course
Cuisine Asian
Servings 2
Calories 467 kcal

Equipment

  • knife
  • cutting board
  • mixing bowl
  • Air Fryer

Ingredients
  

  • 10 oz pork loin

Lemongrass Marinade:

  • 2 tablespoons lemongrass paste
  • 2 tablespoons ginger paste
  • 1 tablespoon garlic paste
  • 1 tablespoon soy sauce
  • 1 tablespoon fish sauce
  • 1 tablespoon oyster sauce
  • 1 tablespoon sweet chili sauce
  • 1 teaspoon sesame oil

Optional: Ginger Scallion Oil

  • 2 tablespoons ginger paste
  • 5 scallions (thinly sliced)
  • 3 tablespoons olive oil
  • 1/4 teaspoon salt

Instructions
 

Pork Loin

  • Mix the Marinade: In a small bowl, whisk together lemongrass paste, ginger paste, soy sauce, fish sauce, oyster sauce, sweet chili sauce, and sesame oil.
  • Prep the Pork: Slice the pork loin into thin ¼-inch rounds. Place in a mixing bowl and pour over the marinade. Toss until fully coated. Cover and refrigerate overnight (or at least 1 hour).
  • Cook in the Air Fryer: Preheat your air fryer to 400°F. Arrange pork slices on the tray in a single layer (avoid overcrowding). Cook for 12–16 minutes, flipping halfway. The pork should reach an internal temperature of 145°F for safe doneness.
  • Serve & Enjoy: Pair with steamed rice and crisp veggies (like cucumbers, carrots, or bok choy) for a balanced, meal-prep-ready plate. Feel free to also enjoy it with the Ginger Scallion Sauce referenced below.
  • Optional: Ginger Scallion Sauce
  • Prep the Scallions and Ginger: Thinly chop the scallions and measure out the ginger paste
  • Heat the Oil: In a small saucepan, heat the olive oil over medium heat.
  • Cook the Aromatics: Add teh ginger paste and chopped scallions to the hot oil and stir for 1-2 minutes. Make sure you don't let it brown or burn, you just want the flavors to infuse. Season with sal.
  • Cool and Store: Let the oil cool and transfer to a condiment container.

Video

Notes

Nutrition information provided is an estimate. It will vary based on cooking method and specific ingredients used. Please consult with your healthcare provider for specific dietary needs. To gain a better understanding, explore our nutrition disclaimer here

Nutrition

Calories: 467kcalCarbohydrates: 12gProtein: 34gFat: 29gSaturated Fat: 5gPolyunsaturated Fat: 4gMonounsaturated Fat: 18gCholesterol: 89mgSodium: 1917mgPotassium: 729mgFiber: 1gSugar: 5gVitamin A: 301IUVitamin C: 8mgCalcium: 54mgIron: 2mg

Reasons Pork Loin is Perfect for Healthy Meal Prep:

  • Lean & Protein-Packed: Pork loin is naturally lean, offering lots of protein without excess fat.
  • Budget-Friendly: Compared to chicken or beef, pork loin is often more affordable for weekly meal preps.
  • Quick Cooking: Thin slices cook fast in the air fryer, which is a lifesaver on busy weeknights.
  • Flavor Sponge: Pork loin absorbs marinades like a champ, so bold flavors (like lemongrass and ginger) shine through.
  • Versatile Pairing: It pairs well with rice, noodles, or even salads—so you can switch up your weekly prep easily.
  • Low Maintenance: Minimal prep, no fancy equipment, and short cook time = meal prep made simple.
  • Meal Prep Hero: Stays juicy when reheated, so your lunch tastes just as good on Thursday as it did on Monday.

The PrepYoSelf Newsletter

Flavor Breakdown: Why These Ingredients Shine

  • Lemongrass Paste: Fresh, citrusy, and slightly floral—lemongrass adds a bright punch that balances out richer flavors. It instantly gives the pork a Southeast Asian vibe that feels refreshing, not heavy.
  • Ginger Paste: Warm, zesty, and slightly spicy. Ginger cuts through the richness of pork and pairs beautifully with lemongrass. It also brings digestive benefits, making your meal prep feel light yet satisfying.
  • Soy Sauce: Savory and salty, soy sauce is the foundation of umami here. It ties all the flavors together and helps tenderize the pork as it marinates.
  • Fish Sauce: A little goes a long way! Fish sauce adds deep, funky umami that makes the dish taste restaurant-level. When combined with lemongrass and ginger, it layers the flavor without overpowering.
  • Oyster Sauce: Thick, glossy, and slightly sweet, oyster sauce helps the marinade cling to the pork slices. It also adds richness and a subtle caramel-like undertone that balances the salty notes.
  • Sweet Chili Sauce: Sweet with a gentle heat, this ingredient adds brightness and a touch of stickiness. It keeps the marinade from tasting too savory while giving your pork that crave-worthy sweet-spicy kick.
  • Sesame Oil: Nutty and aromatic, sesame oil is the finishing touch that rounds out the marinade. A teaspoon is all you need to add depth and a subtle roasted flavor.

pork loin slices with white rice and sliced tomatoes

How to Meal Prep Lemongrass Pork Loin

  1. Make the Marinade: In a small bowl, stir together the lemongrass paste, ginger paste, soy sauce, fish sauce, oyster sauce, sweet chili sauce, and sesame oil. Mix until smooth—this will be your flavor base.
  2. Slice the Pork: Take your pork loin and cut it into thin rounds about ¼-inch thick. Thinner slices help the meat cook quickly and evenly in the air fryer.
  3. Marinate the Pork: Place the sliced pork in a medium mixing bowl. Pour the marinade over the top and use tongs or clean hands to coat each piece well. Cover the bowl with plastic wrap or a lid and refrigerate for at least 1 hour. (Overnight is even better—it lets the flavors really soak in.
  4. Preheat the Air Fryer: Set your air fryer to 400°F and let it preheat for about 3–5 minutes. Preheating helps give the pork a nice sear and keeps it juicy.
  5. Cook the Pork: Arrange the pork slices in a single layer on the air fryer tray or basket. Don’t overlap them—overcrowding can lead to uneven cooking. Cook for 12–16 minutes, flipping halfway through. Use a meat thermometer to check that the pork has reached 145°F in the thickest part for safe doneness.
  6. Optional Ginger Scallion Oil: While the pork is cooking, heat the olive oil in a small skillet over medium heat. Stir in the ginger paste, chopped scallions, and salt. Cook for 1–2 minutes until fragrant but not browned. Drizzle over the pork once it’s done for an extra layer of flavor.
  7. Serve & Store: Enjoy immediately with steamed rice and fresh veggies. For meal prep, let the pork cool slightly, then portion it into containers with rice and veggies. Store in the fridge for up to 4 days.

Reference the recipe card below for detailed instructions.

pork loin slices with white rice and sliced tomatoes

Meal Prep Pairing Tips:

  • Steamed Jasmine Rice: classic, fluffy, and perfect for soaking up the marinade flavors.
  • Brown Rice or Quinoa: adds extra fiber and longer-lasting fullness.
  • Fresh Veggies (cucumbers, carrots, bell peppers, snap peas): crisp, refreshing, and balance the rich pork.
  • Lightly Pickled Veggies: quick pickle in rice vinegar for tangy crunch
  • Leafy Greens (spinach, mixed greens, shredded cabbage): refreshing and meal-prep friendly
  • Roasted or Steamed Veggies (broccoli, green beans, bok choy): mild and complementary to bold lemongrass flavors
  • Optional Ginger Scallion Oil: drizzle over pork to keep it juicy and flavorful when reheated
  • Dipping Sauces (chili crisp, sriracha mayo): add variety and a customizable heat level
  • Carb Swaps (cauliflower rice, zucchini noodles): lighter low-carb options
  • Energy Boost (rice noodles, soba noodles): for a heartier, high-energy meal
  • Fresh Fruit (pineapple, mango): bright sweetness that pairs beautifully with lemongrass and ginger

pork loin slices with white rice and sliced tomatoes

Similar Recipes

chicken soup

One Pot Mexican Chicken Soup

sweet potato blt

Sweet Potato BLT Sandwich

Grilled Honey Dijon Chicken Kale Salad

You Might Also Like

Frequently Asked Questions

Can I use fresh lemongrass instead of paste?

Yes! Chop fresh lemongrass very finely or bruise the stalks and blend them into the marinade. The paste just saves time and is more meal-prep friendly.


What if I don’t have an air fryer?

No problem. You can bake the pork slices in the oven at 400°F for 18–20 minutes or pan-sear them on medium-high heat for 3–4 minutes per side.


Can I make this spicy?

For sure! Add a teaspoon of chili flakes to the marinade or drizzle chili crisp on top when serving.