Posted on Leave a comment

Cauliflower Sausage Pizza

round plate with cauliflower sausage pizza

Hey there, fellow foodies! Get ready to tantalize your taste buds and nourish your body with a sensational recipe that’s perfect for meal prep: Cauliflower Sausage Low Carb Pizza! With just a handful of ingredients and a little bit of culinary prowess, you’ll have a delicious pizza that’s ready to conquer your cravings in no time. The best part? It’s a one-pan wonder! No need to fuss with multiple dishes or complicated techniques. You simply top your cauliflower crusts with mouthwatering sausage and your favorite toppings and bake it to perfection. Voila! A scrumptious pizza is born.

This post may contain affiliate links. Please see our privacy policy for details.

Calories: 579kcal | Carbohydrates: 21g | Protein: 25g | Fat: 45g | Saturated Fat: 16g | Polyunsaturated Fat: 4g | Monounsaturated Fat: 23g | Cholesterol: 92mg | Sodium: 1221mg | Potassium: 1274mg | Fiber: 6g | Sugar: 7g | Vitamin A: 519IU | Vitamin C: 142mg | Calcium: 294mg | Iron: 2mg

round plate with cauliflower sausage pizza

Let’s get down to the nitty-gritty and discuss the cost factor. Cauliflower Sausage Pizza is a budget-friendly option for your meal prep repertoire. Cauliflower is often an affordable vegetable that is readily available. Sausage, with its rich and savory flavors, adds a touch of indulgence without breaking the bank. Plus, you can get creative with your toppings, utilizing leftovers or ingredients you already have on hand and saving money while satisfying your cravings.

But wait, there’s more! This low carb pizza is a healthier alternative to its traditional counterpart. By swapping out the traditional flour-based crust for a cauliflower crust, you’re reducing the carb content significantly. Cauliflower crust is not only lower in carbs but also packed with essential nutrients, fiber, and antioxidants. It’s like getting a nutritional boost while relishing your favorite comfort food. Talk about having your (pizza) pie and eating it too!

The PrepYoSelf Newsletter

Here’s What You’ll Need for Cauliflower Pizza

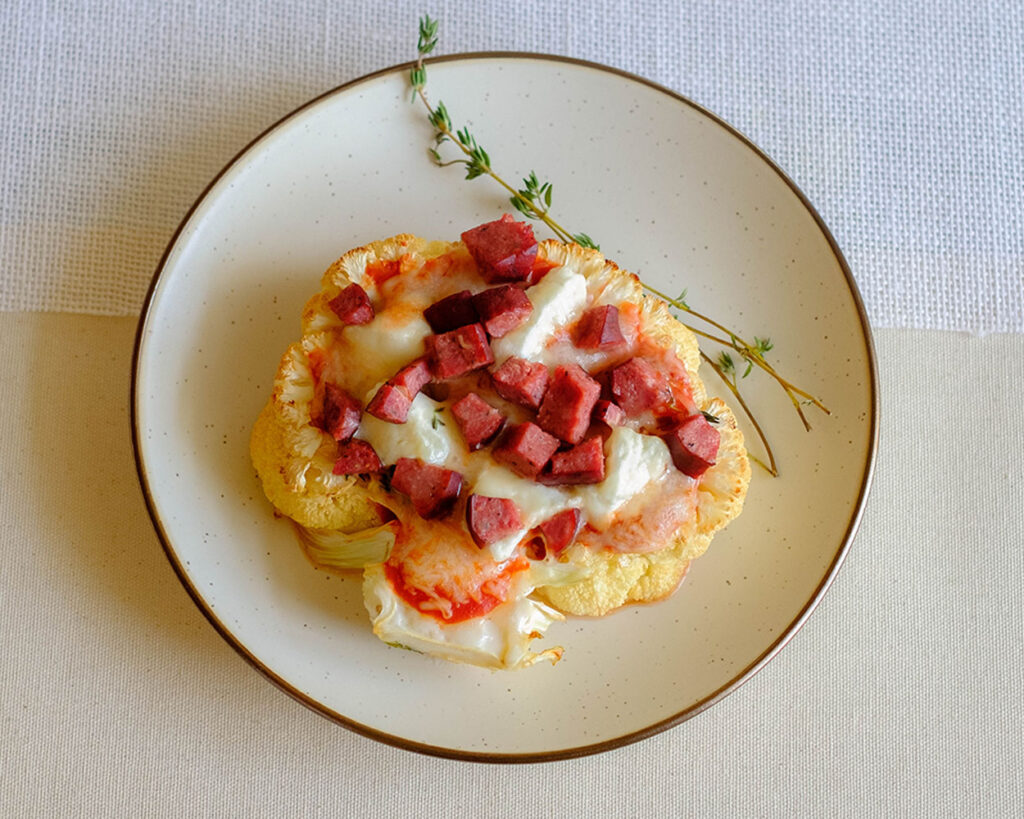
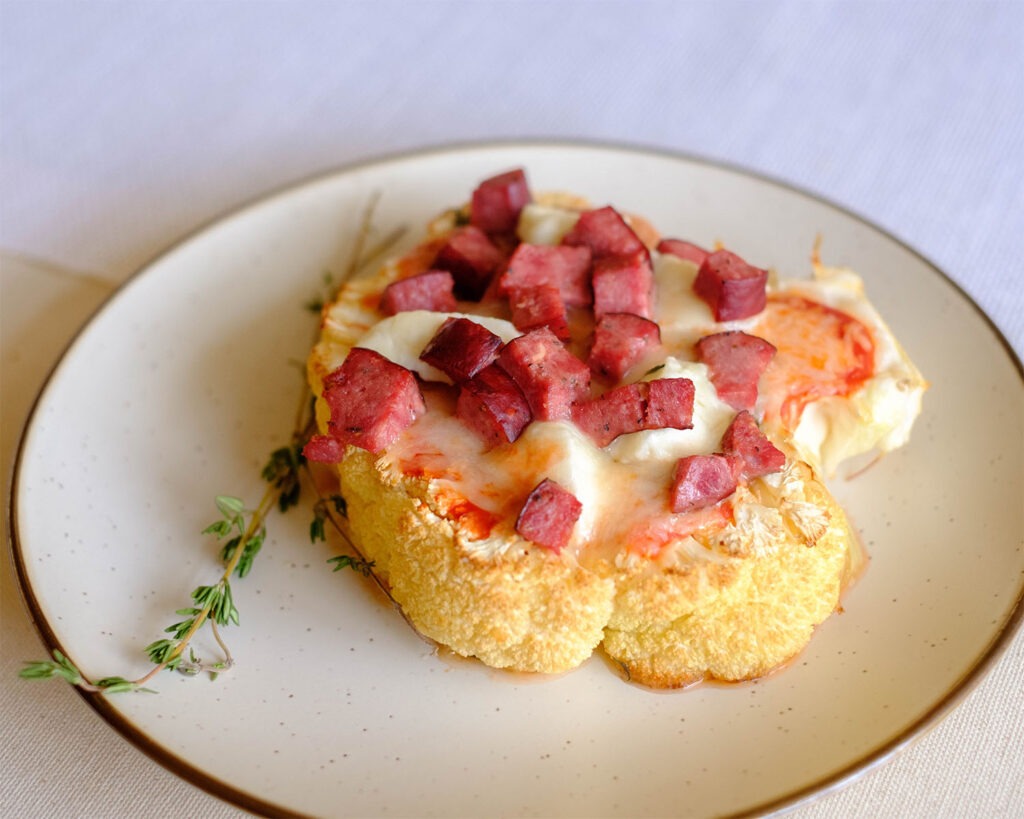
  • First up is the mighty cauliflower head. We’ll transform this humble vegetable into a delicious low carb pizza crust that’s high in flavor.
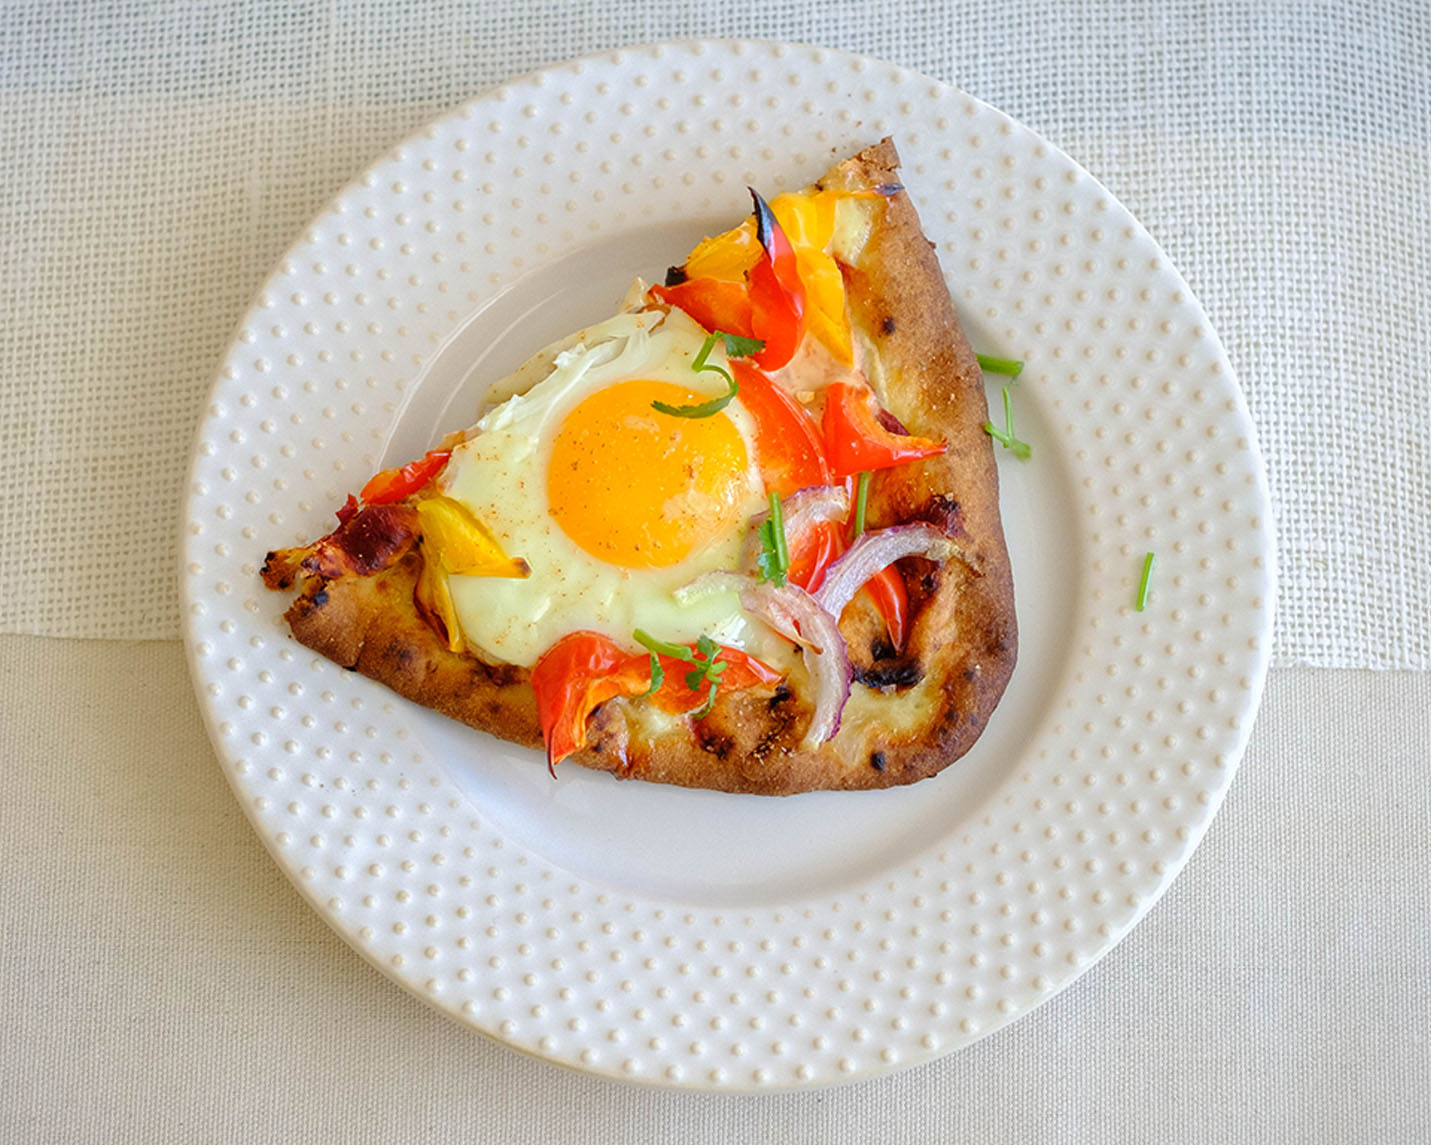
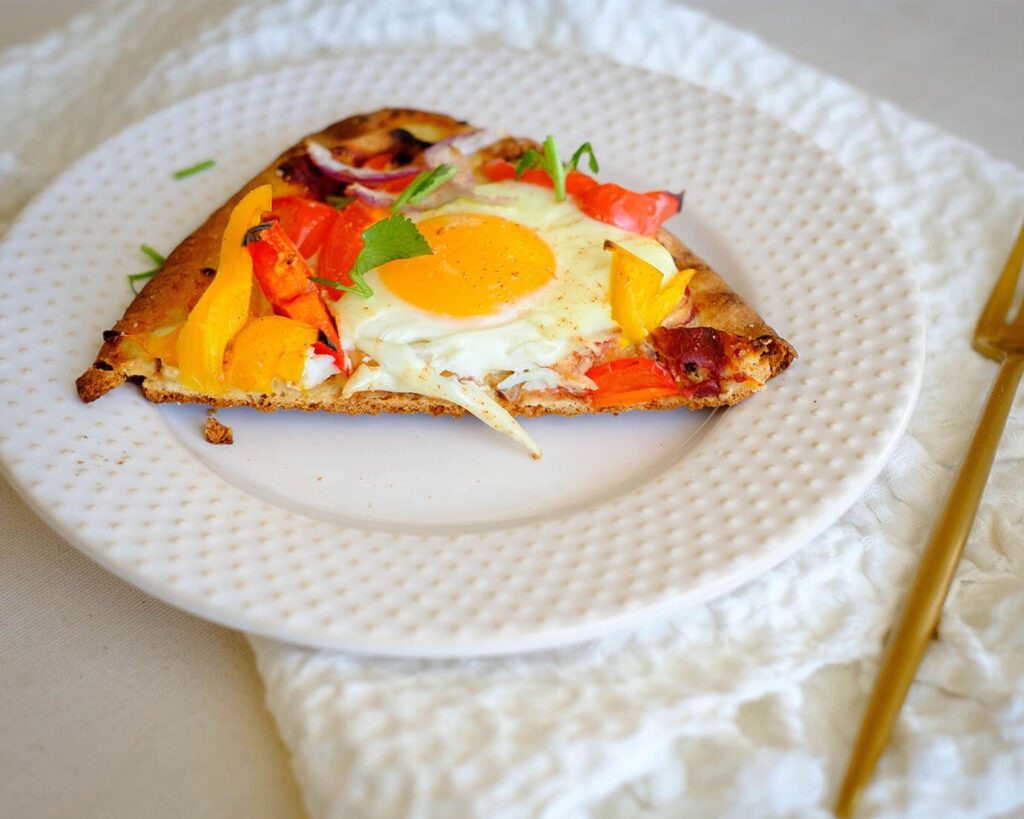
  • Now, let’s talk about the toppings. We’ll start with a generous spread of tomato sauce. You can use your favorite store-bought variety, or if you’re feeling adventurous, whip up a homemade version bursting with fresh flavors. Either way, make sure to cover the cauliflower crust evenly, creating a vibrant tomato canvas for the rest of the ingredients.
  • Next, we’ll add dollops of creamy ricotta cheese. Its smooth texture and subtle tanginess will provide a delightful contrast to the other ingredients. If you don’t have ricotta on hand, feel free to substitute it with goat cheese or even cream cheese for a slightly different twist.
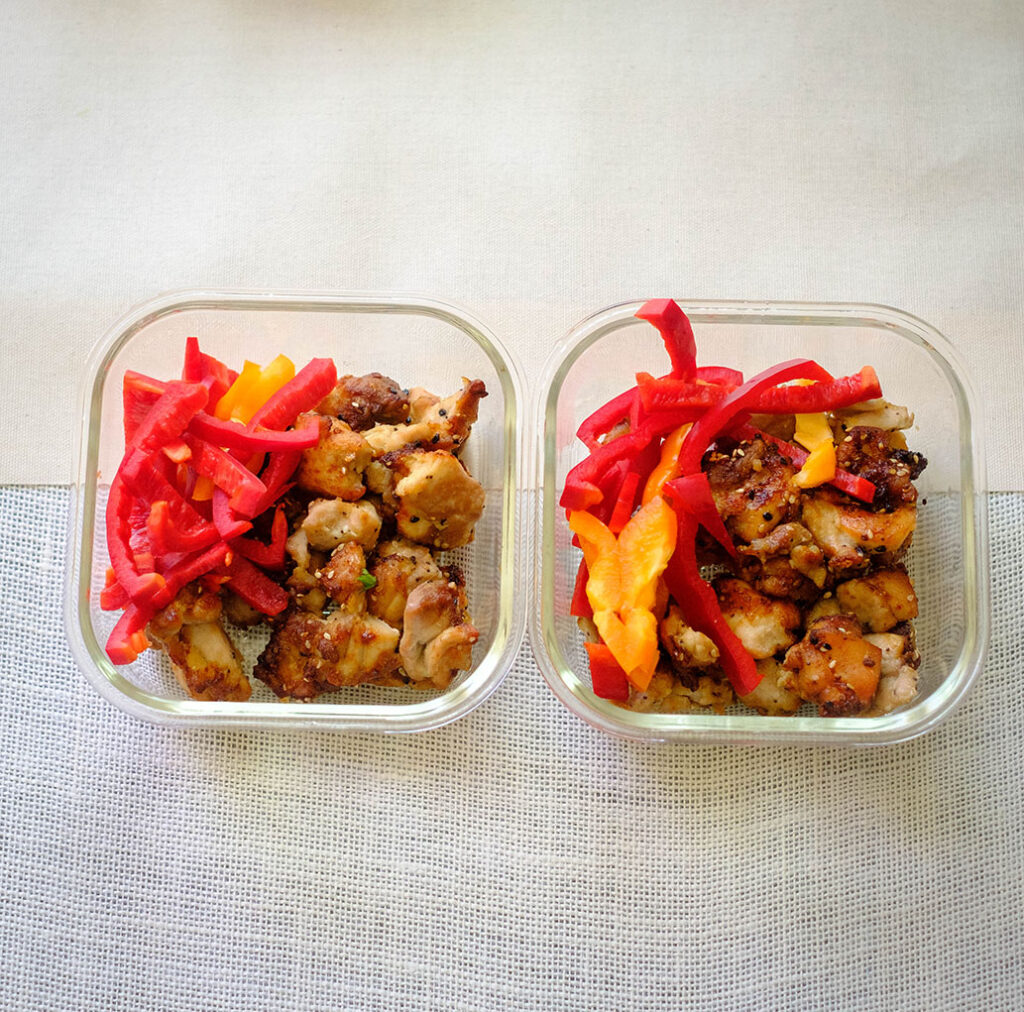
  • Now, it’s time to introduce some protein power. Dice up some beef sausage into bite-sized pieces and scatter them over the pizza. The sausage brings a rich, savory flavor that complements the other components beautifully. If you prefer a vegetarian version, you can swap the beef sausage for your favorite meatless alternative like plant-based sausages or marinated tofu.
  • Of course, what’s a pizza without a generous layer of ooey-gooey mozzarella cheese? Sprinkle it generously over the toppings, allowing it to melt and create a golden, cheesy blanket of deliciousness. If you’re feeling adventurous, you can mix in some grated Parmesan cheese or experiment with different types of cheese like fontina or provolone.
  • To elevate the flavors even further, sprinkle some Italian seasoning over the top. This blend of aromatic herbs like oregano, basil, thyme, and rosemary adds a burst of Mediterranean goodness that will make your taste buds sing. If you don’t have Italian seasoning, feel free to use individual herbs or get creative with your own spice blend.
round plate with cauliflower sausage pizza

How to Make Cauliflower Pizza

  1. Preheat the oven to 400F.
  2. Prep your cauliflower head by removing the outer green leaves and cutting off the bottom stem.
  3. Cut through the middle of the cauliflower head and cut thick 1-inch “steak slices).
  4. Place the cauliflower slices on a sheet pan and drizzle with olive oil and bake it in the oven.
  5. After the cauliflower gets tender and finishes cooking, carefully remove it from the oven and add your toppings.
  6. Place the cauliflower pizzas back in the oven and bake for another 5 to 10 minutes until the sausage heats through and the cheese melts.

Reference the recipe card below for detailed instructions.

glass meal pep containers with cauliflower sausage pizza

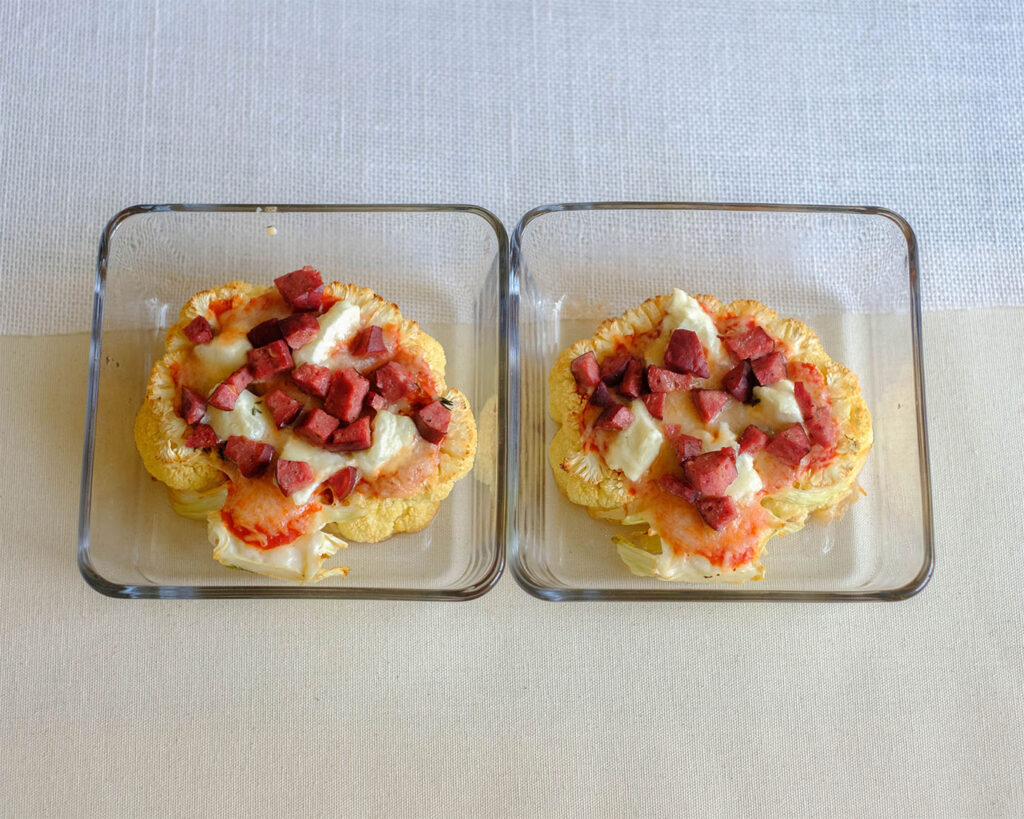
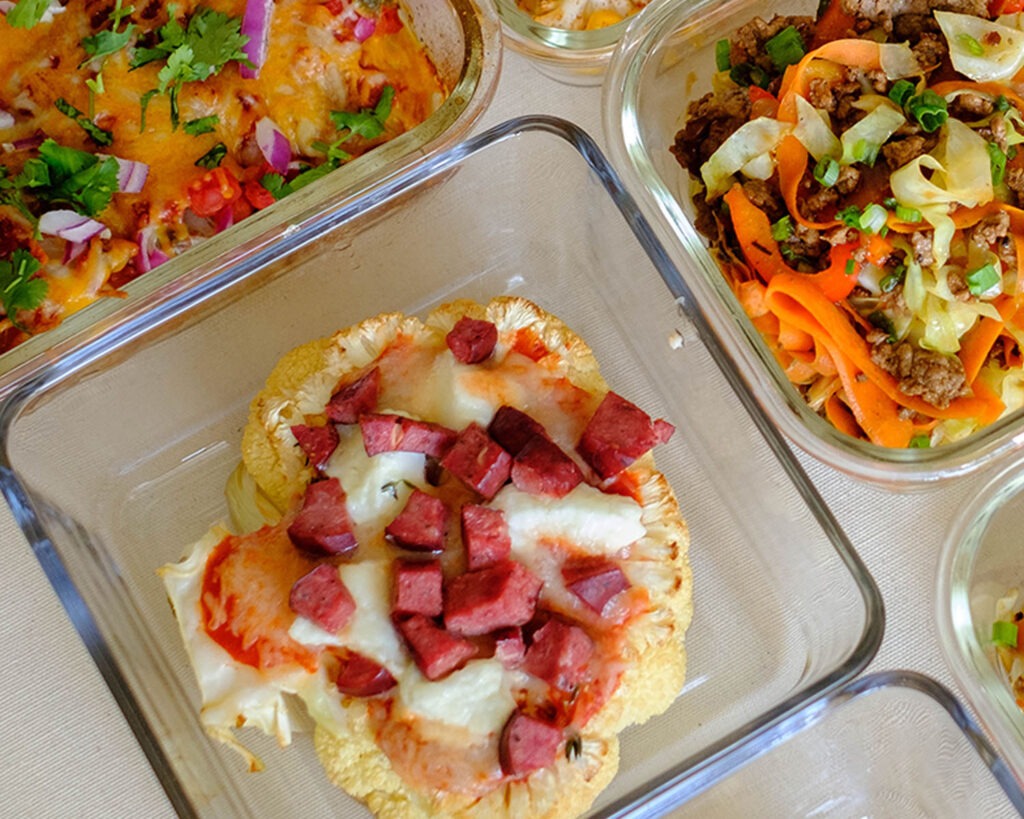
Meal Prep Tips for Cauliflower Low Carb Pizza

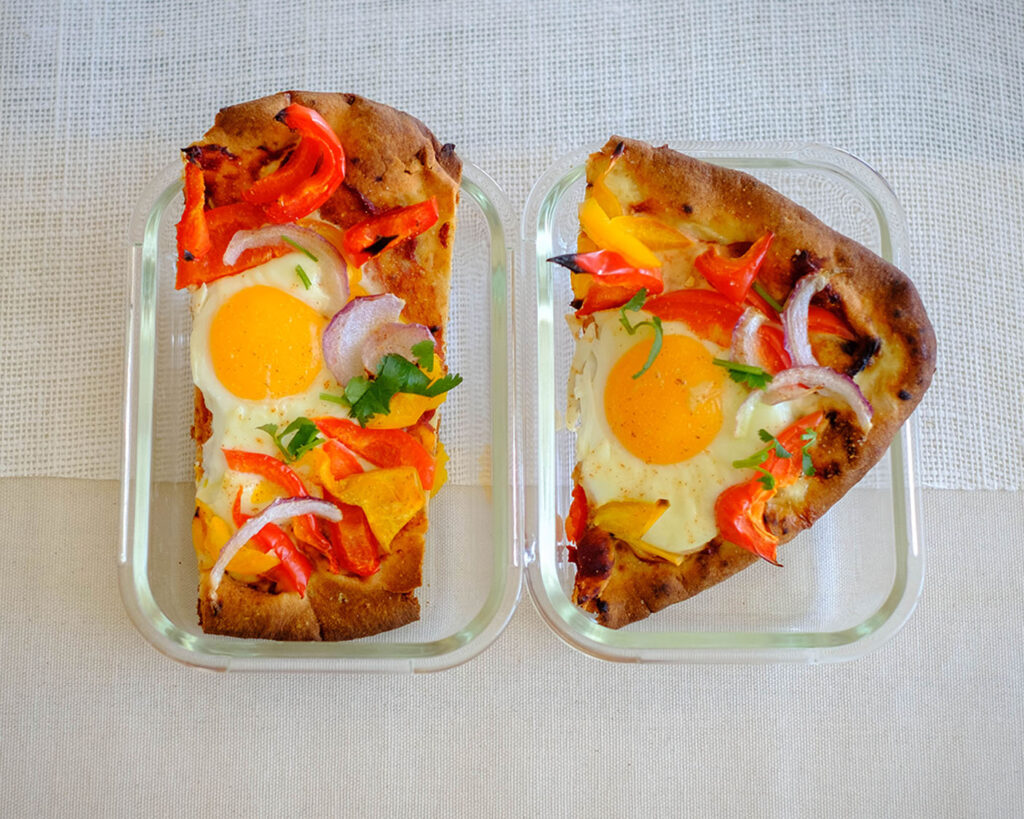
  • Once your Cauliflower Sausage Pizza is baked to golden perfection, you can easily store the leftovers in airtight containers in the fridge. When you’re ready to enjoy it, a quick reheat in the oven or microwave will bring back its glorious flavors. If you want to freeze individual slices, make sure to wrap them tightly in plastic wrap or use freezer-safe containers. This way, you can have a tasty, ready-to-eat meal whenever the pizza cravings strike.
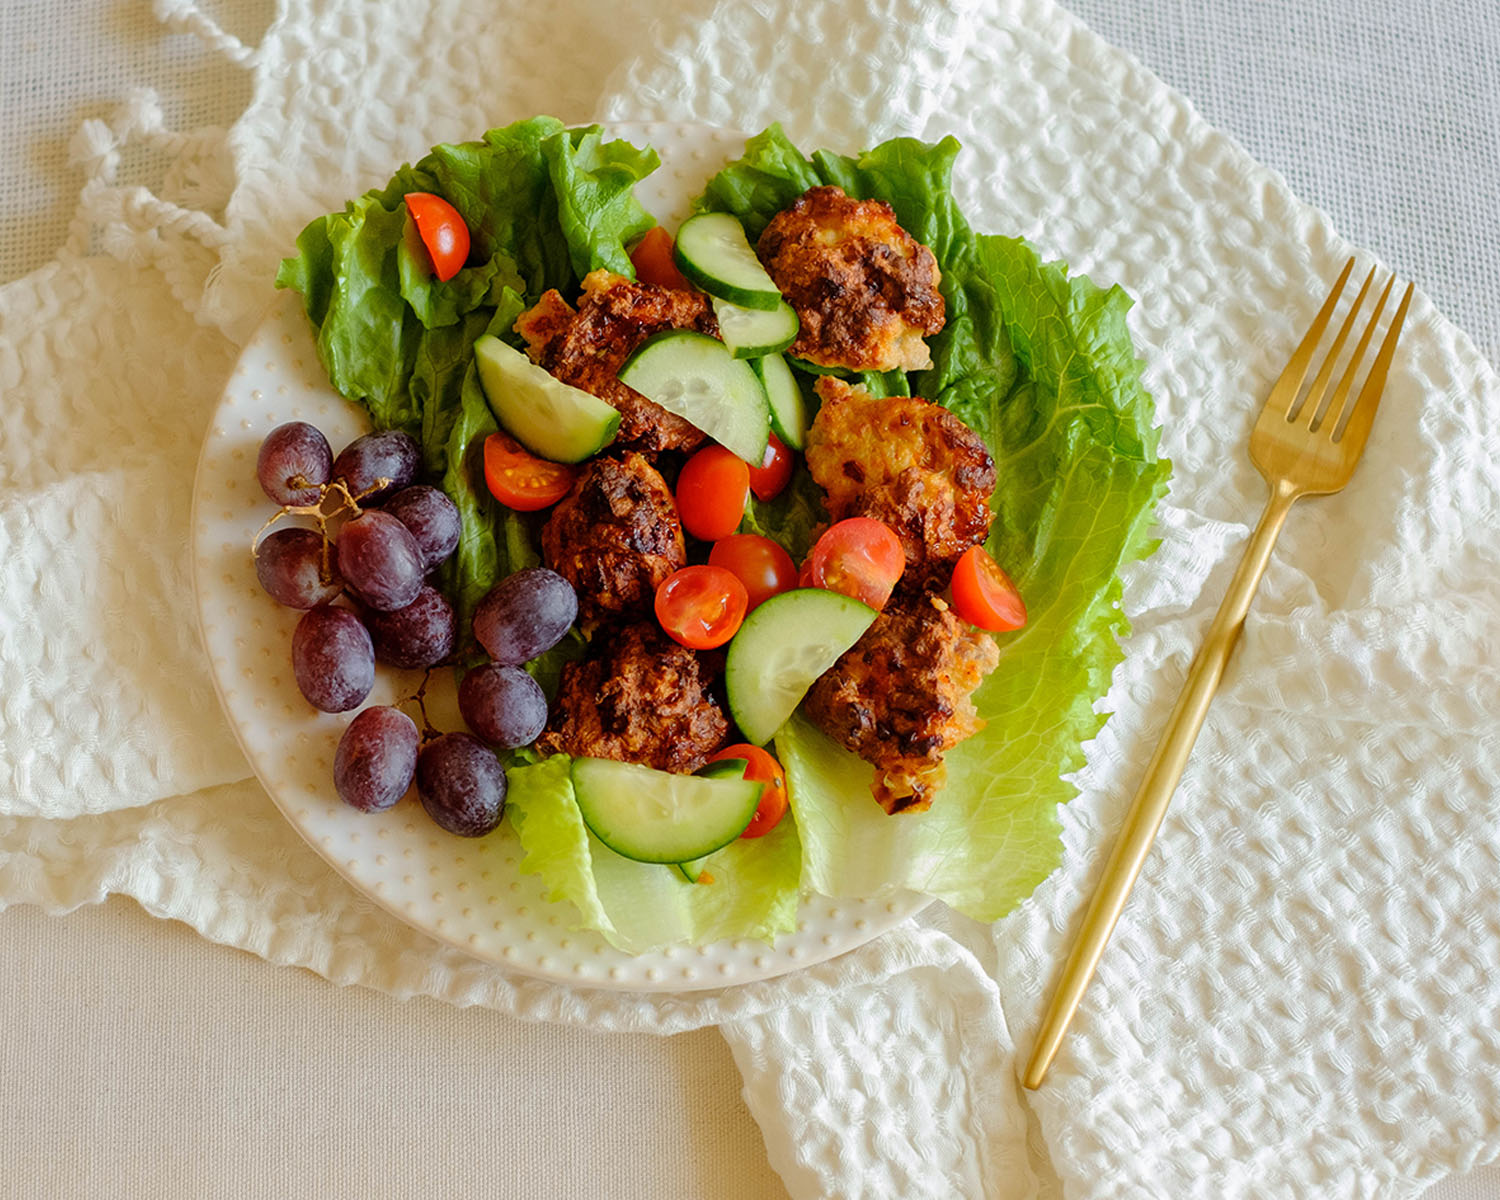
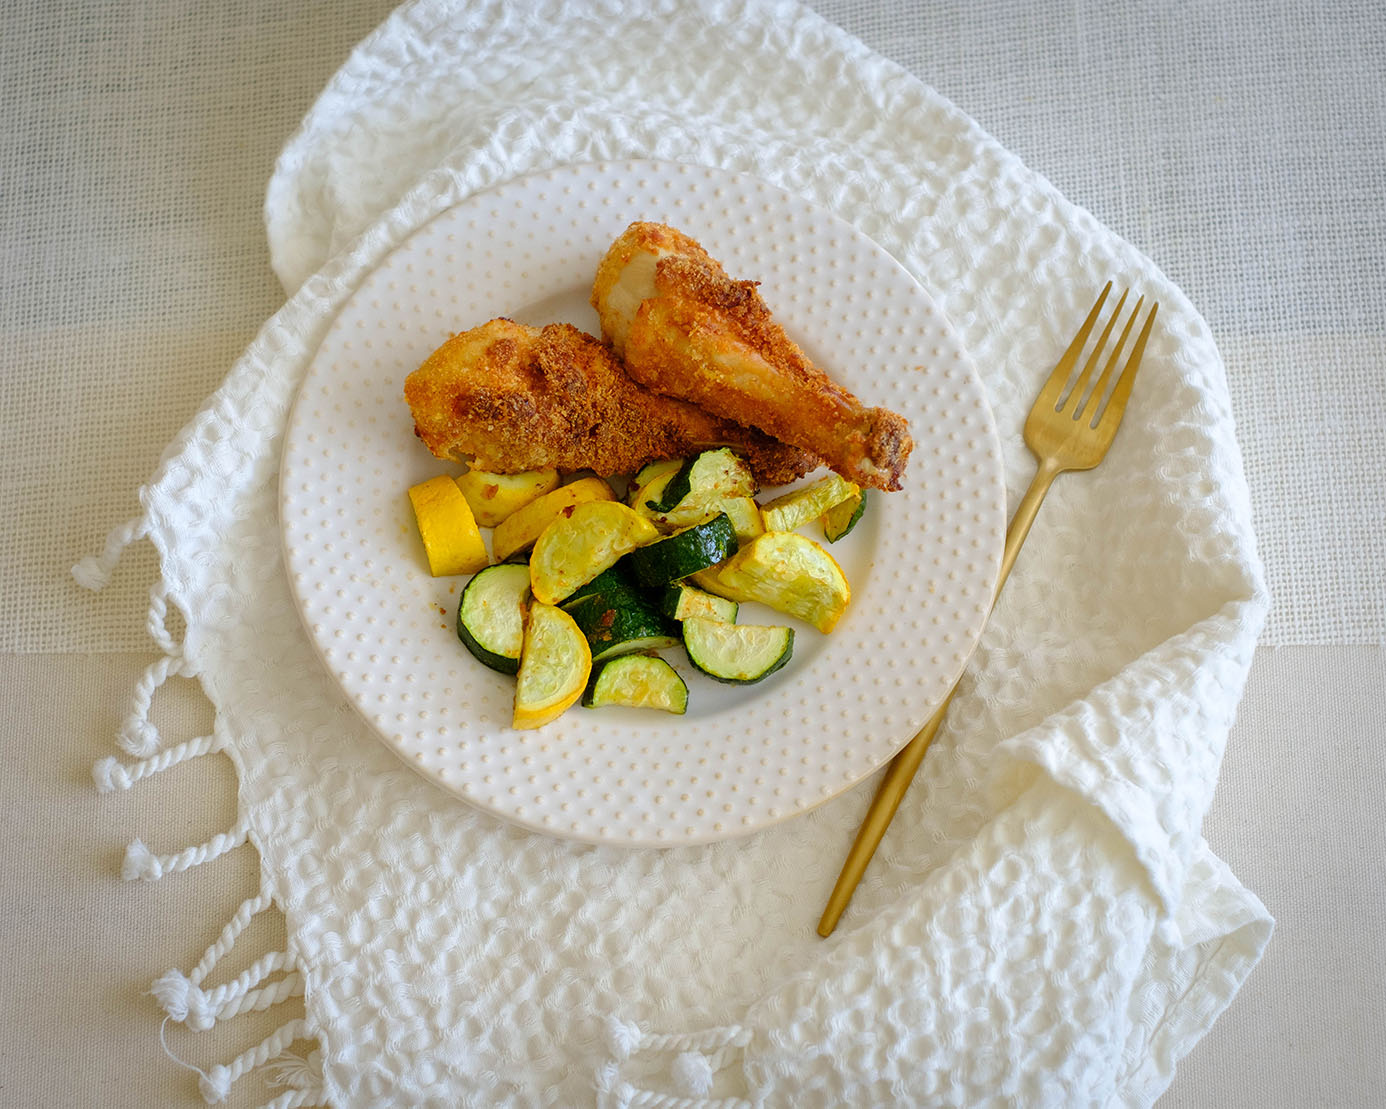
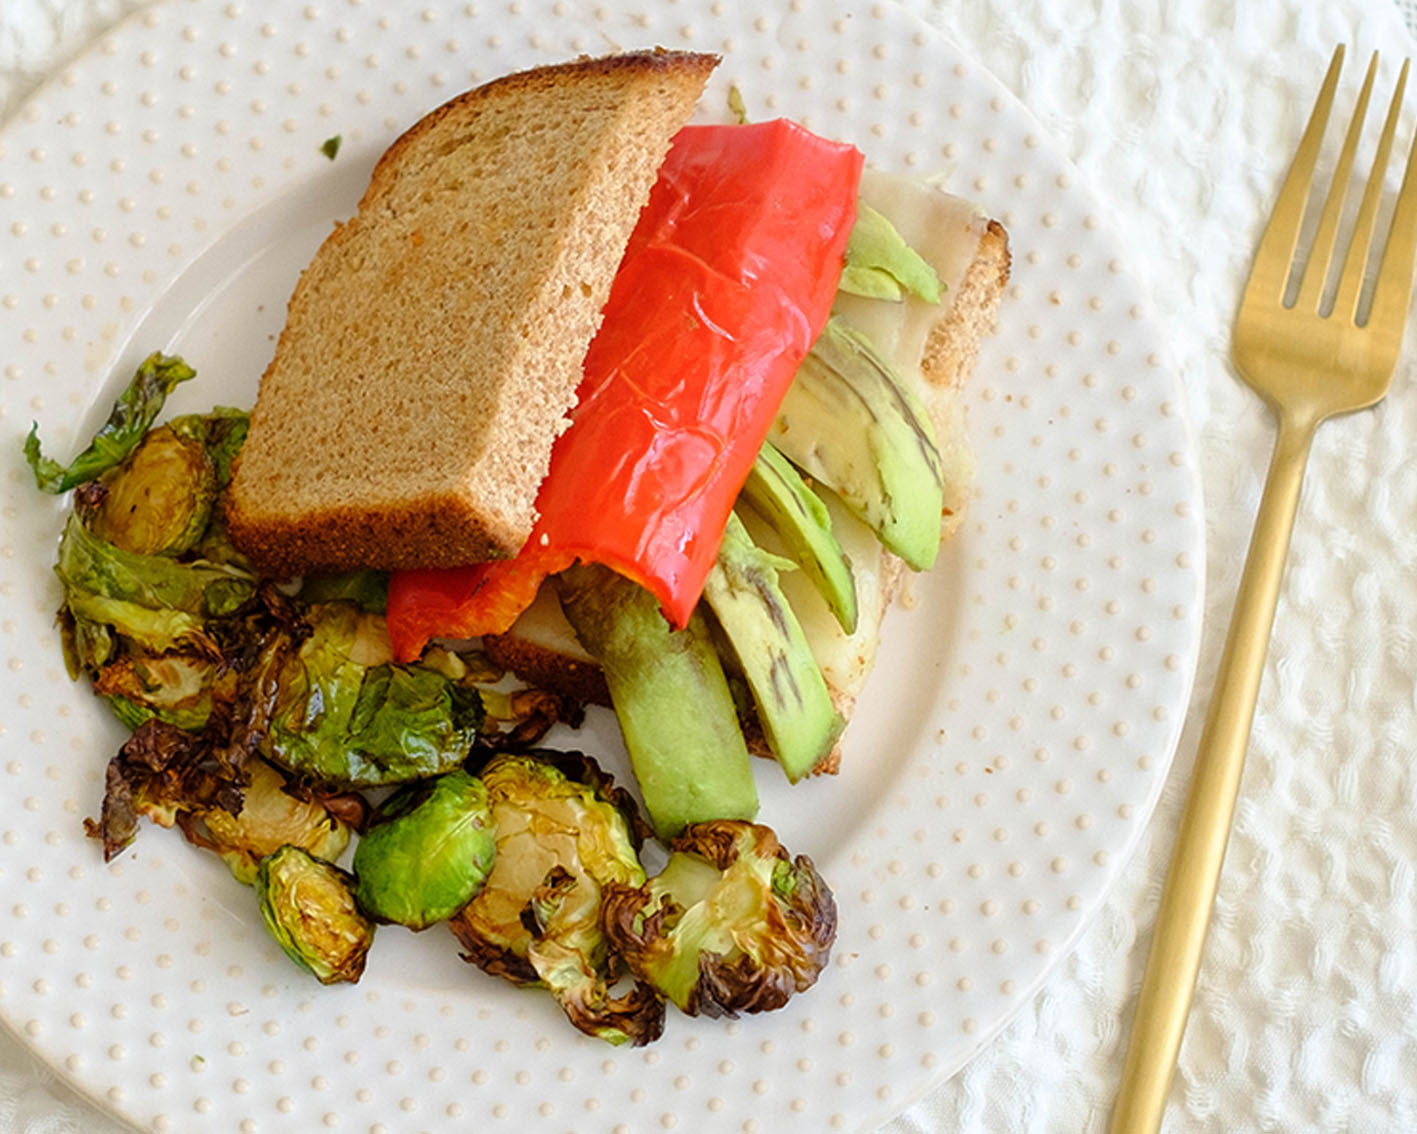
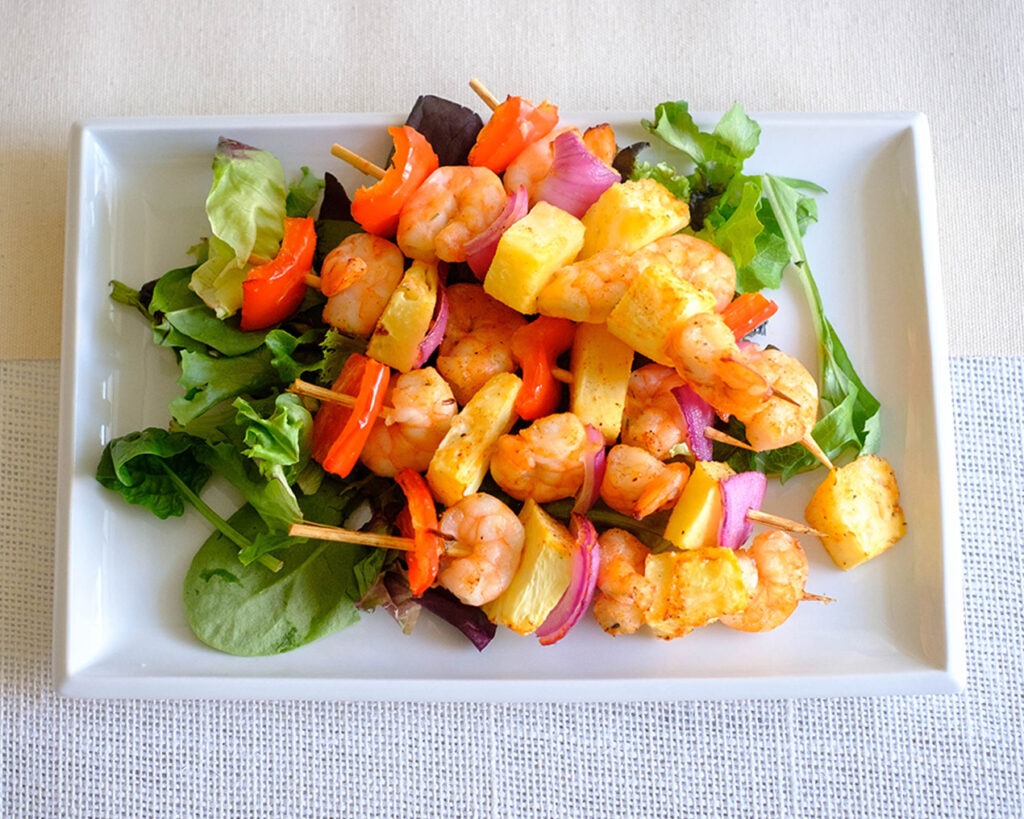
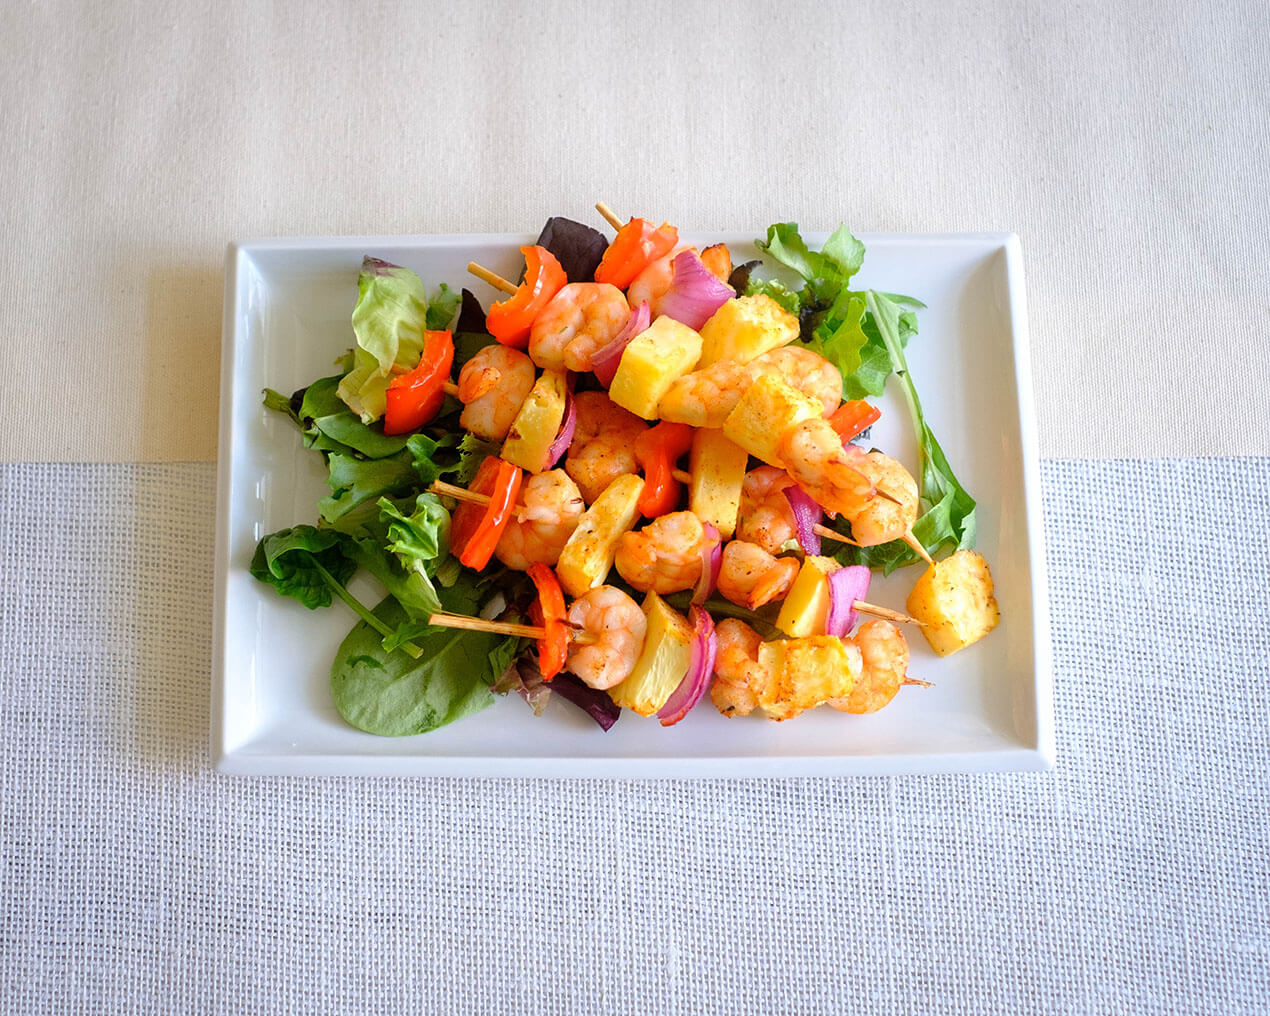
  • But why stop at just pizza? Cauliflower Sausage Pizza is incredibly versatile and can be served with a variety of scrumptious side dishes. How about pairing it with a fresh, vibrant salad loaded with leafy greens and your favorite veggies? The options are endless, and you’ll have a satisfying, protein-packed meal that will keep you energized and feeling fabulous.
  • If you don’t want to use your oven, you can also make this in your Air Fryer. Just keep in mind that the Air Fryer cooks much faster, so reduce the cooking time by 5 minutes and lower the temperature to 375F.
glass meal pep containers with cauliflower sausage pizza
cauliflower pizza

Cauliflower Sausage Pizza

No ratings yet
Prep Time 5 minutes
Cook Time 20 minutes
Course dinner, Main Course
Cuisine American, Italian
Servings 2
Calories 579 kcal

Equipment

  • knife
  • cutting board
  • sheet pan
  • oven

Ingredients
  

  • 1 each cauliflower head
  • 2 each beef sausage links
  • 1/2 cup ricotta cheese
  • 1/4 cup shredded mozzarella cheese
  • 1 tbsp garlic (minced)
  • 1/4 cup tomato sauce
  • 1/4 tsp thyme
  • 1/4 tsp salt
  • 2 tbsp olive oil

Instructions
 

  • Pre-heat the oven to 400F
  • Cut the outer green leaves of the cauliflower and cut off the bottom of the cauliflower stem, but make sure to keep the core intact
  • Cut through the middle of the cauliflower head to keep the florets together and cut thick "steak" slices about 1 inch thick
  • Save two thick slices and set the other floret pieces aside for another dish (you can keep it in the fridge for a few days or freeze it for a few months)
  • Place the cauliflower slices on a sheet pan and drizzle it with olive oil making sure it is fully coated
  • Bake it in the oven for about 25 minutes.
  • Meanwhile, dice the sausage in small square pieces. Mix together the tomato sauce with the thyme and salt
  • After 25 minutes, remove the cauliflower from the oven and top it off with the tomato sauce, minced garlic, shredded mozzarella, ricotta cheese, and sausage
  • Place it back in the oven to bake for another 5 to 10 minutes until the sausage heats through and the cheese melts

Notes

Nutrition information provided is an estimate. It will vary based on cooking method and specific ingredients used. Please consult with your healthcare provider for specific dietary needs. To gain a better understanding, explore our nutrition disclaimer here. 

Nutrition

Calories: 579kcalCarbohydrates: 21gProtein: 25gFat: 45gSaturated Fat: 16gPolyunsaturated Fat: 4gMonounsaturated Fat: 23gCholesterol: 92mgSodium: 1221mgPotassium: 1274mgFiber: 6gSugar: 7gVitamin A: 519IUVitamin C: 142mgCalcium: 294mgIron: 2mg

Similar Recipes

cilantro steak

Grilled Cilantro Skirt Steak with Cauliflower Rice

cauliflower rice

Cauliflower Fried Rice

sweet and sour chicken wings

Air Fryer Sweet and Sour Chicken Wings

You Might Also Like

Frequently Asked Questions

Can I make the pizza without cheese?

Absolutely! If you’re looking for a dairy-free option or simply prefer not to use cheese, you can omit it or try using a vegan cheese alternative.


Can I use a different sauce?

Of course! Feel free to experiment with basil pesto sauce, alfredo sauce, and even just freshly sliced tomatoes.


Can I add additional toppings to the pizza?

Definitely! Feel free to get creative with your toppings. Add your favorite vegetables, such as bell peppers, onions, or mushrooms, to enhance the flavors and add more nutritional value.

Posted on Leave a comment

Air Fryer Honey Sesame Chicken Bites

rectangular wooden plate with small bite size chicken pieces, sliced red bell peppers, and honey mustard applesauce

Hello foodie friends! I’m excited to share this delicious and healthy honey sesame, air fryer chicken recipe that’s not only convenient and cheap but also just as good as takeout! I also want to talk to you about the magic of sesame seeds and how they can add amazing flavor to your Asian-Inspired chicken dishes. In addition we’ve got a tasty recipe for a honey mustard apple sauce that’s both healthy and incredibly flavorful that is perfect for adding some excitement to your meal prep routine.

This post may contain affiliate links. Please see our privacy policy for details.

Calories: 531kcal | Carbohydrates: 22g | Protein: 31g | Fat: 36g | Saturated Fat: 9g | Polyunsaturated Fat: 9g | Monounsaturated Fat: 15g | Trans Fat: 0.1g | Cholesterol: 167mg | Sodium: 1223mg | Potassium: 584mg | Fiber: 3g | Sugar: 18g | Vitamin A: 2019IU | Vitamin C: 77mg | Calcium: 39mg | Iron: 2mg

rectangular wooden plate with small bite size chicken pieces, sliced red bell peppers, and honey mustard applesauce - try this air fryer chicken recipe

Making honey sesame chicken in the Air Fryer is a healthy, convenient, and cheap way to enjoy a delicious meal at home. By following these tips, you’ll be able to cook up a tasty dish that’s just as good as takeout, but with a fraction of the cost and calories. Let’s get started!

The PrepYoSelf Newsletter

Why this recipe is great for meal prep

  • The Air Fryer is a quick and easy way to cook chicken, which is perfect for busy weeknights or meal prepping for the week ahead. Plus, making your own honey sesame sauce is cheaper than buying pre-made sauce from the store.
  • Condiments can often add a lot of unnecessary calories, but this honey mustard applesauce dip is made from scratch. The ingredients include honey which is a natural sweetener that’s lower in calories than refined sugar, and it also has antibacterial and anti-inflammatory properties. And mustard is a low-calorie condiment that adds a lot of flavor without adding a lot of fat or calories.
  • Last but not least, sesame seeds are a versatile and flavorful ingredient that can be used in a variety of dishes, but they are particularly delicious in Asian cuisine. They add a nutty, toasted flavor and a satisfying crunch that elevates any dish. Not to mention, sesame seeds are packed with nutrients like protein, fiber, and healthy fats, making them a great addition to any healthy meal prep.

rectangular wooden plate with air fryer chicken recipe, small bite size chicken pieces, sliced red bell peppers, and honey mustard applesauce. Next to it is a round plate with chicken tacos

Ingredients:

  • Chicken: We used boneless chicken thighs, but you can also use chicken breasts or chicken tenderloins
  • Marinade: We used a simple combination of soy sauce, sesame oil, garlic butter, and honey. However, you can add other ingredients such as hoisin sauce, gyoza sauce, and ginger powder
  • Mustard sauce: This sauce is a simple mixture of yellow mustard, honey, and applesuace

rectangular wooden plate with air fryer chicken recipe - small bite size chicken pieces, sliced red bell peppers, and honey mustard applesauce

Easy Air Fryer Chicken Recipe steps

  1. Cut your chicken into one inch cubes.
  2. Whisk together the honey sesame sauce. In a bowl, combine the chicken with the marinade and make sure they are fully coated.
  3. Place the chicken in the Air Fryer Basket and spray them with cooking spray. Cook them in the Air Fryer for about 20 minutes. Flip them halfway through the cooking process so that they get golden brown all around.
  4. Meanwhile, mix together the honey mustard applesauce dip and slice the bell peppers.

Reference the recipe card below for detailed instructions.

Glass meal prep container with chicken and red bell peppers - try this air fryer chicken recipe

Meal Prep Tips for Honey Sesame Chicken

  • When  it comes to serving your honey sesame Air Fryer chicken recipe, I recommend pairing it with some healthy sides. We served it fresh bell pepper strips, however, steamed or roasted veggies, brown rice, or quinoa are all great options that will help balance out the sweetness of the honey sesame sauce and provide some extra nutrition.
  • To store: Let the chicken cool completely before storing it in an airtight container in the fridge for up to 3 to 4 days.
  • To Reheat: You can reheat it in the Air fryer for 3 to 4 minutes at 350F until it warms through or you can just reheat in the microwave. If the chicken seems dry after reheating, you can make extra honey sesame sauce and drizzle it over the chicken before serving.

rectangular wooden plate with small bite size chicken pieces, sliced red bell peppers, and honey mustard applesauce

Air Fryer Honey Sesame Chicken

This recipe features tender chicken thighs marinated in a flavorful blend of soy sauce, honey, sesame oil, and garlic powder, air-fried to perfection and served with a tangy honey mustard applesauce alongside crisp red bell pepper slices.
No ratings yet
Prep Time 5 minutes
Cook Time 15 minutes
Course lunch, Main Course
Cuisine Asian
Servings 2
Calories 531 kcal

Equipment

  • knife
  • cutting board
  • mixing bowls
  • Air Fryer

Ingredients
  

  • 12 oz boneless chicken thighs
  • 2 tablespoons soy sauce
  • 1 tablespoon honey
  • 1 tablespoon sesame oil
  • 1/4 teaspoon garlic powder
  • 1 teaspoon sesame seeds

Mustard Applesauce

  • 1 tablespoon yellow mustard
  • 1 tablepsoon honey
  • 1/2 cup applesauce

Vegetable Sides

  • 1 red bell pepper (sliced)

Instructions
 

  • Cut the chicken into 1 inch cubes. Add the chicken to a mixing bowl and combine it with the soy sauce, honey, sesame oil, garlic powder, and sesame seeds.
  • Place the chicken in the Air Fryer basket and cook them in the air fryer for 15 minutes at 360F until they fully cook to an internal temperature of 165F. Be sure to flip them over halfway through so that they are golden brown on all sides.
  • Meanwhile, in a small bowl, mix together the mustard, honey, and applesauce. Slice the red bell peppers into thin strips.
  • Once the chicken is cooked, dip them in the honey mustard applesauce and enjoy them with sliced bell peppers or your choice of fresh veggie sticks.

Notes

Nutrition information provided is an estimate. It will vary based on cooking method and specific ingredients used. Please consult with your healthcare provider for specific dietary needs. To gain a better understanding, explore our nutrition disclaimer here. 

Nutrition

Calories: 531kcalCarbohydrates: 22gProtein: 31gFat: 36gSaturated Fat: 9gPolyunsaturated Fat: 9gMonounsaturated Fat: 15gTrans Fat: 0.1gCholesterol: 167mgSodium: 1223mgPotassium: 584mgFiber: 3gSugar: 18gVitamin A: 2019IUVitamin C: 77mgCalcium: 39mgIron: 2mg

Similar Recipes

broccoli beef

Ground Beef and Broccoli Stir Fry

tofu stir fry

Tofu and Veggie Stir Fry

beef and chinese broccoli

Garlicky Beef Stir Fry

You Might Also Like

Frequently Asked Questions

How else can I use sesame seeds?

One of my favorite ways to use them is by making a simple sesame seed crust for chicken. To do this, you’ll need to mix together sesame seeds, breadcrumbs, and your favorite Asian-inspired spices, such as ginger, garlic, and soy sauce. Then, coat your chicken breasts in the mixture and bake them in the oven. The result is a perfectly crispy, flavorful chicken that’s sure to impress.


Can I make this recipe without an Air Fryer? 

Yes, you can! If you don’t have an Air Fryer, you can bake the chicken bites in the oven at 400F for about 20-25 minutes or until it is cooked through and golden brown. Just be sure to flip the chicken bites halfway through cooking to ensure that they are cooking evenly.


How can I use the honey mustard sauce in my meal prep?

It’s also perfect for adding flavor to chicken, pork, or salmon. Simply brush it on your protein before baking or grilling. You can also use it as a dipping sauce for fresh veggies. Add apple cider vinegar and olive oil to the sauce. Blend it together and use it as a salad dressing.

Posted on Leave a comment

Healthy Breakfast Pizza

Round plate with breakfast pizza that has egg topping, bell pepper, and red onions.

This breakfast pizza is a delicious and satisfying way to start your day. You’ll feel energized and ready to tackle whatever comes your way. And let’s face it, breakfast pizza is just plain fun to eat and it’s a healthy pizza!

This post may contain affiliate links. Please see our privacy policy for details.

Round plate with breakfast pizza that has egg topping, bell pepper, and red onions.

Why We Love Breakfast Pizza

  • Breakfast pizza can be a healthy pizza, if you choose nutritious ingredients. Start with a whole grain crust and lots of vegetables to boost the nutrients in your pizza.
  • Prepping it in advance makes it convenient for you to have a healthy option readily available for the mornings. You can store it in the refrigerator or freezer and just heat it up quickly for busy mornings when you don’t have time to prepare breakfast in the mornings.
  • Making it ahead of time also allows you to control the portion size especially if you’re trying to manage your calorie intake and maintain a balanced diet.
  • You also have the flexibility to add a variety of toppings such as eggs, sausage, cheese, vegetables, and herbs you have on hand.

The PrepYoSelf Newsletter

Simple Ingredients You’ll Need

  • Crust: We used a pre-made crust such as naan bread to help with portion control. You can also use pita bread or flatbreads as an option. It just depends on how thick you want your crust
  • Sauce: For the base of your toppings, you can spread tomato sauce. Other options you can use are pesto sauce or just even leave it bare with no sauce
  • Vegetables: We used bell peppers, red onions, and sliced tomatoes because of their nutrients and bright colors. However, feel free to spinach, sliced mushrooms, and even sliced zucchini.
  • Protein toppings: Since it’s breakfast pizza, we had to top it off with an egg, but you can easily add chopped breakfast sausage, bacon pieces, or even slices of prosciutto would be a delicious option
  • Cheese: opt for low-fat cheese or just make sure you only use a balanced portion of cheese to keep the fat and calorie content of your pizza in check. Mozzarella, feta cheese, and gruyere are great options
  • Herbs and spices: To add more flavor, sprinkle in some herbs and spices such as garlic powder, basil, oregano, or red pepper flakes. These ingredients add a layer of extra flavor without adding extra calories

Round plate with breakfast pizza that has egg topping, bell pepper, and red onions.

How to Make Breakfast Pizza

  1. Preheat the oven to 400F. Slice up your toppings as needed.
  2. Spread the base of the crust with tomato sauce.
  3. Crack the egg in the middle of each crust. Assemble the sliced veggies around the egg.
  4. Place the crust on a sheet pan and bake it in the oven for 15-20 minutes until the eggs are firmly set.

Reference the recipe card below for detailed instructions.

round plate with glass meal prep container with breakfast pizza with egg, naan bread, and vegetables

Meal Prep Tips for Breakfast Pizza

  • Use a good quality crust as it is the foundation of any great pizza. We used a pre-made crust to help with the time of prep.
  • Consider how you want your eggs cooked. If you like it runny, you can crack them directly into the pizza before you bake them. However, if you prefer firmer eggs, you can cook the eggs separately and then add them as a topping after the pizza cooks.
  • Experiment with different toppings. Instead of eggs, you can use smoked salmon and use cream cheese as your sauce base. Instead of a savory breakfast pizza, you can also make a sweet version such as a fruit breakfast pizza by using fruit and nut toppings, and maple syrup.

glass meal prep container with breakfast pizza with egg, naan bread, and vegetables

Round plate with breakfast pizza that has egg topping, bell pepper, and red onions.

Breakfast Pizza

Healthy Breakfast Pizza in less than 20 minutes. Start your day with a tasty bite!
No ratings yet
Prep Time 5 minutes
Cook Time 20 minutes
Course Breakfast
Cuisine American
Servings 2

Equipment

  • cutting board
  • knife
  • sheet pan
  • oven (or toaster oven/Air Fryer)

Ingredients
  

  • 2 large naan bread (or flatbread, 6 inches wide)
  • 1/4 cup red bell peppers (sliced)
  • 1/4 cup red onions (sliced)
  • 2 large eggs
  • 1/2 cup shredded mozzarella cheese
  • 2 tablespoons tomato sauce (optional)
  • 1/8 teaspoon garlic powder
  • 1/8 teaspoon salt

Instructions
 

  • Pre-heat the oven 400F. Use a spoon to spread the tomato sauce across the naan bread. Place the naan bread on a sheet pan.
  • Crack two eggs in the middle of each naan bread. Assemble the sliced bell peppers, onions, around the egg. Sprinkle with the seasoning.
  • Bake in the oven for about 15-20 minutes until the egg whites are firmly set and fully cooked. After it cooks, use a knife to cut it in half

Similar Recipes

pepper sandwich

Roasted Red Pepper and Cheese Sandwich

bean and corn taco

Vegetarian Black Bean and Corn Soft Tacos

eggplant

Grilled Eggplant Steaks with Marinara Sauce

You Might Also Like

Frequently Asked Questions

Is breakfast pizza healthy?

It can be healthy if made with nutritious ingredients. The key to keeping it healthy is limiting high fat, high fat, and high sodium ingredients and portion control.


Can breakfast pizza be frozen?

Yes, you can freeze breakfast pizza. Just make sure it is stored in tight plastic wrap in an airtight container. It’s best to use it up within 3 months for the best quality.


How do you reheat breakfast pizza?

You can place it in the oven at 350F for 5 to 7 minutes or you can just microwave it for 1-2 minutes

Posted on Leave a comment

Air Fryer Chicken Meatball Lettuce Wraps

round plate with chicken meatball lettuce wraps served with grapes

Air Fryer Chicken Meatballs are a delicious and healthy way to enjoy this classic dish without the added fat and oil of traditional frying methods. Serving them in lettuce wraps makes them a healthy lunch idea you can enjoy during your busy work week.

This post may contain affiliate links. Please see our privacy policy for details.

round plate with chicken meatball lettuce wraps served with grapes, healthy lunch idea

Air Fryer meatballs are a healthy lunch idea because they are:

  1. Easy to Make: Meatballs can be made quickly and easily in an Air Fryer with minimal effort. You can prepare a large batch of meatballs in just a few minutes, which makes meal prep much easier and faster.
  2. Healthy: Air fryer meatballs are healthier than traditional fried meatballs. They are cooked using hot air, which means they don’t need to be submerged in oil. This reduces the fat and calorie content of the meatballs and makes them a healthier option.
  3. Versatile: Meatballs can be made with a variety of meats and flavors, making them a versatile, healthy lunch idea. You can make meatballs with beef, chicken, turkey, or even plant-based alternatives like tofu or lentils. You can also experiment with different herbs and spices to add flavor.
  4. Freezer-friendly: Air fryer meatballs can be frozen and reheated easily. This means you can make a large batch of meatballs and freeze them for future meals. When you’re ready to eat, simply reheat them in the air fryer for a quick and easy meal.
  5. Portion-controlled: Meatballs are a great way to control portion sizes for meal prep. You can make them in uniform sizes, which makes it easy to portion out your meals for the week. This is especially helpful if you’re trying to stick to a specific calorie or macro-nutrient goal.

The PrepYoSelf Newsletter

  • Ground Chicken
  • Egg
  • Ricotta
  • Garlic
  • Onion powder, dried thyme, salt, and pepper
  • Green Onions and Cilantro

You can use different types of ground meat such as turkey, chicken, pork, or a combination of meats. Just ensure you adjust the cooking time accordingly, as cooking times may vary for different types of meat.

cutting board with a silver mixing bowl filled with ground chicken, small containers filled with green onions, chopped cilantro, seasonings, olive oil, eggs, and ricotta cheese - healthy lunch idea

Variations of meatballs:

  • Italian-style meatballs: Add dried oregano, dried basil, and chopped fresh parsley to the mixture.
  • Asian-style meatballs: Use ground pork and add soy sauce, hoisin sauce, and chopped scallions to the mixture.
  • BBQ meatballs: Use ground beef and add BBQ sauce and chopped onion to the mixture.
  • Vegetarian meatballs: Use 1 can of drained and mashed chickpeas instead of ground meat, and add chopped fresh cilantro and ground cumin to the mixture.

round plate with chicken meatball lettuce wraps served with grapes, healthy lunch idea

How to Air Fry Chicken Meatballs:

  1. Preheat the Air Fryer before cooking to ensure they cook evenly and quickly.
  2. In a large mixing bowl, combine all the ingredients and mix well.
  3. Shape the mixture into meatballs, about 1 inch in diameter.
  4. Place the meatballs in a single layer in the air fryer basket.
  5. Cook for 12-15 minutes, flipping the meatballs halfway through, until they are cooked through and browned on the outside.

Reference the recipe card below for detailed instructions.

glass meal prep containers filled with chicken meatball lettuce wraps - a healthy lunch idea

Meal Prep Tips for Air Fryer Meatballs

  • Make sure the meatballs are evenly sized to ensure even cooking.
  • Please note that cooking times may vary depending on the size of your meatballs and the temperature of your Air Fryer.
  • Experiment with different seasonings to find your favorite flavor combination.
  • If you’re short on time, you can make a big batch of meatballs and freeze them for later use. Simply reheat them in the air fryer when you’re ready to enjoy them.

round plate with chicken meatball lettuce wraps served with grapes

Air Fryer Chicken Meatball Lettuce Wraps

Easy to make Air Fryer Chicken Meatball Lettuce wraps that are great for meal prep.
No ratings yet
Prep Time 5 minutes
Cook Time 25 minutes
Course dinner, Main Course
Cuisine Mediterranean
Servings 2

Equipment

  • knife
  • cutting board
  • mixing bowl
  • sheet pan

Ingredients
  

Meatballs

  • 12 oz ground chicken
  • 1 large egg
  • 1/4 cup ricotta cheese
  • 2 tbsp garlic (minced)
  • 1/4 tsp onion powder
  • 1/4 tsp dried thyme
  • 1/4 cup green onions (chopped)
  • 1/4 cup cilantro (chopped)
  • 1/4 tsp salt
  • 1/4 tsp pepper

Lettuce Wrap Ingredients

  • 6 large lettuce wraps
  • 1/2 cup cherry tomatoes (sliced)
  • 1/4 cup cucumber

Yogurt dip

  • 1 cup greek yogurt
  • 1 tbsp lemon juice
  • 1 tbsp olive oil
  • 1 tbsp garlic (minced)
  • 1/4 cup cucumbers (finley diced)
  • 1/4 tsp salt
  • 1/8 tsp dried dill

Optional

  • 1.5 cups grapes (or choice of fruit)

Instructions
 

  • Pre-heat the Air Fryer for about 5 minutes at 360F.
  • In a mixing bowl, combine the ground chicken, eggs, seasonings, garlic, and ricotta. Use a fork or whisk to mix everything together. Next, add the chopped herbs and fold them in well.
  • Take small portions of the mixture and shape them into meatballs. You can use a small ice cream scoop or 2 spoons to portion out the meatballs (about 1 inch in diameter). Arrange the meatballs into the Air Fryer Basket in a single layer, making sure they are not touching each other. Coat them with cooking spray and cook them in the Air fryer for about 12 to 15 minutes at 360F. Flip them halfway through until they are browned and cooked through an internal temperature of 165F.
  • Meanwhile, in a small bowl, mix together the ingredients for the yogurt sauce. Once cooked, serve with lettuce wraps and top them off with fresh cucumbers and cherry tomatoes.
  • Serve with the yogurt sauce and your choice of fruit.

Similar Recipes

bean and corn taco

Vegetarian Black Bean and Corn Soft Tacos

chicken salad

Oven Baked Honey Mustard Glazed Chicken Salad

balsamic chicken salad

Oven Baked Balsamic Chicken Salad with Strawberries

You Might Also Like

Frequently Asked Questions

Can I use Frozen meatballs in the Air Fryer?

Yes, you can use frozen meatballs in the air fryer. Just make sure to add a few extra minutes to the cooking time to ensure they are fully cooked.


Can I make Air Fryer Meatballs without breadcrumbs?

Yes, you can make air fryer meatballs without breadcrumbs. You can use almond flour, crushed pork rinds, or even grated parmesan cheese as a substitute.


Can I make meatballs in advance and reheat them in the Air Fryer later?

Yes, you can make meatballs in advance and reheat them in the Air Fryer later. Just be sure to store them properly in the fridge or freezer and adjust the cooking time accordingly when reheating.

Posted on Leave a comment

Crispy Air Fryer Chicken Drumsticks

Air Fried Chicken

Enjoy “Fried Chicken” without the mess of a deep-fryer. Learn how to make these fried chicken drumsticks using the Air Fryer and not have to deal with all the oil and mess of traditional deep-fried chicken.

This post may contain affiliate links. Please see our privacy policy for details.

Plate with crispy Air Fryer chicken with sliced yellow squash and zucchini.

We Love these Air Fried Chicken Drumsticks for These Reasons

  • No Need for a crazy amount of oil, so there is less guilt eating them because it’s a healthier version of this comfort food
  • The chicken still turns out golden brown and crunchy on the outside, and still juicy and moist on the inside
  • You can make it for yourself, but also treat your family and friends to this delicious meal

The PrepYoSelf Newsletter

Ingredients You’ll Need

  • Chicken Drumsticks: We used drumsticks because they turn out moist and juicy. However, you can also use chicken thighs. If you want to keep it lean, you can use chicken tenderloins.
  • Eggs and Milk: This will help bind the breadcrumbs to the chicken.
  • Breadcrumbs: We used regular bread crumbs, but you can also use panko breadcrumbs.
  • Vegetables: We used budget-friendly vegetable sides such as yellow squash and zucchini.
  • Seasonings: We kept it simple with paprika, garlic powder, and salt. However, feel free to add other seasonings such as cayenne for a little heat and Italian seasoning if you like herb flavors.
  • Oil: Spray the chicken with oil so that it can get crispy in the Air Fryer. You can also use cooking spray.

Plate with crispy Air Fryer chicken with sliced yellow squash and zucchini.

How to Make Air “Fried” Chicken Drumsticks

  1. First, prepare your egg wash by mixing together the eggs and milk. Next, prepare the breadcrumbs on another plate and season it.
  2. Start dipping the chicken in the egg wash, followed by dredging them in the breadcrumbs. Make sure they are fully coated.
  3. Spray the chicken with cooking spray and place them in the Air Fryer. Cook them until they are golden brown and crispy.
  4. Halfway through the cooking process, be sure to flip them over so that they evenly cook and get crispy on all sides.

Reference the recipe card below for detailed instructions.

Glass meal prep container with crispy Air Fryer chicken with sliced yellow squash and zucchini.

Meal Prep Tips for Air “Fried” Chicken Drumsticks

  • Other cook methods: If you don’t have an Air Fryer, you can bake it in an oven at 425F for 40-45 minutes until it is crispy.
  • To serve: Serve with a side of mashed potatoes, creamy caesar salad, rice pilaf, or other vegetable options such as green beans or asparagus.
  • Storage: Store in an airtight container in the refrigerator for up to 3 to 4 days for the best quality.
  • To Reheat: The chicken can be reheated in the microwave, but it might get soggy. So you can reheat it in the Air Fryer at 360F for 2 to 3 minutes until it is warmed through.

Glass meal prep containers with crispy Air Fryer chicken with sliced yellow squash and zucchini.

air fryer chicken

Crispy Air Fryer Chicken with Squash and Zucchini

Use your Air Fryer to make crispy fried chicken for your next comfort fix.
No ratings yet
Prep Time 5 minutes
Cook Time 35 minutes
Course dinner, Main Course
Cuisine American
Servings 2

Equipment

  • knife
  • cutting board
  • mixing bowls
  • Air Fryer

Ingredients
  

Chicken

  • 4 chicken drumsticks
  • 1 large egg
  • 1/2 cup milk
  • 1 cup breadcrumbs
  • 1/2 teaspoon salt
  • 1/2 teaspoon paprika
  • 1/2 teaspoon garlic powder
  • 1 tablespoon olive oil (or cooking spray)

Vegetables

  • 1 yellow squash
  • 1 zucchini
  • 1/4 teaspoon paprika
  • 1/4 teaspoon salt
  • 1/4 teaspoon garlic powder
  • 1 teaspoon olive oil (or cooking spray)

Instructions
 

Chicken

  • In a mixing bowl, mix together the eggs and milk. Add breadcrumbs to a large plate and sprinkle with the seasonings.
  • Start with dipping the drumsticks in the egg wash. Next, dredge them in the breadcrumbs, making sure that they are fully coated. Spray the chicken with cooking spray and place them in the Air Fryer basket.
  • Cook the chicken at 360F for 20 minutes until it reaches an internal temperature of 165F. (Using tongs, flip them half way through the cooking process so that the drumsticks can get golden brown and crispy all around)

Vegetables

  • Meanwhile, slice the squash and zucchini into 1/4 inch half coins. Season them and spray them with cooking oil.
  • After the chicken has cooked, remove them from the air fryer basket and place the vegetables in the basket. Cook them for 8-10 minutes at 360F.

Similar Recipes

orange chicken

Air Fryer Orange Soy Glazed Chicken and Broccoli

roasted chicken and rutabaga

Roasted Lemon Italian Chicken with Rutabaga

rosemary chicken

Rosemary Baked Chicken and Potatoes

You Might Also Like

Frequently Asked Questions

Is Air Fryer Fried Chicken healthy?

Cooking the chicken in the Air fryer is healthier than cooking it in a deep-fryer. When cooking it in the deep fryer, extra oil seeps into the breading while it cooks because it is fully submerged in oil. You can also make this recipe more healthy if you want to use lean meat such as chicken breast or tenderloins.


How do I make the chicken crispy in the air fryer?

Be sure not to overcrowd your Air Fryer. You want to make sure that enough hot air circulates each chicken drumstick. You can also pre-heat your air fryer for a few minutes before placing the chicken inside the basket so that the basket is already nice and hot.


How long can I store Air Fried chicken?

You can store it in an air-tight container in the refrigerator for up to 3 days. To reheat, we recommend heating it up in the air fryer at 360F for 2 to 3 minutes. It can also be reheated in the microwave, but it may not be as crispy.

Posted on Leave a comment

Sweet Potato BLT and Side Salad

sweet potato blt

This classic twist on a BLT is a great option for your next lunch meal prep. Switch out your bread with nutritious sweet potato slices and you get a combo of sweet and savory flavors in every bite!

This post may contain affiliate links. Please see our privacy policy for details.

Round plate with sweet potato slices with bacon, tomato, and salad mix for lunch meal prep.

We love this Sweet Potato BLT for so many reasons

  • It uses budget-friendly ingredients. You can add different toppings to make it more interesting and to suit your taste.
  • It’s a great way to incorporate more vegetables into your diet. Sweet potato toast is a great source of fiber, vitamins, and minerals, making them a healthy addition to your lunch meal prep
  • It’s an easy sheet pan recipe with minimal cleanup

The PrepYoSelf Newsletter

Basic Ingredients You’ll Need

  • Sweet Potato: Sweet potato contains nutrients that can support a healthy vision, and gut health, and is highly nutritious.
  • Bacon: We used regular bacon, but you can swap it out with turkey bacon or prosciutto slices.
  • Roma Tomato: Use any kind of tomato.
  • Spring Mix: Serve it up with your choice of lettuce mix.
  • Salad Dressing: Make your own homemade dressing or pick your favorite pre-made dressing.

Round plate with sweet potato slices with bacon, tomato, and salad mix.

How to Make Sweet Potato BLT

  1. Preheat the oven to 400F.
  2. Peel the sweet potato and slice it lengthwise into 1/4 inch slices.
  3. Coat the sweet potato slices with olive oil and season on both sides.
  4. Layer the sweet potato and bacon slices on a sheet pan.
  5. Bake them in the oven for about 10-15 minutes.
  6. Remove them from the oven and let them cool before assembling the sandwich.
  7. Note: You can also use an Air Fryer to cook your sweet potato toast at 360F for 12 to 15 minutes, flipping it halfway through.

Reference the recipe card below for detailed instructions.

Glass lunch meal prep container with sweet potato slices with bacon, tomato, and salad mix.

Meal Prep Tips for This BLT Recipe

  • Other Cook Methods: If you don’t want to mess with the oven, you can also microwave the sweet potato slices in 5-minute increments until they soften. However, it may not be as crispy. You can also bake your sweet potato slices and bacon in the Air Fryer.
  • Ingredient Tips: You can also buy pre-cooked bacon slices that you can just heat up in the microwave for a really quick meal.
  • Additions: Feel free to add sliced cheese or sliced avocado. Dress up your sandwich with your choice of condiments.
  • Storage: Store in an airtight container in the refrigerator for up to 3 to 4 days for the best quality.

Glass lunch meal prep containers with sweet potato slices with bacon, tomato, and salad mix.

sweet potato blt

Sweet Potato BLT and Side Salad

Switch out traditional bread otast and try sweet potato toast for your next BLT sandwich
No ratings yet
Prep Time 5 minutes
Cook Time 15 minutes
Course lunch, Main Course
Cuisine American
Servings 2

Equipment

  • knife
  • cutting board
  • sheet pan
  • oven (or Air Fryer)

Ingredients
  

  • 1 medium size sweet potato
  • 3 slices bacon
  • 1 Roma tomato (sliced)
  • 4 cups spring mix
  • 4 tablespoons choice of salad dressing
  • 1/4 teaspoon garlic powder
  • 1.4 teaspoon paprika
  • 1.4 teaspoon salt
  • 1 tablespoon olive oil

Instructions
 

  • Pre-heat the oven to 400F. Peel and slice the potato lengthwise into 1/4 inch thick slices (need at last 4 slices).
  • Place the sweet potato slices and bacon on a sheet pan. Season the sweet potato on both sides with the garlic powder, paprika, and salt. Coat the sweet potato with olive oil on both sides.
  • Bake the sweet potato and bacon in the oven for about 10-15 minutes until the sweet potato is tender and the bacon is crispy.
  • Remove the sheet pan from the oven and let the ingredients cool. Layer the bacon and sliced tomatoes in between two sweet potato slices. Serve with a side salad and choice of salad dressing.
  • Note: You can also use an Air Fryer to cook your sweet potato toast at 360F for 12 to 15 minutes, flipping it halfway through.

Similar Recipes

pepper sandwich

Roasted Red Pepper and Cheese Sandwich

bean and corn taco

Vegetarian Black Bean and Corn Soft Tacos

eggplant

Grilled Eggplant Steaks with Marinara Sauce

You Might Also Like

Frequently Asked Questions

What is the difference between a sweet potato and a yam?

Yams are usually grown in different parts of the world, while sweet potatoes are grown in the United States. Sweet potatoes have tapered ends, have smooth flesh, and taste sweet and moist. Yams are usually cylindrical and have rough, dark, hairy flesh, and usually more starchy and dry.


How to store sweet potatoes?

Keep them in a well-ventilated container in a cool, dark, and dry area such as your pantry or back corner of your kitchen countertop. They usually can keep for a month.


Is turkey bacon healthier than regular bacon?

Turkey bacon has slightly fewer calories and fat than pork and can be a good option for those that can’t eat pork. However, it is still processed with more sugar and preservatives than regular bacon. Both options can be enjoyed in moderation.

Posted on Leave a comment

Air Fryer Sweet and Sour Chicken Wings

sweet and sour chicken wings

Who says meal prep can’t be just as tasty as takeout? Try these tasty Crispy Air Fryer Chicken Wings coated in a sweet and sour sauce!

This post may contain affiliate links. Please see our privacy policy for details.

Round plate with chicken wings drizzled with sweet and sour sauce that includes pineapple chunks and red bell peppers.

Why We Love These Air Fryer Chicken Wings

The best part of this recipe is that the sauce can be easily made from common pantry staples. All you need is canned pineapple juice, ketchup, rice vinegar, soy sauce, and sugar.

Cooking the chicken wings in the Air Fryer is so simple and can be done in less than 30 minutes. You’ll have a healthier and tastier version of this classic sweet and sour-chicken take-out meal.

The PrepYoSelf Newsletter

Ingredients You’ll Need

  • Chicken: We used a mixture of chicken drummettes and flappers, but if you prefer boneless wings, you can use chicken tenderloins or chicken breast chunks.
  • Pineapple: Pineapple is often found in sweet and sour sauces because of its tangy flavors, but you can also use orange juice as a substitute.
  • Red Bell Pepper: You can use yellow or orange bell peppers as well.
  • Soy Sauce: This will help darken the sauce and add salty, savory flavors.
  • Ketchup: If you don’t have ketchup, you can use tomato paste or tomato sauce.
  • Honey: You’ll need a sweetener for the sauce. If you don’t have honey, you can also use brown sugar.
  • Cornstarch: The cornstarch will help thicken the sweet and sour sauce.
  • Garlic Powder: You can use minced garlic, but garlic powder will work just fine.
  • Olive oil: Coat the chicken with oil or spray with cooking spray so that it can get crispy in the Air Fryer.

Glass meal prep container with chicken wings drizzled with sweet and sour sauce that includes pineapple chunks and red bell peppers.

How to Make Sweet and Sour Chicken Wings

  1. In a small bowl, marinate the chicken wings with the soy sauce and garlic powder.
  2. Then, coat it with olive oil and place the chicken in the Air Fryer and cook it until it is fully cooked and crispy.
  3. Meanwhile, prepare the sweet and sour sauce on the stovetop. Add the bell peppers, pineapple chunks, pineapple juice, ketchup, soy sauce, and honey to a heated sauce pot and let it simmer for a few minutes.
  4. Add a cornstarch slurry to the sauce to thicken the sauce.
  5. After the chicken cooks in the Air Fryer, top them off with the sweet and sour sauce.

Reference the recipe card below for detailed instructions.

Glass meal prep container with chicken wings drizzled with sweet and sour sauce that includes pineapple chunks and red bell peppers.

Meal Prep Tips for Air Fryer Chicken Wings

  • Other cook methods: If you don’t have an Air Fryer, you can bake it in an oven at 425F until it is crispy
  • To serve: Serve with a side of steamed rice or noodles. You can also use cauliflower rice if you prefer a low-carb option.
  • Storage: Store in an airtight container in the refrigerator for up to 3 to 4 days for the best quality. You can also keep the sauce separate from the chicken until you are ready to eat the meal, then drizzle the sauce on top of the chicken.
  • To Reheat: Both the chicken wings and sauce can be reheated in the microwave.
  • Leftover pineapple: Use them up in morning smoothies or enjoy them as a snack throughout the day.

Glass meal prep container with chicken wings drizzled with sweet and sour sauce that includes pineapple chunks and red bell peppers.

sweet and sour chicken wings

Air Fryer Sweet and Sour Chicken Wings

Crispy Chicken Wings coated in a sticky, sweet, and sour sauce without hte mess of a deep fryer.
No ratings yet
Prep Time 5 minutes
Cook Time 25 minutes
Course dinner, Main Course
Cuisine American, Asian
Servings 2

Equipment

  • knife
  • cutting board
  • mixing bowl
  • Air Fryer

Ingredients
  

Chicken

  • 12 each chicken wings (flats or drumettes)
  • 1 tablespoon soy sauce
  • 1/2 teaspoon garlic powder
  • 1 tablespoon olive oil

Sweet and Sour Sauce

  • 1/2 cup canned pineapple (chunks)
  • 1/2 cup pineapple juice (from the can)
  • 1/4 cup ketchup
  • 1 tablespoon soy sauce
  • 2 tablespoons honey
  • 1/2 teaspoon garlic powder
  • 1 red bell pepper (cubed)

Corn starch slurry

  • 1 teaspoon cornstarch
  • 2 tablespoons water

Instructions
 

  • In a small mixing bowl, marinate the chicken wings with soy sauce, garlic powder, and olive oil. Place the chicken in the air fryer and cook for 20 minutes at 360F (flip the chicken wings halfway through the cooking process).
  • Meanwhile, prepare the sweet and sour sauce on the stovetop. Heat a saucepan on medium heat and add the red bell pepper, pineapple chunks, pineapple, juice, ketchup, soy sauce, honey, and garlic powder.
  • In a small bowl, mix together the corn starch with water to make a slurry. Add the slurry to the sauce pan and continue to heat the sauce until it thickens
  • After the chicken cooks, top it off with the sweet and sour sauce.

Notes

Note: If you do not have an air fryer, you can preheat an oven to 425F and line the wings on a sheet pan. Bake until crispy (about 35-40 minutes)

Similar Recipes

chicken fajitas

Sheet Pan Chicken Fajitas with Mango Salsa

sausage squash

Spaghetti Squash with Sausage and Peppers

pineapple bbq chicken

Oven Baked Pineapple BBQ Chicken

You Might Also Like

Frequently Asked Questions

Is sweet and sour chicken gluten-free?

Some traditional recipes first coat their chicken with flour, however, this recipe does not include flour and is a gluten-free recipe.


What can I serve with this recipe?

Pair it with steamed cauliflower rice or air fryer broccoli florets.


How can I make sweet and sour chicken wings without an air fryer?

If you don’t have an air fryer, you can bake the chicken wings in the oven for 40-45 minutes at 425F until they are golden, brown, and crispy.

Posted on Leave a comment

Air Fryer Orange Soy Glazed Chicken with Broccoli

orange chicken

This sweet and tangy Air Fryer Chicken Thigh recipe is a healthier version of one of our favorite take-out meals.

This post may contain affiliate links. Please see our privacy policy for details.

Round plate with golden brown chicken thighs and crispy broccoli florets.

You can’t go wrong with ordering Orange Soy Chicken for take-out. Those bite-sized chicken pieces, dredged in fried, golden, and crispy batter tossed in a sweet orange sauce are just so full of flavor.

However, it’s also a lot of work making it at home, not to mention the guilt of loaded calories!

But we don’t want to miss out on those great flavors during our weekly meal prep, so we opted for an easier, more budget-friendly version, but with all the same great flavors.

For this recipe, we wanted to keep the crispy textures and decided to prep Air Fryer Chicken Thighs glazed in an orange soy marinade and paired it with broccoli florets.

The PrepYoSelf Newsletter

To Make this Healthy Air Fryer Orange Chicken, You’ll Need

  • Chicken Thighs: This may not be the leanest cut of chicken, but it’s a lower-calorie version than the chicken pieces dredged in flour and deep-fried in oil. But if you really want to keep it clean and lean, you can still make this recipe with chicken breasts or chicken tenderloins.
  • Marinade: We used a mixture of soy sauce, orange juice, honey, garlic powder, and sesame oil.
  • Broccoli: We love chicken and broccoli together, but you can also use other vegetables such as green beans, bok choy, or bell peppers.

Round plate with golden brown chicken thighs and crispy broccoli florets.

How to Prepare Easy Air Fryer Orange Soy Chicken

  1. Mix together your marinade in a bowl, then add the chicken. Make sure the chicken gets fully coated with the marinade.
  2. Next, place the chicken thighs in the Air Fryer and cook them for about 23 to 25 minutes at 360F.
  3. After the chicken cooks, remove it from the Air Fryer and place the broccoli in the Air Fryer. Sprinkle them with seasonings and coat them with sesame oil. Roast at 360F for 5 minutes.

Reference the recipe card below for detailed instructions.

Glass meal prep container with golden brown chicken thighs and crispy broccoli florets.

Meal Prep Tips for Air Fryer Orange Chicken

  • Other cook methods: If you don’t have an Air Fryer, you can bake it in an oven at 425F until it is crispy.
  • To serve: Serve with a side of grains such as brown rice pilaf or soba noodles.
  • Storage: Store in an airtight container in the refrigerator for up to 3 to 4 days for the best quality.
  • To Reheat: Both the chicken and broccoli can be reheated in the microwave.
  • Larger Batch: If you make a larger batch, you can shred the chicken and serve it on top of lettuce or in a lettuce wrap with Asian slaw.

Glass meal prep container with golden brown chicken thighs and crispy broccoli florets.

orange chicken

Air Fryer Orange Soy Glazed Chicken with Broccoli

Here's a home cooked version of tasty orange soy glazed chicken made right in the Air Fryer.
No ratings yet
Prep Time 5 minutes
Cook Time 25 minutes
Course dinner, Main Course
Cuisine American, Asian
Servings 2

Equipment

  • mixing bowl
  • Air Fryer

Ingredients
  

Chicken and Marinade

  • 4 bone in chicken thighs
  • 1/4 cup soy sauce
  • 1 orange (juiced)
  • 1 tablespoon honey
  • 1/2 teaspoon garlic powder
  • 1 tablespoon sesame oil

Broccoli and Seasonings

  • 4 cups broccoli florets
  • 1/2 teaspoon garlic powder
  • 1/4 teaspoon salt
  • 1 tablespoon sesame oil

Instructions
 

  • Place the chicken thighs in a mixing bowl and add the soy sauce, juice of an orange, honey, garlic powder, and sesame oil. Mix it all together making sure the chicken is fully coated.
  • Then, place the thighs in the Air Fryer and cook them at 360F for 23 to 25 minutes (you'll want to make sure it gets nice and crispy). After it cooks, check the temperature with a thermometer making sure it reaches an internal cook temperature of 165F.
  • Next, remove the chicken and place the broccoli in the air fryer. Sprinkle with the seasonings and sesame oil and cook at 360F for 5 minutes.

Notes

If you don’t have an air fryer, place the chicken on a sheet pan and bake it in the oven for 35-40 minutes at 400F. Bake the broccoli florets for 8-10 minutes.

Similar Recipes

chicken kale salad

Grilled Honey Dijon Chicken and Kale Salad

balsamic chicken salad

Oven Baked Balsamic Spinach and Strawberry Salad

chicken salad

Oven Baked Honey Mustard Glazed Chicken Salad

You Might Also Like

Frequently Asked Questions

Can I make orange soy glazed chicken in the oven?

If you don’t have an Air Fryer, you can also bake the chicken in the oven for 35-40 minutes at 400F until it reaches an internal temperature of 165F. Bake the broccoli florets for 8-10 minutes.


Is this recipe gluten-free?

Yes, we do not use any flour in this recipe like the classic take-out recipes use.


How long do chicken thighs take in the Air Fryer?

If you are cooking it at 360F, it typically takes 23-25 minutes, depending on how thick your chicken thighs are. Use a thermometer to check that it is fully cooked to an internal temperature of 165F.

Posted on Leave a comment

Vegetarian Red Pepper and Cheese Sandwich

roasted pepper sandwich with sliced avocado and roasted brussels sprouts

Toasted cheese sandwiches are the best, and for this recipe, we added an extra layer of flavor and nutrients with roasted bell peppers and creamy avocado slices.

This post may contain affiliate links. Please see our privacy policy for details.

Round plate with a grilled cheese and vegetable sandwich with roasted brussels sprouts.

Who craves comfort food for lunch? I know we do! And it can’t get any more comforting than a toasted cheese sandwich.

But this is not your average cheese sandwich. We leveled it up with roasted red peppers, and sliced avocado, and served it with crispy balsamic brussel sprout chips. And the best part is that we made it all in our Air Fryer Basket!

The PrepYoSelf Newsletter

Ingredients You’ll Need to Make This Tasty Vegetarian Cheese Sandwich

  • Sliced Bread: We used wheat bread, but you can choose any kind of bread that you like such as sourdough, rye bread, and even gluten-free freed
  • Red Bell Peppers: We used red peppers, but you can use any kind of roasted vegetables such as sliced zucchini, sliced eggplant, or sliced portobello mushrooms. We always try to incorporate any veggies when we can
  • Sliced Cheese: We used provolone cheese, muenster cheese, gruyere cheese, and swiss cheese are tasty options
  • Sliced Avocado: Instead of using mayo spread, we opted for healthy fat and used sliced avocado. This is a great option to add the creaminess that we enjoy from using mayo
  • Brussels Sprouts: We glazed our brussels sprouts with balsamic concentrate which added flavor and helped crisp it up during the cooking process

Round plate with a grilled cheese and vegetable sandwich with roasted brussels sprouts.

Easy steps for this Roasted Red Pepper and Cheese Sandwich

When it comes to the classic cheese sandwich, we often make it on the stove top or use a panini grill, but we actually used the Air Fryer to cook the whole meal. Here’s how we did it:

  1. In a bowl, marinate the brussels sprouts and bell peppers with balsamic concentrate, garlic powder, salt, and olive oil.
  2. Next, place the vegetables in the Air Fryer basket and cook at 350F for 7 minutes.
  3. Then, remove the vegetables from the basket and place the bread slices topped with sliced cheese into the basket.
  4. Toast them until the cheese melts.
  5. Assemble the sandwich by layering the roasted red peppers, cheese, and avocado.
  6. Enjoy with a side of roasted balsamic Brussels sprouts.

Reference the recipe card below for detailed instructions.

Glass meal prep container with a grilled cheese and vegetable sandwich with roasted brussels sprouts.

Meal Prep Tips for Roasted Pepper Cheese Sandwich

  • To Serve: Serve with a side salad, soup, or regular chips instead of the brussels sprouts.
  • Prep Tip: If you are prepping this meal in advance, cook only the bell peppers and brussels sprouts in advance. Then, when you are ready to eat the meal, toast the bread and slice the avocado fresh. If you assemble the sandwich too early, the avocado will brown and the sandwich might get too soggy

Glass meal prep containers with a grilled cheese and vegetable sandwich with roasted brussels sprouts.

roasted pepper sandwich with sliced avocado and roasted brussels sprouts

Vegetarian Roasted Red Pepper, Avocado and Cheese Sandwich

Here's a veggie packed cheese sandwich that you can easily prep in your Air Fryer.
No ratings yet
Prep Time 5 minutes
Cook Time 15 minutes
Course lunch, Main Course
Cuisine American
Servings 2

Equipment

  • knife
  • cutting board
  • mixing bowl
  • Air Fryer

Ingredients
  

  • 1 each red bell pepper
  • 2 cups brussels sprouts
  • 1 tablespoon balsamic concentrate
  • 1/4 teaspoon garlic powder
  • 1/4 teaspoon salt
  • 1 tablespoon olive oil
  • 4 slices wheat bread
  • 2 slices cheese (your choice)
  • 1 avocado

Instructions
 

  • Slice the brussels sprouts into thin slices. Cut the bell pepper in half and remove the inner seeds. In a bowl, marinate the vegetables with balsamic concentrate, garlic powder, salt, and olive oil.
  • Place the brussels sprouts and bell pepper in the Air Fryer and cook at 350F for 7 minutes. After the veggies cook, remove them from the Air Fryer basket.
  • Place the bread slices in the basket and top each slice with cheese. Toast the bread at 370F for 1 minute (or until the cheese melts)
  • Then, assemble the sandwich by adding avocado slices, and the bell pepper, and serve with a side of the roasted brussels sprouts.

Similar Recipes

sweet potato blt

Sweet Potato BLT Sandwich

balsamic chicken salad

Baked Balsamic Baked Chicken Spinach Salad

balsamic steak

Grilled Balsamic Steak with Sweet Potato Wedges

You Might Also Like

Frequently Asked Questions

I don’t have an Air Fryer, can I make this in the oven?

Yes! Just roast your veggies at 400F for 10-12 minutes. You can also toast your bread with the sliced cheese in the oven for about 2 to 3 minutes until the bread gets toasted and the cheese melts.


Do avocado and cheese go together?

Cheese and avocado are one of our favorite combos. In hot dishes, you can use any kind of cheese that melts well such as mozzarella, gruyere, provolone, and even swiss cheese. For cold dishes such as salads, combine them with feta cheese.


What else can you put on a grilled cheese sandwich?

You can add caramelized onions, pesto sauce, sauteed mushrooms, spinach, or olive tapenade. All these can add great flavors to your cheese sandwich. It’s also a great way to use up what you have in the kitchen. It’s all about being creative!

Posted on Leave a comment

Air Fryer Shrimp and Pineapple Kebabs

shrimp kebab

Quick and easy Air Fryer Shrimp and Pineapple kebabs filled with tropical flavors that you’re going to love for your weekly meal prep.

This post may contain affiliate links. Please see our privacy policy for details.

Plate with colorful air fryer shrimp kebabs that include shrimp, pineapple, red onions, and red bell pepper.

Why We Enjoy These Air Fryer Shrimp Kebabs

Food on skewers always just makes it more fun to eat! We load ours with skewers with juicy shrimp, sweet bell peppers, tangy pineapple, and aromatic onions.

  • Cooking it in the Air Fryer makes it so easy and fast
  • All the ingredients bring their own flavors, so no need for fancy seasonings
  • If you don’t want to mess with skewers, you can still throw everything in the Air Fryer basket and let them cook all together

The PrepYoSelf Newsletter

Ingredients You’ll Need

This shrimp kebab recipe uses simple ingredients. Here are the essential that you’ll need for the skewers:

  • Shrimp: We used fresh, peeled, and deveined shrimp. You can find them also frozen, however, you’ll need to defrost them in the fridge the night before
  • Red Bell Pepper: You can use any color of bell peppers, but we like the sweetness of red bell peppers
  • Red Onions: You can use any kind of onions that you have on hand, but we like using red onions because it adds color to the dish
  • Pineapple: It’s best to use fresh pineapple for this recipe because canned pineapple will be too mushy when cooked

Plate with colorful air fryer shrimp kebabs that include shrimp, pineapple, red onions, and red bell pepper.

Here Are The Steps To Make Air Fryer Shrimp Kebabs

  1. Cut up the pineapple, red onions, and bell peppers into one-inch cubes.
  2. Assemble the ingredients on the skewers, alternating each ingredient on the skewers.
  3. Coat with olive oil or cooking spray and sprinkle on the seasonings.
  4. Place the skewers in the Air Fryer Basket and cook for 8 to 10 minutes at 360F.

Reference the recipe card below for detailed instructions.

Glass meal prep containers with colorful air fryer shrimp kebabs that include shrimp, pineapple, red onions, and red bell pepper.

Meal Prep Tips for Air Fryer Shrimp Kebabs

  • Adding more flavor: If you want to add more flavor, you can coat it with bbq sauce or a mixture of honey and soy sauce
  • To serve: Serve with a side salad or with a side of rice pilaf
  • Storage: Store in an airtight container in the refrigerator for up to 3 to 4 days for the best quality.
  • Ingredient swaps: You can also use mango instead of pineapple

Glass meal prep containers with colorful air fryer shrimp kebabs that include shrimp, pineapple, red onions, and red bell pepper. Included is a side salad.

shrimp and pineapple kebabs

Air Fryer Shrimp and Pineapple Kebabs

Tropical flavored Shrimp and Pineapple Kebabs cooked in the Air Fryer makes an easy meal prep meal full of flavor during a busy weeknight.
4.50 from 2 votes
Prep Time 10 minutes
Cook Time 15 minutes
Course Main Course
Cuisine American
Servings 2

Equipment

  • cutting board
  • knife
  • Air Fryer

Ingredients
  

  • 12 oz shrimp (peeled and deveined)
  • 1 red bell pepper (cubed)
  • 1/2 small red onion (cubed)
  • 2 cups pineapple (chunks)
  • 1/4 teaspoon garlic powder
  • 1/4 teaspoon paprika
  • 1/4 teaspoon salt
  • 4 cups spring mix
  • 4 tablespoons your choice of vinaigrette dressing

Instructions
 

  • If using wooden skewers, soak them for at least 10 minutes.
  • Season the shrimp, pineapple, bell peppers, and red onions with the seasonings. Assemble the ingredients on the skewers, alternating each ingredient on the skewers. Spray each kebab skewer with cooking spray.
  • Place in the air fryer and cook at 360F for 8-10 minutes (until internal temperature is 145F). If using the oven, cook for 10-15 minutes.
  • Serve with a side salad and your choice of salad dressing.

Similar Recipes

shrimp and asparagus

Oven Baked Shrimp with Panko Breaded Asparagus

shrimp and corn

Sheet Pan Shrimp with Cauliflower and Corn

shrimp quinoa salad

Citrus Shrimp Quinoa and Spinach Salad

You Might Also Like

Frequently Asked Questions

Can I grill my skewers?

Yes, absolutely. Just be sure to soak your skewers before grilling.


What kind of shrimp do I use?

We prefer using fresh shrimp that has been peeled and deveined for this recipe.


How do you know when shrimp is cooked?

When the flesh turns from translucent to opaque, the shrimp should be cooked through.