
Looking for a simple, delicious way to use up leftovers or whip up a satisfying meal? This easy veggie quiche is just the ticket! Made with a buttery premade crust, creamy eggs, and a colorful medley of sweet potatoes, zucchini, tomatoes, and tangy feta cheese, it’s a perfect dish for any time of day. Whether you’re meal-prepping for the week, hosting brunch, or craving a break from holiday leftovers, this quiche has you covered. Plus, it’s versatile enough to adapt with your favorite veggies or add-ins!
This post may contain affiliate links. Please see our privacy policy for details.

Why This Recipe is Great for Leftovers
- Leftover Heroes: Got leftover pie crust or random veggie scraps? BAM—instant quiche magic. You’re saving food and money.
- Veggie-Packed Goodness: After all that turkey and ham, your body is basically begging for a veggie break. You deserve this plant-powered dish.
- Fridge Clearance Queen/King: Use up those half-zucchinis, lonely tomatoes, or sweet potato stragglers. No veggie left behind!
- Stress-Free & Fancy-Looking: Looks impressive, tastes amazing, and takes minimal effort. Winning on every level.
- Perfect for Any Time of Day: Breakfast? Lunch? Dinner? Snack? Quiche doesn’t judge—it’s there for you 24/7.
- Crowd-Pleasing & Customizable: Got other leftovers? Toss ‘em in! Cheddar instead of feta? Yes, please. Bacon bits? Go for it! Quiche is your culinary canvas.
- Light & Fresh: This recipe is like a palate cleanser for your soul after all those rich holiday meals. It’s hearty yet refreshing.

Let’s Break Down the Ingredients
- Premade Pie Crust: The buttery, flaky crust provides the perfect foundation for the creamy filling. It balances the richness of the eggs and adds a satisfying crunch to every bite. Plus, it makes this recipe super convenient—no need to whip up a crust from scratch!
- Eggs: Eggs are the glue that holds everything together. They create a silky, custard-like texture when baked and provide a neutral canvas that lets the veggies and cheese shine. Plus, they’re packed with protein for a hearty, satisfying meal.
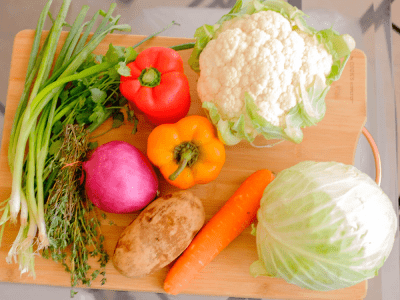
- Sweet Potato: Thinly sliced sweet potatoes add natural sweetness and a velvety texture. They contrast beautifully with the tangy feta and savory eggs. Their vibrant orange color also makes the quiche look stunning and inviting.
- Zucchini: Zucchini is mild and tender when cooked, making it a great addition that won’t overpower the dish. Its water content adds a touch of juiciness, balancing the density of the sweet potatoes and eggs.
- Roma Tomato: Roma tomatoes are firm and less watery than other varieties, which is key for keeping the quiche from getting soggy. Their slight acidity cuts through the richness of the eggs and cheese, adding brightness and freshness.
- Feta Cheese: Feta’s salty, tangy flavor elevates the quiche, giving it a punch of savory goodness. It contrasts beautifully with the sweetness of the potatoes and the mildness of the zucchini, tying all the flavors together.

How to Make Quiche
- Preheat your oven: Set your oven to 375°F so it’s ready when your quiche goes in.
- Prepare the pie crust: Take the premade pie crust out of the package and gently press it into a 9” pie plate, making sure it fits snugly against the bottom and sides. Use your fingers to crimp or pinch the edges for a nice decorative finish.
- Whisk the eggs: In a mixing bowl, crack all six eggs and add the salt. Use a whisk or fork to beat them together until the mixture is smooth and slightly frothy.
- Layer the sweet potatoes: Lay the sweet potato slices evenly across the bottom of the crust, making sure they cover it in a single layer. Pour a small amount of the egg mixture over the sweet potatoes, just enough to coat them.
- Add the zucchini layer: Place the zucchini slices on top of the sweet potatoes in another even layer. Again, pour some of the egg mixture over the zucchini to cover them lightly.
- Top with tomatoes: Lay the tomato slices evenly on top of the zucchini. Pour the remaining egg mixture over everything, ensuring it fills in the gaps and reaches the edges of the crust.
- Sprinkle the cheese: Finish by sprinkling the feta cheese evenly over the top of the quiche. This will add a delicious tangy flavor and a beautiful golden finish.
- Bake the quiche: Carefully place the pie plate in the oven. Bake for 35-40 minutes, or until the quiche is puffed up, golden on top, and the center no longer jiggles when you gently shake the pan.
- Cool before serving: Remove the quiche from the oven and let it sit for about 5 minutes. This will help it set fully and make slicing easier.
Reference the recipe card below for detailed instructions.

Meal Prep Tips and Ingredient Swaps
- Cheese Choices: Try cheddar or gruyere for a richer flavor, or go with goat cheese for a creamier, tangy twist.
- Veggie Varieties: Add in some chopped spinach, mushrooms, or bell peppers for more color and nutrients.
- Protein Boost: Toss in cooked bacon bits, diced ham, or even smoked salmon for added protein and flavor.
- Breakfast Grab-and-Go: Pair a slice with some fresh fruit for a quick and balanced breakfast.
- Lunch Box Hero: Pack a slice with a small side salad or roasted veggies for a satisfying lunch.
- Dinner Upgrade: Serve warm with a bowl of soup or a crusty piece of bread for a cozy dinner.


Frequently Asked Questions
Can I make the quiche ahead of time?
Absolutely! You can prepare and bake the quiche the day before. Let it cool completely, then cover it tightly and store it in the fridge. When ready to serve, reheat slices in the oven at 350°F for 10-15 minutes, or microwave for about 1 minute.
Can I freeze the quiche?
Yes, quiche freezes beautifully! Let it cool completely, then wrap individual slices tightly in plastic wrap and place them in a freezer-safe bag or container. To reheat, bake frozen slices at 350°F for about 20 minutes, or microwave on a lower power setting.
Can I use egg substitutes or egg whites?
Yes, you can use liquid egg substitutes or egg whites instead of whole eggs. Just use the same about of liquid volume egg whites for the recipe.


Easy Quiche Recipe
Equipment
Ingredients
Instructions
Notes
Nutrition