Posted on Leave a comment

Easy Quiche Recipe

Quiche-Eggs baked in pie crust with veggies

Looking for a simple, delicious way to use up leftovers or whip up a satisfying meal? This easy veggie quiche is just the ticket! Made with a buttery premade crust, creamy eggs, and a colorful medley of sweet potatoes, zucchini, tomatoes, and tangy feta cheese, it’s a perfect dish for any time of day. Whether you’re meal-prepping for the week, hosting brunch, or craving a break from holiday leftovers, this quiche has you covered. Plus, it’s versatile enough to adapt with your favorite veggies or add-ins!

This post may contain affiliate links. Please see our privacy policy for details.

Calories: 361kcal | Carbohydrates: 27g | Protein: 14g | Fat: 22g | Saturated Fat: 8g | Polyunsaturated Fat: 3g | Monounsaturated Fat: 8g | Trans Fat: 0.03g | Cholesterol: 262mg | Sodium: 639mg | Potassium: 311mg | Fiber: 2g | Sugar: 2g | Vitamin A: 3072IU | Vitamin C: 7mg | Calcium: 148mg | Iron: 3mg
Quiche-Eggs baked in pie crust with veggies

Why This Recipe is Great for Leftovers

  • Leftover Heroes: Got leftover pie crust or random veggie scraps? BAM—instant quiche magic. You’re saving food and money. 
  • Veggie-Packed Goodness: After all that turkey and ham, your body is basically begging for a veggie break. You deserve this plant-powered dish. 
  • Fridge Clearance Queen/King: Use up those half-zucchinis, lonely tomatoes, or sweet potato stragglers. No veggie left behind! 
  • Stress-Free & Fancy-Looking: Looks impressive, tastes amazing, and takes minimal effort. Winning on every level. 
  • Perfect for Any Time of Day: Breakfast? Lunch? Dinner? Snack? Quiche doesn’t judge—it’s there for you 24/7. 
  • Crowd-Pleasing & Customizable: Got other leftovers? Toss ‘em in! Cheddar instead of feta? Yes, please. Bacon bits? Go for it! Quiche is your culinary canvas. 
  • Light & Fresh: This recipe is like a palate cleanser for your soul after all those rich holiday meals. It’s hearty yet refreshing.

The PrepYoSelf Newsletter

Let’s Break Down the Ingredients

  • Premade Pie Crust: The buttery, flaky crust provides the perfect foundation for the creamy filling. It balances the richness of the eggs and adds a satisfying crunch to every bite. Plus, it makes this recipe super convenient—no need to whip up a crust from scratch!
  • Eggs: Eggs are the glue that holds everything together. They create a silky, custard-like texture when baked and provide a neutral canvas that lets the veggies and cheese shine. Plus, they’re packed with protein for a hearty, satisfying meal.
  • Sweet Potato: Thinly sliced sweet potatoes add natural sweetness and a velvety texture. They contrast beautifully with the tangy feta and savory eggs. Their vibrant orange color also makes the quiche look stunning and inviting.
  • Zucchini: Zucchini is mild and tender when cooked, making it a great addition that won’t overpower the dish. Its water content adds a touch of juiciness, balancing the density of the sweet potatoes and eggs.
  • Roma Tomato: Roma tomatoes are firm and less watery than other varieties, which is key for keeping the quiche from getting soggy. Their slight acidity cuts through the richness of the eggs and cheese, adding brightness and freshness.
  • Feta Cheese: Feta’s salty, tangy flavor elevates the quiche, giving it a punch of savory goodness. It contrasts beautifully with the sweetness of the potatoes and the mildness of the zucchini, tying all the flavors together.
Quiche-Eggs baked in pie crust with veggies

How to Make Quiche

  1. Preheat your oven: Set your oven to 375°F so it’s ready when your quiche goes in.
  2. Prepare the pie crust: Take the premade pie crust out of the package and gently press it into a 9” pie plate, making sure it fits snugly against the bottom and sides. Use your fingers to crimp or pinch the edges for a nice decorative finish.
  3. Whisk the eggs: In a mixing bowl, crack all six eggs and add the salt. Use a whisk or fork to beat them together until the mixture is smooth and slightly frothy.
  4. Layer the sweet potatoes: Lay the sweet potato slices evenly across the bottom of the crust, making sure they cover it in a single layer. Pour a small amount of the egg mixture over the sweet potatoes, just enough to coat them.
  5. Add the zucchini layer: Place the zucchini slices on top of the sweet potatoes in another even layer. Again, pour some of the egg mixture over the zucchini to cover them lightly.
  6. Top with tomatoes: Lay the tomato slices evenly on top of the zucchini. Pour the remaining egg mixture over everything, ensuring it fills in the gaps and reaches the edges of the crust.
  7. Sprinkle the cheese: Finish by sprinkling the feta cheese evenly over the top of the quiche. This will add a delicious tangy flavor and a beautiful golden finish.
  8. Bake the quiche: Carefully place the pie plate in the oven. Bake for 35-40 minutes, or until the quiche is puffed up, golden on top, and the center no longer jiggles when you gently shake the pan.
  9. Cool before serving: Remove the quiche from the oven and let it sit for about 5 minutes. This will help it set fully and make slicing easier.

Reference the recipe card below for detailed instructions.

Quiche-Eggs baked in pie crust with veggies

Meal Prep Tips and Ingredient Swaps

  • Cheese Choices: Try cheddar or gruyere for a richer flavor, or go with goat cheese for a creamier, tangy twist.
  • Veggie Varieties: Add in some chopped spinach, mushrooms, or bell peppers for more color and nutrients.
  • Protein Boost: Toss in cooked bacon bits, diced ham, or even smoked salmon for added protein and flavor.
  • Breakfast Grab-and-Go: Pair a slice with some fresh fruit for a quick and balanced breakfast. 
  • Lunch Box Hero: Pack a slice with a small side salad or roasted veggies for a satisfying lunch. 
  • Dinner Upgrade: Serve warm with a bowl of soup or a crusty piece of bread for a cozy dinner.
Quiche-Eggs baked in pie crust with veggies

Easy Quiche Recipe

This easy veggie quiche combines a premade crust, eggs, sweet potato, zucchini, tomato, and feta for a flavorful, meal-prep-friendly dish!
No ratings yet
Prep Time 5 minutes
Cook Time 40 minutes
Course Breakfast, lunch
Cuisine American
Servings 4
Calories 361 kcal

Equipment

  • mandolin
  • oven
  • mixing bowl

Ingredients
  

  • 1 single premade pie crust (unbaked)
  • 6 eggs
  • 1/2 cup sweet potato (peeled and thinly sliced)
  • 1/2 cup zucchini (thinly sliced)
  • 1/2 cup roma tomato (thinly sliced)
  • 1/2 cup feta cheese
  • 1/4 teaspoon salt

Instructions
 

  • Preheat that oven to 375°F (because magic is about to happen).
  • Roll out your pie crust into a 9” pie plate. Crimp the edges like the artist you are!
  • In a mixing bowl, whisk together eggs and salt until smooth.
  • Layer those sweet potato slices evenly on the crust, then pour in a bit of your egg mixture.
  • Next up, arrange the zucchini slices, pour more eggy goodness, then layer in those gorgeous tomato slices.
  • Pour in the remaining egg mixture like the quiche maestro you’ve always been. Top it all off with a generous sprinkle of feta cheese.
  • Pop it in the oven and bake for 35-40 minutes, or until the center is set and your kitchen smells AMAZING.
  • Let cool for 5 minutes (if you can wait that long), slice, and serve!

Notes

Nutrition information provided is an estimate. It will vary based on cooking method and specific ingredients used. Please consult with your healthcare provider for specific dietary needs. To gain a better understanding, explore our nutrition disclaimer here.

Nutrition

Calories: 361kcalCarbohydrates: 27gProtein: 14gFat: 22gSaturated Fat: 8gPolyunsaturated Fat: 3gMonounsaturated Fat: 8gTrans Fat: 0.03gCholesterol: 262mgSodium: 639mgPotassium: 311mgFiber: 2gSugar: 2gVitamin A: 3072IUVitamin C: 7mgCalcium: 148mgIron: 3mg

Similar Recipes

baked oatmeal

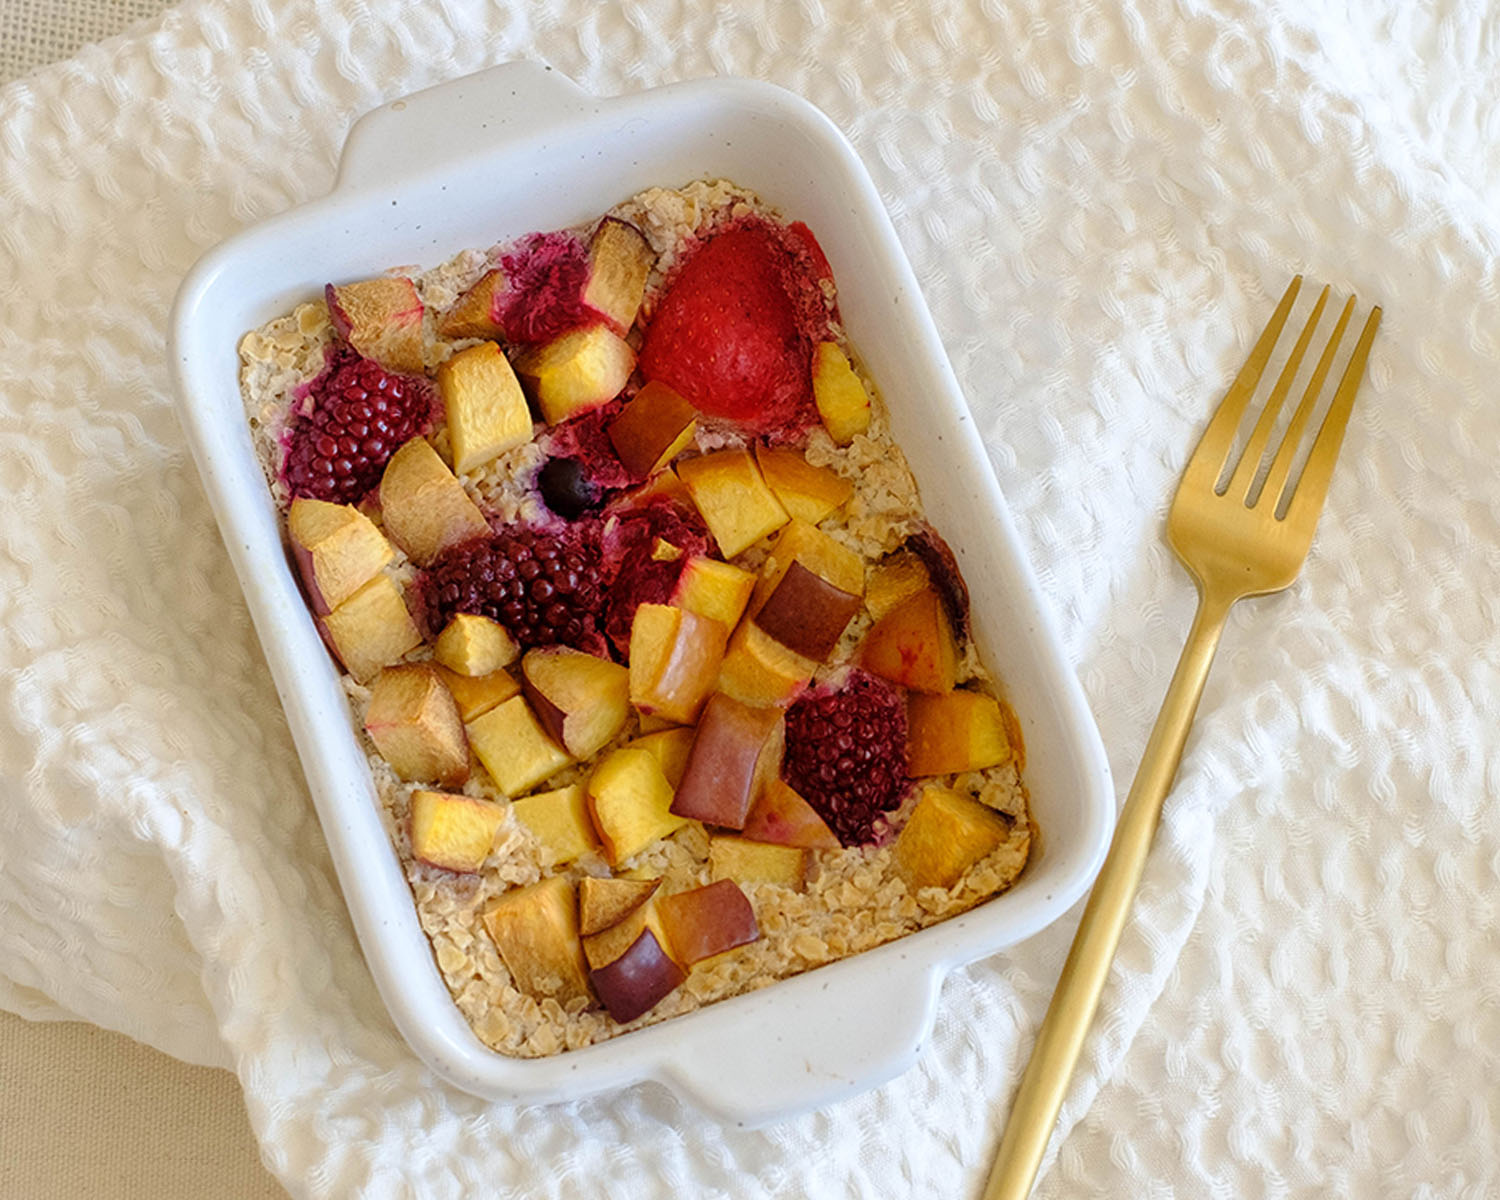
Oven Baked Oats with Apricots and Berries

ricotta apple

Oven Baked Apple with Ricotta and Walnuts

french toast 2

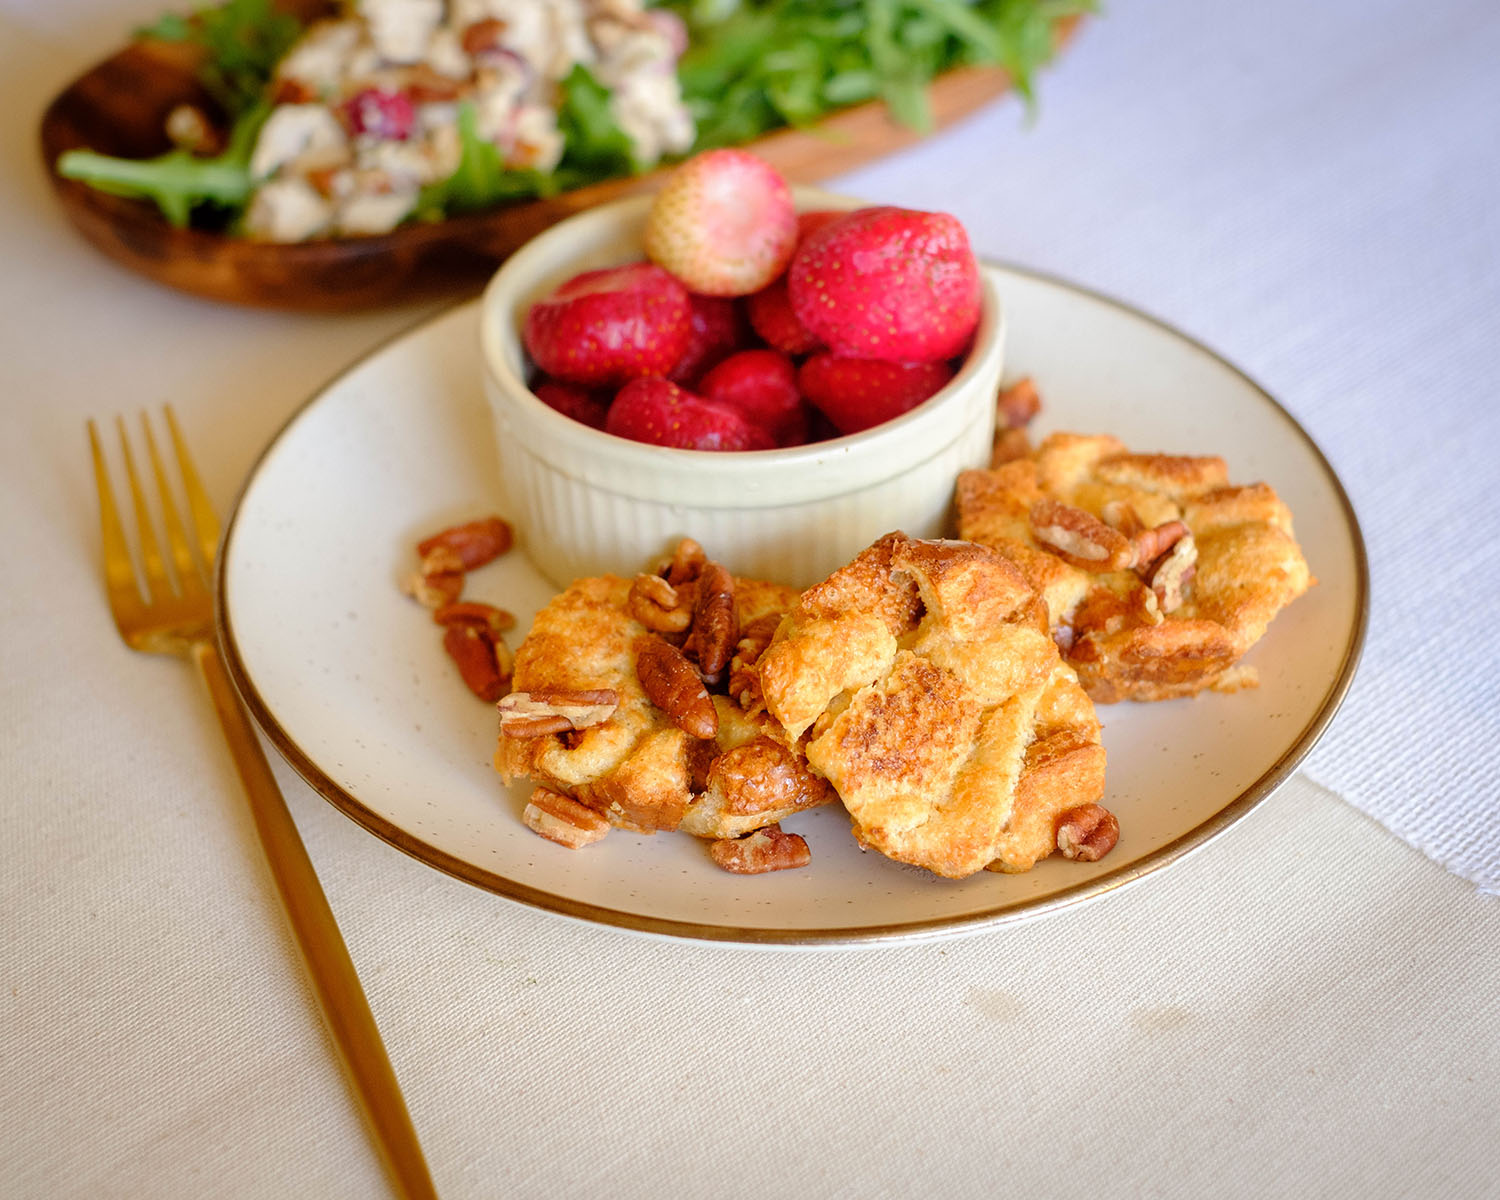
Oven Baked French Toast Muffins with Strawberries

You Might Also Like

Smartfruit Mellow Mango + Immunity, 100% Real Fruit Purée

Trader Joe’s Unsalted, Dry Toasted Slivered Almonds

Trader Joe’s the Dark Chocolate Lover’s Chocolate Bar

Frequently Asked Questions

Can I make the quiche ahead of time?

Absolutely! You can prepare and bake the quiche the day before. Let it cool completely, then cover it tightly and store it in the fridge. When ready to serve, reheat slices in the oven at 350°F for 10-15 minutes, or microwave for about 1 minute.


Can I freeze the quiche?

Yes, quiche freezes beautifully! Let it cool completely, then wrap individual slices tightly in plastic wrap and place them in a freezer-safe bag or container. To reheat, bake frozen slices at 350°F for about 20 minutes, or microwave on a lower power setting.


Can I use egg substitutes or egg whites?

Yes, you can use liquid egg substitutes or egg whites instead of whole eggs. Just use the same about of liquid volume egg whites for the recipe.

Posted on Leave a comment

Roasted Vegetable and Ricotta Puff Pastry Tarts

vegetable puff pastry

Transform your holiday table with these Roasted Vegetable and Ricotta Puff Pastry Tarts—a perfect blend of simplicity and elegance. With flaky puff pastry, creamy ricotta, and vibrant veggies, this dish is as delicious as it is stunning. Whether you’re hosting Thanksgiving or want a quick midweek treat, this recipe delivers on all fronts.

This post may contain affiliate links. Please see our privacy policy for details.

Calories: 507kcal | Carbohydrates: 34g | Protein: 13g | Fat: 36g | Saturated Fat: 12g | Polyunsaturated Fat: 4g | Monounsaturated Fat: 18g | Trans Fat: 0.01g | Cholesterol: 72mg | Sodium: 461mg | Potassium: 231mg | Fiber: 2g | Sugar: 2g | Vitamin A: 2794IU | Vitamin C: 5mg | Calcium: 161mg | Iron: 2mg

vegetable puff pastry

Why This Recipe is a Holiday Treat

  • Elegant Yet Easy: The puff pastry creates a restaurant-quality appearance without complicated techniques.
  • Budget-Friendly Ingredients: With simple pantry staples like ricotta, puff pastry, and seasonal veggies, this tart is both affordable and accessible.
  • A Burst of Color: The vibrant layers of vegetables add a pop of color that looks stunning on any holiday table.
  • Customizable to Your Taste: Swap in your favorite vegetables or seasonings to make it your own.
  • Perfect for Sharing: Cut it into bite-sized squares for a crowd-pleasing appetizer or serve whole as a side dish.
  • Quick Prep Time: With minimal chopping (thank you, mandoline!), this dish is oven-ready in just minutes.
  • Great Make-Ahead Option: Assemble ahead of time and pop it in the oven before guests arrive for a stress-free hosting experience.

The PrepYoSelf Newsletter

Why These Ingredients Shine Together

  • Puff Pastry: The puff pastry is the backbone of this tart. Its flaky, buttery layers provide a light and crispy base that complements the creamy and savory toppings. As it bakes, the pastry puffs up to create a golden, elegant frame, making it both functional and visually stunning.
  • Ricotta Cheese: Ricotta adds a creamy, mild layer that serves as the perfect blank canvas for the vegetables. Its soft texture and subtle tang balance the flaky richness of the puff pastry. The ricotta also helps hold the vegetables in place, acting as a “glue” while adding a luxurious mouthfeel to every bite.
  • Feta Crumbles: Topping this tart with feta crumbles adds a tangy, salty punch that perfectly complements the creamy ricotta and sweet roasted vegetables. The crumbly texture of feta provides a delightful contrast to the soft veggies and flaky puff pastry, while its bold flavor enhances the savory and herbaceous notes of the dish.
  • Egg: The egg is mixed with the ricotta to enhance its creaminess and stability. It helps bind the ricotta mixture, ensuring it sets slightly during baking, so it doesn’t run or become too watery. Additionally, if used as an egg wash, it adds a shiny, golden finish to the pastry edges.
  • Garlic Powder: Garlic powder introduces a savory, aromatic element that amplifies the flavor of the ricotta mixture without overwhelming the dish. Its subtle garlicky note ties the ingredients together, enhancing the overall taste profile.
  • Thyme: Thyme brings a fresh, earthy flavor to the tart. Its herbaceous aroma complements the vegetables and adds depth to the ricotta mixture, giving the dish a hint of sophistication.
  • Sweet Potato: Sweet potato is the sweet and hearty element in this dish. Its natural sugars caramelize slightly in the oven, adding a touch of sweetness that contrasts beautifully with the savory ricotta and thyme. The vibrant orange color also adds to the visual appeal.
  • Zucchini: Zucchini provides a delicate, slightly grassy flavor and a soft texture that pairs well with the other ingredients. Its mild taste allows the other flavors to shine, and its bright green color adds another pop of vibrancy to the tart.
  • Tomato: Tomatoes add juiciness and a tangy sweetness, balancing the richness of the ricotta and the buttery puff pastry. Their acidity brightens the dish, creating a refreshing contrast to the other ingredients.

vegetable puff pastry

How to Make Roasted Vegetable and Ricotta Puff Pastry

  1. Prep Your Vegetables: Start by washing your sweet potato, zucchini, and tomato thoroughly. Using a mandoline slicer, carefully slice each vegetable into very thin pieces. This helps them cook evenly in the oven. If you don’t have a mandoline, you can use a sharp knife—just take your time to ensure the slices are thin. Feel free to use other vegetables like bell peppers or mushrooms if you prefer.
  2. Make the Ricotta Mixture: In a small mixing bowl, combine the ricotta cheese, 1 large egg, ¼ teaspoon garlic powder, ¼ teaspoon salt, and 1 teaspoon thyme. Stir everything together with a spoon or whisk until the mixture is smooth and creamy. This will be your flavorful base layer for the tart.
  3. Prepare the Puff Pastry Base: Unfold your puff pastry sheet and place it on a baking sheet lined with parchment paper to prevent sticking. If the pastry feels stiff, let it sit at room temperature for a few minutes to soften. Once it’s easy to handle, use a sharp knife to trim ½ inch off each edge. Set these strips aside—you’ll use them later. Using a spatula or the back of a spoon, spread the ricotta mixture evenly across the center of the puff pastry, leaving a small border around the edges.
  4. Add the Veggies: Now it’s time to decorate your tart! Arrange the vegetable slices on top of the ricotta layer in a pattern of your choice. For example, you can alternate colors (sweet potato, zucchini, tomato) to create a beautiful, festive design. Make sure the vegetables are placed close together so that each bite is flavorful.
  5. Top with Feta Crumbles: Sprinkle feta crumbles over the arranged veggies for a tangy, salty kick that complements the creamy and savory flavors.
  6. Create a Puff Edge: Take the reserved pastry strips and lay them along the edges of the tart to create a raised border. This step adds a professional touch and helps frame the tart. If you’d like a glossy, golden finish on the edges, whisk an extra egg and lightly brush it over the puff pastry border with a pastry brush.
  7. Bake to Perfection: Preheat your oven to 350°F. Place the baking sheet with your tart in the oven and bake for 20–25 minutes. Keep an eye on it—the puff pastry should rise and turn a golden brown, while the vegetables become tender. When it’s ready, carefully remove the tart from the oven and let it cool for a few minutes before serving.

Reference the recipe card below for detailed instructions.

vegetable puff pastry

Meal Prep Tips:

  • Thaw Puff Pastry Properly: If your puff pastry is frozen, thaw it overnight in the fridge or at room temperature for 30–40 minutes. Don’t leave it out too long, as it can become too soft and sticky to handle.
  • Assemble Ahead of Time: You can assemble the tart a few hours before baking. Cover it with plastic wrap and store it in the fridge. Bake it fresh to ensure the puff pastry stays flaky and doesn’t get soggy.
  • Serve with a Salad: Pair this tart with a fresh arugula or mixed greens salad dressed with a lemon vinaigrette. The acidity of the salad complements the richness of the tart.
  • Cheese Platter: Offer a cheese platter with soft and hard cheeses, nuts, and fruits alongside the tart for a complete appetizer spread.
  • Vegetables: Swap sweet potato for butternut squash or carrots for a similar sweetness.Replace zucchini with thinly sliced eggplant or asparagus for a different texture. Use red bell pepper, mushrooms, or red onion for a more robust flavor.
  • Cheese: Instead of ricotta, try goat cheese for a tangier flavor or cream cheese for a richer texture. Feta or mascarpone can also be excellent substitutes.

vegetable puff pastry

vegetable puff pastry

Roasted Vegetable and Ricotta Puff Pastry

This roasted vegetable and ricotta puff pastry tart is a simple yet elegant dish featuring creamy ricotta, savory herbs, and colorful veggies on a flaky puff pastry base, perfect for holiday gatherings or easy weeknight meals.
No ratings yet
Prep Time 5 minutes
Cook Time 25 minutes
Course Appetizer
Cuisine American
Servings 4
Calories 507 kcal

Equipment

  • mandolin
  • sheet pan
  • oven

Ingredients
  

  • 1 sheet puff pastry
  • 3/4 cup ricotta cheese
  • 2 tablespoons feta crumbles
  • 1 egg
  • 1/4 teaspoon garlic powder
  • 1/4 teaspoon salt
  • 1 teaspoon thyme
  • 1/2 cup sweet potato (thinly sliced)
  • 1/2 cup zucchini (thinly sliced)
  • 1/4 cup tomato (thinly sliced)
  • 1 tablespoon olive oil

Instructions
 

  • Prep Your Vegetables: Use a mandoline to thinly slice the sweet potato, zucchini, and tomato. (Feel free to swap in other favorites like bell peppers or mushrooms!) Thin slices ensure quick, even cooking.
  • Make the Ricotta Mixture: In a small bowl, mix together the ricotta cheese, egg, garlic powder, salt, and thyme until smooth and creamy.
  • Prepare the Puff Pastry Base: Roll out the puff pastry onto a baking sheet. Trim ½ inch off the edges to create strips and set them aside. Spread the ricotta mixture evenly over the pastry base.
  • Add the Veggies: Arrange the sliced veggies in a decorative pattern on top of the ricotta layer—alternating colors for a festive look. Drizzle the vegetables with a little bit of olive oil and a sprinkle of salt.
  • Top with Feta Crumbles:Sprinkle feta crumbles over the arranged veggies for a tangy, salty kick that complements the creamy and savory flavors.
  • Create a Puff Edge: Use the reserved pastry strips to frame the tart edges. Optional: brush the edges with egg wash for a golden brown finish.
  • Bake to Perfection: Preheat your oven to 350°F and bake for 20–25 minutes, or until the pastry is puffed and golden, and the veggies are tender.

Notes

Nutrition information provided is an estimate. It will vary based on cooking method and specific ingredients used. Please consult with your healthcare provider for specific dietary needs. To gain a better understanding, explore our nutrition disclaimer here

Nutrition

Calories: 507kcalCarbohydrates: 34gProtein: 13gFat: 36gSaturated Fat: 12gPolyunsaturated Fat: 4gMonounsaturated Fat: 18gTrans Fat: 0.01gCholesterol: 72mgSodium: 461mgPotassium: 231mgFiber: 2gSugar: 2gVitamin A: 2794IUVitamin C: 5mgCalcium: 161mgIron: 2mg

Similar Recipes

baked oatmeal

Oven Baked Oats with Apricots and Berries

ricotta apple

Oven Baked Apple with Ricotta and Walnuts

french toast 2

Oven Baked French Toast Muffins with Strawberries

You Might Also Like

Smartfruit Mellow Mango + Immunity, 100% Real Fruit Purée

Trader Joe’s Unsalted, Dry Toasted Slivered Almonds

Trader Joe’s the Dark Chocolate Lover’s Chocolate Bar

Frequently Asked Questions

Can I use frozen vegetables?

It’s better to use fresh vegetables for this recipe, as frozen ones can release too much moisture, making the puff pastry soggy. However, if you must use frozen vegetables, thaw them completely and pat them dry with a paper towel before using


How do I prevent my puff pastry from getting soggy?

Make sure the vegetables are thinly sliced and not too wet. Pat them dry before placing them on the tart. Don’t overdo the ricotta mixture—spread it thinly and evenly. Bake the tart on parchment paper or a baking mat for better airflow and even cooking.


What if I don’t have puff pastry?

You can use phyllo dough as a substitute, layering several sheets with a light brush of olive oil or butter in between. Alternatively, try a pre-made pizza dough or pie crust for a different texture.

Posted on Leave a comment

Pomegranate, Apple, and Pear Crisp

pear, apple, and pomegranate crisp dessert

This Apple, Pear, and Pomegranate Crisp is a warm, inviting dessert that combines the best of fall’s bountiful harvest into a single dish. Perfectly spiced with cinnamon, brightened with orange zest, and topped with a buttery oat streusel, it’s an easy, pantry-friendly treat that’s sure to wow at any holiday gathering or cozy night in.

This post may contain affiliate links. Please see our privacy policy for details.

Calories: 401kcal | Carbohydrates: 71g | Protein: 4g | Fat: 13g | Saturated Fat: 7g | Polyunsaturated Fat: 1g | Monounsaturated Fat: 3g | Trans Fat: 0.5g | Cholesterol: 30mg | Sodium: 155mg | Potassium: 398mg | Fiber: 8g | Sugar: 48g | Vitamin A: 470IU | Vitamin C: 31mg | Calcium: 55mg | Iron: 1mg

pear, apple, and pomegranate crisp dessert

Reasons This Crisp is a Fall Favorite

  • Showcases Seasonal Produce: This recipe highlights fall’s best fruits—apples, pears, and pomegranates—which are at their peak for flavor and freshness.
  • Perfectly Spiced: Cinnamon brings warmth to the dish, evoking the comforting essence of autumn. Paired with citrusy orange zest, it’s a flavor combination that feels both cozy and refreshing.
  • Simple, Pantry-Friendly Ingredients: Using staples like oats, flour, butter, and sugar, this dessert is easy to whip up without a lengthy grocery list.
  • Easy to Make, Easy to Love: With just a few steps and minimal equipment, this recipe is stress-free, making it ideal for busy weeknights or last-minute holiday desserts.
  • Holiday-Ready: It’s the perfect dessert for gatherings, offering vibrant colors and flavors that complement festive meals. Plus, it’s easy to transport if you’re bringing it to a potluck.
  • Customizable and Crowd-Pleasing: Serve the crisp warm with a scoop of vanilla ice cream or a dollop of freshly whipped cream. The cool, creamy topping complements the warm, spiced filling beautifully. Sprinkle chopped nuts like walnuts or pecans over the crisp just before serving for added texture and a nutty flavor boost.

The PrepYoSelf Newsletter

Simple Ingredients for this Crisp

  • Apple: Apples bring a classic sweetness with a hint of tartness, depending on the variety you choose. They are a quintessential fall fruit that adds familiarity to the dish. When baked, apples become tender yet hold their shape, offering a firm bite amidst the softer elements of the filling.
  • Pear: Pears provide a mild, honeyed sweetness that complements the tartness of the apple without overwhelming the dish.
  • Pomegranate Seeds: Pomegranate seeds add bright, tangy bursts of flavor that cut through the sweetness of the apples and pears, making the filling more vibrant. Their juicy, crisp texture provides a delightful contrast to the tender fruit and crunchy streusel.
  • Ground Cinnamon: Cinnamon adds warmth and depth, amplifying the autumnal flavors of the apples and pears. Its subtle spice brings complexity to the sweetness of the dish.
  • Orange Zest and Juice: The zest and juice provide a pop of citrusy brightness that balances the richness of the fruit and butter. The orange also enhances the overall flavor, making the dessert taste fresh and light.
  • Rolled Oats: Oats add a hearty, chewy crunch to the streusel, ensuring the topping has a satisfying bite. Their nutty, earthy flavor complements the sweetness of the fruit and sugar.
  • Unsalted Butter: Butter is the magic ingredient that creates a crisp, crumbly streusel.Its creamy richness binds the topping and adds a luxurious depth to the dessert.
  • Honey Drizzle: Honey adds a glossy finish and a floral sweetness that complements both the fruit and the streusel, elevating the dessert into something truly special.

pear, apple, and pomegranate crisp dessert

Instructions for Apple, Pear, and Pomegranate Crisp

  1. Preheat and Prepare Your Baking Dish. Preheat your oven to 350°F (175°C). Lightly grease a small baking dish, about 4×8 inches, with butter or nonstick spray. This will prevent the crisp from sticking to the pan as it bakes.
  2. Prepare the Fruit Filling: Carefully slice the apple and pear thinly using a mandolin for even slices or a sharp knife if you don’t have one. Place the slices in a large mixing bowl. Use a fine grater or zester to remove the orange’s outer peel (zest) and sprinkle it over the fruit. Then cut the orange in half and squeeze the juice directly into the bowl. The orange adds brightness and keeps the fruit from browning.
  3. Mix the Filling Ingredients: Sprinkle the sugar, cinnamon, and cornstarch over the fruit. Add the pomegranate seeds and stir gently until everything is well-coated and combined. The cornstarch will help thicken the juices as the fruit cooks.
  4. Transfer to the Baking Dish: Pour the fruit mixture into your greased baking dish, including any juices from the bowl. Spread it out evenly so it cooks uniformly.
  5. Make the Streusel Topping: In a medium-sized bowl, mix the oats, flour, brown sugar, cinnamon, and salt. These dry ingredients will form the base of the streusel. Cut the butter into small cubes (this makes it easier to mix) and add them to the bowl. Use a fork or your fingers to combine the butter with the dry ingredients. Press and pinch the mixture until it forms crumbs about the size of peas. The butter should be evenly distributed to ensure a crispy topping.
  6. Assemble and Bake: Evenly sprinkle the streusel mixture over the fruit filling in the baking dish, covering as much of the fruit as possible. Place the dish in the preheated oven and bake for 25–30 minutes. You’ll know it’s ready when the fruit filling is bubbling around the edges, and the streusel is golden brown and crispy.
  7. Serve and Enjoy: Let the crisp cool for about 5–10 minutes. This allows the juices to thicken further and makes it easier to serve. For a finishing touch, sprinkle fresh pomegranate seeds on top and drizzle with honey for extra flavor. Serve warm with a scoop of vanilla ice cream or whipped cream for a truly indulgent treat.

Reference the recipe card below for detailed instructions.

pear, apple, and pomegranate crisp dessert

Benefits of Using a Mandolin Slicer for This Recipe:

  • Even Slices for Consistent Cooking: A mandolin ensures uniformly thin slices of apples and pears, which cook evenly in the oven. This avoids undercooked or overly mushy fruit in the filling.
  • Saves Time and Effort: Mandolins are incredibly efficient, allowing you to slice fruit quickly and with minimal effort. This is especially helpful when prepping for multiple servings or larger batches.
  • Professional Presentation: The even slices create a polished, professional look in the finished dessert, especially if you’re layering the fruit neatly in individual ramekins.
  • Enhanced Flavor Distribution: Thin, consistent slices allow the orange juice, zest, and spices to coat the fruit more evenly, ensuring balanced flavors in every bite.
  • Versatility Beyond This Recipe: Investing in a mandolin pays off for other recipes too—use it for slicing vegetables for gratins, salads, or chips, and fruits for tarts or pies.
  • Perfect for Beginners: A mandolin is straightforward to use and delivers professional-quality results, making it a great tool for cooks of any skill level.

pear, apple, and pomegranate crisp dessert

pear, apple, and pomegranate crisp dessert

Pomegranate, Apple, and Pear Crisp

Serve this crisp warm with a scoop of vanilla ice cream or a dollop of whipped cream, and watch as it becomes a fall dessert favorite!
No ratings yet
Prep Time 5 minutes
Cook Time 30 minutes
Course Dessert
Cuisine American
Servings 4
Calories 401 kcal

Equipment

  • mandolin slicer
  • baking dish

Ingredients
  

Fruit Filling

  • 1 apple
  • 1 pear
  • 1 pomegranate
  • 1/4 cup white sugar
  • 1 tablespoon cornstarch
  • 1/2 teaspoon ground cinnamon
  • 1 tablespoon orange zest
  • 1 orange (juiced)

Streusel Topping

  • 1/2 cup oats
  • 1/4 cup flour
  • 1/4 cup brown sugar
  • 1/4 teaspoon ground cinnamon
  • 1/4 teaspoon salt
  • 1/2 stick unsalted butter

Instructions
 

  • Preheat and Prep: Preheat your oven to 350°F. Grease a small baking dish (4×8 inches works perfectly) and set aside.
  • Prepare the Fruit Filling: Use a mandolin or knife to slice the apple and pear thinly. Place the slices in a bowl. Add the zest and juice of one orange, mixing well to coat the fruit. Sprinkle in the sugar, cinnamon, and cornstarch. Add the pomegranate seeds and stir until combined. The fruit will start releasing its natural juices. Transfer the fruit mixture to the prepared baking dish, pouring the juices over the top.
  • Make the Streusel: In another bowl, combine the oats, flour, brown sugar, cinnamon, and salt. Add chunks of butter and use a fork to work it into the dry ingredients until the mixture is crumbly, with pea-sized pieces of butter.
  • Assemble and Bake: Evenly sprinkle the streusel over the fruit filling. Bake in the oven for 25–30 minutes, or until the filling is bubbling and the topping is golden and crisp.
  • Serve and Enjoy: Let the crisp cool slightly before serving. Garnish with fresh pomegranate seeds and a drizzle of honey for an extra touch of sweetness.

Notes

Nutrition information provided is an estimate. It will vary based on cooking method and specific ingredients used. Please consult with your healthcare provider for specific dietary needs. To gain a better understanding, explore our nutrition disclaimer here

Nutrition

Calories: 401kcalCarbohydrates: 71gProtein: 4gFat: 13gSaturated Fat: 7gPolyunsaturated Fat: 1gMonounsaturated Fat: 3gTrans Fat: 0.5gCholesterol: 30mgSodium: 155mgPotassium: 398mgFiber: 8gSugar: 48gVitamin A: 470IUVitamin C: 31mgCalcium: 55mgIron: 1mg

Similar Recipes

baked oatmeal

Oven Baked Oats with Apricots and Berries

ricotta apple

Oven Baked Apple with Ricotta and Walnuts

french toast 2

Oven Baked French Toast Muffins with Strawberries

You Might Also Like

Smartfruit Mellow Mango + Immunity, 100% Real Fruit Purée

Trader Joe’s Unsalted, Dry Toasted Slivered Almonds

Trader Joe’s the Dark Chocolate Lover’s Chocolate Bar

Frequently Asked Questions

Can I use different fruits for the filling?

Yes! This recipe is versatile. Substitute or add other fruits like peaches, plums, or berries. Keep in mind that softer fruits like berries may release more juice, so consider adding an extra teaspoon of cornstarch to thicken the filling.


Can I use canned or frozen fruit?

Absolutely. For canned fruit, drain the syrup or juice to avoid an overly watery filling. When using frozen fruit, thaw the fruit and pat it dry to minimize excess moisture.


What if I don’t have a mandolin slicer?

A sharp knife works fine! Slice the apples and pears as thinly as possible to ensure they cook evenly. A food processor with a slicing attachment can also be a great alternative.

Posted on Leave a comment

Yogurt with Balsamic Glazed Pears and Almonds

yogurt with balsamic glazed pears and almonds

If you’re on the lookout for a recipe that combines the elegance of a gourmet dish with the convenience of easy meal prep, then you’re in for a treat. Our Yogurt with Cinnamon Balsamic Pears and Almonds is the perfect blend of flavors and textures, creating a delightful experience for your taste buds. It’s ideal for breakfast, a snack, or even a light dessert. Let’s dive into this exquisite recipe!

This post may contain affiliate links. Please see our privacy policy for details.

Calories: 405kcal | Carbohydrates: 47g | Protein: 11g | Fat: 22g | Saturated Fat: 6g | Polyunsaturated Fat: 3g | Monounsaturated Fat: 12g | Trans Fat: 0.01g | Cholesterol: 24mg | Sodium: 87mg | Potassium: 531mg | Fiber: 5g | Sugar: 37g | Vitamin A: 205IU | Vitamin C: 5mg | Calcium: 282mg | Iron: 1mg

yogurt with balsamic glazed pears and almonds

Why You’ll Love It:

  • This recipe is pure elegance in a bowl. The combination of creamy yogurt, caramelized pears, crunchy almonds, and the aromatic hint of cinnamon is simply heavenly. It’s decadent without being overly indulgent, making it a healthy yet satisfying option for any time of the day.
  • Not only is this dish a feast for your senses, but it’s also a breeze to prepare. Perfect for those busy mornings or as a quick snack to keep you going through the day. Plus, it feels like a little treat yourself moment with every spoonful.
  • By incorporating fresh, wholesome ingredients, this recipe keeps you on track with your health goals while delivering a restaurant-quality experience at home. And the best part? It’s budget-friendly, so you can enjoy a taste of luxury without breaking the bank.

So, get those meal prep containers ready and treat yourself to this delicious Yogurt with Cinnamon Balsamic Pears and Almonds. Trust me, once you try it, it’ll become a staple in your meal prep routine. Happy cooking, and even happier eating!

The PrepYoSelf Newsletter

Ingredients Spotlight: Why They Shine in Our Yogurt with Cinnamon Balsamic Pears and Almonds

  • Yogurt: Yogurt serves as the creamy, tangy base of our dish. It’s packed with probiotics, which are great for gut health, and it’s an excellent source of protein and calcium.Its mild tartness balances the sweetness of the pears and honey, making the overall flavor profile well-rounded and satisfying.
  • Pear: Pears bring natural sweetness and a juicy texture to the dish. They are rich in fiber, vitamins, and antioxidants, making them a healthy addition. When sautéed, pears become soft and slightly caramelized, enhancing their sweetness and adding a luxurious texture that complements the yogurt beautifully.
  • Balsamic Concentrate: Balsamic concentrate is used to infuse the pears with a rich, tangy sweetness that enhances their natural flavors. It’s also loaded with antioxidants and is known for its heart-health benefits. This ingredient adds a gourmet touch, providing a deep, sweet-tart flavor that contrasts wonderfully with the pears and honey.
  • Honey: Honey acts as a natural sweetener, binding the flavors together with its smooth, floral sweetness. It’s also a healthier alternative to refined sugars. The honey complements the tartness of the yogurt and the balsamic, adding a layer of sweetness that balances the dish perfectly.
  • Cinnamon: Cinnamon is a warm, aromatic spice that enhances the flavors of the pears and honey. A sprinkle of cinnamon brings a comforting warmth and depth, making the dish feel cozy and indulgent.

yogurt with balsamic glazed pears and almonds

Steps to Meal Prep this Yogurt Bowl

  1. Start by dicing your pear into small, bite-sized squares. This step ensures every bite of your yogurt has that perfect sweet and juicy pear flavor.
  2. Heat 1 tbsp of olive oil in a pan over medium-high heat. Toss in your diced pears and sauté for about 3 to 5 minutes until they soften and release their natural sweetness.
  3. Now, drizzle the softened pears with 1 tbsp balsamic concentrate and 2 tbsp honey. This combination is what takes your pears to a whole new level of deliciousness. Let them cook together for another minute to blend all those fantastic flavors.
  4. Throw in the 1/4 cup of almonds. The almonds add a lovely crunch and nuttiness that perfectly complements the tender pears. Give it all a good mix so everything is well-coated.
  5. Grab your bowls and place a generous layer of 2 cups yogurt at the bottom. Top it off with the warm pear and almond mixture, letting those luscious juices seep into the yogurt.
  6. Finish with a sprinkle of 1/4 tsp cinnamon powder on top. This adds a cozy, aromatic touch that’s just irresistible.

Reference the recipe card below for detailed instructions.

yogurt with balsamic glazed pears and almonds

Meal Prep Tips for Yogurt Bowls

  • Experiment with Variations: Get creative with your toppings! Try swapping out the almonds for other nuts like walnuts or pecans, or adding a sprinkle of granola for extra crunch.
  • Enjoy Fresh or Frozen: While this recipe is best enjoyed fresh, you can also freeze portions of the sautéed pear and almond mixture for longer-term storage. Simply thaw in the fridge overnight before serving.
  • Pack a Portable Parfait: Transform your yogurt bowl into a portable parfait by layering the ingredients in a mason jar. Start with yogurt at the bottom, followed by the sautéed pear and almond mixture, and repeat until the jar is filled. Seal with a lid and take it with you for an on-the-go breakfast, snack, or dessert option.

yogurt with balsamic glazed pears and almonds

Pecans & Yogurt

Yogurt with Cinnamon Balsamic Pears & Toasted Almonds

Indulge in creamy yogurt topped with caramelized balsamic pears, crunchy almonds, and a sprinkle of cinnamon for a decadent and healthy meal prep delight!
No ratings yet
Prep Time 5 minutes
Cook Time 10 minutes
Course Breakfast, Dessert, Snack
Cuisine American, Italian
Servings 2
Calories 405 kcal

Ingredients
  

  • 1.5 cups yogurt
  • 1 pear (diced)
  • 1/4 cup almonds
  • 1 tbsp balsamic concentrate
  • 2 tbsp honey
  • 1/4 tsp cinnamon
  • 1 tbsp olive oil

Instructions
 

  • Dice the pears into small squares
  • Add oil to a pan on medium high heat and saute the pears for about 3 to 5 minutes until they soften
  • Next, drizzle the pears with balsamic concentrate and honey
  • Add the almonds and mix it all together
  • Place the yogurt at the bottom of the bowl and top it off with the pear and almond mixture
  • Sprinkle with cinnamon powder

Notes

Nutrition information provided is an estimate. It will vary based on cooking method and specific ingredients used. Please consult with your healthcare provider for specific dietary needs. To gain a better understanding, explore our nutrition disclaimer here

Nutrition

Calories: 405kcalCarbohydrates: 47gProtein: 11gFat: 22gSaturated Fat: 6gPolyunsaturated Fat: 3gMonounsaturated Fat: 12gTrans Fat: 0.01gCholesterol: 24mgSodium: 87mgPotassium: 531mgFiber: 5gSugar: 37gVitamin A: 205IUVitamin C: 5mgCalcium: 282mgIron: 1mg

Similar Recipes

baked oatmeal

Oven Baked Oats with Apricots and Berries

cranberry oat muffins

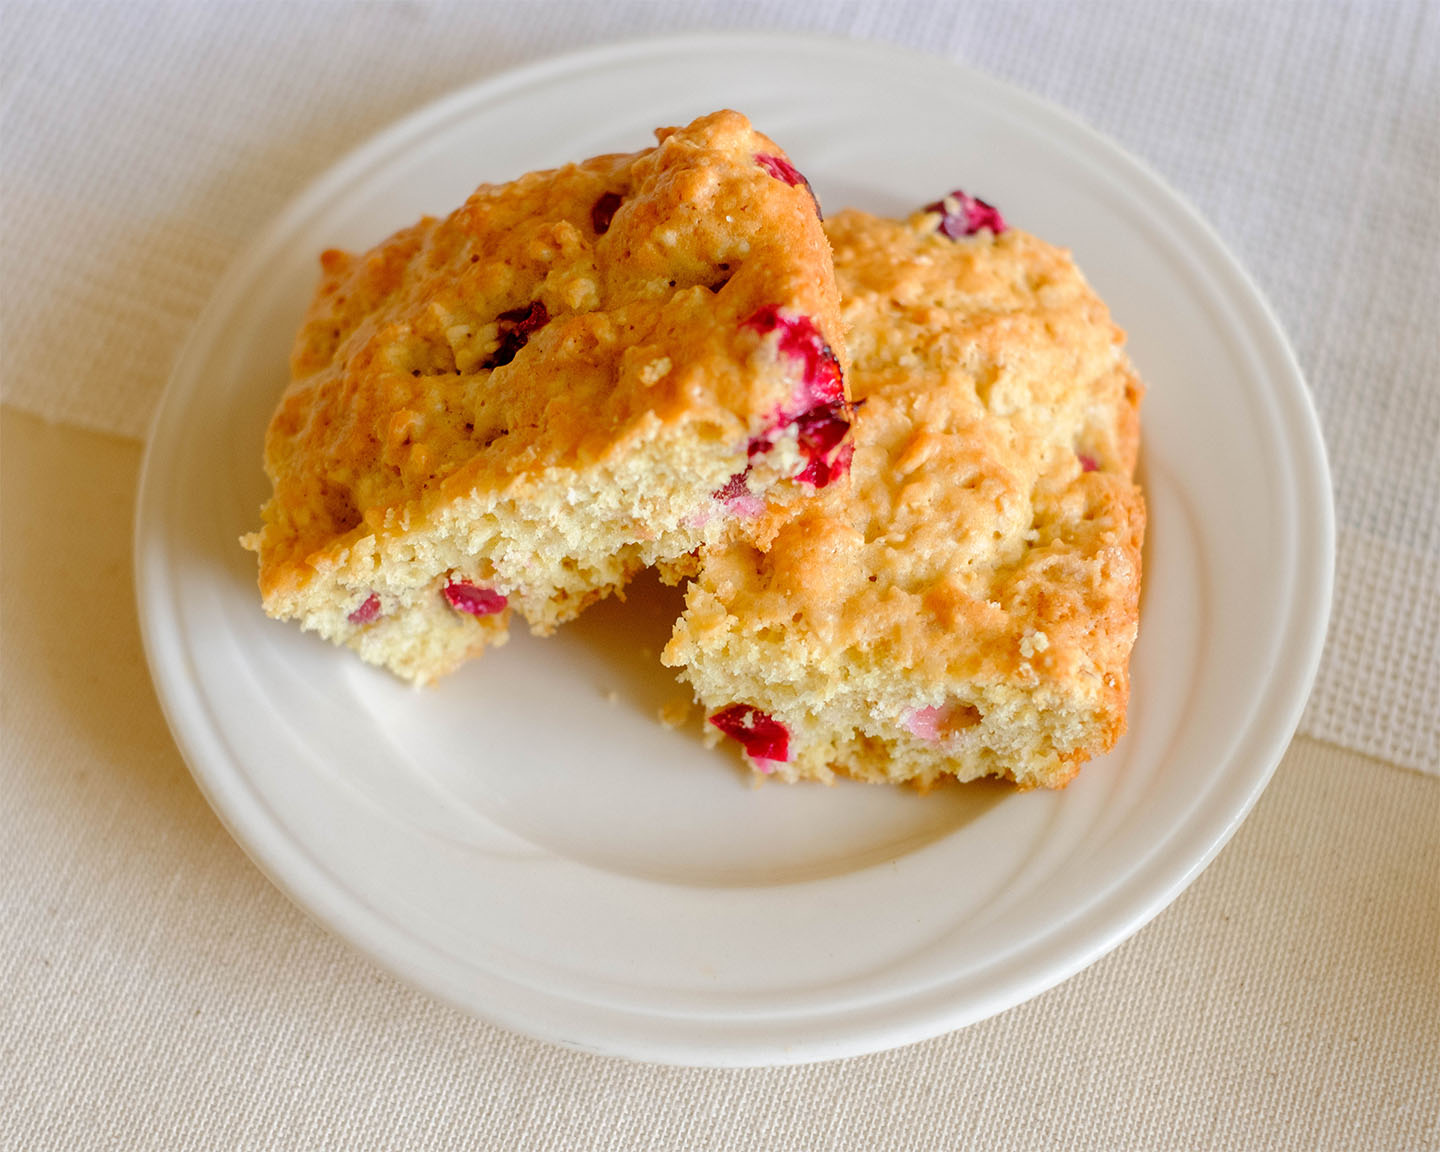
Cranberry Oatmeal Muffin Bars

french toast 2

Oven Baked French Toast Muffins with Strawberries

You Might Also Like

Frequently Asked Questions

How long will the sautéed pear and almond mixture last in the fridge?

The sautéed pear and almond mixture can be stored in an airtight container in the fridge for up to 3-4 days. Just make sure to let it cool completely before refrigerating.


Can I adjust the sweetness level of the recipe?

Definitely! Feel free to adjust the amount of honey or sweetener used in the sautéed pear and almond mixture to suit your taste preferences.


Can I use other fruits besides pears?

Certainly! While pears add a delightful sweetness and texture, feel free to experiment with other fruits like apples, berries, or even stone fruits like peaches or plums.

Posted on Leave a comment

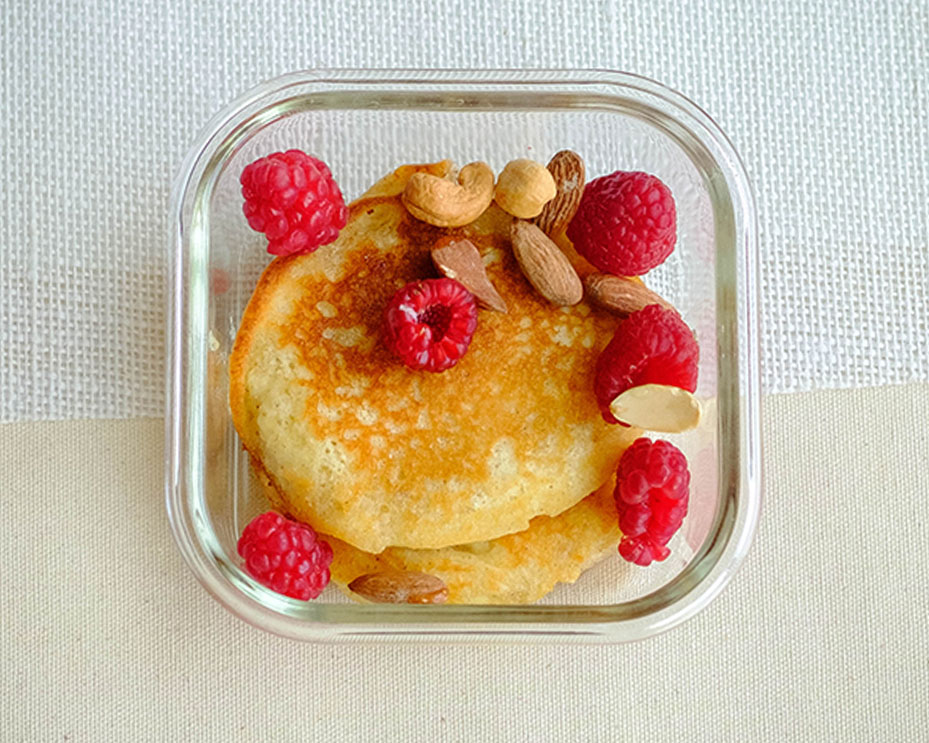
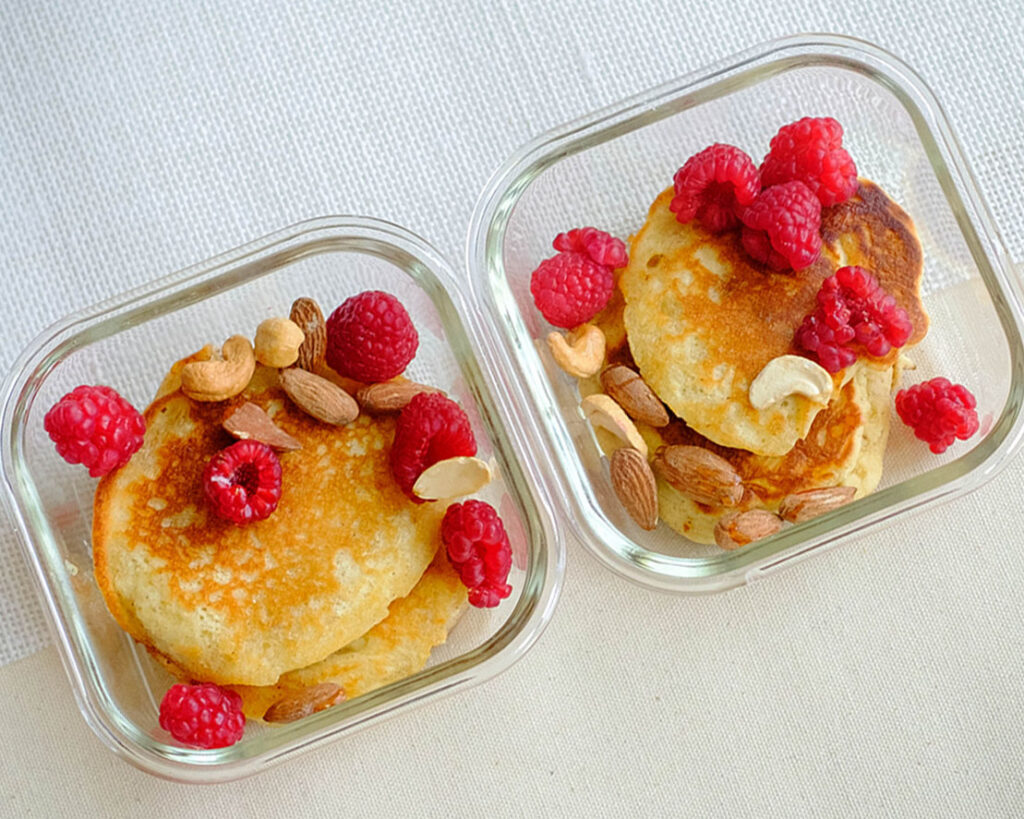
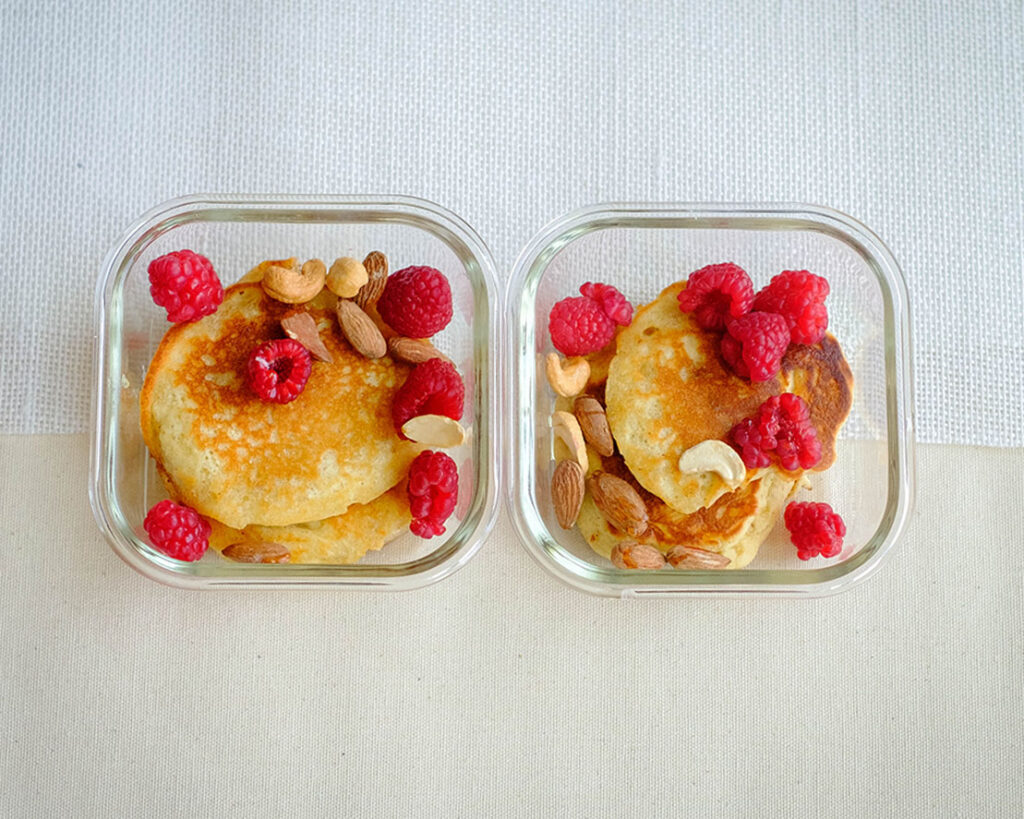
Keto Breakfast Pancakes with Raspberries and Mixed Nuts

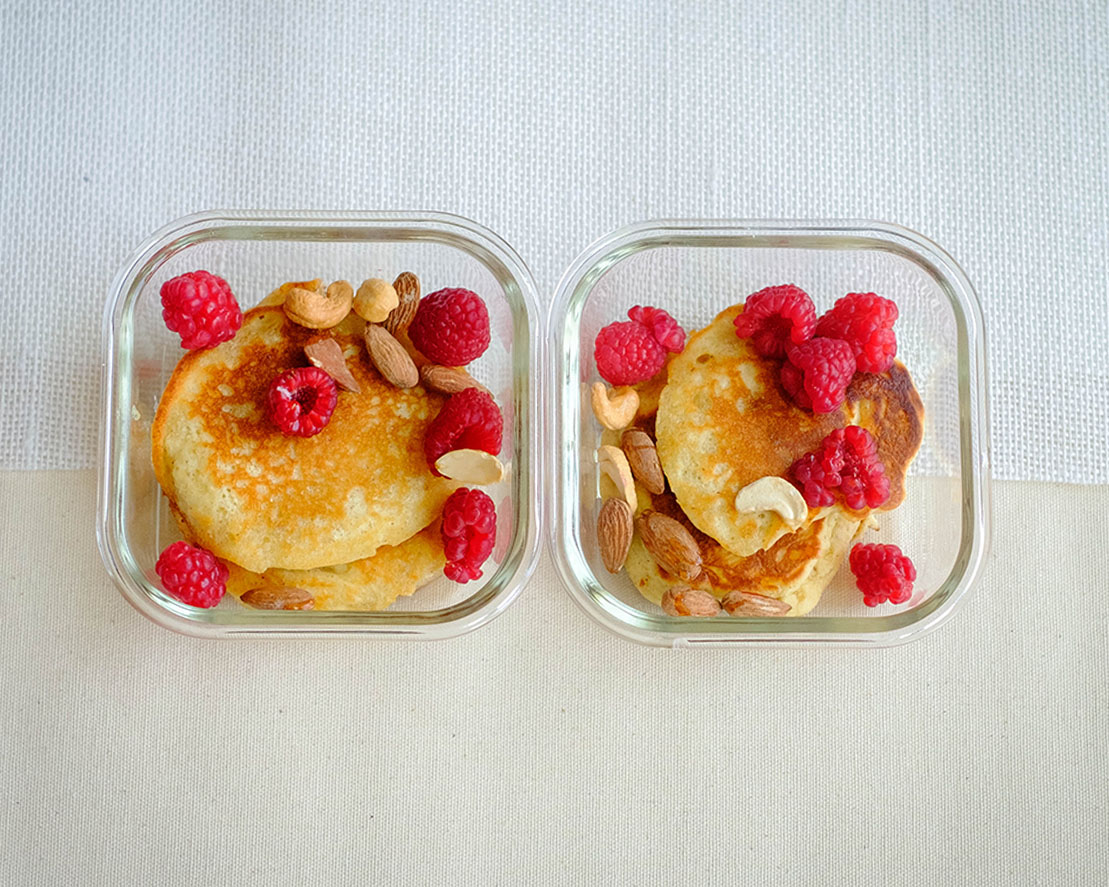
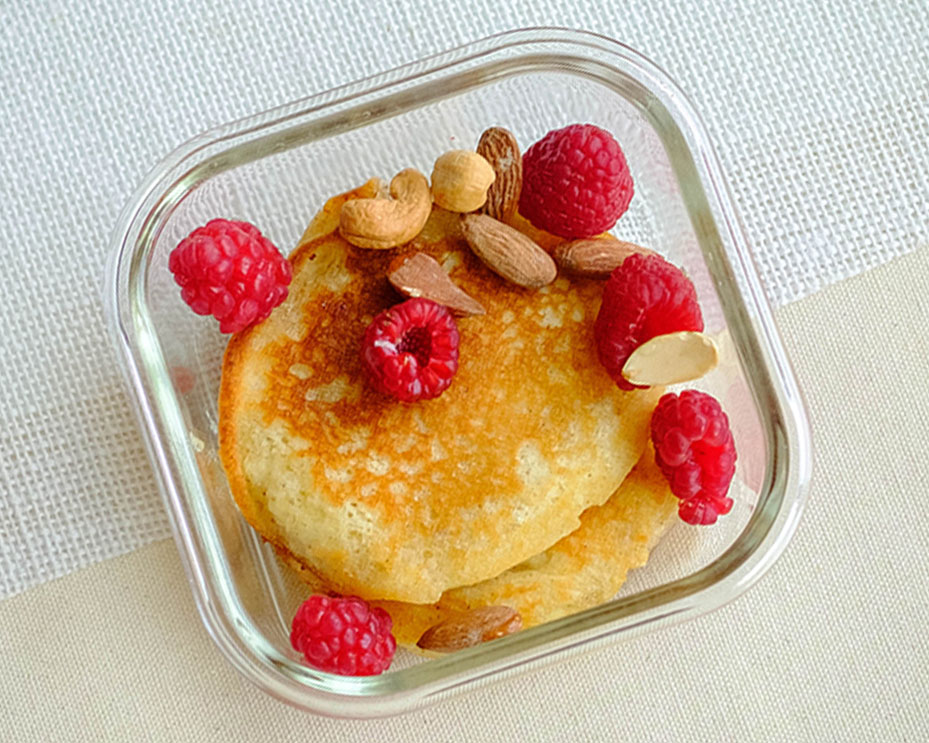
mini pancakes with raspberries and mixed nuts

Hey there, health-conscious foodies! If you’re anything like me, you’re always on the lookout for simple, delicious meal prep ideas that align with your busy lifestyle and nutritional goals. Today, I’m super excited to share a keto-friendly breakfast pancake recipe that will make your mornings both decadent and diet-friendly.
This post may contain affiliate links. Please see our privacy policy for details.

mini pancakes with raspberries and mixed nuts

Using Birch Bender’s Keto breakfast Pancake Mix (or any low-carb brand of your choice), we’re going to whip up some scrumptious pancakes that feel indulgent without the guilt. Trust me, you won’t believe you’re sticking to your keto goals with these beauties on your plate!

Why Pre-Mixed Ingredients Are a Meal Prep Must-Have

Let’s face it: we all strive for that gourmet taste without spending hours in the kitchen. Using a pre-mixed pancake package like Birch Bender’s is your secret weapon. Here’s why:

  • Consistency and Quality: Pre-mixed packages are designed to deliver great results every time. Say goodbye to those mornings of guessing ratios!
  • Time-Saving: Simply add water (and a little love), and you’re good to go. These mixes cut down the prep time, letting you focus on other morning tasks—or, let’s be real, catching a few more Z’s.
  • Cost-Effective: Buying individual keto-friendly ingredients can add up! A ready-made mix offers you the essentials at a fraction of the cost.
  • Versatility: From breakfast staples to snack-time saviors, you can tweak pre-mixed recipes to suit any meal. Today’s added nuts and berries? Just the beginning!

The PrepYoSelf Newsletter

Simple Ingredients for Keto Breakfast Pancakes

Let’s dive into each ingredient of our keto pancake recipe and explore why they’re not only a healthy choice but also how their combination enhances the flavors while being mindful of your budget:

  • Birch Bender’s Keto Pancake Mix (or similar low-carb mix): This mix is the cornerstone of our pancakes, providing a low-carb foundation that’s perfectly formulated for those on a ketogenic diet. It often includes ingredients like almond flour and coconut flour which are excellent flour substitutes, maintaining a lower glycemic index than traditional flours. This ensures you stay within your carb limit while enjoying a classic breakfast favorite. The mix is pre-flavored and includes leavening agents, which means you skip purchasing numerous individual ingredients like almond flour, baking soda, and salt separately, saving time and reducing costs.
  • Water: Water is used to activate the pancake mix without adding extra fats or calories. It’s the simplest binder, keeping the pancakes light and fluffy. t’s the ultimate budget-friendly ingredient—readily available and cost-free!
  • Olive Oil: Olive oil is a healthier fat option that adds moisture to the pancakes, ensuring they don’t dry out during cooking. It’s also a heart-healthy choice, rich in monounsaturated fats, which are beneficial for heart health and stable blood sugar levels.
  • Mixed Nuts (cashews and almonds): Nuts add a delightful crunch and are a powerhouse of nutrition, packed with proteins, healthy fats, and fiber, which are all essential for a balanced keto diet. They help keep you fuller longer, reducing the need for frequent snacking.
  • Raspberries: Raspberries add a fresh, tangy sweetness to the pancakes while being low in calories and carbs but high in fiber, vitamins, and antioxidants. They’re an excellent fruit choice for a ketogenic diet.

mini pancakes with raspberries and mixed nuts

How to Prepare Keto Pancakes

  1. In a bowl, combine the pancake mix and water. Stir until you have a smooth batter. This is your base—a canvas for your culinary creativity.
  2. Add the olive oil to a pan over medium heat. Olive oil is a great choice for keto and gives these pancakes a slight savory edge that complements the nuts beautifully.
  3. Pour the batter into the pan to form 4-inch pancakes. These are the perfect size for a quick bite but filling enough to power you through your morning.
  4. Let them cook for 2 to 3 minutes on one side, then flip them over. Cook for another minute until they’re golden and gorgeous.
  5. Plate these fluffy delights and top them with fresh raspberries and a generous sprinkle of mixed nuts. The nuts add a delightful crunch and a punch of protein, while the raspberries bring a burst of freshness and a touch of sweetness.

Reference the recipe card below for detailed instructions.

mini pancakes with raspberries and mixed nuts

Meal Prep Tips for Keto Pancakes

  • Greek Yogurt or Coconut Cream: Add a spoonful of unsweetened Greek yogurt or whipped coconut cream on top of your pancakes for a creamy texture. This not only adds richness but also boosts your protein intake, which is crucial for a filling breakfast.
  • Keto-Friendly Syrups: Opt for sugar-free maple syrup or any keto-friendly syrup to add sweetness without the carbs. A light drizzle can enhance the flavors without overpowering them.
  • Homemade Berry Coulis: Simmer some raspberries or mixed berries with a touch of sugar free sweeteners and a splash of water to create a delicious, naturally sweet sauce.
  • Chopped Nuts and Seeds: Enhance the nutty texture by sprinkling additional chopped nuts or seeds like chia, flaxseeds, or sunflower seeds. This not only boosts the nutritional value but also adds to the visual appeal and texture.
  • Unsweetened Coconut Flakes: For a hint of tropical flavor and crunch, sprinkle some toasted unsweetened coconut flakes over your pancakes.
  • Avocado and Smoked Salmon: For a savory version, top your pancakes with sliced avocado and smoked salmon. This combo introduces healthy fats and protein, making it a balanced meal.
  • Cheese and Herbs: A sprinkle of grated hard cheese (like Parmesan) and fresh herbs (like chives or basil) can turn your pancakes into a savory delight.
  • Pre-Make and Freeze: Pancakes freeze well, so you can make a large batch, let them cool, and then freeze them between layers of parchment paper. Simply reheat in a toaster or oven for a quick breakfast.
  • Individual Portions: Portion out toppings in small containers or bags for the week. This keeps ingredients fresh and makes it easy to assemble your breakfast quickly.

mini pancakes with raspberries and mixed nuts

pancakes

Keto Pancakes with Nuts & Berries

No ratings yet
Prep Time 5 minutes
Cook Time 5 minutes
Course Breakfast
Cuisine American
Servings 2

Equipment

  • mixing bowl
  • spatula
  • saute pan

Ingredients
  

  • 2/3 cups pancake mix (Birch Bender's Keto Pancake Mix or any low carb brand)
  • 1/2 cup water
  • 1/2 cup mixed nuts (cashews and almonds)
  • 1/2 cup raspberries
  • 1 tbsp olive oil

Instructions
 

  • In a bowl, mix together the pancake mix with water
  • Add oil to a pan on medium heat
  • Pour the batter into the pan making 4 inch pancakes
  • Cook for 2 to 3 minutes, then flip it over to cook the other side for another minute
  • Serve with fresh raspberries and mixed nuts

Similar Recipes

baked oatmeal

Oven Baked Oats with Apricots and Berries

ricotta apple

Oven Baked Apple with Ricotta and Walnuts

french toast 2

Oven Baked French Toast Muffins with Strawberries

You Might Also Like

Smartfruit Mellow Mango + Immunity, 100% Real Fruit Purée

Trader Joe’s Unsalted, Dry Toasted Slivered Almonds

Trader Joe’s the Dark Chocolate Lover’s Chocolate Bar

Frequently Asked Questions

Are there any substitutes for olive oil in the recipe?

Absolutely! If you prefer, you can use coconut oil or avocado oil. Both are great for keto diets and have high smoke points, making them suitable for frying.


Can I add sweeteners to the pancake batter?

Yes, if you prefer your pancakes a bit sweeter, you can add keto-friendly sweeteners like erythritol, stevia, or monk fruit sweetener to the batter. Start with a small amount, taste the batter, and adjust according to your preference.


How do I store leftover pancakes?

Leftover pancakes can be stored in the refrigerator for up to 3 days or frozen for up to 2 months. To freeze, place the cooled pancakes in a single layer on a baking sheet to freeze individually, then transfer to a freezer-safe bag or container. Reheat in the microwave, toaster, or oven.

Posted on Leave a comment

Sweet Potato Pancakes with Blueberries

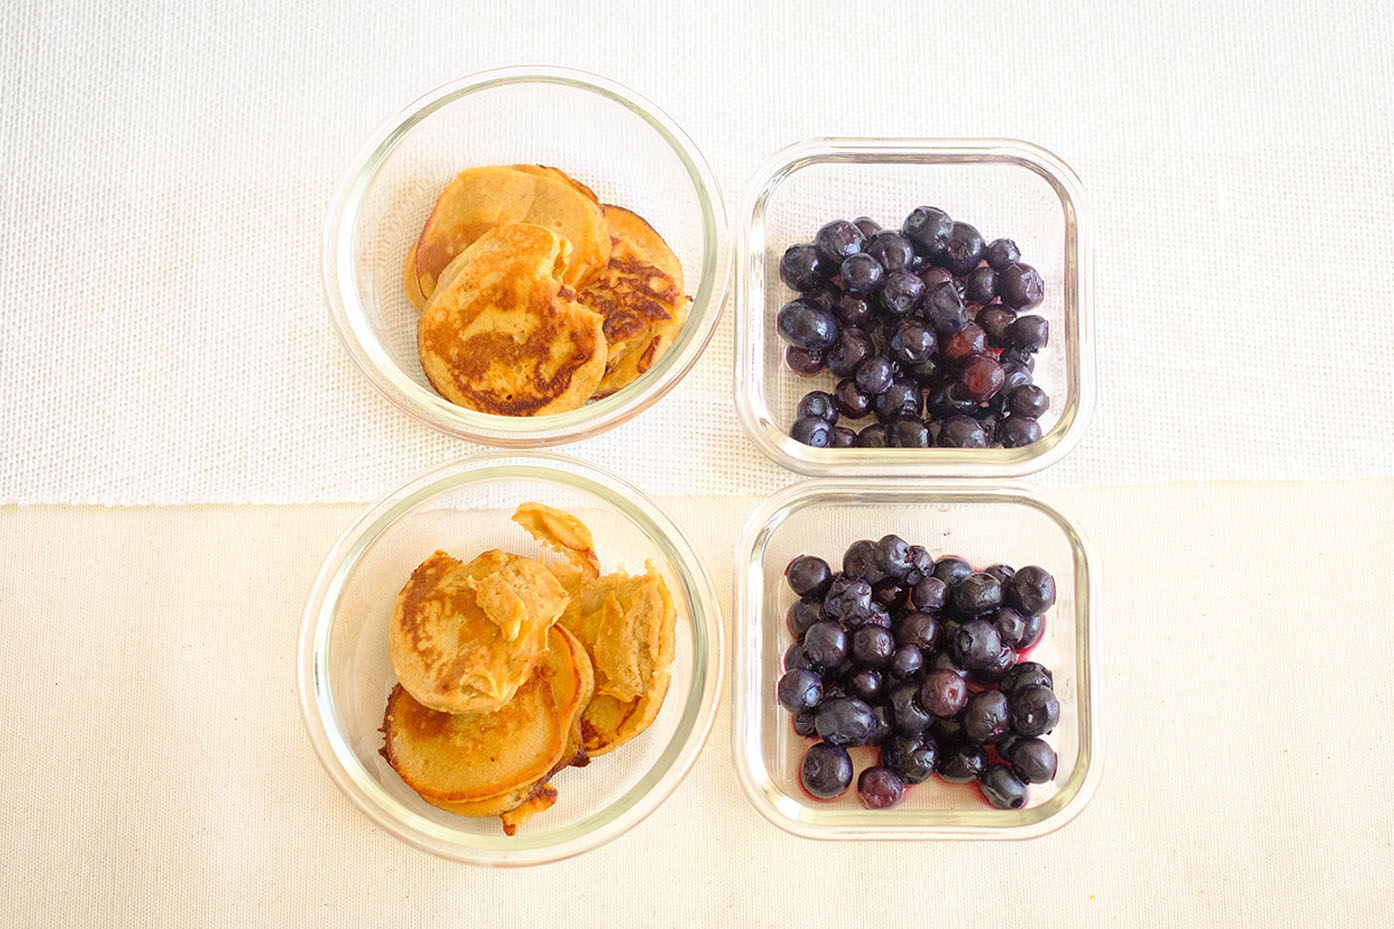
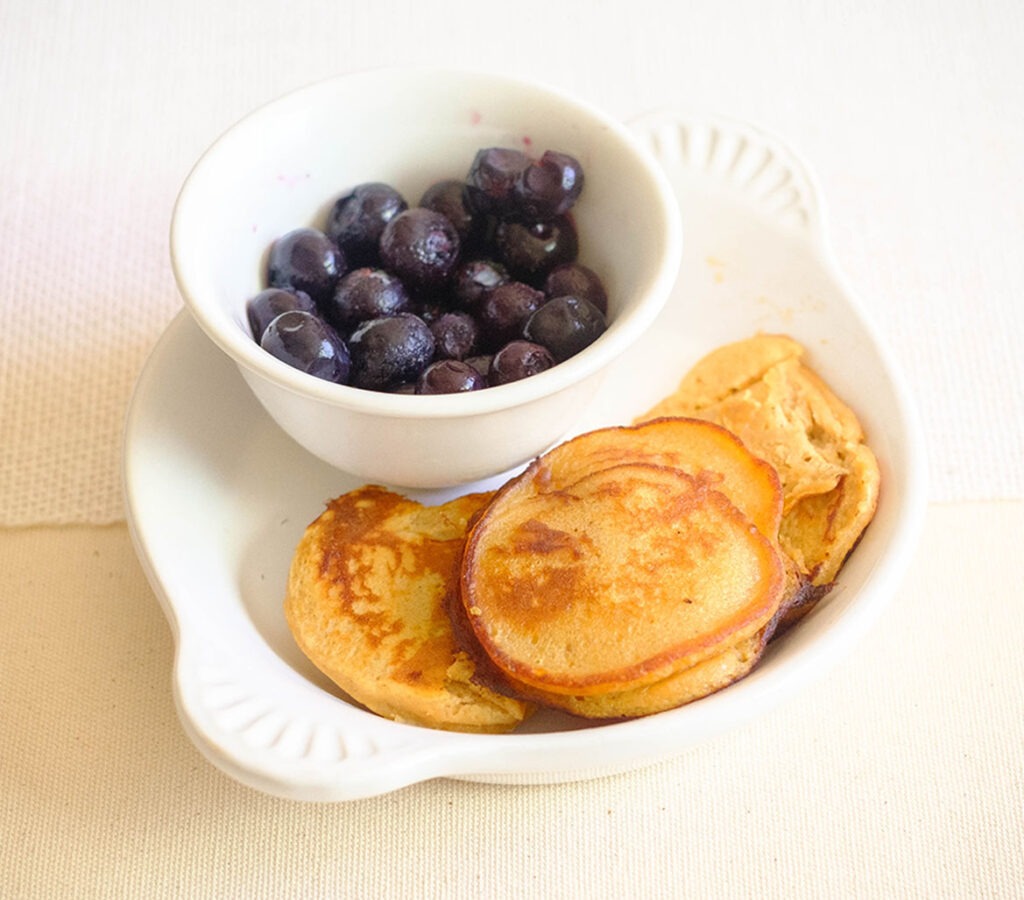
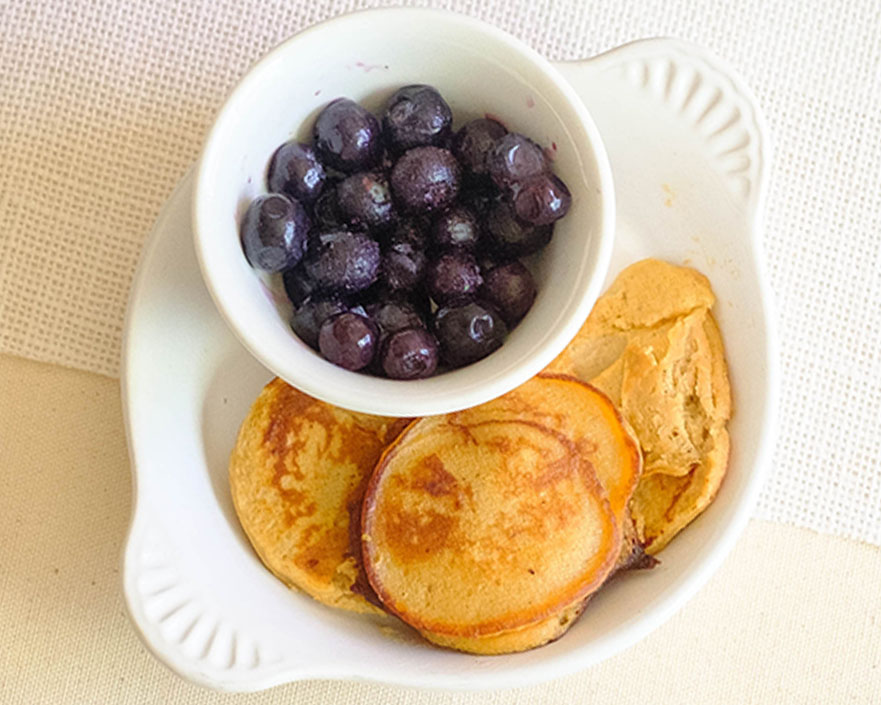
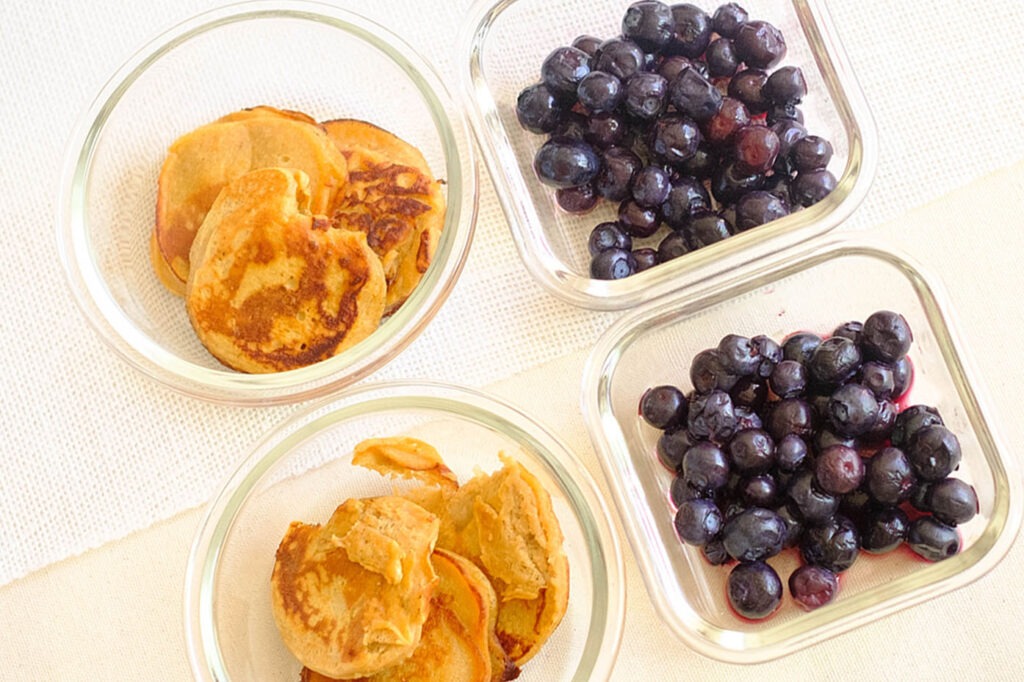
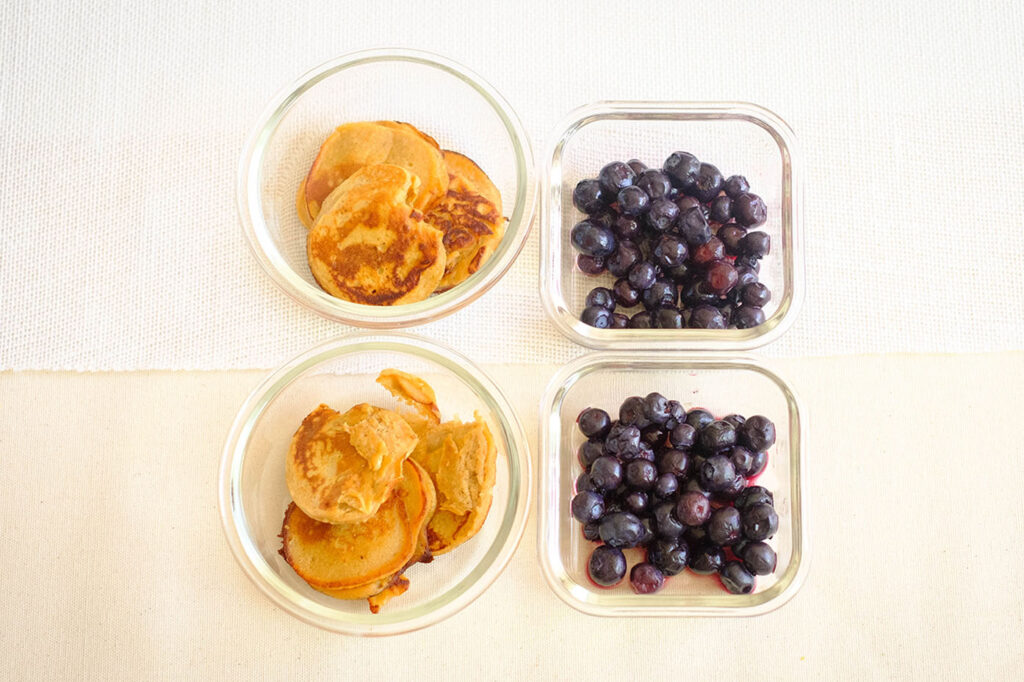
sweet potato pancakes and blueberries

Welcome to your new favorite breakfast recipe – Sweet Potato Pancakes! If you’re a busy individual who craves restaurant-quality food without compromising your health or budget, then you’re in for a treat. These pancakes are a delightful fusion of sweet potato goodness, protein-packed eggs, and a hint of cinnamon, all cooked up to fluffy perfection. Not only are they incredibly tasty, but they’re also packed with nutrients to power you through your day. Plus, with simple ingredients and easy prep, you can whip up a batch in no time and enjoy them throughout the week. Get ready to elevate your breakfast game and satisfy your cravings with these delicious and nutritious sweet potato pancakes!

This post may contain affiliate links. Please see our privacy policy for details.

Calories: 360kcal | Carbohydrates: 51g | Protein: 11g | Fat: 14g | Saturated Fat: 3g | Polyunsaturated Fat: 2g | Monounsaturated Fat: 8g | Trans Fat: 0.03g | Cholesterol: 246mg | Sodium: 158mg | Potassium: 541mg | Fiber: 5g | Sugar: 30g | Vitamin A: 16428IU | Vitamin C: 10mg | Calcium: 79mg | Iron: 2mg

sweet potato pancakes and blueberries

Why This Recipe is Great for Meal Prep

  • Delicious Flavor Fusion: These pancakes marry the natural sweetness of sweet potatoes with the warm, comforting flavor of cinnamon and the delightful burst of freshness from blueberries. Each bite is a party for your taste buds!
  • Quick and Easy Prep: With just a few simple ingredients and minimal prep time, these pancakes are a breeze to whip up – ideal for busy mornings or Sunday meal prep sessions. You can even make a big batch and freeze them for later!
  • Budget-Friendly Brilliance: Eating healthy shouldn’t break the bank, and these sweet potato pancakes prove it. With affordable ingredients that are easy to find at any grocery store, you can enjoy restaurant-quality food without blowing your budget.
  • Versatile and Customizable: While these pancakes are fantastic as-is, feel free to get creative and customize them to suit your taste. Add a sprinkle of nuts or seeds for extra crunch, drizzle with a dollop of Greek yogurt or nut butter for added creaminess, or swap out the blueberries for your favorite fruit – the possibilities are endless!
  • Healthier Alternative: Traditional pancakes can be heavy on refined flour and sugar, but these sweet potato pancakes offer a healthier alternative without sacrificing flavor or texture. With natural sweetness from honey and the nutritional boost from sweet potatoes, you can indulge guilt-free knowing you’re nourishing your body with wholesome ingredients.

The PrepYoSelf Newsletter

Simple Ingredients for Sweet Potato Pancakes

  • Sweet Potato: The star of the show! Sweet potatoes are not only deliciously sweet but also incredibly nutritious. Packed with vitamins A and C, fiber, and antioxidants, sweet potatoes provide a hefty dose of essential nutrients. Plus, they add natural sweetness and a creamy texture to the pancakes without the need for added sugar or excessive fats.
  • Eggs: These protein powerhouses are essential for giving the pancakes structure and providing a hefty dose of satiating protein. Not only do eggs contribute to the fluffy texture of the pancakes, but they also help keep you feeling full and satisfied throughout the morning. Plus, eggs are an affordable source of high-quality protein, making them a budget-friendly addition to any meal.
  • Honey: A touch of honey adds just the right amount of sweetness to the pancakes without overwhelming the natural flavors of the sweet potato and cinnamon. Unlike refined sugars, honey offers trace amounts of vitamins, minerals, and antioxidants, making it a healthier sweetener option. Plus, a little goes a long way, making it a budget-friendly way to add sweetness to your pancakes.
  • Cinnamon Powder: This warm and cozy spice not only adds a delightful flavor to the pancakes but also boasts numerous health benefits. Cinnamon is rich in antioxidants and has anti-inflammatory properties, making it a great addition to any diet. Plus, its aromatic flavor complements the sweetness of the sweet potato and honey perfectly, creating a harmonious flavor profile that’s both comforting and delicious.
  • Blueberries: Bursting with flavor and nutrients, blueberries are the perfect topping for these sweet potato pancakes. Not only do they add a pop of color and freshness, but they also provide a host of health benefits. Blueberries are rich in antioxidants, vitamins, and fiber, making them a nutritious addition to any meal. Plus, they’re budget-friendly and readily available year-round, making them an affordable and convenient choice for topping your pancakes.

sweet potato pancakes and blueberries

How to Meal Prep Sweet Potato Pancakes

  1. Wash your sweet potato and give it a good poke all over with a fork. This step is not just for fun – it helps the steam escape while it cooks.
  2. Pop that spud in the microwave for about 5 minutes. After that, give it a little poke with a knife – if it slides in like butter, you’re good to go! If not, just give it another 30 seconds or so.
  3. Let your sweet potato cool for a bit, then peel off that skin like a pro. Now, mash it up real good in a bowl with a fork. Add in those eggs, honey, and cinnamon powder, and mix it all up until it’s smooth as silk. If you’ve got a blender handy, feel free to give it a whirl in there for an extra smooth batter.
  4. Heat up a drizzle of olive oil in a pan over medium heat. Use a 1/4 cup scoop to pour out your pancake batter – aim for pancakes that are about 3 inches wide. Cook ’em up for 2 to 3 minutes on each side, until they’re golden brown and cooked through.
  5. Serve up those golden beauties with a generous handful of fresh blueberries on top. Voila! You’ve just whipped up a batch of restaurant-quality sweet potato pancakes that are as easy on the wallet as they are on the taste buds.

Reference the recipe card below for detailed instructions.

sweet potato pancakes and blueberries

Meal Prep Tips for Sweet Potato Pancakes

  • Batch Cooking: Whip up a big batch of sweet potato pancake batter and cook them all at once. Once cooled, store the pancakes in an airtight container in the refrigerator for up to 3-4 days. This way, you’ll have a quick and convenient breakfast option ready to go whenever hunger strikes.
  • Freeze for Later: If you want to prep even further ahead, these pancakes freeze beautifully. Simply place cooked and cooled pancakes in a single layer on a baking sheet and freeze until solid. Once frozen, transfer them to a freezer bag or container, separating each pancake with parchment paper to prevent sticking. They can be reheated in the microwave or toaster for a quick and easy breakfast on busy mornings.
  • Portion Control: Use a measuring cup or scoop to portion out the pancake batter evenly for consistent pancake sizes. This ensures even cooking and makes it easier to track your serving sizes for portion control.
  • Customize Individual Servings: If you’re meal prepping for multiple people with different preferences, consider customizing individual servings. Add extra toppings like nuts, seeds, or extra fruit on top of individual portions to cater to everyone’s tastes.
  • Protein Boost: While these sweet potato pancakes already pack a protein punch thanks to the eggs, you can boost the protein content even further by serving them with a side of Greek yogurt or a drizzle of nut butter. This will help keep you feeling full and satisfied until your next meal.
  • Healthy Fats: Add some healthy fats to round out your meal by topping your pancakes with a sprinkle of chopped nuts or seeds. Alternatively, serve them alongside a small handful of avocado slices or a dollop of coconut whipped cream for an extra creamy touch.
  • Fiber-Rich Additions: For an extra fiber boost, add a handful of chia seeds or ground flaxseeds to the pancake batter for added fiber and texture.

sweet potato pancakes and blueberries

Pancakes

Sweet Potato Pancakes & Blueberries

Whip up these nutrient-packed Sweet Potato Pancakes for a delicious, budget-friendly breakfast that's perfect for busy mornings!
No ratings yet
Prep Time 5 minutes
Cook Time 10 minutes
Course Breakfast
Cuisine American
Servings 2
Calories 360 kcal

Equipment

  • bowl
  • fork
  • scoop
  • saute pan
  • spatula
  • microwave

Ingredients
  

  • 1 each sweet potato
  • 3 each large eggs
  • 2 tbsp honey
  • 1/4 tsp cinnamon powder
  • 1 cup blueberries
  • 1 tbsp olive oil

Instructions
 

  • Wash the sweet potato and poke holes all around it with a fork
  • Microwave for 5 minutes. Check for doneness with a pairing knife. The knife should cut through easily (cook for an additional 30 seconds if still not tender)
  • Next, let it cool and remove the peel. Place it in a bowl and use the fork to mash it. Afterwards, add the eggs, cinnamon powder, and honey. Mix it all together until it is a smooth consistency like batter (you can also use a blender)
  • Add oil to a pan on medium heat and use a 1/4 cup scoop to pour each pancake (should make 3 inch pancakes)
  • Cook on each side for about 2 to 3 minutes
  • Serve with blueberries

Notes

Nutrition information provided is an estimate. It will vary based on cooking method and specific ingredients used. Please consult with your healthcare provider for specific dietary needs. To gain a better understanding, explore our nutrition disclaimer here

Nutrition

Calories: 360kcalCarbohydrates: 51gProtein: 11gFat: 14gSaturated Fat: 3gPolyunsaturated Fat: 2gMonounsaturated Fat: 8gTrans Fat: 0.03gCholesterol: 246mgSodium: 158mgPotassium: 541mgFiber: 5gSugar: 30gVitamin A: 16428IUVitamin C: 10mgCalcium: 79mgIron: 2mg

Similar Recipes

baked oatmeal

Oven Baked Oats with Apricots and Berries

ricotta apple

Oven Baked Apple with Ricotta and Walnuts

french toast 2

Oven Baked French Toast Muffins with Strawberries

You Might Also Like

Smartfruit Mellow Mango + Immunity, 100% Real Fruit Purée

Trader Joe’s Unsalted, Dry Toasted Slivered Almonds

Trader Joe’s the Dark Chocolate Lover’s Chocolate Bar

Frequently Asked Questions

Can I use mashed sweet potatoes from a can instead of microwaving a fresh sweet potato?

Absolutely! Using canned sweet potato puree is a convenient alternative to microwaving and mashing a fresh sweet potato. Just be sure to check the ingredients list to ensure there are no added sugars or other unwanted additives.


Can I substitute the honey with another sweetener, like maple syrup or agave nectar?

Definitely! Feel free to swap out the honey for your preferred sweetener. Maple syrup and agave nectar are both delicious alternatives that will add a touch of sweetness to the pancakes. Just keep in mind that different sweeteners may vary in sweetness, so you may need to adjust the amount to taste.


Can I use frozen blueberries instead of fresh ones?

Yes, you can use frozen blueberries if fresh ones aren’t available. Just make sure to thaw them before using and drain off any excess liquid to prevent the polenta from becoming too soggy.

Posted on Leave a comment

Apple Oatmeal Muffin Bars

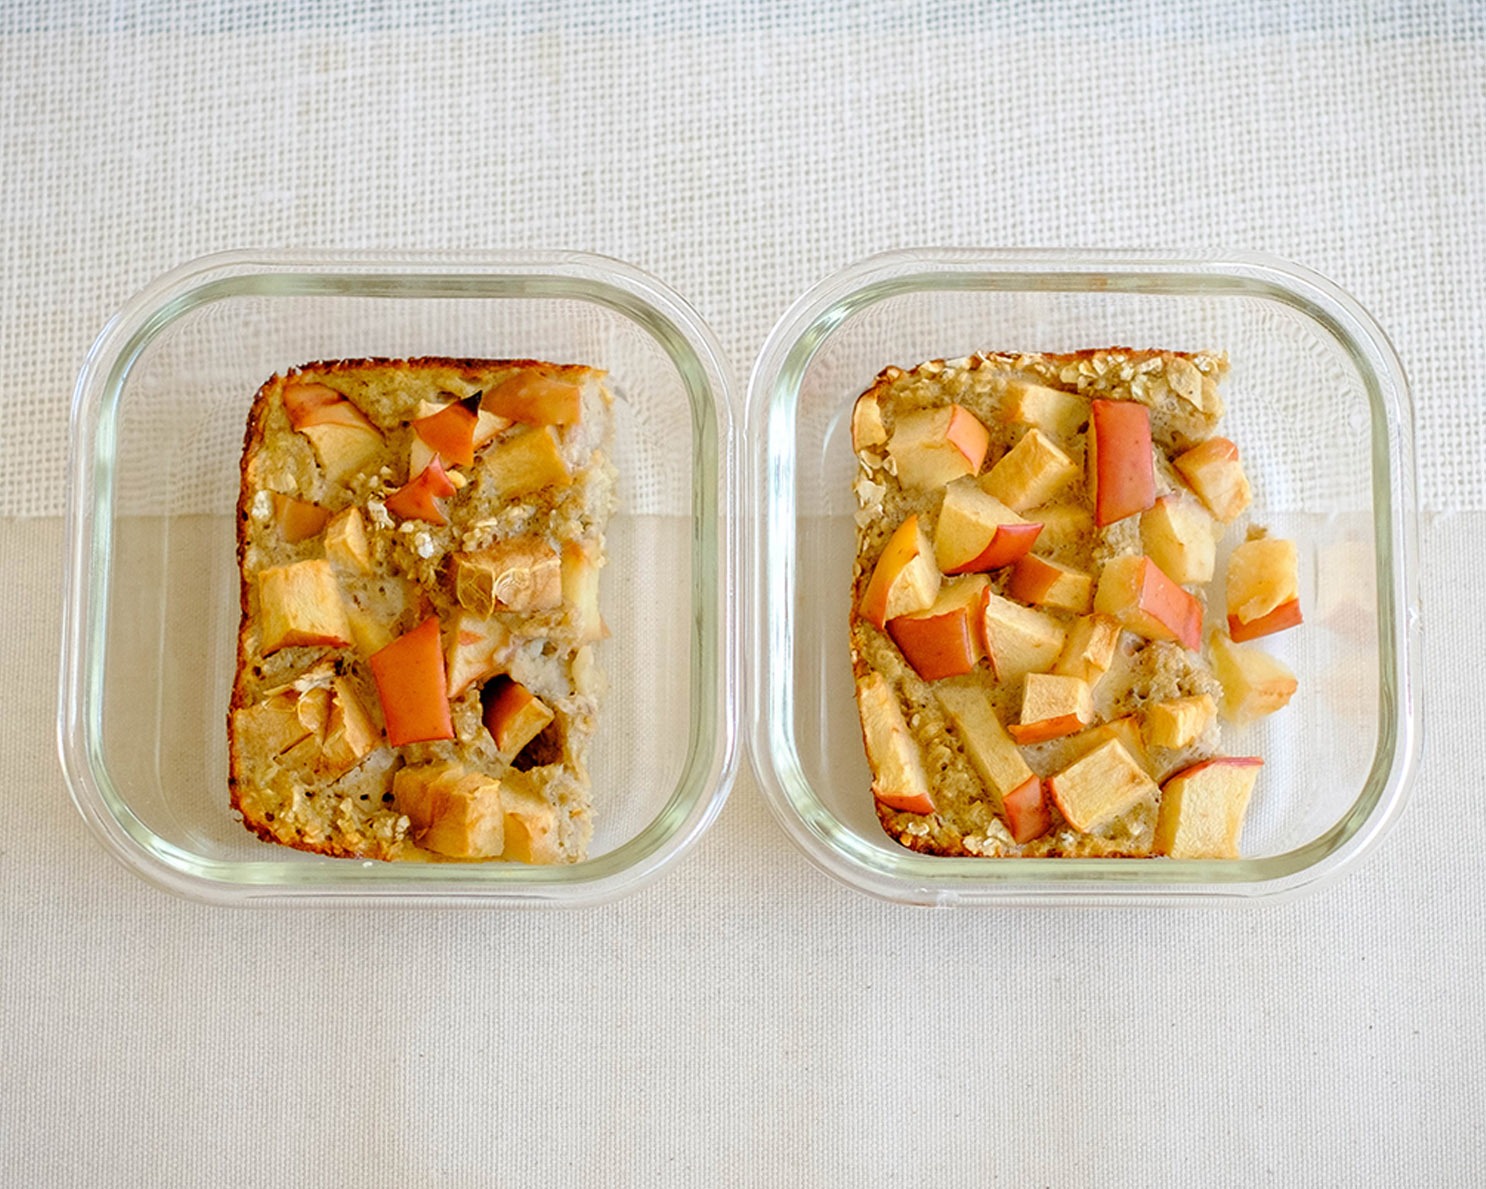
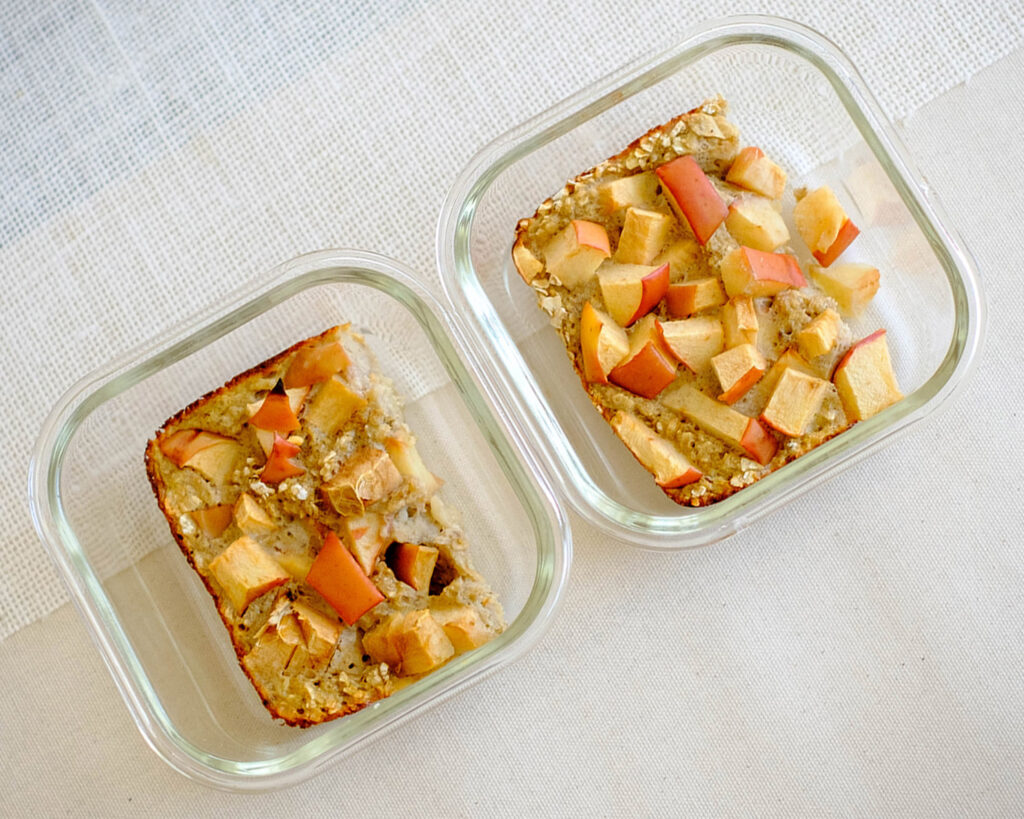
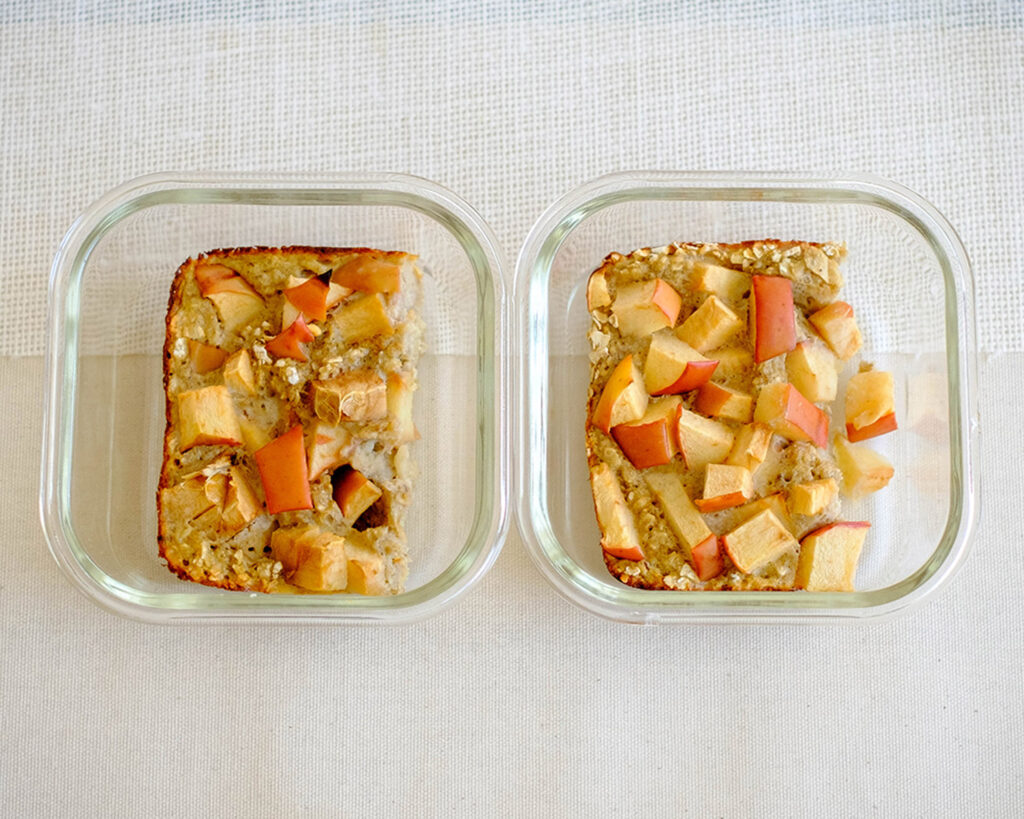
glass meal prep containers with apple oatmeal muffin bar

Our delectable Banana Apple Baked Oatmeal breakfast muffin bars are bursting with flavor and nutrition. This budget-friendly recipe combines the sweetness of ripe bananas with the refreshing crunch of diced apples, all nestled in a hearty bed of rolled oats. Perfectly balanced with protein from eggs and a touch of olive oil for moisture, each bite is a wholesome delight that will keep you fueled throughout the day. So, grab your ingredients and get ready to enjoy a breakfast that’s as nutritious as it is delicious. Let’s bake up some goodness together!

This post may contain affiliate links. Please see our privacy policy for details.

Calories: 188kcal | Carbohydrates: 33g | Protein: 5g | Fat: 5g | Saturated Fat: 1g | Polyunsaturated Fat: 1g | Monounsaturated Fat: 2g | Trans Fat: 0.01g | Cholesterol: 82mg | Sodium: 86mg | Potassium: 376mg | Fiber: 5g | Sugar: 17g | Vitamin A: 206IU | Vitamin C: 9mg | Calcium: 55mg | Iron: 1mg

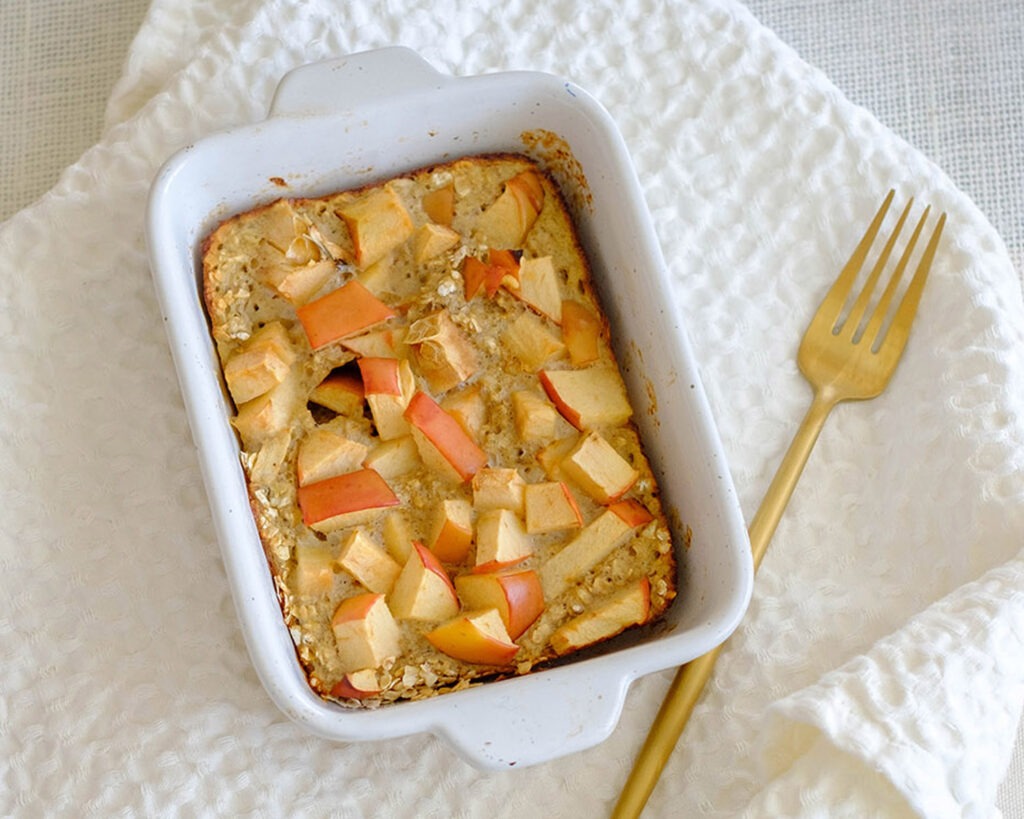
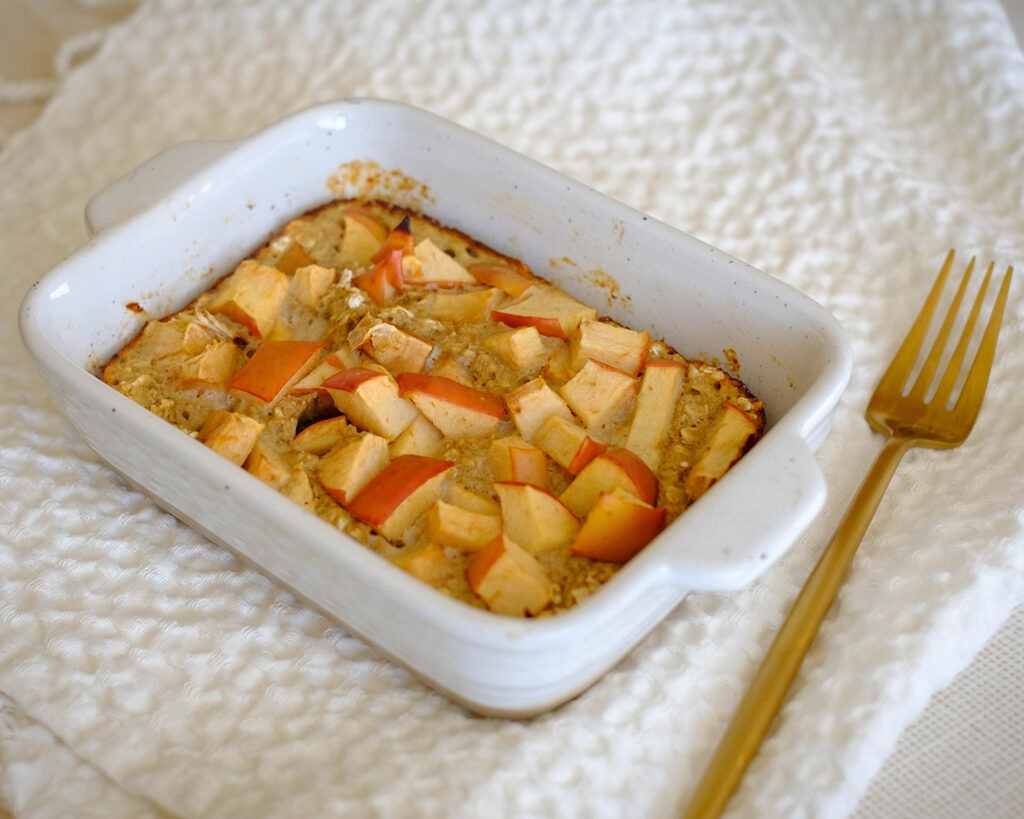
rectangular baking dish with apple oatmeal breakfast muffin bars

Here’s why this recipe rocks:

  • Nutrient-packed Ingredients: Starting your day with a balance of carbs, protein, and healthy fats is essential, and this baked oatmeal delivers just that. Bananas provide a natural sweetness along with potassium and fiber, while eggs add protein to keep you feeling full and focused.
  • Fiber-Filled Oats: Rolled oats are loaded with fiber, which helps regulate digestion, keeps your energy levels stable, and keeps those hunger pangs at bay until your next meal.
  • No-Fuss Preparation: Busy mornings call for quick and easy recipes, and this one fits the bill perfectly. With just a few simple steps, you’ll have a nutritious breakfast ready to go in no time. Blend, mix, pour, bake – it’s that simple!
  • Versatility Galore: Don’t limit yourself to just one variation of this baked oatmeal breakfast muffin bars recipe. Feel free to get creative with your toppings! Swap out the apple for berries, add a sprinkle of nuts or seeds, or drizzle on some honey for extra sweetness. The possibilities are endless!

The PrepYoSelf Newsletter

Budget-Friendly Breakfast Muffin Bars Ingredients:

  • Banana: The star of the show! Ripe bananas bring natural sweetness to the recipe without the need for added sugars. Plus, they’re loaded with potassium, fiber, and vitamins, making them a nutrient-packed addition that keeps our baked oatmeal moist and flavorful.
  • Apple: Adding diced apple not only provides a burst of fresh flavor but also brings in additional fiber, vitamins, and antioxidants. It’s a budget-friendly fruit that adds a lovely texture and sweetness to the dish, complementing the banana beautifully.
  • Rolled Oats: Ah, the humble hero of breakfast foods! Rolled oats are not only inexpensive but also incredibly nutritious. They’re high in fiber, which aids in digestion and helps keep you feeling full and satisfied. Plus, oats provide a hearty texture and nutty flavor that pairs perfectly with the fruity sweetness of the banana and apple.
  • Egg: One large egg adds protein to our baked oatmeal, helping to keep you fueled and energized throughout the morning. Eggs are also relatively inexpensive and versatile, making them a budget-friendly way to boost the nutritional content of our breakfast dish.
  • Baking Powder: A small amount of baking powder helps our baked oatmeal rise and become light and fluffy. It ensures that the texture is just right – not too dense or heavy – creating a delightful breakfast treat that’s both satisfying and budget-friendly.

rectangular baking dish with apple oatmeal breakfast muffin bars

How to Meal Prep Apple Oatmeal Breakfast Muffin Bars

  1. Preheat your oven to 400°F (200°C).
  2. In a blender or mixing bowl, mash up your ripe banana and egg until it’s smooth and creamy. No blender? No problem! A fork works just as well.
  3. Add in the rolled oats and baking powder, giving everything a good mix until it’s nicely combined.
  4. Grease up a baking dish and pour in your oatmeal batter.
  5. Time to add a little fruity flair! Dice up your apple into small pieces and scatter them on top of the batter.
  6. Pop that dish into the oven and bake for 15-20 minutes until it’s golden and cooked through.

Reference the recipe card below for detailed instructions.

glass meal prep containers with apple oatmeal breakfast muffin bars

Meal Prep Tips:

  • Yogurt: Serve your baked oatmeal with a dollop of Greek yogurt for a creamy contrast to the fruity flavors. Add a drizzle of honey or a sprinkle of cinnamon for extra indulgence.
  • Nuts and Seeds: Sprinkle chopped nuts or seeds (such as almonds, walnuts, or pumpkin seeds) on top of your baked oatmeal for added crunch and a boost of healthy fats and protein.
  • Coffee or Tea: Enjoy your Banana Apple Baked Oatmeal with a cup of your favorite hot beverage, such as coffee or tea, for a comforting and satisfying breakfast experience.
  • Spice it Up: Add a pinch of ground cinnamon, nutmeg, or vanilla extract to the batter for extra warmth and flavor.

glass meal prep containers with apple oatmeal breakfast muffin bars

rectangular baking dish with apple oatmeal muffin bar

Apple Oatmeal Muffin Bars

Wholesome and budget-friendly, our Banana Apple Baked Oatmeal combines ripe bananas, diced apples, and hearty rolled oats for a nutritious and delicious breakfast treat!
No ratings yet
Prep Time 5 minutes
Cook Time 15 minutes
Course Breakfast, Snack
Cuisine American
Servings 2
Calories 188 kcal

Equipment

  • blender
  • spatula
  • cutting board
  • oven

Ingredients
  

  • 1 large banana (ripe)
  • 1 large egg
  • 1/4 cup rolled oats
  • 1/4 teaspoon baking powder
  • 1 small apple
  • 1 teaspoon olive oil

Instructions
 

  • Preheat the oven to 400F.
  • Blend together the banana and egg until it is smooth (or you can use a fork to mash it in a mixing bowl)
  • Add the rolled oats and baking powder and mix it all together.
  • Pour the batter into a greased baking dish. Dice the apple into small pieces, and place it on top of the batter.
  • Bake it in the oven for 15 to 20 minutes until the center is fully cooked.

Notes

Nutrition information provided is an estimate. It will vary based on cooking method and specific ingredients used. Please consult with your healthcare provider for specific dietary needs. To gain a better understanding, explore our nutrition disclaimer here

Nutrition

Calories: 188kcalCarbohydrates: 33gProtein: 5gFat: 5gSaturated Fat: 1gPolyunsaturated Fat: 1gMonounsaturated Fat: 2gTrans Fat: 0.01gCholesterol: 82mgSodium: 86mgPotassium: 376mgFiber: 5gSugar: 17gVitamin A: 206IUVitamin C: 9mgCalcium: 55mgIron: 1mg

Similar Recipes

baked oatmeal

Oven Baked Oats with Apricots and Berries

ricotta apple

Oven Baked Apple with Ricotta and Walnuts

french toast 2

Oven Baked French Toast Muffins with Strawberries

You Might Also Like

Smartfruit Mellow Mango + Immunity, 100% Real Fruit Purée

Trader Joe’s Unsalted, Dry Toasted Slivered Almonds

Trader Joe’s the Dark Chocolate Lover’s Chocolate Bar

Frequently Asked Questions

Can I use instant oats instead of rolled oats?

While instant oats can be used in a pinch, rolled oats are preferred for their texture and heartiness in this recipe. Instant oats may result in a softer texture, but the overall flavor should remain similar.


Can I freeze the baked oatmeal muffin?

Yes, you can freeze baked oatmeal muffins for longer storage. Once cooled, wrap individual portions tightly in plastic wrap or aluminum foil, then place them in a freezer-safe bag or container. Freeze for up to 3 months. Thaw overnight in the refrigerator or reheat from frozen in the microwave or oven.


Can I omit the egg to make it vegan?

Absolutely! You can substitute the egg with a flax or chia egg (1 tablespoon ground flaxseed or chia seeds mixed with 3 tablespoons of water, let sit for 5 minutes to gel) to make this recipe vegan-friendly.

Posted on Leave a comment

Yogurt with Strawberries and Mixed Nuts

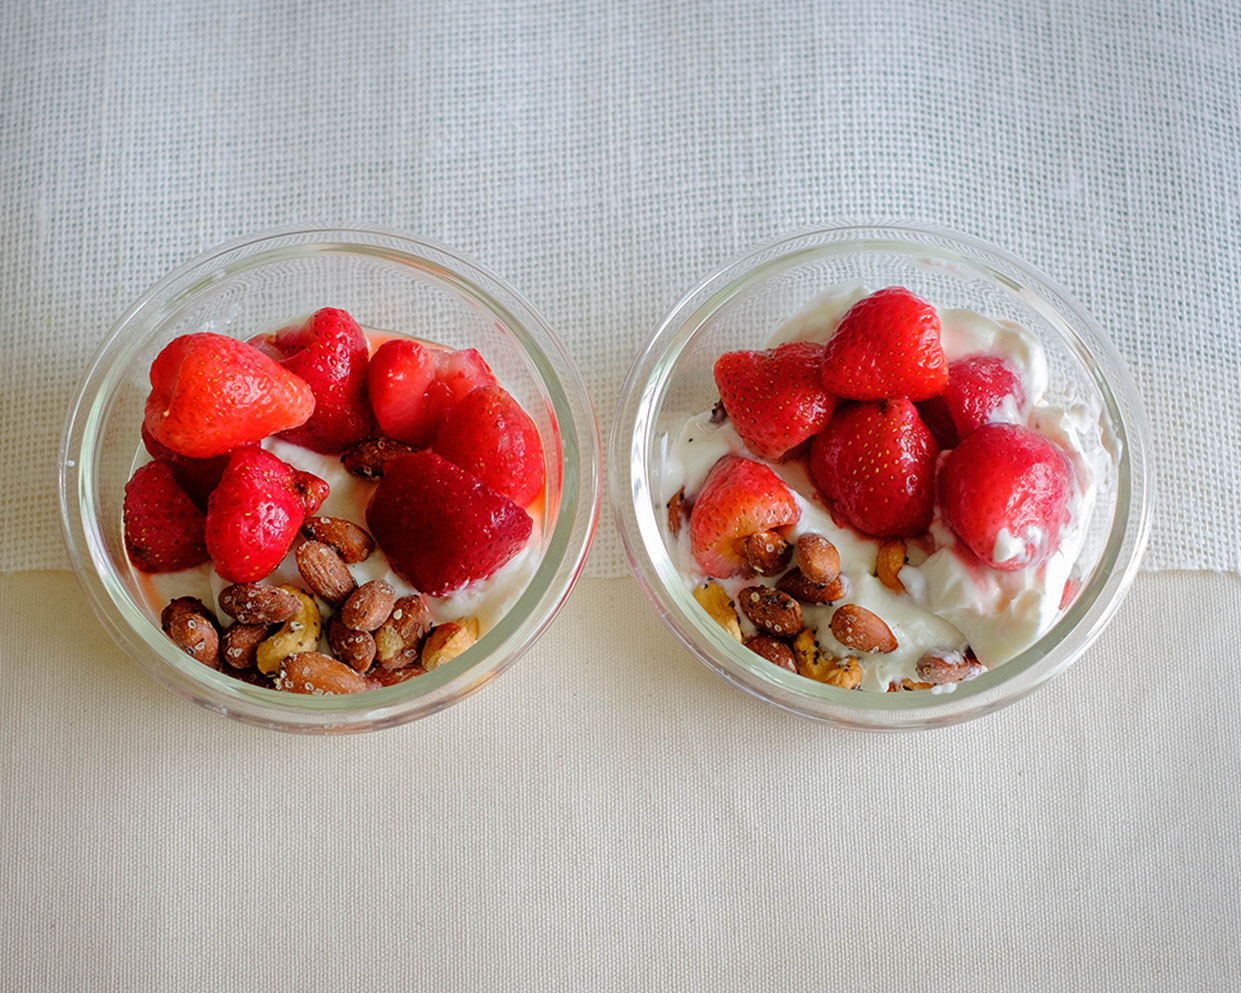
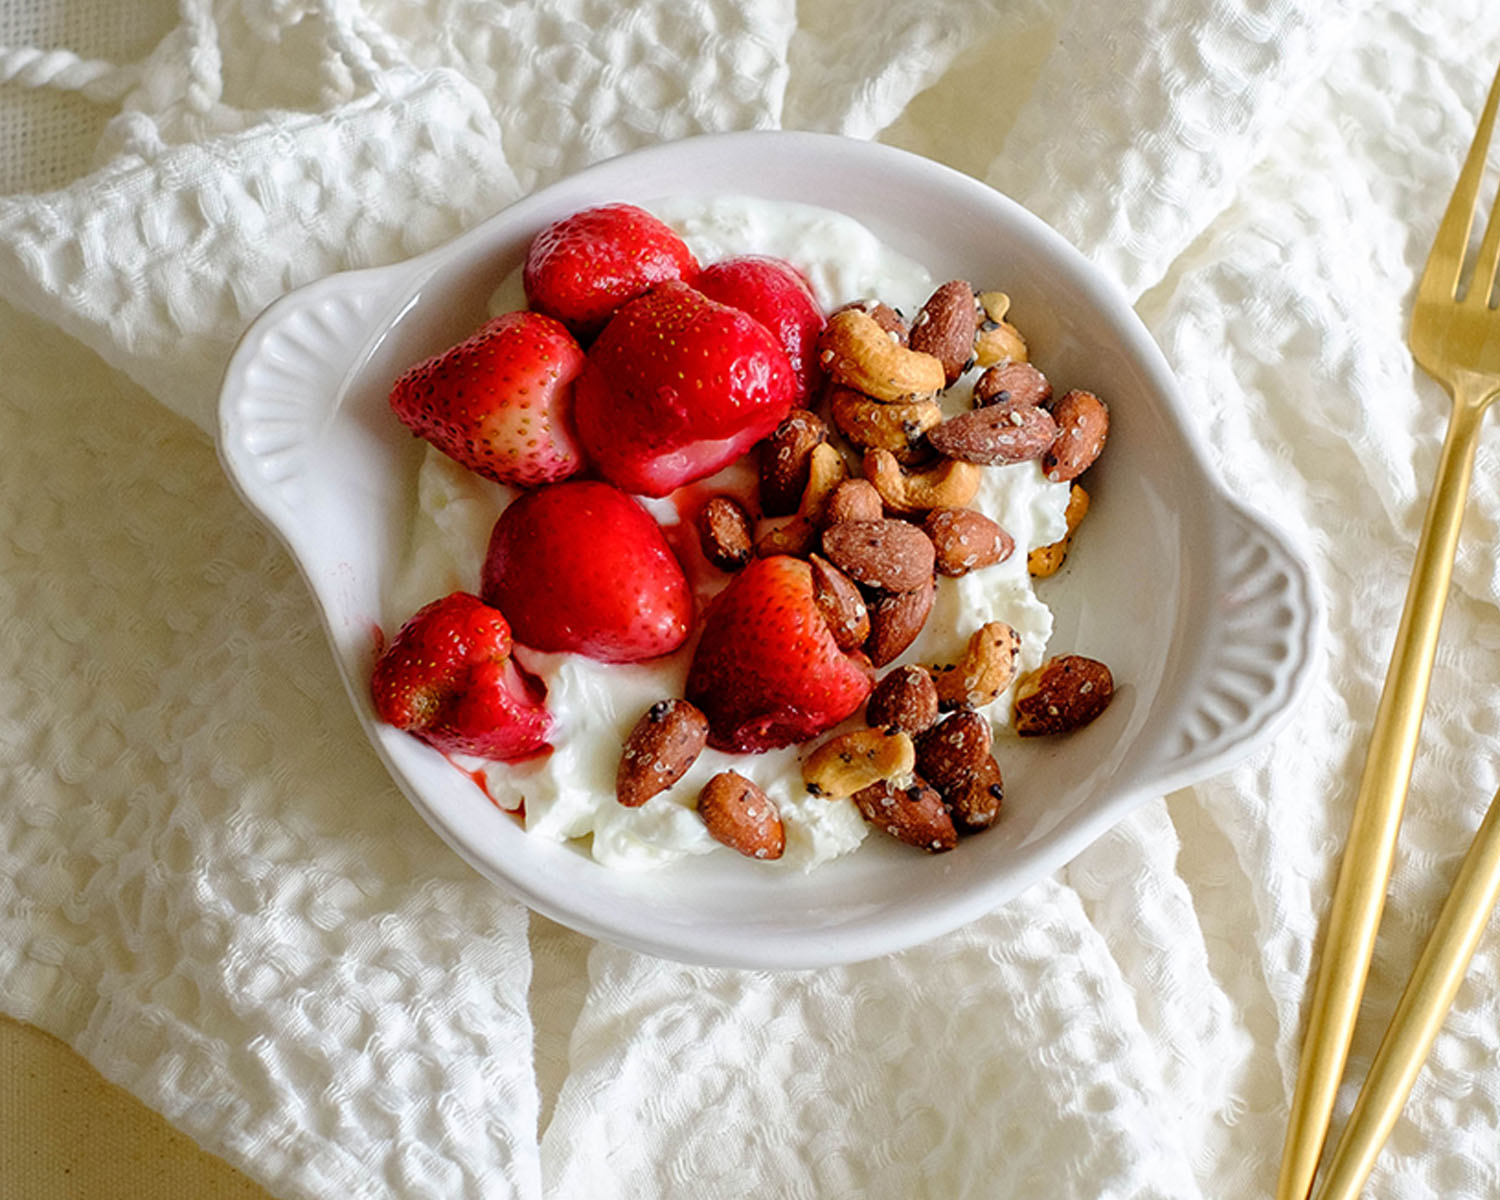
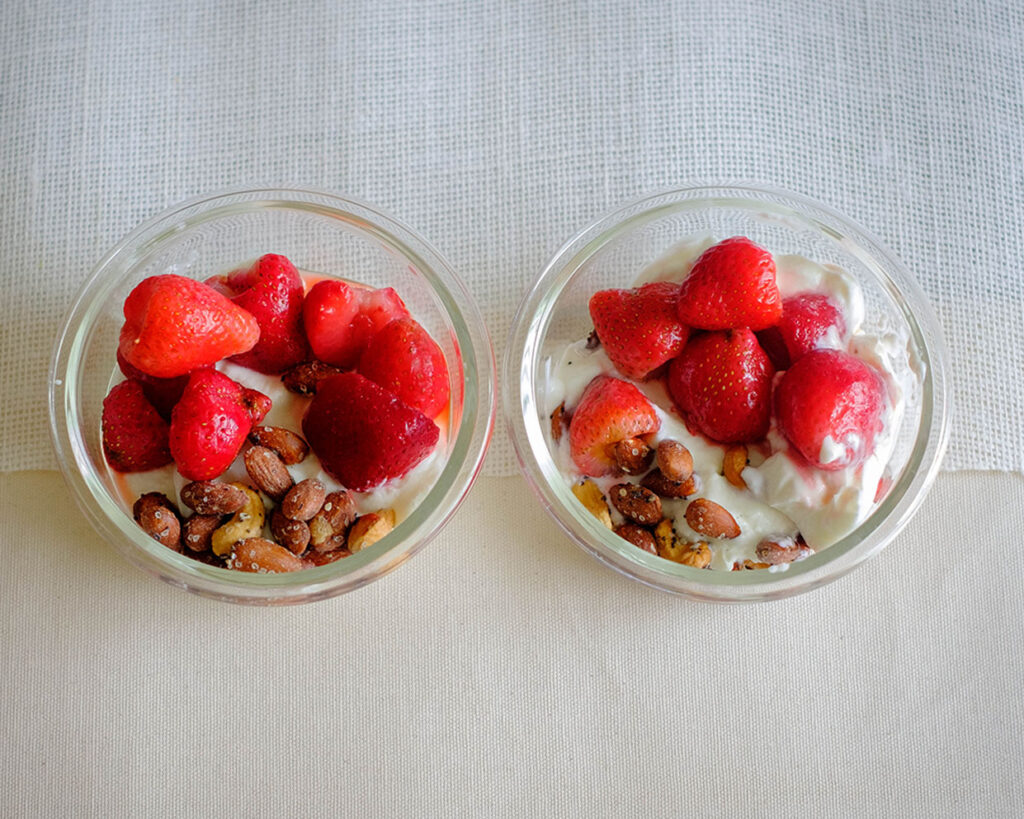
round glass containers with yogurt topped with strawberries and mixed nuts

Meal prep our Healthy Yogurt Bowl with Strawberries and Mixed Nuts! Finding a healthy breakfast that’s both delicious and budget-friendly can be a challenge. But fear not, because this recipe makes for a delicious, easy-to-prep morning ritual. Packed with protein-rich yogurt, fresh strawberries bursting with vitamins, and a crunchy medley of mixed nuts, this bowl is a powerhouse of nutrients to fuel your day. Best of all, it’s a budget-friendly and stress-free option that proves healthy breakfasts can be both attainable and delectable. Get ready to transform your mornings with a breakfast that’s as good for your wallet as it is for your taste buds!

This post may contain affiliate links. Please see our privacy policy for details.

Calories: 292kcal | Carbohydrates: 22g | Protein: 12g | Fat: 18g | Saturated Fat: 7g | Polyunsaturated Fat: 2g | Monounsaturated Fat: 9g | Cholesterol: 32mg | Sodium: 116mg | Potassium: 610mg | Fiber: 3g | Sugar: 15g | Vitamin A: 255IU | Vitamin C: 44mg | Calcium: 324mg | Iron: 1mg

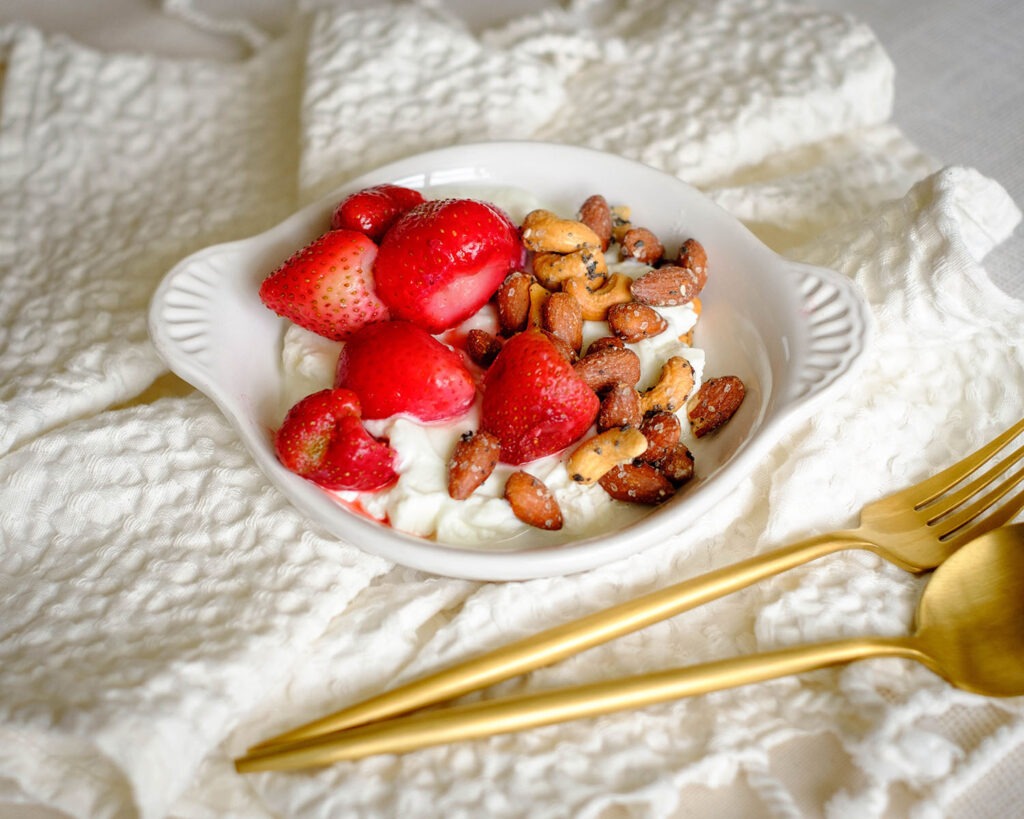
round bowl with yogurt topped with strawberries and mixed nuts for a healthy breakfast

Why This Recipe is Great for Meal Prep

  • Time-Saving Magic: This Yogurt Bowl takes minutes to assemble, making it the ultimate go-to for your busy-morning healthy breakfasts. No need to sacrifice flavor for speed – you can have both!
  • Budget-Friendly Brilliance: Our recipe is designed with your budget in mind. Yogurt, strawberries, mixed nuts, and cinnamon powder – simple, wholesome ingredients that won’t make a dent in your wallet. Who says nutritious can’t be affordable?
  • Minimal Ingredients, Maximum Flavor: When life gets hectic, simplicity is key. With just four main ingredients, this Yogurt Bowl is a breeze to prepare. Yet, each spoonful bursts with the goodness of creamy yogurt, sweet strawberries, crunchy nuts, and a touch of warmth from cinnamon – a symphony of flavors that won’t disappoint.
  • Versatility at its Finest: Feel like mixing it up? Go ahead! This recipe is a canvas for your creativity. Swap out strawberries for your favorite seasonal fruits, experiment with different nut combinations, or add a drizzle of honey if you’re feeling extra indulgent. Your Yogurt Bowl, your rules!
  • Nutrient-Packed Goodness: Busy days call for fuel that keeps you going. This Yogurt Bowl isn’t just a treat for your taste buds; it’s a nutritional powerhouse. Packed with protein, vitamins, and antioxidants from the fruits and nuts, it’s the perfect way to kickstart your day on a healthy breakfast note.
  • Portability for the Win: Got a meeting or an early workout? No worries – this Yogurt Bowl is easily portable. Grab a container with a lid, and you’ve got a nutritious breakfast or snack that you can enjoy on the go. No excuses for skipping the most important meal of the day!

The PrepYoSelf Newsletter

Ingredient Breakdown:

  • Yogurt – Creamy Foundation: The yogurt forms the base of our bowl, providing a lusciously creamy texture that’s both satisfying and indulgent. Yogurt is rich in protein, keeping you full and energized throughout the day. Yogurt is a cost-effective source of dairy or plant-based goodness, making it perfect for those mindful of their wallets.
  • Strawberries – Burst of Sweetness:  Strawberries add a sweet and fruity kick without the need for added sugars. A budget-friendly way to satisfy your sweet tooth! Packed with vitamin C, strawberries contribute to a healthy immune system – a must for busy individuals on the go. Beyond taste, strawberries bring a vibrant burst of color that makes your healthy breakfast visually appealing.
  • Mixed Nuts – Crunchy Nuttiness: Nuts bring a satisfying crunch, adding a dynamic texture to the creamy yogurt and soft strawberries. Nuts are loaded with heart-healthy fats, providing a source of sustained energy. Nuts are a nutrient-dense option, contributing essential vitamins and minerals without breaking the bank.
  • Cinnamon Powder – Warm and Aromatic Elegance: A pinch of cinnamon adds a cozy, comforting element to the bowl, making it a perfect treat, especially on chilly mornings. A little goes a long way with cinnamon, making it a cost-effective way to enhance the overall flavor profile of your bowl.

round bowl with yogurt topped with strawberries and mixed nuts for a healthy breakfast

Steps to Meal Prep this Yogurt Bowl

  1. Grab your meal prep bowls and start by placing a generous cup of your favorite yogurt at the bottom of each bowl. Whether you’re into Greek yogurt for that creamy texture or plant-based options for a dairy-free twist, the choice is yours!
  2. Now, let’s add a pop of color and sweetness! Take your fresh, ripe strawberries and slice them up into bite-sized pieces. Gently place them on top of the yogurt, creating a vibrant strawberry layer that’s as visually appealing as it is delicious.
  3. It’s crunch time! Sprinkle your favorite mixed nuts over the strawberries. Whether you go for almonds, walnuts, or a mix of both, these little powerhouses will add the perfect crunch to every spoonful.
  4. To tie it all together, sprinkle cinnamon powder over the bowl. This warm and aromatic touch will elevate the flavors, giving your Yogurt Bowl a hint of cozy goodness.
  5. Grab a spoon and give your creation a gentle mix. Blend those creamy, fruity, and nutty layers to create a symphony of textures and tastes that will dance on your taste buds.

Reference the recipe card below for detailed instructions.

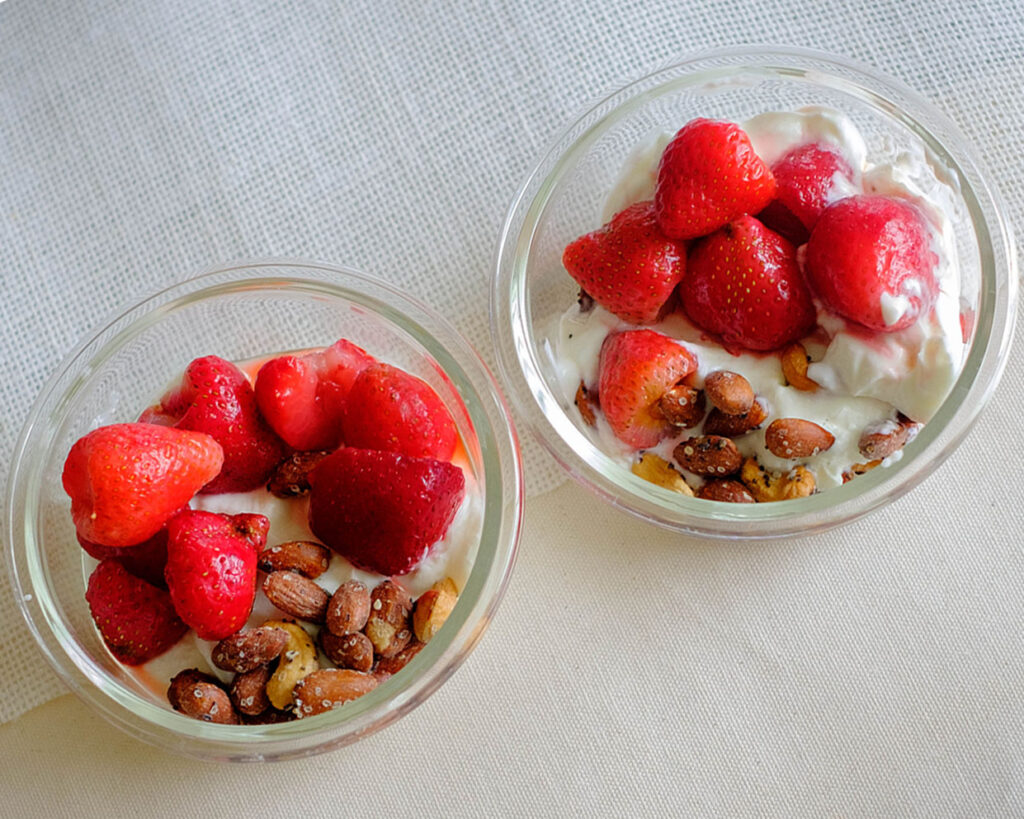
round glass containers with yogurt topped with strawberries and mixed nuts for a healthy breakfast

Meal Prep Tips for Yogurt Bowls

  • Morning Beverage Boost: Pair your Yogurt Bowl with a cup of your favorite morning beverage. Whether it’s a hot cup of coffee, energizing green tea, or a refreshing glass of orange juice, the combination enhances your healthy breakfast experience.
  • Crunchy Granola Topping: For an extra crunch, top your Yogurt Bowl with a small handful of granola. It adds texture, flavor, and a satisfying crunch that complements the creaminess of the yogurt and the nuts.
  • Side of Whole Grain Toast: Add a side of whole grain toast for a well-rounded meal. The complex carbs provide sustained energy, keeping you fueled throughout the morning.
  • Drizzle of Honey: For those with a sweet tooth, a drizzle of honey over the Yogurt Bowl adds a touch of natural sweetness. It’s an indulgent yet healthy breakfast addition.
  • Fresh Mint Garnish: Elevate the freshness by garnishing your bowl with a few fresh mint leaves. The burst of herbal aroma complements the fruity and nutty flavors.
  • Mix Up the Fruit Palette: Experiment with different fruits based on what’s in season or on sale. Blueberries, raspberries, or sliced banana can bring variety to your Yogurt Bowl without compromising on budget or nutrition.

round glass containers with yogurt topped with strawberries and mixed nuts for a healthy breakfast

yogurt with berries

Yogurt with Strawberries and Mixed Nuts

Elevate your mornings with a budget-friendly and nutritious Yogurt Bowl featuring creamy yogurt, fresh strawberries, mixed nuts, and a hint of cinnamon – a quick and easy breakfast that's as wholesome as it is delicious!
No ratings yet
Prep Time 5 minutes
Cook Time 5 minutes
Course Breakfast, Snack
Cuisine American
Servings 2
Calories 292 kcal

Equipment

  • spoon
  • serving bowl

Ingredients
  

  • 2 cups yogurt
  • 1 cup strawberries
  • 4 tbsp mixed nuts
  • 1/4 tsp cinnamon powder

Instructions
 

  • Place yogurt at the bottom of the bowl
  • Add the strawberries and mixed nuts on top
  • Sprinkle with cinnamon powder

Notes

Nutrition information provided is an estimate. It will vary based on cooking method and specific ingredients used. Please consult with your healthcare provider for specific dietary needs. To gain a better understanding, explore our nutrition disclaimer here.

Nutrition

Calories: 292kcalCarbohydrates: 22gProtein: 12gFat: 18gSaturated Fat: 7gPolyunsaturated Fat: 2gMonounsaturated Fat: 9gCholesterol: 32mgSodium: 116mgPotassium: 610mgFiber: 3gSugar: 15gVitamin A: 255IUVitamin C: 44mgCalcium: 324mgIron: 1mg

Similar Recipes

baked oatmeal

Oven Baked Oats with Apricots and Berries

cranberry oat muffins

Cranberry Oatmeal Muffin Bars

french toast 2

Oven Baked French Toast Muffins with Strawberries

You Might Also Like

Frequently Asked Questions

Can I use frozen strawberries?

Fresh strawberries are recommended for the best texture and flavor. If using frozen, thaw them first, and be aware that the consistency might be a bit different.


Is there a dairy-free alternative for this recipe?

Yes, choose a plant-based yogurt to make this recipe dairy-free. Almond, coconut, or soy yogurt are great options, offering a variety of flavors.


How can I adjust the sweetness level?

Feel free to adjust the sweetness by adding a touch of maple syrup, agave nectar, or any sweetener of your choice. Taste as you go to find your perfect balance.

Posted on Leave a comment

Lemon Ricotta Breakfast Cake

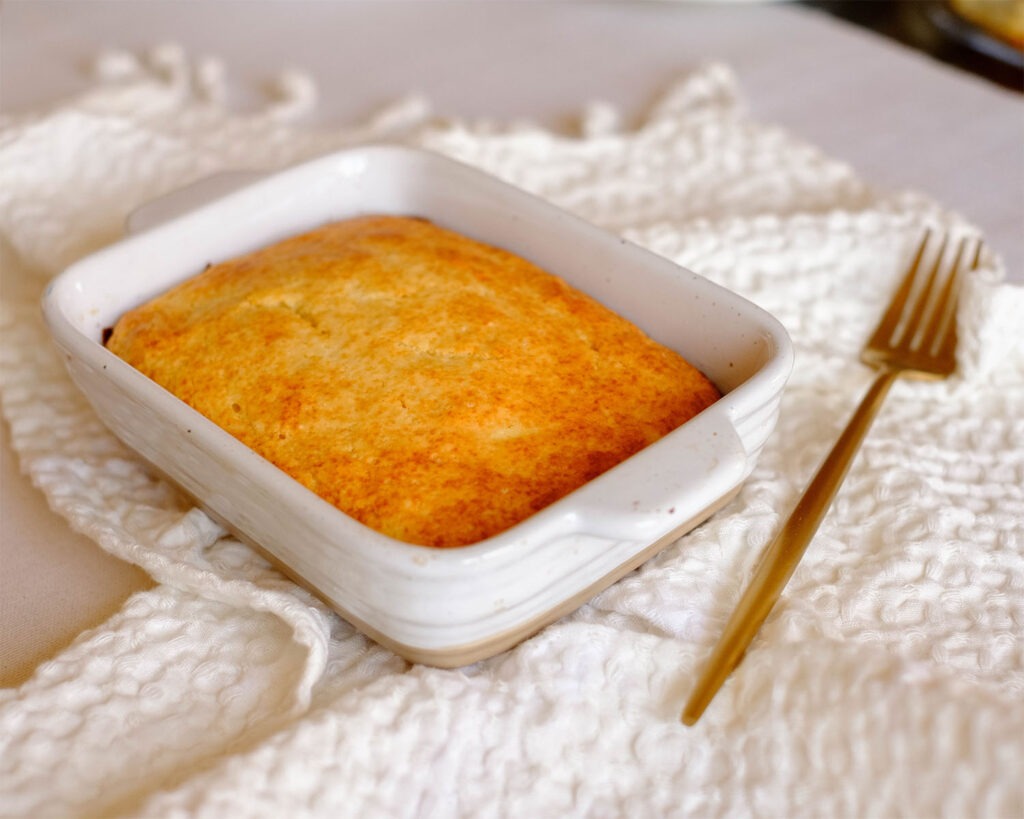
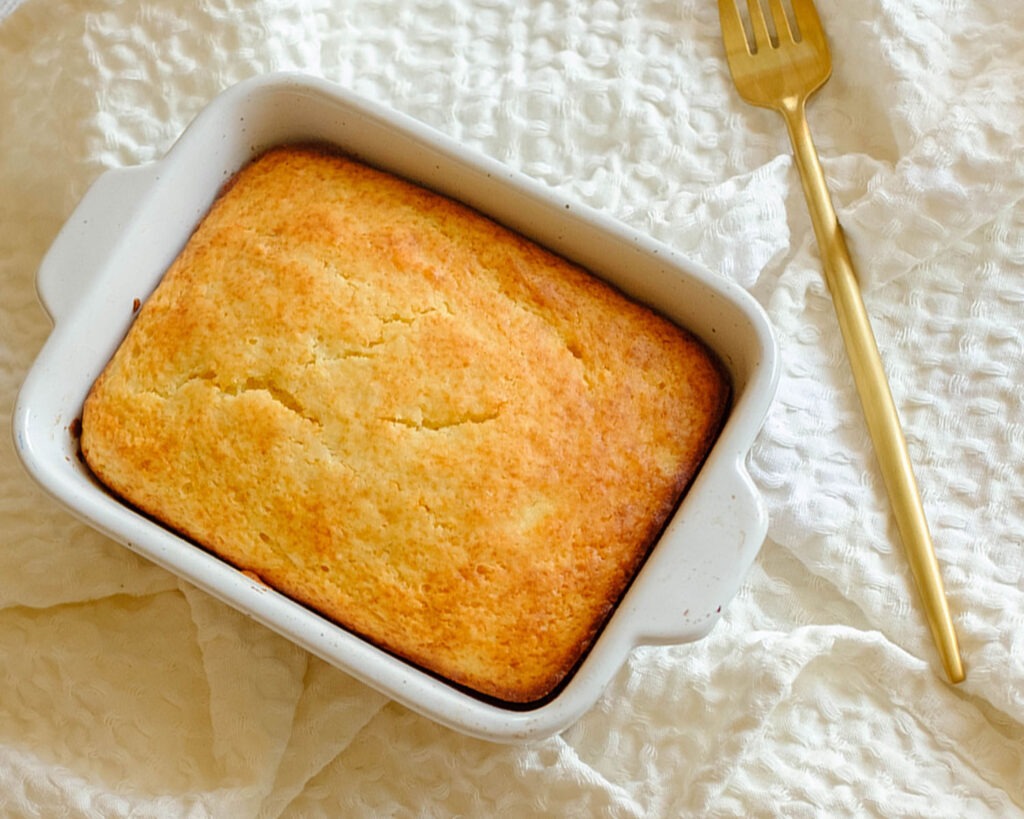
rectangle baking dish with a lemon ricotta breakfast cake

Energize Your Mornings with a Zesty Twist: Lemon Ricotta Breakfast Cake! This delightful creation not only tastes delicious but also takes the hassle out of your busy mornings. Picture this: a zesty, moist cake that’s not only a treat for your senses but a triumph for your meal prep game. With simple ingredients and a quick bake time, it’s the perfect solution for those who crave a wholesome breakfast but lack the time. Get ready to savor the joy of a well-prepared morning with this Lemon Ricotta Breakfast Cake that’s sure to become a staple in your breakfast routine.

This post may contain affiliate links. Please see our privacy policy for details.

Calories: 489kcal | Carbohydrates: 56g | Protein: 14g | Fat: 25g | Saturated Fat: 8g | Polyunsaturated Fat: 2g | Monounsaturated Fat: 13g | Trans Fat: 0.01g | Cholesterol: 113mg | Sodium: 139mg | Potassium: 204mg | Fiber: 2g | Sugar: 27g | Vitamin A: 407IU | Vitamin C: 29mg | Calcium: 189mg | Iron: 3mg

rectangle baking dish with a lemon ricotta breakfast cake

Why This Breakfast Cake is a Game-Changer for Meal Prep

In the world of breakfast delights, this cake stands out as a beacon of tastiness and convenience. So, whether you’re conquering the day solo or sharing the love with your loved ones, let the Lemon Ricotta Breakfast Cake be your morning delight.

  • Quick and Easy: In the blink of an eye, you’ll have a delightful breakfast ready to roll.
  • Zesty Goodness: The lemony kick will wake up your taste buds like a sunrise for your mouth.
  • Wholesome Ingredients: Indulge in the sweet satisfaction without the guilt. The use of olive oil and ricotta keeps it light and lovely
  • Portion Control: Slice it up into individual servings for built-in portion control. No need to eyeball your breakfast; it’s pre-portioned and ready to roll.

The PrepYoSelf Newsletter

Ingredients & Swaps

  • Egg: For an egg-free version, substitute with a flax egg (1 tablespoon ground flaxseed + 3 tablespoons water) or applesauce. This tweak maintains moisture while being kind to our vegan friends.
  • Sugar: Opt for natural sweeteners like maple syrup, honey, or coconut sugar instead of white sugar. It adds a subtle sweetness without the refined sugars. You can also use sugar alternatives such as swerve.
  • Oil: Choose a lighter oil, like avocado oil, for a dose of healthy monounsaturated fats. It keeps the cake moist while giving you a boost of heart-healthy goodness.
  • Flour: Sub in whole wheat flour for a fiber-rich alternative. This not only adds a nutty flavor but also keeps you feeling fuller for longer. Replace a portion of the flour with almond flour. This adds a delightful nuttiness to the cake.
  • Yogurt: Incorporate a couple of tablespoons of Greek yogurt for an additional protein boost and a creamy texture. It complements the ricotta beautifully.
  • Spices: Add a pinch of nutmeg to the mix for a warm, comforting flavor. Nutmeg complements the citrus notes and adds a layer of depth.

rectangle baking dish with a lemon ricotta breakfast cake

How to Meal Prep Lemon Ricotta Breakfast Cake

  1. Preheat your oven to 400°F.
  2. In a mixing bowl, gather your ingredients: 1 large egg, 1/4 cup white sugar, 1/2 cup ricotta cheese, 2 tablespoons of olive oil, and the freshly squeezed juice of one lemon. It’s time to let the flavor dance party begin! Mix until these ingredients well blended.
  3. Now, it’s time to add a little pow-wow to our mix. Sprinkle in 1/2 cup of flour and 1/4 teaspoon of baking powder. Keep the mixing vibes going until you’ve got a batter that’s smooth and sensational.
  4. Grease up your baking dish because it’s showtime! Pour your batter into the dish, making sure it’s spread out evenly. Pop it into the preheated oven and let the magic happen for the next 12-15 minutes.
  5. Keep an eye on your creation as it bakes. You want the center to be fully cooked, and when you insert a toothpick, it should come out clean. Once that happens, you’re officially the maestro of your kitchen!

Reference the recipe card below for detailed instructions.