Posted on Leave a comment

Tuna Stuffed Deviled Eggs

round plate with deviled eggs and arugula salad

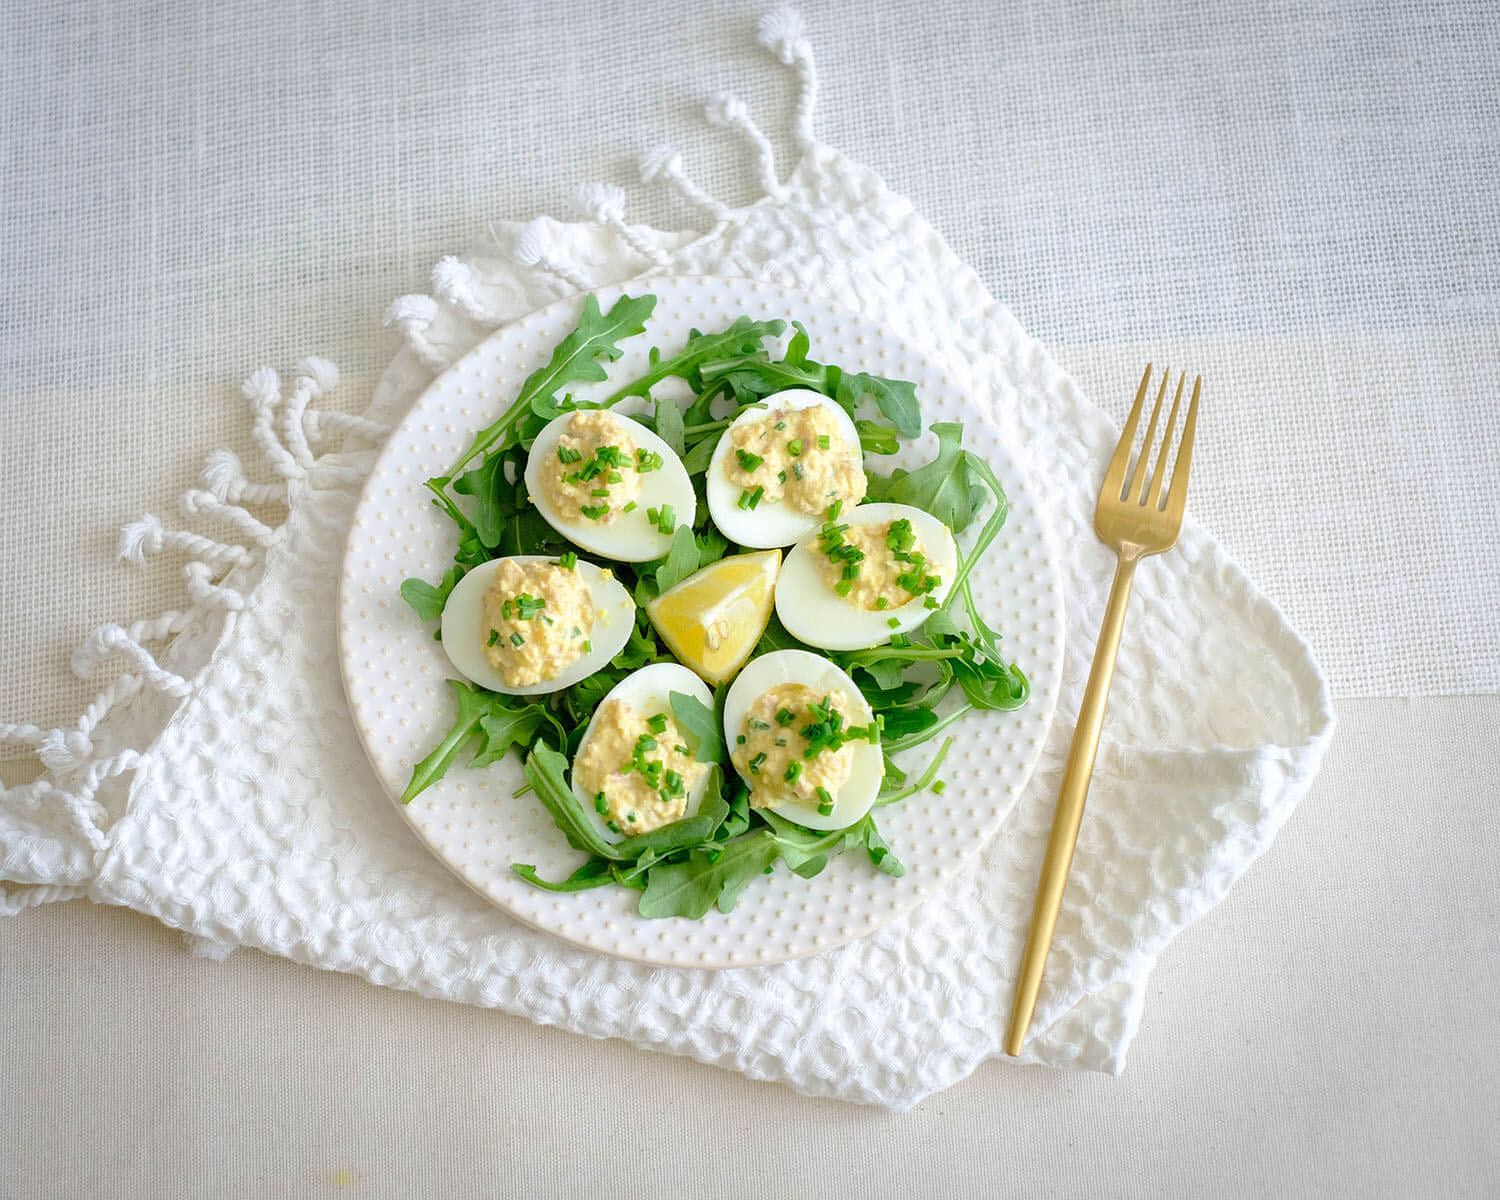
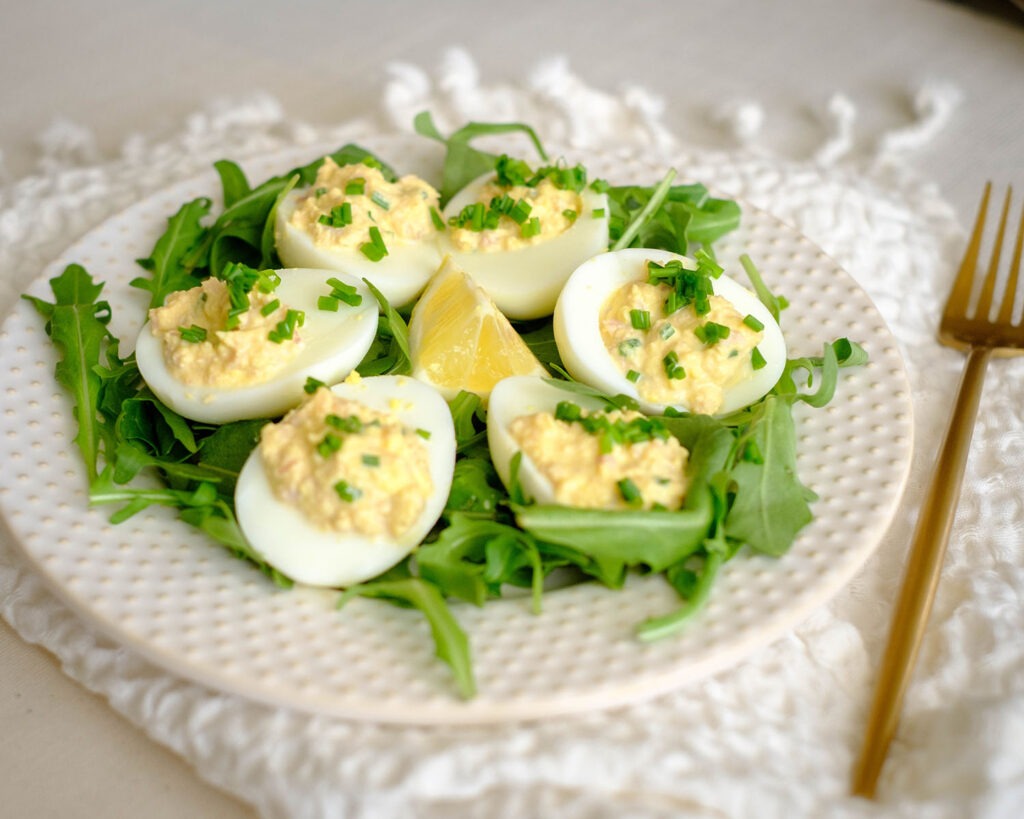
Greetings, food enthusiasts! Today, I’m excited to share with you a fabulous recipe that not only adds a burst of flavor to your meal prep routine but also offers numerous health and cost benefits. Get ready to indulge in the delectable goodness of Tuna Stuffed Deviled Eggs, a low carb meal that will keep your taste buds dancing throughout the week!

This post may contain affiliate links. Please see our privacy policy for details.

round plate with deviled eggs and arugula salad for a low carb meal

Why We Love This Recipe

  1. Health Benefits: When it comes to meal prep, it’s essential to choose recipes that offer a balance of nutrition and taste and a low carb meal. Tuna Stuffed Deviled Eggs perfectly fit the bill. Eggs are a fantastic source of protein, providing you with the energy you need to conquer your day. Additionally, eggs are rich in vitamins such as B12, selenium, and choline, which promote brain health and help maintain a healthy nervous system.
  2. The inclusion of canned tuna takes the nutritional profile up a notch. Tuna is packed with omega-3 fatty acids, which have been linked to numerous health benefits, including reducing the risk of heart disease and promoting brain function. It is also an excellent source of lean protein, making it an ideal choice for those aiming to build or maintain muscle mass.
  3. Cost Benefits: One of the major advantages of this recipe is its cost-effectiveness. Eggs and canned tuna are incredibly affordable and readily available in most grocery stores. By utilizing these budget-friendly ingredients, you can create a delicious and satisfying meal prep option without breaking the bank.

The PrepYoSelf Newsletter

Let’s delve into the simple ingredients that make Tuna Stuffed Deviled Eggs shine:

  • Eggs: A versatile and nutrient-dense ingredient, eggs provide protein, vitamins, and minerals essential for overall health and well-being. They form the sturdy base for the delightful filling.
  • Canned Tuna: Canned tuna adds a burst of umami flavor and contributes heart-healthy omega-3 fatty acids. Opt for sustainable and responsibly sourced tuna for the best quality.
  • Red Onions: You can use any kind of onions.
  • Mayonnaise: Creamy and luscious mayonnaise binds the filling together while imparting a smooth texture. Choose a high-quality mayonnaise or consider using a lighter alternative like Greek yogurt or avocado mayo.
  • Lemon: Fresh lemon juice brightens up
round plate with deviled eggs and arugula salad for a low carb meal

Basic Steps to Prepare Tuna Deviled Eggs

  1. Boil the eggs for 6 to 8 minutes. Meanwhile, in a small bowl mix together the lemon juice, dijon mustard, olive oil, garlic powder, and salt until well blended
  2. In a bowl, add the tuna and half of the egg yolks (discard the rest). Then, mix in the mayonnaise, lemon juice, green onions, salt, and mix until all the ingredients have mixed well
  3. Use a small spoon to stuff the tuna egg salad mixture back into the center of the egg whites.

Reference the recipe card below for detailed instructions.

glass meal prep containers with deviled eggs and arugula salad for a low carb meal

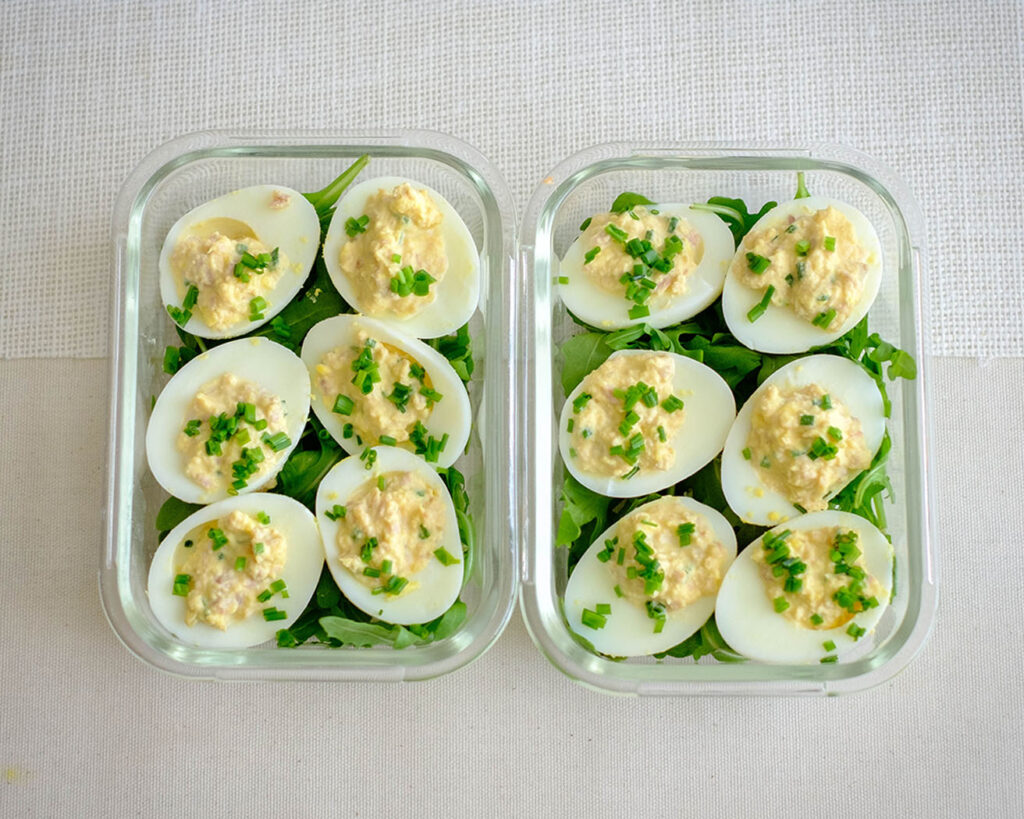
Low Carb Meal Prep Tips for A Tuna Stuffed Deviled Eggs

  • To ensure your Tuna Stuffed Deviled Eggs stay fresh and flavorful, here are some storage tips: Store the deviled eggs in an airtight container in the refrigerator. They can be kept for up to 3-4 days.If you plan to eat them later in the week, consider storing the filling and the egg whites separately. Assemble them just before eating to maintain the perfect texture.
  •  Freezing the deviled eggs is not recommended, as the texture and consistency may be compromised.
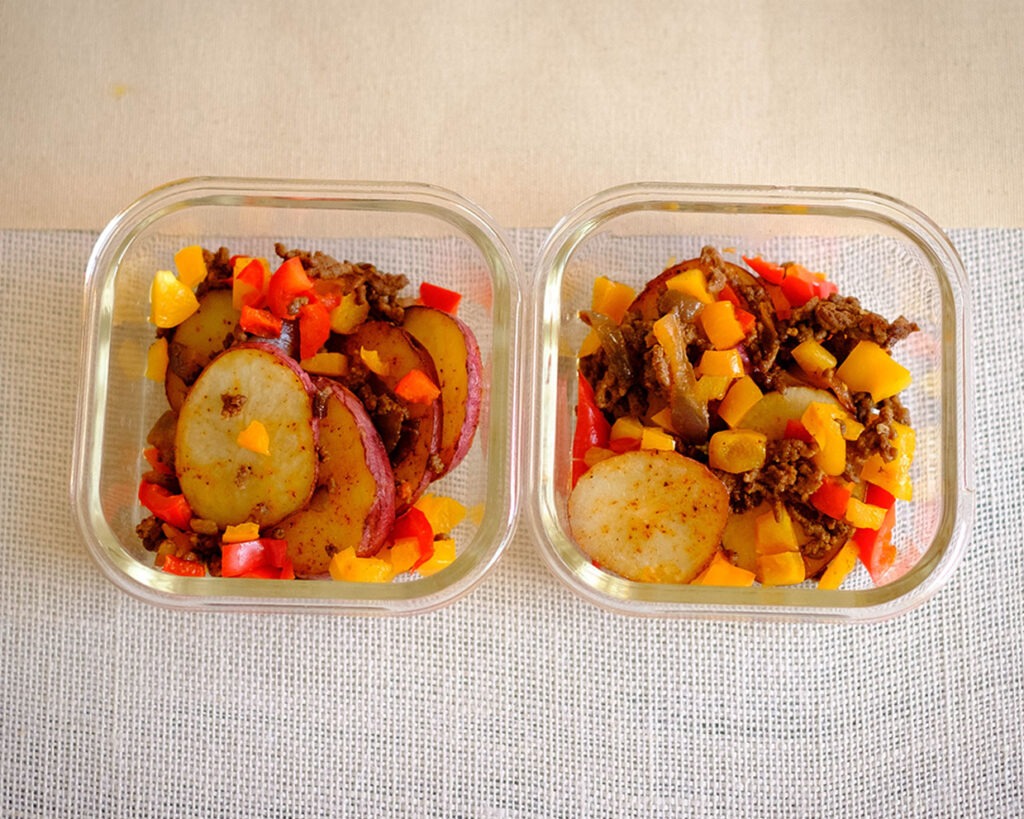
  • Pairing Suggestions: While Tuna Stuffed Deviled Eggs are delicious on their own, they can be paired with various sides to create a well-rounded meal. Here are some ideas: 1) Crisp salad greens with a tangy vinaigrette. 2) Sliced avocado for a creamy and nutritious addition. 3) Whole-grain bread or crackers for a satisfying crunch. 4)Pickles or olives to add a touch of brininess.
glass meal prep containers with deviled eggs and arugula salad for a low carb meal
eggs

Tuna Stuffed Deviled Eggs

The combination of creamy tua filling and the natural richness of eggs creates a savory flavor that you can enjoy for lunch!
No ratings yet
Prep Time 5 minutes
Cook Time 15 minutes
Course lunch, Main Course
Cuisine American
Servings 2

Equipment

  • knife
  • cutting board
  • boiling pot
  • mixing bowl
  • spoon

Ingredients
  

  • 6 each large eggs
  • 2.6 oz canned tuna
  • 2 tbsp mayonnaise
  • 1 each lemon (juiced)
  • 1 tbsp green onions
  • 1/4 tsp garlic powder
  • 4 cups arugula

Lemon Dressing

  • 1 each lemon (juiced)
  • 4 tbsp olive oil
  • 1 tbsp dijon mustard
  • 1/4 tsp salt
  • 1/4 tsp garlic powder

Instructions
 

  • Boil the eggs for 6 to 8 minutes
  • Meanwhile, in a small bowl mix together the lemon juice, dijon mustard, olive oil, garlic powder, and salt until well blended
  • Once the eggs have cooked, let them cool in ice water
  • Then peel the eggs and slice the eggs in half and remove the egg yolk
  • In a bowl, add the tuna and half of the egg yolks (discard the rest). Then, mix in the mayonnaise, lemon juice, green onions, salt and mix until all the ingredients have mixed well
  • Use a small spoon to stuff the tuna egg salad mixture back into the center of the egg whites
  • Toss the arugula in the lemon dressing and serve it with the tuna stuffed eggs

Similar Recipes

chicken kale salad

Grilled Honey Dijon Chicken and Kale Salad

chicken fajitas

Sheet Pan Chicken Fajitas with Mango Salsa

peanut chicken

Peanut Chicken Stir Fry

You Might Also Like

Frequently Asked Questions

Can I substitute mayonnaise with a healthier alternative?

Absolutely! If you’re looking for a healthier option, you can replace mayonnaise with Greek yogurt, avocado mayo, or even mashed avocado. These alternatives provide a creamy texture while reducing the overall calorie and fat content.


Can I add additional ingredients to the filling?

Certainly! Feel free to get creative and personalize the recipe to your liking. You can add ingredients like diced celery, chopped herbs (such as dill or parsley), minced garlic, or a touch of spicy mustard to elevate the flavor profile of the filling.


How can I make the deviled eggs spicier?

If you prefer a spicier kick, you can add ingredients such as hot sauce, cayenne pepper, or finely chopped jalapeños to the filling. Adjust the amount according to your desired level of heat.

Posted on Leave a comment

Oven Baked Crispy Chicken Tenders

round plate with panko breaded chicken tenders and carrots and celery and honey mustard

I’m excited to share with you a fabulous recipe that will surely add a crispy twist to your meal prep routine: Oven-Baked Crispy Panko Chicken Tenderloins! Not only are these tenderloins deliciously crunchy and satisfying, but they also offer numerous health benefits and cost advantages. Get ready to tantalize your taste buds and keep your meal prep exciting throughout the week!

This post may contain affiliate links. Please see our privacy policy for details.

Calories: 473kcal | Carbohydrates: 37g | Protein: 42g | Fat: 17g | Saturated Fat: 3g | Polyunsaturated Fat: 8g | Monounsaturated Fat: 4g | Trans Fat: 0.04g | Cholesterol: 117mg | Sodium: 1023mg | Potassium: 1063mg | Fiber: 5g | Sugar: 14g | Vitamin A: 11119IU | Vitamin C: 7mg | Calcium: 116mg | Iron: 3mg

round plate with panko breaded oven baked chicken tenders and carrots and celery and honey mustard

Why You Need to Make This

  • Let’s start with the health benefits. By opting for oven-baked chicken tenderloins, you’re already making a smart choice. Baking reduces the need for excessive oil, making it a healthier alternative to frying. Additionally, using lean chicken tenderloins ensures you’re getting a good source of protein without the extra fat. This recipe is perfect for those looking to maintain a balanced diet without compromising on flavor.
  • Now, let’s talk about the cost benefits. Chicken tenderloins are often more affordable compared to other cuts of chicken, making them budget-friendly for your meal prep endeavors. By utilizing panko breadcrumbs, you create a delightful crunch without breaking the bank. Panko is light, crispy, and incredibly affordable, making it a fantastic ingredient to have in your pantry.
  • One of the best aspects of this recipe is how it keeps your meal prep interesting and tasty all week long. The crispy panko coating adds a satisfying texture, while the seasonings give it a burst of flavor. Every bite will leave you wanting more! And because these tenderloins are so versatile, you can easily pair them with a variety of sides to keep your taste buds engaged.

The PrepYoSelf Newsletter

Ingredients You’ll Need

  • Let’s quickly run through the star ingredients in this recipe. First up, we have tender and juicy chicken tenderloins. They’re the perfect blank canvas for the crispy panko coating to adhere to, providing you with a delightful combination of textures.
  • Next, we have eggs, which act as a binder for the panko breadcrumbs. They help create that golden-brown and crispy exterior that we all adore. Plus, eggs are a great source of protein and provide essential vitamins and minerals.
  • Speaking of panko breadcrumbs, they are light, airy, and create an extra crunchy coating. Made from crustless bread, panko is coarser than traditional breadcrumbs, resulting in a superior crispy texture. It’s a fantastic ingredient that elevates the overall experience of your chicken tenderloins.
  • Lastly, let’s not forget about the seasonings! Feel free to get creative and experiment with different combinations of herbs and spices. You can go for a classic blend of salt, pepper, garlic powder, and paprika, or try adding some cayenne pepper for a little kick. The choice is yours, and it’s an excellent opportunity to personalize your meal prep creations.

round plate with panko breaded oven baked chicken tenders and carrots and celery and honey mustard

How to Meal Prep Crispy Chicken Tenders

  1. First, pre-heat the oven and prepare your breadcrumbs and seasonings in a mixing bowl.
  2. In another bowl, whisk the eggs.
  3. Dip each tenderloin in the egg wash. Then, dredge them in the breadcrumb mixture.
  4. Place the tenders on a sheet pan and spray them with cooking spray. Then, place them in the oven to bake.

Reference the recipe card below for detailed instructions.

glass meal prep containers with panko breaded oven baked chicken tenders and carrots and celery

Meal Prep Tips for Crispy Panko Chicken Tenders

  • Once you’ve baked your chicken tenderloins, allow them to cool completely. To store them, place them in an airtight container or wrap them tightly in aluminum foil. They can be refrigerated for up to four days, ensuring you have a delicious protein option ready to go throughout the week.
  • When it’s time to enjoy your meal prep masterpiece, reheating is a breeze! Simply pop the tenderloins into a preheated oven at 350°F (175°C) for about 10 minutes or until they are heated through and crispy once again. Alternatively, you can reheat them in a skillet over medium heat with a touch of oil for a quick and crispy revival. You can also reheat them in the microwave, however, they may not be as crispy.
  • Now, let’s talk about the fabulous pairings for these oven baked chicken tenderloins. They go wonderfully with a variety of options, such as a fresh garden salad, roasted vegetables, or a fresh veggie sticks with your favorite dipping sauce. You can also slice them up and add them to wraps, sandwiches, or top them on a bed of greens for a satisfying protein-packed salad. The possibilities are truly endless!

glass meal prep containers with panko breaded oven baked chicken tenders and carrots and celery

chicken tender and veggie sticks

Oven Baked Chicken Tenders with Veggie Sticks

Oven Baked Crispy Chicken Tenders is a tantalizing recipe you'll look forward to enjoying throughout the week.
No ratings yet
Prep Time 5 minutes
Cook Time 25 minutes
Course lunch
Cuisine American
Servings 2
Calories 473 kcal

Equipment

  • knife
  • cutting board
  • mixing bowls
  • tongs
  • oven
  • sheet pan

Ingredients
  

Chicken Tenders

  • 12 oz chicken tenderloins
  • 1 each large egg
  • 1/2 cup breadcrumbs
  • 1/4 tsp garlic powder
  • 1/4 tsp italian seasoning
  • 1/4 tsp paprika
  • 1/4 tsp salt
  • cooking spray

Veggie Sticks

  • 1 cup celery sticks
  • 1 cup carrot sticks

Honey Mustard

  • 2 tbsp mayonnaise
  • 2 tbp dijon mustard
  • 1 tbsp honey

Instructions
 

  • Pre-heat the oven to 425F
  • In a mixing bowl, mix together the breadcrumbs and seasonings
  • In another bowl, whisk together the eggs
  • Dip each tenderloin in the egg wash. Then, dredge each tenderloin in the breadcrumb mixture. Make sure it is fully coated
  • Place the tenderloins on a sheet pan. Spray both sides of the chicken tenderloins with cooking spray
  • Bake in the oven for 20-25 minutes until it reaches an internal temperature of 165F. Flip it halfway through the cooking process
  • Meanwhile, cut up the veggie sticks and mix together the ingredients for the honey mustard sauce

Notes

Nutrition information provided is an estimate. It will vary based on cooking method and specific ingredients used. Please consult with your healthcare provider for specific dietary needs. To gain a better understanding, explore our nutrition disclaimer here. 

Nutrition

Calories: 473kcalCarbohydrates: 37gProtein: 42gFat: 17gSaturated Fat: 3gPolyunsaturated Fat: 8gMonounsaturated Fat: 4gTrans Fat: 0.04gCholesterol: 117mgSodium: 1023mgPotassium: 1063mgFiber: 5gSugar: 14gVitamin A: 11119IUVitamin C: 7mgCalcium: 116mgIron: 3mg

Similar Recipes

orange chicken

Air Fryer Orange Soy Glazed Chicken and Broccoli

roasted chicken and rutabaga

Roasted Lemon Italian Chicken with Rutabaga

rosemary chicken

Rosemary Baked Chicken and Potatoes

You Might Also Like

Frequently Asked Questions

Can I use chicken breasts instead of chicken tenderloins?

Absolutely! Chicken breasts can be used as a substitute for tenderloins in this recipe. However, keep in mind that the cooking time may vary slightly, as chicken breasts are larger and may require a few extra minutes in the oven to ensure they are cooked through.


Can I use regular breadcrumbs instead of panko breadcrumbs?

While panko breadcrumbs provide a distinct crispy texture, you can use regular breadcrumbs if that’s what you have on hand. Just keep in mind that the final result may not be as crunchy as when using panko. To enhance the crispiness, you can add a bit of oil or butter to the regular breadcrumbs before coating the chicken.


Can I use an air fryer instead of the oven?

Absolutely! Using an air fryer is a great option for achieving a crispy exterior while keeping the chicken tender and juicy. Preheat the air fryer to the recommended temperature and cook the chicken tenderloins according to the manufacturer’s instructions. Keep a close eye on them to prevent overcooking.

Posted on Leave a comment

Breakfast Potatoes with Taco Meat

round plate with sliced potatoes rounds, ground beef, and diced bell peppers

Imagine combining the crispy goodness of pan-fried potatoes with the savory deliciousness of taco meat. Trust me, it’s a match made in culinary heaven! Not only will this dish tantalize your taste buds, but it will also help you make the most of your leftovers. Get ready to transform that extra taco meat into a breakfast delight that will make your mornings brighter. Let’s dive in!

This post may contain affiliate links. Please see our privacy policy for details.

round plate with sliced potatoes rounds, ground beef, and diced bell peppers

Why This is Great for Meal Prep

Variety and Convenience: One of the reasons I adore making pan-fried potatoes with taco meat for meal prep is the amazing variety it adds to your weekly menu. We all know how monotonous meal prep can sometimes get, but not anymore! By incorporating this recipe into your repertoire, you’ll have a mouthwatering alternative to the usual meal prep staples.

Versatility: The beauty of this dish lies in its versatility. Not only can you savor taco meat as a main course, but you can also repurpose the leftovers into a delightful breakfast. Picture this: a plateful of golden-brown potatoes topped with reheated taco meat, accompanied by a perfectly fried egg. It’s the kind of breakfast that will make you jump out of bed with enthusiasm!

Time and Money-Saving: Let’s talk about the practical benefits, shall we? Making pan-fried breakfast potatoes with taco meat is a fantastic way to save time and money. By incorporating leftovers into your meal prep routine, you’ll reduce food waste and stretch your budget further. Plus, you won’t have to spend hours cooking each day, as this dish can be made in advance and enjoyed throughout the week.

The PrepYoSelf Newsletter

Ingredients You’ll Need

Let’s delve into the easy and simple ingredients that make this pan-fried breakfast potatoes with taco meat recipe a breeze to prepare. Here’s what you’ll need:

  • Red Potatoes: Red potatoes add a lovely pop of color and a creamy texture to this dish. They hold their shape well when cooked and provide a delicious contrast to the taco meat. Make sure to slice them into thin rounds for optimal cooking.
  • Ground Beef: Ground beef forms the hearty base of the taco meat. Choose a lean or medium-fat ground beef for a balance between flavor and tenderness. You can also opt for ground turkey, chicken, or plant-based alternatives if you prefer.
  • White Onions: White onions add a distinct, slightly sweet flavor to the taco meat. They complement the spices and provide a subtle crunch. Dice them finely or slice them thinly, depending on your preference.
  • Yellow Bell Pepper: Yellow bell pepper contributes a vibrant color and a mild, slightly sweet taste to the dish. It adds freshness and a delightful crunch. Feel free to use other bell pepper colors if you prefer or if they’re readily available.
  • Cherry Tomatoes: Cherry tomatoes bring a burst of juiciness and a hint of sweetness to the recipe. They add a vibrant pop of color and a refreshing element. You can halve or quarter them, depending on their size.
  • Combination of Seasonings: To give the taco meat its irresistible flavor, we have a delightful combination of seasonings such as paprika, chili powder, cumin, garlic powder, and salt. Remember, feel free to adjust the quantities of the seasonings to suit your personal taste preferences. You can also add other spices or herbs to further customize the flavor profile of your dish. Get creative and have fun with it!

round plate with sliced potatoes rounds, ground beef, and diced bell peppers

How to Make Breakfast Potatoes with Taco Meat

  1. Slice the breakfast potatoes into thin slices.
  2. Add oil to the pan, and pan-fry the potatoes on each side until they are golden brown and fluffy on the inside. This should take about 4 to 5 minutes on each side.
  3. After the potatoes are cooked, remove them from the pan.
  4. Using the same pan, cook your taco meat. If the ground meat is raw, make sure it fully cooks. If you are using leftover taco meat, just cook them until they heat through.

Reference the recipe card below for detailed instructions.

rectangle glass meal prep containers with sliced potatoes rounds, ground beef, and diced bell peppers

Meal Prep Tips:

  • To serve this delightful meal, I recommend plating your pan-fried potatoes with a generous helping of taco meat on top. Add a sprinkle of your favorite cheese, a dollop of sour cream, and a handful of fresh herbs for that extra burst of flavor. Voila! A breakfast that will have you dancing to the kitchen in the morning.
  • When it comes to reheating, you can do it on the stovetop, in the oven, or even in the microwave. Just make sure to heat everything thoroughly while maintaining the desired texture of your potatoes.
  • If you want to freeze portions for later use, simply transfer the cooled dish into airtight containers or freezer bags. When you’re ready to enjoy, thaw it in the refrigerator overnight and reheat it using your preferred method.

rectangle glass meal prep containers with sliced potatoes rounds, ground beef, and diced bell peppers

taco meat and potatoes

Breakfast Potatoes with Taco Meat

Pan-fried potatoes with taco meat is the ultimate breakfast meal prep delight.
No ratings yet
Prep Time 5 minutes
Cook Time 20 minutes
Course lunch, Main Course
Cuisine American, Mexican
Servings 2

Equipment

  • knife
  • cutting board
  • spatula
  • saute pan

Ingredients
  

Potatoes

  • 2 each small red potatoes
  • 1/8 tsp paprika
  • 1/8 tsp salt
  • 1 tsp olive oil

Taco Meat

  • 6 oz ground beef
  • 1/4 cup white onions (diced)
  • 1/2 each yellow bell pepper (diced)
  • 1/4 cup cherry tomatoes (sliced)
  • 1/8 tsp chili powder
  • 1/8 tsp cumin
  • 1/8 tsp paprika
  • 1/8 tsp garlic powder
  • 1/8 tsp salt
  • 1 tbsp olive oil

Instructions
 

  • Slice the potatoes into 1/4 inch thick rounds. Season with garlic powder, paprika, and salt
  • Add the oil to a saute pan on medium-high heat. Cook the sliced potatoes on each side for about 4 to 5 minutes until it is golden brown and tender
  • After the potatoes have cooked, remove them from the pan and set them aside. Add more olive oil to the pan and saute the onions and bell peppers until they soften (about 2 to 3 minutes)
  • Next, add the ground beef and seasonings and saute until it is fully cooked and golden brown (about 6 to 7 minutes)
  • Top it off the sliced potatoes with the taco meat and cherry tomatoes

Similar Recipes

fried egg and sausage hash

Fried Egg with Apple and Sausage Hash

Easy Cheese Omelette

easy sausage egg muffins

Sausage Egg Muffins with Strawberries

You Might Also Like

Frequently Asked Questions

Can I use any type of potato for this recipe?

Yes, you can use various types of potatoes, such as russet, Yukon gold, or red potatoes. Just keep in mind that different potatoes may have slightly different textures and cooking times.


Can I customize the toppings?

Absolutely! Feel free to get creative with your toppings. You can add fresh salsa, diced avocado, sliced jalapeños, or a squeeze of lime juice for an extra zing. Customize it to suit your taste preferences and enjoy the burst of flavors!


Can I use pre-cooked taco meat for this recipe?

Absolutely! Using leftover taco meat is a great option, but you can also use pre-cooked taco meat from the store. Just make sure to heat it thoroughly when combining it with the pan-fried potatoes.

Posted on

June 26 Weekly Meal Plan

Southwest Chicken Coleslaw

Make sure to go to How this page works first if you haven’t yet.

Set Your Pace

  • If you’re a beginner at meal prep: Be prepared to set aside 2-3 hours. Once mise en place is complete, all of these recipes can be completed one by one.
  • If you’re a meal prep pro, use the sequenced steps below: These steps give you the flexibility to cook items simultaneously in a sequence of events.
  • Be sure to set timers and check on food items to avoid overcooking. Sequencing will save you time and meal prep can be done in 1-2 hours.

Meal Prep Run Down

  1. First, pre-heat the oven (or toaster oven) to 400F. Then, heat up the meatballs according to the packaging instructions.
  2. Next, place the corn on a baking dish and roast it in the oven.
  3. Meanwhile, start preparing the items that require the stovetop such as the sesame ginger turkey meatballs with squash noodles, shrimp with bok choy and sweet potato rice, and the honey granola.
  4. Then, assemble the southwest chicken coleslaw, sesame ginger chicken coleslaw, and strawberry yogurt parfait.
  5. When everything is finished cooking, plate everything up in containers, and let them cool before refrigerating.

If you’re sequencing your meal prep, be sure to keep an eye on everything! Make sure food is kept refrigerated under 40F degrees until ready to eat.

Assembly Tips

  • Evenly divide meals according to the serving size
  • Let all items cool before placing them in the refrigerator
  • Keep all items refrigerated under 40F until ready to eat or reheat
  • Breakfast: The granola can be reheated in the microwave, while the yogurt can be served chilled
  • Lunch: Serve both coleslaw salads chilled
  • Dinner: Both meals can be reheated in the microwave

Extra Flavors and Substitutions

  • Granola: Use any kind of dried fruit. You can also swap out the honey with maple syrup or agave nectar
  • Meatballs: You can use any meatballs such as beef, chicken, or pork
  • Sweet Potato Rice: If you can’t find sweet potato rice, you can use cauliflower rice
  • Pasta: Feel free to use your choice of pasta or whatever you have on hand in your pantry
  • Supplement meals with additional snacks such as fresh veggies and fruit for additional daily caloric needs. You can use lime/lemon and olive oil in place of salad dressing

Extra Leftover Ingredients Not Used

  • Protein: Freeze any uncooked meats and save for a later recipe, or you can cook the full amount, and freeze the portion that you do not eat, and save for later use.
  • Fruit: Use leftover fruit in smoothies, on top of yogurt, or with your cereal
  • Veggies: Freeze any leftover veggies for later use. Use leftover herbs in omelets or other dishes for the weekend

What Else

How This Page Works
Meal Prep 101
Weekly Meal Plans
Specialty Diets
Recipe Inspirations
Helpful Resources

Posted on Leave a comment

Raspberry Chipotle Chicken Soft Tacos

raspberry chicken soft tacos in rectangle plate

Get ready to embark on a culinary adventure with Raspberry Chipotle Chicken! The delightful combination of sweet raspberries, tangy honey, soy sauce, chipotle powder, and garlic powder will make your taste buds sing. With its ease of preparation and versatility in serving, this chicken soft taco dish is an absolute winner for meal prep. So, grab those ingredients, put on your apron, and let the chicken magic begin!

This post may contain affiliate links. Please see our privacy policy for details.

raspberry chicken soft tacos in rectangle plate

The Chicken Lover’s Delight: 

Now, let’s talk about why this chicken soft taco recipe is a fantastic choice for meal prep. First and foremost, it’s incredibly easy to make, making it perfect for busy individuals who still want to enjoy a homemade, flavorful meal. The marinade comes together quickly, and once the chicken is marinated, you simply need to cook it when you’re ready to eat.

Additionally, the Raspberry Chipotle Chicken reheats beautifully, maintaining its tenderness and delicious flavors. So, whether you’re prepping lunches for the week or planning a quick dinner for those busy weeknights, this recipe has got you covered.

The PrepYoSelf Newsletter

Creating the Irresistible Marinade: 

One of the best things about this recipe is how easy it is to make your own marinade. The combination of sweet raspberries, tangy honey, savory soy sauce, smoky chipotle powder, and aromatic garlic powder creates a flavor profile that’s out of this world. The balance between the sweetness and spiciness is simply divine.

To make the marinade, simply blend fresh or frozen raspberries until smooth, and then mix in honey, soy sauce, chipotle powder, and garlic powder. The result is a luscious, flavorful concoction that will infuse your chicken with a tantalizing taste.

raspberry chicken soft tacos in rectangle plate

The Perfect Cooking Technique:

  1. To achieve juicy and flavorful results, follow this cooking technique. Start by marinating the chicken for at least 10 minutes or up to overnight. When you’re ready to cook, heat a pan over medium-high heat and add a drizzle of oil. Sear the marinated chicken for a couple of minutes on each side until it forms a beautiful golden brown crust.
  2. After searing, transfer the chicken to a preheated oven and let it finish cooking until it reaches an internal temperature of 165°F (74°C). This method ensures a delicious caramelization on the outside while keeping the inside tender and juicy.

Reference the recipe card below for detailed instructions.

raspberry chicken soft tacos in glass meal prep containers

Meal Prep Tips for Raspberry Chipotle Chicken

  • For serving, there are endless possibilities! Once the chicken is cooked, you can enjoy it as the star of the show alongside some steamed rice or quinoa. Alternatively, slice it up and toss it over a crisp, fresh salad for a lighter option. You can even stuff it into tortillas or buns to create scrumptious sandwiches or tacos. Let your imagination run wild!
  • For storing, Once cooked, the Raspberry Chipotle Chicken soft tacos can be stored in the refrigerator for up to 4 days. Remember to cool it down properly before refrigerating and reheat it thoroughly before consuming.
  • For larger batches: This chicken soft tacos recipe is easily scalable, allowing you to make a larger batch to last you throughout the week. Just adjust the quantities of the ingredients accordingly and ensure you have enough containers for storage.

Chicken & Tortilla

Raspberry Chipotle Chicken Soft Tacos

Raspberry Chipotle Chicken is a dish bursting with incredible flavors, perfect for meal prep, and protein packed.
No ratings yet
Prep Time 5 minutes
Cook Time 25 minutes
Course dinner, Main Course
Cuisine American
Servings 2

Equipment

  • knife
  • cutting board
  • blender
  • tongs
  • saute pan
  • sheet pan
  • oven

Ingredients
  

  • 12 oz boneless chicken thighs
  • 1 cup raspberries
  • 1 tsp chipotle powder
  • 2 tbsp soy sauce
  • 2 tbsp honey
  • 1 tsp garlic powder
  • 1/4 tsp salt
  • 1/4 tsp pepper
  • 2 each avocados (peeled and sliced)
  • 4 each tortillas

Instructions
 

  • Pre-heat the oven to 400F
  • Blend together the raspberries, honey, soy sauce, and seasonings in a blender until the marinade is well blended
  • Place the boneless chicken thighs in a bowl and pour in the blended marinate for at least 10 minutes
  • Next, add oil to a saute pan on medium high heat and sear the chicken on both sides for about 3 to 5 minutes
  • Then, transfer the chicken to a sheet pan and finish baking it in the oven for another 15-20 minutes until it is fully cooked and reaches an internal temperature of 165F
  • Once it has cooked, let it rest and cool before slicing it into bite size pieces
  • Serve with soft tortillas and sliced avocado

Similar Recipes

bean and corn taco

Vegetarian Black Bean and Corn Soft Tacos

chicken salad

Oven Baked Honey Mustard Glazed Chicken Salad

balsamic chicken salad

Oven Baked Balsamic Chicken Salad with Strawberries

You Might Also Like

Frequently Asked Questions

Can I use frozen raspberries instead of fresh ones?

Absolutely! Frozen raspberries work just as well in this recipe. Simply thaw them before blending to create the marinade.


Is there a substitute for chipotle powder?

If you don’t have chipotle powder on hand, you can use a combination of smoked paprika and cayenne pepper to achieve a similar smoky and spicy flavor


Can I grill the chicken instead of searing it on the stovetop?

Absolutely! Grilling the Raspberry Chipotle Chicken adds a lovely char and smokiness to the dish. Preheat your grill to medium-high heat and cook the chicken until it reaches the recommended internal temperature.

Posted on Leave a comment

Grilled Peach and Steak Salad

grilled peach and steak salad in rectangle plate

Picture this: succulent grilled peaches paired with perfectly seasoned steak, all atop a bed of vibrant greens. Yes, we’re talking about the irresistible Grilled Peach and Steak Salad! Not only is it a burst of flavors, but it’s also an excellent choice for meal prep. Let’s dive into the fantastic world of grilling peaches, seasoning steak, and assembling this mouthwatering salad.

This post may contain affiliate links. Please see our privacy policy for details.

grilled peach and steak salad in rectangle plate

The Perfect Salad for Freshness and Vibrant Flavors

Here’s why this combination is the ultimate choice when you’re craving something fresh and bursting with flavors:

  • Sweet and Smoky: The grilled peaches add a delightful sweetness and smoky undertones to the salad, making it a delightful surprise in every bite.
  • Juicy and Tender: The steak, with its flavorful seasoning, brings a juicy and tender element to the salad. Its savory notes perfectly complement the sweetness of the peaches.
  • Vibrant Greens: Choose your favorite assortment of fresh greens as the base of your salad. Think crisp lettuce, baby spinach, or peppery arugula. These greens provide a refreshing and nutritious backdrop to the star ingredients.
  • Versatile Additions: Get creative and add your favorite toppings to enhance the flavors even further. Consider adding crumbled feta cheese, toasted nuts, or a tangy vinaigrette for an extra burst of goodness.

The PrepYoSelf Newsletter

Ingredients for this Simple Steak Salad

  • Protein: The steak in this salad serves as a fantastic source of protein. Protein is essential for building and repairing tissues, supporting muscle growth, and keeping you feeling satisfied and full. By including steak in this salad, you’re adding a substantial amount of high-quality protein to your meal.
  • Vegetables: This salad is packed with an abundance of fresh vegetables, which contribute to its nutritional value. The vibrant greens, such as lettuce, spinach, or arugula, provide essential vitamins, minerals, and dietary fiber. These leafy greens are low in calories but rich in nutrients, helping to promote overall health.
  • Fruit: The star ingredient, grilled peaches, adds a delightful touch of fruitiness to the salad. Peaches are not only juicy and delicious but also a great source of vitamins, particularly vitamin C, and dietary fiber. Incorporating fruit into your meal provides natural sweetness and additional nutrients.

grilled peach and steak salad in rectangle plate

How to Make Grilled Peach and Steak Salad

Grilling Peaches: Grilling peaches not only enhances their natural sweetness but also gives them a tantalizing smoky flavor. Here’s a simple step-by-step guide on how to grill peaches to perfection:

  1. Start by preheating your grill to medium-high heat.
  2. Cut the peaches in half, removing the pits.
  3. Brush the cut sides of the peaches with a light coating of olive oil. This will help prevent sticking and promote caramelization.
  4. Place the peaches on the grill, cut side down, and let them cook for about 2-3 minutes until grill marks appear.
  5. Flip the peaches and cook for another 2-3 minutes on the skin side.
  6. Remove the peaches from the grill and let them cool slightly before slicing them into wedges for the salad.

Seasoning the Steak: Now, let’s talk about the star of the show—the steak! We want to infuse it with incredible flavors that will complement the sweetness of the peaches. Here’s a quick and easy seasoning blend that will make your taste buds sing:

  • Start by patting dry your steak to remove any excess moisture.
  • In a small bowl, combine the paprika, garlic powder, and salt to create the seasoning blend.
  • Sprinkle the seasoning evenly on both sides of the steak, pressing it gently to adhere.
  • Preheat your grill or stovetop pan to medium-high heat.
  • Cook the steak for about 4-5 minutes per side, or until it reaches your desired level of doneness. Remember to adjust the cooking time based on the thickness of your steak.
  • Once cooked, let the steak rest for a few minutes before slicing it into thin strips.

Reference the recipe card below for detailed instructions.

grilled peach and steak salad in meal prep containers

Meal Prep Tips

  • Storing: If you have leftovers or are prepping the salad in advance, store the components separately. Keep the grilled peaches, sliced steak, and greens in separate airtight containers in the refrigerator to maintain freshness.
  • Reheating: If you prefer to enjoy the salad warm, you can quickly reheat the grilled peaches and steak before adding them to the greens. You can either heat them in a microwave-safe dish for a short duration or lightly sauté them in a pan over medium heat until warmed through.
  • Side Suggestions: Serve the Grilled Peach and Steak Salad with a slice of crusty bread or a dinner roll. It’s perfect for mopping up any delicious dressing or juices from the salad. Grilled asparagus, zucchini, or bell peppers make excellent side dishes. Toss them with olive oil, salt, and pepper, then grill them alongside the peaches for a well-rounded meal. Add a serving of cooked quinoa or rice as a nutritious and filling side dish. It complements the flavors of the salad while adding some additional texture and substance.

grilled peach and steak salad in meal prep containers

Steak & Peach Salad

Grilled Peach and Steak Salad

This Grilled Peach and Steak Salad is a healthy and balanced meal option that incorporates protein, vegetables, and fruit.
No ratings yet
Prep Time 5 minutes
Cook Time 15 minutes
Course lunch, Main Course
Cuisine American
Servings 2

Equipment

  • knife
  • cutting board
  • tongs
  • indoor grill pan

Ingredients
  

Steak and Seasonings

  • 12 oz sirloin steak
  • 1/4 tsp paprika
  • 1/4 tsp garlic powder
  • 1/4 tsp salt
  • 1 tbsp olive oil

Salad Ingredients

  • 2 each small peaches
  • 4 cups baby spinach
  • 1 each roma tomato (diced)
  • 1/4 cup red onions (sliced)
  • 1 each cucumber (cut in rounds)
  • 4 tbsp choice of vinaigrette dressing

Instructions
 

  • Season the steak with paprika, garlic powder, salt, pepper, and coat with olive oil
  • Cut the peaches into slices
  • Heat an indoor grill pan on medium high heat an sear the peaches on each side for about 2 to 3 minutes. Set aside for the salad
  • Next, sear the steak on each side for about 4 to 5 minutes until it is fully cooked and reaches an internal temperature of 145F. Let it rest before slicing it into thin strips
  • Serve the steak on top of the baby spinach, topped with fresh tomatoes, red onions, and cucumbers. Add the grilled peaches and drizzle with your choice of salad vinaigrette

Similar Recipes

sweet potato blt

Sweet Potato BLT Sandwich

balsamic chicken salad

Oven Baked Balsamic Chicken Salad

chicken salad

Oven Baked Honey Mustard Glazed Chicken Salad

You Might Also Like

Frequently Asked Questions

Can I substitute peaches with other fruits?

Certainly! While grilled peaches add a unique and delicious flavor to the salad, you can experiment with other fruits based on your preference or seasonal availability. Nectarines, plums, or even grilled pineapple can be excellent alternatives that still provide a touch of sweetness.


What dressings pair well with this salad?

The Grilled Peach and Steak Salad pairs well with a variety of dressings. A light vinaigrette made with balsamic vinegar or a tangy citrus dressing can complement the flavors beautifully. You can also try a creamy dressing like a yogurt-based dressing with herbs or a honey mustard dressing for a touch of sweetness.


Can I add additional toppings to the salad?

Absolutely! Feel free to get creative with toppings to enhance the flavors and textures. Crumbled feta cheese, toasted nuts or seeds (such as almonds or pumpkin seeds), thinly sliced red onions, or fresh herbs like basil or mint can all be delightful additions to this salad.

Posted on Leave a comment

Stir Fry Shrimp with Spaghetti Squash

shrimp with spaghetti squash in round plate

If you’re on a quest for a low-carb alternative to lo mein that doesn’t compromise on flavor, our stir fry shrimp with spaghetti squash is your answer. With its low-carb content, delightful flavors, and nutritious ingredients, it’s a recipe that will satisfy your cravings and keep you on track with your health goals. Get ready to indulge in a guilt-free and scrumptious meal that will leave you wanting more!

This post may contain affiliate links. Please see our privacy policy for details.

Why You’ll Enjoy This Shrimp Stir Fry

  • Ah, the classic lo mein—a beloved dish that tempts us with its delightful combination of noodles and flavorful sauce. But for those of us watching our carb intake or following a low-carb lifestyle, indulging in traditional lo mein might not be an option. That’s where our stir fry shrimp with spaghetti squash comes to the rescue as a fantastic low-carb alternative!
  • The star of our dish, spaghetti squash, is a miraculous vegetable that transforms into noodle-like strands when cooked. These strands provide a similar texture to traditional lo mein noodles but without the hefty carb count. So, if you’re craving the satisfaction of a noodle-based stir fry while keeping your carb intake in check, this recipe is an excellent choice.

The PrepYoSelf Newsletter

Simple Ingredients You’ll Need

  • By substituting spaghetti squash for traditional lo mein noodles, you’ll significantly reduce the carbohydrate content of the dish. Spaghetti squash is relatively low in carbs and calories compared to wheat-based noodles, making it a healthier option. It’s also packed with essential vitamins, minerals, and dietary fiber, which contribute to a well-rounded and nutritious meal.
  • Moreover, the stir fry shrimp and veggies add a protein punch to the dish, making it a satisfying and well-balanced meal. Shrimp is not only delicious but also a lean source of protein that supports muscle growth and repair. Combined with the colorful medley of veggies, you’ll be enjoying a nutrient-dense meal that keeps you feeling full and satisfied.
  • Let’s not forget about the flavor! While traditional lo mein relies heavily on soy sauce for its savory taste, our low-carb stir fry brings its own unique blend of flavors. The combination of soy sauce, garlic powder, and lemon juice infuses the dish with a delightful umami profile, accentuating the natural sweetness of the shrimp and the freshness of the veggies. It’s a symphony of flavors that will have your taste buds dancing with joy.

shrimp with spaghetti squash in round plate

Easy Shrimp Stir Fry Recipe Steps

1. First, preheat your oven to 400°F (200°C). Take a large spaghetti squash and slice it in half lengthwise. Scoop out the seeds and pulp with a spoon. Remember to save those seeds for roasting later if you’re feeling adventurous!

2. Next, brush the flesh of the spaghetti squash with some olive oil and season it with salt and pepper. Place the halves face-down on a baking sheet lined with parchment paper. Pop them into the oven and let them roast for about 40-45 minutes or until the flesh becomes tender and easily shreds into strands with a fork.

3. Once your spaghetti squash is roasted to perfection, let it cool slightly before using a fork to scrape out those glorious spaghetti-like strands.

4. Now, let’s move on to the stir-fry itself. Heat oil over medium-high heat and add an array of vibrant and colorful veggies. You can go wild with your choices here, but some great options include bell peppers, broccoli florets, snap peas, and thinly sliced carrots. Sauté them for a few minutes until they’re tender-crisp, maintaining their vibrant colors and crunch.

5. In the same skillet, toss in your shrimp and cook them until they turn pink and opaque, which usually takes around 2-3 minutes per side. Now comes the part where we infuse our stir fry with incredible flavor. Drizzle some soy sauce over the veggies and sprinkle in a generous amount of garlic powder. Squeeze in the juice of fresh lemon to add a bright and tangy kick. Stir everything together and let the flavors meld for a minute or two.

6. Toss everything together gently, ensuring the flavors blend harmoniously, and the shrimp and veggies are evenly distributed.

Reference the recipe card below for detailed instructions.

shrimp with spaghetti squash in round plate

Meal Prep Tips

  • Store any leftovers in an airtight container in the refrigerator for up to 3-4 days. Reheat the stir fry in a skillet or microwave until heated through before serving.
  • Now, what if you find yourself with some leftover spaghetti squash? Fear not, my friends, because the possibilities are endless! You can use it as a base for another stir fry, toss it into salads for added texture, or even transform it into a delightful, guilt-free pasta substitute by pairing it with your favorite sauce and toppings.

shrimp with spaghetti squash in glass meal prep container

Stir-Fry Shrimp with Spaghetti Squash

No ratings yet
Prep Time 5 minutes
Cook Time 45 minutes
Course dinner
Cuisine American, Asian
Servings 2

Equipment

  • knife
  • cutting board
  • saute pan
  • spatula
  • sheet pan
  • oven

Ingredients
  

Spaghetti Squash Bake

  • 1/2 each small spaghetti squash (8 inches in length)
  • 1 tbsp olive oil

Stir Fry

  • 12 oz shrimp (peeled and deveined)
  • 1 cup broccoli slaw mix
  • 1 each red bell pepper (diced)
  • 1/4 tsp garlic powder
  • 2 tbsp soy sauce
  • 1 each lemon (juiced)
  • 1 tbsp olive oil

Instructions
 

Spaghetti Squash Bake

  • Pre-heat the oven to 400F
  • Carefully slice the spaghetti squash in half. Scoop out the seeds with a spoon
  • Place the squash, flesh side up, on a sheet pan. Coat with olive oil and bake in the oven for 40 minutes
  • Once the squash is cooked, let it cool before shredding the squash flesh with a fork

Stir Fry

  • Add oil to a saute pan on medium high heat and saute the the cooked squash, bell pepper and broccoli slaw mix until they soften.
  • Next, add the shrimp. Season with soy sauce, the spices, and juice of a lemon. Stir for another 3 to 4 minutes

Similar Recipes

shrimp kebab

Air Fryer Shrimp and Pineapple Kebabs

shrimp and corn

Sheet Pan Shrimp with Cauliflower and Corn

salmon salad

Salmon Salad Stuffed Avocado

You Might Also Like

Frequently Asked Questions

Can I use pre-cooked shrimp for this recipe?

Yes, you can use pre-cooked shrimp if that’s more convenient for you. Simply add the pre-cooked shrimp to the stir fry towards the end, just to warm them through.


Is there a vegetarian or vegan version of this recipe?

Yes! If you prefer a vegetarian or vegan option, you can omit the shrimp and replace it with tofu or your choice of plant-based protein. Additionally, use a vegan-friendly soy sauce and replace the fish sauce, if used, with a vegan alternative or omit it altogether.


What can I do with leftover spaghetti squash?

Leftover spaghetti squash can be used in various ways. You can mix it with marinara sauce and grated cheese for a low-carb spaghetti squash bake, add it to soups or stews for added texture, or toss it with pesto and roasted vegetables for a flavorful side dish.

Posted on

June 19 Weekly Meal Plan

chicken tenders and slaw

Make sure to go to How this page works first if you haven’t yet.

Set Your Pace

  • If you’re a beginner at meal prep: Be prepared to set aside 2-3 hours. Once mise en place is complete, all of these recipes can be completed one by one.
  • If you’re a meal prep pro, use the sequenced steps below: These steps give you the flexibility to cook items simultaneously in a sequence of events.
  • Be sure to set timers and check on food items to avoid overcooking. Sequencing will save you time and meal prep can be done in 1-2 hours.

Meal Prep Run Down

  1. First, pre-heat the oven to 400F. Then, start boiling water in a pot for the macaroni pasta.
  2. Next, prepare the items that require the oven such as the banana berry oat bar, salmon and sweet potato, and the honey-spiced chicken tenders. Place all the items in the oven to bake.
  3. Meanwhile, start preparing the items that require the stovetop such as the chicken curry with squash noodles, sausage and sun-dried tomato macaroni pasta, and scrambled eggs.
  4. When everything is finished cooking, plate everything up in containers, and let them cool before refrigerating.

If you’re sequencing your meal prep, be sure to keep an eye on everything! Make sure food is kept refrigerated under 40F degrees until ready to eat.

Assembly Tips

  • Evenly divide meals according to the serving size
  • Let all items cool before placing them in the refrigerator
  • Keep all items refrigerated under 40F until ready to eat or reheat
  • Breakfast: Both meals can be reheated in the microwave
  • Lunch: The salmon and chicken tenders can be reheated in the microwave, serve the salad and coleslaw ingredients chilled
  • Dinner: Both meals can be reheated in the microwave

Extra Flavors and Substitutions

  • Sun-dried tomatoes: If you can’t find sun-dried tomatoes, you can substitute with sliced red bell peppers instead
  • Oat Bar: You can use any kind of chopped fruit or frozen fruit that you have on hand
  • Chicken: You can use your choice of boneless chicken such as chicken breast or boneless chicken thighs
  • Pasta: Feel free to use your choice of pasta or whatever you have on hand in your pantry
  • Supplement meals with additional snacks such as fresh veggies and fruit for additional daily caloric needs. You can use lime/lemon and olive oil in place of salad dressing

Extra Leftover Ingredients Not Used

  • Protein: Freeze any uncooked meats and save for a later recipe, or you can cook the full amount, and freeze the portion that you do not eat, and save for later use.
  • Fruit: Use leftover fruit in smoothies, on top of yogurt, or with your cereal
  • Veggies: Freeze any leftover veggies for later use. Use leftover herbs in omelets or other dishes for the weekend

What Else

How This Page Works
Meal Prep 101
Weekly Meal Plans
Specialty Diets
Recipe Inspirations
Helpful Resources

Posted on

June 12 Weekly Meal Plan

turkey soft tacos

Make sure to go to How this page works first if you haven’t yet.

Set Your Pace

  • If you’re a beginner at meal prep: Be prepared to set aside 2-3 hours. Once mise en place is complete, all of these recipes can be completed one by one.
  • If you’re a meal prep pro, use the sequenced steps below: These steps give you the flexibility to cook items simultaneously in a sequence of events.
  • Be sure to set timers and check on food items to avoid overcooking. Sequencing will save you time and meal prep can be done in 1-2 hours.

Meal Prep Run Down

  1. First, pre-heat the oven (or toaster oven) to 400F. Then, start boiling water in a pot for the quinoa.
  2. Next, place the broccolini on a sheet pan and place it in the oven to bake. Once the water reaches a boil, start cooking the quinoa.
  3. Meanwhile, start preparing the items that require the stovetop such as the veggie black bean skillet, hoisin ground turkey, ground turkey with asparagus, and the eggs with black beans.
  4. After everything cooks, start preparing the Asian salmon salad and yogurt with fruit.
  5. When everything is finished cooking, plate everything up in containers, and let them cool before refrigerating.

If you’re sequencing your meal prep, be sure to keep an eye on everything! Make sure food is kept refrigerated under 40F degrees until ready to eat.

Assembly Tips

  • Evenly divide meals according to the serving size
  • Let all items cool before placing them in the refrigerator
  • Keep all items refrigerated under 40F until ready to eat or reheat
  • Breakfast: The eggs and black beans can be reheated in the microwave, while the yogurt can be served chilled
  • Lunch: The Asian salmon salad can be served chilled, while the veggie black bean skillet can be reheated in the microwave
  • Dinner: Both meals can be reheated in the microwave

Extra Flavors and Substitutions

  • Beans: Feel free to use any other kind of beans such as pinto beans
  • Salmon: If you can’t find canned salmon, you can use tuna instead
  • Ground Meat: Feel free to use your choice of ground meat such as ground chicken, lean ground beef, or ground pork. If you want to keep this recipe vegetarian, you can also use chopped tofu
  • Supplement meals with additional snacks such as fresh veggies and fruit for additional daily caloric needs. You can use lime/lemon and olive oil in place of salad dressing

Extra Leftover Ingredients Not Used

  • Protein: Freeze any uncooked meats and save for a later recipe, or you can cook the full amount, and freeze the portion that you do not eat, and save for later use.
  • Veggies: Freeze any leftover veggies for later use. Use leftover herbs in omelets or other dishes for the weekend

What Else

How This Page Works
Meal Prep 101
Weekly Meal Plans
Specialty Diets
Recipe Inspirations
Helpful Resources

Posted on

June 5 Weekly Meal Plan

hoisin chicken

Make sure to go to How this page works first if you haven’t yet.

Set Your Pace

  • If you’re a beginner at meal prep: Be prepared to set aside 2-3 hours. Once mise en place is complete, all of these recipes can be completed one by one.
  • If you’re a meal prep pro, use the sequenced steps below: These steps give you the flexibility to cook items simultaneously in a sequence of events.
  • Be sure to set timers and check on food items to avoid overcooking. Sequencing will save you time and meal prep can be done in 1-2 hours.

Meal Prep Run Down

  1. First, pre-heat the oven to 400F.
  2. Next, prepare the items that require the oven such as the hoisin glazed chicken with snap peas.
  3. Place the chicken and snow peas in the baking dishes and start baking them in the oven. Then, start preparing the Air Fryer Chicken wings and also start cooking them in the Air Fryer.
  4. Meanwhile, prepare the items on the stovetop such as grilled steak, grilled peanut butter chicken, and the peanut butter quesadillas.
  5. Finally, assemble the English muffin fruit pizza.
  6. When everything is finished cooking, plate everything up in containers, and let them cool before refrigerating.

If you’re sequencing your meal prep, be sure to keep an eye on everything! Make sure food is kept refrigerated under 40F degrees until ready to eat.

Assembly Tips

  • Evenly divide meals according to the serving size
  • Let all items cool before placing them in the refrigerator
  • Keep all items refrigerated under 40F until ready to eat or reheat
  • Breakfast: The peanut butter quesadilla can be reheated in the microwave, while the English muffin fruit pizza can be served chilled
  • Lunch: The grilled steak can be reheated in the oven, while the lettuce wraps can be served chilled. The chicken can be reheated in the microwave, while the coleslaw can be served chilled. Wait to slice the avocado until you are ready to eat the meal to prevent it from browning too early
  • Dinner: Both meals can be reheated in the microwave, serve the spring mix salad chilled

Extra Flavors and Substitutions

  • Peanut Butter: Feel free to use any other kind of nut butter such as cashew or almond butter
  • Lettuce Wraps: If you can’t lettuce wraps, you can serve the grilled steak on top of spring mix
  • Parsnips: If you can’t find parsnips, you can use regular potatoes or sweet potatoes
  • Supplement meals with additional snacks such as fresh veggies and fruit for additional daily caloric needs. You can use lime/lemon and olive oil in place of salad dressing

Extra Leftover Ingredients Not Used

  • Protein: Freeze any uncooked meats and save for a later recipe, or you can cook the full amount, and freeze the portion that you do not eat, and save for later use.
  • Veggies: Freeze any leftover veggies for later use. Use leftover herbs in omelets or other dishes for the weekend

What Else

How This Page Works
Meal Prep 101
Weekly Meal Plans
Specialty Diets
Recipe Inspirations
Helpful Resources