Posted on Leave a comment

Oven Roasted Honey Soy Glazed Salmon with Bok Choy and Butternut Squash

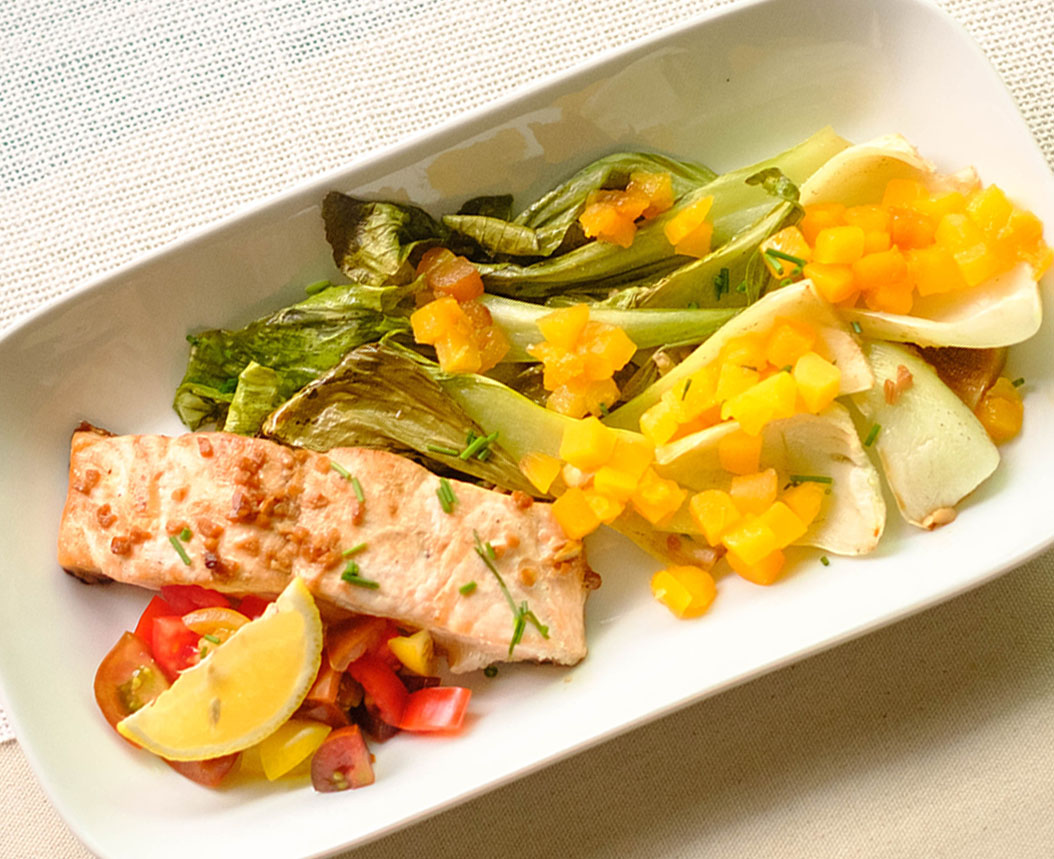
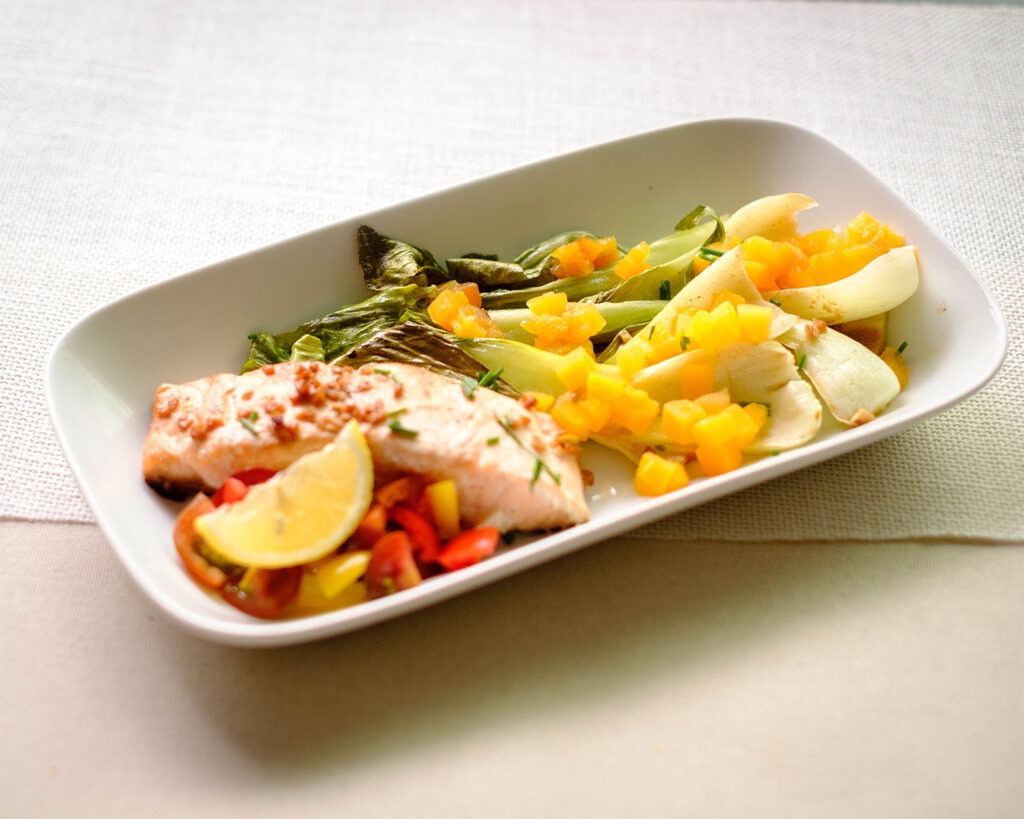
plate with salmon, bok choy, and diced butternut squash

This Oven Roasted Honey Soy Glazed Bok Choy and Butternut Squash paired with Baked Salmon will be your meal prep go-to. It is a meal prep marvel that’s not only a treat for your taste buds but also a smart choice for your health, wallet, and schedule. With a burst of flavors and the delight of convenience, enjoy meal prepping this dish for your busy workweek.

This post may contain affiliate links. Please see our privacy policy for details.
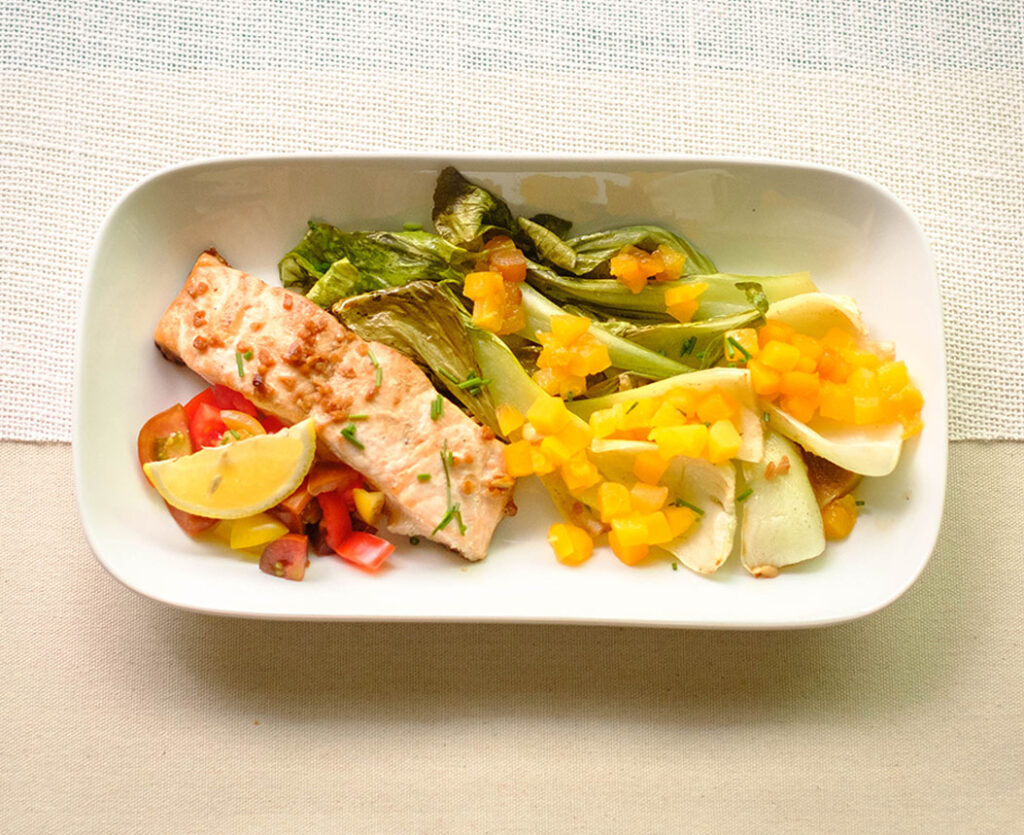
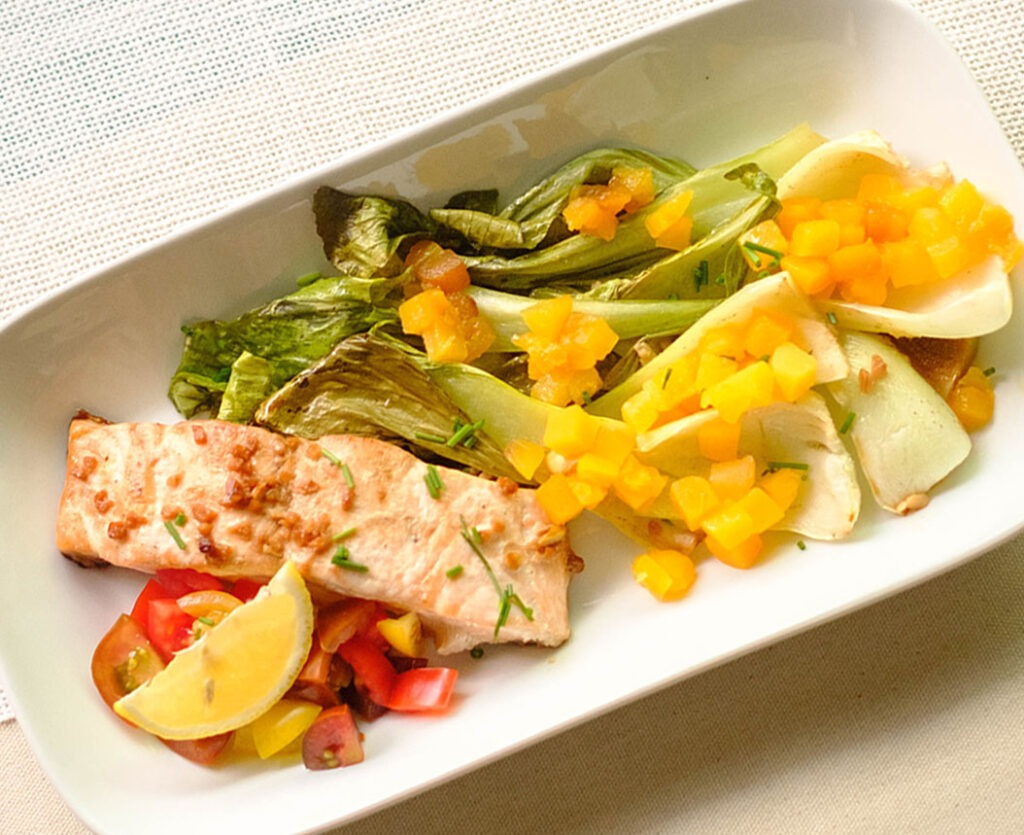
plate with salmon, bok choy, and diced butternut squash

Why This Recipe is Great for Meal Prep

This meal is a powerhouse of nutrients. The Baked Salmon brings a dose of heart-healthy omega-3 fatty acids, while the Bok Choy and Butternut Squash provide vitamins, minerals, and dietary fiber galore. It’s a guilt-free indulgence that’ll give you a health boost and have you feeling vibrant and alive.

Eating healthy doesn’t mean breaking the bank. Salmon might seem fancy, but purchasing frozen fillets can be a cost-effective way to get those omega-3s. Also, bok choy and butternut squash are quite affordable and not to mention nutritious sides.

With our busy lives, convenience is key. Prepare a batch of this dish, and you’ll have meals ready to go all week long. No more last-minute food choices that leave you feeling unsatisfied and guilty. Plus, the flavors meld together beautifully as they sit, making leftovers even tastier.

The PrepYoSelf Newsletter

To Prepare This Salmon Recipe You’ll Need

  • Baked Salmon Fillets: The star of the show, these salmon fillets are the epitome of tender, flaky goodness. When properly marinated and baked, they become a succulent delight that’s rich in omega-3 fatty acids, promoting heart health and overall well-being.
  • Soy Sauce: A savory and slightly salty sauce derived from soybeans, soy sauce adds depth of flavor and a hint of umami to the salmon. It’s a key component of the marinade that brings out the dish’s Asian-inspired essence.
  • Honey: This natural sweetener not only balances the savory notes of soy sauce and garlic but also contributes to the gorgeous caramelization of the salmon during baking. It imparts a subtle touch of sweetness that dances harmoniously with the other flavors.
  • Garlic: The aromatic powerhouse, garlic infuses the salmon with a pungent and earthy flavor profile. Minced and mixed into the marinade, it elevates the dish’s overall complexity and aromatic appeal.
  • Green Onions: These slender green onions, also known as scallions, bring a fresh and slightly sharp flavor to the marinade. Their vibrant color and mild onion essence provide a beautiful contrast to the other robust flavors.
  • Butternut Squash: This vibrant orange vegetable, once peeled, seeded, and diced, becomes a sweet and nutty delight when roasted. It’s a fantastic source of vitamins, minerals, and dietary fiber, adding a hearty and nutritious element to the dish.
  • Baby Bok Choy: These petite heads of bok choy offer a tender and slightly peppery bite. Sliced in half and well-rinsed, they bring a subtle bitterness and a vibrant green color to the ensemble.
  • Lemon Juice: The zesty and tangy juice of half a lemon adds a bright and refreshing element to the marinade. Its acidity not only balances the richness of the salmon but also helps tenderize the fillets.
  • Sesame Oil: This oil is a game-changer, infusing the salmon with a distinct nutty aroma and depth of flavor. Just a touch goes a long way in enhancing the overall Asian-inspired taste of the dish.
plate with salmon, bok choy, and diced butternut squash

Easy Recipe Steps to Make Oven Roasted Salmon

  1. In a bowl, create the marinade by whisking together soy sauce, honey, minced garlic, chopped green onions, sesame oil, half of the lemon juice, and a drizzle of olive oil. Season with salt and pepper. Let the flavors dance together.
  2. Rinse the baby bok choy halves thoroughly to ensure they’re dirt-free. No one wants extra crunch from the soil!
  3. Line a baking sheet with parchment paper. Lay down the marinated Baked Salmon fillets, bok choy halves, and diced butternut squash.
  4. Preheat your oven to 400°F (200°C). Place the baking sheet in the oven and let the ingredients roast to perfection for 10-15 minutes. The salmon should flake easily with a fork, and the veggies should be tender and slightly caramelized.
  5. Serve your Oven Roasted Honey Soy Glazed Bok Choy and Butternut Squash alongside the Baked Salmon. If you desire an extra tangy kick, squeeze the remaining lemon juice over the salmon and veggies, and garnish with fresh tomatoes.

Reference the recipe card below for detailed instructions.
plate with salmon, bok choy, and diced butternut squash

Meal Prep Tips

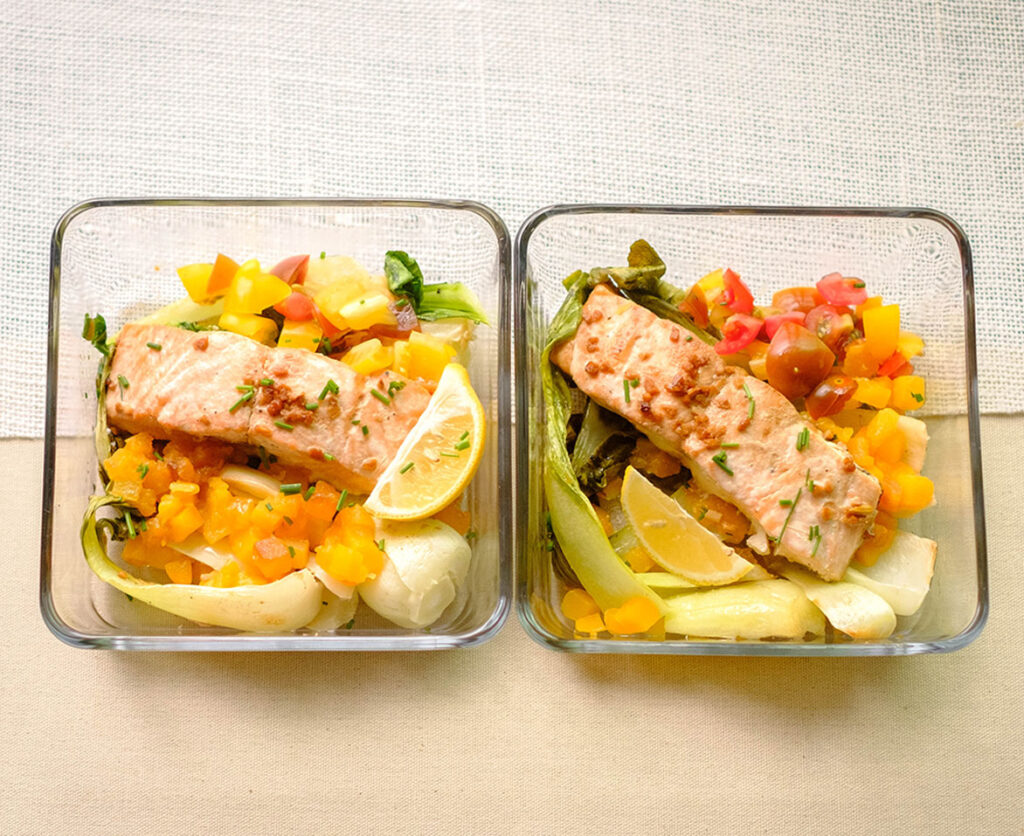
  • Storage: Once cooked, divide the dish into individual meal prep containers. Store them in the refrigerator for up to 3 days.
  • Reheating: To reheat, simply pop the container in the microwave or reheat in the oven at 350°F (175°C) until warmed through.
  • Ingredient Swaps: Feeling adventurous? Swap out the salmon for chicken, pork, or even tofu for a plant-based twist. Customize the marinade with your favorite herbs and spices.
plate with salmon, bok choy, and diced butternut squash
salmon and bok choy

Oven Roasted Honey Soy Glazed Salmon with Bok Choy and Butternut Squash

Oven Roasted Honey Soy Glazed Bok Choy and Butternut Squash with Baked Salmon is a dish with carefully chosen ingredients that come together to create a symphony of flavors and textures that are visually stunning and delightfully delicious.
No ratings yet
Prep Time 5 minutes
Cook Time 15 minutes
Course Main Course
Cuisine American, Asian
Servings 2

Equipment

  • knife
  • cutting board
  • sheet pan
  • oven

Ingredients
  

Salmon

  • 12 oz salmon
  • 2 tbsp soy sauce
  • 1 tbsp honey
  • 1 tbsp garlic (minced)
  • 2 tbsp green onions (chopped)
  • 1 tbsp sesame oil
  • 1/4 tsp pepper
  • 1 each lemon
  • 1 tbsp olive oil

Veggies

  • 2 cups butternut squash (diced)
  • 2 stalks baby bok choy
  • 1/2 cup cherry tomatoes (sliced)
  • 1/4 tsp garlic powder
  • 1/4 tsp salt
  • 1 tbsp olive oil

Instructions
 

Salmon

  • Pre-heat oven to 400F
  • Make the marinade by mixing together the soy sauce, honey, garlic, green onions, sesame oil, half of the lemon juice, and seasonings
  • Slice the baby bok choy in half and rinse well and remove the soil
  • Place the salmon, bok choy, and butternut squash on a sheet pan lined with parchment paper
  • Drizzle the marinade on top of the salmon and veggies
  • Bake everything in the oven for 10-15 minutes
  • Serve the salmon with fresh tomatoes and juice of the lemon if desired

Video

Similar Recipes

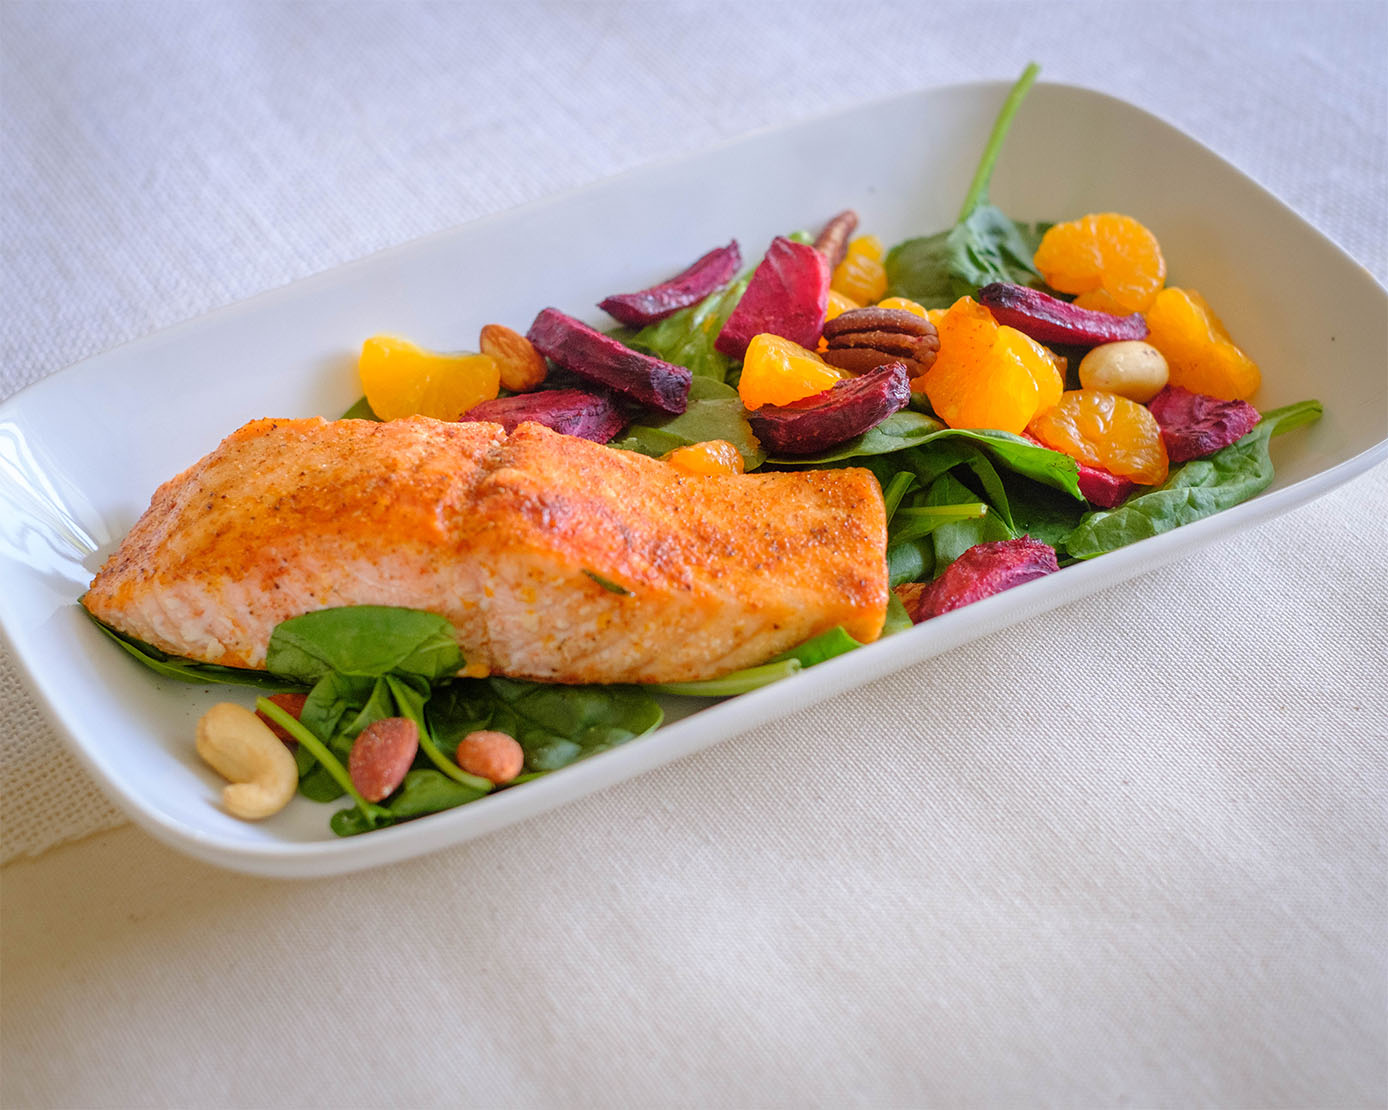
salmon beet salad

Citrus Ginger Salmon with Roasted Beets

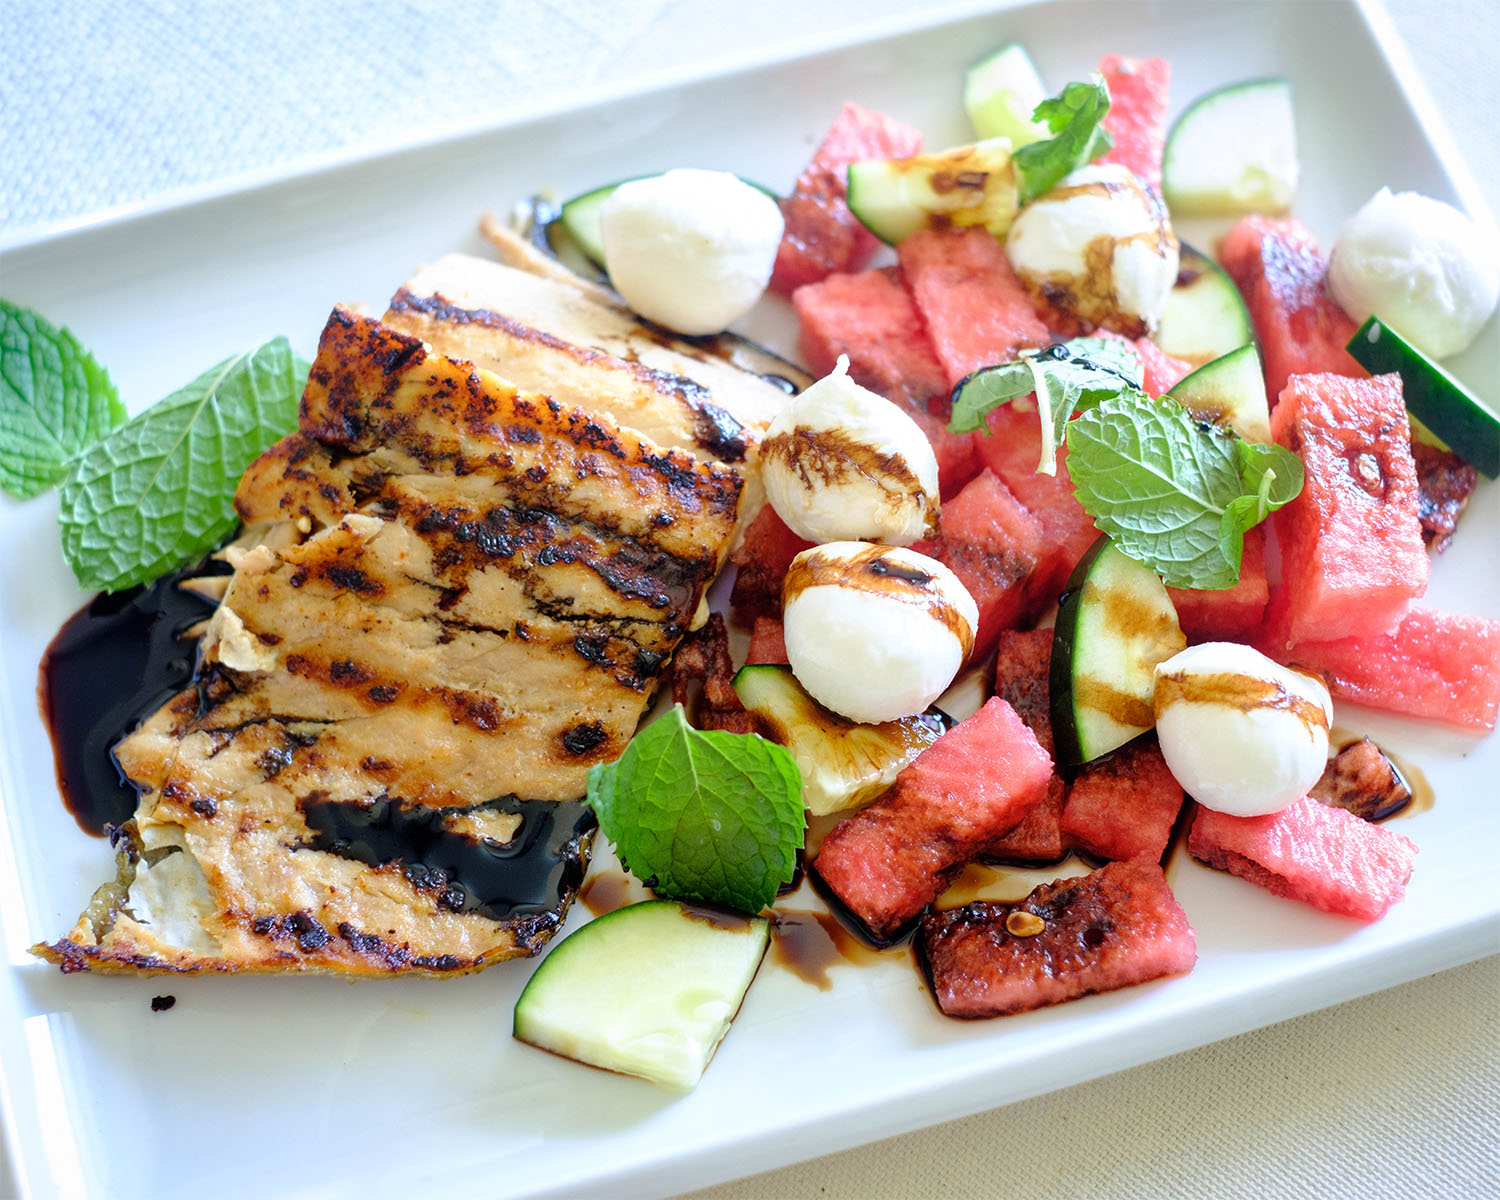
salmon and watermelon salad

Grilled Salmon with Watermelon Salad

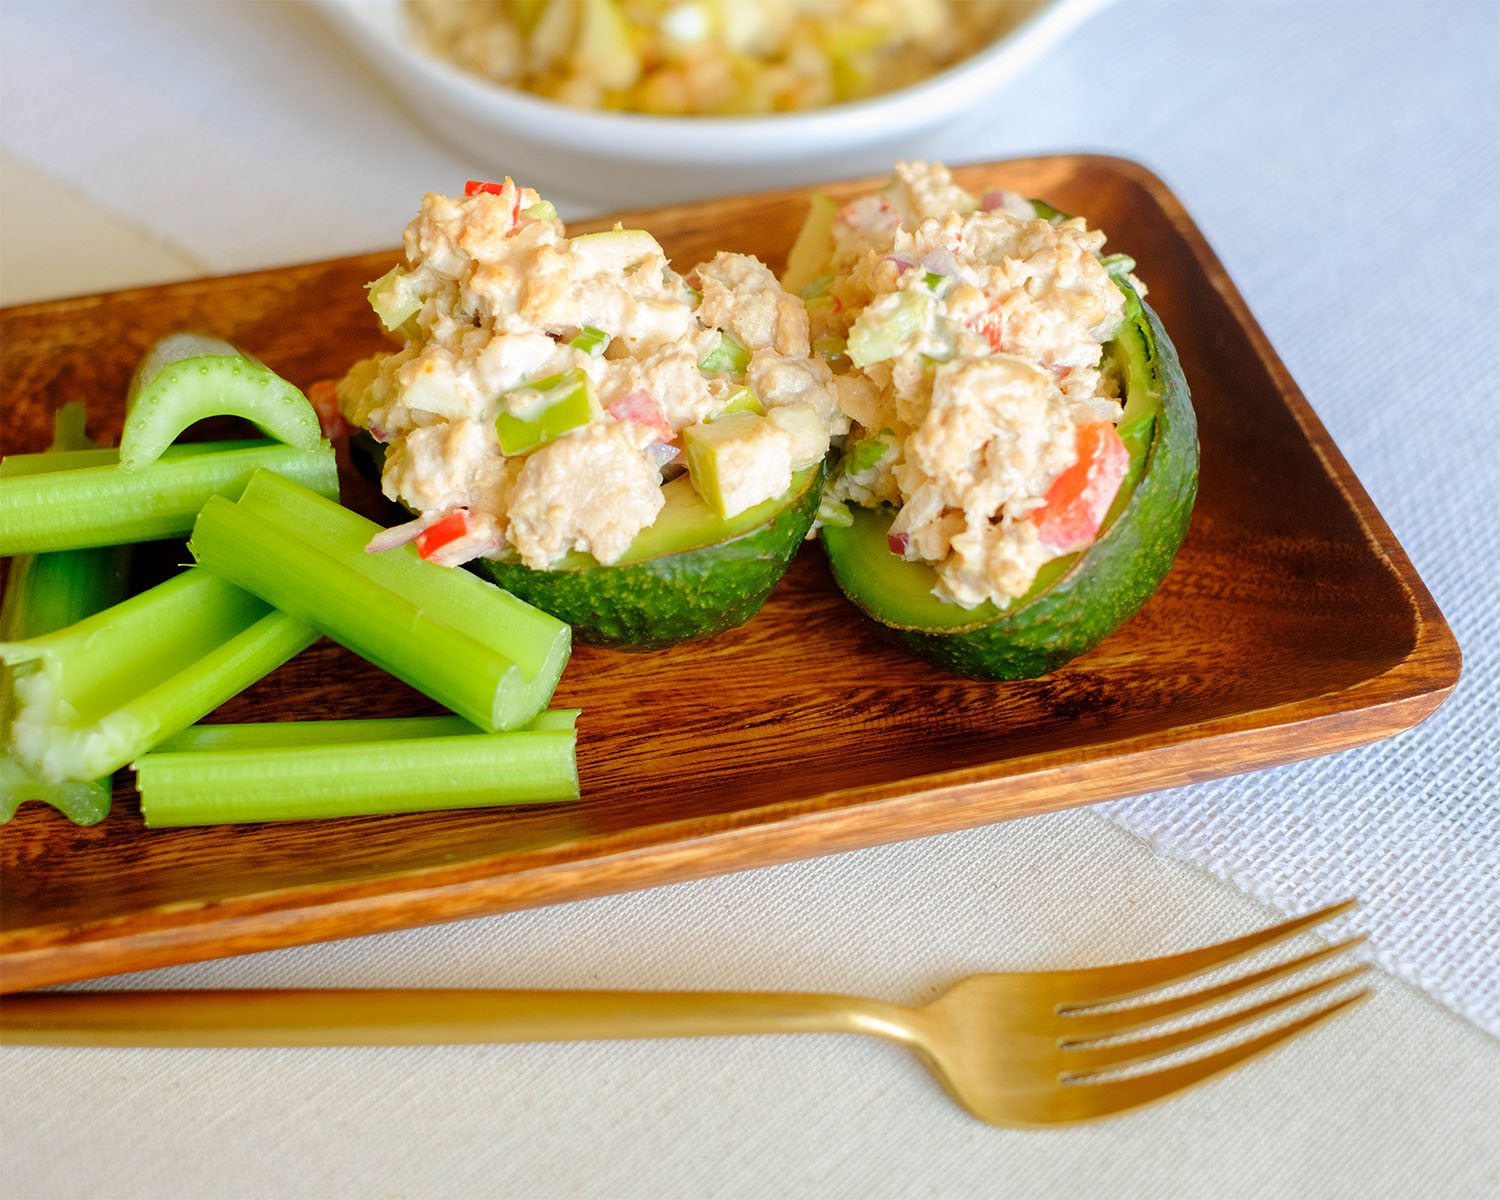
salmon salad

Salmon Stuffed Avocado Salad

You Might Also Like

Frequently Asked Questions

Can I use frozen salmon fillets for this recipe?

Absolutely! Using frozen salmon fillets can be a cost-effective and convenient option. Just make sure to thaw them properly in the refrigerator before marinating and cooking.


Can I use other types of fish for this recipe?

Absolutely! While salmon is the star of this recipe, you can experiment with other fish like trout, cod, or tilapia. Adjust the cooking time based on the thickness of the fillets.


Can I use a different type of squash instead of butternut squash?

Absolutely! Acorn squash, delicata squash, or even sweet potatoes can be great alternatives to butternut squash. Just make sure to adjust the coo

Posted on Leave a comment

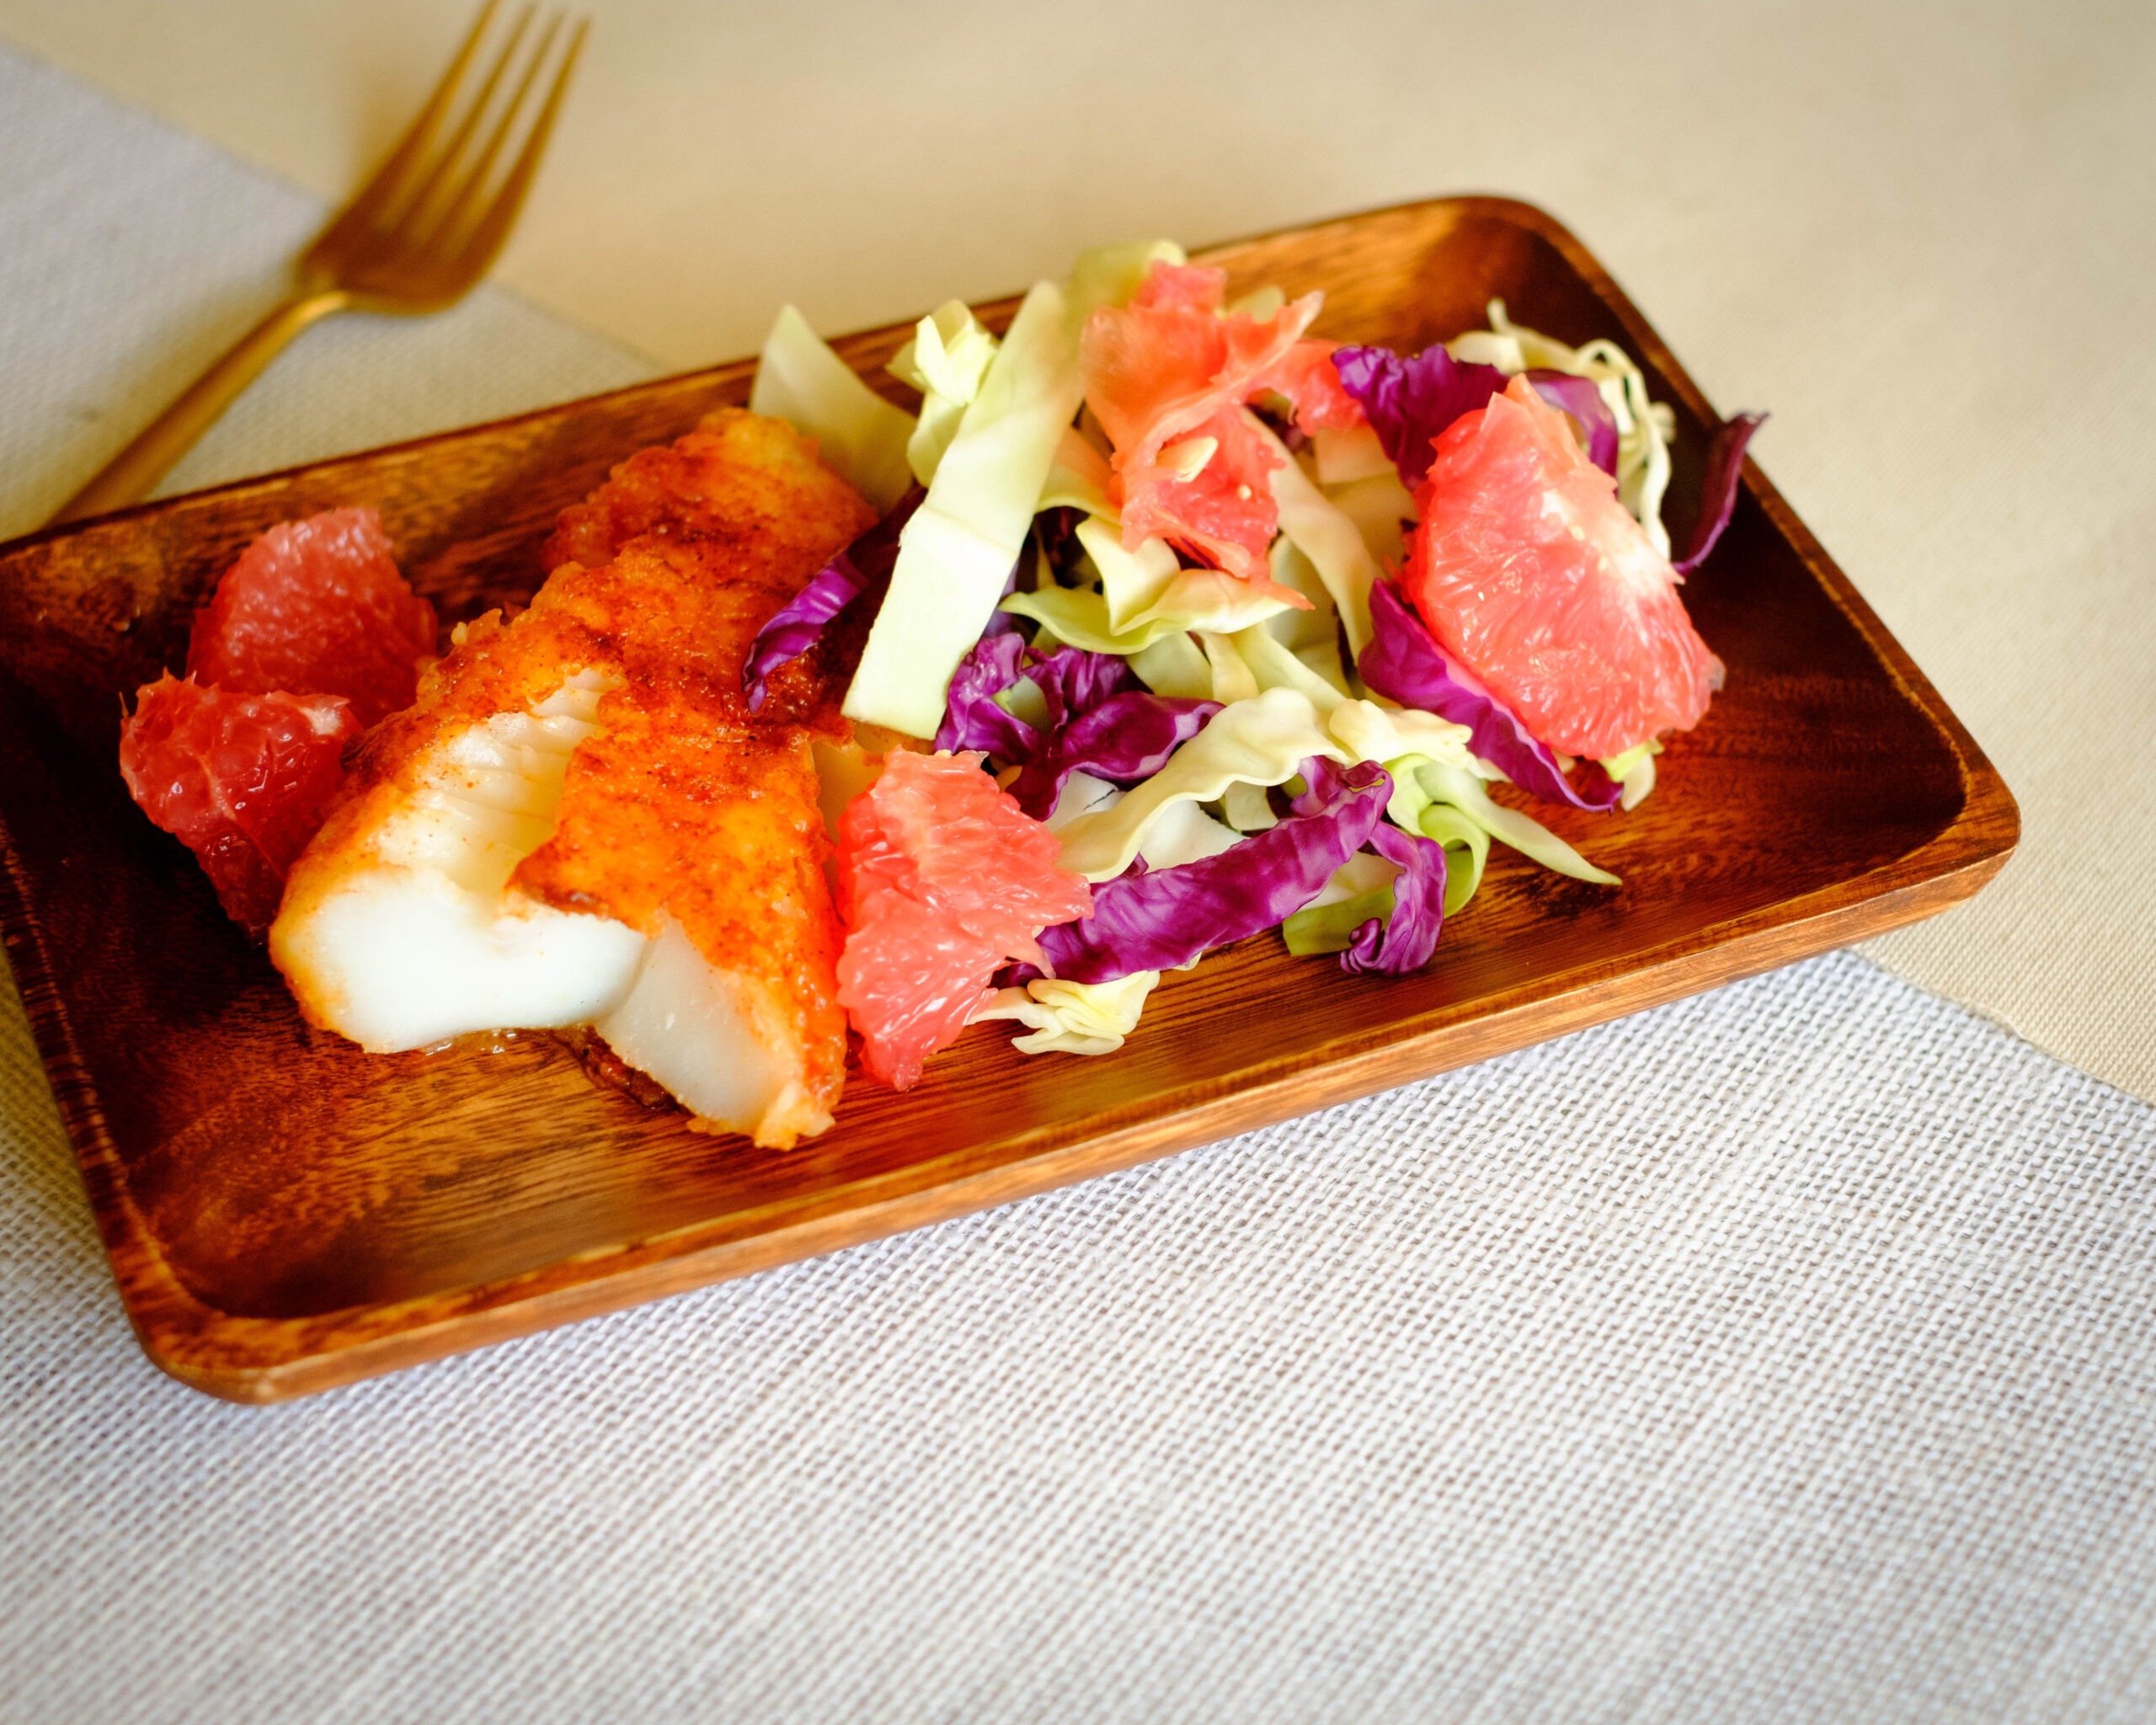
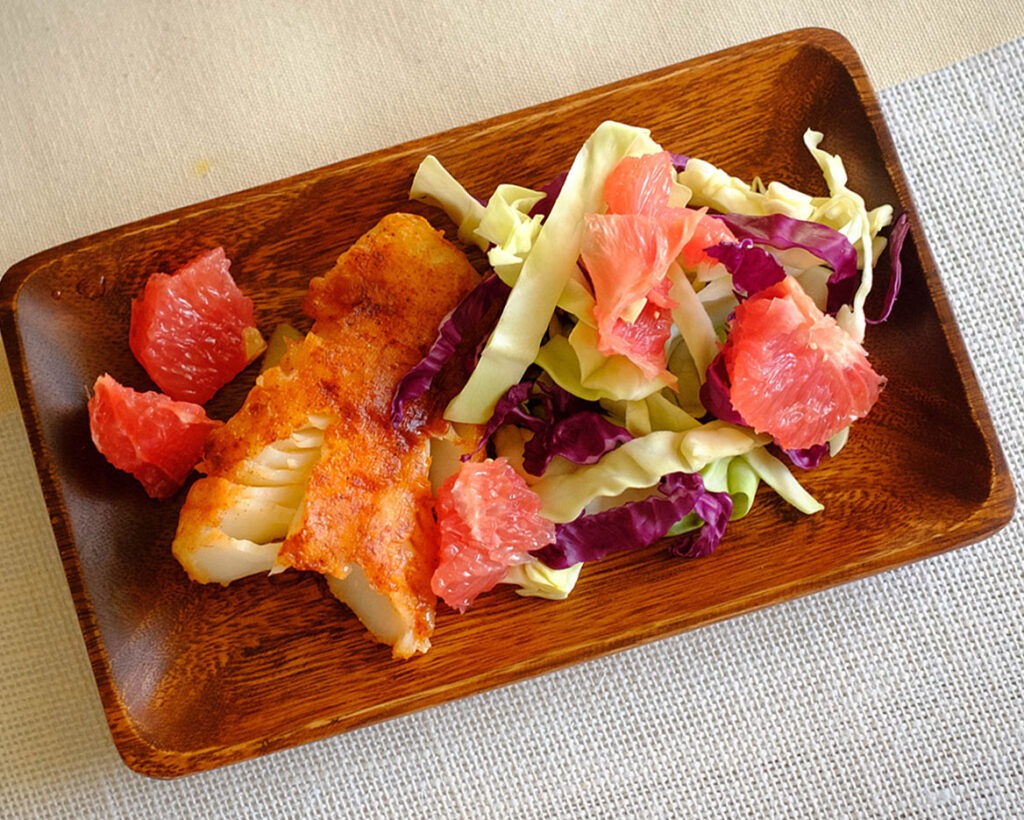
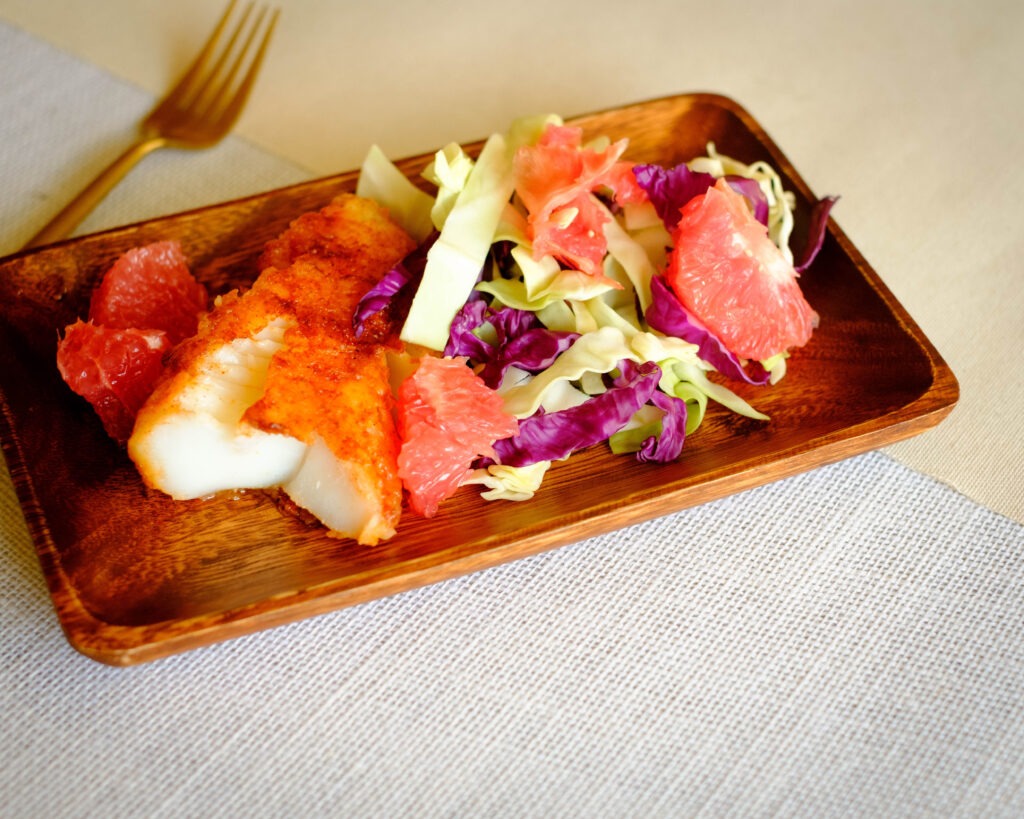
Chili Rubbed Cod with Grapefruit Slaw

rectangular wooden plate with chile rubbed cod and grapefruit coleslaw

Chili-Rubbed Cod with Grapefruit Slaw—a meal prep fish recipe masterpiece that’s bursting with flavors, textures, and the kind of pizzazz that’ll make your colleagues ask where you ordered that “fancy takeout” from. Get prepping and get ready to indulge in a lunch that’s as exciting as it is satisfying! Its vibrant flair is bound to intrigue your coworkers into inquiring about the source of your “gourmet takeout.” Begin your preparation and anticipate a lunch that promises both excitement and gratification!

This post may contain affiliate links. Please see our privacy policy for details.

rectangular wooden plate with fish recipe of chile rubbed cod and grapefruit coleslaw

Why You’ll Enjoy this Recipe

  • One of the key advantages of meal prepping this fish recipe is that the flavors develop and intensify as the components marinate together. The cod’s seasoning melds beautifully, becoming more vibrant and well-rounded. The grapefruit vinaigrette seeps into the cabbage, infusing it with zesty goodness. When you finally enjoy your prepped meal, you’re treated to a symphony of tastes that’s akin to a restaurant-quality dish. Unlike some takeout that can lose its appeal upon reheating, this dish becomes more exquisite as the days go by.
  • The thoughtful combination of the crispy chili-rubbed cod and the refreshing grapefruit slaw ensures that you’re not just enjoying a burst of flavors but also a delightful dance of textures. When you meal prep, the cod’s crispy exterior is preserved by reheating it in the oven, offering that satisfying crunch that can rival any takeout meal. The slaw retains its crispness and juiciness, thanks to being dressed with the vinaigrette just before serving. Unlike soggy takeout, where textures often suffer upon reheating, this dish maintains its delightful contrast between the crispy fish and the crunchy slaw.
  • While we all love indulging in takeout occasionally, it often comes with hidden fats, excessive sodium, and unknown additives. On the other hand, this meal prep masterpiece empowers you to control the quality of ingredients, ensuring that you’re nourishing your body with wholesome components. You get the satisfaction of a takeout experience without compromising on health. Plus, you can adjust the seasonings, use heart-healthy olive oil, and choose lean fish to align with your dietary preferences. It’s a win-win situation where you’re treating yourself to a culinary delight that’s as good for your body as it is for your taste buds.

The PrepYoSelf Newsletter

Simple Ingredients for Chile Rubbed Cod and Grapefruit Slaw

  • Cod Filets: We’re turning these fish filets into crispy, flavorful bites of perfection by seasoning them with a blend of chili powder, paprika, garlic powder, and a pinch of salt. But that’s not all!
  • Cornstarch: To achieve that coveted crunch, we’re giving them a gentle dusting of cornstarch, creating a delicate and crispy coating that’s truly irresistible.
  • Grapefruit and Shredded Cabbage: This zesty slaw side dish is a vibrant blend of green and red cabbage, brought to life with the sweet and tangy allure of grapefruit slices. It’s like a party for your taste buds!
  • Vinaigrette: And to tie everything together, we’re whipping up a Grapefruit Vinaigrette that’s a symphony of flavors—grapefruit juice, apple cider vinegar, a drizzle of olive oil, a pinch of salt, and just a touch of honey for that perfect balance.
rectangular wooden plate with fish recipe of chile rubbed cod and grapefruit coleslaw

How to Prepare this Cod Recipe

  1. Season those cod filets with your chili powder, paprika, garlic powder, and salt. Let those flavors mingle and dance.
  2. Spread a generous layer of cornstarch on a plate and coat your fish filets on both sides. Gently shake off the excess, like saying goodbye to unnecessary calories.
  3. Heat up a pan with a touch of oil over medium-high heat. Once it’s sizzling hot, lay your seasoned fish down and let them sizzle for about 4 to 5 minutes on each side, until they’re gloriously crispy, golden brown, and cooked to perfection.
  4. In a small bowl, mix together the ingredients for that delightful Grapefruit Vinaigrette.
  5. In another bowl, toss together the cabbage and those juicy grapefruit segments. Drizzle that amazing vinaigrette all over and give it a good mix.

Reference the recipe card below for detailed instructions.

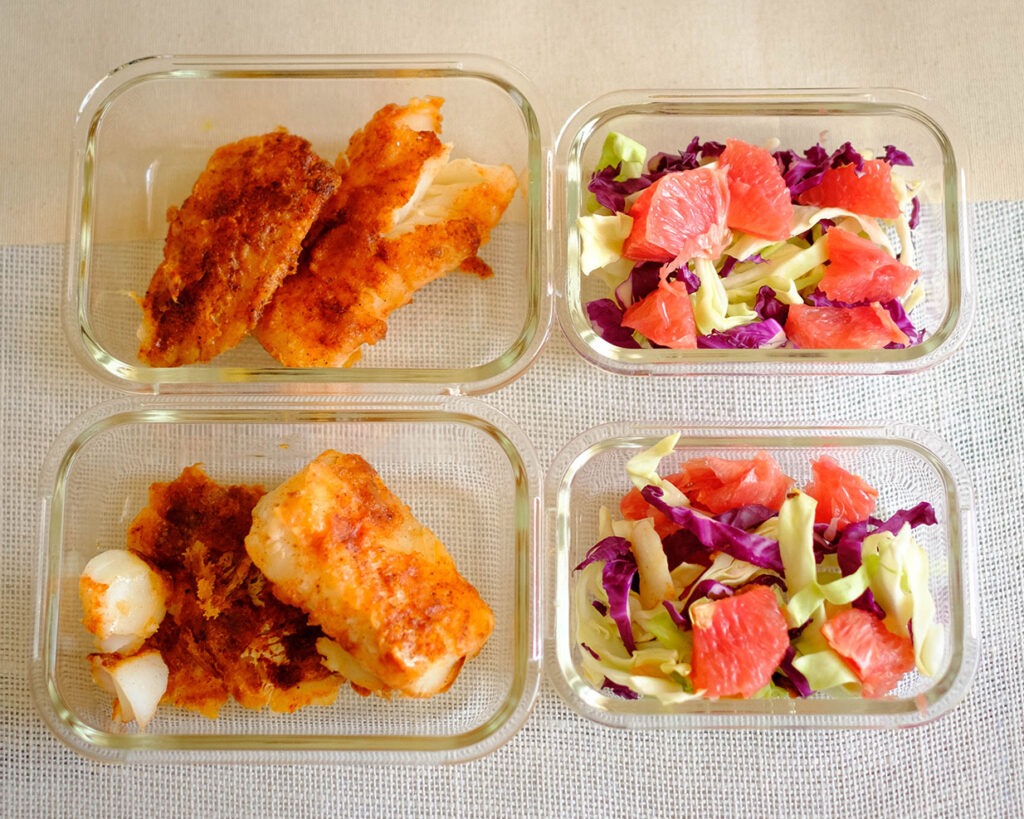
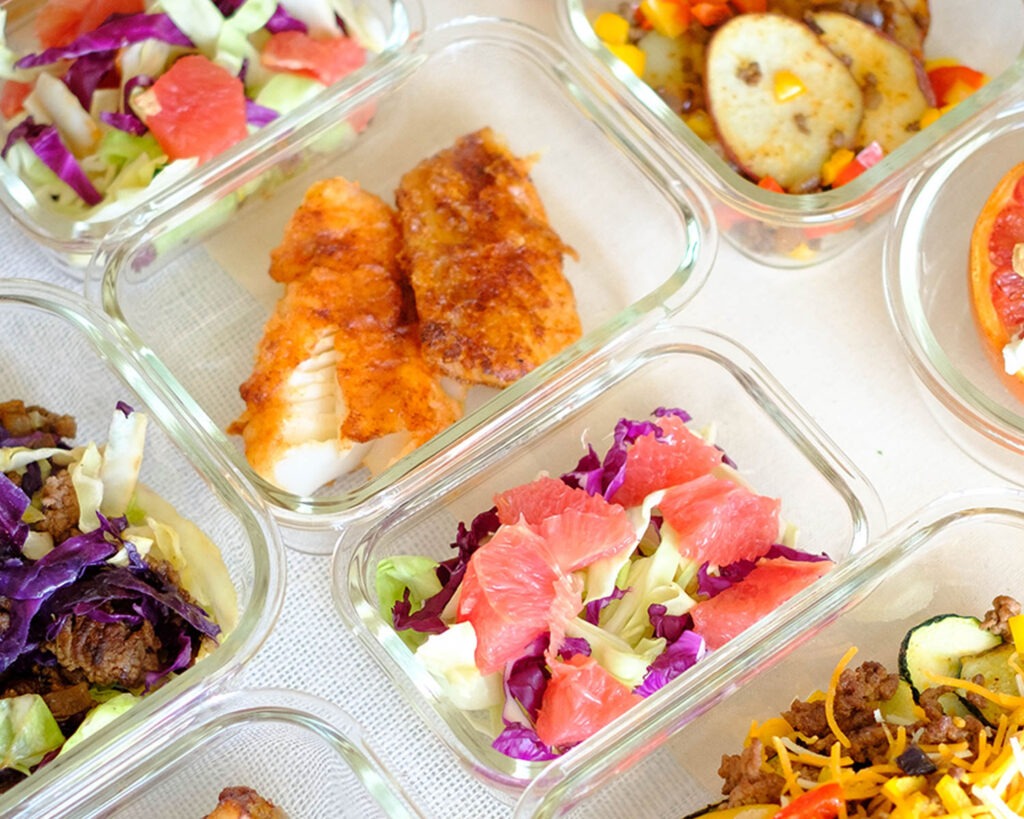
Glass meal prep containers with fish recipe of chile rubbed cod and grapefruit coleslaw

Meal Prep Tips for Cod and Coleslaw

  • Storage Tips: You’re in luck! This fish recipe is an excellent candidate for meal prep. Simply store the crispy cod and the refreshing slaw in separate airtight containers in the refrigerator.
  • Reheating Tips: When you’re ready to enjoy, pop the cod in the oven at 350°F (175°C) for about 8-10 minutes until it’s heated through and as crispy as the day you made it. As for the slaw, it’s best enjoyed fresh, so remember to add that right before you dive in.
  • Ingredient Swaps: Feel like getting creative? You can switch up the type of fish—try snapper, haddock, or even salmon for a different flavor experience. Not a fan of grapefruit? No worries! Swap it out for oranges or even mandarins. And if you’re looking for a touch of heat, throw in some finely chopped jalapeños into that slaw for a fiery kick.

Glass meal prep containers with fish recipe of chile rubbed cod and grapefruit coleslaw

wooden plate with golden brown pan-fried cod filet and grapefruit cabbage slaw.

Chili Rubbed Cod with Grapefruit Slaw

Say hello to Chili-Rubbed Cod with Grapefruit Slaw—a lunchtime masterpiece that's as tasty as a gourmet takeout treat!
No ratings yet
Prep Time 5 minutes
Cook Time 15 minutes
Course lunch
Cuisine American
Servings 2

Equipment

  • saute pan
  • spatula
  • mixing bowl

Ingredients
  

Fish and Seasonings

  • 12 oz cod
  • 1/4 teaspoon chili powder
  • 1/4 teaspoon paprika
  • 1/4 teaspoon garlic powder
  • 1/4 teaspoon salt
  • 1/4 cup corn starch

Grapefruit Coleslaw

  • 1 cup green cabbage (shredded)
  • 1 cup red cabbage (shredded
  • 1 grapefruit (peeled and segmented, reserve 2 pieces for the vinaigrette)

Grapefruit vinaigrette

  • 2 tablespoons grapefruit (squeeze the juice out of 2 pieces of grapefruit segments)
  • 2 tablespoons apple cider vinegar
  • 2 tablespoons olive oil
  • 1/2 teaspoon salt
  • 1 tablespoon honey
  • 1/4 teaspoon garlic powder

Instructions
 

Fish

  • Season the cod filets with the seasonings. Place cornstarch on a plate and dredge the fish on both sides making sure it is completely covered with the corn starch. Shake off the excess.
  • Heat oil in a pan on medium-high heat and sear the cod filets on each side for about 4 to 5 minutes until the fish is fully cooked, crispy, and golden brown.

Coleslaw

  • Peel and segment the grapefruit. Set aside some pieces for the vinaigrette.
  • In a small bowl, squeeze in about 2 to 3 pieces of the grapefruit segments. Then, add the apple cider vinegar, olive oil, salt, and honey and mix together the vinaigrette.
  • In another bowl, combine the cabbage with the grapefruit segments and drizzle it with the vinaigrette. Enjoy this fresh side dish with the crispy fish.

Similar Recipes

italian chicken

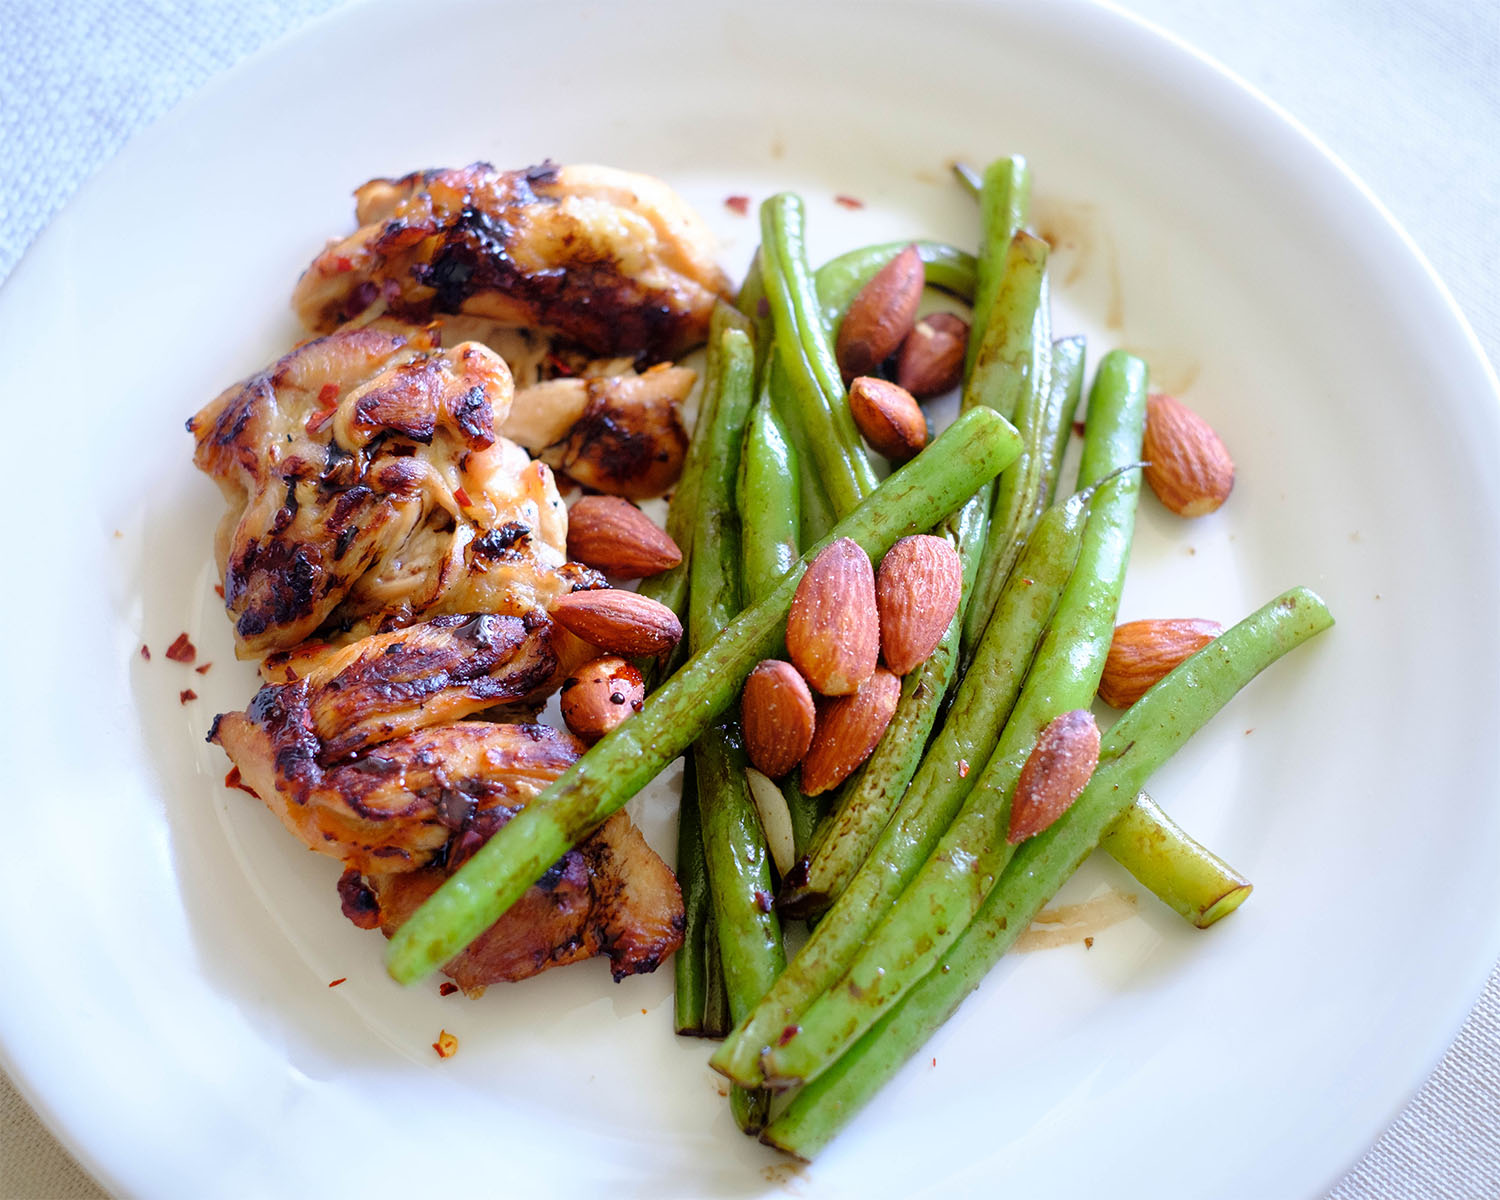
Italian Chicken with Green Beans and Almonds

meatloaf patties

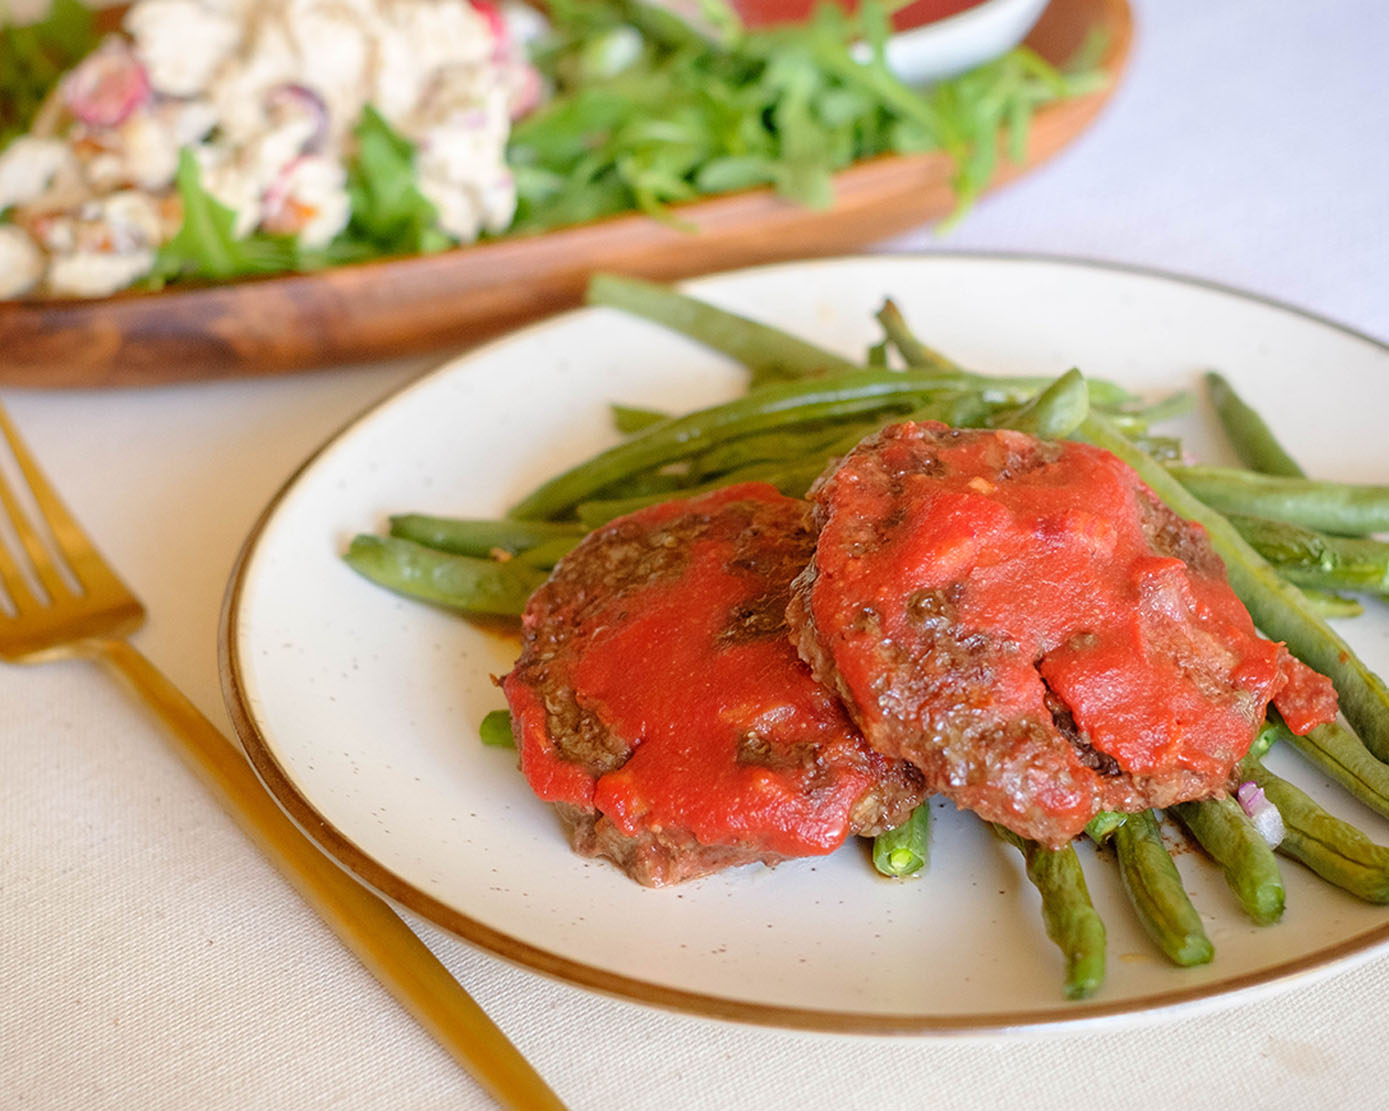
Oven Baked Meatloaf Patties and Roasted Green Beans

shrimp and corn

Sheet Pan Shrimp with Cauliflower and Corn

You Might Also Like

Frequently Asked Questions

Can I use a different type of fish for this recipe?

Absolutely! While cod works wonderfully for this dish, you can experiment with other white fish like snapper, haddock, or even tilapia. Each fish brings its own unique flavor to the table.


I’m not a fan of grapefruit. Can I use a different citrus fruit?

Of course! You can swap grapefruit with oranges, mandarins, or even tangerines for a different citrus twist that’ll still provide that sweet-tangy balance.


How do I prevent the cod from sticking to the pan while searing?

Make sure the pan is well-heated and the oil is shimmering before adding the fish. Also, avoid moving the fish around too much while it’s searing to prevent sticking.

Posted on Leave a comment

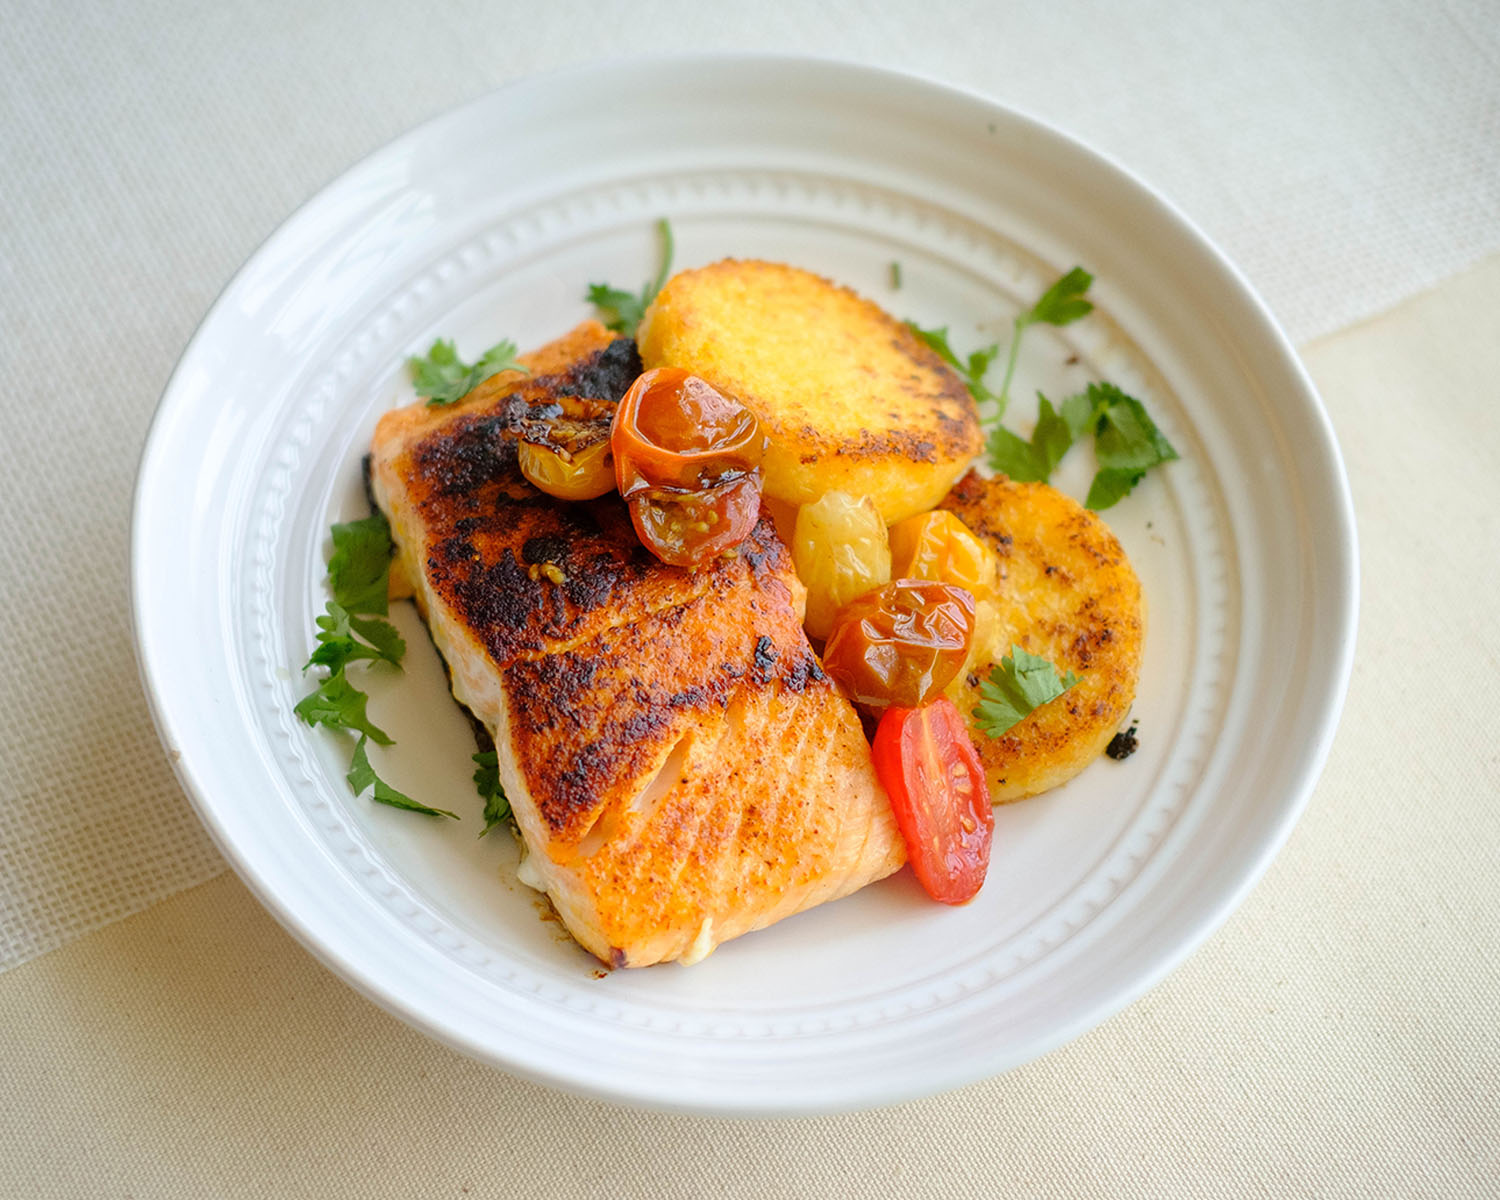
Pan-Fried Salmon with Polenta Cakes

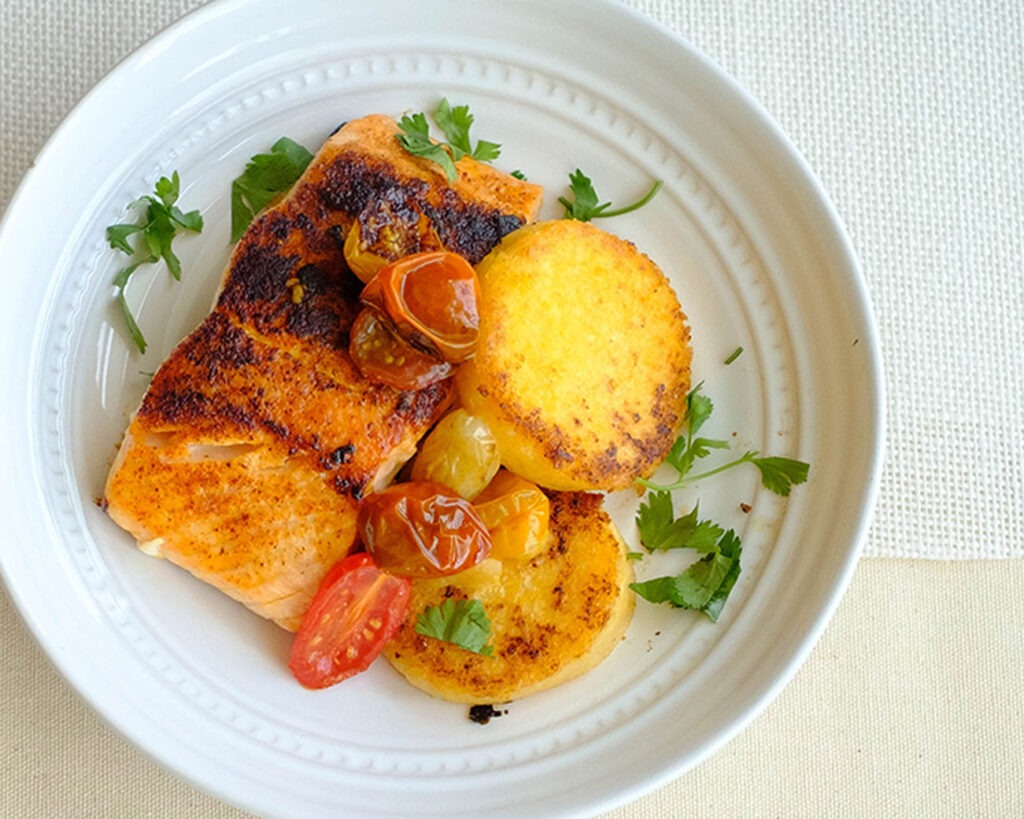
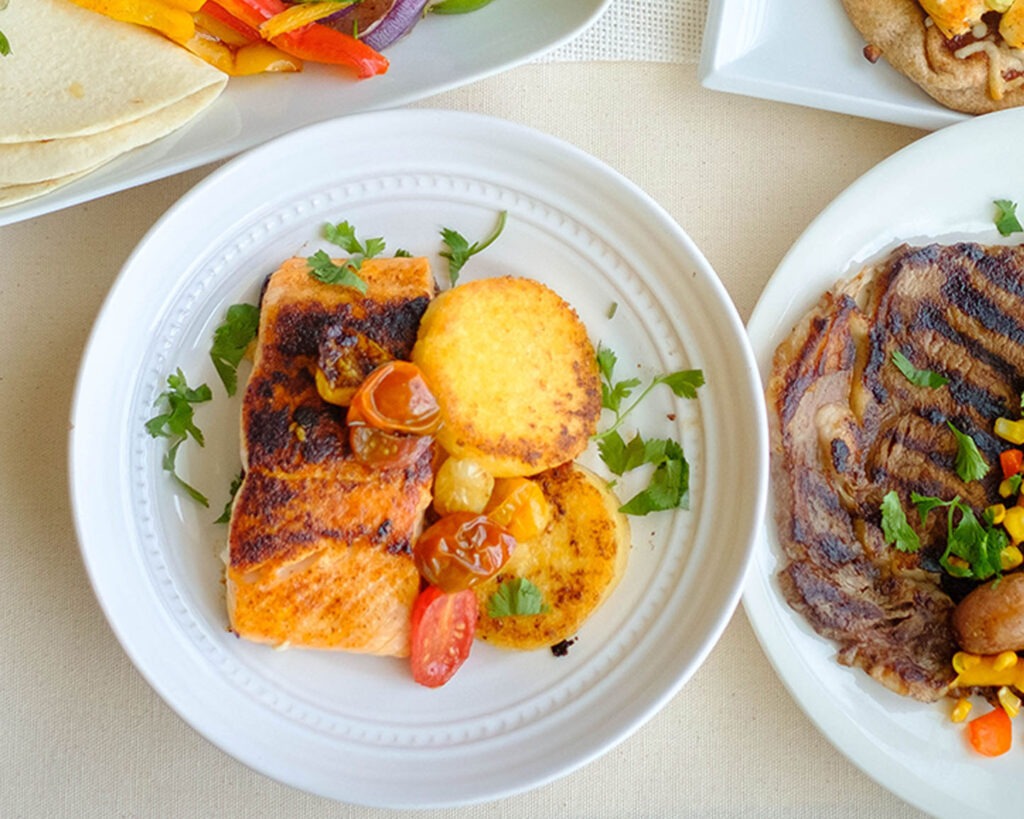
round plate with salmon, cherry tomatoes, and polenta cakes

This Pan-Fried Salmon with Polenta Cakes Recipe has it all – healthiness, speed, ease, and a dash of restaurant-level sophistication. You’ll definitely impress your taste buds with the kind of flavors usually associated with upscale dining. With this easy salmon recipe, you’re creating gourmet magic in your own kitchen, complete with an artistic presentation that’s sure to wow your senses. Get ready to whip up a dish that’s not only a breeze to make but also tastes like a five-star treat.

This post may contain affiliate links. Please see our privacy policy for details.

round plate with salmon, cherry tomatoes, and polenta cakes

Why This Recipe is Great for Meal Prep

Let’s dive deeper into why this Pan-Fried Salmon with Polenta Cakes recipe is a meal prep superstar and why it rivals the flavors of a fancy restaurant dish:

Time Saver: The use of pre-cooked polenta is a game-changer. It slashes your prep time without sacrificing taste or texture, making it an ideal option for anyone with a hectic schedule.

Perfectly Pan-Fried Salmon: Searing the salmon creates that irresistible golden-brown crust, locking in its natural juices and creating a tantalizing contrast of textures. You’ll experience the same expertly cooked salmon you’d expect at a restaurant.

Crispy Polenta Cakes: The pre-cooked polenta’s quick sear results in crispy, golden cakes that are an amazing canvas for the salmon and tomatoes. The combination of textures elevates the eating experience.

Layered Flavors: By using the same pan for each component, you build layers of flavor. The remnants of seasoned salmon and sautéed tomatoes infuse the polenta cakes, creating a cohesive and mouthwatering ensemble.

The PrepYoSelf Newsletter

To Prepare This Easy Salmon Recipe You’ll Need

  • First up, the star of the show: the salmon. Fresh, succulent, and loaded with omega-3 fatty acids for a healthy heart and brain. Season it to perfection, give it a loving coat of oil, and pan-sear it for that beautiful golden-brown crust. The sizzle and aroma will make you feel like a pro chef in your own kitchen.
  • Next up, we’ve got garlic, the aromatic hero that adds a delightful punch to any dish.
  • Now, let’s talk about the meal prep hack that’ll save you some precious minutes – pre-cooked polenta. This underrated gem comes in handy, especially when you’re juggling a busy schedule. Slice it into 1/2 inch rounds, give them a golden-brown, crispy sear in a pan, and you’ve got yourself the perfect base for your dish. It’s like the canvas for your culinary masterpiece.
  • But wait, there’s more! Enter the juicy cherry tomatoes. Sautéed in the same pan where your salmon danced and your polenta crisped up, these little bursts of flavor bring a delightful freshness to the plate. Their vibrant color and slight sweetness are the perfect contrast to the richness of the salmon and the comforting crunch of the polenta cakes.

round plate with salmon, cherry tomatoes, and polenta cakes

Easy Recipe Steps to Make Pan-Fried Salmon

  1. Season your salmon with your favorite seasonings and give it a nice coat of oil.
  2. In the same pan (because why wash an extra dish?), heat some oil over medium-high heat.
  3. Sear the salmon, flesh side down, for around 4 to 5 minutes until it’s gorgeously golden and crispy. Flip it over to the skin side and sear for an additional 2 to 3 minutes. Now, take your masterpiece out of the pan and let it rest.
  4. Slice your pre-cooked polenta into 1/2 inch rounds. Heat some oil in a pan over medium-high heat.
  5. Pan-fry the polenta rounds for about 4 to 5 minutes per side until they’re golden brown and wonderfully crispy. Once done, remove these golden delights from the pan and set them aside.
  6. In that same pan (yes, we’re all about flavor layering and efficiency here), sauté the sliced cherry tomatoes for about 2 to 3 minutes until they’re soft and drool-worthy.
  7. Now, for the grand finale – assemble your plate! Place the crispy polenta cakes on the bottom, nestle that beautifully seared salmon on top, and scatter the sautéed cherry tomatoes around for that pop of freshness.

Reference the recipe card below for detailed instructions.

round plate with salmon, cherry tomatoes, and polenta cakes

Meal Prep Tips – Easy Salmon Recipe

  • This dish is an absolute superstar for meal prep. Store your components separately in airtight containers in the fridge. When it’s time to enjoy, just reheat your polenta cakes and salmon in the oven or microwave until warm, and sauté the cherry tomatoes for a quick refresh.
  • While it’s best enjoyed fresh, you can freeze the cooked components separately. Wrap the salmon tightly in plastic wrap or aluminum foil, and freeze the polenta cakes in a single layer before transferring them to a freezer-safe bag. Reheat in the oven or microwave after thawing.
  • Feeling creative? Feel free to swap out cherry tomatoes for your favorite veggies or herbs. Fresh herbs like parsley, dill, or chives would be great additions. Lemon zest, garlic powder, or a pinch of chili flakes could also elevate the flavors. Zucchini, bell peppers, or spinach would work well. Just adjust cooking times accordingly, as some veggies might cook faster or slower than cherry tomatoes.
  • You can even experiment with different fish or proteins if salmon isn’t your jam.

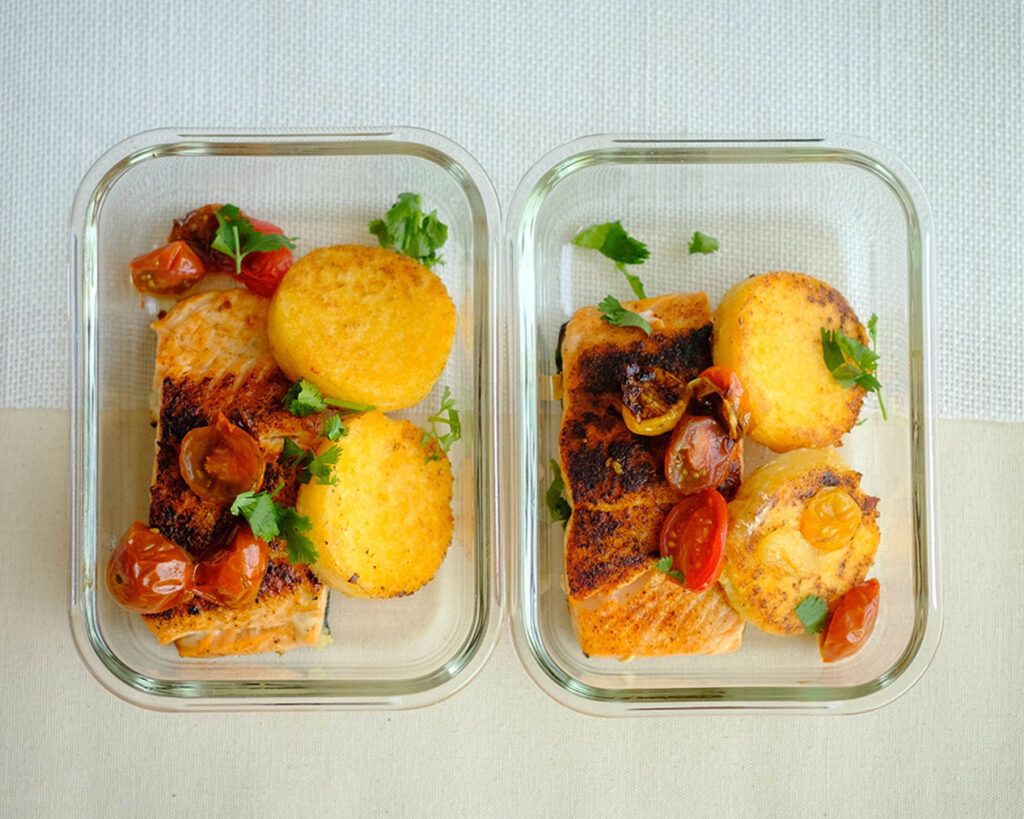
rectangular glass meal prep containers with salmon, cherry tomatoes, and polenta cakes

Salmon and Polenta

Pan-Fried Salmon and Polenta Cakes

This Pan-Fried Salmon with Polenta Cakes recipe is a meal prep superstar and it rivals the flavors of a fancy restaurant dish.
No ratings yet
Prep Time 5 minutes
Cook Time 20 minutes
Course dinner, Main Course
Cuisine American
Servings 2

Equipment

  • knife
  • cutting board
  • spatula
  • saute pan

Ingredients
  

Salmon and seasonings

  • 12 oz salmon
  • 1/4 tsp paprika
  • 1/4 tsp garlic powder
  • 1/4 tsp onion powder
  • 1/4 tsp salt
  • 1 tbsp olive oil

Polenta

  • 8 oz pre-cooked polenta
  • 1/4 tsp garlic powder
  • 1/4 tsp salt
  • 1/4 tsp pepper
  • 1 tbsp olive oil
  • 1 cup cherry tomatoes (sliced)

Instructions
 

Polenta Cakes

  • Slice the pre-cooked polenta into 1/2 inch rounds
  • Add oil to a pan on medium high heat and coo the polenta on each side for about 4 to 5 minutes until each side golden brwon and crispy
  • Then, remove it from the pan and set it aside

Salmon

  • Season the salmon and coat it with oil
  • Add oil to a pan on medium high heat and sear the salmon, flesh side down, and sear for about 4 to 5 minutes. Then, flip it around and sear the other side (skin side down) for another 2 to 3 minutes
  • Next, remove the salmon from the pan. Using the same pan, saute the sliced cherry tomatoes until it softens (about 2 to 3 minutes)
  • Serve the salmon with the crispy polenta cakes and sauteed cherry tomatoes

Similar Recipes

salmon beet salad

Citrus Ginger Salmon with Roasted Beets

salmon and watermelon salad

Grilled Salmon with Watermelon Salad

salmon salad

Salmon Stuffed Avocado Salad

You Might Also Like

Frequently Asked Questions

How do I know when the salmon is cooked through?

Salmon is cooked when it flakes easily with a fork and the internal temperature reaches 145°F (63°C). The flesh should turn opaque and easily separate into flakes.


Can I use a different type of fish?

Absolutely! While this recipe focuses on salmon, you can use other fish like trout, cod, or tilapia. Adjust cooking times as needed based on the thickness of the fillets.


Is pre-cooked polenta necessary, or can I make it from scratch?

Pre-cooked polenta is a time-saving hack for this recipe. However, if you want to make it from scratch, follow your favorite polenta recipe, spread it out in a dish to cool and solidify, and then slice and pan-fry it as instructed.

Posted on Leave a comment

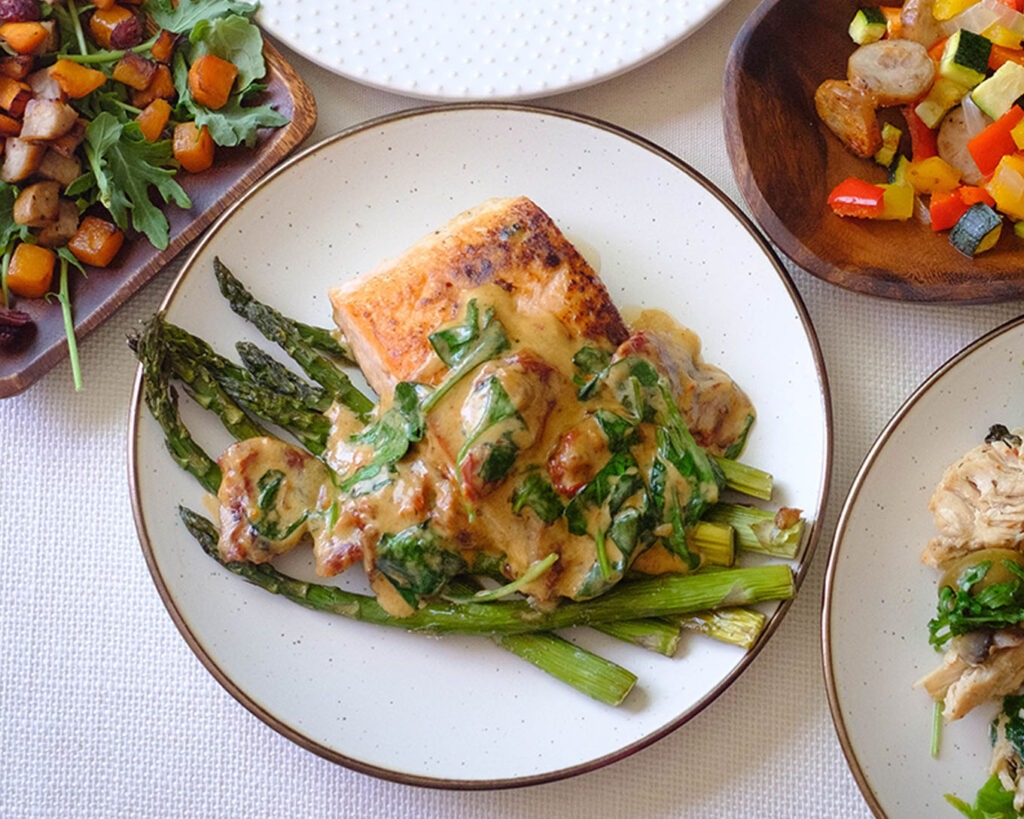
Pan-Seared Salmon with Creamy Sun-Dried Tomato Sauce

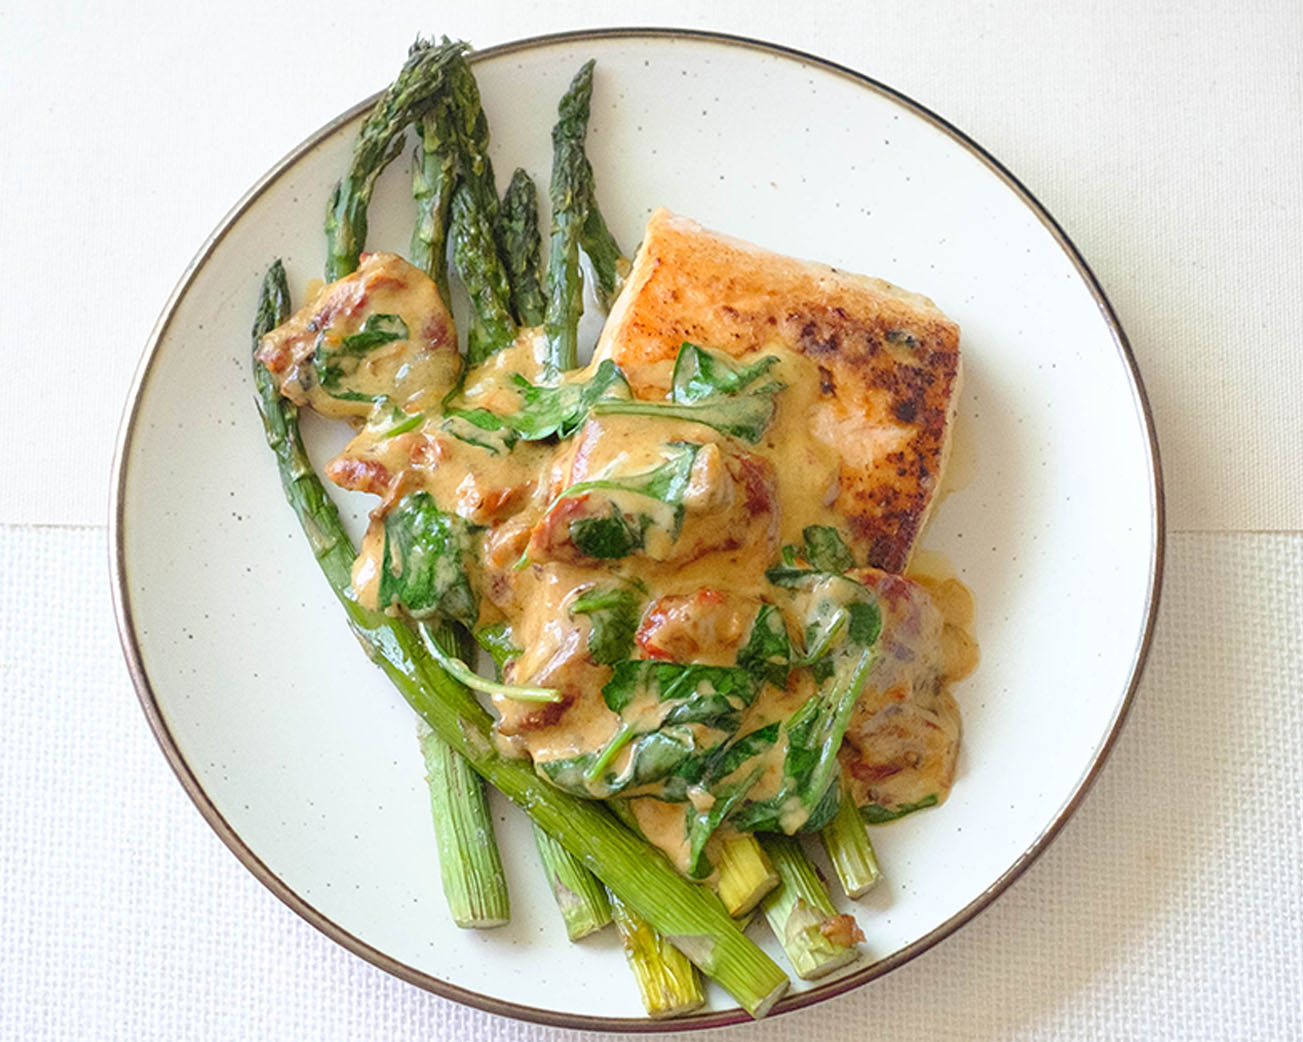
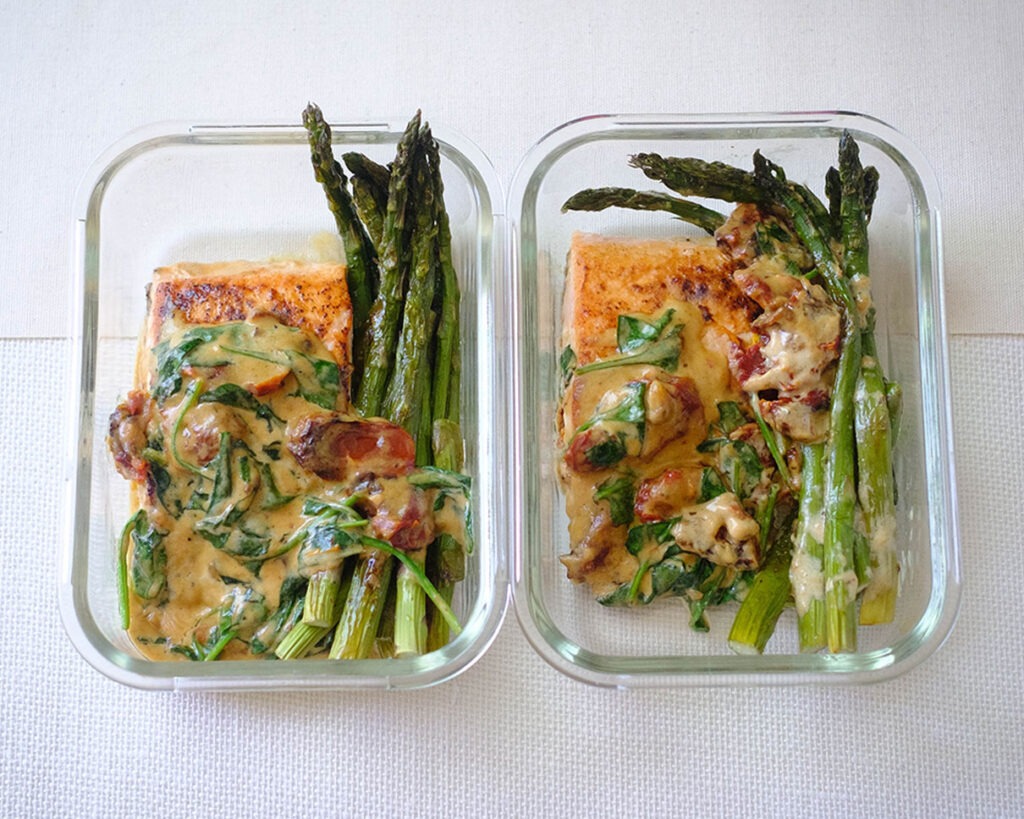
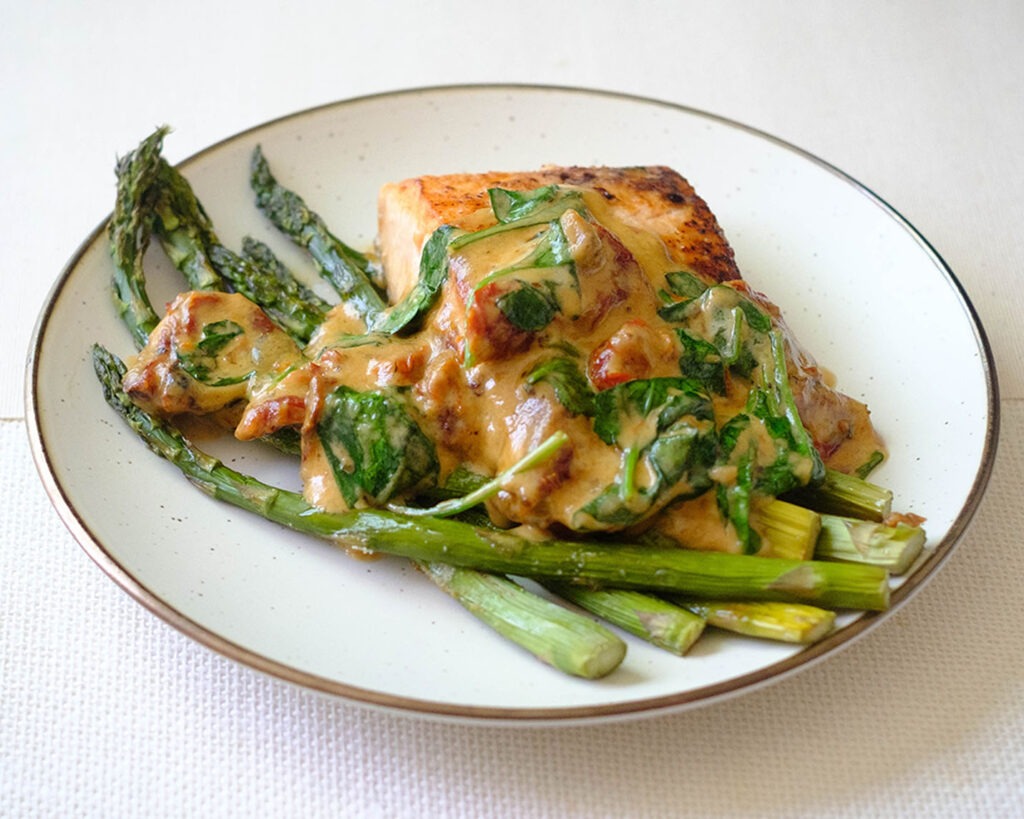
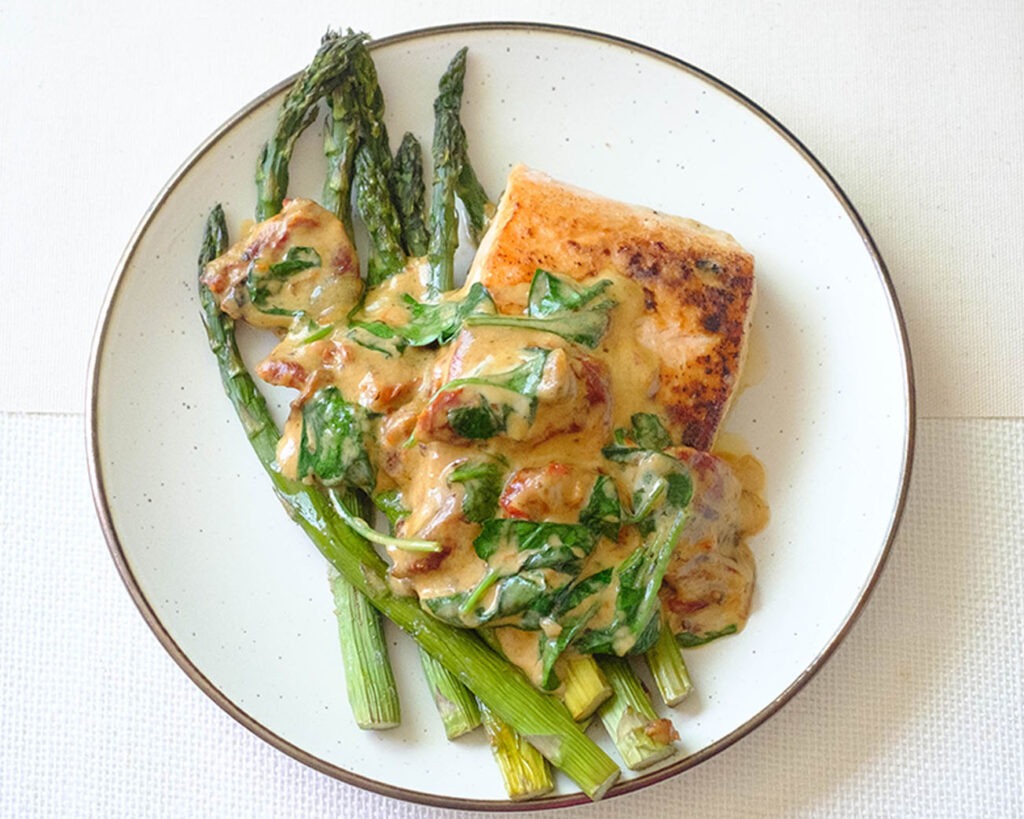
round plate with salmon with creamy sun-dried tomato sauce and asparagus

Pan-Seared Salmon with Creamy Sun-Dried Tomato Sauce and Roasted Asparagus is a fantastic meal prep easy salmon recipe option that brings the flavors of a high-end restaurant right to your own dining table. With its combination of succulent salmon, tangy sun-dried tomatoes, creamy sauce, and crispy asparagus, this dish is a true winner.

This post may contain affiliate links. Please see our privacy policy for details.

round plate with salmon with creamy sun-dried tomato sauce and asparagus

Why This Recipe is Great for Meal Prep

Balanced Macronutrients: This dish contains a good balance of healthy fats, lean protein, and complex carbohydrates from the vegetables. Such balanced meals help regulate blood sugar levels, keep you satisfied, and prevent energy crashes.

Home-Cooked Control: Preparing this dish at home allows you to control the ingredients and portion sizes. It gives you the power to reduce sodium, unhealthy fats, and unnecessary additives often found in restaurant dishes.

Meal Prep Convenience: Preparing this dish in advance ensures you have a healthy and delicious option readily available during busy days. Having pre-portioned meals can help you avoid making less healthy choices when you’re short on time.

The PrepYoSelf Newsletter

To Prepare This Salmon Recipe You’ll Need

  • To start off, you’ll need some glorious salmon fillets. Opt for fresh, high-quality salmon that’s been sustainably sourced for the best flavor.
  • Next up, we’ve got garlic, the aromatic hero that adds a delightful punch to any dish.
  • Sun-dried tomatoes bring their unique tanginess to the table, infusing the creamy sauce with their concentrated flavor.
  • Speaking of the sauce, we’ll be incorporating some luxurious heavy cream to create a velvety texture that will make you feel like you’re dining in a five-star restaurant.
  • And to add a touch of vibrant green, we’ll toss in some fresh spinach, which beautifully complements the creaminess of the sauce.
  • Now, let’s not forget our lovely asparagus, a wonderful vegetable that roasts to perfection. It adds a delightful crunch and earthy flavor to this dish, making it a well-rounded and nutritious option.

round plate with salmon with creamy sun-dried tomato sauce and asparagus

Easy Recipe Steps to Make Pan-Seared Salmon

  1. Begin by searing the salmon fillets in a hot pan, achieving that perfect golden crust while keeping the fish moist and flaky on the inside.
  2. Next, remove it from the pan and set the salmon aside.
  3. In the same pan, sauté garlic until fragrant, then add the sun-dried tomatoes and heavy cream. Then, add the salmon back to the sauce to finish cooking. Allow the sauce to simmer and thicken, infusing it with the irresistible flavors of garlic and tomatoes.
  4. Lastly, toss in the spinach, letting it wilt gently into the creamy goodness.
  5. Meanwhile, roast the asparagus in the oven.

Reference the recipe card below for detailed instructions.

round plate with salmon with creamy sun-dried tomato sauce and asparagus

Meal Prep Tips

  • Now, let’s talk about meal prep and storage tips. This dish is a wonderful option for preparing in advance, allowing you to enjoy a restaurant-quality meal throughout the week. Once cooked, divide the salmon, sauce, and roasted asparagus into individual meal-sized portions.
  • Store them in airtight containers in the refrigerator for up to 3 days, or freeze them for longer-term storage.
  • To elevate this meal even further, consider pairing it with some fluffy quinoa or fragrant jasmine rice. The grains will soak up the luscious sauce, creating an irresistible combination. Additionally, a fresh side salad with a zesty vinaigrette will provide a refreshing contrast to the creamy flavors of the dish.
  • Reheating: When ready to enjoy, gently reheat the salmon and asparagus in the oven at a low temperature to retain their texture and flavors. Alternatively, you can microwave them briefly, taking care not to overcook them.

glass containers with salmon with creamy sun-dried tomato sauce and asparagus

Salmon and Asparagus

Pan-Seared Salmon with Creamy Sun-Dried Tomato Sauce and Asparagus

This salmon recipe is a combination of succulent salmon, tangy sun-dried tomatoes, creamy sauce, and crispy asparagus.
No ratings yet
Prep Time 5 minutes
Cook Time 20 minutes
Course dinner, Main Course
Cuisine American, Italian
Servings 2

Equipment

  • knife
  • cutting board
  • saute pan
  • spatula
  • sheet pan
  • oven

Ingredients
  

Salmon and Seasoning

  • 12 oz salmon
  • 1/4 tsp garlic powder
  • 1/4 tsp salt
  • 1 tbsp olive oil

Sun-Dried Tomato Sauce

  • 2 each garlic cloves (minced)
  • 1/4 cup sun-dried tomatoes (sliced)
  • 1/2 cup heavy cream
  • 1/4 tsp garlic powder
  • 1/4 tsp salt
  • 4 cups baby spinach

Asparagus and Seasonings

  • 12 each asparagus spears
  • 1/4 tsp garlic powder
  • 1/4 tsp salt
  • 1 tbs olive oil

Instructions
 

Asparagus

  • Pre-heat the oven to 400F
  • Place the asparagus on a sheet pan. Sprinkle the asparagus with the seasonings and drizzle with olive oil
  • Bake in the oven for 10-12 minutes

Salmon and Sauce

  • Season the salmon and add oil to a saute pan on medium high heat. Sear the salmon, flesh side down first, and sear for about 2 to 3 minutes
  • Next, flip it over, skin side down, and sear for another 2 to 3 minutes. Then, remove the salmon from the pan and set it aside on a plate
  • Add the sliced garlic cloves and sliced sun-dried tomatoes and stir for about 30 seconds
  • Then, pour in the heavy cream and season with garlic and salt
  • Place the salmon back in the sauce, skin side down, and simmer on low medium heat for about 10 minutes
  • Finally, add the baby spinach and mix it in the sauce until it wilts
  • Serve the salmon and sauce with the roasted asparagus

Similar Recipes

salmon beet salad

Citrus Ginger Salmon with Roasted Beets

salmon and watermelon salad

Grilled Salmon with Watermelon Salad

salmon salad

Salmon Stuffed Avocado Salad

You Might Also Like

Frequently Asked Questions

Can I use frozen salmon fillets for this recipe?

Absolutely! While fresh salmon is ideal, you can definitely use frozen fillets. Just make sure to thaw them thoroughly before cooking to ensure even cooking and optimal texture.


Can I substitute the heavy cream with a lighter alternative?

Yes, you can! If you prefer a lighter version, you can substitute heavy cream with alternatives like half-and-half or Greek yogurt. Keep in mind that the sauce’s texture and richness may vary slightly.


How do I know when the salmon is cooked through?

The cooking time for salmon will depend on the thickness of the fillets. As a general guideline, salmon is cooked through when it flakes easily with a fork and reaches an internal temperature of 145°F (63°C)

Posted on Leave a comment

Smoked Salmon Quesadilla with Strawberry Salsa

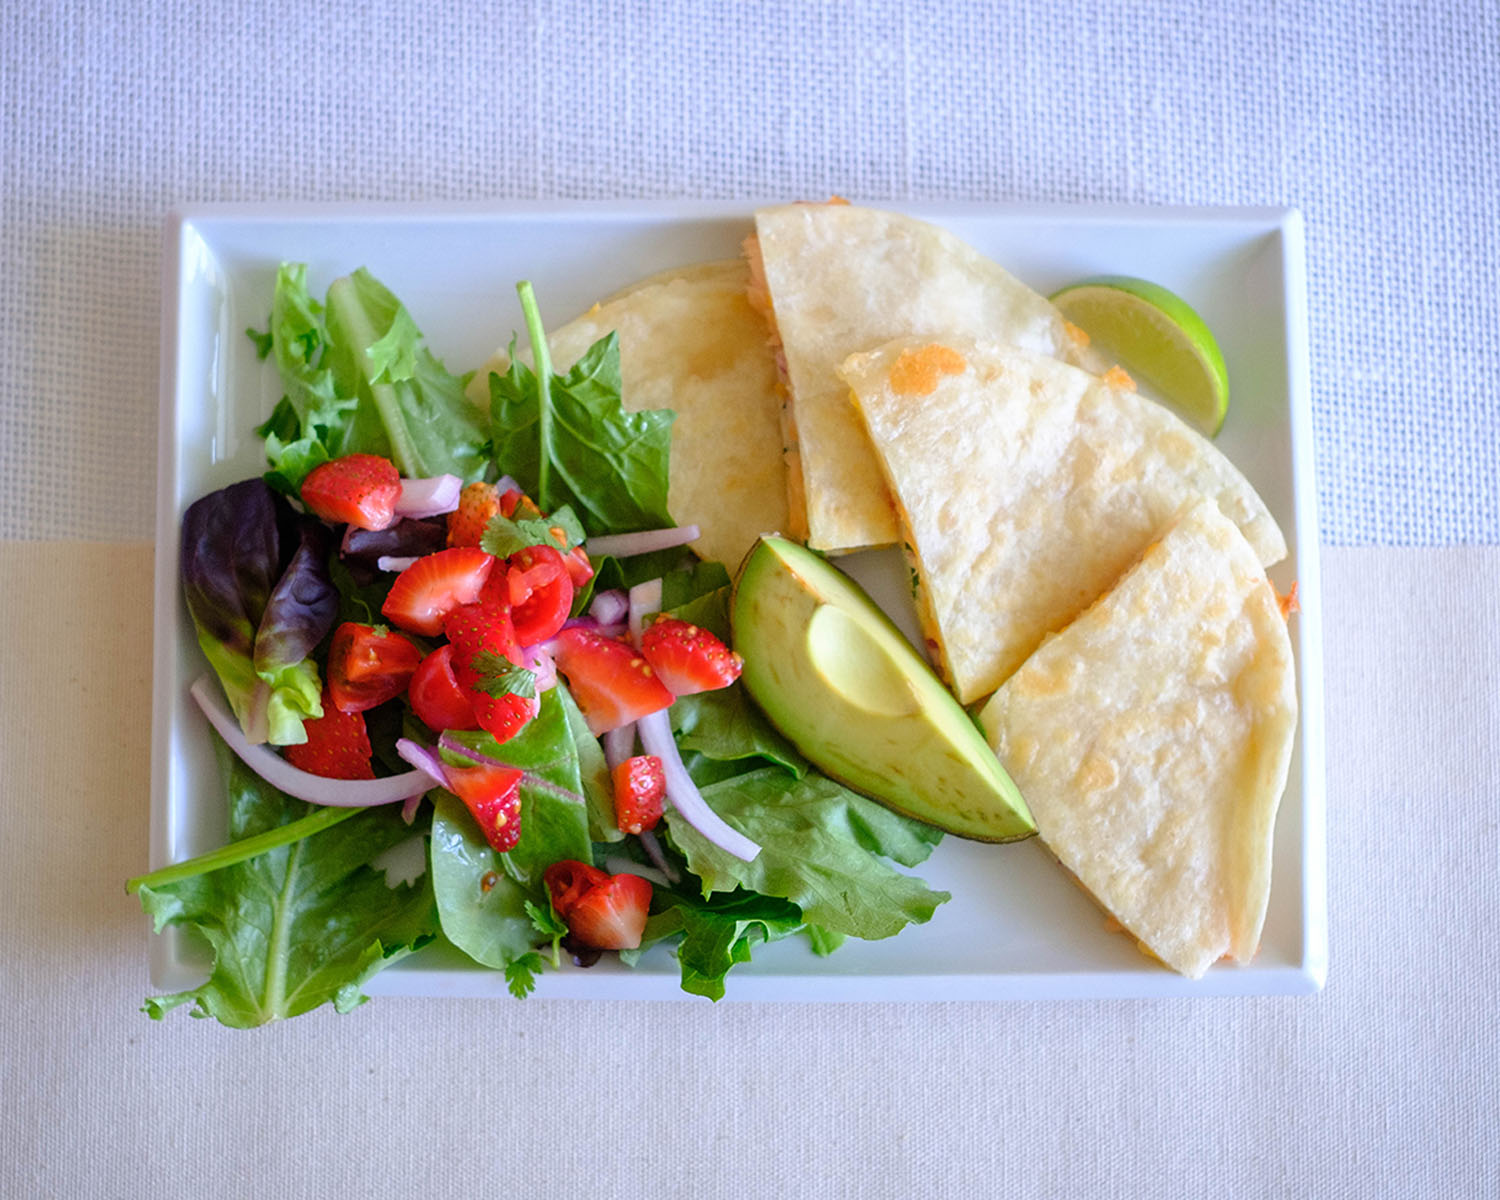
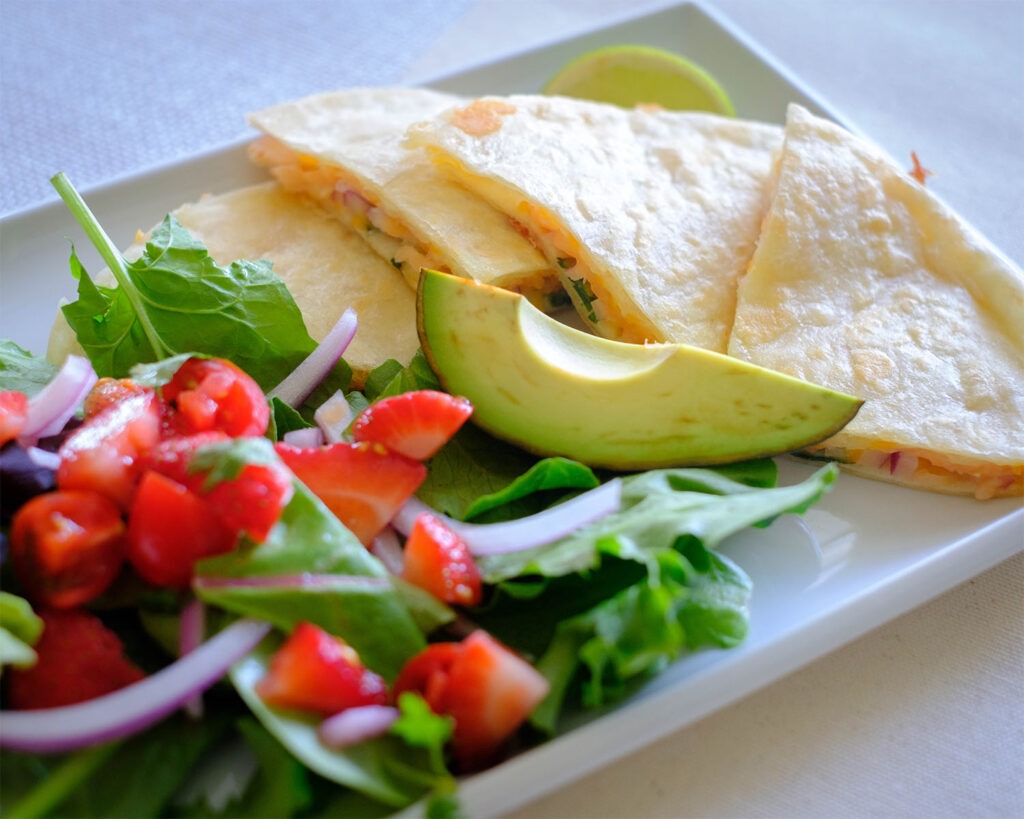
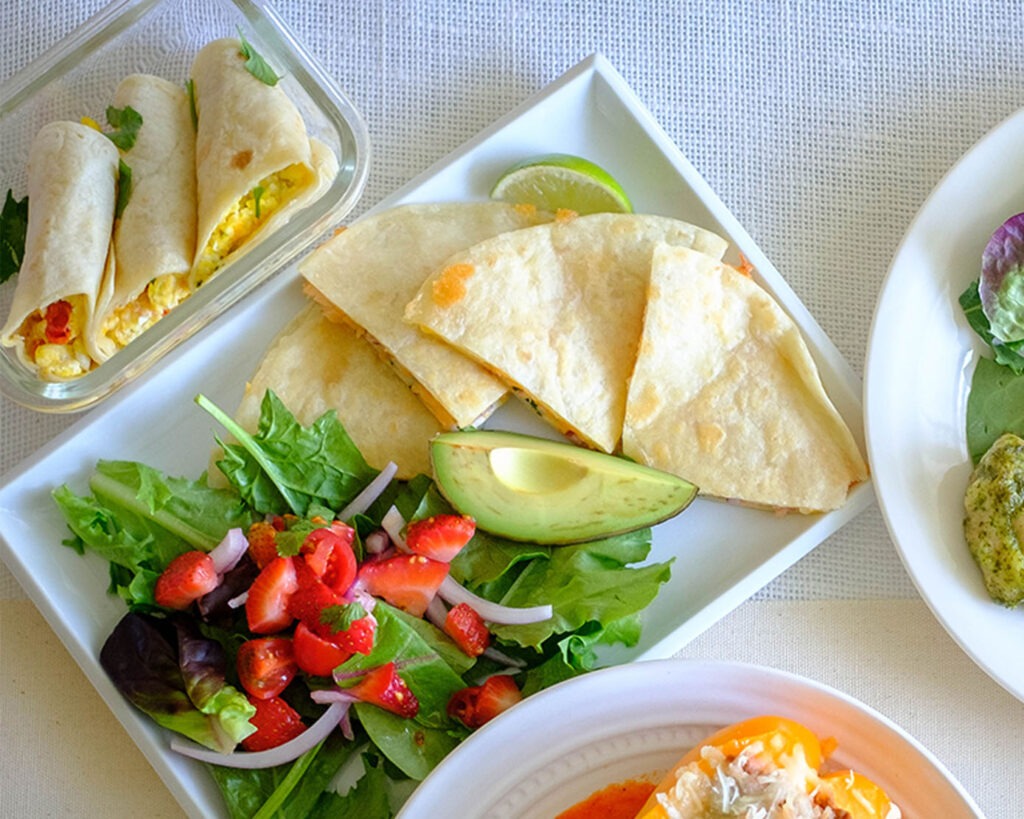
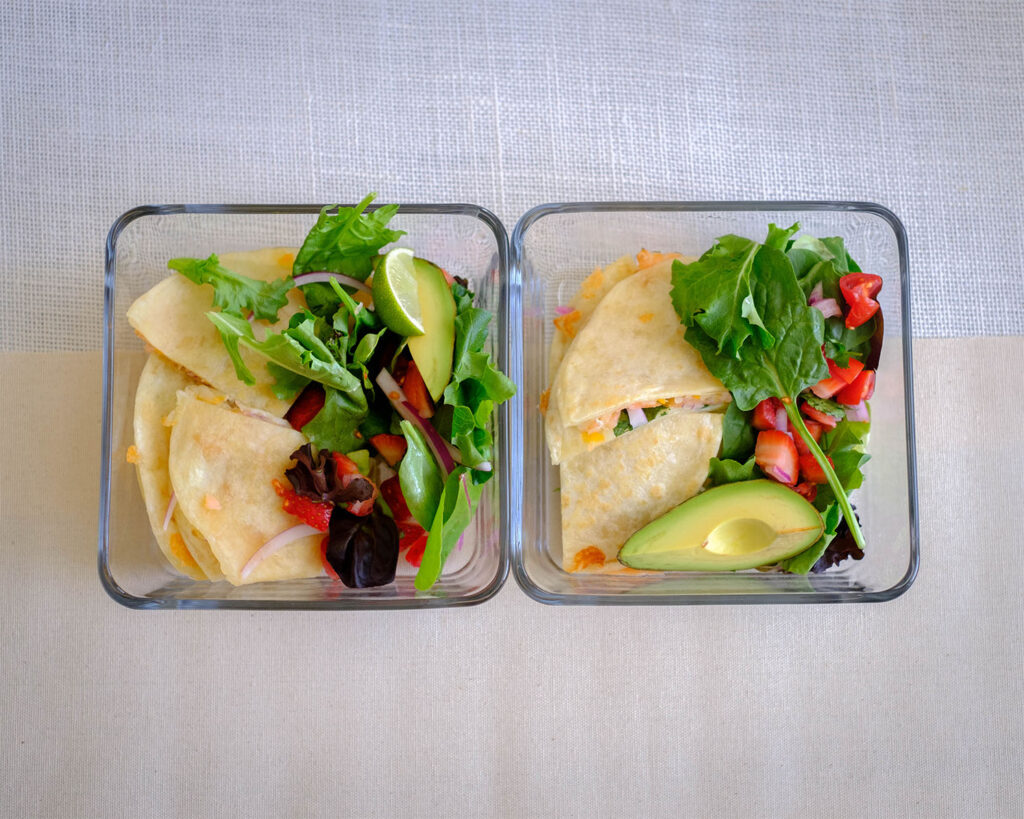
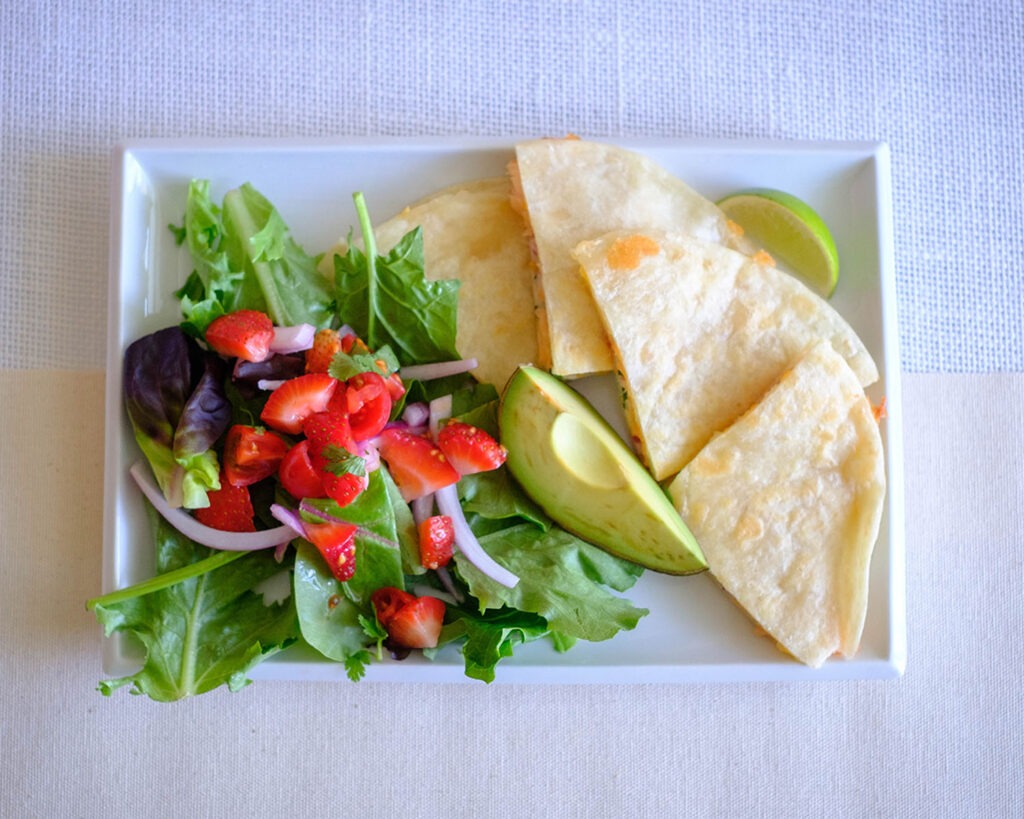
plate with salmon quesadilla and strawberry salsa salad

This post may contain affiliate links. Please see our privacy policy for details.

Smoked Salmon Quesadilla with Strawberry Salsa is a combination match made in culinary heaven that will take your meal prep game to a whole new level of deliciousness. With this exciting meal prep idea, you’ll have a delightful and restaurant-quality meal ready to go whenever hunger strikes. The combination of smoky salmon, melted cheese, and refreshing strawberry salsa is truly a taste sensation that will make your taste buds sing. So, why settle for boring meal prep when you can have a flavor-packed adventure right at your fingertips?

plate with salmon quesadilla and strawberry salsa salad

Why You Need to Make This

Let’s dive into why this restaurant-quality smoked salmon quesadilla with strawberry salsa is not only delicious but also healthy and budget-friendly.

  • Firstly, let’s talk about its health benefits. Smoked salmon is an excellent source of high-quality protein, omega-3 fatty acids, and various vitamins and minerals. Omega-3 fatty acids are known for their heart-healthy properties and can help reduce inflammation in the body. Additionally, the strawberry salsa adds a dose of antioxidants and vitamin C, while ingredients like avocado and cilantro provide healthy fats and beneficial nutrients.
  • Now, let’s talk about the budget-friendly aspect. Making restaurant-quality meals at home is often more cost-effective than dining out. Smoked salmon, while considered a gourmet ingredient, can be found at affordable prices, especially if you look for sales or discounts. Additionally, the quesadilla can be made using basic pantry staples like flour tortillas, shredded cheese, and onions, which are generally budget-friendly ingredients. You can also stretch your budget by using seasonal fruits and vegetables in the strawberry salsa, as they tend to be more affordable and flavorful
  • Meal prepping with this recipe can also help reduce food waste. You can portion out the quesadillas into individual servings and refrigerate or freeze them for later consumption. This way, you can avoid throwing away unused ingredients or having to order takeout on busy days, which can be both expensive and less healthy.

The PrepYoSelf Newsletter

Ingredients You’ll Need

  • Smoked Salmon is a rich, smoky flavor adds a delightful twist to the traditional quesadilla. Combined with the other ingredients, it creates a harmonious medley of flavors that will leave you craving more. Just imagine the creamy, slightly salty salmon blending with the gooey melted cheese. Are you salivating yet?
  • But wait, there’s more! We can’t forget about the refreshing strawberry salsa that elevates this dish to restaurant quality. Prepare the salsa by combining fresh, juicy strawberries, halved cherry tomatoes, finely chopped cilantro, creamy avocado chunks, and a squeeze of lime juice. The result is a vibrant, tangy salsa that perfectly complements the smoky richness of the quesadilla. It’s like a burst of summer in every bite!

plate with salmon quesadilla and strawberry salsa salad

How to Make Smoked Salmon Quesadillas

  1. To assemble the quesadilla, start by laying a tortilla on a plate. Sprinkle a generous amount of shredded cheese evenly across the tortilla, then layer on some thinly sliced red onions. Now, it’s time for the star ingredient—place some delectable smoked salmon slices on top. Finally, top it all off with more cheese and another tortilla.
  2. Grill the quesadilla for a few minutes on each side until the tortilla turns a beautiful golden brown and the cheese melts into a glorious ooey-gooey goodness. The combination of crispy tortilla, melted cheese, and flavorful smoked salmon will have you drooling before you even take your first bite.

Reference the recipe card below for detailed instructions.

plate with salmon quesadilla and strawberry salsa salad

Meal Prep Tips for Salmon Quesadillas

  • The great thing about these smoked salmon quesadillas is that they can be prepared ahead of time and enjoyed throughout the week. Once cooked, allow them to cool completely before storing them in an airtight container in the refrigerator. When you’re ready to enjoy, simply reheat them in a skillet over medium-low heat until warmed through.
  • If you’re looking to freeze them for longer storage, wrap each quesadilla tightly in plastic wrap and place them in a freezer bag. They can be frozen for up to a month for best quality. To reheat, thaw them in the refrigerator overnight, and then follow the same skillet method mentioned earlier.

plate with salmon quesadilla and strawberry salsa salad

Quesadilla

Smoked Salmon Quesadilla with Strawberry Salsa and Salad

This smoked salmon quesadilla with strawberry salsa offers a burst of flavor and restaurant-quality experience.
No ratings yet
Prep Time 5 minutes
Cook Time 15 minutes
Course lunch, Main Course, Salad
Cuisine American, Mexican
Servings 2

Equipment

  • knife
  • cutting board
  • mixing bowls
  • saute pan
  • spatula

Ingredients
  

Quesadilla

  • 4 oz smoked salmon
  • 4 each flour tortillas
  • 1/2 cup shredded cheddar cheese
  • 1/2 cup shredded mozzarella cheese
  • 1/4 cup red onions (diced)
  • 1 tbsp olive oil

Salad and strawberry salsa

  • 4 cups spring mix salad
  • 1 each avocado (peeled and diced)
  • 1/2 cup strawberries (diced)
  • 1/2 cup cherry tomatoes (sliced)
  • 1/4 cup cilantro (chopped)
  • 1 each lime (juiced)
  • 1/4 tsp salt

Instructions
 

Quesadilla

  • For each quesadilla, layer the following ingredients on the bottom tortillas: bottom layer cheese, red onions, cilantro, smoked salmon, then top it off with the top layer cheese, and place another tortilla on top
  • Heat a pan on medium heat and add oil. Place the quesadilla on a pan and cook until the tortilla is golden brown and the cheese melts (about 1 to 2 minutes on each side)
  • Remove the quesadilla from the saute pan and cut into 4 wedges

Strawberry Salsa and Salad

  • In a bowl, mix together the strawberries, cherry tomatoes, cilantro, avocado, and juice of a lime. Season with salt and mix it all together
  • Serve it on top of the spring mix along with the quesadilla wedges

Similar Recipes

cilantro chicken

Cilantro Lime Chicken Salad with Strawberry Salsa

sweet and sour chicken wings

Air Fryer Sweet and Sour Chicken Wings

stuffed primavera chicken

Primavera Stuffed Chicken Breasts

You Might Also Like

Frequently Asked Questions

Can I use a different type of fish instead of smoked salmon?

Absolutely! While smoked salmon adds a unique flavor, you can experiment with other types of fish such as grilled or baked salmon, trout, or even shrimp for a different twist.


Can I use corn tortillas instead of flour tortillas?

Definitely! Corn tortillas can be a great alternative if you prefer their taste and texture. They will add a slightly different flavor profile to the quesadilla but will still pair well with the smoked salmon and strawberry salsa.


Can I freeze the strawberry salsa?

It’s not recommended to freeze the strawberry salsa, as the texture and freshness of the strawberries may be compromised upon thawing. It’s best enjoyed fresh or stored in the refrigerator for a couple of days

Posted on Leave a comment

Tuna Stuffed Deviled Eggs

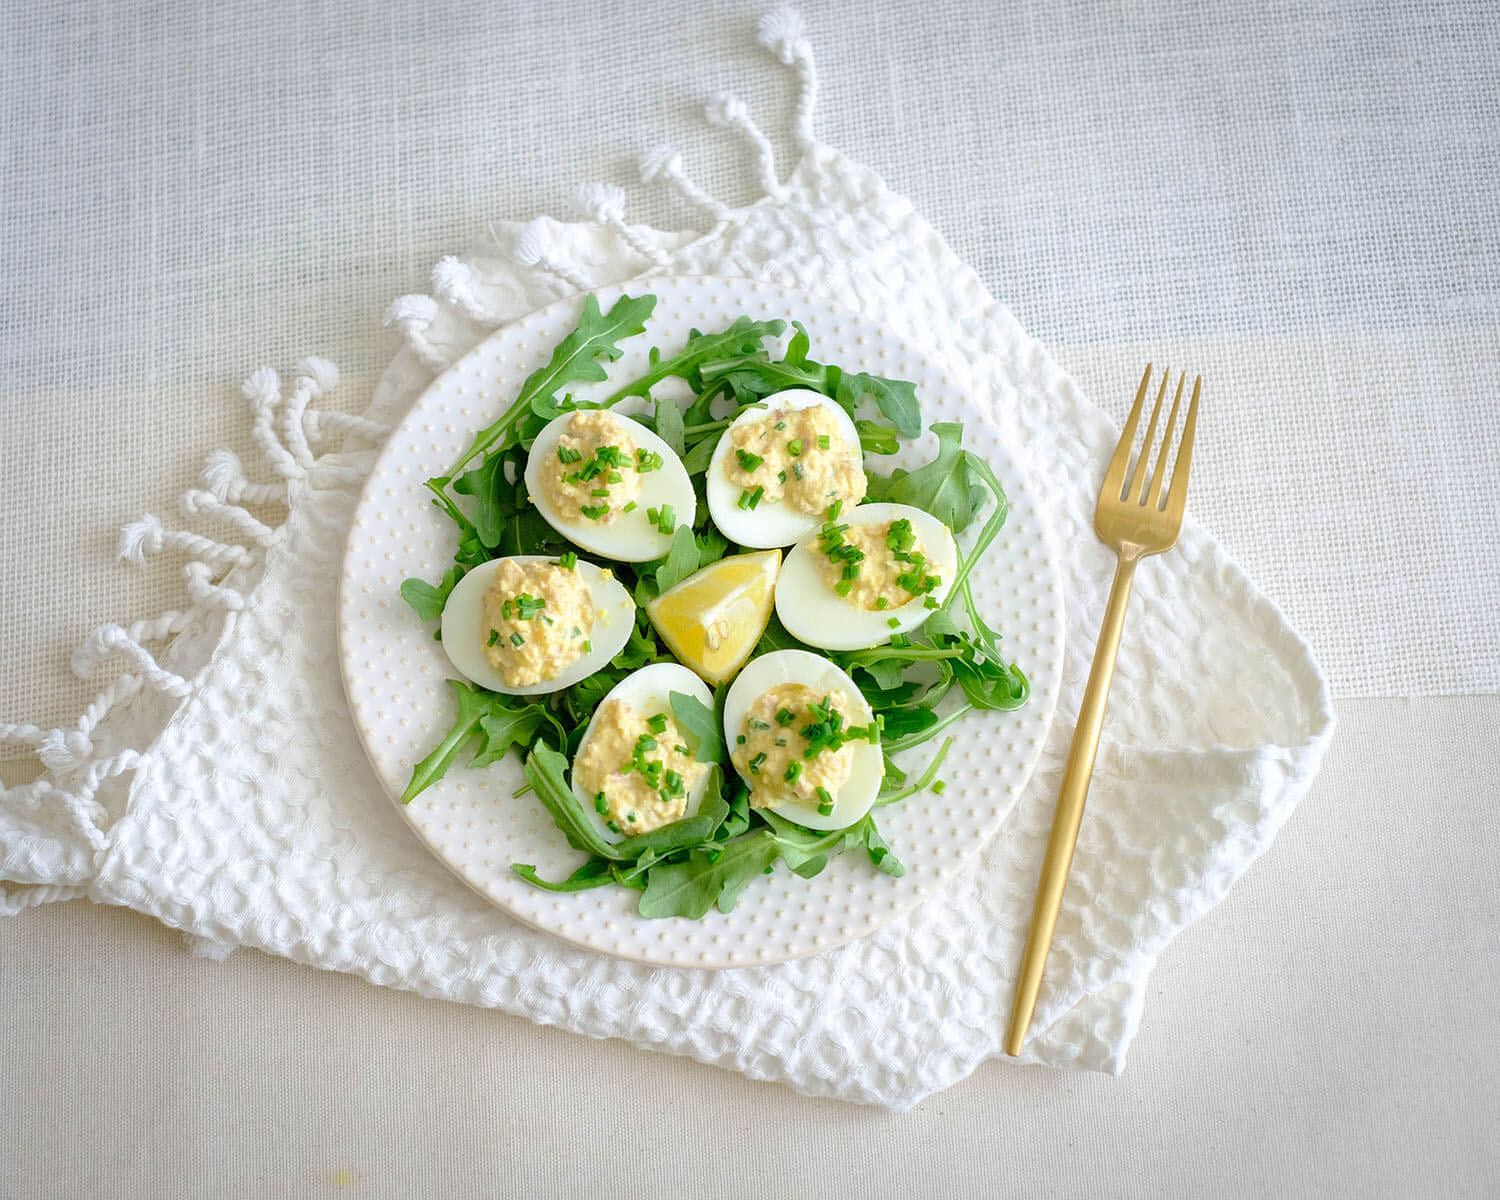
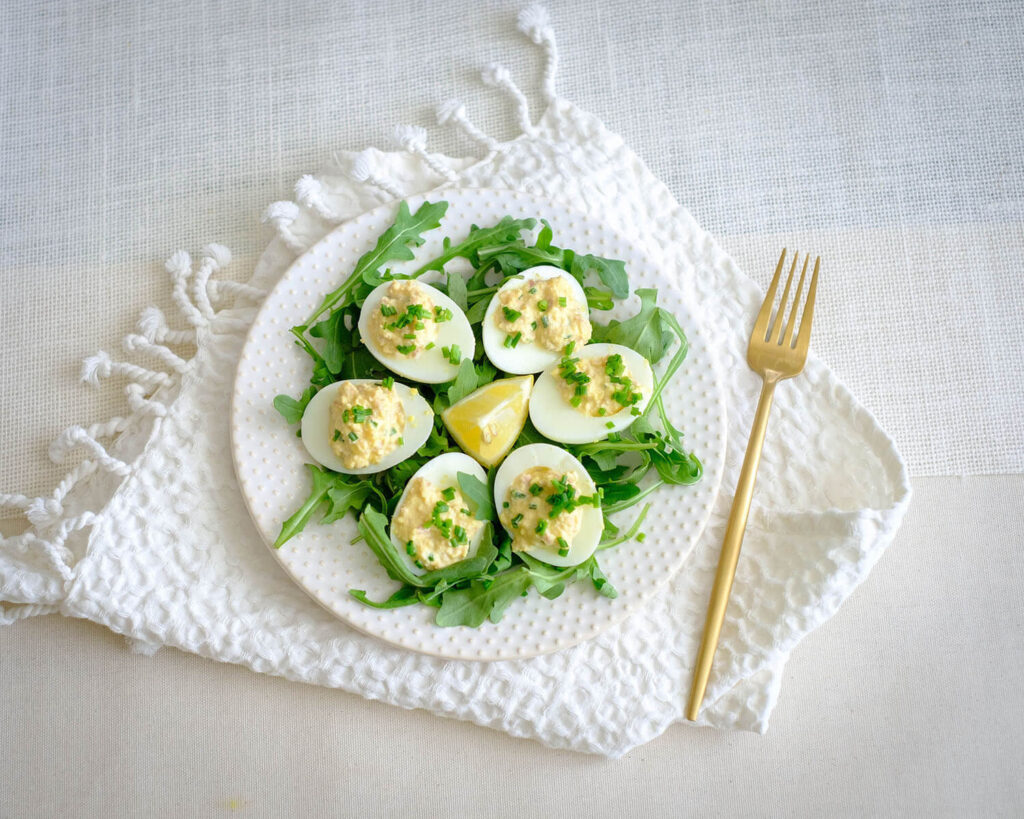
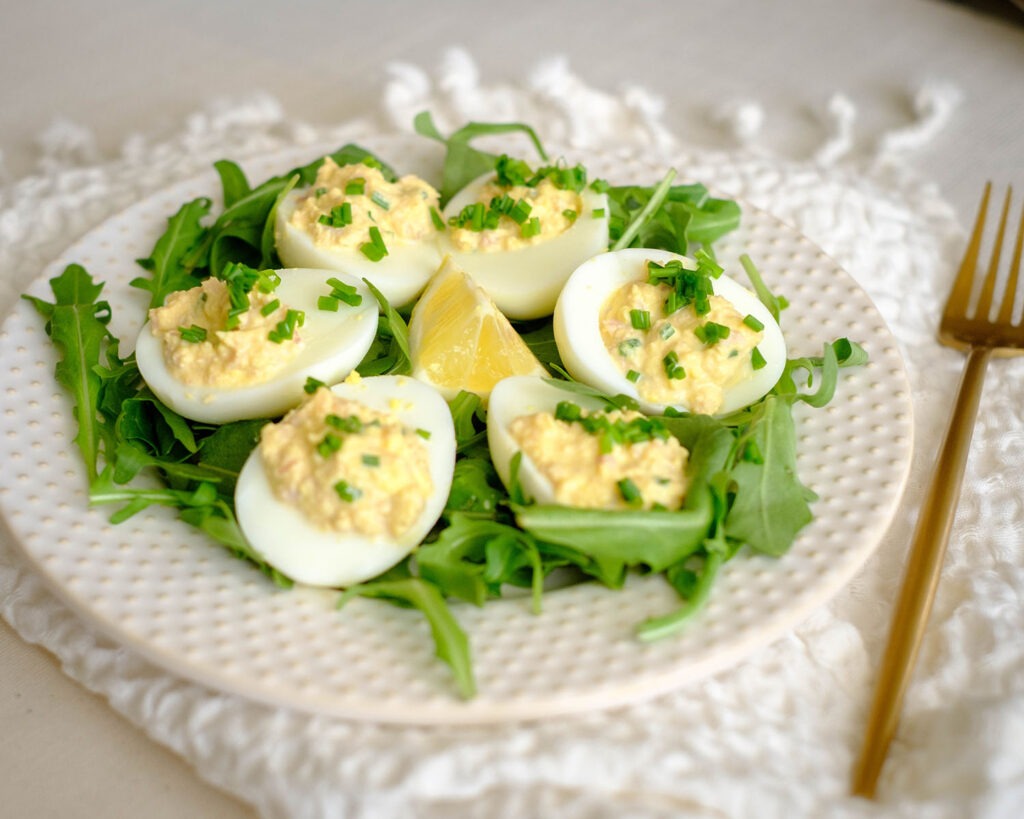
round plate with deviled eggs and arugula salad

Greetings, food enthusiasts! Today, I’m excited to share with you a fabulous recipe that not only adds a burst of flavor to your meal prep routine but also offers numerous health and cost benefits. Get ready to indulge in the delectable goodness of Tuna Stuffed Deviled Eggs, a low carb meal that will keep your taste buds dancing throughout the week!

This post may contain affiliate links. Please see our privacy policy for details.

round plate with deviled eggs and arugula salad for a low carb meal

Why We Love This Recipe

  1. Health Benefits: When it comes to meal prep, it’s essential to choose recipes that offer a balance of nutrition and taste and a low carb meal. Tuna Stuffed Deviled Eggs perfectly fit the bill. Eggs are a fantastic source of protein, providing you with the energy you need to conquer your day. Additionally, eggs are rich in vitamins such as B12, selenium, and choline, which promote brain health and help maintain a healthy nervous system.
  2. The inclusion of canned tuna takes the nutritional profile up a notch. Tuna is packed with omega-3 fatty acids, which have been linked to numerous health benefits, including reducing the risk of heart disease and promoting brain function. It is also an excellent source of lean protein, making it an ideal choice for those aiming to build or maintain muscle mass.
  3. Cost Benefits: One of the major advantages of this recipe is its cost-effectiveness. Eggs and canned tuna are incredibly affordable and readily available in most grocery stores. By utilizing these budget-friendly ingredients, you can create a delicious and satisfying meal prep option without breaking the bank.

The PrepYoSelf Newsletter

Let’s delve into the simple ingredients that make Tuna Stuffed Deviled Eggs shine:

  • Eggs: A versatile and nutrient-dense ingredient, eggs provide protein, vitamins, and minerals essential for overall health and well-being. They form the sturdy base for the delightful filling.
  • Canned Tuna: Canned tuna adds a burst of umami flavor and contributes heart-healthy omega-3 fatty acids. Opt for sustainable and responsibly sourced tuna for the best quality.
  • Red Onions: You can use any kind of onions.
  • Mayonnaise: Creamy and luscious mayonnaise binds the filling together while imparting a smooth texture. Choose a high-quality mayonnaise or consider using a lighter alternative like Greek yogurt or avocado mayo.
  • Lemon: Fresh lemon juice brightens up

round plate with deviled eggs and arugula salad for a low carb meal

Basic Steps to Prepare Tuna Deviled Eggs

  1. Boil the eggs for 6 to 8 minutes. Meanwhile, in a small bowl mix together the lemon juice, dijon mustard, olive oil, garlic powder, and salt until well blended
  2. In a bowl, add the tuna and half of the egg yolks (discard the rest). Then, mix in the mayonnaise, lemon juice, green onions, salt, and mix until all the ingredients have mixed well
  3. Use a small spoon to stuff the tuna egg salad mixture back into the center of the egg whites.

Reference the recipe card below for detailed instructions.

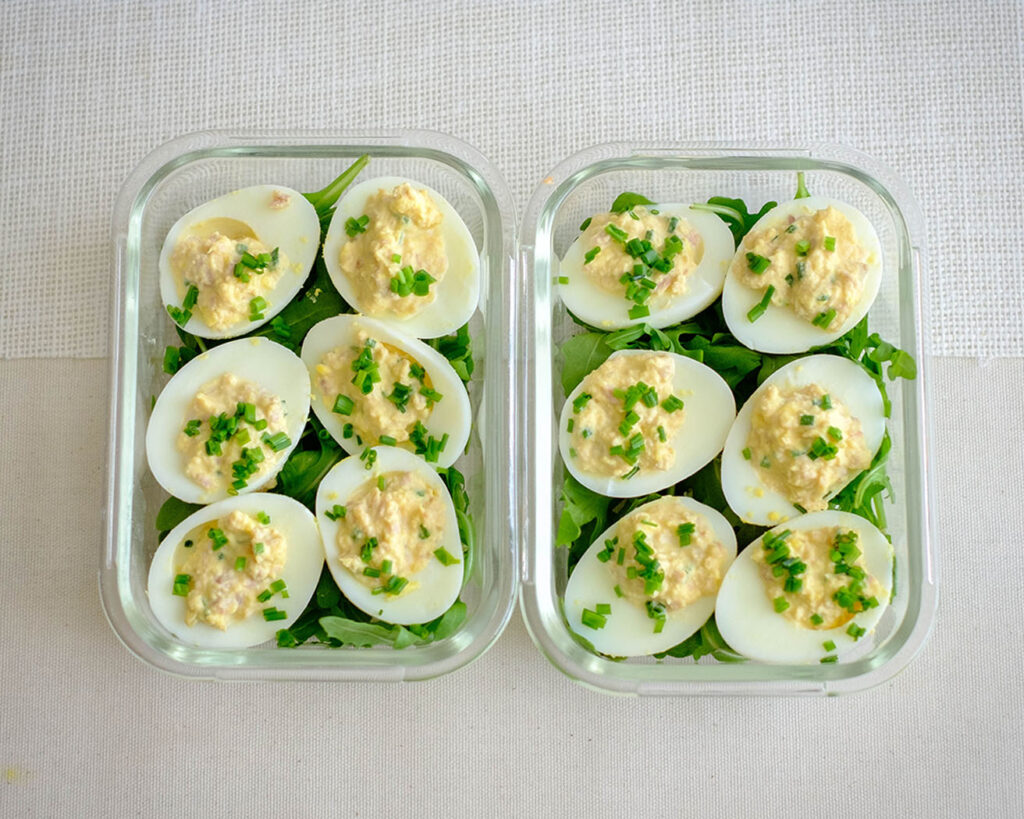
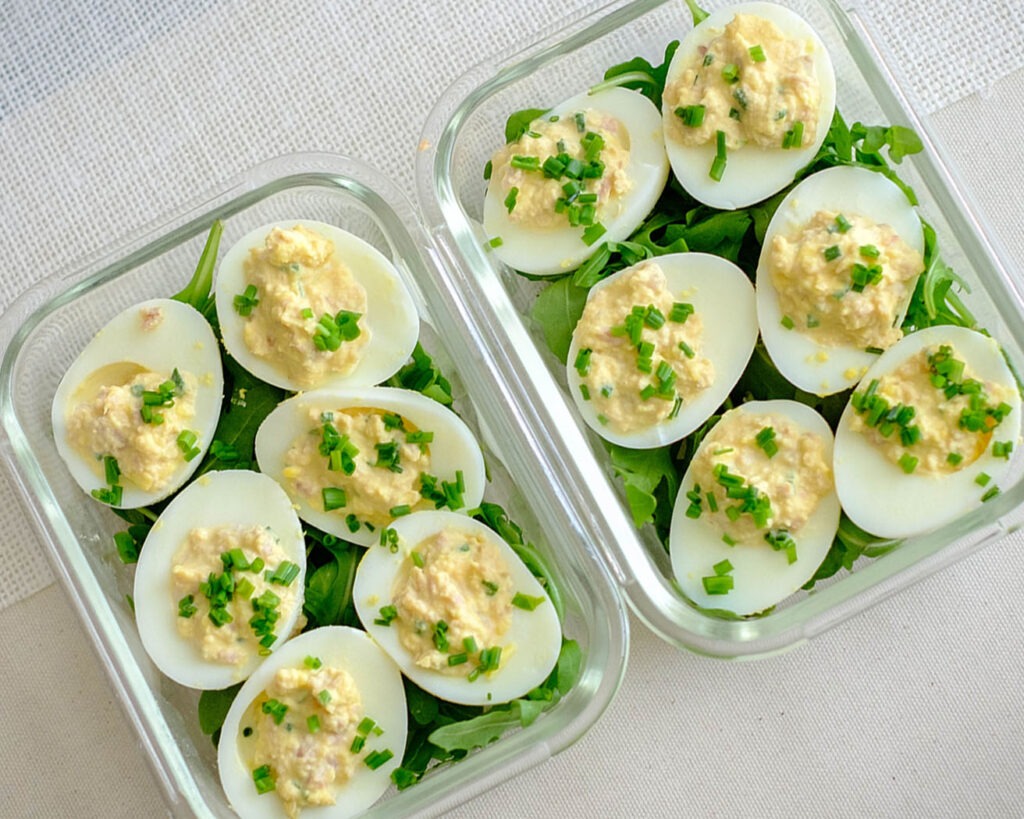
glass meal prep containers with deviled eggs and arugula salad for a low carb meal

Low Carb Meal Prep Tips for A Tuna Stuffed Deviled Eggs

  • To ensure your Tuna Stuffed Deviled Eggs stay fresh and flavorful, here are some storage tips: Store the deviled eggs in an airtight container in the refrigerator. They can be kept for up to 3-4 days.If you plan to eat them later in the week, consider storing the filling and the egg whites separately. Assemble them just before eating to maintain the perfect texture.
  •  Freezing the deviled eggs is not recommended, as the texture and consistency may be compromised.
  • Pairing Suggestions: While Tuna Stuffed Deviled Eggs are delicious on their own, they can be paired with various sides to create a well-rounded meal. Here are some ideas: 1) Crisp salad greens with a tangy vinaigrette. 2) Sliced avocado for a creamy and nutritious addition. 3) Whole-grain bread or crackers for a satisfying crunch. 4)Pickles or olives to add a touch of brininess.

glass meal prep containers with deviled eggs and arugula salad for a low carb meal

eggs

Tuna Stuffed Deviled Eggs

The combination of creamy tua filling and the natural richness of eggs creates a savory flavor that you can enjoy for lunch!
No ratings yet
Prep Time 5 minutes
Cook Time 15 minutes
Course lunch, Main Course
Cuisine American
Servings 2

Equipment

  • knife
  • cutting board
  • boiling pot
  • mixing bowl
  • spoon

Ingredients
  

  • 6 each large eggs
  • 2.6 oz canned tuna
  • 2 tbsp mayonnaise
  • 1 each lemon (juiced)
  • 1 tbsp green onions
  • 1/4 tsp garlic powder
  • 4 cups arugula

Lemon Dressing

  • 1 each lemon (juiced)
  • 4 tbsp olive oil
  • 1 tbsp dijon mustard
  • 1/4 tsp salt
  • 1/4 tsp garlic powder

Instructions
 

  • Boil the eggs for 6 to 8 minutes
  • Meanwhile, in a small bowl mix together the lemon juice, dijon mustard, olive oil, garlic powder, and salt until well blended
  • Once the eggs have cooked, let them cool in ice water
  • Then peel the eggs and slice the eggs in half and remove the egg yolk
  • In a bowl, add the tuna and half of the egg yolks (discard the rest). Then, mix in the mayonnaise, lemon juice, green onions, salt and mix until all the ingredients have mixed well
  • Use a small spoon to stuff the tuna egg salad mixture back into the center of the egg whites
  • Toss the arugula in the lemon dressing and serve it with the tuna stuffed eggs

Similar Recipes

chicken kale salad

Grilled Honey Dijon Chicken and Kale Salad

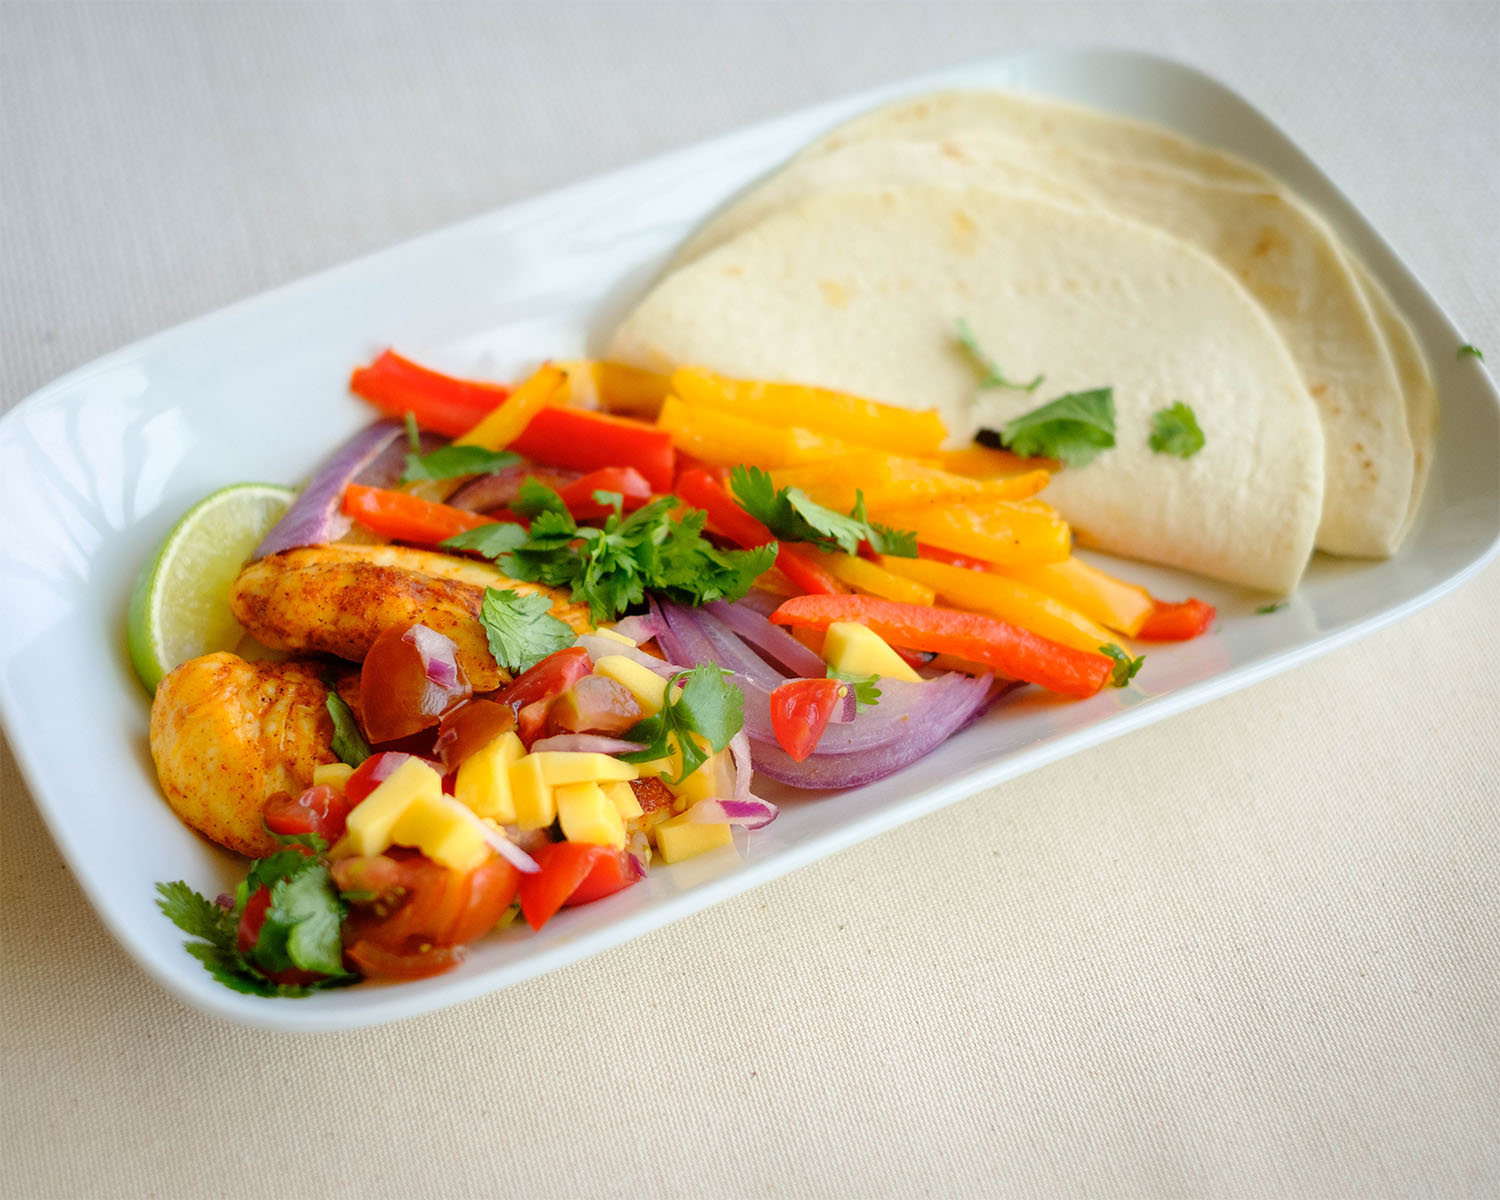
chicken fajitas

Sheet Pan Chicken Fajitas with Mango Salsa

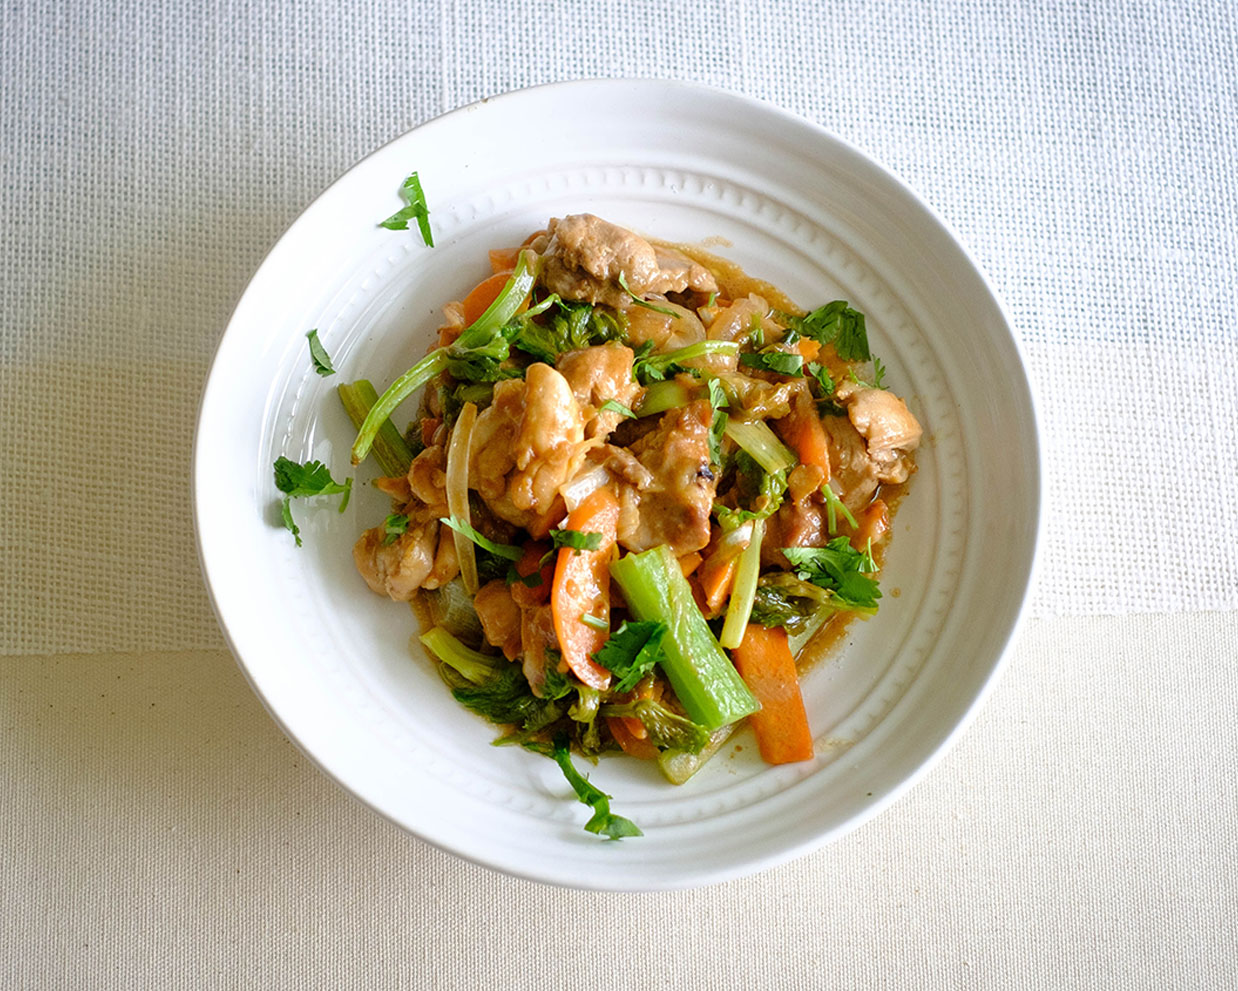
peanut chicken

Peanut Chicken Stir Fry

You Might Also Like

Frequently Asked Questions

Can I substitute mayonnaise with a healthier alternative?

Absolutely! If you’re looking for a healthier option, you can replace mayonnaise with Greek yogurt, avocado mayo, or even mashed avocado. These alternatives provide a creamy texture while reducing the overall calorie and fat content.


Can I add additional ingredients to the filling?

Certainly! Feel free to get creative and personalize the recipe to your liking. You can add ingredients like diced celery, chopped herbs (such as dill or parsley), minced garlic, or a touch of spicy mustard to elevate the flavor profile of the filling.


How can I make the deviled eggs spicier?

If you prefer a spicier kick, you can add ingredients such as hot sauce, cayenne pepper, or finely chopped jalapeños to the filling. Adjust the amount according to your desired level of heat.

Posted on Leave a comment

Stir Fry Shrimp with Spaghetti Squash

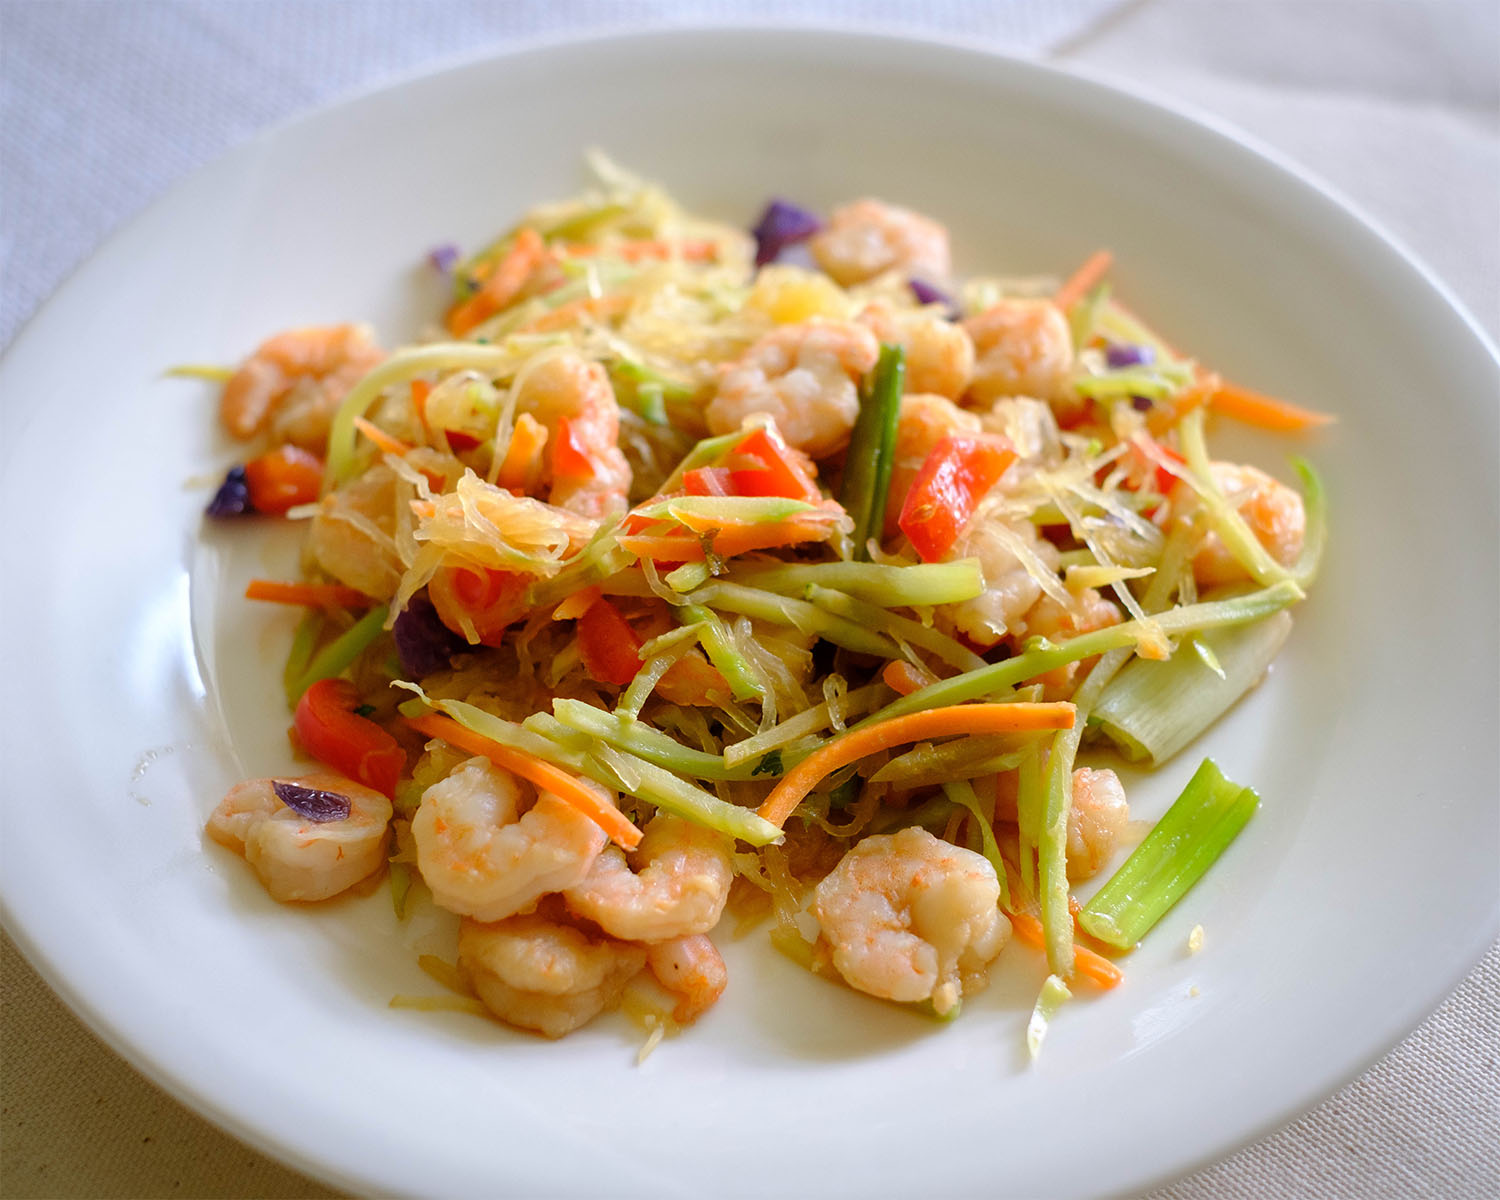
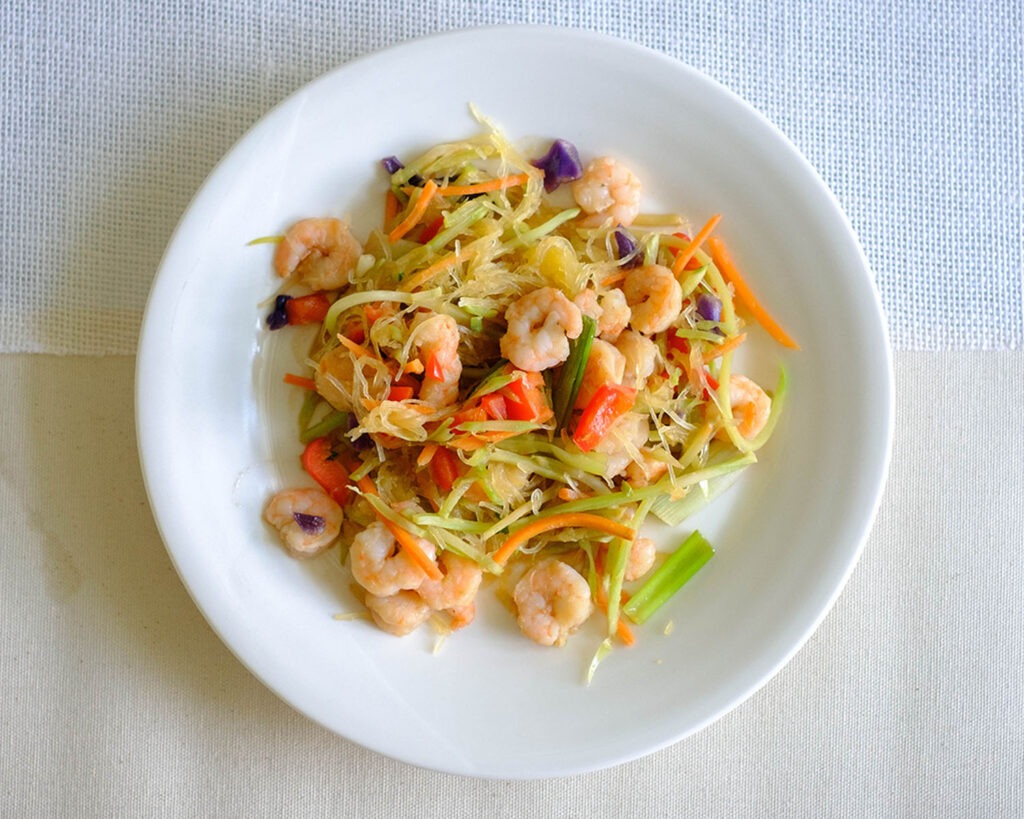
shrimp with spaghetti squash in round plate

If you’re on a quest for a low-carb alternative to lo mein that doesn’t compromise on flavor, our stir fry shrimp with spaghetti squash is your answer. With its low-carb content, delightful flavors, and nutritious ingredients, it’s a recipe that will satisfy your cravings and keep you on track with your health goals. Get ready to indulge in a guilt-free and scrumptious meal that will leave you wanting more!

This post may contain affiliate links. Please see our privacy policy for details.

Why You’ll Enjoy This Shrimp Stir Fry

  • Ah, the classic lo mein—a beloved dish that tempts us with its delightful combination of noodles and flavorful sauce. But for those of us watching our carb intake or following a low-carb lifestyle, indulging in traditional lo mein might not be an option. That’s where our stir fry shrimp with spaghetti squash comes to the rescue as a fantastic low-carb alternative!
  • The star of our dish, spaghetti squash, is a miraculous vegetable that transforms into noodle-like strands when cooked. These strands provide a similar texture to traditional lo mein noodles but without the hefty carb count. So, if you’re craving the satisfaction of a noodle-based stir fry while keeping your carb intake in check, this recipe is an excellent choice.

The PrepYoSelf Newsletter

Simple Ingredients You’ll Need

  • By substituting spaghetti squash for traditional lo mein noodles, you’ll significantly reduce the carbohydrate content of the dish. Spaghetti squash is relatively low in carbs and calories compared to wheat-based noodles, making it a healthier option. It’s also packed with essential vitamins, minerals, and dietary fiber, which contribute to a well-rounded and nutritious meal.
  • Moreover, the stir fry shrimp and veggies add a protein punch to the dish, making it a satisfying and well-balanced meal. Shrimp is not only delicious but also a lean source of protein that supports muscle growth and repair. Combined with the colorful medley of veggies, you’ll be enjoying a nutrient-dense meal that keeps you feeling full and satisfied.
  • Let’s not forget about the flavor! While traditional lo mein relies heavily on soy sauce for its savory taste, our low-carb stir fry brings its own unique blend of flavors. The combination of soy sauce, garlic powder, and lemon juice infuses the dish with a delightful umami profile, accentuating the natural sweetness of the shrimp and the freshness of the veggies. It’s a symphony of flavors that will have your taste buds dancing with joy.

shrimp with spaghetti squash in round plate

Easy Shrimp Stir Fry Recipe Steps

1. First, preheat your oven to 400°F (200°C). Take a large spaghetti squash and slice it in half lengthwise. Scoop out the seeds and pulp with a spoon. Remember to save those seeds for roasting later if you’re feeling adventurous!

2. Next, brush the flesh of the spaghetti squash with some olive oil and season it with salt and pepper. Place the halves face-down on a baking sheet lined with parchment paper. Pop them into the oven and let them roast for about 40-45 minutes or until the flesh becomes tender and easily shreds into strands with a fork.

3. Once your spaghetti squash is roasted to perfection, let it cool slightly before using a fork to scrape out those glorious spaghetti-like strands.

4. Now, let’s move on to the stir-fry itself. Heat oil over medium-high heat and add an array of vibrant and colorful veggies. You can go wild with your choices here, but some great options include bell peppers, broccoli florets, snap peas, and thinly sliced carrots. Sauté them for a few minutes until they’re tender-crisp, maintaining their vibrant colors and crunch.

5. In the same skillet, toss in your shrimp and cook them until they turn pink and opaque, which usually takes around 2-3 minutes per side. Now comes the part where we infuse our stir fry with incredible flavor. Drizzle some soy sauce over the veggies and sprinkle in a generous amount of garlic powder. Squeeze in the juice of fresh lemon to add a bright and tangy kick. Stir everything together and let the flavors meld for a minute or two.

6. Toss everything together gently, ensuring the flavors blend harmoniously, and the shrimp and veggies are evenly distributed.

Reference the recipe card below for detailed instructions.

shrimp with spaghetti squash in round plate

Meal Prep Tips

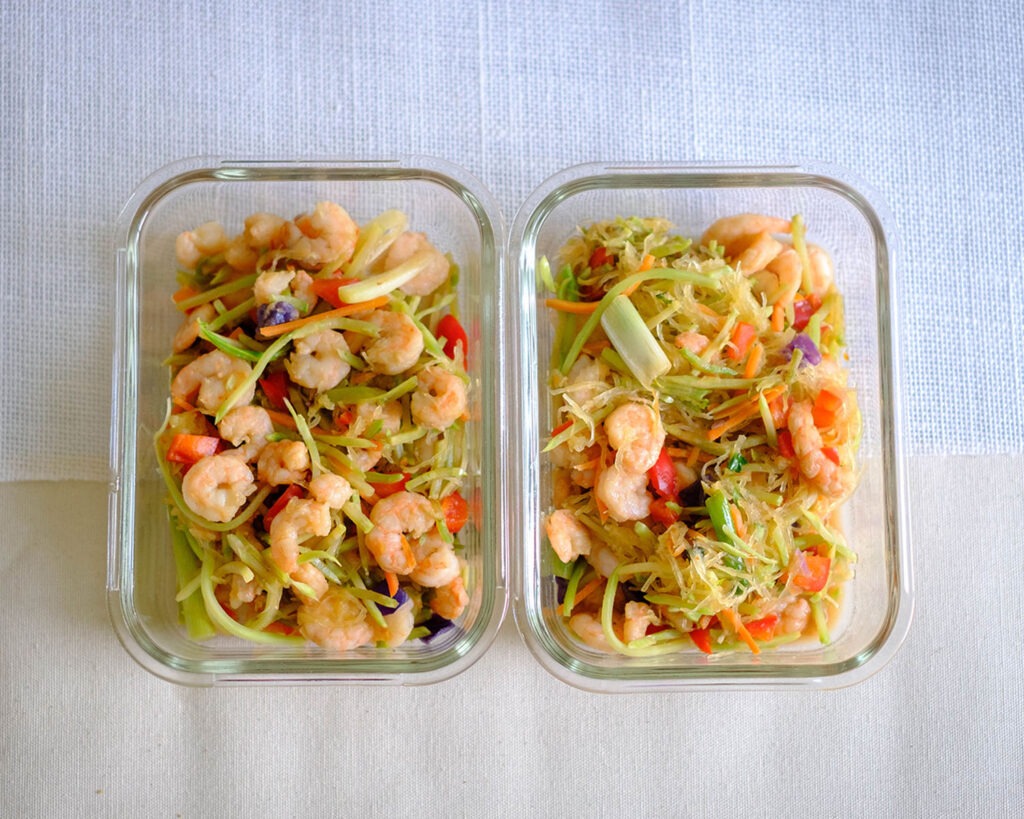
  • Store any leftovers in an airtight container in the refrigerator for up to 3-4 days. Reheat the stir fry in a skillet or microwave until heated through before serving.
  • Now, what if you find yourself with some leftover spaghetti squash? Fear not, my friends, because the possibilities are endless! You can use it as a base for another stir fry, toss it into salads for added texture, or even transform it into a delightful, guilt-free pasta substitute by pairing it with your favorite sauce and toppings.

shrimp with spaghetti squash in glass meal prep container

Stir-Fry Shrimp with Spaghetti Squash

No ratings yet
Prep Time 5 minutes
Cook Time 45 minutes
Course dinner
Cuisine American, Asian
Servings 2

Equipment

  • knife
  • cutting board
  • saute pan
  • spatula
  • sheet pan
  • oven

Ingredients
  

Spaghetti Squash Bake

  • 1/2 each small spaghetti squash (8 inches in length)
  • 1 tbsp olive oil

Stir Fry

  • 12 oz shrimp (peeled and deveined)
  • 1 cup broccoli slaw mix
  • 1 each red bell pepper (diced)
  • 1/4 tsp garlic powder
  • 2 tbsp soy sauce
  • 1 each lemon (juiced)
  • 1 tbsp olive oil

Instructions
 

Spaghetti Squash Bake

  • Pre-heat the oven to 400F
  • Carefully slice the spaghetti squash in half. Scoop out the seeds with a spoon
  • Place the squash, flesh side up, on a sheet pan. Coat with olive oil and bake in the oven for 40 minutes
  • Once the squash is cooked, let it cool before shredding the squash flesh with a fork

Stir Fry

  • Add oil to a saute pan on medium high heat and saute the the cooked squash, bell pepper and broccoli slaw mix until they soften.
  • Next, add the shrimp. Season with soy sauce, the spices, and juice of a lemon. Stir for another 3 to 4 minutes

Similar Recipes

shrimp kebab

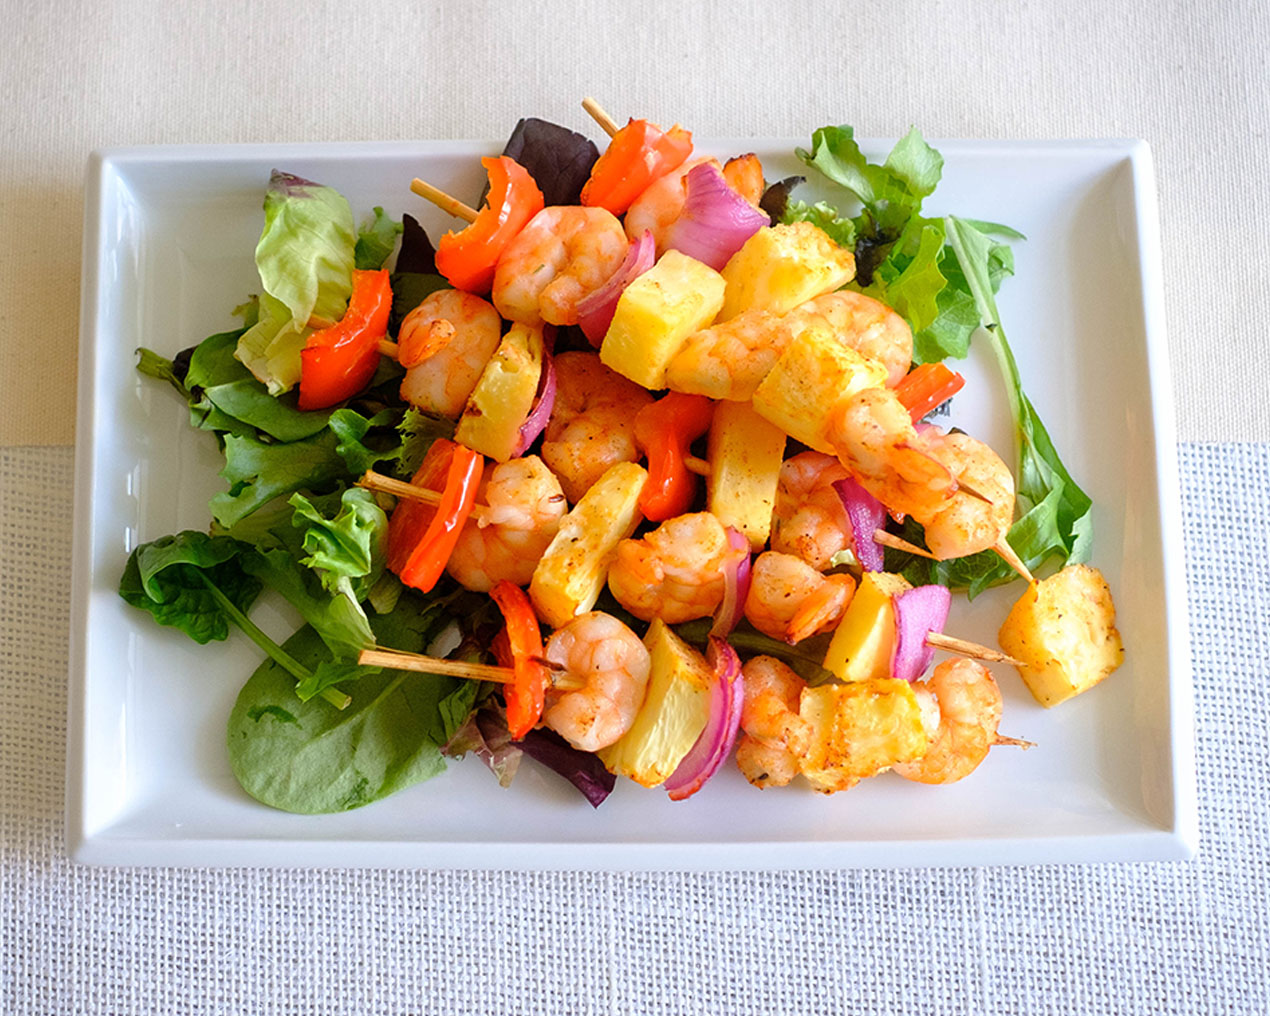
Air Fryer Shrimp and Pineapple Kebabs

shrimp and corn

Sheet Pan Shrimp with Cauliflower and Corn

salmon salad

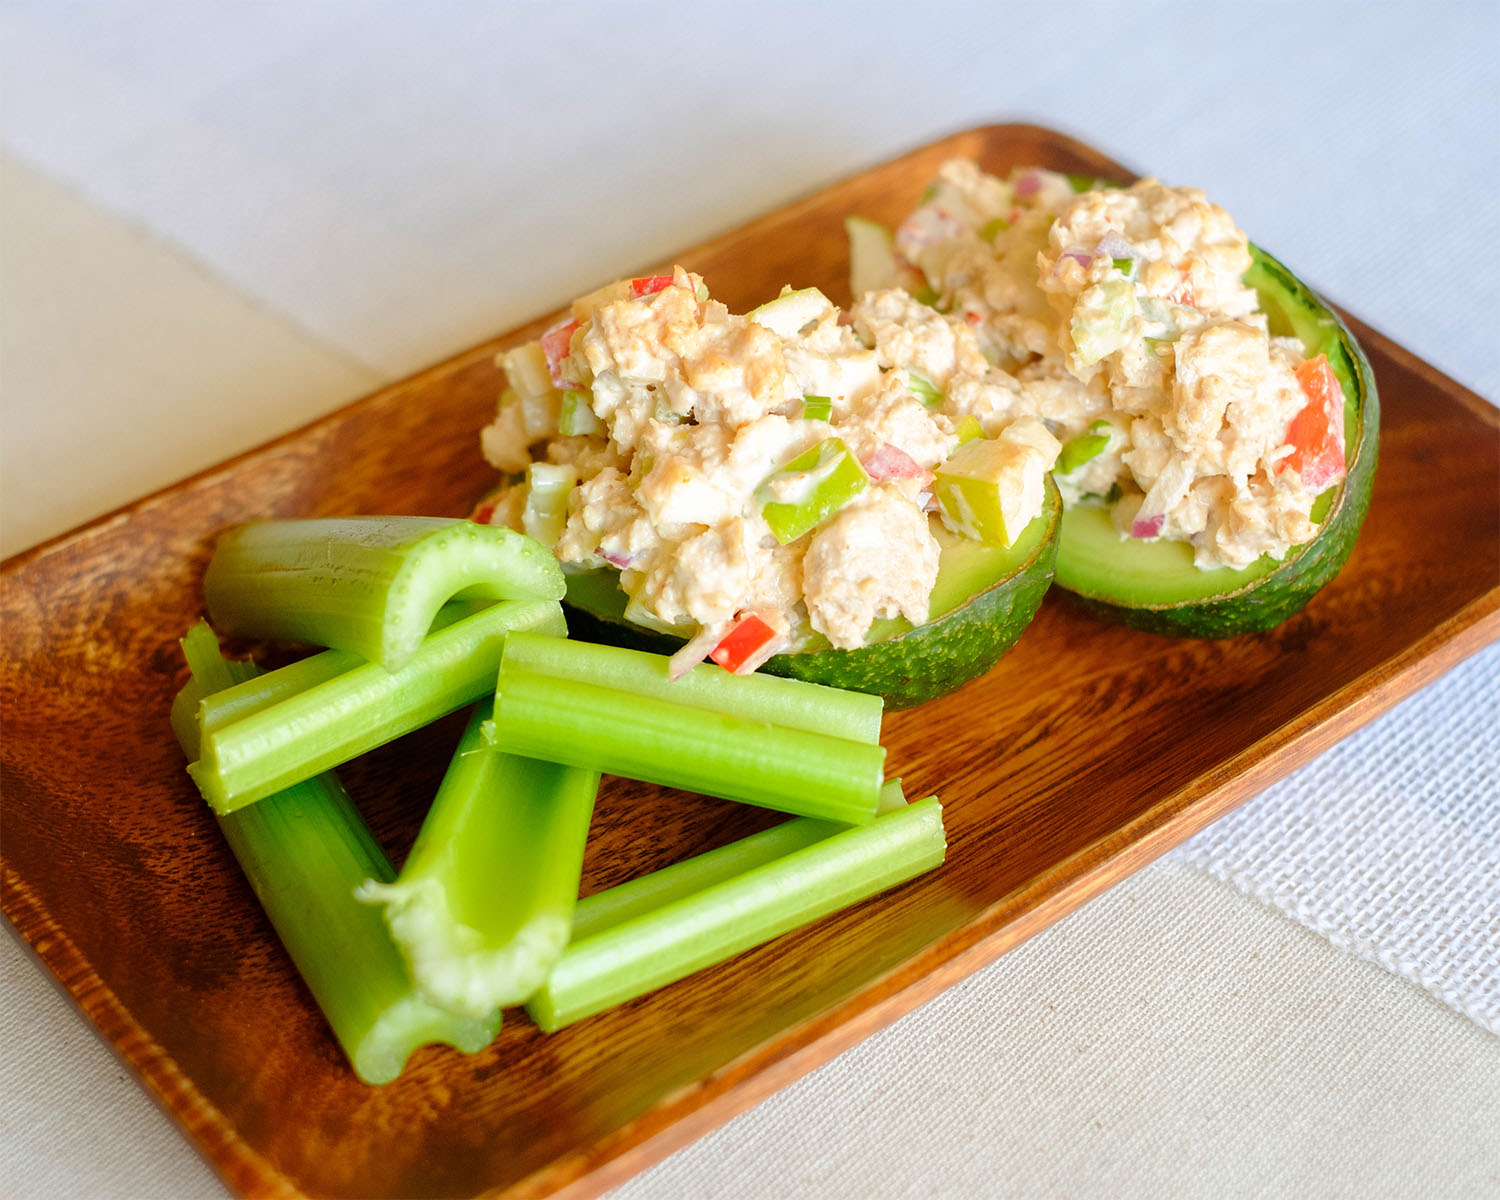
Salmon Salad Stuffed Avocado

You Might Also Like

Frequently Asked Questions

Can I use pre-cooked shrimp for this recipe?

Yes, you can use pre-cooked shrimp if that’s more convenient for you. Simply add the pre-cooked shrimp to the stir fry towards the end, just to warm them through.


Is there a vegetarian or vegan version of this recipe?

Yes! If you prefer a vegetarian or vegan option, you can omit the shrimp and replace it with tofu or your choice of plant-based protein. Additionally, use a vegan-friendly soy sauce and replace the fish sauce, if used, with a vegan alternative or omit it altogether.


What can I do with leftover spaghetti squash?

Leftover spaghetti squash can be used in various ways. You can mix it with marinara sauce and grated cheese for a low-carb spaghetti squash bake, add it to soups or stews for added texture, or toss it with pesto and roasted vegetables for a flavorful side dish.

Posted on Leave a comment

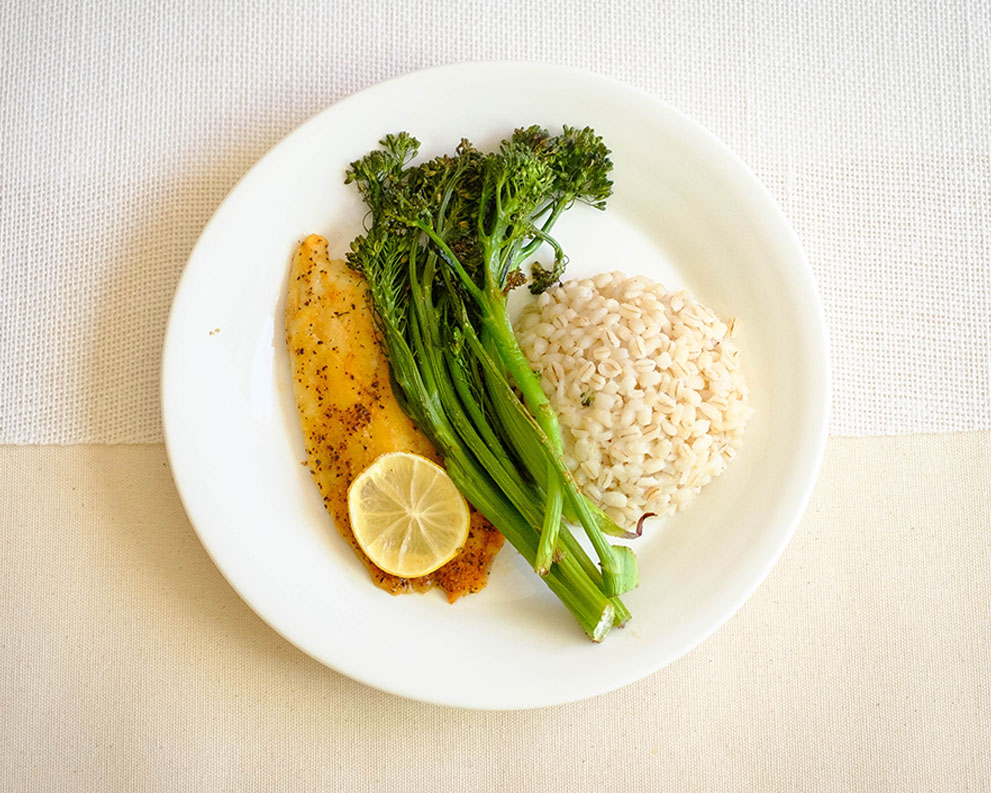
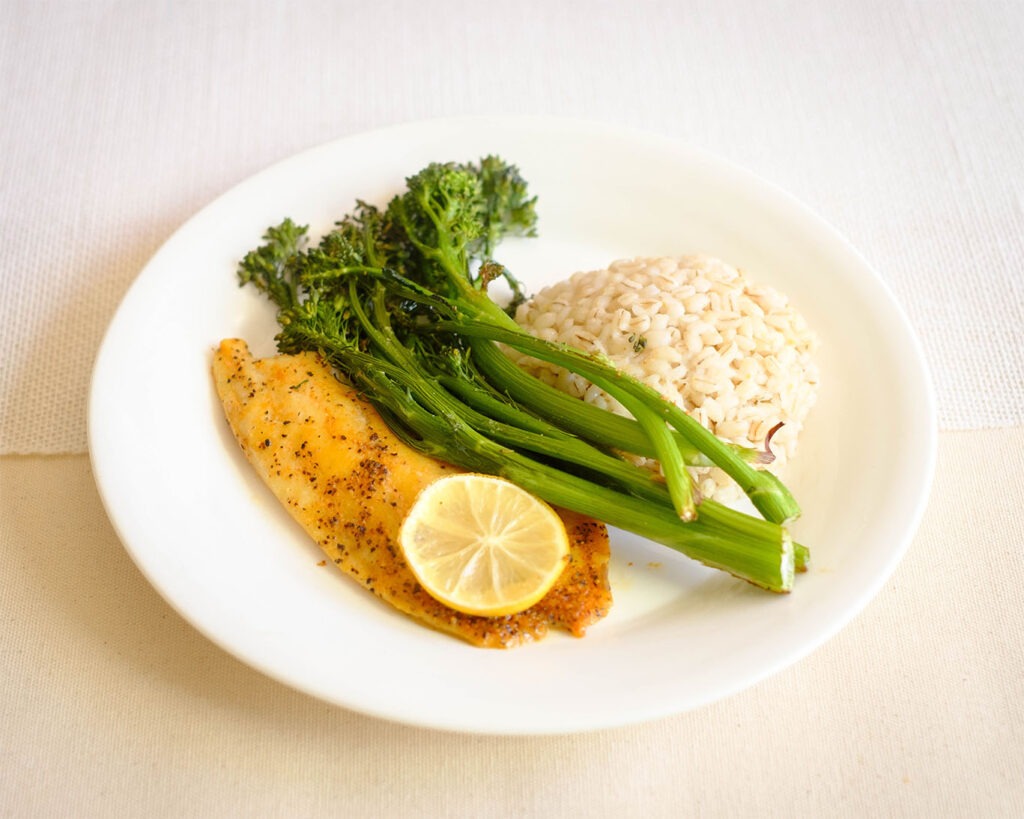
Baked Lemon Pepper Tilapia with Broccolini and Barley

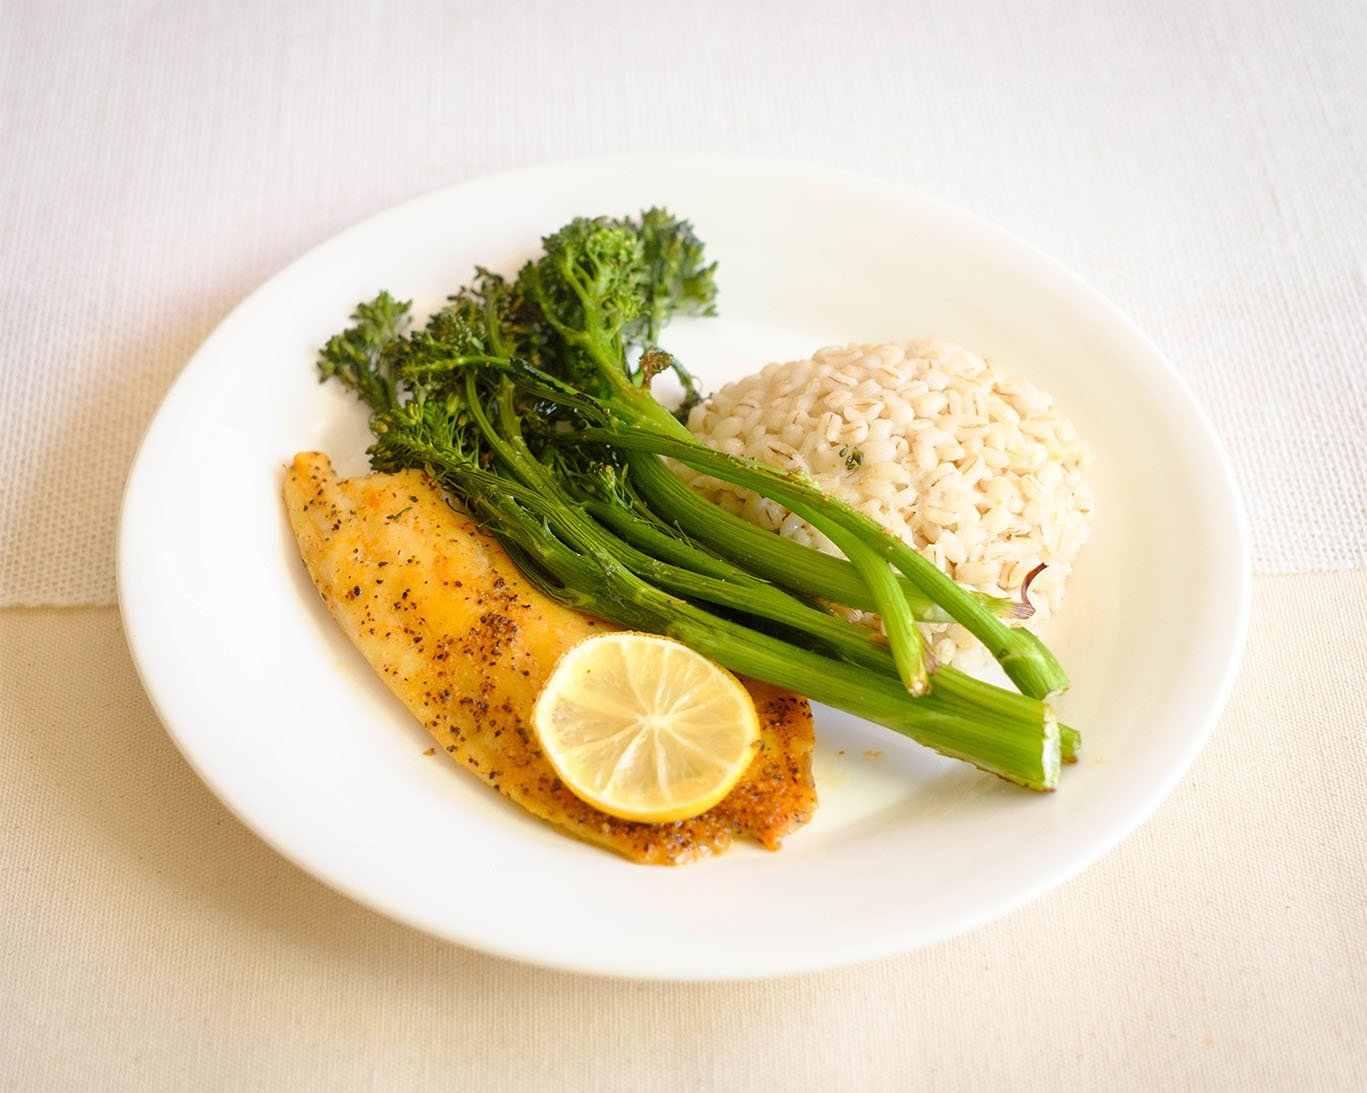
round plate with tilapia fillet, broccolini, and barley

This Baked Lemon Pepper Tilapia recipe with Roasted Broccolini and Barley, is a dish that’s not only bursting with flavor but also incredibly convenient to make. With just a few simple steps, you’ll have a wholesome and delicious meal ready to go. All you need is some fresh tilapia fillets, vibrant broccolini, nutty barley, and zesty lemon pepper seasoning. It’s like a symphony of flavors and textures that come together in perfect harmony on your plate.

This post may contain affiliate links. Please see our privacy policy for details.

round plate with tilapia fillet, broccolini, and barley

What Makes This Recipe So Tasty

So, are you ready to take your tilapia recipe to a whole new level of flavor? Give it a zesty twist with lemon pepper seasoning, and let your taste buds dance with joy!

If you’re looking for a hassle-free way to add flavor to your tilapia, lemon pepper seasoning is your go-to option! It’s readily available in most grocery stores, and a simple sprinkle is all it takes to transform your tilapia into a mouthwatering masterpiece. Plus, it saves you time on measuring and combining multiple spices—talk about a win-win!

Lemon pepper seasoning is incredibly versatile and can be used in various cooking methods for tilapia. Whether you’re grilling, baking, or even pan-searing, the zesty blend of lemon and pepper adds a pop of flavor that works wonders with the delicate flesh of tilapia.

The PrepYoSelf Newsletter

Ingredients You’ll Need

  • Broccolini, a close cousin of broccoli, is a nutritional powerhouse. Packed with vitamins A, C, and K, as well as fiber, it’s a true champion of health. It not only adds a delightful crunch but also contributes to your daily veggie intake. 
  • As for barley, it’s a whole grain that provides a hearty and satisfying base for your dish. It’s high in fiber, minerals, and antioxidants, making it a stellar choice for a well-balanced meal.
  • Now, let’s talk about the heart-healthy aspect of this dish. Tilapia is a lean white fish that’s low in saturated fat and high in protein. It’s a fantastic choice for those looking to maintain a healthy heart and balanced diet. By incorporating broccolini and barley, you’re adding even more heart-healthy goodness to your plate. It’s a meal that nourishes both your body and soul!
  • Lemon pepper seasoning brings a vibrant tanginess to your tilapia that complements its delicate flavor.  The zingy notes of fresh lemon zest and the subtle kick of black pepper create a harmonious balance, elevating the taste of the fish to a whole new level of deliciousness! The aromatic citrusy notes wafting through your kitchen will have your mouth watering before you even take your first bite. The visual appeal of the golden-brown crust formed by the seasoning will make your dish Instagram-worthy.

round plate with tilapia fillet, broccolini, and barley - tilapia recipe on plate

Simple Steps to Make Lemon Pepper Tilapia Recipe

  1. Preheat the oven to 400F.
  2. Next, boil the barley on the stovetop.
  3. Meanwhile, place the broccolini and tilapia on a sheet pan. Sprinkle on the seasonings and coat with olive oil
  4. Bake the tilapia and broccolini in the oven.
  5. After the barley cooks, use a fork to fluff the barley.

Reference the recipe card below for detailed instructions.

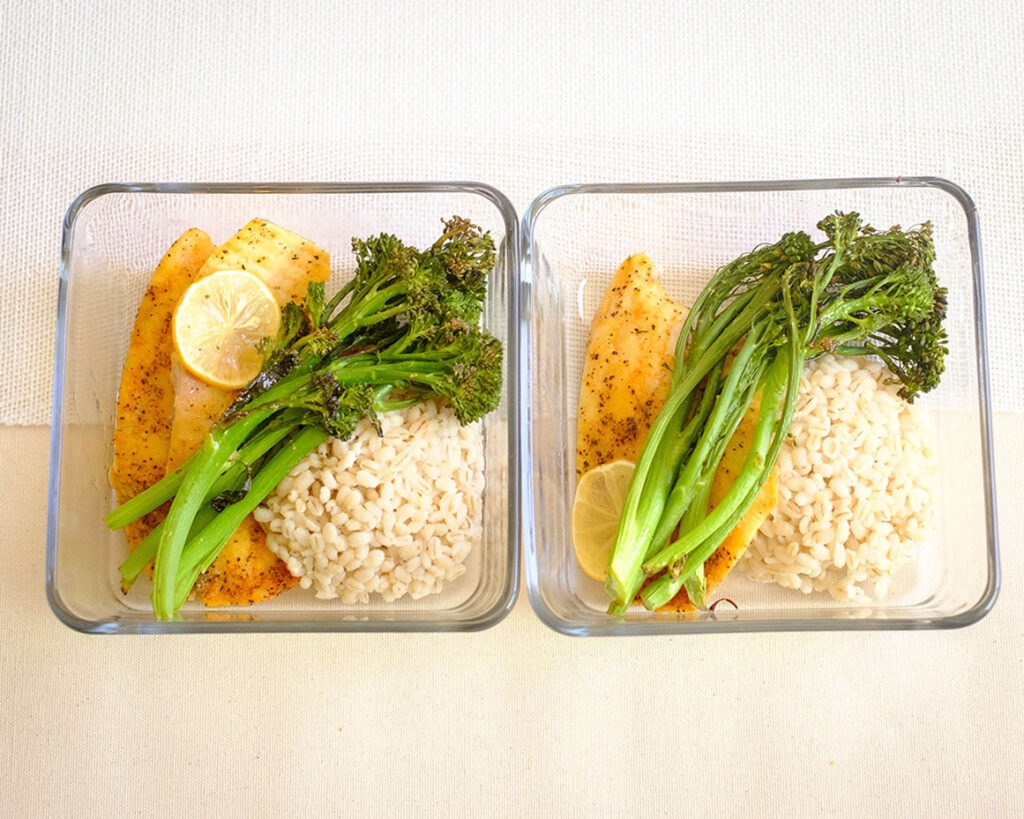
rectangle glass containers with tilapia fillet, broccolini, and barley - tilapia recipe perfect for meal prep

Meal Prep Tips for this Tilapia Recipe

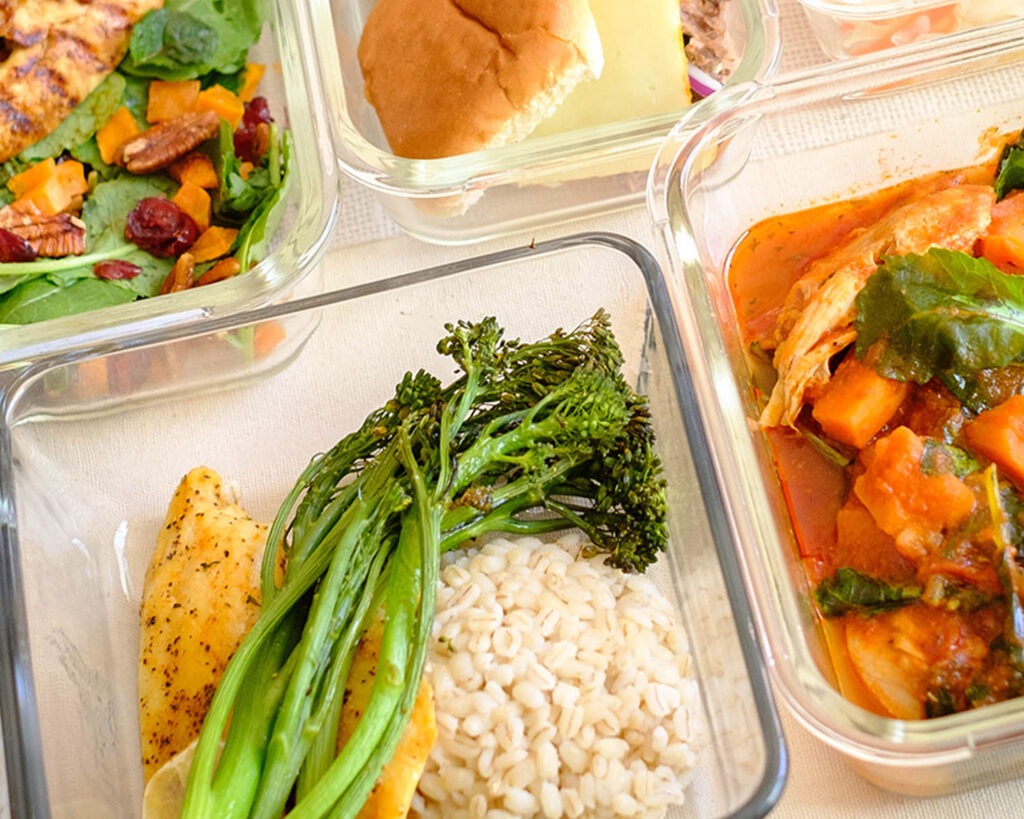
  • When it comes to storage, serving, and freezing, I’ve got you covered. To maximize freshness, store the cooked tilapia, roasted broccolini, and in airtight containers in the refrigerator. They can last up to three days, allowing you to enjoy this delicious meal throughout the week. When you’re ready to dig in, simply reheat the components and plate them together for a delightful experience.
  • As for freezing, you can freeze the cooked tilapia fillets individually, wrapped tightly in plastic wrap and placed in a freezer-safe bag. They will keep for up to three months. When you’re ready to enjoy them, let them thaw overnight in the refrigerator, then reheat them in the oven or microwave. The broccolini and barley can also be frozen, but they might lose some of their texture upon thawing.
  • To take this meal to the next level, let’s explore some options for additional side dishes or swaps. Pair it with a fresh garden salad dressed in a tangy vinaigrette. You could even serve it with a side of roasted sweet potatoes or a quinoa and vegetable medley. The possibilities are endless, and I encourage you to experiment and discover your own delightful combinations.

rectangle glass container with tilapia fillet, broccolini, and barley

tilapia

Lemon Pepper Tilapia with Roasted Broccolini and Barley

Baked Lemon Pepper Tilapia with Roasted Broccolini and Barley is a sensational choice for your meal prep adventures. It's easy to make, heart-healthy, and brimming with deliciousness.
No ratings yet
Prep Time 5 minutes
Cook Time 30 minutes
Course dinner, Main Course
Cuisine American, Mediterranean
Servings 2

Equipment

  • knife
  • cutting board
  • spatula
  • boiling pot
  • sheet pan
  • oven

Ingredients
  

Tilapia

  • 12 oz Tilapia fillets
  • 1/2 tsp lemon pepper
  • 1/2 tsp garlic powder
  • 1/4 tsp salt
  • 1 tbsp olive oil
  • 4 each broccolini spears
  • 1 each lemon (sliced)

Barley

  • 1/2 cups dry barley
  • 1/4 tsp garlic powder
  • 1/4 tsp salt
  • 1 tsp olive oil

Instructions
 

  • Pre-heat the oven to 400F
  • Place the broccolini on a sheet pan next to the tilapia. Evenly season everything with the lemon pepper, garlic powder, and salt. Drizzle both with olive oil and bake in the oven for 15-20 minutes
  • Meanwhile, boil 1.5 cups of water and add the barley, olive oil, garlic powder. Stir it around and lower the heat to low medium. Cover with a lid and let it simmer until all the liquid is absorbed, usually 30 minutes. Use a fork to fluff the barley
  • Serve the roasted broccolini and fish on top of the fish with the barley. Squeeze with fresh lemon juice

Similar Recipes

rosemary chicken

Rosemary Baked Chicken and Potatoes

salmon beet salad

Citrus Ginger Salmon Salad with Roasted Beets

shrimp and corn

Sheet Pan Shrimp with Cauliflower and Corn

You Might Also Like

Frequently Asked Questions

Can I use other types of fish instead of tilapia?

Absolutely! While tilapia works beautifully in this recipe, you can easily substitute it with other mild white fish such as cod, halibut, or sole. The cooking time may vary slightly, so keep an eye on the fish to ensure it’s cooked through.


Can I use regular broccoli instead of broccolini?

Definitely! If you can’t find broccolini, regular broccoli florets will work just fine. Simply chop them into bite-sized pieces, toss with oil and seasonings, and roast alongside the tilapia until tender and slightly caramelized.


Can I use a different grain instead of barley?

Absolutely! If you prefer a different grain or have dietary restrictions, feel free to swap barley with quinoa, brown rice, or even couscous. Adjust the cooking time according to the grain you choose and follow the package instructions for best results.

Posted on Leave a comment

Shrimp and Cabbage Stir Fry

Hey there, seafood lovers! Today, I’m here to share with you a meal prep gem that will make your taste buds dance with joy: shrimp and cabbage stir fry. Brace yourselves for a burst of flavors, because this dish is not only a delightful treat but also an absolute winner when it comes to easy and delicious meal prep.

With this marvelous recipe in your repertoire, you’ll have a tasty, nutritious, and time-saving seafood delight to enjoy whenever your heart desires. So, unleash your inner chef and let the shrimp and cabbage dance their way into your meal prep routine.

This post may contain affiliate links. Please see our privacy policy for details.

Why You’ll Love this Shrimp Stir Fry

  • Imagine succulent shrimp, perfectly cooked to tender perfection, mingling with vibrant and crunchy cabbage. As you take a bite, you’re greeted with the delightful umami of the shrimp, enhanced by the sweetness of the cabbage. Each ingredient brings its own unique taste and texture, creating a harmonious dance of flavors in your mouth.
  • Let’s start by talking about the dynamic duo: shrimp and cabbage. The shrimp, with its delicate and slightly sweet essence, provides a burst of oceanic goodness that will transport you to coastal shores. Its tender texture gives way with each bite, releasing a burst of juiciness that is simply irresistible.
  • Shrimp is not only a feast for the palate but also a great source of lean protein. Packed with essential nutrients like omega-3 fatty acids, vitamin D, and selenium, shrimp is a healthy choice that adds a burst of deliciousness to any meal. 
  • And cabbage, oh cabbage! Its subtle sweetness plays a delightful supporting role, balancing out the flavors of the shrimp and adding a satisfying crunch to every mouthful. With each bite, the cabbage brings a fresh and vibrant note that complements the shrimp perfectly.

The PrepYoSelf Newsletter

Simple Ingredients You’ll Need

  • Shrimp: Use fresh or frozen. If using frozen, just be sure to thaw it first before cooking.
  • Shredded Cabbage: You can use any kind such as napa cabbage, green cabbage, or red cabbage
  • Red Bell Peppers: Feel free to use any color bell peppers
  • Red Onions: You can use white onions or green onions as an alternative
  • Seasonings: Soy Sauce, garlic powder, ginger powder, sesame oil

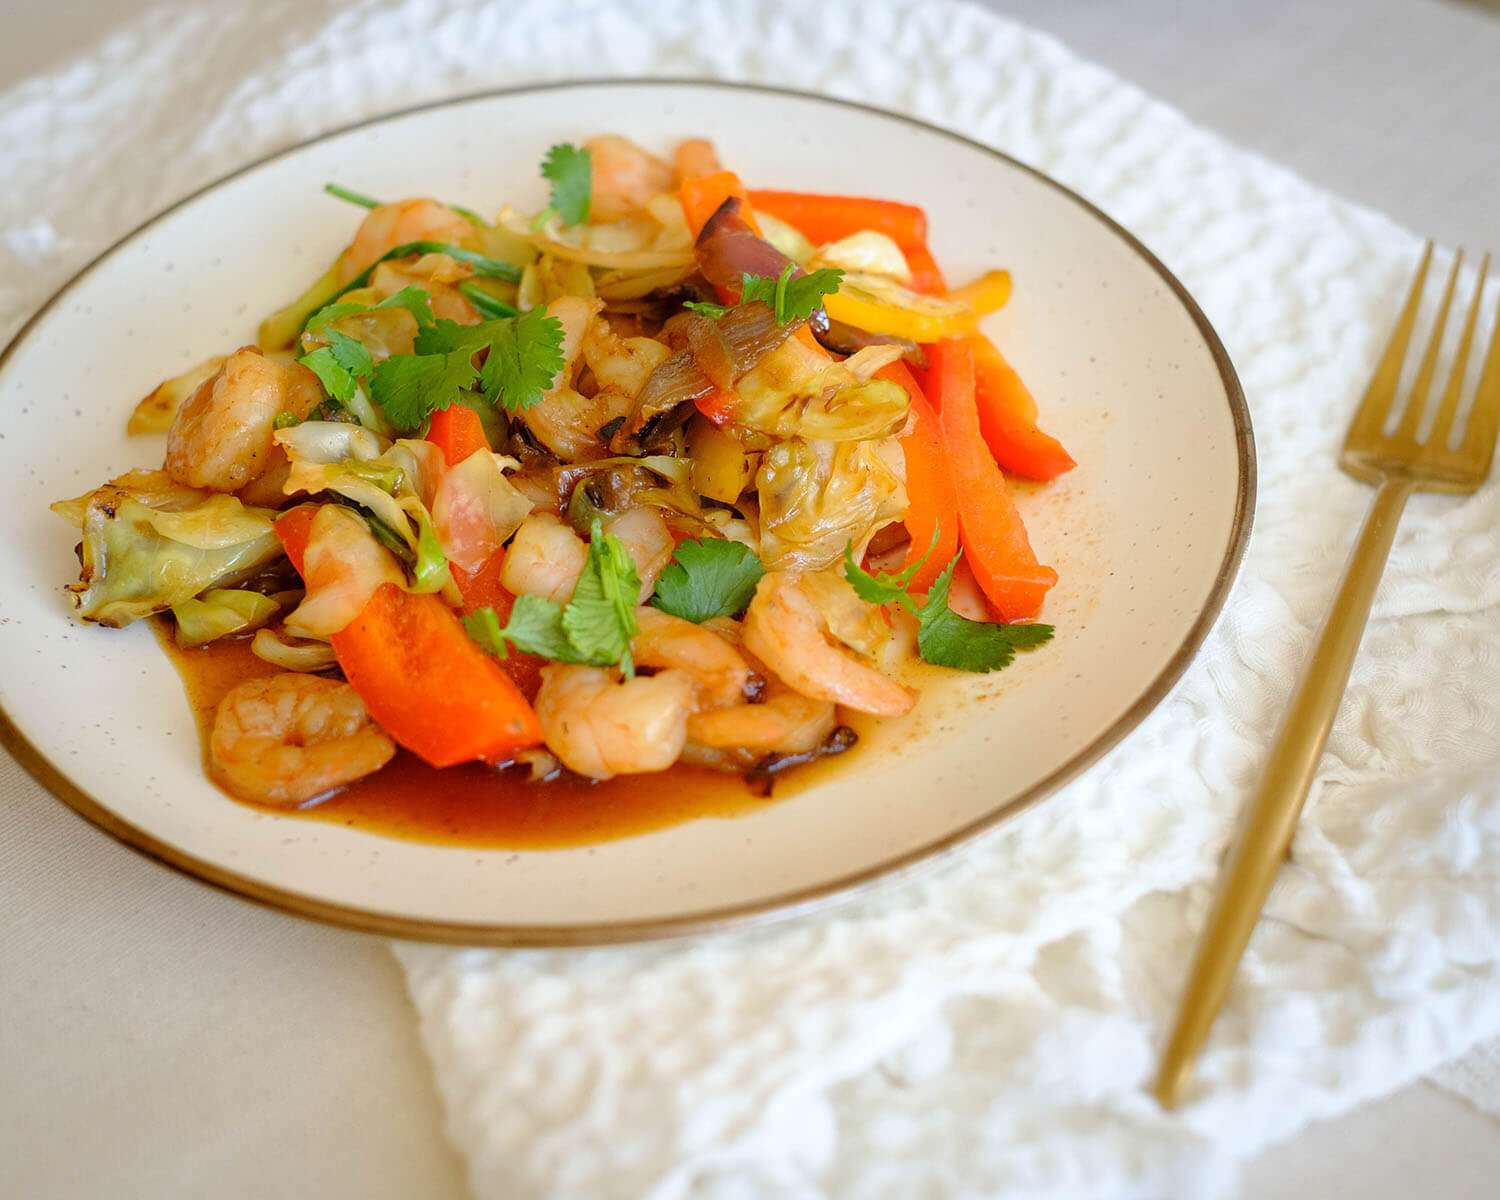
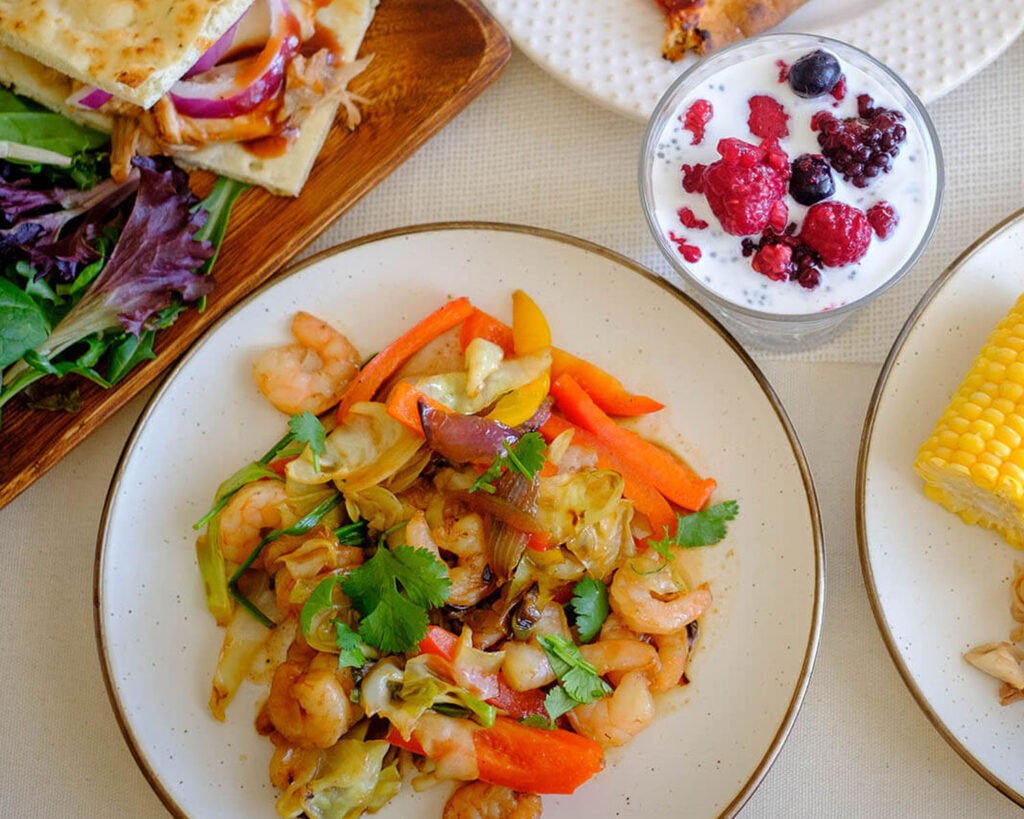
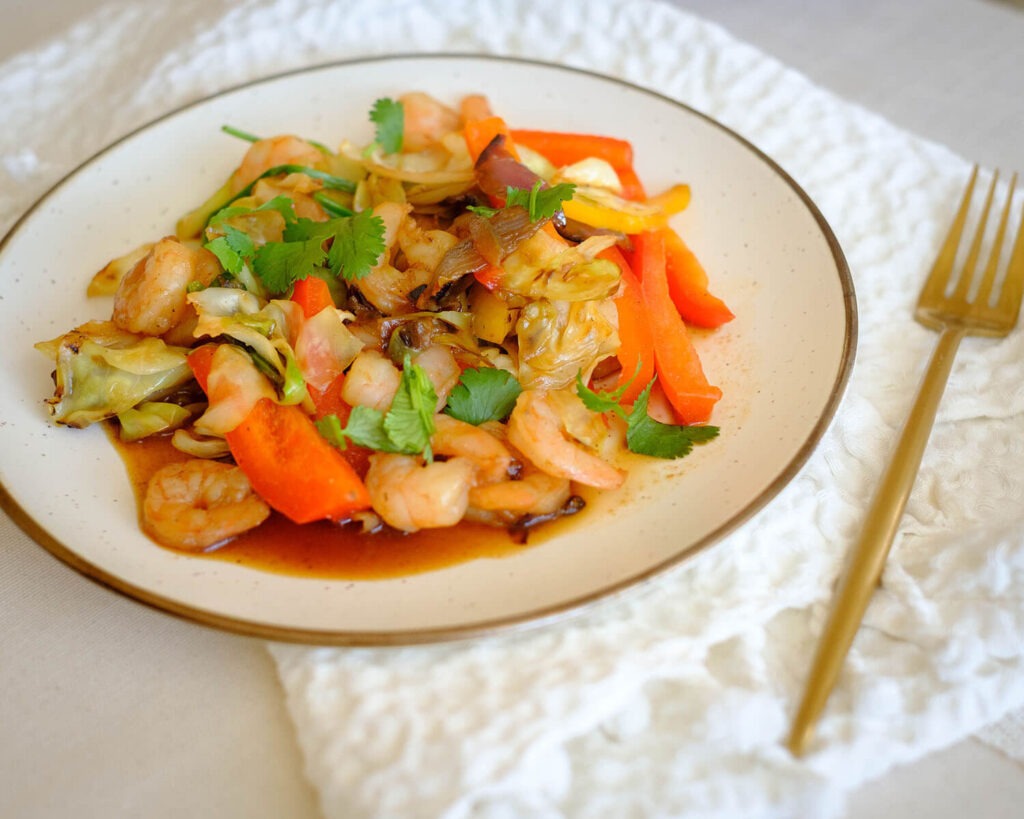
shrimp and cabbage stir fry on a table with other courses

Easy Recipe Steps for Shrimp Stir Fry

Imagine the aromas wafting through your kitchen as the stir fry sizzles in the pan. The fragrance of the shrimp mingling with the earthy undertones of the cabbage creates an olfactory symphony that heightens the anticipation of the feast to come. Here’s how you can enjoy this dish in less than 10 minutes:

  1. Add oil to a hot wok and saute the onions until they soften.
  2. Next, add the shredded cabbage and season with garlic powder and ginger.
  3. Finally, add the bell peppers and shrimp and season with soy sauce and sesame oil.

Reference the recipe card below for detailed instructions.

shrimp and cabbage stir fry on a plate ready to eat

Shrimp Stir Fry Meal Prep Tips

  • When it comes to storing your shrimp and cabbage stir fry, let me share some tips that will keep your taste buds dancing. Make sure you have some airtight containers ready to rock and roll. Once your stir fry has cooled down, divide it into individual servings and pop them into the fridge. This way, you’ll have a fuss-free, grab-and-go meal that’s ready to satisfy your cravings whenever you need it.
  • And if you want to extend its shelf life, my friends, fear not! You can freeze this stir fry for later enjoyment. Just remember to thaw it overnight in the fridge before reheating it to maintain that tantalizing texture and flavor.
  • Now, let’s talk serving because the presentation is key, my seafood aficionados! When it’s time to savor your shrimp and cabbage stir fry, get creative! You can enjoy it as is, reveling in the wonderful flavors that come together in perfect harmony. Or, for an extra dose of awesomeness, pair it with some fluffy jasmine rice or a bed of zucchini noodles to make it a truly satisfying meal. And don’t forget to add a squeeze of zesty lime, a sprinkle of fresh herbs like cilantro or parsley, and maybe a drizzle of your favorite chili sauce to take it to the next level of deliciousness.

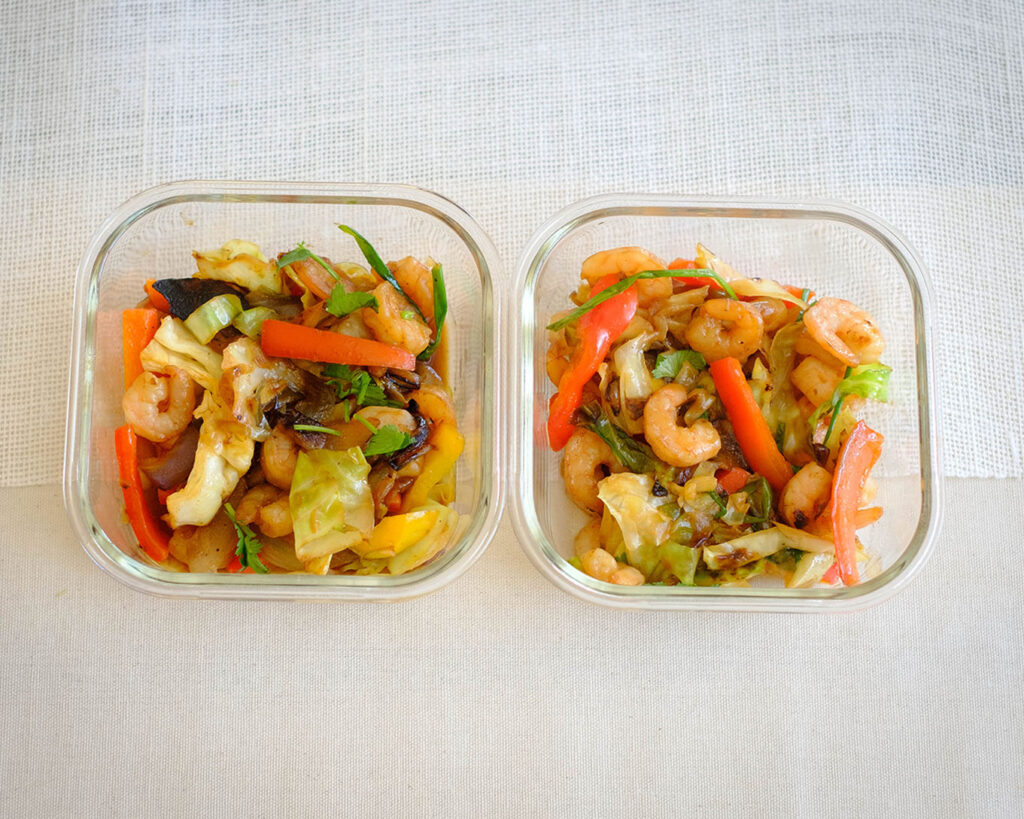
shrimp and cabbage stir fry in meal prep containers

shrimp stir fry

Shrimp and Cabbage Stir Fry

Whether you savor it as a standalone dish or pair it with fluffy rice or noodles, this shrimp and cabbage stir fry is a taste sensation that will leave you yearning for more.
No ratings yet
Prep Time 5 minutes
Cook Time 15 minutes
Course dinner, Main Course
Cuisine Asian
Servings 2

Equipment

  • knife
  • cutting board
  • wok
  • spatula

Ingredients
  

  • 12 oz shrimp (peeled and deveined)
  • 2 cups shredded cabbage
  • 1 each red bell pepper (sliced)
  • 1/4 cup red onions (diced)
  • 2 tbsp soy sauce
  • 1 tsp sesame oil
  • 1/4 tsp garlic powder
  • 1/4 tsp ginger powder
  • 1 tbsp olive oil

Instructions
 

  • Add olive oil to a wok on medium high heat and saute the onions until they soften
  • Next, add the shredded cabbage and season with garlic powder and ginger powder
  • Stir the cabbage until it gets tender (about 3 to 4 minutes)
  • Then, add the bell peppers and shrimp. Season with the soy sauce and sesame oil
  • Stir for about 2 to 3 minutes until the shrimp turns opaque and is fully cooked

Similar Recipes

shrimp kebab

Air Fryer Shrimp and Pineapple Kebabs

shrimp and corn

Sheet Pan Shrimp with Cauliflower and Corn

salmon salad

Salmon Salad Stuffed Avocado

You Might Also Like

Frequently Asked Questions

How long does it take to cook the shrimp?

Shrimp cook very quickly, usually within 2 to 3 minutes. Overcooking can result in a rubbery texture, so keep a close eye on them while they’re in the pan or wok. They should turn pink and opaque when fully cooked.


Can I use frozen shrimp for the stir fry?

Absolutely! Frozen shrimp works great for stir fry recipes. Just make sure to thaw them properly before cooking. You can do this by placing them in the refrigerator overnight or using the quick thawing method in a sealed bag under cold running water.


Can I use a different type of cabbage?

Certainly! While Napa cabbage is commonly used in stir fry recipes, you can experiment with other varieties like green cabbage, Savoy cabbage, or even bok choy. Each type will bring its own unique flavor and texture to the dish.

Posted on Leave a comment

Baked Pistachio Crusted Salmon and Asparagus

Hello, my foodie friends, unleash your inner chef and get ready to turn up your culinary game because we are jumping into the realm of delectable dinners with a showstopper recipe: Crusted Pistachio Salmon with Asparagus in the oven. Get ready to elevate your meal prep game and indulge in a restaurant-quality dinner right at home! This dish is not only packed with flavor and nutrition, but it’s also the epitome of convenience. So, let’s get started and uncover why this recipe is a must-try for your next meal prep session!

This post may contain affiliate links. Please see our privacy policy for details.

Calories: 474kcal | Carbohydrates: 8g | Protein: 38g | Fat: 32g | Saturated Fat: 5g | Polyunsaturated Fat: 8g | Monounsaturated Fat: 18g | Cholesterol: 94mg | Sodium: 823mg | Potassium: 1059mg | Fiber: 3g | Sugar: 2g | Vitamin A: 189IU | Vitamin C: 4mg | Calcium: 63mg | Iron: 3mg

Baked Pistachio Crusted Salmon and Asparagus cooked on a plate

Recipe Magic

Now, let’s talk about the magic of this recipe: the restaurant-quality experience. The combination of the moist and tender salmon, the crunchy and flavorful pistachio crust, and the perfectly roasted asparagus creates a harmony of flavors and textures that rival any high-end restaurant dish. You’ll be amazed at how easily you can recreate the same level of elegance and taste right in your own kitchen.

Pistachios are delightful nuts that bring a delightful crunch and rich flavor to the salmon crust. But that’s not all—pistachios are also loaded with heart-healthy fats, protein, fiber, and an array of vitamins and minerals. By incorporating pistachios into this dish, we’re adding a nutritional boost that pairs perfectly with the omega-3 fatty acids found in salmon.

Speaking of salmon, this recipe is a fantastic option for a filling, low-carb dinner. Salmon is a great source of high-quality protein and healthy fats, making it an ideal choice for those looking to enjoy a filling meal. The pistachio crust adds an additional layer of texture and flavor, transforming an already incredible protein into a culinary masterpiece.

The PrepYoSelf Newsletter

To Prepare This Baked Salmon Recipe You’ll Need

  • Salmon: Use fresh salmon or frozen filets. If using frozen filets, be sure you thaw them out in the refrigerator in advance prior to baking.
  • Pistachios: If you can’t find pistachios, you can use pine nuts
  • Dijon Mustard: Dijon mustard adds a nice spice to the dish, but you can also use regular mustard or even mayo.
  • Asparagus: Add minced garlic and a drizzle of olive oil to add flavor

Baked Pistachio Crusted Salmon and Asparagus ready to cook

Easy Recipe Steps to Make Pistachio-Crusted Salmon

  1. Preheat the oven to 400F.
  2. Use a knife or a food processor to finely chop the pistachios.
  3. Place the salmon and asparagus on a sheet pan.
  4. Spread the Dijon mustard on the salmon and sprinkle with garlic powder and salt. Then, sprinkle the chopped pistachios on the top of the salmon making sure it is fully coated.
  5. Season the asparagus with salt, minced garlic, and drizzle it with olive oil.
  6. Bake everything in the oven for 12 to 15 minutes.
  7. Squeeze lemon juice on top of the salmon and asparagus for added citrus flavors.

Reference the recipe card below for detailed instructions.

Baked Pistachio Crusted Salmon and Asparagus on a plate with fork and knife next to it

Meal Prep Tips

  • To prevent the pistachio crust from burning, you can cover the salmon loosely with foil during the initial part of the baking process. This will allow the salmon to cook through while protecting the crust. Towards the end, remove the foil to let the crust develop a beautiful golden color.
  • You can use frozen salmon for this recipe. Thaw the salmon fillets in the refrigerator overnight before proceeding with the recipe. It’s important to ensure the salmon is completely thawed before applying the pistachio crust and baking.
  • Storage: Once the salmon and asparagus are cooked and cooled, store them separately in airtight containers in the refrigerator. You can keep them for up to three days.
  • Reheating: When ready to enjoy, gently reheat the salmon and asparagus in the oven at a low temperature to retain their texture and flavors. Alternatively, you can microwave them briefly, taking care not to overcook them.
  • Serving Suggestions: Serve the Baked Pistachio Crusted Salmon with Asparagus alongside a fresh salad, quinoa, or roasted potatoes for a complete and balanced meal. Squeeze a bit of lemon juice over the salmon just before serving to brighten the flavors.

Baked Pistachio Crusted Salmon and Asparagus in meal prep containers

salmon and asparagus

Oven Baked Pistachio Crusted Salmon with Roasted Asparagus

With its restaurant-quality appeal, this Pistachio Crusted Salmon and Asparagus recipe will make you feel like a culinary superstar. Tender salmon, with a crunch pistachio crust and perfectly roasted asparagus rivals any high-end restaurant dish.
No ratings yet
Prep Time 5 minutes
Cook Time 15 minutes
Course dinner, lunch
Cuisine American
Servings 2
Calories 474 kcal

Equipment

  • knife
  • cutting board
  • sheet pan
  • oven

Ingredients
  

Salmon and Pistachio Crust

  • 12 oz salmon
  • 1/4 cup pistachios (shelled)
  • 2 tbsp dijon mustard
  • 1 tbsp garlic cloves (minced)
  • 1/4 tsp salt
  • 1 tbsp olive oil

Asparagus

  • 12 each asparagus spears
  • 1 tbsp garlic (minced)
  • 1/4 tsp salt
  • 1 tbsp olive oil
  • 1 each lemon

Instructions
 

  • Pre-heat the oven to 400F.
  • Finely chop the pistachios with a knife (or you can use a food processor)
  • Place the salmon and asparagus on a sheet pan.
  • Use a spoon to spread the Dijon mustard on the salmon. Season the salmon and asparagus with minced garlic and salt. Then, sprinkle the pistachio crust on top of the salmon making sure it is fully coated.
  • Next drizzle the salmon and asparagus with olive oil.
  • Bake everything in the oven for 12 to 15 minutes until the salmon is fully cooked to an internal temperature of 145F
  • Cut the lemon in wedges and squeeze lemon juice on top of the fish and asparagus

Notes

Nutrition information provided is an estimate. It will vary based on cooking method and specific ingredients used. Please consult with your healthcare provider for specific dietary needs. To gain a better understanding, explore our nutrition disclaimer here. 

Nutrition

Calories: 474kcalCarbohydrates: 8gProtein: 38gFat: 32gSaturated Fat: 5gPolyunsaturated Fat: 8gMonounsaturated Fat: 18gCholesterol: 94mgSodium: 823mgPotassium: 1059mgFiber: 3gSugar: 2gVitamin A: 189IUVitamin C: 4mgCalcium: 63mgIron: 3mg

Similar Recipes

salmon beet salad

Citrus Ginger Salmon with Roasted Beets

salmon and watermelon salad

Grilled Salmon with Watermelon Salad

salmon salad

Salmon Stuffed Avocado Salad

You Might Also Like

Frequently Asked Questions

Can I use a different type of fish instead of salmon?

Certainly! While the recipe calls for salmon, you can experiment with other fish varieties such as trout, cod, or halibut. Keep in mind that cooking times may vary depending on the thickness of the fish, so adjust accordingly.


Can I make the pistachio crust in advance?

Absolutely! You can prepare the pistachio crust ahead of time and store it in an airtight container or sealable bag. When you’re ready to cook, simply coat the salmon fillets with the crust mixture and proceed with the recipe as directed.


Can I substitute the asparagus with another vegetable?

While asparagus pairs wonderfully with the pistachio-crusted salmon, you can swap it with other vegetables such as green beans, broccoli, or Brussels sprouts. Just adjust the cooking time accordingly to ensure they are roasted to perfection.