Posted on Leave a comment

Balsamic Glazed Pork Chops with Persimmons

glass meal prep containers with balsamic glazed porkchops with persimmons and baby spinach

Ready to conquer your day with a delicious and nutritious meal that won’t keep you tied to the kitchen for hours? Let’s dive into our fantastic Pork Chops and Sautéed Persimmons recipe – a feast for both your taste buds and your busy schedule! Now is the time to add pork meal prep into your routine.

This post may contain affiliate links. Please see our privacy policy for details.

Calories: 542kcal | Carbohydrates: 42g | Protein: 39g | Fat: 25g | Saturated Fat: 6g | Polyunsaturated Fat: 5g | Monounsaturated Fat: 12g | Trans Fat: 0.1g | Cholesterol: 114mg | Sodium: 699mg | Potassium: 1271mg | Fiber: 2g | Sugar: 6g | Vitamin A: 5814IU | Vitamin C: 74mg | Calcium: 105mg | Iron: 5mg

balsamic glazed porkchops with persimmons and baby spinach

Why You’ll Enjoy This:

  • Flavor Harmony: The rich, sweet, and tangy notes of balsamic glaze beautifully complement the natural sweetness of ripe persimmons. The combination creates a symphony of flavors, balancing savory and sweet for a delightful taste experience that feels both indulgent and satisfying.
  • Seasonal Simplicity: Persimmons come into their prime during the winter months, offering a burst of seasonal freshness to the dish. The warmth of cinnamon and the smokiness of paprika in the pork chops embrace the cozy, comforting vibes of winter, making this meal a perfect cold-weather comfort.
  • Textural Bliss: The tender, succulent pork chops provide a satisfying contrast to the crisp, sautéed persimmons. It’s a play on textures that keeps each bite interesting and enjoyable. The caramelization of the persimmons adds a delightful crunch, creating a mouthwatering experience.
  • Impressive Yet Budget-Friendly: Balsamic glaze adds a touch of sophistication to the dish, making it feel like a restaurant-quality meal without breaking the bank. Pork chops, especially when thinly sliced, are a cost-effective protein option. The use of simple yet flavorful ingredients keeps it elegant and budget-friendly.
  • Versatility at Its Core: Whether you’re hosting a dinner party or preparing a weekday family meal, this dish is versatile and adaptable. The combination of pork chops and persimmons feels special enough for a festive gathering, yet it’s easy and quick enough to fit into your busy weeknight routine. It’s a culinary chameleon that suits different occasions with grace.

The PrepYoSelf Newsletter

Ingredient Breakdown

  • Pork Chops: A lean source of protein that’s not only essential for muscle maintenance but also incredibly satisfying. Pro-tip: Opt for thin slices for quicker cooking and more even marination.
  • Balsamic Glaze: Adds a sweet and tangy depth that elevates the entire dish. Pro-tip: Look for a high-quality balsamic glaze for richer flavor.
  • Cinnamon: Brings warmth and a hint of sweetness, balancing out the savory notes. Pro-tip: A small amount goes a long way, so embrace the magic of this spice.
  • Paprika: Infuses a smoky undertone, adding complexity to the marinade. Pro-tip: Choose sweet or smoked paprika based on your flavor preference.
  • Thyme: Infuses a fresh, earthy aroma that complements the pork beautifully. Pro-tip: If using fresh thyme, strip the leaves from the stems for maximum flavor.
  • Persimmon: Brings a natural sweetness and a pop of vibrant color to the dish. Pro-tip: Choose a ripe persimmon for the best flavor and texture.
  • Baby Spinach: Packed with nutrients, adds a crisp texture, and balances the richness of the pork. Pro-tip: Go for baby spinach for a tender bite.
  • Salad Dressing: Adds a burst of flavor and turns your side salad into a taste sensation. Pro-tip: Pick a dressing that complements the overall flavor profile; a balsamic vinaigrette would be a great match!
pork meal prep of balsamic glazed porkchops with persimmons and baby spinach

How to Meal Prep Pork Chops

  1. Remove the top of the persimmon stem and slice them into delightful wedges.
  2. Time to give those pork chops some love! In a bowl, mix balsamic glaze, cinnamon, paprika, garlic powder, thyme, and salt. Massage this flavorful concoction onto your pork chops, ensuring each piece is coated in yumminess.
  3. Heat up a pan with a tablespoon of olive oil over medium-high heat. Place your marinated pork chops in the pan, and let them sizzle away for 3 to 5 minutes on each side. Keep flipping until they reach a juicy and safe internal temperature of 145°F.
  4. Once your pork chops are perfection on a plate, remove them and lower the heat to low-medium. Toss those persimmon slices into the pan and sauté them for a quick 2 to 3 minutes – just enough to enhance their natural sweetness.
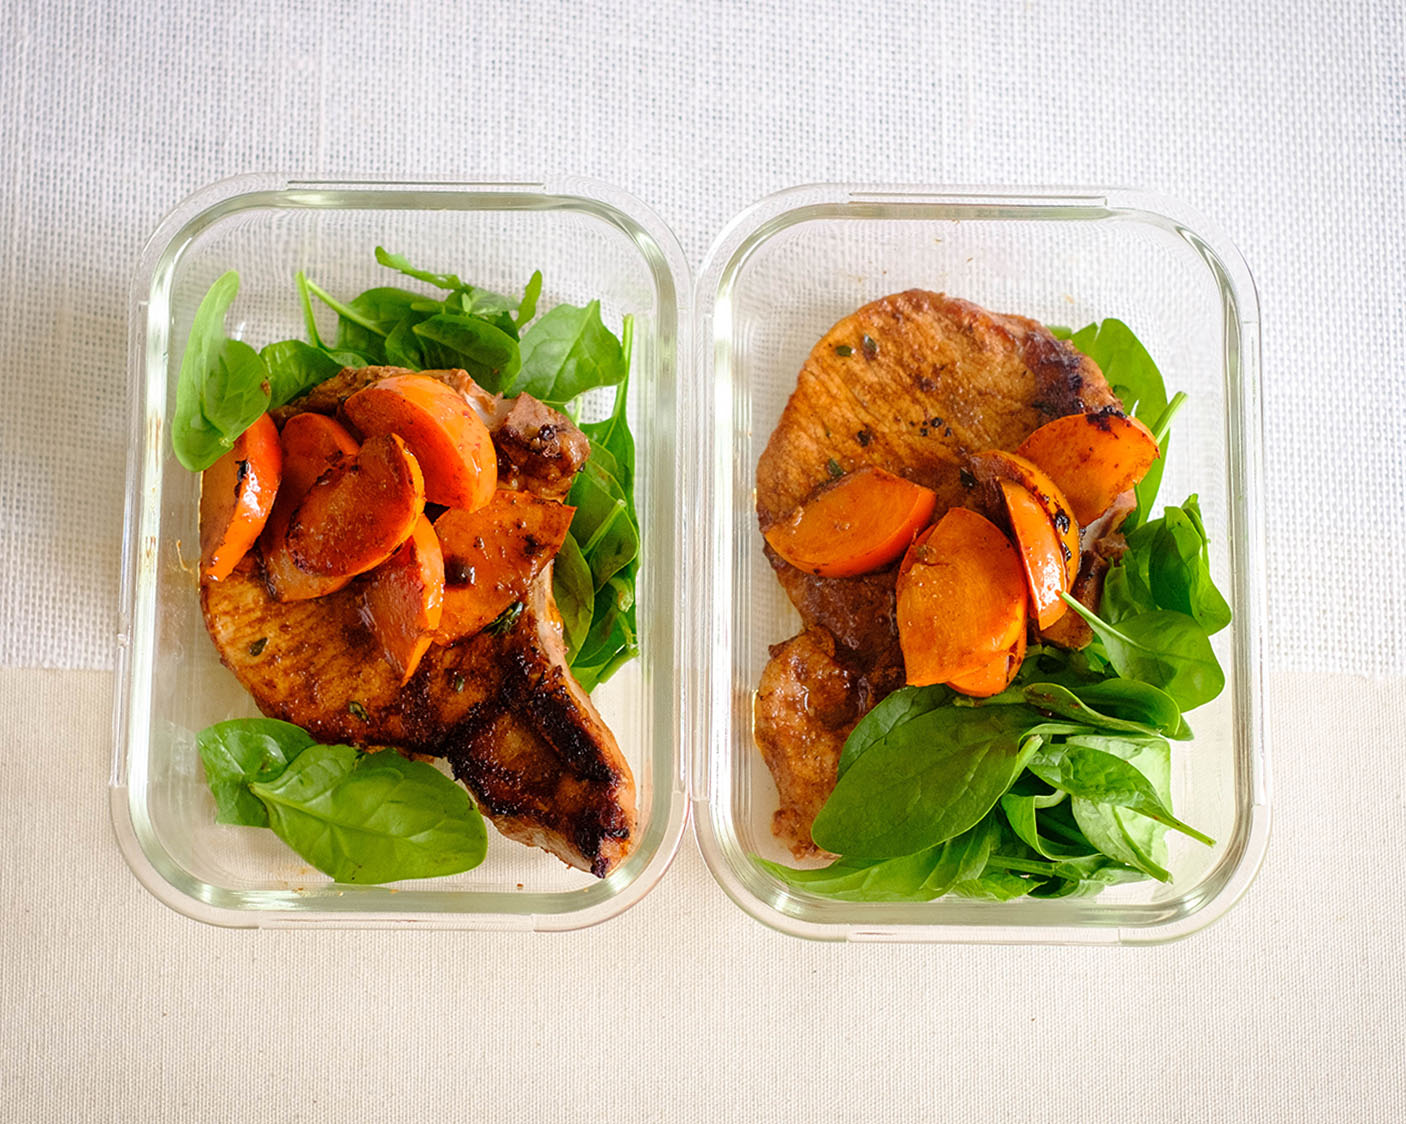
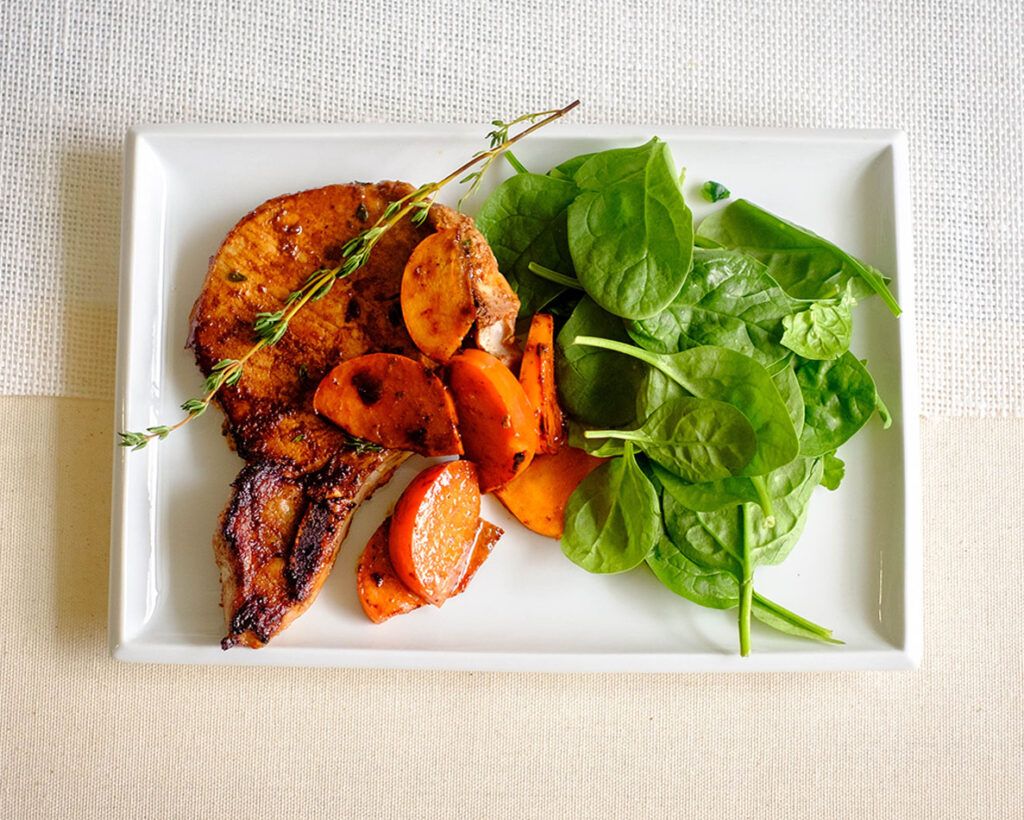
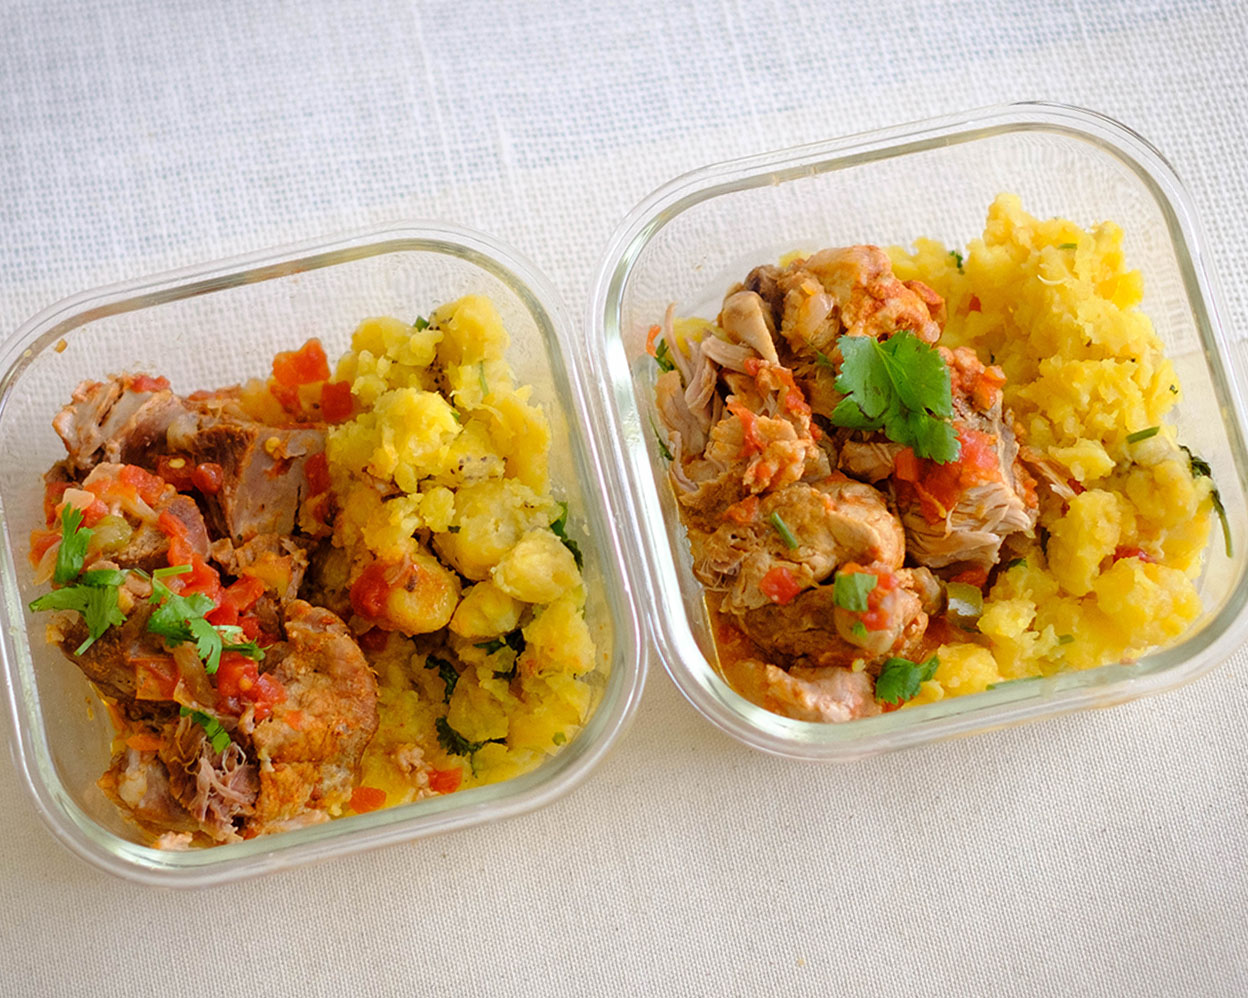
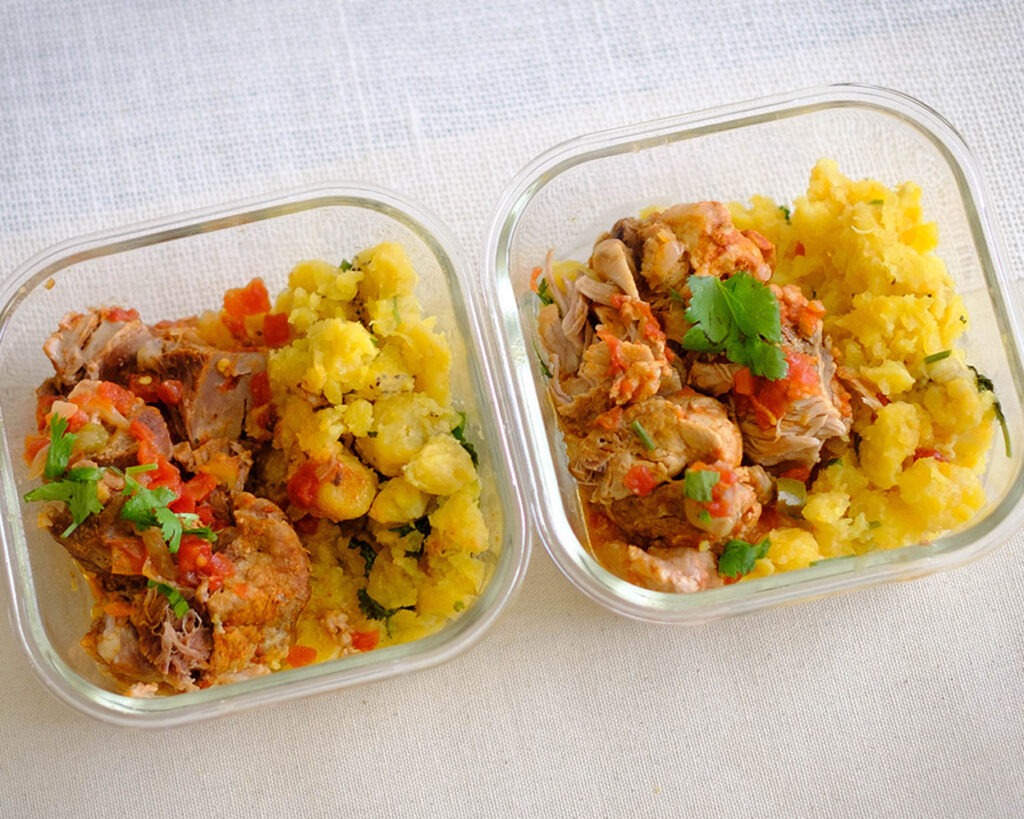
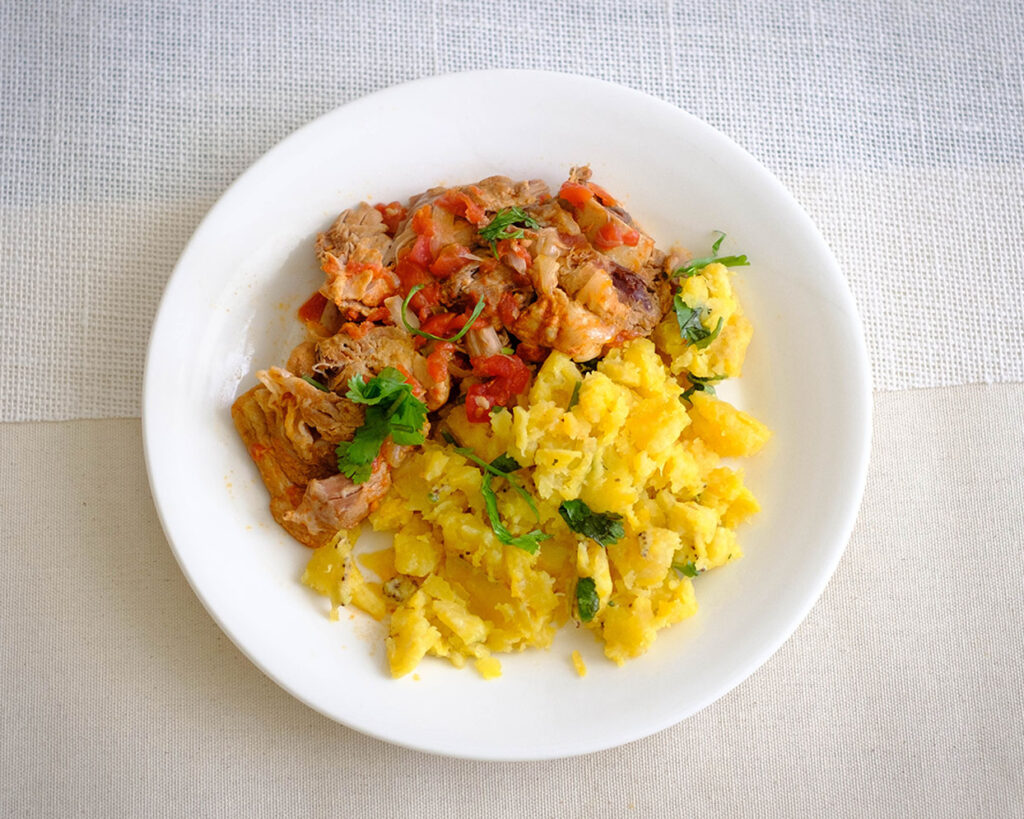
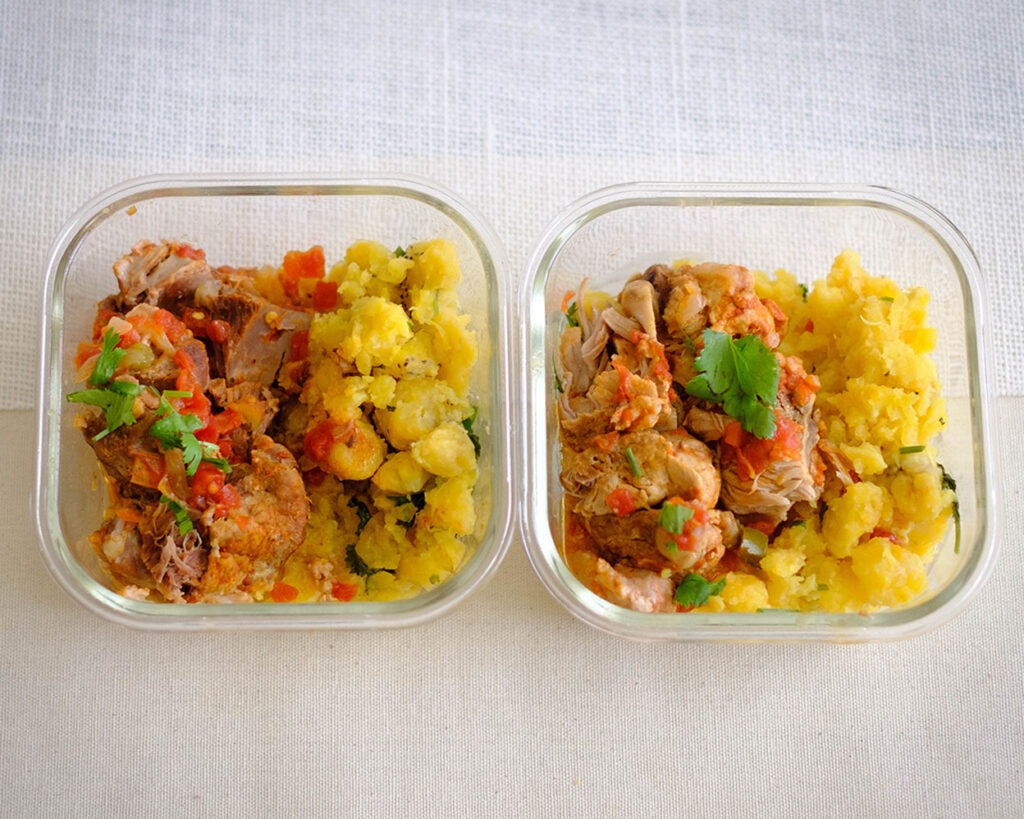
  5. Arrange your succulent pork chops alongside the sautéed persimmons, and serve them up with a generous side of fresh baby spinach. Top it all off with your favorite salad dressing for an extra burst of flavor.

Reference the recipe card below for detailed instructions.

glass meal prep containers with pork meal prep of balsamic glazed porkchops with persimmons and baby spinach

Pork Meal Prep Pairing Tips

  • Grainy Goodness: Serve the pork chops over a bed of wild rice, quinoa, or farro. These grains add a nutty flavor and a chewy texture that pairs wonderfully with the tender pork.
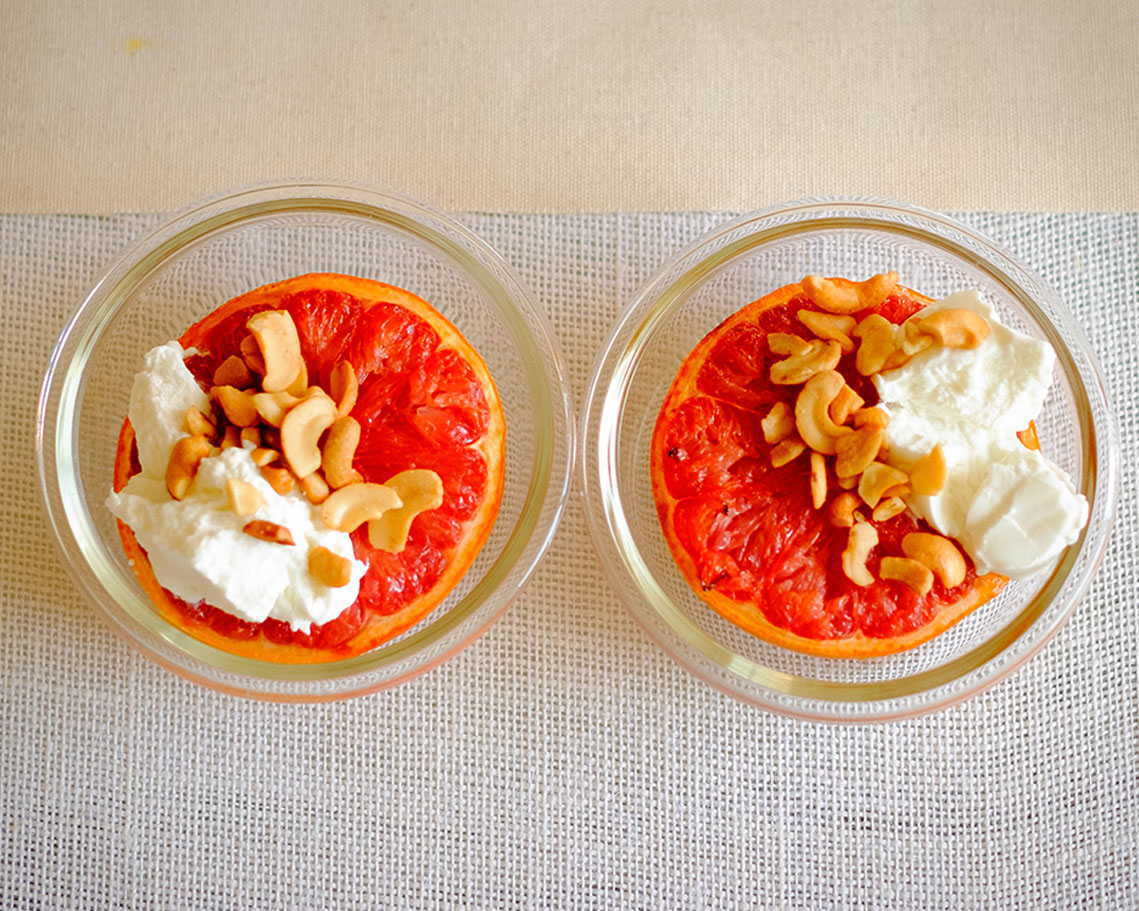
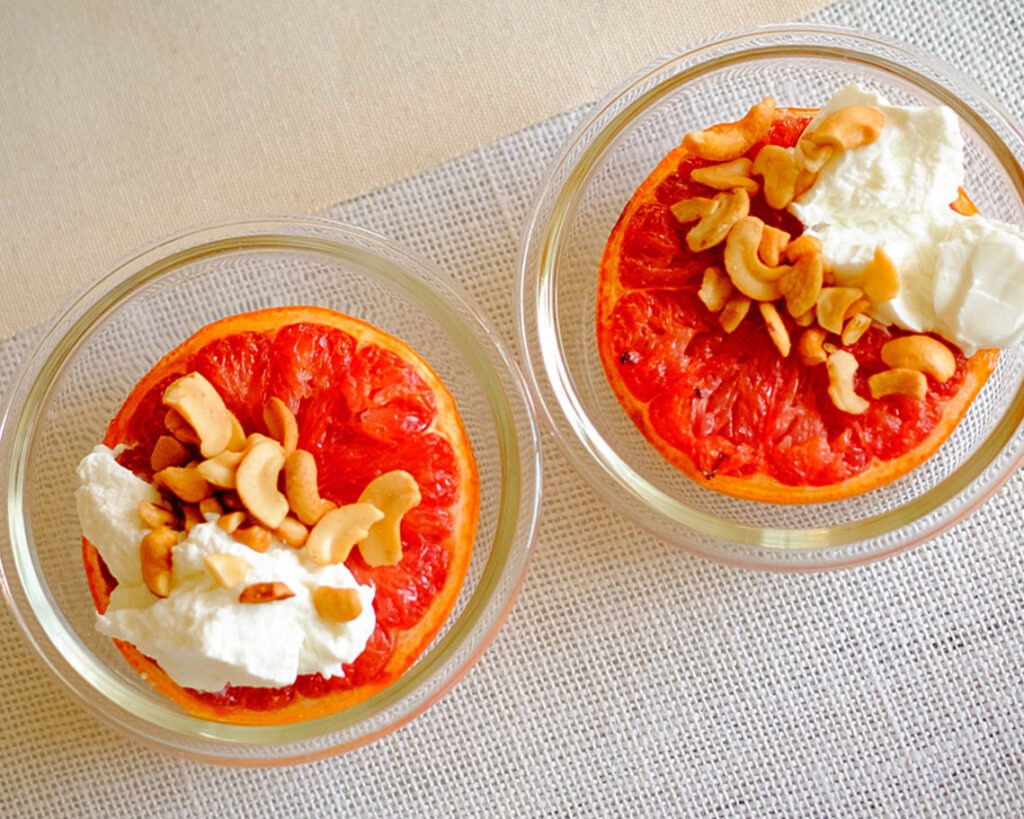
  • Citrusy Sidekick: Consider adding a citrusy element, like an orange or grapefruit salad, to cut through the richness of the dish. The acidity of citrus provides a refreshing contrast.
  • Cheese Pleaser: A sprinkle of crumbled goat cheese or feta over the baby spinach adds a delightful creaminess, while the tangy notes elevate the overall flavor profile.
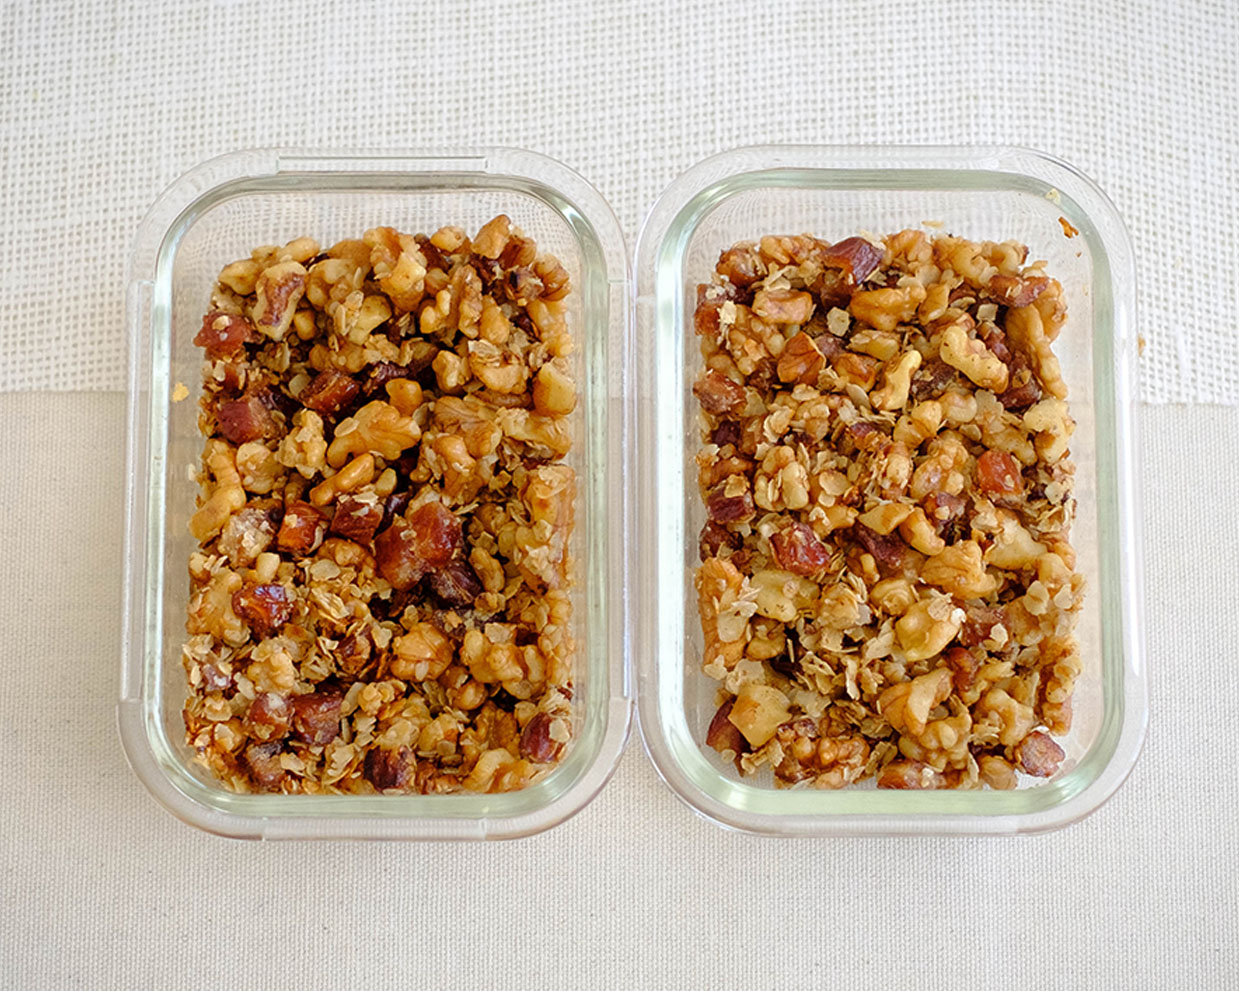
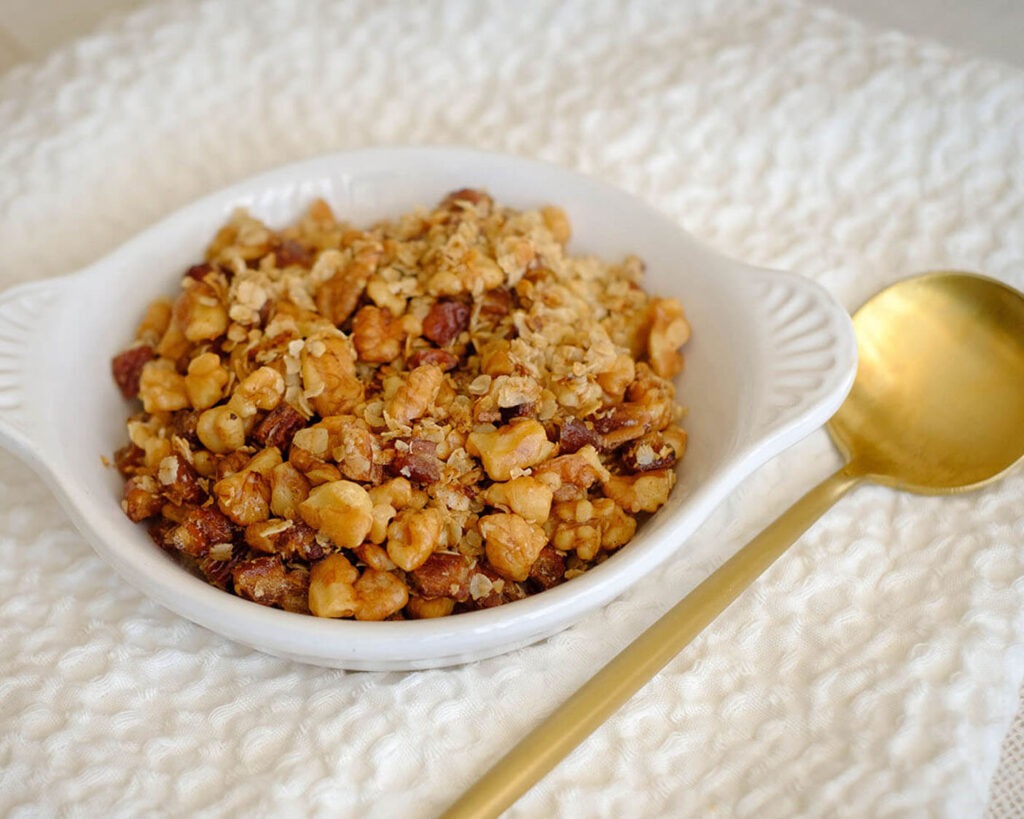
  • Nutty Crunch: Toasted nuts, such as pecans or almonds, add a delightful crunch. Sprinkle them over the salad or use them as a garnish for an extra layer of texture.
  • Freshness Finale: End your meal on a refreshing note with a fruit-based dessert. A simple fruit salad or a light sorbet can provide a satisfying conclusion to the feast.
pork meal prep in containers with balsamic glazed porkchops with persimmons and baby spinach
Balsamic Glazed Pork chops with sliced persimmons and sauteed spinach.

Balsamic Glazed Pork Chops with Persimmons and Spinach

Indulge in the perfect winter dish — balsamic glazed pork chops, marinated to perfection with cinnamon and thyme, paired with sautéed persimmons and served alongside a vibrant baby spinach salad for a restaurant-worthy experience that's both delicious and budget-friendly
No ratings yet
Prep Time 5 minutes
Cook Time 15 minutes
Course dinner, lunch, Main Course
Cuisine American
Servings 2
Calories 542 kcal

Equipment

  • knife
  • cutting board
  • saute pan

Ingredients
  

Pork Chops and Marinade

  • 12 oz pork chops (thinly sliced)
  • 2 tbsp balsamic glaze
  • 1/4 tsp cinnamon
  • 1/4 tsp paprika
  • 1/4 tsp garlic powder
  • 1/4 tsp salt
  • 1 tbsp olive oil
  • 1 tsp thyme (chopped)

Sides

  • 1 persimmon
  • 4 cups baby spinach
  • 4 tbsp salad dressing

Instructions
 

  • Remove the top of the persimmon stem and slice them into wedges.
  • Marinate the pork with balsamic glaze, cinnamon, paprika, garlic powder, thyme, and salt. Add oil to a pan on medium high heat and place the pork chops in the pan. Sear them on each side for about 3 to 5 minutes until they are fully cooked to an internal temperature of 145F.
  • Remove the pork chops from the pan and lower the heat to low-medium. Place the persimmon slices in the pan and saute for about 2 to 3 minutes.
  • Enjoy the pork chops and sauteed persimmons with a side salad and dressing.

Notes

Nutrition information provided is an estimate. It will vary based on cooking method and specific ingredients used. Please consult with your healthcare provider for specific dietary needs. To gain a better understanding, explore our nutrition disclaimer here. 

Nutrition

Calories: 542kcalCarbohydrates: 42gProtein: 39gFat: 25gSaturated Fat: 6gPolyunsaturated Fat: 5gMonounsaturated Fat: 12gTrans Fat: 0.1gCholesterol: 114mgSodium: 699mgPotassium: 1271mgFiber: 2gSugar: 6gVitamin A: 5814IUVitamin C: 74mgCalcium: 105mgIron: 5mg

Similar Recipes

chicken soup

One Pot Mexican Chicken Soup

sweet potato blt

Sweet Potato BLT Sandwich

Grilled Honey Dijon Chicken Kale Salad

You Might Also Like

Frequently Asked Questions

Can I use a different protein besides pork chops?

Absolutely! This marinade works well with various proteins. You can try it with chicken breasts, turkey cutlets, or even tofu for a vegetarian option.


What if I can’t find persimmons?

No worries! While persimmons add a unique flavor, you can substitute them with other seasonal fruits like apples, pears, or even figs for a similar sweet and savory pairing.


Can I use a grill instead of a pan to cook the pork chops?

Certainly! Grilling adds a smoky flavor to the pork chops. Grill them over medium-high heat for 3 to 5 minutes on each side or until they reach an internal temperature of 145°F.

Posted on Leave a comment

Date and Walnut Granola

glass meal prep containers with date, rolled oats, and walnut granola

Energize Your Day with a healthy breakfast of Homemade Date and Walnut Granola! Life is a whirlwind of meetings, deadlines, and endless to-do lists. But guess what? You don’t have to compromise your health for the sake of a busy schedule. Today, I’m here to share a delightful meal prep recipe that’s not only quick and easy but also tasty and affordable.

This post may contain affiliate links. Please see our privacy policy for details.

Calories: 350kcal | Carbohydrates: 47g | Protein: 5g | Fat: 18g | Saturated Fat: 2g | Polyunsaturated Fat: 8g | Monounsaturated Fat: 7g | Sodium: 3mg | Potassium: 278mg | Fiber: 4g | Sugar: 30g | Vitamin A: 31IU | Vitamin C: 0.3mg | Calcium: 40mg | Iron: 2mg

a healthy breakfast on a round plate with date, rolled oats, and walnut granola

Why You’ll Love This Granola:

  • Time-Saving Wonder: It takes only a few minutes to prepare, giving you more time to conquer the day.
  • Energizing Ingredients: Rolled oats provide lasting energy, while dates and walnuts bring natural sweetness and a dose of healthy fats.
  • Versatility at Its Best: Sprinkle this granola on yogurt, top your smoothie bowl, or simply grab a handful for a quick, satisfying snack.
  • Health-Boosting Goodness: Packed with fiber, antioxidants, and nutrients, this granola is a tasty way to keep your health goals on track.

So make your mornings brighter and your days more energized with this fantastic Date and Walnut Granola for a healthy breakfast. Your health journey doesn’t have to be bland or time-consuming—embrace the delicious side of wellness! Prep it, pack it, and conquer your day with a smile.

The PrepYoSelf Newsletter

What You’ll Need to Prepare Granola for a Healthy Breakfast

  • Rolled Oats: Opt for old-fashioned or whole rolled oats for a heartier texture. Ingredient Swaps: For a gluten-free option, choose certified gluten-free oats. Experiment with steel-cut oats for a nuttier and chewier texture.
  • Dried Dates: Choose unsweetened, preservative-free dried dates for a more natural sweetness. Ingredient Swaps: Purchase whole dates and chop them at home for a fresher taste. Swap dates for raisins, apricots, or figs for variety.
  • Walnuts: These are an excellent source of omega-3 fatty acids for heart health.Store walnuts in an airtight container in the refrigerator to preserve their freshness. Ingredient Swaps: Substitute walnuts with almonds, pecans, or pistachios. Toasted seeds like pumpkin or sunflower seeds can be a nut-free alternative.
  • Honey: Choose raw, unprocessed honey for maximum health benefits. Ingredient Swaps: Maple syrup or agave nectar can be used as a vegan alternative. For a lower glycemic option, try using coconut nectar.
  • Cinnamon: Experiment with ground nutmeg or cardamom for a different flavor profile. Consider adding a dash of vanilla extract for a subtle sweetness.
  • Olive Oil: Choose extra virgin olive oil for its rich flavor and higher nutritional content. Ingredient Swaps: Coconut oil or avocado oil can be used for a different flavor. If you prefer a lower-fat option, try using applesauce.

round plate with date, rolled oats, and walnut granola for a healthy breakfast

How to Meal Prep Granola for a Healthy Breakfast

  1. Add a tablespoon of olive oil to a sauté pan over medium heat.
  2. Pour in the rolled oats and let the magic begin. Stir it around until each oat is coated with the glorious olive oil, and you start to get that delightful toasty aroma. Trust me; it’s the scent of a healthier, happier you!
  3. Now, it’s time to sweeten things up. Add those two tablespoons of honey, sprinkle in the cinnamon, and give it a good mix.
  4. Toss in the chopped dates and walnuts. These little gems will add a chewy, crunchy goodness that will make your taste buds sing with joy.
  5. Turn off the heat and mix everything together like you’re crafting a masterpiece. The warm oats will absorb all the sweet, nutty, and cinnamon-infused goodness, creating a symphony of flavors.

Reference the recipe card below for detailed instructions.

glass meal prep containers with a healthy breakfast of dates, rolled oats, and walnut granola

Meal Prep Tips for Date and Walnut Granola

  • Refrigerate for Freshness: If you’ve added perishable items like fresh fruit to your granola, consider storing it in the refrigerator to maintain freshness throughout the week.
  • Layered Pairfaits: Prepare layered yogurt parfaits with the granola, alternating with fresh fruits. Seal them in jars for a visually appealing and convenient breakfast or snack.
  • Freeze Extras: If you’ve made an extra-large batch, freeze some portions in zip-top bags. Thaw a bag in the refrigerator the night before you need it for a quick grab-and-go option.
  • On-the Go Snack Packs: Create small snack packs of granola for your purse, briefcase, or desk drawer. This way, you’ll have a healthy snack readily available wherever you are.

glass meal prep containers with a healthy breakfast of dates, rolled oats, and walnut granola

round plate granola, dates, and walnuts on a white cloth with a gold spoon

Date and Walnut Granola

Elevate your mornings with our quick and nutritious Date and Walnut Granola, a delightful blend of rolled oats, chopped dates, walnuts, honey, and cinnamon, perfect for busy individuals seeking a healthy and flavorful start to their day!
No ratings yet
Prep Time 5 minutes
Cook Time 5 minutes
Course Breakfast, Snack
Cuisine American
Servings 2
Calories 350 kcal

Equipment

  • spatula
  • saute pan

Ingredients
  

  • 1/2 cup rolled oats
  • 1/4 cup dried dates (chopped)
  • 1/4 cup walnuts (chopped)
  • 2 tbsp honey
  • 1/4 tsp cinnamon
  • 1 tbsp olive oil

Instructions
 

  • Add oil to a saute pan on medium heat
  • Pour in the rolled oats and stir it around until it is fully coated with the oil and gets slightly toasted
  • Next, add the honey, cinnamon, and mix well
  • Finally, add the dates and walnuts
  • Turn off the heat and mix it all together

Notes

Nutrition information provided is an estimate. It will vary based on cooking method and specific ingredients used. Please consult with your healthcare provider for specific dietary needs. To gain a better understanding, explore our nutrition disclaimer here. 

Nutrition

Calories: 350kcalCarbohydrates: 47gProtein: 5gFat: 18gSaturated Fat: 2gPolyunsaturated Fat: 8gMonounsaturated Fat: 7gSodium: 3mgPotassium: 278mgFiber: 4gSugar: 30gVitamin A: 31IUVitamin C: 0.3mgCalcium: 40mgIron: 2mg

Similar Recipes

cranberry oat muffins

Cranberry Oatmeal Muffin Bars

french toast 2

Oven Baked French Toast Muffins with Strawberries

baked oatmeal

Oven Baked Oats with Apricots and Berries

You Might Also Like

Frequently Asked Questions

Can I add fresh fruit to the granola?

Absolutely! Fresh fruit like berries, sliced banana, or diced apple can be added when serving for extra flavor and nutrition. However, you may want to mix it in when you are ready to eat the granola to prevent it from getting soggy.


How can I make the granola more crunchy?

If you prefer a crunchier texture, spread the granola mixture in a thin layer on a baking sheet and bake it for a few additional minutes until it reaches your desired crispiness. You can also make this in the Air Fryer by mixing all the ingredients together and cooking it at 330F for about 5 to 7 minutes until it reaches your desired crunchiness.


What are ways to use leftovers from this recipe?

Leftover ingredients like chopped dates, walnuts, and honey can be used in various recipes, from salads to baked goods. 

Posted on Leave a comment

Instant Pot Basil Pesto Beef Stew

glass meal prep containers with basil beef stew with diced tomatoes and potatoes

Our Instant Pot Basil Pesto Beef Stew is a meal prep masterpiece that seamlessly marries convenience, nutrition, and indulgent flavors. Crafted for those seeking a harmonious blend of wholesome ingredients and time-saving efficiency, this recipe promises to level up your weekly meal prep routine. With budget-friendly staples like beef stew meat, red potatoes, and canned tomatoes, it proves that gourmet dining need not break the bank. What sets this dish apart is the secret weapon – basil pesto. Not only does it effortlessly elevate the soup base, but it also introduces a burst of fresh, herbaceous notes that transform each bite into a symphony of flavors.

This post may contain affiliate links. Please see our privacy policy for details.

Calories: 454kcal | Carbohydrates: 32g | Protein: 43g | Fat: 17g | Saturated Fat: 4g | Polyunsaturated Fat: 1g | Monounsaturated Fat: 4g | Cholesterol: 107mg | Sodium: 966mg | Potassium: 1564mg | Fiber: 5g | Sugar: 9g | Vitamin A: 748IU | Vitamin C: 34mg | Calcium: 172mg | Iron: 7mg

round bowl with basil beef stew with diced tomatoes and potatoes

Meal Prep Hack: Elevating Soup Base Flavors with Basil Pesto

Incorporating basil pesto into the soup base not only adds convenience but also introduces a layer of depth and richness, making this Instant Pot Basil Pesto Beef Stew an excellent choice for those seeking a delicious, nutritious, and hassle-free meal prep option. Here are the reasons why:

  • Basil pesto infuses the stew with vibrant, aromatic basil, creating a lively and refreshing flavor profile.
  • Adding pesto eliminates the need for multiple herbs and spices, simplifying the ingredient list while maintaining a complex and sophisticated taste.
  • With just a few tablespoons, basil pesto instantly transforms a basic stew into a restaurant-worthy dish, making it a perfect solution for elevating flavors in a time-efficient manner.
  • Basil pesto pairs well with a variety of ingredients, enhancing the overall taste without overpowering the dish. It’s a versatile ingredient that complements the savory notes of the stew.

The PrepYoSelf Newsletter

Essential Ingredients:

  • Beef Stew Meat: Opt for lean cuts like sirloin or chuck for a healthier stew. Buy in bulk and freeze in individual portions for future use. Substitute beef with chicken or turkey for a lighter option.
  • Red Onions: Purchase a bag of red onions to have them handy for various recipes. They add a sweet and mild flavor to dishes. 
  • Red Potato: Choose firm, unblemished red potatoes. Buying in bulk bags can be cost-effective for regular use in different recipes. Feel free to add carrots, celery, or other favorite veggies.
  • Garlic Cloves: Consider purchasing garlic in bulk; it’s a kitchen staple. Opt for fresh garlic for enhanced flavor.
  • Canned Diced Tomatoes: Look for no-salt-added or low-sodium options. Canned tomatoes are pantry essentials, versatile for numerous recipes.
  • Basil Pesto Sauce: While store-bought is convenient, try making your own for a personalized touch. Store extra in ice cube trays for easy future use. Experiment with different pesto variations like sun-dried tomato or spinach for a unique twist

glass meal prep containers with basil beef stew with diced tomatoes and potatoes

How to Meal Prep Instant Pot Basil Beef Stew

  1. Gather all your ingredients and ensure they are measured and prepared. Dice the red onions, cube the red potato, and peel the garlic cloves. Place all the prepared ingredients in the Instant Pot. Pour in 2 cups of canned diced tomatoes over the beef stew meat, red onions, red potato, and garlic cloves.
  2. Add 3 tablespoons of the star ingredient – basil pesto sauce – for that irresistible herbal kick. Pour in 1 cup of water to create a savory broth. Season the stew with 1/4 teaspoon each of salt, pepper, and Italian seasoning. Give it a good stir to ensure the flavors meld together.
  3. Secure the Instant Pot with the lid and set the valve to the sealed position. Program the Instant Pot to cook for 45 minutes on medium pressure. The anticipation of the rich aroma filling your kitchen begins!
  4. Once the timer goes off, follow the Instant Pot instruction manual for a natural release of steam. As the lid comes off, you’ll be greeted by the sight and scent of a perfectly cooked Basil Pesto Beef Stew.
  5. Spoon out generous servings into your meal prep containers, ensuring each portion gets its fair share of the delectable broth.
  6. Elevate the flavor profile by adding an extra tablespoon of basil pesto to each serving just before consumption. This step not only enhances the taste but also adds a vibrant green hue to your stew.
  7. For those without an Instant Pot, fear not! This recipe is slow-cooker-friendly. Cook on high for 4 to 6 hours and savor the same mouthwatering results.

Reference the recipe card below for detailed instructions.

round bowl with basil beef stew with diced tomatoes and potatoes

Meal Prep Tips

  • Versatile Side Options: Consider preparing different sides to pair with the stew. Rice, quinoa, or a crusty baguette can add variety to your meals throughout the week.
  • Explore Different Bases: While the stew is delightful on its own, experiment with serving it over different bases like mashed cauliflower, sweet potato, or a bed of greens to keep your meals interesting.
  • Double Up on Veggies: Increase the nutritional content by adding extra vegetables. Chop and store them separately to maintain their freshness, adding them to the stew just before reheating.
  • Extra Pesto on the Side: Keep additional basil pesto on hand to add a fresh burst of flavor when serving. Include a small container with each meal for an extra taste of indulgence.

glass meal prep containers with basil beef stew with diced tomatoes and potatoes

round bowl with basil beef stew with diced tomatoes and potatoes

Instant Pot Basil Pesto Beef Stew

Instant Pot Basil Pesto Beef Stew, a budget-friendly and nutrition-packed delight that effortlessly combines lean beef, vibrant vegetables, and aromatic basil pesto for a week's worth of hearty, flavorful meal prep.
No ratings yet
Prep Time 5 minutes
Cook Time 45 minutes
Course dinner
Cuisine American, Italian
Servings 2
Calories 454 kcal

Equipment

  • knife
  • cutting board
  • Instant Pot

Ingredients
  

  • 12 oz beef stew meat
  • 1/4 cup red onions (diced)
  • 1 red potato (cubed)
  • 2 garlic cloves (peeled)
  • 2 cups canned diced tomatoes
  • 3 tablespoons basil pesto sauce
  • 1 cup water
  • 1/4 teaspoon salt
  • 1/4 teaspoon pepper
  • 1/4 teaspoon italian seasoning

Instructions
 

  • Place all of the ingredients in the Instant Pot. Cover the pot with the lid and place the valve in the sealed position. Set the timer for 45 minutes on medium. Note: If you don't have an Instant Pot, you can cook this in the slow cooker for 4 to 6 hours on high.
  • After it cooks, follow the instruction manual to naturally release the steam. Enjoy each serving with an extra tablespoon of basil pesto for extra flavor

Notes

Nutrition information provided is an estimate. It will vary based on cooking method and specific ingredients used. Please consult with your healthcare provider for specific dietary needs. To gain a better understanding, explore our nutrition disclaimer here. 

Nutrition

Calories: 454kcalCarbohydrates: 32gProtein: 43gFat: 17gSaturated Fat: 4gPolyunsaturated Fat: 1gMonounsaturated Fat: 4gCholesterol: 107mgSodium: 966mgPotassium: 1564mgFiber: 5gSugar: 9gVitamin A: 748IUVitamin C: 34mgCalcium: 172mgIron: 7mg

Similar Recipes

chicken soup

One Pot Mexican Chicken Soup

sweet potato blt

Instant Pot Beef Ragu

pork carnitas

Instant Pot Pork Carnitas

You Might Also Like

Frequently Asked Questions

Is the pesto necessary, or can I omit it?

While the pesto adds a unique flavor, you can omit it if needed. The stew will still be delicious, though the basil pesto contributes a distinctive herbal kick. You can also just use fresh basil leaves and extra garlic as an alternative.


Is the 45-minute cooking time in the Instant Pot flexible?

Yes, the cooking time can be adjusted based on your preferences. We prefer the longer cook time so that the meat is fork tender. Experiment with shorter or longer cooking times to achieve your desired stew consistency.


Can I freeze this stew for longer storage?

Absolutely. Portion the stew into freezer-friendly containers, leaving some space for expansion, and freeze for up to 2-3 months. Thaw overnight in the refrigerator before reheating.

Posted on Leave a comment

Air Fryer Honey Grapefruit

round glass meal prep containers with grapefruit topped with yogurt and cashews

Air Fryer Honey Grapefruit! This delightful creation combines the sweet and zesty goodness of grapefruit with the rich touch of honey, crunchy cashews, and your favorite yogurt. Let’s dive right into this citrusy adventure for an air fryer breakfast!

This post may contain affiliate links. Please see our privacy policy for details.

Calories: 268kcal | Carbohydrates: 32g | Protein: 10g | Fat: 13g | Saturated Fat: 5g | Polyunsaturated Fat: 1g | Monounsaturated Fat: 5g | Cholesterol: 22mg | Sodium: 80mg | Potassium: 547mg | Fiber: 3g | Sugar: 23g | Vitamin A: 1640IU | Vitamin C: 41mg | Calcium: 240mg | Iron: 1mg

round plate with grapefruit topped with yogurt and cashews

This Air Fryer Honey Grapefruit breakfast isn’t just a tasty and convenient option for busy mornings – it’s a deliberate choice for health and well-being. From its quick preparation to its nutrient-rich profile and adaptability, it’s a meal that aligns with the needs of individuals navigating a hectic lifestyle while aiming for a healthy reset. Here’s the reason we love this meal prep idea:

  • Efficiency and Speed: In the fast-paced world we live in, efficiency is key. The Air Fryer makes this breakfast a breeze to prepare – in just 8 minutes, you have a delicious, health-packed meal ready to go. This means less time in the kitchen and more time for other morning routines or a few extra minutes of sleep.
  • Nutrient-Packed Goodness: Grapefruit is a nutrient powerhouse, loaded with vitamin C and antioxidants. Combining it with honey, cashews, and yogurt adds a variety of essential nutrients – from healthy fats and proteins to gut-friendly probiotics. This meal isn’t just tasty; it’s a nutrient-packed, energy-boosting start to your day.
  • Balanced and Satisfying: This breakfast hits all the right notes – the natural sugars in honey and grapefruit provide a quick energy boost, while the yogurt and cashews add proteins and healthy fats that keep you feeling satisfied throughout the morning. It’s a balanced combination that curbs mid-morning cravings and sets you up for success.
  • Versatility in Flavors and Textures: The beauty of this recipe lies in its adaptability. You can customize the yogurt choice to your preference, experiment with different types of honey, or even try various nuts for added crunch. This versatility ensures that you won’t get bored and allows you to cater the flavors to your liking, keeping your taste buds excited.
  • Gentle Reset for Healthy Choices: After a weekend of indulgence or during busy weeks where meal choices may sway off track, this Air Fryer Honey Grapefruit serves as a gentle reset button. It’s a deliciously wholesome option that feels like a treat, making it easier to transition back to healthier eating habits. The natural sugars in the grapefruit and honey satisfy sweet cravings without derailing your health goals.

The PrepYoSelf Newsletter

Ingredients You’ll Need For This Nutritious Air Fryer Breakfast

  • Grapefruit: Our main squeeze, the grapefruit, is not only a burst of vibrant citrusy flavor but also packs a punch of nutritional goodness. Loaded with vitamin C, antioxidants, and a refreshing tanginess, the grapefruit sets the tone for a wholesome and invigorating dish. Grocery Tip: Look for grapefruits that are firm, heavy for their size, and have a bright, smooth skin for the juiciest results.
  • Honey: Ah, liquid gold! The honey in this recipe is not just a sweetener; it’s a caramelized drizzle of goodness that enhances the natural sweetness of the grapefruit. Beyond its delightful taste, honey also brings its antibacterial and anti-inflammatory properties to the table, making this recipe a treat for your taste buds and your well-being. Grocery Tip: Opt for locally sourced honey for a touch of regional flair and to support local beekeepers.
  • Cashews: Now, let’s talk about the crunchy element – cashews! These buttery nuts add a layer of texture to the dish, elevating each bite to a whole new level. Cashews bring a subtle nuttiness and a satisfying crunch that complements the juicy tenderness of the grapefruit. Plus, they’re a fantastic source of healthy fats and essential minerals. Prep Tip: Toast the cashews briefly in a dry pan for an extra depth of flavor before adding them to the grapefruit.
  • Yogurt: Yogurt, the creamy canvas that ties everything together! Whether you choose Greek yogurt for its thickness, coconut yogurt for a tropical twist, or almond yogurt for a nutty undertone, the yogurt adds a velvety richness to the dish. It also introduces a layer of probiotics, promoting gut health and making this recipe a deliciously nutritious treat. Grocery Tip: Experiment with different yogurt varieties to find your perfect flavor combination.

round glass meal prep containers with grapefruit topped with yogurt and cashews

Easy Recipe Steps to Air Fry Grapefruit

  1. Start by grabbing a juicy grapefruit – the star of our show! Slice it in half, revealing those vibrant citrusy segments. Now, get ready to elevate the flavor with a drizzle of liquid gold – honey! Pour honey on top of the grapefruit flesh, and with a spoon, spread it evenly to ensure every bite is coated in sweetness.
  2. Time to place the grapefruit in the Air Fryer! Place the honey-drizzled grapefruit halves in the basket, and set the temperature to 400°F. Let the magic happen for 8 minutes – the aroma that fills your kitchen will have you counting down the seconds!
  3. As your grapefruit basks in the Air Fryer glory, it’s time to prepare the crunchy surprise. Take 1/4 cup of cashews and give them a rough chop for that extra texture. After the 8-minute mark, sprinkle these golden nuggets over the grapefruit, adding a delightful crunch that will have your taste buds doing a happy dance.
  4. Last but certainly not least, let’s crown our Air Fryer Honey Grapefruit masterpiece with a generous dollop of yogurt! Whether you prefer Greek, coconut, or almond yogurt, the choice is yours. Spoon it over the honey-drizzled, cashew-covered grapefruit halves, turning each bite into a symphony of flavors.

Reference the recipe card below for detailed instructions.

round plate with grapefruit topped with yogurt and cashews

Meal Prep Tips:

  • Set Up a Breakfast Station: Designate a specific area in your refrigerator for all the prepped components – honey-drizzled grapefruit halves, portioned yogurt, and a container of chopped cashews. Having a designated breakfast station makes it easy to grab everything you need quickly.
  • Use Air Fryer Liners for Easy Cleanup: Consider using air fryer parchment paper or liners for easy cleanup after cooking the grapefruit. This eliminates the need for scrubbing the air fryer basket, saving you time in the morning rush.
  • Experiment with Flavors: While meal prepping, consider experimenting with different honey varieties, yogurt flavors, or even trying different types of nuts. This way, you can switch things up throughout the week, keeping your breakfasts exciting and flavorful.

round glass meal prep containers with grapefruit topped with yogurt and cashews

Round white plate with a grapefruit half, topped with yogurt and cashew nuts.

Air Fryer Honey Grapefruit

Enjoy this burst of citrusy goodness with Air Fryer Honey Grapefruit—juicy grapefruit halves drizzled with honey, air-fried to perfection, and topped with crunchy cashews and creamy yogurt for a deliciously refreshing and wholesome breakfast!
No ratings yet
Prep Time 5 minutes
Cook Time 10 minutes
Course Breakfast, Snack
Cuisine American
Servings 2
Calories 268 kcal

Equipment

  • Air Fryer

Ingredients
  

  • 1 grapefruit
  • 2 teaspoons honey
  • 1/4 cup cashews
  • 12 oz yogurt (your choice)

Instructions
 

  • Slice the grapefruit in half. Drizzle honey on top of the flesh and spread it across.
  • Place the grapefruit in the Air Fryer basket and cook for 8 minutes at 400F. Note: If you don't have an Air Fryer, you can bake it i the oven for 10-12 minutes at 425.
  • Afterward, top it off with cashews and your choice of yogurt.

Notes

Nutrition information provided is an estimate. It will vary based on cooking method and specific ingredients used. Please consult with your healthcare provider for specific dietary needs. To gain a better understanding, explore our nutrition disclaimer here. 

Nutrition

Calories: 268kcalCarbohydrates: 32gProtein: 10gFat: 13gSaturated Fat: 5gPolyunsaturated Fat: 1gMonounsaturated Fat: 5gCholesterol: 22mgSodium: 80mgPotassium: 547mgFiber: 3gSugar: 23gVitamin A: 1640IUVitamin C: 41mgCalcium: 240mgIron: 1mg

Similar Recipes

baked oatmeal

Oven Baked Oats with Apricots and Berries

cranberry oat muffins

Cranberry Oatmeal Muffin Bars

french toast 2

Oven Baked French Toast Muffins with Strawberries

You Might Also Like

Frequently Asked Questions

Can I Use Any Type of Grapefruit?

Yes, feel free to use your favorite variety of grapefruit! Whether it’s ruby red, pink, or white grapefruit, the recipe works well with all types.


Can I Use a Different Sweetener Instead of Honey?

Certainly! While honey adds a unique flavor, you can experiment with other natural sweeteners like maple syrup or agave nectar to suit your taste preferences.


Do I Need to Peel the Grapefruit Before Air Frying?

No need to peel! The grapefruit halves are air fried with the skin intact. Once cooked, the juicy segments can be easily scooped out with a spoon.

Posted on Leave a comment

Cranberry Applesauce Muffin Bars

rectangular glass meal prep containers with cranberry applesauce muffin bars

These Cranberry Applesauce Muffin Bars are ready to take center stage in your breakfast meal prep lineup! These bars are not only a taste sensation but also a fantastic way to bring a burst of fall flavor to your busy week. These bars are a delightful combination of sweet and tart and they’re also a breeze to whip up and perfect for a week morning energy or on-the-go snacking. Prep them ahead, pack them up, and snack your way to happiness. Happy munching!

This post may contain affiliate links. Please see our privacy policy for details.

Calories: 232kcal | Carbohydrates: 43g | Protein: 6g | Fat: 5g | Saturated Fat: 1g | Polyunsaturated Fat: 1g | Monounsaturated Fat: 2g | Trans Fat: 0.01g | Cholesterol: 82mg | Sodium: 34mg | Potassium: 116mg | Fiber: 2g | Sugar: 16g | Vitamin A: 136IU | Vitamin C: 1mg | Calcium: 21mg | Iron: 2mg

round white plate with cranberry applesauce muffin bars

Why You’ll Enjoy These Muffin Bars

In the midst of holiday chaos and workweek madness, these Cranberry Applesauce Muffin Bars are here to simplify your life. They bring ease, flavor, and a touch of festive joy to your daily routine. So, go ahead, treat yourself to a stress-free morning, and let the deliciousness of these bars make your days a little brighter! 

So, let’s dive into the top 5 reasons why these Cranberry Applesauce Muffin Bars are a game-changer for busy individuals during hectic work weeks, especially in the festive holiday season!

  • Quick and Effortless Prep: Life moves fast, and these muffin bars keep up! With minimal ingredients and a straightforward process, you can have a batch ready to roll in no time. Perfect for those busy mornings when every second counts.
  • Versatile Ingredients for Stress-Free Shopping: The ingredient list is short and sweet, and chances are you already have most of these staples in your kitchen. No need for a lengthy shopping trip or searching for obscure items. Keep it simple, keep it tasty!
  • Portable Deliciousness: The hustle and bustle of the holiday season demand snacks that can keep up. These bars are not only delicious but also portable, making them the ideal companion for your on-the-go lifestyle. Grab one on your way out the door, and you’re set!
  • Holiday Flavors in Every Bite: The festive combo of cranberries and applesauce brings a taste of the holidays to your daily routine. It’s like a little celebration in every bite, uplifting your mood and giving you that extra boost to power through the busiest of days.
  • Make-Ahead Magic: Meal prep enthusiasts, rejoice! These muffin bars are the definition of make-ahead magic. Whip up a batch during your Sunday meal prep session, and you’ll have a week’s worth of scrumptious breakfasts or snacks at your fingertips. Less stress, more yum!

The PrepYoSelf Newsletter

Ingredients You’ll Need

  • Large Egg: The egg plays a crucial role in binding our muffin bars together, giving them that perfect texture. It adds richness and contributes to the overall moistness of the bars. Plus, eggs are a fantastic source of high-quality protein, making these bars a wholesome choice to kickstart your day.
  • Applesauce: Ah, the unsung hero of healthier baking! Applesauce not only imparts a natural sweetness to our bars but also replaces some of the fat, keeping them moist without sacrificing flavor. It brings a hint of apple goodness to every bite, adding a touch of fruity freshness.
  • Flour (Gluten-free if preferred): The backbone of our recipe, flour gives structure to the muffin bars. Whether you opt for traditional or gluten-free, it’s the canvas on which the other flavors dance. A simple yet essential ingredient, ensuring our bars have that satisfying, cake-like texture.
  • Dried Cranberries: These little bursts of tartness are like jewels in our muffin bars. Dried cranberries add a pop of color, a hint of sweetness, and a delightful chewiness. Packed with antioxidants and flavor, they elevate the bars to a whole new level, making each bite a delightful surprise.
  • Olive Oil: A touch of good-for-you fat! Olive oil adds a subtle richness to the bars while contributing to their moistness. It also brings its unique flavor profile, complementing the sweetness of the applesauce and the tartness of the cranberries. A healthier alternative that doesn’t compromise on taste.

rectangular glass meal prep containers with cranberry applesauce muffin bars

How to Meal Prep Cranberry Applesauce Muffin Bars

  1. Preheat your oven to 350°F (175°C).
  2. Grab a mixing bowl and let the whisking party begin! Crack open that egg, add in the applesauce, and sprinkle in the sugar. Give it a good whisk until everything is harmoniously blended.
  3. Time to add the flour to our mix. Pour it in, toss in those vibrant dried cranberries, and let the magic happen as you stir everything together. Watch the batter come to life!
  4. A little olive oil love for our baking dish – make sure it’s coated to prevent any muffin bar from sticking. Now, pour in that luscious batter. Can you smell the deliciousness already?
  5. Pop that baking dish into the preheated oven and let the baking magic unfold. In just 15-20 minutes, you’ll have golden-brown, heavenly bars. Keep an eye on them and let your kitchen fill with that irresistible aroma.
  6. Once the center is fully cooked and your kitchen is filled with the irresistible scent of cranberry applesauce bliss, take the bars out and let them cool. When they’re comfortably warm, cut them into squares or bars – whatever your heart desires!

Reference the recipe card below for detailed instructions.

round white plate with cranberry applesauce muffin bars

MealPrep Tips:

  • Double or Triple the Recipe: If you have the oven fired up, why not make a larger batch? Doubling or tripling the recipe allows you to prepare a surplus of muffin bars that can be stored for the entire week. This way, you’ll have a ready-made breakfast or snack whenever hunger strikes.
  • Freeze for Future Convenience: Muffin bars freeze remarkably well. Wrap individual bars in plastic wrap or place them in a freezer-friendly container, and you’ll have a stockpile of convenient, ready-to-eat snacks. Just pop them in the microwave or let them thaw in the fridge overnight when you’re ready to enjoy.
  • Mix Up the Flavors: While the cranberry applesauce combo is delightful, don’t be afraid to experiment with other mix-ins. Try adding nuts, seeds, or different dried fruits to customize the bars to your liking. This way, you can enjoy a variety of flavors throughout the week.
  • Pair with Complementary Snacks: Enhance your meal prep game by pairing these muffin bars with complementary snacks. Consider adding a dollop of Greek yogurt, a handful of fresh berries, or a piece of cheese for a well-rounded and satisfying meal.

rectangular glass meal prep containers with cranberry applesauce muffin bars

round white plate with cranberry applesauce muffin bars

Cranberry Applesauce Muffin Bars

Whip up a batch of delightful Cranberry Applesauce Muffin Bars – a quick, versatile, and make-ahead treat that combines the seasonal flavors of cranberries and applesauce for a perfect on-the-go breakfast or snack during your busiest days!
No ratings yet
Prep Time 5 minutes
Cook Time 20 minutes
Course Breakfast, Snack
Cuisine American
Servings 2
Calories 232 kcal

Equipment

  • mixing bowl
  • whisk
  • baking dish
  • oven

Ingredients
  

  • 1 large egg
  • 1/2 cup applesauce
  • 1/2 cup flour
  • 1 oz dried cranberries
  • 1 teaspoon olive oil

Instructions
 

  • Pre-heat the oven to 400F. In a mixing bowl whisk together the eggs, sugar, and applesauce.
  • Next, add the flour, cranberries, and mix it well. Grease a baking dish with oil and pour in the batter.
  • Bake in the oven for 15-20 minutes until the center is fully cooked.

Notes

Nutrition information provided is an estimate. It will vary based on cooking method and specific ingredients used. Please consult with your healthcare provider for specific dietary needs. To gain a better understanding, explore our nutrition disclaimer here. 

Nutrition

Calories: 232kcalCarbohydrates: 43gProtein: 6gFat: 5gSaturated Fat: 1gPolyunsaturated Fat: 1gMonounsaturated Fat: 2gTrans Fat: 0.01gCholesterol: 82mgSodium: 34mgPotassium: 116mgFiber: 2gSugar: 16gVitamin A: 136IUVitamin C: 1mgCalcium: 21mgIron: 2mg

Similar Recipes

baked oatmeal

Oven Baked Oats with Apricots and Berries

ricotta apple

Oven Baked Apple with Ricotta and Walnuts

french toast 2

Oven Baked French Toast Muffins with Strawberries

You Might Also Like

Smartfruit Mellow Mango + Immunity, 100% Real Fruit Purée

Trader Joe’s Unsalted, Dry Toasted Slivered Almonds

Trader Joe’s the Dark Chocolate Lover’s Chocolate Bar

Frequently Asked Questions

Can I use fresh cranberries instead of dried?

Yes, you can use fresh cranberries, but keep in mind that the texture and sweetness may differ. Adjust sugar levels accordingly.


Can I add spices like cinnamon or nutmeg?

Absolutely! Enhance the flavor profile by adding a pinch of cinnamon, nutmeg, or your favorite spices.


Can I use a different fruit besides applesauce?

Experiment with mashed bananas, pumpkin puree, or pear sauce for a unique flavor twist.

Posted on Leave a comment

Breakfast Bacon Egg Cups

round glass meal prep containers with bacon wrapped eggs and roasted tomato

Here’s a breakfast recipe that’s not only delicious but also ridiculously easy to whip up – Bacon Egg Cups with Roasted Tomato. These little cups of joy are the perfect way to start your day with a protein-packed punch and a burst of flavor. Let’s dive into the kitchen and get these eggs baking!

This post may contain affiliate links. Please see our privacy policy for details.

Calories: 333kcal | Carbohydrates: 2g | Protein: 17g | Fat: 28g | Saturated Fat: 9g | Polyunsaturated Fat: 5g | Monounsaturated Fat: 12g | Trans Fat: 0.1g | Cholesterol: 356mg | Sodium: 418mg | Potassium: 285mg | Fiber: 0.4g | Sugar: 1g | Vitamin A: 760IU | Vitamin C: 4mg | Calcium: 55mg | Iron: 2mg

round plate with bacon wrapped eggs and roasted tomato

The PrepYoSelf Newsletter

Here’s why you need to make this:

These Bacon Egg Cups with Roasted Tomato are not just a tasty treat but also a healthy indulgence that is perfect for meal prep, especially for busy individuals aiming to stay on track with their nutrition:

  • Excitement in Every Bite: Sticking to a meal plan can sometimes feel monotonous, but not with these bacon egg cups. The variety of textures – the crispy bacon, creamy eggs, and juicy tomatoes – along with the interplay of sweet and savory flavors, ensures that each bite is exciting. Meal prep shouldn’t be a chore; it should be an anticipation of delicious moments, and these cups deliver just that.
  • Flavor Harmony: The flavor combinations in these cups create a delightful symphony for your taste buds. The savory, smoky notes from the bacon perfectly complement the richness of the eggs. The roasted tomatoes add a burst of sweetness and acidity, balancing the dish. Topped with fresh green onions, you get a pop of brightness and a hint of freshness that ties everything together into a harmonious and satisfying flavor experience.
  • Portion Control and Satiety: Meal prepping these cups allows for easy portion control. Each cup is a perfectly sized, balanced serving, helping you manage your calorie intake.
  • Time-Efficient Meal Prep: For busy individuals, time is of the essence. These bacon egg cups are a brilliant solution. With just a few simple ingredients and minimal prep time, you can have a batch ready to go. Pop them in the oven, and while they bake, you can focus on other tasks, making it a time-efficient and hassle-free meal prep option.

Simple Ingredients You’ll Need

  • Eggs: We used whole eggs, but you can also swap this with egg whites. 
  • Bacon: Who can resist the allure of bacon? Those savory, crispy slices not only wrap our eggs like a cozy blanket but also infuse every bite with a smoky, salty goodness. Bacon adds that irresistible crunch and umami flavor that takes these cups to the next level. You can swap it with turkey bacon or even prosciutto.
  • Roma Tomato: Enter the burst of freshness! The roma tomato brings a juicy, sweet element to the dish. Roasting them intensifies their natural flavors, creating a delightful contrast to the savory bacon and creamy eggs. It’s the touch of brightness that makes each bite a flavor symphony.
  • Olive Oil: Olive oil plays a crucial role in roasting our tomatoes, adding a subtle earthiness and enhancing their natural sweetness. It also helps achieve that perfect golden crispiness in both the bacon and the edges of the eggs.
  • Green Onions: The vibrant finish! Chopped green onions are not just a garnish; they’re the final touch that brings a burst of freshness and a mild oniony kick. Their bright green color adds visual appeal, and their crisp texture provides a satisfying contrast to the softer components of the dish.

round glass meal prep containers with bacon wrapped eggs and roasted tomato

How to Meal Prep Bacon Egg Cups

  1. First things first, let’s get that oven preheated to a toasty 400°F (or approximately 200°C). This ensures that our bacon egg cups and roasted tomatoes get that perfect golden crispiness.
  2. Now, grab your muffin tin and let’s give these eggs a cozy bacon blanket. Take each bacon slice and wrap it in a circle inside the muffin tin cups. This not only adds a savory touch but also forms the perfect vessel for our eggs.
  3. Time to introduce the stars of the show – crack one large egg into each bacon-wrapped cup. Sprinkle a pinch of salt on top for that extra flavor kick.
  4. Let’s not forget about our roasted tomato companions! Cut that roma tomato in half and place each half in a muffin tin cup. Drizzle them with a teaspoon of olive oil and sprinkle a bit of salt to taste. These roasted tomatoes add a burst of juicy sweetness that pairs perfectly with the savory bacon and eggs.
  5. Pop your muffin tin into the preheated oven and let the magic happen. Bake for approximately 15 minutes or until the egg whites are set. You’ll know they’re ready when the bacon is crispy, and the eggs are cooked to your liking.
  6. Once the bacon egg cups and tomatoes are out of the oven, use a knife to gently loosen the edges of each cup.
  7. Now, let’s add a pop of color and freshness – sprinkle those bacon egg cups with a generous amount of chopped green onions. Not only do they look Instagram-worthy, but they also add a delightful crunch and a burst of oniony goodness.

Reference the recipe card below for detailed instructions.

round plate with bacon wrapped eggs and roasted tomato

Meal Prep Pairing Tips:

These bacon egg cups are not just limited to breakfast. They make a fantastic addition to brunch, lunch, or even a light dinner. Pair them with quinoa, couscous, or a simple green salad for a more substantial meal.

  • Fresh Greens: Serve these cups with a side of fresh greens or a simple salad to add a crunchy and refreshing element to your meal.
  • Avocado Slices: Creamy avocado slices are a perfect accompaniment. The richness of avocado complements the bacon and eggs beautifully.
  • Whole Grain Toast: Enjoy these cups with a side of whole grain toast for a satisfying crunch and additional fiber. It’s a great way to make the meal more filling.
  • Greek Yogurt with Berries: Balance the savory goodness with a sweet touch. A bowl of Greek yogurt topped with fresh berries adds a delightful contrast.
  • Salsa or Hot Sauce: Spice things up! A dollop of salsa or a dash of hot sauce can add a kick of flavor that enhances the overall experience.

round glass meal prep containers with bacon wrapped eggs and roasted tomato

round plate with bacon wrapped eggs and roasted tomato

Bacon Egg Cups with Roasted Tomato

Enjoy the savory symphony of flavor with these Bacon Egg Cups featuring crispy bacon, creamy eggs, and sweet roasted tomatoes, creating a delightful and nutritious meal prep option for any time of day!
No ratings yet
Prep Time 5 minutes
Cook Time 11 minutes
Course Breakfast
Cuisine American
Servings 2
Calories 333 kcal

Equipment

  • knife
  • cutting board
  • muffin
  • oven

Ingredients
  

  • 4 large eggs
  • 4 bacon slices
  • 1 roma tomato
  • 1 teaspoon olive oil
  • 1 teaspoon green onions (chopped)
  • salt (to taste)

Instructions
 

  • Pre-heat the oven to 400F. Place the bacon slices in the muffin tin by wrapping it in a circle. Crack an egg into each cup and sprinkle with salt.
  • Cut tomato in half and place each half in a muffin tin. Drizzle the tomatoes with olive oil and sprinkle with salt to taste.
  • Bake the bacon egg cups and tomatoes in the oven for 15 minutes until the egg whites set. Use a knife to loosen the edge of each cup. Garnish with chopped green onions

Notes

Nutrition information provided is an estimate. It will vary based on cooking method and specific ingredients used. Please consult with your healthcare provider for specific dietary needs. To gain a better understanding, explore our nutrition disclaimer here. 

Nutrition

Calories: 333kcalCarbohydrates: 2gProtein: 17gFat: 28gSaturated Fat: 9gPolyunsaturated Fat: 5gMonounsaturated Fat: 12gTrans Fat: 0.1gCholesterol: 356mgSodium: 418mgPotassium: 285mgFiber: 0.4gSugar: 1gVitamin A: 760IUVitamin C: 4mgCalcium: 55mgIron: 2mg

Similar Recipes

fried egg and sausage hash

Fried Egg with Apple and Sausage Hash

Easy Cheese Omelette

easy sausage egg muffins

Sausage Egg Muffins with Strawberries

You Might Also Like

Frequently Asked Questions

Can I add cheese to these egg cups?

Definitely! Feel free to sprinkle some shredded cheese on top of the eggs before baking. Cheddar, feta, or mozzarella would all be delicious choices.


What other vegetables can I add to these bacon egg cups?

Get creative! Spinach, bell peppers, mushrooms, or even diced zucchini would be fantastic additions. Just make sure to adjust the cooking time if adding more veggies.


Can I use a different type of tomato?

While Roma tomatoes work well, you can experiment with cherry tomatoes or grape tomatoes for a sweeter twist. Just adjust the baking time accordingly.

Posted on Leave a comment

One Pot Chicken Meatball and Kale Soup

glass meal prep containers with chicken meatball soup, diced carrots, celery, onions, and baby kale

Here we have a soul-warming, one pot Chicken Meatball and Kale Soup ready to be portioned and enjoyed throughout the week. Whether you’re meal prepping for a busy week or yearning for a soothing dinner on a chilly evening, this soup is a celebration of simplicity, health, and the irresistible allure of autumn flavors. This wholesome meal prep option not only satisfies your hunger but also nourishes your body with a medley of flavors and nutrients. Say goodbye to mealtime stress and embrace the joy of savoring a homemade, hearty soup at your convenience. Happy cooking!

This post may contain affiliate links. Please see our privacy policy for details.

Calories: 471kcal | Carbohydrates: 22g | Protein: 40g | Fat: 26g | Saturated Fat: 6g | Polyunsaturated Fat: 5g | Monounsaturated Fat: 12g | Trans Fat: 0.1g | Cholesterol: 235mg | Sodium: 2198mg | Potassium: 1497mg | Fiber: 6g | Sugar: 5g | Vitamin A: 12901IU | Vitamin C: 98mg | Calcium: 344mg | Iron: 5mg

round bowl with chicken meatball soup, diced carrots, celery, onions, and baby kale

Why You’ll Enjoy this Version of Chicken Meatball Soup

  • Comforting Warmth for Fall Evenings: As the temperatures drop during the fall months, a steaming bowl of Chicken Meatball and Kale Soup provides comforting warmth, making it the perfect meal to cozy up with after a long day.
  • Nutrient-Rich and Weight-Friendly: With a balance of protein, fiber, and vegetables, this soup is not only delicious but also a smart choice for those watching their weight. The nutrient-rich ingredients contribute to a satisfying meal that won’t leave you feeling deprived.
  • Freezer-Friendly for Extended Enjoyment: This soup freezes well, allowing you to portion it into individual servings for longer storage. Having a stock of frozen meals is a game-changer for busy fall days when cooking seems like a daunting task.
  • Time-Saving Efficiency: Busy individuals will appreciate the simplicity of this meal prep. The meatballs and soup come together with minimal effort, and the soup simmers while you attend to other tasks, making it a time-efficient option for those with packed schedules.
  • High-Protein Content: Ground chicken serves as a lean source of protein, essential for muscle repair and maintenance. Protein-rich meals also contribute to a feeling of fullness, helping to curb unhealthy snacking.

The PrepYoSelf Newsletter

Ingredients You’ll Need

  • Ground Chicken: Opt for lean ground chicken to keep the soup light and healthy. Swap ground chicken for ground turkey if you prefer a milder flavor. For a plant-based option, try using lentils or a mix of finely chopped mushrooms and black beans.
  • Egg: Buying eggs in larger quantities often comes with cost savings, making it a budget-friendly option.
  • Breadcrumbs: To add a whole-grain twist, consider using whole wheat breadcrumbs or panko for added texture. Making your breadcrumbs from stale bread is also economical and sustainable option.
  • Garlic Cloves: Consider purchasing pre-minced garlic or garlic paste for a time-saving option.
  • White Onions, Celery, Carrots: Purchase these vegetables in a pre-chopped, frozen mix to save time without compromising on freshness. 
  • Baby Kale: Look for pre-washed and pre-chopped baby kale for convenience. If baby kale is not available, regular kale can be substituted; just remove the tough stems and chop the leaves finely.
  • Chicken Broth: Consider low-sodium or no-sodium chicken broth to have better control over the soup’s salt content. Buying broth in larger containers or in multipacks can save money.

glass meal prep containers with chicken meatball soup, diced carrots, celery, onions, and baby kale

Basic Steps to Meal Prep Chicken Meatball and Kale Soup

  1. In a mixing bowl, combine the ground chicken, egg, minced garlic, salt, and breadcrumbs. Mix until all ingredients are well incorporated. Shape the mixture into 2-inch round meatballs. Set them aside, ready to infuse the soup with their delicious flavor.
  2. Heat olive oil in a soup pot over medium-high heat. Add diced onions, celery, and carrots. Sauté for 2 to 3 minutes, allowing the vegetables to release their aromatic flavors. Pour in the chicken broth and sprinkle garlic powder, Italian seasoning, and salt into the pot. Stir well to blend the seasonings and vegetables, creating a savory base for your soup.
  3. Gently place the prepared chicken meatballs into the simmering broth. Allow the soup to come to a boil. Once boiling, reduce the heat to low, cover the pot with a lid, and let it simmer for approximately 20 minutes. This ensures that the meatballs cook thoroughly, reaching an internal temperature of 165°F.
  4. Uncover the pot and introduce the vibrant baby kale to the soup. Stir until the kale wilts and softens, infusing the broth with its fresh, earthy essence.

Reference the recipe card below for detailed instructions.

round bowl with chicken meatball soup, diced carrots, celery, onions, and baby kale

Meal Prep Tips for Chicken Meatball Soup

  • Prepare Ingredients in Advance: Wash, chop, and measure all ingredients before you start cooking. This not only streamlines the cooking process but also ensures that you have everything on hand.
  • Batch Prep Meatballs: Make a large batch of chicken meatballs and freeze the extras for future use. This way, you can easily grab the pre-made meatballs for a quick soup whenever you’re in the mood.
  • Refrigerator Storage: Store leftover Chicken Meatball and Kale Soup in airtight containers in the refrigerator. Consume within 3-4 days for optimal freshness.
  • Freezing Individual Portions: Portion the soup into individual containers, leaving some space for expansion, and freeze for longer storage. Label containers with the date for easy tracking.
  • Avoid Overcrowding: When storing in the refrigerator or freezer, avoid overcrowding the containers. This helps the soup cool down faster, reducing the risk of bacterial growth.
  • Reheating Tips: For a quick reheating, place the soup in a microwave-safe container and heat in 1-minute intervals, stirring between each interval. This helps distribute heat evenly.

glass meal prep containers with chicken meatball soup, diced carrots, celery, onions, and baby kale

round bowl with chicken meatball soup, diced carrots, celery, onions, and baby kale

One Pot Chicken Meatball and Kale Soup

Savor the warmth of fall with our Chicken Meatball and Kale Soup, a hearty blend of tender chicken meatballs, vibrant vegetables, and aromatic spices, creating a comforting bowl that's perfect for busy weeknights or cozy evenings
No ratings yet
Prep Time 5 minutes
Cook Time 30 minutes
Course dinner, Main Course
Cuisine American, Italian
Servings 2
Calories 471 kcal

Equipment

  • knife
  • cutting board
  • soup pot

Ingredients
  

Meatball Ingredients

  • 12 oz ground chicken
  • 1 large egg
  • 1/4 cup breadcrumbs
  • 3 garlic cloves (minced)
  • 1/4 teaspoon salt

Soup Ingredients

  • 1/4 cup white onions (diced)
  • 1/4 cup celery (diced)
  • 1/4 cup carrots (diced)
  • 3 cups baby kale
  • 3 cups chicken broth
  • 1/4 teaspoon garlic powder
  • 1/4 teaspoon italian seasoning
  • 1/4 teaspoon salt
  • 1 tablespoon olive oil

Instructions
 

  • In a mixing bowl, add the ground chicken, egg, minced garlic, garlic powder, and salt. Roll them into 2 inch round balls.
  • Next, add olive oil to a soup pot on medium high heat. Saute the onions, celery, and carrots for about 2 to 3 minutes.
  • Then, add the chicken broth and sprinkle in the garlic powder, Italian seasoning, and salt.
  • Place the meatballs in the broth and bring the broth to a boil. Once it reaches a boil, lower the heat, and cover the pot with a lid. Simmer the soup for about 20 minutes until the meatballs fully cook to an internal temperature fo 165F.
  • Finally, remove the lid and add the baby kale. Stir the soup until the kale softens.

Notes

Nutrition information provided is an estimate. It will vary based on cooking method and specific ingredients used. Please consult with your healthcare provider for specific dietary needs. To gain a better understanding, explore our nutrition disclaimer here. 

Nutrition

Calories: 471kcalCarbohydrates: 22gProtein: 40gFat: 26gSaturated Fat: 6gPolyunsaturated Fat: 5gMonounsaturated Fat: 12gTrans Fat: 0.1gCholesterol: 235mgSodium: 2198mgPotassium: 1497mgFiber: 6gSugar: 5gVitamin A: 12901IUVitamin C: 98mgCalcium: 344mgIron: 5mg

Similar Recipes

chicken soup

One Pot Mexican Chicken Soup

beef cabbage stir fry

One Pot Ground Beef Cabbage Stir Fry

chicken pesto

Skillet Chicken Pesto and Peppers

You Might Also Like

Frequently Asked Questions

Can I freeze the soup with the kale, or should I add it fresh when reheating?

For optimal texture and color, it’s recommended to add fresh kale when reheating individual portions rather than freezing it with the soup.


What can I substitute for breadcrumbs if I want a gluten-free version?

Almond flour can be an excellent gluten-free alternative to breadcrumbs in the meatballs.


Are there alternative greens I can use instead of kale?

Certainly! Spinach, Swiss chard, or collard greens can be excellent substitutes for kale in this soup.

Posted on Leave a comment

Beef Tomatillo Stew

glass meal prep containers that have ground beef, sweet potatoes, green bell peppers, cilantro, jalapeno, and red onions

Hey there, meal preppers! Are you ready to add some zesty excitement to your weekly meal prep routine? Look no further than our delicious and nutritious Beef Tomatillo Stew, one pot soup. Packed with lean ground beef, vibrant veggies, and a burst of flavor from tomatillo sauce, this dish will have your taste buds dancing with joy. Plus, it’s the perfect way to keep your healthy eating goals on track! Let’s dive right into the world of meal prep magic.

This post may contain affiliate links. Please see our privacy policy for details.

Calories: 459kcal | Carbohydrates: 45g | Protein: 42g | Fat: 11g | Saturated Fat: 4g | Polyunsaturated Fat: 1g | Monounsaturated Fat: 4g | Trans Fat: 1g | Cholesterol: 110mg | Sodium: 2159mg | Potassium: 1545mg | Fiber: 6g | Sugar: 17g | Vitamin A: 17546IU | Vitamin C: 74mg | Calcium: 117mg | Iron: 6mg

round bowl with soup that has ground beef, sweet potatoes, green bell peppers, cilantro, jalapeno, and red onions

What is Tomatillo Sauce and Why is it Great for Meal prep?

Tomatillo sauce, also known as salsa verde, is a vibrant and tangy sauce made from tomatillos, which are small, green, tomato-like fruits. Tomatillos are known for their slightly citrusy and tart flavor. To make tomatillo sauce, tomatillos are typically husked, boiled or roasted, and then blended with ingredients like green chilies, cilantro, onions, and sometimes garlic. The result is a versatile, green sauce that can be used in a variety of dishes, such as enchiladas, tacos, soups, and stews. Tomatillo sauce adds a zesty and refreshing kick to dishes and is a common condiment in Mexican and Southwestern cuisine.

  • Time-Saving: Pre-made tomatillo sauce eliminates the need for preparing and cooking tomatillos and other ingredients from scratch, cutting down on meal prep time significantly. One pot soups reduce clean up time and effort.
  • Consistent Flavor: Store-bought tomatillo sauce offers a consistent and authentic flavor, ensuring that your stew base will taste as delicious as your favorite restaurant dishes.
  • Cost-Efficient: Buying pre-made tomatillo sauce can be more cost-effective than purchasing individual ingredients and spices, saving you money in the long run.
  • Convenience: It’s a hassle-free option, making it ideal for busy individuals who want to create restaurant-quality flavors without the culinary expertise or the time commitment.
  • Wide Availability: Pre-made tomatillo sauce is readily available at most grocery stores, making it accessible to anyone looking to elevate the flavor of their stew with minimal effort and maximum taste.

The PrepYoSelf Newsletter

Ingredients You’ll Need

  • Lean Ground Beef: You can substitute lean ground turkey or chicken for beef if you prefer a lighter protein option.
  • White Onions: Red onions or shallots can be used as a flavorful alternative.
  • Green Onions: Chives or scallions can be used as substitutes for green onions.
  • Garlic: If you’re in a hurry, pre-minced garlic, garlic paste, or garlic powder can be used as an alternative.
  • Sweet Potato: Regular potatoes, butternut squash, or carrots can be used instead of sweet potatoes.
  • Green Bell Pepper: Look for firm, brightly colored peppers to ensure freshness. Red, yellow, or orange bell peppers can be used for a sweeter flavor.
  • Tomatillo Sauce: You can make your own tomatillo sauce by blending fresh tomatillos, onions, and spices. Tomatillos are low in calories and provide vitamins like vitamin C, A, and K. Salsa verde can be a convenient alternative to tomatillo sauce.
  • Chicken Broth: Buy low-sodium or no-sodium-added chicken broth to have more control over the salt content. Vegetable broth can be used as well.
  • Cilantro: Store fresh cilantro with a damp paper towel in a plastic bag to keep it fresh longer. Parsley or fresh basil can be used for a different herb flavor.
  • Jalapeno: Serrano peppers or crushed red pepper flakes can be used for extra heat.

glass meal prep containers that have ground beef, sweet potatoes, green bell peppers, cilantro, jalapeno, and red onions

Basic Steps to Meal Prep Beef Tomatillo Stew

  1. Heat up a soup pot over medium-high heat and add a touch of oil. Toss in your white and green onions, sautéing them until they become soft and fragrant. This should take about 2 to 3 minutes. It’s the perfect way to start building those savory layers of flavor!
  2. Time to introduce our star player – the lean ground beef. Pop it into the pot alongside the minced garlic. As it cooks, use a spatula to break it up into smaller, delectable pieces. Continue to stir and cook for about 5 to 6 minutes until the beef is browned and cooked through. The aroma alone is enough to get your taste buds tingling!
  3. Once the beef is cooked to perfection, it’s time to add in the chicken broth, tomatillo sauce, diced bell peppers, and sweet potatoes. We’re infusing your stew with nutrients and flavor! Bring this hearty mixture to a rolling boil, and once it’s bubbling, reduce the heat to low-medium and cover the pot with a snug lid. Let it simmer for around 10 minutes, allowing the flavors to meld together in delicious harmony.
  4. After the stew has simmered to its full potential, it’s time for the grand finale. Top off your Beef Tomatillo Stew with a vibrant medley of fresh toppings. Sprinkle on the chopped cilantro, diced red onions, and sliced jalapenos. These final touches not only add a burst of color but also a pop of freshness that’s simply irresistible.

Reference the recipe card below for detailed instructions.

round bowl with soup that has ground beef, sweet potatoes, green bell peppers, cilantro, jalapeno, and red onions

Meal Prep Tips for Beef Tomatillo Stew – One Pot Soup

  • Prep Your Ingredients: Before you start cooking, wash, peel, chop, and measure all your ingredients. Having everything ready will streamline the cooking process and make it more efficient.
  • Serve with Complementary Sides: Enhance your meal prep experience by pairing the Beef Tomatillo Stew with healthy sides such as brown rice, quinoa, or a side salad. Prep these sides in advance for a complete meal.
  • Maintain Freshness: To keep your Beef Tomatillo Stew fresh throughout the week, consider portioning the toppings (cilantro, red onions, jalapenos) separately and add them just before eating. This will ensure they stay crisp and vibrant.
  • Storage Guidelines: Store your meal prep containers in the refrigerator for up to 3-4 days. If you’ve frozen portions, they can last for 2-3 months.

Leftover Ingredient Tips

  • Ground Beef: Make a hearty beef and vegetable stir-fry with any leftover ground beef. Add stir-fry veggies, a splash of soy sauce, and some ginger for a quick and satisfying meal. Transform the beef into a filling for tacos, burritos, or quesadillas. Just add some cheese, your favorite toppings, and tortillas for a new dish.
  • Sweet Potatoes: Mash leftover sweet potatoes and turn them into sweet potato pancakes or fritters. Add a bit of flour and an egg to bind the mixture, then pan-fry until golden brown. Cube and roast the sweet potatoes with olive oil, salt, and pepper for a simple side dish. Add a sprinkle of your favorite herbs or spices for extra flavor.
  • Green Bell Pepper: Slice the green bell pepper and use it as a crunchy addition to salads or wraps. It adds a fresh and colorful touch to your meals. Stuff the bell peppers with a mixture of rice, beans, cheese, and any leftover beef. Bake them until the peppers are tender and the filling is hot.
  • Tomatillo Sauce: Use tomatillo sauce as a marinade for chicken, shrimp, or tofu. It will add a tangy kick to your protein of choice. Mix tomatillo sauce with plain Greek yogurt or sour cream to create a flavorful dip for chips or fresh vegetables.
  • Jalapeno: Slice jalapenos thinly and use them to spice up your pizza, nachos, or omelets. They add a nice kick to a variety of dishes. Create a homemade hot sauce by blending jalapenos with vinegar, salt, and garlic. Adjust the spice level to your preference.

glass meal prep containers that have ground beef, sweet potatoes, green bell peppers, cilantro, jalapeno, and red onions

round bowl with soup that has ground beef, sweet potatoes, green bell peppers, cilantro, jalapeno, and red onions

Beef Tomatillo Stew

Whip up our Beef Tomatillo Stew, a flavorful and wholesome meal prep dinner featuring lean beef, colorful veggies, and zesty tomatillo sauce!
No ratings yet
Prep Time 5 minutes
Cook Time 20 minutes
Course dinner, Main Course
Cuisine Mexican
Servings 2
Calories 459 kcal

Equipment

  • knife
  • cutting board
  • soup pot

Ingredients
  

  • 12 oz lean ground beef
  • 1/4 cup white onions (diced)
  • 1/4 cup green onions (chopped)
  • 1/4 cup garlic (minced)
  • 1 sweet potato (peeled and diced)
  • 1 green bell pepper (diced)
  • 1 cup tomatillo sauce
  • 2 cups chicken broth
  • 1/2 teaspoon paprika
  • 1/4 teaspoon salt
  • 1/4 cup cilantro (chopped)
  • 1/4 cup red onions (diced)
  • 1 jalapeno (sliced)

Instructions
 

  • Add oil to a soup pot on medium high heat and saute the white onions and green onions until they soften (about 2 to 3 minutes).
  • Next, add the ground beef and garlic. Break up the ground beef into smaller pieces and continue to stir until it fully cooks (about 5 to 6 minutes).
  • Then, pour in the broth, tomatillo sauce, bell peppers, sweet potatoes, and seasonings. Bring the liquid to a boil. Once it boils, lower the heat to low medium and cover the pot with a lid. Let it simmer for about 10 minutes.
  • After the stew simmers, top it off with fresh cilantro, red onions, and sliced jalapenos.

Notes

Nutrition information provided is an estimate. It will vary based on cooking method and specific ingredients used. Please consult with your healthcare provider for specific dietary needs. To gain a better understanding, explore our nutrition disclaimer here. 

Nutrition

Calories: 459kcalCarbohydrates: 45gProtein: 42gFat: 11gSaturated Fat: 4gPolyunsaturated Fat: 1gMonounsaturated Fat: 4gTrans Fat: 1gCholesterol: 110mgSodium: 2159mgPotassium: 1545mgFiber: 6gSugar: 17gVitamin A: 17546IUVitamin C: 74mgCalcium: 117mgIron: 6mg

Similar Recipes

chicken soup

One Pot Mexican Chicken Soup

beef cabbage stir fry

One Pot Ground Beef Cabbage Stir Fry

chicken pesto

Skillet Chicken Pesto and Peppers

You Might Also Like

Frequently Asked Questions

Can I make this stew without sweet potatoes if I’m watching my carb intake?

Certainly, you can omit sweet potatoes or substitute them with lower-carb alternatives like cauliflower, zucchini, or additional bell peppers.


Can I make this recipe in a slow cooker or Instant Pot?

Yes, you can adapt this recipe for a slow cooker or Instant Pot. Brown the beef and sauté the onions and garlic before transferring everything to your chosen appliance. Adjust the cooking times accordingly.


What are some optional add-ins or variations for this stew?

You can get creative with this recipe. Consider adding black beans, corn, or diced tomatoes for extra flavor and texture. Experiment with different herbs and spices to suit your taste.

Posted on Leave a comment

Instant Pot Harissa Beef Stew

glass meal prep containers with beef stew, carrots, and turnips

Welcome to our Instant Pot Harissa Beef Stew recipe – a sensational, time-saving Instant Pot meal prep masterpiece that’s perfect for those hectic days when you crave a comforting meal. This stew is a hearty blend of lean beef, vibrant veggies, and aromatic Harissa sauce, all cooked to perfection in your trusty Instant Pot. It’s the ideal solution for busy individuals seeking a flavorful dinner that’s easy to prepare. As the leaves start to fall and the air gets crisp, this stew’s warming spices and rich flavors make it a delicious choice for the autumn season. So, let’s dive into this Instant Pot meal prep adventure and savor a week’s worth of scrumptious, hassle-free dinners.

This post may contain affiliate links. Please see our privacy policy for details.

Calories: 346kcal | Carbohydrates: 19g | Protein: 43g | Fat: 10g | Saturated Fat: 3g | Polyunsaturated Fat: 1g | Monounsaturated Fat: 4g | Cholesterol: 109mg | Sodium: 1735mg | Potassium: 1105mg | Fiber: 4g | Sugar: 10g | Vitamin A: 5498IU | Vitamin C: 31mg | Calcium: 93mg | Iron: 5mg

soup bowl with beef stew, carrots, and turnips

Why it’s a Delicious Meal Prep Option for the Fall Season:

As the temperatures drop and the leaves change, the Instant Pot Harissa Beef Stew is the perfect culinary companion for the autumn season:

  • Warming and Comforting: This stew’s rich, spiced aroma and warm, hearty ingredients provide the ultimate comfort on crisp fall days.
  • Seasonal Veggies: With turnips, carrots, and bell peppers in the mix, this stew highlights the produce in season during the fall months.
  • Spice and Heat: Harissa sauce adds a delightful kick of warmth, making it a cozy choice for when the air gets chilly.
  • Perfect for Gatherings: Whether you’re hosting a fall gathering or craving a cozy dinner at home, this stew is sure to impress with its robust, autumn-inspired flavors.
  • Make-Ahead Delight: Prepare it in advance for those busy fall evenings, so you can savor a comforting, homemade meal without the hassle of cooking from scratch.

The PrepYoSelf Newsletter

Ingredient Breakdown: Grocery Tips, Nutrition Insights, and Swaps

  • Lean Beef Stew Meat: Look for lean cuts like sirloin or round beef. Buying in bulk and freezing in meal-sized portions can save you money. Ingredient Swap: You can substitute the beef with chicken, turkey, or even plant-based options like tofu for a different flavor and dietary preference.
  • White Onions: Buy onions in bulk; they have a long shelf life and are a kitchen staple. Ingredient Swap: Shallots or red onions can be used for a slightly different flavor.
  • Turnips: Choose turnips that are firm and free of blemishes. Buy them fresh when in season for the best taste. Turnips are low in calories and rich in vitamins, fiber, and antioxidants. Ingredient Swap: You can use potatoes or parsnips if you’re not a fan of turnips.
  • Carrots: Opt for whole carrots rather than pre-cut ones to save money. They’re also more flavorful. Ingredient Swap: Sweet potatoes or butternut squash can replace carrots for a twist.
  • Red Bell Pepper: Buy red bell peppers when they are in season to get them at their freshest and most affordable. Ingredient Swap: Use yellow or orange bell peppers for a colorful variation.
  • Harissa Sauce: Look for harissa sauce in the international foods section of your grocery store or make your own for a personalized touch. Harissa is typically low in calories and can add a spicy kick to your dishes. Ingredient Swap: Substitute with your favorite hot sauce or red pepper flakes for a similar level of heat.
  • Chicken Broth: Buy low-sodium or no-sodium-added chicken broth to control the salt content in your stew. Ingredient Swap: Use vegetable broth for a vegetarian version or beef broth for a richer flavor.
  • Bay Leaf: Bay leaves can often be bought in small quantities from the spice aisle. Ingredient Swap: Skip the bay leaf if you don’t have it, but it adds a subtle earthy flavor to the dish.

glass meal prep containers with beef stew, carrots, and turnips

How to Make Instant Pot Harissa Beef Stew

  1. Prepare Your Veggies: Start by peeling the turnips and cutting them into one-inch cubes. Get those colors and flavors ready to shine!
  2. Layer It Up: In your trusty Instant Pot, place the lean beef stew meat at the bottom of the pot. Pour in the aromatic chicken broth to get that rich base going.
  3. Spice It Up: Add 2 tablespoons of harissa sauce for that fiery, North African-inspired flavor. Toss in a bay leaf and a teaspoon of salt to make all those flavors harmonize.
  4. Pile on the Goodness: Now, here’s where the magic happens. Top off your Instant Pot with the white onions, garlic cloves, baby carrots, those beautiful turnip cubes, and the red bell pepper. This is where the party begins – the more colors, the better!
  5. Seal the Deal: Cover your Instant Pot with the lid and make sure it’s in the sealed position. We don’t want those amazing flavors escaping!
  6. Cook to Perfection: Set your Instant Pot to medium and let it work its magic for 45 minutes. The aroma in your kitchen will be absolutely irresistible.
  7. Release the Steam: Once the 45 minutes are up, follow the manufacturer’s instructions to safely release the steam naturally before opening the lid. This ensures your stew is cooked to perfection.

Reference the recipe card below for detailed instructions.

soup bowl with beef stew, carrots, and turnips

Meal Prep Tips:

  • Chop and Prep in Advance: Save time by chopping your vegetables and preparing all the ingredients beforehand. Store them in separate containers so you can easily assemble your stew when it’s time to cook.
  • Cool Before Sealing: Allow your stew to cool to room temperature before sealing it in containers. Hot food can create condensation, which may lead to soggier results.
  • Reheat Safely: When it’s time to enjoy your prepped stew, reheat it in the microwave, on the stovetop, or in the Instant Pot. Be sure to follow safe reheating guidelines and ensure the food is piping hot throughout.
  • Store for the Week: Depending on your meal prep routine, store your containers in the fridge for up to 3-4 days or in the freezer for longer-term storage. Make sure to consume the fresher portions first.
  • Add Freshness at Serving: For an extra touch, consider adding fresh herbs, a dollop of yogurt, or a squeeze of lemon when you’re ready to enjoy your stew. These finishing touches can elevate the flavors.

soup bowl with beef stew, carrots, and turnips

Leftover Ingredient Tips:

  • Leftover Beef Stew Meat: Make Beef Tacos- Shred the beef stew meat and use it as a flavorful filling for tacos. Top with your favorite fixings like cheese, salsa, and sour cream. Beef and Rice-Incorporate the meat into a quick stir-fry with cooked rice and your choice of vegetables. Beef and Pasta-Toss the beef with cooked pasta and a simple tomato sauce for a hearty pasta dish.
  • Harissa Sauce: Marinades-Use the harissa sauce as a flavorful marinade for meats or vegetables before grilling or roasting. Dressing-Mix it with olive oil and a splash of vinegar to create a zesty salad dressing. Harissa Hummus-Blend it with chickpeas, tahini, and lemon juice to make a spicy harissa hummus.
  • Remaining Veggies (Onions, Turnips, Carrots, Bell Pepper): Veggie Omelette-Sauté the veggies with eggs for a tasty omelette or frittata. Roasted Vegetables-Drizzle with olive oil, season with herbs, and roast them for a flavorful side dish. Veggie Stir-Fry-Combine the veggies with some tofu, chicken, or shrimp, and stir-fry with your favorite sauce.

harissa beef stew

Instant Pot Harissa Beef Stew

Instant Pot Harissa Beef Stew is a hearty, time-saving meal prep recipe with lean beef, veggies, and warming spices, perfect for busy autumn days.
No ratings yet
Prep Time 5 minutes
Cook Time 45 minutes
Course dinner, Main Course
Cuisine Middle Eastern
Servings 2
Calories 346 kcal

Equipment

  • knife
  • cutting board
  • Instant Pot

Ingredients
  

  • 12 oz lean beef stew meat
  • 1/2 each white onions (sliced)
  • 2 each turnips
  • 1/2 cup carrots (sliced)
  • 1 each red bell pepper (cubed)
  • 2 each garlic cloves (peeled)
  • 2 tbsp harissa sauce
  • 1 cup chicken stock
  • 1 each bay leaf
  • 1 tsp salt

Instructions
 

  • Peel the turnips and cut them into one-inch cubes
  • Place the beef at the bottom of the pot and pour in the chicken broth
  • Next, add the harissa sauce, bay leaf, and salt
  • Top it off with the white onions, garlic cloves, baby carrots, turnips, and bell peppers
  • Cover with the lid and make sure it is placed in the sealed position. Cook in the Instant Pot on medium for 45 minutes. Note: If you don't have an instant pot, you can use a slow cooker and cook it on high for 4 to 6 hours
  • After it has cooked, follow the manufacturer's instructions to carefully let the steam naturally release before opening the lid

Notes

Nutrition information provided is an estimate. It will vary based on cooking method and specific ingredients used. Please consult with your healthcare provider for specific dietary needs. To gain a better understanding, explore our nutrition disclaimer here. 


Nutrition

Calories: 346kcalCarbohydrates: 19gProtein: 43gFat: 10gSaturated Fat: 3gPolyunsaturated Fat: 1gMonounsaturated Fat: 4gCholesterol: 109mgSodium: 1735mgPotassium: 1105mgFiber: 4gSugar: 10gVitamin A: 5498IUVitamin C: 31mgCalcium: 93mgIron: 5mg

Similar Recipes

chicken soup

One Pot Mexican Chicken Soup

sweet potato blt

Instant Pot Beef Ragu

pork carnitas

Instant Pot Pork Carnitas

You Might Also Like

Frequently Asked Questions

What if I don’t have an Instant Pot?

If you don’t have an Instant Pot, you can prepare this stew in a slow cooker or on the stovetop. If you’re using a slow cooker, cook it on high for 4 to 6 hours. If you are preparing it on the stovetop, let it simmer on low medium heat for about 2 hours.


Can I freeze this stew for long-term storage?

Yes, you can freeze this stew in airtight containers for up to 3-4 months. It’s a great option for long-term meal planning.


What sides go well with this stew?

This stew pairs well with crusty bread, rice, couscous, or a simple green salad. You can also add a dollop of yogurt or a sprinkle of fresh herbs for added freshness.

Posted on Leave a comment

Instant Pot Cuban Pork with Mashed Plantains

glass meal prep containers with shredded pork with mashed plaintains

Looking to elevate your meal prep game with an easy, tasty, and time-saving recipe? You’re in for a treat! Our Instant Pot Cuban Pork with Mashed Plantains is a flavor-packed delight that will transport your taste buds to the vibrant streets of Cuba. In this culinary adventure, we’ll show you how to create a mouthwatering dish that’s perfect for busy weeknights or leisurely weekends. With the magic of the Instant Pot, you’ll have succulent Cuban pork ready in no time. Plus, the creamy Mashed Plantains add a delightful twist to this classic Cuban favorite. Get ready for a fusion of flavors that will make your meal prep a breezey!

This post may contain affiliate links. Please see our privacy policy for details.

round plate with shredded pork with mashed plaintains

5 Reasons to Spice Up Your Meal Prep with New Cuisines and Ingredients

Exploring new cuisines and ingredients in your meal prep can be a fun and rewarding experience. Why not add a bit of Cuban flair to your meal prep this week and discover the exciting world of Cuban cuisine? The Instant Pot Cuban Pork with Mashed Plantains is a fantastic starting point for your culinary exploration! Here are five compelling reasons why you should consider adding a dash of excitement to your weekly rotation:

  • Culinary Adventure: Trying new cuisines introduces you to different cooking techniques, flavors, and ingredients. It’s like taking a culinary journey around the world without leaving your kitchen.
  • Flavorful Variety: Incorporating new ingredients infuses variety into your meal prep, preventing food boredom. Each week can bring a fresh, exciting flavor to your plate.
  • Health Benefits: Different cuisines often feature unique ingredients that offer various health benefits. By diversifying your meal prep, you can boost your nutrient intake and discover new superfoods.
  • Cultural Appreciation: Exploring new cuisines is a great way to learn about different cultures and their culinary traditions. It’s an opportunity to appreciate the rich tapestry of global food heritage.
  • Cooking Skills: Experimenting with new ingredients challenges your cooking skills and creativity. You’ll become a more versatile and confident home chef, ready to tackle any recipe.

The PrepYoSelf Newsletter

Grocery Tips:

  • Buy in Bulk: To save money and reduce waste, purchase pork shoulder and ripe plantains in bulk, and then portion and freeze them for future meals.
  • Canned Tomatoes: You can opt for canned diced tomatoes with green chiles, but you can also use regular canned diced tomatoes and add some diced green chiles or a dash of hot sauce for that kick of heat.
  • Onions: Buying onions in larger quantities can save you money in the long run. You can store them in a cool, dark place for an extended period.
  • Cilantro: Fresh herbs can be expensive. Consider growing cilantro in a pot at home or using dried cilantro as a more budget-friendly alternative.

Nutrition Information:

  • Pork Shoulder: It’s a good source of protein and contains essential vitamins and minerals, but it’s also higher in fat. You can opt for leaner cuts if you’re looking to reduce saturated fat.
  • Plantains: Plantains are a rich source of fiber, vitamins, and minerals, but they are starchy. Moderation is key, especially if you’re watching your carbohydrate intake.

Ingredient Swaps:

  • Protein: If you’re not a fan of pork, you can use chicken thighs or leaner cuts of pork like tenderloin.
  • Plantains: If plantains are hard to find, sweet potatoes or rutabaga can be a suitable substitute for mashed plantains. Just keep in mind that they’ll be sweeter.
  • Butter: Swap out butter with olive oil or coconut oil for a different flavor profile.
  • Garlic Powder: Fresh garlic cloves work well too. One clove usually equals about 1/8 teaspoon of garlic powder.
  • Cilantro: If cilantro isn’t to your liking, try parsley, green onions, or fresh basil for a different herbaceous touch.
  • Low-Sodium Option: To reduce sodium intake, choose low-sodium canned tomatoes and tomato sauce.

glass meal prep containers with shredded pork with mashed plaintains

How to Meal Prep Instant Pot Cuban Pork

  1. Start by adding the pork shoulder to your trusty Instant Pot. Now, here’s where the magic begins! Sprinkle on the garlic powder and cumin, then add those diced tomatoes with green chiles, tomato sauce, and the sliced red onion to the pot.
  2. Seal the Instant Pot with the lid and set it to high pressure. Let the flavors meld together as you cook for 45 minutes. The anticipation is real!
  3. While the pork is doing its thing, let’s move on to the Mashed Plantains. In a separate pot, bring water to a boil. Meanwhile, peel your ripe plantains and gently place them into the boiling water.
  4. Let those plantains cook for about 10-15 minutes until they’re fork-tender. It’s time to get them out and drain them.
  5. Now, transfer your tender plantains to a prep bowl. Add the garlic powder, salt, and a couple of tablespoons of butter. Grab a fork and start mashing. We’re creating a creamy, dreamy side dish here!
  6. As the aroma of your Cuban Pork fills the kitchen, it’s time to release the steam from the Instant Pot carefully. Open the lid and behold the succulent shredded pork that awaits you.
  7. Serve your flavorful shredded pork with those fantastic mashed plantains. To add a pop of freshness, garnish with chopped cilantro. And here’s a pro tip – don’t forget to pour the leftover broth from the Instant Pot over the plantains as a delicious gravy. It’s a game-changer!

Reference the recipe card below for detailed instructions.

round plate with shredded pork with mashed plaintains

Meal Prep Tips:

  • Batch Cooking: Double or triple the recipe to create several servings. This ensures you have enough meals for the week or even to freeze for future use.
  • Customization: Don’t be afraid to personalize your meal prep. You can add side veggies, grains, or even a simple salad to create a well-balanced meal.
  • Fresh Garnishes: While reheating, consider adding fresh garnishes like additional cilantro, lime wedges, or avocado for a burst of flavor.
  • Storage Containers: Invest in good-quality, airtight containers to store your meal prep creations. Make sure they are portion-sized to avoid overeating.
  • Reheating: To reheat, you can use the microwave for convenience or a stovetop to maintain the texture and flavors of your dish.
  • Freezing Option: If you’ve made a large batch, portion out individual servings and freeze them. When needed, simply defrost and reheat for a quick and convenient meal.

glass meal prep containers with shredded pork with mashed plaintains

Leftover Ingredient Tips:

  • Leftover Pork: If you have extra shredded Cuban pork, you’re in for a treat. Use it to make delicious Cuban sandwiches. Layer the pork with ham, Swiss cheese, pickles, and mustard, then grill it until the cheese is melted and the bread is crispy.
  • Extra Plantains: Leftover mashed plantains can be repurposed into sweet or savory dishes. Sweeten them with a touch of brown sugar and cinnamon for a dessert. For a savory twist, shape them into small patties and pan-fry until crispy. Serve with sour cream or salsa.
  • Cilantro: Leftover cilantro can be used to add freshness to salads, soups, or as a garnish for various dishes. You can also blend it with lime juice and a bit of olive oil to make a zesty cilantro-lime dressing.

instant pot pork and plantains

Instant Pot Cuban Pork with Mashed Plantains

Transport your taste buds to Cuba with succulent Instant Pot Cuban Pork served alongside creamy Mashed Plantains – a flavorful, time-saving meal prep delight!
No ratings yet
Prep Time 5 minutes
Cook Time 55 minutes
Course dinner, Main Course
Cuisine Cuban
Servings 2

Equipment

  • knife
  • cutting board
  • Instant Pot
  • boiling pot

Ingredients
  

Instant Pot Cuban Pork

  • 12 oz pork shoulder
  • 1 tsp garlic powder
  • 1 tsp cumin
  • 6 oz diced tomatoes with green chiles
  • 4 oz tomato sauce
  • 1/2 each red onion (sliced)

Mashed Plantains

  • 2 each ripe plantain
  • 2 tbsp butter
  • 1/4 tsp garlic powder
  • 1/4 tsp salt
  • 1/4 cup cilantro (chopped)

Instructions
 

  • Add the pork shoulder to the Instant Pot. Add the seasonings, diced tomatoes, tomato sauce, and onions to the pot.
  • Close and seal the lid to the Instant Pot. Place the setting on high pressure and cook for 45 minutes
  • Meanwhile, boil water in a pot. Remove the peel off the plantains and place them into the boiling water
  • Cook the plantains for 10-15 minutes until it is fork tender
  • Then, drain the plantains and place them in a prep bowl. Add the seasonings and butter and use a fork to mash them
  • After the pork cooks, carefully release the steam and open the lid. Remove the pork from the pot and use a fork to shred the meat
  • Serve the shredded pork with the mashed potatoes. Garnish with fresh cilantro and feel free to pour the leftover broth over the plantains as gravy

Similar Recipes

chicken soup

One Pot Mexican Chicken Soup

sweet potato blt

Sweet Potato BLT Sandwich

Grilled Honey Dijon Chicken Kale Salad

You Might Also Like

Frequently Asked Questions

Can I make this recipe without an Instant Pot?

While the Instant Pot makes this recipe quicker, you can still make it in a regular pot or slow cooker. For stovetop cooking, simmer the pork until tender. In a slow cooker, cook on low for 6-8 hours or on high for 3-4 hours.


Can I use a different type of meat for the Cuban pork?

Yes, you can. While the recipe calls for pork shoulder, you can use other cuts like pork tenderloin or chicken thighs. Just adjust the cooking time as needed for different meats.


Are there any alternatives to plantains for the mashed side dish?

If you can’t find plantains, sweet potatoes or rutabaga make a good substitute for mashed plantains. They’ll be sweeter, but it’s a tasty alternative.