Posted on Leave a comment

One Pot Hot and Sour Soup

rectangular meal prep containers of hot and sour soup

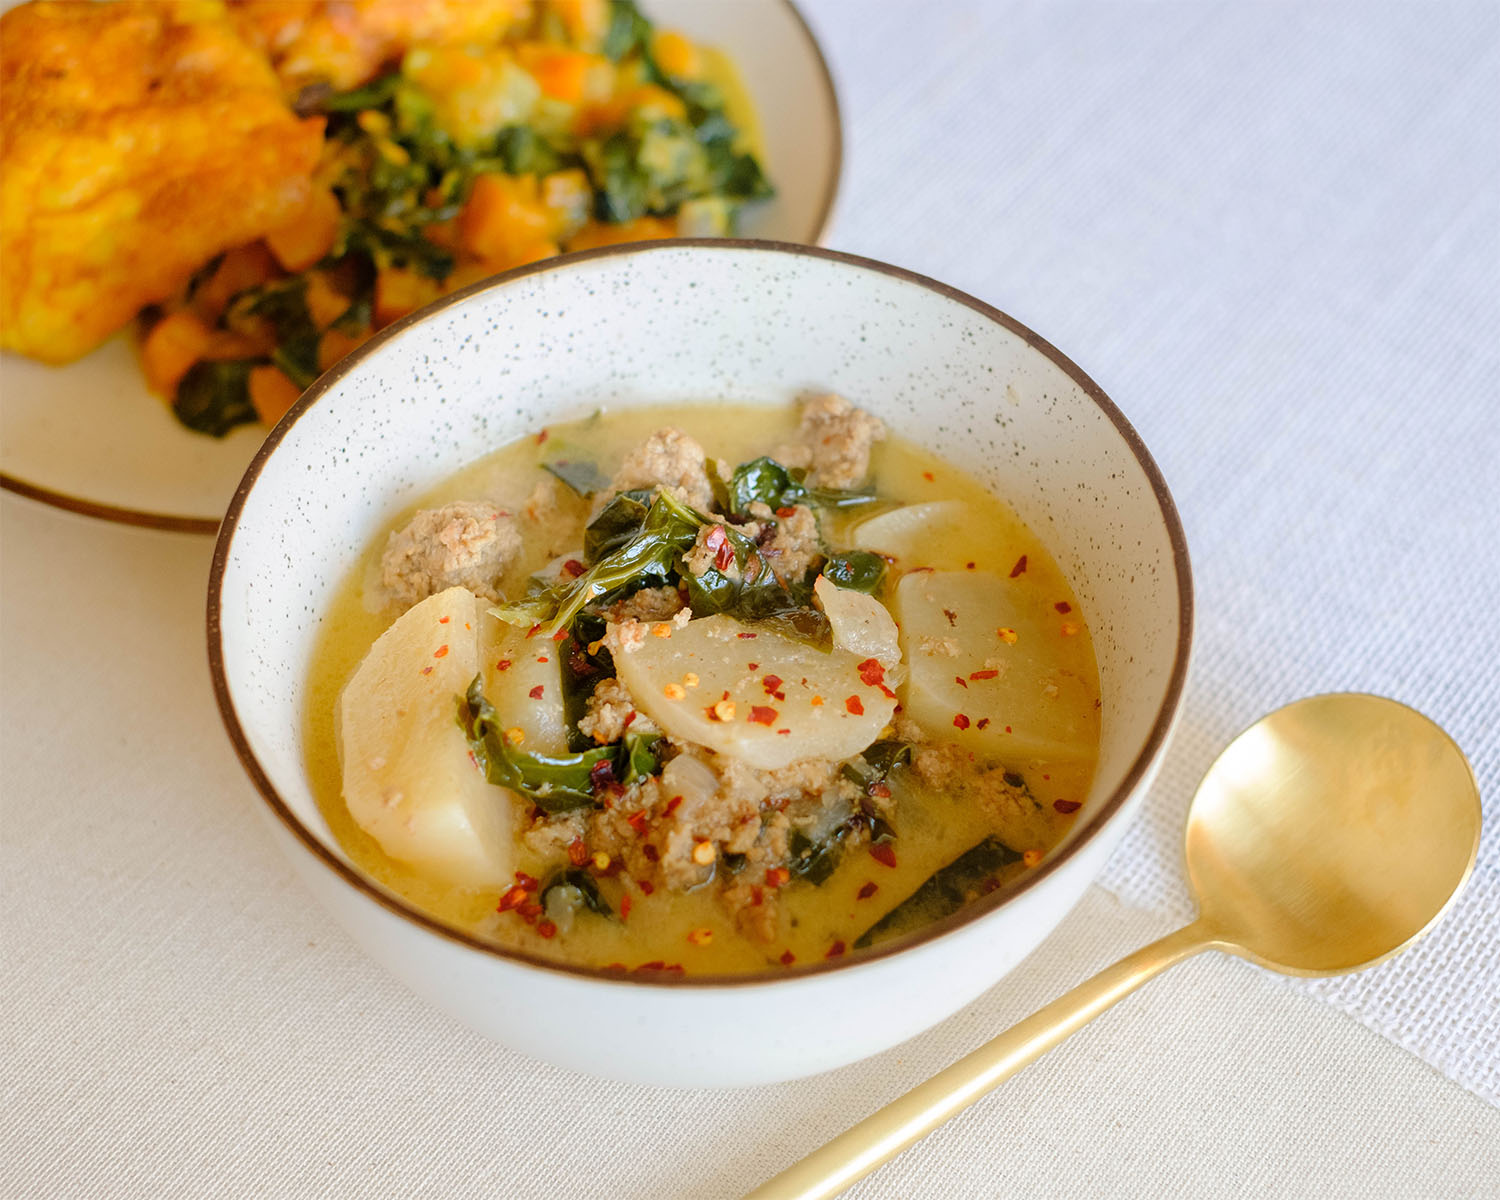
In just a matter of minutes, you can whip up a bowl of comforting goodness from this one pot soup recipe, that not only caters to your hectic lifestyle but also keeps your wallet happy. Packed with vibrant shiitake mushrooms, aromatic spices, and delicate egg ribbons, this recipe is your shortcut to a nourishing meal without compromising on flavor. Whether you’re a seasoned meal prepper or a kitchen newbie, the simplicity of this dish makes it a go-to for those who crave health-conscious convenience. Get ready to elevate your meal prep game with a dish that’s as delightful for your taste buds as it is for your schedule and budget!

This post may contain affiliate links. Please see our privacy policy for details.

Calories: 431kcal | Carbohydrates: 27g | Protein: 23g | Fat: 26g | Saturated Fat: 6g | Polyunsaturated Fat: 6g | Monounsaturated Fat: 13g | Trans Fat: 0.04g | Cholesterol: 335mg | Sodium: 2105mg | Potassium: 760mg | Fiber: 3g | Sugar: 13g | Vitamin A: 682IU | Vitamin C: 7mg | Calcium: 100mg | Iron: 4mg

bowl of hot and sour soup

Why This Recipe is Convenient:

  • Speedy Execution: From prep to simmer, this recipe takes less time than ordering takeout. Perfect for those evenings when you need something hearty and fast. Clean up is easy with this one pot soup as well.
  • Budget-Friendly Goodness: No need to break the bank for a delicious and nutritious meal. Simple, wholesome ingredients that won’t dent your wallet.
  • Healthy Choices: Packed with protein from eggs and the umami goodness of shiitake mushrooms, this soup is your ally in staying on the healthy track.
  • Customizable Comfort: Adjust the spice level or throw in some extra veggies – make it your own while keeping things nutritious.

The PrepYoSelf Newsletter

Budget Friendly Ingredients: 

  • White Onions & Green Onions: Onions are kitchen superheroes – they add flavor without denting your wallet. They’re a staple in most households and can be bought in bulk for additional savings. These can be stored for a good amount of time in a cool, dark place. Keep a supply on hand, and you’re always ready to whip up something tasty.
  • Garlic Cloves: Garlic is not only a flavor powerhouse but also extremely budget-friendly. A little goes a long way, and a whole bulb is usually quite affordable. Garlic is a pantry friendly – it stays fresh for a long time and is versatile enough to be used in a variety of dishes.
  • Shiitake Mushrooms: While considered a specialty, shiitake mushrooms are increasingly available at affordable prices. Their robust flavor adds depth to the soup. Dried shiitake mushrooms can be a great pantry staple. They’re easily rehydrated and can be used in various dishes.
  • Chicken Stock: Store-bought chicken stock is reasonably priced, and you can often find it on sale or in bulk for additional savings. Long shelf life means you can keep a stash in your pantry for whenever the mood for soup strikes.
  • Eggs: Eggs are a nutritional powerhouse at an unbeatable price. They provide protein and richness to the soup without breaking the bank. Always in the fridge, eggs are a quick and easy protein source that can be used in countless recipes.
  • Soy Sauce, Rice Vinegar, Brown Sugar: These pantry staples add the perfect balance of savory, tangy, and sweet without costing a fortune. Essential in many Asian cuisines, these ingredients are likely already sitting in your pantry, ready to elevate your dishes.
  • Olive Oil & Sesame Oil: A little goes a long way, and these oils are versatile enough to be used in various recipes. They’re an investment that pays off over time.
  • Red Pepper Chili Flakes: A small amount of chili flakes imparts big flavor without a big price tag.
bowl of hot and sour soup

Basic Steps to Meal Prep Hot and Sour Soup

  1. Heat up a soup pan on medium-high and kick things off with a drizzle of olive oil. Toss in the white and green onions, sautéing until they’re delightfully soft (about 2-3 minutes). Then, let the garlic and mushrooms join the party, stirring for an additional 2 minutes.
  2. Pour in the chicken stock, soy sauce, rice vinegar, and brown sugar. Give it all a good mix – your kitchen should be smelling amazing by now!
  3. In a separate bowl, whisk those eggs. Using a spatula, stir the soup in a circular motion, and slowly pour in the eggs to create those gorgeous ribbons. Simmer until the eggs are fully cooked, about 2-3 minutes.
  4. Time to elevate the flavors! Add the sesame oil for a rich, nutty undertone. Sprinkle in the red pepper chili flakes for a bit of heat, and throw in those chopped green onions for a burst of freshness.

Reference the recipe card below for detailed instructions.

rectangular meal prep containers of hot and sour soup

Pairing Tips for Hot and Sour Soup

  • Steamed Brown Rice or Quinoa: Serve your Hot and Sour Soup over a bed of steamed brown rice or quinoa. These whole grains add a hearty texture and make the meal more substantial.
  • Asian Slaw or Sesame Cucumber Salad: Lighten things up with a refreshing Asian slaw or a simple sesame cucumber salad. The crispness and tanginess will balance the richness of the soup.
  • Ginger Garlic Edamame: Keep the Asian theme going with some ginger garlic edamame on the side. It’s a quick and protein-packed snack that complements the flavors of the soup.
  • Vegetable Spring Rolls: Enhance the meal with some vegetable spring rolls. The crunchy exterior and fresh vegetable fillings provide a nice contrast to the warm, comforting soup.
  • Stir-Fried Broccoli or Bok Choy: Add a dose of green goodness with a side of stir-fried broccoli or bok choy. The stir-fry method retains the veggies’ crunch, offering a pleasing textural balance.
  • Asian-Inspired Coleslaw: Swap traditional coleslaw for an Asian-inspired version. Use a light sesame-ginger dressing and toss in some mandarin oranges for a sweet and citrusy kick.
  • Sesame Noodles: Serve Hot and Sour Soup with a side of sesame noodles. The nutty flavor of sesame pairs well with this one pot soup’s savory notes.
rectangular meal prep containers of hot and sour soup
Bowl of hot and sour soup garnished with green onions.

Hot and Sour Soup

Whip up a quick and budget-friendly Hot and Sour Soup with a flavorful blend of mushrooms, aromatic spices, and silky egg ribbons – a comforting and health-conscious delight for busy individuals!
No ratings yet
Prep Time 5 minutes
Cook Time 10 minutes
Course lunch, Main Course
Cuisine Asian
Servings 2
Calories 431 kcal

Equipment

  • knife
  • cutting board
  • soup pan
  • spatula

Ingredients
  

  • 1/4 cup white onions (diced)
  • 1/4 cup green onions (chopped)
  • 2 tbsp garlic cloves (minced)
  • 5 oz shiitake mushrooms (sliced)
  • 2 cups chicken stock
  • 4 large eggs
  • 1/4 cup soy sauce
  • 1/4 cup rice vinegar
  • 1 tbsp brown sugar
  • 1 tbsp olive oil
  • 1 tbsp sesame oil
  • 1/4 tsp red pepper chili flakes

Instructions
 

  • Add oil to a soup pan on medium-high heat and saute the white onions and green onions until they soften. (about 2 to 3 minutes). Then, add the garlic and mushrooms and stir for another 2 minutes.
  • Add the chicken stock, soy sauce, vinegar, brown sugar, and mix it all together.
  • In a small bowl, whisk the eggs. Then use the spatula to stir the soup in a circular motion. Slowly pour the eggs into a thin stream so that they form egg ribbons. Continue to simmer the soup until the eggs fully cook (about 2 to 3 minutes)
  • Add the end, add the sesame oil, red pepper flakes, and green onions.

Notes

Nutrition information provided is an estimate. It will vary based on cooking method and specific ingredients used. Please consult with your healthcare provider for specific dietary needs. To gain a better understanding, explore our nutrition disclaimer here. 

Nutrition

Calories: 431kcalCarbohydrates: 27gProtein: 23gFat: 26gSaturated Fat: 6gPolyunsaturated Fat: 6gMonounsaturated Fat: 13gTrans Fat: 0.04gCholesterol: 335mgSodium: 2105mgPotassium: 760mgFiber: 3gSugar: 13gVitamin A: 682IUVitamin C: 7mgCalcium: 100mgIron: 4mg

Similar Recipes

chicken soup

One Pot Mexican Chicken Soup

beef cabbage stir fry

One Pot Ground Beef Cabbage Stir Fry

chicken pesto

Skillet Chicken Pesto and Peppers

You Might Also Like

Frequently Asked Questions

Can I use vegetable stock instead of chicken stock?

Absolutely! Feel free to customize the soup to your preferences. Vegetable stock works well and maintains the rich flavor profile of the Hot and Sour Soup.


Can I make this soup vegetarian or vegan?

Certainly! Substitute chicken stock with vegetable stock, and omit the eggs if you prefer a vegan version. Tofu can be a fantastic addition for added protein in a vegetarian version.


What’s the purpose of whisking the eggs separately?

Whisking the eggs separately before pouring them into the soup creates delicate ribbons, adding a pleasing texture. It’s a classic technique in Hot and Sour Soup that enhances the overall dining experience.

Posted on Leave a comment

Scrambled Eggs and Carnitas

round glass meal prep containers with scrambled eggs, shredded pork, tomatoes, cilantro, and onions

Picture this: golden swirls of perfectly scrambled eggs embracing tender shreds of yesterday’s savory pork carnitas, all crowned with a vibrant pico de gallo flourish. This recipe isn’t just about fueling your day; it’s about savoring every bite. With its easy preparation, ingenious use of leftovers, restaurant-quality flavors, and a protein-packed punch to keep you energized until lunch, get ready to elevate your breakfast game to new heights. Breakfast just got a whole lot more exciting!

This post may contain affiliate links. Please see our privacy policy for details.

Calories: 262kcal | Carbohydrates: 19g | Protein: 19g | Fat: 13g | Saturated Fat: 4g | Polyunsaturated Fat: 2g | Monounsaturated Fat: 3g | Trans Fat: 0.04g | Cholesterol: 353mg | Sodium: 876mg | Potassium: 121mg | Sugar: 14g | Vitamin A: 830IU | Vitamin C: 4mg | Calcium: 79mg | Iron: 2mg

round plate with scrambled eggs, shredded pork, tomatoes, cilantro, and onions

The PrepYoSelf Newsletter

Here’s why you need to make this:

  • Effortless Elegance: This breakfast meal prep idea is a fantastic choice for those hectic mornings when time is of the essence. The straightforward instructions and minimal ingredients make it a breeze to whip up a breakfast that feels like it was crafted by a seasoned chef. In just a few easy steps, you can have a gourmet-style meal that’s as pleasing to the eyes as it is to the palate.
  • Leftovers Turned Gold: Transforming yesterday’s dinner into today’s breakfast not only reduces food waste but also adds a layer of rich, savory depth to your morning meal. The incorporation of leftover pork carnitas not only adds flavor but also ensures that every bite is a delicious reminder of a previous culinary triumph.
  • Restaurant-Quality Delight: Forget about breakfast monotony! With this meal prep, you’re bringing restaurant-quality flavors to your own kitchen. The combination of fluffy scrambled eggs, succulent carnitas, and vibrant pico de gallo creates a symphony of tastes that rivals your favorite breakfast spot. Who needs to dine out when you can create a gourmet experience right at home?
  • Protein Powerhouse: Kickstart your day with a protein-packed punch! The eggs and leftover pork carnitas team up to deliver a high-protein breakfast that will keep you fueled and satisfied until lunchtime. Protein is not only essential for muscle repair but also aids in maintaining a healthy metabolism, making this breakfast an ideal choice for those looking to power through their busy mornings.
  • Saves Time, Satisfies Cravings: By incorporating leftovers and keeping the prep simple, you’re not just saving time – you’re satisfying your breakfast cravings with a meal that checks all the boxes. The harmonious blend of textures and flavors ensures that your taste buds are treated to a delightful morning experience without the need for an extensive cooking session. It’s a win-win for both your schedule and your palate!

Ingredients & Pairing Tips

The ingredients are simple. All you need are eggs, leftover carnitas, and your choice of toppings. Check out our carnitas recipe here. Meal prepping is all about customization, so feel free to experiment with different pairings to suit your taste preferences and nutritional goals. Here’s some pairing tips for this meal prep: 

  • Fresh Fruit Medley: Balance the savory goodness of your scrambled eggs and pork carnitas with a side of fresh fruit. Berries, melon cubes, or citrus segments can add a refreshing touch to your breakfast.
  • Whole Grain Toast or Tortillas: Accompany your fiesta with whole grain toast or warm tortillas. Not only does this add a satisfying crunch, but it also introduces complex carbohydrates for a well-rounded meal.
  • Yogurt Parfait: Elevate your breakfast with a yogurt parfait. Layer Greek yogurt with granola and a drizzle of honey for a delightful contrast to the savory main course.
  • Green Goodness: Boost the nutritional content of your meal by serving a side of sautéed spinach or kale. The earthy greens complement the richness of the eggs and carnitas beautifully.

round plate with scrambled eggs, shredded pork, tomatoes, cilantro, and onions

How to Meal Prep Carnitas and Eggs

  1. First things first, let’s get our pan ready for the culinary magic. Add a splash of your favorite cooking oil to a pan, and let it heat up over medium heat. We’re setting the stage for the star of the show – our scrumptious scrambled eggs and pork carnitas fiesta!
  2. Now, it’s time for the eggs to take center stage. Crack those eggs into the pan and hear them sizzle. That’s the sound of egg-citement! Grab your trusty spatula and start stirring those eggs around. We’re looking for a perfect blend of fluffiness and flavor.
  3. Here comes the twist – the leftover pork carnitas! Throw those savory shreds of goodness into the pan and let them join the party. Watch as the aromas blend together, creating flavors that will have you salivating in no time. Give it a gentle stir, ensuring that they heat through.
  4. Get ready to top your creation with freshness – it’s pico de gallo time! Top off your scrambled eggs and pork carnitas masterpiece with generous scoops of this zesty salsa. The burst of colors and flavors will take your dish to a whole new level. Tomatoes, onions, cilantro, and a hint of lime – the perfect finishing touch!

Reference the recipe card below for detailed instructions.

round glass meal prep containers with scrambled eggs, shredded pork, tomatoes, cilantro, and onions

Meal Prep Tips:

  • Separate Storage for Pico de Gallo: Keep the pico de gallo separate until serving to maintain its freshness and prevent the other components from becoming soggy. Store it in a small container and add it to your dish just before reheating or serving.
  • Freeze for Future Delights: If you want to extend the longevity of your meal prep, consider freezing individual portions. Thaw in the refrigerator overnight, and voila – you’ve got a scrumptious breakfast that’s as good as fresh!
  • Customizable Toppings: Encourage creativity by providing various toppings on the side. Avocado slices, shredded cheese, or a dollop of sour cream can add extra layers of flavor and texture. Let each family member or meal prepper customize their breakfast to suit their taste.

round glass meal prep containers with scrambled eggs, shredded pork, tomatoes, cilantro, and onions

Plate with scrambled eggs topped with pork carnitas and pico de gallo

Scrambled Eggs and Pork Carnitas

Transform your mornings with these delightful Scrambled Eggs and Leftover Pork Carnitas, a flavorful fusion of fluffy eggs, savory carnitas, and zesty pico de gallo, effortlessly crafted for a restaurant-quality breakfast that keeps you satisfied until lunch!
No ratings yet
Prep Time 5 minutes
Cook Time 10 minutes
Course Breakfast
Cuisine American, Mexican
Servings 2
Calories 262 kcal

Equipment

  • saute pan

Ingredients
  

  • 4 large eggs
  • 1/2 cup pico de gallo
  • 1/2 cup pork carnitas (pre-cooked)

Instructions
 

  • Add oil to a pan on medium heat. Crack the eggs into the pan and stir the eggs around.
  • Next, add the pork carnitas to the pan until they heat through. Once the eggs firmly set, top it off with fresh pico de gallo!

Nutrition

Calories: 262kcalCarbohydrates: 19gProtein: 19gFat: 13gSaturated Fat: 4gPolyunsaturated Fat: 2gMonounsaturated Fat: 3gTrans Fat: 0.04gCholesterol: 353mgSodium: 876mgPotassium: 121mgSugar: 14gVitamin A: 830IUVitamin C: 4mgCalcium: 79mgIron: 2mg

Similar Recipes

fried egg and sausage hash

Fried Egg with Apple and Sausage Hash

Easy Cheese Omelette

easy sausage egg muffins

Sausage Egg Muffins with Strawberries

You Might Also Like

Frequently Asked Questions

Can I use any type of leftover meat for this recipe?

While pork carnitas add a unique flavor, you can absolutely experiment with other leftover meats like chicken, beef, or even tofu for a delicious variation.


Can I use fresh pork instead of leftover carnitas?

Absolutely! Cook fresh pork with your favorite spices or use other cooked proteins for a personalized twist.


Can I use a different type of salsa instead of pico de gallo?

Absolutely! Experiment with your favorite salsa varieties, whether it’s salsa verde, roja, or a fruity mango salsa, to tailor the flavor to your liking.

Posted on Leave a comment

Mexican Cabbage Roll

glass meal prep containers with mexican cabbage roll topped with shredded cheese, diced tomatoes, and corn

Our Restaurant-Quality Mexican Cabbage Rolls! combines the comfort of classic cabbage rolls with the bold, vibrant flavors of Mexican cuisine – If you’re a busy bee craving a delicious, budget-friendly meal that doesn’t compromise on taste, you’re in for a treat. Picture this: tender cabbage leaves cradling a savory mixture of lean ground beef, sautéed red onions, and a symphony of spices, all enveloped in a zesty tomato embrace with a hint of chiles. This twist not only elevates the traditional cabbage roll experience to restaurant-quality levels but also offers a lower-carb alternative, making it perfect for those on a health-conscious journey.

This post may contain affiliate links. Please see our privacy policy for details.

Calories: 308kcal | Carbohydrates: 22g | Protein: 31g | Fat: 12g | Saturated Fat: 5g | Polyunsaturated Fat: 1g | Monounsaturated Fat: 4g | Trans Fat: 0.4g | Cholesterol: 84mg | Sodium: 976mg | Potassium: 1060mg | Fiber: 4g | Sugar: 10g | Vitamin A: 1469IU | Vitamin C: 47mg | Calcium: 180mg | Iron: 5mg

round plate with mexican cabbage roll topped with shredded cheese, diced tomatoes, and corn

Why This Recipe Is Meal Prep Worthy

  • Restaurant-Quality Flavors: Our Mexican Cabbage Rolls bring a burst of restaurant-quality flavors to your table. The combination of lean ground beef seasoned with paprika, chili powder, and garlic powder, paired with the spicy kick from diced tomatoes with chiles, creates a symphony of tastes that will transport you straight to your favorite Mexican eatery. It’s a culinary adventure without leaving the comfort of your home.
  • Lower-Carb Delight: For those watching their carb intake, these rolls are a dream come true. It’s a fantastic option for individuals following a low-carb or keto lifestyle without sacrificing the comforting satisfaction of a well-made, hearty meal.
  • Budget-Friendly Brilliance: Eating delicious, wholesome meals shouldn’t break the bank, and our Mexican Cabbage Rolls are a shining example of budget-friendly brilliance. Cabbage is an economical vegetable, and the recipe utilizes lean ground beef, a cost-effective protein source. With pantry staples like canned tomatoes and spices, you’re creating a gourmet experience without the gourmet price tag. It’s a win-win for your taste buds and your wallet.
  • Meal Prep Magic: We understand the hustle of busy lives, and that’s why these Mexican Cabbage Rolls are perfect for meal prep enthusiasts. The recipe is designed to be made in batches, making it easy to prepare several servings at once. Once rolled and baked, these rolls freeze beautifully, ensuring you have a supply of tasty, homemade meals ready to go whenever you need them. It’s meal prep magic that takes the stress out of mealtime.
  • Versatility for All Occasions: Whether you’re hosting a dinner party or enjoying a quiet night in, these rolls are a versatile choice. Their elegant presentation and bold flavors make them a standout dish for special occasions, while their simplicity and practicality make them an excellent option for everyday meals. From family dinners to potlucks, these Mexican Cabbage Rolls are a crowd-pleaser that fits any occasion.

The PrepYoSelf Newsletter

Ingredients & Swaps

  • Cabbage: Cabbage is not only affordable but also a nutritional powerhouse. Packed with vitamins and fiber, it’s the star of our show. When boiling, make sure not to overcook it; we want those leaves tender but still with a bit of bite. For a twist, try using savoy cabbage or even large collard greens for a heartier cabbage roll.
  • Lean Ground Beef: Opting for lean ground beef keeps the dish healthy without compromising on flavor. You can also switch it up with ground turkey or chicken for a lighter alternative.
  • Red Onions: Red onions add a sweet and savory kick to the filling. If you’re not a fan, yellow or white onions work just as well. Shallots can be a sophisticated swap too!
  • Corn: Corn brings a burst of sweetness and texture. Fresh corn off the cob is fantastic, but frozen or canned options are convenient. If you’re feeling adventurous, try black beans or diced zucchini for an extra veggie boost.
  • Orange Bell Pepper: The orange bell pepper adds vibrancy and a slightly sweet flavor. Feel free to experiment with different colored peppers for a visually stunning dish. For a smoky twist, use roasted red peppers from a jar.
  • Canned Diced Tomatoes with Chiles: These tomatoes bring the heat! The canned variety with chiles adds a spicy kick, but you can control the heat by choosing mild or hot versions. Diced tomatoes with jalapeños are a great alternative. Fresh diced tomatoes work too, especially if you want to control the spice level completely.
  • Tomato Sauce: Tomato sauce binds everything together. Choose a low-sodium version to keep things on the healthier side. If you prefer a different texture, crushed tomatoes or tomato puree are excellent substitutes. Add a pinch of sugar to balance acidity if needed.
  • Shredded Cheddar Cheese: Cheddar cheese brings a gooey, melty goodness to the party. Feel free to experiment with different cheeses like Monterey Jack or pepper jack for added flavor.
  • Paprika, Chili Powder, Garlic Powder, Salt: This quartet of spices is the secret behind the flavorful meat mixture. Adjust the quantities based on your taste preferences. Smoked paprika can add depth, and for an extra kick, consider using cayenne pepper or chipotle powder. Fresh garlic is a fantastic swap for garlic powder if you have it on hand.

round plate with mexican cabbage roll topped with shredded cheese, diced tomatoes, and corn

Simple Steps to Meal Prep This Cabbage Roll

  1. Boil a pot of water and toss in the half head of cabbage. Let it dance in the boiling water for 7 to 8 minutes until the leaves become tender and can easily separate from the core. Once it’s all tender, rescue the cabbage and let it cool before you start pulling those leaves apart. It’s cabbage roll time!
  2. In a sauté pan on medium-high heat, add a dash of oil and sauté those red onions until they’re feeling soft and translucent.
  3. Introduce the lean ground beef to the party and sprinkle in the paprika, chili powder, garlic powder, and salt. Break up that beef into bite-sized pieces and let it groove until fully cooked (about 6 to 7 minutes). Now, pour in the tomato sauce and give it a good stir. Let those flavors mingle and dance together.
  4. Take 2 to 3 cabbage leaves and stack them on top of each other for each roll. Scoop 1/3 cup of the seasoned meat mixture into the center of the cabbage leaves. Roll ’em up like a burrito, tucking in the sides as you go. It’s like you’re wrapping up a little gift of goodness!
  5. Preheat your oven to 375°F (190°C). Place your beautiful cabbage rolls in a baking dish and pour over the diced tomatoes with chiles. Oh, the aroma! Sprinkle that shredded cheddar cheese on top, and into the oven they go for 15 minutes. Watch that cheese melt into a gooey perfection!

Reference the recipe card below for detailed instructions.

glass meal prep containers with mexican cabbage roll topped with shredded cheese, diced tomatoes, and corn

Meal Prep Tips for Mexican Cabbage Soup

  • Fresh Greens Galore: Serve the Mexican Cabbage Rolls alongside a crisp, refreshing green salad. The acidity of a lime vinaigrette can complement the richness of the rolls beautifully.
  • Cilantro Sensation: Garnish with freshly chopped cilantro for a burst of freshness. The herb’s citrusy notes enhance the overall flavor profile.
  • Mexican Rice Marvel: Accompany the rolls with a side of fluffy Mexican rice for a complete and satisfying meal. The rice can soak up the flavorful juices from the rolls.
  • Taco Tuesday Remix: Unroll the cabbage leaves and use the seasoned ground beef as a taco filling. Top with your favorite taco fixings like salsa, guacamole, and sour cream for a new twist.
  • Soup of the Day: Dice the leftover cabbage leaves and mix them into a hearty tomato-based soup. Add the remaining meat mixture for a comforting Mexican-inspired soup that’s perfect for chilly days.

glass meal prep containers with mexican cabbage roll topped with shredded cheese, diced tomatoes, and corn

Plate of cabbage rolls topped with shredded cheese and diced tomatoes.

Mexican Cabbage Roll

Experience a budget-friendly fiesta with our Restaurant-Quality Mexican Cabbage Rolls, combining lean ground beef, vibrant spices, and zesty tomatoes, all wrapped in tender cabbage leaves for a lower-carb twist that's perfect for meal prep and bursting with bold, savory flavors.
No ratings yet
Prep Time 5 minutes
Cook Time 30 minutes
Course dinner, Main Course
Cuisine American, Mexican
Servings 2
Calories 308 kcal

Equipment

  • knife
  • cutting board
  • boiling pot
  • saute pan
  • baking dish
  • oven

Ingredients
  

  • 1 half head of cabbage
  • 8 oz lean ground beef
  • 1/4 cup red onions (diced)
  • 1/2 cup corn (fresh, frozen, canned)
  • 1/4 cup orange bell pepper (diced)
  • 12 oz canned diced tomatoes with chiles
  • 4 oz tomato sauce
  • 1/4 cup shredded cheddar cheese
  • 1/4 tsp paprika
  • 1/4 tsp chili powder
  • 1/4 tsp garlic powder
  • 1/4 tsp salt

Instructions
 

  • Boil a pot of water. Place the cabbage in the pot and boil for 7 to 8 minutes until the leaves are tender and can easily separate from the core. Once the cabbage is tender, remove it from the water and let it cool before pulling the leaves apart.
  • Meanwhile, add oil to a saute pan on medium-high heat and saute the red onions until they soften. Add the ground beef and sprinkle in the seasonings. Break it up into smaller pieces and continue to stir the beef around until it fully cooks (about 6 to 7 minutes). Then, add the tomato sauce and stir it into the meat mixture.
  • Layer 2 to 3 cabbage leaves on top of each other for each roll. Scoop 1/3 cup of the meat mixture into the center of the cabbage leaves. Wrap the leaves like a burrito tucking in the sides as you go.
  • Place the rolls in a baking dish and pour over the diced tomatoes. Sprinkle the shredded cheddar cheese on top and bake in the oven for 15 minutes.

Notes

Nutrition information provided is an estimate. It will vary based on cooking method and specific ingredients used. Please consult with your healthcare provider for specific dietary needs. To gain a better understanding, explore our nutrition disclaimer here. 

Nutrition

Calories: 308kcalCarbohydrates: 22gProtein: 31gFat: 12gSaturated Fat: 5gPolyunsaturated Fat: 1gMonounsaturated Fat: 4gTrans Fat: 0.4gCholesterol: 84mgSodium: 976mgPotassium: 1060mgFiber: 4gSugar: 10gVitamin A: 1469IUVitamin C: 47mgCalcium: 180mgIron: 5mg

Similar Recipes

turkey soup

One Pot Turkey Toscana Soup

chicken fajitas

Sheet Pan Chicken Fajitas with Mango Salsa

pork carnitas

Instant Pot Pork Carnitas Tostadas

You Might Also Like

Frequently Asked Questions

Are there alternatives to cabbage for wrapping the rolls?

Yes, indeed! While cabbage leaves are traditional, you can experiment with other leafy greens like collard greens or even large Swiss chard leaves for a unique twist.


Can I make this recipe vegetarian?

Absolutely! Swap the ground beef for plant-based crumbles or a mix of quinoa and black beans for a delicious vegetarian version. Adjust the seasonings accordingly.


Can I customize the filling with additional vegetables?

Of course! Feel free to add your favorite veggies to the meat mixture. Diced zucchini, mushrooms, or spinach can be wonderful additions, adding both flavor and nutrients.

Posted on Leave a comment

Balsamic Glazed Pork Chops with Persimmons

glass meal prep containers with balsamic glazed porkchops with persimmons and baby spinach

Ready to conquer your day with a delicious and nutritious meal that won’t keep you tied to the kitchen for hours? Let’s dive into our fantastic Pork Chops and Sautéed Persimmons recipe – a feast for both your taste buds and your busy schedule! Now is the time to add pork meal prep into your routine.

This post may contain affiliate links. Please see our privacy policy for details.

Calories: 542kcal | Carbohydrates: 42g | Protein: 39g | Fat: 25g | Saturated Fat: 6g | Polyunsaturated Fat: 5g | Monounsaturated Fat: 12g | Trans Fat: 0.1g | Cholesterol: 114mg | Sodium: 699mg | Potassium: 1271mg | Fiber: 2g | Sugar: 6g | Vitamin A: 5814IU | Vitamin C: 74mg | Calcium: 105mg | Iron: 5mg

balsamic glazed porkchops with persimmons and baby spinach

Why You’ll Enjoy This:

  • Flavor Harmony: The rich, sweet, and tangy notes of balsamic glaze beautifully complement the natural sweetness of ripe persimmons. The combination creates a symphony of flavors, balancing savory and sweet for a delightful taste experience that feels both indulgent and satisfying.
  • Seasonal Simplicity: Persimmons come into their prime during the winter months, offering a burst of seasonal freshness to the dish. The warmth of cinnamon and the smokiness of paprika in the pork chops embrace the cozy, comforting vibes of winter, making this meal a perfect cold-weather comfort.
  • Textural Bliss: The tender, succulent pork chops provide a satisfying contrast to the crisp, sautéed persimmons. It’s a play on textures that keeps each bite interesting and enjoyable. The caramelization of the persimmons adds a delightful crunch, creating a mouthwatering experience.
  • Impressive Yet Budget-Friendly: Balsamic glaze adds a touch of sophistication to the dish, making it feel like a restaurant-quality meal without breaking the bank. Pork chops, especially when thinly sliced, are a cost-effective protein option. The use of simple yet flavorful ingredients keeps it elegant and budget-friendly.
  • Versatility at Its Core: Whether you’re hosting a dinner party or preparing a weekday family meal, this dish is versatile and adaptable. The combination of pork chops and persimmons feels special enough for a festive gathering, yet it’s easy and quick enough to fit into your busy weeknight routine. It’s a culinary chameleon that suits different occasions with grace.

The PrepYoSelf Newsletter

Ingredient Breakdown

  • Pork Chops: A lean source of protein that’s not only essential for muscle maintenance but also incredibly satisfying. Pro-tip: Opt for thin slices for quicker cooking and more even marination.
  • Balsamic Glaze: Adds a sweet and tangy depth that elevates the entire dish. Pro-tip: Look for a high-quality balsamic glaze for richer flavor.
  • Cinnamon: Brings warmth and a hint of sweetness, balancing out the savory notes. Pro-tip: A small amount goes a long way, so embrace the magic of this spice.
  • Paprika: Infuses a smoky undertone, adding complexity to the marinade. Pro-tip: Choose sweet or smoked paprika based on your flavor preference.
  • Thyme: Infuses a fresh, earthy aroma that complements the pork beautifully. Pro-tip: If using fresh thyme, strip the leaves from the stems for maximum flavor.
  • Persimmon: Brings a natural sweetness and a pop of vibrant color to the dish. Pro-tip: Choose a ripe persimmon for the best flavor and texture.
  • Baby Spinach: Packed with nutrients, adds a crisp texture, and balances the richness of the pork. Pro-tip: Go for baby spinach for a tender bite.
  • Salad Dressing: Adds a burst of flavor and turns your side salad into a taste sensation. Pro-tip: Pick a dressing that complements the overall flavor profile; a balsamic vinaigrette would be a great match!

pork meal prep of balsamic glazed porkchops with persimmons and baby spinach

How to Meal Prep Pork Chops

  1. Remove the top of the persimmon stem and slice them into delightful wedges.
  2. Time to give those pork chops some love! In a bowl, mix balsamic glaze, cinnamon, paprika, garlic powder, thyme, and salt. Massage this flavorful concoction onto your pork chops, ensuring each piece is coated in yumminess.
  3. Heat up a pan with a tablespoon of olive oil over medium-high heat. Place your marinated pork chops in the pan, and let them sizzle away for 3 to 5 minutes on each side. Keep flipping until they reach a juicy and safe internal temperature of 145°F.
  4. Once your pork chops are perfection on a plate, remove them and lower the heat to low-medium. Toss those persimmon slices into the pan and sauté them for a quick 2 to 3 minutes – just enough to enhance their natural sweetness.
  5. Arrange your succulent pork chops alongside the sautéed persimmons, and serve them up with a generous side of fresh baby spinach. Top it all off with your favorite salad dressing for an extra burst of flavor.

Reference the recipe card below for detailed instructions.

glass meal prep containers with pork meal prep of balsamic glazed porkchops with persimmons and baby spinach

Pork Meal Prep Pairing Tips

  • Grainy Goodness: Serve the pork chops over a bed of wild rice, quinoa, or farro. These grains add a nutty flavor and a chewy texture that pairs wonderfully with the tender pork.
  • Citrusy Sidekick: Consider adding a citrusy element, like an orange or grapefruit salad, to cut through the richness of the dish. The acidity of citrus provides a refreshing contrast.
  • Cheese Pleaser: A sprinkle of crumbled goat cheese or feta over the baby spinach adds a delightful creaminess, while the tangy notes elevate the overall flavor profile.
  • Nutty Crunch: Toasted nuts, such as pecans or almonds, add a delightful crunch. Sprinkle them over the salad or use them as a garnish for an extra layer of texture.
  • Freshness Finale: End your meal on a refreshing note with a fruit-based dessert. A simple fruit salad or a light sorbet can provide a satisfying conclusion to the feast.

pork meal prep in containers with balsamic glazed porkchops with persimmons and baby spinach

Balsamic Glazed Pork chops with sliced persimmons and sauteed spinach.

Balsamic Glazed Pork Chops with Persimmons and Spinach

Indulge in the perfect winter dish — balsamic glazed pork chops, marinated to perfection with cinnamon and thyme, paired with sautéed persimmons and served alongside a vibrant baby spinach salad for a restaurant-worthy experience that's both delicious and budget-friendly
No ratings yet
Prep Time 5 minutes
Cook Time 15 minutes
Course dinner, lunch, Main Course
Cuisine American
Servings 2
Calories 542 kcal

Equipment

  • knife
  • cutting board
  • saute pan

Ingredients
  

Pork Chops and Marinade

  • 12 oz pork chops (thinly sliced)
  • 2 tbsp balsamic glaze
  • 1/4 tsp cinnamon
  • 1/4 tsp paprika
  • 1/4 tsp garlic powder
  • 1/4 tsp salt
  • 1 tbsp olive oil
  • 1 tsp thyme (chopped)

Sides

  • 1 persimmon
  • 4 cups baby spinach
  • 4 tbsp salad dressing

Instructions
 

  • Remove the top of the persimmon stem and slice them into wedges.
  • Marinate the pork with balsamic glaze, cinnamon, paprika, garlic powder, thyme, and salt. Add oil to a pan on medium high heat and place the pork chops in the pan. Sear them on each side for about 3 to 5 minutes until they are fully cooked to an internal temperature of 145F.
  • Remove the pork chops from the pan and lower the heat to low-medium. Place the persimmon slices in the pan and saute for about 2 to 3 minutes.
  • Enjoy the pork chops and sauteed persimmons with a side salad and dressing.

Notes

Nutrition information provided is an estimate. It will vary based on cooking method and specific ingredients used. Please consult with your healthcare provider for specific dietary needs. To gain a better understanding, explore our nutrition disclaimer here. 

Nutrition

Calories: 542kcalCarbohydrates: 42gProtein: 39gFat: 25gSaturated Fat: 6gPolyunsaturated Fat: 5gMonounsaturated Fat: 12gTrans Fat: 0.1gCholesterol: 114mgSodium: 699mgPotassium: 1271mgFiber: 2gSugar: 6gVitamin A: 5814IUVitamin C: 74mgCalcium: 105mgIron: 5mg

Similar Recipes

chicken soup

One Pot Mexican Chicken Soup

sweet potato blt

Sweet Potato BLT Sandwich

Grilled Honey Dijon Chicken Kale Salad

You Might Also Like

Frequently Asked Questions

Can I use a different protein besides pork chops?

Absolutely! This marinade works well with various proteins. You can try it with chicken breasts, turkey cutlets, or even tofu for a vegetarian option.


What if I can’t find persimmons?

No worries! While persimmons add a unique flavor, you can substitute them with other seasonal fruits like apples, pears, or even figs for a similar sweet and savory pairing.


Can I use a grill instead of a pan to cook the pork chops?

Certainly! Grilling adds a smoky flavor to the pork chops. Grill them over medium-high heat for 3 to 5 minutes on each side or until they reach an internal temperature of 145°F.

Posted on Leave a comment

Air Fryer Honey Grapefruit

round glass meal prep containers with grapefruit topped with yogurt and cashews

Air Fryer Honey Grapefruit! This delightful creation combines the sweet and zesty goodness of grapefruit with the rich touch of honey, crunchy cashews, and your favorite yogurt. Let’s dive right into this citrusy adventure for an air fryer breakfast!

This post may contain affiliate links. Please see our privacy policy for details.

Calories: 268kcal | Carbohydrates: 32g | Protein: 10g | Fat: 13g | Saturated Fat: 5g | Polyunsaturated Fat: 1g | Monounsaturated Fat: 5g | Cholesterol: 22mg | Sodium: 80mg | Potassium: 547mg | Fiber: 3g | Sugar: 23g | Vitamin A: 1640IU | Vitamin C: 41mg | Calcium: 240mg | Iron: 1mg

round plate with grapefruit topped with yogurt and cashews

This Air Fryer Honey Grapefruit breakfast isn’t just a tasty and convenient option for busy mornings – it’s a deliberate choice for health and well-being. From its quick preparation to its nutrient-rich profile and adaptability, it’s a meal that aligns with the needs of individuals navigating a hectic lifestyle while aiming for a healthy reset. Here’s the reason we love this meal prep idea:

  • Efficiency and Speed: In the fast-paced world we live in, efficiency is key. The Air Fryer makes this breakfast a breeze to prepare – in just 8 minutes, you have a delicious, health-packed meal ready to go. This means less time in the kitchen and more time for other morning routines or a few extra minutes of sleep.
  • Nutrient-Packed Goodness: Grapefruit is a nutrient powerhouse, loaded with vitamin C and antioxidants. Combining it with honey, cashews, and yogurt adds a variety of essential nutrients – from healthy fats and proteins to gut-friendly probiotics. This meal isn’t just tasty; it’s a nutrient-packed, energy-boosting start to your day.
  • Balanced and Satisfying: This breakfast hits all the right notes – the natural sugars in honey and grapefruit provide a quick energy boost, while the yogurt and cashews add proteins and healthy fats that keep you feeling satisfied throughout the morning. It’s a balanced combination that curbs mid-morning cravings and sets you up for success.
  • Versatility in Flavors and Textures: The beauty of this recipe lies in its adaptability. You can customize the yogurt choice to your preference, experiment with different types of honey, or even try various nuts for added crunch. This versatility ensures that you won’t get bored and allows you to cater the flavors to your liking, keeping your taste buds excited.
  • Gentle Reset for Healthy Choices: After a weekend of indulgence or during busy weeks where meal choices may sway off track, this Air Fryer Honey Grapefruit serves as a gentle reset button. It’s a deliciously wholesome option that feels like a treat, making it easier to transition back to healthier eating habits. The natural sugars in the grapefruit and honey satisfy sweet cravings without derailing your health goals.

The PrepYoSelf Newsletter

Ingredients You’ll Need For This Nutritious Air Fryer Breakfast

  • Grapefruit: Our main squeeze, the grapefruit, is not only a burst of vibrant citrusy flavor but also packs a punch of nutritional goodness. Loaded with vitamin C, antioxidants, and a refreshing tanginess, the grapefruit sets the tone for a wholesome and invigorating dish. Grocery Tip: Look for grapefruits that are firm, heavy for their size, and have a bright, smooth skin for the juiciest results.
  • Honey: Ah, liquid gold! The honey in this recipe is not just a sweetener; it’s a caramelized drizzle of goodness that enhances the natural sweetness of the grapefruit. Beyond its delightful taste, honey also brings its antibacterial and anti-inflammatory properties to the table, making this recipe a treat for your taste buds and your well-being. Grocery Tip: Opt for locally sourced honey for a touch of regional flair and to support local beekeepers.
  • Cashews: Now, let’s talk about the crunchy element – cashews! These buttery nuts add a layer of texture to the dish, elevating each bite to a whole new level. Cashews bring a subtle nuttiness and a satisfying crunch that complements the juicy tenderness of the grapefruit. Plus, they’re a fantastic source of healthy fats and essential minerals. Prep Tip: Toast the cashews briefly in a dry pan for an extra depth of flavor before adding them to the grapefruit.
  • Yogurt: Yogurt, the creamy canvas that ties everything together! Whether you choose Greek yogurt for its thickness, coconut yogurt for a tropical twist, or almond yogurt for a nutty undertone, the yogurt adds a velvety richness to the dish. It also introduces a layer of probiotics, promoting gut health and making this recipe a deliciously nutritious treat. Grocery Tip: Experiment with different yogurt varieties to find your perfect flavor combination.

round glass meal prep containers with grapefruit topped with yogurt and cashews

Easy Recipe Steps to Air Fry Grapefruit

  1. Start by grabbing a juicy grapefruit – the star of our show! Slice it in half, revealing those vibrant citrusy segments. Now, get ready to elevate the flavor with a drizzle of liquid gold – honey! Pour honey on top of the grapefruit flesh, and with a spoon, spread it evenly to ensure every bite is coated in sweetness.
  2. Time to place the grapefruit in the Air Fryer! Place the honey-drizzled grapefruit halves in the basket, and set the temperature to 400°F. Let the magic happen for 8 minutes – the aroma that fills your kitchen will have you counting down the seconds!
  3. As your grapefruit basks in the Air Fryer glory, it’s time to prepare the crunchy surprise. Take 1/4 cup of cashews and give them a rough chop for that extra texture. After the 8-minute mark, sprinkle these golden nuggets over the grapefruit, adding a delightful crunch that will have your taste buds doing a happy dance.
  4. Last but certainly not least, let’s crown our Air Fryer Honey Grapefruit masterpiece with a generous dollop of yogurt! Whether you prefer Greek, coconut, or almond yogurt, the choice is yours. Spoon it over the honey-drizzled, cashew-covered grapefruit halves, turning each bite into a symphony of flavors.

Reference the recipe card below for detailed instructions.

round plate with grapefruit topped with yogurt and cashews

Meal Prep Tips:

  • Set Up a Breakfast Station: Designate a specific area in your refrigerator for all the prepped components – honey-drizzled grapefruit halves, portioned yogurt, and a container of chopped cashews. Having a designated breakfast station makes it easy to grab everything you need quickly.
  • Use Air Fryer Liners for Easy Cleanup: Consider using air fryer parchment paper or liners for easy cleanup after cooking the grapefruit. This eliminates the need for scrubbing the air fryer basket, saving you time in the morning rush.
  • Experiment with Flavors: While meal prepping, consider experimenting with different honey varieties, yogurt flavors, or even trying different types of nuts. This way, you can switch things up throughout the week, keeping your breakfasts exciting and flavorful.

round glass meal prep containers with grapefruit topped with yogurt and cashews

Round white plate with a grapefruit half, topped with yogurt and cashew nuts.

Air Fryer Honey Grapefruit

Enjoy this burst of citrusy goodness with Air Fryer Honey Grapefruit—juicy grapefruit halves drizzled with honey, air-fried to perfection, and topped with crunchy cashews and creamy yogurt for a deliciously refreshing and wholesome breakfast!
No ratings yet
Prep Time 5 minutes
Cook Time 10 minutes
Course Breakfast, Snack
Cuisine American
Servings 2
Calories 268 kcal

Equipment

  • Air Fryer

Ingredients
  

  • 1 grapefruit
  • 2 teaspoons honey
  • 1/4 cup cashews
  • 12 oz yogurt (your choice)

Instructions
 

  • Slice the grapefruit in half. Drizzle honey on top of the flesh and spread it across.
  • Place the grapefruit in the Air Fryer basket and cook for 8 minutes at 400F. Note: If you don't have an Air Fryer, you can bake it i the oven for 10-12 minutes at 425.
  • Afterward, top it off with cashews and your choice of yogurt.

Notes

Nutrition information provided is an estimate. It will vary based on cooking method and specific ingredients used. Please consult with your healthcare provider for specific dietary needs. To gain a better understanding, explore our nutrition disclaimer here. 

Nutrition

Calories: 268kcalCarbohydrates: 32gProtein: 10gFat: 13gSaturated Fat: 5gPolyunsaturated Fat: 1gMonounsaturated Fat: 5gCholesterol: 22mgSodium: 80mgPotassium: 547mgFiber: 3gSugar: 23gVitamin A: 1640IUVitamin C: 41mgCalcium: 240mgIron: 1mg

Similar Recipes

baked oatmeal

Oven Baked Oats with Apricots and Berries

cranberry oat muffins

Cranberry Oatmeal Muffin Bars

french toast 2

Oven Baked French Toast Muffins with Strawberries

You Might Also Like

Frequently Asked Questions

Can I Use Any Type of Grapefruit?

Yes, feel free to use your favorite variety of grapefruit! Whether it’s ruby red, pink, or white grapefruit, the recipe works well with all types.


Can I Use a Different Sweetener Instead of Honey?

Certainly! While honey adds a unique flavor, you can experiment with other natural sweeteners like maple syrup or agave nectar to suit your taste preferences.


Do I Need to Peel the Grapefruit Before Air Frying?

No need to peel! The grapefruit halves are air fried with the skin intact. Once cooked, the juicy segments can be easily scooped out with a spoon.

Posted on Leave a comment

Breakfast Bacon Egg Cups

round glass meal prep containers with bacon wrapped eggs and roasted tomato

Here’s a breakfast recipe that’s not only delicious but also ridiculously easy to whip up – Bacon Egg Cups with Roasted Tomato. These little cups of joy are the perfect way to start your day with a protein-packed punch and a burst of flavor. Let’s dive into the kitchen and get these eggs baking!

This post may contain affiliate links. Please see our privacy policy for details.

Calories: 333kcal | Carbohydrates: 2g | Protein: 17g | Fat: 28g | Saturated Fat: 9g | Polyunsaturated Fat: 5g | Monounsaturated Fat: 12g | Trans Fat: 0.1g | Cholesterol: 356mg | Sodium: 418mg | Potassium: 285mg | Fiber: 0.4g | Sugar: 1g | Vitamin A: 760IU | Vitamin C: 4mg | Calcium: 55mg | Iron: 2mg

round plate with bacon wrapped eggs and roasted tomato

The PrepYoSelf Newsletter

Here’s why you need to make this:

These Bacon Egg Cups with Roasted Tomato are not just a tasty treat but also a healthy indulgence that is perfect for meal prep, especially for busy individuals aiming to stay on track with their nutrition:

  • Excitement in Every Bite: Sticking to a meal plan can sometimes feel monotonous, but not with these bacon egg cups. The variety of textures – the crispy bacon, creamy eggs, and juicy tomatoes – along with the interplay of sweet and savory flavors, ensures that each bite is exciting. Meal prep shouldn’t be a chore; it should be an anticipation of delicious moments, and these cups deliver just that.
  • Flavor Harmony: The flavor combinations in these cups create a delightful symphony for your taste buds. The savory, smoky notes from the bacon perfectly complement the richness of the eggs. The roasted tomatoes add a burst of sweetness and acidity, balancing the dish. Topped with fresh green onions, you get a pop of brightness and a hint of freshness that ties everything together into a harmonious and satisfying flavor experience.
  • Portion Control and Satiety: Meal prepping these cups allows for easy portion control. Each cup is a perfectly sized, balanced serving, helping you manage your calorie intake.
  • Time-Efficient Meal Prep: For busy individuals, time is of the essence. These bacon egg cups are a brilliant solution. With just a few simple ingredients and minimal prep time, you can have a batch ready to go. Pop them in the oven, and while they bake, you can focus on other tasks, making it a time-efficient and hassle-free meal prep option.

Simple Ingredients You’ll Need

  • Eggs: We used whole eggs, but you can also swap this with egg whites. 
  • Bacon: Who can resist the allure of bacon? Those savory, crispy slices not only wrap our eggs like a cozy blanket but also infuse every bite with a smoky, salty goodness. Bacon adds that irresistible crunch and umami flavor that takes these cups to the next level. You can swap it with turkey bacon or even prosciutto.
  • Roma Tomato: Enter the burst of freshness! The roma tomato brings a juicy, sweet element to the dish. Roasting them intensifies their natural flavors, creating a delightful contrast to the savory bacon and creamy eggs. It’s the touch of brightness that makes each bite a flavor symphony.
  • Olive Oil: Olive oil plays a crucial role in roasting our tomatoes, adding a subtle earthiness and enhancing their natural sweetness. It also helps achieve that perfect golden crispiness in both the bacon and the edges of the eggs.
  • Green Onions: The vibrant finish! Chopped green onions are not just a garnish; they’re the final touch that brings a burst of freshness and a mild oniony kick. Their bright green color adds visual appeal, and their crisp texture provides a satisfying contrast to the softer components of the dish.

round glass meal prep containers with bacon wrapped eggs and roasted tomato

How to Meal Prep Bacon Egg Cups

  1. First things first, let’s get that oven preheated to a toasty 400°F (or approximately 200°C). This ensures that our bacon egg cups and roasted tomatoes get that perfect golden crispiness.
  2. Now, grab your muffin tin and let’s give these eggs a cozy bacon blanket. Take each bacon slice and wrap it in a circle inside the muffin tin cups. This not only adds a savory touch but also forms the perfect vessel for our eggs.
  3. Time to introduce the stars of the show – crack one large egg into each bacon-wrapped cup. Sprinkle a pinch of salt on top for that extra flavor kick.
  4. Let’s not forget about our roasted tomato companions! Cut that roma tomato in half and place each half in a muffin tin cup. Drizzle them with a teaspoon of olive oil and sprinkle a bit of salt to taste. These roasted tomatoes add a burst of juicy sweetness that pairs perfectly with the savory bacon and eggs.
  5. Pop your muffin tin into the preheated oven and let the magic happen. Bake for approximately 15 minutes or until the egg whites are set. You’ll know they’re ready when the bacon is crispy, and the eggs are cooked to your liking.
  6. Once the bacon egg cups and tomatoes are out of the oven, use a knife to gently loosen the edges of each cup.
  7. Now, let’s add a pop of color and freshness – sprinkle those bacon egg cups with a generous amount of chopped green onions. Not only do they look Instagram-worthy, but they also add a delightful crunch and a burst of oniony goodness.

Reference the recipe card below for detailed instructions.

round plate with bacon wrapped eggs and roasted tomato

Meal Prep Pairing Tips:

These bacon egg cups are not just limited to breakfast. They make a fantastic addition to brunch, lunch, or even a light dinner. Pair them with quinoa, couscous, or a simple green salad for a more substantial meal.

  • Fresh Greens: Serve these cups with a side of fresh greens or a simple salad to add a crunchy and refreshing element to your meal.
  • Avocado Slices: Creamy avocado slices are a perfect accompaniment. The richness of avocado complements the bacon and eggs beautifully.
  • Whole Grain Toast: Enjoy these cups with a side of whole grain toast for a satisfying crunch and additional fiber. It’s a great way to make the meal more filling.
  • Greek Yogurt with Berries: Balance the savory goodness with a sweet touch. A bowl of Greek yogurt topped with fresh berries adds a delightful contrast.
  • Salsa or Hot Sauce: Spice things up! A dollop of salsa or a dash of hot sauce can add a kick of flavor that enhances the overall experience.

round glass meal prep containers with bacon wrapped eggs and roasted tomato

round plate with bacon wrapped eggs and roasted tomato

Bacon Egg Cups with Roasted Tomato

Enjoy the savory symphony of flavor with these Bacon Egg Cups featuring crispy bacon, creamy eggs, and sweet roasted tomatoes, creating a delightful and nutritious meal prep option for any time of day!
No ratings yet
Prep Time 5 minutes
Cook Time 11 minutes
Course Breakfast
Cuisine American
Servings 2
Calories 333 kcal

Equipment

  • knife
  • cutting board
  • muffin
  • oven

Ingredients
  

  • 4 large eggs
  • 4 bacon slices
  • 1 roma tomato
  • 1 teaspoon olive oil
  • 1 teaspoon green onions (chopped)
  • salt (to taste)

Instructions
 

  • Pre-heat the oven to 400F. Place the bacon slices in the muffin tin by wrapping it in a circle. Crack an egg into each cup and sprinkle with salt.
  • Cut tomato in half and place each half in a muffin tin. Drizzle the tomatoes with olive oil and sprinkle with salt to taste.
  • Bake the bacon egg cups and tomatoes in the oven for 15 minutes until the egg whites set. Use a knife to loosen the edge of each cup. Garnish with chopped green onions

Notes

Nutrition information provided is an estimate. It will vary based on cooking method and specific ingredients used. Please consult with your healthcare provider for specific dietary needs. To gain a better understanding, explore our nutrition disclaimer here. 

Nutrition

Calories: 333kcalCarbohydrates: 2gProtein: 17gFat: 28gSaturated Fat: 9gPolyunsaturated Fat: 5gMonounsaturated Fat: 12gTrans Fat: 0.1gCholesterol: 356mgSodium: 418mgPotassium: 285mgFiber: 0.4gSugar: 1gVitamin A: 760IUVitamin C: 4mgCalcium: 55mgIron: 2mg

Similar Recipes

fried egg and sausage hash

Fried Egg with Apple and Sausage Hash

Easy Cheese Omelette

easy sausage egg muffins

Sausage Egg Muffins with Strawberries

You Might Also Like

Frequently Asked Questions

Can I add cheese to these egg cups?

Definitely! Feel free to sprinkle some shredded cheese on top of the eggs before baking. Cheddar, feta, or mozzarella would all be delicious choices.


What other vegetables can I add to these bacon egg cups?

Get creative! Spinach, bell peppers, mushrooms, or even diced zucchini would be fantastic additions. Just make sure to adjust the cooking time if adding more veggies.


Can I use a different type of tomato?

While Roma tomatoes work well, you can experiment with cherry tomatoes or grape tomatoes for a sweeter twist. Just adjust the baking time accordingly.

Posted on Leave a comment

Beef Tomatillo Stew

glass meal prep containers that have ground beef, sweet potatoes, green bell peppers, cilantro, jalapeno, and red onions

Hey there, meal preppers! Are you ready to add some zesty excitement to your weekly meal prep routine? Look no further than our delicious and nutritious Beef Tomatillo Stew, one pot soup. Packed with lean ground beef, vibrant veggies, and a burst of flavor from tomatillo sauce, this dish will have your taste buds dancing with joy. Plus, it’s the perfect way to keep your healthy eating goals on track! Let’s dive right into the world of meal prep magic.

This post may contain affiliate links. Please see our privacy policy for details.

Calories: 459kcal | Carbohydrates: 45g | Protein: 42g | Fat: 11g | Saturated Fat: 4g | Polyunsaturated Fat: 1g | Monounsaturated Fat: 4g | Trans Fat: 1g | Cholesterol: 110mg | Sodium: 2159mg | Potassium: 1545mg | Fiber: 6g | Sugar: 17g | Vitamin A: 17546IU | Vitamin C: 74mg | Calcium: 117mg | Iron: 6mg

round bowl with soup that has ground beef, sweet potatoes, green bell peppers, cilantro, jalapeno, and red onions

What is Tomatillo Sauce and Why is it Great for Meal prep?

Tomatillo sauce, also known as salsa verde, is a vibrant and tangy sauce made from tomatillos, which are small, green, tomato-like fruits. Tomatillos are known for their slightly citrusy and tart flavor. To make tomatillo sauce, tomatillos are typically husked, boiled or roasted, and then blended with ingredients like green chilies, cilantro, onions, and sometimes garlic. The result is a versatile, green sauce that can be used in a variety of dishes, such as enchiladas, tacos, soups, and stews. Tomatillo sauce adds a zesty and refreshing kick to dishes and is a common condiment in Mexican and Southwestern cuisine.

  • Time-Saving: Pre-made tomatillo sauce eliminates the need for preparing and cooking tomatillos and other ingredients from scratch, cutting down on meal prep time significantly. One pot soups reduce clean up time and effort.
  • Consistent Flavor: Store-bought tomatillo sauce offers a consistent and authentic flavor, ensuring that your stew base will taste as delicious as your favorite restaurant dishes.
  • Cost-Efficient: Buying pre-made tomatillo sauce can be more cost-effective than purchasing individual ingredients and spices, saving you money in the long run.
  • Convenience: It’s a hassle-free option, making it ideal for busy individuals who want to create restaurant-quality flavors without the culinary expertise or the time commitment.
  • Wide Availability: Pre-made tomatillo sauce is readily available at most grocery stores, making it accessible to anyone looking to elevate the flavor of their stew with minimal effort and maximum taste.

The PrepYoSelf Newsletter

Ingredients You’ll Need

  • Lean Ground Beef: You can substitute lean ground turkey or chicken for beef if you prefer a lighter protein option.
  • White Onions: Red onions or shallots can be used as a flavorful alternative.
  • Green Onions: Chives or scallions can be used as substitutes for green onions.
  • Garlic: If you’re in a hurry, pre-minced garlic, garlic paste, or garlic powder can be used as an alternative.
  • Sweet Potato: Regular potatoes, butternut squash, or carrots can be used instead of sweet potatoes.
  • Green Bell Pepper: Look for firm, brightly colored peppers to ensure freshness. Red, yellow, or orange bell peppers can be used for a sweeter flavor.
  • Tomatillo Sauce: You can make your own tomatillo sauce by blending fresh tomatillos, onions, and spices. Tomatillos are low in calories and provide vitamins like vitamin C, A, and K. Salsa verde can be a convenient alternative to tomatillo sauce.
  • Chicken Broth: Buy low-sodium or no-sodium-added chicken broth to have more control over the salt content. Vegetable broth can be used as well.
  • Cilantro: Store fresh cilantro with a damp paper towel in a plastic bag to keep it fresh longer. Parsley or fresh basil can be used for a different herb flavor.
  • Jalapeno: Serrano peppers or crushed red pepper flakes can be used for extra heat.

glass meal prep containers that have ground beef, sweet potatoes, green bell peppers, cilantro, jalapeno, and red onions

Basic Steps to Meal Prep Beef Tomatillo Stew

  1. Heat up a soup pot over medium-high heat and add a touch of oil. Toss in your white and green onions, sautéing them until they become soft and fragrant. This should take about 2 to 3 minutes. It’s the perfect way to start building those savory layers of flavor!
  2. Time to introduce our star player – the lean ground beef. Pop it into the pot alongside the minced garlic. As it cooks, use a spatula to break it up into smaller, delectable pieces. Continue to stir and cook for about 5 to 6 minutes until the beef is browned and cooked through. The aroma alone is enough to get your taste buds tingling!
  3. Once the beef is cooked to perfection, it’s time to add in the chicken broth, tomatillo sauce, diced bell peppers, and sweet potatoes. We’re infusing your stew with nutrients and flavor! Bring this hearty mixture to a rolling boil, and once it’s bubbling, reduce the heat to low-medium and cover the pot with a snug lid. Let it simmer for around 10 minutes, allowing the flavors to meld together in delicious harmony.
  4. After the stew has simmered to its full potential, it’s time for the grand finale. Top off your Beef Tomatillo Stew with a vibrant medley of fresh toppings. Sprinkle on the chopped cilantro, diced red onions, and sliced jalapenos. These final touches not only add a burst of color but also a pop of freshness that’s simply irresistible.

Reference the recipe card below for detailed instructions.

round bowl with soup that has ground beef, sweet potatoes, green bell peppers, cilantro, jalapeno, and red onions

Meal Prep Tips for Beef Tomatillo Stew – One Pot Soup

  • Prep Your Ingredients: Before you start cooking, wash, peel, chop, and measure all your ingredients. Having everything ready will streamline the cooking process and make it more efficient.
  • Serve with Complementary Sides: Enhance your meal prep experience by pairing the Beef Tomatillo Stew with healthy sides such as brown rice, quinoa, or a side salad. Prep these sides in advance for a complete meal.
  • Maintain Freshness: To keep your Beef Tomatillo Stew fresh throughout the week, consider portioning the toppings (cilantro, red onions, jalapenos) separately and add them just before eating. This will ensure they stay crisp and vibrant.
  • Storage Guidelines: Store your meal prep containers in the refrigerator for up to 3-4 days. If you’ve frozen portions, they can last for 2-3 months.

Leftover Ingredient Tips

  • Ground Beef: Make a hearty beef and vegetable stir-fry with any leftover ground beef. Add stir-fry veggies, a splash of soy sauce, and some ginger for a quick and satisfying meal. Transform the beef into a filling for tacos, burritos, or quesadillas. Just add some cheese, your favorite toppings, and tortillas for a new dish.
  • Sweet Potatoes: Mash leftover sweet potatoes and turn them into sweet potato pancakes or fritters. Add a bit of flour and an egg to bind the mixture, then pan-fry until golden brown. Cube and roast the sweet potatoes with olive oil, salt, and pepper for a simple side dish. Add a sprinkle of your favorite herbs or spices for extra flavor.
  • Green Bell Pepper: Slice the green bell pepper and use it as a crunchy addition to salads or wraps. It adds a fresh and colorful touch to your meals. Stuff the bell peppers with a mixture of rice, beans, cheese, and any leftover beef. Bake them until the peppers are tender and the filling is hot.
  • Tomatillo Sauce: Use tomatillo sauce as a marinade for chicken, shrimp, or tofu. It will add a tangy kick to your protein of choice. Mix tomatillo sauce with plain Greek yogurt or sour cream to create a flavorful dip for chips or fresh vegetables.
  • Jalapeno: Slice jalapenos thinly and use them to spice up your pizza, nachos, or omelets. They add a nice kick to a variety of dishes. Create a homemade hot sauce by blending jalapenos with vinegar, salt, and garlic. Adjust the spice level to your preference.

glass meal prep containers that have ground beef, sweet potatoes, green bell peppers, cilantro, jalapeno, and red onions

round bowl with soup that has ground beef, sweet potatoes, green bell peppers, cilantro, jalapeno, and red onions

Beef Tomatillo Stew

Whip up our Beef Tomatillo Stew, a flavorful and wholesome meal prep dinner featuring lean beef, colorful veggies, and zesty tomatillo sauce!
No ratings yet
Prep Time 5 minutes
Cook Time 20 minutes
Course dinner, Main Course
Cuisine Mexican
Servings 2
Calories 459 kcal

Equipment

  • knife
  • cutting board
  • soup pot

Ingredients
  

  • 12 oz lean ground beef
  • 1/4 cup white onions (diced)
  • 1/4 cup green onions (chopped)
  • 1/4 cup garlic (minced)
  • 1 sweet potato (peeled and diced)
  • 1 green bell pepper (diced)
  • 1 cup tomatillo sauce
  • 2 cups chicken broth
  • 1/2 teaspoon paprika
  • 1/4 teaspoon salt
  • 1/4 cup cilantro (chopped)
  • 1/4 cup red onions (diced)
  • 1 jalapeno (sliced)

Instructions
 

  • Add oil to a soup pot on medium high heat and saute the white onions and green onions until they soften (about 2 to 3 minutes).
  • Next, add the ground beef and garlic. Break up the ground beef into smaller pieces and continue to stir until it fully cooks (about 5 to 6 minutes).
  • Then, pour in the broth, tomatillo sauce, bell peppers, sweet potatoes, and seasonings. Bring the liquid to a boil. Once it boils, lower the heat to low medium and cover the pot with a lid. Let it simmer for about 10 minutes.
  • After the stew simmers, top it off with fresh cilantro, red onions, and sliced jalapenos.

Notes

Nutrition information provided is an estimate. It will vary based on cooking method and specific ingredients used. Please consult with your healthcare provider for specific dietary needs. To gain a better understanding, explore our nutrition disclaimer here. 

Nutrition

Calories: 459kcalCarbohydrates: 45gProtein: 42gFat: 11gSaturated Fat: 4gPolyunsaturated Fat: 1gMonounsaturated Fat: 4gTrans Fat: 1gCholesterol: 110mgSodium: 2159mgPotassium: 1545mgFiber: 6gSugar: 17gVitamin A: 17546IUVitamin C: 74mgCalcium: 117mgIron: 6mg

Similar Recipes

chicken soup

One Pot Mexican Chicken Soup

beef cabbage stir fry

One Pot Ground Beef Cabbage Stir Fry

chicken pesto

Skillet Chicken Pesto and Peppers

You Might Also Like

Frequently Asked Questions

Can I make this stew without sweet potatoes if I’m watching my carb intake?

Certainly, you can omit sweet potatoes or substitute them with lower-carb alternatives like cauliflower, zucchini, or additional bell peppers.


Can I make this recipe in a slow cooker or Instant Pot?

Yes, you can adapt this recipe for a slow cooker or Instant Pot. Brown the beef and sauté the onions and garlic before transferring everything to your chosen appliance. Adjust the cooking times accordingly.


What are some optional add-ins or variations for this stew?

You can get creative with this recipe. Consider adding black beans, corn, or diced tomatoes for extra flavor and texture. Experiment with different herbs and spices to suit your taste.

Posted on Leave a comment

Instant Pot Cuban Pork with Mashed Plantains

glass meal prep containers with shredded pork with mashed plaintains

Looking to elevate your meal prep game with an easy, tasty, and time-saving recipe? You’re in for a treat! Our Instant Pot Cuban Pork with Mashed Plantains is a flavor-packed delight that will transport your taste buds to the vibrant streets of Cuba. In this culinary adventure, we’ll show you how to create a mouthwatering dish that’s perfect for busy weeknights or leisurely weekends. With the magic of the Instant Pot, you’ll have succulent Cuban pork ready in no time. Plus, the creamy Mashed Plantains add a delightful twist to this classic Cuban favorite. Get ready for a fusion of flavors that will make your meal prep a breezey!

This post may contain affiliate links. Please see our privacy policy for details.

round plate with shredded pork with mashed plaintains

5 Reasons to Spice Up Your Meal Prep with New Cuisines and Ingredients

Exploring new cuisines and ingredients in your meal prep can be a fun and rewarding experience. Why not add a bit of Cuban flair to your meal prep this week and discover the exciting world of Cuban cuisine? The Instant Pot Cuban Pork with Mashed Plantains is a fantastic starting point for your culinary exploration! Here are five compelling reasons why you should consider adding a dash of excitement to your weekly rotation:

  • Culinary Adventure: Trying new cuisines introduces you to different cooking techniques, flavors, and ingredients. It’s like taking a culinary journey around the world without leaving your kitchen.
  • Flavorful Variety: Incorporating new ingredients infuses variety into your meal prep, preventing food boredom. Each week can bring a fresh, exciting flavor to your plate.
  • Health Benefits: Different cuisines often feature unique ingredients that offer various health benefits. By diversifying your meal prep, you can boost your nutrient intake and discover new superfoods.
  • Cultural Appreciation: Exploring new cuisines is a great way to learn about different cultures and their culinary traditions. It’s an opportunity to appreciate the rich tapestry of global food heritage.
  • Cooking Skills: Experimenting with new ingredients challenges your cooking skills and creativity. You’ll become a more versatile and confident home chef, ready to tackle any recipe.

The PrepYoSelf Newsletter

Grocery Tips:

  • Buy in Bulk: To save money and reduce waste, purchase pork shoulder and ripe plantains in bulk, and then portion and freeze them for future meals.
  • Canned Tomatoes: You can opt for canned diced tomatoes with green chiles, but you can also use regular canned diced tomatoes and add some diced green chiles or a dash of hot sauce for that kick of heat.
  • Onions: Buying onions in larger quantities can save you money in the long run. You can store them in a cool, dark place for an extended period.
  • Cilantro: Fresh herbs can be expensive. Consider growing cilantro in a pot at home or using dried cilantro as a more budget-friendly alternative.

Nutrition Information:

  • Pork Shoulder: It’s a good source of protein and contains essential vitamins and minerals, but it’s also higher in fat. You can opt for leaner cuts if you’re looking to reduce saturated fat.
  • Plantains: Plantains are a rich source of fiber, vitamins, and minerals, but they are starchy. Moderation is key, especially if you’re watching your carbohydrate intake.

Ingredient Swaps:

  • Protein: If you’re not a fan of pork, you can use chicken thighs or leaner cuts of pork like tenderloin.
  • Plantains: If plantains are hard to find, sweet potatoes or rutabaga can be a suitable substitute for mashed plantains. Just keep in mind that they’ll be sweeter.
  • Butter: Swap out butter with olive oil or coconut oil for a different flavor profile.
  • Garlic Powder: Fresh garlic cloves work well too. One clove usually equals about 1/8 teaspoon of garlic powder.
  • Cilantro: If cilantro isn’t to your liking, try parsley, green onions, or fresh basil for a different herbaceous touch.
  • Low-Sodium Option: To reduce sodium intake, choose low-sodium canned tomatoes and tomato sauce.

glass meal prep containers with shredded pork with mashed plaintains

How to Meal Prep Instant Pot Cuban Pork

  1. Start by adding the pork shoulder to your trusty Instant Pot. Now, here’s where the magic begins! Sprinkle on the garlic powder and cumin, then add those diced tomatoes with green chiles, tomato sauce, and the sliced red onion to the pot.
  2. Seal the Instant Pot with the lid and set it to high pressure. Let the flavors meld together as you cook for 45 minutes. The anticipation is real!
  3. While the pork is doing its thing, let’s move on to the Mashed Plantains. In a separate pot, bring water to a boil. Meanwhile, peel your ripe plantains and gently place them into the boiling water.
  4. Let those plantains cook for about 10-15 minutes until they’re fork-tender. It’s time to get them out and drain them.
  5. Now, transfer your tender plantains to a prep bowl. Add the garlic powder, salt, and a couple of tablespoons of butter. Grab a fork and start mashing. We’re creating a creamy, dreamy side dish here!
  6. As the aroma of your Cuban Pork fills the kitchen, it’s time to release the steam from the Instant Pot carefully. Open the lid and behold the succulent shredded pork that awaits you.
  7. Serve your flavorful shredded pork with those fantastic mashed plantains. To add a pop of freshness, garnish with chopped cilantro. And here’s a pro tip – don’t forget to pour the leftover broth from the Instant Pot over the plantains as a delicious gravy. It’s a game-changer!

Reference the recipe card below for detailed instructions.

round plate with shredded pork with mashed plaintains

Meal Prep Tips:

  • Batch Cooking: Double or triple the recipe to create several servings. This ensures you have enough meals for the week or even to freeze for future use.
  • Customization: Don’t be afraid to personalize your meal prep. You can add side veggies, grains, or even a simple salad to create a well-balanced meal.
  • Fresh Garnishes: While reheating, consider adding fresh garnishes like additional cilantro, lime wedges, or avocado for a burst of flavor.
  • Storage Containers: Invest in good-quality, airtight containers to store your meal prep creations. Make sure they are portion-sized to avoid overeating.
  • Reheating: To reheat, you can use the microwave for convenience or a stovetop to maintain the texture and flavors of your dish.
  • Freezing Option: If you’ve made a large batch, portion out individual servings and freeze them. When needed, simply defrost and reheat for a quick and convenient meal.

glass meal prep containers with shredded pork with mashed plaintains

Leftover Ingredient Tips:

  • Leftover Pork: If you have extra shredded Cuban pork, you’re in for a treat. Use it to make delicious Cuban sandwiches. Layer the pork with ham, Swiss cheese, pickles, and mustard, then grill it until the cheese is melted and the bread is crispy.
  • Extra Plantains: Leftover mashed plantains can be repurposed into sweet or savory dishes. Sweeten them with a touch of brown sugar and cinnamon for a dessert. For a savory twist, shape them into small patties and pan-fry until crispy. Serve with sour cream or salsa.
  • Cilantro: Leftover cilantro can be used to add freshness to salads, soups, or as a garnish for various dishes. You can also blend it with lime juice and a bit of olive oil to make a zesty cilantro-lime dressing.

instant pot pork and plantains

Instant Pot Cuban Pork with Mashed Plantains

Transport your taste buds to Cuba with succulent Instant Pot Cuban Pork served alongside creamy Mashed Plantains – a flavorful, time-saving meal prep delight!
No ratings yet
Prep Time 5 minutes
Cook Time 55 minutes
Course dinner, Main Course
Cuisine Cuban
Servings 2

Equipment

  • knife
  • cutting board
  • Instant Pot
  • boiling pot

Ingredients
  

Instant Pot Cuban Pork

  • 12 oz pork shoulder
  • 1 tsp garlic powder
  • 1 tsp cumin
  • 6 oz diced tomatoes with green chiles
  • 4 oz tomato sauce
  • 1/2 each red onion (sliced)

Mashed Plantains

  • 2 each ripe plantain
  • 2 tbsp butter
  • 1/4 tsp garlic powder
  • 1/4 tsp salt
  • 1/4 cup cilantro (chopped)

Instructions
 

  • Add the pork shoulder to the Instant Pot. Add the seasonings, diced tomatoes, tomato sauce, and onions to the pot.
  • Close and seal the lid to the Instant Pot. Place the setting on high pressure and cook for 45 minutes
  • Meanwhile, boil water in a pot. Remove the peel off the plantains and place them into the boiling water
  • Cook the plantains for 10-15 minutes until it is fork tender
  • Then, drain the plantains and place them in a prep bowl. Add the seasonings and butter and use a fork to mash them
  • After the pork cooks, carefully release the steam and open the lid. Remove the pork from the pot and use a fork to shred the meat
  • Serve the shredded pork with the mashed potatoes. Garnish with fresh cilantro and feel free to pour the leftover broth over the plantains as gravy

Similar Recipes

chicken soup

One Pot Mexican Chicken Soup

sweet potato blt

Sweet Potato BLT Sandwich

Grilled Honey Dijon Chicken Kale Salad

You Might Also Like

Frequently Asked Questions

Can I make this recipe without an Instant Pot?

While the Instant Pot makes this recipe quicker, you can still make it in a regular pot or slow cooker. For stovetop cooking, simmer the pork until tender. In a slow cooker, cook on low for 6-8 hours or on high for 3-4 hours.


Can I use a different type of meat for the Cuban pork?

Yes, you can. While the recipe calls for pork shoulder, you can use other cuts like pork tenderloin or chicken thighs. Just adjust the cooking time as needed for different meats.


Are there any alternatives to plantains for the mashed side dish?

If you can’t find plantains, sweet potatoes or rutabaga make a good substitute for mashed plantains. They’ll be sweeter, but it’s a tasty alternative.

Posted on Leave a comment

Oven Baked Chicken Wings and Crispy Plantain Chips

chicken wings with plantain chips

Level up your meal prep routine with our sensational oven-baked chicken wings and crispy plantain chips, a tasty and health-conscious option that beats takeout any day. This recipe boasts restaurant-quality flavor and nourishing ingredients, perfect for those on a meal prep journey. The chicken wings, seasoned with a fun blend of paprika, chili powder, cumin, garlic powder, salt, and pepper, are baked to perfection, delivering lean protein without the guilt of frying. Paired with nutrient-rich plantain chips, rich in vitamins, dietary fiber, and potassium, this duo is a powerhouse of flavor and health benefits. Get ready to conquer your meal prep goals with this delightful, versatile recipe!

This post may contain affiliate links. Please see our privacy policy for details.

chicken wings with plantain chips

Why We Love These Chicken Wings

When it comes to meal prep, bland and boring are not on the menu. Our seasoned chicken wings, featuring a blend of paprika, chili powder, cumin, garlic powder, salt, and pepper, will awaken your taste buds with every bite. You’ll savor the perfect balance of smokiness, spiciness, and savory goodness.

Craving something crispy? Forget about deep-fried options! Our oven-baked chicken wings and plantain chips are your guilt-free solution. Baking instead of frying significantly reduces the oil content while preserving the irresistible crunch. You get all the satisfaction without the added calories.

These recipes are the true chicken meal prep heroes. Make a batch on Sunday, and you’ll have flavorful lunches and dinners all week long. Whether it’s a quick work lunch or a satisfying post-workout meal, you’re covered. Plus, they reheat beautifully without sacrificing taste or texture.

Plantains are not only a delightful sidekick to the chicken wings but also a nutritional powerhouse. Packed with essential vitamins and minerals, they’ll keep your energy levels up and your cravings at bay. Plus, they’re naturally gluten-free and suitable for various dietary preferences.

The PrepYoSelf Newsletter

Ingredients You’ll Need

  • Baking chicken wings significantly reduces the saturated fat content compared to deep-frying. Saturated fats are associated with various health concerns, and by opting for baking, you’re making a heart-smart choice. Oven-baking uses considerably less oil compared to deep-frying, which helps control calorie intake. You can enjoy the crispy texture without excess calories, making it a healthier choice for weight-conscious individuals.
  • Plantains are loaded with essential vitamins, particularly vitamin A, which is crucial for maintaining healthy vision and skin. They also contain vitamin C, which supports the immune system. Plantain chips are a good source of dietary fiber. Fiber aids in digestion, helps maintain healthy cholesterol levels, and keeps you feeling full, which can assist with weight management.
  • These chips are potassium-rich, which plays a vital role in regulating blood pressure and supporting proper muscle and nerve function.
  • When baked rather than fried, plantain chips are a low-fat snack option. This helps keep your calorie intake in check and promotes heart health.
  • Plantains are naturally gluten-free, making them suitable for individuals with gluten sensitivities or those following a gluten-free diet. They’re incredibly versatile and can be seasoned to suit your taste preferences.

chicken wings with plantain chips

How to Meal Prep Chicken Wings and Plantain Chips

  1. Preheat the oven to a toasty 425°F (220°C).
  2. In a mixing bowl, season the chicken wings with paprika, chili powder, cumin, garlic powder, salt, and pepper. Drizzle with olive oil and give them a good rub until they’re fully coated.
  3. Place the chicken wings on a baking sheet lined with parchment paper. Bake for 35-40 minutes, or until they reach an internal temperature of 165°F (74°C). Golden and crispy, just the way you like them!
  4. Meanwhile, peel the plantains and slice them into coins.
  5. In another mixing bowl, season the plantain chips with the same spice blend used for the chicken wings. Add olive oil and coat them thoroughly.
  6. Lay the seasoned plantain chips on a separate sheet pan, making sure they’re not crowded. Bake in the oven for about 20-25 minutes, flipping them over halfway through the cooking time. You’ll know they’re ready when they turn crispy and slightly caramelized.

Reference the recipe card below for detailed instructions.

chicken wings with plantain chips

Meal Prep Tips for Chicken Wings and Plantain Chips

  • Storage Tips: Divide your baked chicken wings and plantain chips into meal-sized portions before storing them. This makes it easier to grab and go when you’re ready to eat. Use airtight containers to store your prepped meals. This helps maintain freshness and prevents any flavors from mingling. Store your prepped meals in the refrigerator for up to 3-4 days. If you want to keep them longer, consider freezing them for up to 2-3 months.
  • Reheating Tips: For best results, reheat your oven-baked chicken wings in the oven at 350°F (175°C) for about 10-15 minutes or until they are heated through. This will help maintain their crispiness. To reheat plantain chips, spread them out on a baking sheet and bake at 350°F (175°C) for 5-10 minutes to regain their crisp texture. If you have an air fryer, it’s an excellent tool for reheating. Preheat the air fryer to 350°F (175°C) and place the wings and chips inside for about 3-5 minutes until they are warmed and crispy again.
  • Ingredient Preparation Tips: When seasoning your chicken wings and plantain chips, consider preparing a larger batch of the spice mixture. Store the extra mix in an airtight container for future use, saving time on future meal preps. f you have time, marinate the chicken wings in the spice mixture for a few hours or even overnight. This allows the flavors to penetrate the meat deeply, resulting in an even more flavorful dish.
  • Ingredient Variations: Experiment with different seasoning blends to keep your meal prep exciting. Try adding a dash of lemon zest or your favorite herbs to the mix.
  • Air Fryer Adaptation: If you prefer to use an air fryer for this meal prep recipe, preheat your air fryer to 360 F. Place the seasoned chicken wings and plantain chips in a single layer in the air fryer basket. You may need to cook them in batches to ensure they cook evenly. Air fry the chicken wings for about 22-24 minutes, flipping them halfway through for even cooking. Check for doneness by ensuring they reach an internal temperature of 165°F (74°C). For the plantain chips, air fry them for about 8-10 minutes, shaking the basket or flipping them halfway through. Keep a close eye on both the chicken wings and plantain chips to prevent overcooking. Cooking times may vary slightly depending on your specific air fryer model, so adjust as needed.

chicken wings with plantain chips

wings and plantain chips

Oven Baked Chicken Wings and Plantain Chips

Savor the goodness of perfectly seasoned oven-baked chicken wings and crispy plantain chips for a healthy, flavor-packed meal prep that beats takeout any day
No ratings yet
Prep Time 5 minutes
Cook Time 40 minutes
Course dinner, lunch, Main Course
Cuisine American, Latin
Servings 2

Equipment

  • knife
  • cutting board
  • mixing bowl
  • sheet pan
  • oven

Ingredients
  

Chicken Wings

  • 6 each large chicken wings
  • 1/4 tsp paprika
  • 1/4 tsp chili powder
  • 1/4 tsp cumin
  • 1/4 tsp garlic powder
  • 1/4 tsp salt
  • 1/4 tsp pepper
  • 1 tbsp olive oil

Plantain Chips

  • 2 each ripe plantain
  • 1/4 tsp paprika
  • 1/4 tsp garlic powder
  • 1/4 tsp salt
  • 1 tbsp olive oil

Optional

  • 2 tbsp fresh cilantro (chopped)

Instructions
 

  • Pre-heat the oven to 425F
  • In a mixing bowl, sprinkle the chicken wings with the seasoning and coat with olive oil. Rub the chicken wings until it is fully coated with the seasonings and oil
  • Place the chicken wings in the oven for about 35 to 40 minutes until they fully cook to an internal temperature fo 165F
  • Meanwhile, peel the plantains and slice them into coins
  • In a mixing bowl, sprinkle the plantain chips with the seasonings and coat them with oil. Rub them until they are fully coated
  • Place them on a sheet pan and bake them in the oven for about 20-25 minutes. Flip them over halfway through the cooking time

Similar Recipes

chicken fajitas

Sheet Pan Chicken Fajitas with Mango Salsa

sausage squash

Spaghetti Squash with Sausage and Peppers

pineapple bbq chicken

Oven Baked Pineapple BBQ Chicken

You Might Also Like

Frequently Asked Questions

Can I use boneless chicken wings or chicken tenders instead of traditional chicken wings?

Yes, you can use boneless chicken wings or tenders, but adjust the cooking time as they may cook faster.


Are there any alternatives to plantain chips if I can’t find plantains?

Sweet potato or regular potato chips can be used as a substitute for plantain chips.


What can I serve as dipping sauces with this meal prep?

Consider options like homemade guacamole, salsa, or a yogurt-based dip for extra flavor.

Posted on Leave a comment

Low Carb Prosciutto Wrapped Chicken Salad

round plate with prosciutto wrapped chicken tenderloins, boiled eggs, cherry tomatoes, and spring mix salad

In the hustle and bustle of daily life, finding time to prepare a wholesome yet quick lunch can be a challenge. That’s where our Prosciutto Wrapped Chicken Salad swoops in to save the day. Imagine tender, succulent chicken enveloped in the salty embrace of prosciutto, paired with creamy boiled eggs, juicy cherry tomatoes, and a bed of vibrant spring mix greens. This recipe is a testament to the idea that healthy eating doesn’t have to be complicated. With minimal effort and maximum taste, you’ll be savoring a satisfying meal that’s perfect for both your taste buds and your busy schedule. So, let’s dive into this culinary adventure and create a meal prep masterpiece that’s sure to become a lunchtime favorite!

This post may contain affiliate links. Please see our privacy policy for details.

round plate with prosciutto wrapped chicken tenderloins, boiled eggs, cherry tomatoes, and spring mix salad

Why Prosciutto Wrapped Chicken Salad is Perfect for Your Busy Lifestyle:

  • With just a few simple steps, you can have this delicious meal ready in no time, making it ideal for those hectic days when you’re juggling work and life.
  • This recipe is loaded with lean protein from chicken tenderloins, and it’s brimming with nutrients from fresh ingredients like spring mix and cherry tomatoes. Plus, it’s lower in calories and fat than other lunch options, helping you stay on your weight management journey.
  • Wrapping chicken tenderloins in prosciutto adds a burst of savory flavor without the need for elaborate seasoning. It’s a simple yet elegant touch that elevates your meal.
  • You can easily customize this low carb chicken salad to suit your taste. Add your favorite veggies, nuts, or cheese for an extra layer of flavor and texture.

The PrepYoSelf Newsletter

What You Need to Make This Low Carb Chicken Salad

  • Chicken Tenderloins: Lean and packed with protein, this will help you stay full until dinner time
  • Prosciutto: Adds a delightful salty flavor and a crispy texture to the chicken.
  • Boiled Eggs: Protein-packed and creamy, boiled eggs provide a rich contrast to the salad.
  • Cherry Tomatoes: Bursting with freshness and color, they add a juicy pop to every bite.
  • Spring Mix: A vibrant blend of baby lettuces and greens that serve as the perfect salad base.

round plate with prosciutto wrapped chicken tenderloins, boiled eggs, cherry tomatoes, and spring mix salad

Simple Basic Steps to Meal Prep this Prosciutto Chicken Salad

  1. Boil the eggs in a pot for about 8 to 10 minutes. Once cooked, let them cool before peeling and slicing them in half.
  2. Preheat your oven to 400°F (200°C). Season the chicken with paprika, garlic powder, and salt. Coat with olive oil and place on a sheet pan. Wrap each chicken tenderloin with slices of prosciutto.
  3. Bake in the oven for about 15-20 minutes until the chicken is fully cooked and reaches an internal temperature of 165°F (74°C).
  4. Meanwhile, In a small bowl, mix together the juice of the lemons with the olive oil, Dijon mustard, honey, and your favorite seasonings. Whisk until blended well.
  5. Serve the chicken and boiled eggs on top of the spring mix.
  6. Drizzle the salad with the homemade dressing and top it off with those fresh, juicy cherry tomatoes.

Reference the recipe card below for detailed instructions.

glass meal prep containers with prosciutto wrapped chicken tenderloins, boiled eggs, cherry tomatoes, and spring mix salad

Meal Prep Tips for Low Carb Prosciutto Chicken Salad

  • Storage Tips: Store your Prosciutto Wrapped Chicken Salad in an airtight container in the refrigerator. This dish can stay fresh for up to four days. Keep the salad dressing in a separate, small container or drizzle it over the salad just before serving to prevent the greens from wilting prematurely.
  • Reheating Tips: To reheat the chicken, place it in the microwave for about 1-2 minutes or until it’s warmed through. You can also use an oven or toaster oven at a low temperature (around 300°F or 150°C) to maintain its crispy prosciutto wrap.
  • Ingredient Swaps and Tips: Swap chicken for turkey tenderloins or even tofu for a vegetarian twist. Experiment with different greens like arugula or spinach. Add a handful of nuts or seeds for extra crunch.

glass meal prep containers with prosciutto wrapped chicken tenderloins, boiled eggs, cherry tomatoes, and spring mix salad

Chicken Salad

Prosciutto Wrapped Chicken Salad

A quick and easy meal prep lunch idea featuring savory chicken, crispy prosciutto, boiled eggs, cherry tomatoes, and fresh spring mix, drizzled with zesty homemade dressing!
No ratings yet
Prep Time 5 minutes
Cook Time 22 minutes
Course lunch, Main Course
Cuisine American, Italian
Servings 2

Equipment

  • knife
  • cutting board
  • boiling pot
  • sheet pan
  • oven

Ingredients
  

  • 12 oz chicken tenderloins
  • 1/4 tsp paprika
  • 1/4 tsp garlic powder
  • 1/4 tsp salt
  • 1 tbsp olive oil
  • 3 oz prosciutto
  • 2 each large eggs
  • 4 cups spring mix
  • 1 cup cherry tomatoes (sliced)

Salad Dressing

  • 2 each lemon (juiced)
  • 4 tbsp olive oil
  • 1 tbsp dijon mustard
  • 2 tbsp honey
  • 1/4 tsp garlic powder
  • 1/4 tsp salt

Instructions
 

Eggs

  • Boil the eggs in a pot for about 8 to 10 minutes. Once cooked, let it cool before peeling and slicing in half

Chicken & Prosciutto

  • Pre-heat oven to 400F. Season the chicken with paprika, garlic powder, and salt. Coat with olive oil and place on a sheet pan
  • Wrap the each chicken tenderloin with slices of prosciutto. Bake in the oven for about 15-20 minutes until it is fully cooked and reaches an internal temperature of 165F

Salad Dressing

  • Meanwhile, in a small bowl, mix together the juice of the lemons with the olive oil, dijon mustard, honey, and seasonings. Whisk until blended well
  • Serve the chicken and eggs on top of the spring mix
  • Drizzle the salad with the dressing and top it off with fresh tomatoes

Similar Recipes

italian chicken

Italian Chicken with Green Beans and Almonds

stuffed primavera chicken

Primavera Stuffed Chicken Breasts

cilantro chicken

Cilantro Lime Chicken Salad with Strawberry Salsa

You Might Also Like

Frequently Asked Questions

Can I use chicken breast instead of tenderloins?

Absolutely! Chicken breast can be used as a substitute. Just be sure to adjust the cooking time accordingly to ensure it’s fully cooked.


Is this salad suitable for weight management and healthy eating?

Absolutely! This salad is packed with lean protein, fresh greens, and wholesome ingredients, making it a great choice for those looking to manage their weight while enjoying a delicious meal.


Can I use store-bought salad dressing?

While homemade dressing helps you control the ingredients you put in, you can use your favorite store-bought dressing for convenience if you prefer.