Posted on Leave a comment

Summer Seafood Meal Prep

salmon and watermelon salad

This is a great time to try out some summer seafood meal prep. From flavors and different fishes to cooking methods, summer style seafood can be a refreshing change of pace. Seafood is rich in nutrients, low in calories, and high in protein and tastes delicious when grilled, baked, and pan cooked.

Summer Seafood Flavors

salmon and watermelon salad

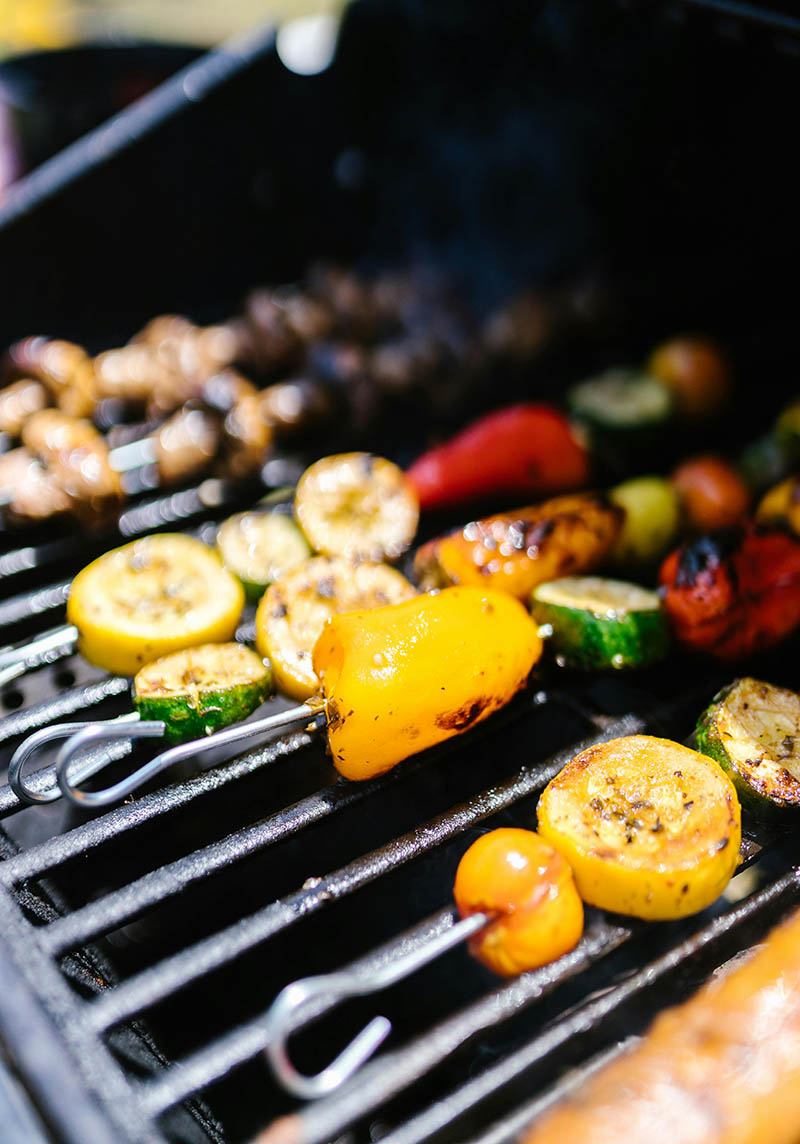
While seafood is delicious anytime of year, there are just certain flavors that scream summer. Many summer seafood meal prep recipes call for fruits. Mangos, watermelon, and oranges are popular options. Alongside the fruit, include vegetables to mellow out the sweetness and marry the flavors with the fish. Asparagus, beets, and corn are all great options. 

The cooking method can be important. If you don’t have a grill that’s fine, many recipes work whether they’re on a grill or not. Bake them in the oven for a more convenient option. See our recommended recipes down below for fantastic flavor combinations that will freshen up your meal prep or surprise guests at dinner.

Types of Seafood Meal Prep

1. Fish Filets

It can be hard to tell when it’s done until you get used to it but once you find the right length of time at a given temperature it becomes more consistent.

  • Preparation: Choose firm fish like salmon, swordfish, halibut, or tuna. Marinate or season as desired.
  • Grilling: Place the filets skin-side down on the grill. Cook for 3-5 minutes per side, depending on thickness. The fish is done when it flakes easily with a fork and is opaque all the way through. 

2. Whole Fish

This is a great option for affordability but it does require more work later when you need to debone as you eat.

  • Preparation: Stuff the cavity of the fish with herbs, lemon slices, and garlic. Season the outside with salt, pepper, and olive oil.
  • Grilling: Grill the whole fish over medium-high heat, 5-7 minutes per side, depending on size. The fish is done when the flesh is opaque and flakes easily with a fork. 

3. Shrimp

Shrimp is always a popular choice. They’re easy to cook and depending on your grocery store options, can be an affordable and nutritious protein. Have fun with your seasonings and sauces as shrimp are a very versatile seafood.

  • Preparation: Peel and devein the shrimp, leaving the tails on if desired. Marinate or season with spices, lemon juice, and olive oil.
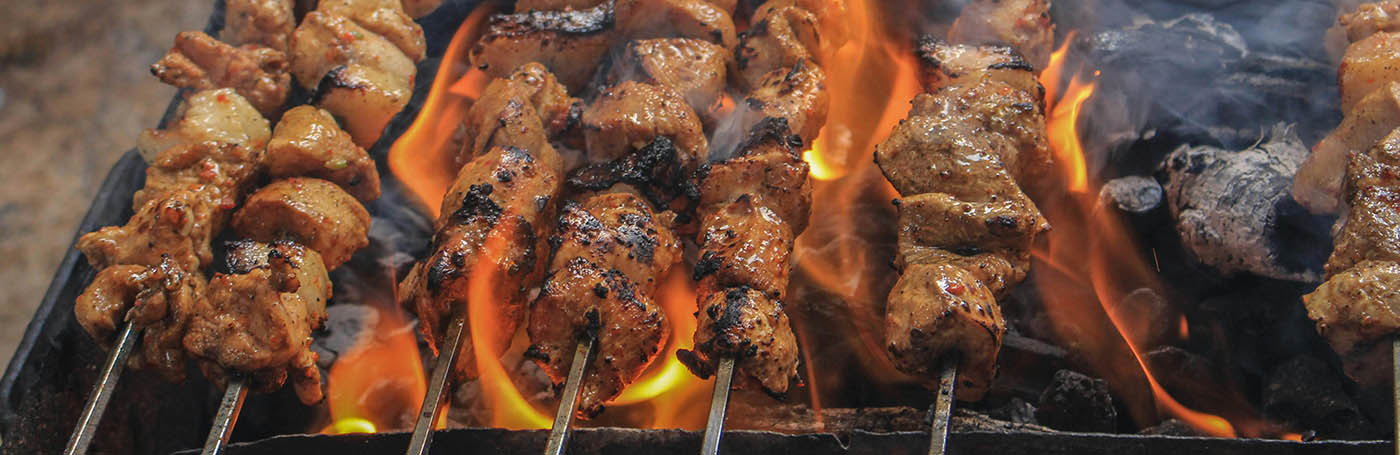
  • Grilling: Thread the shrimp on skewers or use a grill basket. Grill for 2-3 minutes per side until pink and opaque. You’ll know they’re overcooked if they’re rubbery. There isn’t much you can do to fix that except cover it up. Chop them up and make a quesadilla. 

Tips for Grilling Seafood

  1. Preheat the Grill: Ensure your grill is preheated to medium-high heat (350-400°F or 175-200°C) before placing the seafood on it. This helps to prevent sticking and ensures even cooking.
  2. Clean and Oil the Grill Grates: Clean grates prevent sticking and ensure nice grill marks. Use a grill brush to clean the grates, then lightly oil them using a high smoke point oil like canola or grapeseed oil.
  3. Prepare the Seafood: Pat the seafood dry with paper towels to remove excess moisture. This helps achieve a good sear. Season or marinate the seafood as desired.
  4. Use Grill Baskets or Foil: For delicate seafood or smaller pieces, use a grill basket or aluminum foil to prevent them from falling through the grates. This is a good place to start if you’re new to grilling fish. It avoids headaches.
  5. Cook Time and Temperature: Seafood cooks quickly, so keep a close eye on it. Generally, fish should be grilled for 3-5 minutes per side, depending on thickness. Shellfish like shrimp and scallops typically take 2-3 minutes per side.

Make sure to cook shellfish thoroughly however seafood like salmon and tuna have more leeway in acceptable doneness. You’ll know when you nail the right cook on the fish as it will be buttery to taste and texture.  Enjoy seafood cooking and trust that you’ll get better over time. Seafood is famous for having a short window of being perfectly done. 

View All Seafood Meal Prep Recipes

salmon and watermelon salad

Grilled Balsamic Salmon with Watermelon Salad

If you’re looking for a way to figure out what to do with so much watermelon, try this refreshing watermelon and mozzarella salad served with grilled salmon. This post may contain affiliate links. Please see our privacy policy for details. Watermelon is such a refreshing fruit that provides so many nutrients. We replaced tomatoes with…

Continue Reading
shrimp and corn

Sheet Pan Shrimp and Cauliflower with Corn

Easy Sheet Pan Shrimp with a corn and cauliflower bake that is ready in less than 20 minutes! This post may contain affiliate links. Please see our privacy policy for details. This sheet pan lunch is a lighter version of a shrimp boil that makes it an easy weekday meal prep. Here’s What We Love…

Continue Reading
salmon beet salad

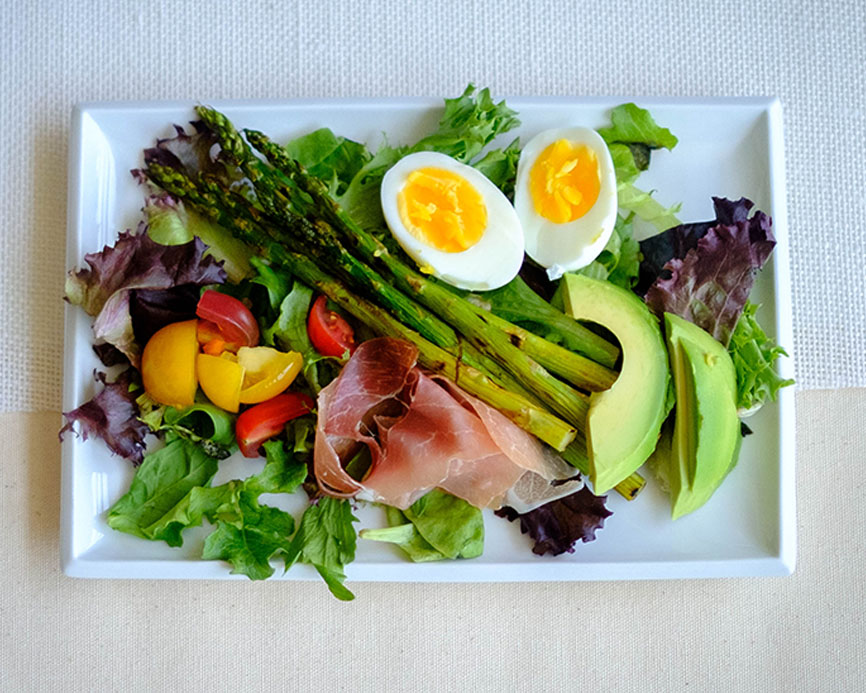
Citrus Ginger Salmon Salad with Roasted Beets

This Citrus Ginger Salmon and Beet Salad is so refreshing, tangy, and full of healthy ingredients that will help you power through your day. This post may contain affiliate links. Please see our privacy policy for details. It’s always nice to have a nice, crisp salad during the warmer weather, but having one that is…

Continue Reading
cocktail shrimp

Cocktail Shrimp Ceviche Salad

Cocktail Shrimp Ceviche Salad knifecutting boardmixing bowl 12 oz pre-cooked frozen shrimp ((defrosted))1/4 cup red onion ((diced))1 each roma tomato ((diced))1/4 cup cilantro ((chopped))1 each lime ((sliced))4 cups spring mix1/4 tsp garlic powder1/4 tsp salt1/4 tsp pepper Defrost frozen shrimp according to the packaged instructionsPlace the shrimp in a mixing bowlStir in the following ingredients:…
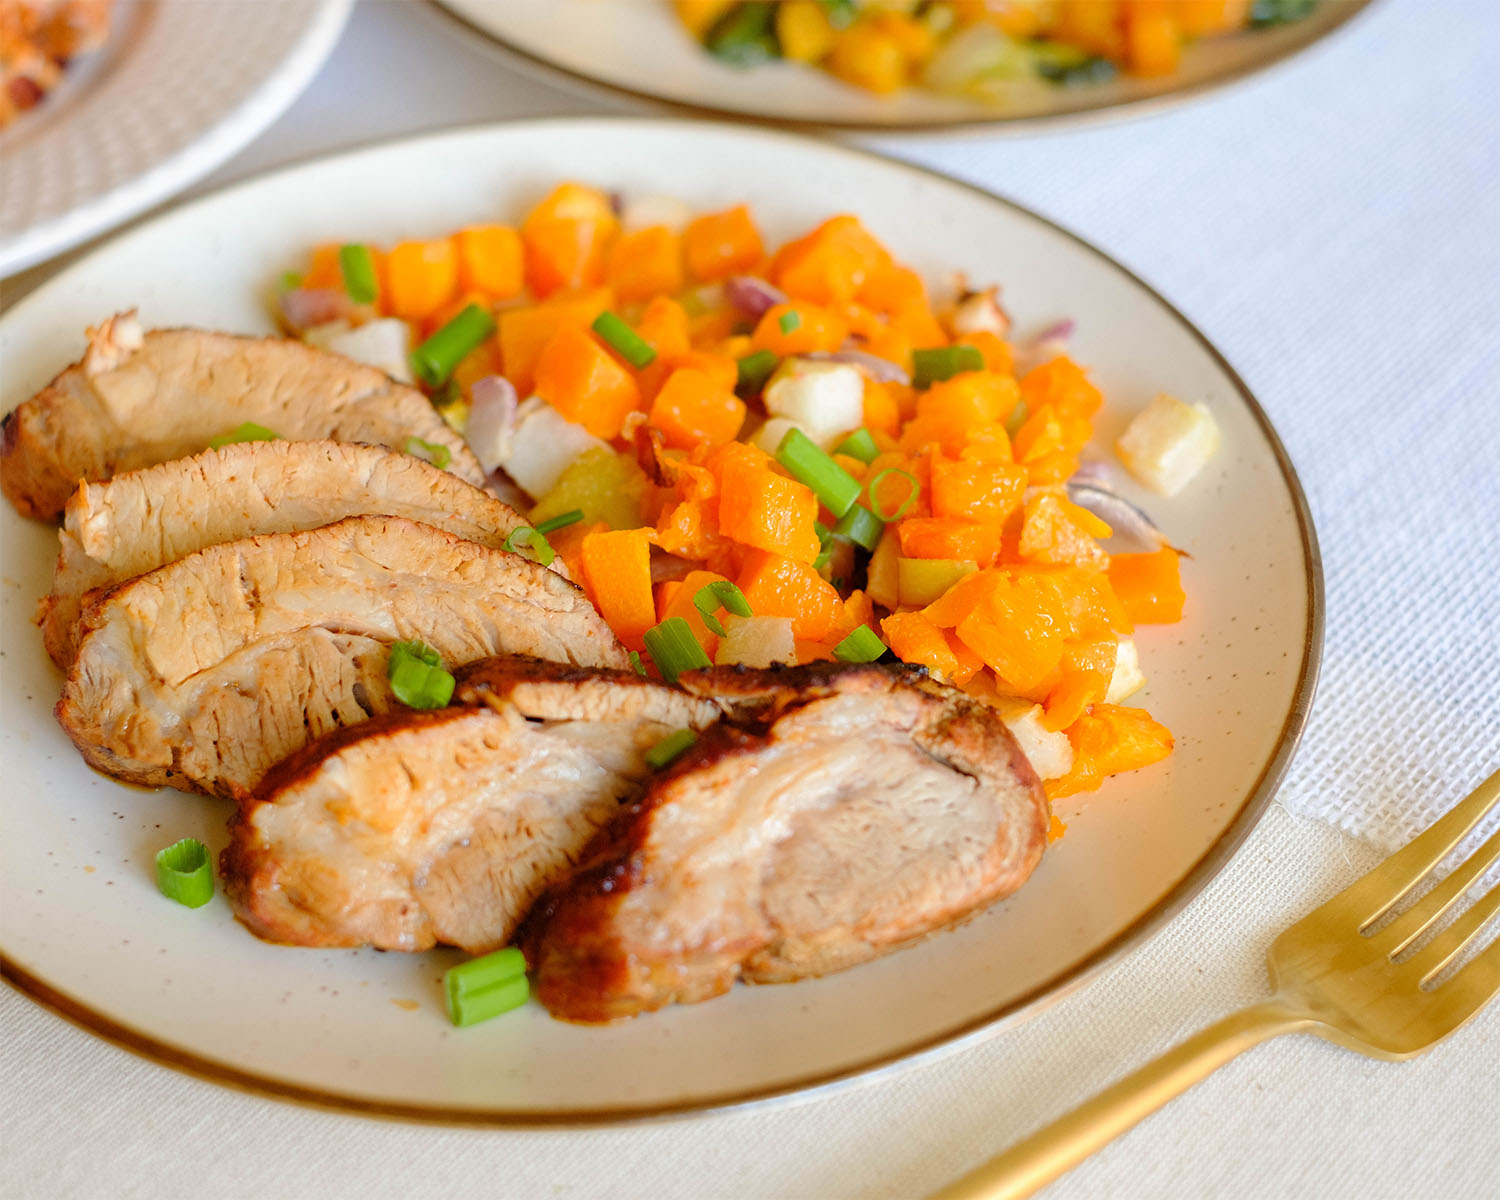
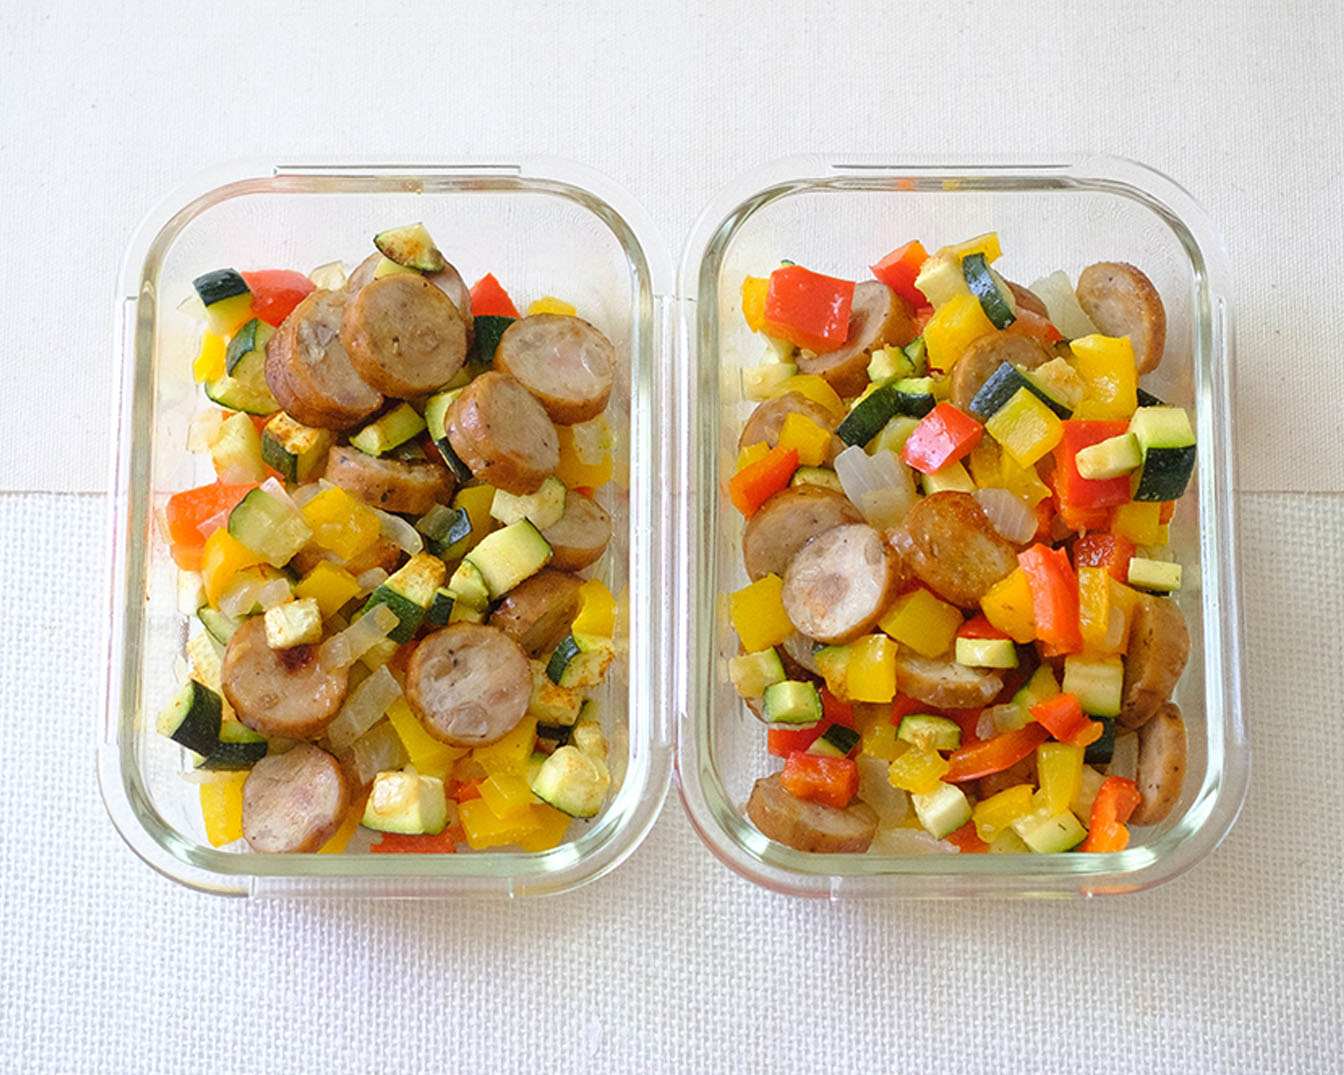
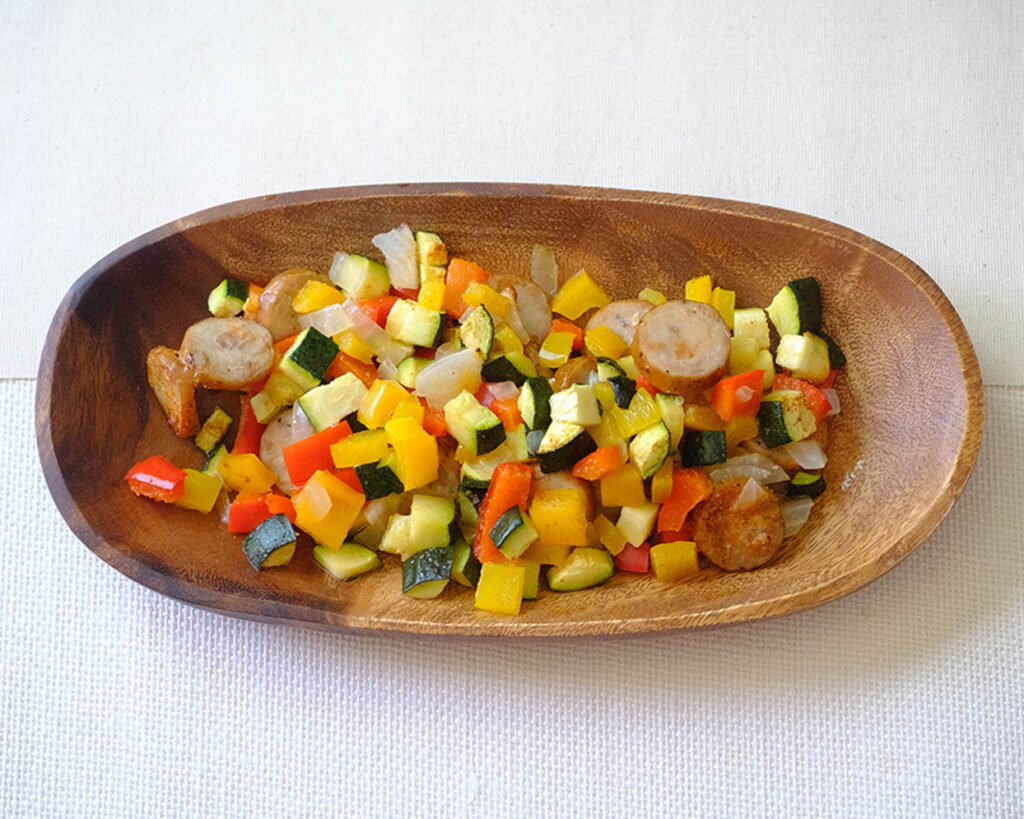
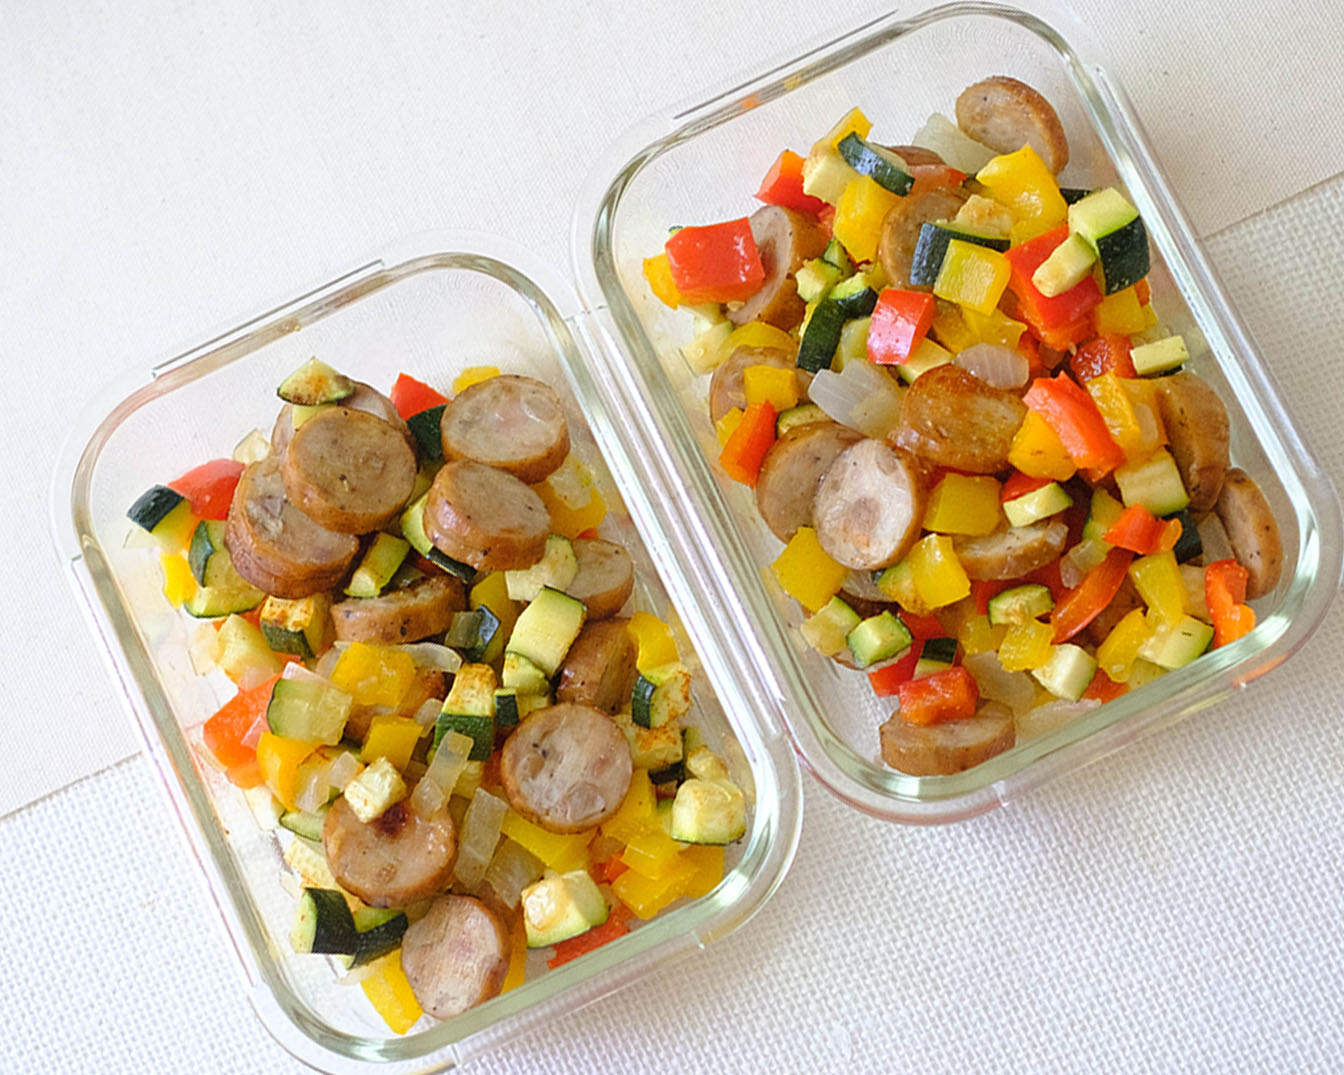
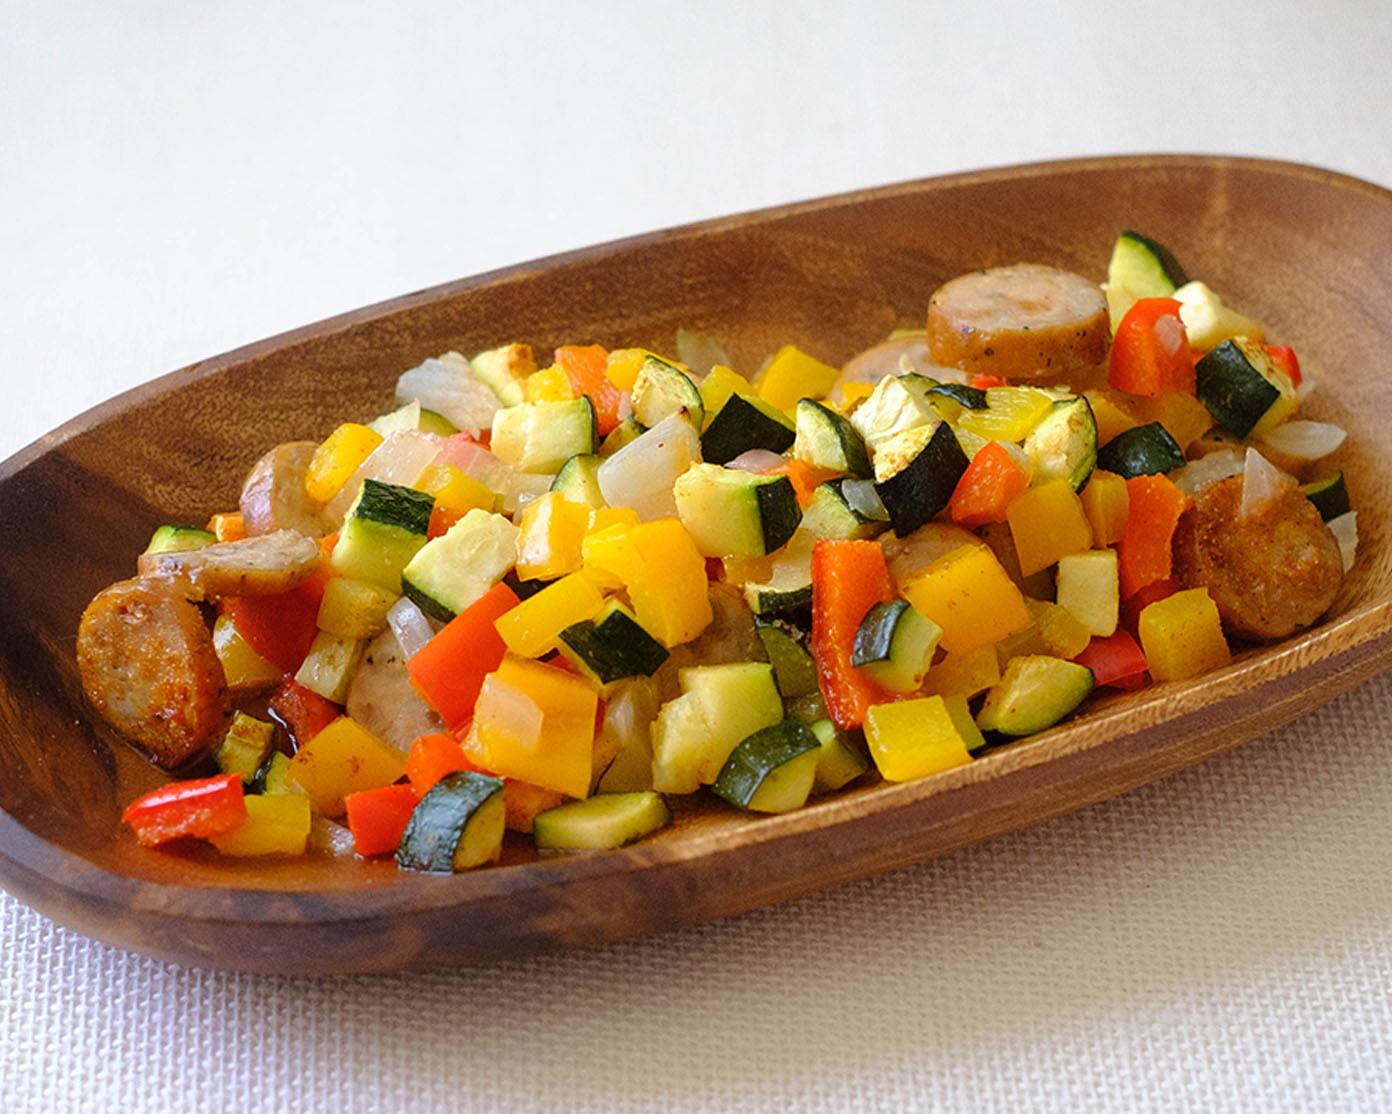
Continue Reading
pan-seared-tilapia-with-zucchini-and-bell-peppers
Posted on Leave a comment

Grilled Lemon Pesto Chicken

grilled lemon chicken breasts

Don’t hesitate to give this easy grilled lemon pesto chicken a try! It’s a quick and nutritious option that’s sure to become a favorite in your household. Not only is it simple to prepare, but it’s also packed with flavor and nutrients, making it a win-win for your taste buds and your health. Happy grilling!

This post may contain affiliate links. Please see our privacy policy for details.

Calories: 434kcal | Carbohydrates: 8g | Protein: 51g | Fat: 21g | Saturated Fat: 4g | Polyunsaturated Fat: 1g | Monounsaturated Fat: 2g | Trans Fat: 0.03g | Cholesterol: 148mg | Sodium: 651mg | Potassium: 914mg | Fiber: 2g | Sugar: 3g | Vitamin A: 913IU | Vitamin C: 31mg | Calcium: 92mg | Iron: 1mg

grilled lemon chicken breasts
Screenshot

Why This Recipe is a Must-Try:

  • Nutrient-Rich: Chicken breasts are a great source of lean protein, essential for muscle repair and growth. The basil pesto adds a dose of healthy fats and antioxidants from the basil, nuts, and olive oil.
  • Flavorful and Aromatic: The combination of lemon and pesto creates a vibrant, fresh taste that elevates the chicken, making it anything but ordinary.
  • Time-Saving: Using a premade basil pesto is a fantastic meal prep hack. It saves time without compromising on flavor. You can find high-quality pesto at most grocery stores, and it’s a great pantry staple to have on hand for a quick flavor boost in various dishes.
  • Versatile: This recipe is incredibly flexible. Whether you’re meal prepping for the week, hosting a barbecue, or simply looking for a quick and healthy dinner option, this grilled chicken fits the bill perfectly.

The PrepYoSelf Newsletter

Ingredients You’ll Need

  • Chicken Breasts: Chicken breasts are a lean source of protein, essential for muscle growth and repair. They are versatile and absorb flavors well when marinated. You can substitute chicken thighs for a juicier alternative, though they contain more fat. For a vegetarian option, use tofu or portobello mushrooms.
  • Lemon: Lemon juice adds a fresh, zesty flavor and helps to tenderize the chicken by breaking down the proteins in the meat. Lime juice can be used for a different citrus flavor. If citrus is not preferred, a splash of apple cider vinegar can provide the needed acidity.
  • Basil Pesto Sauce: Pesto adds a rich, aromatic flavor from the basil, garlic, nuts, and cheese. It also provides healthy fats from the olive oil, enhancing the overall taste of the chicken. If you don’t have basil pesto, you can use sun-dried tomato pesto, arugula pesto, or a store-bought marinade of your choice. For a dairy-free version, use a vegan pesto.
chicken breasts with basil pesto and lemon

How to Grill Lemon Pesto Chicken

  1. In a small bowl, mix together the basil pesto with the juice of a lemon. Place your chicken breasts in a Ziploc bag or mixing bowl and marinate the chicken with the pesto sauce for at least one hour or overnight. This allows the flavors to deeply penetrate the meat, ensuring every bite is bursting with taste.
  2. Heat up a grill over medium-high heat. Grill the chicken on each side for about 5 to 7 minutes. Depending on the thickness of your chicken, continue to fully cook until it reaches an internal temperature of 165°F.
  3. Once cooked, remove the chicken from the grill and let it rest for a few minutes before slicing into strips. This step is crucial as it allows the juices to redistribute, making the chicken more tender and juicy.
  4. Serve your grilled lemon pesto chicken with your choice of sides such as grilled veggies, potato salad, or a side salad. This versatile dish pairs well with a variety of accompaniments, making it a fantastic centerpiece for any meal.

Reference the recipe card below for detailed instructions.

grilled chicken breasts
Screenshot

Meal Prep Tips for Grilled Chicken

  • Yogurt Marinade: To tenderize and add a creamy texture, mix Greek yogurt with the lemon juice and pesto for a creamy marinade that further tenderizes the chicken and adds a tangy flavor.
  • Alternative Cooking Methods: If grilling is not an option, you can bake the marinated chicken in the oven at 375°F for 25-30 minutes, or cook it in a skillet on the stovetop until fully cooked.
  • Platter Presentation: Arrange the sliced grilled chicken on a large serving platter. Garnish with fresh basil leaves, lemon slices, and a drizzle of extra pesto sauce. Sprinkle some grated Parmesan cheese on top for an elegant touch.
  • Recommended Side Dishes: Enjoy with grilled veggies such as zucchini, bell peppers, and cherry tomatoes. You can also enjoy it with a classic cold potato salad with a creamy dressing. Other options include a delicious mediterranean couscous salad topped with red onions, cucumber, olives, and feta cheese.
grilled lemon chicken breasts
Screenshot
grilled lemon chicken breasts

Grilled Lemon Pesto Chicken

Grilled Lemon Pesto Chicken: Tender chicken breasts marinated in zesty lemon and aromatic basil pesto, grilled to perfection and served with your choice of sides for a delicious and nutritious meal.
No ratings yet
Prep Time 5 minutes
Cook Time 15 minutes
Course dinner, lunch
Cuisine American
Servings 2
Calories 434 kcal

Equipment

  • mixing bowl
  • tongs
  • grill

Ingredients
  

  • 1 lb chicken breasts
  • 1 lemon
  • 1/3 cup basil pesto

Instructions
 

  • In a small bowl, combine the zesty lemon juice with the flavorful basil pesto.
  • Place your chicken breasts in a Ziploc bag or mixing bowl and let them soak up the delicious pesto marinade for at least an hour, or even better, overnight!
  • Fire up your grill to medium-high heat. Grill the chicken for about 5 to 7 minutes on each side, making sure it’s fully cooked to an internal temperature of 165°F.
  • Once done, let the chicken rest for a few minutes, then slice into strips. Serve with your favorite sides like grilled veggies, potato salad, or a fresh side salad, and dig in!

Notes

Nutrition information provided is an estimate. It will vary based on cooking method and specific ingredients used. Please consult with your healthcare provider for specific dietary needs. To gain a better understanding, explore our nutrition disclaimer here

Nutrition

Calories: 434kcalCarbohydrates: 8gProtein: 51gFat: 21gSaturated Fat: 4gPolyunsaturated Fat: 1gMonounsaturated Fat: 2gTrans Fat: 0.03gCholesterol: 148mgSodium: 651mgPotassium: 914mgFiber: 2gSugar: 3gVitamin A: 913IUVitamin C: 31mgCalcium: 92mgIron: 1mg

Similar Recipes

orange chicken

Air Fryer Orange Soy Glazed Chicken and Broccoli

roasted chicken and rutabaga

Roasted Lemon Italian Chicken with Rutabaga

rosemary chicken

Rosemary Baked Chicken and Potatoes

You Might Also Like

Frequently Asked Questions

How do I prevent the chicken from sticking to the grill?

Preheat the grill, oil the grates, and avoid moving the chicken too soon. Let it cook on one side for a few minutes before flipping.


How should I store leftovers?

Store leftovers in an airtight container in the refrigerator for up to 3 days. Reheat gently in a microwave or on the stovetop.


How can I adjust the flavor?

Add extra herbs, spices, or swap the lemon juice for lime or orange juice. You can also mix in a bit of honey or maple syrup for sweetness.

Posted on Leave a comment

How to Get Started with Grilling Meal Prep

Introducing grilling into your meal prep can be a fantastic way to add variety and stay healthy. It’s that time of year to do some grilling before it gets insanely hot outside. Grilling meal prep is fun and for a lot of people, not the first thing you think about when meal prepping. Whether you’re on charcoal or propane, enjoy a little sun and get some smokey flavor.

Why Grill Meal Prep

Grilled foods can be very healthy while being delicious. Grilling requires little to no added fats to cook in. Usually the fat drains away while you grill, reducing the overall fat. Grilling can also preserve nutrients with the quick cook time like vitamins B & C. Lastly, the taste of the grill is often what people are looking for so you can save calories by leaving out additional flavorings you may need for an oven cook.

Before you get started grilling your meal prep, consider a few things. How many meals are you planning to prepare? You’ll want to get all of your setup ready to go before you start grilling. Think through the combinations of protein and veggies and how much you’ll eat per meal. Balance your meals for a healthy mix of protein, veggies, and whole grains by selecting recipes that include grilling or grilling could be used as a substitute cooking method. Pick recipes that use a variety of veggies or proteins but lend themselves to grilling. More on that below.

Grilling Meal Prep Equipment

  • Grill (gas, charcoal, or electric)
  • Grill tools (tongs, spatula, basting brush, grill brush for cleaning)
  • Meat thermometer

Grill Foods

Now you’ve got the equipment to grill, you’ll need some food to grill. Knowing what works on the grill can make or break your meal. Some foods work well and others not so well or require a different approach. Using foil as a base for smaller veggies will save you a ton of headaches. Although you can grill many different foods, you’ll want to stick to the usual proteins and veggies before you start experimenting. It’s a terrible feeling to waste all of that time and money only to lose your food to the grill.

Proteins:

  • Chicken breasts, thighs, wings and legs
  • Turkey or beef burgers
  • Steaks of any cut
  • Fish especially salmon or tuna
  • Pork chops
  • Sausages

Vegetables:

  • Bell peppers, zucchini, and mushrooms brushed with olive oil and spices
  • Asparagus spears with garlic and lemon
  • Corn on the cob with a light butter and herb coating
  • Onions
  • Potatoes

Prepare to Grill

Pre-Cut Vegetables:

Chop vegetables into grill-friendly sizes. This means bigger than your usual cut to avoid them slipping through the rack. Unless you’re cooking them in foil. Another great grilling meal prep option is skewers. Skewering your meats and veggies not only prevents losing food through the rack but also combines the flavors. Alternate your veggies and protein and you’ll create wonderful combinations with onions, bell peppers, pineapple and more.

Marinate and Season:

  • Marinate proteins like chicken, beef, or tofu overnight for better flavor.
  • Season vegetables with olive oil, salt, pepper, and herbs.

Organize by Cooking Time:

  • Group ingredients by their cooking times to ensure even grilling (e.g., quick-cooking vegetables together, longer-cooking meats separately).
  • Consider your grill size and how much you can fit at one time. You don’t want to crowd the grill but you can definitely get efficient with it. 

Get Started Grilling

Preheat the Grill:

Clean and preheat your grill to the appropriate temperature. Cleaning the grill can avoid burnt flavors or “dirty” flavors. The appropriate temperature depends on what you’re cooking, the type of grill, and how you have arranged your foods on the grill. You can place certain foods slightly off from where the flames are the strongest for a slower char but a higher ambient temperature in the grill. You can find good estimates online for what you’re grilling but it really comes down to trial and error with your personal grill. Use the meat thermometer and walk up to the level of cook that you’re looking for.

Cook Proteins First:

Grill meats, fish, and plant-based proteins first. Use a meat thermometer to ensure they are cooked to the correct internal temperature (e.g., 165°F for chicken, 145°F for beef). Meat tends to take longer to grill so getting it on first allows for a more efficient flow later when it’s time for the veggies. This will also give the protein time to rest before you cut into it. This preserves the juices and flavor.

Grill Vegetables and Other Sides:

Grill vegetables until they have a nice char and are tender. Consider grilling fruits like pineapple for a sweet touch. Watch your fruits and veggies closely and make sure to rotate when needed. Grills can change in temperature rapidly and veggies can get burnt fast if you’re not paying attention.

Eating Grilled Meal Prep

Add fresh ingredients like herbs, avocado, or a squeeze of lemon juice just before eating to enhance flavor. Grilled meal prep can be a little dry if you’re new to grilling as much of the fat drips away. Adding fresh ingredients can reintroduce that moisture and provide a better exciting experience.

Tips for Success

  • Variety: Mix up your proteins and vegetables each week to keep grill meal prep interesting.
  • Efficiency: Use your grill space efficiently by grilling multiple items at once.
  • Safety: Always practice food safety by storing grilled foods in the fridge within two hours of cooking and consuming them within 3-4 days.

Prepared: Make sure you have clean surfaces to place the food after cooking. Bring napkins, hand sanitizer, and water with you.

Posted on Leave a comment

How to Build a Balanced Meal Prep

round plate with sliced pork tenderloin and diced butternut squash

There are many reasons for meal prep and nutrition is one of the biggest. Nutritionally balanced meal prep leaves you feeling better throughout the day with more energy and a clearer mind. Balancing a single meal or even an entire day can be fairly straightforward but once you start thinking bigger and planning for long term health goals, you’ll want to balance your entire meal prep routine. This is where it can start to get more complicated. We’re here to help. Our focus has always been to provide the best information on nutritional, easy, and affordable meal prep.

Nutritional Basics: Balanced Meal Prep

A nutritionally balanced meal prep can be as easy as setting your daily basic nutrient goals and then aiming to hit the same level everyday. First of all, that can get boring real quick. Second, not every day needs to be the same exact nutrients or foods. Mixing it up can keep you healthy and loving your meal prep rather than burning out worrying about vitamins and calories.

round plate with sliced pork tenderloin and diced butternut squash

If you’re new to meal prep or nutritional planning, keep it simple. Aim for specific nutrients that you want to focus on. Examples of this are high protein or low carbohydrate diets. These are easier to plan. Keep in mind that you still need to balance the rest of your nutrients. To start though, follow some basic guidelines for your weight, age, and any specific dietary needs that you have.

The “Plate” method can be helpful to get started. Simply fill half your plate with non starchy vegetables, a quarter with lean protein, and one quarter with carbohydrate foods like whole grains, starchy vegetables, or fruit.

  • Lean Protein: Essential for muscle repair and growth. Sources include chicken, fish, beans, tofu, and eggs.
  • Carbohydrates: Provide energy. Opt for complex carbs like whole grains, sweet potatoes, and legumes.
  • Fats: Necessary for hormone production and brain health. Choose healthy fats such as avocados, nuts, seeds, and olive oil.
  • Fiber: Important for digestive health. Found in fruits, vegetables, whole grains, and legumes.
  • Vitamins and Minerals: Vital for various bodily functions. Aim for a variety of colorful fruits and vegetables to cover your bases.

Again, don’t get overwhelmed. Focus on balancing each meal and day with these foods. Avoid overly processed, high sodium, or high sugar foods and you’ll be on a good path.

Portion Control

Balancing your meals with the right foods and nutrients is key and so is portion control. Just because it’s healthy doesn’t mean you can’t overdo it. This is especially true if you’re trying to lose weight. Managing your portion sizes is also important. Meal prep containers with separators are a great way to measure quickly although a food scale is a more accurate method.

Recommended Serving Sizes

  • Vegetables: Aim for 2-3 cups of vegetables per meal.
  • Fruits: One medium fruit or 1/2 cup of chopped fruit.
  • Proteins: About 3-4 ounces of cooked lean meat, poultry, or fish (the size of a deck of cards).
  • Grains: 1/2 cup of cooked grains or pasta, or 1 slice of whole-grain bread.
  • Dairy: 1 cup of milk or yogurt, or 1.5 ounces of cheese.

How to Quick Portion Food

  • Protein: A palm-sized portion.
  • Vegetables: Two handfuls.
  • Carbohydrates: A cupped hand.
  • Fats: A thumb-sized portion.

Plan Your Balanced Meal Prep

Create a weekly menu that includes a variety of foods that balance the food types listed above. If you’re aiming for high protein and want to keep count, be sure to weigh your foods and take a minute to do the math at the beginning of the week to know how much of each food you need for each meal. If you’re taking a more zen approach, take an approach like the plate method to each meal and you’ll be fine. Let’s break the day down by meals.

  • Breakfasts:
  • Overnight oats with berries, chia seeds, and almond milk. These are good for fiber, vitamins, and carbohydrates. Early in the day this will help fuel your body and mind.
    • Veggie-packed egg muffins with spinach, bell peppers, and mushrooms. This is a great set of options for higher protein diets. If you plan to workout in the morning, this is a great place to start.

easy sausage egg muffins

Sausage Egg Muffins with Strawberries

We love making these high-protein, low-carb egg muffins for meal prep. This post may contain affiliate links. Please see our privacy policy for details. Why sausage egg muffins are great for weight loss They are high in protein which will help you stay full longer Egg muffins can be an easy way to pack in…

Continue Reading

  • Lunches:
    • Quinoa salad with chickpeas, cherry tomatoes, cucumbers, and feta cheese. These foods are perfect for a light lunch that will pack in the vitamins and healthy fats while balancing the carbohydrates.
    • Grilled chicken breast with roasted sweet potatoes and steamed broccoli. The lean protein and carbohydrates are perfect for active lifestyles.

rectangle plate with corn, avocado, grilled chicken, cherries, cucumbers, and lettuce

  • Dinners:
    • Baked salmon with brown rice and a side of mixed vegetables. Finish the day out with lean protein, healthy carbs, and good fiber for a good night’s rest and gut health.
    • Stir-fried tofu with mixed vegetables and soba noodles. These are also great options for a balanced protein, carb, and fiber meals.

balsamic glazed porkchops with persimmons and baby spinach

Nov 10 Weekly Meal Plan

Welcome aboard if you’re new! Our meal planning tool is your personalized meal prep assistant –  you can tweak your serving sizes or skip some recipe options, it’s all in your hands! Our meal plans are meant to be a guide, so feel free to use all recipes or just a few to get you…

Continue Reading

  • Snacks:
    • Greek yogurt with honey and walnuts. The healthy fats and protein in the yogurt are great while also providing benefits to gut health.
    • Apple slices with peanut butter. This is a super simple snack option that’s not only tasty but also high in protein and vitamins.

round glass containers with yogurt topped with strawberries and mixed nuts

Yogurt with Strawberries and Mixed Nuts

Meal prep our Healthy Yogurt Bowl with Strawberries and Mixed Nuts! Finding a healthy breakfast that’s both delicious and budget-friendly can be a challenge. But fear not, because this recipe makes for a delicious, easy-to-prep morning ritual. Packed with protein-rich yogurt, fresh strawberries bursting with vitamins, and a crunchy medley of mixed nuts, this bowl…

Continue Reading

Posted on Leave a comment

Grilled Asparagus and Prosciutto Cobb Salad

Grilled asparagus and prosciutto cobb salad

Are you in a lunch rut? Tired of the same old sandwiches and salads that leave you hungry by 3 PM? Let’s shake things up with a gourmet yet simple-to-make Grilled Asparagus and Prosciutto Cobb Salad. This cobb salad packs a punch of flavor, keeps your budget in check, and gets you through your busy week with a smile.

This post may contain affiliate links. Please see our privacy policy for details.

Calories: 574kcal | Carbohydrates: 39g | Protein: 16g | Fat: 43g | Saturated Fat: 10g | Polyunsaturated Fat: 6g | Monounsaturated Fat: 25g | Trans Fat: 0.1g | Cholesterol: 192mg | Sodium: 1043mg | Potassium: 825mg | Fiber: 6g | Sugar: 24g | Vitamin A: 2404IU | Vitamin C: 98mg | Calcium: 104mg | Iron: 5mg

Grilled asparagus and prosciutto cobb salad

Why You’ll Love This Cobb Salad:

  • Gourmet, Yet Simple: Feels like a restaurant dish but made in your own kitchen.
  • Quick to Prepare: Minimal cooking involved, because I know your time is gold!
  • Healthy & Filling: Balanced with greens, proteins, and a zesty homemade dressing.
  • Budget-Friendly: Say goodbye to pricey lunches!

The PrepYoSelf Newsletter

Ingredients You’ll Need For This Cobb Salad

  • Asparagus: Asparagus is a powerhouse vegetable that’s not only low in calories but also rich in nutrients, including fiber, folate, and vitamins A, C, and K. When grilled, asparagus develops a pleasingly crisp texture and a smoky flavor that elevates this salad from simple to spectacular.
  • Prosciutto: This Italian dry-cured ham adds a luxurious touch to any dish. It’s thin, savory, and has a melt-in-your-mouth texture that contrasts beautifully with the crisp vegetables. Prosciutto is also protein-rich, making it a great component for adding depth without overpowering the other flavors.
  • Eggs: Eggs are a budget-friendly protein source that bring richness and substance to the salad. The creamy yolks add a comforting element, balancing the crisp textures of the other ingredients, while the whites provide a lean protein boost that keeps you full and energized.
  • Spring Mix: The blend of young, tender greens in a spring mix (like baby spinach, arugula, and romaine) offers not just a variety of textures and tastes but also a host of nutrients including iron, calcium, and vitamins. The mild and slightly peppery flavors of these greens create a fresh base for our heavier toppings.
  • Cherry Tomatoes: Adding a burst of juiciness and sweetness, cherry tomatoes are a great source of vitamin C, potassium, and other antioxidants. They introduce a bright, tangy contrast to the salty prosciutto and rich eggs, enhancing the overall freshness of the dish.
  • Lemon: Lemon juice brings zest and vivacity to the salad, cutting through the richness of the prosciutto and eggs with its vibrant acidity. It’s also great for digestion and adds a dose of vitamin C.
  • Honey: A touch of honey balances the tartness of the lemon and the sharpness of the mustard with its natural sweetness, rounding out the flavors in the dressing.
  • Paprika, Garlic Powder, Salt: These spices are used to season the asparagus and the dressing. Paprika adds a subtle warmth and color, garlic powder provides a savory depth, and salt enhances all the flavors in the salad.
Grilled asparagus and prosciutto cobb salad

How to Meal Prep this Healthy Lunch Salad

  1. Start by boiling your eggs for about 8 to 10 minutes. We want them just right – firm yet creamy. Once done, let them cool, then peel and halve. These beauties are going to add that rich, comforting texture to your salad.
  2. While your eggs are cooking, toss the asparagus spears in olive oil, paprika, garlic powder, and salt. Heat up your grill pan and give those spears a good char for about 2 to 3 minutes on each side. You’re looking for tender but crisp with those irresistible grill marks.
  3. Whip up your dressing by combining lemon juice, olive oil, Dijon mustard, honey, garlic powder, and salt in a small bowl. Whisk it up until it’s well blended. This dressing brings a bright and tangy flavor that ties all the components together beautifully.
  4. Lay down a bed of fresh spring mix. Arrange the grilled asparagus, slices of silky prosciutto, and your halved eggs over the greens. Scatter those juicy cherry tomatoes around for a pop of color and sweetness.
  5. Drizzle your homemade dressing over the salad. Each bite will be a perfect blend of smoky, tangy, and sweet flavors – absolutely divine!

Reference the recipe card below for detailed instructions.

Grilled asparagus and prosciutto cobb salad

Ingredient Swaps:

  • Greens: Swap spring mix for kale, spinach, or romaine lettuce depending on availability and preference. Each brings a different texture and nutritional profile.
  • Prosciutto: If prosciutto is too pricey or not available, try smoked turkey or even crispy bacon. For a vegetarian option, grilled halloumi or tofu can be delicious substitutes.
  • Asparagus: Green beans, zucchini, or bell peppers are great alternatives that also grill beautifully.
  • Eggs: For those avoiding eggs, chickpeas or cannellini beans can provide a similar protein boost with a different texture.
  • Cherry Tomatoes: Feel free to swap these with any diced regular tomato, cucumbers, or even roasted red peppers for a change in flavor.
  • Olive Oil: In the dressing, avocado oil is an excellent substitute, offering similar health benefits and a mild, neutral taste.
  • Lemons: If lemons are out of reach, try using apple cider vinegar or white wine vinegar for that essential tangy component in your dressing.
  • Honey: Maple syrup or agave nectar are perfect alternatives if you prefer a different kind of sweetness or have dietary restrictions.
  • Dijon Mustard: If Dijon isn’t your favorite, try using whole grain mustard for a bit more texture and a milder taste.
Grilled asparagus and prosciutto cobb salad
proscuitto salad

Grilled Asparagus and Prosciutto Cobb Salad

Enjoy a delicious and easy-to-prep Grilled Asparagus and Prosciutto Cobb Salad, featuring a vibrant mix of tender grilled asparagus, savory prosciutto, and boiled eggs, all drizzled with a homemade lemon-Dijon dressing.
No ratings yet
Prep Time 5 minutes
Cook Time 15 minutes
Course lunch, Main Course
Cuisine American, Italian
Servings 2
Calories 574 kcal

Equipment

  • knife
  • cutting board
  • boiling pot
  • indoor grill pan
  • tongs
  • oven

Ingredients
  

  • 2 large eggs
  • 3 oz prosciutto
  • 12 asparagus spears
  • 1/4 tsp paprika
  • 1/4 tsp garlic powder
  • 1/4 tsp salt
  • 1 tbsp olive oil
  • 4 cups spring mix
  • 1 cup cherry tomatoes (sliced)

Salad Dressing

  • 2 lemons (juiced)
  • 2 tbsp olive oil
  • 1 tbsp dijon mustard
  • 2 tbsp honey
  • 1/4 tsp garlic powder
  • 1/4 tsp salt

Instructions
 

Eggs

  • Boil the eggs in a pot for about 8 to 10 minutes. Once cooked, let it cool before peeling and slicing in half

Grilled Asparagus

  • Season the asparagus with paprika, garlic powder, and salt. Heat an indoor grill pan on medium high heat and grill the asparagus for about 2 to 3 minutes on each side

Salad Dressing

  • Meanwhile, in a small bowl, mix together the juice of the lemons with the olive oil, dijon mustard, honey, and seasonings. Whisk until blended well
  • Serve the grilled aspragus, proscuitto slices, and eggs on top of the spring mix
  • Drizzle the salad with the dressing and top it off with fresh tomatoes

Notes

Nutrition information provided is an estimate. It will vary based on cooking method and specific ingredients used. Please consult with your healthcare provider for specific dietary needs. To gain a better understanding, explore our nutrition disclaimer here

Nutrition

Calories: 574kcalCarbohydrates: 39gProtein: 16gFat: 43gSaturated Fat: 10gPolyunsaturated Fat: 6gMonounsaturated Fat: 25gTrans Fat: 0.1gCholesterol: 192mgSodium: 1043mgPotassium: 825mgFiber: 6gSugar: 24gVitamin A: 2404IUVitamin C: 98mgCalcium: 104mgIron: 5mg

Similar Recipes

cilantro chicken

Cilantro Lime Chicken Salad with Strawberry Salsa

sweet and sour chicken wings

Air Fryer Sweet and Sour Chicken Wings

stuffed primavera chicken

Primavera Stuffed Chicken Breasts

You Might Also Like

Frequently Asked Questions

What if I don’t have a grill pan? 

No grill pan? No problem! You can roast the asparagus in the oven or even use a regular skillet on the stove. The key is to cook it at high heat to achieve a bit of char.


Can I add other proteins to this salad?

Yes, this salad is versatile. Grilled chicken, shrimp, or even steak are great proteins to add for variety and to make the meal more filling.


Can I use frozen asparagus?

Fresh asparagus is ideal for grilling as it maintains a better texture and flavor. However, if only frozen is available, thaw it completely and pat it dry to remove excess moisture before grilling.

Posted on Leave a comment

Individual BBQ Chicken and Pineapple Flatbread Pizza

BBQ Chicken Pineapple Flatbread Pizza

Are you in search of a meal that’s as easy to prepare as it is delightful to eat? Look no further than these BBQ Chicken and Pineapple Flatbread Pizzas! Combining the smoky sweetness of BBQ chicken with the tropical zest of pineapple and a hint of cilantro, these pizzas bring a burst of flavors that are sure to please any palate. Perfect for a quick weeknight dinner or a fun meal prep option, they come together in less than 30 minutes. Whether you’re feeding a crowd or just looking for a simple and satisfying meal, these flatbread pizzas are a guaranteed hit!

This post may contain affiliate links. Please see our privacy policy for details.

Calories: 563kcal | Carbohydrates: 66g | Protein: 36g | Fat: 18g | Saturated Fat: 8g | Polyunsaturated Fat: 2g | Monounsaturated Fat: 6g | Trans Fat: 0.01g | Cholesterol: 99mg | Sodium: 1652mg | Potassium: 736mg | Fiber: 5g | Sugar: 35g | Vitamin A: 945IU | Vitamin C: 43mg | Calcium: 335mg | Iron: 3mg

BBQ Chicken Pineapple Flatbread Pizza

Here are 7 reasons why you’re going to absolutely love making and devouring these delightful flatbread pizzas:

  • Quick & Easy Prep: We all know time is precious. That’s why this recipe is a gem. With minimal prep and a total cooking time of about 30 minutes, you can whip up a week’s worth of lunches or dinners in no time.
  • Bursting with Flavor: Each bite of this pizza is a perfect blend of smoky BBQ sauce, juicy pineapple, savory chicken, and a hint of fresh cilantro. It’s a tropical taste adventure right in your mouth!
  • Healthy & Filling: These flatbreads are not only delicious but also balanced. Lean chicken provides protein, pineapple adds some vitamins and fiber, and mozzarella offers that calcium kick. It’s a wholesome meal that keeps you fueled and satisfied.
  • Customizable: Whether you’re a meat-lover or vegetarian, gluten-free or dairy-free, this recipe can be tailored to suit your dietary needs without compromising on taste. Swap out ingredients to make it your own!
  • Perfect for Portion Control: Individual flatbreads mean you can easily manage portions, whether you’re calorie counting or just trying to avoid overeating. It’s a great way to keep your meals in check!
  • Budget-Friendly: Let’s talk about savings! Making these flatbread pizzas at home is so much cheaper than dining out or ordering from your favorite restaurant. Use ingredients from your pantry or leftovers to cut costs even more.
  • Restaurant Quality at Home: Impress yourself and maybe even a guest with these delectably gourmet-tasting pizzas that come together effortlessly. They look fancy, taste incredible, and all without the hefty price tag or the wait!

The PrepYoSelf Newsletter

Here’s What You Need

  • Chicken: Chicken is a fantastic source of lean protein, which is essential for muscle repair and growth. It also makes the meal filling and satisfying. Using chicken tenderloins keeps cooking times short and ensures the meat stays tender and juicy.
  • Chili Powder, Paprika, and Garlic Powder: These spices bring warmth, a mild heat, and a depth of flavor to the chicken, enhancing its natural taste without overpowering it.
  • Olive Oil: Olive oil is used to help the spice mix adhere to the chicken and prevents sticking during cooking, besides adding a subtle richness.
  • Flatbreads: Flatbreads, such as naan or pita, provide a sturdy, delicious base for the toppings, and they cook quickly, which is perfect for a fast meal prep.
  • Pineapple: The sweetness of the pineapple complements the savory elements of the pizza, especially the BBQ sauce and chicken, adding a burst of freshness and tang.
  • Red Onions: They offer a slight crunch and a zesty sharpness that balances the sweetness of the pineapple and BBQ sauce.
  • Cilantro: Cilantro adds a fresh, citrusy layer to the pizza, brightening up the overall flavors.
  • BBQ Sauce: It acts as the flavor backbone, providing a smoky, slightly sweet, and tangy base that ties all the other ingredients together.
  • Mozzarella Cheese: Cheese is the crowning glory of any pizza, offering gooey, melty deliciousness that also helps to bind all the toppings together.

BBQ Chicken Pineapple Flatbread Pizza

Easy Steps for Meal Prepping this BBQ Chicken Flatbread Pizza

  1. Fire up your oven to 400F to get things started. Mix the chili powder, paprika, garlic powder, and salt, then toss your chicken tenderloins in this seasoning along with a drizzle of olive oil. Pop them on a sheet pan and let them bake for about 20 minutes, or until they reach a safe internal temperature of 165F.
  2. Once your chicken is cooked and cooled, chop it into bite-size chunks. This is a great time to start prepping your other toppings – dice that pineapple, slice those red onions, and chop the cilantro.
  3. Grab your flatbreads and spread a generous layer of BBQ sauce over each. Scatter your chopped chicken, pineapple, and red onions evenly, then sprinkle with cilantro and a good handful of shredded mozzarella.
  4. Place your assembled pizzas back into the oven for about 5 to 7 minutes, just until the cheese is deliciously melted and bubbly.
  5. Slice, serve, or store! These pizzas are fantastic for immediate dining or can be cooled, packed, and stored in the fridge for grab-and-go ease during the week.

Reference the recipe card below for detailed instructions.

BBQ Chicken Pineapple Flatbread Pizza

Meal Prep Tips for BBQ Chicken Flatbread Pizzas

  • Batch Cook: Prepare your chicken in bulk at the beginning of the week. Bake enough chicken for these pizzas and other dishes you might want to whip up, like salads or wraps.
  • Prep Ingredients Separately: Chop and store your toppings like pineapple, onions, and cilantro in separate containers in the fridge. This keeps them fresh and allows you to quickly assemble the flatbreads when you’re ready to eat.
  • Assemble When Ready to Eat: For the best texture, assemble the flatbreads right before you plan to bake them. This prevents the bread from getting soggy.
  • Side Salads: Pair your flatbread pizza with a light salad like a classic Caesar, a fresh arugula salad with lemon and pepper, or a cucumber and tomato salad with a vinaigrette. This adds a refreshing contrast to the hearty pizza.
  • Healthy Snacks: Serve with a side of raw vegetables like carrot sticks, celery, or bell peppers with a light hummus or yogurt dip for an added crunch and nutrition boost.

BBQ Chicken Pineapple Flatbread Pizza

BBQ Chicken Pineapple Flatbread Pizza

Individual BBQ Chicken and Pineapple Flatbread Pizza

Enjoy a quick and delicious meal with these BBQ Chicken and Pineapple Flatbread Pizzas, combining tender seasoned chicken, sweet pineapple, zesty red onions, and fresh cilantro on a crispy flatbread base, all topped with melted mozzarella.
No ratings yet
Prep Time 5 minutes
Cook Time 30 minutes
Course lunch, Main Course
Cuisine American
Servings 2
Calories 563 kcal

Equipment

  • knife
  • cutting board
  • sheet pan
  • oven

Ingredients
  

Chicken

  • 6 oz chicken tenderloins
  • 1/4 teaspoon chili powder
  • 1/4 teaspoon paprika
  • 1/4 teaspoon garlic powder
  • 1/4 teaspoon salt
  • 1 teaspoon olive oil

Pizza

  • 2 flatbreads (or naan, pita bread)
  • 1 cup pineapple (diced)
  • 1/4 cup red onions (thinly sliced)
  • 1/4 cup cilantro (chopped)
  • 1/2 cup bbq sauce
  • 1 cup shredded mozzarella

Instructions
 

  • Pre-heat the oven to 400F. Season the chicken and coat it with olive oil. Place them in a sheet pan and bake them in the oven for about 20 minutes until they fully cook to an internal temperature of 165F.
  • After the chicken cooks, let them cool before chopping them into bite size pieces.
  • Now, assemble the pizza by spreading the bbq sauce on the flatbread. Add the chicken, pineapple, onions, and cilantro. Finally, sprinkle the top with the cheese.
  • Place the pizza on a sheet pan and let them bake in the oven for 5 to 7 minutes until the cheese melts.

Notes

Nutrition information provided is an estimate. It will vary based on cooking method and specific ingredients used. Please consult with your healthcare provider for specific dietary needs. To gain a better understanding, explore our nutrition disclaimer here

Nutrition

Calories: 563kcalCarbohydrates: 66gProtein: 36gFat: 18gSaturated Fat: 8gPolyunsaturated Fat: 2gMonounsaturated Fat: 6gTrans Fat: 0.01gCholesterol: 99mgSodium: 1652mgPotassium: 736mgFiber: 5gSugar: 35gVitamin A: 945IUVitamin C: 43mgCalcium: 335mgIron: 3mg

Similar Recipes

chicken soup

One Pot Mexican Chicken Soup

sweet potato blt

Sweet Potato BLT Sandwich

Grilled Honey Dijon Chicken Kale Salad

You Might Also Like

Frequently Asked Questions

Can I use store-bought cooked chicken instead of baking my own?

Absolutely! Using pre-cooked chicken, like rotisserie chicken, is a great time-saver. Just season it with a little chili powder, paprika, and garlic powder before adding it to your flatbread to keep the flavors consistent.


What can I use if I don’t have flatbread?

Any type of sturdy bread-like base works for this recipe. You can use naan, pita bread, or even large tortillas if you prefer a thinner crust. Pre-made pizza crusts are also an excellent time-saver.


Are there any alternatives to BBQ sauce that I can use?

If BBQ sauce isn’t your favorite, you can try other sauces like marinara, pesto, or even a simple olive oil and garlic spread as the base for your pizzas.

Posted on Leave a comment

Chicken Mole Tacos

Shredded Chicken in Mole Sauce with Corn Tortillas

Our restaurant-quality Chicken Mole Street Tacos are ready to rock your taste buds. These babies are not only bursting with flavor but also budget-friendly and perfect for busy individuals like you who crave delicious a chicken dinner without the hassle. So go ahead, dig in, and savor every bite of these delightful tacos. Happy meal prepping!

This post may contain affiliate links. Please see our privacy policy for details.

Calories: 660kcal | Carbohydrates: 64g | Protein: 27g | Fat: 36g | Saturated Fat: 11g | Polyunsaturated Fat: 6g | Monounsaturated Fat: 14g | Trans Fat: 0.1g | Cholesterol: 116mg | Sodium: 1539mg | Potassium: 1183mg | Fiber: 12g | Sugar: 27g | Vitamin A: 5376IU | Vitamin C: 25mg | Calcium: 120mg | Iron: 4mg

Shredded Chicken in Mole Sauce with Corn Tortillas

Why You’ll Enjoy This!

  • Flavor Explosion: With the bold flavors of the mole sauce infused into every tender bite of chicken, these tacos are anything but boring. Say goodbye to bland meal prep chicken dinner and hello to a fiesta of flavors that will keep you excited for lunchtime!
  • Easy Peasy Prep: Our recipe is designed with busy individuals in mind. With simple instructions and minimal ingredients, you can whip up a batch of these tacos in no time. Perfect for those hectic weekday evenings when you need something quick and satisfying.
  • Budget-Friendly: Our Chicken Mole Street Tacos are made with affordable ingredients that won’t bust your budget. Save money without sacrificing flavor – it’s a win-win!
  • Versatile and Customizable: Don’t be afraid to get creative with your taco toppings! Whether you prefer a little extra heat with some sliced jalapeños or want to add some creamy avocado slices, these tacos are the perfect canvas for your culinary imagination.
  • Portion Control Made Easy: With each taco neatly packed and ready to go, portion control becomes a breeze. Say goodbye to the temptation of overeating – simply grab a prepped taco and enjoy a perfectly portioned meal that keeps you on track with your health goals.
  • Meal Prep Magic: Perhaps the best reason of all – these tacos are meal prep superheroes! Whip up a batch on Sunday evening and enjoy delicious, restaurant-quality meals throughout the week. No more last-minute scrambles or unhealthy takeout – just grab and go for a stress-free week of tasty eats.

The PrepYoSelf Newsletter

Gather the Following Ingredients

  • Boneless Chicken Thighs: Chicken thighs are used for their succulent flavor and tenderness. They’re also budget-friendly compared to other cuts of meat. By using boneless thighs, we make the prep process easier and quicker while still delivering that juicy texture.
  • Corn Tortillas: Corn tortillas provide the perfect vessel for our tacos. Not only are they gluten-free and lower in calories compared to flour tortillas, but they also add a deliciously rustic flavor that complements the richness of the mole sauce.
  • White Onions: Sliced white onions add a sweet and slightly pungent flavor to the dish. They also provide a nice texture contrast to the tender chicken and creamy mole sauce. Onions are a budget-friendly ingredient that adds depth and complexity to the overall flavor profile.
  • Chicken Broth: Chicken broth serves as the base for our sauce, infusing it with savory flavor and moisture. It’s also a cost-effective way to add depth to the dish without the need for expensive ingredients.
  • Mole Base Ingredients: This combination of tomato sauce, dried ancho chile, chipotle pepper, garlic powder, cumin, and chocolate chips forms the heart and soul of our dish. Each ingredient contributes to the complex flavor profile of the mole sauce – the tomato sauce provides acidity and sweetness, the dried ancho chile and chipotle pepper add smoky heat, the garlic powder and cumin lend aromatic depth, and the chocolate chips bring richness and depth. 
  • Garnishes (Lime and Cilantro): Fresh lime slices and chopped cilantro add brightness and freshness to the tacos. The tangy citrus of the lime cuts through the richness of the mole sauce, while the herbal notes of cilantro provide a refreshing contrast to this chicken dinner. These garnishes not only enhance the flavor of the dish but also add a vibrant pop of color, making this chicken dinner as visually appealing as they are delicious.

Shredded Chicken in Mole Sauce with Corn Tortillas

How to Meal Prep Chicken Mole Tacos:

  1. In a blender, combine the tomato sauce, dried ancho chile, chipotle pepper, garlic powder, cumin, and salt. Blend until smooth and set aside. This luscious mole sauce is the secret to our tacos’ rich flavor!
  2. Heat olive oil in a soup pan over medium-high heat. Sear the chicken thighs on each side for about 3 to 4 minutes until they are golden brown and delicious. Add the sliced white onions and sauté until they soften and become fragrant.
  3. Pour in the chicken broth and the prepared Mole Base. Give it a good stir, bring it to a boil, then reduce the heat to low-medium. Cover the pan with a lid and let it simmer for approximately 25 minutes until the chicken is tender and the flavors have melded together beautifully.
  4. Once the chicken is cooked through, uncover the pan and add those decadent chocolate chips. Stir until they melt into the sauce, infusing it with a luxurious richness. Continue to simmer the sauce uncovered until it thickens to perfection.
  5. Now for the fun part! Use two forks to shred the tender chicken directly in the pan. Grab your corn tortillas and fill them generously with the mouthwatering chicken filling. Top each taco with a sprinkle of fresh cilantro and a squeeze of zesty lime juice for that extra pop of flavor.

Reference the recipe card below for detailed instructions.

Shredded Chicken in Mole Sauce with Corn Tortillas

Meal Prep Tips for Chicken Mole Tacos:

  • Fresh Sides: Serve your Chicken Mole Street Tacos with fresh, vibrant sides like a crisp green salad, pico de gallo, or a refreshing fruit salsa. The bright flavors will complement the richness of the tacos and provide a balanced meal.
  • Mexican Rice: Pair your tacos with some fluffy Mexican rice for a complete and satisfying meal. The rice absorbs the flavors of the mole sauce and serves as a delicious side dish.
  • Black Beans: Add a side of seasoned black beans for extra protein and fiber. The earthy flavors of the beans complement the smoky richness of the mole sauce perfectly.
  • Corn and Avocado Salad: A light and refreshing corn and avocado salad is the perfect accompaniment to the bold flavors of the tacos. The creamy avocado and sweet corn provide a lovely contrast to the savory chicken mole filling in this chicken dinner.
  • Tortilla Chips and Guacamole: For a casual and fun meal, serve your tacos with crispy tortilla chips and homemade guacamole. The crunchy chips and creamy guac are the perfect accompaniments to the indulgent flavors of the tacos.

round plate with 3 corn tortilla tacos topped with shredded chicken and fresh cilantro

Chicken Mole Street Tacos

Deliciously tender chicken thighs simmered in a rich mole sauce, stuffed into warm corn tortillas and topped with fresh cilantro and a squeeze of lime – our Chicken Mole Street Tacos are a flavor-packed fiesta in every bite!
No ratings yet
Prep Time 5 minutes
Cook Time 35 minutes
Course lunch, Main Course
Cuisine Mexican
Servings 2
Calories 660 kcal

Equipment

  • knife
  • cutting board
  • blender
  • spatula
  • soup pot with a lid

Ingredients
  

  • 4 small corn tortillas
  • 8 oz boneless chicken thighs
  • 1/4 cup white onions (sliced)
  • 2 cups chicken broth
  • 1 tablespoon olive oil

Mole Base

  • 8 oz tomato sauce
  • 1 dried ancho chile
  • 1 chipotle pepper in adobo sauce
  • 1/4 teaspoon garlic powder
  • 1/4 teaspoon cumin
  • 1/4 teaspoon salt
  • 1/4 cup semi bittersweet chocolate chips

Garnish

  • 1 lime (sliced)
  • 1/4 cup cilantro (chopped)

Instructions
 

  • Blend together the ingredients of the mole base (minus the chocolate chips) until it is smooth and set it aside.
  • Add oil to a soup pan on medium high heat and sear the chicken thighs on each side for about 3 to 4 minutes until they are golden brown. Next add the white onions and saute until they soften.
  • Then, pour in the broth and mole base and stir it all around. Bring the soup to a boil, then lower the heat to low medium and cover the soup pan with a lid.Let it simmer for about 25 minutes until the chicken is tender.
  • After the chicken cooks, remove the lid and add the chocolate chips and stir until it fully melts. Continue to simmer the sauce until it thickens.
  • Finally use two forks to shred the chicken and stuff each tortilla with the chicken filling. Top it off with fresh cilantro and lime juice.

Notes

Nutrition information provided is an estimate. It will vary based on cooking method and specific ingredients used. Please consult with your healthcare provider for specific dietary needs. To gain a better understanding, explore our nutrition disclaimer here

Nutrition

Calories: 660kcalCarbohydrates: 64gProtein: 27gFat: 36gSaturated Fat: 11gPolyunsaturated Fat: 6gMonounsaturated Fat: 14gTrans Fat: 0.1gCholesterol: 116mgSodium: 1539mgPotassium: 1183mgFiber: 12gSugar: 27gVitamin A: 5376IUVitamin C: 25mgCalcium: 120mgIron: 4mg

Similar Recipes

bean and corn taco

Vegetarian Black Bean and Corn Soft Tacos

chicken salad

Oven Baked Honey Mustard Glazed Chicken Salad

balsamic chicken salad

Oven Baked Balsamic Chicken Salad with Strawberries

You Might Also Like

Frequently Asked Questions

Can I use chicken breast instead of chicken thighs?

While chicken thighs are preferred for their tenderness and flavor, you can certainly use chicken breast if you prefer. Just be mindful that chicken breast tends to be leaner and may require shorter cooking time to avoid drying out.


Is it necessary to use both dried ancho chile and chipotle pepper in adobo sauce?

The combination of dried ancho chile and chipotle pepper adds depth and complexity to the mole sauce, but if you can’t find one of the ingredients or prefer a milder heat, you can adjust the recipe accordingly. You can also substitute with other dried chiles or adjust the amount of chipotle pepper to suit your taste preferences.


Can I freeze the chicken mole filling?

Yes, you can freeze the cooked chicken mole filling for later use. Store it in a freezer-safe container for up to 2-3 months. Thaw it overnight in the refrigerator before reheating, and add a splash of chicken broth or water if needed to revive the sauce.

Posted on Leave a comment

Chinese Food Meal Prep

glass meal prep containers with egg rolls, sliced green cucumber, and shredded red cabbage

Chinese food meal prep is one of the best options for busy people looking to eat healthy on a budget. We’ve already covered Asian food meal prep overall, but there is so much depth to each cuisine, so we’re deep-diving into Chinese food meal prep.

Chinese cuisine’s vibrant flavors and variety of dishes offers huge potential for meal prepping. 

Chinese food meal prep can typically be made with inexpensive ingredients such as rice, noodles, tofu, and vegetables. Asian grocery stores also often provide options to buy in bulk which can save a lot of money and cut down on packaging trash. Consider whether or not you have the space to efficiently and comfortably store the ingredients though. The last thing you want to do is spend money on a big bag of rice only to find yourself with so much you’ll never use it all. You can still use rice for non-Chinese dishes so compile a list of recipes that you want to try and buy rice accordingly.

The drag of meal prep for many people is burning out on the same recipes after eating them week in and week out. Chinese food meal prep is a great way to open a door to a world of diverse recipes while using similar ingredients (sometimes). From stir-fries to steamed dishes to soups and dumplings, there are tons of options. 

Beef Stir Fry with Squash Noodles

When picking a recipe you do need to consider which recipes will store or travel well. Dishes like stir-fries, fried rice, and soups can be easily reheated without compromising their flavor or texture, making them ideal for meal prepping.

Chinese food meal prep can also be quick and easy with only a little time actually cooking. Stir-fries, for example, come together in a matter of minutes and can be made in large batches.

Chinese cuisine emphasizes a balance of flavors and incorporates plenty of vegetables, lean proteins, and whole grains. Many traditional Chinese dishes are low in fat and calories with a good balance of nutrients. More American style Chinese recipes that are covered in sauce can be high in calories, sugar, and salt. Cooking more healthy chinese recipes or by altering unhealthy recipes with low sodium or low sugar sauces you can eat well on a diet. You can also consider removing elements and eating a more deconstructed version that focuses more on the protein and veggies rather than the fried or saucy components.

Breaking down Chinese food meal prep even further we can look at variations in cuisine from North China to South China.

South China Food Meal Prep

Cantonese cuisine, which originates from the Guangdong province in Southern China, has had a significant influence on Southern cuisine as a whole. Cantonese dishes are known for their use of fresh seafood and subtle seasoning.

glass meal prep containers with egg rolls, sliced green cucumber, and shredded red cabbage

Southern Chinese recipes are more focused on rice as a base reflecting a warmer climate perfect for rice cultivation. Rice is often served as a side to compliment a dish or as part of the preparation like in stir-fries. Rice can be great for meal prepping especially if you have a rice cooker and can prep the veggies and proteins ahead and time and simply pair it with fresh rice. 

This cuisine typically features lighter and fresher flavors focusing on the natural taste of the ingredients. Seasoned with soy sauce, rice vinegar, ginger, and garlic, but balanced so as to not mask the natural flavors. Finding healthy options for soy sauce is a great way to eat healthy without compromising the recipe’s taste.

You may recognize such famous Southern Chinese recipes such as dim sum, roast duck, and sweet and sour pork. All delicious and very different within the same cuisine. Southern Chinese food meal prep is great for fresh lunches and dinners that are totally unique.

Northern Chinese Food Meal Prep

The imperial cuisine of the Ming and Qing dynasties influenced Northern Chinese recipes with elaborate presentations and the use of high-quality ingredients. 

Northern Chinese recipes tend to use wheat as their base such as noodles, dumplings, and steamed buns. The cooler climates of the north are more conducive to wheat cultivation and heartier meals.

The flavors of Northern Chinese food meal prep are more robust and hearty, often featuring rich sauces. Just like the south, most dishes are seasoned with soy sauce, vinegar, ginger, and garlic. Different from the south though, this cuisine uses these ingredients to enhance the savory flavors of the rest of the dish.

Many Northern Chinese dishes are well known around the world like  Peking duck, Mongolian hot pot, and jianbing. The steamed buns are often a popular choice with their rich flavors inside, bouncy bun exterior, and ease of eating.. 

Whether you are picking recipes from North or South China or you’re making variations of more American-style dishes, remember to have fun with them. Having fun with new recipes is one of the most important ways to enjoy them, even if your cooking skills need some practice. Try starting with some of our Chinese food meal prep recipes for a healthy and quick option.

<!–- /stk-start:posts/template –->

<!–- /stk-end:post/template –->

Posted on Leave a comment

Crispy Panko Breaded Chicken Tender Salad

crispy panko breaded chicken tender with salad, sliced cucumbers, tomatoes, and red onions

We’ve crafted a recipe specifically tailored to the needs of busy individuals who crave delicious, budget-friendly options without compromising on taste. Imagine tender chicken breasts, thinly sliced and perfectly breaded with crispy Panko breadcrumbs, seasoned to perfection with paprika, garlic powder, and a hint of salt. Paired with a vibrant spring mix salad featuring juicy Roma tomatoes, crisp cucumbers, and tangy red onions, this dish is a symphony of textures and flavors. Whether you’re meal prepping for the week ahead or looking for a quick and satisfying dinner option, this recipe has you covered.

This post may contain affiliate links. Please see our privacy policy for details.

Calories: 469kcal | Carbohydrates: 32g | Protein: 42g | Fat: 19g | Saturated Fat: 3g | Polyunsaturated Fat: 5g | Monounsaturated Fat: 8g | Trans Fat: 0.04g | Cholesterol: 111mg | Sodium: 1191mg | Potassium: 909mg | Fiber: 2g | Sugar: 5g | Vitamin A: 1470IU | Vitamin C: 22mg | Calcium: 61mg | Iron: 3mg

crispy panko breaded chicken tender with salad, sliced cucumbers, tomatoes, and red onions

Why This is Great for Meal Prep

  • Quick and Easy Preparation: With simple instructions and minimal ingredients, this recipe is a breeze to prepare, even for those with the busiest of schedules. The thinly sliced chicken cooks up in just a few minutes, while the salad assembly is quick and straightforward. It’s a time-saving meal prep option that won’t leave you stuck in the kitchen for hours.
  • Nutrient-Rich Ingredients: This meal is packed with wholesome ingredients like lean chicken breast, fresh vegetables, and nutrient-rich greens. The chicken provides a healthy dose of protein to keep you feeling satisfied and energized throughout the day, while the salad veggies offer essential vitamins, minerals, and fiber to support overall health and well-being.
  • Balanced and Satisfying: Our Crispy Panko Breaded Chicken Tender Salad strikes the perfect balance between protein, carbs, and healthy fats, making it a satisfying and well-rounded meal. The combination of crispy chicken tenders and crunchy veggies keeps your taste buds happy, while the addition of complex carbs from the salad greens provides long-lasting energy to power you through your busy day.
  • Versatile and Customizable: One of the best things about this meal prep recipe is its versatility. While we’ve provided a basic salad combination, feel free to get creative and customize it to suit your taste preferences and dietary needs. Swap out the veggies, experiment with different salad dressings, or add your favorite toppings to make each meal uniquely yours.
  • Portion-Controlled and Budget-Friendly: By prepping individual servings ahead of time, you can easily control portion sizes and avoid overeating throughout the week. Plus, by buying ingredients in bulk and prepping multiple meals at once, you’ll save both time and money in the long run. It’s a budget-friendly meal prep solution that helps you stay on track with your health and wellness goals without breaking the bank.

The PrepYoSelf Newsletter

Ingredients You’ll Need

  • Chicken Breast: Chicken breast is a lean source of protein that’s not only affordable but also versatile and easy to cook. By using thinly sliced chicken breast, we ensure that it cooks quickly and evenly, making it perfect for meal prep. Protein is essential for muscle repair and growth, as well as for keeping you feeling full and satisfied between meals.
  • Panko Breadcrumbs: Panko breadcrumbs are light and airy, resulting in an incredibly crispy and crunchy coating for our chicken tenders. Unlike traditional breadcrumbs, panko creates a thicker and more textured crust, adding an extra layer of flavor and texture to the dish. Plus, using breadcrumbs instead of a heavier batter keeps the dish lighter and healthier without sacrificing that satisfying crunch.
  • Seasonings (Paprika, Garlic Powder, Salt): These simple yet flavorful seasonings add depth and complexity to the dish without the need for excess salt or unhealthy additives. Paprika provides a subtle smokiness and mild heat, while garlic powder adds savory flavor. Salt enhances the overall taste of the dish and helps to balance out the other flavors. Together, these seasonings elevate the chicken tenders from basic to extraordinary.
  • Egg: The egg serves as a binding agent for the breadcrumbs, helping them adhere to the chicken and creating a crispy coating when cooked. It also adds moisture and richness to the chicken tenders, ensuring they stay juicy and flavorful. Eggs are an affordable and nutritious ingredient that adds both structure and texture to the dish.
  • Olive Oil: Olive oil is used for pan-frying the chicken tenders, providing a healthy source of monounsaturated fats and adding a deliciously rich flavor to the dish. It’s a budget-friendly option that’s readily available and adds a luxurious touch to the crispy chicken tenders. Plus, pan-frying allows us to achieve that golden-brown crust without the need for deep frying, making it a healthier cooking method.
  • Spring Mix: Spring mix is a blend of tender baby greens like spinach, arugula, and lettuce, providing a nutritious and flavorful base for our salad. It’s packed with vitamins, minerals, and antioxidants, making it a nutrient-rich addition to any meal. Plus, spring mix adds a variety of textures and flavors to the salad, from peppery arugula to buttery lettuce, creating a more interesting and satisfying eating experience.
  • Tomato, Cucumber, Red Onion: These fresh vegetables add color, crunch, and flavor to our salad, making it a vibrant and delicious side dish. Tomatoes provide sweetness and acidity, cucumbers add a refreshing crunch, and red onions lend a mild tanginess. Together, they create a well-balanced salad that complements the crispy chicken tenders perfectly.
  • Salad Dressing: A choice of salad dressing adds the finishing touch to our meal prep masterpiece, tying all the flavors together and adding a burst of tangy or creamy goodness. Whether you prefer a classic balsamic vinaigrette, a zesty Italian dressing, or a creamy ranch, the dressing adds moisture and flavor to the salad without overpowering the other ingredients. Plus, by choosing a store-bought dressing or making your own at home, you can control the ingredients and customize the flavor to suit your taste preferences.
crispy panko breaded chicken tender with salad, sliced cucumbers, tomatoes, and red onions

How to Meal Prep Crispy Panko Chicken Tenders

  1. If you can’t find thinly sliced chicken breast at your local store, fear not! Simply filet your chicken breast and slice it in half sideways. Want it even flatter? Place it between two layers of plastic wrap and give it a good pound with a meat pounder or a small frying pan. This step not only makes your chicken cook faster but also ensures maximum crispiness!
  2. In three separate bowls, set up your breading station. Whisk the egg in one bowl, place the flour in another, and combine the panko breadcrumbs with paprika, garlic powder, and salt in the third bowl.
  3. First, dip each chicken slice into the flour, making sure it’s fully coated. Shake off any excess flour. Next, dip it into the egg wash, ensuring it’s nicely covered. Finally, coat the chicken in the seasoned panko breadcrumbs, pressing gently to adhere.
  4. Heat a skillet with olive oil over medium-high heat. Once hot, add your breaded chicken tenders and cook for about 3 to 5 minutes on each side, or until they’re golden brown and cooked through. Pro tip: Check for an internal temperature of 165°F to ensure they’re perfectly done.
  5. While your chicken is sizzling away, it’s time to prep your salad. Toss together the spring mix, sliced tomato, cucumber, and red onions in a large bowl. Divide the salad into meal prep containers and top each with a crispy chicken tender.
  6. Don’t forget the finishing touch! Drizzle each salad with your favorite salad dressing. Whether you’re into balsamic vinaigrette, honey mustard, or creamy ranch, the choice is yours!

Reference the recipe card below for detailed instructions.

crispy panko breaded chicken tender with salad, sliced cucumbers, tomatoes, and red onions

Meal Prep Tips for Crispy Panko Chicken Tenders

  • Healthy Dips: Pair your crispy chicken tenders with a variety of healthy dipping sauces, such as hummus, tzatziki, or guacamole. These flavorful dips add extra moisture and flavor to the chicken without piling on extra calories or unhealthy fats.
  • Soup or Soup Starter: Kick off your meal with a light soup or broth-based starter, such as vegetable soup or miso soup. Not only does this help to increase your vegetable intake, but it also fills you up with low-calorie, nutrient-rich foods, making you less likely to overindulge on the main course.
  • Fruit Dessert: End your meal on a sweet note with a serving of fresh fruit or a fruit salad. Not only does this provide a refreshing and naturally sweet treat, but it also adds extra vitamins, minerals, and antioxidants to your meal. Try pairing your salad with seasonal fruits like berries, melon, or citrus for a burst of flavor.
  • Hydration: Don’t forget to stay hydrated throughout the day by drinking plenty of water or herbal tea. Hydration is key for overall health and well-being, and it helps to support digestion, energy levels, and cognitive function. Consider infusing your water with fresh fruit or herbs for a flavorful twist.
crispy panko breaded chicken tender with salad, sliced cucumbers, tomatoes, and red onions
pan-fried chicken salad

Crispy Panko Breaded Chicken Tender Salad

Enjoy crispy Panko-breaded chicken tenders atop a bed of fresh greens, perfect for a flavorful and convenient meal prep option.
No ratings yet
Prep Time 5 minutes
Cook Time 20 minutes
Course lunch, Main Course
Cuisine American
Servings 2
Calories 469 kcal

Equipment

  • knife
  • cutting board
  • saute pan
  • tongs

Ingredients
  

Chicken and Breading

  • 12 oz chicken breasts (thinly sliced)
  • 1/4 cup flour
  • 1/2 cup panko breadcrumbs
  • 1 tsp paprika
  • 1 tsp garlic powder
  • 1/2 tsp salt
  • 1 each large egg
  • 1 tbsp olive oil

Salad

  • 4 cups spring mix
  • 1 each roma tomato (sliced)
  • 1/2 each cucumber (sliced)
  • 1/4 cup red onions (sliced
  • 4 tbsp choice of salad dressing

Instructions
 

  • If you can't find thinly sliced chicken breast, filet your chicken breast and slice it in half sideways. If you want it even flatter and thinner, lay it in between two layers of plastic wrap and use a meat pounder or a small frying pan to pound it out flat. This will help the chicken cook faster.
  • Whisk the egg in a large bowl. Place the flour in another bowl. Then, place the panko breadcrumbs and seasonings in another bowl
  • First dip the chicken in the flour making sure it is fully coated. Then shake off the excess
  • Next, dip the chicken in the egg wash. Then, drip it into the seasoned panko breadcrumbs. Make sure it is fully coated
  • Heat a skillet with olive oil on medium high heat. Then, pan fry the chicken breast on each side until golden brown and fully cooked (about 3 to 5 minutes on each side-check for an internal temperature of 165F).
  • Serve the chicken with a side salad.

Notes

Nutrition information provided is an estimate. It will vary based on cooking method and specific ingredients used. Please consult with your healthcare provider for specific dietary needs. To gain a better understanding, explore our nutrition disclaimer here

Nutrition

Calories: 469kcalCarbohydrates: 32gProtein: 42gFat: 19gSaturated Fat: 3gPolyunsaturated Fat: 5gMonounsaturated Fat: 8gTrans Fat: 0.04gCholesterol: 111mgSodium: 1191mgPotassium: 909mgFiber: 2gSugar: 5gVitamin A: 1470IUVitamin C: 22mgCalcium: 61mgIron: 3mg

Similar Recipes

orange chicken

Air Fryer Orange Soy Glazed Chicken and Broccoli

roasted chicken and rutabaga

Roasted Lemon Italian Chicken with Rutabaga

rosemary chicken

Rosemary Baked Chicken and Potatoes

You Might Also Like

Frequently Asked Questions

Can I use a different type of protein instead of chicken breast?

Absolutely! While chicken breast is the star of this recipe, you can easily swap it out for other proteins like turkey breast, pork loin, tofu, or even fish fillets. Adjust cooking times accordingly based on the protein you choose.


Can I make this recipe gluten-free?

Yes! You can easily make this recipe gluten-free by using gluten-free breadcrumbs or almond flour instead of traditional flour and panko breadcrumbs. Be sure to check that all seasonings and salad dressing are also gluten-free.


How long will the chicken tenders stay crispy?

While the chicken tenders are best enjoyed fresh, you can help them stay crispy by storing them separately from the salad components. Store the chicken tenders in an airtight container in the refrigerator for up to 3-4 days. Reheat in a toaster oven or oven to maintain crispiness.

Posted on Leave a comment

Low Carb Sheet Pan Sausage and Zucchini Medley

rectangular glass meal prep containers with sliced sausage and diced zucchini, bell peppers, and red onions

If you’re looking for a delicious, low-carb option that’s both convenient and budget-friendly, you’ve come to the right place. Packed with pre-cooked chicken sausage, vibrant veggies, and a medley of savory seasonings, this recipe is a game-changer for busy individuals striving to maintain a healthy lifestyle. With just a few simple steps and minimal prep time, you can have a satisfying meal ready to enjoy in no time. Whether you’re meal prepping for the week ahead or simply craving a quick and healthy lunch, this Sheet Pan Sausage and Zucchini Medley has got you covered.

This post may contain affiliate links. Please see our privacy policy for details.

Calories: 290kcal | Carbohydrates: 17g | Protein: 16g | Fat: 20g | Saturated Fat: 4g | Polyunsaturated Fat: 1g | Monounsaturated Fat: 5g | Cholesterol: 60mg | Sodium: 1174mg | Potassium: 548mg | Fiber: 3g | Sugar: 7g | Vitamin A: 2614IU | Vitamin C: 206mg | Calcium: 33mg | Iron: 2mg

round wooden plate with a healthy lunch of sliced sausage and diced zucchini, bell peppers, and red onions

Why this recipe is great for easy and quick meal prep

  • Quick and Easy: With just a few simple steps, you’ll have a delicious and healthy lunch ready to go in no time. From prep to plate, this recipe takes minimal effort, perfect for those hectic weekdays.
  • Convenient Pre-cooked Sausage: Using pre-cooked sausage is a total lifesaver when it comes to meal prep. It cuts down on cooking time significantly, meaning you can have this healthy lunch on the table in a flash. Plus, it’s super convenient to have on hand for those last-minute meals.
  • Budget-Friendly: Let’s talk savings! By using affordable ingredients like chicken sausage and fresh veggies, you can enjoy a tasty, healthy lunch without spending a fortune.
  • Low-Carb Goodness: Staying on track with your low-carb lifestyle has never been tastier! This medley is packed with nutritious veggies and lean protein, making it the perfect healthy lunch option for those watching their carb intake.

The PrepYoSelf Newsletter

Ingredients You’ll Need

  • Chicken Sausage: Pre-cooked chicken sausage adds a delicious savory flavor, and it also provides a lean source of protein, making this dish both satisfying and nutritious. For a flavor twist, feel free to swap in turkey sausage or even plant-based sausage for a meatless option.
  • Zucchini: Zucchini adds a burst of freshness and color to this dish. It’s low in carbs and calories but high in vitamins and minerals, making it a fantastic choice for those looking to boost their veggie intake. If you’re not a fan of zucchini, you can swap it out for other low-carb veggies like broccoli, cauliflower, or asparagus.
  • White Onion: White onion adds a subtle sweetness and depth of flavor to the medley. It also provides important nutrients like vitamin C and antioxidants. If you prefer a milder onion flavor, you can swap white onion for yellow onion or even shallots.
  • Yellow and Red Bell Pepper: These vibrant bell peppers not only add a pop of color but also a hint of sweetness to the dish. They’re rich in vitamins A and C, as well as antioxidants, making them a nutritious addition to any meal. If you’re not a fan of bell peppers, you can swap them out for cherry tomatoes or sliced mushrooms for a different flavor profile.
  • Paprika, Thyme, Garlic Powder, Salt: These seasonings are the secret to adding depth and flavor to the medley. Paprika adds a smoky richness, thyme brings a subtle earthiness, garlic powder adds a savory kick, and salt helps to enhance all the flavors. Feel free to customize the seasonings to suit your taste preferences or swap them out for your favorite herbs and spices.
  • Olive Oil: Last but not least, olive oil helps to coat the ingredients evenly and adds a touch of richness to the dish. It also provides heart-healthy fats and antioxidants. If you prefer a different oil, you can swap olive oil for avocado oil or melted coconut oil.

round wooden plate with a healthy lunch of sliced sausage and diced zucchini, bell peppers, and red onions

How to Meal Prep Sausage and Veggies

  1. Preheat the oven to 400°F (200°C).
  2. Grab your chicken sausage and give it a good slice into rounds. Now, let’s dice up those veggies – zucchini, white onion, yellow bell pepper, and red bell pepper. Chop chop!
  3. Lay out a sheet pan and place your sausage rounds and diced veggies on it. Spread them out evenly so everyone gets their time to shine.
  4. Time to add some flavor! Sprinkle on the paprika, thyme, garlic powder, and salt. Let’s give this medley a little kick!
  5. Grab that olive oil and give everything a nice, even drizzle. This’ll help bring out all those delicious flavors in the oven.
  6. Pop that sheet pan into the preheated oven and let the magic happen. Bake for around 15-20 minutes, or until your veggies are tender and begging to be devoured.

Reference the recipe card below for detailed instructions.

rectangular glass meal prep containers with a healthy lunch of sliced sausage and diced zucchini, bell peppers, and red onions

Meal Prep Pairing Tips:

  • Grain Options: Serve the medley over a bed of cooked quinoa, brown rice, or cauliflower rice for a wholesome and filling meal. The grains will soak up the flavorful juices from the sausage and veggies, adding an extra layer of deliciousness to each bite.
  • Leafy Greens: Add a side of leafy greens, such as a simple mixed salad or sautéed spinach, to balance out the richness of the sausage and zucchini. A light vinaigrette dressing with lemon or balsamic vinegar can provide a refreshing contrast to the savory flavors of the medley.
  • Creamy Dips: Whip up a creamy dip, such as tzatziki or hummus, to accompany the medley. The cool and tangy flavors of the dip will complement the warmth and spice of the sausage and veggies, creating a well-rounded and satisfying meal.
  • Crusty Bread: Serve the medley alongside a slice of crusty bread or a warm dinner roll to sop up the delicious juices. You can also toast the bread and rub it with garlic for extra flavor. The contrast in textures between the crispy bread and tender medley will make each bite irresistible.
  • Fresh Herbs: Garnish the medley with fresh herbs like parsley, cilantro, or basil to add a pop of color and freshness. The herbs will brighten up the dish and add a fragrant aroma that enhances the overall dining experience.

rectangular glass meal prep containers with a healthy lunch of sliced sausage and diced zucchini, bell peppers, and red onions

round wooden plate with sliced sausage and diced zucchini, bell peppers, and red onions

Low Carb Sheet Pan Sausage and Zucchini Medley

Enjoy a hassle-free, low-carb delight with our Sheet Pan Sausage and Zucchini Medley—bursting with flavor and ready in minutes!
No ratings yet
Course lunch
Cuisine American
Servings 2
Calories 290 kcal

Equipment

  • knife
  • cutting board
  • sheet pan
  • oven or air fryer

Ingredients
  

  • 6 oz chicken sausage (pre-cooked)
  • 1 zucchini (diced)
  • 1/4 cup white onion (diced)
  • 1 yellow bell pepper (diced)
  • 1 red bell pepper (diced)
  • 1/4 teaspoon paprika
  • 1/4 teaspoon thyme
  • 1/4 teaspoon garlic powder
  • 1/4 teaspoon salt
  • 1 tablespoon olive oil

Instructions
 

  • Pre-heat the oven to 400F. Slice the sausage into rounds and dice the veggies into small squares.
  • Place the sausage and veggies on a sheet pan and sprinkle them with the seasonings.
  • Drizzle everything with the olive oil and bake in the oven for 15-20 minutes until the veggies are tender.

Notes

Nutrition information provided is an estimate. It will vary based on cooking method and specific ingredients used. Please consult with your healthcare provider for specific dietary needs. To gain a better understanding, explore our nutrition disclaimer here

Nutrition

Calories: 290kcalCarbohydrates: 17gProtein: 16gFat: 20gSaturated Fat: 4gPolyunsaturated Fat: 1gMonounsaturated Fat: 5gCholesterol: 60mgSodium: 1174mgPotassium: 548mgFiber: 3gSugar: 7gVitamin A: 2614IUVitamin C: 206mgCalcium: 33mgIron: 2mg

Similar Recipes

cilantro chicken

Cilantro Lime Chicken Salad with Strawberry Salsa

sweet and sour chicken wings

Air Fryer Sweet and Sour Chicken Wings

stuffed primavera chicken

Primavera Stuffed Chicken Breasts

You Might Also Like

Frequently Asked Questions

Can I use fresh sausage instead of pre-cooked sausage?

While pre-cooked sausage is recommended for this recipe to save on cooking time, you can certainly use fresh sausage if preferred. Just make sure to cook it thoroughly before adding it to the sheet pan with the veggies.


Can I use different cooking methods instead of baking in the oven?

Absolutely! While baking in the oven is the recommended method for this recipe, you can also cook the medley on the stovetop in a large skillet or on the grill in a grill basket. Just make sure to adjust the cooking time and temperature accordingly.


Can I use frozen vegetables instead of fresh ones?

While fresh vegetables are recommended for the best texture and flavor, you can use frozen vegetables in a pinch. Just be aware that frozen vegetables may release more moisture during cooking, which could affect the overall texture of the dish. If using frozen vegetables, thaw them before adding them to the sheet pan and pat them dry with a paper towel to remove excess moisture.