Posted on Leave a comment

Fall Persimmon Muffins

glass meal prep containers with persimmon muffins

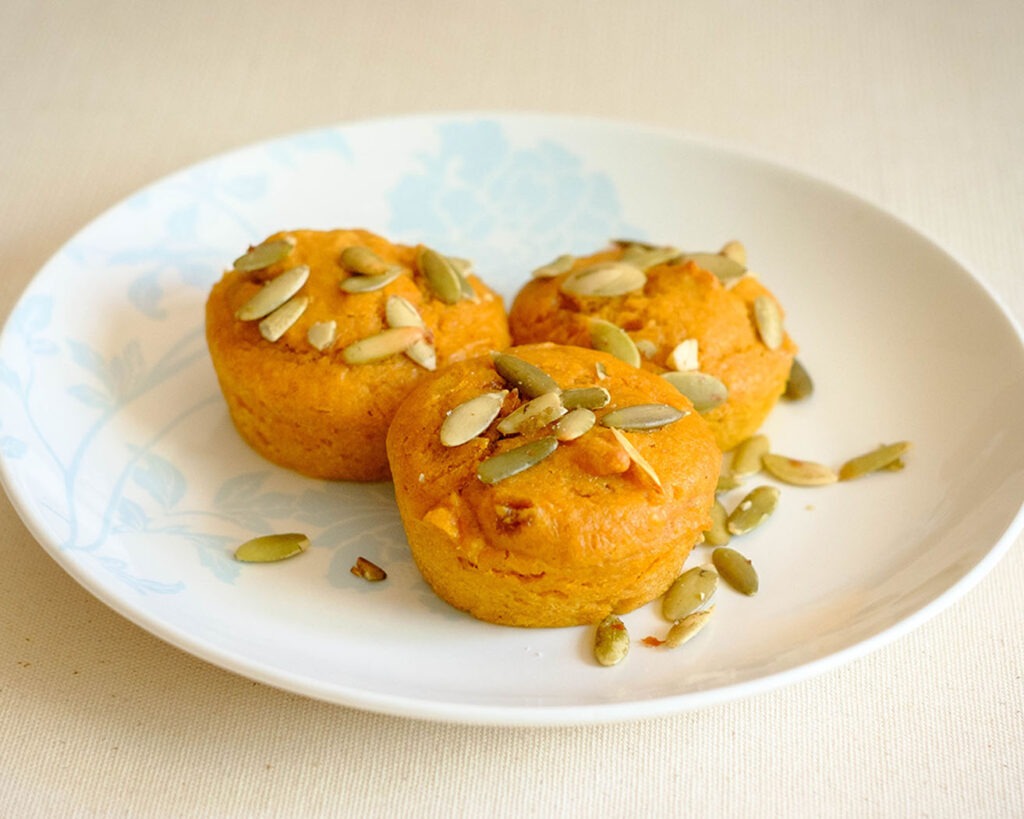
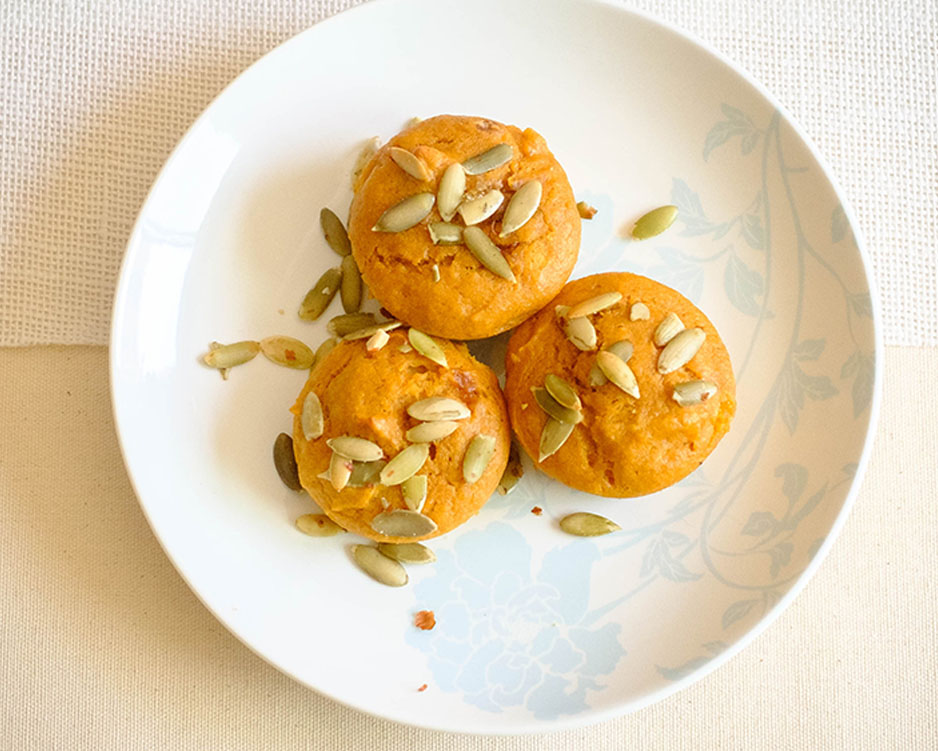
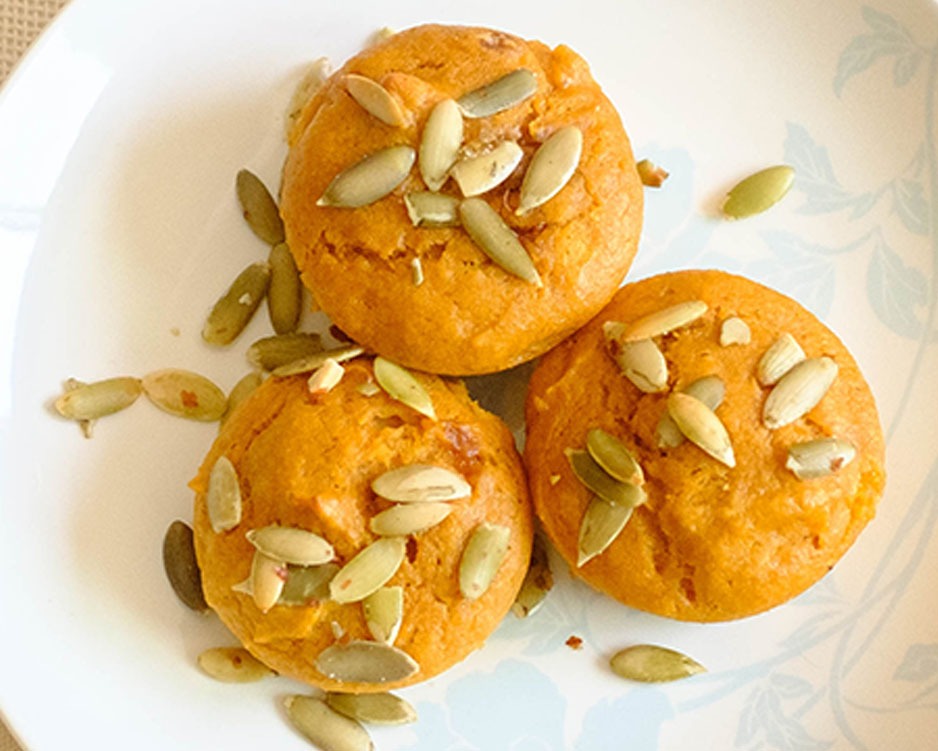
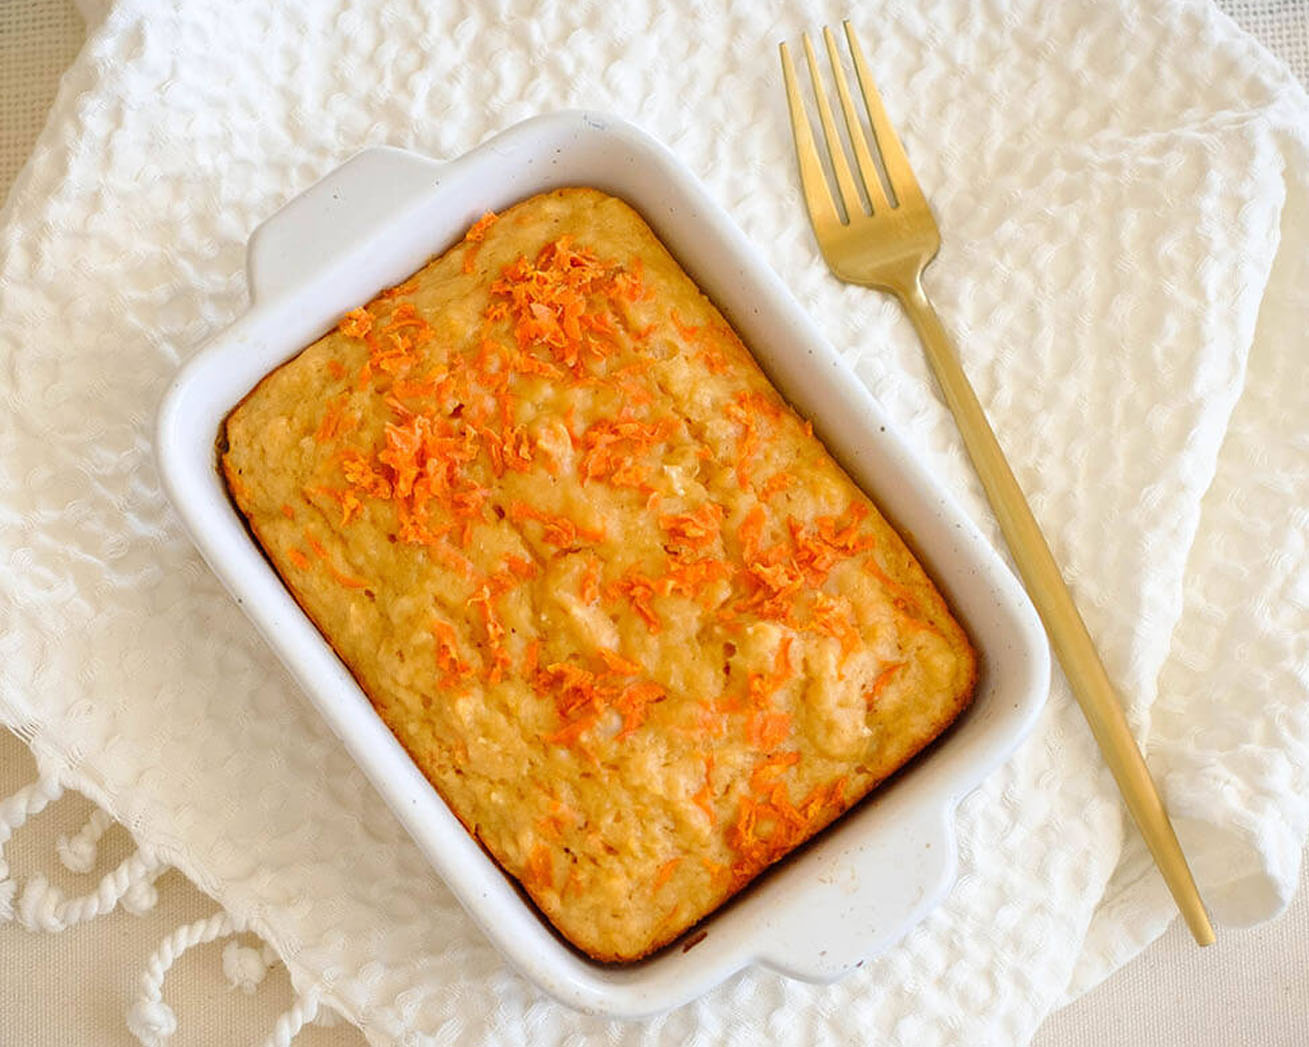
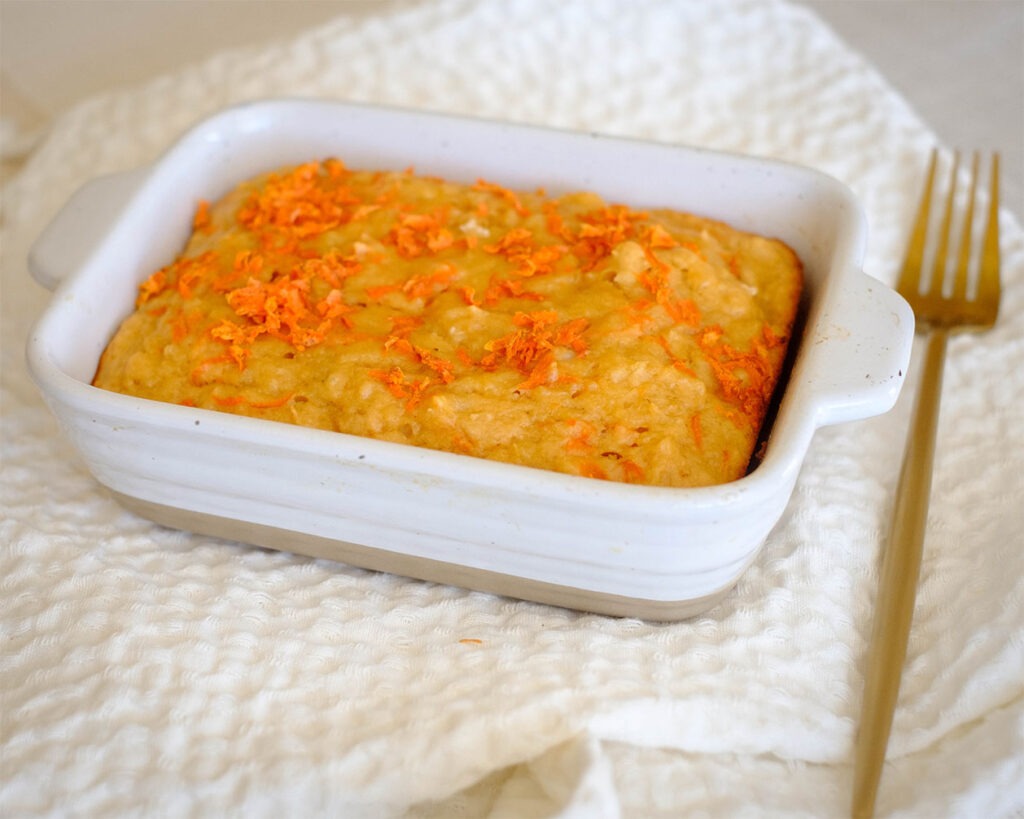
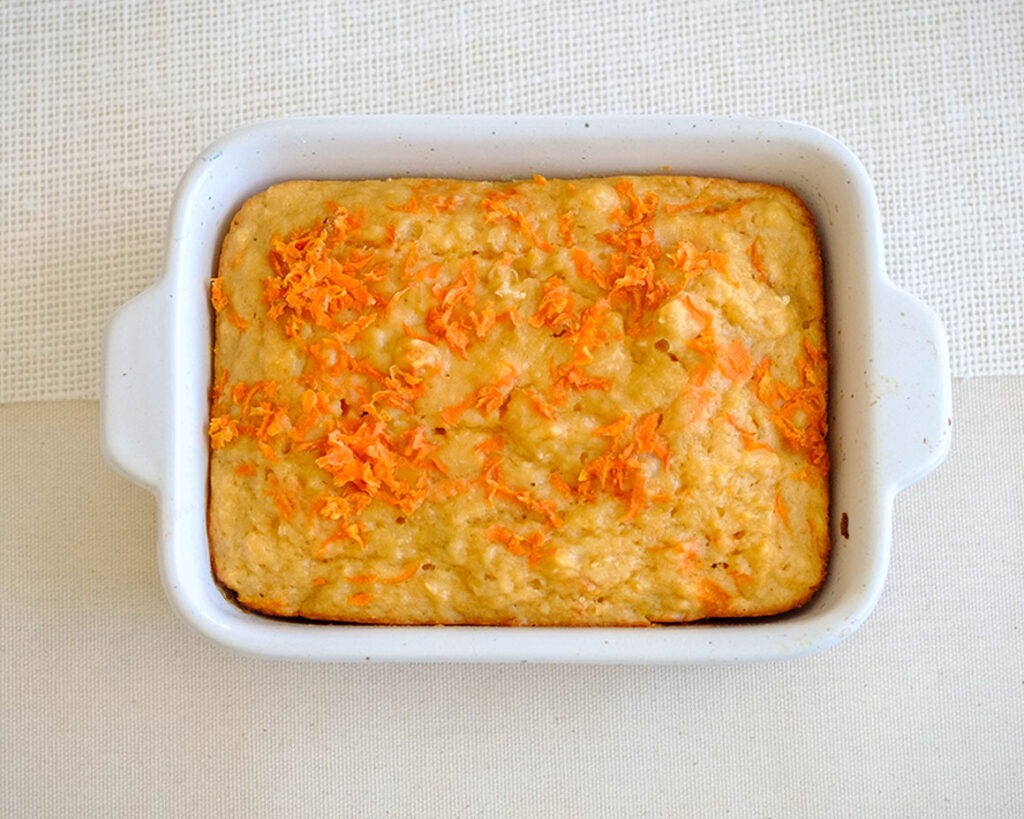
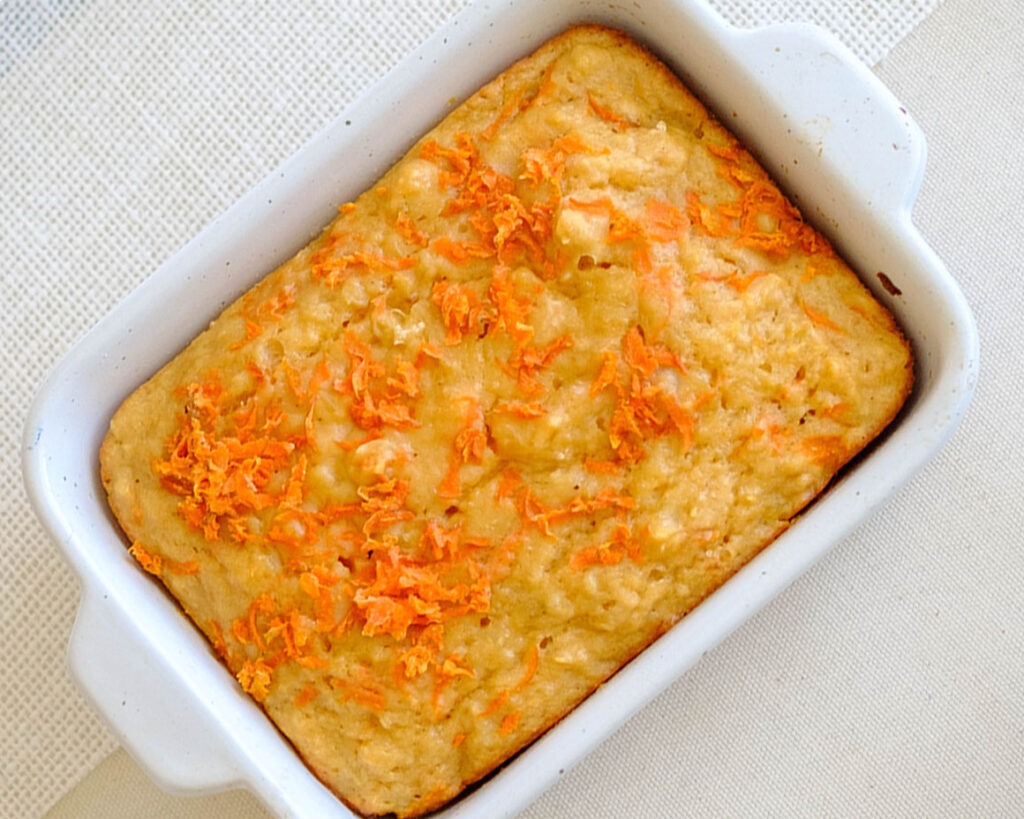
Energize Your Mornings with Healthy Persimmon Almond Muffins! Packed with wholesome goodness, these muffins are a delightful start to your day, combining the exotic flavor of persimmons with the nutty crunch of almonds.  These muffins are not only delicious but also a perfect choice for a healthy breakfast meal prep. They are rich in fiber, vitamins, and minerals, and the almonds add an extra protein boost to kickstart your day.

Plus, they are super easy to prepare, ensuring that your morning routine stays stress-free.  Enjoy these muffins fresh out of the oven or store them for meal prep throughout the week.

This post may contain affiliate links. Please see our privacy policy for details.

round plate with with persimmon muffins

Reasons to Meal Prep Breakfast Persimmon Muffins

  • Balanced Nutrition: These muffins provide a well-balanced mix of macronutrients, including healthy fats from almonds, protein from the egg, and carbohydrates from the flour and fruits. This breakfast meal prep combination helps keep you full and energized throughout the morning, reducing the urge for unhealthy snacking.
  • Fruit-Packed Goodness: Persimmons (or their alternatives, like apples or pears) are rich in vitamins, fiber, and antioxidants. Incorporating fruit into your breakfast helps meet your daily fruit intake requirements and contributes to better overall health.
  • Portion Control: Meal prepping muffins in advance allows you to control portion sizes. Having these muffins readily available ensures you’re not tempted to grab unhealthy, oversized snacks or fast food on a busy morning.
  • Fiber for Satiety: The combination of fruit and whole wheat flour (if used) offers a good amount of dietary fiber. Fiber promotes a feeling of fullness, aids digestion, and helps regulate blood sugar levels, which can be a game-changer for staying focused throughout the day.
  • Convenience and Time Savings: Busy individuals often struggle to find time for a healthy breakfast. Breakfast meal prep in advance will save you time during the morning rush. They’re grab-and-go, making it easier to stick to a nutritious breakfast routine even on the busiest of days.

The PrepYoSelf Newsletter

Ingredients You’ll Need for Persimmon Muffins

  • Persimmons: When shopping for persimmons, look for fruit that’s ripe but not overly soft. They should have a vibrant orange color and be slightly firm to the touch. You can find them in the produce section of your local grocery store or farmers’ market. These orange fruits are a good source of vitamins A and C, fiber, and antioxidants. They add natural sweetness and moisture to the muffins. If you can’t find persimmons, you can swap them out with apples or pears.
  • Egg: Eggs are an excellent source of high-quality protein and various essential nutrients like choline, which is important for brain health. No breakfast meal prep is complete without them.
  • Minced Ginger: Fresh ginger is preferred for its robust flavor. If you don’t have fresh ginger on hand, you can use ground ginger, but reduce the quantity to 1/2 teaspoon for a milder flavor. Ginger is known for its potential anti-inflammatory and digestive benefits. It adds a zesty kick to the muffins.
  • Flour: Choose whole wheat flour or almond flour for added nutrition. Whole wheat flour is higher in fiber, while almond flour is gluten-free and provides healthy fats and protein.
  • Baking Powder and Baking Soda: These leavening agents are essential for the muffins to rise and become light and fluffy.
  • Cinnamon: Opt for ground cinnamon with no added sugars or additives.
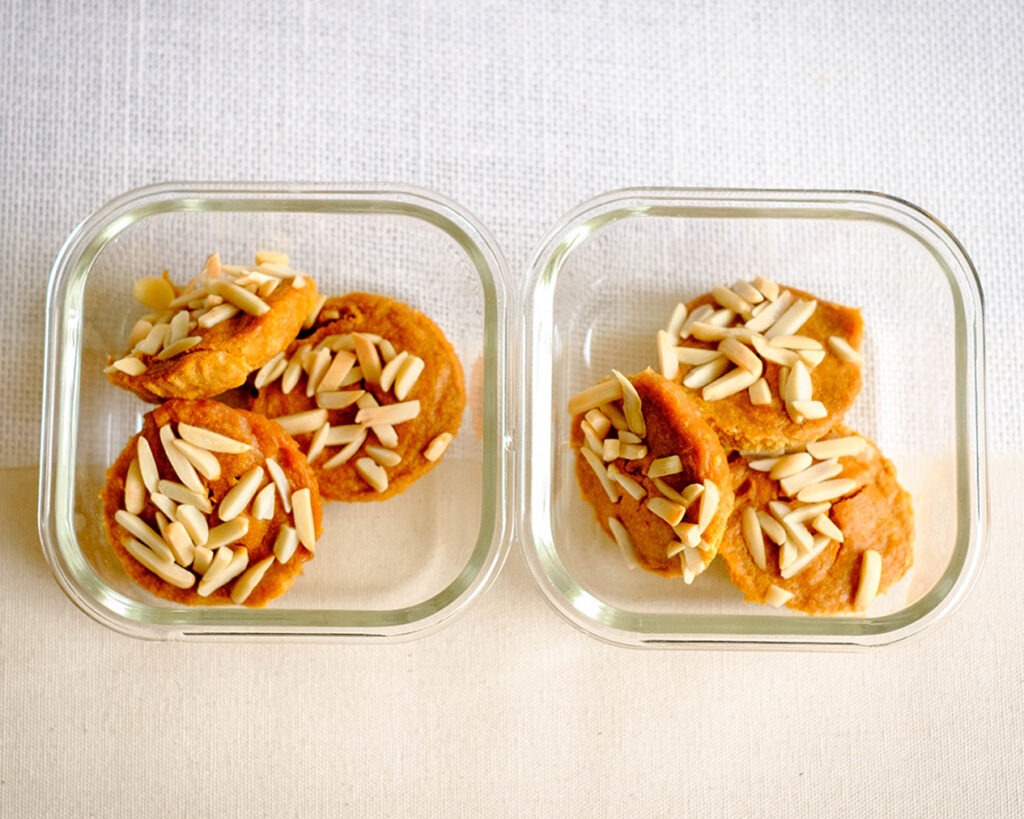
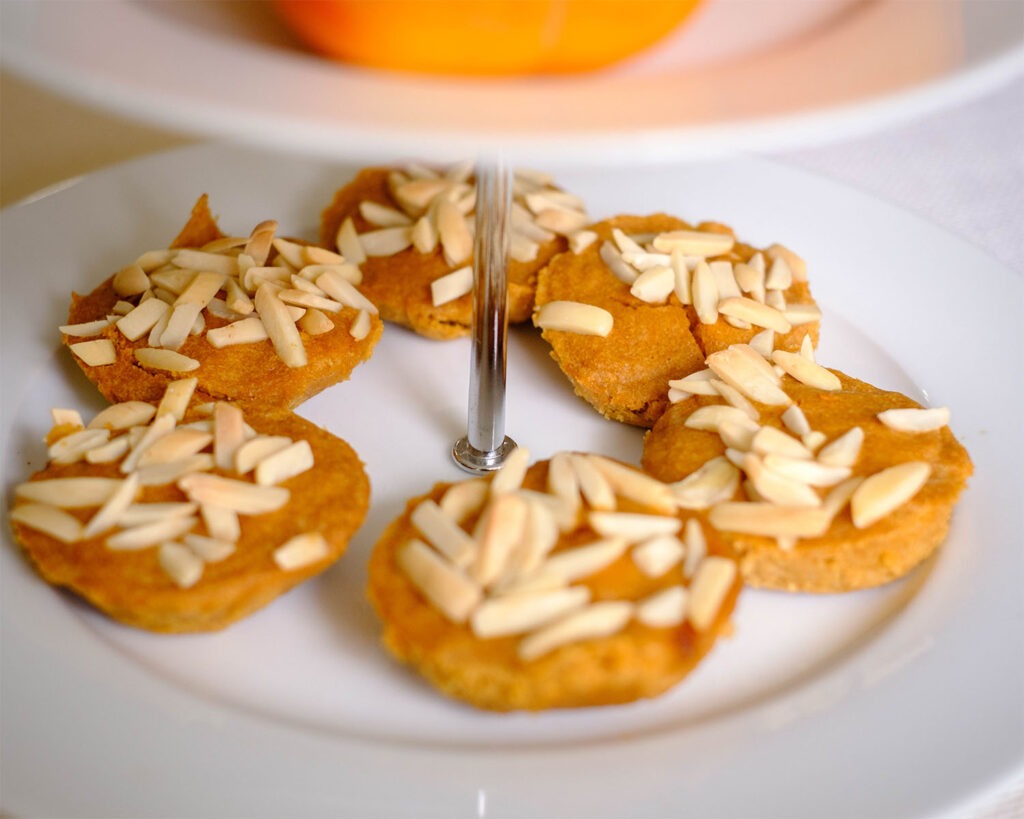
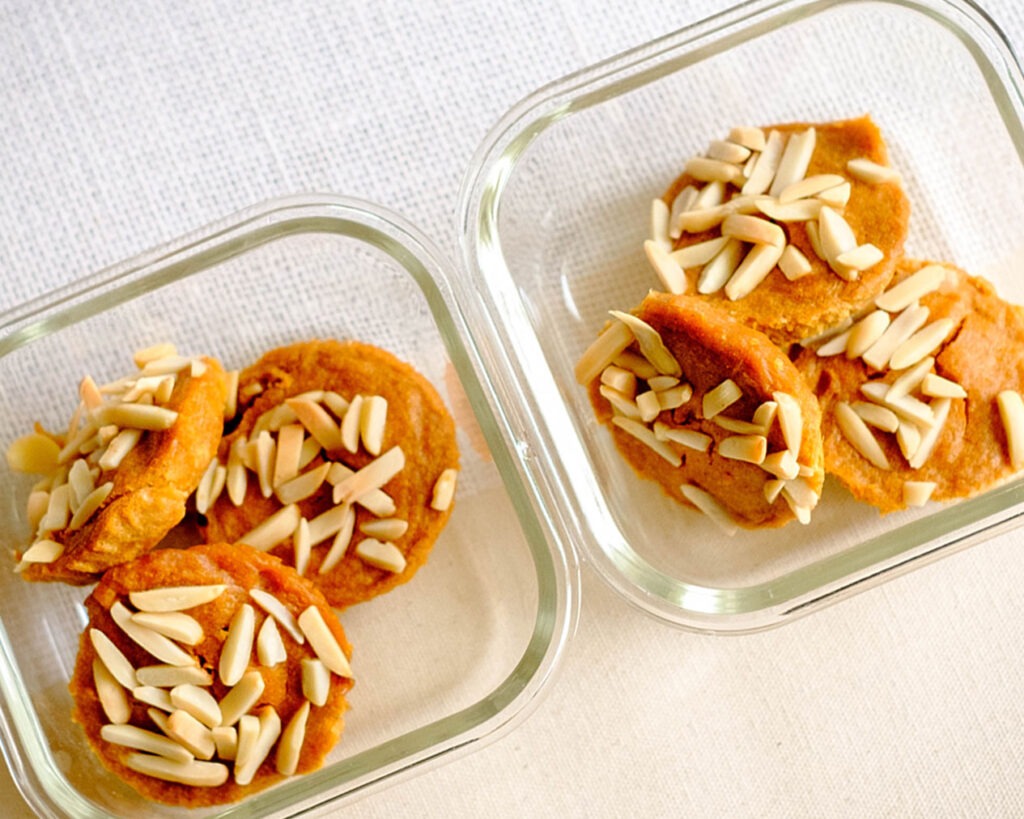
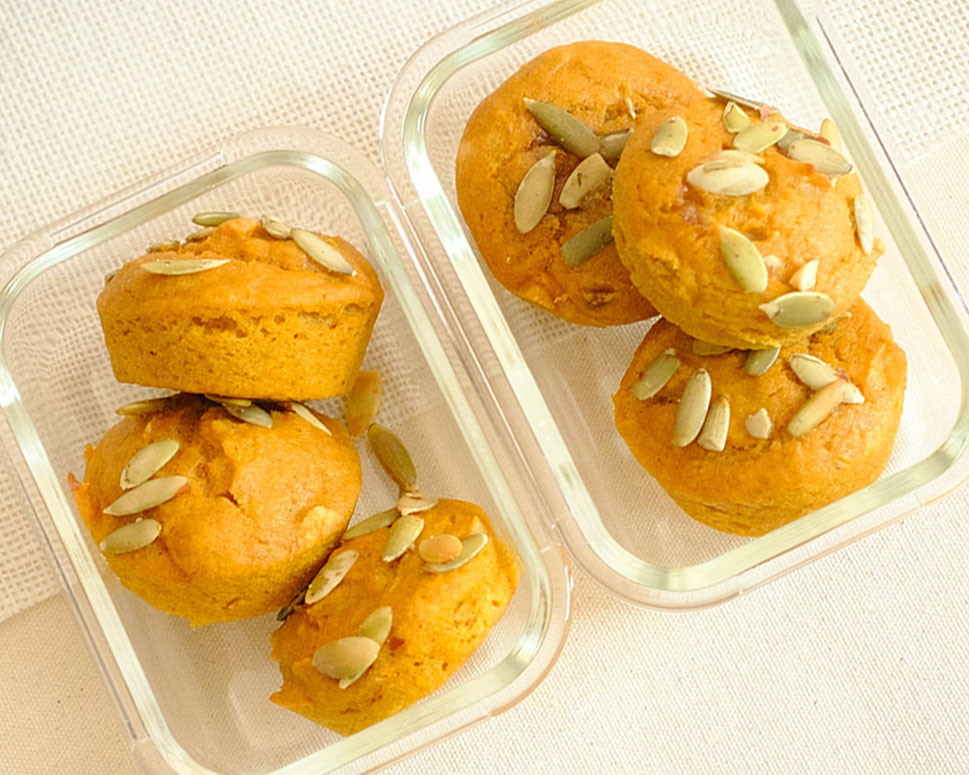
  • Sliced Almonds: Purchase sliced almonds in the bulk section of your grocery store for cost savings. You can also toast them for a richer flavor. Almonds are a great source of healthy fats, protein, fiber, and various vitamins and minerals. They provide a satisfying crunch and extra nutrition to your muffins.
glass breakfast meal prep containers with persimmon muffins

How to Meal Prep Prepare Persimmon Muffins

  1. Preheat the Oven: First things first, preheat your oven to a toasty 350°F (175°C). This ensures your muffins bake to perfection.
  2. Prepare the Persimmons: Remove the top stem of the persimmons and peel off the skin. This will reveal the sweet and succulent flesh within. Now, place these persimmons along with the olive oil into a blender. Blend until you achieve a smooth and velvety puree.
  3. Mix the Wet Ingredients: Pour the persimmon and olive oil blend into a mixing bowl. To this, add the large egg, brown sugar, and a tablespoon of minced ginger. Now, it’s time to grab your trusty whisk and blend all these delicious ingredients together. The ginger adds a delightful, zesty kick, perfect for perking up your taste buds in the morning.
  4. Incorporate the Dry Ingredients: Gradually add the flour, baking powder, baking soda, and cinnamon into the bowl. Continue whisking until the batter is silky smooth, and there are no lumps in sight.
  5. Grease and Prepare Your Muffin Pan: To ensure your muffins don’t stick, grease a muffin pan and give it a light spritz of cooking spray. This step will make your clean-up a breeze.
  6. Scoop the Batter: Using a 1/4 cup scoop, evenly pour the batter into each muffin well. This ensures that your muffins are uniform in size and bake evenly. The aroma of the cinnamon combined with the ginger is sure to make your kitchen smell amazing.
  7. Top with Sliced Almonds: For that extra crunch and a touch of elegance, sprinkle some sliced almonds on top of each muffin. Almonds are a great source of healthy fats, making these muffins a wholesome breakfast choice.
  8. Baking Time: Pop your muffin pan into the preheated oven and bake for 15-20 minutes. Keep an eye on them; they’re ready when they turn a golden brown and a toothpick inserted into the center comes out clean.

Reference the recipe card below for detailed instructions.

round plate with with persimmon muffins

Pairing Tips:

  • Nut Butter: Drizzle some almond or peanut butter over your muffins for an extra layer of richness and protein. Nut butter pairs exceptionally well with the almond flavor in the muffins.
  • Honey or Maple Syrup: A drizzle of honey or maple syrup over the muffins adds natural sweetness and a touch of luxury to your breakfast. It’s a delightful alternative to refined sugars.
  • Green Tea or Coffee: A warm cup of green tea or a morning coffee can be the perfect beverage pairing for your muffins. The slightly bitter and aromatic notes of these beverages complement the sweetness of the muffins.
  • Cottage Cheese: Cottage cheese is a high-protein option that pairs well with the fruitiness of the muffins. It’s a great choice for those seeking a protein-packed breakfast.

Leftover Ingredient Tips:

  • Persimmons: If you have extra persimmons, you can enjoy them as a healthy snack or add them to salads for a burst of sweetness. They can also be blended into smoothies, turned into fruit compote, or used in other baked goods like pies, tarts, or fruit crisps.
  • Minced Ginger: Ginger has numerous uses in the kitchen. You can store the extra minced ginger in an airtight container in the freezer for future recipes. It can be grated or used in stir-fries, soups, sauces, and tea
  • Sliced Almonds: Extra sliced almonds can be sprinkled on top of salads or yogurt for added texture and nutrition. They can also be used in various baked goods, like cookies or granola.

Meal Prep Tips:

  • Storage Tips: If you plan to consume the muffins within 1-2 days, you can store them at room temperature in an airtight container. Make sure they are fully cooled before sealing in the container. Otherwise, store the muffins in the refrigerator.
  • Reheating Tips: reheat muffins from the refrigerator, simply microwave them for 10-15 seconds. This short burst of heat will restore some of the muffin’s softness without making it soggy.
glass breakfast meal prep containers with persimmon muffins
round white plate with persimmon almond muffins.

Persimmon Almond Muffins

No ratings yet
Prep Time 5 minutes
Cook Time 20 minutes
Course Breakfast, Snack
Cuisine American
Servings 2

Equipment

  • blender
  • muffin pan
  • oven

Ingredients
  

  • 2 persimmons
  • 1 large egg
  • 1/4 cup olive oil
  • 1/2 cup brown sugar
  • 1 tbsp minced ginger
  • 3/4 cup flour
  • 1/4 tsp baking powder
  • 1/4 tsp baking soda
  • 1/2 tsp cinnamon
  • 2 tbsp sliced almonds

Instructions
 

  • Pre-heat the oven to 350F
  • Remove the top stem of the persimmon and peel the skin. Place the persimmons and olive oil in a blender and puree until smooth. Pour the blend into a mixing bowl and add the egg, brown sugar, and cinnamon. Use a whisk to blend it all together.
  • Next, add the baking powder, baking soda, and flour. Whisk until the batter is smooth.
  • Grease a muffin pan and spray it with cooking spray. Use a 1/4 cup scoop to evenly pour the batter into each muffin well. Top each muffin with sliced almonds. Bake for 15-20 minutes.

Similar Recipes

baked oatmeal

Oven Baked Oats with Apricots and Berries

ricotta apple

Oven Baked Apple with Ricotta and Walnuts

french toast 2

Oven Baked French Toast Muffins with Strawberries

You Might Also Like

Smartfruit Mellow Mango + Immunity, 100% Real Fruit Purée

Trader Joe’s Unsalted, Dry Toasted Slivered Almonds

Trader Joe’s the Dark Chocolate Lover’s Chocolate Bar

Frequently Asked Questions

Can I use other nuts besides almonds for topping?

Yes, you can use other nuts like walnuts or pecans as a topping for these muffins, or omit them if you have nut allergies. Dried fruit such as cranberries or raisins are also a tasty option.


Can I omit ginger if I don’t have it on hand?

Yes, you can omit the minced ginger if you don’t have it, but it adds a delightful zesty kick to the muffins. You can also use ground ginger as a substitute.


Can I substitute white sugar for brown sugar?

Absolutely, you can use white sugar as a substitute for brown sugar if you prefer. Keep in mind that brown sugar adds a touch of molasses flavor, so the taste may vary slightly.

Posted on Leave a comment

Pumpkin Muffins

glass meal prep containers with pumpkin muffins

Embrace the Cozy Season with Our Easy Fall Breakfast Pumpkin Muffin Meal Prep Recipe. As autumn sweeps in with its golden hues and crisp mornings, there’s no better time to savor the flavors of the season. Our simple yet delicious pumpkin muffins are the perfect fall breakfast treat, offering both convenience and comfort. With easy meal prep at the core of this recipe, you can indulge in the essence of fall without the morning hustle. Dive into the warm embrace of cinnamon and pumpkin, and make your mornings brighter with this delightful and easy breakfast meal prep idea

This post may contain affiliate links. Please see our privacy policy for details.

Calories: 460kcal | Carbohydrates: 70g | Protein: 11g | Fat: 17g | Saturated Fat: 3g | Polyunsaturated Fat: 4g | Monounsaturated Fat: 8g | Trans Fat: 0.02g | Cholesterol: 82mg | Sodium: 154mg | Potassium: 421mg | Fiber: 5g | Sugar: 39g | Vitamin A: 14423IU | Vitamin C: 4mg | Calcium: 147mg | Iron: 5mg

round plate with pumpkin muffins

Why These Muffins Are an Ideal Breakfast Meal Prep Solution

  • Autumn Bliss: These pumpkin muffins are a taste of fall in every bite! Packed with warm cinnamon and rich pumpkin puree, they’re like a cozy sweater for your taste buds during the crisp autumn months.
  • Easy Breakfast Meal Prep: The magic of these muffins lies in their simplicity. With a straightforward recipe and minimal ingredients, it’s a breeze to whip them up in advance and have breakfast sorted for the week. 
  • Nutrient-Rich Fuel: These muffins aren’t just delicious; they’re packed with nutrients! Pumpkin puree offers vitamins A and C, while pumpkin seeds deliver a protein punch and essential minerals. Perfect to keep you energized throughout your busy day.
  • Portability and Convenience: When you’re dashing out the door in the morning, these muffins are your trusty sidekick. Grab one, and you’re all set! No mess, no fuss, just a delicious breakfast on the go.

The PrepYoSelf Newsletter

Simple Ingredients for Meal Prep Pumpkin Muffins

  • Eggs: Look for free-range or organic eggs if possible for a fresh and rich flavor. Ingredient Swap: If you’re vegan or allergic to eggs, you can substitute with a flax or chia egg. Mix 1 tablespoon of ground flaxseeds or chia seeds with 2.5 tablespoons of water and let it sit until it thickens.
  • Pumpkin Puree: Canned pumpkin puree is convenient, but you can also make your own by roasting and pureeing fresh pumpkin. Ingredient Swap: If you want to try something different, sweet potato puree can be a great alternative with a similar texture and taste.
  • Flour: Choose whole wheat flour for added fiber or opt for gluten-free flour if you have dietary restrictions. You can also blend rolled oats. Ingredient Swap: Consider almond flour for a gluten-free and higher protein option, or oat flour for a heartier texture.
  • Brown Sugar: You can use natural sweeteners like coconut sugar or maple syrup for a different flavor profile. Ingredient Swap: If you’re looking to reduce sugar, try using a sugar substitute like stevia or erythritol
  • Cinnamon: Cinnamon is packed with antioxidants and has potential health benefits, such as reducing inflammation. Ingredient Swap: Experiment with other spices like nutmeg or pumpkin pie spice for a unique twist.
  • Pumpkin Seeds: Pumpkin seeds are a great source of protein, healthy fats, and minerals like magnesium. Ingredient Swap: If you’re not a fan of pumpkin seeds, chopped nuts like walnuts or pecans can be a tasty alternative.

glass meal prep containers with pumpkin muffins

How to Prepare Pumpkin Muffins

  1. First things first, set your oven to 400°F (200°C) to get it all nice and toasty.
  2. In a mixing bowl, crack your egg and add in the brown sugar and that creamy pumpkin puree. Now, let’s give it a good whisk until everything becomes beautifully smooth. It’s like a cozy autumn hug in a bowl!
  3. Next, introduce your flour, cinnamon, and baking powder to the party. Stir them in with the wet ingredients until you have a batter that’s smooth and inviting.
  4. Take your olive oil and use it to generously grease your muffin pans. This will make sure your muffins come out effortlessly.
  5. Using a 1/3 cup scoop, evenly distribute that delicious batter into each muffin well.
  6. For that extra touch of fall flair, sprinkle your muffins with those lovely pumpkin seeds. It’s like the cherry on top of a pumpkin pie – delightful!
  7. Pop your muffin pans into the preheated oven and let them bake for about 12-15 minutes. Keep an eye on them; when the center is cooked to perfection and a toothpick comes out clean, they’re ready to shine!

Reference the recipe card below for detailed instructions.

round plate with pumpkin muffins

Pairing Tips:

  • Hot Coffee or Chai Tea: A warm, comforting beverage like coffee or chai tea pairs beautifully with the spiced notes of the muffins. The combination is perfect for a cozy fall morning.
  • Greek Yogurt: Serve your muffins with a side of Greek yogurt. The creamy and tangy yogurt balances the sweetness of the muffins and adds a nice protein boost.
  • Fresh Fruit: A fruit salad or sliced fresh fruit like apples, pears, or berries can add a refreshing contrast to the rich muffins.
  • Savory Complements: For a savory option, serve the muffins alongside scrambled eggs, bacon, or a breakfast sandwich. The sweet and savory contrast can be surprisingly delicious.

Leftover Ingredient Tips:

  • Pumpkin Puree: Don’t let that extra pumpkin puree go to waste. Make a smoothie with yogurt and pumpkin, or add it to your oatmeal. It’s great for soups and stews as well.
  • Flour: Flour has countless uses! It’s essential for baking, but you can also use it to thicken soups, make pancakes, or bread chicken or fish for a crispy coating.
  • Brown Sugar: Leftover brown sugar can sweeten your morning coffee or tea. Use it for baking, or sprinkle some on oatmeal or yogurt for extra flavor.
  • Pumpkin Seeds: Pumpkin seeds are fantastic for snacking. Roast them with your favorite seasonings and enjoy. You can also add them to salads, yogurt, or granola for an extra crunch.

Meal Prep Tips for Pumpkin Muffins:

  • Storage Tips: For longer storage, place them in an airtight container or resealable bags and refrigerate for up to a week. To extend their shelf life further, wrap each muffin individually in plastic wrap and store them in an airtight container or a freezer-safe bag. They can last up to 3 months in the freezer. When ready to enjoy, simply thaw muffins in the refrigerator or on the counter for a few hours. You can also reheat them in the microwave or oven for that fresh-baked taste.
  • Reheating Tips: Place a muffin on a microwave-safe plate. Microwave for 15-20 seconds per muffin. Check the muffin’s center for warmth and adjust the time accordingly. Be cautious not to overheat, as it can make the muffin dry.

glass meal prep containers with pumpkin muffins

pumpkin muffins

Pumpkin Muffins

Enjoy the flavors of fall with these easy-to-prep Pumpkin Muffins, a delightful grab-and-go breakfast or snack option.
No ratings yet
Prep Time 5 minutes
Cook Time 15 minutes
Course Breakfast, Snack
Cuisine American
Servings 2
Calories 460 kcal

Equipment

  • bowl
  • whisk
  • muffin pan
  • oven

Ingredients
  

  • 1 each large egg
  • 3/4 cup pumpkin puree
  • 1/2 cup flour
  • 1/3 cup brown sugar
  • 1 tsp cinnamon
  • 1/2 tsp baking powder
  • 1 oz pumpkin seeds
  • 1 tbsp olive oil

Instructions
 

  • Pre-heat the oven to 400F
  • In a bowl, mix together the egg, brown sugar, and pumpkin puree until smooth
  • Next, add the flour, cinnamon, baking powder, and mix until you achieve a smooth batter
  • Grease the muffin pans with olive oil. Use a 1/3 cup scoop to pour the better into each muffin well
  • Evenly top each muffin with pumpkin seeds
  • Bake in the oven for 12-15 minutes until the center is cooked

Notes

Note: 3 muffins per serving
Nutrition information provided is an estimate. It will vary based on cooking method and specific ingredients used. Please consult with your healthcare provider for specific dietary needs. To gain a better understanding, explore our nutrition disclaimer here

Nutrition

Calories: 460kcalCarbohydrates: 70gProtein: 11gFat: 17gSaturated Fat: 3gPolyunsaturated Fat: 4gMonounsaturated Fat: 8gTrans Fat: 0.02gCholesterol: 82mgSodium: 154mgPotassium: 421mgFiber: 5gSugar: 39gVitamin A: 14423IUVitamin C: 4mgCalcium: 147mgIron: 5mg

Similar Recipes

baked oatmeal

Oven Baked Oats with Apricots and Berries

ricotta apple

Oven Baked Apple with Ricotta and Walnuts

french toast 2

Oven Baked French Toast Muffins with Strawberries

You Might Also Like

Smartfruit Mellow Mango + Immunity, 100% Real Fruit Purée

Trader Joe’s Unsalted, Dry Toasted Slivered Almonds

Trader Joe’s the Dark Chocolate Lover’s Chocolate Bar

Frequently Asked Questions

Can I use fresh pumpkin instead of canned pumpkin puree?

Absolutely! Roast and puree fresh pumpkin for a homemade touch.


Can I add nuts or other mix-ins to the batter?

Of course! Chopped nuts, chocolate chips, or dried fruit can be delightful additions.


Can I make these muffins gluten-free?

Yes, simply use gluten-free flour in place of regular flour.

Posted on Leave a comment

Breakfast Avocado Egg Sandwich

round plate with avocado and egg sandwich

Are you tired of rushed mornings, grabbing unhealthy breakfast options on the go? Well, worry no more, because today, we’re diving headfirst into the world of meal prepping an Avocado Egg Breakfast Sandwich that’s as easy and convenient as it is delicious. Get ready to transform your breakfast routine with this scrumptious and nutritious meal prep idea.

This post may contain affiliate links. Please see our privacy policy for details.

round plate with avocado and egg sandwich

Why Meal Prep an Avocado Egg Breakfast Sandwich?

The hustle and bustle of daily life can leave us with little time to prepare a nutritious breakfast. But with Avocado Egg Breakfast Sandwich meal prep, you can reclaim those precious minutes in the morning. Spend just a little time on the weekend, and you’ll have breakfast ready to go all week long!

Convenience is the name of the game here. Imagine the joy of opening your fridge to find a perfectly assembled breakfast sandwich waiting for you. No more groggy mornings spent cracking eggs and slicing avocados – it’s all done in advance.

Avocado is full of healthy fats and essential nutrients like potassium and fiber. Pair it with eggs, and you’ve got a protein-packed meal that’ll keep you feeling satisfied and energized throughout the morning. Plus, this combo is a great source of antioxidants and vitamins.

Meal prepping an Avocado Egg Breakfast Sandwich doesn’t mean monotony. You can customize each sandwich to suit your taste. Add a sprinkle of cheese, a dash of hot sauce, or some fresh herbs for an extra kick of flavor.

The PrepYoSelf Newsletter

Here are the Ingredients You’ll Need:

  • Sliced Bread or Whole-Grain English Muffins: Your choice of bread can truly elevate your sandwich. Whole-grain options are excellent for providing complex carbohydrates, fiber, and essential nutrients. They offer a hearty and nutty flavor that pairs wonderfully with creamy avocado and eggs. Sliced bread can be soft, while English muffins have a delightful combination of a crisp exterior and a tender interior. Consider your texture preference when selecting your base. Don’t hesitate to explore various types of bread, such as sourdough, multigrain, or even gluten-free options, to cater to your dietary needs and flavor preferences.
  • Avocado: Avocado is like nature’s butter. It brings a luscious, creamy texture that’s perfect for spreading on your bread. Avocado is renowned for its heart-healthy monounsaturated fats, which can help reduce bad cholesterol levels. They’re also calorie-dense, making you feel fuller for longer. Beyond the good fats, avocados are packed with nutrients. They contain potassium, which is essential for maintaining proper blood pressure, and they’re a great source of fiber, which aids digestion.
  • Egg: Eggs are renowned for their high-quality protein content. They are considered the gold standard for protein, containing all the essential amino acids your body needs. Eggs are more than just protein. They’re a great source of vitamins like B12, riboflavin (B2), and pantothenic acid (B5), which play crucial roles in energy metabolism. Eggs can be prepared in various ways, from scrambled to fried to poached. They cook up fast, making them an ideal ingredient for a speedy breakfast. Eggs are budget-friendly and readily available, making them an accessible source of nutrition.

glass meal prep container with avocado and egg sandwich

How to Meal Prep Your Avocado Egg Breakfast Sandwich:

  1. Begin by adding a small amount of oil to a pan and heating it over medium heat. Once the pan is hot, crack two eggs into it. Make sure to crack them gently to avoid breaking the yolks. Let the eggs cook for about 2 minutes until the egg whites are firm enough to flip over with a spatula. If you prefer your yolks runny, cook them for a shorter time. Flip the eggs carefully and cook for another minute or until the yolks reach your desired level of doneness. Once the eggs are cooked to your liking, remove them from the pan and set them aside.
  2. Cut the ripe avocado in half lengthwise and remove the seed. Be cautious when removing the seed, as it can be slippery. Use a spoon to scoop out the avocado flesh and place it in a bowl. Add a pinch of salt and pepper, then mash the avocado with a fork until it reaches a creamy consistency.
  3. Take your choice of bread or English muffins and spread the mashed avocado evenly on the insides of each slice.
  4. Place one cooked egg in between two slices of bread or on one half of the English muffin.
  5. Return the assembled sandwiches to the pan, which should still have a bit of oil from cooking the eggs. Toast the sandwiches for about a minute on each side, or until the bread is golden brown and crispy.

Reference the recipe card below for detailed instructions.

Meal Prep Tips:

  • Batch Cooking Eggs: To save time during the week, consider batch-cooking eggs in advance. Cook a dozen or more eggs, store them in the refrigerator, and reheat them briefly in the microwave when you’re ready to assemble your sandwiches.
  • Prep Ingredients Separately: To keep your sandwiches fresher, store the avocado spread, cooked eggs, and bread slices separately. Assemble the sandwiches just before you’re ready to eat. This helps prevent the bread from becoming soggy.
  • Use Silicone Muffin Pans: For perfectly round egg patties, consider using silicone muffin pans. Crack an egg into each cup and bake them in the oven until set. These egg patties can be easily placed in your sandwiches during the meal prep process.

Ingredient Swaps:

  • Bread or Bread Alternatives: Instead of traditional sliced bread or English muffins, you can use whole-grain wraps, tortillas, or even lettuce leaves for a low-carb option.
  • Egg Preparations: Change up the egg preparation by poaching, boiling, or making a fluffy omelette. Each method will bring a distinct texture and taste to your sandwich.
  • Toppings and Fillings: Get creative with toppings and fillings. Add sliced tomatoes, crispy bacon, sautéed mushrooms, or a sprinkle of feta cheese for extra flavor and variety.
  • Spices and Herbs: Elevate the flavor profile by incorporating spices like paprika, cayenne pepper, or herbs like cilantro, basil, or chives.

glass meal prep container with avocado and egg sandwich

avocado and egg sandwich

Avocado Egg Sandwich

Create a quick and nutritious Avocado Egg Sandwich by mashing ripe avocados, cooking perfectly seasoned eggs, and toasting your choice of bread until golden brown, perfect for a convenient and satisfying breakfast.
No ratings yet
Prep Time 5 minutes
Cook Time 10 minutes
Course Breakfast
Cuisine American
Servings 2

Equipment

  • knife
  • cutting board
  • saute pan
  • spatula

Ingredients
  

  • 4 slices bread
  • 2 each large eggs
  • 1 each avocado
  • 1 tbsp olive oil

Instructions
 

  • Add oil to a pan on medium heat and crack two eggs into the pan
  • Let the eggs cook for about 2 minutes until the egg whites are firm enough to flip over with a spatula. Cook the eggs for another minute. Then remove the eggs from the pan
  • Cut open the avocado and remove the seed. Use a spoon to scoop out the avocado and spread it evenly on the insides of the bread slices.
  • Place an egg in between two slices of bread and place the sandwiches back into the pan
  • Toast the sandwiches for about a minute on each side until the bread is golden brown

Similar Recipes

fried egg and sausage hash

Fried Egg with Apple and Sausage Hash

egg stuffed bell peppers

Oven Baked Breakfast Egg Stuffed Peppers

easy sausage egg muffins

Sausage Egg Muffins with Strawberries

You Might Also Like

Evolution Fresh Organic Pure 100% Cold-Pressed Orange Juice

Setton Farms Dry Roasted and Salted Pistachios

Filippo Berio Pesto, Classic Basil

Frequently Asked Questions

Can I use pre-made guacamole instead of mashing avocados?

Certainly! Using pre-made guacamole is a time-saving option. Just spread it on your bread or English muffin as you would with mashed avocados.


Can I substitute the avocado spread with something else? 

If you’re not a fan of avocado or looking for a different spread, you can use hummus, Greek yogurt, or even cream cheese as an alternative.


Are there variations for the type of cheese to use in the sandwich?

Yes, you can use your favorite cheese. Cheddar, Swiss, pepper jack, or goat cheese are all excellent options for adding a cheesy twist to your sandwich.

Posted on Leave a comment

Baked Sweet Potato Egg Frittata

round plate with baked eggs and sweet potato

This oven-baked sweet potato egg frittata is a hearty dish that boasts a delightful combination of velvety eggs, the wholesome goodness of sweet potatoes, and the fresh pop of green onions. Whether you’re a meal prep enthusiast looking for a weekly staple or a busy individual in need of quick, satisfying meals, this frittata has got you covered.

This post may contain affiliate links. Please see our privacy policy for details.

round plate with baked egg frittata and sweet potato

The PrepYoSelf Newsletter

Here’s why you need to make this:

When you’re in the midst of a hectic week, the last thing you want to do is spend hours in the kitchen every day. This egg frittata allows you to prepare a substantial portion of your meals in one go. With just one batch, you’ll have several portions ready to enjoy throughout the week.

Sweet potatoes and eggs are nutritional powerhouses. Sweet potatoes provide vitamins, minerals, and fiber, while eggs offer high-quality protein and essential nutrients. By meal prepping this frittata, you ensure you’re consistently fueling your body with these healthful ingredients.

Meal prepping with ingredients like eggs and sweet potatoes is incredibly budget-friendly. These staples are readily available and cost-effective, making it easier on your wallet while still providing a nutritious and delicious meal option.

Simple Ingredients for Sweet Potato Egg Frittata

  • Large Eggs: Eggs are a fantastic source of protein and nutrients like vitamin B12 and choline. They add a creamy texture and hold everything together in our frittata.
  • Small Sweet Potato: Sweet potatoes are not only delicious but also packed with vitamins, minerals, and fiber. They provide natural sweetness and a hearty base for our frittata.
  • Green Onions: These little green wonders add a burst of freshness and a mild oniony kick. They’re rich in vitamins A and K, and they make our frittata look oh-so-pretty.
  • Olive Oil: A touch of heart-healthy olive oil not only prevents sticking but also imparts a delightful flavor to our dish. It’s the secret ingredient that ties everything together.

round plate with baked egg frittata and sweet potato

How to Make Breakfast Sweet Potato Egg Frittata

  1. First things first, pre-heat your oven to a toasty 400°F (200°C). We want it nice and hot for our frittata.
  2. Grab that small sweet potato and give it a good peel. Then, slice it into thin rounds, about 1/4 inch thick. These sweet potato slices will serve as the foundation of our frittata.
  3. In a mixing bowl, crack in those large eggs, and give them a good whisk. Add a pinch of salt to taste, and mix it all together. The salt enhances the flavors and makes our frittata sing.
  4. Take a baking dish and generously grease it with a drizzle of olive oil. This not only prevents sticking but also adds that extra layer of flavor.
  5. Now, arrange those sweet potato slices in the baking dish. Pour the whisked eggs over them, ensuring they’re all cozy and covered. Sprinkle our fresh, chopped green onions on top for that extra zing.
  6. Pop the dish into your pre-heated oven and let it bake for around 10-15 minutes, or until the eggs are firm and set. You’ll know it’s ready when the edges turn a lovely golden brown.

Reference the recipe card below for detailed instructions.

glass meal prep containers with baked egg frittata and sweet potato

Meal Prep Tips for Egg Frittata:

  • Storage: Once your frittata has cooled, slice it into individual portions. Store them in airtight containers in the fridge for up to four days.
  • Reheating: Reheat your slices in the microwave for a quick meal on the go, or pop them back in the oven for a few minutes to maintain that delightful crispiness.
  • Ingredient Swaps: Get creative with your frittata by swapping in different veggies, cheeses, or even adding cooked bacon or sausage for extra protein and flavor.
  • Leftovers: Frittata slices make fantastic breakfast sandwiches or can be diced and added to salads or grain bowls for a quick, protein-packed meal.

glass meal prep containers with baked egg frittata and sweet potato

sweet potato frittata
Print Recipe
No ratings yet

Sweet Potato Egg Frittata

Oven-Baked Sweet Potato Egg Frittata: A wholesome and budget-friendly meal prep option featuring eggs, sweet potatoes, and green onions, all baked to perfection for a satisfying and nutritious delight.
Prep Time5 minutes
Cook Time15 minutes
Course: Breakfast
Cuisine: American
Keyword: breakfast ideas
Servings: 2

Equipment

  • knife
  • cutting board
  • baking dish
  • oven

Ingredients

  • 4 each large eggs
  • 1 each small sweet potato
  • 1 tbsp green onions (chopped)
  • 1 tbsp olive oil
  • 1/4 tsp salt

Instructions

  • Pre-heat the oven to 400F
  • Peel and slice the sweet potato into 1/4 inch rounds
  • Whisk the eggs in a bowl and add salt
  • Grease a baking dish with olive oil
  • Place the sweet potato slices in the baking dish and pour the whisked eggs over the sweet potato slices. Garnish the top with the chopped green onions.
  • Bake in the oven for 10-15 minutes until the eggs firmly set

Similar Recipes

fried egg and sausage hash

Fried Egg with Apple and Sausage Hash

Easy Cheese Omelette

easy sausage egg muffins

Sausage Egg Muffins with Strawberries

You Might Also Like

Frequently Asked Questions

Can I use other vegetables in this frittata?

Absolutely! Feel free to get creative and add your favorite veggies, like bell peppers, spinach, or mushrooms, to customize the frittata to your liking.


Can I use other types of potatoes instead of sweet potatoes?

While sweet potatoes are recommended for their natural sweetness and nutrition, you can use regular potatoes or even Yukon Gold potatoes if you prefer a different flavor and texture.


Are there any variations to add extra flavor?

Absolutely! Try adding your favorite herbs, spices, or cheese for extra flavor. Crumbled feta, cheddar, or parmesan cheese work beautifully.

Posted on Leave a comment

Breakfast Savory Bread Pudding

round plate with bread pudding with bell peppers

 Savory Bread Pudding is a delightful dish that’s not only incredibly tasty but also budget-friendly and perfect for your meal prep routine. With just a handful of simple ingredients, a bit of culinary flair, and a dash of enthusiasm, you’ll be on your way to a week’s worth of delicious, home-cooked meals.

This post may contain affiliate links. Please see our privacy policy for details.

rectangle baking dish with bread pudding with bell peppers

Why Choose Savory Bread Pudding?

  • Before we dive into the recipe, let’s talk about why Savory Bread Pudding deserves a spot in your meal prep repertoire. First and foremost, it’s delicious. This savory twist on a classic comfort food is packed with flavor and can be customized to suit your taste buds.
  • Second, it’s budget-friendly! Savory Bread Pudding is a great way to use up stale bread and make the most of your pantry staples. Plus, it’s an excellent canvas for incorporating veggies that might be on the brink of going bad. In this recipe, we’ll be featuring red bell peppers and red onions, but feel free to get creative with whatever veggies you have on hand.
  • Finally, convenience is key. Once you’ve mastered this recipe, you’ll have a filling, ready-made meal that you can portion out for the week ahead. Let’s get started!

The PrepYoSelf Newsletter

Simple Ingredients for Savory Bread Pudding

  • Eggs: These little protein powerhouses not only bind our dish together but also provide that delightful custardy texture.
  • Heavy Cream: Cream adds richness and a velvety mouthfeel to our savory bread pudding.
  • Bread: A hearty loaf of day-old bread is perfect for this recipe. Slice it into one-inch cubes, and watch it transform into a golden delight.
  • Red Bell Pepper: A vibrant and sweet addition that adds color and flavor.
  • Red Onions: These add a delightful punch of flavor and a hint of sweetness.
  • Chili Powder: For a bit of heat and depth.
  • Paprika: Adds smokiness and a beautiful red hue.

rectangle baking dish with bread pudding with bell peppers

How to Prepare Savory Breakfast Pudding:

  1. First things first, pre-heat your oven to a toasty 400°F (200°C). This will ensure that your savory bread pudding cooks evenly and achieves that irresistible golden top.
  2. Dice the vibrant red bell pepper and red onions. Slice your bread into one-inch cubes. The combination of these fresh veggies and crusty bread is the heart of our savory bread pudding.
  3. In a mixing bowl, whisk together the heavy cream, eggs, chili powder, paprika, and a pinch of salt. This luxurious concoction is what will give our dish its creamy, flavorful interior.
  4. Place your cubed bread and diced veggies in a deep baking dish. Pour the heavenly cream and egg mixture over them, ensuring that every nook and cranny is soaked. Let it sit for a few minutes to let those flavors meld.
  5. Pop your baking dish into the preheated oven and bake for 12 to 15 minutes, or until the top is gloriously golden brown and the pudding is set. The aroma will fill your kitchen, and you’ll know it’s ready when the edges are slightly crispy.

Reference the recipe card below for detailed instructions.

round plate with bread pudding with bell peppers

Meal Prep Tips for Savory Bread Pudding:

  • Storage: Allow your savory bread pudding to cool before dividing it into individual portions. Store them in airtight containers in the refrigerator for up to 4-5 days.
  • Reheating: Reheat in the microwave or oven for a few minutes until warmed through. Add a fresh sprinkle of herbs or grated cheese for that extra oomph!
  • Ingredient Swaps: Get creative with your ingredients! Swap out the red bell pepper and red onions for other veggies like spinach, mushroom

glass meal prep containers with bread pudding with bell peppers

savory bread pudding

Savory Bread Pudding

Savory Bread Pudding: Budget-friendly meal prep with eggs, veggies, and cream. Delightful, convenient, and versatile dish.
4 from 1 vote
Prep Time 5 minutes
Cook Time 15 minutes
Course Breakfast
Cuisine American
Servings 2

Equipment

  • knife
  • cutting board
  • baking dish
  • oven

Ingredients
  

  • 2 each large eggs
  • 1/2 cup heavy cream
  • 4 slices bread (toasted)
  • 1/2 cup red bell pepper (diced)
  • 1/4 cup red onions (diced)
  • 1/4 tsp chili powder
  • 1/4 tsp paprika
  • 1/4 tsp salt
  • 1 tsp olive oil

Instructions
 

  • Pre-heat the oven to 400F
  • Dice the veggies and slice the bread into one inch cubes
  • In a mixing bowl, whisk together the heavy cream, eggs, chili powder, paprika, and salt
  • Then, place the cubed bread and diced veggies in a deep baking dish. Pour the heavy cream and egg mixture over the bread, making sure it is soaked
  • Bake in the oven for 12 to 15 minutes until the top is golden brown

Similar Recipes

baked oatmeal

Oven Baked Oats with Apricots and Berries

ricotta apple

Oven Baked Apple with Ricotta and Walnuts

french toast 2

Oven Baked French Toast Muffins with Strawberries

You Might Also Like

Smartfruit Mellow Mango + Immunity, 100% Real Fruit Purée

Trader Joe’s Unsalted, Dry Toasted Slivered Almonds

Trader Joe’s the Dark Chocolate Lover’s Chocolate Bar

Frequently Asked Questions

Can I use any type of bread for this recipe?

Absolutely! While a hearty, day-old bread works best, you can experiment with different types like French bread, ciabatta, or whole-grain for varied textures and flavors.


How can I add extra protein to this dish?

If you want to boost the protein content, consider adding cooked bacon, crumbled sausage, or even diced cooked chicken to the mixture before baking.


What are some recommended garnishes or toppings?

Get creative with garnishes! Fresh herbs like parsley or chives add a burst of freshness. Grated Parmesan or cheddar cheese can also be sprinkled on top before baking for a cheesy finish.

Posted on Leave a comment

Peanut Butter and Apple Quesadillas

round plate with peanut butter quesadillas and sliced green apples

Whip up a quick and nutritious delight with our Peanut Butter and Apple Quesadilla! Tangy green apples, creamy peanut butter, crunchy chopped pecans,and a sprinkle of cinnamon powder are folded into tortillas, creating a satisfying breakfast that’s perfect for meal prep. Whether you’re diving into a busy workday or need a nutritious breakfast on the go, this recipe has got you covered. Try it out, and let the nutty, apple-infused goodness put a smile on your face every morning! 

This post may contain affiliate links. Please see our privacy policy for details.

Calories: 448kcal | Carbohydrates: 35g | Protein: 9g | Fat: 34g | Saturated Fat: 5g | Polyunsaturated Fat: 8g | Monounsaturated Fat: 19g | Sodium: 153mg | Potassium: 432mg | Fiber: 8g | Sugar: 23g | Vitamin A: 107IU | Vitamin C: 9mg | Calcium: 42mg | Iron: 1mg

round plate with peanut butter quesadillas and sliced green apples

Why you’ll love these peanut butter quesadillas

Let me break down the 5 reasons why the Peanut Butter and Apple Quesadilla is the perfect meal prep recipe for busy folks who want to stay on track with their health, time, and budget:

  • Instead of throwing away stale bread, In the hustle and bustle of daily life, time is of the essence. This recipe requires minimal prep work – slicing apples, spreading peanut butter, and assembling the quesadillas take just minutes. The cooking process is quick too, with only a few minutes per side. So, even on the most hectic mornings, you can have a wholesome breakfast ready in a flash. can use it up in this recipe
  • Managing a healthy weight is all about making nutritious choices. The Peanut Butter and Apple Quesadilla is a powerhouse of nutrients. Green apples provide fiber and vitamins, while peanut butter offers a dose of protein and healthy fats that can keep you satiated and prevent overeating later in the day. The chopped pecans add crunch and a dose of heart-healthy fats.
  • Grocery budgets matter, and this recipe shines in that department too. The ingredients are simple and cost-effective – tortillas, apples, peanut butter, pecans, olive oil, and cinnamon powder are all readily available and reasonably priced. By using budget-friendly staples, you can whip up a batch of these quesadillas without breaking the bank.
  • The Peanut Butter and Apple Quesadilla is incredibly versatile. Swap out the apples for whatever fruit you have on hand, experiment with different nut butters, or use alternative nuts and seeds. This flexibility ensures that you can make the most of what you already have and reduce food waste.
  • With this recipe, you can prepare a bunch of quesadillas all at once and refrigerate them for the week ahead. As busy days roll in, all you need to do is reheat a quarter of a quesadilla, and you’ve got a satisfying breakfast that will keep you fueled and focused. This not only saves you time but also prevents you from grabbing less nutritious options on busy mornings.

The PrepYoSelf Newsletter

Let’s Gather the Ingredients:

  • Tortillas (regular or low-carb, depending on your preference)
  • Green apples (Granny Smith apples work great for their tartness)
  • Peanut butter (go for your favorite variety, whether creamy or crunchy)
  • Chopped pecans (for that delightful crunch)
  • Olive oil (for cooking)
  • Cinnamon powder (a warm and fragrant touch)

How to Make Peanut Butter Quesadillas:

  1. Start by washing and slicing the green apples into thin, uniform slices. No need to peel them – the skin adds a lovely texture and color!
  2. Take your chosen tortillas and lay them flat. Using a butter knife, evenly spread a generous layer of peanut butter on each tortilla.
  3. On one half of each tortilla, evenly place half of your sliced apples. Sprinkle a handful of chopped pecans and a pinch of cinnamon powder over the apples.
  4. Gently fold the tortilla over the apple-nut mixture to create a half-moon shape, pressing down to stick the sides together.
  5. Heat a sauté pan over medium heat and add a touch of olive oil. Once the oil is hot, carefully place your stuffed tortillas onto the pan. Cook for about 2 to 3 minutes on each side, until the tortillas turn golden brown and crispy, and the peanut butter melts into a gooey delight.
  6. Once your quesadillas have reached crispy perfection, remove them from the pan and let them cool for a moment. Then, cut each quesadilla into quarters for easy serving.
  7. To add an extra burst of freshness, serve your Peanut Butter and Apple Quesadillas with a few extra slices of fresh apple on the side. It’s like a double apple treat!

Reference the recipe card below for detailed instructions.

round plate with peanut butter quesadillas and sliced green apples

Meal Prep Tips for Easy Quesadillas

  • Storage: If you’re prepping these quesadillas for the week, let them cool completely before storing them in an airtight container in the fridge. They’ll stay fresh and delicious for up to 4 days.
  • Reheating: To reheat, simply pop a quesadilla quarter into the microwave for about 20-30 seconds. You can also use a toaster oven for a crispy edge.
  • Ingredient Swaps: Get creative with your ingredients! Swap out green apples for pears or even bananas. Almond butter or sunflower seed butter can stand in for peanut butter, and walnuts can replace pecans.

glass meal prep containers with peanut butter quesadillas and sliced green apples

apple quesadilla

Peanut Butter and Apple Quesadilla

Whip up a quick and nutritious delight with our Peanut Butter and Apple Quesadilla! Tangy green apples, creamy peanut butter, and a sprinkle of cinnamon powder are folded into tortillas, creating a satisfying breakfast that's perfect for meal prep. Enjoy the wholesome goodness and kickstart your day with this easy and budget-friendly recipe
No ratings yet
Prep Time 5 minutes
Cook Time 15 minutes
Course Breakfast
Cuisine American
Servings 2
Calories 448 kcal

Equipment

  • knife
  • cutting board
  • spatula
  • saute pan

Ingredients
  

  • 4 each low carb tortillas (8 inch)
  • 2 each green apples
  • 4 tbsp peanut butter
  • 1/4 cup chopped pecans
  • 1 tbsp olive oil
  • 1/4 tsp cinnamon powder

Instructions
 

  • Slice the granny apples into thin slices
  • Use a butter knife to evenly spread the nut butter on the tortillas
  • Evenly spread half of the sliced apples on half of the tortillas. Add the chopped pecans and cinnamon powder. Then add the top layer of the tortillas
  • Add oil to a saute pan on medium heat. In batches, place the tortillas on the griddle and cook for about 2 to 3 minutes on each side until the tortillas are golden brown and the nut butter has melted
  • After the tortillas have crisped up, cut them into quarters
  • Serve with extra fresh slices of apple

Notes

Nutrition information provided is an estimate. It will vary based on cooking method and specific ingredients used. Please consult with your healthcare provider for specific dietary needs. To gain a better understanding, explore our nutrition disclaimer here

Nutrition

Calories: 448kcalCarbohydrates: 35gProtein: 9gFat: 34gSaturated Fat: 5gPolyunsaturated Fat: 8gMonounsaturated Fat: 19gSodium: 153mgPotassium: 432mgFiber: 8gSugar: 23gVitamin A: 107IUVitamin C: 9mgCalcium: 42mgIron: 1mg

Similar Recipes

baked oatmeal topped with fruit

Oven Baked Oats with Apricots and Berries

cranberry oat muffins

Cranberry Oatmeal Muffin Bars

ricotta apple

Oven Baked Apple with Ricotta and Walnuts

You Might Also Like

Trader Joe’s Light Roast 100% Arabica Ground Coffee

Amazon Brand – Happy Belly Roasted and Salted Peanuts

Trader Joe’s Speculoos Cookie Butter

Frequently Asked Questions

Can I use a different type of nut butter?

Absolutely! Feel free to swap out peanut butter for almond butter, cashew butter, or any other nut or seed butter you prefer.


Can I add extra ingredients to the filling?

Of course, get creative! You can add sliced bananas, strawberries, or even a drizzle of honey for extra sweetness and variety.


Can I serve these quesadillas as a snack or dessert?

You bet! These quesadillas make a versatile snack or even a dessert. Adjust the portion size accordingly to suit your needs.

Posted on Leave a comment

Spinach Egg Quesadilla

round plate with spinach and egg quesadilla

The spinach and egg breakfast quesadilla is an exceptional choice for your meal prep repertoire. From its adaptability to its freezer-friendly nature and the convenience of being able to enjoy it anywhere, this recipe is truly a meal prepper’s dream come true! This breakfast meal prep option is nutritious, and it also utilizes pantry-friendly ingredients, making it a total win-win!

This post may contain affiliate links. Please see our privacy policy for details.

round plate with spinach and egg quesadilla

Why you’ll enjoy this Spinach Egg Breakfast Quesadilla:

Planning for a busy week ahead? Well, good news! These quesadillas are freezer-friendly champions. After assembling and cooking them, let them cool completely, then wrap them individually in parchment paper and store them in a freezer-safe bag. They can be your “emergency breakfast” that’s ready to be heated up in a jiffy, making those hectic mornings much smoother and more satisfying.

Let’s talk convenience. These breakfast quesadillas are a meal prep dream when it comes to portability. Imagine this: You’re rushing out the door, and there’s no time to whip up breakfast. Fear not, because you can grab a pre-made spinach and egg quesadilla, and it’s your nutritious, hand-held meal on the go. Whether you’re heading to work, the gym, or an outdoor adventure, your meal prep efforts have your back, ensuring you’re always equipped with a tasty and nourishing option.

In a world where food waste is a concern, this recipe shines. By using pantry-friendly staples like eggs, cheese, and tortillas, you’re making the most of what you already have on hand. This not only saves you money but also contributes to a more sustainable way of eating. Plus, if you’ve got leftover ingredients from other recipes, like a handful of spinach or that last bit of shredded cheese, this recipe offers a tasty way to use them up before they go to waste.

The PrepYoSelf Newsletter

Here are the Ingredients You’ll Need:

For this recipe for one, we will use simple ingredients to teach you the basics of how to make this breakfast quesadilla.

  • Low Carb Tortillas: These gems are not only a great source of fiber but also help keep the carb count in check. Plus, they’re the perfect vessel to hold all that deliciousness together.
  • Large Eggs: Eggs are your protein-packed BFFs. They’re loaded with essential amino acids and vitamins, including B12 and D, which are essential for bone health and energy production.
  • Baby Spinach: Popeye knew what he was talking about! Spinach adds a burst of vitamins and minerals, including iron, magnesium, and vitamin K, while bringing a satisfying texture and a touch of earthiness.
  • Shredded Mozzarella: Creamy, gooey, and oh-so-satisfying, mozzarella adds that irresistible cheese pull factor. It’s a good source of calcium and protein to keep you feeling full and satisfied.

round plate with spinach and egg quesadilla

How to Make an Egg Breakfast Quesadilla:

  1. Add 1 tbsp of olive oil to a pan on medium heat and crack those eggs into the pan.
  2. Gently stir the eggs as they cook until they’re firm and perfectly set.
  3. Introduce the baby spinach to the party and let them wilt into the egg goodness.
  4. Evenly spread the spinach and egg mixture onto half of the tortillas, then sprinkle that shredded mozzarella on top.
  5. Add the tortilla tops and place the quesadilla back into the pan. Toast both sides for about 2 minutes each, until they’re gorgeously golden brown and the cheese has melted to cheesy perfection.
  6. Slice and Savor: Time to cut those quesadillas into quarters – ready to dazzle your taste buds!

Reference the recipe card below for detailed instructions.

Meal Prep Tips for Spinach and Egg Quesadilla:

  • Storage and Reheating Tips: Allow your quesadillas to cool before storing them in an airtight container in the fridge for up to 3-4 days. To reheat, pop them in the microwave for about 30 seconds or re-crisp them in a skillet for that delightful crunch.
  • Ingredient Swaps:  One of the brilliant aspects of this recipe is its versatility. You can easily customize it to suit your taste preferences or dietary needs. Want to add a dash of hot sauce for a kick? Go for it! Prefer a plant-based option? Swap out the eggs for tofu or chickpea scramble. Craving extra veggies? Load up on colorful bell peppers, mushrooms, or zucchini. This flexibility ensures that you won’t get bored and can adapt the recipe to your changing cravings. Get creative! You can swap out the mozzarella for cheddar, feta, or even dairy-free cheese if you prefer. And don’t shy away from adding diced tomatoes, bell peppers, or onions for an extra veggie boost.
  • Balanced Meal Bliss: Want to take this meal up a notch? Pair your spinach and egg quesadilla with a side of fresh fruit, a dollop of Greek yogurt, or a small handful of nuts. Voila! A complete, balanced breakfast that will keep you fueled and ready to conquer the day.

square glass meal prep containers with spinach and egg quesadilla

Egg Quesadilla

Spinach And Egg Quesadilla

Get ready to embrace the Spinach and Egg Quesadilla recipe as your go-to choice for breakfast meal prep. It's not just highly nourishing but also cleverly makes use of pantry staples, resulting in an all-around advantageous option!
No ratings yet
Prep Time 5 minutes
Cook Time 10 minutes
Course Breakfast, Main Course
Cuisine American
Servings 2

Equipment

  • knife
  • cutting board
  • saute pan
  • spatula

Ingredients
  

  • 4 each low carb tortillas
  • 3 each large eggs
  • 2 cups baby spinach
  • 1/4 cup shredded mozzarella cheese
  • 1/4 tsp salt
  • 1 tbsp olive oil

Instructions
 

  • Add 1 tbsp of olive oil to a pan on medium heat and crack the eggs into the pan
  • Stir the eggs until they have cooked and firmly set
  • Next, add the spinach and cook until they have wilted
  • Evenly spread the egg mixture on half of the tortillas and sprinkle the top with cheese
  • Add the top layer of the tortillas and place the quesadilla back into the pan. Toast on each side for about 2 minutes until it has turned golden brown and the cheese has melted
  • Cut the tortillas in quarters

Similar Recipes

fried egg and sausage hash

Fried Egg with Apple and Sausage Hash

egg stuffed bell peppers

Oven Baked Breakfast Egg Stuffed Peppers

easy sausage egg muffins

Sausage Egg Muffins with Strawberries

You Might Also Like

Evolution Fresh Organic Pure 100% Cold-Pressed Orange Juice

Setton Farms Dry Roasted and Salted Pistachios

Filippo Berio Pesto, Classic Basil

Frequently Asked Questions

Can I add meat to this recipe?

Definitely! If you’re looking to up the protein content or enjoy a meaty twist, feel free to add cooked and diced chicken, turkey, or even some crispy bacon. Just ensure the meat is fully cooked before incorporating it into your quesadilla.


Can I add other seasonings or herbs?

Experiment with different seasonings to tailor the flavor to your liking. Fresh herbs like cilantro or chives can add a burst of freshness. You can also sprinkle in some smoked paprika, cumin, or chili powder for an extra layer of depth.


Can I add avocado to these quesadillas?

Avocado adds a creamy, nutrient-rich element to your quesadilla. You can either slice avocado and add it to the filling before folding or spread mashed avocado onto the tortilla before adding the egg mixture.

Posted on Leave a comment

Chia Pudding with Mixed Berries

glass cup with chia pudding topped with mixed berries

Chia Pudding with Mixed Berries – a vibrant, nutrient-packed creation that spells a simple, healthy breakfast with a touch of culinary artistry. Enjoy your mornings with this fuss-free delight, and remember, meal prep isn’t just about saving time – it’s about embracing a delicious and nutritious lifestyle. Happy prepping!

This post may contain affiliate links. Please see our privacy policy for details.

Calories: 355kcal | Carbohydrates: 19g | Protein: 7g | Fat: 32g | Saturated Fat: 22g | Polyunsaturated Fat: 6g | Monounsaturated Fat: 2g | Trans Fat: 0.04g | Sodium: 19mg | Potassium: 392mg | Fiber: 10g | Sugar: 1g | Vitamin A: 23IU | Vitamin C: 9mg | Calcium: 179mg | Iron: 6mg

glass cup with chia pudding topped with mixed berries for a healthy breakfast

Why Chia Pudding with Mixed Berries?

  • First things first, this recipe is the embodiment of health and convenience. Imagine starting your day with a healthy breakfast that’s rich in fiber, omega-3 fatty acids, and antioxidants, all bundled up in a jar of deliciousness. 
  • Chia seeds, the star of the show, provide a hearty dose of these nutrients, promoting digestion and heart health. 
  • And guess what? There’s no cooking involved! Perfect for those busy mornings when you’d rather snooze for an extra few minutes.

The PrepYoSelf Newsletter

The Ensemble of Ingredients:

  • Coconut Milk: Creamy, luscious, and dairy-free. Coconut milk adds a delightful tropical twist to your chia pudding, giving it a velvety texture and a subtly sweet flavor.
  • Chia Seeds: These tiny wonders pack a punch! They absorb liquid like champions, transforming into a jelly-like consistency that forms the base of your pudding.
  • Stevia Sweetener: Hello, natural sweetness! Stevia, a zero-calorie sweetener, adds the perfect touch of sweetness without the guilt. Say goodbye to refined sugars!
  • Raspberries (or Mixed Berries): Bursting with antioxidants and vitamins, raspberries add a burst of color and flavor to your chia pudding. The juicy goodness of mixed berries takes this concoction to the next level.

glass cup with chia pudding topped with mixed berries for a healthy breakfast

Steps to Make Chia Pudding

  1. In a jar or small bowl, pour in the coconut milk.
  2. Add the chia seeds and stevia sweetener. Give it a good stir until those chia seeds are no longer playing hard to get, making sure the mixture is well combined.
  3. Now, top them off with the mixed berries in and give it a gentle stir to distribute the berrylicious goodness.
  4. Cover the jar, and pop it into the fridge for a relaxing rest of about 1 to 2 hours or, even better, overnight.
  5. Voilà! Your chia pudding should emerge thick and inviting, not runny. If it’s still a tad liquidty, simply give it a stir, then let it lounge for an extra 30 minutes.

Reference the recipe card below for detailed instructions.

glass cups with chia pudding topped with mixed berries for a healthy breakfast

Meal Prep Tips for Chia Pudding for a Healthy Breakfast

  • As much as we’d love to gobble it all up at once, restrain yourself! Your healthy breakfast of chia pudding with mixed berries can last in the fridge for up to 3-4 days. To keep the flavors fresh, store it in an airtight container.
  • To create a complete and balanced meal, consider pairing your chia pudding with a handful of nuts or a dollop of Greek yogurt for some protein. You could also throw in a slice of whole-grain toast or a boiled egg for an extra energy boost.

glass cups with chia pudding topped with mixed berries for a health breakfast

chia pudding

Chia Pudding with Mixed Berries

Whether you're a busy bee or someone who adores hassle-free mornings, this Chia Pudding Recipe is about to become your new meal prep favorite!
No ratings yet
Prep Time 5 minutes
Cook Time 5 minutes
Course Breakfast
Cuisine American
Servings 2
Calories 355 kcal

Equipment

  • jar
  • spoon

Ingredients
  

  • 1 cup coconut milk
  • 4 tbsp chia seeds
  • 1 tsp stevia sweetener
  • 1/2 cup raspberries

Instructions
 

  • In a jar, pour in the coconut milk
  • Add the chia seeds and sweetener and stir with a spoon until the chia seeds are no longer clumpy
  • Add the mixed berries and cover the mixture. Place it in the fridge for about 1 to 2 hours or overnight
  • The chia pudding should be thick and not liquidty. If it is liquidity, stir it around and let it stit for another 30 minutes

Notes

Nutrition information provided is an estimate. It will vary based on cooking method and specific ingredients used. Please consult with your healthcare provider for specific dietary needs. To gain a better understanding, explore our nutrition disclaimer here

Nutrition

Calories: 355kcalCarbohydrates: 19gProtein: 7gFat: 32gSaturated Fat: 22gPolyunsaturated Fat: 6gMonounsaturated Fat: 2gTrans Fat: 0.04gSodium: 19mgPotassium: 392mgFiber: 10gSugar: 1gVitamin A: 23IUVitamin C: 9mgCalcium: 179mgIron: 6mg

Similar Recipes

baked oatmeal

Oven Baked Oats with Apricots and Berries

cranberry oat muffins

Cranberry Oatmeal Muffin Bars

french toast 2

Oven Baked French Toast Muffins with Strawberries

You Might Also Like

Frequently Asked Questions

Can I use a different type of milk?

bsolutely! While coconut milk adds a creamy texture and a touch of tropical flavor, you can swap it out for almond milk, oat milk, or any other milk of your choice.


Is the stevia sweetener necessary?

Not at all! If you prefer natural sweetness from the berries and coconut milk, feel free to skip the sweetener altogether. Customize the recipe to


Can I blend the mixture for a smoother texture?

Certainly! If you prefer a smoother consistency, you can blend the coconut milk, chia seeds, and sweetener before adding the berries. This will create a more uniform texture.

Posted on Leave a comment

Oven Baked Pineapple Carrot Muffin Bars

rectangular baking dish with a pineapple and carrot muffin bar

Dive into the joy of baking these Oven Baked Pineapple Carrot Muffin Bars, and let them be your tasty accomplices on your journey to conquering busy mornings with a full belly and a satisfied smile. These delightful treats are not only a breeze to make but are also a fantastic addition to your meal prep arsenal. Let’s dive into why these muffins are a must-try for breakfast enthusiasts.

This post may contain affiliate links. Please see our privacy policy for details.

rectangular baking dish with a pineapple and carrot muffin bar

These Oven Baked Pineapple Carrot Muffins are meal prep game changers. Bake up a batch during your weekend kitchen escapades, and you’ll have a quick, wholesome breakfast option ready to conquer those hectic weekdays.

Why It’s Great for Meal Prep

  • Health Benefits: Loaded with the natural sweetness of crushed pineapple and the vibrant goodness of grated carrots, these muffins deliver a one-two punch of flavor and nutrition. Carrots bring in a healthy dose of beta-carotene, while pineapple adds a tropical twist rich in vitamin C and bromelain, which can aid digestion.
  • Convenience and Fuel for the Day: Imagine waking up to the inviting aroma of these muffins wafting through your kitchen. They’re your secret weapon to starting your day on the right foot. Packed with a balanced combination of carbs, fiber, and a touch of protein from the eggs, these muffins provide lasting energy and help keep those hunger pangs at bay until your next meal.

The PrepYoSelf Newsletter

Simple Ingredients for Pineapple Carrot Muffin Bars

  • Egg: This protein-packed superstar helps keep you feeling full and energized.
  • Brown Sugar: A touch of sweetness to enhance the flavors without going overboard.
  • Crushed Pineapple: Adds a burst of tropical sweetness and a dose of vitamin C.
  • Grated Carrots: These bring color, flavor, and a healthy crunch to the muffins.
  • Flour: The base ingredient that gives structure to our muffins.
  • Baking Powder: The magic ingredient that makes these muffins rise and become beautifully fluffy.

rectangular baking dish with a pineapple and carrot muffin bar

How to Prepare Pineapple Carrot Muffin Bars:

  1. Preheat the oven to 425°F.
  2. Whisk the eggs and brown sugar together in a mixing bowl until they become a smooth, creamy mixture.
  3. Add the crushed pineapple and grated carrots, stirring gently to combine all the flavors.
  4. Then, add the flour and baking powder. Mix well to form a luscious batter that’s teeming with pineapple-carrot goodness.
  5. Grease the baking dish with oil, ensuring your muffins won’t stick around longer than your appetite can bear.
  6. Pour in the batter with excitement and anticipation for what’s to come!
  7. Bake in the pre-heated oven for 15 minutes or until the center is firmly set, and the tops are golden brown.

Reference the recipe card below for detailed instructions.

rectangular baking dish with a pineapple and carrot muffin bar

Meal Prep Tips for Muffin Bars:

  • Storage and Reheating: Once these muffins have cooled down, store them in an airtight container. For reheating, a quick zap in the microwave or a few minutes in a toaster oven will bring back that just-baked warmth and aroma.
  • Ingredient Swaps and Pairings: Feeling adventurous? Swap out the brown sugar for honey or maple syrup for an alternative hint of sweetness. You could also throw in some chopped nuts or dried fruits for added texture and flavor.
  • Pairings: For a wholesome breakfast spread, consider pairing these muffins with some Greek yogurt, a side of scrambled eggs, or a refreshing fruit salad.

rectangular baking dish with a pineapple and carrot muffin bar

carrot muffin

Oven Baked Pineapple Carrot Muffin Bar

Packed with crushed pineapple, grated carrots, and a touch of sweetness, these muffins are easy to make and great for meal prep.
No ratings yet
Prep Time 5 minutes
Cook Time 15 minutes
Course Breakfast, Snack
Cuisine American
Servings 2

Equipment

  • grater
  • mixing bowl
  • baking dish
  • oven

Ingredients
  

  • 1 each large egg
  • 1/4 cup brown sugar
  • 1/2 cup crushed pineapple
  • 1/4 cup carrot (grated)
  • 1/2 cup flour
  • 1/4 tsp baking powder
  • 1 tsp olive oil

Instructions
 

  • Pre-heat the oven to 425F
  • Whisk the eggs and brown sugar together in a mixing bowl
  • Add the crushed pineapple and grated carrots
  • Then, add the flour and baking powder. Mix well
  • Grease the baking dish with oil
  • Pour in the batter and bake in the oven for 15 minutes until the center is firmly set

Similar Recipes

baked oatmeal

Oven Baked Oats with Apricots and Berries

ricotta apple

Oven Baked Apple with Ricotta and Walnuts

french toast 2

Oven Baked French Toast Muffins with Strawberries

You Might Also Like

Smartfruit Mellow Mango + Immunity, 100% Real Fruit Purée

Trader Joe’s Unsalted, Dry Toasted Slivered Almonds

Trader Joe’s the Dark Chocolate Lover’s Chocolate Bar

Frequently Asked Questions

 Can I use canned pineapple for this recipe?

Absolutely! Canned crushed pineapple works well in this recipe. Just make sure to drain any excess juice before adding it to the batter.


Can I substitute white sugar for brown sugar?

Yes, you can use white sugar as a substitute for brown sugar. However, keep in mind that brown sugar adds a caramelized flavor that complements the pineapple and carrot. If you choose to use white sugar, the flavor profile may be slightly different.


Can I use whole wheat flour for a healthier option?

Absolutely! Whole wheat flour is a great option for added fiber and nutrients. Keep in mind that whole wheat flour can result in slightly denser muffins, so the texture may be different.

Posted on Leave a comment

Peach Granola Muffin Bars

oval baking dish with peach muffin bar

Peach Granola Muffin Bars are the ultimate meal prep savior – healthy, budget-friendly, and convenient. Start your day on a high note with these delightful treats, and you’ll thank me later! Happy baking!

This post may contain affiliate links. Please see our privacy policy for details.

Calories: 468kcal | Carbohydrates: 80g | Protein: 9g | Fat: 13g | Saturated Fat: 2g | Polyunsaturated Fat: 2g | Monounsaturated Fat: 7g | Trans Fat: 0.01g | Cholesterol: 82mg | Sodium: 164mg | Potassium: 323mg | Fiber: 4g | Sugar: 43g | Vitamin A: 390IU | Vitamin C: 4mg | Calcium: 132mg | Iron: 4mg

oval baking dish with peach muffin bar

Why These Are Great for Breakfast Meal Prep

I’m super excited to share with you my latest creation: the incredibly delicious Peach Granola Muffin Bar! Not only is this recipe a flavor explosion, but it’s also an absolute game-changer for meal prepping. Let me tell you why it’s a must-have in your weekly repertoire!

  • First of all, let’s talk about the health factor. These muffin bars are packed with wholesome goodness! We start with large eggs, providing a protein boost to keep you energized throughout the day.
  • But wait, there’s more! We’re swapping some of the butter or oil with applesauce, which not only adds moisture but also slashes unnecessary calories. A win-win, right?
  • Now, let’s chat about budget-friendliness! We all know how important it is to keep our wallets happy, and this recipe won’t break the bank. With basic pantry staples like flour and brown sugar, you’ve got a solid foundation. The star of the show, though, is the granola! You can use store-bought or homemade granola, and the best part is that it adds texture, flavor, and keeps your taste buds dancing.
  • Convenience is key when it comes to weekday breakfasts, and that’s where these Peach Granola Muffin Bars shine. You can whip up a batch on the weekend and store them in an airtight container for the whole week! Talk about a time-saver! No more frantic mornings, wondering what to eat – just grab one of these bars, and you’re good to go.

The PrepYoSelf Newsletter

Simple Ingredients for Peach Granola Muffin Bars

Now, let’s talk ingredients, shall we? We’ve already covered the eggs, applesauce, brown sugar, flour, and granola, but let’s not forget the delightful spices! A dash of cinnamon takes these muffin bars to the next level, infusing each bite with warmth and cozy vibes. And let’s not underestimate the power of baking powder – it’s the secret behind the perfect rise and fluffiness of these bars!

Last but not least, those luscious frozen peaches. They add a burst of summer sweetness to the recipe, and using frozen peaches means you can enjoy these goodies year-round! No need to wait for peach season; you’ve got a taste of sunshine in every bite.

oval baking dish with peach muffin bar

How to Prepare Peach Granola Muffin Bars for One:

  1. Preheat the oven to 400F. Grease your baking dish.
  2. In a mixing bowl, mix together your wet ingredients: egg, applesauce, and brown sugar.
  3. Next add your dry ingredients: flour, granola, baking powder, and cinnamon.
  4. Then, pour the batter into the baking dish and top it off with the peaches.
  5. Finally, bake in the oven until the center is fully cooked.

Reference the recipe card below for detailed instructions.

oval baking dish with peach muffin bar

Meal Prep Tips for Peach Granola Muffin Bars:

  • Now, let’s talk storage tips! Once you’ve baked these beauties, let them cool completely before storing them. Place them in an airtight container or wrap them individually in plastic wrap. Keep them at room temperature for up to 2 days or in the fridge for up to a week. For longer-term storage, pop them in the freezer and thaw as needed – they freeze like a dream!
  • But wait, there’s more! To elevate your breakfast game, pair these Peach Granola Muffin Bars with a dollop of Greek yogurt or smear on some nut butter for extra protein. Fresh fruit on the side makes it a complete, balanced breakfast that will leave you feeling full and satisfied until lunchtime.
  • Feeling adventurous? Here are some swaps and substitutes to try: swap the frozen peaches for other fruits like berries or diced apples. If you’re looking to cut back on sugar, use coconut sugar or a sugar substitute of your choice. And for all the gluten-free folks out there, simply switch the flour to a gluten-free alternative – easy peasy!

oval baking dish with peach muffin bar

Peach Muffin

Peach Granola Muffin Bar

These Peach Granola Muffin Bars are a convenient weekday breakfast that you can easily whip up in advance and have them ready for early mornings or even as an afternoon snack.
No ratings yet
Prep Time 5 minutes
Cook Time 15 minutes
Course Breakfast
Cuisine American
Servings 2
Calories 468 kcal

Equipment

  • baking dish
  • mixing bowl
  • whisk
  • spatula
  • oven

Ingredients
  

Wet Ingredients

  • 1 each large egg
  • 1/2 cup applesauce
  • 1/4 cup brown sugar

Dry Ingredients

  • 1/2 cup flour
  • 1/3 cup granola
  • 1 tsp cinnamon
  • 1/2 tsp baking powder

Other

  • 1 cup frozen peaches
  • 1 tbsp olive oil

Instructions
 

  • Pre-heat the oven to 400F, Grease the baking dish with the olive oil
  • In a mixing bowl, whisk together the wet ingredients. Then, add the flour, cinnamon, baking powder and whisk it all together
  • Finally, add the granola and mix it in. Use the spatula to pour the batter into the baking dish. Top off the batter with the sliced peaches
  • Bake in the oven for 12-15 minutes until the center is fully cooked

Notes

Nutrition information provided is an estimate. It will vary based on cooking method and specific ingredients used. Please consult with your healthcare provider for specific dietary needs. To gain a better understanding, explore our nutrition disclaimer here

Nutrition

Calories: 468kcalCarbohydrates: 80gProtein: 9gFat: 13gSaturated Fat: 2gPolyunsaturated Fat: 2gMonounsaturated Fat: 7gTrans Fat: 0.01gCholesterol: 82mgSodium: 164mgPotassium: 323mgFiber: 4gSugar: 43gVitamin A: 390IUVitamin C: 4mgCalcium: 132mgIron: 4mg

Similar Recipes

baked oatmeal

Oven Baked Oats with Apricots and Berries

ricotta apple

Oven Baked Apple with Ricotta and Walnuts

french toast 2

Oven Baked French Toast Muffins with Strawberries

You Might Also Like

Smartfruit Mellow Mango + Immunity, 100% Real Fruit Purée

Trader Joe’s Unsalted, Dry Toasted Slivered Almonds

Trader Joe’s the Dark Chocolate Lover’s Chocolate Bar

Frequently Asked Questions

Can I replace the applesauce with oil or butter?

While applesauce is a healthier substitute for some of the fats, you can use melted butter or vegetable oil if you prefer. However, keep in mind that using applesauce helps reduce the calorie content and adds natural sweetness


Can I add nuts or seeds to the batter?

es, you can! Chopped nuts like almonds, walnuts, or seeds like chia or flax seeds would be a delightful addition, providing extra texture and nutrients.


Can I reduce the amount of sugar used in the recipe?

Sure! If you prefer a less sweet option, you can decrease the amount of brown sugar used. Just keep in mind that this might slightly affect the overall texture and sweetness of the muffin bars