Posted on Leave a comment

Cashew Chicken and Eggplant Stirfry

Chicken Stir Fry with cashews, red bell peppers, eggplant, and green onions

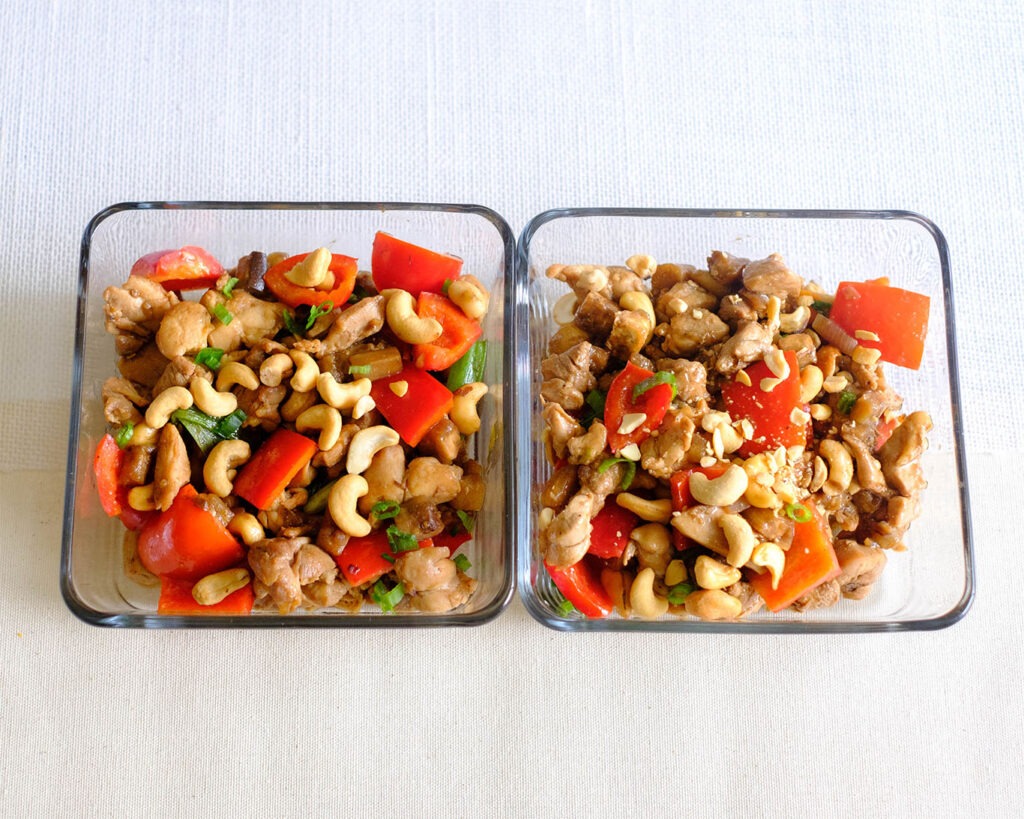
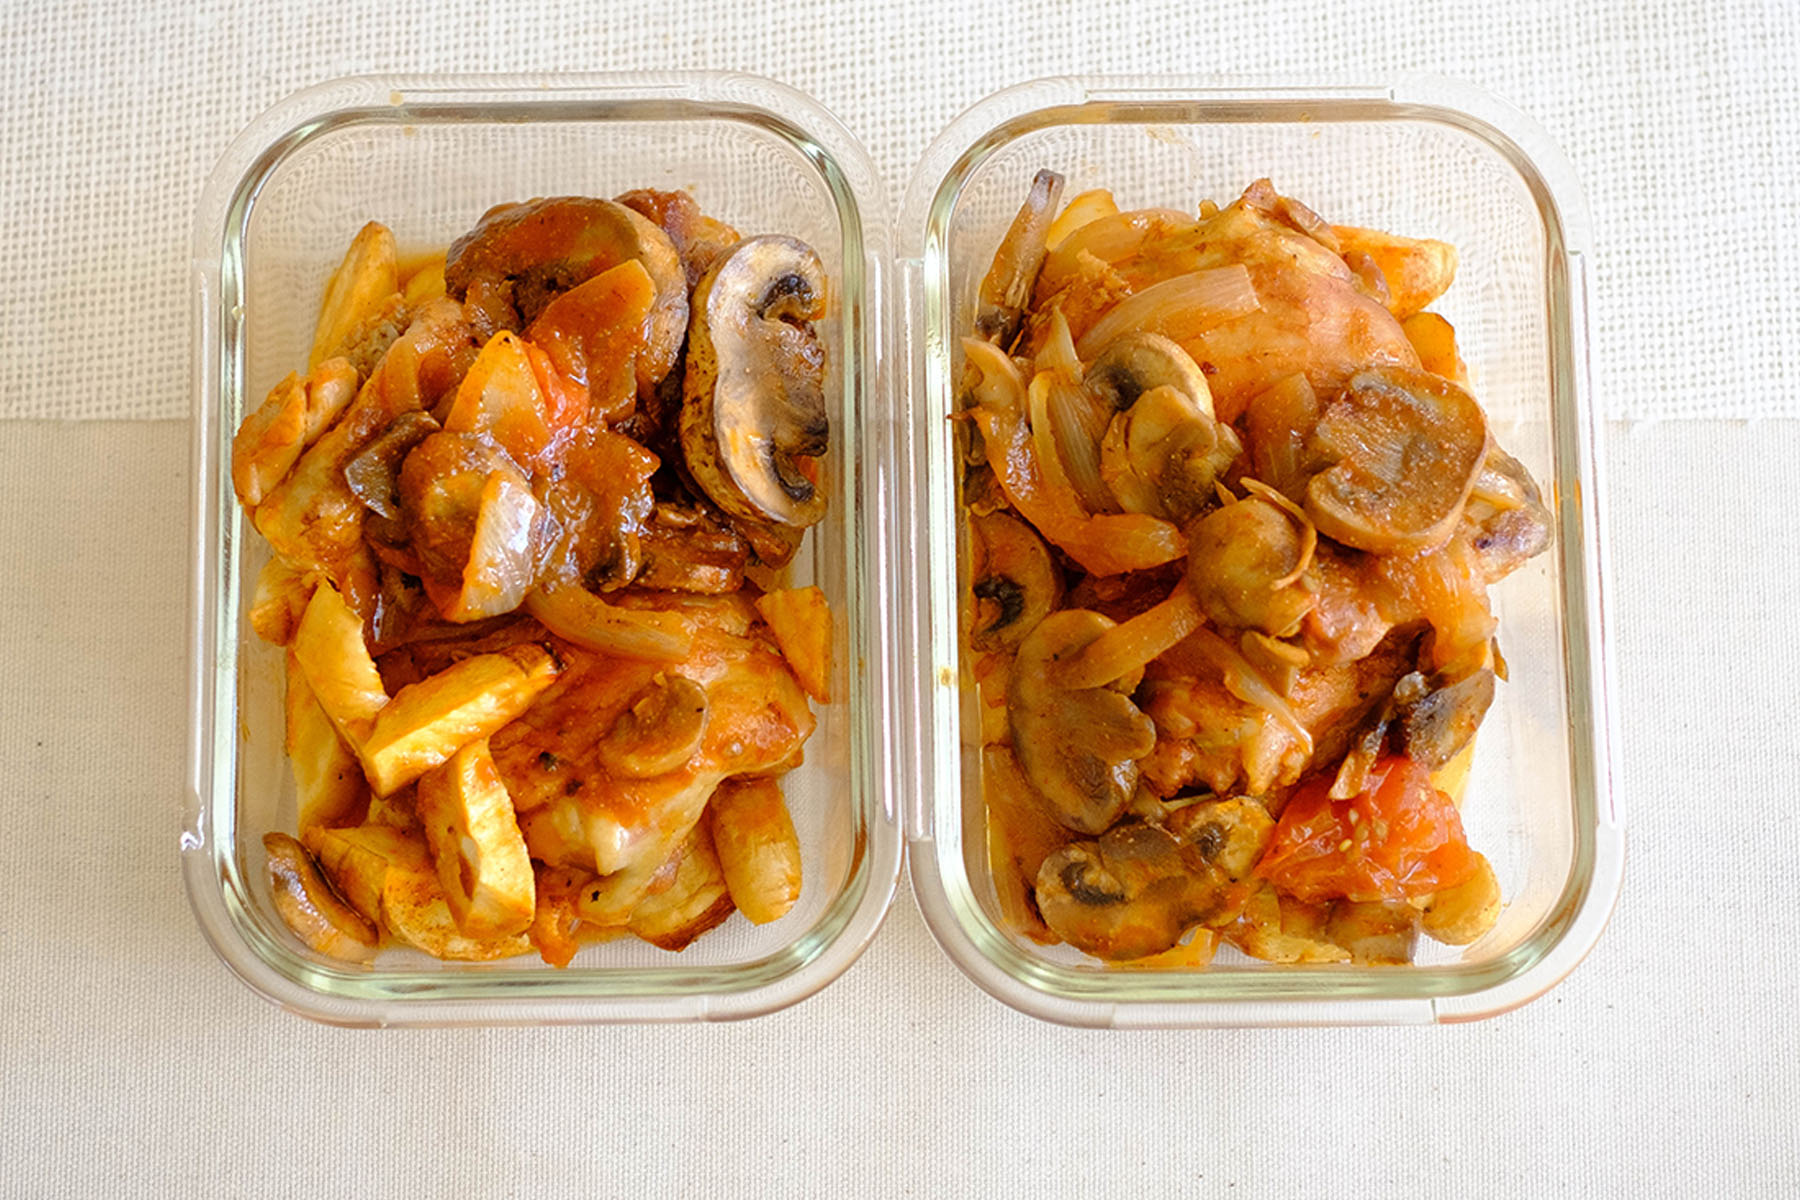
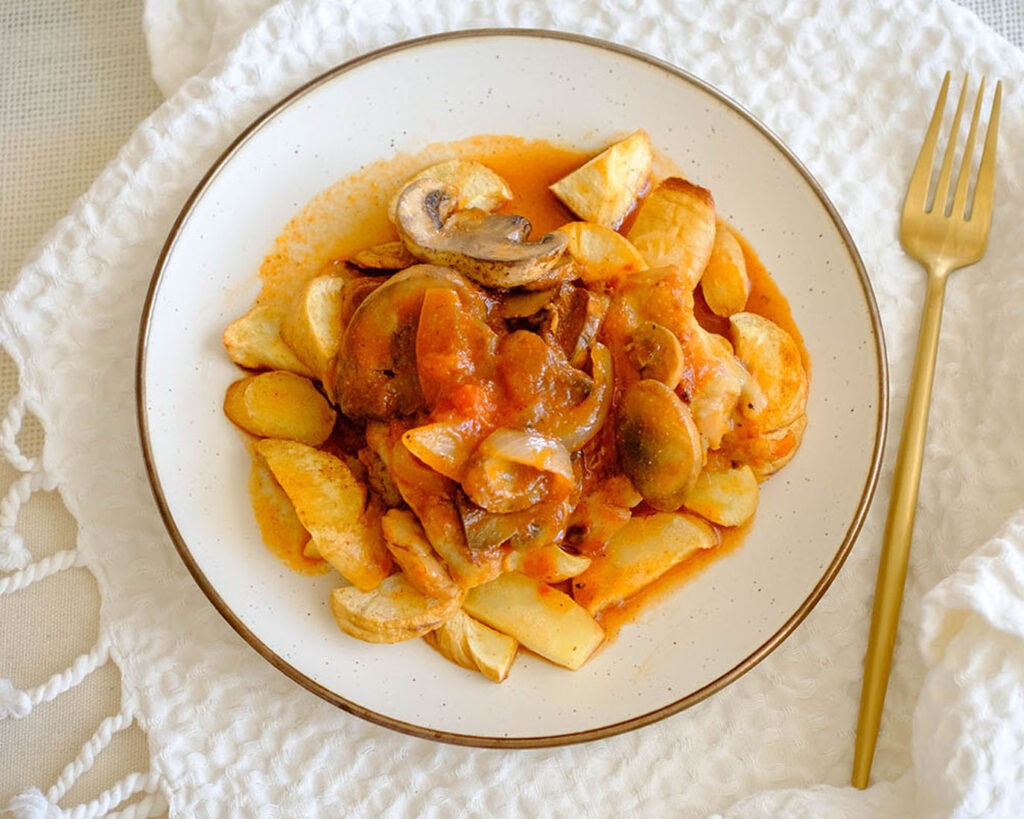
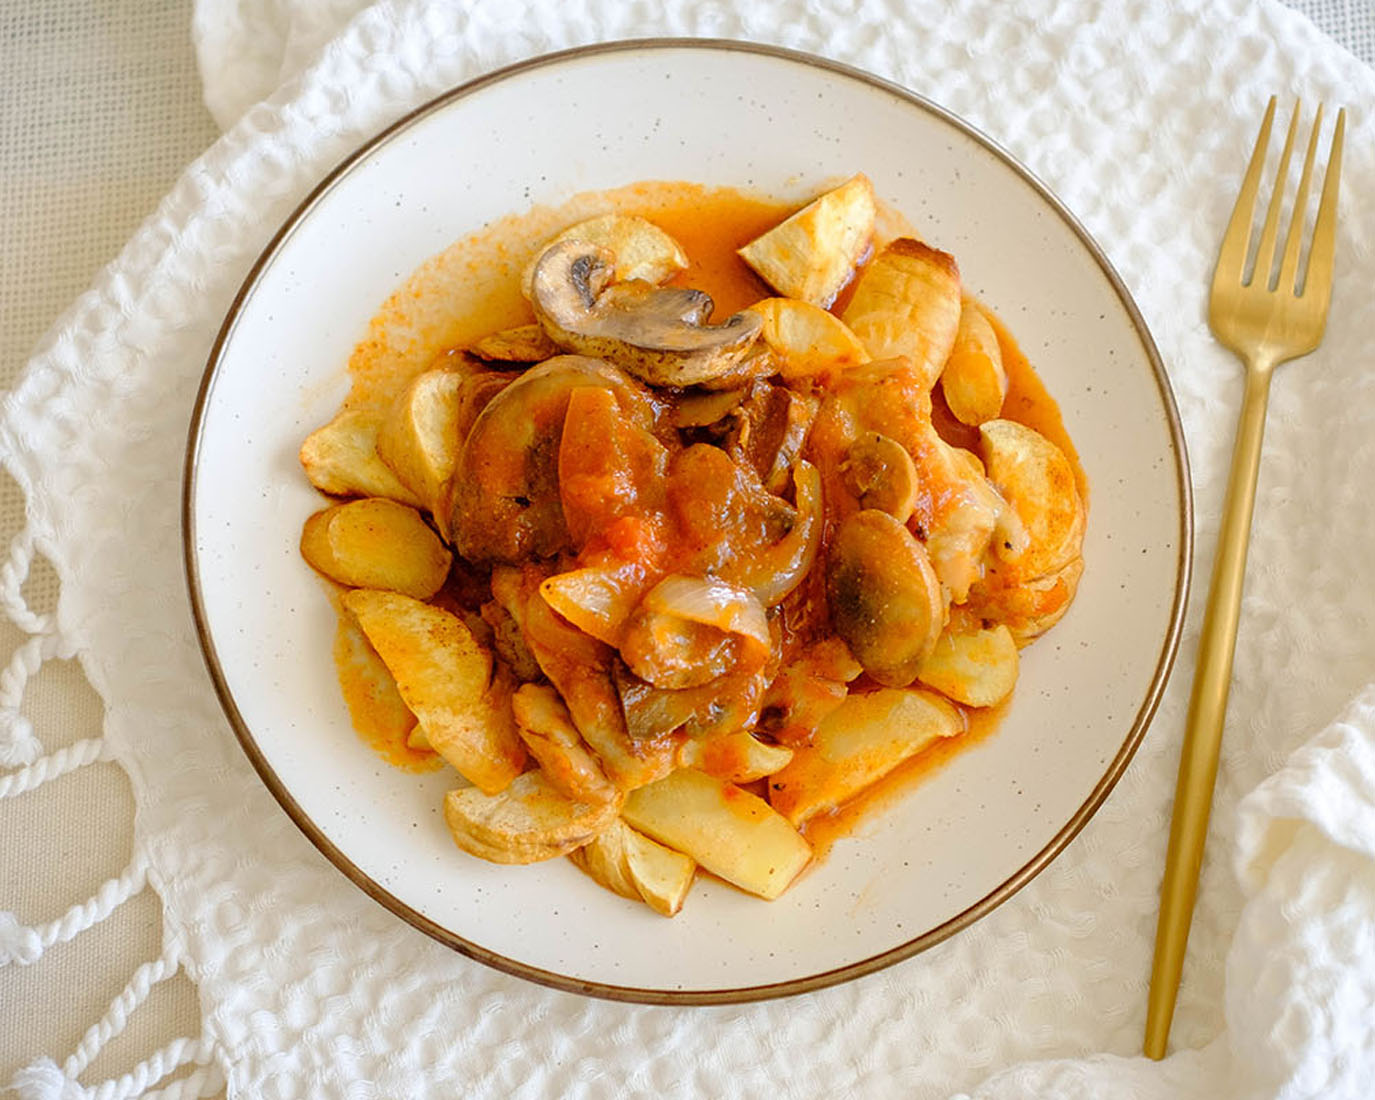
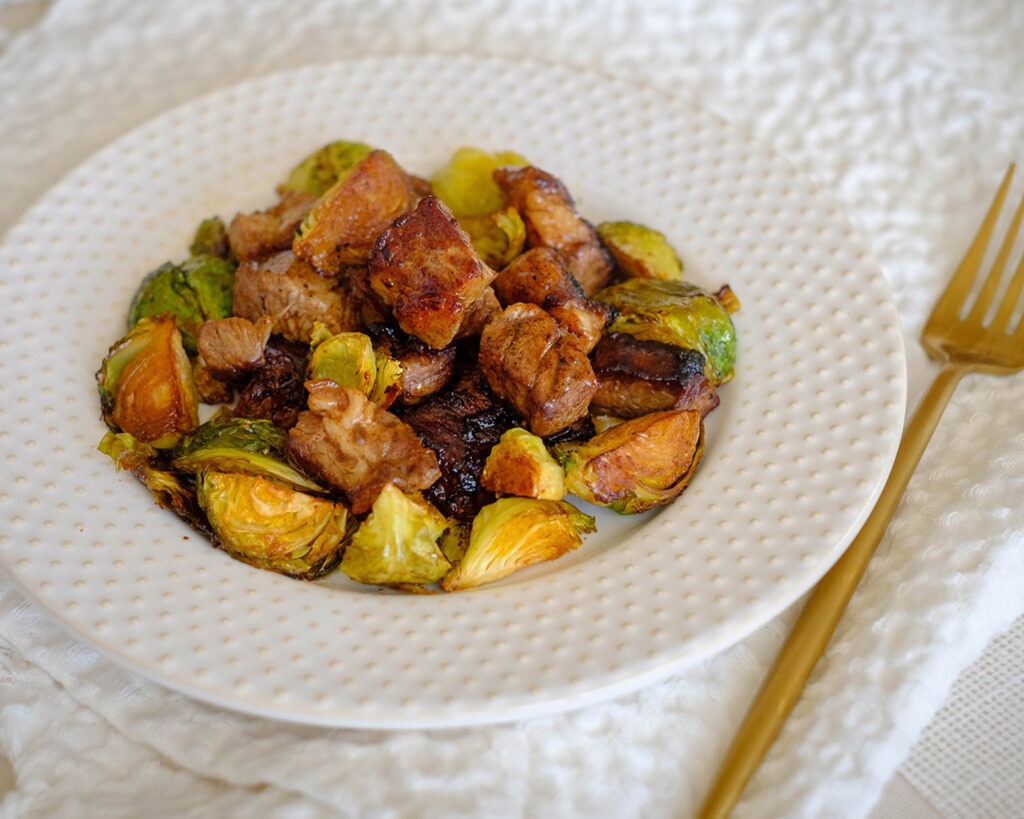
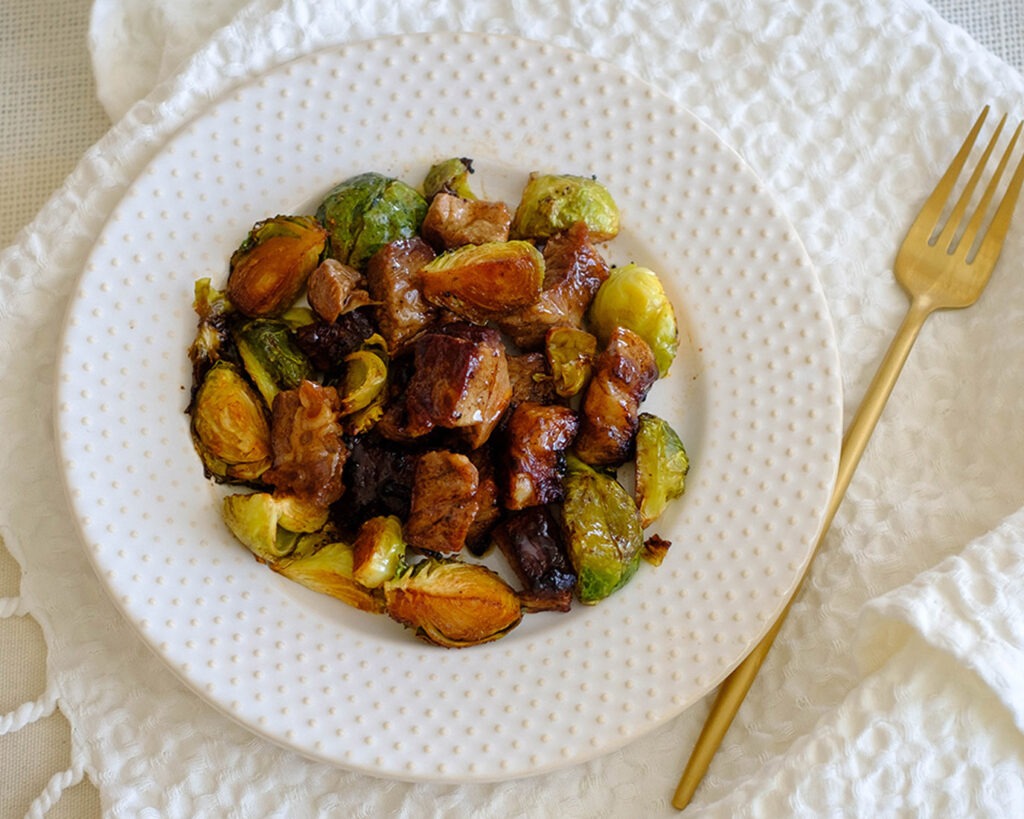
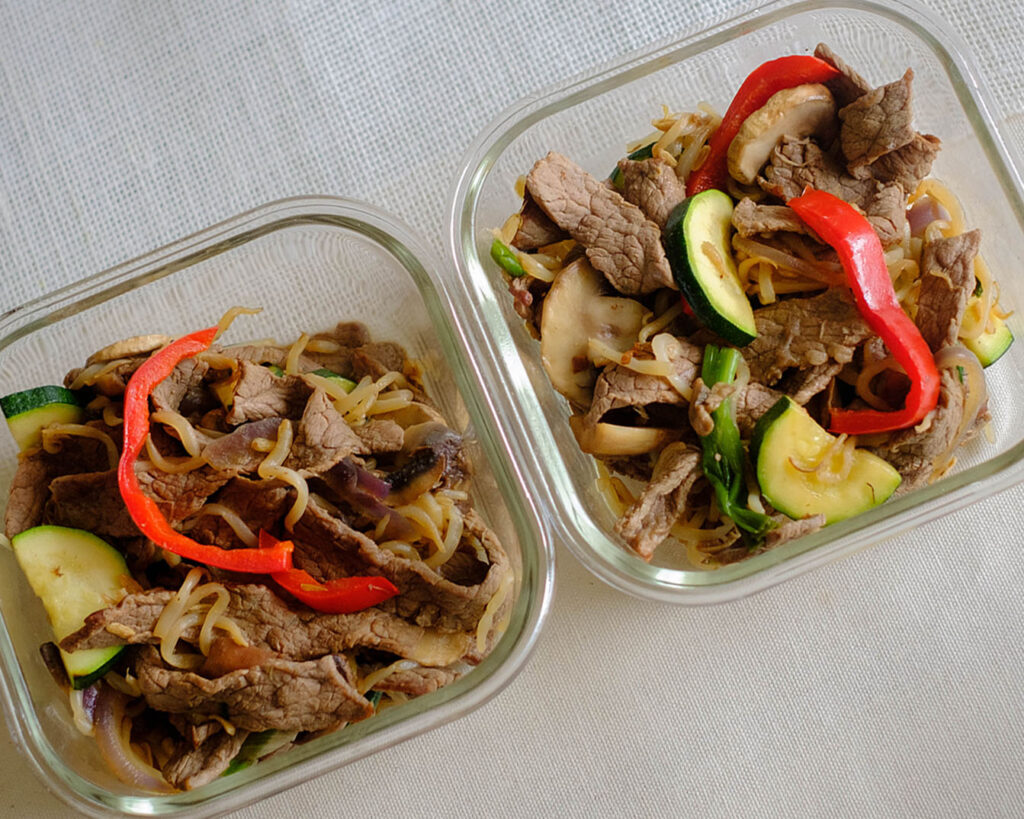
This Cashew Chicken and Eggplant Stir Fry recipe is the epitome of flavor meets efficiency, perfect for busy individuals seeking a nutritious yet budget-friendly meal prep option. Picture succulent boneless chicken thighs, velvety eggplant, and vibrant bell peppers dancing in a symphony of savory sauces, all topped off with crunchy cashews for that extra dose of texture and taste. With just a handful of simple ingredients and easy-to-follow instructions, you’ll be amazed at how effortlessly this dish comes together, leaving you with ample time to conquer your day.

This post may contain affiliate links. Please see our privacy policy for details.

Calories: 578kcal | Carbohydrates: 25g | Protein: 30g | Fat: 41g | Saturated Fat: 9g | Polyunsaturated Fat: 8g | Monounsaturated Fat: 20g | Trans Fat: 0.1g | Cholesterol: 139mg | Sodium: 1383mg | Potassium: 843mg | Fiber: 6g | Sugar: 12g | Vitamin A: 2119IU | Vitamin C: 83mg | Calcium: 57mg | Iron: 3mg

Chicken Stir Fry with cashews, red bell peppers, eggplant, and green onions

The PrepYoSelf Newsletter

Why you’ll enjoy this?

  • Quick and Easy: With simple ingredients and straightforward instructions, this recipe is a breeze to whip up, perfect for those hectic days when time is of the essence.
  • Nutritious and Balanced: Packed with lean protein from chicken thighs, plenty of veggies like eggplant and bell peppers, and healthy fats from cashews and sesame oil, this stir fry provides a well-rounded and nutritious meal that keeps you energized throughout the day.
  • Budget-Friendly: Utilizing affordable ingredients like boneless chicken thighs, eggplant, and bell peppers, this recipe proves that eating healthy doesn’t have to break the bank. Plus, by preparing meals at home, you’ll save money compared to dining out or ordering takeout.
  • Versatile: Don’t be afraid to get creative! This stir fry is incredibly versatile, so feel free to swap in your favorite veggies or add extra ingredients like broccoli, snap peas, or even pineapple for a personalized touch.
  • Flavorful and Satisfying: With a combination of savory soy sauce, sweet hoisin sauce, and aromatic sesame oil, every bite of this stir fry bursts with irresistible flavor. Plus, the addition of crunchy cashews adds a delightful texture that keeps you coming back for more.
  • Healthy Lifestyle Support: Whether you’re trying to eat more veggies, cut back on processed foods, or simply maintain a balanced diet, this recipe aligns perfectly with your health and wellness goals, making it easy to stay on track without sacrificing taste or convenience.
Chicken Stir Fry with cashews, red bell peppers, eggplant, and green onions

Ingredients you’ll need for this Peanut Chicken Stir Fry

  • Boneless Chicken Thighs: Chicken thighs are not only budget-friendly but also pack a flavorful punch. They’re juicier and more tender compared to chicken breasts, making them perfect for stir-frying. Plus, they’re an excellent source of protein, helping to keep you feeling full and satisfied.
  • Eggplant: Eggplant adds a hearty texture and mild flavor to the stir fry. It’s also incredibly budget-friendly and loaded with nutrients like fiber, vitamins, and minerals. Eggplant soaks up the flavors of the sauce beautifully while providing a satisfying bite in every mouthful.
  • Red Bell Pepper: Not only does red bell pepper bring vibrant color to the dish, but it also adds a subtle sweetness and crunch. Rich in vitamin C and antioxidants, red bell peppers boost the nutritional value of the stir fry without breaking the bank.
  • Garlic: A staple in many cuisines, garlic infuses the stir fry with a robust, aromatic flavor. It’s also praised for its numerous health benefits, including immune-boosting properties and potential heart health benefits. Plus, a little garlic goes a long way, making it a cost-effective way to elevate the dish.
  • Red Onion: Red onions lend a touch of sweetness and a hint of spice to the stir fry. They’re also more budget-friendly compared to other onion varieties. Packed with antioxidants and flavonoids, red onions not only enhance the flavor but also contribute to overall health and wellness.
  • Green Onions: Also known as scallions, green onions add a fresh, oniony flavor and a pop of color to the dish. They’re a wallet-friendly ingredient that adds brightness and depth to the stir fry. Plus, they’re low in calories but high in vitamins and minerals, making them a nutritious addition to any meal.
  • Cashews: Crunchy cashews provide a delightful texture contrast to the tender chicken and veggies. They’re a budget-friendly nut option that adds richness and nuttiness to the dish. Cashews also offer healthy fats, protein, and essential nutrients like magnesium and copper, making them a wholesome addition to this stir fry.
  • Soy Sauce: A pantry staple in many households, soy sauce adds depth of flavor and a savory umami kick to the stir fry. It’s an affordable way to season the dish while providing a satisfying saltiness without the need for additional seasoning.
  • Hoisin Sauce: Sweet and tangy hoisin sauce brings a touch of sweetness and complexity to the stir fry sauce. It’s a budget-friendly condiment that adds depth of flavor and richness to the dish, elevating it to new heights of deliciousness.
  • Olive Oil and Sesame Oil: These oils provide a flavorful base for sautéing the ingredients and impart a subtle richness to the stir fry. Olive oil is a heart-healthy option that’s readily available and budget-friendly. Sesame oil adds a distinctive nutty aroma and flavor that complements the other ingredients perfectly.
Chicken Stir Fry with cashews, red bell peppers, eggplant, and green onions

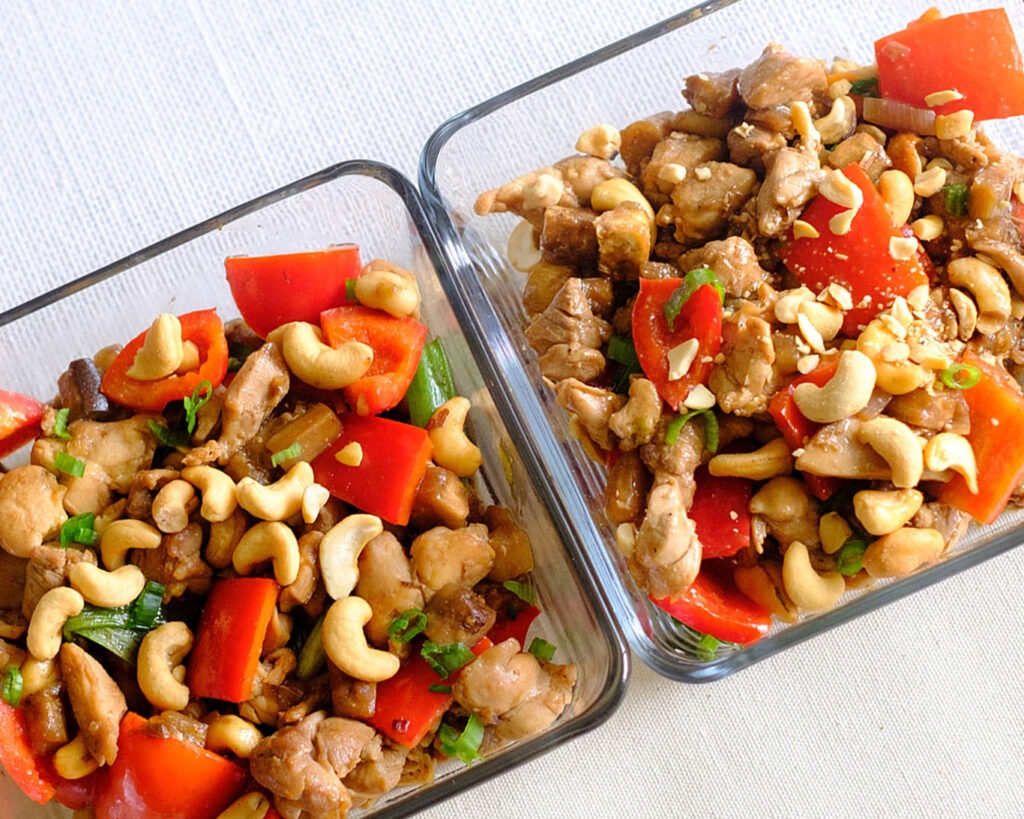
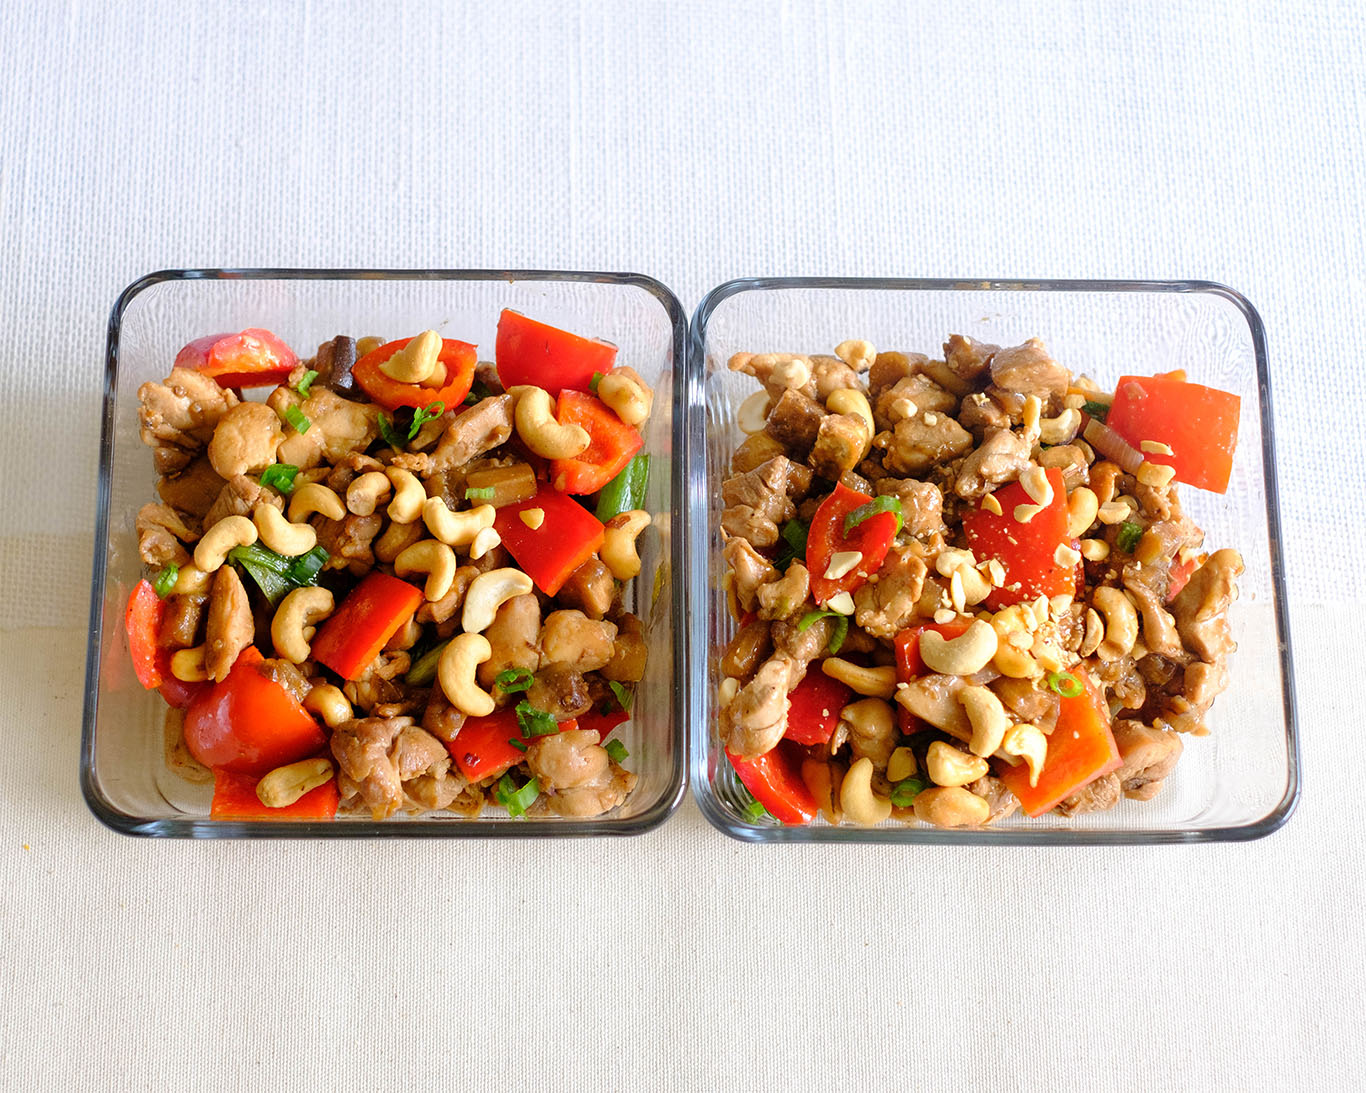
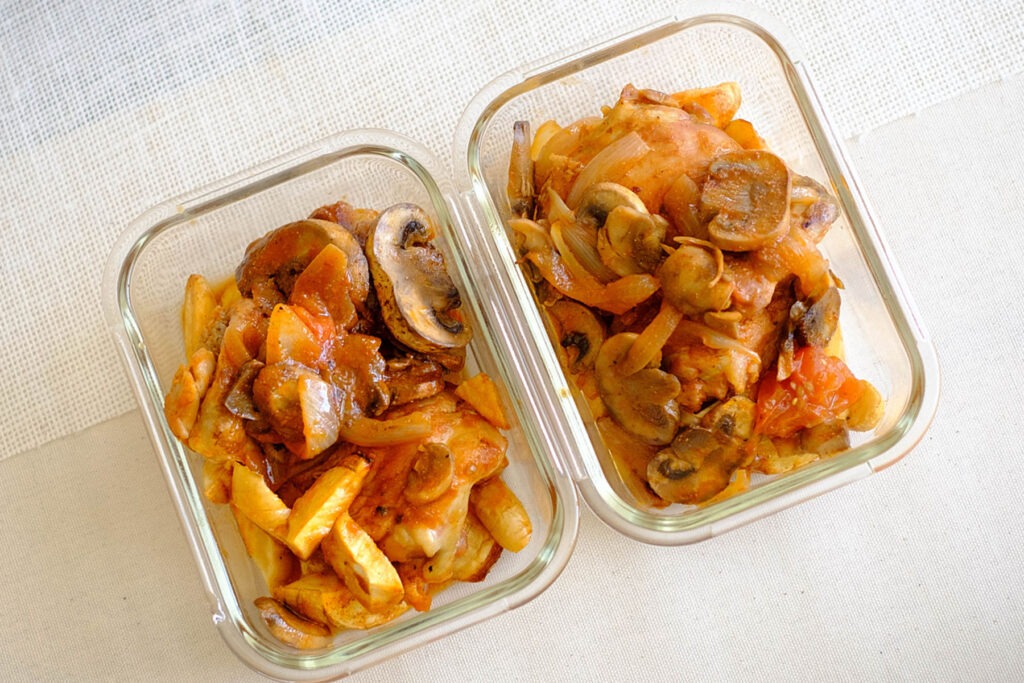
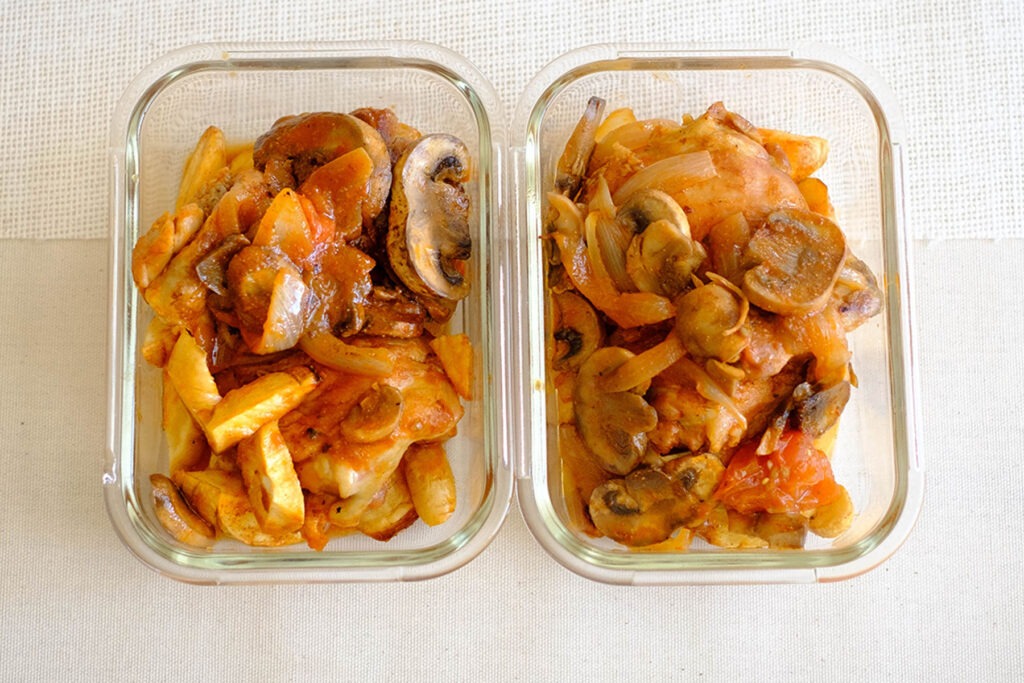
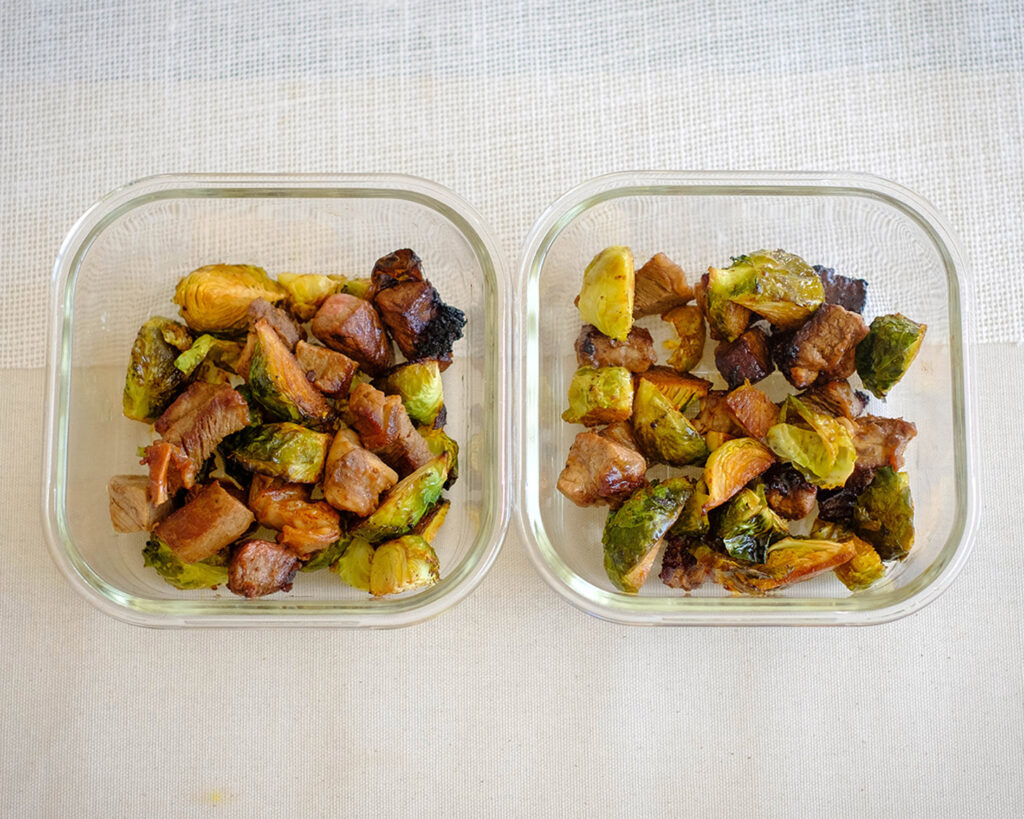
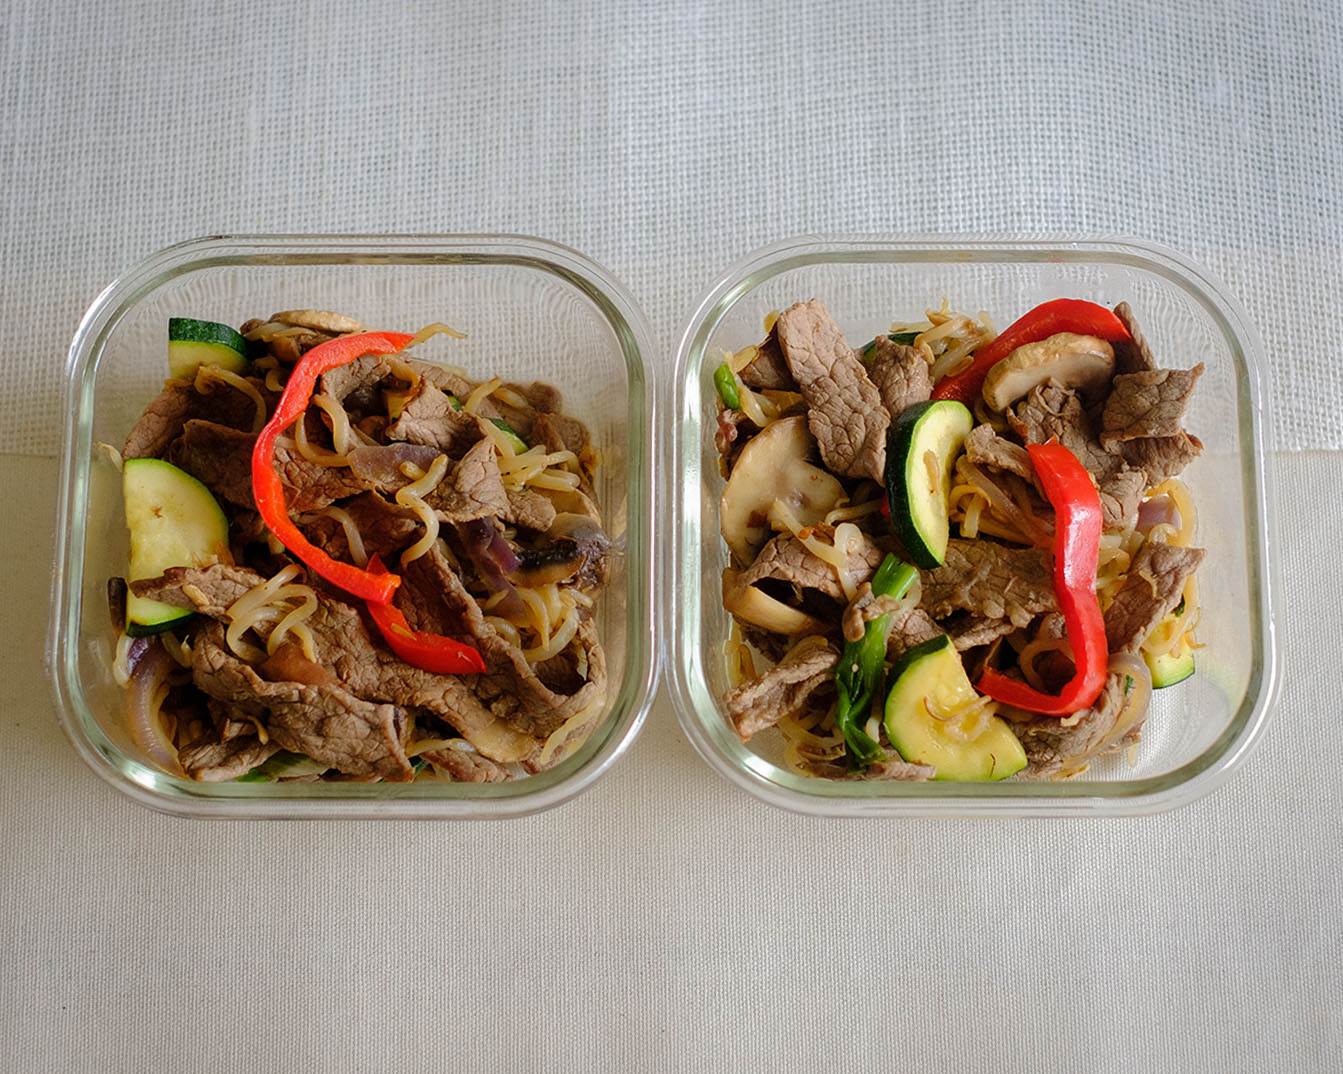
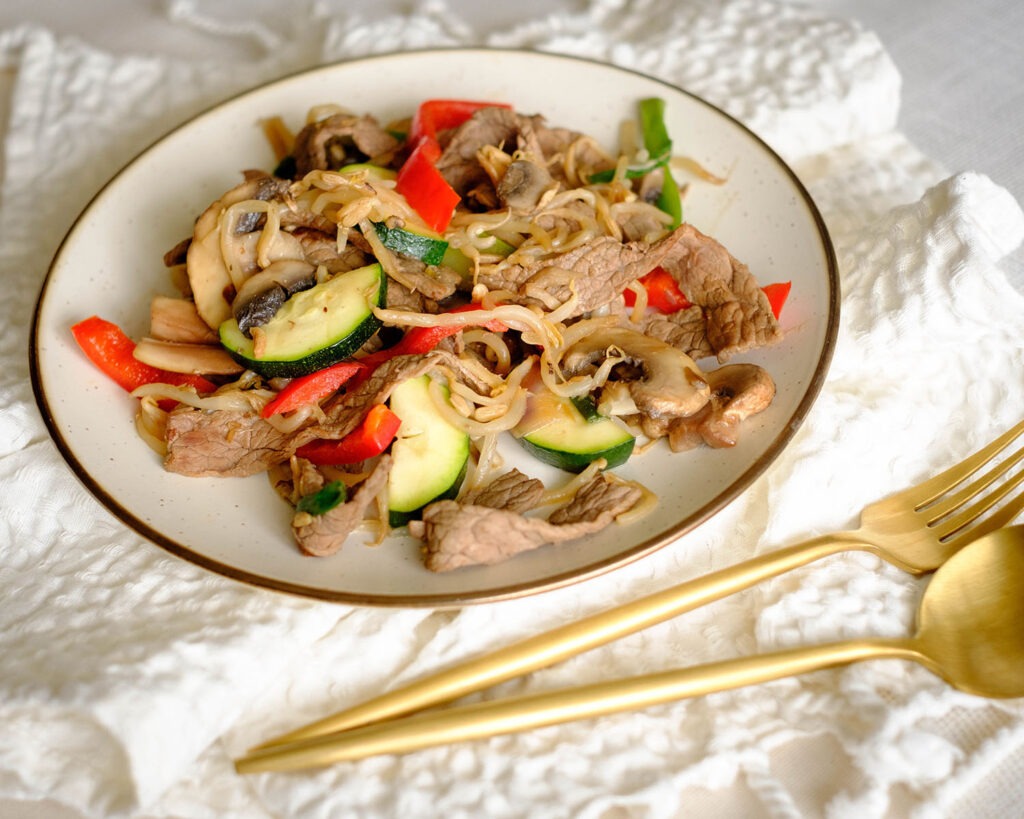
How to Meal Prep Cashew Chicken Stir Fry

  1. Start by cutting your chicken, eggplant, and red bell peppers into adorable little one-inch cubes. Mince up those garlic cloves, dice the red onions, and give those green onions a good chop. We’re getting ready to rock and roll!
  2. Heat up a wok on high heat and drizzle in that olive oil. Toss in the red onions and chicken, and let the magic happen. Stir and sizzle until your chicken is golden brown and cooked through, about 5 to 6 minutes. Trust us, your kitchen is about to smell AMAZING!
  3. Now, it’s time to add some color and flavor. Throw in the garlic, eggplant, and bell peppers, and give everything a good mix. Let those veggies soften up and mingle with the chicken for about 3 to 4 minutes. Can you smell that deliciousness wafting through the air?
  4. This is where the magic truly happens. Pour in the soy sauce, hoisin sauce, and sesame oil, and watch as your stir-fry transforms into a symphony of flavors. Give it all a good stir to ensure every morsel is coated in that savory goodness.
  5. Sprinkle on those crunchy cashews and vibrant green onions like the culinary artist you are. Not only do they add a delightful crunch and pop of color, but they also take this dish to the next level of deliciousness!

Reference the recipe card below for detailed instructions.

Chicken Stir Fry with cashews, red bell peppers, eggplant, and green onions

Meal Prep Tips for Cashew Chicken Stir Fry

  • Customize to Taste: Feel free to customize the stir fry to suit your preferences. Add extra veggies like broccoli, carrots, or snap peas for added nutrition and variety. You can also adjust the seasonings and sauces to your liking for a personalized touch.
  • Reheat with Care: When reheating the stir fry, use a microwave-safe container or reheat it gently on the stovetop to prevent drying out the chicken and vegetables. Add a splash of water or broth if needed to maintain moisture and freshness.
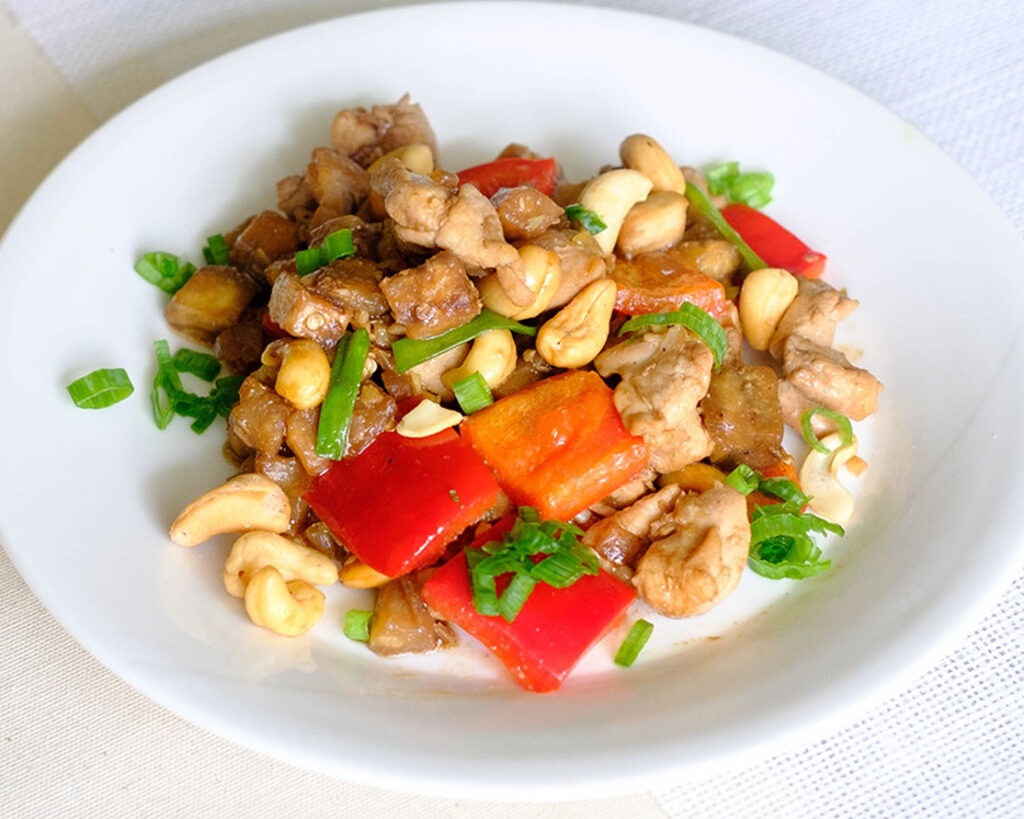
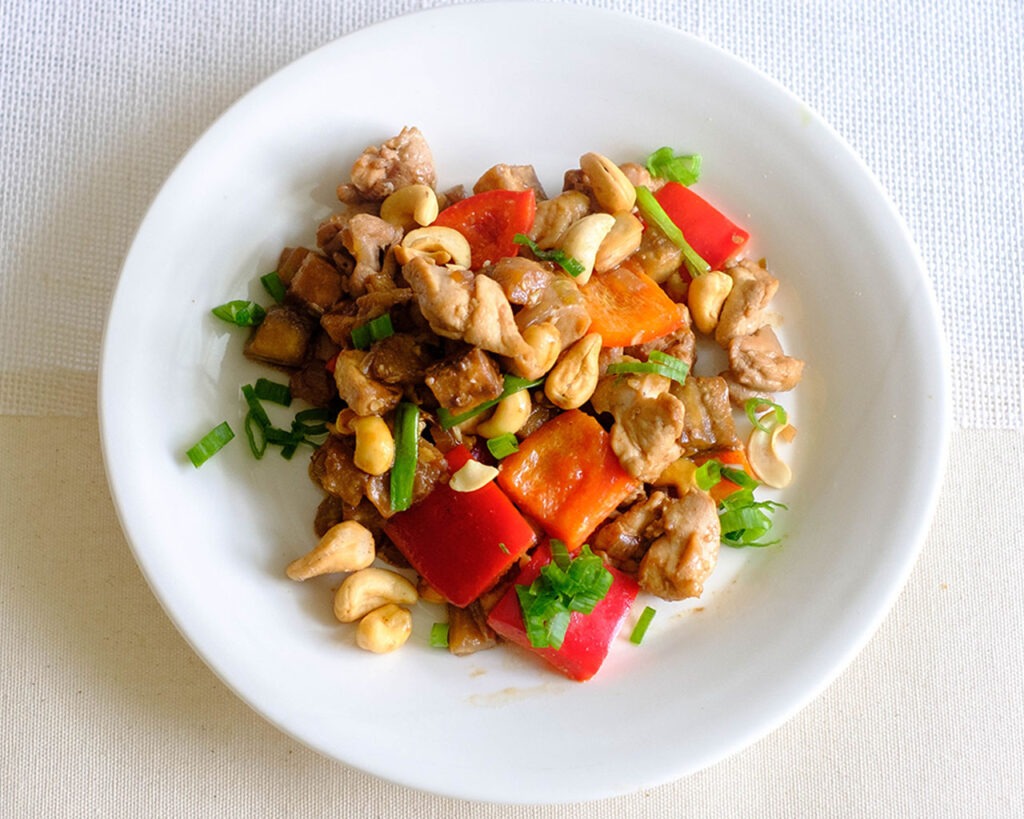
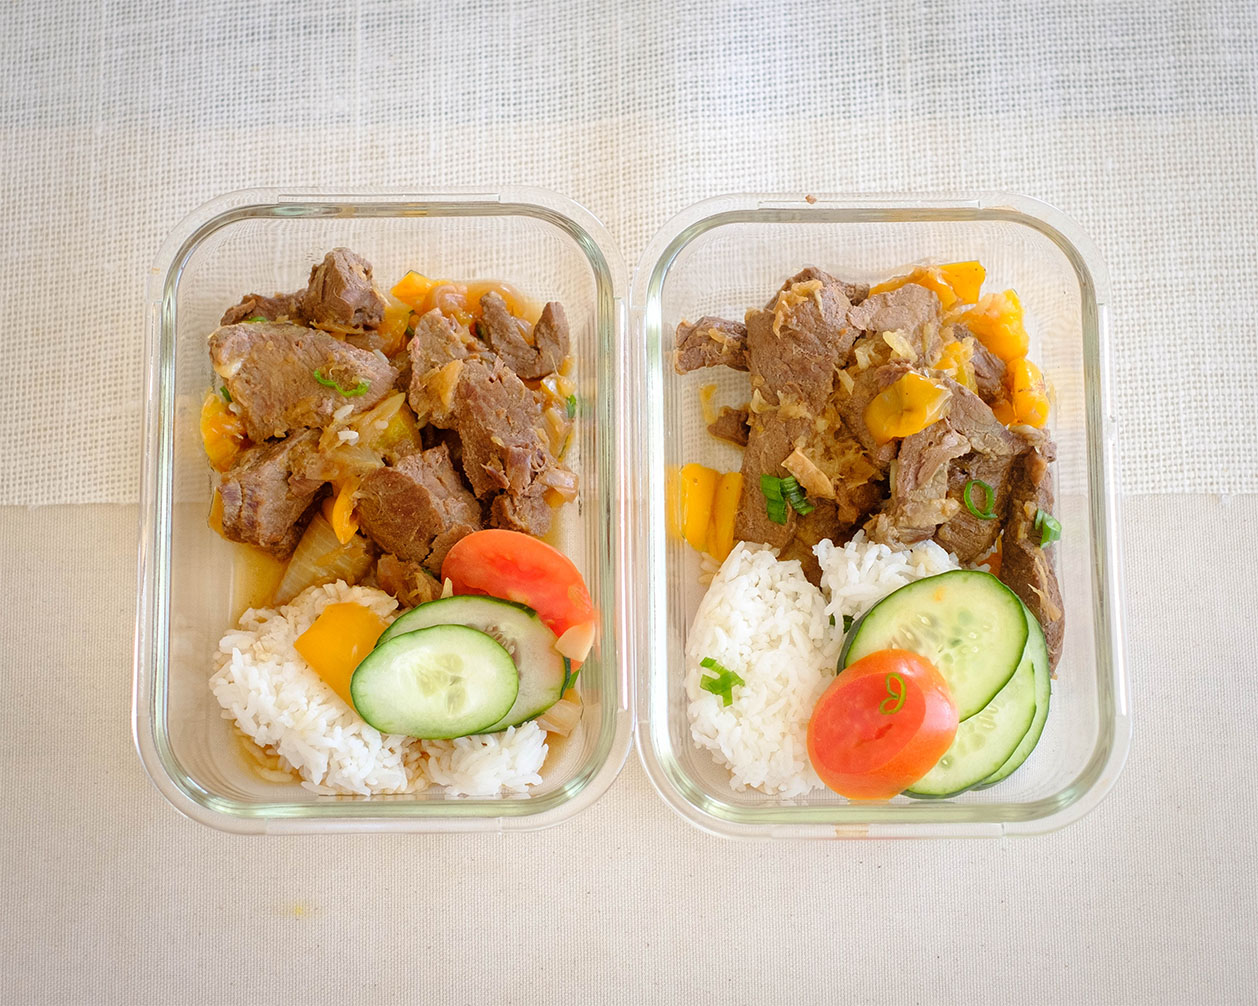
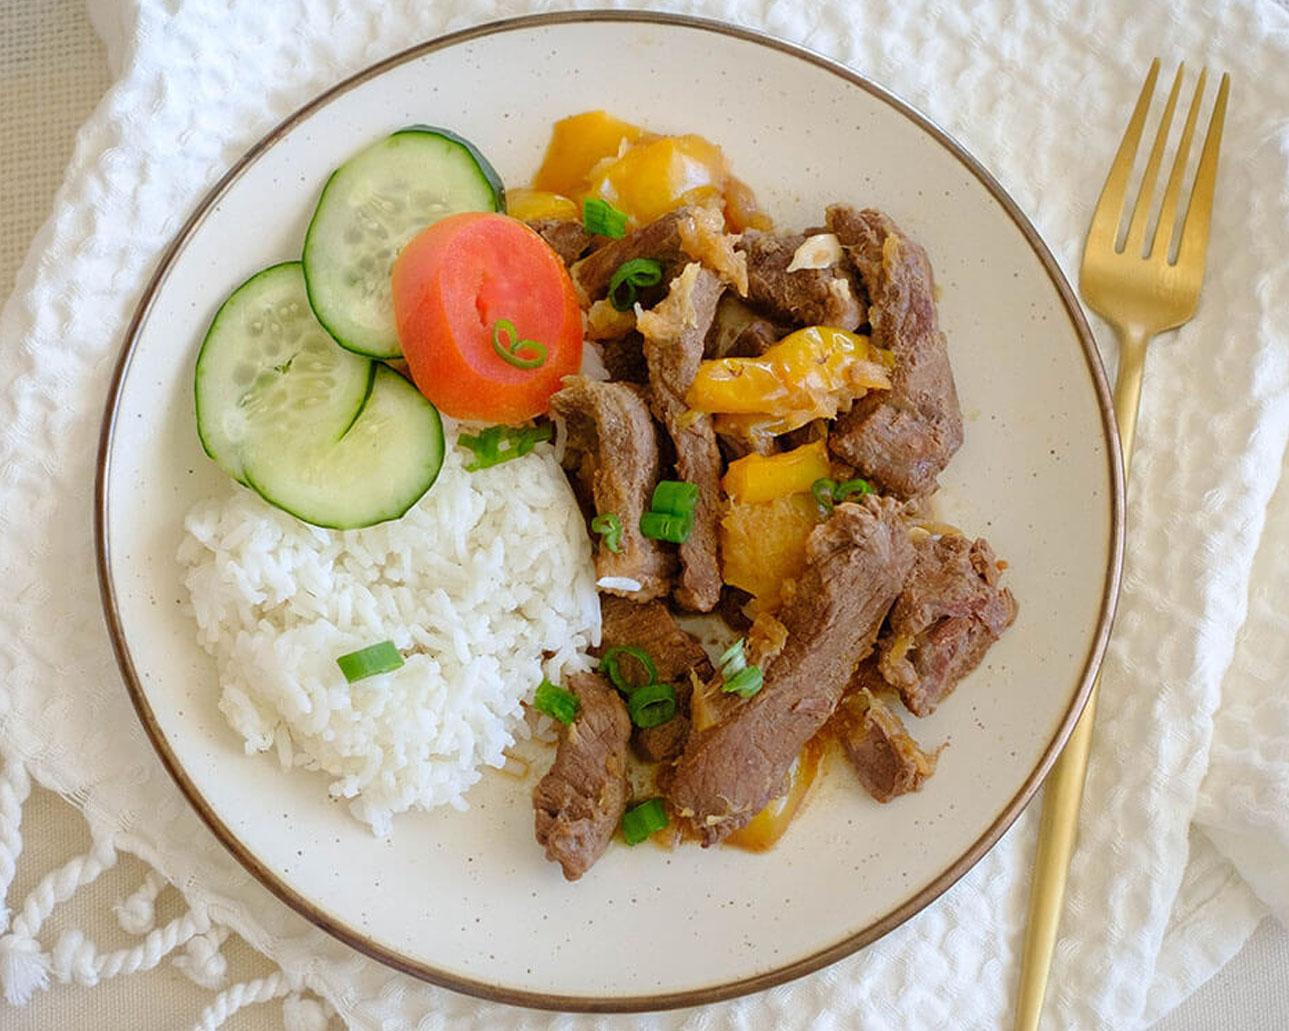
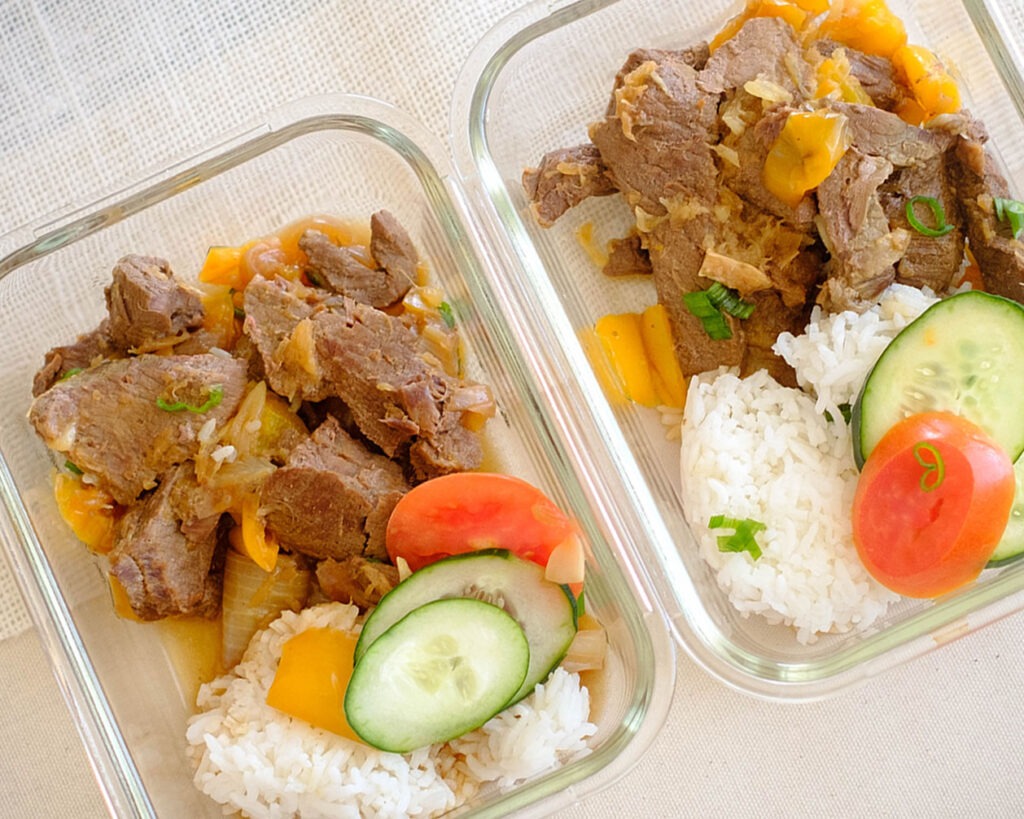
  • Serve with Rice or Noodles: Cashew Chicken and Eggplant Stir Fry pairs beautifully with steamed white or brown rice, or even noodles like rice noodles or udon noodles. The starch helps soak up the flavorful sauce and adds heartiness to the meal.
  • Add a Side Salad: Fresh, crisp salad greens with a tangy vinaigrette make a refreshing accompaniment to the stir fry. Try a simple mix of mixed greens, cherry tomatoes, cucumber, and shredded carrots for a burst of color and freshness. You can also serve this up in lettuce wraps.
  • Incorporate Fermented Foods: Fermented foods like kimchi or pickled vegetables add a zesty kick and probiotic goodness to your meal. Enjoy them as a side dish or incorporate them into the stir fry for extra flavor and gut health benefits.
Chicken Stir Fry with cashews, red bell peppers, eggplant, and green onions

Cashew Chicken and Eggplant Stir Fry

Deliciously flavorful Cashew Chicken and Eggplant Stir Fry, packed with tender chicken, vibrant veggies, and crunchy cashews, perfect for easy meal prep and budget-friendly weeknight dinners!
No ratings yet
Prep Time 5 minutes
Cook Time 15 minutes
Course dinner, Main Course
Cuisine Asian
Servings 2
Calories 578 kcal

Equipment

  • knife
  • cutting board
  • wok

Ingredients
  

  • 10 oz boneless chicken thighs
  • 2 cup eggplant
  • 1 red bell pepper
  • 2 garlic cloves
  • 1/4 cup red onion
  • 1/4 cup green onions
  • 1/4 cup cashews
  • 2 tablespoons soy sauce
  • 2 tablespoons hoisin sauce
  • 1 tablespoon olive oil
  • 1 teaspoon sesame oil

Instructions
 

  • Cut the chicken, eggplant, and red bell peppers into one inch cubes. Peel and mince the garlic, dice the red onions, and chop the green onions.
  • Add olive oil to a wok on high heat and saute the red onions and chicken until the chicken is fully cooked and golden brown (about 5 to 6 minutes).
  • Next, add the garlic, eggplant, and bell peppers. Mix thoroughly until the veggies soften (about 3 to 4 minutes).
  • Then, season everything with the soy sauce, hoisin sauce, and sesame oil and stir it all together.
  • Finally, garnish with the cashews and green onions.

Notes

Nutrition information provided is an estimate. It will vary based on cooking method and specific ingredients used. Please consult with your healthcare provider for specific dietary needs. To gain a better understanding, explore our nutrition disclaimer here. 

Nutrition

Calories: 578kcalCarbohydrates: 25gProtein: 30gFat: 41gSaturated Fat: 9gPolyunsaturated Fat: 8gMonounsaturated Fat: 20gTrans Fat: 0.1gCholesterol: 139mgSodium: 1383mgPotassium: 843mgFiber: 6gSugar: 12gVitamin A: 2119IUVitamin C: 83mgCalcium: 57mgIron: 3mg

Similar Recipes

broccoli beef

Ground Beef and Broccoli Stir Fry

tofu stir fry

Tofu and Veggie Stir Fry

beef and chinese broccoli

Garlicky Beef Stir Fry

You Might Also Like

Frequently Asked Questions

Can I use chicken breast instead of chicken thighs?

Absolutely! While chicken thighs provide extra juiciness and flavor, you can definitely use chicken breast if you prefer. Just be mindful not to overcook it to prevent it from drying out.


Can I make this dish vegetarian or vegan?

Definitely! You can easily make this dish vegetarian or vegan by omitting the chicken and using tofu or tempeh instead. Simply cube the tofu or tempeh and stir-fry it along with the veggies as directed in the recipe.


Can I make this dish spicy?

Of course! If you like a bit of heat, you can add a sprinkle of red pepper flakes or a drizzle of sriracha sauce to the stir fry when adding the sauces. Adjust the amount to your desired level of spiciness.

Posted on Leave a comment

Instant Pot Beef Teriyaki

rectangle glass meal prep containers with teriyaki beef stew, white rice, cucumber, and sliced tomato

This Instant Pot Beef Teriyaki meal prep recipe is a flavorful and wholesome dish that’s perfect for busy individuals craving convenience without compromising on flavor. Picture succulent pieces of lean beef stew meat simmered in a rich and savory teriyaki sauce, infused with the aromatic flavors of garlic, ginger, and sesame oil. But that’s not all – we’re taking things up a notch by adding a medley of vibrant vegetables, including onions, bell peppers, and crushed pineapple, for a burst of freshness and nutrition. The beauty of this recipe lies in its simplicity and versatility – whether you’re meal prepping for the week ahead or looking for a quick and satisfying dinner option, Instant Pot Beef Teriyaki has got you covered.

This post may contain affiliate links. Please see our privacy policy for details.

Calories: 506kcal | Carbohydrates: 51g | Protein: 47g | Fat: 12g | Saturated Fat: 4g | Polyunsaturated Fat: 1g | Monounsaturated Fat: 5g | Cholesterol: 105mg | Sodium: 2582mg | Potassium: 1068mg | Fiber: 3g | Sugar: 11g | Vitamin A: 556IU | Vitamin C: 16mg | Calcium: 85mg | Iron: 5mg

round plate with instant pot beef teriyaki stew, white rice, cucumber, and sliced tomato

Why this Instant Pot Beef Recipe is Great for Meal Prep

  • Quick and Easy Prep: With simple ingredients and straightforward instructions, this recipe won’t have you spending hours in the kitchen. It’s designed for those on the go who need a meal prep solution that fits into their busy schedule.
  • Instant Pot Magic: The Instant Pot is a lifesaver for busy folks. It cooks food faster than traditional methods, meaning you can have a delicious meal on the table in a fraction of the time. It’s the ultimate kitchen multitasker!
  • Nutritious and Balanced: Lean beef stew meat, fresh vegetables, and wholesome grains make this dish a nutritional powerhouse. It’s packed with protein, vitamins, and minerals to fuel your body and keep you going throughout the day.
  • Budget-Friendly: Eating well shouldn’t break the bank, and this recipe proves just that. By using affordable ingredients like beef stew meat, onions, and bell peppers, you can enjoy a satisfying meal without overspending.
  • Delicious and Satisfying: Last but certainly not least, let’s talk about flavor. This Instant Pot Beef Teriyaki is an explosion of taste in every bite. From the tender beef to the savory teriyaki sauce, it’s a meal that’s sure to satisfy your cravings and leave you feeling nourished and satisfied.

The PrepYoSelf Newsletter

Ingredient Breakdown

  • Lean Beef Stew Meat: Lean beef stew meat is the protein powerhouse of this dish. It’s not only rich in protein, which helps keep you feeling full and satisfied, but it also adds a hearty flavor to the dish. By opting for lean cuts, we keep the dish healthy without sacrificing taste.
  • Onions: Onions are a kitchen staple for a reason. They add a delicious depth of flavor to any dish and are packed with nutrients like vitamins C and B6, as well as antioxidants. Plus, they’re super affordable, making them a budget-friendly choice that adds both flavor and nutrition to our beef teriyaki.
  • Bell Peppers: Not only do bell peppers add a pop of color to our dish, but they also bring a subtle sweetness and crunch. They’re loaded with vitamins A and C, as well as fiber, making them a nutritious addition to our meal. Plus, they’re relatively inexpensive, especially when in season, making them a wallet-friendly choice.
  • Garlic and Ginger: These aromatic ingredients are the flavor powerhouses of our dish. Garlic adds a savory depth, while ginger brings a zesty, slightly spicy kick. Both are known for their anti-inflammatory and immune-boosting properties, adding both flavor and health benefits to our meal.
  • Crushed Pineapple: Crushed pineapple adds a touch of sweetness and acidity to our teriyaki sauce. It helps balance out the savory flavors and adds a tropical twist to the dish. Plus, canned pineapple is an affordable option that’s available year-round, making it a budget-friendly choice.
  • Beef Broth: Beef broth not only serves as the liquid base for our dish but also adds depth and richness to the flavor. It helps tenderize the beef and infuses it with savory goodness. Using store-bought beef broth is a convenient and budget-friendly option, but you can also make your own using leftover beef bones for an even thriftier choice.
  • Soy Sauce: Soy sauce is the star of our teriyaki sauce, adding that classic umami-rich flavor. It’s salty, savory, and adds a depth of flavor that ties everything together. Plus, it’s a pantry staple that’s relatively inexpensive and adds a ton of flavor to dishes without breaking the bank.
  • Sesame Oil: Sesame oil adds a nutty richness to our dish and helps round out the flavors of our teriyaki sauce. A little goes a long way, so even though it may be a bit pricier than other oils, you only need a small amount to add a big punch of flavor.

rectangle glass meal prep containers with instant pot beef teriyaki stew, white rice, cucumber, and sliced tomato

How to Meal Prep Instant Pot Beef Teriyaki

  1. Gather up all your ingredients and let’s prep like a pro! Slice those onions, cube the bell pepper, peel those garlic cloves, and grate that ginger. We’re about to create magic in the kitchen!
  2. Now, it’s time to bring out the Instant Pot, our trusty sidekick in the kitchen. Add in the beef, onions, garlic, ginger, bell peppers, crushed pineapple, beef broth, soy sauce, salt, pepper, garlic powder, and sesame oil. It’s like a party in there!
  3. Close the lid of your Instant Pot and set the valve to “sealing”. We’re about to embark on a flavor-filled journey! Set it to cook on high pressure for 25 minutes. Go ahead, take a moment to revel in the anticipation.
  4. Once the cooking cycle is complete, let the pressure naturally release for 5 to 10 minutes. It’s like giving our dish a little time to relax and soak up all those delicious flavors before the big reveal.
  5. Open the lid of your Instant Pot and get ready for the grand finale! Ladle that mouthwatering beef teriyaki over a generous bowl of cooked rice. The aroma alone is enough to make your taste buds dance with joy!
  6. ow, let’s add some flair to our masterpiece! Top off your dish with some fresh sliced cucumbers and tomatoes. Not only does it add a pop of color, but it also adds a refreshing crunch that takes this dish to the next level!

Reference the recipe card below for detailed instructions.

round plate with instant pot beef teriyaki stew, white rice, cucumber, and sliced tomato

Meal Prep and Pairing Tips

  • Rice Varieties: While white rice is the classic pairing for beef teriyaki, you can mix things up by using brown rice, jasmine rice, or even cauliflower rice for a lower-carb option. Each variety brings its own unique texture and flavor to the dish.
  • Side Salad: Pair your beef teriyaki with a simple side salad for added freshness and crunch. Mix together your favorite greens with some sliced cucumbers, cherry tomatoes, and a drizzle of sesame ginger dressing for a flavor-packed accompaniment.
  • Stir-Fried Vegetables: Serve your beef teriyaki alongside a medley of stir-fried vegetables for a complete meal. You can quickly sauté broccoli, bell peppers, snap peas, and carrots in a hot skillet with a splash of soy sauce and sesame oil for a delicious and nutritious side dish.
  • Asian Slaw: For a refreshing twist, serve your beef teriyaki with a side of Asian slaw. Shred cabbage, carrots, and bell peppers, and toss them with a tangy sesame ginger dressing for a crunchy and flavorful accompaniment.
  • Fresh Fruit: Round out your meal with some fresh fruit for dessert. Sliced pineapple, mango, or watermelon make a sweet and refreshing way to end your meal on a high note.

rectangle glass meal prep containers with instant pot beef teriyaki stew, white rice, cucumber, and sliced tomato

Round plate with rice, beef, cucumber and tomato

Instant Pot Pineapple Beef Teriyaki

Tender beef paired with tangy, pineapple and a savory teriyaki sauce that is quick to prep on a busy week night.
No ratings yet
Prep Time 5 minutes
Cook Time 35 minutes
Course dinner, Main Course
Cuisine Asian
Servings 2
Calories 506 kcal

Equipment

  • knife
  • cutting board
  • Instant Pot

Ingredients
  

  • 12 oz lean beef stew meat
  • 1/2 each white onions (sliced)
  • 1 each yellow bell pepper (cubed)
  • 2 each garlic cloves (peeled)
  • 1 tablespoon ginger (grated)
  • 1/2 cup crushed pineapple
  • 2 cups beef broth
  • 2 tablespoon soy sauce
  • 1/2 teaspoon salt
  • 1/4 teaspoon pepper
  • 1/4 teasponn garlic powder
  • 1 teaspoon sesame oil

Optional Sides

  • 1.5 cups rice (cooked)
  • 1/4 cup cucumber (sliced)
  • 1 tomato (sliced)

Instructions
 

  • Add the beef, onions, garlic, ginger, bell peppers, crushed pineapple, broth, sesame oil, soy sauce, salt, and pepper to the pot.
  • Close the lid of the Instant Pot and set the valve to "sealing". Cook on high pressure for 25 minutes
  • Once the cooking cycle is complete, allow the pressure to naturally release for 5 to 10 minutes before manually releasing any remaining pressure.
  • Open the lid and ladle the soup over a bowl of rice. Garnish with sliced cucumbers and tomatoes.
  • Note: If you don't have an instant pot, you can use a slow cooker and cook it on high for 4 to 6 hours

Notes

Nutrition information provided is an estimate. It will vary based on cooking method and specific ingredients used. Please consult with your healthcare provider for specific dietary needs. To gain a better understanding, explore our nutrition disclaimer here. 

Nutrition

Calories: 506kcalCarbohydrates: 51gProtein: 47gFat: 12gSaturated Fat: 4gPolyunsaturated Fat: 1gMonounsaturated Fat: 5gCholesterol: 105mgSodium: 2582mgPotassium: 1068mgFiber: 3gSugar: 11gVitamin A: 556IUVitamin C: 16mgCalcium: 85mgIron: 5mg

Similar Recipes

chicken soup

One Pot Mexican Chicken Soup

sweet potato blt

Instant Pot Beef Ragu

pork carnitas

Instant Pot Pork Carnitas

You Might Also Like

Frequently Asked Questions

Can I use a different cut of beef for this recipe?

Absolutely! While lean beef stew meat works well in this recipe, you can also use other cuts like flank steak, sirloin, or even beef chuck. Just make sure to adjust the cooking time accordingly based on the cut you choose.


Can I make this recipe without an Instant Pot?

Yes, you can! If you don’t have an Instant Pot, you can still make this recipe on the stovetop or in a slow cooker. Simply follow the same instructions, adjusting the cooking time and method as needed.


Can I use fresh pineapple instead of crushed pineapple?

Of course! Fresh pineapple will add a wonderful burst of flavor to the dish. Simply chop it into small pieces and use it in place of the crushed pineapple. You may want to adjust the sweetness to taste by adding a bit of honey or brown sugar if needed.

Posted on Leave a comment

Salmon Piccata with Asparagus

glass rectangle meal prep containers with salmon fillet topped with lemon, capers, and asparagus

Welcome to your new go-to meal prep solution that’s as delicious as it is convenient: Salmon Piccata Meal Prep! If you’re a busy individual looking to stay on track with your healthy eating goals without sacrificing flavor or breaking the bank, then you’ve come to the right place. This recipe combines tender salmon fillets, crisp asparagus, and a tangy lemon caper sauce for a gourmet experience that’s ready in a flash. With just a handful of ingredients and minimal prep time, you’ll have a week’s worth of nutritious and satisfying meals at your fingertips. Get ready to impress your taste buds and streamline your meal prep routine with this flavor-packed dish. So, let’s roll up our sleeves and dive into the kitchen – your taste buds will thank you!

This post may contain affiliate links. Please see our privacy policy for details.

Calories: 370kcal | Carbohydrates: 6g | Protein: 36g | Fat: 22g | Saturated Fat: 9g | Polyunsaturated Fat: 5g | Monounsaturated Fat: 7g | Trans Fat: 0.5g | Cholesterol: 124mg | Sodium: 680mg | Potassium: 1043mg | Fiber: 2g | Sugar: 2g | Vitamin A: 1073IU | Vitamin C: 12mg | Calcium: 56mg | Iron: 3mg

round plate with salmon fillet topped with lemon, capers, and asparagus

Why This Recipe is Great for Meal Prep

  • Quick and Easy: With just a few simple steps and minimal prep time, this recipe fits perfectly into your busy schedule. No need to spend hours in the kitchen – you’ll have delicious meals ready to go in no time!
  • Healthy and Nutritious: Salmon is packed with omega-3 fatty acids, protein, and essential vitamins, making it a nutritious choice for fueling your body. Paired with nutrient-rich asparagus, this meal provides a wholesome balance of nutrients to keep you energized throughout the day.
  • Budget-Friendly: Eating healthy doesn’t have to break the bank! This recipe utilizes affordable ingredients like salmon and asparagus, allowing you to enjoy a gourmet meal without overspending.
  • Flavor Explosion: The tangy lemon sauce infused with butter, garlic, and capers adds a burst of flavor to every bite. It’s a deliciously satisfying meal that will leave your taste buds dancing with joy.
  • Versatile: While this recipe is designed for meal prep, it’s also versatile enough to be enjoyed for dinner parties or weeknight meals. Impress your guests or treat yourself to a gourmet dinner without the hassle.

The PrepYoSelf Newsletter

To Meal Prep This Salmon Recipe You’ll Need

  • Salmon: Salmon is the star of this dish for a good reason. Not only is it rich in omega-3 fatty acids, which are beneficial for heart health and brain function, but it’s also an excellent source of protein. Protein helps to keep you feeling full and satisfied, making it an essential component of any meal. Additionally, salmon has a naturally rich and buttery flavor that pairs beautifully with the tangy lemon sauce, creating a harmonious balance of flavors.
  • Asparagus: Asparagus not only adds vibrant color to the dish but also contributes a host of nutrients. It’s packed with vitamins, minerals, and antioxidants, including vitamins A, C, E, and K. Asparagus is also high in fiber, which aids in digestion and promotes gut health. Its slightly bitter flavor complements the richness of the salmon and adds a delightful crunch to each bite.
  • Lemon Juice: Lemon juice serves as the primary acidic component in the sauce, lending a bright and tangy flavor to the dish. It adds a refreshing zing that cuts through the richness of the butter and enhances the natural flavors of the salmon and asparagus. Additionally, lemon juice is a great source of vitamin C, which boosts the immune system and aids in iron absorption.
  • Butter: Melted butter adds a luxurious richness to the sauce, creating a velvety texture that coats the salmon and asparagus. While butter is often associated with indulgence, using it in moderation adds depth of flavor without compromising on health. Opting for unsalted butter allows you to control the sodium content of the dish.
  • Capers: Capers are small, briny buds that pack a punch of flavor. They add a unique, slightly tangy taste to the sauce, balancing out the richness of the butter and adding depth to the overall flavor profile. Capers are also low in calories and high in antioxidants, making them a healthy and flavorful addition to the dish.
  • Minced Garlic: Garlic is a kitchen staple known for its pungent flavor and numerous health benefits. It adds a savory depth to the sauce, enhancing the overall complexity of flavors. Garlic is also rich in sulfur compounds that have been shown to have anti-inflammatory and immune-boosting properties, making it a nutritious addition to any meal.

round plate with salmon fillet topped with lemon, capers, and asparagus

Easy Recipe Steps to Meal Prep Oven Roasted Salmon

  1. First things first, preheat your oven to 400F. We’re getting ready to create some magic!
  2. Rinse the baby bok choy halves thoroughly to ensure they’re dirt-free. No one wants extra crunch from the soil!
  3. While the oven is heating up, let’s whip together that amazing sauce. In a small bowl, mix together the lemon juice, melted butter, capers, minced garlic, and a pinch of salt. Give it a good stir until everything is nicely combined. This sauce is going to be the star of the show!
  4. Now, grab a sheet pan and lay out your salmon fillets and asparagus. It’s like creating a canvas for a masterpiece!
  5. Next, pour that delectable sauce you just made all over the salmon and asparagus. Be generous! We want every bite to be bursting with flavor.
  6. Once your oven is nice and toasty, pop the sheet pan in and let the magic happen. Bake for 10-12 minutes, or until the salmon is cooked to perfection and the asparagus is tender. Trust me, your kitchen is going to smell amazing!
  7. Once the timer goes off, carefully remove the sheet pan from the oven. Let it cool for a moment before portioning out your servings into containers.

Reference the recipe card below for detailed instructions.

rectangle glass meal prep containers with salmon fillet topped with lemon, capers, and asparagus

Meal Prep and Pairing Tips

  • Grains: Pairing this dish with a whole grain such as quinoa, brown rice, or farro can add texture, substance, and extra nutrients to your meal. Cook a batch of grains during your meal prep session and portion them into containers alongside the salmon and asparagus.
  • Fresh Fruit: Adding fresh fruit like berries, sliced apples, or grapes to your meal prep containers provides a refreshing and sweet contrast to the savory flavors of the salmon piccata. It’s a simple and nutritious way to round out your meal.
  • Healthy Fat Sources: Consider adding sources of healthy fats such as avocado slices, nuts, or seeds to your meal prep containers. These ingredients not only add flavor and texture but also help to keep you feeling full and satisfied.
  • Herbs: Garnishing your meal prep containers with fresh herbs like parsley, dill, or basil adds a pop of color and freshness. 
  • Sauce Options: While the lemon caper sauce is delicious on its own, you can also consider pairing the salmon piccata with additional sauce options such as pesto, tzatziki, or salsa verde for variety. Portion the sauce into small containers or drizzle it directly over the meal prep containers before serving.

glass rectangle meal prep containers with salmon fillet topped with lemon, capers, and asparagus

glass meal prep containers with salmon, asparagus, topped with lemon slice and capers

Oven Baked Salmon Piccata with Roasted Asparagus

Effortlessly flavorful Salmon Piccata Meal Prep: succulent salmon and crisp asparagus bathed in a tangy lemon caper sauce, perfect for busy days!
No ratings yet
Prep Time 5 minutes
Cook Time 10 minutes
Course dinner, lunch, Main Course
Cuisine American
Servings 2
Calories 370 kcal

Equipment

  • sheet pan
  • oven

Ingredients
  

Salmon and Asparagus

  • 12 oz salmon
  • 6 oz asparagus

Sauce

  • 2 tablespoons lemon juice
  • 2 tablespoons melted butter
  • 2 tablespoons capers
  • 1 tablespoons minced garlic
  • 1/4 teaspoon salt

Instructions
 

  • Pre-heat the oven to 400F. Mix together the sauce in a small bowl.
  • Place the salmon and asparagus on a sheet pan and evenly pour the sauce over the salmon and asparagus.
  • Bake in the oven for 10-12 minutes until the salmon is fully cooked.

Notes

Nutrition information provided is an estimate. It will vary based on cooking method and specific ingredients used. Please consult with your healthcare provider for specific dietary needs. To gain a better understanding, explore our nutrition disclaimer here. 

Nutrition

Calories: 370kcalCarbohydrates: 6gProtein: 36gFat: 22gSaturated Fat: 9gPolyunsaturated Fat: 5gMonounsaturated Fat: 7gTrans Fat: 0.5gCholesterol: 124mgSodium: 680mgPotassium: 1043mgFiber: 2gSugar: 2gVitamin A: 1073IUVitamin C: 12mgCalcium: 56mgIron: 3mg

Similar Recipes

salmon beet salad

Citrus Ginger Salmon with Roasted Beets

salmon and watermelon salad

Grilled Salmon with Watermelon Salad

salmon salad

Salmon Stuffed Avocado Salad

You Might Also Like

Frequently Asked Questions

Can I use frozen salmon instead of fresh?

Yes, frozen salmon can be used in this recipe. Just make sure to thaw it completely before cooking. You may need to adjust the cooking time slightly depending on the thickness of the fillets


Can I substitute a different type of fish for the salmon?

While salmon works beautifully in this recipe, you can certainly experiment with other types of fish such as trout, cod, or tilapia. Just be mindful of variations in cooking times and adjust accordingly.


I’m not a fan of asparagus. Can I use a different vegetable?

Absolutely! Feel free to swap out the asparagus for your favorite vegetable or a medley of veggies. Broccoli, green beans, or Brussels sprouts would all be delicious alternatives.

Posted on Leave a comment

Peanut Butter and Banana Muffin Bars

rectangle baking dish with peanut butter muffin with banana slice topping

Wake up to the delightful aroma of freshly baked Peanut Butter Banana Muffin Bars, a nutritious and convenient breakfast option that will kickstart your day with a burst of flavor. This recipe combines the timeless duo of peanut butter and bananas into moist and tender muffin bars, sweetened with a touch of honey for the perfect balance of sweetness. With just a handful of pantry staples and simple instructions, you can easily whip up a batch of these delicious bars in no time, making them ideal for busy mornings or meal prepping ahead of time. Whether enjoyed warm out of the oven or packed for an on-the-go breakfast, these muffin bars are sure to become a favorite in your household. Customize them with your favorite mix-ins or enjoy them as is for a satisfying and wholesome start to your day.

This post may contain affiliate links. Please see our privacy policy for details.

Calories: 310kcal | Carbohydrates: 39g | Protein: 12g | Fat: 13g | Saturated Fat: 3g | Polyunsaturated Fat: 3g | Monounsaturated Fat: 5g | Trans Fat: 0.01g | Cholesterol: 89mg | Sodium: 177mg | Potassium: 251mg | Fiber: 2g | Sugar: 13g | Vitamin A: 218IU | Vitamin C: 0.1mg | Calcium: 130mg | Iron: 2mg

viewed from an angle a rectangle baking dish with peanut butter muffin bars with banana slice topping

Why are these muffin bars great for meal prep?

  • Convenience Factor: With just a handful of ingredients and simple instructions, these muffin bars are incredibly easy to whip up. Plus, they’re perfect for meal prepping ahead of time, saving you valuable minutes during busy mornings
  • Versatile and Customizable: While the base recipe is delicious on its own, you can easily customize these muffin bars to suit your taste preferences. Add in extras like chocolate chips, chopped nuts, or a sprinkle of cinnamon for a flavor twist.
  • Portability: Whether you’re rushing out the door or enjoying a leisurely breakfast at home, these muffin bars are the perfect grab-and-go option. Simply wrap them up individually and take them with you wherever you go.
  • Kid-Friendly: Picky eaters won’t be able to resist the sweet combination of peanut butter and bananas in these muffin bars. They’re a great way to sneak in some extra nutrients for the little ones while keeping them satisfied until lunchtime.
  • Freezer-Friendly: Make a big batch of these muffin bars and stash them in the freezer for future breakfasts. They’ll stay fresh for weeks, making them a convenient option for busy mornings or last-minute meals.

The PrepYoSelf Newsletter

Simple Ingredients for Peanut Butter and Banana Muffin Bars

  • Bananas: Bananas serve as the primary fruit component in this recipe. They not only add natural sweetness but also contribute moisture and texture to the muffin bars. Bananas are rich in potassium, which supports heart health, and fiber, which aids digestion. Additionally, bananas are typically inexpensive year-round, making them a budget-friendly choice for adding flavor and nutrients to the recipe.
  • Peanut Butter: Peanut butter not only adds a rich, nutty flavor but also brings healthy fats and protein to the table. It helps to make the muffin bars more filling and satisfying, keeping hunger at bay throughout the morning. Peanut butter is also a budget-friendly pantry staple, offering a great bang for your buck in terms of nutritional value and versatility in various recipes.
  • Egg: The egg serves as a binding agent in this recipe, helping to hold the ingredients together and providing structure to the muffin bars. Eggs are an excellent source of high-quality protein, vitamins, and minerals, including vitamin B12 and selenium. They’re also relatively affordable, especially when purchased in larger quantities, making them a budget-friendly ingredient that adds nutritional value to the recipe.
  • Milk: Milk adds moisture and richness to the muffin bars while also contributing to their tender texture. It provides essential nutrients such as calcium, vitamin D, and protein, promoting bone health and overall wellness. Milk is often an affordable staple in most households, making it a budget-friendly ingredient that enhances both the flavor and nutritional profile of the recipe.
  • Honey: Honey serves as a natural sweetener in this recipe, providing a touch of sweetness without the need for refined sugars. It also adds moisture and helps to enhance the flavors of the other ingredients. Honey contains antioxidants and has antimicrobial properties, making it a healthier alternative to processed sugars. While honey may be slightly more expensive than granulated sugar, a little goes a long way, making it a cost-effective option for adding sweetness to the muffin bars.
  • Flour: Flour serves as the base ingredient in this recipe, providing structure and volume to the muffin bars. While all-purpose flour is used here, you can also opt for whole wheat flour for added fiber and nutrients. Flour is a pantry staple that is relatively inexpensive, making it a budget-friendly option for baking a variety of recipes.
  • Baking Powder: Baking powder acts as a leavening agent in this recipe, helping the muffin bars to rise and achieve a light and fluffy texture. It ensures that the bars have the perfect amount of lift and tenderness. Baking powder is a cost-effective ingredient commonly used in baking, making it a budget-friendly addition to this recipe.

rectangle baking dish with peanut butter muffin bars with banana slice topping

How to Meal Prep Peanut Butter and Banana Muffin Bars:

  1. First things first, preheat your oven to 400°F (200°C). This ensures that it’s ready to go when your muffin bars are all set to bake.
  2. In a mixing bowl, crack open your egg and pour in the milk, honey, and peanut butter. Whisk these ingredients together until they are well combined and form a smooth mixture.
  3. Now, it’s time to add the flour and baking powder to the wet mixture. Stir everything together until you achieve a smooth batter. Make sure there are no lumps, as we want our muffin bars to be perfectly fluffy.
  4. Grease a baking dish to prevent sticking, then transfer your batter into it. Spread the batter evenly using a spatula to ensure uniform baking.
  5. lace the baking dish in the preheated oven and let your muffin bars bake for approximately 15 minutes, or until the center is fully cooked. You can test this by inserting a toothpick into the center—if it comes out clean, your bars are ready to go!
  6. Once your muffin bars are out of the oven and cooling down, it’s time to add the finishing touch. Slice some fresh bananas and place them on top of your bars for a delicious and nutritious topping.

Reference the recipe card below for detailed instructions.

rectangle baking dish with peanut butter muffin bars with banana slice topping

Meal Prep and Pairing Tips:

  • Coffee or Tea: Start your morning right by enjoying a warm cup of coffee or tea alongside your muffin bar. The slight bitterness of coffee or the soothing qualities of tea can balance the sweetness of the muffin bars, creating a harmonious breakfast duo.
  • Greek Yogurt: Serve your muffin bar with a side of creamy Greek yogurt for added protein and texture. You can even drizzle some honey on top of the yogurt for extra sweetness.
  • Granola: Sprinkle some crunchy granola over your muffin bar to add texture and a hint of sweetness. It’s a great way to add a satisfying crunch to your breakfast.
  • Maple Syrup: Drizzle a touch of maple syrup over your muffin bar for an extra layer of sweetness. The rich, caramel-like flavor of maple syrup pairs beautifully with the nuttiness of peanut butter and the natural sweetness of bananas.
  • Hard-Boiled Eggs: For a balanced breakfast with added protein, serve your muffin bar with a side of hard-boiled eggs. It’s a filling combination that will keep you satisfied until your next meal.

rectangle baking dish with peanut butter muffin bars with banana slice topping

rectangle baking dish with peanut butter muffin with banana slice topping

Peanut Butter Banana Muffin Bar

Wholesome Peanut Butter Banana Muffin Bars, bursting with natural sweetness and packed with nutrients, perfect for a quick and satisfying breakfast on-the-go!
No ratings yet
Prep Time 5 minutes
Cook Time 15 minutes
Course Breakfast
Cuisine American
Servings 2
Calories 310 kcal

Equipment

  • whisk
  • mixing bowl
  • baking dish
  • oven

Ingredients
  

  • 1 large egg
  • 1/2 cup milk
  • 1 tablespoon honey
  • 2 tablespoon peanut butter
  • 1/2 cup flour
  • 1/4 teaspoon baking powder

Instructions
 

  • Preheat the oven to 400F
  • Add the egg, milk, honey, and peanut butter to a mixing bowl.
  • Next, add the flour and baking powder and mix all the ingredients together until you get a smooth batter.
  • Transfer the batter into a greased baking dish. Bake in the oven for 15 minutes until the center is fully cooked.
  • After the muffin cooks, top it off with sliced bananas.

Notes

Nutrition information provided is an estimate. It will vary based on cooking method and specific ingredients used. Please consult with your healthcare provider for specific dietary needs. To gain a better understanding, explore our nutrition disclaimer here. 

Nutrition

Calories: 310kcalCarbohydrates: 39gProtein: 12gFat: 13gSaturated Fat: 3gPolyunsaturated Fat: 3gMonounsaturated Fat: 5gTrans Fat: 0.01gCholesterol: 89mgSodium: 177mgPotassium: 251mgFiber: 2gSugar: 13gVitamin A: 218IUVitamin C: 0.1mgCalcium: 130mgIron: 2mg

Similar Recipes

baked oatmeal

Oven Baked Oats with Apricots and Berries

ricotta apple

Oven Baked Apple with Ricotta and Walnuts

french toast 2

Oven Baked French Toast Muffins with Strawberries

You Might Also Like

Smartfruit Mellow Mango + Immunity, 100% Real Fruit Purée

Trader Joe’s Unsalted, Dry Toasted Slivered Almonds

Trader Joe’s the Dark Chocolate Lover’s Chocolate Bar

Frequently Asked Questions

How should I store the muffin bars?

Allow the muffin bars to cool completely before storing them. You can store them in an airtight container at room temperature for up to 3 days, in the refrigerator for up to 1 week, or in the freezer for up to 3 months. If storing in the freezer, individually wrap the bars in plastic wrap or aluminum foil before placing them in a freezer-safe bag or container.


Can I add other mix-ins to the batter?

Absolutely! Feel free to customize your muffin bars by adding your favorite mix-ins such as chocolate chips, chopped nuts, shredded coconut, or dried fruit. Just be mindful of the additional moisture content and adjust the baking time accordingly if needed.


Can I omit the peanut butter if I have an allergy or preference?

Yes, you can omit the peanut butter if necessary. You can replace it with almond butter, cashew butter, or sunflower seed butter if you prefer or if you have a peanut allergy.

Posted on Leave a comment

Tomato Braised Chicken With Parsnips

glass meal prep containers with chicken in tomato sauce with sliced mushrooms and parsnips

Get ready to elevate your meal prep game with our one pot chicken recipe of Tomato Braised Chicken with Parsnips! Bursting with savory flavors and wholesome ingredients, this dish is perfect for busy individuals who crave convenient yet nutritious meals. With tender boneless chicken thighs, sweet parsnips, earthy mushrooms, and a rich tomato sauce, every bite is full of deliciousness. Served alongside your favorite grains or veggies, this recipe is sure to become a staple in your weekly meal rotation.

This post may contain affiliate links. Please see our privacy policy for details.

Calories: 502kcal | Carbohydrates: 28g | Protein: 35g | Fat: 30g | Saturated Fat: 8g | Polyunsaturated Fat: 6g | Monounsaturated Fat: 12g | Trans Fat: 0.1g | Cholesterol: 169mg | Sodium: 1516mg | Potassium: 1482mg | Fiber: 7g | Sugar: 13g | Vitamin A: 1169IU | Vitamin C: 29mg | Calcium: 74mg | Iron: 4mg

round plate with chicken in tomato sauce with sliced mushrooms and parsnips

Why You’ll Enjoy this One Pot Chicken Recipe

  • Flavor Explosion: With ingredients like tomato sauce, tomato paste, diced tomatoes, and a blend of aromatic spices, this dish is bursting with flavor at every bite. The combination of savory chicken, sweet parsnips, and earthy mushrooms creates a symphony of tastes that will make your taste buds happy.
  • Easy Peasy: Busy individuals rejoice! This recipe is incredibly easy to make, requiring just one skillet and a handful of simple ingredients. With minimal prep and hands-on time, you can have a wholesome and flavorful meal ready to enjoy in no time.
  • Meal Prep Champion: For those who love to meal prep, this recipe is a true champion. It’s perfect for batch cooking and can be easily portioned out into meal prep containers for convenient grab-and-go lunches or dinners throughout the week. Simply reheat and enjoy whenever hunger strikes!
  • Versatile: Don’t be afraid to get creative with this recipe! Feel free to swap out the parsnips for your favorite root vegetables or customize the spices to suit your taste preferences. Whether you’re a fan of extra garlic, a kick of chili powder, or a sprinkle of fresh herbs, the possibilities are endless with this versatile

The PrepYoSelf Newsletter

Ingredients You’ll Need

  • Boneless Chicken Thighs: Chicken thighs are not only budget-friendly but also pack a lot of flavor. They have slightly more fat than chicken breasts, which helps keep them juicy and tender, especially when braised. Plus, they’re a great source of protein, making them a satisfying and nutritious choice for this dish.
  • Tomato Sauce, Tomato Paste, and Diced Tomatoes: Tomatoes are the star of this dish, providing a rich, tangy base for the sauce. Tomato sauce and paste add depth of flavor and a thick, velvety texture, while diced tomatoes contribute a burst of freshness and texture. Tomatoes are also rich in vitamins, minerals, and antioxidants, making them a healthy and flavorful addition to any meal.
  • Chicken Broth: Chicken broth not only adds flavor but also helps to thin out the tomato sauce, creating a luscious, savory broth. It infuses the dish with additional chicken flavor and provides moisture to keep the chicken tender during cooking. Using broth also adds depth and complexity to the overall flavor profile without the need for additional seasoning.
  • Mushrooms: Mushrooms add a wonderful earthy flavor and meaty texture to the dish, making them an excellent substitute for meat in vegetarian meals. They soak up the flavors of the sauce and release their own juices as they cook, adding depth and richness to the dish. Plus, mushrooms are low in calories and rich in nutrients like vitamins, minerals, and antioxidants, making them a healthy and budget-friendly ingredient.
  • Parsnips: Parsnips are a root vegetable similar to carrots but with a sweeter, nuttier flavor. They add sweetness and depth to the dish while providing a hearty, satisfying texture. Parsnips are also rich in fiber, vitamins, and minerals, making them a nutritious and budget-friendly choice for bulking up the meal.
  • White Onions: Onions add a subtle sweetness and depth of flavor to the dish, helping to balance out the acidity of the tomatoes. They also provide texture and aroma, enhancing the overall eating experience. Onions are a staple ingredient in many cuisines around the world and are known for their versatility, affordability, and nutritional benefits.
  • Garlic Powder, Paprika, and Salt: These spices add warmth, depth, and complexity to the dish, enhancing the natural flavors of the ingredients without overpowering them. Garlic powder adds a savory, umami-rich flavor, while paprika contributes a subtle smokiness and a hint of sweetness. Salt helps to balance out the flavors and enhance the overall seasoning of the dish, ensuring that every bite is perfectly seasoned and delicious.

round plate with chicken in tomato sauce with sliced mushrooms and parsnips

Basic Steps to Meal Prep One Pot Chicken

  1. Heat up a skillet over medium-high heat and add a splash of olive oil. Once the skillet is hot, place the chicken thighs in the pan and sear them on each side for about 2 to 3 minutes, or until they develop a beautiful golden brown color.
  2. Toss in the diced onions and sauté them until they become soft and translucent, infusing the dish with their aromatic flavor.
  3. Stir in the tomato paste, diced tomatoes, sliced mushrooms, and parsnips. Let them mingle and get to know each other in the skillet for about 2 to 3 minutes, allowing all those incredible flavors to meld together.
  4. Pour in the tomato sauce and chicken broth, making sure to scrape up any delicious charred bits stuck to the bottom of the pan. These little flavor bombs will take your dish to the next level!
  5. Cover the skillet with a lid and reduce the heat to low-medium. Let everything simmer away for approximately 25 minutes, or until the chicken is fully cooked and reaches an internal temperature of 165°F. This slow-cooking process ensures that every bite is tender, juicy, and bursting with flavor.
  6. Once the chicken is cooked through and the flavors have melded beautifully, it’s time to dish up this mouthwatering meal! Serve your Tomato Braised Chicken with Parsnips alongside your favorite sides, or portion it out into meal prep containers for easy grab-and-go lunches throughout the week.

Reference the recipe card below for detailed instructions.

glass meal prep containers with one pot chicken in tomato sauce with sliced mushrooms and parsnips

Meal Prep Pairing Tips for Tomato Braised Chicken

  • Grains: Serve the Tomato Braised Chicken with Parsnips over cooked grains like quinoa, brown rice, or couscous for a hearty and satisfying meal. The grains will soak up the flavorful sauce and complement the tender chicken and parsnips perfectly.
  • Leafy Greens: Add a pop of freshness and color to your plate by serving the one pot chicken dish alongside a simple green salad or steamed greens like spinach, kale, or broccoli. The vibrant greens will provide a nice contrast to the rich and savory flavors of the main dish.
  • Crusty Bread: Serve slices of crusty whole grain bread or garlic bread on the side to soak up any leftover sauce from the Tomato Braised Chicken with Parsnips. It’s a delicious way to enjoy every last bit of flavor!
  • Fresh Herbs: Garnish the Tomato Braised Chicken with Parsnips with freshly chopped herbs like parsley, basil, or cilantro for a burst of freshness and flavor. The herbs will add a bright, aromatic element to the dish and elevate its overall presentation.

glass meal prep containers with one pot chicken in tomato sauce with sliced mushrooms and parsnips

round plate with chicken in tomato sauce with sliced mushrooms and parsnips

Tomato Braised Chicken with Parsnips

Deliciously budget-friendly Tomato Braised Chicken with Parsnips, a wholesome meal prep option bursting with savory flavors and easy-to-follow instructions!
No ratings yet
Prep Time 5 minutes
Cook Time 35 minutes
Course dinner
Cuisine American
Servings 2
Calories 502 kcal

Equipment

  • knife
  • cutting board
  • sheet pan
  • skillet

Ingredients
  

  • 12 oz boneless chicken thighs
  • 1 cup tomato sauce
  • 1 cup chicken broth
  • 1 tbsp tomato paste
  • 1 roma tomato (diced)
  • 2 cups mushrooms (sliced)
  • 1/4 cup white onions (diced)
  • 1 cup parsnips (sliced)
  • 1/4 teaspoon garlic powder
  • 1/4 teaspoon paprika
  • 1/4 teaspoon salt

Instructions
 

  • Add olive oil to a skillet on medium high heat and sear the chicken on each side for about 2 to 3 minutes until golden brown.
  • Next, add the sliced onions and saute them until they soften.
  • Add the tomato paste, diced tomatoes, sliced mushrooms, and sliced parsnips. Stir everything around for about 2 to 3 minutes.
  • Then, add the tomato sauce and chicken broth, scraping the bottom of the pan to get all the charred bits (this adds flavor to the broth).
  • Cover the pan with a lid and simmer on low medium heat for about 25 minutes until the chicken fully cooks to an internal temperature of 165F.

Notes

Nutrition information provided is an estimate. It will vary based on cooking method and specific ingredients used. Please consult with your healthcare provider for specific dietary needs. To gain a better understanding, explore our nutrition disclaimer here. 

Nutrition

Calories: 502kcalCarbohydrates: 28gProtein: 35gFat: 30gSaturated Fat: 8gPolyunsaturated Fat: 6gMonounsaturated Fat: 12gTrans Fat: 0.1gCholesterol: 169mgSodium: 1516mgPotassium: 1482mgFiber: 7gSugar: 13gVitamin A: 1169IUVitamin C: 29mgCalcium: 74mgIron: 4mg

Similar Recipes

chicken soup

One Pot Mexican Chicken Soup

beef cabbage stir fry

One Pot Ground Beef Cabbage Stir Fry

chicken pesto

Skillet Chicken Pesto and Peppers

You Might Also Like

Frequently Asked Questions

Can I use chicken breasts instead of chicken thighs?

Yes, you can absolutely use chicken breasts instead of chicken thighs in this recipe. Keep in mind that chicken breasts may cook slightly faster than thighs, so adjust the cooking time accordingly to prevent them from becoming dry.


Can I make this recipe vegetarian or vegan?

Yes, you can easily make this recipe vegetarian or vegan by substituting the chicken with tofu, tempeh, or your favorite meat alternative. Simply follow the same cooking instructions, adjusting the cooking time as needed for the vegetarian protein option.


Can I use different vegetables in this recipe?

Absolutely! Feel free to customize this recipe by adding your favorite vegetables or using whatever you have on hand. Bell peppers, carrots, zucchini, or eggplant would all be delicious additions to this dish.

Posted on Leave a comment

Apple Oatmeal Muffin Bars

glass meal prep containers with apple oatmeal muffin bar

Our delectable Banana Apple Baked Oatmeal breakfast muffin bars are bursting with flavor and nutrition. This budget-friendly recipe combines the sweetness of ripe bananas with the refreshing crunch of diced apples, all nestled in a hearty bed of rolled oats. Perfectly balanced with protein from eggs and a touch of olive oil for moisture, each bite is a wholesome delight that will keep you fueled throughout the day. So, grab your ingredients and get ready to enjoy a breakfast that’s as nutritious as it is delicious. Let’s bake up some goodness together!

This post may contain affiliate links. Please see our privacy policy for details.

Calories: 188kcal | Carbohydrates: 33g | Protein: 5g | Fat: 5g | Saturated Fat: 1g | Polyunsaturated Fat: 1g | Monounsaturated Fat: 2g | Trans Fat: 0.01g | Cholesterol: 82mg | Sodium: 86mg | Potassium: 376mg | Fiber: 5g | Sugar: 17g | Vitamin A: 206IU | Vitamin C: 9mg | Calcium: 55mg | Iron: 1mg

rectangular baking dish with apple oatmeal breakfast muffin bars

Here’s why this recipe rocks:

  • Nutrient-packed Ingredients: Starting your day with a balance of carbs, protein, and healthy fats is essential, and this baked oatmeal delivers just that. Bananas provide a natural sweetness along with potassium and fiber, while eggs add protein to keep you feeling full and focused.
  • Fiber-Filled Oats: Rolled oats are loaded with fiber, which helps regulate digestion, keeps your energy levels stable, and keeps those hunger pangs at bay until your next meal.
  • No-Fuss Preparation: Busy mornings call for quick and easy recipes, and this one fits the bill perfectly. With just a few simple steps, you’ll have a nutritious breakfast ready to go in no time. Blend, mix, pour, bake – it’s that simple!
  • Versatility Galore: Don’t limit yourself to just one variation of this baked oatmeal breakfast muffin bars recipe. Feel free to get creative with your toppings! Swap out the apple for berries, add a sprinkle of nuts or seeds, or drizzle on some honey for extra sweetness. The possibilities are endless!

The PrepYoSelf Newsletter

Budget-Friendly Breakfast Muffin Bars Ingredients:

  • Banana: The star of the show! Ripe bananas bring natural sweetness to the recipe without the need for added sugars. Plus, they’re loaded with potassium, fiber, and vitamins, making them a nutrient-packed addition that keeps our baked oatmeal moist and flavorful.
  • Apple: Adding diced apple not only provides a burst of fresh flavor but also brings in additional fiber, vitamins, and antioxidants. It’s a budget-friendly fruit that adds a lovely texture and sweetness to the dish, complementing the banana beautifully.
  • Rolled Oats: Ah, the humble hero of breakfast foods! Rolled oats are not only inexpensive but also incredibly nutritious. They’re high in fiber, which aids in digestion and helps keep you feeling full and satisfied. Plus, oats provide a hearty texture and nutty flavor that pairs perfectly with the fruity sweetness of the banana and apple.
  • Egg: One large egg adds protein to our baked oatmeal, helping to keep you fueled and energized throughout the morning. Eggs are also relatively inexpensive and versatile, making them a budget-friendly way to boost the nutritional content of our breakfast dish.
  • Baking Powder: A small amount of baking powder helps our baked oatmeal rise and become light and fluffy. It ensures that the texture is just right – not too dense or heavy – creating a delightful breakfast treat that’s both satisfying and budget-friendly.

rectangular baking dish with apple oatmeal breakfast muffin bars

How to Meal Prep Apple Oatmeal Breakfast Muffin Bars

  1. Preheat your oven to 400°F (200°C).
  2. In a blender or mixing bowl, mash up your ripe banana and egg until it’s smooth and creamy. No blender? No problem! A fork works just as well.
  3. Add in the rolled oats and baking powder, giving everything a good mix until it’s nicely combined.
  4. Grease up a baking dish and pour in your oatmeal batter.
  5. Time to add a little fruity flair! Dice up your apple into small pieces and scatter them on top of the batter.
  6. Pop that dish into the oven and bake for 15-20 minutes until it’s golden and cooked through.

Reference the recipe card below for detailed instructions.

glass meal prep containers with apple oatmeal breakfast muffin bars

Meal Prep Tips:

  • Yogurt: Serve your baked oatmeal with a dollop of Greek yogurt for a creamy contrast to the fruity flavors. Add a drizzle of honey or a sprinkle of cinnamon for extra indulgence.
  • Nuts and Seeds: Sprinkle chopped nuts or seeds (such as almonds, walnuts, or pumpkin seeds) on top of your baked oatmeal for added crunch and a boost of healthy fats and protein.
  • Coffee or Tea: Enjoy your Banana Apple Baked Oatmeal with a cup of your favorite hot beverage, such as coffee or tea, for a comforting and satisfying breakfast experience.
  • Spice it Up: Add a pinch of ground cinnamon, nutmeg, or vanilla extract to the batter for extra warmth and flavor.

glass meal prep containers with apple oatmeal breakfast muffin bars

rectangular baking dish with apple oatmeal muffin bar

Apple Oatmeal Muffin Bars

Wholesome and budget-friendly, our Banana Apple Baked Oatmeal combines ripe bananas, diced apples, and hearty rolled oats for a nutritious and delicious breakfast treat!
No ratings yet
Prep Time 5 minutes
Cook Time 15 minutes
Course Breakfast, Snack
Cuisine American
Servings 2
Calories 188 kcal

Equipment

  • blender
  • spatula
  • cutting board
  • oven

Ingredients
  

  • 1 large banana (ripe)
  • 1 large egg
  • 1/4 cup rolled oats
  • 1/4 teaspoon baking powder
  • 1 small apple
  • 1 teaspoon olive oil

Instructions
 

  • Preheat the oven to 400F.
  • Blend together the banana and egg until it is smooth (or you can use a fork to mash it in a mixing bowl)
  • Add the rolled oats and baking powder and mix it all together.
  • Pour the batter into a greased baking dish. Dice the apple into small pieces, and place it on top of the batter.
  • Bake it in the oven for 15 to 20 minutes until the center is fully cooked.

Notes

Nutrition information provided is an estimate. It will vary based on cooking method and specific ingredients used. Please consult with your healthcare provider for specific dietary needs. To gain a better understanding, explore our nutrition disclaimer here. 

Nutrition

Calories: 188kcalCarbohydrates: 33gProtein: 5gFat: 5gSaturated Fat: 1gPolyunsaturated Fat: 1gMonounsaturated Fat: 2gTrans Fat: 0.01gCholesterol: 82mgSodium: 86mgPotassium: 376mgFiber: 5gSugar: 17gVitamin A: 206IUVitamin C: 9mgCalcium: 55mgIron: 1mg

Similar Recipes

baked oatmeal

Oven Baked Oats with Apricots and Berries

ricotta apple

Oven Baked Apple with Ricotta and Walnuts

french toast 2

Oven Baked French Toast Muffins with Strawberries

You Might Also Like

Smartfruit Mellow Mango + Immunity, 100% Real Fruit Purée

Trader Joe’s Unsalted, Dry Toasted Slivered Almonds

Trader Joe’s the Dark Chocolate Lover’s Chocolate Bar

Frequently Asked Questions

Can I use instant oats instead of rolled oats?

While instant oats can be used in a pinch, rolled oats are preferred for their texture and heartiness in this recipe. Instant oats may result in a softer texture, but the overall flavor should remain similar.


Can I freeze the baked oatmeal muffin?

Yes, you can freeze baked oatmeal muffins for longer storage. Once cooled, wrap individual portions tightly in plastic wrap or aluminum foil, then place them in a freezer-safe bag or container. Freeze for up to 3 months. Thaw overnight in the refrigerator or reheat from frozen in the microwave or oven.


Can I omit the egg to make it vegan?

Absolutely! You can substitute the egg with a flax or chia egg (1 tablespoon ground flaxseed or chia seeds mixed with 3 tablespoons of water, let sit for 5 minutes to gel) to make this recipe vegan-friendly.

Posted on Leave a comment

Spinach and Cheese Omelette

glass meal prep containers with omelette topped with eggs

Our Spinach Omelette Meal Prep is bursting with protein, veggies, and cheesy goodness. This budget-friendly breakfast egg recipe is designed to fuel your day with nutrition and flavor. Perfect for those who crave a wholesome start without sacrificing convenience, each bite of this omelette is a symphony of savory delights. Imagine fluffy eggs enveloping wilted spinach and gooey mozzarella, topped with vibrant cherry tomatoes for a burst of freshness. Whether you’re rushing out the door or savoring a leisurely morning, this egg recipe is your ticket to a satisfying and nourishing breakfast experience. Get ready to conquer your day with a hearty, homemade meal that’s as easy on the wallet as it is on the taste buds!

This post may contain affiliate links. Please see our privacy policy for details.

Calories: 289kcal | Carbohydrates: 4g | Protein: 19g | Fat: 22g | Saturated Fat: 7g | Polyunsaturated Fat: 3g | Monounsaturated Fat: 10g | Trans Fat: 0.04g | Cholesterol: 349mg | Sodium: 486mg | Potassium: 475mg | Fiber: 1g | Sugar: 2g | Vitamin A: 5066IU | Vitamin C: 21mg | Calcium: 239mg | Iron: 3mg

round plate with omelette topped with eggs

Why this egg recipe is a nutritional powerhouse:

  • Protein-Packed Powerhouse: Protein is essential for muscle repair and growth, keeping you feeling full and satisfied for longer periods. Say goodbye to mid-morning hunger pangs and hello to sustained energy levels!
  • Veggie-Rich Goodness: Spinach isn’t just Popeye’s favorite for nothing! Packed with vitamins, minerals, and antioxidants, spinach adds a nutritious punch to your morning routine. It’s a great source of iron, folate, vitamin K, and fiber, supporting overall health and vitality.
  • Cheese for Calcium: Who says healthy eating can’t be indulgent? The addition of shredded mozzarella not only amps up the flavor but also provides a calcium boost. 
  • Tomato for Vitamin C: Those vibrant cherry tomatoes aren’t just there for show! Packed with vitamin C, they bolster your immune system and promote healthy skin. Plus, their juicy sweetness adds a burst of flavor that elevates the entire dish.
  • Long-Lasting Satisfaction: Thanks to the combination in this egg recipe of protein, fiber, and healthy fats from eggs, spinach, and olive oil, this Spinach Omelette Meal Prep keeps you feeling full and satisfied for hours. No more mid-afternoon energy crashes or desperate trips to the vending machine—just steady, sustained energy to power you through your day.

The PrepYoSelf Newsletter

Here are the Ingredients You’ll Need For This Egg Recipe:

  • Eggs: Eggs are the backbone of our omelette, providing a rich source of high-quality protein, essential vitamins, and minerals. They’re budget-friendly and versatile, making them a staple in any meal prep arsenal. Not only do they add a creamy texture to our omelette, but they also contribute to its satisfying and filling nature, helping you stay satiated throughout the morning.
  • Spinach: Popeye knew what he was talking about! Spinach adds vibrant color, texture, and a nutritional punch to our omelette. It’s packed with vitamins A, C, and K, as well as iron, folate, and fiber. By sautéing the spinach before adding it to the omelette, we not only enhance its flavor but also make its nutrients more readily available for absorption by the body. Plus, using baby spinach keeps costs down without compromising on taste or nutrition.
  • Mozzarella Cheese: This ooey-gooey goodness not only adds a creamy texture and cheesy flavor to our omelette but also provides a source of calcium and protein. By using shredded mozzarella, we ensure that each bite is perfectly balanced with just the right amount of cheesy goodness. Plus, mozzarella tends to be more budget-friendly compared to other types of cheese, making it a cost-effective choice for meal prep.
  • Cherry Tomatoes: These little bursts of flavor add a pop of color and sweetness to our omelette. Rich in vitamin C, potassium, and antioxidants, cherry tomatoes not only enhance the taste but also contribute to overall health and well-being. Slicing them up and garnishing our omelette with fresh cherry tomatoes adds a refreshing touch that complements the savory flavors perfectly.
  • Olive Oil: A drizzle of olive oil adds a hint of Mediterranean flair to our omelette while providing heart-healthy monounsaturated fats. By using just a tablespoon, we keep the fat content in check while still enhancing the flavor and texture of the dish. Olive oil is a pantry staple that’s both budget-friendly and versatile, making it an excellent choice for meal prep recipes.

round plate with omelette topped with eggs

How to Meal Prep Spinach and Cheese Omelette:

  1. Heat up a tablespoon of olive oil in a pan over medium heat. Make sure that glorious green oil coats the bottom like a champ. Toss in those chopped spinach leaves and let them dance around until they wilt into perfection. Once they’re done, scoop ’em out of the pan and set them aside. They’ll be back for a flavorful encore!
  2. Grab a bowl and crack those eggs into it. Give them a good whisk until they’re all buddy-buddy. Now, pour this eggy goodness into your preheated pan. Tilt the pan like a pro to spread that eggy magic all around. Let it heat up and firm up, then use your spatula skills to coax the edges towards the middle.
  3. Once your eggs are starting to look all fancy and set, it’s time to add the stars of the show! Sprinkle that shredded mozzarella like confetti over the top, followed by your sautéed spinach. Gently fold your omelette in half, shaping it into a glorious moon of yumminess. Let it cook for a hot minute or so to melt that cheese into gooey perfection.
  4. It’s garnish time, folks! Grab those cherry tomatoes, slice ’em up, and scatter them over your omelette masterpiece. They add a pop of color and a burst of freshness that’ll have your taste buds doing the happy dance.

Reference the recipe card below for detailed instructions.

Meal Prep and Pairing Tips:

  • Whole Grain Toast or English Muffins: Serve your Spinach Omelette with a slice of whole grain toast or an English muffin for added fiber and texture. It’s the perfect vehicle for soaking up any leftover egg and cheese goodness.
  • Fresh Fruit: Add a pop of color and sweetness to your meal with a side of fresh fruit. Berries, sliced bananas, or a fruit salad are all excellent options that complement the savory flavors of the omelette.
  • Greek Yogurt: Boost the protein content of your breakfast by pairing your omelette with a small serving of Greek yogurt. Top it with a drizzle of honey or a sprinkle of granola for extra flavor and crunch.
  • Mixed Greens Salad: Balance out the richness of the omelette with a simple mixed greens salad dressed with olive oil and balsamic vinegar. It’s a refreshing and nutritious addition to your meal.
  • Avocado Slices: Creamy avocado slices are a delicious addition to your breakfast plate. They add healthy fats, fiber, and a satisfying creaminess that pairs perfectly with the omelette.

glass meal prep containers with omelette topped with eggs

round plate with omelette topped with eggs

Spinach and Cheese Omelette

Fuel your day with our Spinach Omelette Meal Prep—packed with protein, veggies, and cheesy goodness, it's a budget-friendly breakfast that's as nutritious as it is delicious!
No ratings yet
Prep Time 5 minutes
Cook Time 10 minutes
Course Breakfast
Cuisine American
Servings 2
Calories 289 kcal

Equipment

  • knife
  • cutting board
  • mixing bowl
  • whisk
  • 6 inch omelette pan
  • spatula

Ingredients
  

  • 4 large eggs
  • 1/2 cup shredded mozzarella
  • 3 cups baby spinach (chopped)
  • 1/2 cup cherry tomatoes (sliced)
  • 1 tablespoon olive oil
  • 1/8 teaspoon salt (or to preferred taste)

Instructions
 

  • Add olive oil to a pan on medium heat making sure it coats the bottom of the pan. Add the spinach and saute until it wilts. Then remove it from the pan and set it aside.
  • Whisk the eggs in a bowl. Pour the egg mixture into the heated pan. Tilt the pan around to spread it to the edge of the pan. Let the eggs heat through and firm up. Use the spatula to gently push the sides toward the middle, letting the liquid egg flow to the edge of the pan.
  • Let the eggs cook for another 2 to 3 minutes and sprinkle the top of the eggs with the shredded cheese and the cooked spinach. Gently fold the omelette in half in a moon shape and cook for another 30 seconds to let the cheese melt.
  • Garnish with freshly sliced cherry tomatoes.

Notes

Nutrition information provided is an estimate. It will vary based on cooking method and specific ingredients used. Please consult with your healthcare provider for specific dietary needs. To gain a better understanding, explore our nutrition disclaimer here. 

Nutrition

Calories: 289kcalCarbohydrates: 4gProtein: 19gFat: 22gSaturated Fat: 7gPolyunsaturated Fat: 3gMonounsaturated Fat: 10gTrans Fat: 0.04gCholesterol: 349mgSodium: 486mgPotassium: 475mgFiber: 1gSugar: 2gVitamin A: 5066IUVitamin C: 21mgCalcium: 239mgIron: 3mg

Similar Recipes

fried egg and sausage hash

Fried Egg with Apple and Sausage Hash

egg stuffed bell peppers

Oven Baked Breakfast Egg Stuffed Peppers

easy sausage egg muffins

Sausage Egg Muffins with Strawberries

You Might Also Like

Evolution Fresh Organic Pure 100% Cold-Pressed Orange Juice

Setton Farms Dry Roasted and Salted Pistachios

Filippo Berio Pesto, Classic Basil

Frequently Asked Questions

Can I use frozen spinach instead of fresh?

Absolutely! Frozen spinach works well in this recipe. Just make sure to thaw it and squeeze out any excess moisture before sautéing it in the pan.


Can I add meat to this recipe?

Yes, you can add cooked meat such as diced ham, cooked bacon, or crumbled sausage for extra protein and flavor. Make sure the meat is fully cooked before adding it to the omelette.


Can I make this recipe ahead and freeze it?

Yes, you can! Wrap individual portions of the cooked omelette tightly in plastic wrap or aluminum foil and place them in a freezer-safe bag or container. They can be frozen for up to 2-3 months. To reheat, simply thaw in the refrigerator overnight and reheat in the microwave or skillet until heated through.

Posted on Leave a comment

Balsamic Steak Bites with Brussels Sprouts

These Balsamic Steak Bites are a testament to the fact that nutritious meal prep doesn’t have to be complicated or time-consuming. Picture succulent New York Strip Steak, perfectly seared to golden perfection, dancing in a marinade of balsamic vinegar, honey, and savory spices. Paired with crispy, roasted Brussels sprouts, this recipe proves you can prioritize your health without sacrificing taste or precious time in the kitchen.

This post may contain affiliate links. Please see our privacy policy for details.

Calories: 569kcal | Carbohydrates: 35g | Protein: 40g | Fat: 30g | Saturated Fat: 11g | Polyunsaturated Fat: 2g | Monounsaturated Fat: 14g | Cholesterol: 136mg | Sodium: 712mg | Potassium: 1108mg | Fiber: 5g | Sugar: 25g | Vitamin A: 998IU | Vitamin C: 112mg | Calcium: 108mg | Iron: 5mg

round plate with steak cubes and brussel sprouts

Reasons Why This Recipe is Tasty and Healthy:

  • Protein Powerhouse: The New York Strip Steak in this recipe is not only mouthwateringly delicious but also a fantastic source of high-quality protein. Perfect for keeping you full and satisfied throughout your hectic day.
  • Green Goodness: Brussels sprouts are the unsung heroes of the veggie world. Packed with vitamins, minerals, and fiber, these little green gems contribute to a healthy digestive system and provide a nutrient boost to keep you going strong.
  • Balanced Marinade Magic: Our balsamic vinegar and honey marinade adds a burst of flavor without loading up on unnecessary calories. It’s the perfect balance of sweet and tangy, elevating your meal without the guilt.
  • Easy Peasy Oven Magic: Throw those brussels sprouts in the oven, and let them work their crispy magic while you tackle other tasks. Minimal effort, maximum taste – just what the busy bee ordered!
  • Budget-Friendly Brilliance: We get it, keeping it affordable is key. This recipe is not only easy on the wallet but also a savvy way to ensure you’re getting the most bang for your nutritional buck.

The PrepYoSelf Newsletter

Ingredient Breakdown:

  • New York Strip Steak: Not only is it a lean cut, keeping things light on the calorie front, but it’s also a fantastic source of high-quality protein. This ensures you stay fuller for longer, aiding in muscle repair and overall satiety. Plus, it’s a budget-friendly choice that packs a punch of flavor without breaking the bank.
  • Brussels Sprouts: Brussels sprouts are a nutritional powerhouse, and we’ve enlisted them for their fiber content, vitamins (C, K, and B), and minerals. They bring a delightful crunch and earthy flavor, balancing the richness of the steak. Not to mention, these little green wonders are budget-friendly, making them a wallet-friendly choice for a nutrient-packed side.
  • Balsamic Vinegar: Balsamic vinegar adds a layer of depth and tanginess to our marinade without piling on excess calories. It’s a wise flavor investment that elevates the dish while providing antioxidants and potential digestive benefits. The sweet and sour notes make for a delightful contrast, making your taste buds dance without compromising your health goals.
  • Honey: Honey brings natural sweetness to the marinade, harmonizing with the balsamic vinegar for a balanced flavor profile. It’s a healthier alternative to refined sugar, offering a touch of sweetness without the guilt. This golden nectar enhances the overall taste experience while contributing trace amounts of essential nutrients.
  • Garlic Powder: Garlic powder adds a savory kick and depth of flavor to both the steak marinade and the brussels sprouts. It’s a budget-friendly way to infuse a savory note without the fuss of chopping and sautéing fresh garlic. 
  • Olive Oil: Olive oil not only helps in searing the steak to perfection but also contributes heart-healthy monounsaturated fats. It brings richness to the dish and aids in the absorption of fat-soluble vitamins from the brussels sprouts. In moderation, it’s a smart and flavorful addition to keep your meal both tasty and nutrient-dense.

round plate with steak cubes and brussel sprouts

How to Meal Prep Balsamic Steak Bites

  1. Preheat that oven to 400F, and while it’s warming up, mix together the balsamic marinade. Set it aside – it’s about to work its magic!
  2. While your sprouts are roasting, cube up that New York Strip Steak. Sear it to golden perfection in a hot skillet, approximately 2-3 minutes per side.
  3. Turn off the heat, drizzle the remaining marinade over your steak bites, and give it a good mix. Watch that sauce reduce and thicken – pure perfection in the making.
  4. Once your steak bites and brussels sprouts are ready, it’s time to savor the fruits of your labor. Delicious, nutritious, and oh-so-satisfying!

Reference the recipe card below for detailed instructions.

glass meal prep containes with steak cubes and brussel sprouts

Meal Prep Pairing Tips

  • Grain Power: Pair this dish with a side of quinoa, brown rice, or cauliflower rice for an extra boost of complex carbs. It adds a satisfying element to your meal and complements the flavors of the steak and brussels sprouts.
  • Fresh Greens: Serve alongside a simple green salad tossed with a lemon vinaigrette. The crispiness of the salad provides a refreshing contrast to the hearty steak bites and roasted brussels sprouts.
  • Citrus Zing: Squeeze a bit of fresh lemon over the steak bites just before serving. The citrusy brightness enhances the overall flavor profile and adds a delightful zing to every bite.
  • Creamy Contrast: A dollop of horseradish sauce or a light sour cream-based sauce can provide a creamy contrast to the dish. It adds a cooling element and complements the savory flavors of the steak and balsamic marinade.
  • Herbaceous Twist: Garnish with fresh herbs such as parsley or thyme to add a burst of freshness. The herbs not only contribute to the visual appeal but also bring a layer of complexity to the dish.

round plate with steak cubes and brussel sprouts

Balsamic Steak Bites with Brussels Sprouts

Savor the simplicity of our Balsamic Steak Bites with Brussels Sprouts – succulent New York Strip Steak, seared to perfection, bathed in a flavorful balsamic-honey marinade, and paired with crispy roasted Brussels sprouts for an easy, healthy, and downright delicious meal prep.
No ratings yet
Prep Time 5 minutes
Cook Time 20 minutes
Course dinner, lunch
Cuisine American
Servings 2
Calories 569 kcal

Equipment

  • knife
  • cutting board
  • skillet
  • sheet pan
  • oven

Ingredients
  

  • 12 oz New York Strip Steak
  • 3 cups brussels sprouts

Marinade

  • 4 tablespoons balsamic vinegar
  • 2 tablespoons honey
  • 1/2 teaspoon garlic powder
  • 1/2 teaspoon salt
  • 1/2 teaspoon pepper
  • 2 teaspoons olive oil

Instructions
 

  • Preheat the oven to 400F.
  • In a small bowl, mix together the marinade and set it aside.
  • Next, trim the brussels sprouts and cut them into quarters. Place them on a sheet pan and drizzle them with half of the marinade. Bake them in the oven for 15-20 minutes until golden brown and crispy.
  • Meanwhile, cut the steak into one inch cubes. Add oil to a hot skillet and sear the steak on each side for about 2 to 3 minutes until it is golden brown and fully cooked to your desired doneness.
  • Turn the heat off the skillet and drizzle the rest of the marinade over the steak bites and mix it thoroughly. Let the sauce reduce and thicken. Enjoy the steak bites along with the roasted brussels sprouts.

Notes

Nutrition information provided is an estimate. It will vary based on cooking method and specific ingredients used. Please consult with your healthcare provider for specific dietary needs. To gain a better understanding, explore our nutrition disclaimer here. 

Nutrition

Calories: 569kcalCarbohydrates: 35gProtein: 40gFat: 30gSaturated Fat: 11gPolyunsaturated Fat: 2gMonounsaturated Fat: 14gCholesterol: 136mgSodium: 712mgPotassium: 1108mgFiber: 5gSugar: 25gVitamin A: 998IUVitamin C: 112mgCalcium: 108mgIron: 5mg

Similar Recipes

sweet potato blt

Sweet Potato BLT Sandwich

balsamic chicken salad

Oven Baked Balsamic Chicken Salad

chicken salad

Oven Baked Honey Mustard Glazed Chicken Salad

You Might Also Like

Frequently Asked Questions

Can I use a different cut of steak for this recipe?

Of course! While New York Strip Steak is recommended for its lean profile and tenderness, you can experiment with other cuts like sirloin or flank steak. Adjust cooking times accordingly.


Are there any substitutes for honey in the marinade?

Absolutely! Maple syrup or agave nectar can be excellent alternatives. They provide a similar sweetness without compromising the overall flavor.


Is this recipe suitable for a low-carb diet?

Yes! With the focus on lean protein and vegetables, this recipe is friendly for those following a low-carb or keto lifestyle. Pair it with cauliflower rice for an even lower carb option. Feel free to adjust the honey and balsamic vinegar ratios to suit your taste preferences.

Posted on Leave a comment

Stuffed Acorn Squash with Taco Meat

rectangle meal prep container with acorn squash stuffed with taco meat, tomatoes, and side spring salad

Our Taco Meat Stuffed Acorn Squash recipe is a sensational fusion of Tex-Mex flavors that brings together convenience, health, and affordability. Perfectly seasoned lean ground beef dances with aromatic spices, creating a delicious combination of flavors. Nestled within the tender embrace of roasted acorn squash halves, this dish transforms your meal prep into a delightful experience. The optional garnishes of cherry tomatoes and cilantro add a burst of freshness, elevating it to restaurant-quality heights.

This post may contain affiliate links. Please see our privacy policy for details.

Calories: 551kcal | Carbohydrates: 35g | Protein: 41g | Fat: 29g | Saturated Fat: 7g | Polyunsaturated Fat: 5g | Monounsaturated Fat: 16g | Trans Fat: 1g | Cholesterol: 105mg | Sodium: 843mg | Potassium: 1756mg | Fiber: 5g | Sugar: 6g | Vitamin A: 2378IU | Vitamin C: 53mg | Calcium: 116mg | Iron: 7mg

wooden plate with acorn squash stuffed with taco meat, tomatoes, and side spring salad

Why You’ll Enjoy this Recipe for Meal Prep

Now, why is this recipe a game-changer for your hectic schedule? Imagine savoring restaurant-quality flavors without spending hours in the kitchen or draining your wallet. It’s the perfect blend of convenience, health, and taste.

The acorn squash provides a natural, nutrient-rich bowl for your taco masterpiece, making it hearty and satisfying. Plus, the vibrant colors and fresh ingredients not only make it visually appealing but also ensure you’re getting a wholesome, balanced meal.

So, let’s break the monotony of meal prep! With this Taco Meat Stuffed Acorn Squash, you’re not just cooking – you’re creating a mini fiesta in your kitchen. Enjoy the convenience, relish the flavors, and make meal prep an exciting part of your routine. Say goodbye to boring and hello to deliciously easy!

The PrepYoSelf Newsletter

Ingredients You’ll Need

  • Lean Ground Beef: A protein powerhouse! Lean ground beef provides the essential protein to keep you full and satisfied. It’s a budget-friendly option, and the leanness ensures you’re getting all the good stuff without unnecessary fat.
  • Acorn Squash: The star of our show! Acorn squash acts as a natural, nutrient-packed bowl for our taco meat. Rich in vitamins and fiber, it adds a hearty and wholesome element to the dish. Plus, it’s easy on the budget, making it a smart choice for our busy bees.
  • Red Onions: Packed with flavor and a touch of sweetness, red onions add a delightful crunch and depth to the sautéed mixture. They’re a cost-effective way to elevate the taste without breaking the bank.
  • Yellow Bell Pepper: Bringing vibrant color and a boost of vitamin C, yellow bell peppers add freshness and a hint of sweetness. They’re an affordable veggie option that complements the overall flavor profile.
  • Chili Powder: A spice that brings the heat! Chili powder adds that characteristic Tex-Mex kick, enhancing the flavor of the ground beef without the need for excess salt or unhealthy additives.
  • Paprika: Smoky and earthy, paprika contributes depth and warmth to the dish. It’s a cost-effective way to infuse a restaurant-quality flavor into our taco meat.
  • Tomato Paste: A concentrated burst of tomato goodness! Tomato paste not only thickens our taco mixture but also imparts a rich, savory flavor. It’s an economical way to add depth to the dish.
  • Cherry Tomatoes:  A burst of freshness! Cherry tomatoes add a juicy and colorful touch to the stuffed acorn squash. They’re optional, but their affordability and vibrancy make them a delightful addition.
  • Chopped Cilantro: The herb that ties it all together! Cilantro adds a bright and herbaceous note, enhancing the overall freshness of the dish. It’s an optional garnish, but its budget-friendly nature and flavor-enhancing properties make it a winner.

wooden plate with acorn squash stuffed with taco meat, tomatoes, and side spring salad

How to Meal Prep this Stuffed Acorn Squash With Taco Meat

  1. Preheat your oven to 400F. Slice that acorn squash in half, scoop out those seeds, and place them on a baking sheet. Sprinkle with a pinch of salt and coat with a tablespoon of olive oil. Into the oven for 40 minutes until the squash is tender
  2. While the squash works its magic, sauté diced onions in a tablespoon of oil until soft. Add the ground beef, break it into pieces, and let it turn into golden brown goodness.
  3. Sprinkle in chili powder, paprika, garlic powder, and salt. Stir until your kitchen is filled with the aroma of a Tex-Mex masterpiece.
  4. Introduce tomato paste to the party, mixing it until it becomes one with the taco meat. Toss in diced bell peppers, stirring for an extra minute of flavor fusion.
  5. Your acorn squash should be ready for the spotlight. Carefully stuff each half with your sizzling taco meat.
  6. Top it off with a burst of freshness – cherry tomatoes and chopped cilantro. Ta-da!
  7. Pair your stuffed squash with a vibrant spring mix salad, dressed to perfection with your favorite dressing.

Reference the recipe card below for detailed instructions.

rectangle meal prep container with acorn squash stuffed with taco meat, tomatoes, and side spring salad

Meal Prep Tips:

  • Sharp Knife for Squash: A sharp knife is your best friend when dealing with acorn squash. It makes slicing through the tough skin and removing the seeds much easier. Take your time and use a steady hand for safety.
  • Even Squash Halves: When slicing the acorn squash, aim for even halves. This ensures uniform cooking, and your taco meat will be evenly distributed, creating a balanced and satisfying meal.
  • Oil Coating for Squash: Coat the acorn squash halves with olive oil before baking. This not only enhances the flavor but also helps achieve a beautifully roasted exterior. A brush or your hands can be used to evenly distribute the oil.
  • Seasoning Layering: Add the chili powder, paprika, garlic powder, and salt gradually while cooking the taco meat. This allows the flavors to layer and develop, giving your dish that authentic Tex-Mex taste.
  • Careful Squash Stuffing: When stuffing the acorn squash halves, do it with care to avoid breaking the squash. Evenly distribute the taco meat mixture, ensuring each bite has a perfect balance of flavors.

rectangle meal prep container with acorn squash stuffed with taco meat, tomatoes, and side spring salad

taco stuffed squash

Taco Meat Stuffed Acorn Squash

Experience a burst of Tex-Mex flavors with our Taco Meat Stuffed Acorn Squash, where lean ground beef seasoned to perfection meets tender roasted acorn squash, topped with optional cherry tomatoes and cilantro, paired with a refreshing side spring salad – a delicious, healthy, and budget-friendly meal prep delight!
No ratings yet
Prep Time 5 minutes
Cook Time 40 minutes
Course dinner, lunch, Main Course
Cuisine American, Mexican
Servings 2
Calories 551 kcal

Equipment

  • knife
  • cutting board
  • spatula
  • saute pan
  • sheet pan
  • oven

Ingredients
  

  • 12 oz lean ground beef
  • 1 each acorn squash
  • 1/4 cup red onions (diced)
  • 1 each yellow bell pepper (diced)
  • 1/4 tsp chili powder
  • 1/4 tsp paprika
  • 1/4 tsp garlic powder
  • 1/4 tsp salt
  • 2 tbsp tomato paste
  • 2 tbsp olive oil
  • 4 cups spring mix
  • 4 tbsp your choice of salad dressing
  • 1/4 cup cherry tomatoes (optional)
  • 1/4 cup chopped cilantro (optional)

Instructions
 

  • Pre-heat the oven to 400F
  • Slice the acorn squash in half and remove the seeds. Place the halves on a sheet pan and sprinkle it with a pinch of slat and coat it with a tbsp of olive oil
  • Bake it in the oven for 40 minutes until the flesh is tender
  • Meanwhile, add a tbsp of oil to a saute pan on medium-high heat and saute the diced onions until they soften. Then, add the ground beef and break it into smaller pieces
  • Season the beef with the seasonings and continue to stir until it is fully cooked and golden brown (about 5 to 7 minutes)
  • Then, add the tomato paste and mix it well until it is fully incorporated
  • Add the chopped bell peppers and mix them well into the taco meat for another minute
  • Once the acorn squash cooks, carefully remove it from the oven. Evenly stuff each squash half with the taco meat
  • Top it off with fresh tomatoes and cilantro and enjoy with a side salad

Notes

Nutrition information provided is an estimate. It will vary based on cooking method and specific ingredients used. Please consult with your healthcare provider for specific dietary needs. To gain a better understanding, explore our nutrition disclaimer here. 

Nutrition

Calories: 551kcalCarbohydrates: 35gProtein: 41gFat: 29gSaturated Fat: 7gPolyunsaturated Fat: 5gMonounsaturated Fat: 16gTrans Fat: 1gCholesterol: 105mgSodium: 843mgPotassium: 1756mgFiber: 5gSugar: 6gVitamin A: 2378IUVitamin C: 53mgCalcium: 116mgIron: 7mg

Similar Recipes

cilantro chicken

Cilantro Lime Chicken Salad with Strawberry Salsa

sweet and sour chicken wings

Air Fryer Sweet and Sour Chicken Wings

stuffed primavera chicken

Primavera Stuffed Chicken Breasts

You Might Also Like

Frequently Asked Questions

Can I substitute the ground beef with another protein?

Absolutely! You can swap out the ground beef for ground turkey, chicken, or a plant-based alternative if you prefer. Adjust cooking times accordingly.


I’m not a fan of acorn squash. Can I use a different type of squash?

Of course! While acorn squash adds a unique sweetness, you can use butternut squash or even bell peppers as a delicious alternative.


Can I freeze the stuffed acorn squash for later?

While the acorn squash itself may not freeze well due to its high water content, you can freeze the taco meat mixture separately. Thaw and stuff fresh acorn squash when ready to enjoy.

Posted on Leave a comment

Beef and Bean Sprout Stir Fry

glass square containers with sliced beef stir fry with bell peppers, sliced zucchini, and sliced mushrooms, and bean sprouts

Whip up a delightful Beef and Bean Sprout Stir Fry – a budget-friendly, healthy, and quick meal prep alternative to takeout. Thinly sliced sirloin steak, vibrant veggies, and crunchy bean sprouts create a symphony of flavors in this easy-to-follow recipe. Perfect for busy individuals who need help with weekly meal prep, this dish offers convenience without compromising on taste or nutrition. From the savory soy-infused beef to the satisfying crunch of fresh bean sprouts, each bite is a celebration of deliciousness. Elevate your dinner routine with this homemade stir fry, bringing together speed, affordability, and wholesome ingredients for a delightful dining experience.

This post may contain affiliate links. Please see our privacy policy for details.

Calories: 434kcal | Carbohydrates: 23g | Protein: 50g | Fat: 18g | Saturated Fat: 4g | Polyunsaturated Fat: 2g | Monounsaturated Fat: 9g | Cholesterol: 104mg | Sodium: 1128mg | Potassium: 1535mg | Fiber: 7g | Sugar: 14g | Vitamin A: 1196IU | Vitamin C: 79mg | Calcium: 104mg | Iron: 6mg

round plate with weekly meal prep of sliced beef stir fry with bell peppers, sliced zucchini, and sliced mushrooms, and bean sprouts

Bean Sprouts: The Crunchy Marvel in Asian Cuisine

Bean sprouts are a culinary gem, especially in Asian dishes, and for good reason. These little sprouts are typically grown from mung beans and are harvested just as they start to sprout. Here’s why they’ve become a staple in Asian cuisine and weekly meal prep:

  • Nutrient-Packed Powerhouse: Despite their delicate appearance, bean sprouts are a nutritional powerhouse. They’re low in calories but high in essential nutrients like vitamins C and K, folate, and fiber. Talk about a nutrient boost without the guilt!
  • Crunchy Texture and Fresh Flavor: Bean sprouts bring a delightful crunch to any dish. This adds a textural contrast that’s particularly appreciated in stir-fries, salads, and noodle dishes. Their mild, slightly sweet flavor complements various ingredients, making them a versatile addition to any recipe.
  • Quick and Easy to Prepare: Bean sprouts require minimal preparation. A quick rinse and they’re ready to go! This makes them a time-saving ingredient for busy individuals who want to streamline their meal prep without sacrificing freshness and nutrition.
  • Affordable and Accessible: One of the best parts about bean sprouts is their accessibility and affordability. You can easily find them in grocery stores year-round, and they won’t break the bank. This makes them an excellent choice for those looking to maintain a healthy diet on a budget.
  • Versatility in Asian Cuisine: Bean sprouts play a crucial role in many Asian dishes, adding a distinctive element to classics like Pad Thai, Bibimbap, and, of course, stir-fries. They absorb the flavors of the surrounding ingredients while maintaining their own unique texture, making them an integral part of the dish.

In conclusion, bean sprouts are a weekly meal prep champion – they’re nutritious, easy to work with, and add that extra oomph to your Asian-inspired culinary creations. So, whether you’re stir-frying, tossing them into salads, or experimenting with noodle dishes, let bean sprouts take center stage in your meal prep adventures! 

The PrepYoSelf Newsletter

To Weekly Meal Prep Beef & Bean Sprout Stir Fry, You’ll Need

  • Sirloin Steak: Sirloin steak brings protein-packed goodness to the table. Sliced thinly, it cooks quickly, ensuring a tender and juicy bite. It’s the heart of our stir fry, providing substance and that meaty satisfaction.
  • Red Onions: Red onions add a touch of sweetness and vibrant color to the dish. When sautéed, they become tender and release their natural sugars, enhancing the overall flavor profile.
  • Green Onions: Green onions contribute a mild onion flavor with a hint of freshness. They’re sprinkled on top at the end, providing a pop of color and a delightful crunch.
  • Zucchini: Zucchini adds a mild, slightly sweet flavor and a wonderful tender-crisp texture. It complements the heartiness of the beef, bringing balance to the dish.
  • Red Bell Pepper: The red bell pepper introduces a burst of color and a hint of sweetness. Its crisp texture adds another layer of complexity, making each bite exciting.
  • Bean Sprouts: The crunchy heroes of our stir fry! Bean sprouts bring a refreshing, crisp texture that contrasts beautifully with the other ingredients. They absorb the savory flavors of the dish while maintaining their freshness.
  • Mushrooms: Mushrooms contribute a savory, earthy flavor and a meaty texture. They absorb the sauce beautifully, adding depth to the overall taste.
  • Soy Sauce: The umami powerhouse! Soy sauce is the key to the savory, salty goodness that ties everything together. It adds depth and richness to the dish.
  • Sesame Oil: The finishing touch! Sesame oil adds a delightful nutty aroma and flavor. Drizzled at the end, it provides a burst of authenticity and enhances the overall Asian-inspired experience.

round plate with weekly meal prep of sliced beef stir fry with bell peppers, sliced zucchini, and sliced mushrooms, and bean sprouts

How to Weekly Meal Prep Beef and Bean Sprout Stir Fry

  1. Start by slicing your sirloin steak into thin strips against the grain. Sprinkle a pinch of salt and pepper over the strips to enhance the flavor.
  2. Heat up your wok on medium-high heat, add a splash of olive oil, and sauté those beef strips until they’re golden and cooked to perfection. Once done, set them aside – we’ll bring them back into the limelight in a bit.
  3. Toss in the sliced onions, bell pepper, and bean sprouts into the wok. Let them dance around for 3 to 5 minutes until they’re soft and tender. We’re creating a symphony of colors and flavors here!
  4. Bring back those glorious beef strips to the pan, and it’s party time! Season the ensemble with soy sauce and a dash of garlic powder. Then, drizzle in that magical sesame oil. Give it a good mix until every ingredient is singing in harmony.
  5. Your Beef and Bean Sprout Stir Fry is ready to steal the show! Serve it up with steamed rice or noodles – whatever suits your fancy.

Reference the recipe card below for detailed instructions.

weekly meal prep glass square containers with sliced beef stir fry with bell peppers, sliced zucchini, and sliced mushrooms, and bean sprouts

Ingredient Swaps

  • Protein Variations: Swap out the sirloin steak for thinly sliced chicken breast or thigh for a leaner option. For a vegetarian twist, substitute the meat with extra-firm tofu cubes. Press the tofu to remove excess water before slicing.
  • Vegetable Options: Replace zucchini with broccoli florets for a cruciferous crunch. Add matchstick carrots for a touch of natural sweetness and vibrant color.
  • Sauce Substitutes: Switch up the flavor profile by using teriyaki sauce instead of soy sauce. For a richer umami taste, consider using oyster sauce in place of soy sauce.
  • Oil Alternatives: Infuse a hint of coconut flavor by using coconut oil instead of olive oil. If you’re out of sesame oil, use toasted sesame seed oil for a similar nutty aroma.
  • Vegetarian Option: Introduce edamame for an extra protein boost in the absence of meat.

glass square containers with sliced beef stir fry with bell peppers, sliced zucchini, and sliced mushrooms, and bean sprouts for weekly meal prep

round plate with thin slice beef stir fry with red bell pepper, zucchini, and bean sprouts

Beef and Bean Sprout Stir Fry

This beef and bean sprout stir fry is a healthy and flavorful dish that is perfect for a quick and easy weeknight dinner. It's also a great way to use up any leftover vegetables you have in your fridge.
No ratings yet
Prep Time 5 minutes
Cook Time 15 minutes
Course dinner, Main Course
Cuisine Asian
Servings 2
Calories 434 kcal

Equipment

  • knife
  • cutting board
  • wok
  • tongs

Ingredients
  

  • 12 oz sirloin steak (thinly sliced strips)
  • 1/4 cup red onions (sliced)
  • 1/4 cup green onions (sliced)
  • 1/2 zucchini (sliced)
  • 1/2 red bell pepper (sliced)
  • 14 oz bean sprouts (canned and drained, or fresh)
  • 8 oz mushrooms (sliced)
  • 2 tbsp soy sauce
  • 1/4 tsp garlic powder
  • 1 tablespoon olive oil
  • 1 teaspoon sesame oil

Instructions
 

  • Slice the beef into thin strips against the grain and season with salt and pepper.
  • Add olive oil to a wok on medium-high heat and saute the beef strips. After they cook, scoop them out of the wok and set them aside.
  • Next, add the sliced onions, bell pepper, and bean sprouts to the wok and saute them for about 3 to 5 minutes until the vegetables are soft and tender.
  • Finally, return the beef strips to the pan and season with soy sauce and garlic powder. Then, drizzle with sesame oil and mix well. Enjoy with steamed rice or noodles.

Notes

Nutrition information provided is an estimate. It will vary based on cooking method and specific ingredients used. Please consult with your healthcare provider for specific dietary needs. To gain a better understanding, explore our nutrition disclaimer here. 

Nutrition

Calories: 434kcalCarbohydrates: 23gProtein: 50gFat: 18gSaturated Fat: 4gPolyunsaturated Fat: 2gMonounsaturated Fat: 9gCholesterol: 104mgSodium: 1128mgPotassium: 1535mgFiber: 7gSugar: 14gVitamin A: 1196IUVitamin C: 79mgCalcium: 104mgIron: 6mg

Similar Recipes

ginger salmon

Oven Baked Orange Ginger Salmon and Snow Peas

orange chicken

Air Fryer Orange Soy Glazed Chicken with Broccoli

balsamic steak

Grilled Steak with Sweet Potato Wedges

You Might Also Like

Frequently Asked Questions

Can I use a different cut of beef?

Absolutely! While sirloin steak is a great option, you can use flank steak, ribeye, or even tenderloin. Adjust cooking times based on the cut’s thickness.


What type of noodles or rice pairs best with this dish?

Steamed jasmine rice or thin rice noodles are fantastic choices. Udon or soba noodles also work well. Pick your favorite or mix it up each time you make it!


How do I prevent the beef from becoming tough?

Slice the beef thinly against the grain and avoid overcooking. Sauté quickly on medium-high heat to maintain tenderness.