Posted on Leave a comment

Stuffed Baked Potato with Instant Pot BBQ Beef

Whether you’re craving the comforting flavors of a backyard barbecue or the simple pleasure of a well-executed baked potato, this Instant Pot BBQ Beef and Baked Potato recipe hits all the right notes. The rich, smoky beef combined with the buttery, fluffy potato is a combination that will have you singing its praises.

This post may contain affiliate links. Please see our privacy policy for details.

plate with baked potato and instant pot beef bbq on top with broccoli side

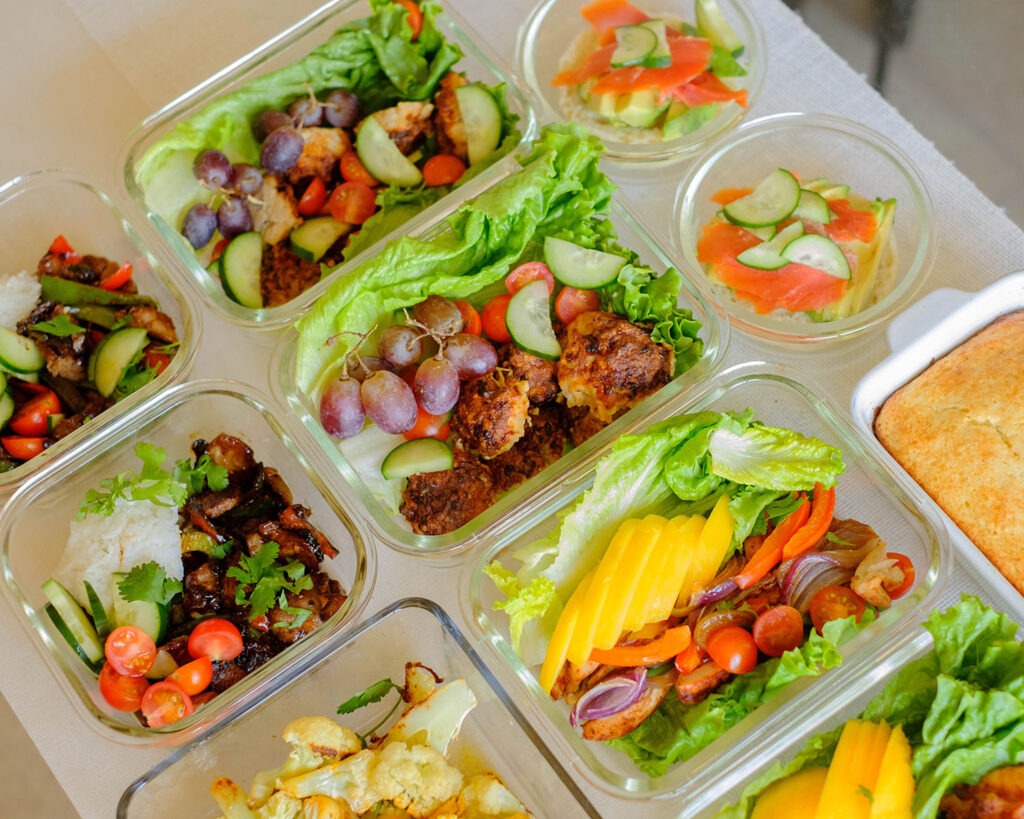
Why this meal is great for meal prep

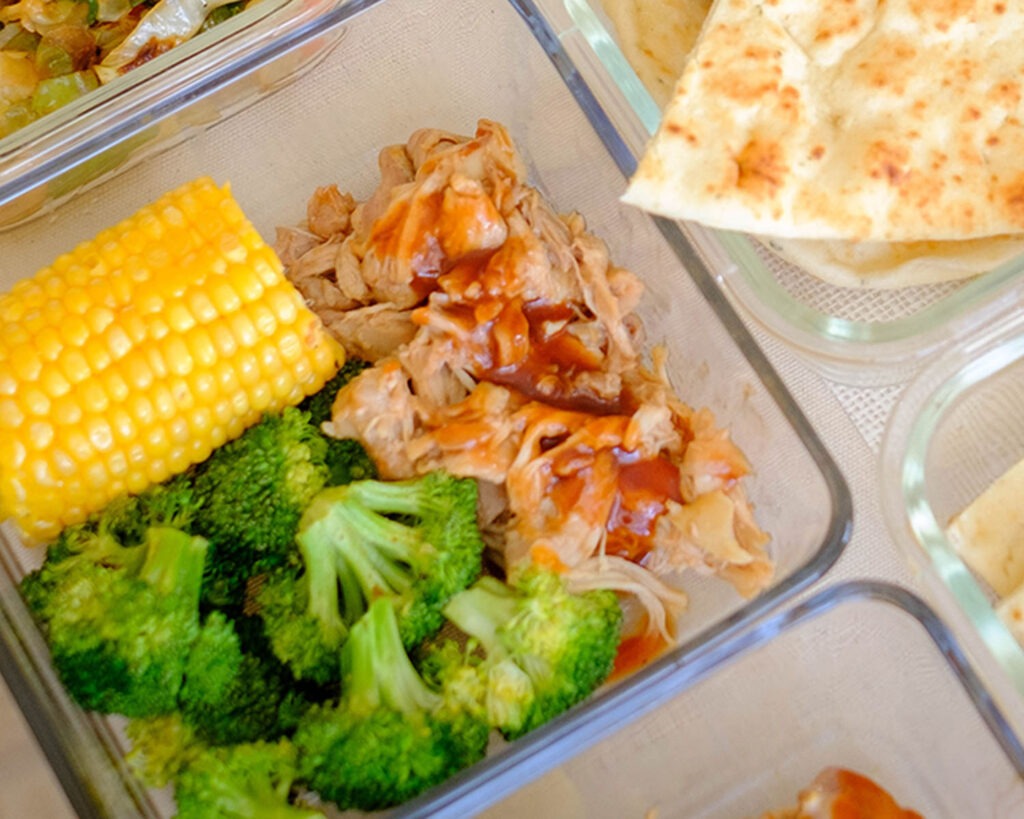
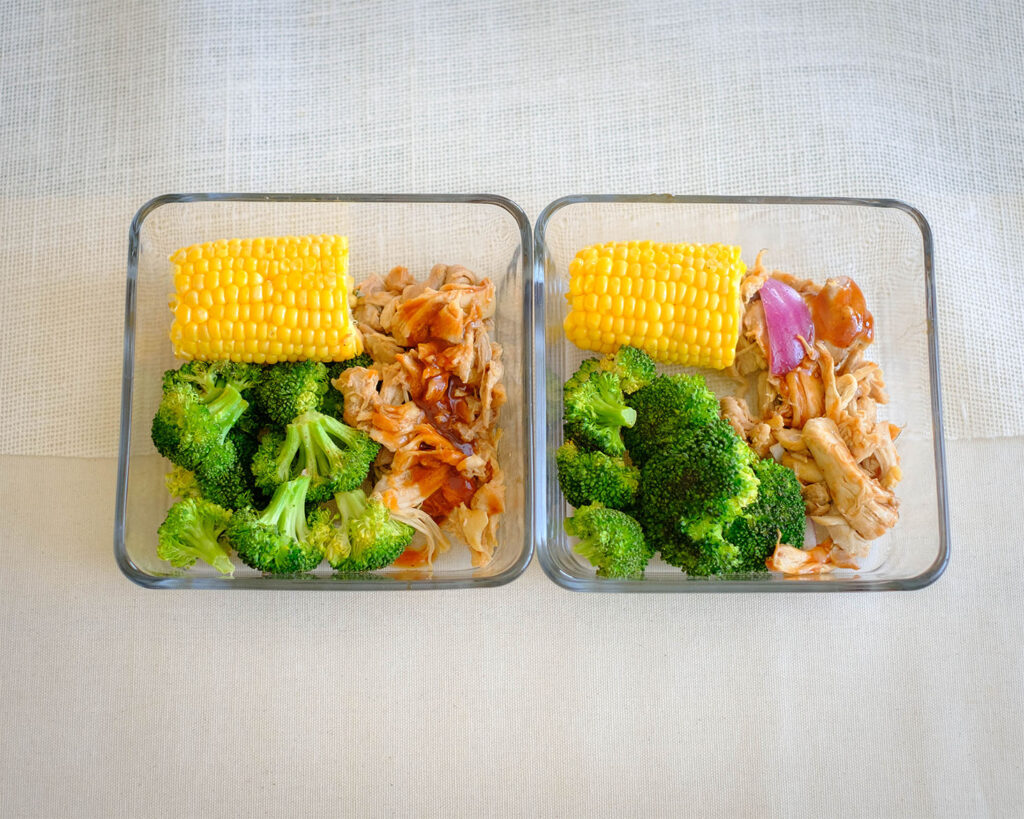
Meal prepping can be a lifesaver, especially for those of us with busy schedules. With this recipe, you can prepare a batch of tender, juicy shredded beef, and perfectly baked potatoes in your trusty Instant Pot. The best part? It’s incredibly easy! Just set it and forget it while you go about your day, and voila – a delicious meal awaits you when you’re ready.

Now, let’s talk about the single-serving aspect. Sometimes, you just want a satisfying meal all to yourself, right? Well, this recipe has got you covered. You can easily adjust the portions to make a single serving, allowing you to indulge in a hearty and comforting meal without worrying about leftovers. It’s the perfect solution for those nights when you’re craving a nice warm, comfort meal.

The PrepYoSelf Newsletter

Here’s What You Need to Make Stuffed Potatoes with Instant Pot Beef BBQ

  • Beef: We used chuck roast, but you can choose any cut of beef
  • Aromatics: We added, garlic cloves, celery, white onions, and green onions
  • Liquid: We added some water to tomato sauce
  • Potatoes: You can also use sweet potatoes
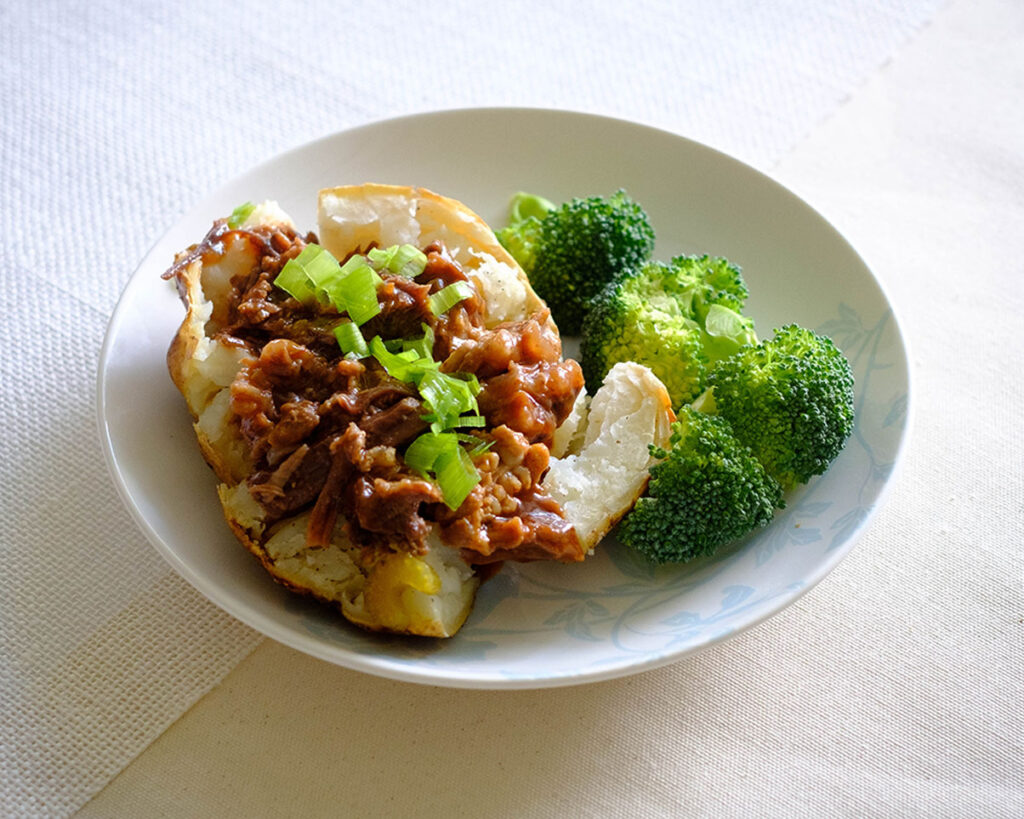
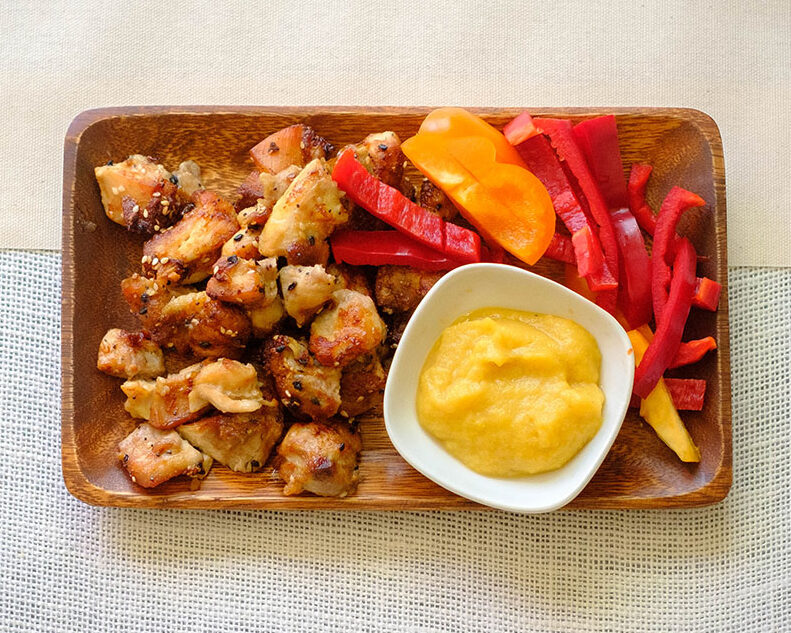
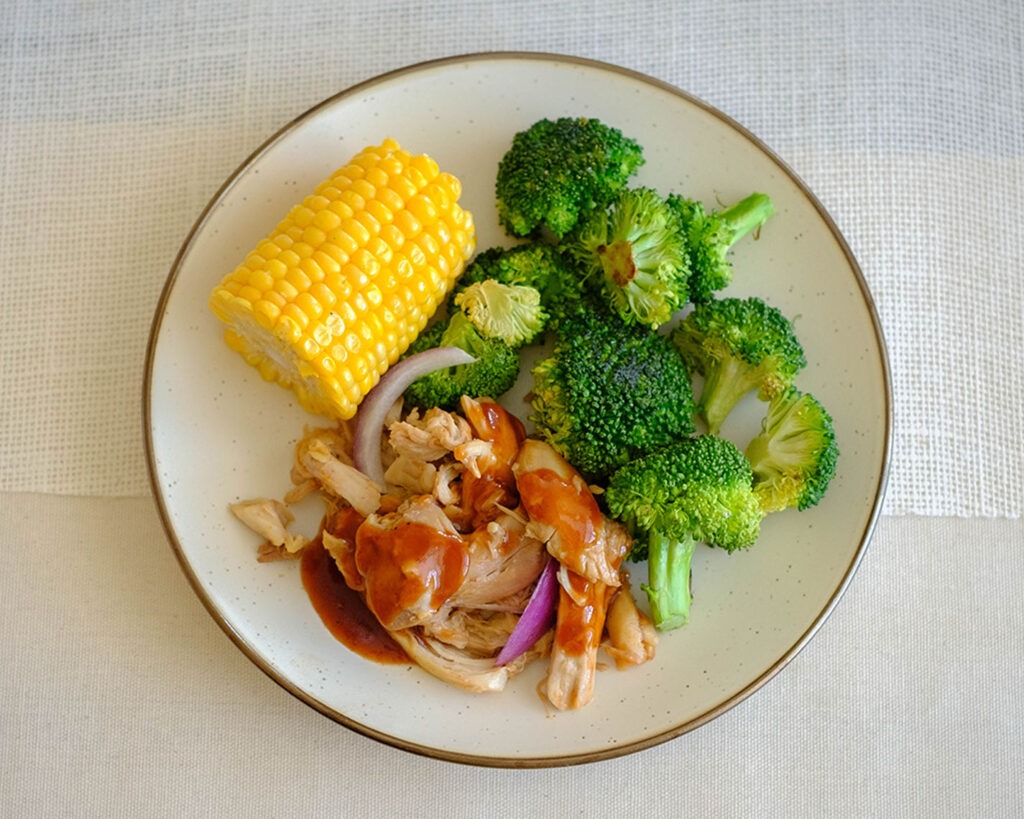
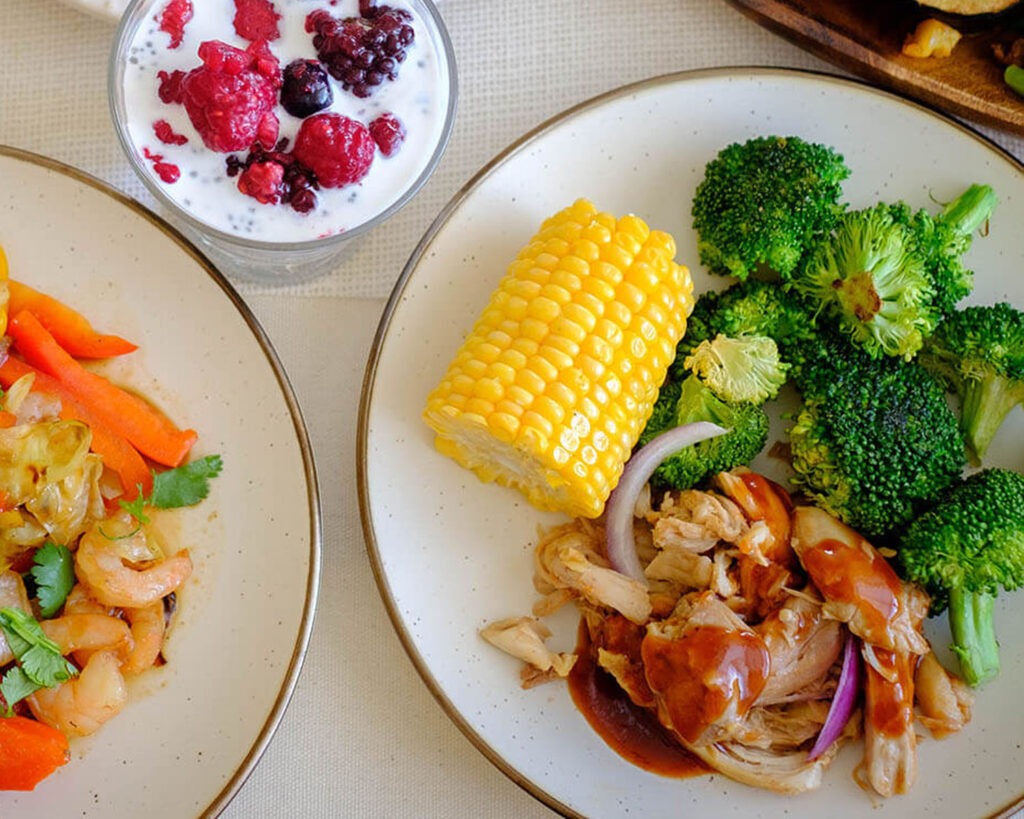
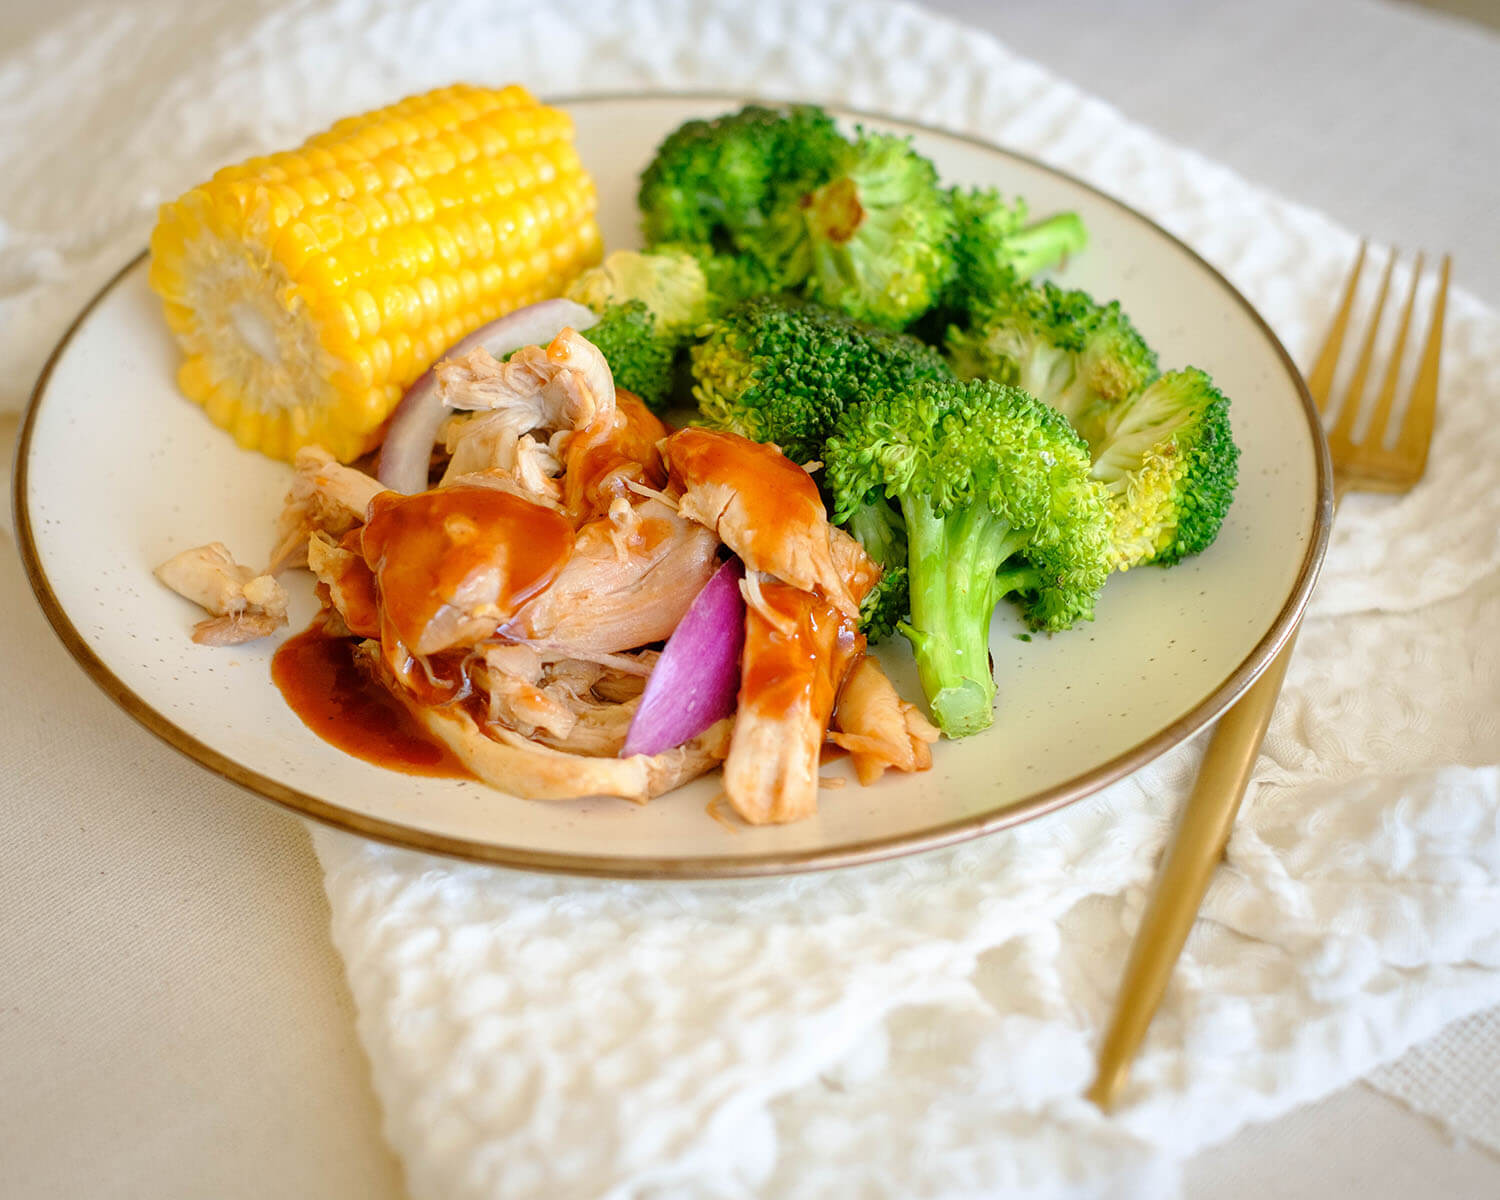
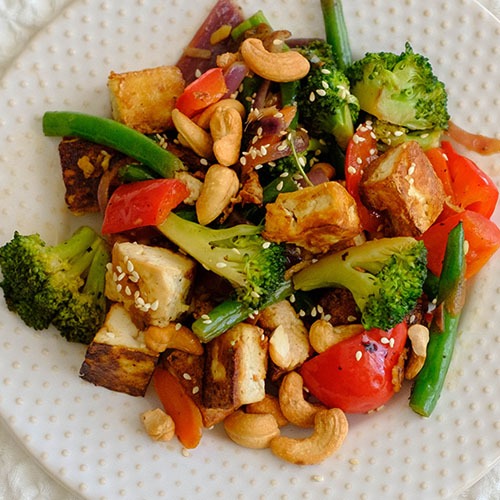
  • Broccoli: For added fiber, we enjoyed this dish with broccoli, but feel free to serve it with your choice of veggies.
plate with baked potato and instant pot beef bbq on top with broccoli side

How to Make Instant Pot BBQ Beef

Now, let’s talk about why this recipe is a dream come true for BBQ lovers and baked potato enthusiasts. The Instant Pot works its magic, transforming tough cuts of beef into melt-in-your-mouth, smoky, BBQ-infused perfection. The meat becomes so tender that it practically falls apart with a gentle touch of a fork. Pair that with a perfectly baked potato – fluffy on the inside, crispy on the outside – and you’ve got a match made in heaven. Here’s how to make it:

  1. Prepare the shredded beef in the instant pot. Add the garlic, celery, white onions, tomato sauce, salt, and pepper.
  2. While the beef cooks, preheat the oven to 425F. Clean the potatoes and scrub them well. Then, place them on a sheet pan and bake them in the oven for 50-60 minutes.
  3. After the beef cooks, carefully release the steam and remove the lid. Drain the beef from the excess liquid and shred it with a fork.
  4. Mix the beef with your choice of BBQ sauce.
  5. Once the potatoes are cooked, let them cool before slicing them in half. Top it off with the BBQ beef and enjoy with a side of veggies. Garnish with fresh green onions.

Reference the recipe card below for detailed instructions.

Glass meal prep container with instant pot beef and baked potato and broccoli

Meal Prep Tips for Stuffed BBQ Beef Potatoes

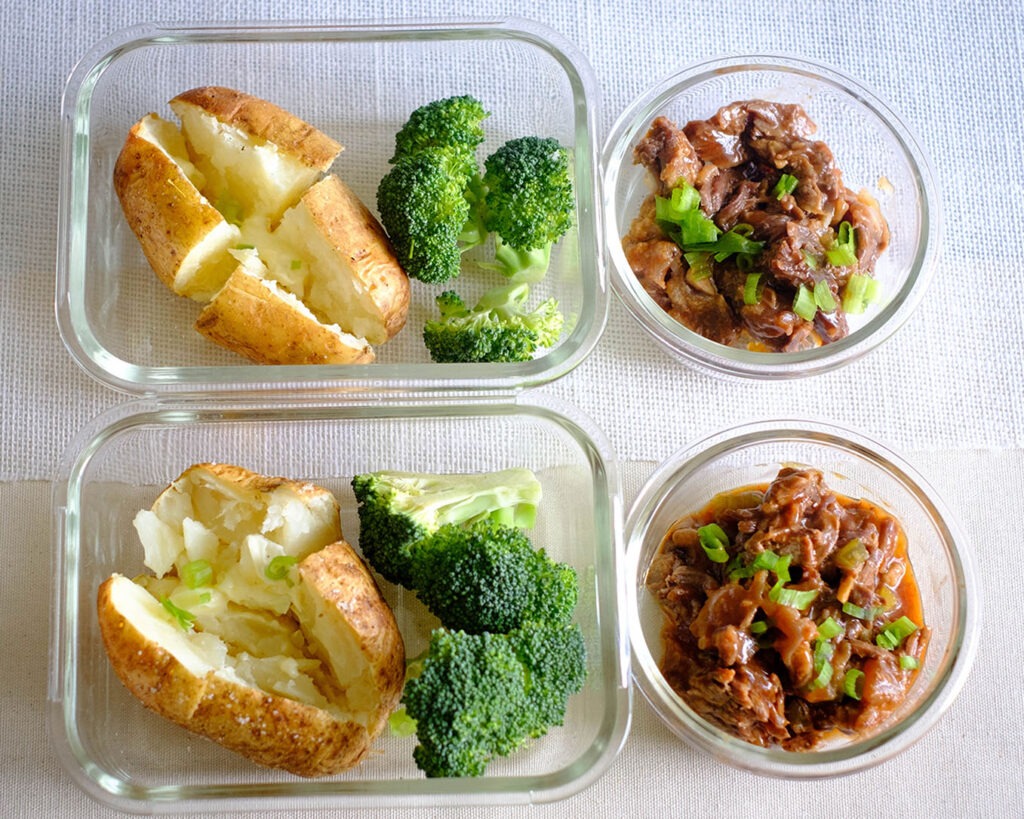
  • Now, let’s dive into the nitty-gritty of storage and serving. Once you’ve prepared your Instant Pot BBQ Shredded Beef and Baked Potatoes, you’ll want to store them properly to enjoy later. I recommend dividing the shredded beef into individual airtight containers and refrigerating them. As for the baked potatoes, wrap them in foil and keep them in the fridge alongside the beef. When you’re ready to dig in, simply reheat the beef in the microwave or on the stovetop, and warm up the baked potato in the oven or microwave. Easy peasy, right?
  • When it comes to serving, get creative! Pile that luscious shredded beef on top of the fluffy baked potato, and garnish with your favorite toppings like sour cream, shredded cheese, green onions, or even some spicy BBQ sauce. The possibilities are endless, so feel free to customize it to your liking. 
  • To reheat, simply microwave the shredded beef on high for 1-2 minutes or until warmed through. For the baked potatoes, you can either reheat them in the oven at 350°F (175°C) for about 10-15 minutes or in the microwave for 2-3 minutes until heated to your liking.
glass meal prep containers with food including instant pot beef and baked potatoes
BBQ Baked Potato

BBQ Beef Stuffed Potatoes with Steamed Broccoli

A comforting stuffed baked potato with tender and juicy Instant Pot BBQ beef that is perfect for a weekday meal.
No ratings yet
Prep Time 5 minutes
Cook Time 50 minutes
Course lunch, Main Course
Cuisine American
Servings 2

Equipment

  • knife
  • cutting board
  • Instant Pot
  • mixing bowls
  • spoon
  • sheet pan
  • oven

Ingredients
  

  • 12 oz chuck roast
  • 2 each garlic cloves
  • 1/4 cup celery (diced)
  • 1/2 cup white onions (diced)
  • 8 oz tomato sauce
  • 1 tsp salt
  • 1 tsp pepper
  • 2 each small russet potatoes
  • 3 cups broccoli florets
  • 2 tbsp green onions (chopped)
  • 1/4 tsp salt
  • 1 tbsp olive oil

Condiments

  • 1/4 cup BBQ Sauce

Instructions
 

Baked Potato

  • Pre-heat the oven to 425F
  • Wash and scrub the potatoes. Poke them with a fork all around
  • Coat them with olive oil and season with salt and pepper
  • Place the potatoes on a sheet pan and bake in the oven for 50-60 minutes

Instant Pot BBQ Beef

  • Meanwhile, prepare the shredded beef in the instant pot. Add the garlic, celery, white onions, tomato sauce, salt, and pepper
  • After the beef cooks, be sure to follow the manufacturer instructions for natural release of the steam. Carefully remove the lid
  • Drain the beef from the excess liquid and shred with a fork
  • After you shred the beef, mix it with the BBQ sauce

Steamed Broccoli

  • Pour water into a boiling pot 1/4 of the way and boil the water. Place a strainer that will fit over the rim of the boiling pot
  • Carefully place the broccoli in the strainer and steam for about 5 to 6 mintues above boiling water

Assembly

  • Once the potatoes are cooked, let it cool for a few minutes before slicing it in half. Top it off with the bbq beef and serve with a side of steamed broccoli. Garnish with fresh chopped green onions

Similar Recipes

chicken soup

One Pot Mexican Chicken Soup

sweet potato blt

Sweet Potato BLT Sandwich

Grilled Honey Dijon Chicken Kale Salad

You Might Also Like

Frequently Asked Questions

Can I use any type of potato for stuffed baked potatoes?

While russet potatoes are most commonly used for stuffed baked potatoes due to their fluffy texture, you can also use other varieties like Yukon gold or sweet potatoes. Just keep in mind that the cooking times may vary slightly depending on the type of potato you choose.


Can stuffed baked potatoes be frozen?

Stuffed baked potatoes can be frozen, but it’s best to freeze them before adding the toppings. After baking and cooling the potatoes, wrap them individually in foil or place them in airtight freezer bags. They can be stored in the freezer for up to 3 months. When ready to enjoy, thaw the potatoes in the refrigerator overnight, reheat in the oven, and then add your desired toppings.


Are stuffed baked potatoes healthy?

Stuffed baked potatoes can be part of a healthy diet when prepared with nutritious toppings and enjoyed in moderation. It’s important to balance the ingredients and portion sizes to ensure a well-rounded meal.

Posted on Leave a comment

Baked Pistachio Crusted Salmon and Asparagus

Hello, my foodie friends, unleash your inner chef and get ready to turn up your culinary game because we are jumping into the realm of delectable dinners with a showstopper recipe: Crusted Pistachio Salmon with Asparagus in the oven. Get ready to elevate your meal prep game and indulge in a restaurant-quality dinner right at home! This dish is not only packed with flavor and nutrition, but it’s also the epitome of convenience. So, let’s get started and uncover why this recipe is a must-try for your next meal prep session!

This post may contain affiliate links. Please see our privacy policy for details.

Calories: 474kcal | Carbohydrates: 8g | Protein: 38g | Fat: 32g | Saturated Fat: 5g | Polyunsaturated Fat: 8g | Monounsaturated Fat: 18g | Cholesterol: 94mg | Sodium: 823mg | Potassium: 1059mg | Fiber: 3g | Sugar: 2g | Vitamin A: 189IU | Vitamin C: 4mg | Calcium: 63mg | Iron: 3mg

Baked Pistachio Crusted Salmon and Asparagus cooked on a plate

Recipe Magic

Now, let’s talk about the magic of this recipe: the restaurant-quality experience. The combination of the moist and tender salmon, the crunchy and flavorful pistachio crust, and the perfectly roasted asparagus creates a harmony of flavors and textures that rival any high-end restaurant dish. You’ll be amazed at how easily you can recreate the same level of elegance and taste right in your own kitchen.

Pistachios are delightful nuts that bring a delightful crunch and rich flavor to the salmon crust. But that’s not all—pistachios are also loaded with heart-healthy fats, protein, fiber, and an array of vitamins and minerals. By incorporating pistachios into this dish, we’re adding a nutritional boost that pairs perfectly with the omega-3 fatty acids found in salmon.

Speaking of salmon, this recipe is a fantastic option for a filling, low-carb dinner. Salmon is a great source of high-quality protein and healthy fats, making it an ideal choice for those looking to enjoy a filling meal. The pistachio crust adds an additional layer of texture and flavor, transforming an already incredible protein into a culinary masterpiece.

The PrepYoSelf Newsletter

To Prepare This Baked Salmon Recipe You’ll Need

  • Salmon: Use fresh salmon or frozen filets. If using frozen filets, be sure you thaw them out in the refrigerator in advance prior to baking.
  • Pistachios: If you can’t find pistachios, you can use pine nuts
  • Dijon Mustard: Dijon mustard adds a nice spice to the dish, but you can also use regular mustard or even mayo.
  • Asparagus: Add minced garlic and a drizzle of olive oil to add flavor

Baked Pistachio Crusted Salmon and Asparagus ready to cook

Easy Recipe Steps to Make Pistachio-Crusted Salmon

  1. Preheat the oven to 400F.
  2. Use a knife or a food processor to finely chop the pistachios.
  3. Place the salmon and asparagus on a sheet pan.
  4. Spread the Dijon mustard on the salmon and sprinkle with garlic powder and salt. Then, sprinkle the chopped pistachios on the top of the salmon making sure it is fully coated.
  5. Season the asparagus with salt, minced garlic, and drizzle it with olive oil.
  6. Bake everything in the oven for 12 to 15 minutes.
  7. Squeeze lemon juice on top of the salmon and asparagus for added citrus flavors.

Reference the recipe card below for detailed instructions.

Baked Pistachio Crusted Salmon and Asparagus on a plate with fork and knife next to it

Meal Prep Tips

  • To prevent the pistachio crust from burning, you can cover the salmon loosely with foil during the initial part of the baking process. This will allow the salmon to cook through while protecting the crust. Towards the end, remove the foil to let the crust develop a beautiful golden color.
  • You can use frozen salmon for this recipe. Thaw the salmon fillets in the refrigerator overnight before proceeding with the recipe. It’s important to ensure the salmon is completely thawed before applying the pistachio crust and baking.
  • Storage: Once the salmon and asparagus are cooked and cooled, store them separately in airtight containers in the refrigerator. You can keep them for up to three days.
  • Reheating: When ready to enjoy, gently reheat the salmon and asparagus in the oven at a low temperature to retain their texture and flavors. Alternatively, you can microwave them briefly, taking care not to overcook them.
  • Serving Suggestions: Serve the Baked Pistachio Crusted Salmon with Asparagus alongside a fresh salad, quinoa, or roasted potatoes for a complete and balanced meal. Squeeze a bit of lemon juice over the salmon just before serving to brighten the flavors.

Baked Pistachio Crusted Salmon and Asparagus in meal prep containers

salmon and asparagus

Oven Baked Pistachio Crusted Salmon with Roasted Asparagus

With its restaurant-quality appeal, this Pistachio Crusted Salmon and Asparagus recipe will make you feel like a culinary superstar. Tender salmon, with a crunch pistachio crust and perfectly roasted asparagus rivals any high-end restaurant dish.
No ratings yet
Prep Time 5 minutes
Cook Time 15 minutes
Course dinner, lunch
Cuisine American
Servings 2
Calories 474 kcal

Equipment

  • knife
  • cutting board
  • sheet pan
  • oven

Ingredients
  

Salmon and Pistachio Crust

  • 12 oz salmon
  • 1/4 cup pistachios (shelled)
  • 2 tbsp dijon mustard
  • 1 tbsp garlic cloves (minced)
  • 1/4 tsp salt
  • 1 tbsp olive oil

Asparagus

  • 12 each asparagus spears
  • 1 tbsp garlic (minced)
  • 1/4 tsp salt
  • 1 tbsp olive oil
  • 1 each lemon

Instructions
 

  • Pre-heat the oven to 400F.
  • Finely chop the pistachios with a knife (or you can use a food processor)
  • Place the salmon and asparagus on a sheet pan.
  • Use a spoon to spread the Dijon mustard on the salmon. Season the salmon and asparagus with minced garlic and salt. Then, sprinkle the pistachio crust on top of the salmon making sure it is fully coated.
  • Next drizzle the salmon and asparagus with olive oil.
  • Bake everything in the oven for 12 to 15 minutes until the salmon is fully cooked to an internal temperature of 145F
  • Cut the lemon in wedges and squeeze lemon juice on top of the fish and asparagus

Notes

Nutrition information provided is an estimate. It will vary based on cooking method and specific ingredients used. Please consult with your healthcare provider for specific dietary needs. To gain a better understanding, explore our nutrition disclaimer here

Nutrition

Calories: 474kcalCarbohydrates: 8gProtein: 38gFat: 32gSaturated Fat: 5gPolyunsaturated Fat: 8gMonounsaturated Fat: 18gCholesterol: 94mgSodium: 823mgPotassium: 1059mgFiber: 3gSugar: 2gVitamin A: 189IUVitamin C: 4mgCalcium: 63mgIron: 3mg

Similar Recipes

salmon beet salad

Citrus Ginger Salmon with Roasted Beets

salmon and watermelon salad

Grilled Salmon with Watermelon Salad

salmon salad

Salmon Stuffed Avocado Salad

You Might Also Like

Frequently Asked Questions

Can I use a different type of fish instead of salmon?

Certainly! While the recipe calls for salmon, you can experiment with other fish varieties such as trout, cod, or halibut. Keep in mind that cooking times may vary depending on the thickness of the fish, so adjust accordingly.


Can I make the pistachio crust in advance?

Absolutely! You can prepare the pistachio crust ahead of time and store it in an airtight container or sealable bag. When you’re ready to cook, simply coat the salmon fillets with the crust mixture and proceed with the recipe as directed.


Can I substitute the asparagus with another vegetable?

While asparagus pairs wonderfully with the pistachio-crusted salmon, you can swap it with other vegetables such as green beans, broccoli, or Brussels sprouts. Just adjust the cooking time accordingly to ensure they are roasted to perfection.

Posted on Leave a comment

Chicken Enchilada Stuffed Peppers

Hello meal preppers! Let’s make lunchtime something to look forward to with these incredible Chicken Enchilada Stuffed Peppers. They’re vibrant, nutritious, and bursting with Tex-Mex flair. Say goodbye to boring lunches, and embrace the joy of flavorful and convenient meal prep. Your taste buds will thank you!

This post may contain affiliate links. Please see our privacy policy for details.

Round Plate with stuffed peppers filled with shredded chicken in enchilada sauce.

I am thrilled to share with you a lip-smacking recipe that will add a burst of flavor to your lunchtime routine. Not only are these peppers a delightful explosion of mouthwatering goodness, but they also work wonders for your meal prep game. So, let’s dive right in and discover why these stuffed peppers are the ultimate lunchtime meal!

These vibrant bell pepper beauties not only bring a pop of color to your plate but also pack a punch in terms of nutritional benefits. Bell peppers are loaded with vitamins A and C, antioxidants, and dietary fiber, making them a fantastic addition to your lunch. Plus, they provide a crisp and refreshing texture that perfectly complements the savory filling.

One of the many reasons why Chicken Enchilada Stuffed Peppers excel at meal prep is their single-serving nature. Each pepper acts as its own self-contained lunch, allowing for easy portion control. You can prep multiple peppers ahead of time, ensuring you have a delicious and satisfying lunch ready to go throughout the week. Say goodbye to sad desk lunches!

The PrepYoSelf Newsletter

Gather the Following Ingredients

  • Chicken: You can use pre-cooked chicken from the local rotisserie, or you can boil chicken breasts for about 25 minutes and shred the chicken
  • Bell Peppers: Feel free to use any color of bell peppers
  • Enchilada Sauce: We used pre-made enchilada sauce to save time on meal prep. You can find this in the canned goods aisle.
  • Cilantro and Red Onions: These ingredients add a level of freshness to the recipe.

plate of veggies and stuffed peppers

How to Make Enchilada Stuffed Peppers

What makes this recipe a meal prep champion is its ease of preparation. The filling comes together in a snap, using simple and readily available ingredients. Once your peppers are stuffed, pop them in the oven, and let the magic happen. You’ll have a lunch that is not only delicious but also packed with protein and veggies—perfect for keeping you fueled and satisfied throughout the day.

  1. Preheat the oven to 400F. Slice the bell peppers in half and remove the inside core.
  2. Next, combine the chicken, red onions, cilantro, and enchilada sauce.
  3. Use a spoon to scoop the chicken mixture into the peppers.
  4. Place the peppers on a baking dish and bake in the oven for 20-25 minutes until the peppers are cooked to your desired tenderness.

Reference the recipe card below for detailed instructions.

Glass meal prep containers with stuffed peppers with shredded chicken in enchilada sauce.

Meal Prep Tips for Stuffed Peppers

  • Storage is a breeze when it comes to these stuffed peppers. Once cooked, allow them to cool completely before storing them in airtight containers in the refrigerator. They’ll stay fresh and flavorful for up to four days. When it’s time to enjoy your lunch, simply heat them in the microwave or oven until warmed through. Talk about a hassle-free lunchtime solution!
  • Now, let’s discuss serving options. These Chicken Enchilada Stuffed Peppers are delightful on their own, but you can take them to the next level by adding a dollop of sour cream, a sprinkle of fresh cilantro, or a squeeze of lime juice. Serve them with your favorite side of salsa. These little touches elevate the flavors and bring a burst of freshness to every bite. Feel free to get creative and make it your own!
  • You can also freeze the stuffed peppers for future meals. Once cooked and cooled, place them in freezer-safe containers or wrap them tightly in aluminum foil. Thaw in the refrigerator overnight before reheating in the oven or microwave.

stuffed pepper

Chicken Enchilada Stuffed Peppers

These incredible Chicken Enchilada Stuffed Peppers are vibrant, nutritious, and bursting with flavor. Enjoy them for a fantastic option for your next lunch prep.
No ratings yet
Prep Time 5 minutes
Cook Time 20 minutes
Servings 2

Equipment

  • knife
  • cutting board
  • mixing bowl
  • spoon
  • baking dish
  • oven

Ingredients
  

  • 10 oz shredded chicken breast (pre-cooked)
  • 1 each red bell pepper
  • 1 each green bell pepper
  • 1 cup enchilada sauce
  • 1/4 cup red onions (diced)
  • 1/4 cup cilantro (chopped)
  • 2 each small avocados
  • 4 cups salad mix
  • 4 tbsp salad dressing (your choice)

Instructions
 

  • Pre-heat the oven to 400F
  • Slice the bell peppers in half and remove the inside core
  • In a bowl, mix together the red onions, cilantro, shredded chicken, and enchilada sauce
  • Use a spoon to scoop the chicken into the peppers
  • Place the peppers into a baking dish and bake in the oven for 20-25 minutes until the peppers are tender
  • Top the stuffed peppers with sliced avocado and enjoy with a side salad and your choice of dressing

Similar Recipes

bean and corn taco

Vegetarian Black Bean and Corn Soft Tacos

chicken salad

Oven Baked Honey Mustard Glazed Chicken Salad

balsamic chicken salad

Oven Baked Balsamic Chicken Salad with Strawberries

You Might Also Like

Frequently Asked Questions

Can I use a different type of protein instead of chicken?

Absolutely! While the recipe calls for chicken, you can easily swap it out with other proteins such as ground beef, turkey, or even plant-based options like black beans or tofu. Customize the recipe to your liking and dietary preferences


Can I make the filling ahead of time?

You can prepare the filling for the Chicken Enchilada Stuffed Peppers ahead of time and store it in the refrigerator for a day or two. When you’re ready to assemble the peppers, simply stuff them and bake them according to the recipe instructions.


Can I use different types of peppers?

While the recipe typically calls for bell peppers, you can experiment with different pepper varieties to add a unique twist to your stuffed peppers. Try using poblano peppers for a smoky flavor or banana peppers for a touch of sweetness. The choice is yours!

Posted on Leave a comment

Air Fryer Honey Sesame Chicken Bites

rectangular wooden plate with small bite size chicken pieces, sliced red bell peppers, and honey mustard applesauce

Hello foodie friends! I’m excited to share this delicious and healthy honey sesame, air fryer chicken recipe that’s not only convenient and cheap but also just as good as takeout! I also want to talk to you about the magic of sesame seeds and how they can add amazing flavor to your Asian-Inspired chicken dishes. In addition we’ve got a tasty recipe for a honey mustard apple sauce that’s both healthy and incredibly flavorful that is perfect for adding some excitement to your meal prep routine.

This post may contain affiliate links. Please see our privacy policy for details.

Calories: 531kcal | Carbohydrates: 22g | Protein: 31g | Fat: 36g | Saturated Fat: 9g | Polyunsaturated Fat: 9g | Monounsaturated Fat: 15g | Trans Fat: 0.1g | Cholesterol: 167mg | Sodium: 1223mg | Potassium: 584mg | Fiber: 3g | Sugar: 18g | Vitamin A: 2019IU | Vitamin C: 77mg | Calcium: 39mg | Iron: 2mg

rectangular wooden plate with small bite size chicken pieces, sliced red bell peppers, and honey mustard applesauce - try this air fryer chicken recipe

Making honey sesame chicken in the Air Fryer is a healthy, convenient, and cheap way to enjoy a delicious meal at home. By following these tips, you’ll be able to cook up a tasty dish that’s just as good as takeout, but with a fraction of the cost and calories. Let’s get started!

The PrepYoSelf Newsletter

Why this recipe is great for meal prep

  • The Air Fryer is a quick and easy way to cook chicken, which is perfect for busy weeknights or meal prepping for the week ahead. Plus, making your own honey sesame sauce is cheaper than buying pre-made sauce from the store.
  • Condiments can often add a lot of unnecessary calories, but this honey mustard applesauce dip is made from scratch. The ingredients include honey which is a natural sweetener that’s lower in calories than refined sugar, and it also has antibacterial and anti-inflammatory properties. And mustard is a low-calorie condiment that adds a lot of flavor without adding a lot of fat or calories.
  • Last but not least, sesame seeds are a versatile and flavorful ingredient that can be used in a variety of dishes, but they are particularly delicious in Asian cuisine. They add a nutty, toasted flavor and a satisfying crunch that elevates any dish. Not to mention, sesame seeds are packed with nutrients like protein, fiber, and healthy fats, making them a great addition to any healthy meal prep.

rectangular wooden plate with air fryer chicken recipe, small bite size chicken pieces, sliced red bell peppers, and honey mustard applesauce. Next to it is a round plate with chicken tacos

Ingredients:

  • Chicken: We used boneless chicken thighs, but you can also use chicken breasts or chicken tenderloins
  • Marinade: We used a simple combination of soy sauce, sesame oil, garlic butter, and honey. However, you can add other ingredients such as hoisin sauce, gyoza sauce, and ginger powder
  • Mustard sauce: This sauce is a simple mixture of yellow mustard, honey, and applesuace

rectangular wooden plate with air fryer chicken recipe - small bite size chicken pieces, sliced red bell peppers, and honey mustard applesauce

Easy Air Fryer Chicken Recipe steps

  1. Cut your chicken into one inch cubes.
  2. Whisk together the honey sesame sauce. In a bowl, combine the chicken with the marinade and make sure they are fully coated.
  3. Place the chicken in the Air Fryer Basket and spray them with cooking spray. Cook them in the Air Fryer for about 20 minutes. Flip them halfway through the cooking process so that they get golden brown all around.
  4. Meanwhile, mix together the honey mustard applesauce dip and slice the bell peppers.

Reference the recipe card below for detailed instructions.

Glass meal prep container with chicken and red bell peppers - try this air fryer chicken recipe

Meal Prep Tips for Honey Sesame Chicken

  • When  it comes to serving your honey sesame Air Fryer chicken recipe, I recommend pairing it with some healthy sides. We served it fresh bell pepper strips, however, steamed or roasted veggies, brown rice, or quinoa are all great options that will help balance out the sweetness of the honey sesame sauce and provide some extra nutrition.
  • To store: Let the chicken cool completely before storing it in an airtight container in the fridge for up to 3 to 4 days.
  • To Reheat: You can reheat it in the Air fryer for 3 to 4 minutes at 350F until it warms through or you can just reheat in the microwave. If the chicken seems dry after reheating, you can make extra honey sesame sauce and drizzle it over the chicken before serving.

rectangular wooden plate with small bite size chicken pieces, sliced red bell peppers, and honey mustard applesauce

Air Fryer Honey Sesame Chicken

This recipe features tender chicken thighs marinated in a flavorful blend of soy sauce, honey, sesame oil, and garlic powder, air-fried to perfection and served with a tangy honey mustard applesauce alongside crisp red bell pepper slices.
No ratings yet
Prep Time 5 minutes
Cook Time 15 minutes
Course lunch, Main Course
Cuisine Asian
Servings 2
Calories 531 kcal

Equipment

  • knife
  • cutting board
  • mixing bowls
  • Air Fryer

Ingredients
  

  • 12 oz boneless chicken thighs
  • 2 tablespoons soy sauce
  • 1 tablespoon honey
  • 1 tablespoon sesame oil
  • 1/4 teaspoon garlic powder
  • 1 teaspoon sesame seeds

Mustard Applesauce

  • 1 tablespoon yellow mustard
  • 1 tablepsoon honey
  • 1/2 cup applesauce

Vegetable Sides

  • 1 red bell pepper (sliced)

Instructions
 

  • Cut the chicken into 1 inch cubes. Add the chicken to a mixing bowl and combine it with the soy sauce, honey, sesame oil, garlic powder, and sesame seeds.
  • Place the chicken in the Air Fryer basket and cook them in the air fryer for 15 minutes at 360F until they fully cook to an internal temperature of 165F. Be sure to flip them over halfway through so that they are golden brown on all sides.
  • Meanwhile, in a small bowl, mix together the mustard, honey, and applesauce. Slice the red bell peppers into thin strips.
  • Once the chicken is cooked, dip them in the honey mustard applesauce and enjoy them with sliced bell peppers or your choice of fresh veggie sticks.

Notes

Nutrition information provided is an estimate. It will vary based on cooking method and specific ingredients used. Please consult with your healthcare provider for specific dietary needs. To gain a better understanding, explore our nutrition disclaimer here

Nutrition

Calories: 531kcalCarbohydrates: 22gProtein: 31gFat: 36gSaturated Fat: 9gPolyunsaturated Fat: 9gMonounsaturated Fat: 15gTrans Fat: 0.1gCholesterol: 167mgSodium: 1223mgPotassium: 584mgFiber: 3gSugar: 18gVitamin A: 2019IUVitamin C: 77mgCalcium: 39mgIron: 2mg

Similar Recipes

broccoli beef

Ground Beef and Broccoli Stir Fry

tofu stir fry

Tofu and Veggie Stir Fry

beef and chinese broccoli

Garlicky Beef Stir Fry

You Might Also Like

Frequently Asked Questions

How else can I use sesame seeds?

One of my favorite ways to use them is by making a simple sesame seed crust for chicken. To do this, you’ll need to mix together sesame seeds, breadcrumbs, and your favorite Asian-inspired spices, such as ginger, garlic, and soy sauce. Then, coat your chicken breasts in the mixture and bake them in the oven. The result is a perfectly crispy, flavorful chicken that’s sure to impress.


Can I make this recipe without an Air Fryer? 

Yes, you can! If you don’t have an Air Fryer, you can bake the chicken bites in the oven at 400F for about 20-25 minutes or until it is cooked through and golden brown. Just be sure to flip the chicken bites halfway through cooking to ensure that they are cooking evenly.


How can I use the honey mustard sauce in my meal prep?

It’s also perfect for adding flavor to chicken, pork, or salmon. Simply brush it on your protein before baking or grilling. You can also use it as a dipping sauce for fresh veggies. Add apple cider vinegar and olive oil to the sauce. Blend it together and use it as a salad dressing.

Posted on Leave a comment

Asian Lettuce Wraps with Beef and Fresh Basil

Hey there fellow meal-prepping enthusiasts, I am so excited to share with you one of my go-to recipes for Asian Ground Beef Lettuce Wraps! This dish is not only delicious, but it’s also healthy, low-carb, and perfect for weekly meal prep.

One of the meal prep hacks to making this dish truly tasty is by adding fresh herbs. Not only do they add a pop of color and freshness to your dish, but they also add an incredible depth of flavor. For this recipe, I highly recommend adding fresh basil to your ground beef filling. The combination of this fresh herb with the juicy ground beef and flavorful sauce is simply irresistible.

This post may contain affiliate links. If you use these links to buy something we may earn a commission at no extra cost to you. Please read the disclosure policy.

With a little bit of planning and preparation, you can enjoy restaurant-quality flavors at home all week long. 

asian beef lettuce wraps on a wooden bowl

The PrepYoSelf Newsletter

Now, let’s talk about the nutritional benefits of this dish. By using lettuce wraps you’re cutting out lots of calories. Plus, ground beef is a great source of protein and the addition of vegetables like bell peppers and onions adds fiber and important vitamins and minerals. And let’s not forget about the incredible flavors and textures that make this dish so satisfying.

I’m going to show you how to make Asian Flavored Ground Beef Lettuce Wraps that taste just as good as your favorite takeout but with the added convenience of being able to prepare it in advance for the week ahead.

asian beef lettuce wraps on a wooden bowl

Simple Keto-Friendly, Low-Carb Ingredients

Firstly, let’s talk about how to make this dish taste absolutely amazing. The key is to season your ground beef well with Asian spices like garlic, ginger, and soy sauce. You can also add a little sweetness with honey or brown sugar, and some heat with red pepper flakes or chili paste. The combination of these flavors will make your taste buds dance with delight!

  • Ground Beef: We used ground beef, but you can easily swap in ground pork, ground turkey, or ground chicken for your protein
  • Red Onions: We used diced red onions, but chopped green onions are also a great choice.
  • Lettuce Wraps: We used butter lettuce leaves, but you can also use romaine lettuce leaves
  • Bell Peppers: This will add freshness to the dish and also bright colors
  • Herbs: We used basil leaves, but you can easily swap them with cilantro
  • Soy Sauce: Soy sauce adds great savory flavors to stir fry, but you can also use other sauces such as hoisin sauce, gyoza sauce, or oyster sauce.
  • Oils: We stir fry with olive oil, but then drizzle in a little bit of sesame oil for extra flavor in the end.

asian beef lettuce wraps in meal prep containers

How to Make Ground Beef Lettuce Wraps

  • Add 1 tbsp olive oil to a saute pan on medium-high heat. Saute the onions until they soften (about 2 to 3 minutes)
  • Next, add the ground beef and saute for about 5 to 6 minutes until the beef is fully cooked and golden brown
  • Then, add seasonings, bell peppers, and chopped fresh basil leaves and mix it all together
  • Serve the beef on top of the lettuce wraps

Reference the recipe card below for detailed instructions.

asian beef lettuce wraps in meal prep containers

Meal Prep Tips for Basil Beef Lettuce Wraps

  • Now, let’s talk about what side dishes would pair well with this recipe. I recommend serving these lettuce wraps with some pickled ginger or onions, which will help balance out the flavors. You could also enjoy it with a side of fruit like sliced oranges for added nutrition and citrus flavors.
  • When it comes to storing and reheating this dish for the week, it’s important to separate the lettuce wraps from the ground beef filling and store them separately. This will help keep the lettuce wraps crips and fresh and prevent them from getting soggy.
  • To reheat, you could also heat up the filling in a skillet with a little oil to crisp it up or just simply microwave the filling until heated through and then assemble the lettuce wraps. 

Beef lettuce wraps

Basil Ground Beef Lettuce Wraps with Bell Peppers

No ratings yet
Prep Time 5 minutes
Cook Time 15 minutes
Course lunch, Main Course
Cuisine American, Asian
Servings 2

Equipment

  • knife
  • cutting board
  • spatula
  • saute pan

Ingredients
  

  • 12 oz ground beef
  • 1/4 cup red onions (diced)
  • 1 each red bell pepper (sliced)
  • 4 each fresh basil leaves (thinly sliced)
  • 2 tbsp soy sauce
  • 1 tbsp honey
  • 1 tsp sesame oil
  • 1/4 tsp garlic powder
  • 4 each large lettuce leaves

Instructions
 

  • Add 1 tbsp olive oil to a saute pan on medium high heat. Saute the onions until they soften (about 2 to 3 minutes)
  • Next, add the ground beef and saute for about 5 to 6 minutes until the beef is fully cooked and golden brown
  • Then, add seasonings, bell peppers, and chopped fresh basil leaves and mix it all together
  • Serve the beef on top of the lettuce wraps

Similar Recipes

peanut chicken

Peanut Chicken and Celery Stir Fry

beef and chinese broccoli

Garlicky Beef Stir Fry

tofu stir fry

Tofu and Veggie Stir Fry

You Might Also Like

Frequently Asked Questions

Can I add vegetables to the filling?

Absolutely! Adding vegetables like broccoli, carrots, and mushrooms will not only add more nutrition to the dish but also add texture and flavor.


How can I make sure the lettuce stays fresh for meal prepping?

To keep the lettuce fresh for meal prepping, I recommend storing the lettuce leaves separately from the filling. Place a damp paper towel at the bottom of the container and then layer the lettuce leaves on top. This will help keep the lettuce fresh and crisp.


Can I freeze ground beef lettuce wraps?

I do not recommend freezing the lettuce wraps as the lettuce will become wilted and soggy when thawed. However, you can freeze the cooked ground beef filling for up to three months.

Posted on Leave a comment

Instant Pot BBQ Chicken

Round plate with shredded bbq chicken, corn, and broccoli

Making your Instant Pot BBQ Chicken is a cost-effective way to meal prep rather than buying pre-made chicken at a store or getting it from a restaurant.

This post may contain affiliate links. Please see our privacy policy for details.

Round plate with shredded instant pot bbq chicken, corn, and broccoli

Why Instant Pot BBQ Chicken is Great for Meal Prep

  • By making your own shredded bbq chicken in the Instant Pot, you can control your portion size and can control the ingredients to ensure that they are healthy.
  • Using the Instant Pot to cook your BBQ chicken also saves a lot of time because the pressure cooking feature allows it to cook quickly and thoroughly.
  • You can also make a large batch and freeze them in portioned containers for later use which makes it a convenient option for busy nights when you don’t have time to cook from scratch.
  • The shredded BBQ chicken can be served in a variety of meals. We enjoy eating it with roasted vegetables, in sandwiches or wraps, or even on top of salads. You can use this protein dish in multiple meals throughout the week without getting tired of it.

The PrepYoSelf Newsletter

Here’s What You Need to Make BBQ Chicken

Making your own shredded BBQ chicken in the Instant Pot allows you to control the ingredients and flavors to your liking.

  • Chicken: We used boneless chicken thighs, but you can also use chicken breasts or chicken tenderloins if you prefer leaner protein.
  • BBQ Sauce: You can make your own BBQ sauce, however, we used a store bought version for the sake of time. Just be sure to read the ingredient labels and pick a BBQ sauce that is less in sugar and sodium.
  • Broth: We used chicken broth, but you can also use water. You just need a little bit of liquid for this recipe
  • Seasonings: To enhance the flavor, we added garlic powder, paprika, and a little bit of liquid smoke to add the “BBQ flavor”

Round plate with shredded instant pot bbq chicken, corn, and broccoli

Easy Steps for Instant Pot BBQ Chicken

  1. Combine the ingredients in the Instant Pot.
  2. Seal the lid and set the timer for 25 minutes on high pressure.
  3. Once the cook time finishes, carefully release the steam and open the lid.
  4. Use two forks to shred the chicken. Then drain the excess liquid.
  5. Add more BBQ sauce to the chicken to your liking.
  6. Enjoy with vegetables or make a sandwich.

Reference the recipe card below for detailed instructions.

glass meal prep container with shredded instant pot bbq chicken, corn, and broccoli

Meal Prep Tips for Instant Pot BBQ Chicken

  • Use boneless chicken beause they cook quickly and are easy to shred. You won’t have to deal with separating the bones.
  • Double the recipe if you want to freeze extra portions for a later time. Just be sure to label and date the containers.
  • Allow the chicken to cool for a fewminutes before shredding to make it easier to handle so that you don’t burn your hands. You can also use a hand mixer on low speed to shred the meat.

glass meal prep container with shredded instant pot bbq chicken, corn, and broccoli

shredded bbq chicken

Shredded BBQ Chicken with Roasted Broccoli and Corn

No ratings yet
Prep Time 5 minutes
Cook Time 35 minutes
Course lunch, Main Course
Cuisine American
Servings 4

Equipment

  • knife
  • cutting board
  • mixing bowl
  • Instant Pot
  • sheet pan
  • oven

Ingredients
  

Chicken

  • 1.5 lbs boneless chicken thighs
  • 1.5 cups BBQ sauce
  • 1 cup chicken broth
  • 1/4 cup red onions (sliced)
  • 1 tsp garlic powder
  • 1 tsp paprika
  • 1/2 tsp salt

Vegetables

  • 4 cups broccoli florets
  • 4 pieces corn on the cob
  • 1/4 tsp garlic powder
  • 1/4 tsp paprika
  • 1/4 tsp salt
  • 1 tbsp olive oil

Instructions
 

  • Pre-heat the oven to 400F
  • Meanwhile, place the chicken in the Instant Pot and pour in chicken broth, half of the BBQ sauce, red onions, and seasonings
  • Seal the lid and set the timer for 35 minutes and cook on the medium setting
  • Next, place the broccoli and corn on a sheet pan and sprinkle with garlic powder, paprika, and salt. Coat it with olive oil. Bake in the oven for 12-15 minutes
  • After the chicken cooks, follow the manufacturer's instructions to carefully release the steam and open the lid
  • Drain the chicken broth and use two forks to shred the chicken. Then, pour over the leftover BBQ sauce and mix it all together
  • Serve the shredded chicken with the roasted broccoli and corn
  • optional: Enjoy with a side salad

Similar Recipes

chicken soup

One Pot Mexican Chicken Soup

sweet potato blt

Sweet Potato BLT Sandwich

Grilled Honey Dijon Chicken Kale Salad

You Might Also Like

Frequently Asked Questions

Can I use frozen chicken?

Yes, absolutely, you’ll just have to adjust the cooking time accordingly to make sure it cooks thoroughly, approximately an additional 10 extra minutes per pound when using frozen meats. 


Can I reheat Instant Pot BBQ Chicken in the microwave?

Yes, you can reheat it in the microwave or on the stovetop.


Can I use any type of BBQ Sauce?

Yes, you can use any type of BBQ Sauce. There are many different flavors such as the traditional tangy flavors that is tomato based, smoky bbq sauce that comes from smoked paprika or liquid smoke, spicy bbq sauce that has a kick to it from cayenne pepper, or honey bbq sauce that is sweet from the addition of honey. 

Posted on Leave a comment

Air Fryer Chicken Meatball Lettuce Wraps

round plate with chicken meatball lettuce wraps served with grapes

Air Fryer Chicken Meatballs are a delicious and healthy way to enjoy this classic dish without the added fat and oil of traditional frying methods. Serving them in lettuce wraps makes them a healthy lunch idea you can enjoy during your busy work week.

This post may contain affiliate links. Please see our privacy policy for details.

round plate with chicken meatball lettuce wraps served with grapes, healthy lunch idea

Air Fryer meatballs are a healthy lunch idea because they are:

  1. Easy to Make: Meatballs can be made quickly and easily in an Air Fryer with minimal effort. You can prepare a large batch of meatballs in just a few minutes, which makes meal prep much easier and faster.
  2. Healthy: Air fryer meatballs are healthier than traditional fried meatballs. They are cooked using hot air, which means they don’t need to be submerged in oil. This reduces the fat and calorie content of the meatballs and makes them a healthier option.
  3. Versatile: Meatballs can be made with a variety of meats and flavors, making them a versatile, healthy lunch idea. You can make meatballs with beef, chicken, turkey, or even plant-based alternatives like tofu or lentils. You can also experiment with different herbs and spices to add flavor.
  4. Freezer-friendly: Air fryer meatballs can be frozen and reheated easily. This means you can make a large batch of meatballs and freeze them for future meals. When you’re ready to eat, simply reheat them in the air fryer for a quick and easy meal.
  5. Portion-controlled: Meatballs are a great way to control portion sizes for meal prep. You can make them in uniform sizes, which makes it easy to portion out your meals for the week. This is especially helpful if you’re trying to stick to a specific calorie or macro-nutrient goal.

The PrepYoSelf Newsletter

  • Ground Chicken
  • Egg
  • Ricotta
  • Garlic
  • Onion powder, dried thyme, salt, and pepper
  • Green Onions and Cilantro

You can use different types of ground meat such as turkey, chicken, pork, or a combination of meats. Just ensure you adjust the cooking time accordingly, as cooking times may vary for different types of meat.

cutting board with a silver mixing bowl filled with ground chicken, small containers filled with green onions, chopped cilantro, seasonings, olive oil, eggs, and ricotta cheese - healthy lunch idea

Variations of meatballs:

  • Italian-style meatballs: Add dried oregano, dried basil, and chopped fresh parsley to the mixture.
  • Asian-style meatballs: Use ground pork and add soy sauce, hoisin sauce, and chopped scallions to the mixture.
  • BBQ meatballs: Use ground beef and add BBQ sauce and chopped onion to the mixture.
  • Vegetarian meatballs: Use 1 can of drained and mashed chickpeas instead of ground meat, and add chopped fresh cilantro and ground cumin to the mixture.

round plate with chicken meatball lettuce wraps served with grapes, healthy lunch idea

How to Air Fry Chicken Meatballs:

  1. Preheat the Air Fryer before cooking to ensure they cook evenly and quickly.
  2. In a large mixing bowl, combine all the ingredients and mix well.
  3. Shape the mixture into meatballs, about 1 inch in diameter.
  4. Place the meatballs in a single layer in the air fryer basket.
  5. Cook for 12-15 minutes, flipping the meatballs halfway through, until they are cooked through and browned on the outside.

Reference the recipe card below for detailed instructions.

glass meal prep containers filled with chicken meatball lettuce wraps - a healthy lunch idea

Meal Prep Tips for Air Fryer Meatballs

  • Make sure the meatballs are evenly sized to ensure even cooking.
  • Please note that cooking times may vary depending on the size of your meatballs and the temperature of your Air Fryer.
  • Experiment with different seasonings to find your favorite flavor combination.
  • If you’re short on time, you can make a big batch of meatballs and freeze them for later use. Simply reheat them in the air fryer when you’re ready to enjoy them.

round plate with chicken meatball lettuce wraps served with grapes

Air Fryer Chicken Meatball Lettuce Wraps

Easy to make Air Fryer Chicken Meatball Lettuce wraps that are great for meal prep.
No ratings yet
Prep Time 5 minutes
Cook Time 25 minutes
Course dinner, Main Course
Cuisine Mediterranean
Servings 2

Equipment

  • knife
  • cutting board
  • mixing bowl
  • sheet pan

Ingredients
  

Meatballs

  • 12 oz ground chicken
  • 1 large egg
  • 1/4 cup ricotta cheese
  • 2 tbsp garlic (minced)
  • 1/4 tsp onion powder
  • 1/4 tsp dried thyme
  • 1/4 cup green onions (chopped)
  • 1/4 cup cilantro (chopped)
  • 1/4 tsp salt
  • 1/4 tsp pepper

Lettuce Wrap Ingredients

  • 6 large lettuce wraps
  • 1/2 cup cherry tomatoes (sliced)
  • 1/4 cup cucumber

Yogurt dip

  • 1 cup greek yogurt
  • 1 tbsp lemon juice
  • 1 tbsp olive oil
  • 1 tbsp garlic (minced)
  • 1/4 cup cucumbers (finley diced)
  • 1/4 tsp salt
  • 1/8 tsp dried dill

Optional

  • 1.5 cups grapes (or choice of fruit)

Instructions
 

  • Pre-heat the Air Fryer for about 5 minutes at 360F.
  • In a mixing bowl, combine the ground chicken, eggs, seasonings, garlic, and ricotta. Use a fork or whisk to mix everything together. Next, add the chopped herbs and fold them in well.
  • Take small portions of the mixture and shape them into meatballs. You can use a small ice cream scoop or 2 spoons to portion out the meatballs (about 1 inch in diameter). Arrange the meatballs into the Air Fryer Basket in a single layer, making sure they are not touching each other. Coat them with cooking spray and cook them in the Air fryer for about 12 to 15 minutes at 360F. Flip them halfway through until they are browned and cooked through an internal temperature of 165F.
  • Meanwhile, in a small bowl, mix together the ingredients for the yogurt sauce. Once cooked, serve with lettuce wraps and top them off with fresh cucumbers and cherry tomatoes.
  • Serve with the yogurt sauce and your choice of fruit.

Similar Recipes

bean and corn taco

Vegetarian Black Bean and Corn Soft Tacos

chicken salad

Oven Baked Honey Mustard Glazed Chicken Salad

balsamic chicken salad

Oven Baked Balsamic Chicken Salad with Strawberries

You Might Also Like

Frequently Asked Questions

Can I use Frozen meatballs in the Air Fryer?

Yes, you can use frozen meatballs in the air fryer. Just make sure to add a few extra minutes to the cooking time to ensure they are fully cooked.


Can I make Air Fryer Meatballs without breadcrumbs?

Yes, you can make air fryer meatballs without breadcrumbs. You can use almond flour, crushed pork rinds, or even grated parmesan cheese as a substitute.


Can I make meatballs in advance and reheat them in the Air Fryer later?

Yes, you can make meatballs in advance and reheat them in the Air Fryer later. Just be sure to store them properly in the fridge or freezer and adjust the cooking time accordingly when reheating.

Posted on Leave a comment

Instant Pot Recipe for Beef Udon Noodles

Round bowl with beef soup and udon noodles.

Enjoy udon noodles served in this savory soup by using your chopsticks while making a slurping sound. Slurping enhances the flavors of this dish 🙂

This post may contain affiliate links. Please see our privacy policy for details.

Round bowl with beef soup and udon noodles.

Cooking for two can be a challege, but with a little planning and creativity, it can be enjoyable. One of our tips is to embrace conveience. Sometimes, convenience foods can be a lifesaver when cooking for two.

You can buy pre-cut vegetales or pre-cooked grains to save time. For this recipe, we are incorporating pre-cooked udon noodles, and we are letting the Instant Pot do all the heavy lifting of this meal prep process.

What is udon noodles?

If you’re looking for a new side dish to accompany your meal prep, give udon noodles a try. Udon noodles are chewy Japanese noodles made from wheat flour, water, and salt. They are thicker than ramen and soba noodles that you often find in Asian recipes.

They are often served in a simple broth or used in stir fry recipes. The great thing about this ingredient is that you can often find them already packaged and pre-cooked in the international aisles of the grocery store. This means no cooking is required! When it comes to meal prep, you definitely want to incorporate ready to eat ingredients to cut down on prep time.

Not only are udon noodles a great alternate to rice, udon noodles can be a healthy addition to your meal prep as long as they are portioned right and portioned with a fair amount of protein and fiber.

The PrepYoSelf Newsletter

Ingredients for Instant Pot Beef Udon Soup

  • Beef: We used lean beef stew meat, but you can use cubed pork or chicken for this recipe
  • Bell Peppers: This adds a sweetness to the broth and also vibrant colors. If you don’t have bell peppers, you can also use carrots or butternut squash
  • Aromatics: Green onions, onions and garlic cloves add a ton of flavor to your cooking
  • Herbs: We used green onions, but you can easily use fresh cilantro or basil
  • Udon Noodles: You can use dried udon noodles or soft udon noodles that are pre-cooked. For the ease of meal prep, we opted for the soft udon noodels so that there is no pre-cooking required. All you have to do is heat them up.

Instant Pot with raw beef and vegetables

How to Make Beef Udon Soup Using Instant Pot

  1. Add the beef, vegetables, broth, and seasonings to the pot.
  2. Add the broth and seal the lid.
  3. Cook on medium setting for 25 minutes.
  4. After the beef cooks, carefully release the steam and remove the lid.
  5. Ladle the soup over udon noodles.

Reference the recipe card below for detailed instructions.

Round bowl with beef soup and udon noodles.

Meal Prep Tips for Instant Pot Beef Udon

  • Additional ingredients: For extra seasoning, you can add 1/2 tsp of star anise seeds. This is a great seasoning that can add a sweet-licorice-peppery flavor often found in Asian dishes. To add extra flavor, you can also drizzle chili oil as a garnish for a little bit of heat.
  • What to serve with beef udon: You can also add cubes of fried tofu or a boiled egg. Pickled veggies such as radish brined in vinegar and seasonings gives a sour and crunchy texture that is delicious with udon noodles.
  • Large Batches: Increase the serving size of the recipe and make a large batch that you can freeze. Store it in a freezer-safe bag or container and freeze it for up to 3 months for the best quality.
  • Storage: Store in an airtight container in the refrigerator for up to 3 to 4 days for the best quality.

Glass meal prep containers with beef soup and udon noodles.

Round bowl with beef soup and udon noodles.

Instant Pot Recipe for Beef Udon Noodle Soup

Enjoy this simple and delicious recipe for Beef Udon Noodle Soup that you can make in your Instant Pot.
No ratings yet
Prep Time 5 minutes
Cook Time 35 minutes
Course dinner, Main Course
Cuisine Asian
Servings 2

Equipment

  • knife
  • cutting board
  • Instant Pot

Ingredients
  

  • 12 oz lean beef stew meat
  • 1/2 each white onions (sliced)
  • 1/2 cup green onions (sliced)
  • 1 each red bell pepper (cubed)
  • 1 cup mushrooms (sliced)
  • 2 each garlic cloves (peeled)
  • 1 tablespoon ginger (grated)
  • 3 cups beef broth
  • 2 tablespoon soy sauce
  • 1/2 teaspoon salt
  • 1/4 teaspoon pepper
  • 1/4 teasponn garlic powder
  • 1/4 teaspoon star anise
  • 1 tablespoon honey
  • 1 bay leaf
  • 2 cups udon noodles

Instructions
 

  • Add the beef, onions, half of the green onions, garlic, bell peppers, mushrooms, broth, honey, soy sauce, salt, and pepper to the pot.
  • Close the lid of the Instant Pot and set the valve to "sealing". Cook on high pressure for 25 minutes
  • Once the cooking cycle is complete, allow the pressure to naturally release for 5 to 10 minutes before manually releasing any remaining pressure.
  • Open the lid and ladle the soup over a bowl of udon noodles. Garnish with sliced green onions.

Notes

If you don’t have an instant pot, you can use a slow cooker and cook it on high for 4 to 6 hours

Similar Recipes

chicken soup

One Pot Mexican Chicken Soup

sweet potato blt

Instant Pot Beef Ragu

pork carnitas

Instant Pot Pork Carnitas

You Might Also Like

Frequently Asked Questions

Can I make this beef udon noodle soup with my slow cooker?

Yes, you can cook the beef and vegetables on low for 8-10 hours or on high for 4 to 6 hours. After the beef cooks, ladle the soup over the udon noodles.


Are udon noodles gluten free?

Udon noodles are not gluten free. Their primary ingredient is wheat flour, which contains gluten. If you have a gluten allergy, you can substitute with rice noodles.


What is the difference between udon noodles and ramen noodles?

Udon noodles are thicker than ramen noodles. The main big difference is that ramen is made with egg while udon is vegan.

Posted on Leave a comment

Tofu and Veggie Stir Fry

tofu stir fry

Crispy crunchy tofu flavored in a soy-ginger sauce and stir-fried with a bright and colorful mixture of vegetables.

This post may contain affiliate links. Please see our privacy policy for details.

Round plate with tofu stir fry with broccoli, red bell peppers, and cashew nuts.

Tofu tends to have a bad reputation for being bland. However, with the right combination of sauce and seasonings, it can soak up all the flavor and make for a delicious meal. Add fresh and colorful veggies and you get a fast and healthy dinner

The PrepYoSelf Newsletter

Prepare This Easy Tofu Stir Fry with Simple Ingredients

  • Tofu: We used firm tofu because it has less moisture and easier to get it crispy during the cooking process
  • Aromatics: We used red onions and garlic to round out the flavors of this dish, but you can also use green onions or shallots
  • Vegetables: We used a combination of colorful vegetables such as carrots, green beans, broccoli, and red bell peppers
  • Cashew: You can also use peanuts which are found in many stir fry recipes
  • Seasonings: We seasoned this dish with a honey soy sauce, along with sesame seeds and sesame oil which are traditional in Asian-inspired dishes

Round plate with tofu stir fry with broccoli, red bell peppers, and cashew nuts.

How to Make Easy Tofu Stir Fry

  1. Press the moisture out of your tofu.
  2. Cut the tofu into cubes.
  3. Add oil to a heated wok and sear the tofu cubes on each side until golden brown.
  4. Remove the tofu, and add the vegetables.
  5. Stir until the vegetables are tender.
  6. Add back the tofu and pour in the stir-fry sauce.
  7. Top it off with cashews and sesame seeds.

Reference the recipe card below for detailed instructions.

Saute pan with tofu stir fry with broccoli, red bell peppers, and cashew nuts.

Meal Prep Tips for Tofu Stir Fry

  • Ingredients Options: To save time on prep, you can buy pre-washed and cut vegetables. There are fresh and frozen options available at the grocery store
  • Cook Methods: You can also turn this into a “sheet pan” stir fry recipe and cook it in the oven or your Air Fryer. Just coat the tofu and vegetables in oil and sprinkle with garlic powder and salt. Roast in the oven at 400F for 12 to 15 minutes or cook it in the Air Fryer at 360F for 8 to 10 minutes. In the end, drizzle it with the stir-fry sauce.
  • To Serve: You can enjoy this meal with a side of steamed rice or cauliflower rice if you want to keep it low-carb
  • To Store: Store in an airtight container in the refrigerator for up to 3 to 4 days.
  • To Reheat: The meal can be reheated in the microwave

Glass meal prep container with tofu stir fry with broccoli, red bell peppers, and cashew nuts.

Tofu Stir Fry

Tofu and Veggie Stir Fry

Flavorful, crispy tofu tossed with fresh and colorful vegetables are perfect for a quick and healthy vegetarian dinner.
No ratings yet
Prep Time 5 minutes
Cook Time 15 minutes
Course dinner, Main Course
Cuisine American, Asian
Servings 2

Equipment

  • knife
  • cutting board
  • mixing bowl
  • spatula
  • saute pan

Ingredients
  

  • 12 oz tofu (firm)
  • 1/4 cup red onions (sliced)
  • 1/4 cup shredded carrots
  • 1 cup green beans (washed and trimmed)
  • 1 cup broccoli florets
  • 1 red bell pepper
  • 2 tablespoons cashews
  • 1/2 teaspoon sesame seeds
  • 1 tablespoon olive oil

Stir Fry Sauce

  • 2 tablespoon soy sauce
  • 1 tablespoon rice vinegar
  • 1 tablespoon honey
  • 1 teaspoon sesame oil
  • 1/4 teaspoon garlic powder
  • 1/4 teaspoon red chili flakes

Instructions
 

  • Prep the veggies: Cut the bell peppers into one inch cubes, dice the red onions, cut the green beans into one inch pieces, and make sure the florets are cut in half.
  • Make the stir fry sauce: In a mixing bowl, mix together the stir fry sauce until it is well blended.
  • Prep the tofu: Next, cut the tofu block in half and place each block in between several paper towels. Press down on the tofu to remove the excess moisture. Cut the tofu into one inch cubes.
  • Cook the tofu: Add oil to a skillet on medium high heat and sear the tofu cubes on each side until it is completely golden brown all around (about 2 to 3 minutes each side)
  • Cook the veggies: Next, remove the tofu from the skillet. Add the onions and carrots and saute until they soften. Then, add the green beans, red bell peppers, and broccoli florets. Add the stir fry sauce and mix it around for 3 to 4 minutes until the veggies are tender.
  • Combine it all together: At the end, add the tofu back into the pan and top it off with the cashews and sesame seeds.

Similar Recipes

cauliflower rice

Cauliflower Fried Rice

broccoli beef

Ground Beef and Broccoli Vegetable Stir Fry

peanut chicken

Peanut Chicken and Celery Vegetable Stir Fry

You Might Also Like

Joel Gott Sauvignon Blanc White Wine

Amazon Brand – Happy Belly Roasted and Salted Peanuts

Trader joe’s Chili Onion Crunch

Frequently Asked Questions

How long can you keep this in the fridge?

You can store it in an airtight container for up to 3 to 4 days.


What else can I serve with this tofu stir fry?

Enjoy this recipe with steamed rice, lo mein noodles, or even with quinoa.


What can I substitute cashews with?

Regular peanuts or pine nuts are great tasty options!

Posted on Leave a comment

Grilled Steak with Roasted Corn and Potato Hash

steak and corn

This roasted corn and potato medley is the star of this steak dinner meal.

This post may contain affiliate links. Please see our privacy policy for details.

Round plate with grilled ribeye steak with corn, baby potatoes, and bell peppers.

When it comes to meal appeal, it is more important to add bright colors and use flavor profiles that you crave, and nothing pulls at our cravings like grilled steak dinner, crispy potatoes, and sweet corn.

The PrepYoSelf Newsletter

Here’s What You Need for This Steak Dinner and Corn Recipe

  • Steak: We used Rib Eye steak that was thinly sliced so that it can grill quickly
  • Marinade: We marinated our steak with balsamic glaze, paprika, garlic powder, and salt, and coated it with olive oil. This marinade gave good flavor and a good char and caramelization when we grilled the steak.
  • Vegetable Medley: We used a combination of corn, baby corn, and bell peppers

Round plate with grilled ribeye steak with corn, baby potatoes, and bell peppers.

Easy Steps for Making Steak and Corn

  1. Pre-heat the oven to 400F.
  2. Cut the vegetables and place them on a sheet pan. Add the seasonings and coat them with olive oil. Roast them in the oven.
  3. Meanwhile, marinate the steak with balsamic concentrate and seasonings.
  4. Heat an indoor grill and sear the steak on each side until it cooks to your desired doneness.
  5. Let the steak rest before slicing it into thin strips and enjoy them with the roasted corn and potato medley.

Reference the recipe card below for detailed instructions.

Glass meal prep container with grilled ribeye steak with corn, baby potatoes, and bell peppers.

Meal Prep Tips for Steak and Corn

  • Cooking option: If you have an Air Fryer, you can also air fry the vegetables at 350F for 8 minutes
  • Herbs: Add herbs to the corn medley such as green onions, basil, or cilantro for fresh flavors
  • To Store: Store in an airtight container for up to 3 days in the refrigerator

Glass meal prep container with grilled ribeye steak with corn, baby potatoes, and bell peppers.

Steak & Corn

Grilled Balsamic Steak with Roasted Corn and Potato Hash

A gourmet steak dinner served with a delicious medley of roasted sweet corn, potatoes, and bell peppers.
No ratings yet
Prep Time 5 minutes
Cook Time 15 minutes
Course dinner, Main Course
Cuisine American
Servings 2

Equipment

  • knife
  • cutting board
  • sheet pan
  • tongs
  • indoor grill pan
  • oven

Ingredients
  

Steak and Seasonings

  • 12 oz rib eye steak (thinly sliced)
  • 1 tablespoon balsamic concentrate
  • 1/4 teaspoon paprika
  • 1/4 teaspoon garlic powder
  • 1/4 teaspoon salt
  • 1 tablespoon olive oil

Roasted Corn and Potatoes

  • 2 baby potatoes
  • 1 cup corn
  • 1 red bell pepper (diced)
  • 1/4 teaspoon garlic powder
  • 1/4 teaspoon salt
  • 1/4 tsp pepper
  • 1 tablespoon olive oil

Instructions
 

  • Pre-heat the oven to 400F. Cut the baby potatoes in half and dice the red bell pepper. Place the potatoes, bell peppers, and corn on a sheet pan, add the seasonings and coat it with olive oil. Bake in the oven for 15 minutes.
  • Meanwhile, season the steak with balsamic concentrate, paprika, garlic powder, salt, pepper, and coat with olive oil.
  • Heat an indoor grill pan on medium high heat an sear the steak on each side for about 4 to 5 minutes until it is fully cooked and reaches an internal temperature of 145F. Let it rest before slicing it into thin strips and enjoy them with the roasted colorful veggies!

Similar Recipes

chicken soup

One Pot Mexican Chicken Soup

rosemary chicken

Rosemary Baked Chicken and Potatoes

shrimp and corn

Sheet Pan Shrimp with Cauliflower and Corn

You Might Also Like

Frequently Asked Questions

What else can you do with any leftover corn and potato medley?

If you have any leftovers, you can use them as a salad topper. We also like making it into a corn potato salad by adding a little bit of mayo and lemon juice.


Is corn high in fiber?

Yes, it is rich in fiber and can help aid digestion. It has insoluble fiber which feeds good bacteria in your gut and can help you keep regular. 


Is corn healthy?

Most people trying to lose weight avoid corn because they are concerned about weight gain. However, one ear of corn only has about 100 calories, 3 grams of fiber which can help you feel full longer, and the carb is a slow-to digest type of carb that can help with weight control. So you can enjoy this vegetable in balanced portions.