Posted on Leave a comment

Instant Pot Chopped Beef Sliders with Coleslaw

glass meal prep containers with bbq beef sliders and coleslaw

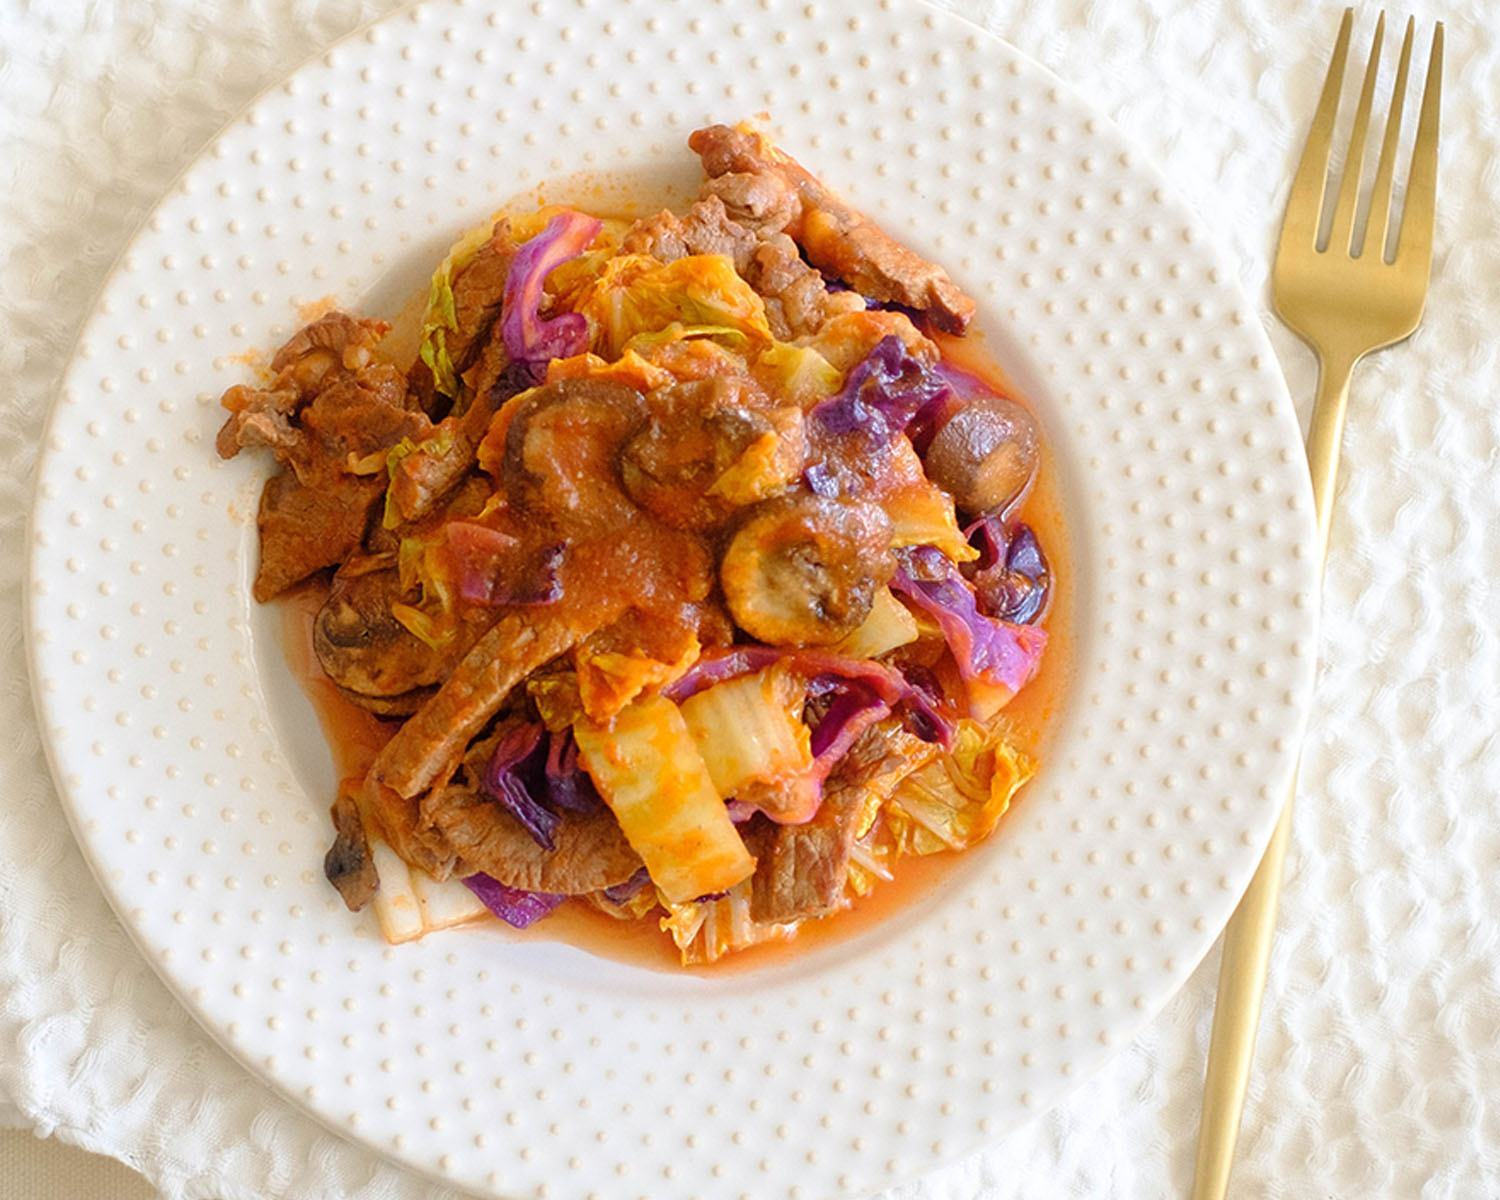
Our delectable recipe for Instant Pot Chopped Beef Sliders, featuring a one-of-a-kind Fruit-Infused Homemade BBQ Sauce, is here to make your meal prep experience truly exceptional. These sliders are not just a meal; they’re a flavor-packed adventure. With a luscious combination of savory chuck roast, zesty coleslaw, and the unique twist of our fruit-infused BBQ sauce, you’re in for a taste sensation that’s perfect for your tasty meal prep ideas. So, roll up your sleeves, and let’s dive into this culinary adventure of a instant pot beef recipe!

This post may contain affiliate links. Please see our privacy policy for details.

plate with bbq beef sliders and coleslaw

Elevate Your Meal Prep with Unique Fruit-Infused Homemade BBQ Sauce

  • Vibrant Flavors: Adding fruit to your BBQ sauce introduces a burst of vibrant, natural flavors. The sweetness and tartness of the fruit complement the smokiness and richness of the BBQ sauce, creating a dynamic and exciting taste profile.
  • Natural Sweetness: Fruit-infused BBQ sauce allows you to reduce the amount of added sugar typically found in store-bought sauces. The natural sugars from the fruit provide a delightful sweetness without the need for excessive amounts of sugar or high-fructose corn syrup.
  • Unique and Memorable: Fruit-based BBQ sauces add a unique and memorable element to your instant pot beef recipes. Blueberries, raspberries, peaches, or even pineapple can infuse your sauce with distinctive and unforgettable taste, making your meal prep stand out.
  • Balanced Complexity: Fruit adds complexity to the BBQ sauce, offering layers of both sweetness and acidity. This balance of flavors enhances the overall taste experience, making every bite of your chopped beef sliders an adventure for your taste buds.
  • Versatile Pairing: Fruit-infused BBQ sauce is incredibly versatile. It pairs well not only with beef but also with other meats like chicken, pork, and even tofu. You can use it for grilling, roasting, or as a dipping sauce, expanding your culinary horizons and giving you plenty of reasons to make extra sauce for future meals.

The PrepYoSelf Newsletter

Grocery Tips for Instant Pot BBQ Beef Sliders

  • Freshness Matters: When buying the chuck roast, look for meat that is marbled with just the right amount of fat. This marbling ensures tenderness and flavor.
  • BBQ Sauce Selection: While you can use pre-made BBQ sauce, consider trying different flavors or brands to find one that suits your taste preferences. You might like a smoky, sweet, or spicy BBQ sauce, so explore the options at your grocery store.
  • Blueberries: For the blueberry BBQ sauce, opt for fresh or frozen blueberries. If fresh blueberries are out of season or expensive, frozen ones work just as well.
  • Slider Buns: Choose slider buns that you enjoy. You can go with classic white buns, whole wheat, or even gluten-free buns based on dietary preferences.

Ingredient Information

  • Chuck Roast: Chuck roast is a cut of beef that’s ideal for slow cooking. It’s known for its rich, beefy flavor and becomes incredibly tender when cooked for an extended period.
  • Coleslaw: Coleslaw is a versatile side dish made from shredded cabbage and often combined with a creamy or vinaigrette-based dressing. It provides a refreshing contrast to the savory sliders.

Ingredient Swaps:

  • Chuck Roast Alternative: If you can’t find chuck roast, you can use other cuts like beef brisket or even pork shoulder. Just adjust the cooking time and method accordingly.
  • Homemade BBQ Sauce: Instead of pre-made BBQ sauce, you can make your own from scratch using ketchup, brown sugar, vinegar, and spices. This allows you to tailor the flavor to your liking.
  • Butter: Swap out butter with olive oil or coconut oil for a different flavor profile.
  • Fruit for BBQ Sauce: If blueberries are unavailable, you can experiment with other fruits like raspberries, blackberries, or even peaches to create a unique fruit-infused BBQ sauce.
  • Cheese Options: While muenster cheese adds a mild creaminess, feel free to try other cheese varieties such as cheddar, Swiss, or pepper jack for a different flavor profile.
  • Coleslaw Dressing: Adjust the coleslaw dressing to your liking. If you prefer a creamier coleslaw, add more mayonnaise or Greek yogurt. If you like it tangy, increase the amount of apple cider vinegar.
glass meal prep containers with bbq beef sliders and coleslaw

How to Meal Prep Instant Pot Beef Recipe

  1. Start this instant pot beef recipe by adding the chuck roast to your trusty Instant Pot. Now, sprinkle in the garlic powder, salt, and pepper for that fantastic flavor. Throw in the sliced red onions for a hint of sweetness. Lastly, pour in the marinara sauce and water.
  2. Seal the lid of your Instant Pot, set it to high pressure, and let it work its magic for 45 minutes. The countdown begins!
  3. While the beef is cooking away, let’s whip up some delicious coleslaw. In a mixing bowl, combine the shredded coleslaw with apple cider vinegar, honey, yellow mustard, olive oil, garlic powder, and a pinch of salt. Mix it all up, and you’ve got a zesty coleslaw ready to roll.
  4. Time to add a fruity twist to your BBQ sauce. Pop your BBQ sauce and those fresh blueberries into a blender, then puree them into a delightful blueberry BBQ sauce. Talk about a flavor explosion!
  5. Once the 45-minute timer is up, carefully release the steam from the Instant Pot and unveil the aromatic beef. Using a fork, shred that tender meat to perfection.
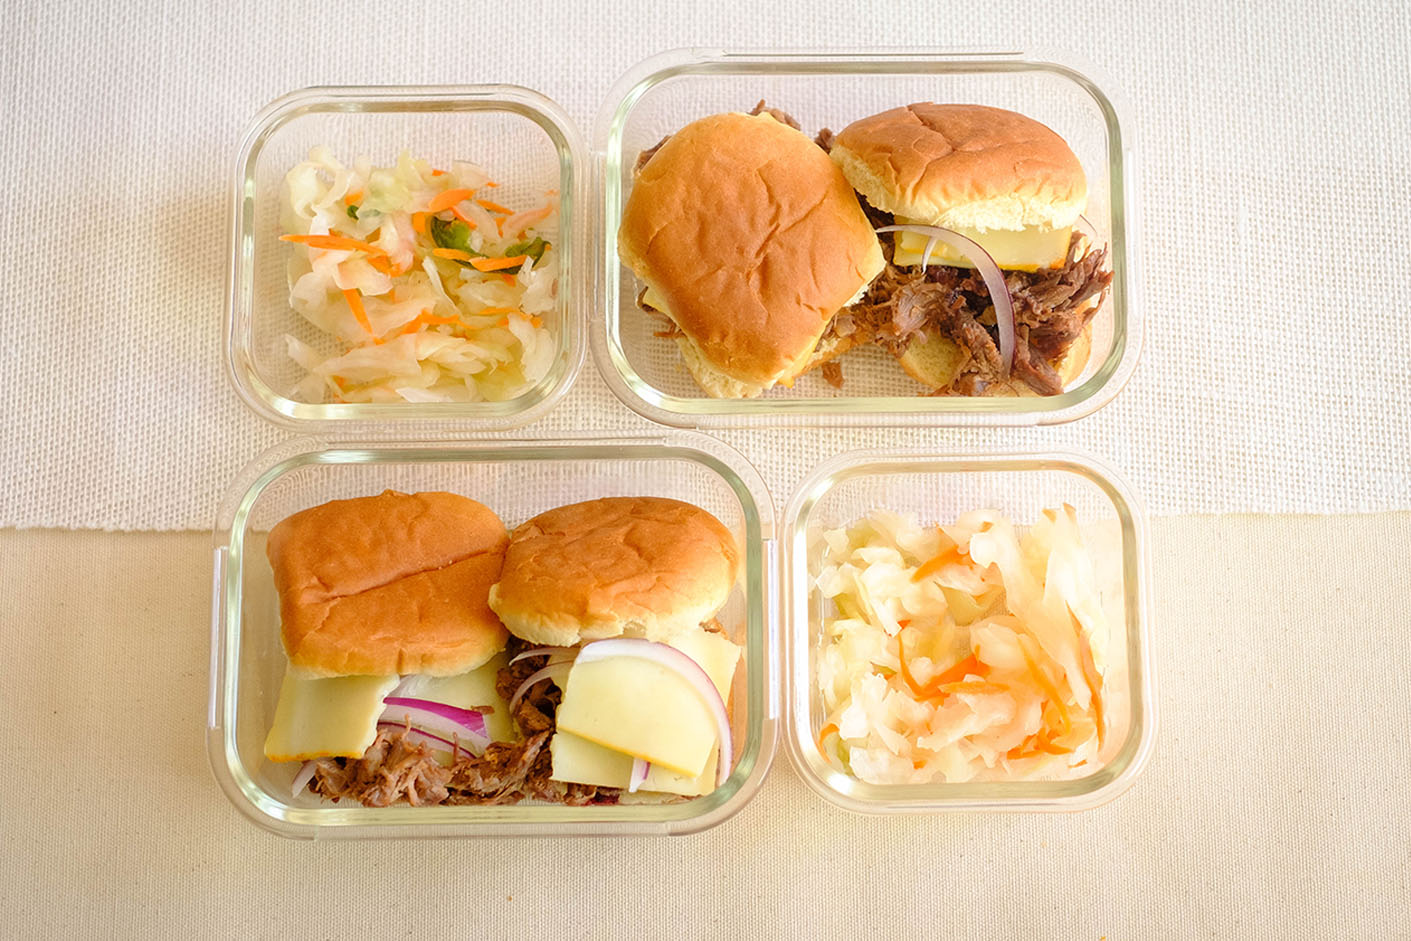
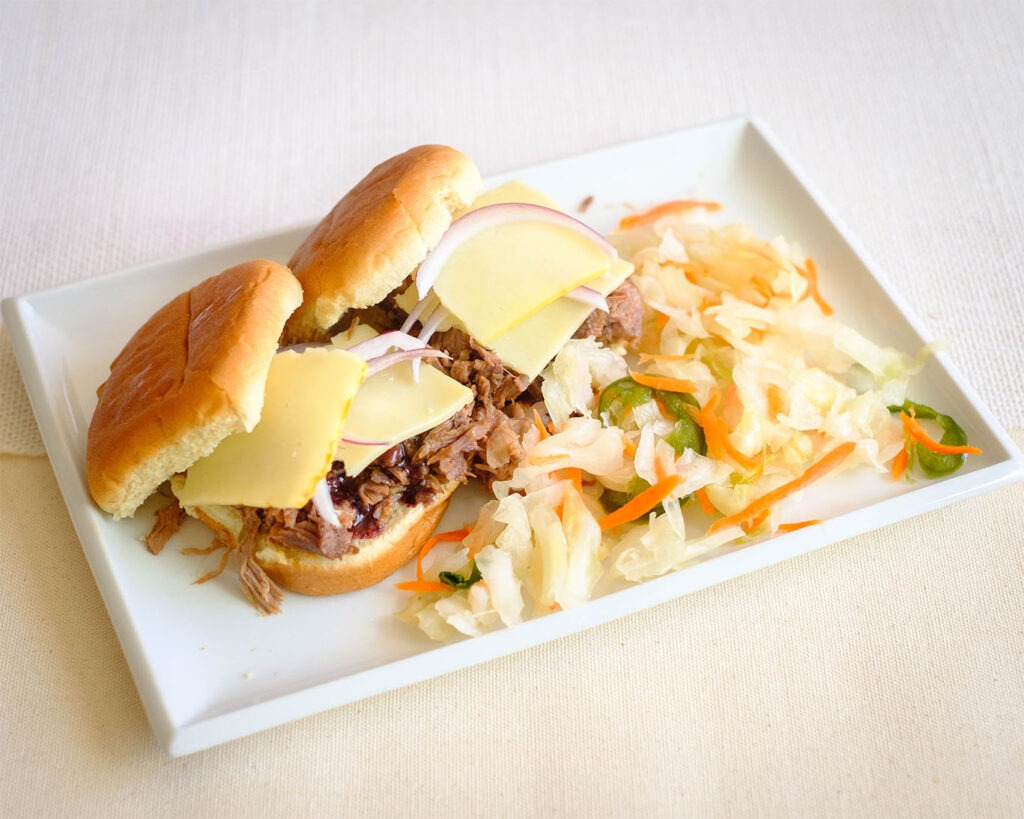
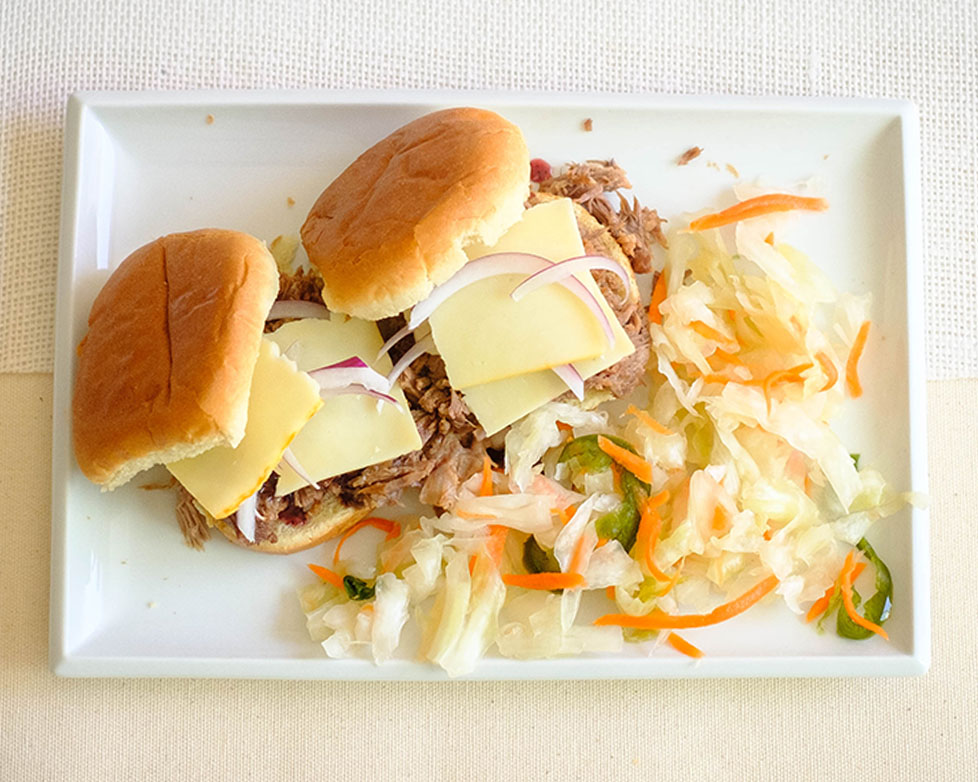
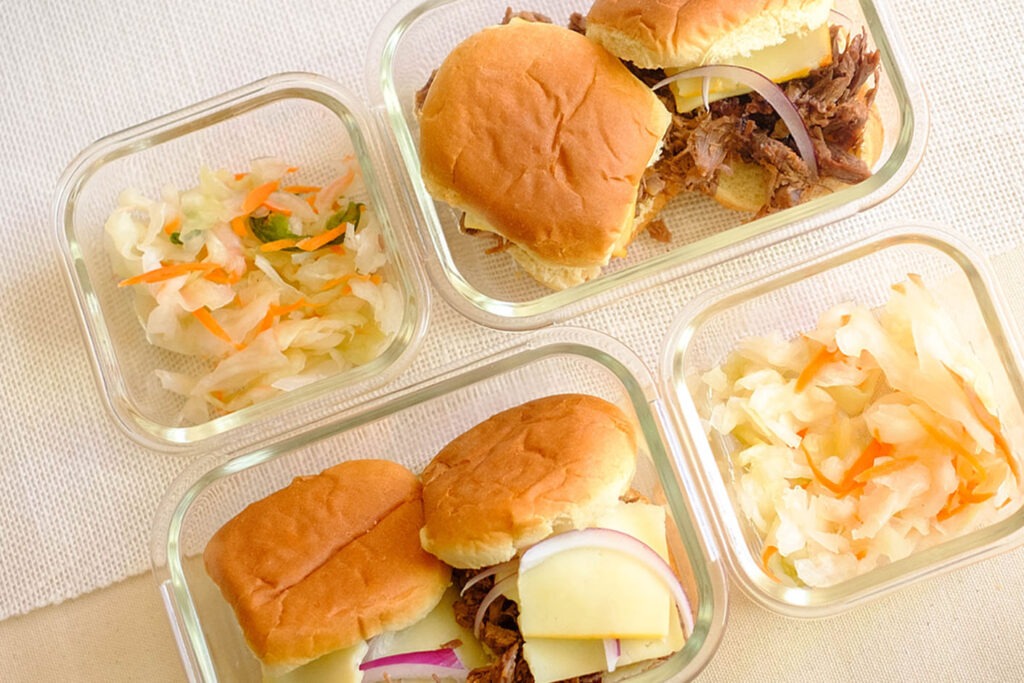
  6. Now, for the fun part – assembling your sliders. Place a generous heap of that delectable chopped beef between your slider buns. Top it off with a drizzle of the blueberry BBQ sauce, a slice of muenster cheese, and some sliced red onions. The perfect combination of flavors and textures!
  7. Don’t forget to serve these sliders with a side of that tangy coleslaw you prepared earlier. It’s the perfect balance to the savory, juicy goodness of the beef.

Reference the recipe card below for detailed instructions.

plate with bbq beef sliders and coleslaw

Meal Prep Tips

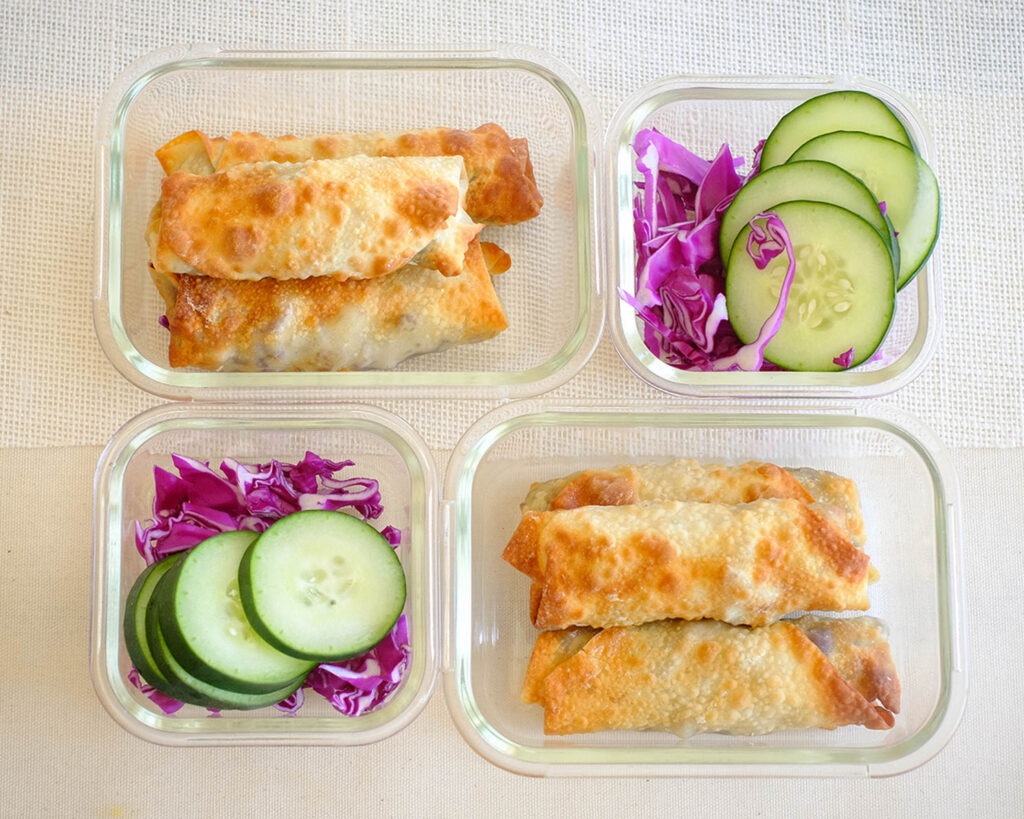
  • Portion Control: When assembling the sliders, consider making a variety of portion sizes to accommodate different dietary preferences. Create full-sized burgers for hearty appetites and mini sliders for smaller portions.
  • BBQ Sauce on the Side: If you prefer to control the amount of BBQ sauce on your sliders, serve the fruit-infused BBQ sauce on the side. This allows you to dip or drizzle the sauce according to your taste.
  • Make Extra BBQ Sauce: Prepare extra fruit-infused BBQ sauce and store it in a jar. This homemade sauce can be used for various other dishes, such as grilled chicken, ribs, or even as a dip for snacks.
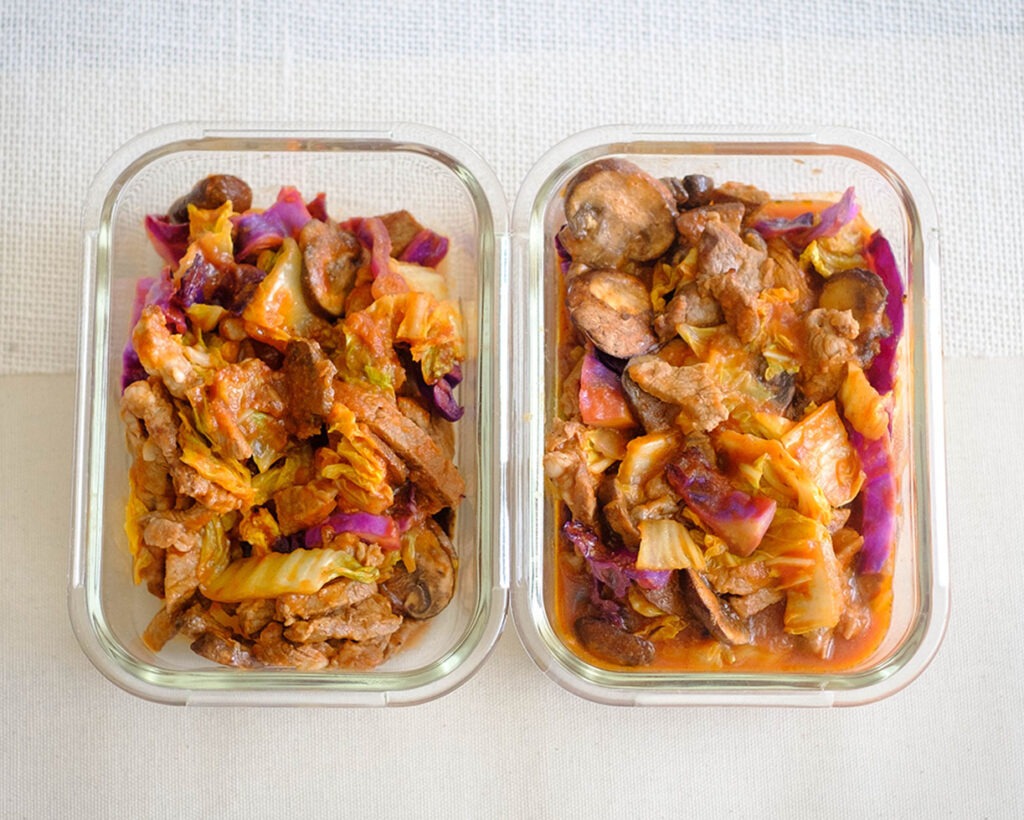
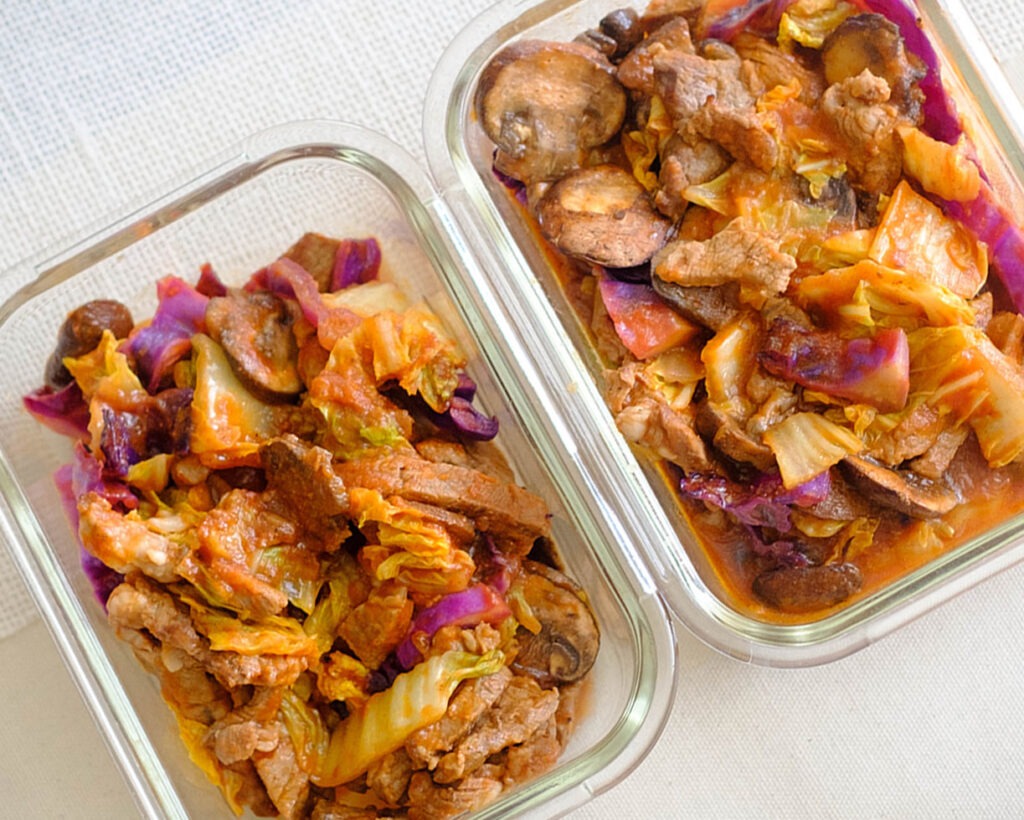
  • Storage: Store in an airtight container in the refrigerator for up to 3 to 4 days for the best quality.
  • Reheating: When reheating the chopped beef, consider using the microwave, stovetop, or oven. Add a touch of water or broth to maintain its moisture and tenderness.
glass meal prep containers with bbq beef sliders and coleslaw
beef sliders and coleslaw

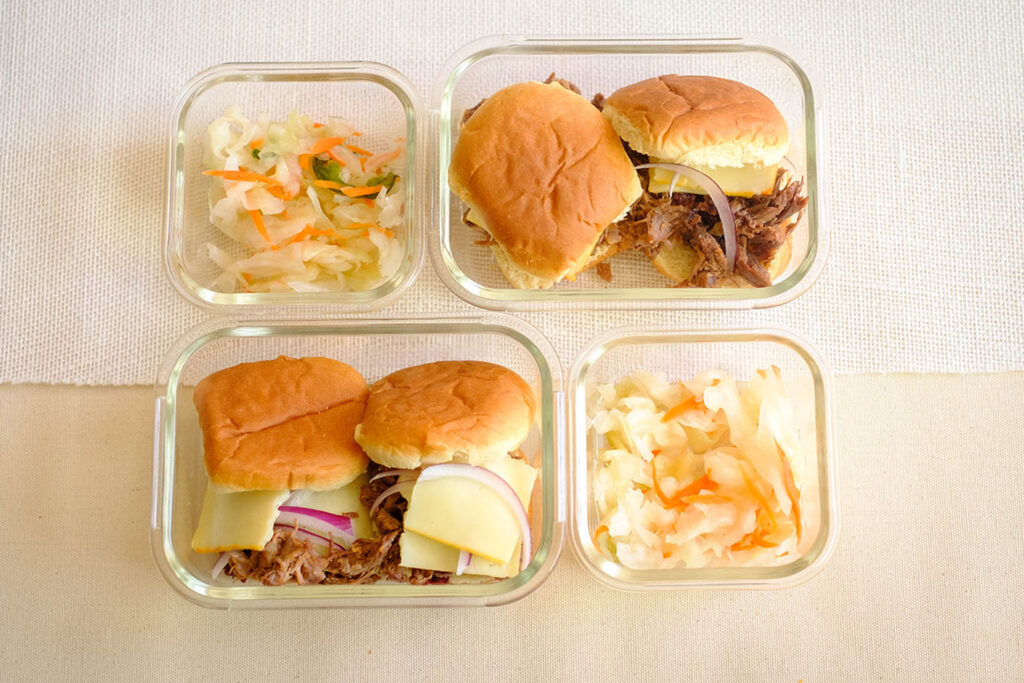
Instant Pot Chopped Beef Sliders and Coleslaw

This Instant Pot Chopped Beef Sliders features a unique fruit-infused homemade BBQ sauce, served alongside zesty coleslaw for an unforgettable meal prep experience.
No ratings yet
Prep Time 5 minutes
Cook Time 55 minutes
Course dinner, lunch, Main Course
Cuisine American
Servings 2

Equipment

  • knife
  • cutting board
  • Instant Pot
  • blender

Ingredients
  

Instant Pot Beef

  • 12 oz chuck roast
  • 1 cup marinara sauce
  • 1 tsp garlic powder
  • 1/2 tsp salt
  • 1/4 tsp pepper
  • 1/4 cup red onion (sliced)
  • 1 cup water

Coleslaw

  • 2 cups shredded coleslaw
  • 1 tbsp apple cider vinegar
  • 1 tbsp honey
  • 1 tsp yellow mustard
  • 1 tbsp olive oil
  • 1/4 tsp garlic powder
  • 1/4 tsp salt

BBQ Sauce

  • 1/2 cup BBQ sauce (pre-made)
  • 1/2 cup blueberries

Bread and Toppings

  • 4 each slider buns
  • 2 slices muenster cheese
  • 1/4 cup red onions (sliced)

Instructions
 

  • Add the chuck roast to the Instant Pot. Add the seasonings, marinara sauce, onions, and water to the pot.
  • Close and seal the lid to the Instant Pot. Place the setting on high pressure and cook for 45 minutes
  • Meanwhile, mix together the coleslaw ingredients in a mixing bowl.
  • For the bbq sauce, place the blueberries and bbq sauce in a blender and puree the mixture.
  • After the beef cooks, carefully release the steam and open the lid. Remove the beef from the pot and use a fork to shred the meat.
  • Serve the chopped beef in between sliders. Top the beef off with the blueberry bbq sauce. Add sliced cheese and red onions. Enjoy with coleslaw

Notes

Note: If you do not have an Instant Pot, you can also cook the beef in a slow cooker on high for 4 to 6 hours.

Similar Recipes

chicken soup

One Pot Mexican Chicken Soup

sweet potato blt

Instant Pot Beef Ragu

pork carnitas

Instant Pot Pork Carnitas

You Might Also Like

Frequently Asked Questions

Can I use frozen blueberries for the BBQ sauce?

Yes, frozen blueberries work well for the sauce. Just thaw them before blending.


Can I use a different type of mustard for the coleslaw dressing?

Yes, you can use Dijon mustard, whole-grain mustard, or honey mustard for a unique flavor in your coleslaw.


Can I make the BBQ sauce in advance and store it?

Absolutely, the fruit-infused BBQ sauce can be made ahead and refrigerated for up to a week.

Posted on Leave a comment

Fall Persimmon Muffins

glass meal prep containers with persimmon muffins

Energize Your Mornings with Healthy Persimmon Almond Muffins! Packed with wholesome goodness, these muffins are a delightful start to your day, combining the exotic flavor of persimmons with the nutty crunch of almonds.  These muffins are not only delicious but also a perfect choice for a healthy breakfast meal prep. They are rich in fiber, vitamins, and minerals, and the almonds add an extra protein boost to kickstart your day.

Plus, they are super easy to prepare, ensuring that your morning routine stays stress-free.  Enjoy these muffins fresh out of the oven or store them for meal prep throughout the week.

This post may contain affiliate links. Please see our privacy policy for details.

round plate with with persimmon muffins

Reasons to Meal Prep Breakfast Persimmon Muffins

  • Balanced Nutrition: These muffins provide a well-balanced mix of macronutrients, including healthy fats from almonds, protein from the egg, and carbohydrates from the flour and fruits. This breakfast meal prep combination helps keep you full and energized throughout the morning, reducing the urge for unhealthy snacking.
  • Fruit-Packed Goodness: Persimmons (or their alternatives, like apples or pears) are rich in vitamins, fiber, and antioxidants. Incorporating fruit into your breakfast helps meet your daily fruit intake requirements and contributes to better overall health.
  • Portion Control: Meal prepping muffins in advance allows you to control portion sizes. Having these muffins readily available ensures you’re not tempted to grab unhealthy, oversized snacks or fast food on a busy morning.
  • Fiber for Satiety: The combination of fruit and whole wheat flour (if used) offers a good amount of dietary fiber. Fiber promotes a feeling of fullness, aids digestion, and helps regulate blood sugar levels, which can be a game-changer for staying focused throughout the day.
  • Convenience and Time Savings: Busy individuals often struggle to find time for a healthy breakfast. Breakfast meal prep in advance will save you time during the morning rush. They’re grab-and-go, making it easier to stick to a nutritious breakfast routine even on the busiest of days.

The PrepYoSelf Newsletter

Ingredients You’ll Need for Persimmon Muffins

  • Persimmons: When shopping for persimmons, look for fruit that’s ripe but not overly soft. They should have a vibrant orange color and be slightly firm to the touch. You can find them in the produce section of your local grocery store or farmers’ market. These orange fruits are a good source of vitamins A and C, fiber, and antioxidants. They add natural sweetness and moisture to the muffins. If you can’t find persimmons, you can swap them out with apples or pears.
  • Egg: Eggs are an excellent source of high-quality protein and various essential nutrients like choline, which is important for brain health. No breakfast meal prep is complete without them.
  • Minced Ginger: Fresh ginger is preferred for its robust flavor. If you don’t have fresh ginger on hand, you can use ground ginger, but reduce the quantity to 1/2 teaspoon for a milder flavor. Ginger is known for its potential anti-inflammatory and digestive benefits. It adds a zesty kick to the muffins.
  • Flour: Choose whole wheat flour or almond flour for added nutrition. Whole wheat flour is higher in fiber, while almond flour is gluten-free and provides healthy fats and protein.
  • Baking Powder and Baking Soda: These leavening agents are essential for the muffins to rise and become light and fluffy.
  • Cinnamon: Opt for ground cinnamon with no added sugars or additives.
  • Sliced Almonds: Purchase sliced almonds in the bulk section of your grocery store for cost savings. You can also toast them for a richer flavor. Almonds are a great source of healthy fats, protein, fiber, and various vitamins and minerals. They provide a satisfying crunch and extra nutrition to your muffins.

glass breakfast meal prep containers with persimmon muffins

How to Meal Prep Prepare Persimmon Muffins

  1. Preheat the Oven: First things first, preheat your oven to a toasty 350°F (175°C). This ensures your muffins bake to perfection.
  2. Prepare the Persimmons: Remove the top stem of the persimmons and peel off the skin. This will reveal the sweet and succulent flesh within. Now, place these persimmons along with the olive oil into a blender. Blend until you achieve a smooth and velvety puree.
  3. Mix the Wet Ingredients: Pour the persimmon and olive oil blend into a mixing bowl. To this, add the large egg, brown sugar, and a tablespoon of minced ginger. Now, it’s time to grab your trusty whisk and blend all these delicious ingredients together. The ginger adds a delightful, zesty kick, perfect for perking up your taste buds in the morning.
  4. Incorporate the Dry Ingredients: Gradually add the flour, baking powder, baking soda, and cinnamon into the bowl. Continue whisking until the batter is silky smooth, and there are no lumps in sight.
  5. Grease and Prepare Your Muffin Pan: To ensure your muffins don’t stick, grease a muffin pan and give it a light spritz of cooking spray. This step will make your clean-up a breeze.
  6. Scoop the Batter: Using a 1/4 cup scoop, evenly pour the batter into each muffin well. This ensures that your muffins are uniform in size and bake evenly. The aroma of the cinnamon combined with the ginger is sure to make your kitchen smell amazing.
  7. Top with Sliced Almonds: For that extra crunch and a touch of elegance, sprinkle some sliced almonds on top of each muffin. Almonds are a great source of healthy fats, making these muffins a wholesome breakfast choice.
  8. Baking Time: Pop your muffin pan into the preheated oven and bake for 15-20 minutes. Keep an eye on them; they’re ready when they turn a golden brown and a toothpick inserted into the center comes out clean.

Reference the recipe card below for detailed instructions.

round plate with with persimmon muffins

Pairing Tips:

  • Nut Butter: Drizzle some almond or peanut butter over your muffins for an extra layer of richness and protein. Nut butter pairs exceptionally well with the almond flavor in the muffins.
  • Honey or Maple Syrup: A drizzle of honey or maple syrup over the muffins adds natural sweetness and a touch of luxury to your breakfast. It’s a delightful alternative to refined sugars.
  • Green Tea or Coffee: A warm cup of green tea or a morning coffee can be the perfect beverage pairing for your muffins. The slightly bitter and aromatic notes of these beverages complement the sweetness of the muffins.
  • Cottage Cheese: Cottage cheese is a high-protein option that pairs well with the fruitiness of the muffins. It’s a great choice for those seeking a protein-packed breakfast.

Leftover Ingredient Tips:

  • Persimmons: If you have extra persimmons, you can enjoy them as a healthy snack or add them to salads for a burst of sweetness. They can also be blended into smoothies, turned into fruit compote, or used in other baked goods like pies, tarts, or fruit crisps.
  • Minced Ginger: Ginger has numerous uses in the kitchen. You can store the extra minced ginger in an airtight container in the freezer for future recipes. It can be grated or used in stir-fries, soups, sauces, and tea
  • Sliced Almonds: Extra sliced almonds can be sprinkled on top of salads or yogurt for added texture and nutrition. They can also be used in various baked goods, like cookies or granola.

Meal Prep Tips:

  • Storage Tips: If you plan to consume the muffins within 1-2 days, you can store them at room temperature in an airtight container. Make sure they are fully cooled before sealing in the container. Otherwise, store the muffins in the refrigerator.
  • Reheating Tips: reheat muffins from the refrigerator, simply microwave them for 10-15 seconds. This short burst of heat will restore some of the muffin’s softness without making it soggy.

glass breakfast meal prep containers with persimmon muffins

round white plate with persimmon almond muffins.

Persimmon Almond Muffins

No ratings yet
Prep Time 5 minutes
Cook Time 20 minutes
Course Breakfast, Snack
Cuisine American
Servings 2

Equipment

  • blender
  • muffin pan
  • oven

Ingredients
  

  • 2 persimmons
  • 1 large egg
  • 1/4 cup olive oil
  • 1/2 cup brown sugar
  • 1 tbsp minced ginger
  • 3/4 cup flour
  • 1/4 tsp baking powder
  • 1/4 tsp baking soda
  • 1/2 tsp cinnamon
  • 2 tbsp sliced almonds

Instructions
 

  • Pre-heat the oven to 350F
  • Remove the top stem of the persimmon and peel the skin. Place the persimmons and olive oil in a blender and puree until smooth. Pour the blend into a mixing bowl and add the egg, brown sugar, and cinnamon. Use a whisk to blend it all together.
  • Next, add the baking powder, baking soda, and flour. Whisk until the batter is smooth.
  • Grease a muffin pan and spray it with cooking spray. Use a 1/4 cup scoop to evenly pour the batter into each muffin well. Top each muffin with sliced almonds. Bake for 15-20 minutes.

Similar Recipes

baked oatmeal

Oven Baked Oats with Apricots and Berries

ricotta apple

Oven Baked Apple with Ricotta and Walnuts

french toast 2

Oven Baked French Toast Muffins with Strawberries

You Might Also Like

Smartfruit Mellow Mango + Immunity, 100% Real Fruit Purée

Trader Joe’s Unsalted, Dry Toasted Slivered Almonds

Trader Joe’s the Dark Chocolate Lover’s Chocolate Bar

Frequently Asked Questions

Can I use other nuts besides almonds for topping?

Yes, you can use other nuts like walnuts or pecans as a topping for these muffins, or omit them if you have nut allergies. Dried fruit such as cranberries or raisins are also a tasty option.


Can I omit ginger if I don’t have it on hand?

Yes, you can omit the minced ginger if you don’t have it, but it adds a delightful zesty kick to the muffins. You can also use ground ginger as a substitute.


Can I substitute white sugar for brown sugar?

Absolutely, you can use white sugar as a substitute for brown sugar if you prefer. Keep in mind that brown sugar adds a touch of molasses flavor, so the taste may vary slightly.

Posted on Leave a comment

Stuffed Acorn Squash with Beef Marinara

glass meal prep containers with acorn squash stuffed with beef marinara sauce and green baby spinach

Our Stuffed Acorn Squash with Beef Marinara is the perfect budget-friendly, healthy dinner idea that brings the gourmet experience right to your kitchen table. This delectable recipe combines lean ground beef, seasonal acorn squash, and a homemade marinara sauce to create a flavorful, nutrient-rich masterpiece. Whether you’re on a budget or simply seeking a wholesome yet affordable meal prep option, this dish has got you covered. Let’s embark on a culinary journey that’s not only easy on your weekly budget but also a restaurant-quality delight for your senses.

This post may contain affiliate links. Please see our privacy policy for details.

Calories: 713kcal | Carbohydrates: 41g | Protein: 46g | Fat: 43g | Saturated Fat: 11g | Polyunsaturated Fat: 10g | Monounsaturated Fat: 20g | Trans Fat: 1g | Cholesterol: 117mg | Sodium: 2003mg | Potassium: 2450mg | Fiber: 9g | Sugar: 11g | Vitamin A: 7580IU | Vitamin C: 59mg | Calcium: 261mg | Iron: 10mg

round plate with acorn squash stuffed with beef marinara sauce and green baby spinach

Why Meal Prep Stuffed Acorn Squash

  • Packed with nutrient-rich ingredients like lean ground beef, acorn squash, and a homemade marinara sauce, this meal provides a balanced mix of protein, vitamins, and fiber. It’s a fantastic way to nourish your body with the good stuff.
  • Eating healthy doesn’t have to break the bank! Lean ground beef and seasonal acorn squash are wallet-friendly, making this meal prep idea a perfect fit for budget-conscious foodies. You can enjoy restaurant-quality flavors without the hefty price tag.
  • The combination of savory beef marinara, tender acorn squash, and gooey melted mozzarella cheese creates an explosion of flavors in your mouth. It’s like dining at a five-star restaurant but without the reservation hassle.
  • Short on time? No problem! This meal prep idea is a weeknight dinner hero. With just a bit of prep and 50-55 minutes of oven time, you’ll have a scrumptious, restaurant-quality meal on the table in no time. It’s perfect for busy evenings.
  • This healthy dinner idea ticks all the boxes. It’s high in protein, loaded with veggies, and has just the right amount of flavor-enhancing ingredients. With acorn squash as the star, it’s a guilt-free delight that’ll make you feel like you’re dining out, all while staying on track with your health goals.

The PrepYoSelf Newsletter

Ingredients You’ll Need

  • Lean Ground Beef: Look for lean ground beef with lower fat content, ideally 90% lean or higher. Lean beef is an excellent source of protein, iron, and zinc. It’s a healthy protein choice when you opt for lower fat varieties. Ingredient Swap: You can also use ground turkey or ground chicken as an option.If you’re looking for a plant-based option, consider using ground tofu, tempeh, or plant-based crumbles.
  • Marinara Sauce: When buying store-bought marinara sauce, check the label for low sodium and minimal added sugars. Ingredient Swap: If you want to make your own sauce, combine canned tomatoes with garlic, basil, and oregano for a healthier, lower-sodium alternative.
  • Acorn Squash: Look for acorn squash that is firm and heavy for its size, with a deep green color and minimal blemishes. Acorn squash is rich in vitamins A and C, fiber, and antioxidants. It’s a nutritious and low-calorie vegetable. Ingredient Swap: You can substitute acorn squash with other winter squashes like butternut or kabocha if needed.
  • Red Onions: Choose firm, dry, and unblemished onions with a vibrant red color. Ingredient Swap: Swap red onions for shallots or sweet onions if you prefer a milder flavor.
  • Shredded Mozzarella Cheese: Opt for part-skim or reduced-fat mozzarella cheese to reduce the saturated fat content. Ingredient Swap: Consider using part-skim ricotta or a blend of Parmesan and low-fat cottage cheese for a lighter option.

glass meal prep containers with acorn squash stuffed with beef marinara sauce and green baby spinach

How to Meal Prep this Stuffed Acorn Squash Recipe

  1. Preheat your oven to a toasty 400°F. Carefully cut the acorn squash in half. Watch those fingers! Once it’s cut, use a spoon to scoop out the seeds. We want all that space for our tasty filling.
  2. Season the acorn squash with a pinch of salt and give them a good coat of olive oil. Now, place them on a baking sheet, flesh side up. Pop them into your preheated oven and let them roast for about 50-55 minutes or until they’re tender. Your kitchen will soon be filled with amazing aromas.
  3. While your squash is getting all tender and flavorful in the oven, let’s work on the savory filling. Heat up some oil in a sauté pan over medium-high heat. Toss in those finely chopped red onions and cook them until they soften. It won’t take long to get that beautiful aroma filling the air. Add the lean ground beef and give it a good stir. Keep it cooking until it’s golden brown and fully cooked. That usually takes about 5 to 7 minutes. 
  4. Now, pour in that delightful marinara sauce over the ground beef. Add in the garlic powder and a dash of salt, and give it all a good mix. Let the sauce and the beef become the best of friends in the pan. 
  5. By now, your acorn squash should be ready to take a bow from the oven. Carefully remove them. Now, evenly stuff each squash half with the meat sauce you just whipped up. Don’t be shy; pile it on! To take it up a notch, sprinkle that lovely shredded mozzarella cheese on top.
  6. As a final touch of healthy goodness, enjoy your stuffed acorn squash with a side spinach salad. A perfect complement to balance out your meal.

Reference the recipe card below for detailed instructions.

round plate with acorn squash stuffed with beef marinara sauce and green baby spinach

Meal Prep Tips:

  • Storage Tips: After preparing your meal, allow it to cool to room temperature. Then, store any leftovers in an airtight container in the refrigerator. It’s best to use shallow containers, as they help cool the food more quickly, reducing the risk of bacterial growth.
  • Reheating Tips: Microwave: For a quick reheating, use the microwave. Place the stuffed acorn squash on a microwave-safe dish, cover it with a microwave-safe lid or a damp paper towel, and heat it in 1-minute increments until it’s thoroughly heated. Be sure to stir or rotate the squash to ensure even heating.

Leftover Ingredient Tips

  • Marinara Sauce: Pasta Sauce-Use it as a sauce for pasta dishes like spaghetti, lasagna, or baked ziti. Pizza Sauce-Make homemade pizzas or flatbreads using the marinara as a base. Eggplant Parmesan-Layer it in a classic eggplant Parmesan recipe. Freeze It-Portion out the sauce and freeze it in small containers for future use.
  • Extra Ground Beef: Tacos or Burritos-Turn it into taco or burrito filling with your favorite toppings. Stuffed Bell Peppers-Use the beef as a filling for stuffed bell peppers. Spaghetti Bolognese-Make a quick and hearty spaghetti Bolognese sauce. Chili-Transform it into a delicious chili with beans and spices.
  • Additional Acorn Squash: Roasted Squash-Cube and roast it with olive oil, salt, and your favorite spices as a side dish. Squash Salad-Add it to your salads for extra texture and flavor. Squash Soup-Blend it into a creamy butternut squash or acorn squash soup.
  • Extra Mozzarella Cheese: Caprese Salad-Make a classic Caprese salad with fresh tomatoes and basil. Grilled Cheese-Add it to your grilled cheese sandwich for a gooey, cheesy twist. Cheese Quesadillas-Create cheesy quesadillas with your favorite fillings.

glass meal prep containers with acorn squash stuffed with beef marinara sauce and green baby spinach

stuffed acorn squash with marinara sauce

Stuffed Acorn Squash with Beef Marinara

Delicious, budget-friendly, and restaurant-quality, this stuffed acorn squash with beef marinara is a healthy dinner idea that's easy to make and perfect for weeknight meal prep.
No ratings yet
Prep Time 5 minutes
Cook Time 55 minutes
Course dinner, lunch, Main Course
Cuisine American, Italian
Servings 2
Calories 713 kcal

Equipment

  • knife
  • cutting board
  • oven
  • sheet pan
  • saute pan

Ingredients
  

Beef Marinara Sauce

  • 12 oz lean ground beef
  • 2 cups marinara sauce
  • 1/4 tsp garlic powder
  • 1/4 tsp salt
  • 1/4 tsp pepper
  • 1/4 cup red onions (diced)
  • 1 tbsp olive oil

Acorn Squash

  • 1 each acorn squash
  • 1/4 tsp salt
  • 1 tbsp olive oil

Optional Side Salad and toppings

  • 4 cups baby spinach
  • 4 tbsp choice of vinaigrette dressing
  • 2 tbsp shredded mozzarella cheese

Instructions
 

  • Pre-heat the oven to 400F
  • Carefully cut the acorn squash in half. Once it is cut, use a spoon to scoop out the seeds
  • Season the acorn squash with salt and coat it with olive oil. Place it on a sheet pan, flesh side up, and bake it in the oven for 50-55 minutes until it is tender
  • Meanwhile, add oil to a saute pan on medium high heat and cook the onions until they soften
  • Add the ground beef and continue to stir it around until it is golden brown and fully cooked (about 5 to 7 minutes)
  • Then, pour the marinara sauce over the ground beef and add the seasonings. Stir it around until the sauce is fully mixed well.
  • After the acorn squash cooks, carefully remove it from the oven. Evenly stuff each squash halve with the meat sauce and sprinkle the the shredded mozzarella cheese on top. Enjoy with a side salad

Notes

Note: If you do not have an Instant Pot, you can also cook the beef in a slow cooker on high for 4 to 6 hours.
Nutrition information provided is an estimate. It will vary based on cooking method and specific ingredients used. Please consult with your healthcare provider for specific dietary needs. To gain a better understanding, explore our nutrition disclaimer here. 

Nutrition

Calories: 713kcalCarbohydrates: 41gProtein: 46gFat: 43gSaturated Fat: 11gPolyunsaturated Fat: 10gMonounsaturated Fat: 20gTrans Fat: 1gCholesterol: 117mgSodium: 2003mgPotassium: 2450mgFiber: 9gSugar: 11gVitamin A: 7580IUVitamin C: 59mgCalcium: 261mgIron: 10mg

Similar Recipes

cilantro chicken

Cilantro Lime Chicken Salad with Strawberry Salsa

sweet and sour chicken wings

Air Fryer Sweet and Sour Chicken Wings

stuffed primavera chicken

Primavera Stuffed Chicken Breasts

You Might Also Like

Frequently Asked Questions

Can I use other types of winter squash besides acorn squash for this recipe?

Yes, you can substitute acorn squash with other winter squashes like butternut, kabocha, or delicata. The cooking times may vary slightly, so keep an eye on them while roasting.


What are some recommended variations for the side salad?

For variety, you can try different side salads such as a kale and quinoa salad, a mixed greens salad with a citrus vinaigrette, or a cucumber and red onion salad. Get creative with your salad choices!


What can I do with the scooped-out acorn squash seeds?

Leftovers can be used in various ways. Try adding them to omelets, grain bowls, or as toppings for pizza or pasta dishes.

Posted on Leave a comment

Pumpkin Muffins

glass meal prep containers with pumpkin muffins

Embrace the Cozy Season with Our Easy Fall Breakfast Pumpkin Muffin Meal Prep Recipe. As autumn sweeps in with its golden hues and crisp mornings, there’s no better time to savor the flavors of the season. Our simple yet delicious pumpkin muffins are the perfect fall breakfast treat, offering both convenience and comfort. With easy meal prep at the core of this recipe, you can indulge in the essence of fall without the morning hustle. Dive into the warm embrace of cinnamon and pumpkin, and make your mornings brighter with this delightful and easy breakfast meal prep idea

This post may contain affiliate links. Please see our privacy policy for details.

Calories: 460kcal | Carbohydrates: 70g | Protein: 11g | Fat: 17g | Saturated Fat: 3g | Polyunsaturated Fat: 4g | Monounsaturated Fat: 8g | Trans Fat: 0.02g | Cholesterol: 82mg | Sodium: 154mg | Potassium: 421mg | Fiber: 5g | Sugar: 39g | Vitamin A: 14423IU | Vitamin C: 4mg | Calcium: 147mg | Iron: 5mg

round plate with pumpkin muffins

Why These Muffins Are an Ideal Breakfast Meal Prep Solution

  • Autumn Bliss: These pumpkin muffins are a taste of fall in every bite! Packed with warm cinnamon and rich pumpkin puree, they’re like a cozy sweater for your taste buds during the crisp autumn months.
  • Easy Breakfast Meal Prep: The magic of these muffins lies in their simplicity. With a straightforward recipe and minimal ingredients, it’s a breeze to whip them up in advance and have breakfast sorted for the week. 
  • Nutrient-Rich Fuel: These muffins aren’t just delicious; they’re packed with nutrients! Pumpkin puree offers vitamins A and C, while pumpkin seeds deliver a protein punch and essential minerals. Perfect to keep you energized throughout your busy day.
  • Portability and Convenience: When you’re dashing out the door in the morning, these muffins are your trusty sidekick. Grab one, and you’re all set! No mess, no fuss, just a delicious breakfast on the go.

The PrepYoSelf Newsletter

Simple Ingredients for Meal Prep Pumpkin Muffins

  • Eggs: Look for free-range or organic eggs if possible for a fresh and rich flavor. Ingredient Swap: If you’re vegan or allergic to eggs, you can substitute with a flax or chia egg. Mix 1 tablespoon of ground flaxseeds or chia seeds with 2.5 tablespoons of water and let it sit until it thickens.
  • Pumpkin Puree: Canned pumpkin puree is convenient, but you can also make your own by roasting and pureeing fresh pumpkin. Ingredient Swap: If you want to try something different, sweet potato puree can be a great alternative with a similar texture and taste.
  • Flour: Choose whole wheat flour for added fiber or opt for gluten-free flour if you have dietary restrictions. You can also blend rolled oats. Ingredient Swap: Consider almond flour for a gluten-free and higher protein option, or oat flour for a heartier texture.
  • Brown Sugar: You can use natural sweeteners like coconut sugar or maple syrup for a different flavor profile. Ingredient Swap: If you’re looking to reduce sugar, try using a sugar substitute like stevia or erythritol
  • Cinnamon: Cinnamon is packed with antioxidants and has potential health benefits, such as reducing inflammation. Ingredient Swap: Experiment with other spices like nutmeg or pumpkin pie spice for a unique twist.
  • Pumpkin Seeds: Pumpkin seeds are a great source of protein, healthy fats, and minerals like magnesium. Ingredient Swap: If you’re not a fan of pumpkin seeds, chopped nuts like walnuts or pecans can be a tasty alternative.

glass meal prep containers with pumpkin muffins

How to Prepare Pumpkin Muffins

  1. First things first, set your oven to 400°F (200°C) to get it all nice and toasty.
  2. In a mixing bowl, crack your egg and add in the brown sugar and that creamy pumpkin puree. Now, let’s give it a good whisk until everything becomes beautifully smooth. It’s like a cozy autumn hug in a bowl!
  3. Next, introduce your flour, cinnamon, and baking powder to the party. Stir them in with the wet ingredients until you have a batter that’s smooth and inviting.
  4. Take your olive oil and use it to generously grease your muffin pans. This will make sure your muffins come out effortlessly.
  5. Using a 1/3 cup scoop, evenly distribute that delicious batter into each muffin well.
  6. For that extra touch of fall flair, sprinkle your muffins with those lovely pumpkin seeds. It’s like the cherry on top of a pumpkin pie – delightful!
  7. Pop your muffin pans into the preheated oven and let them bake for about 12-15 minutes. Keep an eye on them; when the center is cooked to perfection and a toothpick comes out clean, they’re ready to shine!

Reference the recipe card below for detailed instructions.

round plate with pumpkin muffins

Pairing Tips:

  • Hot Coffee or Chai Tea: A warm, comforting beverage like coffee or chai tea pairs beautifully with the spiced notes of the muffins. The combination is perfect for a cozy fall morning.
  • Greek Yogurt: Serve your muffins with a side of Greek yogurt. The creamy and tangy yogurt balances the sweetness of the muffins and adds a nice protein boost.
  • Fresh Fruit: A fruit salad or sliced fresh fruit like apples, pears, or berries can add a refreshing contrast to the rich muffins.
  • Savory Complements: For a savory option, serve the muffins alongside scrambled eggs, bacon, or a breakfast sandwich. The sweet and savory contrast can be surprisingly delicious.

Leftover Ingredient Tips:

  • Pumpkin Puree: Don’t let that extra pumpkin puree go to waste. Make a smoothie with yogurt and pumpkin, or add it to your oatmeal. It’s great for soups and stews as well.
  • Flour: Flour has countless uses! It’s essential for baking, but you can also use it to thicken soups, make pancakes, or bread chicken or fish for a crispy coating.
  • Brown Sugar: Leftover brown sugar can sweeten your morning coffee or tea. Use it for baking, or sprinkle some on oatmeal or yogurt for extra flavor.
  • Pumpkin Seeds: Pumpkin seeds are fantastic for snacking. Roast them with your favorite seasonings and enjoy. You can also add them to salads, yogurt, or granola for an extra crunch.

Meal Prep Tips for Pumpkin Muffins:

  • Storage Tips: For longer storage, place them in an airtight container or resealable bags and refrigerate for up to a week. To extend their shelf life further, wrap each muffin individually in plastic wrap and store them in an airtight container or a freezer-safe bag. They can last up to 3 months in the freezer. When ready to enjoy, simply thaw muffins in the refrigerator or on the counter for a few hours. You can also reheat them in the microwave or oven for that fresh-baked taste.
  • Reheating Tips: Place a muffin on a microwave-safe plate. Microwave for 15-20 seconds per muffin. Check the muffin’s center for warmth and adjust the time accordingly. Be cautious not to overheat, as it can make the muffin dry.

glass meal prep containers with pumpkin muffins

pumpkin muffins

Pumpkin Muffins

Enjoy the flavors of fall with these easy-to-prep Pumpkin Muffins, a delightful grab-and-go breakfast or snack option.
No ratings yet
Prep Time 5 minutes
Cook Time 15 minutes
Course Breakfast, Snack
Cuisine American
Servings 2
Calories 460 kcal

Equipment

  • bowl
  • whisk
  • muffin pan
  • oven

Ingredients
  

  • 1 each large egg
  • 3/4 cup pumpkin puree
  • 1/2 cup flour
  • 1/3 cup brown sugar
  • 1 tsp cinnamon
  • 1/2 tsp baking powder
  • 1 oz pumpkin seeds
  • 1 tbsp olive oil

Instructions
 

  • Pre-heat the oven to 400F
  • In a bowl, mix together the egg, brown sugar, and pumpkin puree until smooth
  • Next, add the flour, cinnamon, baking powder, and mix until you achieve a smooth batter
  • Grease the muffin pans with olive oil. Use a 1/3 cup scoop to pour the better into each muffin well
  • Evenly top each muffin with pumpkin seeds
  • Bake in the oven for 12-15 minutes until the center is cooked

Notes

Note: 3 muffins per serving
Nutrition information provided is an estimate. It will vary based on cooking method and specific ingredients used. Please consult with your healthcare provider for specific dietary needs. To gain a better understanding, explore our nutrition disclaimer here. 

Nutrition

Calories: 460kcalCarbohydrates: 70gProtein: 11gFat: 17gSaturated Fat: 3gPolyunsaturated Fat: 4gMonounsaturated Fat: 8gTrans Fat: 0.02gCholesterol: 82mgSodium: 154mgPotassium: 421mgFiber: 5gSugar: 39gVitamin A: 14423IUVitamin C: 4mgCalcium: 147mgIron: 5mg

Similar Recipes

baked oatmeal

Oven Baked Oats with Apricots and Berries

ricotta apple

Oven Baked Apple with Ricotta and Walnuts

french toast 2

Oven Baked French Toast Muffins with Strawberries

You Might Also Like

Smartfruit Mellow Mango + Immunity, 100% Real Fruit Purée

Trader Joe’s Unsalted, Dry Toasted Slivered Almonds

Trader Joe’s the Dark Chocolate Lover’s Chocolate Bar

Frequently Asked Questions

Can I use fresh pumpkin instead of canned pumpkin puree?

Absolutely! Roast and puree fresh pumpkin for a homemade touch.


Can I add nuts or other mix-ins to the batter?

Of course! Chopped nuts, chocolate chips, or dried fruit can be delightful additions.


Can I make these muffins gluten-free?

Yes, simply use gluten-free flour in place of regular flour.

Posted on Leave a comment

Artichoke and Smoked Salmon Pasta Salad

glass meal prep containers with rotini pasta, smoked salmon, artichoke hearts, and arugula

Our Artichoke and Smoked Salmon Pasta Salad recipe is the ultimate solution for a wholesome and satisfying lunch that’s quick to prepare and perfect for meal prep. Packed with healthy ingredients like smoked salmon, artichoke hearts, and vibrant arugula, this salad offers a delicious way to power through your day. With the added punch of a zesty Lemon Vinaigrette, this meal is not just a feast for your taste buds but also a boost for your overall well-being. Get ready to discover a healthy lunch that’s rich in Omega-3 fatty acids, antioxidants, and essential vitamins, all while keeping you energized and satisfied.

This post may contain affiliate links. Please see our privacy policy for details.

Calories: 480kcal | Carbohydrates: 45g | Protein: 28g | Fat: 20g | Saturated Fat: 3g | Polyunsaturated Fat: 3g | Monounsaturated Fat: 13g | Cholesterol: 26mg | Sodium: 2171mg | Potassium: 508mg | Fiber: 6g | Sugar: 13g | Vitamin A: 1307IU | Vitamin C: 16mg | Calcium: 88mg | Iron: 2mg

round plate with rotini pasta, smoked salmon, artichoke hearts, and arugula

Why This Recipe is Great for Meal Prep

  • Convenience and Time-Saving: This recipe can be prepared in advance, making it a fantastic time-saver. By cooking the pasta and chopping the ingredients ahead of time, you can quickly assemble your lunch for the week. This is ideal for those with busy schedules.
  • Nutrient-Packed: With ingredients like smoked salmon, artichoke hearts, arugula, and a homemade lemon vinaigrette, this pasta salad is a nutritional powerhouse. It’s rich in Omega-3 fatty acids, antioxidants, vitamins, and essential nutrients, ensuring you get a well-rounded and healthy meal.
  • Balanced Meal: The combination of protein from smoked salmon, carbohydrates from pasta, and a variety of vegetables ensures a balanced meal. It’s not only delicious but also keeps you feeling full and satisfied, reducing the temptation to snack on less healthy options.
  • Longer Shelf Life: Many meal prep dishes improve in flavor as they sit, and this pasta salad is no exception. The flavors meld together, enhancing the overall taste. It’s one of those dishes that actually gets better with time, so you can prepare it in batches and enjoy it throughout the week without losing quality.

The PrepYoSelf Newsletter

To Meal Prep This Pasta Salad, You’ll Need

  • Smoked Salmon: When shopping for smoked salmon, opt for sustainably sourced, wild-caught salmon if possible. Look for vacuum-sealed packages to ensure freshness. Smoked salmon is rich in Omega-3 fatty acids, high-quality protein, and essential vitamins like B12 and D. It’s a heart-healthy choice and promotes brain function. Ingredient Swap: For a vegetarian alternative, consider smoked tofu or marinated grilled tempeh.
  • Dried Rotini Pasta: Choose whole wheat or gluten-free pasta if you have dietary preferences or restrictions. Whole wheat pasta offers added fiber and nutrients. Ingredient Swap: You can use other pasta shapes like penne, bowtie, or fusilli, depending on your preference.
  • Roma Tomato: Select firm, ripe roma tomatoes with vibrant red color. Consider buying organic for a fresher taste. Ingredient Swap: If you’re not a fan of tomatoes, consider bell peppers or cucumbers for a similar crunch and color.
  • Artichoke Hearts (Canned and Drained): Look for artichoke hearts canned in water, without added salt or oil. You can also find frozen artichoke hearts in some stores. Artichokes are a good source of dietary fiber, antioxidants, and vitamins, particularly folate and vitamin K. Ingredient Swap: If you’re not into artichokes, try roasted red bell peppers or asparagus spears.
  • Arugula Salad: Choose arugula that appears fresh and vibrant. Bagged pre-washed arugula can save you time. Arugula is a leafy green high in vitamins A, C, and K, as well as calcium. It adds a peppery, refreshing flavor. Ingredient Swap: Spinach or mixed baby greens can be substituted for arugula if you prefer a milder taste.
  • Lemon Vinaigrette: You can make your vinaigrette at home using olive oil, lemon juice, honey, and salt, or purchase a high-quality store-bought dressing. Homemade dressings often have fewer additives and preservatives, making them a healthier choice. Ingredient Swap: Experiment with different vinaigrettes or dressings, such as balsamic or a yogurt-based dressing for a creamy twist.

glass meal prep containers with rotini pasta, smoked salmon, artichoke hearts, and arugula

How to Prepare Smoked Salmon Salad

  1. Begin by boiling the rotini pasta according to the package instructions. Cooking times may vary, but typically, it takes around 7-9 minutes for the pasta to reach an al dente texture. Once cooked, drain the pasta and set it aside to cool completely. This step ensures that your pasta salad retains its perfect texture and doesn’t become soggy.
  2. While your pasta is cooling, let’s work on the star of the show – smoked salmon. Carefully remove the smoked salmon from its packaging and give it a good chop into smaller, bite-sized pieces. Smoked salmon is a fantastic source of Omega-3 fatty acids, making it a superb choice for a healthy lunch.
  3. Now, turn your attention to the artichoke hearts. Drain these tender delights from the can and cut them into quarters. Artichoke hearts not only bring a unique flavor to the salad but are also packed with fiber, antioxidants, and essential vitamins.
  4. In a small ramekin, prepare the zesty Lemon Vinaigrette by whisking together olive oil, lemon juice, honey, and a pinch of salt. This dressing not only adds a burst of flavor but also provides healthy fats and vitamins.
  5. In a spacious mixing bowl, combine the smoked salmon, cooled pasta, diced roma tomato, artichoke hearts, and a generous helping of fresh arugula salad. This combination creates a delightful balance of textures and flavors, making it an ideal choice for a power-packed lunch.
  6. Pour the Lemon Vinaigrette over your salad ingredients. Toss everything together gently, ensuring that the dressing coats each element evenly. The combination of smoked salmon and lemony dressing adds a refreshing and vibrant touch to your meal.

Reference the recipe card below for detailed instructions.

glass meal prep containers with rotini pasta, smoked salmon, artichoke hearts, and arugula

Leftover Ingredient Tips

By creatively repurposing leftover ingredients, you can reduce food waste and enjoy a variety of meals throughout the week. This not only saves money but also adds diversity to your diet. Here are some tips for using up any leftover ingredients from the Artichoke and Smoked Salmon Pasta Salad recipe:

  • Dried Rotini Pasta: Use any remaining pasta to create another pasta salad with different ingredients, like cherry tomatoes, olives, and feta cheese. Incorporate pasta into a stir-fry dish for added texture and substance.
  • Artichoke Hearts: Create a delicious artichoke dip by blending the artichoke hearts with cream cheese, Parmesan, and seasonings. Serve with crackers or fresh veggies. Use artichoke hearts as a pizza topping along with spinach, feta, and olives.
  • Arugula Salad: Add a handful of arugula to your morning smoothie for a nutrient boost. Use arugula as a fresh and peppery addition to sandwiches, wraps, or burgers.
  • Lemon Vinaigrette: Continue to use the lemon vinaigrette for other salads or as a marinade for grilled chicken or fish. Drizzle the vinaigrette over roasted vegetables to enhance their flavor.

round plate with rotini pasta, smoked salmon, artichoke hearts, and arugula

round plate with rotini pasta, smoked salmon, artichoke hearts, and arugula

Artichoke and Smoked Salmon Pasta

Elevate your lunch with our Artichoke and Smoked Salmon Pasta Salad – a nutritious, zesty, and delicious meal prep idea.
No ratings yet
Prep Time 5 minutes
Cook Time 10 minutes
Course lunch, Salad
Cuisine American
Servings 2
Calories 480 kcal

Equipment

  • knife
  • cutting board
  • boiling pot
  • mixing bowl

Ingredients
  

Salad Ingredients

  • 8 ounces smoked salmon
  • 1 cup dried rotini pasta
  • 1 small roma tomato (diced)
  • 1 cup artichoke hearts (canned and drained)
  • 4 cups arugula salad

Lemon Vinaigrette

  • 2 tablespoon olive oil
  • 2 tablespoon lemon juice
  • 1 tablespoon honey
  • 1/4 teaspoon salt

Instructions
 

  • Boil the pasta according to the packaged instructions. Once the pasta is cooked, drain it and let it cool.
  • Meanwhile, remove the smoked salmon from the packaging and chop it up into smaller pieces. Drain the artichokes from the can and cut the artichokes into quarters.
  • In a small ramekin, mix together the salad viniagrette.
  • In a mixing bowl, add the salmon, pasta, diced tomato, artichoke hearts, and arugula salad. Pour in the dressing and toss the ingredients.

Notes

Nutrition information provided is an estimate. It will vary based on cooking method and specific ingredients used. Please consult with your healthcare provider for specific dietary needs. To gain a better understanding, explore our nutrition disclaimer here. 

Nutrition

Calories: 480kcalCarbohydrates: 45gProtein: 28gFat: 20gSaturated Fat: 3gPolyunsaturated Fat: 3gMonounsaturated Fat: 13gCholesterol: 26mgSodium: 2171mgPotassium: 508mgFiber: 6gSugar: 13gVitamin A: 1307IUVitamin C: 16mgCalcium: 88mgIron: 2mg

Similar Recipes

shrimp quinoa salad

Citrus Shrimp Quinoa and Spinach Salad

ginger salmon

Baked Orange Ginger Salmon with Snow Peas

salmon and watermelon salad

Grilled Salmon with Watermelon Salad

You Might Also Like

Frequently Asked Questions

Can I use fresh salmon instead of smoked salmon?

Absolutely, you can use fresh salmon if you prefer. Simply grill, bake, or pan-sear the salmon until it’s cooked to your liking, then flake it and use it in the recipe.


Can I freeze this pasta salad for future use?

It’s not recommended to freeze this salad because freezing can affect the texture of the ingredients, particularly the arugula and tomatoes. Fresh salads are best enjoyed within a few days of preparation.


How can I make this recipe more low-carb?

To reduce the carb content, use a lower-carb pasta or swap the pasta for spiralized zucchini (zoodles) or cauliflower rice.

Posted on Leave a comment

Linguine With Clams

glass meal prep container with linguine pasta and clams

Looking for a budget-friendly weekly dinner option that’s both a wallet-saver and a taste sensation? Your search ends here! Our Linguine Pasta with Clams recipe is the perfect solution, combining affordability with mouthwatering flavor. In just 30 minutes, you can whip up a delicious meal that rivals your favorite takeout without breaking the bank. Whether you’re planning your weekly meal prep or simply craving a quick, restaurant-quality dish for a busy weeknight, this pasta meal prep recipe checks all the boxes.

This post may contain affiliate links. Please see our privacy policy for details.

Calories: 690kcal | Carbohydrates: 55g | Protein: 56g | Fat: 26g | Saturated Fat: 11g | Polyunsaturated Fat: 3g | Monounsaturated Fat: 9g | Trans Fat: 0.5g | Cholesterol: 39mg | Sodium: 2631mg | Potassium: 1287mg | Fiber: 3g | Sugar: 3g | Vitamin A: 577IU | Vitamin C: 5mg | Calcium: 339mg | Iron: 6mg

round plate with linguini pasta and clams

Why You’ll Enjoy This Pasta Meal Prep

  • Quick and Easy Preparation: This dish can be prepared in under 30 minutes, making it a speedy option for those hectic weeknights. It’s as fast as ordering takeout, but you get to enjoy a homemade meal with fresher, higher-quality ingredients.
  • Budget-Friendly: Compared to dining out or ordering takeout, preparing this linguine pasta with clams at home is a cost-effective choice. You can buy ingredients in bulk, and you’ll have leftovers for multiple meals, saving you money in the long run.
  • Restaurant-Quality Flavor: The combination of clams, aromatic onions and garlic, buttery richness, and zesty lemon juice creates a restaurant-quality flavor profile. You can savor gourmet taste in the comfort of your own home without the restaurant price tag.
  • Versatile Ingredient Swaps: This recipe is highly adaptable. You can swap out ingredients based on what you have in your pantry or your personal preferences. Whether it’s using different types of pasta, protein options, or cheese varieties, you have the freedom to make it your own.

The PrepYoSelf Newsletter

Simple Ingredients You’ll Need

  • Frozen Clams: When buying frozen clams, look for reputable brands and ensure the packaging is intact. Check the “use by” or “best before” date. Opt for sustainably sourced clams if possible. If fresh clams are available and you have time, you can use them instead, just remember to clean them thoroughly and discard any that remain open after tapping them. Ingredient Swaps: If you can’t find frozen clams or prefer a different seafood option, you can use cooked shrimp, mussels, or even diced, cooked chicken or tofu for a protein variation.
  • Dry Linguine Pasta: Choose high-quality pasta for the best taste and texture. Whole wheat linguine is a healthy alternative that adds more fiber to your meal. Ingredient Swaps: If you’re looking for a gluten-free alternative, you can use gluten-free pasta like rice or corn-based linguine. Whole wheat pasta is a healthy option too.
  • Green Onions: Select green onions with vibrant green tops and firm white bottoms. Avoid wilted or slimy ones. Store them in the refrigerator with a damp paper towel wrapped around the roots to keep them fresh longer. Ingredient Swaps: If you’re out of green onions, substitute them with chives, shallots, or regular onions, adjusting the quantity to your taste.
  • Red Onions: Look for red onions with shiny, unblemished skin. They should feel heavy for their size, which indicates freshness. Store them in a cool, dark place.Ingredient Swaps: Yellow or white onions can be used instead of red onions. Red onions are milder, so adjust the quantity accordingly.
  • Garlic: Opt for plump garlic bulbs with unbroken skin. Avoid any with green sprouts unless you want a milder flavor. Store garlic in a cool, dry place, not in the fridge.
  • Roma Tomato: Choose ripe, firm, and unblemished Roma tomatoes. If they are out of season, you can use canned diced tomatoes, which work just as well and are readily available year-round.
  • Shredded Parmesan Cheese: Buy a block of Parmesan cheese and grate it yourself for the best flavor. Pre-shredded cheese often contains anti-caking agents, which can affect the texture of your sauce. Ingredient Swaps: Pecorino Romano, Asiago, or a blend of these cheeses can be used as substitutes for Parmesan cheese.
  • Butter: Opt for unsalted butter to have more control over the saltiness of your dish. Ingredient Swaps: Olive oil or a dairy-free butter substitute can be great options.
  • Lemon: Look for plump, heavy lemons with smooth skin. Roll the lemon between your hand and a countertop to release more juice. Ingredient Swaps: If you don’t have fresh lemons, bottled lemon juice can be a convenient substitute.

glass meal prep container with linguine pasta and clams

Easy Steps to Meal Prep This Pasta Recipe

1. First things first, we need to cook our linguine pasta according to the package instructions. Remember to salt the water for added flavor. Once your pasta is perfectly al dente, drain it and set aside.

2. Heat up a pan over medium-high heat and add the olive oil. When it shimmers, toss in the green onions, red onions, and garlic. Sauté these aromatic ingredients until they become soft and fragrant. The scent will make your kitchen feel like an Italian paradise!

3. Add your frozen clams to the pan and let the magic happen. As they cook, they’ll start to steam and open up, releasing their mouthwatering aroma. This should take about 3 to 5 minutes. Keep an eye on those little treasures.

4. Take your cooked linguine and add it to the pan. Along with it, pour in that 1/4 cup of pasta water – this liquid gold will help create a silky, luxurious sauce. Stir everything together, letting the pasta soak up the flavors of the sea.

5. Here’s where the real magic happens. Drop in the butter and shower that Parmesan cheese over the linguine and clams. Stir it all together until you’ve got a creamy, cheesy sauce coating every last noodle. The buttery richness and the salty Parmesan will elevate the dish to the next level of deliciousness.

6. Before we wrap up, give your linguine pasta with clams a burst of freshness. Squeeze the juice of a lemon over the top. This brightens the flavors and adds a zesty kick, balancing out the richness of the dish.

Reference the recipe card below for detailed instructions.

glass meal prep container with linguine pasta and clams

Pasta Meal Prep Tips

  • Storage Tips:  If you have leftover linguine pasta with clams, allow it to cool to room temperature before storing it. Transfer it to an airtight container and store it in the refrigerator. Consume within 2-3 days to maintain the best quality.
  • Reheating Tips: Reheating in the microwave is the quickest option. Place your portion in a microwave-safe dish and cover it with a microwave-safe lid or microwave-safe plastic wrap with a small vent for steam. Reheat in 30-second intervals, stirring in between, until it’s heated through. Be careful not to overheat, as this can make the pasta rubbery.
  • Add Fresh Ingredients: To revitalize the flavors, consider adding a drizzle of olive oil, a sprinkle of fresh Parmesan, and a squeeze of lemon after reheating. This can help bring back some of the original freshness.

glass meal prep container with linguine pasta and clams

linguini clams

Linguine with Clams

No ratings yet
Prep Time 5 minutes
Cook Time 20 minutes
Course dinner, Main Course
Cuisine American
Servings 2
Calories 690 kcal

Equipment

  • knife
  • cutting board
  • saute pan

Ingredients
  

  • 12 oz frozen clams
  • 4 oz dry linguine pasta
  • 1/4 cup green onions (chopped)
  • 1/4 cup red onions
  • 2 cloves garlic (minced)
  • 1 each roma tomato (diced)
  • 1/4 cup shredded parmesan cheese
  • 2 tbsp butter
  • 1 each lemon
  • 1 tbsp olive oil
  • 1/4 tsp salt

Instructions
 

  • Boil the pasta according to the packaged instructions
  • Add oil to a pan on medium-high heat and saute the green onions, red onions, and garlic until they soften
  • Next, add the frozen clams and cook until they steam and open (should take about 3 to 5 minutes)
  • Then, add the cooked linguine and 1/4 cup of pasta water to the pan
  • Add the butter and parmesan cheese to the pan and mix it all together
  • At the end squeeze lemon juice over the pasta

Notes

Nutrition information provided is an estimate. It will vary based on cooking method and specific ingredients used. Please consult with your healthcare provider for specific dietary needs. To gain a better understanding, explore our nutrition disclaimer here. 

Nutrition

Calories: 690kcalCarbohydrates: 55gProtein: 56gFat: 26gSaturated Fat: 11gPolyunsaturated Fat: 3gMonounsaturated Fat: 9gTrans Fat: 0.5gCholesterol: 39mgSodium: 2631mgPotassium: 1287mgFiber: 3gSugar: 3gVitamin A: 577IUVitamin C: 5mgCalcium: 339mgIron: 6mg

Similar Recipes

shrimp kebab

Air Fryer Shrimp and Pineapple Kebabs

shrimp and corn

Sheet Pan Shrimp with Cauliflower and Corn

salmon salad

Salmon Salad Stuffed Avocado

You Might Also Like

Frequently Asked Questions

Can I make this recipe without dairy (butter and cheese)?

Yes, if you prefer a dairy-free version, you can use a dairy-free butter substitute and skip the cheese. The dish will still be delicious and creamy.


Can I use different seafood with this recipe?

Absolutely! While clams are the traditional choice, you can use other seafood like shrimp, mussels, or even chunks of white fish. Adjust the cooking time accordingly, as different seafood may require varying cooking times.


Can I freeze this dish for later?

It’s best not to freeze the prepared dish because the texture of the clams and pasta may change upon thawing and reheating. It’s recommended to store leftovers in the refrigerator and consume them within 2-3 days.

Posted on Leave a comment

Sausage Pumpkin Pasta

glass meal prep containers with pasta and pumpkin marinara with green spinach and shredded cheese

Fall into Flavor with this Healthy Seasonal Meal Prep with Sausage and Pumpkin Marinara Pasta. Embracing the changing seasons doesn’t mean you have to compromise your health or your taste buds. As the air turns crisp and leaves blanket the ground, it’s time to welcome the comforting flavors of fall into your kitchen. Our Sausage and Pumpkin Marinara Pasta recipe is here to do just that – combining the heartiness of sausage, the warmth of pumpkin, and the convenience of meal prep into a single, mouthwatering dish. This recipe not only tantalizes your taste buds but also fits seamlessly into the busy lives of individuals who seek to maintain a healthy and balanced diet. Let’s dive into the flavorful world of autumn with a dish that’s as nutritious as it is delightful.

This post may contain affiliate links. Please see our privacy policy for details.

Calories: 665kcal | Carbohydrates: 69g | Protein: 35g | Fat: 30g | Saturated Fat: 7g | Polyunsaturated Fat: 1g | Monounsaturated Fat: 6g | Cholesterol: 99mg | Sodium: 2702mg | Potassium: 960mg | Fiber: 8g | Sugar: 13g | Vitamin A: 22957IU | Vitamin C: 25mg | Calcium: 244mg | Iron: 6mg

round plate with pasta and pumpkin marinara with green spinach and shredded cheese

Why this Recipe is Great for Fall Meal Prep

Balanced Nutrition: This recipe combines lean chicken sausage, whole-grain pasta, nutrient-rich pumpkin, and fresh spinach. It’s a wholesome balance of protein, fiber, vitamins, and minerals, making it a nutritious choice for individuals striving to maintain a balanced diet.

Fall-Inspired Comfort: The warm, hearty flavors of pumpkin and savory sausage provide the comforting essence of the fall season. It’s a satisfying and cozy meal that allows you to enjoy the seasonal vibes without compromising on health.

Time-Efficiency: Meal prepping this dish saves you valuable time during busy workdays. You can prepare a batch on the weekend and have delicious, ready-made meals throughout the week, reducing the temptation to opt for less healthy, fast-food alternatives.

Portion Control: Meal prepping allows you to control your portion sizes. With this recipe, you can pre-portion your meals, preventing overeating and aiding in weight management and portion control.

The PrepYoSelf Newsletter

Here’s What You’ll Need To Meal Prep Sausage Pumpkin Pasta

  • Chicken Sausage Links: Look for chicken sausages labeled as “lean” or “low-fat” for a healthier option. Chicken sausages, especially lean varieties, are lower in saturated fat compared to traditional pork sausages. Ingredient Swap: Consider using turkey sausage or plant-based sausages for a lighter, meatless alternative.
  • Dried Spaghetti Noodles: Choose whole grain or legume-based pasta for extra fiber and protein. Whole grain pasta offers more nutrients and fiber, contributing to better satiety and digestion. Ingredient Swap: Experiment with gluten-free pasta if you have dietary restrictions.
  • Pumpkin Puree: Opt for canned or freshly made unsweetened pumpkin puree. Pumpkin is a rich source of vitamin A, fiber, and antioxidants. Ingredient Swap: Butternut squash puree can be a delightful alternative to pumpkin puree with a slightly different flavor profile.
  • Marinara Sauce: Check the labels for low-sodium or no-sugar-added marinara sauce options. A good marinara sauce should be low in saturated fat and a decent source of vitamin C. Ingredient Swap: For a change, try a spicy arrabbiata sauce for a kick of heat or a creamy tomato sauce for added richness.
  • Baby Spinach: Spinach is a low-calorie, nutrient-dense leafy green packed with vitamins and minerals. Ingredient Swap: Swap spinach for kale, arugula, or Swiss chard for a different flavor and nutrient mix.
  • Shredded Parmesan Cheese: Purchase freshly grated Parmesan for the best flavor. Ingredient Swap: If you prefer a dairy-free option, use nutritional yeast or a vegan Parmesan substitute.
  • Red Onions: Look for firm, unblemished red onions. Red onions provide antioxidants and vitamins, including vitamin C. Ingredient Swap: Sweet Vidalia onions or shallots can be a milder, sweeter alternative to red onions.

glass meal prep containers with pasta and pumpkin marinara with green spinach and shredded cheese

Easy Steps to Meal Prep Pasta Recipe

  1. The first step to meal prepping this delightful dish is to boil your pasta. Simply follow the package instructions for your chosen pasta, and when it’s perfectly al dente, drain the water. Using whole wheat or gluten-free pasta is an excellent way to add extra nutrition to your meal prep.
  2. Now, it’s time to introduce some savory goodness to the mix. Slice your favorite sausage into rounds about 1/4 inch thick. Whether you opt for sweet Italian sausage or spicy chorizo, it’s sure to add a flavorful kick to your meal prep.
  3. Heat a dash of oil in a pan over medium-high heat, and sauté the onions and sausage for about 3 to 5 minutes until the sausage heats through and turns golden brown. The aroma filling your kitchen will be absolutely irresistible!
  4. Pour in your marinara sauce, pumpkin puree, and a dash of your favorite seasonings. This autumnal twist adds depth, creaminess, and a healthy dose of vitamin A to your meal prep. Stir it all together until the sauce is perfectly blended, and your kitchen smells like a cozy fall haven.
  5. Time to unite your perfectly cooked pasta with the delectable pumpkin marinara. Add the pasta to the pan and mix it well until every strand is coated with that delightful sauce. The union of flavors is pure perfection.
  6. To balance the richness of our dish, toss in some fresh baby spinach. As you fold it into the pasta, the vibrant green will not only brighten up your meal prep but also add a dose of healthy greens. It’s like a little burst of fall color right in your bowl.
  7. What’s a pasta dish without a touch of cheese? Finish off your meal prep by sprinkling some Parmesan cheese over the top. It adds a nutty richness that complements the pumpkin marinara perfectly. Your taste buds will thank you!

Reference the recipe card below for detailed instructions.

glass meal prep container with pasta and pumpkin marinara with green spinach and shredded cheese

Meal Prep Tips for Sausage Pumpkin Pasta

  • Storage Tips: After preparing your meal, portion it into individual serving containers. This makes it easier to grab and go when you need a meal. Store your meal prep containers in the refrigerator for up to 3-4 days. 
  • Reheating Tips: For a quick reheating option, microwave your meal for 1-2 minutes on medium power. Make sure to stir the contents halfway through to ensure even heating. To achieve a crispy top layer, you can reheat it in the oven. Preheat your oven to 350°F (175°C), place the pasta in an oven-safe dish, cover with foil, and heat for 15-20 minutes. Uncover for the last 5 minutes to let the top crisp up. Be cautious not to overheat, as pasta can become mushy and the spinach can wilt excessively. Start with shorter reheating times and adjust as needed.

round plate with pasta and pumpkin marinara with green spinach and shredded cheese

sausage pumpkin pasta

Sausage Pasta with Pumpkin Marinara

Indulge in the flavors of fall with our Sausage and Pumpkin Marinara Pasta, a hearty and nutritious meal prep that combines savory sausage, creamy pumpkin, and wholesome ingredients.
No ratings yet
Prep Time 5 minutes
Cook Time 20 minutes
Course dinner, Main Course
Cuisine American, Italian
Servings 2
Calories 665 kcal

Equipment

  • knife
  • cutting board
  • saute pan
  • tongs
  • ladle
  • boiling pot

Ingredients
  

  • 3 each chicken sausage links (3 oz each)
  • 4 oz dried spaghetti noodles
  • 1 cup pumpkin puree
  • 1 cup marinara sauce
  • 2 cups baby spinach
  • 1/4 cup shredded parmesan cheese
  • 1/4 cup red onions (diced)
  • 1/2 tsp garlic powder
  • 1/2 tsp salt
  • 1 tbsp olive oil

Instructions
 

  • Boil the pasta according to the package instructions. Once it is cooked, drain the water
  • Slice the sausage into rounds 1/4 inch thick
  • Add oil to a pan on medium high heat and saute the onions and sausage for about 3 to 5 minutes until the sausage heats through and turns golden brown
  • Next add the marinara sauce, pumpkin puree, seasonings, and mix it together until the sauce is well blended
  • Then, add the pasta to the pan and mix it well until the pasta is coated with the sauce
  • Finally, add fresh baby spinach and fold it into the pasta. Sprinkle with parmesan cheese

Notes

Nutrition information provided is an estimate. It will vary based on cooking method and specific ingredients used. Please consult with your healthcare provider for specific dietary needs. To gain a better understanding, explore our nutrition disclaimer here. 

Nutrition

Calories: 665kcalCarbohydrates: 69gProtein: 35gFat: 30gSaturated Fat: 7gPolyunsaturated Fat: 1gMonounsaturated Fat: 6gCholesterol: 99mgSodium: 2702mgPotassium: 960mgFiber: 8gSugar: 13gVitamin A: 22957IUVitamin C: 25mgCalcium: 244mgIron: 6mg

Similar Recipes

chicken pesto

Sauteed Chicken Pesto with Bell Peppers

pepper sandwich

Roasted Red Pepper and Cheese Sandwich

sheet pan sausage

Sheet Pan Sausage with Roasted Vegetables

You Might Also Like

Frequently Asked Questions

 Can I use a different type of pasta for this recipe?

Absolutely! You can use your preferred pasta, such as penne, farfalle, or whole wheat pasta. Just adjust the cooking time based on the type of pasta you choose.


 What can I serve as a side dish with this pasta?

A simple side salad with mixed greens, balsamic vinaigrette, and crusty bread is a great complement to this dish. A warm garlic breadstick is also a popular choice.


Can I add other vegetables to this dish?

Yes, you can personalize this recipe by adding other vegetables like bell peppers, mushrooms, or zucchini. Sauté them with the sausage and onions for added flavor and nutrients.

Posted on Leave a comment

One Pot Beef and Cabbage Stew

round plate with beef chunks in tomato sauce with napa cabbage, red cabbage, and sliced mushrooms

Are you in search of a hearty and hassle-free dinner meal prep option that will make your weeknights a breeze? Look no further than our One-Pot Beef and Cabbage Stew recipe. Packed with lean beef, colorful cabbage, and savory mushrooms, this dish is a surefire way to satisfy your taste buds while simplifying your meal prep routine. So, let’s dive right in and learn how to make this delectable meal that’s perfect for your busy lifestyle.

This post may contain affiliate links. Please see our privacy policy for details.

Calories: 384kcal | Carbohydrates: 16g | Protein: 44g | Fat: 16g | Saturated Fat: 4g | Polyunsaturated Fat: 1g | Monounsaturated Fat: 9g | Cholesterol: 105mg | Sodium: 1435mg | Potassium: 1484mg | Fiber: 5g | Sugar: 9g | Vitamin A: 1269IU | Vitamin C: 57mg | Calcium: 142mg | Iron: 6mg

round plate with beef chunks in tomato sauce with napa cabbage, red cabbage, and sliced mushrooms

Why This Recipe is Great for Meal Prep

Here are a few compelling reasons why our One-Pot Beef and Cabbage Stew is a fantastic choice for busy individuals who crave comfort food without sacrificing nutrition and efficiency in their dinner meal prep routine:

Time-Saving One-Pot Wonder: This recipe is a time-saver because it’s a one-pot meal. You sauté, simmer, and cook everything in a single pan, minimizing both cooking and cleanup time. Busy individuals can appreciate the simplicity of fewer dishes to wash, leaving more time for other tasks or relaxation.

Nutrient-Rich Ingredients: Lean beef provides a good source of protein, essential for muscle health and energy. Cabbage is loaded with vitamins (like vitamin K and C), antioxidants, and dietary fiber, promoting overall well-being. Mushrooms offer immune-boosting properties and a unique umami flavor. These ingredients make for a balanced and nutritious meal.

Portion Control and Meal Prep Ease: By preparing this stew in advance, you have portion-controlled, ready-to-go meals for the week. This helps you avoid the temptation of unhealthy takeout or fast food during busy moments. It’s easy to divide the stew into containers, ensuring you have satisfying and wholesome meals on hand whenever hunger strikes.

Comfort Food with a Nutritional Twist: Many people turn to comfort food during hectic times, and this stew offers just that. It’s hearty, flavorful, and comforting, providing a sense of satisfaction. However, unlike traditional comfort foods that can be heavy on unhealthy fats and empty calories, this stew is rich in nutrients and lower in fat, making it a guilt-free indulgence.

The PrepYoSelf Newsletter

Ingredients You’ll Need:

  • Lean Beef Chunks : When selecting your beef, lean cuts like sirloin, round, or tenderloin work well. You can also opt for ground beef if you prefer a different texture.
    Ingredient Swap: If you’re looking for a plant-based alternative, consider using tofu chunks or tempeh for a vegetarian or vegan version of this stew.
  • Tomato Sauce: Tomato sauce adds a rich, tomatoey base to the stew. You can use store-bought tomato sauce or make your own with fresh tomatoes, garlic, and herbs.
    Ingredient Swap: To reduce sodium or sugar content, you can use low-sodium or no-sugar-added tomato sauce. If you’re not a fan of tomatoes, consider using a roasted red pepper sauce for a unique twist.
  • Beef Broth: Beef broth provides a savory depth of flavor. You can use store-bought beef broth or prepare your own using beef bouillon cubes or beef stock.
    Ingredient Swap: For a vegetarian or vegan version, switch to vegetable broth or mushroom broth. It will still infuse your stew with a rich, savory taste.
  • Napa Cabbage: Napa cabbage is known for its mild flavor and crisp texture, making it perfect for this stew. It adds a pleasant crunch and absorbs the delicious flavors.
    Ingredient Swap: If you can’t find napa cabbage, you can use regular green cabbage or savoy cabbage as alternatives.
  • Red Cabbage: Red cabbage not only contributes vibrant color but also a slightly sweet and peppery taste that complements the dish.
    Ingredient Swap: If you’re not a fan of red cabbage, feel free to use more napa cabbage or substitute it with kale or Swiss chard for added nutrition.
  • Mushrooms: Mushrooms bring an earthy, umami flavor to the stew. You can use a variety of mushrooms like cremini, button, or shiitake for depth of flavor.
    Ingredient Swap: If you’re not a mushroom enthusiast, you can skip them altogether or use other vegetables like bell peppers, zucchini, or carrots.

round plate with beef chunks in tomato sauce with napa cabbage, red cabbage, and sliced mushrooms

Instructions for Easy Dinner Meal Prep

  1. Begin by heating a tablespoon of olive oil in a large, sturdy pan over medium-high heat. Toss in the diced white onions and sauté them until they become soft and translucent. This step infuses a delightful aroma into your dish and provides a flavorful base for your stew.
  2. Next up, it’s time to introduce those lean beef chunks to the pan. Place them in with the sautéed onions and sear them until they achieve a glorious golden brown crust on each side. This step locks in the beef’s juices and sets the stage for a succulent stew.
  3. Once your beef is beautifully seared, add in the sliced mushrooms and sauté them alongside the beef until they soften and release their savory flavors. Mushrooms are a fantastic source of umami and will elevate the overall taste of your stew.
  4. Pour in the tomato sauce and beef broth into the pan, combining all the ingredients into a harmonious mixture. The tomato sauce adds a rich, tangy dimension, while the beef broth infuses depth and richness to your stew.
  5. Now, it’s time to introduce the vibrant cabbages to the party! Add the napa cabbage and red cabbage to the pan, stirring everything together. These cabbage varieties bring not only color but also a delightful crunch and a hint of sweetness to the stew.
  6. Bring the liquid to a gentle boil, allowing all those fantastic flavors to meld together. Once it reaches a boil, cover your pan with a lid, lower the heat to medium-low, and let it simmer for approximately 25 minutes. This allows the beef to fully cook and the cabbage to soften to perfection. If you desire an even more tender beef, feel free to extend the simmering time in 10-minute increments.

Reference the recipe card below for detailed instructions.

glass meal prep containers with beef chunks in tomato sauce with napa cabbage, red cabbage, and sliced mushrooms

Meal Prep Tips for Beef and Cabbage Stew

  • Storage Tips: Allow the stew to cool to room temperature before refrigerating it. Hot food in the fridge can raise the temperature inside, potentially compromising the safety of other items. Transfer the stew to airtight containers or meal prep containers with secure lids. This helps prevent moisture loss and keeps the stew fresh. The stew can typically be refrigerated for up to 3-4 days. If you want to extend the storage time, consider freezing individual portions. Use freezer-safe containers or zip-top freezer bags, removing as much air as possible to prevent freezer burn. Frozen stew can be kept for 2-3 months.
  • Reheating Tips: For a quick reheating, transfer your desired portion of stew to a microwave-safe bowl with a microwave-safe cover or microwave-safe plastic wrap. Reheat in 1-minute intervals, stirring in between, until it’s heated through.  To reheat on the stovetop, place the stew in a saucepan over medium-low heat. Stir occasionally as it heats to ensure even warming. This method may take a bit longer but can help maintain the stew’s texture. If you find the stew has thickened during storage, add a splash of beef broth or water to restore the desired consistency while reheating.
  • Complimentary Side Dishes: Pairing your One-Pot Beef and Cabbage Stew with complementary side dishes can enhance the overall dining experience. These include dinner rolls, rice or mashed potatoes, or a crisp and refreshing salad with a light vinaigrette that can contrast the stew’s heartiness. Pickled red onions or cucumbers serve as a zesty and tangy condiment that can cut through the richness of the stew. And as always, chopped fresh herbs like parsley, cilantro, or chives can add color and a burst of freshness to each bite. 

glass meal prep containers with beef chunks in tomato sauce with napa cabbage, red cabbage, and sliced mushrooms

Round plate with beef, tomato sauce, mushrooms, and cabbage

One Pot Beef and Cabbage Stew

Enjoy the ultimate comfort with our One-Pot Beef and Cabbage Stew – a hearty, nutritious, and easy meal prep option bursting with flavors!
No ratings yet
Prep Time 5 minutes
Cook Time 30 minutes
Course dinner, Main Course
Cuisine American
Servings 2
Calories 384 kcal

Equipment

  • knife
  • cutting board
  • saute pan with lid

Ingredients
  

  • 12 oz lean beef chunks
  • 1 cup tomato sauce
  • 1 cup beef broth
  • 2 cups napa cabbage (sliced)
  • 1 cup red cabbage (sliced)
  • 1 cup mushrooms (sliced)
  • 1/4 cup white onions (diced)
  • 1/4 teaspoon garlic powder
  • 1/4 teaspoon salt
  • 1 tablespoon olive oil

Instructions
 

  • Add oil to a pan on medium-high heat and saute the onions until they soften. Next, add the beef chunks and sear them until they turn golden brown on each side.
  • Then, add the sliced mushrooms and saute until they soften. Pour in the tomato sauce and beef broth and mix everything together.
  • Add the napa cabbage and red cabbage and stir it all together. Bring the liquid to a boil. Once it reaches a boil, cover the pan with a lid and lower the heat to low medium. Simmer for about 25 minutes until the beef is fully cooked. Note: you can continue to cook at additional 10 minute increments if you want your beef more tender.

Notes

Nutrition information provided is an estimate. It will vary based on cooking method and specific ingredients used. Please consult with your healthcare provider for specific dietary needs. To gain a better understanding, explore our nutrition disclaimer here. 

Nutrition

Calories: 384kcalCarbohydrates: 16gProtein: 44gFat: 16gSaturated Fat: 4gPolyunsaturated Fat: 1gMonounsaturated Fat: 9gCholesterol: 105mgSodium: 1435mgPotassium: 1484mgFiber: 5gSugar: 9gVitamin A: 1269IUVitamin C: 57mgCalcium: 142mgIron: 6mg

Similar Recipes

chicken soup

One Pot Mexican Chicken Soup

sweet potato blt

Instant Pot Beef Ragu

pork carnitas

Instant Pot Pork Carnitas

You Might Also Like

Frequently Asked Questions

Can I use a different type of meat for this stew?

Yes, you can! While the recipe calls for lean beef chunks, you can substitute with chicken, turkey, pork, or even plant-based options like tofu or tempeh to suit your dietary preferences.


Can I use pre-sliced or pre-chopped vegetables to save time?

Pre-sliced or pre-chopped vegetables can be a time-saving convenience. You can find these in the produce section of many grocery stores.


Can I make this stew in a slow cooker or Instant Pot?

Certainly! For a slow cooker, brown the beef and sauté the onions and mushrooms in a pan first, then transfer everything to the slow cooker. Cook on low for 6-8 hours or on high for 3-4 hours. For an Instant Pot, use the sauté function to brown the beef and sauté the vegetables, then pressure cook on high for about 30 minutes.

Posted on Leave a comment

Air Fryer Beef Egg Rolls

round plate with egg rolls, sliced green cucumber, and shredded red cabbage

If you’re a fan of savory, crispy, and oh-so-flavorful bites, you’re in for a treat. These mouthwatering egg rolls are not just about incredible taste; they’re a celebration of health and budget-friendliness. With lean ground beef, vibrant red cabbage, and a homemade sauce that’s both sweet and savory, we’re about to create a lunch meal prep masterpiece that’ll leave you excited for lunchtime all week long. So, roll up your sleeves, and let’s discover how to make these irresistible Air Fryer Beef Egg Rolls right at home!

This post may contain affiliate links. If you use these links to buy something we may earn a commission at no extra cost to you. Please read the disclosure policy.

Calories: 407kcal | Carbohydrates: 40g | Protein: 31g | Fat: 13g | Saturated Fat: 4g | Polyunsaturated Fat: 1g | Monounsaturated Fat: 8g | Trans Fat: 0.4g | Cholesterol: 74mg | Sodium: 1324mg | Potassium: 709mg | Fiber: 3g | Sugar: 13g | Vitamin A: 775IU | Vitamin C: 41mg | Calcium: 72mg | Iron: 5mg

round plate with egg rolls, sliced green cucumber, and shredded red cabbage

The PrepYoSelf Newsletter

Reasons You’ll Love This Lunch Meal Prep Recipe

  • When you prepare your own Air Fryer Beef Egg Rolls at home, you have complete control over the ingredients. Opting for lean ground beef, fresh veggies like red cabbage, and a homemade sauce means you can create a meal that’s lower in unhealthy fats, sodium, and additives often found in restaurant or takeout versions.
  • Meal prepping allows you to portion your meals according to your dietary needs and goals. By making these egg rolls at home, you can ensure that each roll contains the right balance of protein, fiber, and nutrients, helping you maintain portion control and stay on track with your health goals.
  • Dining out or ordering takeout can quickly add up, especially if you do it regularly. Preparing Air Fryer Beef Egg Rolls at home is significantly more budget-friendly. You can buy ingredients in bulk, take advantage of sales and discounts, and stretch your budget while still enjoying delicious, homemade lunch meal prep.
  • When you meal prep, you have the freedom to customize the flavors to your liking. Adjust the level of sweetness or spiciness in the sauce, add extra veggies, or experiment with different dipping sauces. This personalization ensures that your meals are not only healthy but also tailored to your taste preferences.
  • By cooking at home, you can track the nutritional content of your meals more accurately. You’ll know exactly what goes into your Air Fryer Beef Egg Rolls, making it easier to meet your dietary goals, whether you’re counting calories, watching your macros, or focusing on specific nutrients.

round plate with egg rolls, sliced green cucumber, and shredded red cabbage

Simple Air Fryer Egg Roll Ingredients

  • Lean Ground Beef: Opt for lean ground beef to keep your meal on the healthier side. It’s packed with protein and essential nutrients while being lower in fat.
  • Egg Roll Wrappers: These thin, light wrappers are the perfect vessel for our flavorful filling. They become wonderfully crispy in the Air Fryer.
  • Red Cabbage: Red cabbage not only adds a beautiful burst of color but also provides a wealth of vitamins, minerals, and antioxidants. It’s a crunchy and nutritious addition to our egg rolls.
  • White Onions: Onions add a delightful sweetness and depth of flavor to our filling when sautéed. They’re also rich in vitamins and fiber.
  • Sauce (Soy Sauce, Honey, Garlic Powder): The sauce is where the magic happens! Soy sauce adds savory depth, honey brings sweetness, and garlic powder provides that irresistible aroma. Plus, it’s a healthier alternative to store-bought sauces, which may contain added sugars and preservatives.

glass lunch meal prep containers with egg rolls, sliced green cucumber, and shredded red cabbage

How to Meal Prep Air Fryer Egg Rolls

  1. Sauté Onions: Start by heating a bit of oil in a pan over medium-high heat. Add finely chopped white onions and sauté until they soften and become translucent.
  2. Cook the Lean Ground Beef: Next, add the lean ground beef to the pan with the sautéed onions. Cook it for about 5 to 6 minutes until it’s fully cooked and nicely browned.
  3. Add Red Cabbage and Sauce: Now, toss in the red cabbage and pour in the delightful sauce mixture of soy sauce, honey, and garlic powder. Stir it all around until the cabbage softens and absorbs those fantastic flavors. Once done, remove the beef and cabbage mixture from the pan and let it cool to room temperature.
  4. Assemble the Egg Rolls: Lay each egg roll wrapper on a flat surface, resembling a diamond shape. Load approximately 2 to 3 tablespoons of your beef and cabbage filling into the center of each wrapper. Roll the corner closest to you over the filling and gently tuck it under the filling. Fold over the left and right sides towards the middle. Brush a bit of water on the top corner to help seal the roll, then roll it up towards the top corner.
  5. Air Fry until Golden Brown and Delicious: Place your beautifully assembled egg rolls in the Air Fryer basket. Give them a light spray with cooking spray to help them achieve that golden crispiness. Cook for 8 minutes at 400°F, or until they turn delightfully crispy and golden brown.
  6. Serve them up!: Pair your Air Fryer Beef Egg Rolls with fresh veggies and some extra cabbage for a healthy crunch. Don’t forget your choice of dressing for dipping!

Reference the recipe card below for detailed instructions.

glass lunch meal prep containers with egg rolls, sliced green cucumber, and shredded red cabbage

Meal Prep Tips for Air Fryer Egg Rolls

  • To Serve: If you want to store the egg rolls for an extended period, you can freeze them for future lunch meal prep. To do this, arrange the cooked and cooled egg rolls in a single layer on a baking sheet, ensuring they’re not touching each other. Once frozen individually, transfer them to a freezer-safe bag or container. This prevents them from sticking together during freezing.
  • To Reheat: When reheating refrigerated or frozen egg rolls, use the Air Fryer or oven for best results. Avoid microwaving them, as it can make them soggy. Reheat them until they are hot and crispy, which may take a few minutes in the Air Fryer or a moderate oven.
  • Ingredient Swaps: To make these egg rolls vegan or vegetarian, use plant-based protein sources like tofu or tempeh instead of meat and replace honey with maple syrup or agave nectar in the sauce. Add a kick of spice by incorporating chopped chili peppers, chili flakes, or hot sauce into the filling or dipping sauce. Elevate the flavor by adding fresh herbs like cilantro, basil, or mint to the filling for a burst of freshness.

round plate with egg rolls, cucumber, and cabbage

Air Fryer Beef Egg Rolls

Delight in homemade Air Fryer Beef Egg Rolls with lean ground beef, red cabbage, and a savory-sweet sauce for a crispy, healthy, and budget-friendly meal prep.
No ratings yet
Prep Time 5 minutes
Cook Time 20 minutes
Course Appetizer, dinner, lunch, Main Course
Cuisine American, Asian
Servings 2
Calories 407 kcal

Equipment

  • Air Fryer
  • saute pan
  • spatula

Ingredients
  

Beef Egg Roll

  • 8 oz lean ground beef
  • 6 egg roll wrappers
  • 1 cup red cabbage (shredded)
  • 1/4 cup white onions (diced)
  • 1 tablespoon olive oil

Sauce

  • 2 tablespoon soy sauce
  • 1 tablespoon honey
  • 1/4 teaspoon garlic powder

Sides

  • 1/2 cup red cabbage (sliced)
  • 1/2 cup cucumbers (sliced)

Instructions
 

  • Add oil to a pan on medium high heat and saute the onions until they soften.
  • Next, add the ground beef and cook it for about 5 to 6 minutes until it is fully cooked. Then, add the red cabbage and pour in the sauce. Stir it all around until the cabbage softens. Remove the meat from the pan and let it cool to room temperature.
  • Then, lay each egg roll wrapper on a flat service like a diamond and load about 2 to 3 tablespoons of beef mixture into the middle of teh wrapper. roll the corner closest to you over the filling and gently tuck it under the filling. Fold over the left and right sides towards the middle. Brush water at the top of the corner and roll the egg roll towards the top corner.
  • Spray the egg rolls with cooking spray and place them in the Air Fryer basket. Cook for 8 minutes at 400F until they are crispy, golden brown. Enjoy them with fresh veggies and cabbage with your chocie of dressing.

Notes

Nutrition information provided is an estimate. It will vary based on cooking method and specific ingredients used. Please consult with your healthcare provider for specific dietary needs. To gain a better understanding, explore our nutrition disclaimer here. 

Nutrition

Calories: 407kcalCarbohydrates: 40gProtein: 31gFat: 13gSaturated Fat: 4gPolyunsaturated Fat: 1gMonounsaturated Fat: 8gTrans Fat: 0.4gCholesterol: 74mgSodium: 1324mgPotassium: 709mgFiber: 3gSugar: 13gVitamin A: 775IUVitamin C: 41mgCalcium: 72mgIron: 5mg

Similar Recipes

peanut chicken

Peanut Chicken and Celery Stir Fry

beef and chinese broccoli

Garlicky Beef Stir Fry

tofu stir fry

Tofu and Veggie Stir Fry

You Might Also Like

Frequently Asked Questions

What other protein options can I use instead of beef?

You can use ground chicken, pork, shrimp, or even tofu for a protein variation.


What other vegetables can I add to the filling for extra nutrition?

Feel free to add vegetables like shredded carrots, bell peppers, or mushrooms for added nutrition and flavor.


What type of egg roll wrappers should I use, and where can I find them?

Look for egg roll wrappers in the refrigerated section of your local grocery store or at Asian supermarkets. They are usually labeled as “spring roll” or “egg roll” wrappers.

Posted on 2 Comments

Baked French Toast Sausage Roll-Ups

round white plate with sausage rolled up in french toast

Introducing a breakfast delight that combines the best of both worlds – Baked French Toast Sausage Roll-Ups! This delectable recipe marries the comforting flavors of French toast with the savory goodness of breakfast sausages, creating the ultimate morning meal prep masterpiece. Whether you’re seeking an easy breakfast, a convenient meal prep option, or a flavor-packed twist on a classic favorite, these roll-ups have you covered. With simple steps and a burst of wholesome ingredients like wheat bread, breakfast sausage links, eggs, milk, honey, and cinnamon, this recipe is perfect for anyone looking to whip up easy breakfasts or meal prep breakfasts. Get ready to elevate your morning routine with these mouthwatering roll-ups that are as satisfying as they are scrumptious!

This post may contain affiliate links. Please see our privacy policy for details.

Calories: 374kcal | Carbohydrates: 43g | Protein: 25g | Fat: 12g | Saturated Fat: 3g | Polyunsaturated Fat: 1g | Monounsaturated Fat: 1g | Trans Fat: 0.01g | Cholesterol: 89mg | Sodium: 889mg | Potassium: 239mg | Fiber: 3g | Sugar: 22g | Vitamin A: 220IU | Vitamin C: 0.1mg | Calcium: 160mg | Iron: 2mg

round white plate with sausage rolled up in french toast

Why This Recipe is Great for Meal Prep

  • These roll-ups are the epitome of meal prep convenience. With just a little effort, you can have a batch of delicious breakfasts ready to go for the week. Say goodbye to those hectic mornings when you’re rushing to prepare breakfast – simply grab a roll-up, reheat, and enjoy.
  • Meal prep is all about maintaining a balanced diet, and these roll-ups offer a great balance of protein from the sausage, fiber from the whole wheat bread, and a touch of natural sweetness from honey. It’s a breakfast that provides essential nutrients to kickstart your day.
  • One of the key benefits of meal prep is portion control. By making these roll-ups in advance, you ensure that you’re eating the right amount, which can be especially helpful for those looking to manage their calorie intake or maintain a healthy weight.
  • You can personalize these roll-ups to suit your taste. Whether you prefer pork, turkey, or chicken sausage, or if you want to experiment with different types of bread, milk, or even add-ins like cheese or veggies, this recipe is highly adaptable. Meal prep doesn’t mean sacrificing flavor or variety!
  • Starting your day with a warm, satisfying breakfast is a great way to boost your mood and energy levels. These Baked French Toast Sausage Roll-Ups offer a delightful and comforting breakfast experience, making it easier to look forward to the day ahead.

The PrepYoSelf Newsletter

Let’s Gather the Ingredients:

  • Wheat Bread: We’re opting for wheat bread, a healthier alternative that still provides that wonderful crunch and flavor when toasted. Wheat bread is rich in fiber, helping keep you full and satisfied throughout your busy morning.
  • Breakfast Sausage Links: Choose your favorite breakfast sausage links for that savory punch. You can go for classic pork or explore turkey or chicken options.Sausage links are a great source of protein, essential for fueling your day.
  • Egg: Eggs are a breakfast staple, providing protein and a creamy texture to our French toast mixture.4. Milk: Milk adds creaminess to the egg mixture, creating that perfect blend of flavors and textures. Opt for your preferred type of milk, whether it’s whole, skim, almond, or any other dairy-free alternative.
  • Honey: Honey lends a touch of natural sweetness, complementing the savory sausage and cinnamon. It’s a healthier alternative to refined sugar and provides a boost of energy.
  • Cinnamon: Cinnamon adds warmth and a hint of spice to our French toast mixture. This aromatic spice also boasts potential health benefits, such as anti-inflammatory properties.

How to Make French Toast Sausage Rollups:

  1. First things first, preheat your oven to a toasty 400°F (200°C). This will ensure that our roll-ups bake up to golden perfection.
  2. In a mixing bowl, whisk together the egg, milk, honey, and a dash of cinnamon. This heavenly mixture is the secret to our delectable French toast coating.
  3. Now, take each slice of wheat bread and slice it diagonally to create two triangles. Efficient and visually appealing, right?
  4. Dip each triangle into our egg-milk-honey-cinnamon concoction. Make sure they’re nicely coated, soaking up all that deliciousness.
  5. Place a breakfast sausage link at one corner of each triangle and roll it up to the opposite corner. This step is where the magic happens!
  6. Grease a baking dish and place your sausage roll-ups inside. Pop them in the preheated oven for 12-15 minutes, or until they turn into glorious golden brown bundles of joy.

Reference the recipe card below for detailed instructions.

round white plate with sausage rolled up in french toast

Ingredient Swaps

  • Bread: While the recipe calls for wheat bread, you can experiment with different types of bread, such as whole grain, sourdough, or even gluten-free bread if you have dietary restrictions.
  • Sausage: Get creative with your sausage choices! You can use pork, turkey, chicken, or even plant-based sausages for a vegetarian or vegan twist. You can also try different flavors like apple-infused sausages for a sweet touch.
  • Egg: If you have an egg allergy or are following a vegan diet, you can substitute the eggs with a vegan egg replacer, silken tofu blended to a creamy consistency, or unsweetened applesauce. Use about 1/4 cup of your chosen substitute for each egg in the recipe.
  • Milk: Any milk variety can be used to replace regular milk in this recipe. Almond milk, soy milk, oat milk, or any other non-dairy milk can be used to suit your dietary preferences.
  • Honey: Feel free to swap honey with maple syrup, agave nectar, or a vegan-friendly sweetener like coconut nectar for a different flavor profile or to make the recipe vegan.
  • Add-Ins: Get creative by adding other ingredients to the roll-ups. Try adding shredded cheese, diced bell peppers, onions, or spinach for a savory kick. If you prefer a sweeter version, you can add fruit slices like bananas or berries.

Meal Prep Tips for Easy Breakfast French Toast Roll-Ups

  • Storage Tips: Allow your Baked French Toast Sausage Roll-Ups to cool down to room temperature before storing them. This prevents condensation inside the storage container, which can make the roll-ups soggy. You have a couple of options for storing. You can individually wrap each roll-up in plastic wrap or aluminum foil, or you can place them in an airtight container. Wrapping them individually is great for portion control and preventing them from sticking together.
  • Reheating Tips: If your roll-ups are in the refrigerator, you can simply microwave them for 30-60 seconds, depending on your microwave’s power. This quick reheating method retains their texture and flavor. When reheating from frozen, it’s best to thaw them in the refrigerator overnight. This will prevent them from getting too soggy when reheated. Once thawed, microwave for 60-90 seconds, or until heated through.

meal prep containers with sausage rolled up in french toast

round plate with sausage wrapped in french toast

Baked French Toast Sausage Roll Ups

Elevate your breakfast game with Baked French Toast Sausage Roll-Ups, a delicious twist on a classic that's perfect for meal prep.
No ratings yet
Prep Time 5 minutes
Cook Time 15 minutes
Course Breakfast
Cuisine American
Servings 2
Calories 374 kcal

Equipment

  • knife
  • cutting board
  • mixing bowl
  • baking dish
  • oven

Ingredients
  

  • 3 slices wheat bread
  • 6 each small sausage links (fully cooked, 0.66 oz each)
  • 1 large egg
  • 1/2 cup milk
  • 2 tbsp honey
  • 1/4 teaspoon cinnamon

Instructions
 

  • Pre-heat the oven to 400F. In a mixing bowl, whisk together the egg, milk, honey, and cinnamon
  • Slice each bread slice diagnolly and dip each triangle in the egg milk mixture. Place each sausage at the corner of each triangle and roll it up to the other corner of the triangle.
  • Place each sausage roll up in a greased baking dish and bake for 12-15 minutes until the bread is toasted and golden brown.

Notes

Nutrition information provided is an estimate. It will vary based on cooking method and specific ingredients used. Please consult with your healthcare provider for specific dietary needs. To gain a better understanding, explore our nutrition disclaimer here. 

Nutrition

Calories: 374kcalCarbohydrates: 43gProtein: 25gFat: 12gSaturated Fat: 3gPolyunsaturated Fat: 1gMonounsaturated Fat: 1gTrans Fat: 0.01gCholesterol: 89mgSodium: 889mgPotassium: 239mgFiber: 3gSugar: 22gVitamin A: 220IUVitamin C: 0.1mgCalcium: 160mgIron: 2mg

Similar Recipes

baked oatmeal topped with fruit

Oven Baked Oats with Apricots and Berries

cranberry oat muffins

Cranberry Oatmeal Muffin Bars

ricotta apple

Oven Baked Apple with Ricotta and Walnuts

You Might Also Like

Trader Joe’s Light Roast 100% Arabica Ground Coffee

Amazon Brand – Happy Belly Roasted and Salted Peanuts

Trader Joe’s Speculoos Cookie Butter

Frequently Asked Questions

Can I freeze these roll-ups?

Absolutely! These roll-ups freeze well. Just wrap them individually and store them in an airtight container or freezer bag for up to 2-3 months.


Can I make a sweet version of these roll-ups?

Yes, you can! Add a sprinkle of powdered sugar or a drizzle of maple syrup for a sweeter twist. You can also experiment with sweet sausages or different spices.


Can I customize the spices in the egg mixture?

Absolutely! Experiment with different spices like nutmeg, vanilla extract, or pumpkin spice to customize the flavor of your roll-ups.