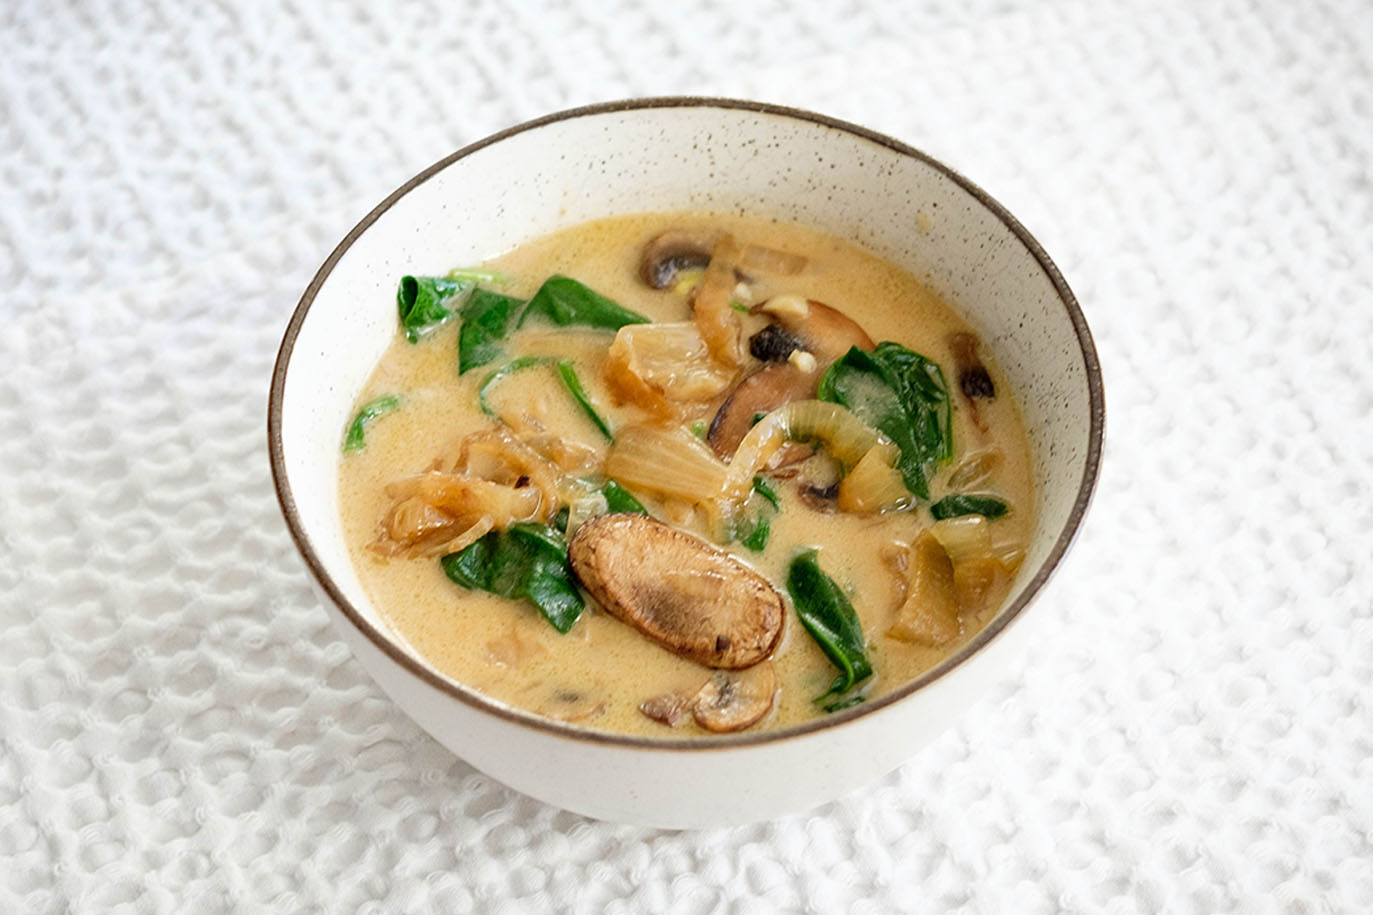
Posted on Leave a comment

Air Fryer Cajun Salmon Bites

cajun salmon bites and creamed corn
Looking for a quick, flavorful meal that feels gourmet without the hassle? These Cajun Salmon Bites with Creamed Corn are a game-changer for busy individuals who crave bold, mouthwatering flavors in a fraction of the time. With tender, flaky salmon coated in a sweet and spicy glaze and paired with creamy, comforting corn, this recipe hits all the right notes. Whether you’re prepping meals for the week or whipping up a dinner that impresses without stress, these salmon bites are here to make your life deliciously easy.

This post may contain affiliate links. Please see our privacy policy for details.

Calories: 243kcal | Carbohydrates: 10g | Protein: 28g | Fat: 10g | Saturated Fat: 2g | Polyunsaturated Fat: 4g | Monounsaturated Fat: 3g | Cholesterol: 78mg | Sodium: 355mg | Potassium: 746mg | Fiber: 1g | Sugar: 9g | Vitamin A: 1042IU | Vitamin C: 0.1mg | Calcium: 22mg | Iron: 2mg

cajun salmon bites and creamed corn

Why This Recipe Is Perfect for Busy Individuals

  • Quick Cook Time: The salmon bites cook in just 8–10 minutes in the air fryer, making it a breeze for those with tight schedules.
  • Minimal Ingredients: With just five simple ingredients, there’s no need for an overwhelming grocery list.
  • Easy Prep: Cutting the salmon into bite-sized pieces and tossing them in the seasoning takes under 10 minutes.
  • Air Fryer Convenience: No need to watch a stove or oven—set the air fryer and let it do the work.
  • Versatile Sides: Pair the bites with whatever you have on hand—creamed corn, rice, or even a salad—for a customizable and stress-free meal.
  • Packed with Flavor: The Cajun seasoning and honey create a sweet-and-spicy glaze that feels gourmet but takes almost no effort.
  • Perfect for Meal Prep: Make a big batch and portion into containers for lunches or dinners throughout the week. Reheats like a dream in minutes!

The PrepYoSelf Newsletter

The Ingredients: Why They Pack a Flavor Punch

  • Salmon: Salmon is naturally rich and buttery, with a mild flavor that pairs perfectly with bold seasonings. Its tender, flaky texture makes it an ideal base for a dish that balances spice, sweetness, and savory notes.
  • Cajun Seasoning: This blend of spices—typically a mix of paprika, garlic powder, onion powder, cayenne pepper, and herbs—brings the heat and an explosion of bold, smoky flavors. It transforms simple salmon into a dish that tastes like it came straight from the heart of Louisiana.
  • Honey: Honey adds a touch of natural sweetness that balances the spiciness of the Cajun seasoning. It also caramelizes during cooking, creating a subtle glaze that enhances the salmon’s savory flavor while giving the bites a beautiful golden-brown color.
  • Olive Oil: Olive oil acts as a binding agent, helping the seasoning and honey stick to the salmon evenly. It also ensures the bites stay moist and develop a slightly crispy exterior when cooked in the air fryer. Its mild, fruity flavor complements the dish without overpowering it.
  • Creamed Corn: This classic comfort food side adds a creamy, slightly sweet contrast to the spicy Cajun salmon. Its smooth texture and subtle sweetness make it the perfect partner, balancing the dish for a well-rounded flavor experience.
cajun salmon bites and creamed corn

Easy Recipe Steps for Air Fryer Salmon Bites

  1. Prep the Salmon: Use a sharp knife to cut the salmon into 1-inch cubes. Pat the pieces dry with a paper towel to remove excess moisture—this helps the seasoning stick better and ensures a crispy finish.
  2. Season the Salmon: Place the salmon pieces in a mixing bowl. Sprinkle the Cajun seasoning evenly over the salmon. Drizzle in the honey and olive oil. Use a spoon or clean hands to toss the salmon pieces gently, ensuring each piece is fully coated with the seasoning mixture.
  3. Prepare the Air Fryer: Lightly spray or brush the air fryer basket with oil to prevent sticking. Arrange the salmon bites in a single layer, leaving a little space between each piece for even cooking.
  4. Cook the Salmon: Set the air fryer to 400°F and cook for 8–10 minutes. Check at the 8-minute mark to ensure the salmon is golden brown and flakes easily with a fork. If needed, cook for an additional 1–2 minutes.
  5. Pair & Serve: Serve the salmon bites hot with creamed corn or your choice of sides, such as rice, roasted vegetables, or a fresh salad.

Reference the recipe card below for detailed instructions.

cajun salmon bites and creamed corn

Meal Prep Pairing Tips

  • Hearty Grains: Pair the salmon bites with fluffy white or brown rice for a classic, satisfying base. For a nutty, protein-packed option, quinoa works beautifully.
  • Fresh & Light: Add a crisp side salad drizzled with a tangy vinaigrette for a refreshing contrast. Steamed or roasted vegetables such as broccoli, asparagus, or green beans also make excellent choices.
  • Southern Flair: Embrace a Southern-inspired touch by serving the salmon with cheesy grits or mashed sweet potatoes. Cornbread adds a rustic and comforting element to the meal.
  • Low-Carb Options: For a lighter option, cauliflower rice or mashed cauliflower is a great substitute. Zucchini noodles or sautéed spinach also pair wonderfully with the bold flavors of the Cajun salmon.
cajun salmon bites and creamed corn

Cajun Salmon Bites with Creamed Corn

These spicy cajun salmon bites are a time-saving solution for anyone balancing a busy lifestyle but still craving something wholesome and delicious. Try it out—you’ll be hooked!
No ratings yet
Prep Time 5 minutes
Cook Time 10 minutes
Course Main Course
Cuisine Cajun
Servings 2
Calories 243 kcal

Equipment

  • knife
  • cutting board
  • mixing bowl
  • Air Fryer

Ingredients
  

  • 10 oz salmon (fresh and skinless)
  • 2 teaspoon cajun seasoning
  • 1 tablespoon honey
  • 1 tablesoon olive oil
  • 1/4 teaspoon salt
  • 1.5 cup creamed corn (optional, or choose your favorite side)

Instructions
 

  • Prep the Salmon: Cut the salmon into 1-inch cubes and pat them dry with a paper towel.
  • Season the Salmon: In a mixing bowl, sprinkle the salmon with Cajun seasoning. Add the honey and olive oil, then toss until each piece is well coated.
  • Cook in the Air Fryer: Line the salmon bites in an air fryer basket and cook at 400°F for 8–10 minutes until golden brown and cooked through.
  • Pair & Serve: Enjoy with creamed corn or your choice of sides, such as rice, roasted veggies, or a salad.

Notes

Nutrition information provided is an estimate. It will vary based on cooking method and specific ingredients used. Please consult with your healthcare provider for specific dietary needs. To gain a better understanding, explore our nutrition disclaimer here. 

Nutrition

Calories: 243kcalCarbohydrates: 10gProtein: 28gFat: 10gSaturated Fat: 2gPolyunsaturated Fat: 4gMonounsaturated Fat: 3gCholesterol: 78mgSodium: 355mgPotassium: 746mgFiber: 1gSugar: 9gVitamin A: 1042IUVitamin C: 0.1mgCalcium: 22mgIron: 2mg

Similar Recipes

salmon beet salad

Citrus Ginger Salmon with Roasted Beets

salmon and watermelon salad

Grilled Salmon with Watermelon Salad

salmon salad

Salmon Stuffed Avocado Salad

You Might Also Like

Frequently Asked Questions

Can I use skin-on salmon?

Yes! If your salmon has skin, remove it before cutting into cubes, or cook with the skin and remove it after cooking if preferred.


Can I substitute the honey?

Yes, you can use maple syrup or agave nectar for a similar sweetness. For a sugar-free option, try monk fruit syrup or omit it altogether.


What’s a good way to add extra vegetables to this meal?

Toss chopped bell peppers, zucchini, or asparagus in the air fryer alongside the salmon, or serve with a side of steamed or roasted veggies.

Posted on Leave a comment

Cheesy Smashed Brussels Sprouts

cheesy smashed brussel sprouts

Whether you’re hosting a holiday dinner or prepping your meals for the week, these cheesy smashed brussels sprouts are a must-try for their versatility, flavor, and ease. This Cheesy Smashed Brussels Sprouts recipe is the perfect balance of crispy, cheesy, and savory. These little flavor bombs make for a delightful side dish or snack that even brussels sprouts skeptics will adore. With a simple ingredient list and straightforward steps, you’ll be whipping up a restaurant-quality dish in no time!

This post may contain affiliate links. Please see our privacy policy for details.

Calories: 154kcal | Carbohydrates: 12g | Protein: 6g | Fat: 10g | Saturated Fat: 3g | Polyunsaturated Fat: 1g | Monounsaturated Fat: 6g | Cholesterol: 11mg | Sodium: 400mg | Potassium: 344mg | Fiber: 3g | Sugar: 4g | Vitamin A: 736IU | Vitamin C: 72mg | Calcium: 107mg | Iron: 1mg

cheesy smashed brussel sprouts

Why You’ll Start Loving Brussels Sprouts

  • Bursting with Flavor: The combination of crispy roasted brussels sprouts, savory cheese, and the tangy sweetness of balsamic glaze creates a delicious flavor profile that feels both festive and comforting.
  • Crowd-Pleasing Appeal: Even picky eaters who claim they don’t like brussels sprouts might change their minds once they taste the crispy edges and cheesy topping. It’s a side dish that can convert skeptics into fans.
  • Holiday-Worthy Presentation: The golden brown sprouts topped with melted cheese look stunning on a holiday table. Plus, they pair beautifully with classic holiday proteins like roast turkey, ham, or beef tenderloin.
  • Simple Yet Sophisticated: This recipe uses minimal ingredients but delivers a restaurant-quality dish. It’s easy to make yet has a refined look and flavor, making it perfect for impressing guests or upgrading a weeknight meal.
  • Perfect for Meal Prep: Brussels sprouts hold up well when reheated, making this recipe ideal for weekly meal prep. Just store them in an airtight container, and they’ll stay flavorful and satisfying for days.
  • Versatile Pairing Options: Whether you’re serving them alongside a holiday feast or pairing them with grilled chicken, roasted salmon, or a veggie-packed grain bowl for meal prep, these sprouts complement a wide range of dishes.
  • Customizable for Any Occasion: Swap out mozzarella for Parmesan, Gruyère, or even cheddar to tailor the flavors to your liking. You can also sprinkle red pepper flakes for a spicy kick or drizzle extra balsamic glaze for added sweetness—perfect for different tastes and occasions!

The PrepYoSelf Newsletter

Simple Ingredients You’ll Need

  • Brussels Sprouts: These little green veggies are the star of the show! When roasted, their natural sugars caramelize, creating a nutty, slightly sweet flavor. Their hearty texture holds up well to boiling, smashing, and roasting, making them the perfect base for this recipe.
  • Olive Oil: Olive oil enhances the roasting process by helping the brussels sprouts crisp up in the oven. Its mild, fruity flavor complements the natural sweetness of the sprouts and allows the other seasonings to stick to their surface.
  • Balsamic Glaze: This tangy-sweet ingredient adds a pop of bold flavor, balancing the earthiness of the sprouts. The glaze also caramelizes during roasting, creating a glossy, slightly sticky layer that amplifies the dish’s appeal.
  • Salt: A small but mighty ingredient, salt enhances all the flavors in the dish, drawing out the natural sweetness of the brussels sprouts and balancing the tang of the balsamic glaze.
  • Garlic Powder: Garlic powder provides a subtle, savory depth that pairs beautifully with both the roasted sprouts and the cheese. Its mild, consistent flavor ensures every bite is seasoned perfectly without overpowering the dish.
  • Pepper: Black pepper adds a hint of warmth and spice that balances the richness of the cheese and the sweetness of the balsamic glaze. It gives the dish a touch of complexity.
  • Shredded Mozzarella (or Parmesan Cheese): Cheese brings richness, creaminess, and a touch of indulgence. Mozzarella adds a melty, stretchy texture, while Parmesan offers a sharp, nutty flavor and creates crispy edges. Whichever you choose, the cheese elevates the sprouts to irresistible comfort food territory.

cheesy smashed brussel sprouts

How to Make Cheesy Smashed Brussels Sprouts

  1. Prep the Oven and Baking Sheet: Preheat your oven to 400°F (200°C). Line a large baking sheet with parchment paper to prevent sticking and make cleanup easier.
  2. Trim the Brussels Sprouts: Rinse the brussels sprouts under cool running water to remove any dirt. Use a small, sharp knife to cut off the stem ends (the hard, dry part at the bottom). Peel away any outer leaves that are damaged or discolored.
  3. Cook the Sprouts Until Tender: Bring a large pot of water to a boil. Carefully add the brussels sprouts and cook them for 8-10 minutes, or until they are tender when pierced with a fork. Be careful not to overcook, as they will soften further in the oven.
  4. Cool the Sprouts: Once tender, drain the brussels sprouts in a colander. To prevent them from continuing to cook and becoming mushy, run them under cold water or place them in a bowl of ice water for about 1 minute. Drain again and pat them completely dry with a clean kitchen towel or paper towels.
  5. Make the Seasoning: In a small bowl, mix together the olive oil, balsamic glaze, salt, garlic powder, and pepper. This will serve as a flavorful coating for the sprouts.
  6. Prepare the Brussels Sprouts for Roasting: Spread the brussels sprouts on the prepared baking sheet, leaving about 2 inches of space between each one to ensure even roasting.
  7. Smash the Sprouts: Using the bottom of a sturdy glass or jar, gently press down on each brussels sprout to flatten it slightly. Aim for a disc shape, about ½-inch thick, but don’t press too hard—you want them to stay intact.
  8. Season and Add Cheese: Brush the smashed sprouts generously with the olive oil mixture, coating both sides for maximum flavor. Sprinkle the shredded cheese evenly over the top of each sprout.
  9. Roast to Crispy Perfection: Place the baking sheet in the preheated oven and roast for 25-30 minutes, or until the edges of the brussels sprouts are golden brown, the cheese is bubbly, and everything looks deliciously crispy.
  10. Serve and Enjoy: Remove the baking sheet from the oven and let the sprouts cool slightly before serving. These are best enjoyed warm, as a side dish or snack.

Reference the recipe card below for detailed instructions.

cheesy smashed brussel sprouts

Meal Prep Tips

  • Smashing Tip: If the glass sticks while smashing, spray its bottom lightly with cooking spray.
  • Cheese Choice: Mozzarella gives a stretchy texture, while Parmesan adds a crispy, nutty flavor. Pick your favorite or mix both!
  • Reheating: Reheat leftovers in an air fryer or oven to restore their crispy texture.
  • Protein Pairings: Grilled or roasted chicken pairs wonderfully with the crispy, cheesy flavors of this dish. Baked or glazed pork tenderloin complements the sweetness of the balsamic glaze. Light proteins like salmon or shrimp add a fresh, buttery element that contrasts with the earthy brussels sprouts.
  • Sauces and Condiments: Add a drizzle of garlic aioli, pesto, or honey mustard dressing for an extra layer of flavor. A light drizzle of extra balsamic glaze after cooking can amplify the dish’s sweetness and tang.

cheesy smashed brussel sprouts

cheesy smashed brussel sprouts

Cheesy Smashed Brussels Sprouts

Make these ahead for the week! Store them in an airtight container and reheat in the oven or air fryer to revive their crispy texture. Pair with grilled chicken or a light salad for a complete meal.
No ratings yet
Prep Time 5 minutes
Cook Time 40 minutes
Course Appetizer, Side Dish
Cuisine American
Servings 4
Calories 154 kcal

Equipment

  • knife
  • cutting board
  • boiling pot
  • sheet pan
  • oven

Ingredients
  

  • 12 oz brussels sprouts
  • 2 tablespoons olive oil
  • 2 tablespoon balsamic glaze
  • 1/4 teaspoon salt
  • 1/4 teaspoon garlic powder
  • 1/4 teaspoon salt
  • 1/2 cup shredded mozzarella cheese

Instructions
 

  • Prep and Preheat: Preheat your oven to 400°F (200°C). Line a sheet pan with parchment paper for easy cleanup.
  • Trim the Brussels Sprouts: Trim off the stem ends of the brussels sprouts and remove any outer leaves that look discolored or wilted.
  • Boil to Tender Perfection: Bring a large pot of water to a boil and carefully add the brussels sprouts. Cook for 8-10 minutes until they are fork-tender.
  • Cool Them Down: Drain the brussels sprouts and quickly cool them by running them under cold water or plunging them into an ice bath. This halts the cooking process and keeps them from becoming mushy. Pat them dry with a paper towel to remove excess moisture.
  • Seasoning Magic: In a small bowl, whisk together the olive oil, balsamic glaze, salt, garlic powder, and pepper.
  • Smash and Brush: Place the brussels sprouts on the prepared sheet pan, leaving about 2 inches of space between each. Using the bottom of a glass jar, gently press each brussels sprout to flatten it slightly. Brush both sides of each sprout with the olive oil mixture for that irresistible flavor boost.
  • Cheesy Goodness: Sprinkle the smashed brussels sprouts generously with shredded mozzarella or Parmesan cheese.
  • Roast to Perfection: Roast in the preheated oven for 25-30 minutes or until the edges are golden brown, crispy, and the cheese is bubbly and slightly browned.
  • Serve and Savor: Remove from the oven and let them cool for a minute before serving. These crispy, cheesy delights are best enjoyed warm!

Notes

Nutrition information provided is an estimate. It will vary based on cooking method and specific ingredients used. Please consult with your healthcare provider for specific dietary needs. To gain a better understanding, explore our nutrition disclaimer here. 

Nutrition

Calories: 154kcalCarbohydrates: 12gProtein: 6gFat: 10gSaturated Fat: 3gPolyunsaturated Fat: 1gMonounsaturated Fat: 6gCholesterol: 11mgSodium: 400mgPotassium: 344mgFiber: 3gSugar: 4gVitamin A: 736IUVitamin C: 72mgCalcium: 107mgIron: 1mg

Similar Recipes

pepper sandwich

Roasted Red Pepper and Cheese Sandwich

bean and corn taco

Vegetarian Black Bean and Corn Soft Tacos

eggplant

Grilled Eggplant Steaks with Marinara Sauce

You Might Also Like

Frequently Asked Questions

Can I use frozen brussels sprouts instead of fresh ones?

Yes, you can use frozen brussels sprouts in a pinch! However, fresh brussels sprouts will give you the best texture and flavor. If using frozen, make sure to thaw and pat them dry before boiling or roasting to avoid excess moisture.


Can I add other seasonings or ingredients to this recipe?

Absolutely! This recipe is versatile and allows you to get creative with seasonings. Try adding red pepper flakes for a bit of heat, smoked paprika for a smoky touch, or even chopped fresh herbs like rosemary or thyme for added aroma.


 How do I know when the brussels sprouts are done roasting?

They’re ready when they are golden brown and crispy on the edges, and the cheese is melted and bubbly. If you notice any burnt spots, reduce the oven temperature slightly for the next batch.

Posted on Leave a comment

Cranberry and Pear Chicken Salad with Arugula

cranberry and pear chicken salad with arugula and vinaigrette

Winter is the perfect time to cozy up with vibrant and hearty meals that are as nutritious as they are flavorful. This Cranberry and Pear Chicken Salad with Arugula is the ultimate winter-inspired dish that brings together the tangy taste of fresh cranberries, the sweetness of juicy pears, and the crunch of pecans. It’s an easy recipe for meal prep and versatile enough to wow your holiday gathering or potluck.

This post may contain affiliate links. Please see our privacy policy for details.

Calories: 540kcal | Carbohydrates: 10g | Protein: 36g | Fat: 41g | Saturated Fat: 6g | Polyunsaturated Fat: 18g | Monounsaturated Fat: 15g | Trans Fat: 0.1g | Cholesterol: 107mg | Sodium: 1733mg | Potassium: 612mg | Fiber: 4g | Sugar: 4g | Vitamin A: 1008IU | Vitamin C: 11mg | Calcium: 103mg | Iron: 2mg

cranberry and pear chicken salad with arugula and vinaigrette

Why It’s Perfect for Winter & Meal Prep

  • Seasonal Ingredients: Fresh cranberries and pears are at their peak during the winter months, providing a festive touch and a burst of seasonal flavor.
  • Nutritious & Balanced: Packed with lean protein, healthy fats from pecans, and fiber-rich arugula and fruit, this salad is a well-rounded option to keep your energy up during chilly days.
  • Meal Prep Hero: This recipe stays fresh for up to 3-4 days in the fridge, making it a convenient, grab-and-go option for busy weekdays. Store the chicken salad and arugula separately for maximum freshness.
  • Holiday-Ready: The colorful mix of cranberries, pears, and pecans gives this dish a festive appeal, making it perfect for potlucks, family dinners, or holiday parties.
  • Customizable: Swap out the pecans for walnuts or almonds, add dried cranberries for extra sweetness, or use a different leafy green if arugula isn’t your style.

The PrepYoSelf Newsletter

Why These Ingredients Work Together Perfectly

  • Shredded Rotisserie Chicken Breast: The chicken is lean, tender, and subtly flavored, making it an ideal protein base that soaks up the flavors of the tangy dressing and sweet fruit. Rotisserie chicken adds convenience and richness, perfect for a quick yet hearty salad.
  • Fresh Cranberries (Chopped): Cranberries bring a tart, slightly bitter edge that cuts through the richness of the chicken and mayonnaise. Their bright flavor and vibrant red color add a festive and seasonal touch, perfect for winter dishes.
  • Pear (Diced): The pear provides natural sweetness and juiciness, balancing the tart cranberries and savory chicken. Its soft texture contrasts beautifully with the crunch of the pecans and arugula.
  • Red Onion (Diced): Red onion adds a pop of sharpness and a mild bite, enhancing the salad’s overall depth of flavor. Its vibrant color also contributes to the visual appeal of the dish.
  • Pecans (Chopped): Pecans add a buttery, nutty crunch that complements the soft texture of the chicken and pear. They also provide healthy fats, making the salad more satisfying and nutritious.
  • Mayonnaise: Acting as a creamy binder, the mayo helps all the ingredients meld together. Its richness balances the tartness of the cranberries and the sharpness of the mustard and onion.
  • Dijon Mustard: Dijon adds a subtle tangy heat and a slightly sharp flavor that enhances the dish’s complexity without overpowering it. It pairs well with the cranberries and mayonnaise for a balanced dressing.
  • Garlic Powder: A touch of garlic powder adds depth and a savory note, tying together the sweet and tangy elements of the dish.
  • Arugula Salad: Arugula’s peppery, slightly bitter flavor balances the sweetness of the pear and cranberries while adding freshness and a vibrant green color to the plate.
  • Vinaigrette (Optional): A light drizzle of vinaigrette enhances the arugula’s flavor and adds an extra layer of acidity, which complements the creaminess of the chicken salad.

cranberry and pear chicken salad with arugula and vinaigrette

Basic Steps to Meal Prep Chicken Salad

  1. Prep Your Ingredients: Use a sharp knife to chop the fresh cranberries into small pieces, dice the pear into bite-sized cubes, and finely dice the red onion. Roughly chop the pecans for added crunch.
  2. Combine the Salad Base: In a large mixing bowl, place the shredded chicken, cranberries, pear, red onion, and pecans.
  3. Make the Dressing: Add the mayonnaise, Dijon mustard, garlic powder, and salt directly into the bowl. Use a large spoon or spatula to mix everything until all the ingredients are evenly coated.
  4. Assemble the Salad: Lay the arugula on a plate or in a meal prep container. Top it with a generous scoop of the chicken salad. For extra flavor, drizzle with vinaigrette just before eating

Reference the recipe card below for detailed instructions.

cranberry and pear chicken salad with arugula and vinaigrette

Meal Prep Tips for Chicken Salad

  • Store Separately: To keep everything fresh, store the chicken salad and arugula in separate containers. This prevents the arugula from wilting due to the moisture in the chicken salad. Add the vinaigrette just before serving.
  • Keep Nuts Crunchy: If you like extra crunch, store pecans separately and add them to the salad just before eating.
  • Use up your leftover ingredients in these other recipes
  • Cranberries Alternative: Dried cranberries can be used in place of fresh for a sweeter flavor. Adjust the amount since they are more concentrated in flavor.
  • Pear Substitution: Swap pears for apples or even mandarin oranges for a sweet, juicy twist.
  • Nut Variations: Almonds or walnuts can replace pecans. For nut-free options, use sunflower or pumpkin seeds.
  • Greens Swap: If arugula isn’t your favorite, try spinach, mixed greens, or kale for a different base.
  • Bread or Crackers: Serve the chicken salad with whole-grain crackers or as a filling in a sandwich or wrap for a heartier meal.
  • Soup Combo: Pair it with a warm winter soup, such as butternut squash or tomato basil, for a comforting and balanced lunch.

cranberry and pear chicken salad with arugula and vinaigrette

cranberry salad

Cranberry and Pear Chicken Salad

This Cranberry and Pear Chicken Salad with Arugula is an effortless way to add a touch of holiday magic to your winter meal rotation.
No ratings yet
Prep Time 10 minutes
Course lunch
Cuisine American
Servings 2
Calories 540 kcal

Equipment

  • knife
  • cutting board
  • mixing bowl

Ingredients
  

  • 8 oz shredded rotisserie chicken breast
  • 1/2 cup fresh cranberries (chopped)
  • 1 each pear (diced)
  • 1/4 cup red onions (diced)
  • 1 oz pecans (chopped)
  • 2 tbsp mayonnaise
  • 1 tbsp dijon mustard
  • 1/4 tsp garlic powder
  • 1 tsp salt
  • 4 cups arugula salad
  • 4 tbsp vinaigrette (optional)

Instructions
 

  • Prep Your Ingredients: Chop the fresh cranberries, dice the pear and red onion, and roughly chop the pecans for added crunch.
  • Mix the Salad Base: In a large mixing bowl, combine the shredded chicken, cranberries, pear, red onion, and pecans.
  • Make the Dressing: Add the mayonnaise, Dijon mustard, garlic powder, and salt to the bowl. Mix until everything is evenly coated.
  • Assemble: For each serving, top a bed of arugula with a generous scoop of the chicken salad. If you like, drizzle with your favorite vinaigrette to enhance the flavors.
  • Note: If you don't have rotisserie chicken, boil 10 oz of chicken breast for about 20-25 minutes until it cooks to an internal temperature of 165F. Use a fork to shred with a fork and let it cool before mixing it with the rest of the ingredients.

Notes

Nutrition information provided is an estimate. It will vary based on cooking method and specific ingredients used. Please consult with your healthcare provider for specific dietary needs. To gain a better understanding, explore our nutrition disclaimer here. 

Nutrition

Calories: 540kcalCarbohydrates: 10gProtein: 36gFat: 41gSaturated Fat: 6gPolyunsaturated Fat: 18gMonounsaturated Fat: 15gTrans Fat: 0.1gCholesterol: 107mgSodium: 1733mgPotassium: 612mgFiber: 4gSugar: 4gVitamin A: 1008IUVitamin C: 11mgCalcium: 103mgIron: 2mg

Similar Recipes

chicken kale salad

Grilled Honey Dijon Chicken and Kale Salad

chicken fajitas

Sheet Pan Chicken Fajitas with Mango Salsa

peanut chicken

Peanut Chicken Stir Fry

You Might Also Like

Frequently Asked Questions

How long does the chicken salad last in the fridge?

The chicken salad will stay fresh for 3-4 days if stored in an airtight container in the refrigerator. Keep the arugula separate to prevent wilting.


Can I use a store-bought vinaigrette?

Absolutely! A citrus-based vinaigrette or balsamic vinaigrette works wonderfully with the flavors in this salad.


What’s the best way to shred chicken?

For quick shredding, use two forks to pull the chicken apart. Alternatively, place the chicken in a stand mixer with the paddle attachment and mix on low speed for a few seconds.

Posted on Leave a comment

Creamy Mushroom and Spinach Onion Soup

mushroom and spinach onion soup

This creamy mushroom and spinach onion soup is a warm, hearty dish perfect for cool evenings. The caramelized onions add a natural sweetness, the mushrooms provide earthy depth, and the wilted spinach lends freshness—all brought together in a velvety broth enriched with heavy cream. Simple to prepare yet indulgently delicious, it’s a comforting meal in every spoonful.

This post may contain affiliate links. Please see our privacy policy for details.

Calories: 361kcal | Carbohydrates: 17g | Protein: 10g | Fat: 30g | Saturated Fat: 15g | Polyunsaturated Fat: 2g | Monounsaturated Fat: 11g | Cholesterol: 67mg | Sodium: 1244mg | Potassium: 862mg | Fiber: 3g | Sugar: 6g | Vitamin A: 5097IU | Vitamin C: 22mg | Calcium: 130mg | Iron: 3mg

mushroom and spinach onion soup

Why This Recipe is Perfect for a Thanksgiving Meat Break:

  • A Hearty Yet Meat-Free Alternative: This creamy mushroom and spinach onion soup is packed with earthy mushrooms, sweet caramelized onions, and savory beef broth flavors that mimic the richness of traditional meat dishes—without actually including meat. It’s the perfect way to take a break from the turkey and ham without sacrificing comfort and satisfaction.
  • Light Yet Indulgent: With the velvety texture of heavy cream and the umami-packed broth, this soup feels indulgent without being overly heavy. It’s a welcome reprieve from the decadence of stuffing, gravy, and buttery casseroles while still offering a rich, cozy experience.
  • Savory Comfort for Non-Meat Eaters: If you have vegetarians in the crowd (substitute vegetable broth for the beef broth!), this dish is a fantastic, flavor-forward option that doesn’t feel like a compromise. The caramelized onions and sautéed mushrooms provide layers of taste that rival any meat-based comfort dish.
  • A Touch of Green Amongst the Feast: Baby spinach adds a fresh, nutrient-packed burst of color and flavor, offering a much-needed veggie break from the carb-heavy Thanksgiving sides. It balances the richness of the soup with its light and slightly bitter notes.
  • Quick and Simple: This recipe comes together in just 30 minutes, making it an ideal addition to your menu when you need something easy to prepare but still impressive enough to eat.
  • Warm and Soul-Soothing: Cooking isn’t just about the food; it’s about the feeling. This soup is warm, creamy, and soul-soothing—offering the same cozy vibes as the best comfort food dishes without being meat-centric.

The PrepYoSelf Newsletter

Ingredient Breakdown:

  • Onion (Thinly Sliced): Onions serve as the flavor punch of this dish. When caramelized, they develop a natural sweetness that serves as the flavor base of the soup. Their soft, velvety texture adds body to the broth, while their mild sweetness perfectly balances the earthiness of the mushrooms and the richness of the cream.
  • Sliced Mushrooms: Mushrooms bring a deep, earthy umami flavor that elevates the soup’s savory profile. When sautéed, they develop a meaty texture and slightly smoky notes, which contrast beautifully with the creamy and sweet elements of the dish. Their natural glutamates also enhance the overall taste, making the soup more flavorful.
  • Minced Garlic: Garlic provides a punch of aromatic depth, rounding out the dish with its subtle spice and complexity. It complements the caramelized onions and mushrooms by adding warmth and enhancing their natural flavors without overpowering the dish.
  • Baby Spinach: Spinach adds a fresh, slightly bitter note that contrasts and balances the richness of the cream. Its vibrant green color also makes the dish visually appealing, while its tender leaves melt into the broth, adding texture and nutrients without overpowering the flavors.
  • Flour: Flour acts as a thickening agent, creating a silky, velvety texture for the soup. It binds the liquids together, transforming the broth and cream into a luscious base that holds all the flavors. By cooking the flour with the onions, you ensure there’s no raw flour taste in the final dish.
  • Beef Broth: The beef broth is the backbone of the soup, adding depth, savoriness, and complexity. Its bold, meaty flavor complements the mushrooms and onions, creating a robust base that supports the cream’s richness while keeping the soup light enough to enjoy as a starter or side.
  • Heavy Cream: Cream ties everything together by adding richness and a luxurious mouthfeel. It mellows the stronger flavors, like garlic and beef broth, while amplifying the caramelized sweetness of the onions and the earthy warmth of the mushrooms.
  • Salt and Pepper: These simple seasonings are essential to bring out the natural flavors of the other ingredients. Salt enhances the savory umami notes of the mushrooms and broth, while pepper adds a gentle spice that brightens the overall taste.

mushroom and spinach onion soup

Basic Steps to Meal Prep Mushroom and Spinach Onion Soup

  1. Sauté the Mushrooms: Heat the olive oil in a large pan over medium heat. Once the oil is hot, add the sliced mushrooms in a single layer. Let them cook undisturbed for 2-3 minutes to develop a golden-brown color, then stir occasionally to ensure even cooking. Continue to sauté until the mushrooms soften and their moisture evaporates, about 5-7 minutes. Remove the mushrooms from the pan and set aside on a plate.
  2. Caramelize the Onions: In the same pan, add the thinly sliced onions. Stir to coat them in the remaining oil, then reduce the heat to medium-low. Cook the onions, stirring occasionally, until they soften and turn golden brown, about 10 minutes. If the pan looks dry or the onions start to stick, add a tablespoon of water and scrape the bottom of the pan to loosen any caramelized bits. This step develops a deep, sweet flavor, so take your time.
  3. Incorporate Garlic and Flour: Once the onions are golden and fully caramelized, add the minced garlic and stir for about 1 minute, until it becomes fragrant. Sprinkle the flour evenly over the onions and stir continuously. The mixture will become thick and pasty—this is the base that will help thicken the soup later. Cook for an additional 1-2 minutes to remove the raw taste of the flour.
  4. Add Liquids and Thicken: Slowly pour in the beef broth, stirring constantly to avoid lumps. Scrape the bottom of the pan to incorporate all the flavorful caramelized bits. Once combined, stir in the heavy cream. Increase the heat slightly and bring the mixture to a gentle simmer. Stir occasionally as it cooks for 5-7 minutes, allowing the soup to thicken. It should coat the back of a spoon when ready.
  5. Cook the Spinach and Reintroduce Mushrooms: Add the baby spinach to the soup and stir until it wilts completely, about 2 minutes. Return the sautéed mushrooms to the pan, stirring to combine everything evenly. Let the soup simmer for 1-2 more minutes to meld the flavors.
  6. Season and Serve: Taste the soup and season with salt and pepper as needed. Stir well and ladle into bowls. For an extra touch, garnish with a sprinkle of fresh parsley or grated Parmesan if desired. Serve hot with crusty bread or dinner rolls.

Reference the recipe card below for detailed instructions.

mushroom and spinach onion soup

Meal Prep Pairing Tips:

  • Customize for Variety: Mix in cooked pasta, rice, or barley to make it more filling and hearty.
  • Bread Pairings: Crusty bread, like a baguette or sourdough, is perfect for dipping and soaking up the creamy broth. Garlic bread or cheesy toast adds an extra layer of indulgence.
  • Salad Pairings: A fresh, crisp salad with a light vinaigrette, like arugula or mixed greens with lemon dressing, balances the soup’s richness. A roasted vegetable salad (with Brussels sprouts, sweet potatoes, or beets) complements the earthy mushroom flavors.

mushroom and spinach onion soup

mushroom and spinach onion soup

Creamy Mushroom and Spinach Onion Soup

This creamy mushroom and spinach onion soup combines caramelized onions, sautéed mushrooms, and velvety cream for a comforting, hearty dish.
No ratings yet
Prep Time 5 minutes
Cook Time 20 minutes
Course lunch
Cuisine American
Servings 2
Calories 361 kcal

Equipment

  • knife
  • cutting board
  • spatula

Ingredients
  

  • 1 onion (thinly sliced)
  • 2 cups mushrooms (sliced)
  • 2 tablespoons garlic (minced)
  • 3 cups baby spinach
  • 1 tablespoon flour
  • 2 cups beef broth
  • 1/2 cup heavy cream
  • 1/4 teaspoon salt
  • 1/4 teaspoon pepper
  • 1 tablespoon olive oil

Instructions
 

  • Sauté the Mushrooms: Heat the olive oil in a large pan over medium heat. Add the sliced mushrooms and sauté until they soften and develop a golden-brown color, about 5-7 minutes. Remove the mushrooms from the pan and set them aside.
  • Caramelize the Onions: In the same pan, add the thinly sliced onions. Cook them over medium heat, stirring occasionally, until they soften and caramelize, about 10 minutes. Add small splashes of water as needed to prevent sticking and to enhance the caramelization process.
  • Incorporate Garlic and Flour: Once the onions are deeply caramelized, stir in the minced garlic and cook until fragrant, about 1 minute. Sprinkle the flour over the onions and stir until it forms a paste, cooking for an additional minute to remove the raw flour taste.
  • Add Liquids and Thicken: Slowly pour in the beef broth while stirring to combine, followed by the heavy cream. Simmer the mixture, stirring occasionally, until it begins to thicken, about 5 minutes.
  • Finish with Spinach and Mushrooms: Add the baby spinach to the pan and cook until it wilts, about 2 minutes. Return the sautéed mushrooms to the soup and stir to combine. Season with salt and pepper to taste.
  • Serve and Enjoy: Ladle the creamy soup into bowls, garnish with fresh herbs (if desired), and serve hot with crusty bread or a side salad.

Notes

Nutrition information provided is an estimate. It will vary based on cooking method and specific ingredients used. Please consult with your healthcare provider for specific dietary needs. To gain a better understanding, explore our nutrition disclaimer here. 

Nutrition

Calories: 361kcalCarbohydrates: 17gProtein: 10gFat: 30gSaturated Fat: 15gPolyunsaturated Fat: 2gMonounsaturated Fat: 11gCholesterol: 67mgSodium: 1244mgPotassium: 862mgFiber: 3gSugar: 6gVitamin A: 5097IUVitamin C: 22mgCalcium: 130mgIron: 3mg

Similar Recipes

chicken soup

One Pot Mexican Chicken Soup

beef cabbage stir fry

One Pot Ground Beef Cabbage Stir Fry

chicken pesto

Skillet Chicken Pesto and Peppers

You Might Also Like

Frequently Asked Questions

Can I use a different type of cream?

Yes, you can use half-and-half or coconut milk for a lighter version, but the texture may be slightly less rich.


Can I make this soup gluten-free?

Swap the flour for a gluten-free alternative like cornstarch or rice flour to thicken the soup.


Can I make this soup vegetarian?

Absolutely! Substitute vegetable broth for beef broth to make it vegetarian-friendly.

Posted on Leave a comment

Cheesy Garlic Roasted Asparagus with Pistachios

Cheesy Garlic Roasted Asparagus with Pistachios

If you’re looking for a simple yet show-stopping side dish that’s packed with flavor, this Cheesy Garlic Roasted Asparagus with Pistachios is your go-to recipe. Perfect for the holidays or a quick weekday dinner, this dish combines tender roasted asparagus, rich creaminess, a cheesy crust, and a delightful crunch. The best part? It’s easy to prepare and pairs beautifully with just about any main course.

This post may contain affiliate links. Please see our privacy policy for details.

Calories: 175kcal | Carbohydrates: 5g | Protein: 5g | Fat: 16g | Saturated Fat: 6g | Polyunsaturated Fat: 1g | Monounsaturated Fat: 7g | Cholesterol: 28mg | Sodium: 239mg | Potassium: 186mg | Fiber: 2g | Sugar: 2g | Vitamin A: 850IU | Vitamin C: 5mg | Calcium: 105mg | Iron: 2mg

Cheesy Garlic Roasted Asparagus with Pistachios

Why This Recipe Is Perfect for the Holidays (or Any Day!)

  • Quick and Easy: This dish comes together in just 30 minutes, making it ideal for busy holiday schedules or weeknight dinners.
  • Minimal Ingredients: You only need a handful of pantry staples and a fresh bunch of asparagus to create a gourmet side dish.
  • Cheesy Goodness: The melted mozzarella cheese creates a rich, indulgent topping that will have everyone coming back for seconds.
  • Elegant Presentation: The vibrant green asparagus topped with golden cheese and sprinkled with pistachios adds a touch of sophistication to any table.
  • Nutrient-Rich: Asparagus is loaded with vitamins and fiber, making this a healthier option that doesn’t skimp on flavor.
  • Customizable: This recipe is versatile—swap out the mozzarella for Parmesan or Gruyère, or use almond slivers instead of pistachios.
  • Meal Prep Friendly: It reheats beautifully, so you can make it ahead of time and simply warm it up before serving.

The PrepYoSelf Newsletter

Ingredients You’ll Need

  • Asparagus: The star of the dish, asparagus is tender yet slightly crisp when roasted, with a natural earthy flavor. Its mild bitterness pairs perfectly with the richness of cheese and cream, while its vibrant green color brings a festive, fresh look to the plate.
  • Olive Oil: Olive oil adds a light, fruity richness and helps the asparagus roast evenly. It ensures that the garlic adheres to the spears while enhancing their natural flavors.
  • Garlic: Minced garlic provides a fragrant, savory base that permeates the entire dish. When roasted, garlic’s pungency mellows into a slightly sweet, caramelized flavor that complements both the asparagus and cheese.
  • Salt and Pepper: These simple seasonings enhance the natural flavors of the asparagus and garlic. The salt brings out sweetness in the roasted asparagus, while the pepper adds a subtle kick to balance the creaminess of the dish.
  • Heavy Cream: Heavy cream adds luxuriousness to the dish, creating a silky sauce that ties all the ingredients together. It prevents the asparagus from drying out while baking and acts as a base for the cheese to melt into a gooey layer of deliciousness.
  • Shredded Mozzarella Cheese: Mozzarella is creamy, mild, and melts beautifully. It forms a golden, bubbly topping that not only looks appetizing but also provides a satisfying, stretchy texture. The cheese balances the garlic and asparagus with its rich, indulgent flavor.
  • Pistachios: The final flourish, crushed pistachios add a pop of color and a delightful crunch. Their nutty, slightly sweet flavor contrasts with the creaminess of the cheese and cream, providing texture and complexity to the dish.

Cheesy Garlic Roasted Asparagus with Pistachios

How to Make Cheesy Garlic Roasted Asparagus with Pistachios

  1. Preheat and Prep the Asparagus: Set your oven to preheat at 400°F (200°C). While the oven warms up, rinse the asparagus under cool running water to remove any dirt. Pat it dry with a clean kitchen towel or paper towels. Using a sharp knife, trim off the tough, woody ends—about 1 inch from the bottom of each spear.
  2. Arrange the Asparagus: Take a baking dish or sheet pan and spread the asparagus in a single layer. Avoid overcrowding to ensure even roasting.
  3. Prepare and Drizzle the Garlic Oil: In a small bowl, combine the olive oil and minced garlic, stirring to mix them well. Drizzle this mixture over the asparagus, making sure each spear is coated. You can use your hands or tongs to toss the asparagus gently for even coverage.
  4. Season and Add Cream: Sprinkle the asparagus with salt and pepper for flavor. Then, evenly pour the heavy cream over the asparagus. The cream will provide a rich base and help the cheese melt into a delicious sauce.
  5. Top with Cheese: Take your shredded mozzarella and sprinkle it evenly over the top of the asparagus. Try to cover as much of the asparagus as possible for a cheesy crust.
  6. Roast in the Oven: Place the baking dish in the preheated oven and bake for 15 to 20 minutes. Keep an eye on it during the last few minutes. The asparagus should become tender (you can test with a fork), the cream should bubble, and the cheese should turn a light golden brown.
  7. Add the Crunch: Once you’ve removed the dish from the oven, sprinkle the asparagus with crushed pistachios while it’s still hot. The pistachios add a nutty crunch and a beautiful finishing touch.
  8. Serve and Enjoy: Transfer the dish to the table while it’s still warm. Pair it with your favorite main course, and enjoy the compliments from your family and guests!

Reference the recipe card below for detailed instructions.

Cheesy Garlic Roasted Asparagus with Pistachios

Pairings for a Complete Meal

  • Roast Chicken: The juicy, savory chicken pairs wonderfully with the creamy and garlicky asparagus.
  • Baked Salmon: The richness of salmon complements the cheesy and nutty flavors of this dish.
  • Beef Tenderloin: A classic holiday choice, its bold flavor pairs well with the mild bitterness of the asparagus.
  • Mashed Potatoes: Creamy potatoes provide a smooth, starchy base that complements the textures of the asparagus dish.
  • Wild Rice Pilaf: Adds a nutty, earthy element that pairs well with the pistachios and garlic.
  • Crusty Baguette: Perfect for sopping up the creamy, cheesy sauce.
  • Simple Greens with Lemon Vinaigrette: Light and refreshing to balance the richness.

Cheesy Garlic Roasted Asparagus with Pistachios

Cheesy Garlic Roasted Asparagus with Pistachios

Cheesy Garlic Roasted Asparagus with Pistachios

Creamy, garlicky roasted asparagus topped with melty mozzarella and crunchy pistachios—an easy, elegant side dish for any occasion!
No ratings yet
Prep Time 5 minutes
Cook Time 20 minutes
Course Side Dish
Cuisine American
Servings 4
Calories 175 kcal

Equipment

  • knife
  • cutting board
  • baking dish
  • oven

Ingredients
  

  • 10 oz asparagus
  • 2 tablespoons olive oil
  • 2 tablespoons garlic (peeled and minced)
  • 1/4 teaspoon salt
  • 1/4 teaspoon pepper
  • 1/4 cup heavy cream
  • 1/2 cup shredded mozzarella cheese

Instructions
 

  • Prep the Oven and Asparagus: Preheat your oven to 400°F (200°C). Rinse the asparagus under cold water and trim the woody ends—usually about an inch.
  • Assemble the Dish: Arrange the trimmed asparagus in a baking dish. In a small bowl, whisk together the olive oil and minced garlic. Drizzle this mixture over the asparagus, tossing gently to ensure every spear is coated.
  • Season and Add Cream: Sprinkle the asparagus with salt and pepper to taste. Pour the heavy cream over the top to add a luscious, creamy base.
  • Add the Cheese: Sprinkle shredded mozzarella generously over the asparagus. Make sure it’s evenly distributed for that gooey, cheesy finish.
  • Roast to Perfection: Bake in the preheated oven for 15 to 20 minutes, or until the asparagus is tender, the cream is bubbling, and the cheese is golden and melty.
  • Garnish with Pistachios: Once out of the oven, sprinkle the roasted asparagus with crushed pistachios for a touch of crunch and a pop of flavor. Serve immediately and watch it disappear!

Notes

Nutrition information provided is an estimate. It will vary based on cooking method and specific ingredients used. Please consult with your healthcare provider for specific dietary needs. To gain a better understanding, explore our nutrition disclaimer here.

Nutrition

Calories: 175kcalCarbohydrates: 5gProtein: 5gFat: 16gSaturated Fat: 6gPolyunsaturated Fat: 1gMonounsaturated Fat: 7gCholesterol: 28mgSodium: 239mgPotassium: 186mgFiber: 2gSugar: 2gVitamin A: 850IUVitamin C: 5mgCalcium: 105mgIron: 2mg

Similar Recipes

cilantro chicken

Cilantro Lime Chicken Salad with Strawberry Salsa

sweet and sour chicken wings

Air Fryer Sweet and Sour Chicken Wings

stuffed primavera chicken

Primavera Stuffed Chicken Breasts

You Might Also Like

Frequently Asked Questions

Can I substitute mozzarella with another cheese?

Absolutely! Parmesan, Gruyère, or even cheddar work well in this recipe. Parmesan will add a nutty, slightly salty flavor, while Gruyère brings a creamy, rich texture.


What can I use instead of pistachios?

If pistachios aren’t available or preferred, you can substitute with slivered almonds, chopped walnuts, or even sunflower seeds. These alternatives add a similar crunch and nutty flavor.


Can I cook this in the Air Fryer?

Definitely! Arrange the asparagus in a small baking dish that will fit in the air fryer basket. Set the temperature to 375°F and cook for 10–12 minutes, or until the asparagus is tender and the cheese is melted and golden. Add the pistachios after cooking.

Posted on Leave a comment

Braised Red Wine Beef Short Rib Bourguinon

beef short ribs and sweet potato stacks

Move over turkey and ham—there’s a new guest of honor at the holiday table! This Braised Red Wine Short Rib Bourguignon is pure comfort food elevated to gourmet status. Tender, melt-in-your-mouth short ribs simmered in a rich, aromatic red wine sauce with pancetta, pearl onions, and mushrooms make for an unforgettable entree. Best of all, this dish is deceptively simple to prepare, yet it will have your guests raving like you’re a Michelin-starred chef.

This post may contain affiliate links. Please see our privacy policy for details.

Calories: 442kcal | Carbohydrates: 10g | Protein: 37g | Fat: 25g | Saturated Fat: 10g | Polyunsaturated Fat: 2g | Monounsaturated Fat: 11g | Trans Fat: 0.02g | Cholesterol: 110mg | Sodium: 923mg | Potassium: 1035mg | Fiber: 2g | Sugar: 4g | Vitamin A: 299IU | Vitamin C: 10mg | Calcium: 56mg | Iron: 5mg

beef short ribs and sweet potato stacks

Why This Dish is a Succulent Holiday Star

  • Unmatched Tenderness: Slow cooking transforms short ribs into buttery, fall-off-the-bone perfection.
  • Complex Flavors: The red wine, pancetta, and thyme create a savory depth of flavor that feels both rustic and luxurious.
  • Make-Ahead Marvel: This dish tastes even better the next day, freeing you up for other holiday prep.
  • Sophisticated Yet Simple: While it looks and tastes like fine dining, the recipe is easy to follow.
  • Versatile Pairing Options: Serve with creamy mashed potatoes, crusty bread, or roasted vegetables for a well-rounded meal.
  • Show-Stopping Presentation: The rich sauce and vibrant garnishes make this a visual feast worthy of any holiday table.
  • Guest-Worthy Glam: A break from traditional holiday proteins, this dish is bound to surprise and delight your guests.

The PrepYoSelf Newsletter

Here’s What You Need: 

  • Bone-In Beef Short Ribs: The star of the dish, short ribs are rich in marbled fat and connective tissue. As they braise, the fat melts and the collagen breaks down, creating fork-tender meat and a naturally silky sauce. The bones add depth and body to the braising liquid, making the sauce irresistibly flavorful.
  • Pancetta: This cured Italian bacon contributes smoky, savory notes that build a strong foundation for the dish. As the pancetta crisps, it releases rendered fat, which infuses the other ingredients with its luxurious, salty richness.
  • Garlic: Sliced garlic adds a sweet and aromatic punch. When sauteed, garlic mellows and deepens, layering a warm, nutty flavor into the dish. It’s a classic complement to the beef and red wine.
  • Pearl Onions (or Regular Onion): Pearl onions bring a subtle sweetness and tender texture that contrasts beautifully with the richness of the short ribs. They absorb the braising liquid, turning into little bursts of flavor. If using regular onions, they offer a similar sweetness and caramelize beautifully.
  • Cremini Mushrooms: Earthy and meaty, cremini mushrooms lend an umami boost that enhances the savory character of the dish. They hold their texture well during long cooking, ensuring every bite is hearty and satisfying.
  • Red Wine:The backbone of the sauce, red wine provides acidity to cut through the richness of the beef while enhancing its flavor. It also contributes fruity and tannic notes, creating complexity. Choose a wine you’d enjoy drinking for the best results.
  • Beef Broth: A rich beef broth amplifies the meatiness of the dish, blending seamlessly with the wine and aromatics. It serves as the base for the sauce, giving it body and depth.
  • Tomato Sauce: Tomato sauce introduces a tangy, slightly sweet element that balances the richness of the beef and pancetta. Its natural acidity also helps tenderize the meat as it cooks.
  • Dried Bay Leaves: These aromatic leaves impart subtle herbal notes that tie the dish together. Their slightly floral, tea-like flavor enhances the overall complexity without overpowering.
  • Fresh Thyme: The piney, citrusy fragrance of fresh thyme is the perfect match for beef and red wine. It brightens the dish and adds a sophisticated herbal note, elevating the flavor profile.

beef short ribs

Braised Red Wine Short Rib Bourguignon: Step-by-Step Instructions

  1. Preheat and Prep: Preheat your oven to 350°F. Bring a small pot of water to a boil, add the pearl onions, and boil for 2–3 minutes. Drain, let them cool, then peel off the outer skins. If using a regular onion, chop it into large chunks. Clean the cremini mushrooms by wiping them with a damp paper towel to remove any dirt. Remove the stems if desired.
  2. Render Pancetta: Dice the pancetta into small pieces. Heat a large, heavy-bottomed pan or Dutch oven over medium-high heat. Add the pancetta and cook until the fat renders out and the pieces are crispy, stirring occasionally (about 5–7 minutes). Use a slotted spoon to transfer the cooked pancetta to a small plate, leaving the rendered fat in the pan.
  3. Sear the Short Ribs: Pat the short ribs dry with paper towels (this helps them sear properly). Season lightly with salt. Increase the heat to high and sear the short ribs in the pancetta fat, about 2–3 minutes per side, until they are golden brown all over. Work in batches if needed to avoid overcrowding the pan. Transfer the seared ribs to a large baking dish or keep them in the same oven-safe pan if using a Dutch oven.
  4. Sauté Aromatics and Vegetables: Lower the heat to medium. In the same pan, add the sliced garlic, peeled pearl onions (or chopped onion), and mushrooms. Stir and cook for 2–3 minutes until the garlic is fragrant and the vegetables start to soften.
  5. Build the Sauce: Pour in the red wine and scrape the bottom of the pan with a wooden spoon to release any browned bits (this is where the flavor is!). Add the beef broth, tomato sauce, bay leaves, and chopped fresh thyme. Season with 1/2 teaspoon of salt and stir to combine.
  6. Combine and Braise: Pour the sauce and vegetables over the short ribs in the baking dish. If you’re using a Dutch oven, leave everything in the pan. Cover tightly with foil or a lid, ensuring no steam escapes. Place in the oven and bake for 30 minutes at 350°F.
  7. Slow-Cook: After 30 minutes, lower the oven temperature to 300°F. Let the short ribs cook for an additional 3 hours. The long cooking time will make the meat tender enough to fall off the bone.
  8. Optional Step – Skim the Fat: If the sauce seems greasy, use a spoon to skim off the fat floating on top. Alternatively, let the dish cool completely, refrigerate it overnight, and remove the solidified fat before reheating.
  9. Serve and Enjoy: Carefully remove the bay leaves before serving. Serve the short ribs with the rich sauce over mashed potatoes, buttered noodles, or polenta, and garnish with fresh thyme if desired.
  10. Taste test: Taste the sauce before serving and adjust seasoning with salt if needed. Don’t be afraid to experiment—this dish is forgiving and rewards patience!

Reference the recipe card below for detailed instructions.

beef short ribs and sweet potato stacks

Meal Prep Tips

  • Make It Ahead: Prepare the entire dish a day or two in advance. Once cooled, refrigerate in an airtight container. Reheat gently on the stovetop or in the oven, adding a splash of beef broth or water to loosen the sauce if needed.
  • Portion and Freeze: Divide the short ribs and sauce into individual portions in freezer-safe containers. They’ll keep for up to 3 months. Thaw overnight in the fridge before reheating.
  • Use a Slow Cooker: After searing the beef and sauteing the aromatics, transfer everything to a slow cooker. Cook on low for 6–8 hours or high for 4–5 hours. This method is hands-off and perfect for busy schedules.
  • Skim Fat Easily: After braising, refrigerate the dish. The fat will solidify on top, making it easy to remove before reheating. This ensures a leaner sauce.
  • Pair with Make-Ahead Sides: Serve with mashed potatoes, polenta, or sweet potato stacks, which can all be prepared in advance and reheated alongside the ribs.
  • Prep Ingredients Ahead: Dice the pancetta, peel the onions, and clean the mushrooms the day before. Store them in airtight containers in the fridge to save time on cooking day.

beef short ribs

beef short ribs and sweet potato stacks

Braised Red Wine Beef Short Rib Bourguignon

Let your holiday table shine with this Braised Red Wine Short Rib Bourguignon—a decadent dish that’s as delightful to eat as it is to prepare. Trust me, your guests will be clamoring for the recipe!
No ratings yet
Prep Time 10 minutes
Cook Time 3 hours
Course dinner, Main Course
Cuisine American, French
Servings 6
Calories 442 kcal

Equipment

  • knife
  • cutting board
  • baking dish
  • saute pan
  • oven

Ingredients
  

  • 3 lbs beef short ribs
  • 4 oz pancetta
  • 2 tablespoons sliced garlic
  • 1 cup pearl onions
  • 2 cups cremini mushrooms
  • 1 cup red wine
  • 2 cups beef broth
  • 1 cup tomato sauce
  • 2 dried bay leaves
  • 2 tablespoons chopped thyme
  • 1/2 teaspoon salt
  • 1/4 teaspoon pepper

Instructions
 

  • Preheat & Prep: Preheat your oven to 350°F. To prep pearl onions, boil them in water for 2–3 minutes, cool, and peel. Remove stems from cremini mushrooms and clean them with a damp paper towel.
  • Render Pancetta: Heat a pan over medium-high heat and cook diced pancetta until the fat renders and it becomes crispy. Set aside.
  • Sear the Short Ribs: In the same pan, sear the short ribs on all sides until golden brown, about 2–3 minutes per side. Transfer them to a large baking dish.
  • Saute Aromatics: Add sliced garlic, pearl onions, and mushrooms to the pan. Saute for 2–3 minutes, allowing their natural flavors to develop.
  • Build the Sauce: Stir in red wine, beef broth, tomato sauce, bay leaves, thyme, and salt.
  • Bake: Pour the sauce over the short ribs in the baking dish. Cover tightly with foil and bake for 30 minutes at 350°F. Then, lower the heat to 300°F and cook for 3 more hours, until the short ribs are fork-tender.
  • Optional Step: Skim off excess fat with a spatula for a leaner dish.

Notes

Nutrition information provided is an estimate. It will vary based on cooking method and specific ingredients used. Please consult with your healthcare provider for specific dietary needs. To gain a better understanding, explore our nutrition disclaimer here. 

Nutrition

Calories: 442kcalCarbohydrates: 10gProtein: 37gFat: 25gSaturated Fat: 10gPolyunsaturated Fat: 2gMonounsaturated Fat: 11gTrans Fat: 0.02gCholesterol: 110mgSodium: 923mgPotassium: 1035mgFiber: 2gSugar: 4gVitamin A: 299IUVitamin C: 10mgCalcium: 56mgIron: 5mg

Similar Recipes

chicken soup

One Pot Mexican Chicken Soup

sweet potato blt

Instant Pot Beef Ragu

pork carnitas

Instant Pot Pork Carnitas

You Might Also Like

Frequently Asked Questions

What’s the best type of red wine to use?

Choose a dry, full-bodied red wine like Cabernet Sauvignon, Merlot, or Pinot Noir. The wine doesn’t need to be expensive but should be something you enjoy drinking since its flavor will shine in the dish.


Can I use boneless short ribs instead of bone-in?

Yes, boneless short ribs work well, but bone-in ribs provide extra flavor and richness to the dish as the bones release collagen during braising. If you use boneless, consider adding a splash of beef broth or gelatin to enhance the sauce’s depth.


Is this recipe kid-friendly?

Yes, the alcohol in the wine cooks off during the braising process, leaving behind a rich flavor without the alcohol content. If you’re concerned, substitute the wine with one of the alcohol-free options mentioned above.

Posted on Leave a comment

Mini Beef Wellingtons

mini beef wellington and smashed potatoes

Ready to impress your guests (or yourself!) this holiday season? These Individual Beef Wellingtons are pure elegance wrapped in golden, flaky puff pastry. With juicy filet mignon, rich mushroom duxelles, and buttery pastry perfection, they’re the definition of indulgence. Whether you’re hosting a grand feast or enjoying an intimate holiday dinner, these little bundles are here to steal the show. Let’s start cooking!

This post may contain affiliate links. Please see our privacy policy for details.

mini beef wellington and smashed potatoes

Why These Mini Beef Wellingtons are a Star

  • Individual Portions = Perfect Presentation: Everyone gets their own beautifully wrapped parcel of deliciousness—no messy carving required!
  • No Turkey? No Problem!: Not a fan of turkey? This dish offers a decadent alternative that feels just as festive (if not more!).
  • Flavor Explosion: The earthy mushroom duxelles paired with the tangy Dijon mustard and perfectly seared filet mignon is an unbeatable combo.
  • Impress Without the Stress: These Wellingtons look like they take hours, but with simple steps and store-bought puff pastry, they’re surprisingly doable.
  • Customizable Doneness: With individual portions, you can cook each one to your guests’ preferred level of doneness. Medium-rare? Well-done? Easy peasy!
  • A Feast for the Eyes: That golden, shiny puff pastry crust? Absolute table goals. Pair it with a side of roasted veggies, and you’ve got a masterpiece.
  • Special Yet Versatile: Whether you’re serving two or a small crowd, these are perfect for cozy nights or glamorous gatherings.

The PrepYoSelf Newsletter

Ingredient Breakdown:

  • Filet Mignon: The star of the dish! Filet mignon is tender, juicy, and perfectly portioned for individual servings. Its mild flavor lets the other ingredients shine while offering a luxurious bite.
  • Mushrooms: Earthy and rich, mushrooms are the base of the duxelles. Their umami-packed flavor deepens as they cook, creating a savory layer that pairs beautifully with the beef.
  • Shallot: With its mild onion and garlic-like flavor, shallot adds subtle sweetness and depth to the mushroom mixture without overpowering it.
  • Garlic: A touch of garlic enhances the flavor profile of the duxelles, bringing a hint of warmth and richness to every bite.
  • Dijon Mustard: Dijon’s tangy, slightly sharp flavor adds a subtle kick that cuts through the richness of the beef and puff pastry, tying everything together.
  • Thyme: This fragrant herb adds a hint of earthy, floral notes that elevate the duxelles and complement the mushrooms and beef.
  • Puff Pastry: Buttery, flaky, and golden, puff pastry wraps everything into an indulgent package. It provides a perfect contrast to the tender beef and soft mushroom filling.
  • Egg: The egg wash creates a shiny, golden crust on the pastry, making the dish as visually stunning as it is delicious.

mini beef wellington and smashed potatoes

How to Make Mini Beef Wellingtons

  1. Sear the Steak: Heat a pan on medium-high and add a drizzle of oil. Place the filet mignon steaks in the pan and cook them for about 1–2 minutes on each side, just enough to give them a golden crust. Once done, remove the steaks from the pan and let them cool on a plate.
  2. Make the Mushroom Filling (Duxelles): Finely chop the mushrooms, garlic, and shallots. If chopping feels tricky, you can use a food processor to make this step easier! Heat another drizzle of oil in the same pan over medium-high heat. Add the chopped mixture and sprinkle with a pinch of salt and pepper. Stir the mixture occasionally until the mushrooms turn dark brown and most of the liquid has evaporated. This should take about 10–12 minutes. Tip: If the mixture sticks to the pan, lower the heat and add a tiny splash of water to loosen it. Once it’s done, let it cool.
  3. Preheat the Oven: Set your oven to 425°F so it’s nice and hot by the time you’re ready to bake.
  4. Assemble the Wellingtons: Take the puff pastry sheet and cut it in half. Spread a thin layer of Dijon mustard on each cooled steak. Place a spoonful of the mushroom mixture in the center of each piece of puff pastry—make it about the same size as the steak. Sprinkle a pinch of thyme over the mushrooms. Place a steak on top of the mushroom layer. Add another small spoonful of mushrooms on top of the steak.
  5. Wrap the Steak in Pastry: Carefully bring the corners of the puff pastry up and around the steak to cover it completely, like wrapping a present. Gently stretch the pastry if needed to make sure the steak is fully covered. Pinch the edges to seal.
  6. Add the Finishing Touch: In a small bowl, whisk the egg. Use a brush to paint the outside of the puff pastry with the egg wash—this will give it a beautiful golden color when baked.
  7. Bake and Check the Doneness: Place the Wellingtons on a baking sheet and bake for 17–20 minutes. For medium-rare, use a meat thermometer to check the temperature of the steak—it should read about 120°F. If you don’t have a thermometer, you can bake it until the pastry is golden and crisp.
  8. Let It Rest: Once they’re out of the oven, let the Wellingtons rest for 5 minutes before cutting into them. This helps keep all the juices inside.

Reference the recipe card below for detailed instructions.

mini beef wellington and smashed potatoes

Pro Tips:

  • Prepare the Duxelles in Advance: Make the mushroom mixture up to 2 days ahead and store it in an airtight container in the fridge. This saves time on the day of cooking and allows the flavors to develop.
  • Wrap and Chill Early: Assemble the wellingtons (up to wrapping them in puff pastry) the night before. Store them in the fridge, uncovered, to keep the pastry cold and ready to bake.
  • Freeze for Later: Assemble the wellingtons fully, wrap them tightly in plastic wrap, and freeze them. When ready to cook, bake from frozen at 400°F for 25–30 minutes.
  • Use a Thermometer: A meat thermometer ensures the beef is cooked to your desired doneness without overbaking. Aim for 120°F for medium-rare.
  • Thaw Puff Pastry Properly: Thaw puff pastry in the fridge overnight or for about 30 minutes on the counter, keeping it cold but pliable for easy handling.
  • Work in Steps: Break down the recipe into steps—sear the beef, make the duxelles, and assemble the wellingtons at your own pace. This keeps the process stress-free.
  • Plan Sides Ahead: Pair with simple sides like roasted vegetables or mashed potatoes. Prep these alongside your wellingtons to streamline your cooking process.
  • Rest After Baking: Allow the wellingtons to rest for 5 minutes after baking. This keeps the beef juicy and gives you time to plate the meal beautifully.

mini beef wellington and smashed potatoes

Mini Beef Wellingtons

Elegant and indulgent, these Individual Beef Wellingtons feature tender filet mignon, savory mushroom filling, and flaky puff pastry, perfect for a special occasion or holiday meal.
No ratings yet
Prep Time 5 minutes
Cook Time 25 minutes
Course dinner, Main Course
Cuisine english
Servings 2

Equipment

  • knife
  • cutting board
  • oven
  • saute pan

Ingredients
  

Beef Wellington

  • 10 oz filet mignons (cut into two pieces, each about 1 1/2 inch thick)
  • 1 tablespoon olive oil
  • 2 tablespoon dijon mustard
  • 1 teaspoon thyme
  • 1 sheet puff pastry
  • 1 egg
  • 1/4 teaspoon salt

Mushroom Duxelles

  • 4 oz mushrooms
  • 1 shallot
  • 2 tablespoons garlic
  • 1 tablespoon olive oil
  • 1/4 teaspoon salt

Instructions
 

  • Sear the Steak: Heat a pan on medium-high, add a little oil, and sear the steaks for 1–2 minutes on each side until golden. Remove and let them cool.
  • Make the Mushroom Filling: Finely chop the mushrooms, garlic, and shallots (or use a food processor). Sauté them in a bit of oil over medium-high heat, adding salt and pepper. Cook for 10–12 minutes, stirring occasionally, until browned and the liquid is gone. If it sticks, lower the heat and add a splash of water. Cool the mixture.
  • Preheat the Oven: Set your oven to 425°F.
  • Assemble the Wellingtons: Cut the puff pastry into two pieces. Spread Dijon mustard on each steak. Place a spoonful of the mushroom filling in the center of each pastry piece. Sprinkle thyme on top. Put a steak on the mushroom layer, then add another spoonful of mushrooms on top.
  • Wrap in Pastry: Fold the pastry over the steak, stretching if needed, to cover it completely. Pinch the edges to seal.
  • Brush and Bake: Whisk the egg and brush it over the pastry for a golden crust. Bake for 17–20 minutes, checking for 120°F for medium-rare or until the pastry is golden.
  • Rest and Serve: Let the Wellingtons rest for 5 minutes before cutting to keep them juicy. Enjoy your fancy, foolproof meal!

Similar Recipes

sweet potato blt

Sweet Potato BLT Sandwich

balsamic chicken salad

Oven Baked Balsamic Chicken Salad

chicken salad

Oven Baked Honey Mustard Glazed Chicken Salad

You Might Also Like

Frequently Asked Questions

What can I use if I don’t have filet mignon?

You can use another tender cut like sirloin. Just make sure the portion size and thickness are similar for even cooking.


What if my puff pastry tears?

Don’t worry! Use scraps of pastry to patch any holes. Once baked, the patchwork will blend into the golden crust.


What if I don’t have Dijon mustard?

You can use whole-grain mustard, a mild horseradish, or a thin layer of softened herb cream cheese as a flavorful substitute.

Posted on Leave a comment

Pomegranate, Apple, and Pear Crisp

pear, apple, and pomegranate crisp dessert

This Apple, Pear, and Pomegranate Crisp is a warm, inviting dessert that combines the best of fall’s bountiful harvest into a single dish. Perfectly spiced with cinnamon, brightened with orange zest, and topped with a buttery oat streusel, it’s an easy, pantry-friendly treat that’s sure to wow at any holiday gathering or cozy night in.

This post may contain affiliate links. Please see our privacy policy for details.

Calories: 401kcal | Carbohydrates: 71g | Protein: 4g | Fat: 13g | Saturated Fat: 7g | Polyunsaturated Fat: 1g | Monounsaturated Fat: 3g | Trans Fat: 0.5g | Cholesterol: 30mg | Sodium: 155mg | Potassium: 398mg | Fiber: 8g | Sugar: 48g | Vitamin A: 470IU | Vitamin C: 31mg | Calcium: 55mg | Iron: 1mg

pear, apple, and pomegranate crisp dessert

Reasons This Crisp is a Fall Favorite

  • Showcases Seasonal Produce: This recipe highlights fall’s best fruits—apples, pears, and pomegranates—which are at their peak for flavor and freshness.
  • Perfectly Spiced: Cinnamon brings warmth to the dish, evoking the comforting essence of autumn. Paired with citrusy orange zest, it’s a flavor combination that feels both cozy and refreshing.
  • Simple, Pantry-Friendly Ingredients: Using staples like oats, flour, butter, and sugar, this dessert is easy to whip up without a lengthy grocery list.
  • Easy to Make, Easy to Love: With just a few steps and minimal equipment, this recipe is stress-free, making it ideal for busy weeknights or last-minute holiday desserts.
  • Holiday-Ready: It’s the perfect dessert for gatherings, offering vibrant colors and flavors that complement festive meals. Plus, it’s easy to transport if you’re bringing it to a potluck.
  • Customizable and Crowd-Pleasing: Serve the crisp warm with a scoop of vanilla ice cream or a dollop of freshly whipped cream. The cool, creamy topping complements the warm, spiced filling beautifully. Sprinkle chopped nuts like walnuts or pecans over the crisp just before serving for added texture and a nutty flavor boost.

The PrepYoSelf Newsletter

Simple Ingredients for this Crisp

  • Apple: Apples bring a classic sweetness with a hint of tartness, depending on the variety you choose. They are a quintessential fall fruit that adds familiarity to the dish. When baked, apples become tender yet hold their shape, offering a firm bite amidst the softer elements of the filling.
  • Pear: Pears provide a mild, honeyed sweetness that complements the tartness of the apple without overwhelming the dish.
  • Pomegranate Seeds: Pomegranate seeds add bright, tangy bursts of flavor that cut through the sweetness of the apples and pears, making the filling more vibrant. Their juicy, crisp texture provides a delightful contrast to the tender fruit and crunchy streusel.
  • Ground Cinnamon: Cinnamon adds warmth and depth, amplifying the autumnal flavors of the apples and pears. Its subtle spice brings complexity to the sweetness of the dish.
  • Orange Zest and Juice: The zest and juice provide a pop of citrusy brightness that balances the richness of the fruit and butter. The orange also enhances the overall flavor, making the dessert taste fresh and light.
  • Rolled Oats: Oats add a hearty, chewy crunch to the streusel, ensuring the topping has a satisfying bite. Their nutty, earthy flavor complements the sweetness of the fruit and sugar.
  • Unsalted Butter: Butter is the magic ingredient that creates a crisp, crumbly streusel.Its creamy richness binds the topping and adds a luxurious depth to the dessert.
  • Honey Drizzle: Honey adds a glossy finish and a floral sweetness that complements both the fruit and the streusel, elevating the dessert into something truly special.

pear, apple, and pomegranate crisp dessert

Instructions for Apple, Pear, and Pomegranate Crisp

  1. Preheat and Prepare Your Baking Dish. Preheat your oven to 350°F (175°C). Lightly grease a small baking dish, about 4×8 inches, with butter or nonstick spray. This will prevent the crisp from sticking to the pan as it bakes.
  2. Prepare the Fruit Filling: Carefully slice the apple and pear thinly using a mandolin for even slices or a sharp knife if you don’t have one. Place the slices in a large mixing bowl. Use a fine grater or zester to remove the orange’s outer peel (zest) and sprinkle it over the fruit. Then cut the orange in half and squeeze the juice directly into the bowl. The orange adds brightness and keeps the fruit from browning.
  3. Mix the Filling Ingredients: Sprinkle the sugar, cinnamon, and cornstarch over the fruit. Add the pomegranate seeds and stir gently until everything is well-coated and combined. The cornstarch will help thicken the juices as the fruit cooks.
  4. Transfer to the Baking Dish: Pour the fruit mixture into your greased baking dish, including any juices from the bowl. Spread it out evenly so it cooks uniformly.
  5. Make the Streusel Topping: In a medium-sized bowl, mix the oats, flour, brown sugar, cinnamon, and salt. These dry ingredients will form the base of the streusel. Cut the butter into small cubes (this makes it easier to mix) and add them to the bowl. Use a fork or your fingers to combine the butter with the dry ingredients. Press and pinch the mixture until it forms crumbs about the size of peas. The butter should be evenly distributed to ensure a crispy topping.
  6. Assemble and Bake: Evenly sprinkle the streusel mixture over the fruit filling in the baking dish, covering as much of the fruit as possible. Place the dish in the preheated oven and bake for 25–30 minutes. You’ll know it’s ready when the fruit filling is bubbling around the edges, and the streusel is golden brown and crispy.
  7. Serve and Enjoy: Let the crisp cool for about 5–10 minutes. This allows the juices to thicken further and makes it easier to serve. For a finishing touch, sprinkle fresh pomegranate seeds on top and drizzle with honey for extra flavor. Serve warm with a scoop of vanilla ice cream or whipped cream for a truly indulgent treat.

Reference the recipe card below for detailed instructions.

pear, apple, and pomegranate crisp dessert

Benefits of Using a Mandolin Slicer for This Recipe:

  • Even Slices for Consistent Cooking: A mandolin ensures uniformly thin slices of apples and pears, which cook evenly in the oven. This avoids undercooked or overly mushy fruit in the filling.
  • Saves Time and Effort: Mandolins are incredibly efficient, allowing you to slice fruit quickly and with minimal effort. This is especially helpful when prepping for multiple servings or larger batches.
  • Professional Presentation: The even slices create a polished, professional look in the finished dessert, especially if you’re layering the fruit neatly in individual ramekins.
  • Enhanced Flavor Distribution: Thin, consistent slices allow the orange juice, zest, and spices to coat the fruit more evenly, ensuring balanced flavors in every bite.
  • Versatility Beyond This Recipe: Investing in a mandolin pays off for other recipes too—use it for slicing vegetables for gratins, salads, or chips, and fruits for tarts or pies.
  • Perfect for Beginners: A mandolin is straightforward to use and delivers professional-quality results, making it a great tool for cooks of any skill level.

pear, apple, and pomegranate crisp dessert

pear, apple, and pomegranate crisp dessert

Pomegranate, Apple, and Pear Crisp

Serve this crisp warm with a scoop of vanilla ice cream or a dollop of whipped cream, and watch as it becomes a fall dessert favorite!
No ratings yet
Prep Time 5 minutes
Cook Time 30 minutes
Course Dessert
Cuisine American
Servings 4
Calories 401 kcal

Equipment

  • mandolin slicer
  • baking dish

Ingredients
  

Fruit Filling

  • 1 apple
  • 1 pear
  • 1 pomegranate
  • 1/4 cup white sugar
  • 1 tablespoon cornstarch
  • 1/2 teaspoon ground cinnamon
  • 1 tablespoon orange zest
  • 1 orange (juiced)

Streusel Topping

  • 1/2 cup oats
  • 1/4 cup flour
  • 1/4 cup brown sugar
  • 1/4 teaspoon ground cinnamon
  • 1/4 teaspoon salt
  • 1/2 stick unsalted butter

Instructions
 

  • Preheat and Prep: Preheat your oven to 350°F. Grease a small baking dish (4×8 inches works perfectly) and set aside.
  • Prepare the Fruit Filling: Use a mandolin or knife to slice the apple and pear thinly. Place the slices in a bowl. Add the zest and juice of one orange, mixing well to coat the fruit. Sprinkle in the sugar, cinnamon, and cornstarch. Add the pomegranate seeds and stir until combined. The fruit will start releasing its natural juices. Transfer the fruit mixture to the prepared baking dish, pouring the juices over the top.
  • Make the Streusel: In another bowl, combine the oats, flour, brown sugar, cinnamon, and salt. Add chunks of butter and use a fork to work it into the dry ingredients until the mixture is crumbly, with pea-sized pieces of butter.
  • Assemble and Bake: Evenly sprinkle the streusel over the fruit filling. Bake in the oven for 25–30 minutes, or until the filling is bubbling and the topping is golden and crisp.
  • Serve and Enjoy: Let the crisp cool slightly before serving. Garnish with fresh pomegranate seeds and a drizzle of honey for an extra touch of sweetness.

Notes

Nutrition information provided is an estimate. It will vary based on cooking method and specific ingredients used. Please consult with your healthcare provider for specific dietary needs. To gain a better understanding, explore our nutrition disclaimer here. 

Nutrition

Calories: 401kcalCarbohydrates: 71gProtein: 4gFat: 13gSaturated Fat: 7gPolyunsaturated Fat: 1gMonounsaturated Fat: 3gTrans Fat: 0.5gCholesterol: 30mgSodium: 155mgPotassium: 398mgFiber: 8gSugar: 48gVitamin A: 470IUVitamin C: 31mgCalcium: 55mgIron: 1mg

Similar Recipes

baked oatmeal

Oven Baked Oats with Apricots and Berries

ricotta apple

Oven Baked Apple with Ricotta and Walnuts

french toast 2

Oven Baked French Toast Muffins with Strawberries

You Might Also Like

Smartfruit Mellow Mango + Immunity, 100% Real Fruit Purée

Trader Joe’s Unsalted, Dry Toasted Slivered Almonds

Trader Joe’s the Dark Chocolate Lover’s Chocolate Bar

Frequently Asked Questions

Can I use different fruits for the filling?

Yes! This recipe is versatile. Substitute or add other fruits like peaches, plums, or berries. Keep in mind that softer fruits like berries may release more juice, so consider adding an extra teaspoon of cornstarch to thicken the filling.


Can I use canned or frozen fruit?

Absolutely. For canned fruit, drain the syrup or juice to avoid an overly watery filling. When using frozen fruit, thaw the fruit and pat it dry to minimize excess moisture.


What if I don’t have a mandolin slicer?

A sharp knife works fine! Slice the apples and pears as thinly as possible to ensure they cook evenly. A food processor with a slicing attachment can also be a great alternative.

Posted on Leave a comment

One Pot Cherry Chipotle Beef Chili

beef chili with cornbread muffins

A Cozy, High-Protein Fall Meal Prep Idea. As the weather turns crisp and the days get shorter, there’s nothing more comforting than a warm bowl of chili to get you through fall. But this isn’t your typical chili—this Cherry Chipotle Beef Chili recipe brings a delightful twist by combining the smoky heat of chipotle peppers with the sweet burst of cherries. It’s not only hearty and flavorful, but also packed with protein, making it a perfect meal prep dish for busy weeks.

This post may contain affiliate links. Please see our privacy policy for details.

Calories: 346kcal | Carbohydrates: 33g | Protein: 26g | Fat: 13g | Saturated Fat: 4g | Polyunsaturated Fat: 1g | Monounsaturated Fat: 8g | Trans Fat: 0.4g | Cholesterol: 70mg | Sodium: 386mg | Potassium: 863mg | Fiber: 6g | Sugar: 24g | Vitamin A: 430IU | Vitamin C: 20mg | Calcium: 72mg | Iron: 5mg

beef chili with cornbread muffins

Why This Chili is the Ultimate Fall Meal Prep

  • Protein Powerhouse: Lean ground beef provides an excellent source of protein, perfect for keeping you full and energized throughout the day. This chili is a high-protein option to fuel busy workdays or after-workout recovery.
  • Unique Flavor Combo: The surprising sweetness from cherries pairs beautifully with the smoky, spicy chipotle peppers. It’s a fun, unexpected twist that elevates this chili far beyond the standard recipe.
  • Meal Prep Hero: This chili stores wonderfully in the fridge or freezer, making it ideal for meal prep. Make a large batch and portion it out for easy grab-and-go lunches or dinner during the week.
  • Comfort in a Bowl: With hearty ingredients like beef, carrots, and tomatoes, it’s a warm and comforting dish perfect for those chilly fall nights. Pair it with cornbread or crackers for extra comfort-food vibes.
  • Nutrient-Rich: Cherries are packed with antioxidants and vitamins, while carrots and tomatoes add a wealth of fiber, vitamins, and minerals to the mix. This chili isn’t just tasty—it’s packed with health benefits.
  • Satisfies Your Sweet & Spicy Cravings: The balance of sweet cherries and honey with the fiery kick of chipotle peppers creates a flavor profile that hits all the right notes. Every spoonful is a dance of bold, contrasting flavors that’ll make your tastebuds happy.
  • Perfect for Fall Gatherings: This chili is great for more than just meal prep. It’s a crowd-pleasing dish to bring to potlucks, football watch parties, or family dinners, offering a unique and delicious alternative to classic chili.

The PrepYoSelf Newsletter

Suprising Ingredients That Work Well Together

  • Frozen Cherries: Cherries might seem like an unusual ingredient for chili, but they’re the secret star of this recipe. Their natural sweetness balances the smokiness and heat from the chipotle peppers, creating a beautiful contrast. As they simmer, the cherries break down and release their juices, adding a subtle sweetness that enhances the overall flavor without being overpowering.
  • Chipotle Peppers in Adobo Sauce: These smoky, spicy peppers bring the heat to this chili. The rich, smoky flavor of the chipotle peppers works beautifully with the beef, giving the chili a deep, savory base. Their heat is balanced by the sweetness of the cherries and honey, ensuring that the chili has a complex flavor without being overwhelmingly spicy.
  • Lean Ground Beef: The foundation of any chili, lean ground beef provides the dish with a hearty texture and rich flavor. Its meaty base allows it to carry the bold spices and sweetness of the other ingredients without being overwhelming. Lean beef is a great option because it gives you all the flavor of beef without excessive fat, making this a lighter yet satisfying chili.
  • Carrots: Carrots add a subtle sweetness and a bit of crunch to balance the spiciness of the chipotle peppers. When cooked, they soften and absorb the smoky flavors, giving you a pleasant contrast to the heat in each bite. Their natural sugars also complement the cherries, creating a nice harmony between sweet and savory.
  • Red Onions: Red onions are slightly sweeter and milder than yellow or white onions, which makes them ideal for this chili. When sautéed, they release a natural sweetness that enhances the flavor of the beef and adds depth to the dish. Their sweetness also complements the honey and cherries, providing a balanced backdrop to the spicy elements.
  • Canned Diced Tomatoes with Green Chiles: The diced tomatoes add moisture and a slight acidity to the dish, which helps cut through the richness of the beef. The green chiles in the can introduce an additional mild heat that blends well with the chipotle peppers, creating layers of spicy, smoky, and tangy flavors. The tomatoes also help thicken the chili as it simmers, giving it a hearty texture.
  • Honey: Honey serves as a natural sweetener to complement the cherries and soften the spice from the chipotle peppers. Just a tablespoon is enough to round out the bold flavors and bring harmony to the dish. It adds a smooth sweetness without making the chili overly sugary, creating a balanced flavor profile that makes the chili feel warm and comforting.

beef chili with cornbread muffins

Basic Steps to Meal Prep Beef Chili

  1. Prep Your Ingredients: Before you start cooking, make sure to dice the carrot and red onion into small pieces. If you’re using whole chipotle peppers in adobo sauce, finely chop them or blend them into a smooth puree. Defrost the cherries by leaving them at room temperature or microwaving them for about 30 seconds.
  2. Sauté the Vegetables: In a large sauté pan, heat 1 tablespoon of olive oil over medium-high heat. Once the oil is hot (you should see a slight shimmer), add the diced red onions and carrots. Stir the vegetables occasionally so they cook evenly, and let them cook for about 5 minutes, or until they begin to soften and the onions become translucent (meaning you can almost see through them). This step helps bring out the sweetness and flavor of the vegetables.
  3. Brown the Ground Beef: Add the ground beef directly into the pan with the softened vegetables. As the beef starts to cook, use a spatula or spoon to break it into smaller pieces so it cooks evenly. Sprinkle in the garlic powder and salt. Stir the beef frequently to make sure all the pieces brown and cook thoroughly. This should take about 5-7 minutes, and the beef should be fully browned with no pink remaining.
  4. Add the Flavorful Ingredients: Once the beef is cooked, it’s time to add the bold flavors! Pour in the chopped chipotle peppers (or puree), the can of diced tomatoes with green chiles (including the liquid), the water, honey, and the defrosted cherries. Stir everything together so the ingredients are well combined. The cherries will add a touch of sweetness, while the chipotle peppers bring a smoky heat to the dish.
  5. Simmer and Let the Flavors Meld: Turn the heat down to low or medium-low. You want the chili to gently simmer, not boil. Cover the pan with a lid (or partially cover if you want it to reduce a little). Let it cook for about 20 minutes, stirring occasionally to make sure nothing sticks to the bottom. During this time, the flavors will blend together, and the chili will thicken slightly.
  6. Serve and Garnish: Once the chili is done simmering, taste it to check if it needs any more salt or seasoning. Spoon the chili into bowls and garnish with chopped cilantro for extra freshness. You can also serve it with cornbread or crackers on the side for a complete, cozy meal.

Reference the recipe card below for detailed instructions.

beef chili with cornbread muffins

Meal Prep Tips for Cherry Chipotle Beef Chili

  • Make a Big Batch: Double or triple the recipe and store portions in individual containers. This way, you have ready-to-go lunches or dinners for the entire week. Chili stores well in both the fridge and freezer, so you can plan for multiple meals in advance.
  • Freeze for Later: Chili freezes beautifully! Once cooled, divide the chili into airtight freezer containers or resealable freezer bags. Label and date them for easy grab-and-go meals. When you’re ready to eat, just thaw in the fridge overnight and reheat on the stovetop or microwave.
  • Pair with Sides: Make your meal more complete by prepping sides like cornbread, crackers, or a simple green salad. You can even bake cornbread muffins ahead of time and store them in the freezer alongside your chili.
  • Mix Up the Garnishes: Change up your chili by prepping a variety of garnishes like avocado slices, shredded cheese, sour cream, or even a dollop of Greek yogurt. Have these on hand to add something fresh and fun to each serving.
  • Ground Turkey or Chicken: Swap out the lean ground beef for ground turkey or chicken for a lighter version. Both options still pack plenty of protein while offering a slightly different flavor profile.
  • Chili-Stuffed Baked Potatoes: For a fun twist, serve this chili over baked sweet potatoes or regular baked potatoes. It’s a filling and delicious way to enjoy your meal while adding extra fiber.
  • Chili Tacos: Serve the chili inside soft tortillas or taco shells for a quick and easy taco night. Garnish with your favorite taco toppings like shredded lettuce, cheese, or guacamole.

beef chili with cornbread muffins

cherry chili

Cherry Chipotle Beef Chili

With its rich flavors, nutritional punch, and ease of preparation, this Cherry Chipotle Beef Chili is a fantastic dish to keep in your fall meal rotation.
No ratings yet
Prep Time 5 minutes
Cook Time 30 minutes
Course Main Course
Cuisine American
Servings 2
Calories 346 kcal

Equipment

  • medium soup pot
  • knife
  • cutting board
  • spatula

Ingredients
  

  • 8 oz lean ground beef
  • 1 each small carrot (diced)
  • 1/4 cup red onions (diced)
  • 1/4 cup chipotle peppers in adobo sauce (finley chopped or pureed)
  • 10 oz canned diced tomatoes with green chiles
  • 1/2 cup water
  • 1 cup frozen cherries (defrosted)
  • 1/4 cup cilantro (chopped)
  • 1 tbsp honey
  • 1/4 tsp salt
  • 1/4 tsp garlic powder
  • 1 tbsp olive oil

Instructions
 

  • Sauté the Vegetables: Heat 1 tablespoon of olive oil in a sauté pan over medium-high heat. Add the diced red onions and carrots. Cook until they soften, stirring occasionally, for about 5 minutes.
  • Cook the Beef: Add the ground beef to the pan. Sprinkle in the garlic powder and salt, breaking up the beef as it cooks. Stir and brown the meat for about 5-7 minutes until it's fully cooked.
  • Add Bold Flavors: Stir in the chipotle peppers, canned diced tomatoes with green chiles, water, honey, and defrosted cherries. Mix everything together and bring it to a simmer.
  • Simmer: Turn the heat to low-medium and let the chili simmer for about 20 minutes, allowing the flavors to meld beautifully.
  • Serve and Garnish: Once done, garnish with chopped cilantro and enjoy with a side of warm cornbread or crunchy crackers.

Notes

Nutrition information provided is an estimate. It will vary based on cooking method and specific ingredients used. Please consult with your healthcare provider for specific dietary needs. To gain a better understanding, explore our nutrition disclaimer here. 

Nutrition

Calories: 346kcalCarbohydrates: 33gProtein: 26gFat: 13gSaturated Fat: 4gPolyunsaturated Fat: 1gMonounsaturated Fat: 8gTrans Fat: 0.4gCholesterol: 70mgSodium: 386mgPotassium: 863mgFiber: 6gSugar: 24gVitamin A: 430IUVitamin C: 20mgCalcium: 72mgIron: 5mg

Similar Recipes

chicken soup

One Pot Mexican Chicken Soup

beef cabbage stir fry

One Pot Ground Beef Cabbage Stir Fry

chicken pesto

Skillet Chicken Pesto and Peppers

You Might Also Like

Frequently Asked Questions

What can I substitute for ground beef?

You can use ground turkey, chicken, or even ground pork as a substitute. For a vegetarian option, try plant-based crumbles, lentils, or black beans. All will work well in this recipe while maintaining the hearty feel of chili.


Can I add beans to this chili?

Absolutely! Adding a can of beans like kidney beans, black beans, or pinto beans will increase the fiber content and make the chili even heartier. Simply drain and rinse the beans before stirring them in with the other ingredients.


Can I use fresh cherries instead of frozen?

Yes, you can use fresh cherries if they are in season. Just pit and chop them before adding to the chili. Fresh cherries will provide an even more intense sweetness compared to frozen ones.

Posted on Leave a comment

Chicken and Spinach Spaghetti Squash Alfredo

ground chicken alfredo with spaghetti squash

Chicken and Spinach Spaghetti Squash Alfredo, A Healthier Twist on a Comfort Classic. As we head into the cooler months, there’s nothing quite like indulging in your favorite comfort foods. But what if you could enjoy those cozy, creamy dishes without the guilt? Enter Chicken and Spinach Spaghetti Squash Alfredo—a deliciously creamy yet lighter version of traditional Chicken Alfredo. This dish swaps out heavy pasta for spaghetti squash, while keeping all the flavors you love!

This post may contain affiliate links. Please see our privacy policy for details.

Calories: 431kcal | Carbohydrates: 19g | Protein: 25g | Fat: 30g | Saturated Fat: 12g | Polyunsaturated Fat: 4g | Monounsaturated Fat: 12g | Trans Fat: 0.1g | Cholesterol: 135mg | Sodium: 526mg | Potassium: 1016mg | Fiber: 4g | Sugar: 8g | Vitamin A: 2888IU | Vitamin C: 12mg | Calcium: 181mg | Iron: 2mg

ground chicken alfredo with spaghetti squash

Why You’ll Love This Recipe:

  • Guilt-Free Comfort – You get all the creamy, cheesy flavors of Chicken Alfredo, but with fewer carbs and calories by using spaghetti squash instead of traditional pasta.
  • Packed with Nutrients – Spinach and spaghetti squash bring vitamins, fiber, and antioxidants to the plate, making this meal both delicious and nourishing.
  • Balanced Indulgence – You’ll still enjoy that rich Alfredo sauce, but with a lighter twist, so you can indulge in your cravings without compromising your health goals.
  • Easy to Make – This dish is simple enough to prepare after a long day, giving you a healthy, home-cooked meal with minimal fuss.
  • Great for Meal Prep – The components of this dish can easily be made ahead and stored, so you can enjoy it throughout the week without the hassle of cooking each night.
  • Low Carb & Satisfying – For those looking to reduce carbs without sacrificing taste, spaghetti squash is a perfect pasta alternative. It’s light, yet satisfying and filling!
  • Perfect for the Cooler Weather – As fall arrives, this warm, creamy dish is the ultimate comfort food to cozy up with—without the heaviness of a traditional Alfredo.

The PrepYoSelf Newsletter

Balanced and Flavorful Ingredients:

  • Ground Chicken: The lean ground chicken provides a hearty, protein-rich base for the dish, keeping it light compared to traditional Alfredo made with heavier cuts of meat like chicken breasts or thighs. Its mild flavor allows the creamy sauce and seasonings to shine.
  • Heavy Cream: While heavy cream gives the sauce its rich, velvety texture, it’s used sparingly to maintain the creaminess you crave from Alfredo without overloading the dish. This ingredient balances richness with a smooth, indulgent sauce.
  • Parmesan Cheese: Parmesan adds sharp, salty notes to the sauce, giving it depth and umami flavor. Its distinct nuttiness complements the cream, creating that signature Alfredo taste with a smaller amount compared to other cheeses.
  • Italian Seasoning: A blend of herbs like oregano, basil, and thyme, Italian seasoning infuses the sauce with a warm, aromatic flavor. It elevates the dish without overpowering the other ingredients.
  • Garlic Powder: Garlic powder adds a subtle, savory bite to the sauce, enhancing the flavor profile without the fuss of peeling and mincing fresh garlic. It pairs beautifully with the cream and parmesan.
  • Baby Spinach: This superfood is not only rich in nutrients like vitamins A and C but also adds a fresh, slightly earthy flavor. The spinach wilts perfectly into the sauce, adding a pop of color and lightness that balances the richness of the cream and cheese.
  • Olive Oil: Olive oil is used to sauté the chicken and helps the squash bake to a perfect texture. Its subtle fruity flavor adds richness without the heaviness of butter, keeping the dish heart-healthy.
  • Spaghetti Squash: The star of the recipe! Spaghetti squash is a low-carb, nutrient-packed alternative to pasta. Its slightly sweet, neutral flavor absorbs the creamy Alfredo sauce beautifully, while its spaghetti-like strands provide the perfect texture for a satisfying bite.

ground chicken alfredo

Quick and Easy Recipe Steps:

For the Spaghetti Squash:

  1. Carefully cut the spaghetti squash in half lengthwise (from top to bottom) and scoop out the seeds with a spoon.
  2. Brush the inside of each half with olive oil and sprinkle with salt.
  3. Place the squash halves face down on a baking sheet and bake for 35-40 minutes, until they’re soft when poked with a fork.
  4. Let the squash cool for a few minutes, then use a fork to scrape out the inside, which will look like spaghetti.

For the Chicken Alfredo:

  1. Heat 1 tablespoon of olive oil in a pan over medium-high heat.
  2. Add the ground chicken and cook until it’s fully browned, stirring often.
  3. Pour in the heavy cream, add the parmesan cheese, Italian seasoning, garlic powder, and salt. Stir everything together until the sauce thickens.
  4. Add the baby spinach and stir until it wilts down and mixes into the sauce.
  5. Serve the creamy chicken and sauce on top of the spaghetti squash strands.

Reference the recipe card below for detailed instructions.

ground chicken alfredo with spaghetti squash

Meal Prep Recipe Tips

  • Cook the Spaghetti Squash in Advance: Bake the spaghetti squash ahead of time and store the strands in an airtight container. It will keep in the fridge for up to 5 days. When you’re ready to assemble the meal, simply reheat the squash in the microwave or a skillet for a couple of minutes.
  • Store Sauce Separately: If you want to keep your meal fresh, store the chicken Alfredo mixture separately from the spaghetti squash. This prevents the squash from soaking up too much sauce and becoming soggy. Combine them just before reheating.
  • Lighten It Up: To make this dish even lighter, swap the heavy cream for half-and-half or a plant-based milk like unsweetened almond or cashew milk. You can thicken it with a little extra parmesan or by reducing the sauce.
  • Swap Ground Chicken:Ground turkey or lean ground beef can easily replace ground chicken. These options still keep the dish high in protein, but with different flavor profiles. You can even use shredded rotisserie chicken for convenience.
  • Add More Veggies: Bulk up the dish by adding mushrooms, bell peppers, or zucchini to the Alfredo sauce. These vegetables sauté well and bring extra fiber, vitamins, and texture to the meal.
  • Use Zoodles: If you can’t find spaghetti squash, zucchini noodles (zoodles) are a great alternative. They’re quick to cook and have a similar light, pasta-like texture.
  • Go Dairy-Free:If you’re looking for a dairy-free option, swap the heavy cream for a dairy-free alternative like coconut cream, and use nutritional yeast in place of parmesan for a cheesy flavor without the dairy.

ground chicken alfredo
Screenshot

ground chicken alfredo with spaghetti squash

Chicken and Spinach Spaghetti Squash Aflredo

Enjoy a lighter, healthier twist on a classic comfort dish with this creamy Chicken and Spinach Spaghetti Squash Alfredo, packed with flavor and perfect for satisfying cravings.
No ratings yet
Prep Time 5 minutes
Cook Time 20 minutes
Course dinner, Main Course
Cuisine American, Italian
Servings 4
Calories 431 kcal

Equipment

  • knife
  • cutting board
  • saute pan
  • oven

Ingredients
  

Chicken Alfredo Mixture

  • 1 lb ground chicken
  • 1/2 cup heavy cream
  • 1/4 cup shredded parmesan cheese
  • 1/4 teaspoon Italian seasoning
  • 1/4 teaspoon garlic powder
  • 3 cups baby spinach
  • 1/4 teaspoon salt
  • 1 tablespoon olive oil

Spaghetti Squash

  • 1 spaghetti squash
  • 1 tablespoon olive oil
  • 1/4 teaspoon salt

Instructions
 

Spaghetti Squash

  • Preheat the oven to 400°F. Cut the spaghetti squash in half lengthwise and scoop out the seeds.
  • Brush the inside of the squash with olive oil and sprinkle with salt.
  • Place the squash cut-side down on a baking sheet and bake for 35-40 minutes, or until tender.
  • Let it cool slightly, then use a fork to pull out the spaghetti-like strands.

Chicken Alfredo

  • Heat 1 tablespoon of olive oil in a sauté pan over medium-high heat. Add the ground chicken and cook until browned and cooked through.
  • Add the heavy cream, parmesan cheese, Italian seasoning, garlic powder, and salt. Stir well, allowing the sauce to thicken.
  • Toss in the baby spinach and stir until it wilts and becomes tender.
  • Serve the creamy chicken alfredo mixture over the spaghetti squash strands

Notes

Nutrition information provided is an estimate. It will vary based on cooking method and specific ingredients used. Please consult with your healthcare provider for specific dietary needs. To gain a better understanding, explore our nutrition disclaimer here. 

Nutrition

Calories: 431kcalCarbohydrates: 19gProtein: 25gFat: 30gSaturated Fat: 12gPolyunsaturated Fat: 4gMonounsaturated Fat: 12gTrans Fat: 0.1gCholesterol: 135mgSodium: 526mgPotassium: 1016mgFiber: 4gSugar: 8gVitamin A: 2888IUVitamin C: 12mgCalcium: 181mgIron: 2mg

Similar Recipes

orange chicken

Air Fryer Orange Soy Glazed Chicken and Broccoli

roasted chicken and rutabaga

Roasted Lemon Italian Chicken with Rutabaga

rosemary chicken

Rosemary Baked Chicken and Potatoes

You Might Also Like

Frequently Asked Questions

How do I know when the spaghetti squash is fully cooked?

You’ll know the squash is ready when you can easily pierce the skin with a fork, and the flesh pulls away in spaghetti-like strands. If it’s still hard to scrape, give it a few more minutes in the oven.


What can I use instead of parmesan cheese for a different flavor?

If you want to switch up the cheese, you could try Romano cheese for a saltier bite or Pecorino for a sharper, tangier flavor. For a more mild option, mozzarella will create a gooey texture.


Can I use frozen spinach instead of fresh baby spinach?

thaw it first and squeeze out any excess water before adding it to the sauce. This prevents the sauce from becoming watery.