Posted on Leave a comment

One Pot Mexican Chicken Soup

chicken soup

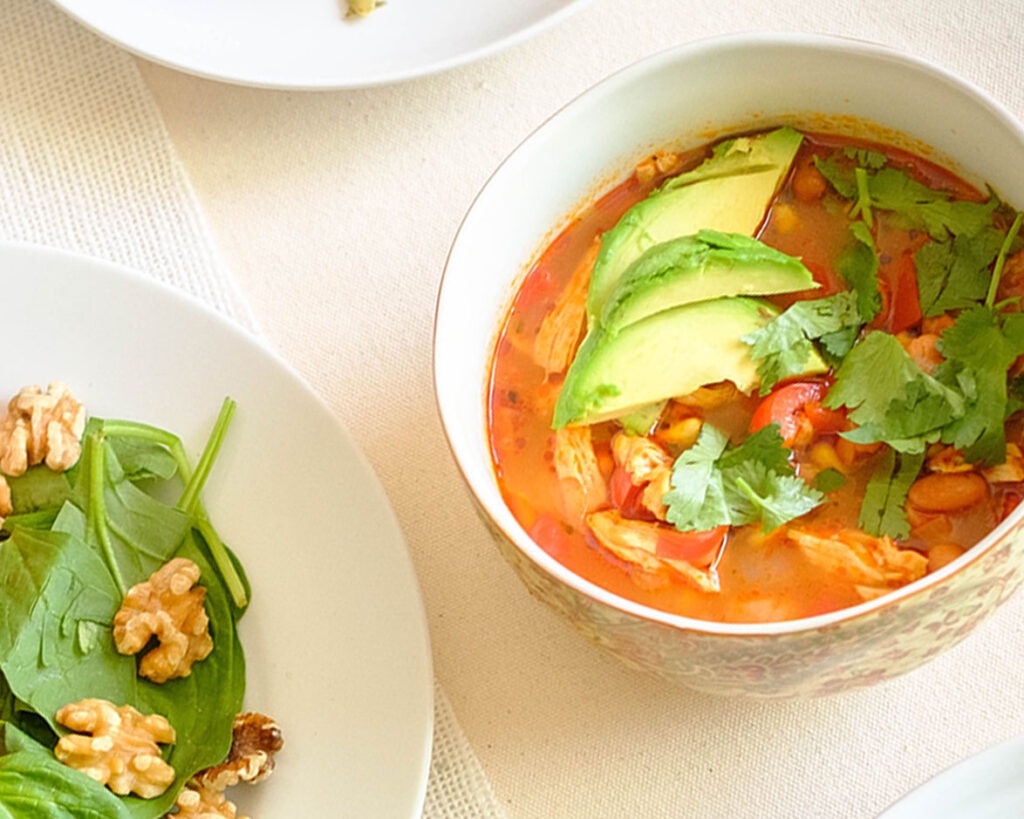
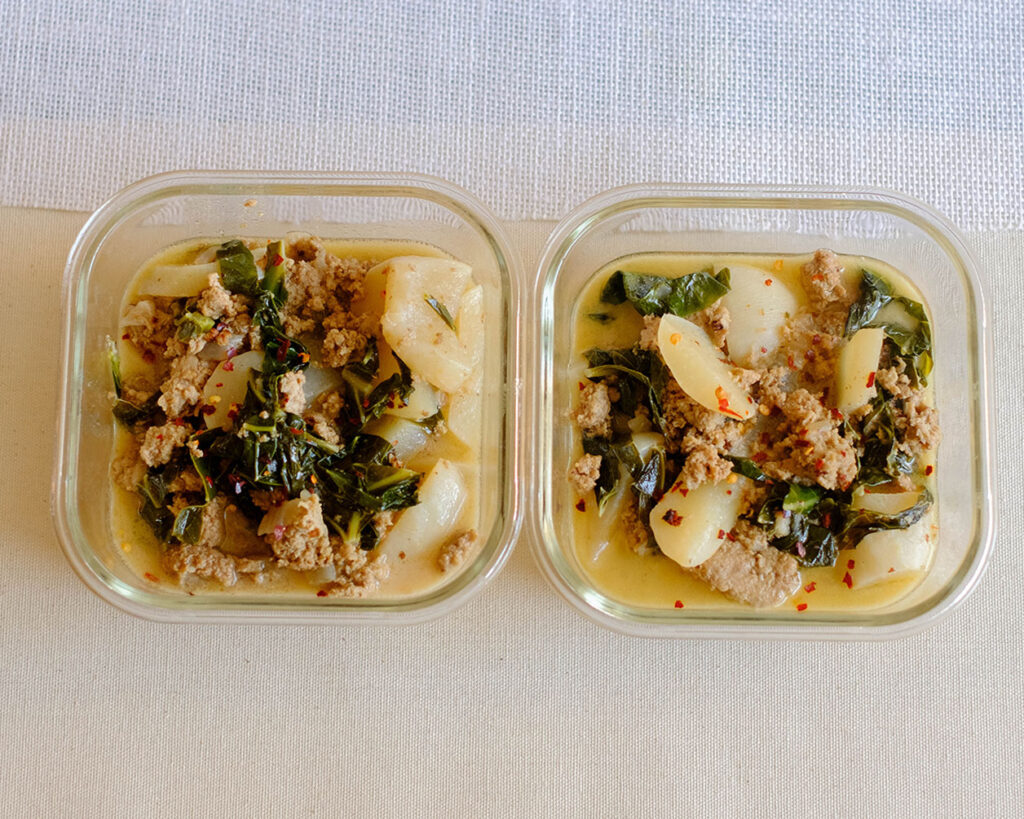
This Mexican Chicken Soup Recipe comes together quickly and is a flavorful and budget-friendly meal.

This post may contain affiliate links. Please see our privacy policy for details.

Round bowl of chicken soup with beans, vegetables, avocado, and cilantro

Not only is this Mexican Chicken Soup Recipe full of nutrients and high in protein, it is also made with pantry-friendly and budget-friendly ingredients.

Why is This Chicken Soup Recipe Great for Meal Prep?

  • It is a one-pot recipe that helps with clean-up duties.
  • You can use any part of the chicken that you have on hand.
  • The recipe includes pantry-friendly ingredients such as beans, tomato sauce, broth, and simple seasoning.
  • You can make a large batch and freeze it.
  • You can throw in extra veggies that you have on hand.

The PrepYoSelf Newsletter

Ingredients to Make This Mexican Chicken Soup

  • Chicken: Use any cut. We used lean chicken breast, but you can also use boneless chicken thighs, chicken tenderloins, and even ground chicken.
  • Beans: We used pinto beans, but you can also use kidney beans or black beans.
  • Tomato Sauce: If you don’t have tomato sauce, you can use leftover marinara sauce, tomato paste, or even freshly diced tomatoes.
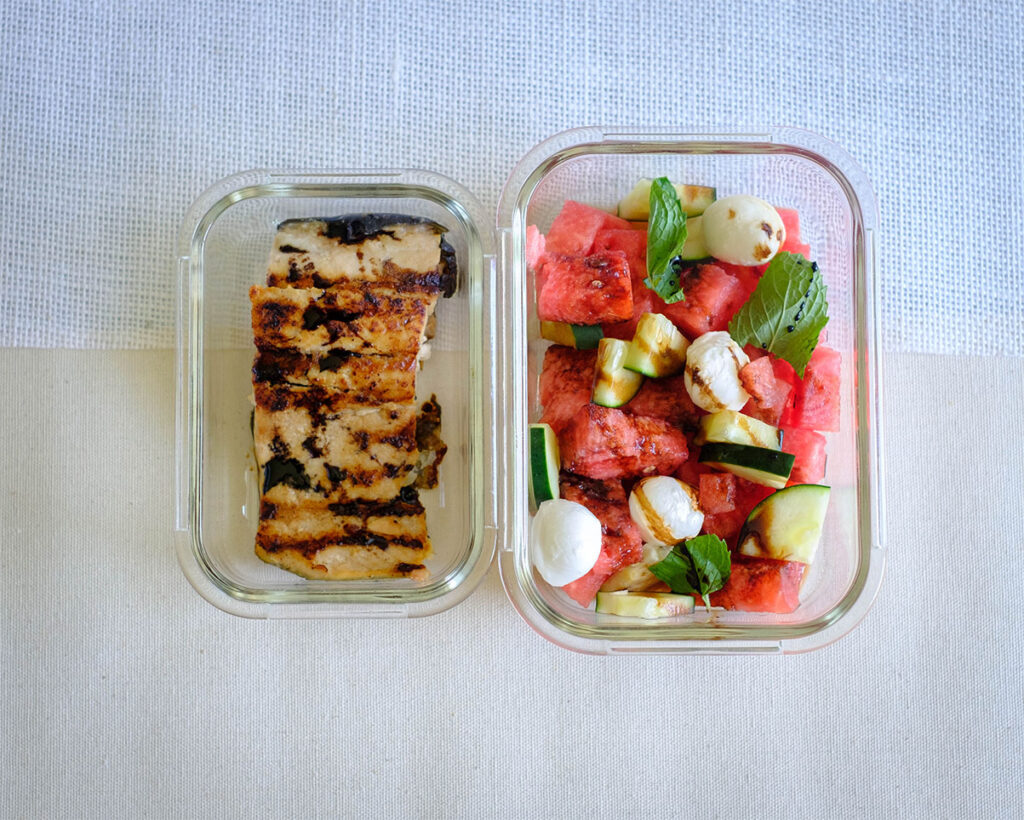
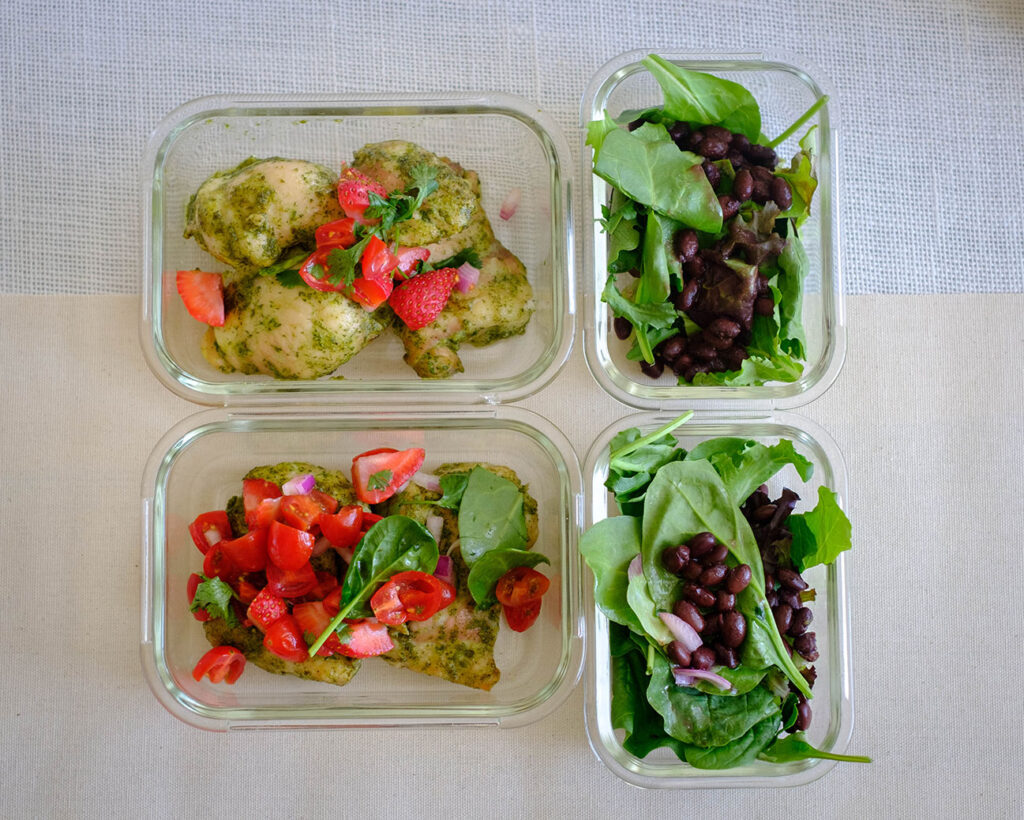
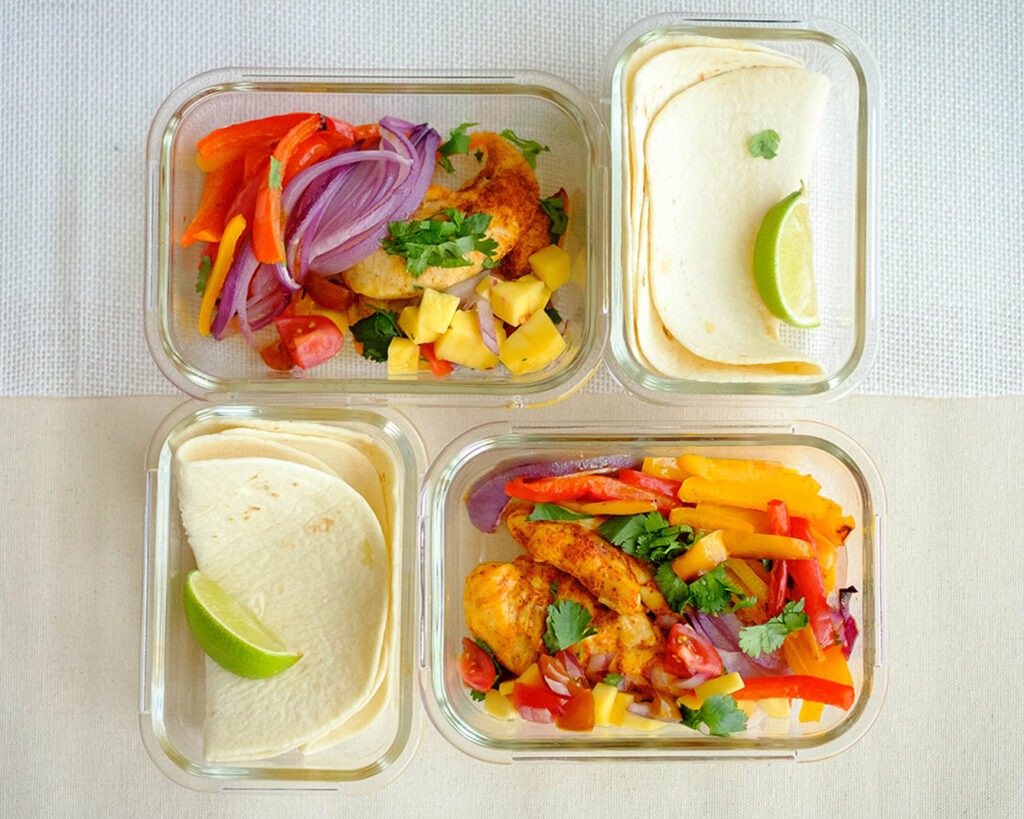
  • Vegetables: The great thing about this recipe is that you can use any kind of vegetables you have on hand, whether they are fresh, frozen, or canned.
  • Broth: We used chicken broth, but you can also use vegetable broth.
  • Toppings: We topped ours off with sliced avocado for an added healthy fat and chopped cilantro for fresh herb flavors.
Round bowl of chicken soup with beans, vegetables, avocado, and cilantro

Simple Steps for this One Pot Mexican Chicken Soup

  1. Heat your soup pot and saute the onions until they soften.
  2. Next, add the chicken, tomato sauce, broth, ad seasonings.
  3. Bring the liquid to a boil. After it reaches a boil, lower the head and simmer with a cover on the pot.
  4. Simmer until the chicken is fully cooked and is fork tender.
  5. Remove the chicken from the broth and shred it into small pieces.
  6. Add the chicken back to the pot, along with the vegetables and beans and let it simmer for a few more minutes.
  7. Top off the soup with sliced avocado and fresh cilantro.

Reference the recipe card below for detailed instructions.

Glass meal prep container of chicken soup with beans, vegetables, avocado, and cilantro

Meal Prep Tips for One Pot Mexican Chicken Soup

  • Ingredient Swaps: Make it vegetarian/vegan by omitting the chicken and just adding more beans and using vegetable broth. Make it keto by eliminating the corn and using non-starchy vegetables such as celery, zucchini, or yellow squash.
  • Leftover Leverage: Leftover uncooked chicken breasts can be frozen and saved for another recipe. You can also use it as a salad topping or make it into a chicken salad. Cilantro can be used up in scrambled eggs or added to salsa.
  • Storage: Store in an airtight container in the refrigerator for up to 3 to 4 days for the best quality.
Glass meal prep containers of chicken soup with beans, vegetables, avocado, and cilantro
chicken soup

One Pot Mexican Chicken Soup

Hearty and filling Mexican Chicken Soup Recipe that can be made ready in less than 30 minutes!
No ratings yet
Prep Time 5 minutes
Cook Time 30 minutes
Course lunch, Main Course
Cuisine American, Mexican
Servings 2

Equipment

  • knife
  • cutting board
  • spatula
  • soup pan

Ingredients
  

  • 1 tbsp olive oil
  • 1/4 cup red onions (diced)
  • 6 oz chicken breasts
  • 1 cup tomato sauce
  • 2 cups chicken broth
  • 1 cup corn (frozen)
  • 2 cups pinto beans (drained)
  • 1 red bell pepper (diced)
  • 1/4 teaspoon chili powder
  • 1/4 teaspoon paprika
  • 1/4 teaspoon garlic powder
  • 1/4 teaspoon salt
  • 1/4 teaspoon pepper
  • 2 avocado (sliced)
  • 2 tablespoons cilantro (chopped)

Instructions
 

  • Add oil to a soup pan on medium high heat and saute the onions until they soften. Next, add the chicken, tomato sauce, broth, and seasonings.
  • Bring the liquid to a boil. Once it boils, lower the heat to low medium and cover the pot with a lid. Let it simmer for 25 minutes until the chicken it is fork tender and shreds easily.
  • After the 25 minutes, scoop out the chicken onto another plate and use two forks to shred the chicken apart.
  • Place the shredded chicken back into the soup pot, along with the corn, pinto beans, and bell peppers. Serve the soup with sliced avocados and chopped cilantro.

Similar Recipes

turkey soup

One Pot Turkey Toscana Soup

chicken fajitas

Sheet Pan Chicken Fajitas with Mango Salsa

pork carnitas

Instant Pot Pork Carnitas Tostadas

You Might Also Like

Frequently Asked Questions

What toppings can I add to the soup?

For this soup recipe, you can add shredded cheese, crushed tortilla chips, and even sour cream


Can I use chicken stock in place of chicken broth?

Yes, both can be used interchangeably. The only difference is that broth is made from meat and vegetables, but stock is made with bones. For this recipe, either one will work just fine.


Can I use leftover rotisserie chicken?

Absolutely, however, you still want the soup to simmer for at least 12 to 15 minutes so that all the flavors and seasonings blend well together to give you a delicious broth.

Posted on Leave a comment

Ground Beef Cabbage Stir Fry

beef cabbage stir fry

Today, I’ve got a delicious and low-carb recipe for you: Ground Beef Cabbage Stir Fry. This Ground Beef Cabbage Stir Fry is not only a taste sensation but also a great low-carb meal prep option. Perfect for those looking to keep their carb intake in check while enjoying a satisfying, homemade meal. Give it a try, and you won’t be disappointed!

This post may contain affiliate links. If you use these links to buy something we may earn a commission at no extra cost to you. Please read the disclosure policy.

Struggling with getting vegetables into your diet during your weekly meal prep? Well this recipe ground beef cabbage stir fry is the solution that you’ll definitely enjoy!

Round plate with stir fry ground beef with red and green shredded cabbage.

This easy ground beef meal prep dish is full of vegetables and has a lot of great flavors using simple ingredients.

The PrepYoSelf Newsletter

There are several options for vegetables that you can use for stir fry. For this recipe, we used a mix of green and red cabbage, but you can easily add more vegetables such as sliced mushrooms, shredded carrots, and green beans.

Glass meal prep container with stir fry ground beef with red and green shredded cabbage.

Simple Keto-Friendly, Low-Carb Beef Stir Fry Ingredients

  • Ground Beef: We used ground beef, but you can easily swap in ground pork, ground turkey, or ground chicken for this stir fry recipe.
  • Red Onions: We used diced red onions, but chopped green onions are also a great choice.
  • Cabbage: You can buy a head of cabbage, however, you may end up with tons of leftovers that you’ll be eating for days, so sometimes, we opt for pre-chopped coleslaw mix. It saves time with prep and you’re not stuck with food waste.
  • Soy Sauce: Soy sauce adds great savory flavors to stir fry, but you can also use other sauces such as hoisin sauce, gyoza sauce, or oyster sauce.
  • Oils: We stir fry with olive oil, but then drizzle in a little bit of sesame oil for extra flavor in the end.

Glass meal prep container with stir fry ground beef with red and green shredded cabbage.

How to Meal Prep Ground Beef and Cabbage Stir Fry

  • Add oil to a hot wok and saute the onions until they soften.
  • Next, add the ground beef and continue to stir until it fully cooks.
  • Then, add the shredded cabbage and season with soy sauce, and stir fry until it gets tender.
  • Finally, drizzle the dish with a little bit of sesame oil.

Reference the recipe card below for detailed instructions.

Glass meal prep containers with stir fry ground beef with red and green shredded cabbage.

Meal Prep Tips for Ground Beef Stir Fry

  • To Serve: You can serve these with a side of steamed rice or soba noodles. If you want to keep it low-carb, you can also serve it with cauliflower rice or shirataki noodles.
  • To Reheat: Warm it up in the microwave for a few minutes until it heats through
  • To Store: You can store this in an airtight container in the refrigerator for up to 3 to 4 days

beef stir fry

Ground Beef Cabbage Stir Fry

This Ground Beef Cabbage Stir Fry is an easy meal prep recipe that you can cook in less than 15 minutes.
No ratings yet
Prep Time 5 minutes
Cook Time 15 minutes
Course dinner, Main Course
Cuisine Asian
Servings 2

Equipment

  • knife
  • cutting board
  • wok
  • spatula

Ingredients
  

  • 12 oz lean ground beef
  • 1/4 cup red onion (diced)
  • 2 cups green cabbage (shredded)
  • 2 cups red cabbage (shredded)
  • 1/2 teaspoon garlic powder
  • 2 tablespoons soy sauce
  • 1 tablespoon olive oil
  • 1 teaspoon sesame oil

Instructions
 

  • Add olive oil to a wok on medium-high heat and saute the red onions until they soften (about 2 to 3 minutes).
  • Next, add the ground beef and break it up into smaller pieces. Continue to stir it around for about 5 to 6 minutes until it fully cooks and is golden brown. Season with garlic powder.
  • Then, add the shredded cabbage and continue to stir until they soften. Season with soy sauce and mix thoroughly. At the end, drizzle with sesame oil and mix well.

Similar Recipes

peanut chicken

Peanut Chicken and Celery Stir Fry

beef and chinese broccoli

Garlicky Beef Stir Fry

tofu stir fry

Tofu and Veggie Stir Fry

You Might Also Like

Frequently Asked Questions

What are the benefits of cabbage?

Cabbage is rich in vitamin B6 and folate which help with energy metabolism. It is also a good source of fiber and contains powerful antioxidants that help protect the body.


Is cabbage low carb?

Yes, 1 cup of chopped raw cabbage only has 5 grams of carbs.


Is cabbage good for weight loss?

Yes, it is low in calories, fat, and high in fiber which well help you stay full longer. 

Posted on Leave a comment

Grilled Balsamic Salmon with Watermelon Salad

salmon and watermelon salad

If you’re looking for a way to figure out what to do with so much watermelon, try this refreshing watermelon and mozzarella salad served with grilled salmon.

This post may contain affiliate links. Please see our privacy policy for details.

Plate with grilled salmon and watermelon salad with mozzarella balls, cucumbers, and mint leaves drizzled with balsamic glaze.

Watermelon is such a refreshing fruit that provides so many nutrients. We replaced tomatoes with watermelon in this tasty twist of the classic Caprese salad.

Here are Ways to Enjoy Watermelon

  • Make it into a fruit slushie
  • Add it to salsa recipes
  • Make watermelon kebabs
  • Wrap it up in prosciutto for a healthy snack

The PrepYoSelf Newsletter

To Make this Watermelon Salad with Salmon, You’ll Need

  • Salmon: Salmon is full of nutrients, but you can also swap this out with chicken breasts if you prefer another protein option
  • Watermelon: You can also use cantaloupe or honeydew
  • Mint Leaves: You can also use fresh basil leaves
  • Mozzarella balls: You can also swap this out with feta cheese
  • Cucumber: This is another hydrating ingredient that makes this dish refreshing
  • Balsamic concentrate: If you don’t have the concentrate, you can use the vinaigrette

Plate with grilled salmon and watermelon salad with mozzarella balls, cucumbers, and mint leaves drizzled with balsamic glaze.

How to Make Grilled Salmon and Watermelon Salad

  1. Heat a grill pan and start with grilling the salmon flesh side down, then flip it over and cook it until the skin gets crispy.
  2. Meanwhile, prep your watermelon and cucumbers.
  3. In a mixing bowl, mix together the watermelon with the mozzarella, and mint leaves, and drizzle it with the balsamic concentrate.

Reference the recipe card below for detailed instructions.

Glass meal prep containers with grilled salmon and watermelon salad with mozzarella balls, cucumbers, and mint leaves drizzled with balsamic glaze.

Meal Prep Tips for Grilled Salmon and Watermelon Salad

  • To Store: Store in an airtight container in the refrigerator for up to 3 to 4 days. Separate the salmon from the watermelon salad to keep it from getting soggy.
  • To Reheat: You can serve the salmon chilled, however, you can also reheat the salmon in the microwave separately.

Glass meal prep containers with grilled salmon and watermelon salad with mozzarella balls, cucumbers, and mint leaves drizzled with balsamic glaze.

Salmon & Watermelon

Grilled Balsamic Salmon with Watermelon Salad

Watermelon and mozzarella salad drizzled with a balsamic glaze is the perfect salad to keep you cool during the warm weather. It's a mouthwatering twist on the classic Caprese salad.
No ratings yet
Prep Time 5 minutes
Cook Time 15 minutes
Course lunch, Main Course
Cuisine American, Mediterranean
Servings 2

Equipment

  • knife
  • cutting board
  • indoor grill pan
  • spatula
  • mixing bowls

Ingredients
  

Salmon & Seasonings

  • 12 oz salmon
  • 1/4 teaspoon garlic powder
  • 1/4 teaspoon onion powder
  • 1/4 teaspoon paprika
  • 1/4 teaspoon salt
  • 1/4 teaspoon pepper
  • 1 tablespoon olive oil

Watermelon Salad

  • 2 cups watermelon (cubed)
  • 1 cup cucumber (sliced)
  • 8 mini mozzarella balls
  • 3 mint leaves (chopped)
  • 2 tablespoons balsamic concentrate

Instructions
 

  • Season salmon with the seasonings. Heat a grill pan on medium heat and add the salmon, flesh side down, and cook for about 5 minutes. Flip it over and cook until the skin gets crispy (about 5 minutes).
  • Meanwhile, cut the watermelon into 1 inch cubes. Slice the cucumbers into rounds (1/4 inch thick). Chop the mint leaves.
  • In a mixing bowl, mix together the watermelon in a bowl with the mozarella and mint leaves. Drizzle the balsamic concentrate on top of the salmon and watermelon salad.

Similar Recipes

pine nut fish and spinach

Baked Pine Nut Crusted Tilapia with Sauteed Spinach

cajun tilapia

Cajun Tilapia with Roasted Broccolini and Potatoes

shrimp and asparagus

Oven Baked Shrimp with Panko Breaded Asparagus

You Might Also Like

Frequently Asked Questions

What are some best uses of watermelon?

If you’re tired of hydrating with water, make a refreshing drink by adding watermelon to your drink or add it to your smoothies. You can also make fruit pizza for kids.


Is watermelon good for weight loss?

It is 90% water so it’s low in calories and helps you stay hydrated.


Can I use shredded mozzarella instead of mozzarella balls?

Absolutely, shredded mozzarella will work. You can also use feta cheese crumbles.

Posted on Leave a comment

Baked Cilantro Lime Chicken with Strawberry Salsa

cilantro chicken

Let’s keep your basic baked chicken breasts from being boring for your next meal prep. We’re keeping it tasty with this cilantro lime pesto marinade, paired with perfect sides and condiments. Great for lunch or a chicken dinner with style.

This post may contain affiliate links. Please see our privacy policy for details.

Round plate with cilantro marinated chicken topped with strawberry salsa, black beans.

Not only do you get a good protein source from the chicken, but you also get an additional protein and fiber load from the tasty black beans.

To top it off, your tastebuds are going to be feeling fresh with the sweet and savory strawberry salsa.

Now we know what you are thinking…” Wow, that’s a lot to meal prep!”. Don’t worry, we’ll show you how to make this beautiful dish in no time.

The PrepYoSelf Newsletter

Gather the Following Ingredients

Ingredients For the Chicken and Cilantro Lime Pesto:

  • Chicken: We used boneless chicken thighs, but you can also use chicken breasts or chicken tenderloins.
  • Fresh Cilantro: If you don’t have cilantro, you can swap it out with green onions
  • Lime: You can also use oranges or lemons
  • Pine Nuts: If you don’t have pine nuts, you can use whatever nuts you have on hand
  • Garlic: We used fresh garlic, but you can also use garlic paste or garlic powder

Round plate with cilantro marinated chicken topped with strawberry salsa, black beans.

Ingredients For the Strawberry Salsa and Salad Mix:

  • Strawberries: Mango or pineapple are also good fruits to use in salsa
  • Cherry Tomatoes: We like cherry tomatoes because they are easy to slice into small pieces, but feel free to use regular tomatoes
  • Red Onions: Use whatever onions you have on hand, including shallots
  • Cilantro: You can also use green onions
  • Lime: Oranges or lemon can also be used
  • Spring Mix: Choose any kind of lettuce mix you like
  • Black Beans: Pinto beans will also work

Round plate with cilantro marinated chicken topped with strawberry salsa, black beans.

How to Bake Cilantro Lime Chicken:

  1. Make the Cilantro Pesto: In a blender, add the cilantro, pine nuts, juice of a lime, olive oil, garlic, and salt. Blend until smooth.
  2. Marinate the Chicken: Place the chicken in a mixing bowl. Pour in the cilantro pesto that you just blended. Marinate the chicken for at least 10 minutes.
  3. Bake the Chicken: Place the chicken on a sheet pan. Bake the chicken in the oven for 25-30 minutes until it is fully cooked. Meanwhile, prepare the strawberry salsa, salad, and black beans.

Reference the recipe card below for detailed instructions.

Glass meal prep container with cilantro marinated chicken topped with strawberry salsa, black beans.

Meal Prep Tips for Baked Cilantro Lime Chicken Dinner

  • Cook method variations: You can also cook the chicken in a small toaster oven or in the Air Fryer (cook at 360F for 20-25 minutes). Another option is to grill it on an outdoor grill or on an indoor grill pan which will give it a nice char and caramelized flavor.
  • To Serve: After the chicken cooks, let it rest for a few minutes before slicing it into bite-size pieces. This chicken dinner brings so much color and excitement to the plate.
  • To Store: Store it in an airtight container for up to 3 to 4 days in the refrigerator. Keep the salsa and beans separate from the spring mix to prevent the spring mix from getting soggy.
  • To Reheat: You can serve this meal chilled, but if want to reheat the chicken, you can warm it up in the microwave until it is heated through.

Cilantro Chicken

Oven Baked Cilantro Lime Chicken with Strawberry Salsa and Black Bean Salad

Cilantro Lime Marinated Chicken served with a light and refreshing strawberry salsa.
No ratings yet
Prep Time 5 minutes
Course lunch, Main Course
Cuisine American, Mexican
Servings 2

Equipment

  • knife
  • cutting board
  • blender
  • sheet pan
  • oven
  • mixing bowls

Ingredients
  

Chicken and Pesto

  • 12 oz boneless chicken thighs
  • 1 cup cilantro (chopped)
  • 1 lime (juiced)
  • 1/4 cup olive oil
  • 2 tablespoons pine nuts
  • 2 garlic cloves (peeled)
  • 1/4 teaspoon salt

Salad and Black Beans

  • 4 cups spring mix salad
  • 1 cup black beans (drained and rinsed)

Strawberry Salsa

  • 1/2 cup strawberries (diced)
  • 1/2 cup cherry tomatoes (sliced)
  • 1/4 cup red onions (diced)
  • 1/4 cup cilantro (chopped)
  • 1 lime (juiced)
  • 1/4 teaspoon salt

Instructions
 

  • Preheat the oven to 400F. Place the cilantro, pine nuts, juice of a lime, olive oil, garlic, and salt in a blender and blend until smooth.
  • Place the chicken in a mixing bowl and pour in the cilantro pesto. Marinate the chicken for about 10 minutes.
  • Next, place the chicken on a sheet pan and bake it in the oven for about 25-30 minutes until it reaches an internal temperature of 165F (half way through, flip over the chicken)
  • Meanwhile, rinse the strawberries and remove the stems. Cut them into quarters. Add them to another mixing bowl with the cherry tomatoes, red onions, cilantro, lime juice, and salt. Mix it all together.
  • After the chicken cooks, top it off with the strawberry salsa and enjoy it with a side of black beans and a side salad.

Notes

Instead of baking the chicken, you can also grill the chicken on an indoor grill pan for about 6 to 7 minutes on each side until it is fully cooked and reaches an internal temperature of 165F

Similar Recipes

bean and corn taco

Vegetarian Black Bean and Corn Soft Tacos

chicken salad

Oven Baked Honey Mustard Glazed Chicken Salad

balsamic chicken salad

Oven Baked Balsamic Chicken Salad with Strawberries

You Might Also Like

Frequently Asked Questions

What to serve with cilantro lime chicken?

If you have extra cilantro, you can make cilantro lime rice or serve the chicken with flour or corn tortillas.


Can you use lemon juice instead of lime juice?

Yes, they can be used interchangeably in this recipe.


How long can you keep marinated chicken in the refrigerator?

You can keep it for 24 hours, after that, any uncooked marinade should also be discarded.

Posted on Leave a comment

One Pot Turkey Toscana Soup

turkey soup

Here’s a healthy spin on a restaurant classic. This One Pot Turkey Toscana Soup recipe is lightened up with healthy ingredients that you can make in less than 30 minutes.

This post may contain affiliate links. Please see our privacy policy for details.

Soup bowl with turkey toscana soup that includes ground turkey, potatoes, and leafy greens.

Why You’ll Enjoy this Version of Turkey Toscana Soup

Zuppa Toscana soup is one of our favorite soups that we enjoy at Olive Garden. It’s typically made with Italian sausage, leafy greens, bacon, and potatoes. For our weekly meal prep, we are making this restaurant recipe with lighter ingredients at home.

  • In our recipe, we use high-protein ground turkey seasoned with Italian flavors
  • It’s satisfying and filling from the combination of tender potatoes and healthy collard greens
  • You can make everything in one pot and have minimal dishes for clean up

The PrepYoSelf Newsletter

Ingredients You’ll Need

This easy Turkey Toscana soup is a perfect one-pot meal loaded with flavors and nutrients. All you need is:

  • Ground Turkey: You can also use ground chicken or ground Italian pork sausage
  • Onions and Garlic: These aromatics provide a lot of flavors and give it the savory flavors for the soup
  • Collard Greens: Other dark leafy greens you can use are baby spinach or kale
  • Yukon Potatoes: Any kind of potatoes will work, but if you want to keep it low carb, you can use cauliflower florets
  • Chicken Stock: You can also use vegetable stock or broth
  • Coconut Milk: We used coconut milk to keep it dairy free, however, you can also use heavy cream if you are good with a little bit of dairy
  • Seasonings: We used a pre-made Italian seasoning with garlic powder and red pepper chili flakes for a little bit of heat

Glass meal prep container with turkey toscana soup that includes ground turkey, potatoes, and leafy greens.

Basic Steps to Make Turkey Soup

  1. Add oil to a soup pot on medium-high heat.
  2. Saute the onions and ground turkey until the turkey is cooked.
  3. Next, add the garlic and stir it around for a few seconds.
  4. Then, pour in the chicken broth and bring the liquid to a boil.
  5. Add the chopped collard greens, potatoes, and seasonings.
  6. Lower the heat to low-medium and let the soup simmer until the potatoes are fork tender.
  7. In the end, pour in the coconut milk and stir it all together.

Reference the recipe card below for detailed instructions.

Glass meal prep container with turkey toscana soup that includes ground turkey, potatoes, and leafy greens.

Meal Prep Tips for Turkey Toscana Soup

  • Adding vegetables: If you decide to swap in the cauliflower or spinach, you can add them towards the last 5 minutes of simmering the soup since these ingredients cook fast.
  • To reheat: Reheat it in the microwave until it is warm (about 2 minutes depending on your microwave settings).
  • Storage: Store in an airtight container in the refrigerator for up to 3 to 4 days for the best quality.
  • To freeze: If you want to freeze this meal, you can store it in freezer bags in the freezer for up to 3 months for the best quality. Just be sure to thaw it out in the refrigerator before reheating it.

Glass meal prep container with turkey toscana soup that includes ground turkey, potatoes, and leafy greens.

turkey toscana soup

One Pot Turkey Toscana Soup

A healthy, meaty, and completely slurpworthy soup that you can whip up in no time.
No ratings yet
Prep Time 5 minutes
Cook Time 25 minutes
Course dinner, lunch, Main Course
Cuisine American
Servings 2

Equipment

  • knife
  • cutting board
  • soup pan
  • spatula

Ingredients
  

  • 12 oz lean ground turkey
  • 1/2 cup red onions (diced)
  • 1 garlic clove (sliced)
  • 3 cups collard greens (rinsed and chopped)
  • 2 small yukon potatoes (cut in 1/2 inch cubes)
  • 3 cups chicken broth
  • 1/2 cup coconut milk
  • 1/2 teaspoon red pepper flakes
  • 1/4 teaspoon Italian seasoning
  • 1/2 teaspoon garlic powder
  • 1/2 teaspoon salt
  • 1 tablespoon olive oil

Instructions
 

  • Add oil to a soup pot on medium-high heat and saute the onions and garlic until they soften. Next, add the ground turkey and break it up into smaller pieces. Continue to stir until the turkey is golden brown (about 5 to 7 minutes).
  • Then, add the chicken broth, chopped collard greens, cubed potatoes, and seasonings. Stir it all together and bring the soup to a boil.
  • Once the soup reaches a boil, lower the heat to a low medium and simmer for 10-15 minutes until the potatoes are fork tender.
  • At the end, pour in the coconut milk and sprinkle with red pepper flakes.

Similar Recipes

chicken soup

One Pot Mexican Chicken Soup

beef cabbage stir fry

One Pot Ground Beef Cabbage Stir Fry

chicken pesto

Skillet Chicken Pesto and Peppers

You Might Also Like

Frequently Asked Questions

Can I use frozen vegetables?

Yes, most frozen vegetables are already pre-cooked, so the cooking time may be reduced. We love using broccoli florets instead of collard greens for this recipe and also add frozen cauliflower rice to thicken the soup. 


What can I serve with this soup?

This recipe can be served with a side salad or toasted sourdough bread. We also like getting breadsticks from the local bakery.


What else can I add to this soup?

You can also add legumes such as navy beans. They are mild flavored, dense, and smooth, and are an excellent source of dietary fiber and protein.

Posted on Leave a comment

Oven Baked Chicken Fajitas with Mango Salsa

chicken fajitas

This post may contain affiliate links. Please see our privacy policy for details.

Sheet pan chicken fajitas are the fastest dinner you can make with tender chicken, and colorful veggies, and it’s an easy clean-up!

Plate with chicken fajitas, mango salsa, and colorful bell peppers and onions served with tortillas.

Why We Love This Oven Baked Chicken Fajitas

  • There is no need to spend extra dollars at a restaurant for your weeknight dinner.
  • This easy fajita dinner is budget-friendly and super tasty.
  • You can bake everything in one pan and you get juicy chicken with sweet roasted peppers and onions, and the oven does all the work.

The PrepYoSelf Newsletter

To Make Easy Baked Chicken Fajitas, You’ll Need

  • Chicken Tenderloins: You can also use chicken breasts or boneless chicken thighs
  • Bell Peppers and Onions: These ingredients add flavor and lots of color to the dish
  • Fajita Seasoning: We made our own mixture, however, you can also use pre-mixed seasonings
  • Tortillas: Serve it up with your flour tortillas or corn tortillas. There are also low-carb options and vegetable options such as jicama tortillas if you are keeping it keto-friendly
  • Mango Salsa: We love adding fruit to our salsa, especially if we have extra on hand. Other tasty toppings you can add are guacamole, pico de gallo, cheese, or sour cream

Plate with chicken fajitas, mango salsa, and colorful bell peppers and onions served with tortillas.

How to Cook Chicken Fajitas in the Oven

  1. Preheat the oven to 400F.
  2. Mix together your seasonings in a small bowl.
  3. Place the chicken tenderloins on one side of the sheet pan and the sliced peppers and onions on the other side.
  4. Coat all the ingredients with olive oil and sprinkle them with the seasonings.
  5. Bake everything in the oven until the chicken is fully cooked.
  6. Meanwhile, prepare the Mango Salsa and other toppings.

Reference the recipe card below for detailed instructions.

Glass meal prep container with chicken fajitas, mango salsa, and colorful bell peppers and onions served with tortillas.

Meal Prep Tips for Baked Chicken Fajitas

  • Large Batches: If you decide to increase the batch size, you can serve the fajita chicken and veggies on top of a salad or serve it in a lettuce wrap or with a side of Spanish rice and beans.
  • Other Recipe Ideas: You can also add veggie fajitas with breakfast tacos. Make pasta with the chicken and bell peppers simply by adding them to penne pasta, and adding shredded parmesan cheese.
  • Storage: Store in an airtight container in the refrigerator for up to 3 to 4 days for the best quality.

Glass meal prep containers with chicken fajitas, mango salsa, and colorful bell peppers and onions served with tortillas.

chicken fajitas

Oven Baked Chicken Fajitas with Mango Salsa

Budget-Friendly and flavorful chicken fajitas baked in the oven in less than 30 minutes!
No ratings yet
Prep Time 5 minutes
Cook Time 20 minutes
Course lunch, Main Course
Cuisine Mexican
Servings 2

Equipment

  • knife
  • cutting board
  • sheet pan
  • oven

Ingredients
  

Chicken & Seasoning

  • 12 oz chicken tenderloins
  • 1/4 teaspoon chili powder
  • 1/4 teaspoon cumin
  • 1/4 teaspoon garlic powder
  • 1/4 teaspoon paprika
  • 1/4 teaspoon salt
  • 1 tablespoon olive oil
  • 4 low carb tortillas

Fajita Veggies & Seasoning

  • 1 red bell pepper (sliced)
  • 1/4 cup red onions (sliced)
  • 1/4 teaspoon paprika
  • 1/4 teaspoon garlic powder
  • 1/4 teaspoon salt
  • 1 tablespoon olive oil

Mango Salsa

  • 1 mango (peeled and diced)
  • 1/4 cup cilantro (chopped)
  • 1/4 cup red onions (diced)
  • 1 cup cherry tomatoes (sliced)
  • 1 lime (juiced)
  • 1/4 teaspoon garlic powder
  • 1/4 teaspoon salt

Instructions
 

  • Pre-heat the oven to 400F. Place the chicken tenderloins, sliced bell peppers, and sliced onions on a sheet pan. Sprinkle them with the seasonings and coat them with olive oil
  • Bake in the oven for 20 minutes until the chicken is fully cooked and reaches an internal temperature of 165F. (cook for an additional 5 minutes until it reaches the internal temperature of 165F)
  • Meanwhile, add the diced mango, cilantro, red onion, and cherry tomatoes in a mixing bowl. Add the seasonings, juice of a lime, and mix everything together
  • After the chicken cooks, layer the chicken tenderloins in the middle of the tortillas and top it off with the fajita veggies and fresh mango salsa. Enjoy this beautiful colorful and tasty dish!

Similar Recipes

cilantro chicken

Cilantro Lime Chicken Salad with Strawberry Salsa

sweet and sour chicken wings

Air Fryer Sweet and Sour Chicken Wings

stuffed primavera chicken

Primavera Stuffed Chicken Breasts

You Might Also Like

Frequently Asked Questions

Is chicken fajita healthy?

Yes, baking it in the oven is one of the healthiest ways to make chicken fajitas because this recipe uses healthy fat, lean meat, and healthy vegetables.


What goes well with fajitas?

Serve it with a cilantro corn salad, avocado salad, or baked black beans.


How do you cut chicken breast for fajitas?

If you are using chicken breasts instead of tenderloins, you will want to let the cooked chicken rest before slicing it into thin strips. Slice it the chicken breasts horizontally into ½-inch thick slices.

Posted on Leave a comment

Quinoa and Kale Salad

quinoa salad

This quinoa and kale salad recipe is a powerhouse of ingredients you should add to your weekly meal prep.

This post may contain affiliate links. Please see our privacy policy for details.

Bowl of quinoa salad with kale and butternut squash.

The combination of all these ingredients in this salad is not only colorful and flavorful but it’s also packed with nutrition. Both quinoa and kale are nutrient-dense, and the addition of butternut squash, shredded cabbage, and dried cranberries add healthy fiber and vitamins.

The PrepYoSelf Newsletter

Here’s What You Need for This High-Protein Quinoa Salad

  • Quinoa: There are different types of quinoa, but we used a tri-color quinoa
  • Kale: You can also swap this out with other greens such as arugula or spinach
  • Butternut squash: Another option is acorn squash or delicata squash
  • Red cabbage: We love the purple colors of red cabbage, but you can also use regular green cabbage
  • Dried cranberries: Feel free to use whatever dried fruit you have on hand such as raisins
  • Seasonings: We seasoned this salad with a homemade lemon honey dijon vinaigrette

Bowl of quinoa salad with kale and butternut squash.

Easy Steps to Make this Nutritious Kale Salad Recipe

  1. Boil water in a pot and add the quinoa. Cover the pot with a lid and lower the heat and let it simmer until it fully cooks.
  2. Meanwhile, blend together the ingredients for the homemade salad dressing.
  3. After the quinoa cooks, place it in a bowl and add the butternut squash, kale, shredded cabbage, and dried cranberries.
  4. Pour in the dressing and mix it all together.

Reference the recipe card below for detailed instructions.

Bowl of quinoa salad with kale and butternut squash.

Meal Prep Tips for Quinoa and Kale Salad

  • Ingredient Tips: Feel free to add diced avocado for some healthy fat
  • Nuts: You can also add nuts for more protein such as walnuts, almonds, or pecans
  • To Store: Store in an airtight container in the refrigerator for up to 3 to 4 days

Bowl of quinoa salad with kale and butternut squash.

Quinoa and Kale

Quinoa and Kale Salad

Here's a tasty kale salad with quinoa tossed in a homemade vinaigrette dressing.
No ratings yet
Prep Time 5 minutes
Cook Time 15 minutes
Course lunch, Main Course
Cuisine American, Mediterranean
Servings 2

Equipment

  • knife
  • cutting board
  • mixing bowls
  • boiling pot

Ingredients
  

Quinoa

  • 1/3 cup dried quinoa
  • 1 cup water

Salad Components

  • 1 cup butternut squash (diced)
  • 4 cups Baby kale
  • 1/4 cup shredded red cabbage
  • 2 tablespoons dried cranberries

Salad Dressing

  • 2 lemon (juiced)
  • 4 tablespoons olive oil
  • 1 tablespoon dijon mustard
  • 1 tablespoon honey
  • 1/4 teaspoon garlic powder
  • 1/4 teaspoon salt

Instructions
 

Quinoa

  • Bring 1 cup of water to a boil in a boiling pot. Add the quinoa and lower the heat to medium. Cover the pot with a lid and cook for 15 minutes. After it cooks, fluff with a fork and let it cool.

Salad Dressing

  • In a mixing bowl, add the juice of two lemons with olive oil, dijon mustard, honey, and the seasonings. Whisk together until the dressing is well blended.

Salad Assembly

  • In a bowl, add the butternut squash, quinoa, kale, shredded red cabbage, and dried cranberries.
  • Pour over the dressing and mix all the components together.

Similar Recipes

shrimp quinoa salad

Citrus Shrimp Quinoa and Spinach Salad

Honey Dijon Chicken with Kale and Sweet Potato Salad

salmon beet salad

Citrus Ginger Salmon Salad

You Might Also Like

Bubo, Pinot Noir

Trader Joe’s Meyer Lemon Cookie Thins

Amazon Affiliate TAlessi Autentico – Italian Crispy Breadsticksitle

Frequently Asked Questions

Do you serve this quinoa salad cold or hot?

You’ll want to let the quinoa cool before you mix it in with the other salad ingredients.


Is kale salad good for weight loss?

Kale is a nutrient-dense food that is a good source of fiber and protein which helps you keep full longer.


Can you eat quinoa raw?

It’s best to cook the dried quinoa prior to eating it, because it may cause digestive comfort, plus it tastes better!

Posted on Leave a comment

Vegetarian Red Pepper and Cheese Sandwich

roasted pepper sandwich with sliced avocado and roasted brussels sprouts

Toasted cheese sandwiches are the best, and for this recipe, we added an extra layer of flavor and nutrients with roasted bell peppers and creamy avocado slices.

This post may contain affiliate links. Please see our privacy policy for details.

Round plate with a grilled cheese and vegetable sandwich with roasted brussels sprouts.

Who craves comfort food for lunch? I know we do! And it can’t get any more comforting than a toasted cheese sandwich.

But this is not your average cheese sandwich. We leveled it up with roasted red peppers, and sliced avocado, and served it with crispy balsamic brussel sprout chips. And the best part is that we made it all in our Air Fryer Basket!

The PrepYoSelf Newsletter

Ingredients You’ll Need to Make This Tasty Vegetarian Cheese Sandwich

  • Sliced Bread: We used wheat bread, but you can choose any kind of bread that you like such as sourdough, rye bread, and even gluten-free freed
  • Red Bell Peppers: We used red peppers, but you can use any kind of roasted vegetables such as sliced zucchini, sliced eggplant, or sliced portobello mushrooms. We always try to incorporate any veggies when we can
  • Sliced Cheese: We used provolone cheese, muenster cheese, gruyere cheese, and swiss cheese are tasty options
  • Sliced Avocado: Instead of using mayo spread, we opted for healthy fat and used sliced avocado. This is a great option to add the creaminess that we enjoy from using mayo
  • Brussels Sprouts: We glazed our brussels sprouts with balsamic concentrate which added flavor and helped crisp it up during the cooking process

Round plate with a grilled cheese and vegetable sandwich with roasted brussels sprouts.

Easy steps for this Roasted Red Pepper and Cheese Sandwich

When it comes to the classic cheese sandwich, we often make it on the stove top or use a panini grill, but we actually used the Air Fryer to cook the whole meal. Here’s how we did it:

  1. In a bowl, marinate the brussels sprouts and bell peppers with balsamic concentrate, garlic powder, salt, and olive oil.
  2. Next, place the vegetables in the Air Fryer basket and cook at 350F for 7 minutes.
  3. Then, remove the vegetables from the basket and place the bread slices topped with sliced cheese into the basket.
  4. Toast them until the cheese melts.
  5. Assemble the sandwich by layering the roasted red peppers, cheese, and avocado.
  6. Enjoy with a side of roasted balsamic Brussels sprouts.

Reference the recipe card below for detailed instructions.

Glass meal prep container with a grilled cheese and vegetable sandwich with roasted brussels sprouts.

Meal Prep Tips for Roasted Pepper Cheese Sandwich

  • To Serve: Serve with a side salad, soup, or regular chips instead of the brussels sprouts.
  • Prep Tip: If you are prepping this meal in advance, cook only the bell peppers and brussels sprouts in advance. Then, when you are ready to eat the meal, toast the bread and slice the avocado fresh. If you assemble the sandwich too early, the avocado will brown and the sandwich might get too soggy

Glass meal prep containers with a grilled cheese and vegetable sandwich with roasted brussels sprouts.

roasted pepper sandwich with sliced avocado and roasted brussels sprouts

Vegetarian Roasted Red Pepper, Avocado and Cheese Sandwich

Here's a veggie packed cheese sandwich that you can easily prep in your Air Fryer.
No ratings yet
Prep Time 5 minutes
Cook Time 15 minutes
Course lunch, Main Course
Cuisine American
Servings 2

Equipment

  • knife
  • cutting board
  • mixing bowl
  • Air Fryer

Ingredients
  

  • 1 each red bell pepper
  • 2 cups brussels sprouts
  • 1 tablespoon balsamic concentrate
  • 1/4 teaspoon garlic powder
  • 1/4 teaspoon salt
  • 1 tablespoon olive oil
  • 4 slices wheat bread
  • 2 slices cheese (your choice)
  • 1 avocado

Instructions
 

  • Slice the brussels sprouts into thin slices. Cut the bell pepper in half and remove the inner seeds. In a bowl, marinate the vegetables with balsamic concentrate, garlic powder, salt, and olive oil.
  • Place the brussels sprouts and bell pepper in the Air Fryer and cook at 350F for 7 minutes. After the veggies cook, remove them from the Air Fryer basket.
  • Place the bread slices in the basket and top each slice with cheese. Toast the bread at 370F for 1 minute (or until the cheese melts)
  • Then, assemble the sandwich by adding avocado slices, and the bell pepper, and serve with a side of the roasted brussels sprouts.

Similar Recipes

sweet potato blt

Sweet Potato BLT Sandwich

balsamic chicken salad

Baked Balsamic Baked Chicken Spinach Salad

balsamic steak

Grilled Balsamic Steak with Sweet Potato Wedges

You Might Also Like

Frequently Asked Questions

I don’t have an Air Fryer, can I make this in the oven?

Yes! Just roast your veggies at 400F for 10-12 minutes. You can also toast your bread with the sliced cheese in the oven for about 2 to 3 minutes until the bread gets toasted and the cheese melts.


Do avocado and cheese go together?

Cheese and avocado are one of our favorite combos. In hot dishes, you can use any kind of cheese that melts well such as mozzarella, gruyere, provolone, and even swiss cheese. For cold dishes such as salads, combine them with feta cheese.


What else can you put on a grilled cheese sandwich?

You can add caramelized onions, pesto sauce, sauteed mushrooms, spinach, or olive tapenade. All these can add great flavors to your cheese sandwich. It’s also a great way to use up what you have in the kitchen. It’s all about being creative!

Posted on Leave a comment

Grilled Honey Dijon Chicken Kale Salad

chicken kale salad

This delicious and gorgeous roasted sweet potato and kale salad with grilled chicken is full of flavor. It’s a nutrient-packed lunch for the week.

This post may contain affiliate links. Please see our privacy policy for details.

Plate with chicken served on top of baby kale salad with sweet potato, cranberries, and pecans.

Why This Kale Salad is Healthy

  • Complete Meal: This recipe has lean protein, complex carbs, vegetables, fruit, and healthy fats.
  • Benefits of Kale: Kale is a green, leafy, cruciferous veggie that is rich in nutrients such as fiber, antioxidants, calcium, Vitamin C, K, and Iron.
  • Benefits of Sweet Potato: This sweet and starchy root vegetable is great for meal prep because it comes in a variety of sizes and colors. It is also a great source of fiber, vitamins, and minerals that help promote gut health.

The PrepYoSelf Newsletter

Ingredients You’ll Need

  • Chicken and Marinade: For this recipe, we used chicken tenderloins because they cook fast, but you can also use boneless chicken thighs or chicken breast. We also marinated the chicken in a honey dijon sauce before grilling it.
  • Sweet Potato & Seasonings: Other orange vegetable options you can use are diced butternut squash or acorn squash.
  • Salad Ingredients: For our salad mix, we incorporated a dark leafy green such as baby kale mix, but you can also use baby spinach.
  • Toppings: We topped off the salad with crunchy components such as pecan halves and dried cranberries.
  • Salad Dressing: To streamline the ingredients, we made our own homemade vinaigrette using the same ingredients used for the chicken marinade.

Plate with chicken served on top of baby kale salad with sweet potato, cranberries, and pecans.

How to Prepare Grilled Honey Dijon Chicken Kale Salad

  1. Preheat the oven to 400F.
  2. Cut the sweet potato into small pieces and place them on a baking sheet. Season the diced sweet potato and coat with olive oil.
  3. Bake the sweet potato in the oven until they are tender and golden brown.
  4. Meanwhile, marinate the chicken and cook it on the indoor grill.
  5. Afterward, toss together the chicken with the baby kale salad, sweet potatoes, dried fruit, and nuts, and drizzle the salad dressing on top.

Reference the recipe card below for detailed instructions.

Plate with chicken served on top of baby kale salad with sweet potato, cranberries, and pecans.

Meal Prep Tips for Kale Salad

  • Other Flavors: To make kale taste good, add citrus flavors. Kale leaves are crunchy and have a strong taste. Therefore, acidic flavors can cut through the tough flavors of raw kale.
  • Ingredient Variations: You can also a balsamic vinaigrette or Italian dressing to marinate your chicken if you don’t want to make your own homemade dressing.
  • Storage: Store in an airtight container in the refrigerator for up to 3 to 4 days for the best quality.

Glass meal prep containers with chicken served on top of baby kale salad with sweet potato, cranberries, and pecans.

chicken kale salad

Grilled Honey Dijon Chicken Kale Salad

Here's a nutrient packed salad filled with lean protein, dark leafy kale mix, and roasted sweet potato tossed in a sweet and tangy honey dijon vinaigrette dressing
No ratings yet
Prep Time 5 minutes
Cook Time 15 minutes
Course lunch
Cuisine American
Servings 2

Equipment

  • knife
  • cutting board
  • mixing bowls
  • tongs
  • sheet pan
  • indoor grill
  • oven

Ingredients
  

Chicken and Marinade

  • 12 oz chicken tenderloins
  • 2 tablespoons worcestershire sauce
  • 1 tablespoon dijon mustard
  • 2 tablespoons honey
  • 1/4 teaspoon paprika
  • 1/4 teaspoon garlic powder
  • 1/4 teaspoon salt
  • 1 tablespoon olive oil

Sweet Potato & Seasonings

  • 1 sweet potato
  • 1/4 teaspoon garlic powder
  • 1/4 teaspoon onion powder
  • 1/4 teaspoon salt
  • 1 tablespoon olive oil

Salad Ingredients

  • 4 cups baby kale
  • 2 tablespoons pecan halves
  • 2 tablespoons dried cranberries

Honey Dijon Vinaigrette

  • 3 tablespoons olive oil
  • 1 tablespoon dijon mustard
  • 2 tablespoons honey
  • 2 tablespoons apple cider vinegar
  • 1/2 teaspoon garlic powder
  • 1/2 teaspoon salt

Instructions
 

  • Preheat the oven to 400F. Peel the sweet potato and cut it into small dices. Place the sweet potato on a sheet pan and sprinkle them with the seasonings. Coat the sweet potato with olive oil. Bake in the oven for 15 minutes.
  • Meanwhile, in a mixing bowl, mix together the chicken marinade. Add the chicken in the bowl and make sure it is fully coated with the marinade.
  • Heat an indoor grill on medium high heat and grill the chicken tenders on each side for about 4 to 5 minutes until they are fully cooked and reach an internal temperature of 165F.
  • Enjoy the grilled chicken tenders with the baby kale salad topped with the roasted sweet potatoes, dried cranberries, pecan halves, and a drizzle of the vinaigrette.

Similar Recipes

cilantro chicken

Cilantro Lime Chicken Salad with Strawberry Salsa

stuffed primavera chicken

Primavera Stuffed Chicken Breasts

chicken fajitas

Sheet Pan Chicken Fajitas with Mango Salsa

You Might Also Like

Frequently Asked Questions

How to store kale?

Bagged kale can keep in the fridge for up to 5 to 7 days


What is massaged kale?

Massaging kale usually involves adding an acid such as lemon juice with olive oil to chopped kale. Use your hands to massage it for a few minutes to soften the leaves. It results in a glossed and reduced volume. Massaging kale helps break down the tough cell structure and allows for a softer texture and a more appetizing flavor. 


Is it better to eat kale raw or cooked?

 Raw kale is more beneficial than cooked, however, some people find it hard to digest and dislike the bittern flavors, therefore heating it softens some of the tough fibers and make it more appealing to consume.

Posted on Leave a comment

Celery Chicken Salad Wrap

round plate with celery chicken salad wrapped in flour tortilla

Here’s a twist on the classic chicken salad. We’ve got shredded chicken tossed in a creamy and tangy mayo and dijon mustard dressing with crisp, diced veggies and crunchy nuts.

This post may contain affiliate links. Please see our privacy policy for details.

Round plate with celery chicken salad served in tortilla wraps.

Reasons We Love This Chicken Salad With Celery

  • It is filling and full of fresh and bright ingredients
  • It is high in protein
  • You can make it into a healthy wrap or serve it as a healthy chicken salad topping with baby spinach or spring mix

The PrepYoSelf Newsletter

Chicken salad is usually a blank canvas for whatever you want to add to it. Our goal was to make it easy with basic ingredients that you can easily have on hand.

To make this easy chicken salad recipe, you’ll need

  • Shredded Chicken: You can use leftover chicken breast from a pre-cooked rotisserie chicken or boil it yourself.
  • Celery: This ingredient adds a nice crisp, fresh texture to the salad. If you don’t like celery, you can use other crips veggies such as diced bell peppers.
  • Red Onions: You can use any kind of onions.
  • Green Onions: You can other herbs such as tarragon or basil.
  • Walnuts: Use any kind of nuts that you have such as pecans or almonds.
  • Mayo: If you want more added protein you can also use greek yogurt.
  • Dijon Mustard: You can also use regular mustard or spicy mustard.
  • Sugar: The sweetness adds a balance to the savory flavors of this dish.
  • Flour Tortillas: Use any kind of tortilla for your wrap. You can also use lettuce wraps for a low-carb option

Round plate with celery chicken salad served in tortilla wraps.

Basic Steps to Prepare Celery Chicken Salad

  1. In a mixing bowl, add the shredded chicken, diced vegetables, nuts, mayo, dijon mustard, salt, pepper, and sugar.
  2. Mix it all together until the ingredients are well blended.
  3. Scoop small portions of the chicken salad into each tortilla wrap (about 1/2 cup scoop per tortilla).

Reference the recipe card below for detailed instructions.

Glass meal prep containers storing celery chicken salad served in tortilla wraps.

Meal Prep Tips for A Celery Chicken Salad Wrap

  • Other Cook Methods: If you don’t have pre-cooked rotisserie chicken, you can boil chicken breasts for about 15 to 20 minutes. After it cooks, use two forks to shred the chicken and let it cool.
  • Ingredient Variations: Instead of using shredded chicken, you can use boiled eggs or canned tuna.
  • Additional Ingredients: In addition to vegetables and herbs, you can also add common fruits such as sliced grapes, diced pears or apples, and even dried fruit such as dried cranberries.
  • Storage: Store in an airtight container in the refrigerator for up to 3 to 4 days for the best quality. If you’re not eating the meal right away, keep the tortillas separate from the chicken salad mixture to prevent the tortillas from getting soggy.

Glass meal prep containers storing celery chicken salad served in tortilla wraps.

round plate with celery chicken salad wrapped in flour tortilla

Celery Chicken Salad Wrap

This serving of chicken salad is great to utilize leftover chicken from another meal. It's filled with fresh veggies, crunchy nuts, and a creamy dressing.
No ratings yet
Prep Time 5 minutes
Cook Time 15 minutes
Course lunch, Main Course
Cuisine American
Servings 2

Equipment

  • knife
  • cutting board
  • mixing bowl

Ingredients
  

  • 1.5 cups shredded chicken (pre-cooked)
  • 2 tablespoons mayo
  • 2 tablespoons dijon mustard
  • 2 tablespoons green onions (chopped)
  • 1/2 cup celery (diced)
  • 1/4 cup red onions (diced)
  • 1/4 cup walnuts (chopped)
  • 1 teaspoon salt
  • 1/4 teaspoon pepper
  • 1 teaspoon sugar
  • 4 flour tortillas

Instructions
 

  • In a bowl, mix together the chicken, green onions, celery, red onions, walnuts, mayo, dijon mustard, salt, pepper, and sugar.
  • Scoop the chicken salad into a tortilla wrap.

Notes

Note: if you don’t have pre-cooked chicken, bring water to a boil and boil chicken breast in a pot for about 20 minutes until it fully cooks. Once it cooks, use two forks to shred it into pieces. Let it cool before mixing it with the other ingredients.

Similar Recipes

chicken kale salad

Grilled Honey Dijon Chicken and Kale Salad

chicken fajitas

Sheet Pan Chicken Fajitas with Mango Salsa

peanut chicken

Peanut Chicken Stir Fry

You Might Also Like

Frequently Asked Questions

What to eat with chicken salad?

You can serve this with sandwich bread, in a croissant, or with lettuce wraps.


What can I use instead of celery in chicken salad?

If you need a crunch, you can use jicama, carrots, and even radish.


Can I use grilled chicken for chicken salad?

Yes! Any leftover cooked chicken works well. Just be sure to chop it up into small pieces so that it can mix well with the other ingredients.