
Air Fryer Turkey Deli Taquitos – the ultimate air fryer lunch hero. Budget-friendly, time-saving, kid-approved, and infinitely customizable. Believe me, if you’re all about quick, budget-friendly, and delicious meal prepping, this is the game changer you’ve been waiting for!
This post may contain affiliate links. Please see our privacy policy for details.
We love Air Fryer Taquitos
- First things first, let’s talk about the perks. Time-saving? Absolutely! With the mighty air fryer in your corner, you can whip up a batch of these taquitos in no time. Just a few minutes of prep, a quick air frying session, and boom! You’ve got a week’s worth of scrumptious lunches ready to roll
- Now, let’s talk dollars and cents. These air fryer lunch taquitos are a budget-friendly masterpiece. All you need are some tortillas, lean turkey deli slices, and a sprinkle of cheddar cheese. It’s like a wallet-friendly flavor explosion! And guess what? You’re not only saving money, but you’re also saving those precious hours you’d otherwise spend queuing at the deli counter or going through the drive-thru.
- Oh, and did I mention these taquitos are kid-approved? If you’re a parent, you know how finicky little taste buds can be. But fear not, these turkey and cheese delights are sure to be a hit with the kiddos. They’re just the right size for those tiny hands and big appetites.

Basic Ingredients You’ll Need
- Flour tortillas are a versatile choice for wrapping up the delicious fillings. They’re soft and pliable, making them easy to roll. If you’re looking for a healthier option, you can opt for whole wheat tortillas for added fiber and nutrients.
- Turkey deli slices provide a lean source of protein for these taquitos. They are a lower-fat alternative to other deli meats, and they offer a mild, savory flavor that pairs well with the other ingredients.
- Cheddar cheese slices bring a wonderful creaminess and a hint of sharpness to the taquitos. They melt beautifully, holding the turkey slices together and adding that classic cheesy goodness.
- Olive oil is brushed lightly on the taquitos before air frying. This step not only contributes to the delightful crispiness but also imparts a subtle flavor and helps achieve that golden-brown hue.
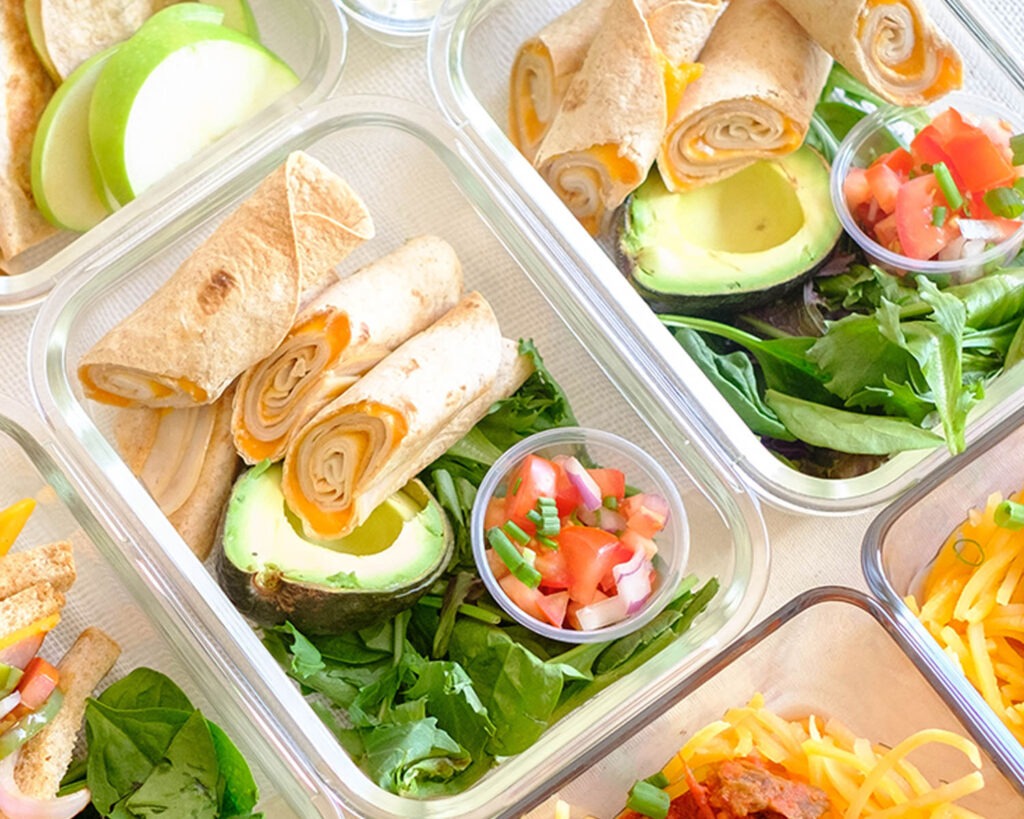
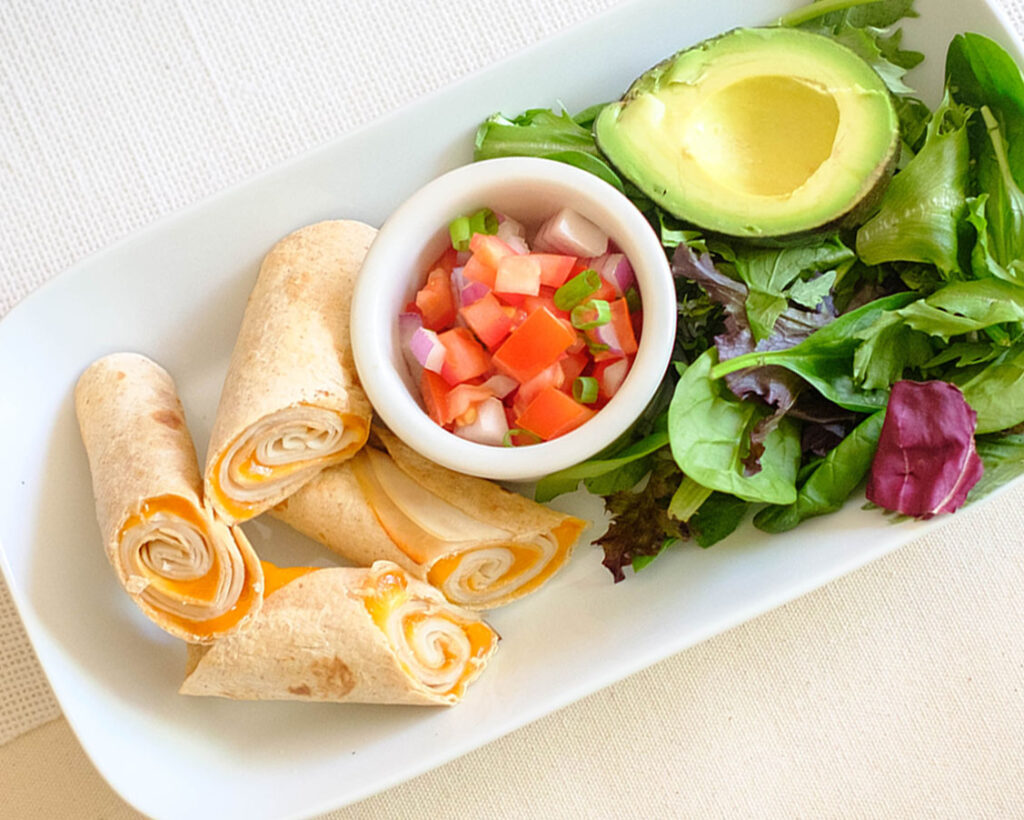
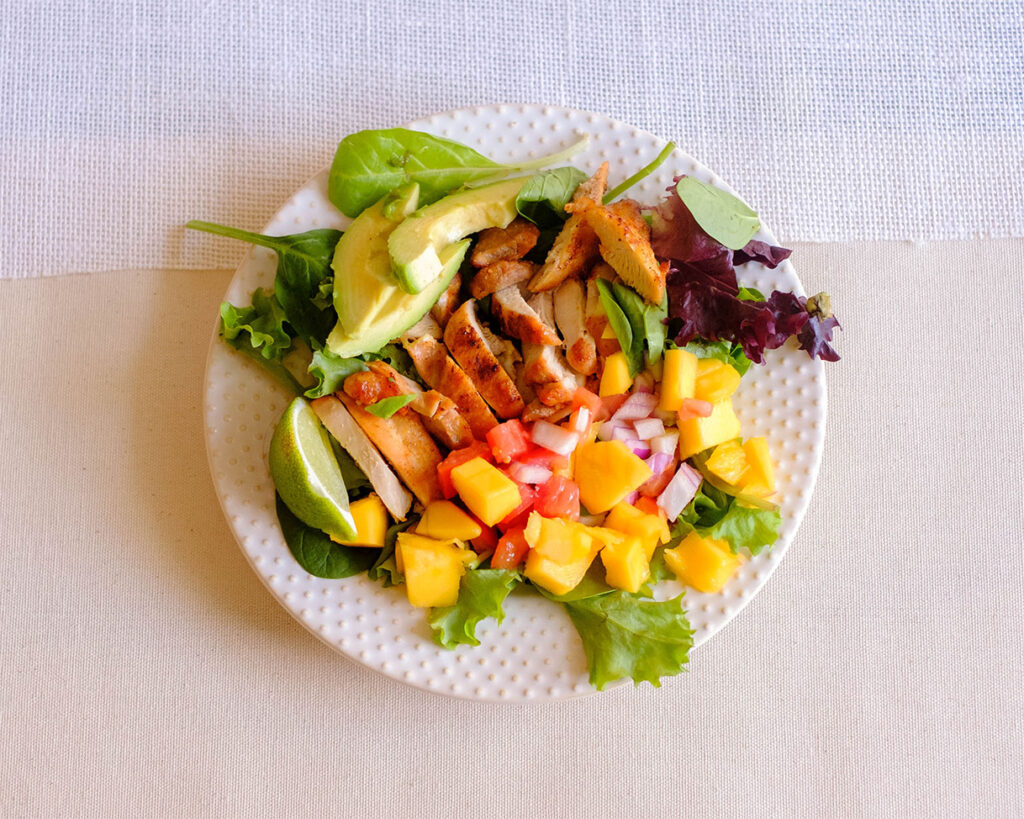
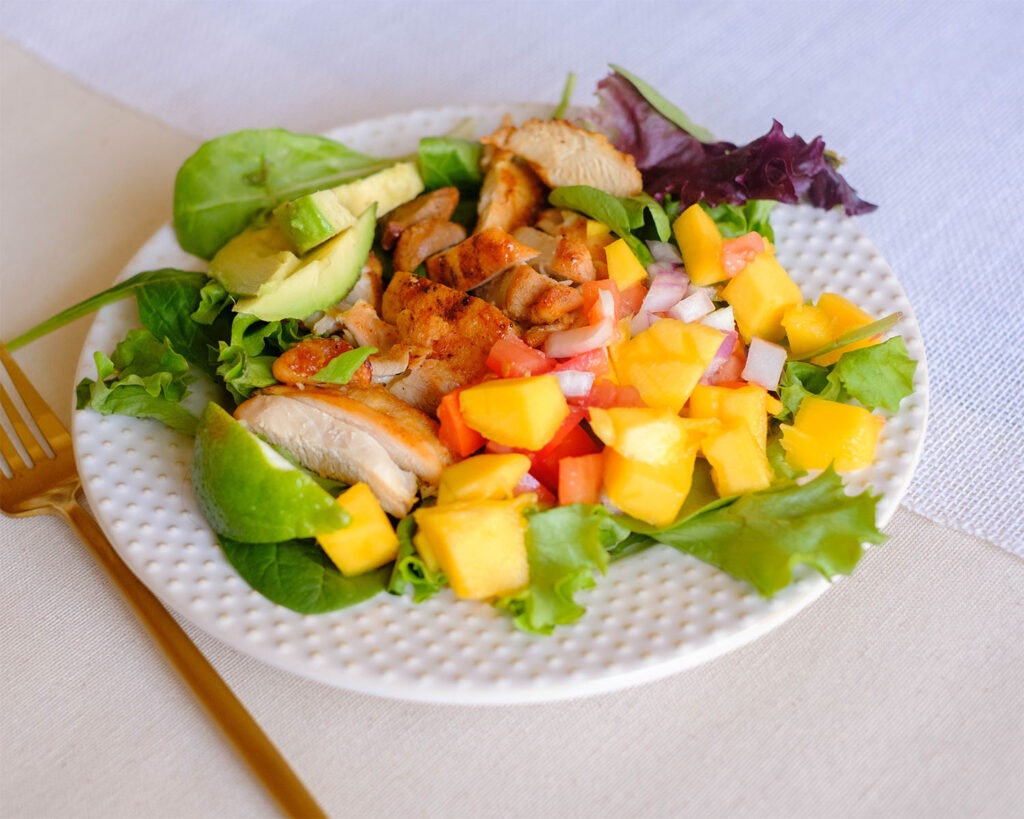
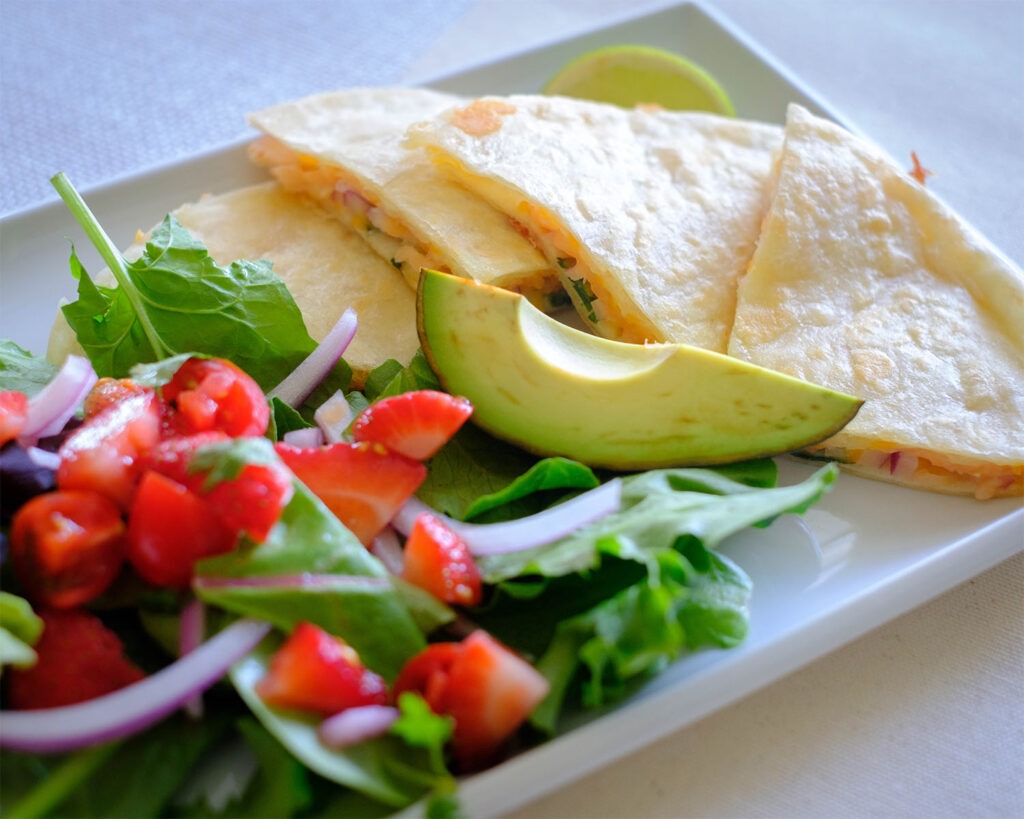
- Avocado is a creamy and nutritious addition to the dish. It provides healthy fats, vitamins, and a luscious texture. Slicing it adds a touch of luxury to the plate and balances the flavors.
- Spring mix or your preferred greens serve as the base of the side salad. They bring freshness, color, and a variety of nutrients to the meal. Feel free to choose your favorite leafy greens for the bed of the salad.
- Pico de gallo is a simple and vibrant salsa made from fresh ingredients. Diced tomatoes provide juiciness, while finely chopped onions and cilantro add pungent and herbaceous flavors. Lime juice, salt, and pepper bring a zesty kick.
How to Make Air Fryer Lunch Taquitos
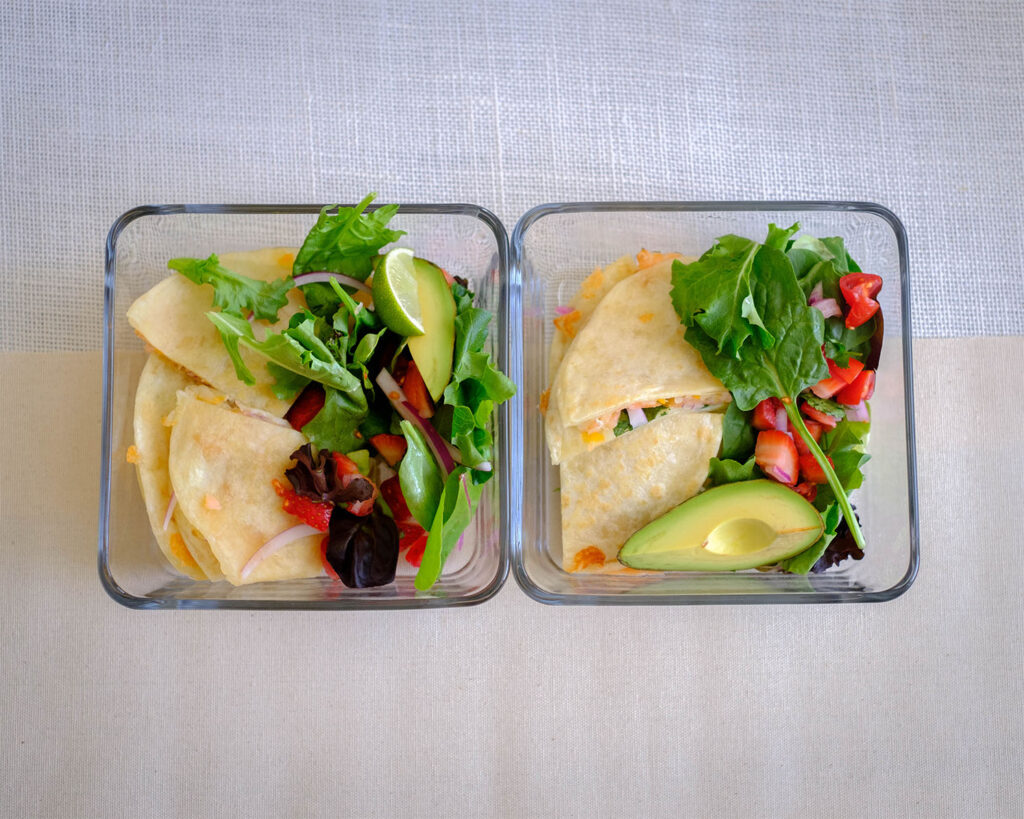
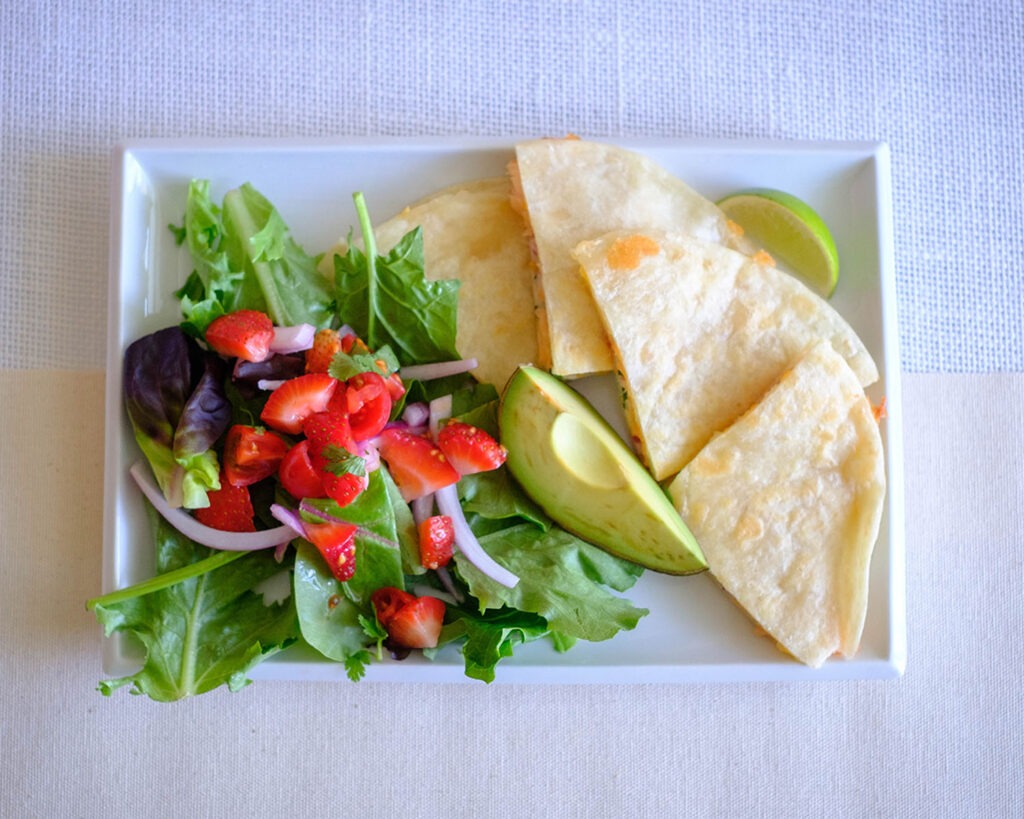
- Lay out a tortilla and place one slice of cheddar cheese in the center. On top of the cheese, layer 2 oz of turkey deli slices.
- Roll the tortilla tightly around the fillings to form a taquito.Brush the rolled taquito lightly with olive oil all around to help achieve that crispy goodness.
- Place the taquitos in a single layer in the air fryer basket, seam side down, ensuring they’re not touching each other.
- Cook the taquitos for 5 to 6 minutes, or until they turn a beautiful golden brown and achieve that perfect crunch.
- While the taquitos are air frying, whip up the pico de gallo. Dice tomatoes, onions, and fresh cilantro. Combine the diced ingredients in a bowl, squeeze in some fresh lime juice, and season with salt and pepper to taste. Mix well to create vibrant and zesty pico de gallo.
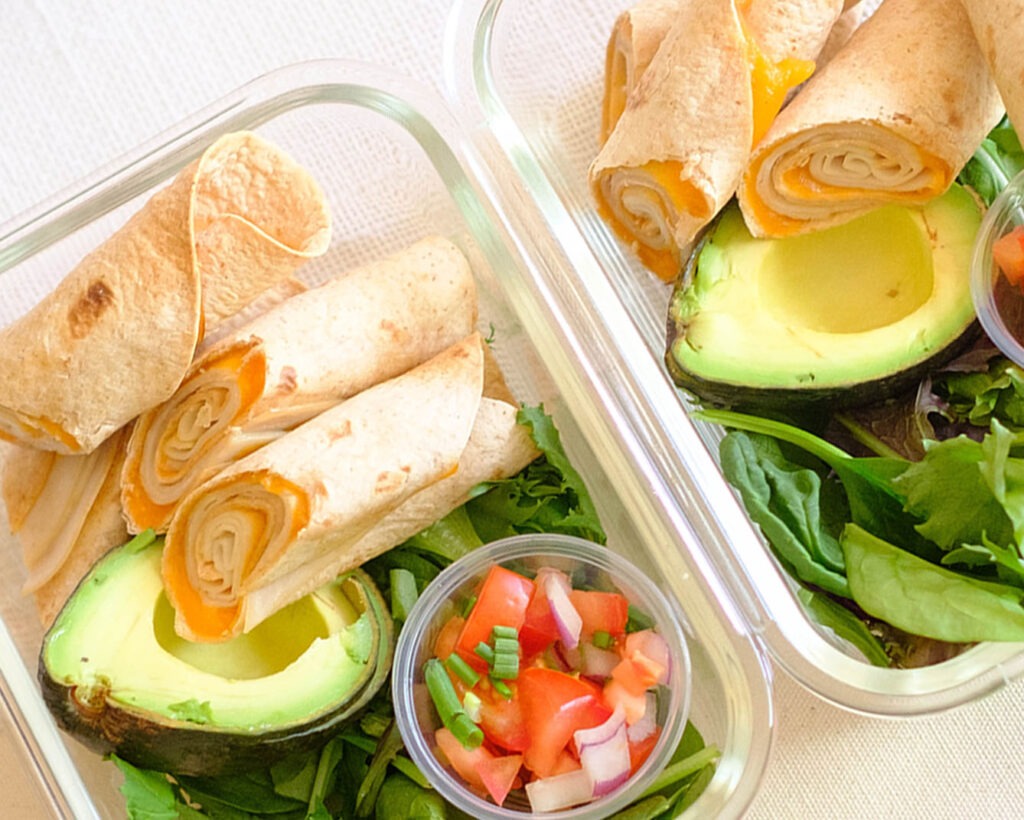
- Once your taquitos are perfectly crispy and golden, take them out of the air fryer. On a plate, arrange a bed of spring mix or your favorite greens. Place the taquitos on top of the greens. Add a generous spoonful of homemade pico de gallo on one side of the plate. Artfully arrange the avocado slices next to the pico de gallo.
Reference the recipe card below for detailed instructions.
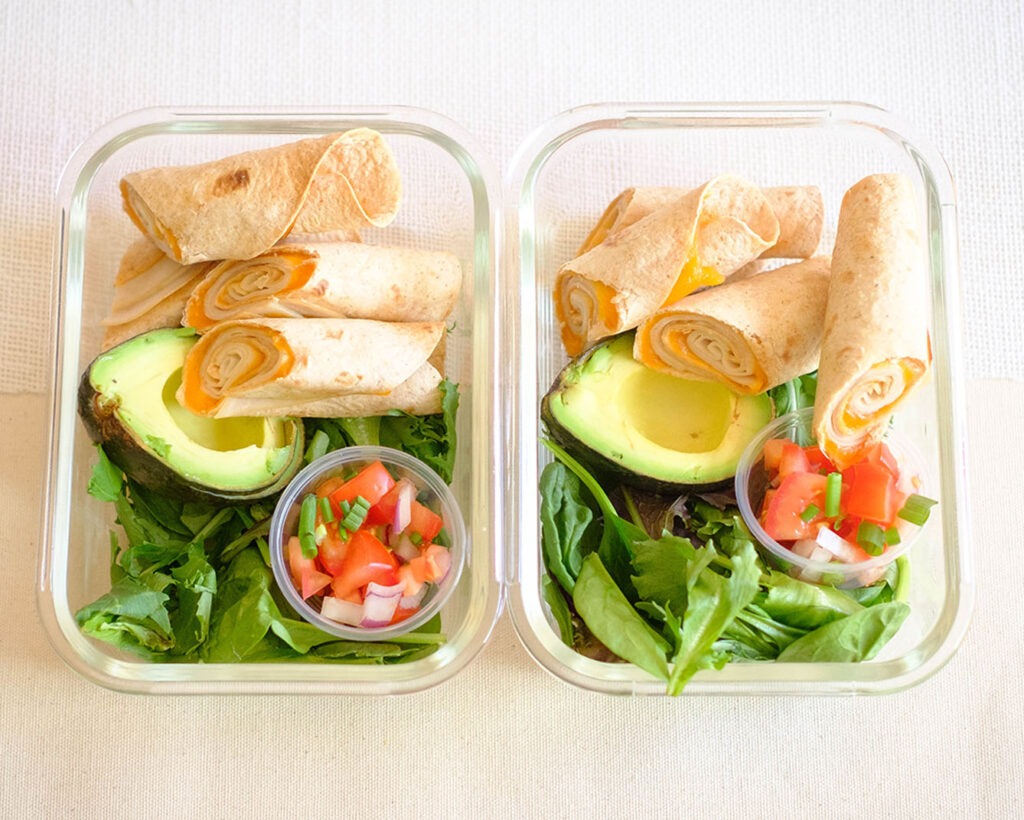
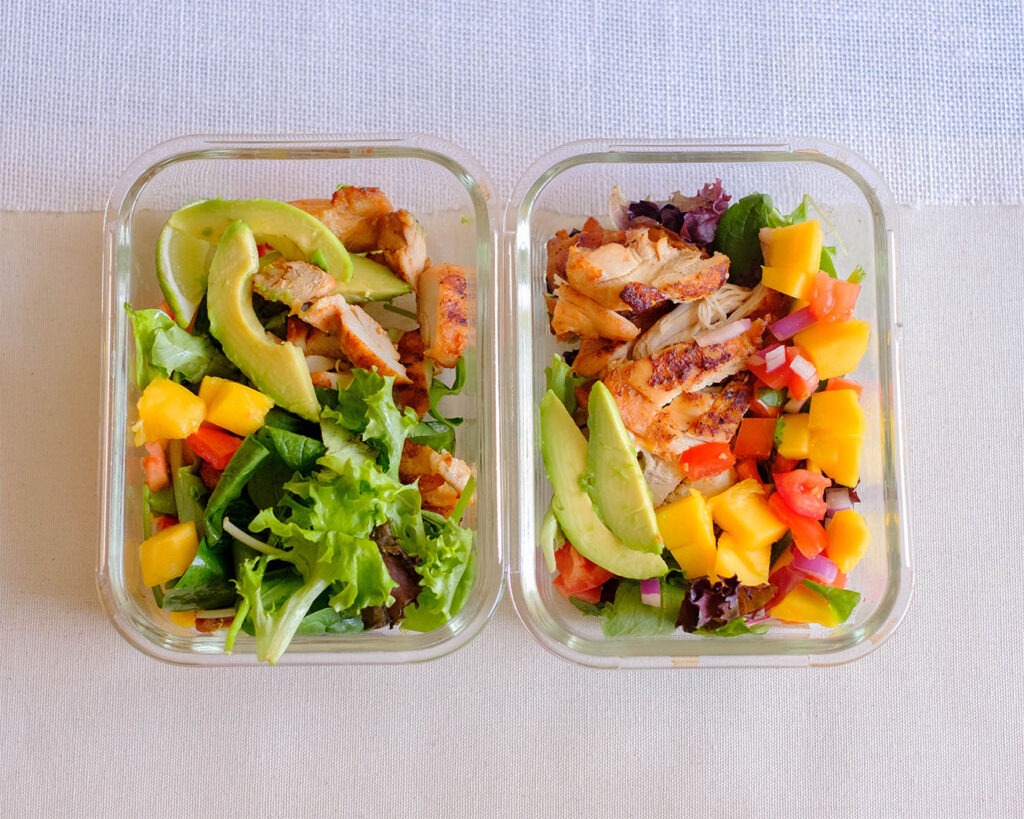
Meal Prep Tips for This Air Fryer Taquito Recipe
- Now, let’s get into the nitty-gritty of meal prep success. Storage is a breeze – once your taquitos are air-fried to golden perfection, let them cool completely before storing in an airtight container in the fridge.
- And when hunger strikes, simply pop them back into the air fryer for a quick reheat. They’ll regain their delightful crunch and gooey cheese center like they were just freshly made.
- Feeling adventurous? Feel free to switch up the ingredients! Swap turkey for chicken, experiment with different cheese blends, or go all-veggie for a meatless version. Your taste buds, your rules!


Frequently Asked Questions
How can I prevent the taquitos from unraveling in the air fryer?
To prevent unraveling, make sure to roll the tortillas tightly around the fillings before air frying. Placing them seam side down in the air fryer basket also helps them hold their shape.
Can I use pre-shredded cheese instead of cheese slices?
Of course! Pre-shredded cheese works just fine. However, using cheese slices helps keep the cheese evenly distributed, preventing clumps and ensuring a consistent melt.
Can I use whole wheat tortillas for a healthier option?
Absolutely! Whole wheat tortillas are a fantastic choice for a healthier spin on this recipe. They bring more fiber and nutrients to the table while maintaining that satisfying crunch.


Air Fryer Turkey Taquitos
Equipment
Ingredients
Pico de Gallo
Instructions
Notes
Nutrition