Posted on Leave a comment

Easy Salmon Burger Lettuce Wraps with Crispy Sweet Potato Cubes

salmon burger lettuce wraps with sweet potato cubes

If you’re looking for a quick, healthy, and heart-healthy meal, these Salmon Burger Lettuce Wraps with Crispy Roasted Sweet Potatoes recipe are a perfect fit. With just a few simple ingredients, you can whip up a delicious, low-carb dish in under 20 minutes. We’re using Trader Joe’s pre-formed salmon patties to help speed up the meal prep process! The tender, omega-3-rich salmon patties pair perfectly with crisp iceberg lettuce and juicy tomatoes, while roasted sweet potato cubes add a satisfying crunch and sweetness. This meal is not only flavorful but also customizable with easy ingredient swaps, making it ideal for busy weeknights or meal prep for the week ahead.

This post may contain affiliate links. Please see our privacy policy for details.

salmon burger lettuce wraps with sweet potato cubes

Why This Recipe Works for Busy Individuals:

This recipe is the perfect weekday meal for those who want something heart-healthy, quick, and easy to prep. The air fryer does most of the work, and you’ll have a balanced, delicious meal ready in under 20 minutes! With protein-rich salmon, fresh lettuce, and sweet potato cubes for a dose of fiber and vitamins, it’s not just filling but also great for meal prepping. You can cook extra salmon patties and potatoes to enjoy later in the week, making it a time-saver for anyone looking to stay on track with their healthy eating goals

The PrepYoSelf Newsletter

Why These Ingredients Work Together:

  • Trader Joe’s Salmon Patties: These salmon patties are packed with heart-healthy omega-3 fatty acids and protein, making them a nutritious choice for busy individuals. The mild flavor of the salmon pairs well with many ingredients, and because they’re pre-seasoned, they require minimal effort. If you don’t have salmon patties, you can easily swap them for grilled chicken breasts, veggie burgers, or even a turkey patty for a similar protein boost.
  • Iceberg Lettuce Wraps: Iceberg lettuce is a great low-carb, crunchy alternative to bread or buns, and its mild taste allows the salmon and other flavors to shine. The crisp texture contrasts nicely with the tender salmon. If you want more nutrients or a sturdier wrap, you can swap iceberg for romaine lettuce, butter lettuce, or even collard greens.
  • Roma Tomato: Sliced Roma tomatoes add a juicy freshness and a subtle sweetness to balance the savory flavors of the salmon. The acidity in the tomato also enhances the overall taste of the dish. If you’re out of Roma tomatoes, you can easily substitute with cherry tomatoes, a beefsteak tomato, or even sliced cucumbers for a bit of crunch.
  • Sweet Potato: Sweet potatoes are rich in fiber, vitamins, and antioxidants, making them a nutrient-dense side dish. The natural sweetness of the roasted sweet potatoes complements the savory and slightly salty flavor of the salmon patties. You can swap sweet potatoes for regular potatoes, carrots, or even roasted butternut squash if you prefer a different flavor profile.
  • Olive Oil: Olive oil is used to coat the sweet potato cubes, helping them roast evenly and adding a touch of healthy fats. It also enhances the flavor of the spices and creates a golden, crispy texture on the potatoes. If you don’t have olive oil, feel free to use avocado oil, coconut oil, or even melted butter for similar results.
  • Seasonings (Salt, Paprika, Garlic Powder): These spices are simple but effective. Salt brings out the natural flavors of the ingredients, while paprika adds a smoky warmth, and garlic powder lends a savory depth. You can easily swap these seasonings to fit your taste preferences—try using chili powder for heat, rosemary for an earthy flavor, or cumin for a warm, spiced twist.
salmon burger lettuce wraps with sweet potato cubes

Easy Recipe Steps to Make Salmon Lettuce Wraps

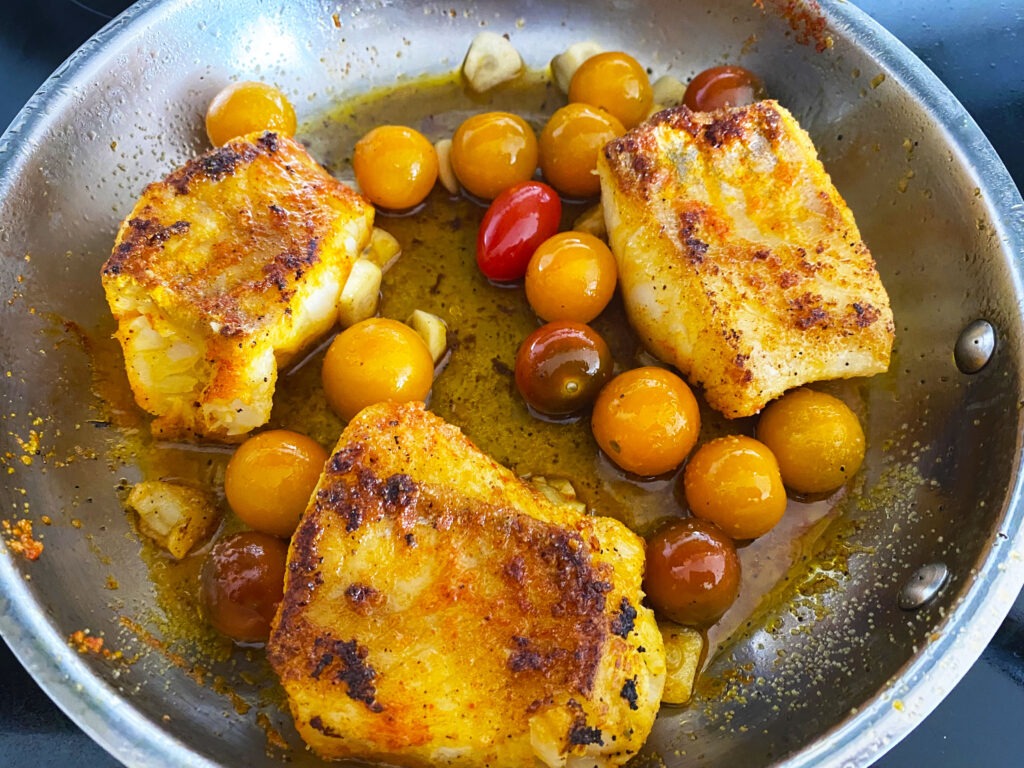
  1. Cook the Salmon Patties: Remove the salmon patties from their packaging and place them in the air fryer basket. Set the temperature to 400°F and cook for 8 to 10 minutes. Check that they reach an internal temperature of 145°F using a food thermometer. If they aren’t quite there, cook for an extra 2 to 3 minutes until fully cooked through.
  2. Roast the Sweet Potatoes: While the salmon is cooking, peel the sweet potato and cut it into ½ inch cubes. Place the cubes in a bowl, drizzle with olive oil, and sprinkle on the salt, paprika, and garlic powder. After the salmon is done, add the sweet potato cubes to the air fryer and cook at 400°F for 8 to 10 minutes, shaking the basket halfway. For extra crispiness, cook for an additional 2 to 3 minutes until golden.
  3. Prepare the Lettuce Wraps: While the sweet potatoes cook, take the iceberg lettuce and carefully cut out the leaves to create wraps. Rinse them under cold water and pat dry. Slice the Roma tomato into thin rounds so everything is ready to go.
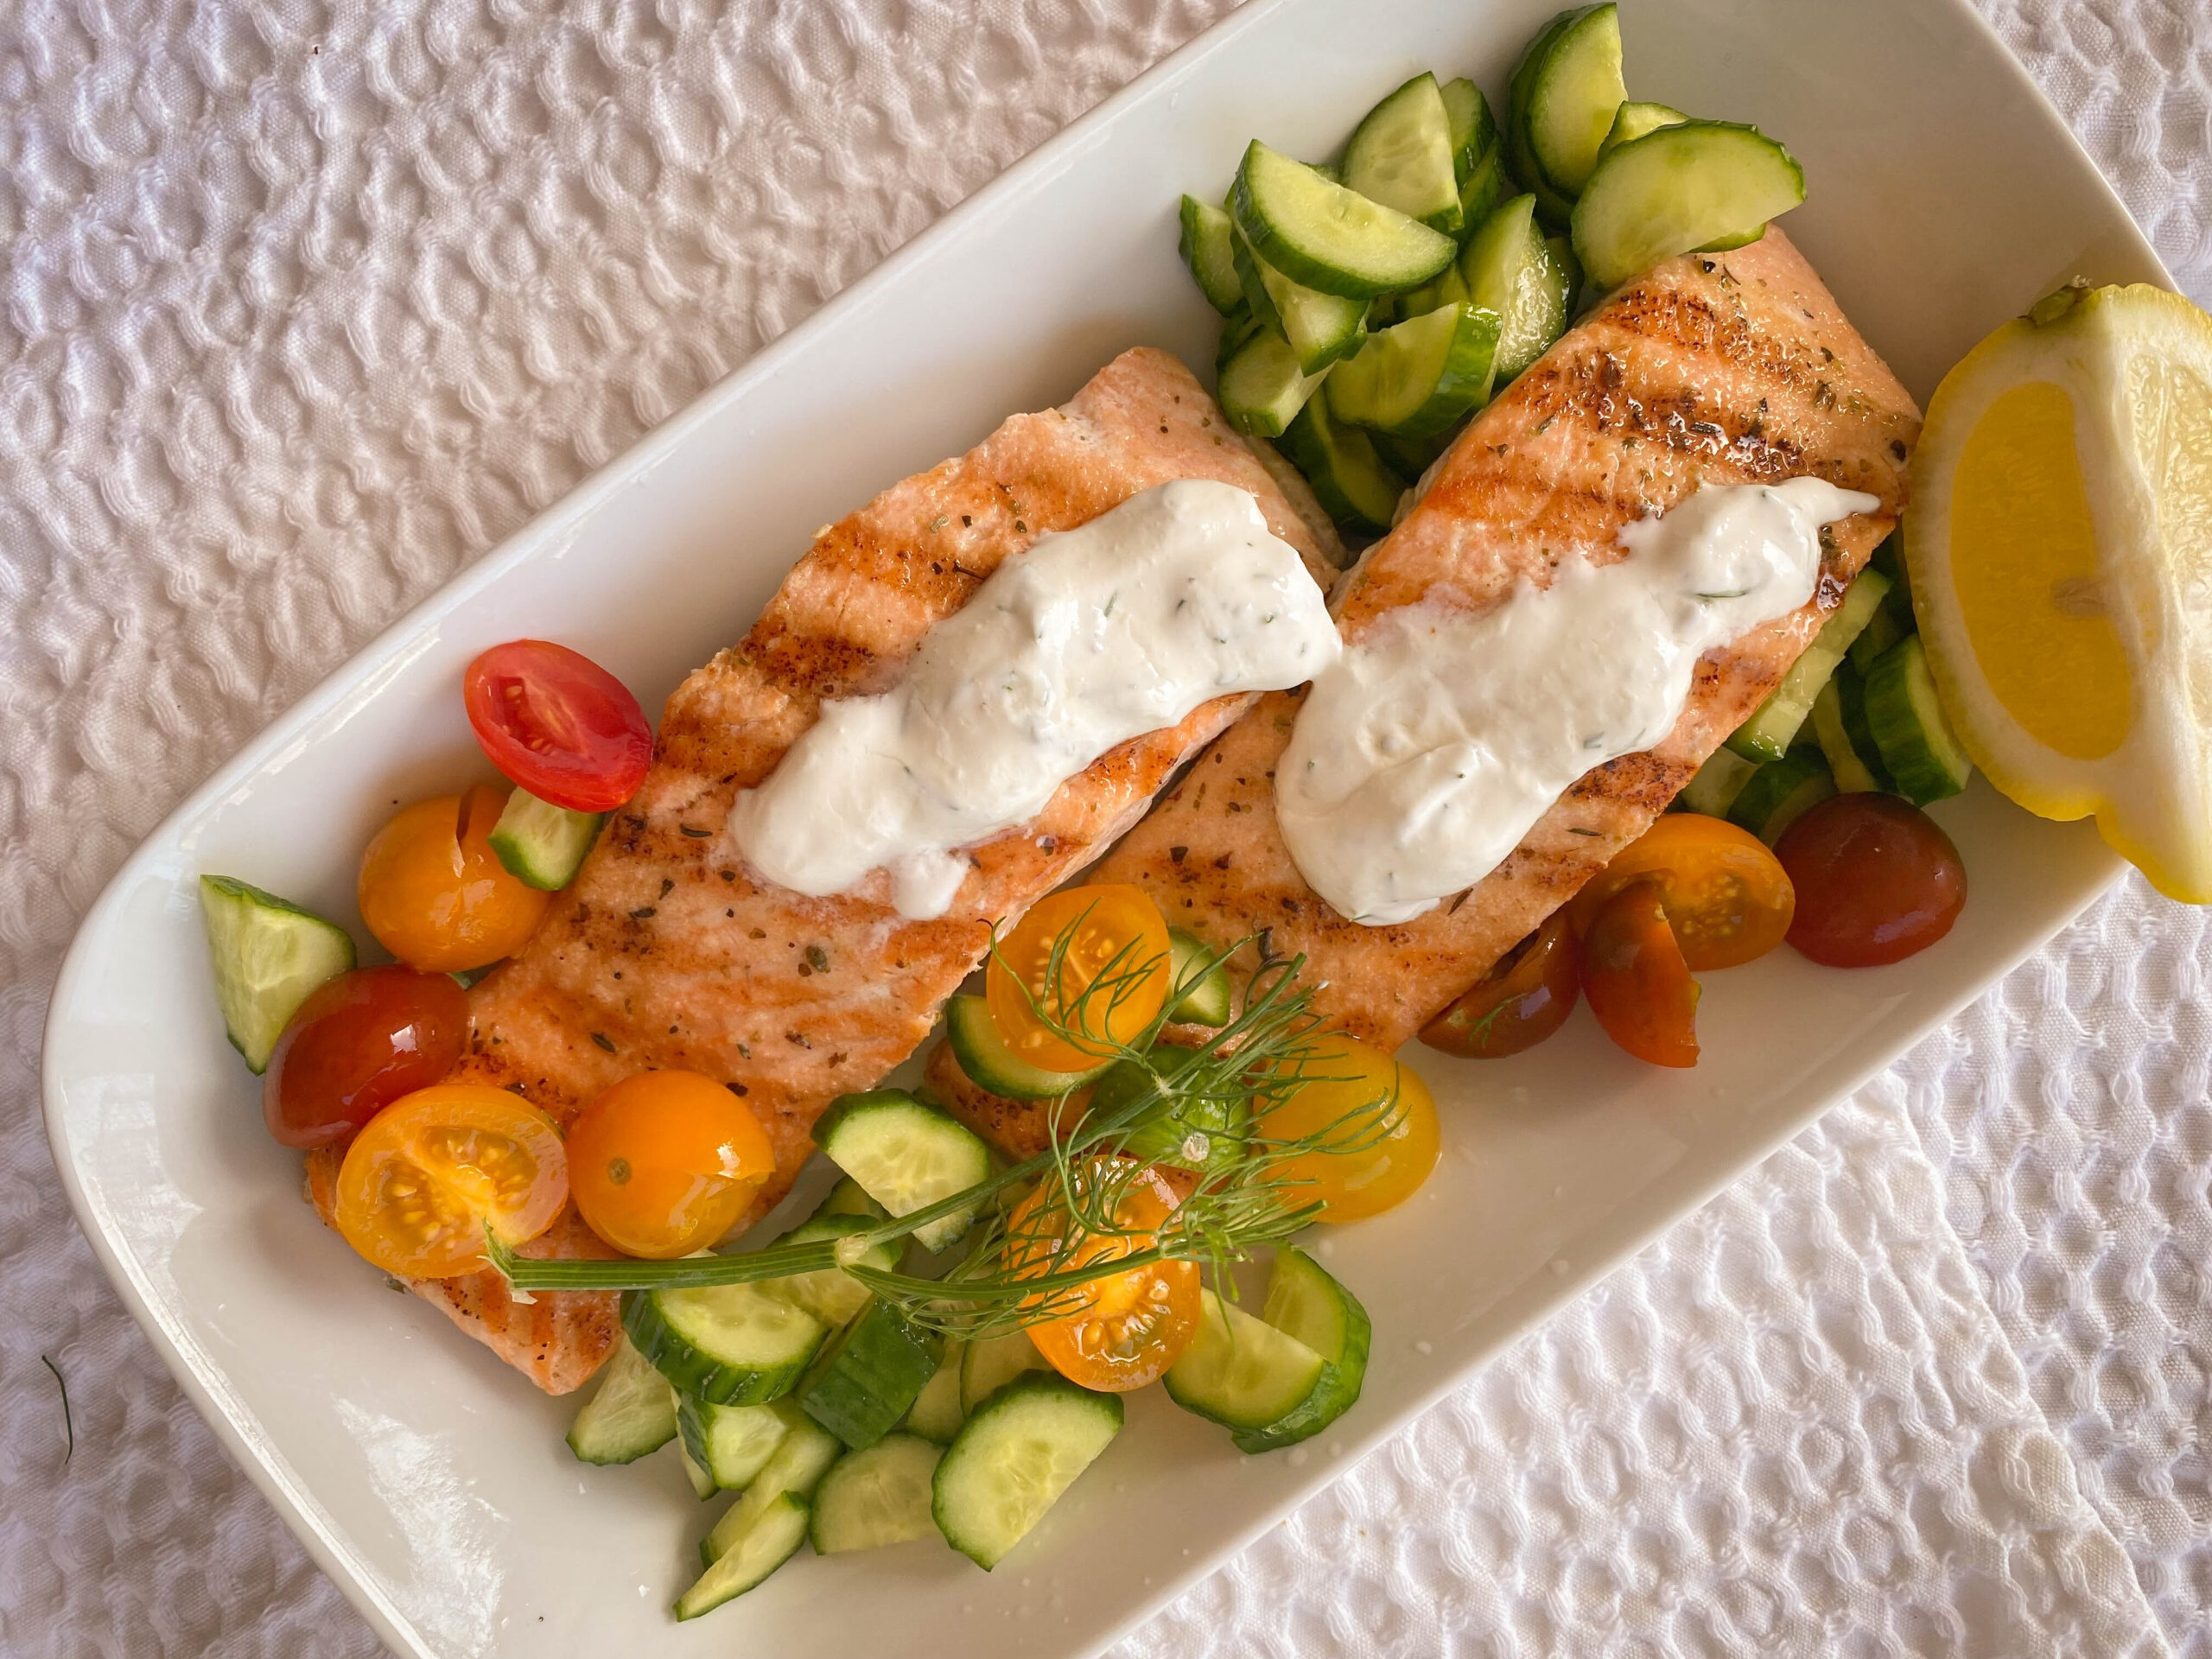
  4. Assemble the Lettuce Wraps: Take a cooked salmon patty and place it between two lettuce leaves. Add a couple of tomato slices on top. Feel free to customize with cheese, avocado, or your favorite sauce. Serve alongside the crispy sweet potato cubes for a complete meal.

Reference the recipe card below for detailed instructions.

salmon burger lettuce wraps with sweet potato cubes

Pairing Tips

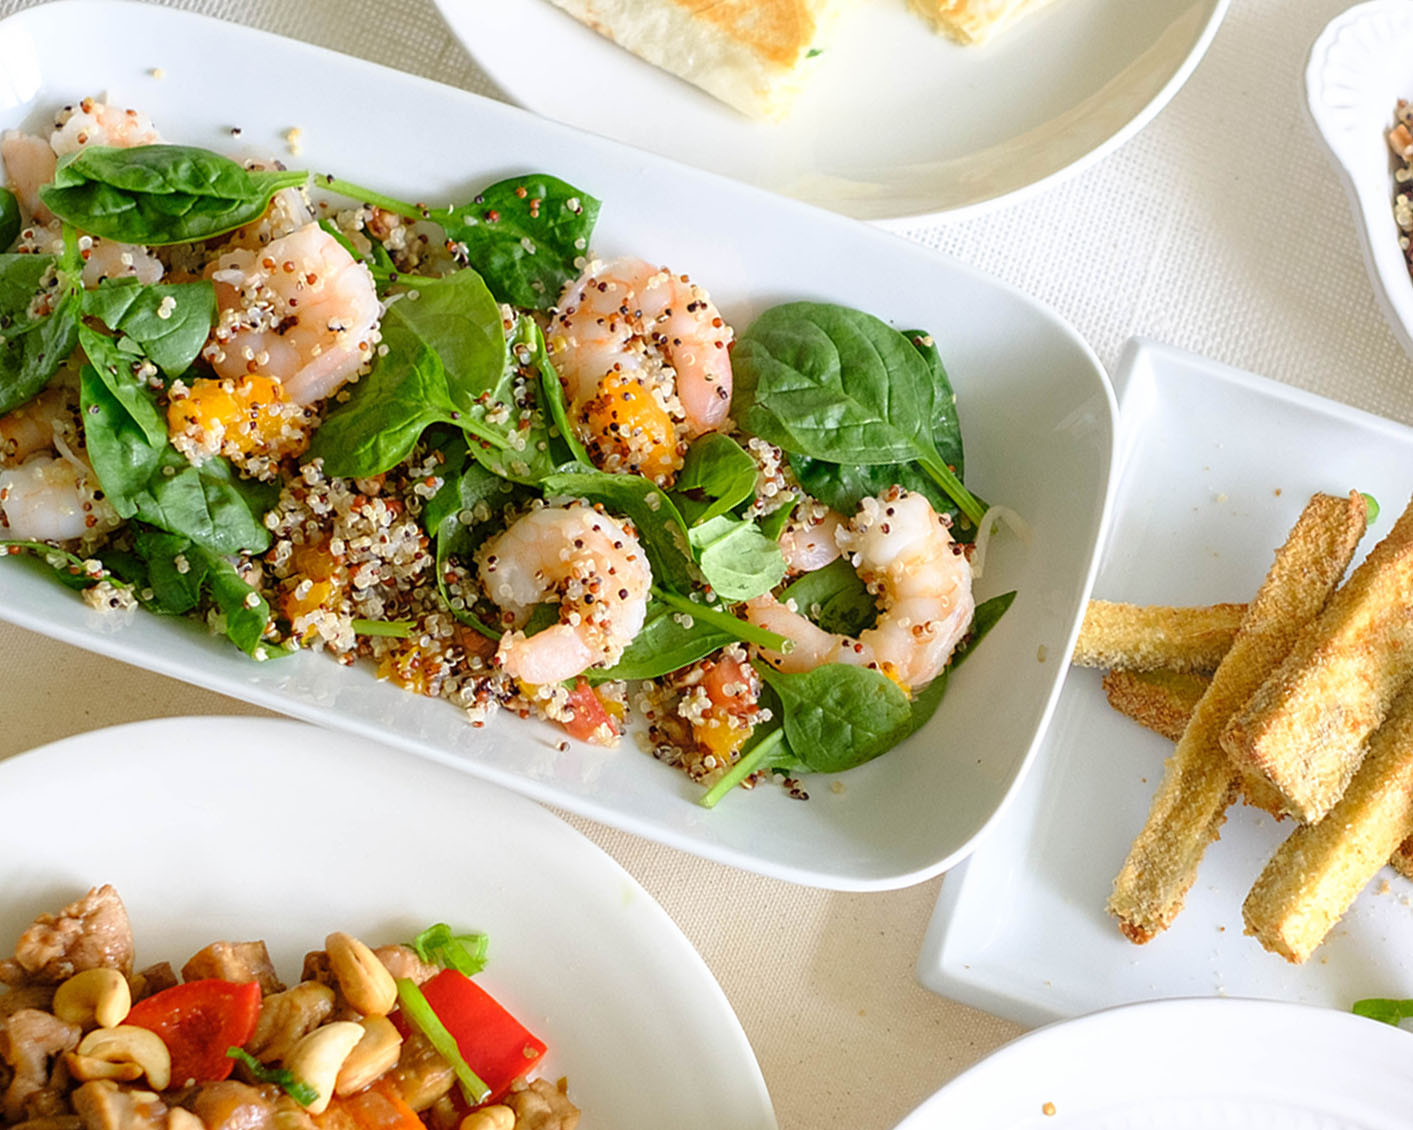
  • Side Salad: A light cucumber and tomato salad with lemon vinaigrette complements the rich flavors of the salmon patties.
  • Whole Grain: For a more filling meal, pair the wraps with a side of quinoa, brown rice, or farro.
  • Toppings and Dips: Pair your wraps with a simple tahini or yogurt dip for added creaminess and flavor. Enjoy with slides of avocado.
  • Fruit Salad: A fresh fruit salad of berries or citrus slices adds a light, refreshing contrast to the meal.
salmon burger lettuce wraps with sweet potato cubes

Easy Weekday Recipe: Trader Joe’s Salmon Burger Lettuce Wraps with Crispy Roasted Sweet Potato Cubes

Quick and heart-healthy, these salmon lettuce wraps paired with crispy roasted sweet potatoes are a delicious and easy meal perfect for busy weeknights or meal prep.
No ratings yet
Prep Time 5 minutes
Cook Time 20 minutes
Course lunch, Main Course
Cuisine American
Servings 2

Equipment

  • knife
  • cutting board
  • Air Fryer

Ingredients
  

  • 6 oz salmon patties (Trader Joe's frozen patties)
  • 6 iceberg lettuce wraps
  • 1 roma tomato (sliced)
  • 1/2 lb sweet potato (peeled and diced)
  • 1/4 teaspoon paprika
  • 1/4 teaspoon garlic powder
  • 1/4 teaspoon salt
  • 1 tablespoon olive oil

Instructions
 

  • Cook the Salmon Patties: Remove the salmon patties from the packaging and air fry them at 400°F for 8 to 10 minutes, until they reach an internal temperature of 145°F. If needed, cook for an additional 2 to 3 minutes to ensure they are perfectly cooked.
  • Roast the Sweet Potatoes: While the salmon cooks, peel and dice the sweet potato into ½ inch cubes. Toss the cubes with olive oil, salt, paprika, and garlic powder. Once the salmon is done, place the seasoned sweet potato cubes in the air fryer and cook at 400°F for 8 to 10 minutes, shaking halfway through. If you want them crispier, cook in 2 to 3 minute increments until golden and crunchy.
  • Prepare the Lettuce Wraps: While the potatoes cook, cut and rinse the iceberg lettuce leaves, then pat them dry. Arrange the sliced Roma tomatoes to have them ready for assembly.
  • Assemble the Lettuce Wraps: Place each salmon patty between two lettuce wraps and top with sliced tomatoes. You can add a slice of cheese, avocado, or your favorite condiment for extra flavor. Serve with the crispy roasted sweet potato cubes on the side.

Similar Recipes

salmon beet salad

Citrus Ginger Salmon with Roasted Beets

salmon and watermelon salad

Grilled Salmon with Watermelon Salad

salmon salad

Salmon Stuffed Avocado Salad

You Might Also Like

Frequently Asked Questions

Can I cook the salmon patties from frozen?

Yes! You can air fry, pan-sear, bake, or grill the salmon patties directly from frozen. Cooking times will be slightly longer than thawed patties. Just ensure the internal temperature reaches 145°F.


How long can I store leftovers?

Cooked salmon patties and roasted sweet potatoes can be stored in an airtight container in the fridge for up to 3 days. For best results, store the lettuce and toppings separately to keep everything fresh.


What’s an easy swap for iceberg lettuce?

Romaine, butter lettuce, or collard greens make excellent alternatives for wraps. If you want a grain-based option, use whole wheat tortillas or pita bread.

Posted on Leave a comment

Low Carb Shrimp Zucchini Boats

shrimp zucchini boats

If you’re on the hunt for a quick, budget-friendly, and incredibly tasty dish that’s low carb and high in protein, you’ve hit the jackpot with these Shrimp & Artichoke Zucchini Boats! Picture this: tender zucchini filled with a savory shrimp and artichoke mixture, all topped with a sprinkle of Parmesan and fresh Roma tomatoes. Not only is this meal a breeze to prepare, but it also packs a flavorful punch that will make you forget you’re eating healthy. Whether you’re meal prepping for the week or whipping up a quick dinner after a long day, this recipe is sure to become a staple in your kitchen. Ready to dive in? Let’s get cooking!

This post may contain affiliate links. Please see our privacy policy for details.

Calories: 251kcal | Carbohydrates: 13g | Protein: 21g | Fat: 13g | Saturated Fat: 2g | Polyunsaturated Fat: 1g | Monounsaturated Fat: 5g | Trans Fat: 0.01g | Cholesterol: 139mg | Sodium: 354mg | Potassium: 846mg | Fiber: 4g | Sugar: 6g | Vitamin A: 1173IU | Vitamin C: 52mg | Calcium: 136mg | Iron: 2mg

shrimp zucchini boats

5 Reasons You’ll Love This Recipe:

  • Quick and Easy: With just a few simple steps, you can have this delicious meal prepped and ready to go in under 30 minutes. Perfect for busy weeknights!
  • Low Carb, High Protein: This dish is a fantastic way to keep your carbs low while still packing in plenty of protein, thanks to the shrimp.
  • Budget-Friendly: Zucchini and shrimp are affordable, and by using marinated artichokes, you’re adding tons of flavor without the need for extra ingredients.
  • Meal Prep Magic: These zucchini boats reheat beautifully, making them an excellent choice for meal prepping your lunches or dinners for the week.
  • Flavor Explosion: The marinated artichokes add a zesty, tangy kick that elevates the whole dish, turning simple ingredients into something extraordinary.

Why Marinated Artichokes Are a Meal Prep Hack:

Using marinated artichokes is a genius way to amp up the flavor in your meals without any extra fuss. They come pre-seasoned, so you’re saving time on chopping and seasoning while still getting a burst of flavor. Plus, they add a great texture and an extra serving of veggies to your dish, making it even more nutritious. Toss them into salads, pasta, or like in this recipe, as part of a tasty filling for your zucchini boats. It’s an easy way to add a gourmet touch to your meals with minimal effort!

The PrepYoSelf Newsletter

Ingredient Breakdown

  • Zucchini is the perfect low-carb vessel for our savory filling. Its mild flavor allows the other ingredients to shine while providing a tender, slightly sweet base. When hollowed out and air-fried, it becomes soft yet firm enough to hold the delicious shrimp and artichoke mixture. Plus, zucchini is rich in vitamins and minerals, adding a nutritious element to the dish.
  • Shrimp is a lean source of protein that cooks quickly and has a delicate flavor, making it an ideal pairing with both zucchini and artichokes. Its slightly sweet, briny taste enhances the dish without overpowering it, and it absorbs the flavors of the garlic and marinade beautifully. The shrimp adds texture and heartiness, making the dish more filling while keeping it light.
  • Marinated artichokes are the secret ingredient that takes this recipe to the next level. They bring a tangy, zesty flavor that contrasts nicely with the mild zucchini and the tender shrimp. The marination adds depth and complexity to the dish without the need for extra seasoning. Plus, artichokes are a good source of fiber, making the meal more satisfying and nutritious.
  • Garlic is the flavor powerhouse of the recipe. Its pungent, savory taste adds warmth and aroma, enhancing both the shrimp and artichokes. Garlic pairs especially well with seafood, drawing out the natural sweetness of the shrimp while adding a savory kick that ties all the ingredients together.
  • Parmesan adds a salty, nutty flavor that complements the tanginess of the artichokes and the sweetness of the shrimp. It melts slightly over the hot shrimp mixture, creating a creamy, savory topping that pulls the entire dish together. A little Parmesan goes a long way in enhancing the overall flavor profile of the meal.
  • The Roma tomato adds a fresh, juicy element that brightens up the dish. Its slight acidity cuts through the richness of the Parmesan and the olive oil, providing a refreshing contrast. Diced Roma tomatoes also add color and texture, making the zucchini boats visually appealing as well as delicious.

shrimp zucchini boats

How to Make Shrimp Zucchini Boats

  1. Hollow out the insides of the zucchini and save them for later. (Tip: Use a melon baller for easy scooping!)
  2. Drizzle the zucchini boats with a little bit of olive oil and place them flesh side down in the Air Fryer. Air fry at 350°F for about 5 to 7 minutes. Depending on the thickness of your zucchini, you may need to cook for an additional 2 to 3 minutes until tender.
  3. Meanwhile, in a large skillet over medium heat, add olive oil. Add the shrimp, minced garlic, marinated artichokes, and about 2 tablespoons of the marinade from the jar. Cook until the shrimp are pink and cooked through, about 3 to 4 minutes.
  4. Remove the shrimp and artichokes from the heat. Scoop the shrimp mixture into the zucchini boats, garnish with grated Parmesan and diced tomatoes.
  5. Serve immediately or pack them up for a perfect meal-prep option. Enjoy!

Reference the recipe card below for detailed instructions.

shrimp zucchini boats

Ingredient Swaps and Additions:

  • Swap Shrimp for Chicken: If you’re not a fan of shrimp or want to switch it up, diced chicken breast or thighs work great. Cook them the same way as the shrimp, making sure they’re fully cooked through before adding them to the zucchini boats
  • Use Fresh Artichokes: If you prefer a more subtle artichoke flavor, you can use steamed or roasted fresh artichokes instead of marinated ones. This will give the dish a more delicate taste, allowing the other ingredients to shine.
  • Replace Parmesan with Feta: For a different flavor profile, swap the Parmesan with crumbled feta cheese. Feta adds a tangy, creamy element that pairs well with the other ingredients, especially if you enjoy Mediterranean-inspired dishes.
  • Try Different Vegetables: If zucchini isn’t your favorite, you can use bell peppers, eggplant, or even large tomatoes as the base for your filling. Just adjust the cooking time to ensure your chosen vegetable is tender.
  • Spice it Up: If you like a little heat, sprinkle some crushed red pepper flakes or add a dash of hot sauce to the shrimp and artichoke mixture. It will give the dish a spicy kick that balances well with the tangy artichokes and sweet zucchini.

shrimp zucchini boats

shrimp zucchini boats

Shrimp Zucchini Boats

These Shrimp & Artichoke Zucchini Boats are a quick, low-carb, high-protein dish packed with flavor and perfect for busy individuals looking for a healthy, budget-friendly meal.

No ratings yet

Prep Time 5 minutes
Cook Time 15 minutes

Course Main Course
Cuisine American, Mediterranean

Servings 2
Calories 251 kcal

Equipment

  • knife
  • cutting board
  • melon baller
  • Air Fryer
  • saute pan

Ingredients


  • 2 zucchini (cut in half lengthwise)
  • 6 oz shrimp (peeled, deveined)
  • 1/2 cup marinated artichokes
  • 2 tablespoons garlic (minced)
  • 1 tablespoon olive oil
  • 1 tablespoon grated parmesan cheese
  • 1 roma tomato (diced)

Instructions


  • Prep the Zucchini: Hollow out the zucchini using a melon baller (save the insides for later).
  • Cook the Zucchini: Drizzle a bit of olive oil over the zucchini boats. Place them flesh side down in the Air Fryer and cook at 350°F for 5-7 minutes. If needed, add an extra 2-3 minutes until tender.
  • Cook the Shrimp: While the zucchini cooks, heat olive oil in a large skillet over medium heat. Add shrimp, minced garlic, marinated artichokes, and 2 tablespoons of the marinade. Cook until the shrimp are pink and done, about 3-4 minutes.
  • Assemble & Serve: Fill the zucchini boats with the shrimp mixture. Garnish with grated Parmesan and diced tomatoes. Serve immediately or pack for a meal prep option. Enjoy!

Notes

Nutrition information provided is an estimate. It will vary based on cooking method and specific ingredients used. Please consult with your healthcare provider for specific dietary needs. To gain a better understanding, explore our nutrition disclaimer here.

Nutrition

Calories: 251kcalCarbohydrates: 13gProtein: 21gFat: 13gSaturated Fat: 2gPolyunsaturated Fat: 1gMonounsaturated Fat: 5gTrans Fat: 0.01gCholesterol: 139mgSodium: 354mgPotassium: 846mgFiber: 4gSugar: 6gVitamin A: 1173IUVitamin C: 52mgCalcium: 136mgIron: 2mg

Similar Recipes

pepper sandwich

Roasted Red Pepper and Cheese Sandwich

bean and corn taco

Vegetarian Black Bean and Corn Soft Tacos

eggplant

Grilled Eggplant Steaks with Marinara Sauce

You Might Also Like

Frequently Asked Questions

Can I make this recipe without an air fryer?

Absolutely! If you don’t have an air fryer, you can bake the zucchini boats in a preheated oven at 375°F (190°C) for about 10-12 minutes or until tender. You can also lightly sauté the zucchini halves in a skillet with a bit of olive oil before stuffing them.


Can I use frozen shrimp for this recipe?

Yes, frozen shrimp works well. Just be sure to thaw them completely and pat them dry before cooking to prevent excess water from diluting the flavors.


What can I do with the zucchini flesh I scooped out?

Don’t let the zucchini flesh go to waste! You can chop it up and sauté it with the shrimp and artichoke mixture, or save it for another dish like a stir-fry, omelet, or even a smoothie for an added veggie boost.

Posted on Leave a comment

Meal Prep Smoothies

In the throes of summer heat, a cool smoothie can make all the difference. Whether as a meal replacement or as a snack, meal prep smoothies are a nutritious, delicious, and nice change of pace for meals. The flavor combinations and cool temperature make for a different experience than the usual lunch. Meal prep smoothies take it a step further, planning and portioning out the ingredients in advance to make smoothies even easier.

three bottles of meal prep smoothie

Meal prep smoothies can also help with lunch smoothies. You can pre-make the smoothies and take it with you in a bottle, keep it in the fridge, and mix it up before drinking. If you are making more of a juice smoothie this is an option that works. If, on the other hand, you’re making more of a frozen fruit smoothie, it may be better to meal prep the smoothie instead.

green super food meal prep smoothie with kale and two straws

To meal prep smoothies, combine freezable ingredients together in a ziploc bag. Pretty much all fruits and some veggies. Carrots and cucumbers freeze well, however spinach, kale, and avocado do not so much. Chia seed and flaxseed can both be frozen well too. Measuring all of these out into a single or double portion and bagging them together is a great way to shorten your prep time later. The rest of the ingredients that don’t freeze well can be portioned out and kept in the fridge or pantry. Most of these can be pre-cut or pre-combined separately from the frozen ingredients so that you only need to grab two containers in the morning before you head out for work or school. Another option is to combine them together the morning you plan to use them. The frozen ingredients may defrost a bit before you’re ready to consume them but that can be for the best as often smoothies come out too frozen. 

Meal prep smoothies can be a great meal replacement option. Your nutritional balance needs to be considered. If you’re lacking fruits and veggies in your diet, smoothies are a great way to fit them in. Don’t think it’s always healthy to replace meals with smoothies though. In some cases you may be lacking calories in your diet or in other cases you may find yourself snacking constantly to make up for the calories you didn’t get at lunch, ultimately consuming more than you saved at lunch.

1. Balanced nutrition

Balance your protein, healthy fats, and carbohydrates in smoothies. These ingredients can help you feel full and provide huge health benefits.

2. Avoid high sugar ingredients

Avoid high sugar ingredients like off the shelf juices. Even fresh fruit and vegetables can be high in sugar. Depending on your diet you may need to avoid certain ingredients even if they are healthy.

3. Add fiber

Most people struggle to achieve adequate levels of fiber and a smoothie can be a great opportunity to add this to your diet. Fiber aids in digestion and increases the feeling of fullness.

4. Use whole, fresh ingredients

Whenever possible, use whole, fresh, and organic ingredients. This ensures you’re getting the maximum nutritional benefits without added preservatives or chemicals.

5. Control portion sizes

Be mindful of portion sizes to avoid overconsumption of calories. A meal-replacement smoothie should generally be between 300-500 calories, depending on your individual needs and activity level.

6. Include greens

Leafy greens like spinach or kale can boost the nutrient content without significantly altering the flavor. This is a fantastic method for getting your greens in if you don’t like salads. You’ll barely taste the greens.

Popular Meal Prep Smoothie Ingredients

Fruits

  • Strawberries
  • Mango
  • Banana
  • Peach
  • Pineapple
  • Apricot
  • Melon
  • Cherries

Vegetables

  • Carrots
  • Kale
  • Spinach
  • Avocado
  • Cucumber
  • Pumpkin

Healthy Fats & Nutrients

  • Chia seed
  • Flaxseed

High Protein

  • Greek yogurt plain
  • Almond butter
  • Peanut butter
  • Soymilk plain
  • Milk plain
  • Oat milk plain
  • Protein powder (whey, pea, hemp)

Juices

  • Coconut water
  • V8
  • Apple juice unsweetened
  • Orange juice unsweetened
  • Water

Smoothie Meal Prep Tips

strawberry meal prep smoothie in a glass with strawberries

Choose a High-Quality Blender

Start with a Liquid Base

  • Always start by adding your liquid first. This helps to create a vortex that pulls the other ingredients down into the blades for even blending.

Balance Your Ingredients

  • Aim for a balanced ratio of fruits, vegetables, protein, and healthy fats to create a nutritious smoothie. Sometimes this takes trial and error

Use Frozen Fruits and Vegetables

  • Using frozen fruits and vegetables can give your smoothie a thick, creamy texture without needing to add ice, which can water it down.

Add a Natural Sweetener Sparingly

Blend in Steps

  • To achieve a smooth texture, start by blending your liquid and greens first, then add softer ingredients like fruits and yogurt, and finally, blend in any hard or frozen items.

Taste and Adjust

  • After blending, taste your smoothie and adjust as needed. You might need to add a bit more sweetener, a squeeze of citrus for brightness, or more liquid to reach the desired consistency.

Don’t Overfill Your Blender

  • Avoid overloading your blender, as this can lead to uneven blending. Fill it about three-quarters full for the best results.

Clean Your Blender Immediately

Posted on Leave a comment

Dragon Fruit Salsa with Shrimp

shrimp with dragon fruit salsa

This Dragon Fruit Salsa with Shrimp is the perfect way to level up your salsa game. It’s not only vibrant and flavorful but also a nutrient-rich addition to your healthy lifestyle. Get ready to enjoy a dish that’s as beneficial for your body as it is delightful for your taste buds

This post may contain affiliate links. Please see our privacy policy for details.

Calories: 121kcal | Carbohydrates: 10g | Protein: 18g | Fat: 1g | Saturated Fat: 0.1g | Polyunsaturated Fat: 0.2g | Monounsaturated Fat: 0.1g | Trans Fat: 0.01g | Cholesterol: 137mg | Sodium: 423mg | Potassium: 291mg | Fiber: 2g | Sugar: 5g | Vitamin A: 70IU | Vitamin C: 11mg | Calcium: 72mg | Iron: 1mg

shrimp with dragon fruit salsa

Why This Salsa is a Game-Changer:

  • Refreshing & Nourishing: Dragon fruit is not only beautiful with its speckled flesh, but it’s also packed with antioxidants and vitamin C, boosting your immunity and keeping your skin glowing. Paired with shrimp, a lean source of protein, this dish is as nourishing as it is refreshing.
  • Budget-Friendly: With just a few simple ingredients, this recipe is easy on your wallet. The dragon fruit adds a touch of exotic flair without breaking the bank, and pre-cooked shrimp saves you time and effort.
  • Simple & Quick: This salsa comes together in minutes! It’s perfect for a quick lunch, a light dinner, or even as an appetizer at your next gathering.
  • Powerhouse ingredients: You’re not just making salsa—you’re creating a dish that nourishes your body from the inside out. Each ingredient plays a vital role in boosting your health, from providing essential vitamins and minerals to delivering antioxidants and anti-inflammatory benefits.

The PrepYoSelf Newsletter

Level Up Your Salsa Game: The Nutrient Powerhouse in Every Bite!

  • Dragon Fruit: Dragon fruit is the star of this salsa, and for good reason! This exotic fruit isn’t just pretty; it’s packed with fiber, antioxidants, and vitamin C. Fiber helps keep your digestive system running smoothly, while the antioxidants fight off free radicals, keeping your cells healthy. Vitamin C boosts your immune system and promotes glowing skin. By adding dragon fruit to your salsa, you’re infusing your meal with a refreshing sweetness and a vibrant dose of nutrition.
  • Shrimp: Shrimp is a lean, low-calorie source of high-quality protein, making it a fantastic addition to this dish. Protein is essential for muscle repair, hormone production, and overall body maintenance. Plus, shrimp is rich in selenium, an important mineral that acts as a powerful antioxidant, supporting your immune system and thyroid function. With shrimp in your salsa, you’re not only adding a savory element but also giving your body the building blocks it needs to stay strong and energized.
  • Fresh Basil: Basil brings a burst of fresh, herbaceous flavor to this salsa, but it’s also loaded with health benefits. This aromatic herb is rich in vitamin K, which plays a key role in blood clotting and bone health. Basil also contains compounds that have anti-inflammatory and antimicrobial properties, helping to support your overall well-being. Adding basil to your salsa not only elevates the flavor but also adds a layer of health-boosting goodness.
  • Red Onions: Red onions add a sharp, tangy bite to your salsa, and they’re packed with nutrients like vitamin C, fiber, and antioxidants. The quercetin in red onions is known for its anti-inflammatory properties, which can help reduce inflammation in the body. Additionally, the sulfur compounds in onions support heart health by improving cholesterol levels and lowering blood pressure. Red onions are a simple way to level up the nutritional profile of your salsa while adding depth to the flavor.
  • Lime Juice: Lime juice not only adds a zesty, citrusy kick to your salsa but also brings a ton of vitamin C to the table. This essential vitamin boosts your immune system, aids in iron absorption, and supports healthy skin. Lime juice also has natural detoxifying properties, helping to cleanse your body and support digestive health. A squeeze of lime is all it takes to brighten up the flavors of your salsa while giving your body a nutrient boost.
  • Salt: A pinch of salt ties all the flavors together and enhances the natural sweetness of the dragon fruit while balancing the acidity of the lime. Just a small amount can elevate the entire dish, making each bite more satisfying.
dragon fruit salsa

How to Make Dragon Fruit Salsa with Shrimp

  1. Prep the Shrimp: If your shrimp is frozen, defrost it according to the package instructions. Pat dry.
  2. Mix the Salsa: In a mixing bowl, combine the diced dragon fruit, fresh basil, chopped red onions, lime juice, and salt. Toss everything together gently to marry the flavors.
  3. Serve: Lay the shrimp on a plate and top with the vibrant dragon fruit salsa. Serve immediately and enjoy the burst of fresh flavors!

Reference the recipe card below for detailed instructions.

shrimp with dragon fruit salsa

Meal Prep Tips:

  • Avocado: Add diced avocado for a creamy texture and an extra dose of healthy fats.
  • Jalapeño: For a bit of heat, finely chop a jalapeño or another chili pepper and mix it into the salsa.
  • Cucumber: Add diced cucumber for extra crunch and hydration, making the salsa even more refreshing.
  • Mint: Swap half of the basil for fresh mint to give the salsa a bright, cooling flavor.
  • Protein Swap: Instead of shrimp, try grilled chicken, tofu, or even black beans for a different source of protein.
  • Fruit Swap: Swap dragon fruit with diced mango, pineapple, or even kiwi for a different but equally delicious flavor profile.
  • Red Onion Swap: If you prefer a milder flavor, swap red onions for thinly sliced green onions or shallots.
shrimp with dragon fruit salsa

Dragon Fruit Salsa with Shrimp

A vibrant and nutrient-packed Dragon Fruit Salsa with Shrimp, combining sweet and savory flavors for a refreshing and health-boosting dish.

No ratings yet

Course lunch
Cuisine American

Servings 2
Calories 121 kcal

Equipment

  • knife
  • cutting board
  • mixing bowl

Ingredients


  • 6 oz shrimp (pre-cooked, peeled, deveined)
  • 1 dragon fruit (peeled and diced)
  • 2 tabelspoons fresh basil (thinly sliced)
  • 1/4 cup red onions (finely diced)
  • 1 lime (juiced)
  • 1/4 teaspoon salt

Instructions


  • If the shrimp is frozen, defrost it according to packaged instructions.
  • Combine the diced dragon fruit, basil, onions, lime juice, and salt in a mixing bowl.
  • Top the shrimp with the dragon fruit salsa.

Notes

Nutrition information provided is an estimate. It will vary based on cooking method and specific ingredients used. Please consult with your healthcare provider for specific dietary needs. To gain a better understanding, explore our nutrition disclaimer here. 

Nutrition

Calories: 121kcalCarbohydrates: 10gProtein: 18gFat: 1gSaturated Fat: 0.1gPolyunsaturated Fat: 0.2gMonounsaturated Fat: 0.1gTrans Fat: 0.01gCholesterol: 137mgSodium: 423mgPotassium: 291mgFiber: 2gSugar: 5gVitamin A: 70IUVitamin C: 11mgCalcium: 72mgIron: 1mg

Similar Recipes

shrimp kebab

Air Fryer Shrimp and Pineapple Kebabs

shrimp and corn

Sheet Pan Shrimp with Cauliflower and Corn

salmon salad

Salmon Salad Stuffed Avocado

You Might Also Like

Frequently Asked Questions

Can I use raw shrimp instead of pre-cooked shrimp?

Absolutely! If you prefer to use raw shrimp, just cook them first by sautéing or grilling until they’re pink and opaque. Let them cool before adding to the salsa


What can I serve with this salsa?

This salsa is versatile! Serve it as an appetizer with tortilla chips, as a topping for tacos, or over a bed of greens for a light salad. It also pairs well with grilled fish or chicken.


Can I use other fruits along with dragon fruit?

Yes, you can mix in other fruits like diced mango, pineapple, or even strawberries to create a more complex and fruity salsa. It’s a great way to experiment with flavors!

Posted on Leave a comment

High Protein, Egg and Cottage Cheese Spinach Wrap

spinach wrap

Looking for a high-protein, delicious, and easy-to-make meal prep option? These Egg, Cottage Cheese, and Spinach Wraps are perfect for busy mornings, quick lunches, or a satisfying snack. Packed with nutrient-dense spinach, creamy cottage cheese, and protein-rich eggs, these wraps are both nutritious and versatile. You can enjoy them plain or filled with your favorite ingredients like prosciutto, fresh veggies, and cheese. Let’s dive into this simple yet flavorful recipe that will keep you fueled and ready to tackle your day!

This post may contain affiliate links. Please see our privacy policy for details.

Calories: 46kcal | Carbohydrates: 1g | Protein: 4g | Fat: 3g | Saturated Fat: 1g | Polyunsaturated Fat: 0.4g | Monounsaturated Fat: 1g | Trans Fat: 0.01g | Cholesterol: 84mg | Sodium: 79mg | Potassium: 86mg | Fiber: 0.2g | Sugar: 0.5g | Vitamin A: 840IU | Vitamin C: 2mg | Calcium: 31mg | Iron: 1mg

spinach wrap

Why You’ll Love This Recipe:

  • High Protein: Eggs and cottage cheese are both fantastic sources of protein.
  • Veggie Boost: Spinach adds a great dose of greens.
  • Versatile: You can customize these wraps with any fillings you like.
  • Easy to Make: With just a few simple steps, you have a nutritious meal ready in no time.

The PrepYoSelf Newsletter

Ingredients to Fill Your Wrap

  • Mediterranean Delight: Hummus, Sliced cherry tomatoes, Kalamata olives, Cucumber slices, Feta cheese
  • Protein Powerhouse: Grilled chicken strips, Avocado slices, Red bell pepper strips, Baby arugula, A drizzle of tahini sauce
  • Classic Breakfast: Sautéed mushrooms, Crumbled bacon or turkey bacon, Shredded cheese (cheddar or Swiss), Sliced avocado
  • Italian Inspired: Sliced prosciutto, Fresh mozzarella, Basil leaves, Sun-dried tomatoes, A drizzle of balsamic glaze
  • Veggie Lover’s: Roasted red peppers, Sliced zucchini, Red onion slices, Fresh spinach leaves, A sprinkle of goat cheese
  • Spread and Sauce Ideas: Cream cheese mixed with herbs, Pesto, Sriracha Mayto, Hummus
spinach wrap ingredients

Simple Basic Steps to Make Spinach Wrap

  1. Blend the Ingredients: Combine the baby spinach, eggs, and cottage cheese in a blender. Blend until the mixture is smooth and vibrant green.
  2. Prepare the Skillet: Heat an 8 or 9-inch non-stick skillet over medium heat. Lightly spray with cooking spray to prevent sticking.
  3. Cook the Wraps: Pour about â…“ cup of the blended mixture into the heated skillet, spreading it out like a crepe. Let it cook for 2-3 minutes until the edges start to lift and you can easily flip it over. Carefully flip the wrap and cook for another 1-2 minutes on the other side until fully set.
  4. Repeat: Repeat the process with the remaining batter. You should get about 3 to 4 wraps in total.
  5. Fill and Enjoy: Now comes the fun part! Fill your wraps with your favorite fillings. Some great options include prosciutto slices, fresh tomatoes, onions, and sliced cheese. Roll them up and they’re ready to go!

Reference the recipe card below for detailed instructions.

spinach wrap

Meal Prep Tips for High Protein Spinach Wrap

  • Non-Stick Skillet Care: Use a good quality non-stick skillet to ensure easy flipping and cooking. Avoid using metal utensils that can scratch the surface. Clean the skillet thoroughly between batches if any residue starts to build up.
  • Cooling and Stacking: Allow the wraps to cool completely on a wire rack before stacking. This prevents them from becoming soggy.Place a piece of parchment paper between each wrap to avoid them sticking together.
  • Storage: Store the cooled wraps in an airtight container in the refrigerator. They will stay fresh for up to 3-4 days. If you want to store them longer, consider freezing. Lay the wraps flat with parchment paper between each one and place them in a freezer-safe bag. They can be frozen for up to 2 months.
  • Reheating: If frozen, let the wraps thaw in the refrigerator overnight. Reheat the wraps in a skillet over medium heat for about 1-2 minutes on each side or until heated through. Alternatively, microwave the wraps on a microwave-safe plate for about 30 seconds to 1 minute, or until warm.
spinach wrap
spinach wrap

High Protein, Egg and Cottage Cheese Spinach Wrap

These high-protein Egg, Cottage Cheese, and Spinach Wraps are easy to make and perfect for meal prep, offering a nutritious and versatile option for any meal.

No ratings yet

Prep Time 5 minutes
Cook Time 10 minutes

Course lunch
Cuisine American

Servings 4
Calories 46 kcal

Equipment

  • blender
  • non-stick skillet

Ingredients


  • 1 cup baby spinach (packed)
  • 2 large eggs
  • 1/4 cup cottage cheese (full fat)
  • cooking spray

Instructions


  • Combine the spinach, eggs, and cottage cheese in a blender and blend until smooth.
  • Heat an 8 or 9 inch non-stick skillet on medium heat and lightly spray with olive oil. Pour in â…“ cup of the mixture into the pan and let it spread out like a crepe. Let it sit for about 2-3 minutes before carefully flipping it over with a spatula. Let it continue to cook for another 1 to 2 minutes on the other side.
  • Repeat the process for the remaining batter which should make about 3 to 4 wraps total.
  • Enjoy it with your choice of fillings such as prosciutto slices, tomatoes, onions, and sliced cheese.

Notes

Nutrition information provided is an estimate. It will vary based on cooking method and specific ingredients used. Please consult with your healthcare provider for specific dietary needs. To gain a better understanding, explore our nutrition disclaimer here. 

Nutrition

Calories: 46kcalCarbohydrates: 1gProtein: 4gFat: 3gSaturated Fat: 1gPolyunsaturated Fat: 0.4gMonounsaturated Fat: 1gTrans Fat: 0.01gCholesterol: 84mgSodium: 79mgPotassium: 86mgFiber: 0.2gSugar: 0.5gVitamin A: 840IUVitamin C: 2mgCalcium: 31mgIron: 1mg

Similar Recipes

italian chicken

Italian Chicken with Green Beans and Almonds

stuffed primavera chicken

Primavera Stuffed Chicken Breasts

cilantro chicken

Cilantro Lime Chicken Salad with Strawberry Salsa

You Might Also Like

Frequently Asked Questions

Can I add seasonings or herbs to the wrap batter?

Absolutely! Feel free to add garlic powder, onion powder, salt, pepper, or fresh herbs like parsley or basil to the batter for extra flavor.


Can I use frozen spinach instead of fresh baby spinach?

Yes, you can use frozen spinach. Make sure to thaw and drain it well before blending with the eggs and cottage cheese to avoid excess moisture.


Can I use egg whites instead of whole eggs?

Yes, you can substitute the whole eggs with egg whites if you prefer. Use about 4 egg whites to replace the 2 large eggs.

Posted on Leave a comment

Refreshing Green Papaya Salad

shredded green papaya salad

Get ready to refresh your taste buds with this delicious Green Papaya Salad! Perfect for meal prep, this vibrant dish combines the crispness of green papaya and carrots with the sweetness of mini bell peppers, all tossed in a tangy and savory dressing. It’s not just delicious but also packed with nutrients, making it a fantastic addition to any healthy meal plan. Plus, it’s easy to customize with your favorite herbs and toppings. Let’s dive into this simple yet flavorful recipe!

This post may contain affiliate links. Please see our privacy policy for details.

Calories: 43kcal | Carbohydrates: 11g | Protein: 1g | Fat: 0.2g | Saturated Fat: 0.1g | Polyunsaturated Fat: 0.1g | Monounsaturated Fat: 0.04g | Sodium: 247mg | Potassium: 171mg | Fiber: 1g | Sugar: 8g | Vitamin A: 2621IU | Vitamin C: 51mg | Calcium: 17mg | Iron: 0.3mg

shredded green papaya salad

What’s Green Papaya?

Green papaya is simply the unripe version of the tropical fruit we all know and love. Unlike its ripe counterpart, green papaya is firm and not sweet, making it perfect for salads. It’s packed with enzymes that aid digestion and is rich in vitamins A, C, and E. Plus, it’s low in calories but high in fiber, so it’s a fantastic addition to any healthy diet.

Why You’ll Love This Salad:

  • Refreshing and Light: This salad is super refreshing, making it a great side dish or a light meal on its own. Perfect for hot summer days or whenever you need a pick-me-up!
  • Flavor Explosion: The combination of tangy calamansi juice, savory fish sauce, and sweet honey creates a flavor explosion in every bite. Your taste buds are in for a treat!
  • Versatile and Customizable: You can easily switch up the ingredients to suit your taste. Add your favorite herbs, throw in some nuts, or spice it up with chilis. The possibilities are endless!
  • Meal Prep Friendly: This salad stays fresh in the fridge for a few days, making it ideal for meal prepping. Just keep the dressing separate until you’re ready to eat to maintain that perfect crunch.

The PrepYoSelf Newsletter

Ingredient Breakdown:

  • Green Papaya: Green papaya is the star of this salad! Its crisp texture and mild flavor make it the perfect base for soaking up all the delicious dressing. Plus, it’s packed with enzymes that aid digestion and is rich in vitamins A, C, and E. If you can’t find green papaya, try using jicama or green mango for a similar crunch and freshness.
  • Mini Bell Peppers : Mini bell peppers add a burst of color and a sweet, mild flavor that complements the tangy dressing. Their crunch adds a satisfying texture to the salad.Regular bell peppers or even thinly sliced red cabbage can be used if mini bell peppers aren’t available.
  • Carrot : Carrots bring in a touch of sweetness and a vibrant orange color, enhancing both the flavor and visual appeal of the salad. They also add another layer of crunch. If you’re out of carrots, try using daikon radish or zucchini for a different but equally delightful texture.
  • Fish Sauce: Fish sauce adds a deep, savory umami flavor that balances the sweetness and acidity of the dressing. It’s a staple in many Southeast Asian dishes for a reason! For a vegetarian option, substitute with soy sauce or tamari. If you want a milder flavor, try using a splash of light soy sauce.
  • Honey: Honey adds a natural sweetness that mellows out the tartness of the calamansi or lime juice, creating a harmonious balance in the dressing. Agave syrup or maple syrup can be used as vegan alternatives, or you can use brown sugar in a pinch.
  • Calamansi Juice (or Lime Juice): Calamansi juice brings a unique citrusy tang that’s slightly sweeter than lime juice, adding a refreshing zing to the salad. Lime juice works just as well, providing that essential bright acidity. Lemon juice can be used if you don’t have calamansi or lime. For an extra citrusy kick, a combination of lemon and orange juice could also be interesting.
ingredients for green papaya salad

Simple Steps to Make Papaya Salad

  1. Rinse and peel the green papaya and carrot. Use a handheld julienne tool or mandolin with a julienne attachment to shred them into beautiful, thin strips.
  2. Slice the mini bell peppers into thin strips. Aren’t those colors just gorgeous?
  3. Mix it up! Place the shredded papaya, carrot, and bell peppers in a small mixing bowl. Pour in the fish sauce, honey, and calamansi juice. Mix it well until everything is fully coated in that delicious dressing.
  4. Get creative! Optional: Feel free to add fresh herbs like chopped cilantro, basil, or green onions. You can also top it off with sliced chilis for some heat or chopped peanuts for a crunchy twist.

Reference the recipe card below for detailed instructions.

shredded green papaya salad

Meal Prep Tips:

  • Prep Optional Add-Ins: Chop any fresh herbs like cilantro, basil, or green onions in advance and store them in separate containers. If you’re adding chilis or peanuts, have them ready to go as well.
  • Portion Control: Divide the shredded veggies into single-serving containers for easy grab-and-go lunches or quick side dishes throughout the week. This helps with portion control and makes meal prep a breeze.
  • Add Protein: For a more complete meal, prep some protein options like grilled chicken, shrimp, or tofu. Store them separately and add them to your salad when you’re ready to eat.
  • Stay Creative: Don’t be afraid to mix things up! Rotate in different add-ins like edamame, cherry tomatoes, or sliced radishes to keep the salad exciting and flavorful each time.
shredded green papaya salad

Refreshing Green Papaya Salad

A refreshing and crunchy Green Papaya Salad made with shredded green papaya, carrots, and mini bell peppers, tossed in a tangy, sweet, and savory dressing of fish sauce, honey, and calamansi juice

No ratings yet

Prep Time 10 minutes

Course Side Dish
Cuisine Asian

Servings 6
Calories 43 kcal

Equipment

  • knife
  • julienne tool or mandolin

Ingredients


  • 1 green papaya (unripe, medium sized)
  • 3 mini bell peppers
  • 1 carrot
  • 1 tablespoon fish sauce
  • 1 tablespoon honey
  • 2 tablespoon calamansi juice (or lime juice)

Instructions


  • Rinse and peel the green papaya and carrot. Use a handheld julienne tool or mandolin with a julienne attachment to shred them into beautiful, thin strips.
  • Slice the mini bell peppers into thin strips. Aren’t those colors just gorgeous?
  • Mix it up! Place the shredded papaya, carrot, and bell peppers in a small mixing bowl. Pour in the fish sauce, honey, and calamansi juice. Mix it well until everything is fully coated in that delicious dressing.
  • Get creative! Optional: Feel free to add fresh herbs like chopped cilantro, basil, or green onions. You can also top it off with sliced chilis for some heat or chopped peanuts for a crunchy twist.

Notes

Nutrition information provided is an estimate. It will vary based on cooking method and specific ingredients used. Please consult with your healthcare provider for specific dietary needs. To gain a better understanding, explore our nutrition disclaimer here. 

Nutrition

Calories: 43kcalCarbohydrates: 11gProtein: 1gFat: 0.2gSaturated Fat: 0.1gPolyunsaturated Fat: 0.1gMonounsaturated Fat: 0.04gSodium: 247mgPotassium: 171mgFiber: 1gSugar: 8gVitamin A: 2621IUVitamin C: 51mgCalcium: 17mgIron: 0.3mg

Similar Recipes

shrimp spinach salad

Citrus Shrimp Quinoa and Spinach Salad

tofu stir fry

Tofu and Veggie Stir Fry

pine nut fish and spinach

Baked Pine Nut Crusted Tilapia with Spinach

You Might Also Like

Bubo, Pinot Noir

Amazon Brand – Happy Belly Roasted and Salted Peanuts

ParmCrisps – Original Cheese Parm Crisps

Frequently Asked Questions

Can I use ripe papaya for this salad?

Ripe papaya is too soft and sweet for this type of salad. For the best results, stick to green (unripe) papaya, which has a crisp texture and a neutral flavor.


Is there a vegetarian substitute for fish sauce?

Yes! You can use soy sauce or tamari as a vegetarian substitute. For a more authentic taste, look for vegetarian fish sauce alternatives made from seaweed or mushrooms.


Can I make this salad spicy?

Definitely! You can add sliced chilis or a pinch of chili flakes to the salad for some heat. Adjust the amount to suit your spice tolerance.

Posted on Leave a comment

Pan-Seared Cod with Lemon Butter Tomato Sauce

pan seared cod

If you’re looking for a quick, healthy, and delicious meal, this Pan-Seared Cod in Lemon Butter Tomato Sauce is the perfect choice. With tender cod fillets seared to perfection and a tangy, buttery tomato sauce, this dish is both flavorful and nutritious. It’s a breeze to prepare, making it ideal for busy weeknights when time is of the essence. Plus, incorporating fish like cod into your diet provides a host of health benefits, from lean protein to heart-healthy omega-3 fatty acids. Follow along as we guide you through this simple yet elegant recipe that will become a staple in your meal prep routine.

This post may contain affiliate links. Read the disclosure policy.

Calories: 325kcal | Carbohydrates: 5g | Protein: 32g | Fat: 20g | Saturated Fat: 8g | Polyunsaturated Fat: 2g | Monounsaturated Fat: 8g | Trans Fat: 0.5g | Cholesterol: 103mg | Sodium: 485mg | Potassium: 904mg | Fiber: 1g | Sugar: 2g | Vitamin A: 906IU | Vitamin C: 23mg | Calcium: 50mg | Iron: 1mg

pan seared cod

Why This Recipe Works for Busy Individuals:

  • Quick Preparation: This entire recipe can be made in under 20 minutes, making it perfect for those hectic weeknights.
  • Minimal Cleanup: With just one pan needed, cleanup is a breeze.
  • Make Ahead: You can easily prepare the components ahead of time and assemble quickly for a fast meal.

The PrepYoSelf Newsletter

Here’s What You Need

  • Cod Fillets: Cod is a lean, white fish with a mild flavor and firm texture, making it perfect for pan-searing. It easily absorbs the flavors of the seasoning and sauce, creating a delicious, protein-packed base for the dish.
  • Paprika: Paprika adds a subtle smoky sweetness to the cod, enhancing its natural flavors without overpowering them. It also gives the fillets a beautiful golden color when seared.
  • Garlic Powder: Garlic powder infuses the cod with a savory depth of flavor, complementing the fresh garlic used later in the sauce. It’s an easy way to evenly season the fish.
  • Garlic Cloves (Sliced): Fresh garlic adds a robust, aromatic flavor to the sauce. When sautéed, it releases its natural oils, creating a fragrant base that pairs perfectly with the sweet tomatoes and tangy lemon juice.
  • Cherry Tomatoes: Cherry tomatoes provide a burst of sweetness and acidity, balancing the richness of the butter and the savoriness of the garlic. Their natural juices help to create a flavorful sauce as they cook down.
  • Water: Water helps to deglaze the pan, incorporating the browned bits left from searing the cod into the sauce. It also helps to soften the tomatoes and create a cohesive, silky sauce.
  • Butter: Butter adds richness and a velvety texture to the sauce. It melts into the mixture, creating a smooth, luxurious finish that ties all the flavors together.
  • Lemon Juice: Lemon juice adds a bright, tangy flavor that cuts through the richness of the butter. It complements the sweetness of the tomatoes and garlic, providing a refreshing contrast.

How to Meal Prep Pan-Seared Cod

  1. Prep the Cod: Pat the cod fillets dry with paper towels. This helps achieve a nice, crispy sear.Season the fillets with paprika, garlic powder, and salt.
  2. Cook the Cod: Heat the olive oil in a large sauté pan over medium-high heat. Place the cod fillets in the pan and cook until golden brown on each side, about 3 to 4 minutes per side.
  3. Add Flavor: Add the sliced garlic and cherry tomatoes to the pan. Stir and cook for 2 to 3 minutes until the garlic is fragrant and the tomatoes start to soften.
  4. Make the Sauce: Pour in the water and let it cook for a few minutes until the tomatoes break down and the sauce begins to form. Add the lemon juice and butter, mixing well until the butter melts and the sauce thickens, about 1 to 2 minutes.
  5. Serve and Enjoy: Remove from heat and serve immediately. This dish pairs beautifully with a side of steamed vegetables or a fresh salad.

Reference the recipe card below for detailed instructions.

pan seared cod

Pairing Tips for Pan-Seared Cod

  • Vegetable Sides: Broccoli, asparagus, green beans, or zucchini make excellent sides. Their mild flavors complement the tangy lemon butter sauce. A fresh salad with mixed greens, cucumbers, and a light vinaigrette adds a crisp, refreshing contrast to the rich sauce.
  • Farro or Barley: These chewy grains add texture and are packed with fiber.
  • Healthy Starches: Roasted or mashed sweet potatoes offer a sweet and savory pairing that balances the tartness of the lemon.
  • Simple Garnishes: Garnish with fresh parsley or basil for added freshness and color.
panseared cod
panseared cod

Pan-seared Cod with Lemon Butter tomato Sauce

Lemon Butter Tomato Sauce features tender cod fillets in a tangy, buttery sauce with cherry tomatoes and garlic.

No ratings yet

Prep Time 5 minutes
Cook Time 15 minutes

Course dinner
Cuisine American

Servings 2
Calories 325 kcal

Equipment

  • saute pan

Ingredients


  • 12 oz cod
  • 1/4 teaspoon paprika
  • 1/4 teaspoon garlic powder
  • 1/4 teaspoon salt
  • 3 garlic cloves (sliced)
  • 1 cup cherry tomatoes
  • 1/2 cup water
  • 2 tablespoons butter
  • 1 tablespoon lemon juice
  • 1 tablespoon olive oil

Instructions


  • Pat the cod dry with paper towels. Season the cod with paprika, garlic powder, and salt.
  • Add oil to a large saute pan on medium-high heat. Place the cod in the oil and cook until golden brown on each side for about 3 to 4 minutes.
  • Next, add the sliced garlic and the cherry tomatoes and stir them around for 2 to 3 minutes.
  • Then, add the water and let it cook for a few minutes until the tomatoes soften.
  • Finally, add the lemon juice and butter and mix it in well. Let the sauce cook for 1 to 2 minutes until the sauce thickens.

Notes

Nutrition information provided is an estimate. It will vary based on cooking method and specific ingredients used. Please consult with your healthcare provider for specific dietary needs. To gain a better understanding, explore our nutrition disclaimer here. 

Nutrition

Calories: 325kcalCarbohydrates: 5gProtein: 32gFat: 20gSaturated Fat: 8gPolyunsaturated Fat: 2gMonounsaturated Fat: 8gTrans Fat: 0.5gCholesterol: 103mgSodium: 485mgPotassium: 904mgFiber: 1gSugar: 2gVitamin A: 906IUVitamin C: 23mgCalcium: 50mgIron: 1mg

Similar Recipes

ginger salmon

Oven Baked Orange Ginger Salmon and Snow Peas

shrimp and asparagus

Oven Baked Shrimp with Panko Breaded Asparagus

salmon beet salad

Citrus Ginger Salmon Spinach Salad with Roasted Beets

You Might Also Like

Frequently Asked Questions

Can I use frozen cod fillets for this recipe?

Yes, you can use frozen cod fillets. Just make sure to fully thaw and pat them dry before cooking to ensure a nice sear.


What can I use instead of cod?

You can substitute cod with other white fish like haddock, tilapia, or halibut. Adjust the cooking time as needed depending on the thickness of the fillets.


How do I prevent the cod from sticking to the pan?

Make sure the pan and oil are hot before adding the cod. Also, avoid moving the fillets too soon; let them sear properly to form a crust that will release from the pan.

Posted on Leave a comment

Grilled Salmon with Sour Cream Dill Sauce

grilled salmon with dill sauce, cherry tomatoes, and cucumbers

Let’s dive into this mouth-watering Grilled Salmon with Sour Cream Dill Sauce recipe that will have you savoring every bite. It’s perfect for those busy weeknights when you crave something wholesome yet quick to prepare. Let’s get cooking!

This post may contain affiliate links. Please see our privacy policy for details.

Calories: 648kcal | Carbohydrates: 26g | Protein: 62g | Fat: 34g | Saturated Fat: 9g | Polyunsaturated Fat: 8g | Monounsaturated Fat: 12g | Cholesterol: 190mg | Sodium: 749mg | Potassium: 2.353mg | Fiber: 6g | Sugar: 13g | Vitamin A: 1.448IU | Vitamin C: 101mg | Calcium: 180mg | Iron: 5mg

grilled salmon with dill sauce, cherry tomatoes, and cucumbers

Nutritional Goodness:

Salmon is packed with omega-3 fatty acids, which are fantastic for heart health. Combined with the creamy yet light sour cream dill sauce, you’re getting a dose of vitamins, minerals, and a satisfying meal without any guilt.

Get ready to impress yourself and anyone lucky enough to join you at the dinner table. This Grilled Salmon with Sour Cream Dill Sauce is sure to become a staple in your healthy meal rotation. Happy cooking!

The PrepYoSelf Newsletter

To Meal Prep This Salmon Recipe You’ll Need

  • Salmon Fillets: Rich in Omega-3 fatty acids, high-quality protein, and essential vitamins like B12, D, and selenium. Omega-3s are fantastic for heart health, reducing inflammation, and boosting brain function. The high protein content supports muscle repair and growth, while vitamins and minerals enhance overall well-being.
  • Sour Cream: Contains probiotics, calcium, and vitamins A and D. Probiotics promote a healthy gut microbiome, while calcium and vitamins strengthen bones and support immune function. Sour cream adds a creamy texture without being overly heavy.
  • Lemon Juice: High in Vitamin C, antioxidants, and citric acid. Vitamin C boosts your immune system, helps with iron absorption, and supports skin health. The antioxidants in lemon juice protect your cells from damage, and citric acid aids in digestion.
  • Dill: Fresh dill not only enhances the flavor but also provides antioxidants and anti-inflammatory benefits. It supports bone health and boosts your immune system.
  • Cherry Tomatoes: Cherry tomatoes are also low in calories and their heir natural sweetness and tanginess add a delightful burst of flavor to any dish.
  • Cucumber: Their crisp texture and refreshing taste make them a perfect addition to this dish.
cutting board with sour cream, cherry tomatoes, lemon, cucumbers, fresh dill, and seasonings

Easy Recipe Steps to Grill Salmon

  1. Prep Your Salmon: Place your beautiful salmon fillets on a plate. Drizzle them with olive oil sprinkle it with a little bit of salt.
  2. Fire Up the Grill: Preheat your grill to medium-high heat. If you don’t have a grill, no worries! You can use a grill pan on your stovetop or even a regular saute pan.
  3. Grill Time: Place the salmon fillets skin-side down on the hot grill. Cook for about 4-5 minutes per side, depending on the thickness of your fillets. You’ll know they’re ready when they flake easily with a fork. Oh, the aroma is going to be divine!
  4. Make the Magic Sauce: While your salmon is grilling, let’s whip up the star of the show – the sour cream dill sauce! In a small bowl, mix together the sour cream, fresh dill, lemon juice, and seasonings. Stir it up until it’s smooth and creamy. Taste and adjust the flavors as needed.
  5. Plate and Enjoy: Once your salmon is grilled to perfection, place it on a plate and generously spoon the sour cream dill sauce over the top. Enjoy with a side of cherry tomatoes and cucumbers. Garnish with a few extra sprigs of dill and a lemon wedge if you’re feeling fancy.

Reference the recipe card below for detailed instructions.

grilled salmon with dill sauce, cherry tomatoes, and cucumbers

Meal Prep Tips

  • Pre-Make the Sauce: Whip up the sour cream dill sauce (sour cream, fresh dill, lemon zest, honey) and store it in a covered container. This not only saves time but also lets the flavors meld together beautifully.
  • Portion Control: Portion out the salmon fillets and sauce into meal prep containers.This makes it easy to grab a perfectly portioned, balanced meal. 
  • Quick Reheating Tips: To reheat grilled salmon, use a low setting in the microwave or reheat in a skillet over low heat. This prevents the salmon from drying out and keeps it tender and flavorful.
  • Make Extra Sauce: Double the sauce recipe and use it throughout the week. The sour cream dill sauce is versatile and can be used as a dip for veggies, a spread for sandwiches, or a topping for other proteins.
grilled salmon with dill sauce, cherry tomatoes, and cucumbers

Grilled Salmon with Sour Cream Dill Sauce

Quick and nutritious, this Grilled Salmon with Sour Cream Dill Sauce combines tender marinated salmon with a creamy, tangy sauce for a delicious, healthy meal perfect for busy weeknights.

No ratings yet

Prep Time 5 minutes
Cook Time 15 minutes

Course lunch, Main Course
Cuisine American

Calories 648 kcal

Equipment

  • knife
  • cutting board
  • grill (or indoor grill pan)
  • mixing bowl

Ingredients


  • 10 oz salmon
  • 1 cup cherry tomatoes (diced)
  • 1 cucumber (diced)
  • 1/4 cup sour cream
  • 1 lemon (juiced)
  • 1 teaspoon fresh dill (chopped)
  • 1/4 teaspoon salt
  • 1/4 teaspoon garlic powder
  • 1 teaspoon olive oil

Instructions


  • Prep Your Salmon: Place your beautiful salmon fillets on a plate. Drizzle them with olive and a sprinkle of salt.
  • Fire Up the Grill: Preheat your grill to medium-high heat. If you don't have a grill, no worries! You can use an indoor grill pan on your stovetop or a regular saute pan.
  • Grill Time: Place the salmon fillets skin-side down on the hot grill. Cook for about 4-5 minutes per side, depending on the thickness of your fillets. You'll know they are ready when they flake easily with a fork.
  • Make the Magic Sauce: While your salmon is grilling, let's whip up the star of the show!-the sour cream dill sauce. In a small bowl, mix together the sour cream, fresh dill, lemon juice, and seasonings. Stir it up until it;=;s smooth and creamy.
  • Plate and Enjoy: Once your salmon is grilled, place it on a plate and generously spoon the sour cream dill sauce on top and enjoy with fresh cherry tomatoes and cucumbers.

Notes

Nutrition information provided is an estimate. It will vary based on cooking method and specific ingredients used. Please consult with your healthcare provider for specific dietary needs. To gain a better understanding, explore our nutrition disclaimer here. 

Nutrition

Calories: 648kcalCarbohydrates: 26gProtein: 62gFat: 34gSaturated Fat: 9gPolyunsaturated Fat: 8gMonounsaturated Fat: 12gCholesterol: 190mgSodium: 749mgPotassium: 2.353mgFiber: 6gSugar: 13gVitamin A: 1.448IUVitamin C: 101mgCalcium: 180mgIron: 5mg

Similar Recipes

salmon beet salad

Citrus Ginger Salmon with Roasted Beets

salmon and watermelon salad

Grilled Salmon with Watermelon Salad

salmon salad

Salmon Stuffed Avocado Salad

You Might Also Like

Frequently Asked Questions

How do I know when the salmon is fully cooked?

The salmon is fully cooked when it flakes easily with a fork and reaches an internal temperature of 145°F (63°C). Cooking time is usually about 4-5 minutes per side, depending on the thickness of the fillets.


What can I use as a substitute for fresh dill?

If you don’t have fresh dill, you can use dried dill. Use about one-third the amount of dried dill as you would fresh dill. You can also experiment with other herbs like parsley or chives for a different flavor profile.


Can I use Greek yogurt instead of sour cream for the sauce?

Yes, Greek yogurt is a great substitute for sour cream. It will give you a similar creamy texture with a bit more tang and additional protein.

Posted on Leave a comment

Vibrant Grilled Veggies Delight

grilled veggies with basil pesto sauce

Summer is the perfect time to embrace healthy eating and quick meal prepping, and what better way to do so than by grilling a rainbow of fresh vegetables? Introducing our Vibrant Veggie Grill Delight—a simple, delicious, and nutritious recipe that will add a burst of color and flavor to your summer meals. This easy-to-make dish is perfect for those looking to incorporate more veggies into their diet while enjoying the delightful flavors that grilling brings.

This post may contain affiliate links. Please see our privacy policy for details.

Calories: 103kcal | Carbohydrates: 12g | Protein: 4g | Fat: 6g | Saturated Fat: 1g | Polyunsaturated Fat: 0.4g | Monounsaturated Fat: 2g | Cholesterol: 1mg | Sodium: 182mg | Potassium: 570mg | Fiber: 4g | Sugar: 7g | Vitamin A: 1.965IU | Vitamin C: 65mg | Calcium: 55mg | Iron: 3mg

grilled veggies with basil pesto sauce

Why Grilling Veggies is a Game-Changer

Grilling vegetables is not only quick and easy, but it also enhances their natural flavors, giving them a smoky, caramelized taste that’s hard to resist. By grilling a variety of vegetables, you’re adding a medley of colors to your plate, which is not only visually appealing but also nutritionally beneficial. Each color represents different vitamins, minerals, and antioxidants, making your meal both beautiful and healthful.

The PrepYoSelf Newsletter

The Beauty of a Colorful Plate

A plate full of colorful grilled vegetables isn’t just pleasing to the eye—it’s also a powerhouse of nutrition. The different colors of the vegetables signify a variety of nutrients:

  • Green (Asparagus, Zucchini): Rich in vitamins K and C, folate, and fiber.
  • Yellow (Yellow Squash): Packed with vitamins A and C, magnesium, and potassium.
  • Red (Mini Bell Pepper, Cherry Tomatoes): High in vitamins A, C, and antioxidants like lycopene.
  • Purple (Red Onion): Full of vitamins C and B6, folate, and antioxidants.

By enjoying this colorful medley, you’re treating your body to a wide range of health benefits, all while delighting your taste buds.

Meal Prep Hack: Basil Pesto Sauce

One of the best ways to elevate your grilled veggies without much effort is by using pre-made basil pesto sauce. This vibrant, flavorful sauce adds a deliciously herby kick to your vegetables, making them even more irresistible. By opting for pre-made pesto, you save time and effort, making this dish even more convenient for your busy summer days.

variety of vegetables

Simple Steps to a Flavorful Feast

  1. Prep Time! Rinse all your veggies thoroughly and get them ready for the grill:
  • Asparagus: Trim off one inch of the ends.
  • Zucchini & Yellow Squash: Slice them lengthwise.
  • Portobello Mushrooms: Slice into thick, hearty strips.
  • Red Onions: Slice into beautiful rounds.
  • Cherry Tomatoes: Skewer them for easy grilling.
  • 2. Get Saucy! Drizzle the veggies with olive oil and sprinkle with salt for that perfect flavor boost.
  • 3. Grill & Chill: Preheat your grill or grill pan to medium-high heat. Cook the vegetables for about 3 to 5 minutes on each side, or until they’re as tender and charred as you like.
  • 4. Plate & Pesto: Arrange the grilled veggies on a serving plate and drizzle generously with basil pesto sauce.

Reference the recipe card below for detailed instructions.

grilled veggies

Perfect Pairings for Vibrant Veggie Grill Delight

The Vibrant Veggie Grill Delight is a versatile dish that pairs wonderfully with a variety of sides, proteins, and beverages. Here are some pairing tips to enhance your meal and create a delightful dining experience:

  • Grilled Chicken Breast: Seasoned simply with salt, pepper, and a squeeze of lemon, grilled chicken complements the fresh flavors of the veggies without overpowering them.
  • Salmon Fillets: Marinated in a blend of olive oil, garlic, and herbs, grilled salmon adds a rich, savory note that pairs beautifully with the smoky vegetables.
  • Quinoa or Chickpeas: For a plant-based protein option, serve your veggies with a side of fluffy quinoa or roasted chickpeas. Both add texture and protein, making the meal hearty and satisfying.
grilled veggies
grilled veggies with basil pesto sauce

Vibrant Grilled Veggies

Grill a colorful medley of asparagus, zucchini, yellow squash, bell peppers, portobello mushrooms, red onions, and cherry tomatoes, then drizzle with basil pesto for a vibrant, healthy summer dish.

No ratings yet

Prep Time 5 minutes
Cook Time 15 minutes

Course Side Dish
Cuisine American

Servings 6
Calories 103 kcal

Equipment

  • knife
  • cutting board
  • grill

Ingredients


  • 1 bunch asparagus
  • 1 yellow squash
  • 1 zucchini
  • 5 mini bell peppers
  • 1 red onion
  • 1 pint cherry tomatoes
  • 1 tablespoon olive oil
  • 1/4 teaspoon salt
  • 3 tablespoons basil pesto

Instructions


  • Prep Time! Rinse all your veggies thoroughly and get them ready for the grill:

    -Asparagus: Trim off one inch of the ends.

    -Zucchini & Yellow Squash: Slice them lengthwise.

    -Portobello Mushrooms: Slice into thick, hearty strips.

    -Red Onions: Slice them into rounds.

    -Cherry Tomatoes: Skewer them for easy grilling.

  • Get Saucy! Drizzle the veggies with olive oil and sprinkle with salt for that perfect flavor boost.
  • Grill & Chill: Preheat your grill or grill pan to medium-high heat. Cook the vegetables for about 3 to 5 minutes on each side, or until they’re as tender and charred as you like.
  • Plate & Pesto: Arrange the grilled veggies on a serving plate and drizzle generously with basil pesto sauce.

Notes

Nutrition information provided is an estimate. It will vary based on cooking method and specific ingredients used. Please consult with your healthcare provider for specific dietary needs. To gain a better understanding, explore our nutrition disclaimer here. 

Nutrition

Calories: 103kcalCarbohydrates: 12gProtein: 4gFat: 6gSaturated Fat: 1gPolyunsaturated Fat: 0.4gMonounsaturated Fat: 2gCholesterol: 1mgSodium: 182mgPotassium: 570mgFiber: 4gSugar: 7gVitamin A: 1.965IUVitamin C: 65mgCalcium: 55mgIron: 3mg

Similar Recipes

pepper sandwich

Roasted Red Pepper and Cheese Sandwich

stuffed lasagna peppers

Stuffed Lasagna Peppers

meatloaf patties

Oven Baked Meatloaf Patties with Roasted Green Beans

You Might Also Like

Joel Gott Sauvignon Blanc White Wine

Setton Farms Dry Roasted and Salted Pistachios, Premium California In Shell Pistachios

ParmCrisps – Original Cheese Parm Crisp

Frequently Asked Questions

Do I need a grill to make this recipe?

While a grill is ideal, you can also use a grill pan on your stovetop or an oven broiler. Both methods will give you deliciously charred vegetables.


What if I don’t have basil pesto sauce?

If you don’t have basil pesto sauce, you can use other sauces like chimichurri, tahini, or a simple balsamic glaze. Homemade pesto is also an easy option if you have fresh basil, garlic, nuts, and olive oil.


How do I prevent the vegetables from sticking to the grill?

Ensure your grill is clean and preheated. Lightly coat the vegetables with olive oil before grilling to prevent sticking.

Posted on Leave a comment

Summer Seafood Meal Prep

salmon and watermelon salad

This is a great time to try out some summer seafood meal prep. From flavors and different fishes to cooking methods, summer style seafood can be a refreshing change of pace. Seafood is rich in nutrients, low in calories, and high in protein and tastes delicious when grilled, baked, and pan cooked.

Summer Seafood Flavors

salmon and watermelon salad

While seafood is delicious anytime of year, there are just certain flavors that scream summer. Many summer seafood meal prep recipes call for fruits. Mangos, watermelon, and oranges are popular options. Alongside the fruit, include vegetables to mellow out the sweetness and marry the flavors with the fish. Asparagus, beets, and corn are all great options. 

The cooking method can be important. If you don’t have a grill that’s fine, many recipes work whether they’re on a grill or not. Bake them in the oven for a more convenient option. See our recommended recipes down below for fantastic flavor combinations that will freshen up your meal prep or surprise guests at dinner.

Types of Seafood Meal Prep

1. Fish Filets

It can be hard to tell when it’s done until you get used to it but once you find the right length of time at a given temperature it becomes more consistent.

  • Preparation: Choose firm fish like salmon, swordfish, halibut, or tuna. Marinate or season as desired.
  • Grilling: Place the filets skin-side down on the grill. Cook for 3-5 minutes per side, depending on thickness. The fish is done when it flakes easily with a fork and is opaque all the way through. 

2. Whole Fish

This is a great option for affordability but it does require more work later when you need to debone as you eat.

  • Preparation: Stuff the cavity of the fish with herbs, lemon slices, and garlic. Season the outside with salt, pepper, and olive oil.
  • Grilling: Grill the whole fish over medium-high heat, 5-7 minutes per side, depending on size. The fish is done when the flesh is opaque and flakes easily with a fork. 

3. Shrimp

Shrimp is always a popular choice. They’re easy to cook and depending on your grocery store options, can be an affordable and nutritious protein. Have fun with your seasonings and sauces as shrimp are a very versatile seafood.

  • Preparation: Peel and devein the shrimp, leaving the tails on if desired. Marinate or season with spices, lemon juice, and olive oil.
  • Grilling: Thread the shrimp on skewers or use a grill basket. Grill for 2-3 minutes per side until pink and opaque. You’ll know they’re overcooked if they’re rubbery. There isn’t much you can do to fix that except cover it up. Chop them up and make a quesadilla. 

Tips for Grilling Seafood

  1. Preheat the Grill: Ensure your grill is preheated to medium-high heat (350-400°F or 175-200°C) before placing the seafood on it. This helps to prevent sticking and ensures even cooking.
  2. Clean and Oil the Grill Grates: Clean grates prevent sticking and ensure nice grill marks. Use a grill brush to clean the grates, then lightly oil them using a high smoke point oil like canola or grapeseed oil.
  3. Prepare the Seafood: Pat the seafood dry with paper towels to remove excess moisture. This helps achieve a good sear. Season or marinate the seafood as desired.
  4. Use Grill Baskets or Foil: For delicate seafood or smaller pieces, use a grill basket or aluminum foil to prevent them from falling through the grates. This is a good place to start if you’re new to grilling fish. It avoids headaches.
  5. Cook Time and Temperature: Seafood cooks quickly, so keep a close eye on it. Generally, fish should be grilled for 3-5 minutes per side, depending on thickness. Shellfish like shrimp and scallops typically take 2-3 minutes per side.

Make sure to cook shellfish thoroughly however seafood like salmon and tuna have more leeway in acceptable doneness. You’ll know when you nail the right cook on the fish as it will be buttery to taste and texture.  Enjoy seafood cooking and trust that you’ll get better over time. Seafood is famous for having a short window of being perfectly done. 

View All Seafood Meal Prep Recipes

salmon and watermelon salad

Grilled Balsamic Salmon with Watermelon Salad

If you’re looking for a way to figure out what to do with so much watermelon, try this refreshing watermelon and mozzarella salad served with grilled salmon. This post may contain affiliate links. Please see our privacy policy for details. Watermelon is such a refreshing fruit that provides so many nutrients. We replaced tomatoes with…

Continue Reading

shrimp and corn

Sheet Pan Shrimp and Cauliflower with Corn

Easy Sheet Pan Shrimp with a corn and cauliflower bake that is ready in less than 20 minutes! This post may contain affiliate links. Please see our privacy policy for details. This sheet pan lunch is a lighter version of a shrimp boil that makes it an easy weekday meal prep. Here’s What We Love…

Continue Reading

salmon beet salad

Citrus Ginger Salmon Salad with Roasted Beets

This Citrus Ginger Salmon and Beet Salad is so refreshing, tangy, and full of healthy ingredients that will help you power through your day. This post may contain affiliate links. Please see our privacy policy for details. It’s always nice to have a nice, crisp salad during the warmer weather, but having one that is…

Continue Reading

cocktail shrimp

Cocktail Shrimp Ceviche Salad

Cocktail Shrimp Ceviche Salad knifecutting boardmixing bowl 12 oz pre-cooked frozen shrimp ((defrosted))1/4 cup red onion ((diced))1 each roma tomato ((diced))1/4 cup cilantro ((chopped))1 each lime ((sliced))4 cups spring mix1/4 tsp garlic powder1/4 tsp salt1/4 tsp pepper Defrost frozen shrimp according to the packaged instructionsPlace the shrimp in a mixing bowlStir in the following ingredients:…

Continue Reading

pan-seared-tilapia-with-zucchini-and-bell-peppers