Posted on Leave a comment

Smoked Salmon Salad Croissant Sandwich

smoked salmon salad croissant sandwich with salad

Looking for a sandwich that feels indulgent but is super easy to throw together? This Smoked Salmon Salad Croissant Sandwich is your new go-to for those busy days when you crave something fresh, flavorful, and just plain delicious!

This post may contain affiliate links. Please see our privacy policy for details.

Calories: 434kcal | Carbohydrates: 37g | Protein: 24g | Fat: 21g | Saturated Fat: 10g | Polyunsaturated Fat: 2g | Monounsaturated Fat: 6g | Cholesterol: 73mg | Sodium: 947mg | Potassium: 866mg | Fiber: 5g | Sugar: 14g | Vitamin A: 2972IU | Vitamin C: 37mg | Calcium: 84mg | Iron: 3mg

smoked salmon salad croissant sandwich with salad

Why You’ll Love It:

This no-cook recipe is perfect for busy days. The smoked salmon brings a rich, savory flavor, while the crisp cucumbers and red onions add a refreshing crunch. Plus, it’s so easy to assemble with ingredients you likely already have in your fridge! It’s an ideal grab-and-go meal that doesn’t sacrifice taste for convenience. Whether it’s lunch on the run or a quick dinner, this sandwich packs in satisfying flavors and textures without all the fuss.

Ready to take your meal prep game up a notch? This Hot Smoked Salmon Salad Croissant Sandwich has got your back!

The PrepYoSelf Newsletter

Ingredient Breakdown:

  • Hot Smoked Salmon: The star of this sandwich, hot smoked salmon offers a rich, smoky flavor with a delicate texture that adds depth to each bite. Its bold taste contrasts beautifully with the fresh and creamy components of the recipe.
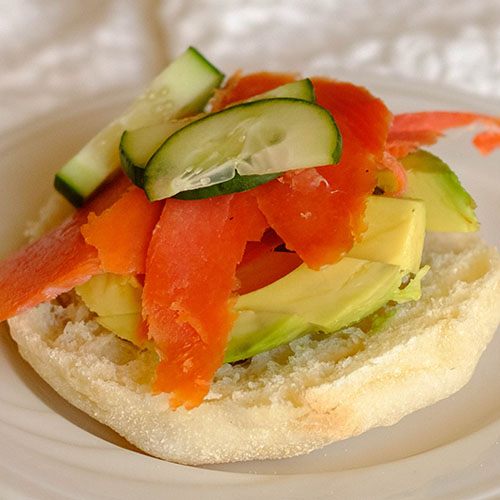
  • Croissant: Buttery and flaky, croissants elevate the sandwich with their soft, melt-in-your-mouth texture. They complement the rich salmon and add a touch of indulgence to every bite.
  • Cream Cheese: Cream cheese brings creaminess and tang that balances the smoky salmon. Its smooth texture helps bind the ingredients together, creating a luscious spread.
  • Greek Yogurt: The addition of Greek yogurt lightens up the cream cheese, adding a subtle tanginess and a creamy consistency that keeps the salmon salad from feeling too heavy.
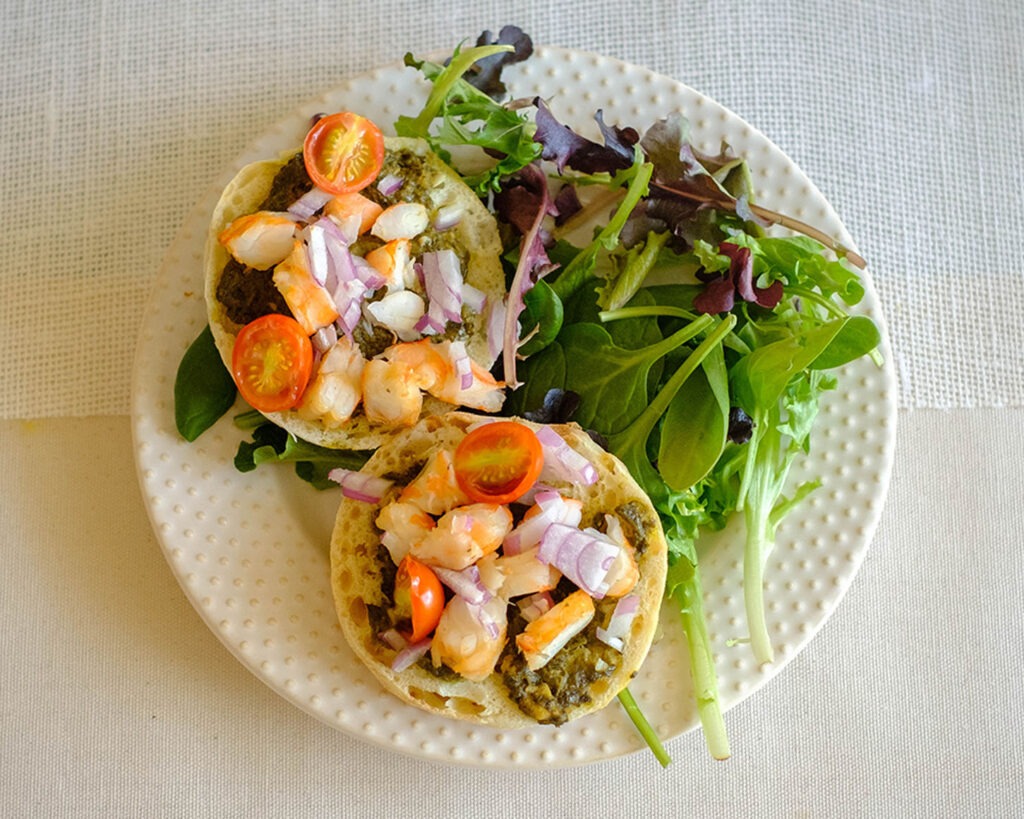
  • Cucumber (Diced & Sliced): The finely diced cucumbers add a crisp, refreshing crunch to the salmon salad, while the sliced cucumbers bring extra texture and freshness to the sandwich, balancing the richness of the salmon and cream cheese.
  • Red Onions (Diced & Sliced): Diced red onions provide a sharp, zesty bite that cuts through the creaminess of the salad, while the sliced red onions add an extra layer of crunch and flavor to the sandwich, enhancing the overall taste. Pickled red onions work wonderfully in this recipe because they add a tangy, slightly sweet flavor that cuts through the richness of the smoked salmon and cream cheese
  • Heirloom Tomatoes: Juicy and sweet, heirloom tomatoes provide a burst of fresh flavor that complements the smoky salmon and creamy components. Their vibrant color and taste brighten up the sandwich, making each bite more satisfying.
  • Chives: Chives are a fantastic addition to this recipe because they add a mild onion-like flavor without overpowering the dish. Their subtle sharpness complements the richness of the smoked salmon and cream cheese, while their fresh, herbaceous taste enhances the overall flavor profile. Plus, the bright green color adds a pop of color and visual appeal to the sandwich, making it even more appetizing!
smoked salmon salad croissant sandwich ingredients

Easy Recipe Steps

  1. Prep Your Salmon Salad: In a bowl, add the hot smoked salmon fillet. Use a fork to gently break it up into shredded pieces (that smoky flavor is going to make your taste buds so happy!). Toss in the cream cheese, Greek yogurt, finely diced cucumbers, and red onions. Mix it all together until you’ve got a creamy, dreamy salmon salad.
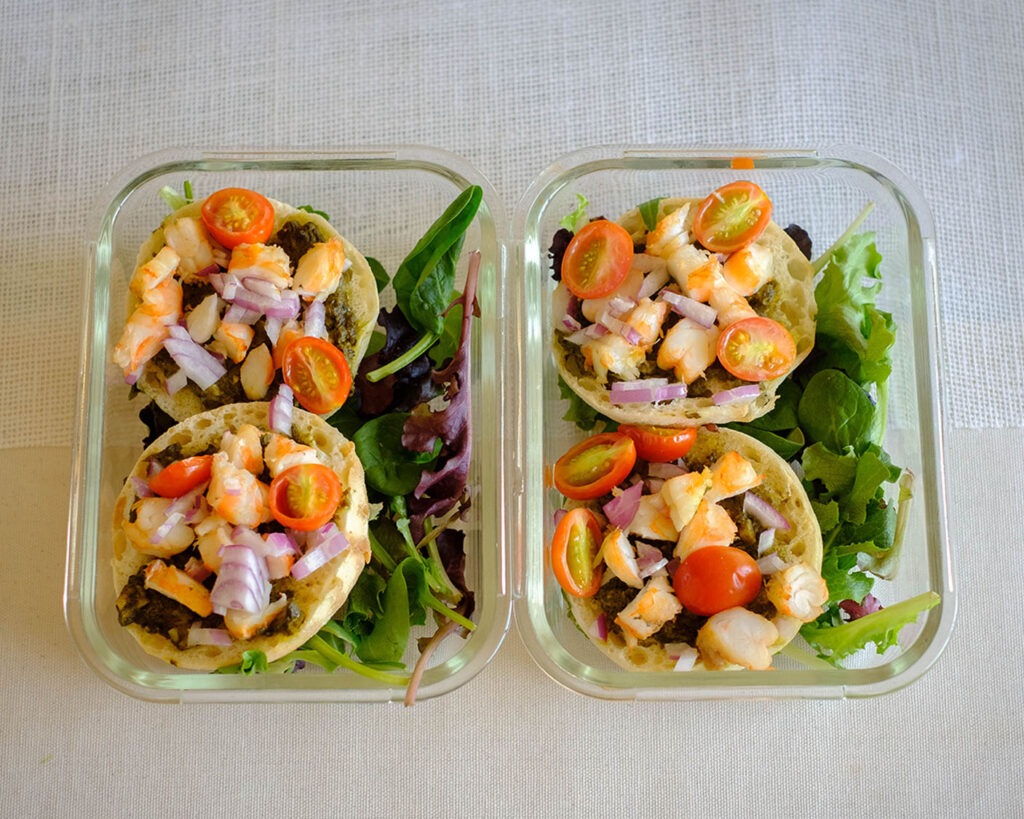
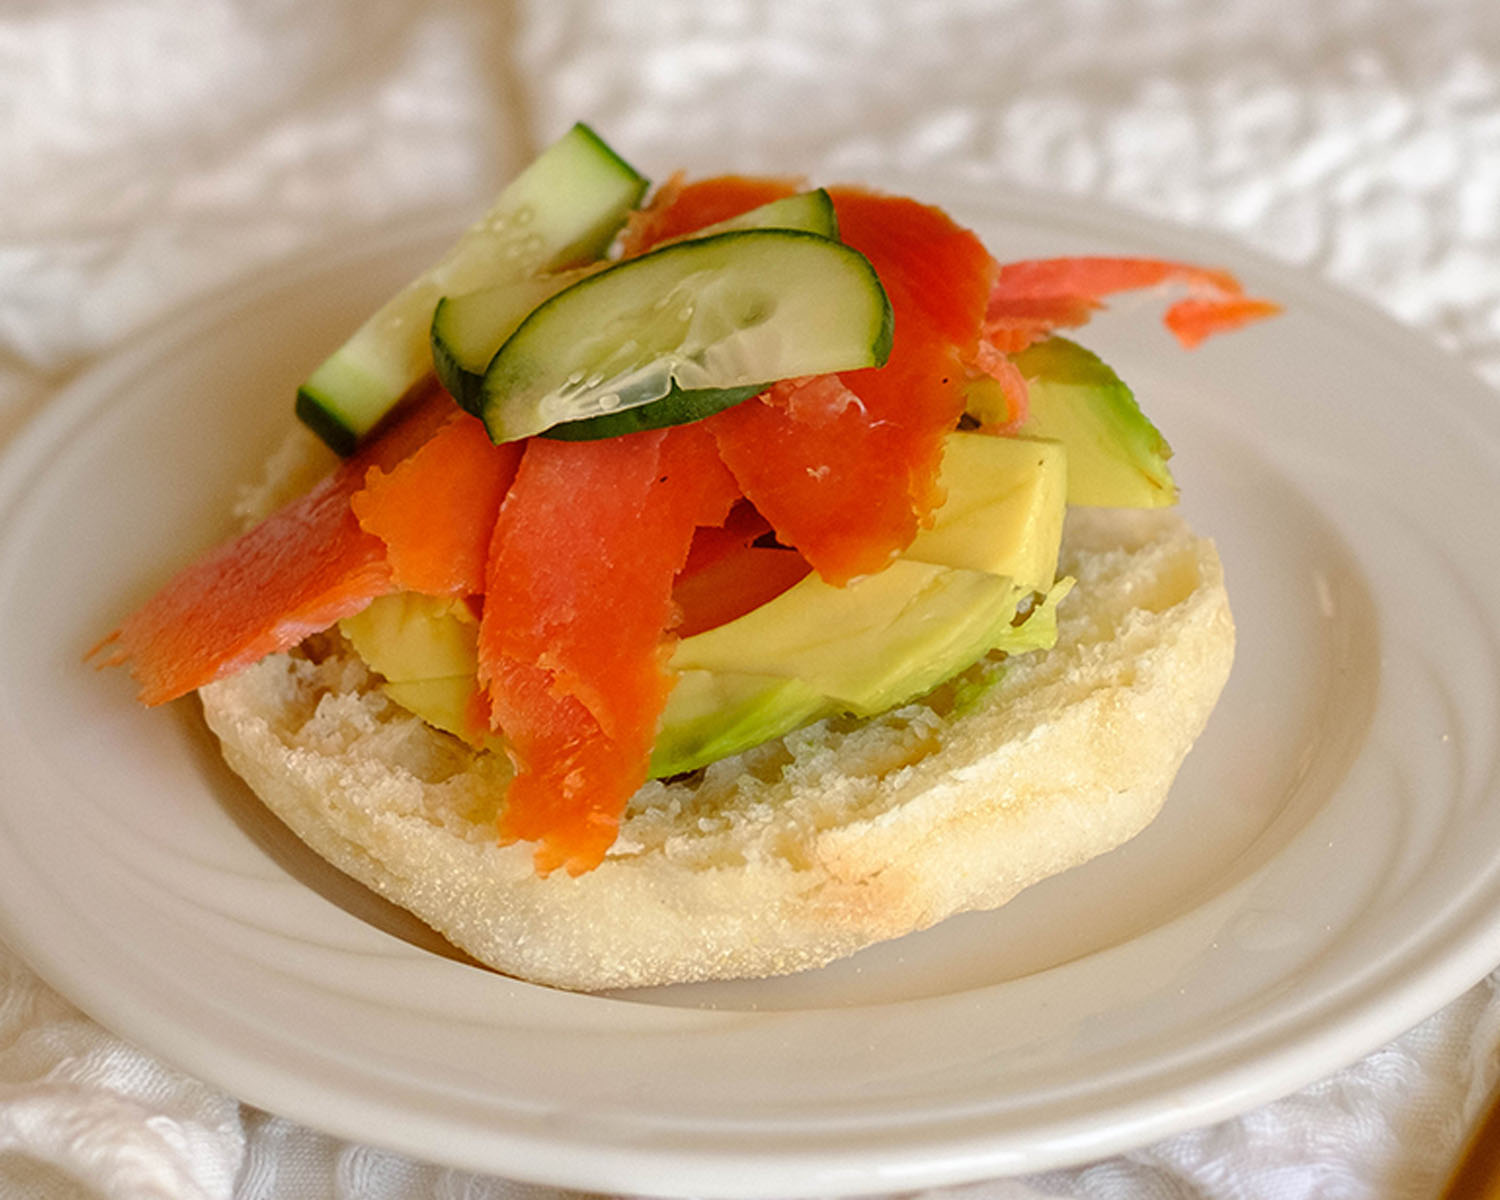
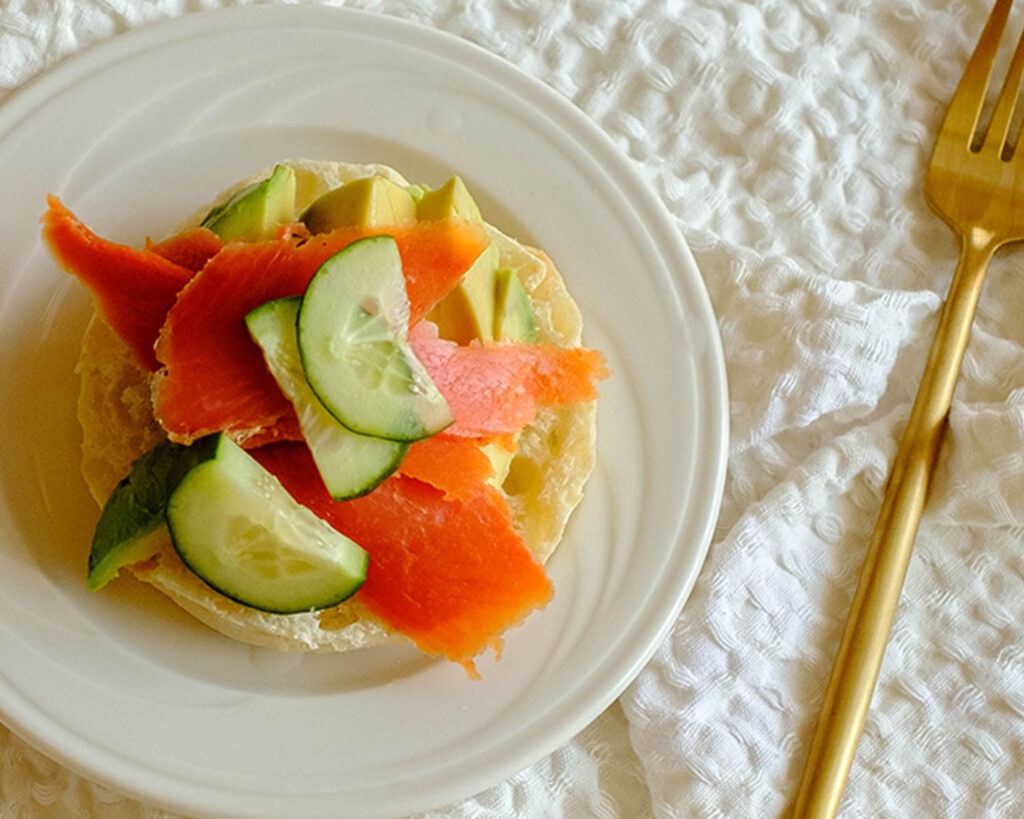
  2. Build Your Sandwich: Slice your croissants in half. On the bottom half, generously layer on the smoked salmon salad. Top it off with slices of juicy heirloom tomatoes, more cucumber slices for crunch, and some thinly sliced red onions.
  3. Finish It Off: Place the top half of your croissant on, and voilà! You’ve just created a sandwich that tastes like a gourmet café dish in minutes.
  4. Serve & Enjoy: Pair it with a side salad or some fresh fruit, and you’re ready to go!

Reference the recipe card below for detailed instructions.

smoked salmon salad croissant sandwich with salad

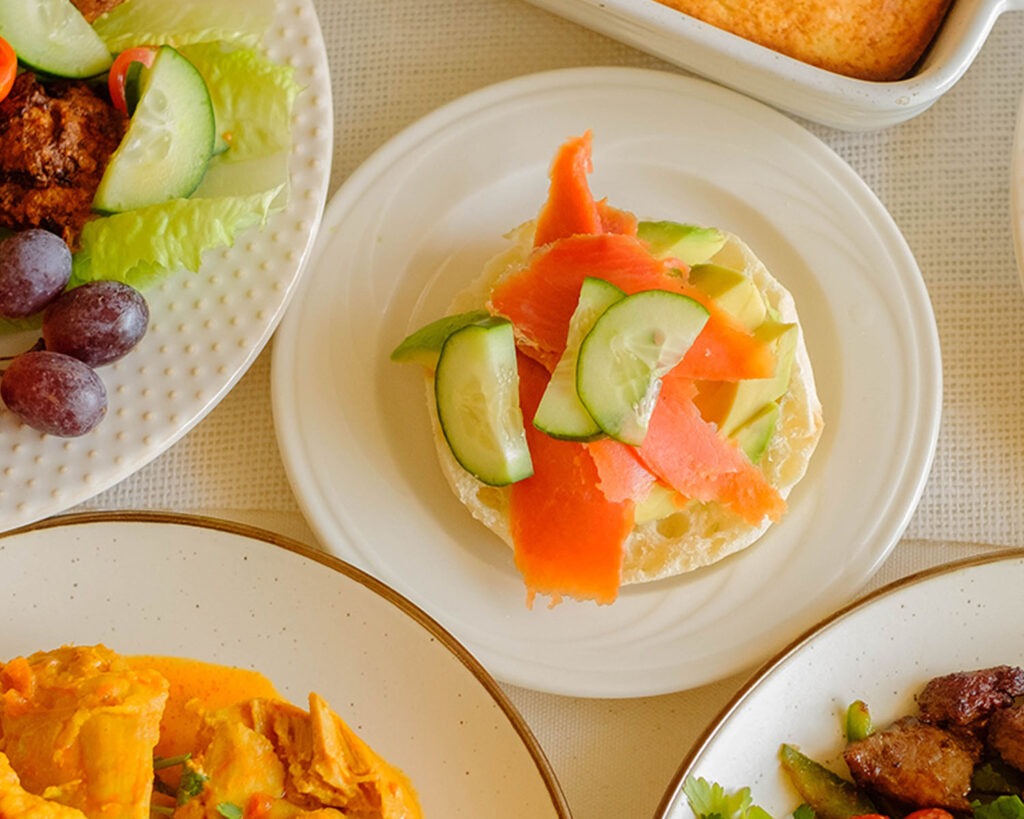
Meal Prep Pairing Tips

  • Versatile Salad: The smoked salmon salad can be repurposed! Use it as a topping for crackers, in a wrap, or on top of a bed of greens for a quick and delicious lunch throughout the week.
  • Side Salad: A light side salad with mixed greens, a simple vinaigrette, and perhaps some avocado slices will complement the richness of the croissant sandwich while adding extra freshness and nutrients to your meal.
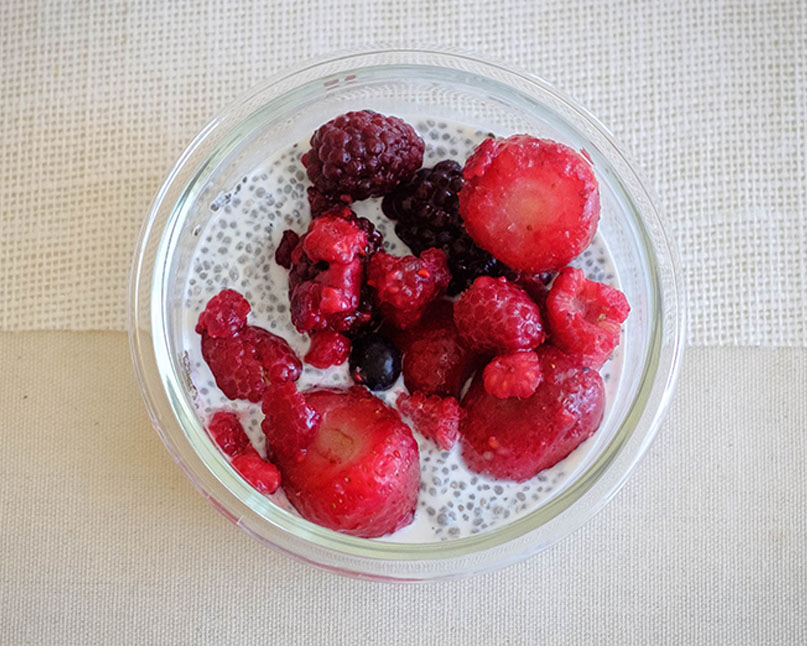
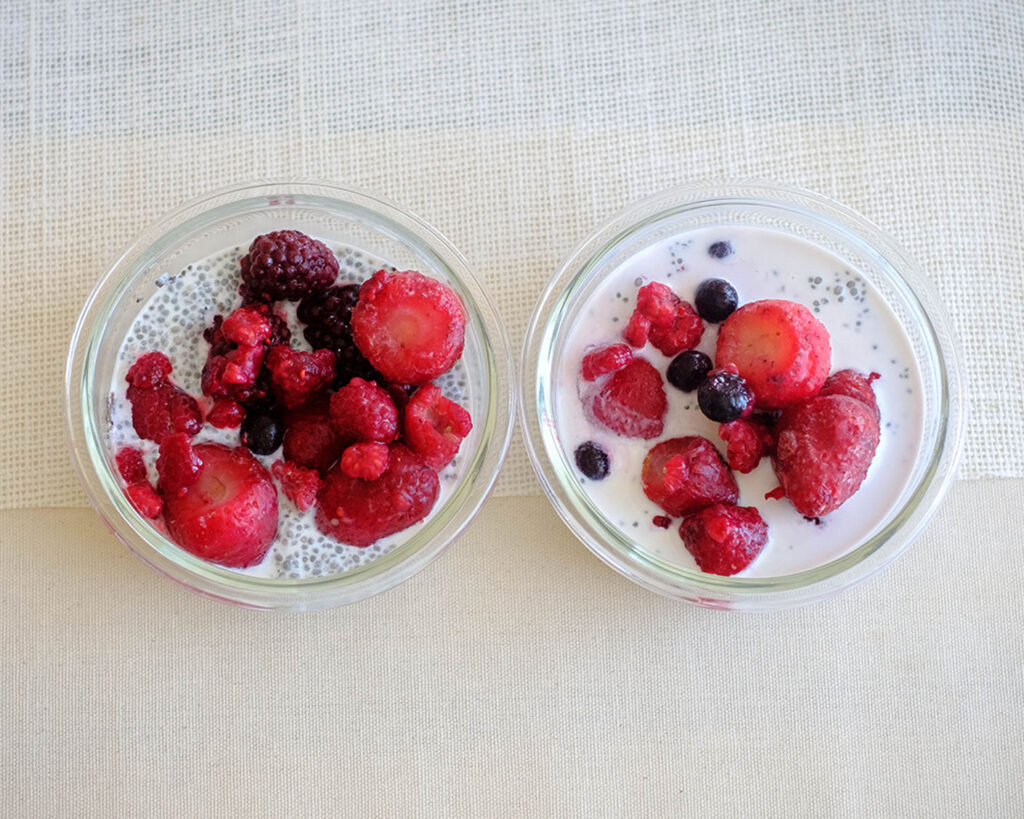
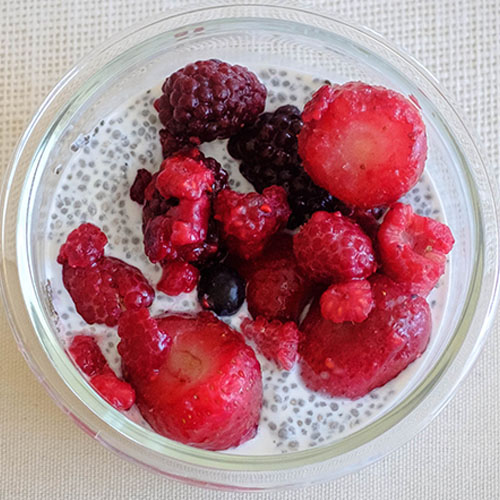
  • Fruit Salad: Pair your sandwich with a fresh fruit salad featuring berries, melon, or citrus for a light and sweet contrast to the savory flavors of the sandwich.
  • Vegetable Chips: For a crunchy side, opt for baked vegetable chips such as sweet potato, beet, or kale chips. These add texture and make for a healthy alternative to traditional chips.
  • Sparkling Water with Citrus: Stay refreshed with a glass of sparkling water infused with slices of lemon, lime, or orange. The citrusy notes will cleanse your palate between bites and enhance the overall flavor experience.
smoked salmon salad croissant sandwich with salad

Smoked Salmon Salad Croissant Sandwich

A delicious and easy-to-make Smoked Salmon Salad Croissant Sandwich, packed with creamy smoked salmon, crisp vegetables, and vibrant flavors, perfect for a quick and satisfying meal on the go.
No ratings yet
Prep Time 5 minutes
Cook Time 10 minutes
Course Drinks
Cuisine American
Servings 2
Calories 434 kcal

Equipment

  • knife
  • cutting board
  • mixing bowl

Ingredients
  

  • 6 oz hot smoked salmon fillet
  • 2 croissants
  • 2 tablespoons cream cheese
  • 1 tablespoons Greek yogurt
  • 1/4 cup cucumber (finely diced)
  • 1/4 cup chives (finley diced)
  • 4 heirloom tomatoes (finely diced)
  • cucumber (thin slices, add as much as desired)
  • pickled red onions (thin slices, add as much as desired)

Instructions
 

  • Prep Your Salmon Salad: Place the hot smoked salmon fillet in a bowl and gently shred it with a fork (get ready for that smoky flavor to work its magic!). Add the cream cheese, Greek yogurt, finely diced cucumbers, and red onions. Mix everything together until you have a smooth, flavorful salmon salad.
  • Build Your Sandwich: Cut the croissants in half. Generously spread the smoked salmon salad on the bottom half. Layer on slices of juicy heirloom tomatoes, additional cucumber slices for crunch, and thinly sliced red onions.
  • Finish It Off: Top your creation with the other half of the croissant, and just like that, you've made a sandwich that tastes like it came straight from a gourmet café in no time.
  • Serve & Enjoy: Pair with a side salad or some fresh fruit, and you're all set to dig in!

Notes

Nutrition information provided is an estimate. It will vary based on cooking method and specific ingredients used. Please consult with your healthcare provider for specific dietary needs. To gain a better understanding, explore our nutrition disclaimer here. 

Nutrition

Calories: 434kcalCarbohydrates: 37gProtein: 24gFat: 21gSaturated Fat: 10gPolyunsaturated Fat: 2gMonounsaturated Fat: 6gCholesterol: 73mgSodium: 947mgPotassium: 866mgFiber: 5gSugar: 14gVitamin A: 2972IUVitamin C: 37mgCalcium: 84mgIron: 3mg

Similar Recipes

salmon beet salad

Citrus Ginger Salmon with Roasted Beets

salmon and watermelon salad

Grilled Salmon with Watermelon Salad

salmon salad

Salmon Stuffed Avocado Salad

You Might Also Like

Frequently Asked Questions

Can I use regular smoked salmon instead of hot smoked salmon?

Yes, regular smoked salmon will work, but keep in mind that hot smoked salmon has a firmer texture and a more intense smoky flavor. Regular smoked salmon will give you a softer, more delicate texture.


Can I substitute the croissant with another type of bread?

Absolutely! You can use any bread you like—bagels, whole-grain rolls, or even sourdough. Just make sure it’s sturdy enough to hold the salmon salad and all the toppings.


How long will the smoked salmon salad keep in the fridge?

The smoked salmon salad will stay fresh in the fridge for up to 3 days if stored in an airtight container.

Posted on Leave a comment

Dragon Fruit Salsa with Shrimp

shrimp with dragon fruit salsa

This Dragon Fruit Salsa with Shrimp is the perfect way to level up your salsa game. It’s not only vibrant and flavorful but also a nutrient-rich addition to your healthy lifestyle. Get ready to enjoy a dish that’s as beneficial for your body as it is delightful for your taste buds

This post may contain affiliate links. Please see our privacy policy for details.

Calories: 121kcal | Carbohydrates: 10g | Protein: 18g | Fat: 1g | Saturated Fat: 0.1g | Polyunsaturated Fat: 0.2g | Monounsaturated Fat: 0.1g | Trans Fat: 0.01g | Cholesterol: 137mg | Sodium: 423mg | Potassium: 291mg | Fiber: 2g | Sugar: 5g | Vitamin A: 70IU | Vitamin C: 11mg | Calcium: 72mg | Iron: 1mg

shrimp with dragon fruit salsa

Why This Salsa is a Game-Changer:

  • Refreshing & Nourishing: Dragon fruit is not only beautiful with its speckled flesh, but it’s also packed with antioxidants and vitamin C, boosting your immunity and keeping your skin glowing. Paired with shrimp, a lean source of protein, this dish is as nourishing as it is refreshing.
  • Budget-Friendly: With just a few simple ingredients, this recipe is easy on your wallet. The dragon fruit adds a touch of exotic flair without breaking the bank, and pre-cooked shrimp saves you time and effort.
  • Simple & Quick: This salsa comes together in minutes! It’s perfect for a quick lunch, a light dinner, or even as an appetizer at your next gathering.
  • Powerhouse ingredients: You’re not just making salsa—you’re creating a dish that nourishes your body from the inside out. Each ingredient plays a vital role in boosting your health, from providing essential vitamins and minerals to delivering antioxidants and anti-inflammatory benefits.

The PrepYoSelf Newsletter

Level Up Your Salsa Game: The Nutrient Powerhouse in Every Bite!

  • Dragon Fruit: Dragon fruit is the star of this salsa, and for good reason! This exotic fruit isn’t just pretty; it’s packed with fiber, antioxidants, and vitamin C. Fiber helps keep your digestive system running smoothly, while the antioxidants fight off free radicals, keeping your cells healthy. Vitamin C boosts your immune system and promotes glowing skin. By adding dragon fruit to your salsa, you’re infusing your meal with a refreshing sweetness and a vibrant dose of nutrition.
  • Shrimp: Shrimp is a lean, low-calorie source of high-quality protein, making it a fantastic addition to this dish. Protein is essential for muscle repair, hormone production, and overall body maintenance. Plus, shrimp is rich in selenium, an important mineral that acts as a powerful antioxidant, supporting your immune system and thyroid function. With shrimp in your salsa, you’re not only adding a savory element but also giving your body the building blocks it needs to stay strong and energized.
  • Fresh Basil: Basil brings a burst of fresh, herbaceous flavor to this salsa, but it’s also loaded with health benefits. This aromatic herb is rich in vitamin K, which plays a key role in blood clotting and bone health. Basil also contains compounds that have anti-inflammatory and antimicrobial properties, helping to support your overall well-being. Adding basil to your salsa not only elevates the flavor but also adds a layer of health-boosting goodness.
  • Red Onions: Red onions add a sharp, tangy bite to your salsa, and they’re packed with nutrients like vitamin C, fiber, and antioxidants. The quercetin in red onions is known for its anti-inflammatory properties, which can help reduce inflammation in the body. Additionally, the sulfur compounds in onions support heart health by improving cholesterol levels and lowering blood pressure. Red onions are a simple way to level up the nutritional profile of your salsa while adding depth to the flavor.
  • Lime Juice: Lime juice not only adds a zesty, citrusy kick to your salsa but also brings a ton of vitamin C to the table. This essential vitamin boosts your immune system, aids in iron absorption, and supports healthy skin. Lime juice also has natural detoxifying properties, helping to cleanse your body and support digestive health. A squeeze of lime is all it takes to brighten up the flavors of your salsa while giving your body a nutrient boost.
  • Salt: A pinch of salt ties all the flavors together and enhances the natural sweetness of the dragon fruit while balancing the acidity of the lime. Just a small amount can elevate the entire dish, making each bite more satisfying.

dragon fruit salsa

How to Make Dragon Fruit Salsa with Shrimp

  1. Prep the Shrimp: If your shrimp is frozen, defrost it according to the package instructions. Pat dry.
  2. Mix the Salsa: In a mixing bowl, combine the diced dragon fruit, fresh basil, chopped red onions, lime juice, and salt. Toss everything together gently to marry the flavors.
  3. Serve: Lay the shrimp on a plate and top with the vibrant dragon fruit salsa. Serve immediately and enjoy the burst of fresh flavors!

Reference the recipe card below for detailed instructions.

shrimp with dragon fruit salsa

Meal Prep Tips:

  • Avocado: Add diced avocado for a creamy texture and an extra dose of healthy fats.
  • Jalapeño: For a bit of heat, finely chop a jalapeño or another chili pepper and mix it into the salsa.
  • Cucumber: Add diced cucumber for extra crunch and hydration, making the salsa even more refreshing.
  • Mint: Swap half of the basil for fresh mint to give the salsa a bright, cooling flavor.
  • Protein Swap: Instead of shrimp, try grilled chicken, tofu, or even black beans for a different source of protein.
  • Fruit Swap: Swap dragon fruit with diced mango, pineapple, or even kiwi for a different but equally delicious flavor profile.
  • Red Onion Swap: If you prefer a milder flavor, swap red onions for thinly sliced green onions or shallots.

shrimp with dragon fruit salsa

shrimp with dragon fruit salsa

Dragon Fruit Salsa with Shrimp

A vibrant and nutrient-packed Dragon Fruit Salsa with Shrimp, combining sweet and savory flavors for a refreshing and health-boosting dish.
No ratings yet
Course lunch
Cuisine American
Servings 2
Calories 121 kcal

Equipment

  • knife
  • cutting board
  • mixing bowl

Ingredients
  

  • 6 oz shrimp (pre-cooked, peeled, deveined)
  • 1 dragon fruit (peeled and diced)
  • 2 tabelspoons fresh basil (thinly sliced)
  • 1/4 cup red onions (finely diced)
  • 1 lime (juiced)
  • 1/4 teaspoon salt

Instructions
 

  • If the shrimp is frozen, defrost it according to packaged instructions.
  • Combine the diced dragon fruit, basil, onions, lime juice, and salt in a mixing bowl.
  • Top the shrimp with the dragon fruit salsa.

Notes

Nutrition information provided is an estimate. It will vary based on cooking method and specific ingredients used. Please consult with your healthcare provider for specific dietary needs. To gain a better understanding, explore our nutrition disclaimer here. 

Nutrition

Calories: 121kcalCarbohydrates: 10gProtein: 18gFat: 1gSaturated Fat: 0.1gPolyunsaturated Fat: 0.2gMonounsaturated Fat: 0.1gTrans Fat: 0.01gCholesterol: 137mgSodium: 423mgPotassium: 291mgFiber: 2gSugar: 5gVitamin A: 70IUVitamin C: 11mgCalcium: 72mgIron: 1mg

Similar Recipes

shrimp kebab

Air Fryer Shrimp and Pineapple Kebabs

shrimp and corn

Sheet Pan Shrimp with Cauliflower and Corn

salmon salad

Salmon Salad Stuffed Avocado

You Might Also Like

Frequently Asked Questions

Can I use raw shrimp instead of pre-cooked shrimp?

Absolutely! If you prefer to use raw shrimp, just cook them first by sautéing or grilling until they’re pink and opaque. Let them cool before adding to the salsa


What can I serve with this salsa?

This salsa is versatile! Serve it as an appetizer with tortilla chips, as a topping for tacos, or over a bed of greens for a light salad. It also pairs well with grilled fish or chicken.


Can I use other fruits along with dragon fruit?

Yes, you can mix in other fruits like diced mango, pineapple, or even strawberries to create a more complex and fruity salsa. It’s a great way to experiment with flavors!

Posted on Leave a comment

Shrimp Rice Paper Spring Rolls

shrimp rice paper rolls

Let me introduce you to the ultimate Shrimp Rice Paper Rolls! These little gems are light, refreshing, and packed with deliciousness. Perfect for a quick lunch or a delightful snack, they’re a must-try! Let’s dive into the recipe!

This post may contain affiliate links. Please see our privacy policy for details.

Calories: 372kcal | Carbohydrates: 59g | Protein: 29g | Fat: 3g | Saturated Fat: 0.4g | Polyunsaturated Fat: 1g | Monounsaturated Fat: 0.4g | Trans Fat: 0.01g | Cholesterol: 145mg | Sodium: 1207mg | Potassium: 670mg | Fiber: 4g | Sugar: 9g | Vitamin A: 5235IU | Vitamin C: 18mg | Calcium: 161mg | Iron: 4mg

shrimp rice paper spring rolls

Why You’ll Love It:

  • Light and Refreshing: Perfect for a hot day or when you want something satisfying but not too heavy.
  • Packed with Flavor: The combination of shrimp, creamy yogurt, sweet chili, and a hint of sriracha creates a taste explosion in every bite!
  • Nutritious and Healthy: High in protein, low in calories, and loaded with fresh veggies. It’s a win-win!
  • Easy to Make: With just a few simple steps, you’ll have a gourmet meal ready in no time.

The PrepYoSelf Newsletter

Ingredient Breakdown: Why They Shine in Our Shrimp Rice Paper Rolls

  • Shrimp: Shrimp is the star of the show! Pre-cooked shrimp is not only convenient but also a fantastic source of lean protein. Its mild, sweet flavor pairs beautifully with the tangy and spicy sauces, creating a perfect balance in every bite.
  • High-Protein Greek Yogurt: Greek yogurt brings a creamy texture to the filling while adding a protein boost. It’s tangy and rich, providing a healthy alternative to mayonnaise or cream-based sauces. Plus, it helps bind the ingredients together, ensuring each roll is packed with flavor.
  • Sweet Chili Sauce: This sauce adds a delightful sweetness with a hint of heat, enhancing the shrimp’s natural sweetness. It blends perfectly with the yogurt, creating a balanced, flavorful filling that’s neither too spicy nor too sweet.
  • Soy Sauce: Soy sauce introduces a savory, umami depth to the rolls. It complements the sweet chili and sriracha, adding a rich, salty undertone that enhances the overall taste. Just a tablespoon brings out the best in the shrimp and yogurt mixture.
  • Sriracha Sauce: Sriracha gives our rolls that irresistible kick! Its heat is perfectly balanced with garlic and vinegar, adding a spicy, tangy note that livens up the entire dish. You can always adjust the amount based on your heat preference.
  • Lime Wedge: A squeeze of fresh lime juice brightens up the filling, cutting through the richness of the yogurt and balancing the sweet and spicy elements. Lime adds a zesty freshness that elevates all the flavors.
  • Rice Spring Roll Wrappers: These delicate, translucent sheets are the perfect vessel for our delicious filling. They’re light and allow the vibrant colors and textures of the ingredients to shine through. Plus, they’re fun and easy to work with once you get the hang of it!
  • Carrot: Shredded carrot adds a sweet crunch and a burst of color to the rolls. It’s packed with vitamins and provides a nice contrast to the soft shrimp filling, making each bite more exciting.
  • Cucumber: Crisp, cool cucumber slices bring a refreshing crunch and a mild, fresh flavor that complements the shrimp perfectly. It’s hydrating and adds a lovely texture to the rolls.
  • Sesame Seeds: A sprinkle of sesame seeds adds a subtle nutty flavor and a slight crunch. They also bring an extra touch of visual appeal, making the rolls look even more appetizing.

shrimp rice paper spring rolls

How to Make Shrimp Spring Rolls

  1. Prep the Shrimp: Chop those succulent shrimp into small pieces. If they’re frozen, defrost them in the refrigerator or follow the package instructions. We want them ready to mingle with our zesty flavors!
  2. Veggie Time: Slice the cucumber into matchsticks and shred the carrots. Fresh and crisp, these veggies add the perfect crunch!
  3. Mix It Up: Combine the Greek yogurt, sweet chili sauce, sriracha, soy sauce, and a squeeze of lime. Toss in the chopped shrimp and mix it all up. This creamy, tangy filling is the heart of our rolls!
  4. Roll Call: Lightly wet 4 rice paper sheets and lay them down, slightly overlapping. These sheets are like a blank canvas, ready to be filled with goodness.
  5. Assemble: Top the rice paper with cucumber slices, shrimp filling, shredded carrot, and a sprinkle of sesame seeds. Feel free to add a bit more sriracha if you’re feeling spicy!
  6. Roll and Enjoy: Fold the sides of the rice paper inward and roll them up tightly. Slice into 1-inch thick pieces. Voila! You have beautiful, bite-sized rolls ready to be devoured.

Reference the recipe card below for detailed instructions.

shrimp rice paper spring rolls

Meal Pairing Tips:

  • Fresh Salad: Pair your rolls with a light, fresh salad. A simple mixed greens salad with a tangy vinaigrette complements the flavors perfectly and adds extra veggies to your meal.
  • Light Soup: A bowl of miso soup or a light broth-based soup works great as a side dish. It’s warm and comforting, balancing the cool, crisp rolls.
  • Fruit Side Dish: Fresh fruit like pineapple, mango, or watermelon adds a sweet, refreshing touch. The natural sweetness of the fruit complements the savory and spicy rolls.
  • Herbal Tea: Enjoy your rolls with a cup of herbal tea. Mint or ginger tea adds a soothing, aromatic element that pairs well with the flavors in the rolls.

shrimp rice paper spring rolls

shrimp rice paper spring rolls

Shrimp Rice Paper Spring Rolls

Light and refreshing Shrimp Rice Paper Rolls packed with flavorful shrimp, fresh veggies, and a zesty yogurt-based sauce, perfect for a healthy lunch or snack.
No ratings yet
Prep Time 5 minutes
Cook Time 10 minutes
Course lunch
Cuisine Asian
Servings 2
Calories 372 kcal

Equipment

  • knife
  • cutting board

Ingredients
  

  • 6 oz shrimp (pre-cooked, peeled, deveined)
  • 2 tablespoon greek yogurt
  • 1 tablespoon sweet chili sauce
  • 1 tablespoon soy sauce
  • 1 teaspoon sriracha sauce
  • 1 lime (wedged)
  • 8 spring roll wrappers
  • 1 carrot thinly shredded
  • 1 cucumber julienne cut
  • 1 teaspoon sesame seeds

Instructions
 

  • Chop the shrimp into small pieces (if frozen, defrost it in the refrigerator or according to the packaged instructions).
  • Meanwhile, slice the cucumber into matchsticks and shred the carrots.
  • Combine the Greek yogurt, sweet chilli, sriracha, soy sauce and squeeze of lime and mix in the shrimp.
  • Lightly wet and place down 4 rice paper sheets, slightly overlapping.
  • Top the rice paper with sliced cucumber, shrimp filling,  carrot, spring onion and sesame seeds.
  • Fold and tuck in the sides inwards to create a roll. Slice into 1 inch thick pieces and enjoy!

Notes

Nutrition information provided is an estimate. It will vary based on cooking method and specific ingredients used. Please consult with your healthcare provider for specific dietary needs. To gain a better understanding, explore our nutrition disclaimer here. 

Nutrition

Calories: 372kcalCarbohydrates: 59gProtein: 29gFat: 3gSaturated Fat: 0.4gPolyunsaturated Fat: 1gMonounsaturated Fat: 0.4gTrans Fat: 0.01gCholesterol: 145mgSodium: 1207mgPotassium: 670mgFiber: 4gSugar: 9gVitamin A: 5235IUVitamin C: 18mgCalcium: 161mgIron: 4mg

Similar Recipes

pepper sandwich

Roasted Red Pepper and Cheese Sandwich

bean and corn taco

Vegetarian Black Bean and Corn Soft Tacos

eggplant

Grilled Eggplant Steaks with Marinara Sauce

You Might Also Like

Frequently Asked Questions

Can I use fresh shrimp instead of pre-cooked shrimp?

Absolutely! Just cook the shrimp in advance and let them cool before chopping and mixing with the other ingredients. This ensures your rolls stay fresh and flavorful.


How do I keep the rice paper rolls from sticking together?

To prevent sticking, separate the rolls with parchment paper or lightly damp paper towels in between layers. This helps maintain their texture and prevents them from tearing.


Are there other protein options besides shrimp?

Definitely! You can use cooked chicken, tofu, or even tempeh as a substitute for shrimp. Just chop them into small pieces and mix with the sauce.

Posted on Leave a comment

Refreshing Green Papaya Salad

shredded green papaya salad

Get ready to refresh your taste buds with this delicious Green Papaya Salad! Perfect for meal prep, this vibrant dish combines the crispness of green papaya and carrots with the sweetness of mini bell peppers, all tossed in a tangy and savory dressing. It’s not just delicious but also packed with nutrients, making it a fantastic addition to any healthy meal plan. Plus, it’s easy to customize with your favorite herbs and toppings. Let’s dive into this simple yet flavorful recipe!

This post may contain affiliate links. Please see our privacy policy for details.

Calories: 43kcal | Carbohydrates: 11g | Protein: 1g | Fat: 0.2g | Saturated Fat: 0.1g | Polyunsaturated Fat: 0.1g | Monounsaturated Fat: 0.04g | Sodium: 247mg | Potassium: 171mg | Fiber: 1g | Sugar: 8g | Vitamin A: 2621IU | Vitamin C: 51mg | Calcium: 17mg | Iron: 0.3mg

shredded green papaya salad

What’s Green Papaya?

Green papaya is simply the unripe version of the tropical fruit we all know and love. Unlike its ripe counterpart, green papaya is firm and not sweet, making it perfect for salads. It’s packed with enzymes that aid digestion and is rich in vitamins A, C, and E. Plus, it’s low in calories but high in fiber, so it’s a fantastic addition to any healthy diet.

Why You’ll Love This Salad:

  • Refreshing and Light: This salad is super refreshing, making it a great side dish or a light meal on its own. Perfect for hot summer days or whenever you need a pick-me-up!
  • Flavor Explosion: The combination of tangy calamansi juice, savory fish sauce, and sweet honey creates a flavor explosion in every bite. Your taste buds are in for a treat!
  • Versatile and Customizable: You can easily switch up the ingredients to suit your taste. Add your favorite herbs, throw in some nuts, or spice it up with chilis. The possibilities are endless!
  • Meal Prep Friendly: This salad stays fresh in the fridge for a few days, making it ideal for meal prepping. Just keep the dressing separate until you’re ready to eat to maintain that perfect crunch.

The PrepYoSelf Newsletter

Ingredient Breakdown:

  • Green Papaya: Green papaya is the star of this salad! Its crisp texture and mild flavor make it the perfect base for soaking up all the delicious dressing. Plus, it’s packed with enzymes that aid digestion and is rich in vitamins A, C, and E. If you can’t find green papaya, try using jicama or green mango for a similar crunch and freshness.
  • Mini Bell Peppers : Mini bell peppers add a burst of color and a sweet, mild flavor that complements the tangy dressing. Their crunch adds a satisfying texture to the salad.Regular bell peppers or even thinly sliced red cabbage can be used if mini bell peppers aren’t available.
  • Carrot : Carrots bring in a touch of sweetness and a vibrant orange color, enhancing both the flavor and visual appeal of the salad. They also add another layer of crunch. If you’re out of carrots, try using daikon radish or zucchini for a different but equally delightful texture.
  • Fish Sauce: Fish sauce adds a deep, savory umami flavor that balances the sweetness and acidity of the dressing. It’s a staple in many Southeast Asian dishes for a reason! For a vegetarian option, substitute with soy sauce or tamari. If you want a milder flavor, try using a splash of light soy sauce.
  • Honey: Honey adds a natural sweetness that mellows out the tartness of the calamansi or lime juice, creating a harmonious balance in the dressing. Agave syrup or maple syrup can be used as vegan alternatives, or you can use brown sugar in a pinch.
  • Calamansi Juice (or Lime Juice): Calamansi juice brings a unique citrusy tang that’s slightly sweeter than lime juice, adding a refreshing zing to the salad. Lime juice works just as well, providing that essential bright acidity. Lemon juice can be used if you don’t have calamansi or lime. For an extra citrusy kick, a combination of lemon and orange juice could also be interesting.

ingredients for green papaya salad

Simple Steps to Make Papaya Salad

  1. Rinse and peel the green papaya and carrot. Use a handheld julienne tool or mandolin with a julienne attachment to shred them into beautiful, thin strips.
  2. Slice the mini bell peppers into thin strips. Aren’t those colors just gorgeous?
  3. Mix it up! Place the shredded papaya, carrot, and bell peppers in a small mixing bowl. Pour in the fish sauce, honey, and calamansi juice. Mix it well until everything is fully coated in that delicious dressing.
  4. Get creative! Optional: Feel free to add fresh herbs like chopped cilantro, basil, or green onions. You can also top it off with sliced chilis for some heat or chopped peanuts for a crunchy twist.

Reference the recipe card below for detailed instructions.

shredded green papaya salad

Meal Prep Tips:

  • Prep Optional Add-Ins: Chop any fresh herbs like cilantro, basil, or green onions in advance and store them in separate containers. If you’re adding chilis or peanuts, have them ready to go as well.
  • Portion Control: Divide the shredded veggies into single-serving containers for easy grab-and-go lunches or quick side dishes throughout the week. This helps with portion control and makes meal prep a breeze.
  • Add Protein: For a more complete meal, prep some protein options like grilled chicken, shrimp, or tofu. Store them separately and add them to your salad when you’re ready to eat.
  • Stay Creative: Don’t be afraid to mix things up! Rotate in different add-ins like edamame, cherry tomatoes, or sliced radishes to keep the salad exciting and flavorful each time.

shredded green papaya salad

shredded green papaya salad

Refreshing Green Papaya Salad

A refreshing and crunchy Green Papaya Salad made with shredded green papaya, carrots, and mini bell peppers, tossed in a tangy, sweet, and savory dressing of fish sauce, honey, and calamansi juice
No ratings yet
Prep Time 10 minutes
Course Side Dish
Cuisine Asian
Servings 6
Calories 43 kcal

Equipment

  • knife
  • julienne tool or mandolin

Ingredients
  

  • 1 green papaya (unripe, medium sized)
  • 3 mini bell peppers
  • 1 carrot
  • 1 tablespoon fish sauce
  • 1 tablespoon honey
  • 2 tablespoon calamansi juice (or lime juice)

Instructions
 

  • Rinse and peel the green papaya and carrot. Use a handheld julienne tool or mandolin with a julienne attachment to shred them into beautiful, thin strips.
  • Slice the mini bell peppers into thin strips. Aren’t those colors just gorgeous?
  • Mix it up! Place the shredded papaya, carrot, and bell peppers in a small mixing bowl. Pour in the fish sauce, honey, and calamansi juice. Mix it well until everything is fully coated in that delicious dressing.
  • Get creative! Optional: Feel free to add fresh herbs like chopped cilantro, basil, or green onions. You can also top it off with sliced chilis for some heat or chopped peanuts for a crunchy twist.

Notes

Nutrition information provided is an estimate. It will vary based on cooking method and specific ingredients used. Please consult with your healthcare provider for specific dietary needs. To gain a better understanding, explore our nutrition disclaimer here. 

Nutrition

Calories: 43kcalCarbohydrates: 11gProtein: 1gFat: 0.2gSaturated Fat: 0.1gPolyunsaturated Fat: 0.1gMonounsaturated Fat: 0.04gSodium: 247mgPotassium: 171mgFiber: 1gSugar: 8gVitamin A: 2621IUVitamin C: 51mgCalcium: 17mgIron: 0.3mg

Similar Recipes

shrimp spinach salad

Citrus Shrimp Quinoa and Spinach Salad

tofu stir fry

Tofu and Veggie Stir Fry

pine nut fish and spinach

Baked Pine Nut Crusted Tilapia with Spinach

You Might Also Like

Bubo, Pinot Noir

Amazon Brand – Happy Belly Roasted and Salted Peanuts

ParmCrisps – Original Cheese Parm Crisps

Frequently Asked Questions

Can I use ripe papaya for this salad?

Ripe papaya is too soft and sweet for this type of salad. For the best results, stick to green (unripe) papaya, which has a crisp texture and a neutral flavor.


Is there a vegetarian substitute for fish sauce?

Yes! You can use soy sauce or tamari as a vegetarian substitute. For a more authentic taste, look for vegetarian fish sauce alternatives made from seaweed or mushrooms.


Can I make this salad spicy?

Definitely! You can add sliced chilis or a pinch of chili flakes to the salad for some heat. Adjust the amount to suit your spice tolerance.

Posted on Leave a comment

Yogurt with Strawberries and Mixed Nuts

round glass containers with yogurt topped with strawberries and mixed nuts

Meal prep our Healthy Yogurt Bowl with Strawberries and Mixed Nuts! Finding a healthy breakfast that’s both delicious and budget-friendly can be a challenge. But fear not, because this recipe makes for a delicious, easy-to-prep morning ritual. Packed with protein-rich yogurt, fresh strawberries bursting with vitamins, and a crunchy medley of mixed nuts, this bowl is a powerhouse of nutrients to fuel your day. Best of all, it’s a budget-friendly and stress-free option that proves healthy breakfasts can be both attainable and delectable. Get ready to transform your mornings with a breakfast that’s as good for your wallet as it is for your taste buds!

This post may contain affiliate links. Please see our privacy policy for details.

Calories: 292kcal | Carbohydrates: 22g | Protein: 12g | Fat: 18g | Saturated Fat: 7g | Polyunsaturated Fat: 2g | Monounsaturated Fat: 9g | Cholesterol: 32mg | Sodium: 116mg | Potassium: 610mg | Fiber: 3g | Sugar: 15g | Vitamin A: 255IU | Vitamin C: 44mg | Calcium: 324mg | Iron: 1mg

round bowl with yogurt topped with strawberries and mixed nuts for a healthy breakfast

Why This Recipe is Great for Meal Prep

  • Time-Saving Magic: This Yogurt Bowl takes minutes to assemble, making it the ultimate go-to for your busy-morning healthy breakfasts. No need to sacrifice flavor for speed – you can have both!
  • Budget-Friendly Brilliance: Our recipe is designed with your budget in mind. Yogurt, strawberries, mixed nuts, and cinnamon powder – simple, wholesome ingredients that won’t make a dent in your wallet. Who says nutritious can’t be affordable?
  • Minimal Ingredients, Maximum Flavor: When life gets hectic, simplicity is key. With just four main ingredients, this Yogurt Bowl is a breeze to prepare. Yet, each spoonful bursts with the goodness of creamy yogurt, sweet strawberries, crunchy nuts, and a touch of warmth from cinnamon – a symphony of flavors that won’t disappoint.
  • Versatility at its Finest: Feel like mixing it up? Go ahead! This recipe is a canvas for your creativity. Swap out strawberries for your favorite seasonal fruits, experiment with different nut combinations, or add a drizzle of honey if you’re feeling extra indulgent. Your Yogurt Bowl, your rules!
  • Nutrient-Packed Goodness: Busy days call for fuel that keeps you going. This Yogurt Bowl isn’t just a treat for your taste buds; it’s a nutritional powerhouse. Packed with protein, vitamins, and antioxidants from the fruits and nuts, it’s the perfect way to kickstart your day on a healthy breakfast note.
  • Portability for the Win: Got a meeting or an early workout? No worries – this Yogurt Bowl is easily portable. Grab a container with a lid, and you’ve got a nutritious breakfast or snack that you can enjoy on the go. No excuses for skipping the most important meal of the day!

The PrepYoSelf Newsletter

Ingredient Breakdown:

  • Yogurt – Creamy Foundation: The yogurt forms the base of our bowl, providing a lusciously creamy texture that’s both satisfying and indulgent. Yogurt is rich in protein, keeping you full and energized throughout the day. Yogurt is a cost-effective source of dairy or plant-based goodness, making it perfect for those mindful of their wallets.
  • Strawberries – Burst of Sweetness:  Strawberries add a sweet and fruity kick without the need for added sugars. A budget-friendly way to satisfy your sweet tooth! Packed with vitamin C, strawberries contribute to a healthy immune system – a must for busy individuals on the go. Beyond taste, strawberries bring a vibrant burst of color that makes your healthy breakfast visually appealing.
  • Mixed Nuts – Crunchy Nuttiness: Nuts bring a satisfying crunch, adding a dynamic texture to the creamy yogurt and soft strawberries. Nuts are loaded with heart-healthy fats, providing a source of sustained energy. Nuts are a nutrient-dense option, contributing essential vitamins and minerals without breaking the bank.
  • Cinnamon Powder – Warm and Aromatic Elegance: A pinch of cinnamon adds a cozy, comforting element to the bowl, making it a perfect treat, especially on chilly mornings. A little goes a long way with cinnamon, making it a cost-effective way to enhance the overall flavor profile of your bowl.

round bowl with yogurt topped with strawberries and mixed nuts for a healthy breakfast

Steps to Meal Prep this Yogurt Bowl

  1. Grab your meal prep bowls and start by placing a generous cup of your favorite yogurt at the bottom of each bowl. Whether you’re into Greek yogurt for that creamy texture or plant-based options for a dairy-free twist, the choice is yours!
  2. Now, let’s add a pop of color and sweetness! Take your fresh, ripe strawberries and slice them up into bite-sized pieces. Gently place them on top of the yogurt, creating a vibrant strawberry layer that’s as visually appealing as it is delicious.
  3. It’s crunch time! Sprinkle your favorite mixed nuts over the strawberries. Whether you go for almonds, walnuts, or a mix of both, these little powerhouses will add the perfect crunch to every spoonful.
  4. To tie it all together, sprinkle cinnamon powder over the bowl. This warm and aromatic touch will elevate the flavors, giving your Yogurt Bowl a hint of cozy goodness.
  5. Grab a spoon and give your creation a gentle mix. Blend those creamy, fruity, and nutty layers to create a symphony of textures and tastes that will dance on your taste buds.

Reference the recipe card below for detailed instructions.

round glass containers with yogurt topped with strawberries and mixed nuts for a healthy breakfast

Meal Prep Tips for Yogurt Bowls

  • Morning Beverage Boost: Pair your Yogurt Bowl with a cup of your favorite morning beverage. Whether it’s a hot cup of coffee, energizing green tea, or a refreshing glass of orange juice, the combination enhances your healthy breakfast experience.
  • Crunchy Granola Topping: For an extra crunch, top your Yogurt Bowl with a small handful of granola. It adds texture, flavor, and a satisfying crunch that complements the creaminess of the yogurt and the nuts.
  • Side of Whole Grain Toast: Add a side of whole grain toast for a well-rounded meal. The complex carbs provide sustained energy, keeping you fueled throughout the morning.
  • Drizzle of Honey: For those with a sweet tooth, a drizzle of honey over the Yogurt Bowl adds a touch of natural sweetness. It’s an indulgent yet healthy breakfast addition.
  • Fresh Mint Garnish: Elevate the freshness by garnishing your bowl with a few fresh mint leaves. The burst of herbal aroma complements the fruity and nutty flavors.
  • Mix Up the Fruit Palette: Experiment with different fruits based on what’s in season or on sale. Blueberries, raspberries, or sliced banana can bring variety to your Yogurt Bowl without compromising on budget or nutrition.

round glass containers with yogurt topped with strawberries and mixed nuts for a healthy breakfast

yogurt with berries

Yogurt with Strawberries and Mixed Nuts

Elevate your mornings with a budget-friendly and nutritious Yogurt Bowl featuring creamy yogurt, fresh strawberries, mixed nuts, and a hint of cinnamon – a quick and easy breakfast that's as wholesome as it is delicious!
No ratings yet
Prep Time 5 minutes
Cook Time 5 minutes
Course Breakfast, Snack
Cuisine American
Servings 2
Calories 292 kcal

Equipment

  • spoon
  • serving bowl

Ingredients
  

  • 2 cups yogurt
  • 1 cup strawberries
  • 4 tbsp mixed nuts
  • 1/4 tsp cinnamon powder

Instructions
 

  • Place yogurt at the bottom of the bowl
  • Add the strawberries and mixed nuts on top
  • Sprinkle with cinnamon powder

Notes

Nutrition information provided is an estimate. It will vary based on cooking method and specific ingredients used. Please consult with your healthcare provider for specific dietary needs. To gain a better understanding, explore our nutrition disclaimer here.

Nutrition

Calories: 292kcalCarbohydrates: 22gProtein: 12gFat: 18gSaturated Fat: 7gPolyunsaturated Fat: 2gMonounsaturated Fat: 9gCholesterol: 32mgSodium: 116mgPotassium: 610mgFiber: 3gSugar: 15gVitamin A: 255IUVitamin C: 44mgCalcium: 324mgIron: 1mg

Similar Recipes

baked oatmeal

Oven Baked Oats with Apricots and Berries

cranberry oat muffins

Cranberry Oatmeal Muffin Bars

french toast 2

Oven Baked French Toast Muffins with Strawberries

You Might Also Like

Frequently Asked Questions

Can I use frozen strawberries?

Fresh strawberries are recommended for the best texture and flavor. If using frozen, thaw them first, and be aware that the consistency might be a bit different.


Is there a dairy-free alternative for this recipe?

Yes, choose a plant-based yogurt to make this recipe dairy-free. Almond, coconut, or soy yogurt are great options, offering a variety of flavors.


How can I adjust the sweetness level?

Feel free to adjust the sweetness by adding a touch of maple syrup, agave nectar, or any sweetener of your choice. Taste as you go to find your perfect balance.

Posted on Leave a comment

Pesto Shrimp Mini Pizza Sandwiches

round plate with english muffins topped with chopped shrimp, red onions, and cherry tomatoes with spring mix salad

Pesto Shrimp Mini Pizzas are a meal prep masterpiece that’s not only incredibly tasty but also budget-friendly and super convenient for all you busy individuals out there. These easy shrimp mini pizzas are the perfect solution for those days when you need a quick and satisfying meal without breaking the bank. Whip up a batch and enjoy these scrumptious delights any time you like! Happy meal prepping!

This post may contain affiliate links. Please see our privacy policy for details.

round plate with english muffins topped with chopped shrimp, red onions, and cherry tomatoes with spring mix salad

Why Make These

  • These mini pizzas provide a balanced mix of macronutrients and essential nutrients, making them a smart choice for weight-conscious individuals. 
  • One of the biggest challenges in maintaining a healthy weight is controlling portion sizes. These mini pizzas come in built-in portions, making it easier to manage your calorie intake. Plus, the visual appeal of these bite-sized beauties helps satisfy your hunger.
  • Healthy eating doesn’t mean sacrificing flavor. The combination of the zesty basil pesto, succulent shrimp, and crisp vegetables creates a burst of taste that will keep your taste buds happy. This can help prevent cravings for less nutritious, high-calorie options.
  • The key to maintaining a healthy weight is to find meals that you genuinely enjoy and can sustain over the long term. Pesto Shrimp Mini Pizzas offer a delicious alternative to restrictive diets, helping you stay on track without feeling deprived.

The PrepYoSelf Newsletter

Basic Ingredients You’ll Need

  • Pre-cooked Shrimp (Peeled and Deveined): Start with pre-cooked shrimp, which you can easily find in the frozen section of your local grocery store. Be sure to defrost them according to the packaging instructions and then chop them up into bite-sized pieces. These little seafood gems are not only delicious but also packed with protein.
  • English Muffins: Our crispy, crunchy base is none other than the humble English muffin. They’re not only budget-friendly but also provide a perfect canvas for all our toppings.
  • Basil Pesto Sauce: This vibrant green sauce adds a burst of flavor to our pizzas. Its rich, herby notes complement the shrimp beautifully.
  • Cherry Tomatoes: These tiny bursts of sweetness will balance out the flavors and provide a juicy, fresh contrast.
  • Diced Red Onions: The onions add a delightful crunch and a hint of zing to every bite.
  • Spring Mix: For that refreshing touch, we’re using spring mix as a side salad. It’s a great way to get your greens in while enjoying your pizza.
  • Salad Vinaigrette: To dress our spring mix, whip up a simple salad vinaigrette using olive oil, vinegar,

round plate with english muffins topped with chopped shrimp, red onions, and cherry tomatoes with spring mix salad

How to Make These Mini Shrimp Pizza Sandwiches

  1. Start by defrosting the pre-cooked shrimp following the packaging instructions.Once they’re ready, chop the shrimp into bite-sized pieces. They’ll be the star topping on our pizzas!
  2. Slice the English muffins in half and lay them out on a plate. Evenly spread the basil pesto sauce on each side of the muffin halves. This is where the magic begins!
  3. Sprinkle the chopped shrimp, sliced cherry tomatoes, and diced red onions on top of the pesto-covered muffin halves. The colors and textures are just fabulous!
  4. In a separate bowl, prepare your spring mix. Mix together your salad vinaigrette ingredients (olive oil, vinegar, lemon juice, salt, and pepper) in a small bowl. Drizzle it over the spring mix and toss well.
  5. Plate up your Pesto Shrimp Mini Pizzas alongside the fresh spring mix salad. Drizzle some more vinaigrette on the salad for that extra zing.

Reference the recipe card below for detailed instructions.

glass meal prep containers with english muffins topped with chopped shrimp, red onions, and cherry tomatoes with spring mix salad

Meal Prep Tips

  • To store these mini pizzas, place them in an airtight container in the refrigerator for up to 3-4 days. The salad should be stored separately to keep it fresh.
  • If. you want to eat these warm, simply pop them in the toaster oven at 350°F (175°C) for about 3 to 5 minutes or until they’re heated through. This will keep the muffins nice and crispy.
  • Feel free to get creative with ingredient swaps. You can use whole wheat English muffins for a healthier twist or add some mozzarella cheese if you’re feeling cheesy!

glass meal prep containers with english muffins topped with chopped shrimp, red onions, and cherry tomatoes with spring mix salad

Shrimp mini pizzas

Pesto Shrimp Mini Pizzas

Enjoy a guilt-free delight with Pesto Shrimp Mini Pizzas: bite-sized, protein-packed perfection for busy, health-conscious individuals.
No ratings yet
Prep Time 10 minutes
Course lunch
Cuisine American
Servings 2

Equipment

  • knife
  • cutting board
  • mixing bowls

Ingredients
  

  • 6 oz pre-cooked shrimp (peeled and deveined)
  • 2 each english muffins
  • 4 tsp basil pesto sauce
  • 1/4 cup cherry tomatoes (sliced
  • 2 tsp red onions (sliced)
  • 4 cups spring mix salad

Lemon Dressing

  • 2 tbsp apple cider vinegar
  • 1 tbsp honey
  • 1/4 tbsp dried oregano
  • 4 tbsp olive oil
  • 1/4 tsp salt
  • 1/4 tsp pepper

Instructions
 

  • Defrost the pre-cooked shrimp according to the packaging instructions. Then chop it up into bite size pieces
  • Slice the english muffins in half and evely spread the pesto sauce on each side
  • Add the chopped shrimp, sliced tomatoes, and diced red onions on top
  • Next, prepare the salad dressing in a bowl and mix well until well blended
  • Serve the mini pizzas spring mix and drizzle with the lemon vinaigrette

Similar Recipes

pepper sandwich

Roasted Red Pepper and Cheese Sandwich

bean and corn taco

Vegetarian Black Bean and Corn Soft Tacos

eggplant

Grilled Eggplant Steaks with Marinara Sauce

You Might Also Like

Frequently Asked Questions

Can I use fresh shrimp instead of pre-cooked shrimp?

Absolutely! Just ensure they are cooked thoroughly before adding them to the pizzas.


Is this recipe suitable for a low-carb diet?

To make it low-carb, you can use cauliflower crusts or a similar


What can I use as a substitute for basil pesto sauce?

If you’re not a fan of basil pesto, try using a tomato-based sauce or a creamy garlic sauce for a different flavor profile.

Posted on Leave a comment

Chia Pudding with Mixed Berries

glass cup with chia pudding topped with mixed berries

Chia Pudding with Mixed Berries – a vibrant, nutrient-packed creation that spells a simple, healthy breakfast with a touch of culinary artistry. Enjoy your mornings with this fuss-free delight, and remember, meal prep isn’t just about saving time – it’s about embracing a delicious and nutritious lifestyle. Happy prepping!

This post may contain affiliate links. Please see our privacy policy for details.

Calories: 355kcal | Carbohydrates: 19g | Protein: 7g | Fat: 32g | Saturated Fat: 22g | Polyunsaturated Fat: 6g | Monounsaturated Fat: 2g | Trans Fat: 0.04g | Sodium: 19mg | Potassium: 392mg | Fiber: 10g | Sugar: 1g | Vitamin A: 23IU | Vitamin C: 9mg | Calcium: 179mg | Iron: 6mg

glass cup with chia pudding topped with mixed berries for a healthy breakfast

Why Chia Pudding with Mixed Berries?

  • First things first, this recipe is the embodiment of health and convenience. Imagine starting your day with a healthy breakfast that’s rich in fiber, omega-3 fatty acids, and antioxidants, all bundled up in a jar of deliciousness. 
  • Chia seeds, the star of the show, provide a hearty dose of these nutrients, promoting digestion and heart health. 
  • And guess what? There’s no cooking involved! Perfect for those busy mornings when you’d rather snooze for an extra few minutes.

The PrepYoSelf Newsletter

The Ensemble of Ingredients:

  • Coconut Milk: Creamy, luscious, and dairy-free. Coconut milk adds a delightful tropical twist to your chia pudding, giving it a velvety texture and a subtly sweet flavor.
  • Chia Seeds: These tiny wonders pack a punch! They absorb liquid like champions, transforming into a jelly-like consistency that forms the base of your pudding.
  • Stevia Sweetener: Hello, natural sweetness! Stevia, a zero-calorie sweetener, adds the perfect touch of sweetness without the guilt. Say goodbye to refined sugars!
  • Raspberries (or Mixed Berries): Bursting with antioxidants and vitamins, raspberries add a burst of color and flavor to your chia pudding. The juicy goodness of mixed berries takes this concoction to the next level.

glass cup with chia pudding topped with mixed berries for a healthy breakfast

Steps to Make Chia Pudding

  1. In a jar or small bowl, pour in the coconut milk.
  2. Add the chia seeds and stevia sweetener. Give it a good stir until those chia seeds are no longer playing hard to get, making sure the mixture is well combined.
  3. Now, top them off with the mixed berries in and give it a gentle stir to distribute the berrylicious goodness.
  4. Cover the jar, and pop it into the fridge for a relaxing rest of about 1 to 2 hours or, even better, overnight.
  5. Voilà! Your chia pudding should emerge thick and inviting, not runny. If it’s still a tad liquidty, simply give it a stir, then let it lounge for an extra 30 minutes.

Reference the recipe card below for detailed instructions.

glass cups with chia pudding topped with mixed berries for a healthy breakfast

Meal Prep Tips for Chia Pudding for a Healthy Breakfast

  • As much as we’d love to gobble it all up at once, restrain yourself! Your healthy breakfast of chia pudding with mixed berries can last in the fridge for up to 3-4 days. To keep the flavors fresh, store it in an airtight container.
  • To create a complete and balanced meal, consider pairing your chia pudding with a handful of nuts or a dollop of Greek yogurt for some protein. You could also throw in a slice of whole-grain toast or a boiled egg for an extra energy boost.

glass cups with chia pudding topped with mixed berries for a health breakfast

chia pudding

Chia Pudding with Mixed Berries

Whether you're a busy bee or someone who adores hassle-free mornings, this Chia Pudding Recipe is about to become your new meal prep favorite!
No ratings yet
Prep Time 5 minutes
Cook Time 5 minutes
Course Breakfast
Cuisine American
Servings 2
Calories 355 kcal

Equipment

  • jar
  • spoon

Ingredients
  

  • 1 cup coconut milk
  • 4 tbsp chia seeds
  • 1 tsp stevia sweetener
  • 1/2 cup raspberries

Instructions
 

  • In a jar, pour in the coconut milk
  • Add the chia seeds and sweetener and stir with a spoon until the chia seeds are no longer clumpy
  • Add the mixed berries and cover the mixture. Place it in the fridge for about 1 to 2 hours or overnight
  • The chia pudding should be thick and not liquidty. If it is liquidity, stir it around and let it stit for another 30 minutes

Notes

Nutrition information provided is an estimate. It will vary based on cooking method and specific ingredients used. Please consult with your healthcare provider for specific dietary needs. To gain a better understanding, explore our nutrition disclaimer here. 

Nutrition

Calories: 355kcalCarbohydrates: 19gProtein: 7gFat: 32gSaturated Fat: 22gPolyunsaturated Fat: 6gMonounsaturated Fat: 2gTrans Fat: 0.04gSodium: 19mgPotassium: 392mgFiber: 10gSugar: 1gVitamin A: 23IUVitamin C: 9mgCalcium: 179mgIron: 6mg

Similar Recipes

baked oatmeal

Oven Baked Oats with Apricots and Berries

cranberry oat muffins

Cranberry Oatmeal Muffin Bars

french toast 2

Oven Baked French Toast Muffins with Strawberries

You Might Also Like

Frequently Asked Questions

Can I use a different type of milk?

bsolutely! While coconut milk adds a creamy texture and a touch of tropical flavor, you can swap it out for almond milk, oat milk, or any other milk of your choice.


Is the stevia sweetener necessary?

Not at all! If you prefer natural sweetness from the berries and coconut milk, feel free to skip the sweetener altogether. Customize the recipe to


Can I blend the mixture for a smoother texture?

Certainly! If you prefer a smoother consistency, you can blend the coconut milk, chia seeds, and sweetener before adding the berries. This will create a more uniform texture.

Posted on Leave a comment

Refreshing Watermelon Prosciutto Sandwich

watermelon with prosciutto and spring mix

Get ready to tantalize your taste buds with a refreshingly delicious lunch idea that’s perfect for those scorching hot days. Today, we’re diving into the realm of culinary creativity with a delightful watermelon prosciutto sandwich that will make your mouth water. Trust me, folks, this recipe is an absolute game-changer for meal prep!

This post may contain affiliate links. Please see our privacy policy for details.

watermelon with prosciutto and spring mix

Why You Need to Make This

  • Let’s talk about the health benefits because we all know that eating well is essential for our overall well-being. Watermelon, the star of this show, is not only incredibly refreshing but also packed with vitamins A and C, along with lycopene, a powerful antioxidant.
  • Plus, it’s hydrating! Combine that with the lean and flavorful prosciutto, and you’ve got a protein-rich option that’ll keep you feeling satisfied and energized throughout the day.
  • This recipe is an absolute lifesaver when it comes to surviving the scorching summer heat. The watermelon’s natural sweetness and juiciness offer a burst of hydration and a cooling effect, while the salty, delicate prosciutto perfectly complements its flavors. It’s like a summer party in your mouth!

The PrepYoSelf Newsletter

Simple Ingredients You’ll Need

So, what’s the secret behind this mouthwatering creation? It’s simple, my friends. All you need are a few key ingredients that blend together beautifully to create a harmonious symphony of flavors. Here’s what you’ll need for this sensational sandwich: watermelon slices, prosciutto slices, balsamic concentrate, and a handful of spring mix. That’s it!

watermelon with prosciutto and spring mix

How to Make Watermelon Prosciutto Sandwich

  1. Start by slicing the watermelon into 5 x 5-inch squares, 1 inch thick.
  2. Lay one slice of watermelon down on a plate and take a few slices of prosciutto and layer them on the watermelon.
  3. Place a handful of fresh spring mix on top of the prosciutto.
  4. Then drizzle a generous amount of concentrate over the spring mix.
  5. Add the top slice of watermelon.

Reference the recipe card below for detailed instructions.

watermelon with prosciutto and spring mix

Meal Prep Tips for Watermelon Prosciutto Sandwich

  • To ensure your watermelon prosciutto sandwiches stay fresh and delicious, here are a couple of storage tips. First, it’s best to assemble the sandwiches just before enjoying them to prevent the bread from getting soggy. However, if you’re prepping ahead, you can keep the ingredients separated and assemble them when you’re ready to devour.
  • Another tip is to store the balsamic concentrate separately in a small container and drizzle it on just before digging in. This way, you’ll maintain that lovely combination of textures and flavors.
  • Looking to jazz up your lunch even more? Well, you’re in luck! This watermelon prosciutto sandwich pairs beautifully with a variety of other foods. You can serve it with a side of fresh mixed greens, perhaps a zesty arugula salad, or even some crunchy cucumber slices. If you’re feeling a bit more adventurous, why not try a sprinkle of crumbled feta cheese or a drizzle of honey for a touch of sweetness?

watermelon with prosciutto and spring mix

watermelon sandwich

Watermelon Prosciutto Sandwich

The watermelon's natural sweetness and juiciness offers a burst of hydration and a cooling effect, while the salty, delicate prosciutto perfectly complements its flavors.
No ratings yet
Prep Time 10 minutes
Course Breakfast, lunch, Snack
Cuisine American, Italian
Servings 2

Equipment

  • knife
  • cutting board

Ingredients
  

  • 4 slices watermelon (cut into 5 by 5 inch squares, 1 inch thick)
  • 4 slices prosciutto
  • 1 tbsp balsamic concentrate
  • 1/2 cup spring mix (optional)

Instructions
 

  • Just like a sandwich, layer the prosciutto slices and spring mix in between 2 watermelon slices
  • Drizzle with balsamic concentrate

Similar Recipes

steak and watermelon salad

Steak and Watermelon Salad

cajun tilapia

Smoked Salmon and Fruit Salad

shrimp and asparagus

Shrimp Cocktail Salad

You Might Also Like

Frequently Asked Questions

Can I substitute prosciutto with a different type of cured meat?

Of course! While prosciutto adds a unique flavor to the sandwich, you can substitute it with other cured meats like ham or even turkey if you prefer. Just keep in mind that the taste and texture may vary slightly.


Can I add other ingredients to the sandwich, like cheese or herbs?

Absolutely! Feel free to experiment and add your favorite ingredients. Crumbled feta cheese, goat cheese, or fresh basil leaves can all be wonderful additions to enhance the flavors of this sandwich


Can I use other fruits instead of watermelon?

While watermelon works beautifully in this recipe, you can experiment with other fruits like cantaloupe, honeydew, or even ripe peaches for a different twist. Just make sure to choose fruits that are firm and not overly juicy to maintain the sandwich’s integrity.

Posted on Leave a comment

Tuna Stuffed Deviled Eggs

round plate with deviled eggs and arugula salad

Greetings, food enthusiasts! Today, I’m excited to share with you a fabulous recipe that not only adds a burst of flavor to your meal prep routine but also offers numerous health and cost benefits. Get ready to indulge in the delectable goodness of Tuna Stuffed Deviled Eggs, a low carb meal that will keep your taste buds dancing throughout the week!

This post may contain affiliate links. Please see our privacy policy for details.

round plate with deviled eggs and arugula salad for a low carb meal

Why We Love This Recipe

  1. Health Benefits: When it comes to meal prep, it’s essential to choose recipes that offer a balance of nutrition and taste and a low carb meal. Tuna Stuffed Deviled Eggs perfectly fit the bill. Eggs are a fantastic source of protein, providing you with the energy you need to conquer your day. Additionally, eggs are rich in vitamins such as B12, selenium, and choline, which promote brain health and help maintain a healthy nervous system.
  2. The inclusion of canned tuna takes the nutritional profile up a notch. Tuna is packed with omega-3 fatty acids, which have been linked to numerous health benefits, including reducing the risk of heart disease and promoting brain function. It is also an excellent source of lean protein, making it an ideal choice for those aiming to build or maintain muscle mass.
  3. Cost Benefits: One of the major advantages of this recipe is its cost-effectiveness. Eggs and canned tuna are incredibly affordable and readily available in most grocery stores. By utilizing these budget-friendly ingredients, you can create a delicious and satisfying meal prep option without breaking the bank.

The PrepYoSelf Newsletter

Let’s delve into the simple ingredients that make Tuna Stuffed Deviled Eggs shine:

  • Eggs: A versatile and nutrient-dense ingredient, eggs provide protein, vitamins, and minerals essential for overall health and well-being. They form the sturdy base for the delightful filling.
  • Canned Tuna: Canned tuna adds a burst of umami flavor and contributes heart-healthy omega-3 fatty acids. Opt for sustainable and responsibly sourced tuna for the best quality.
  • Red Onions: You can use any kind of onions.
  • Mayonnaise: Creamy and luscious mayonnaise binds the filling together while imparting a smooth texture. Choose a high-quality mayonnaise or consider using a lighter alternative like Greek yogurt or avocado mayo.
  • Lemon: Fresh lemon juice brightens up

round plate with deviled eggs and arugula salad for a low carb meal

Basic Steps to Prepare Tuna Deviled Eggs

  1. Boil the eggs for 6 to 8 minutes. Meanwhile, in a small bowl mix together the lemon juice, dijon mustard, olive oil, garlic powder, and salt until well blended
  2. In a bowl, add the tuna and half of the egg yolks (discard the rest). Then, mix in the mayonnaise, lemon juice, green onions, salt, and mix until all the ingredients have mixed well
  3. Use a small spoon to stuff the tuna egg salad mixture back into the center of the egg whites.

Reference the recipe card below for detailed instructions.

glass meal prep containers with deviled eggs and arugula salad for a low carb meal

Low Carb Meal Prep Tips for A Tuna Stuffed Deviled Eggs

  • To ensure your Tuna Stuffed Deviled Eggs stay fresh and flavorful, here are some storage tips: Store the deviled eggs in an airtight container in the refrigerator. They can be kept for up to 3-4 days.If you plan to eat them later in the week, consider storing the filling and the egg whites separately. Assemble them just before eating to maintain the perfect texture.
  •  Freezing the deviled eggs is not recommended, as the texture and consistency may be compromised.
  • Pairing Suggestions: While Tuna Stuffed Deviled Eggs are delicious on their own, they can be paired with various sides to create a well-rounded meal. Here are some ideas: 1) Crisp salad greens with a tangy vinaigrette. 2) Sliced avocado for a creamy and nutritious addition. 3) Whole-grain bread or crackers for a satisfying crunch. 4)Pickles or olives to add a touch of brininess.

glass meal prep containers with deviled eggs and arugula salad for a low carb meal

eggs

Tuna Stuffed Deviled Eggs

The combination of creamy tua filling and the natural richness of eggs creates a savory flavor that you can enjoy for lunch!
No ratings yet
Prep Time 5 minutes
Cook Time 15 minutes
Course lunch, Main Course
Cuisine American
Servings 2

Equipment

  • knife
  • cutting board
  • boiling pot
  • mixing bowl
  • spoon

Ingredients
  

  • 6 each large eggs
  • 2.6 oz canned tuna
  • 2 tbsp mayonnaise
  • 1 each lemon (juiced)
  • 1 tbsp green onions
  • 1/4 tsp garlic powder
  • 4 cups arugula

Lemon Dressing

  • 1 each lemon (juiced)
  • 4 tbsp olive oil
  • 1 tbsp dijon mustard
  • 1/4 tsp salt
  • 1/4 tsp garlic powder

Instructions
 

  • Boil the eggs for 6 to 8 minutes
  • Meanwhile, in a small bowl mix together the lemon juice, dijon mustard, olive oil, garlic powder, and salt until well blended
  • Once the eggs have cooked, let them cool in ice water
  • Then peel the eggs and slice the eggs in half and remove the egg yolk
  • In a bowl, add the tuna and half of the egg yolks (discard the rest). Then, mix in the mayonnaise, lemon juice, green onions, salt and mix until all the ingredients have mixed well
  • Use a small spoon to stuff the tuna egg salad mixture back into the center of the egg whites
  • Toss the arugula in the lemon dressing and serve it with the tuna stuffed eggs

Similar Recipes

chicken kale salad

Grilled Honey Dijon Chicken and Kale Salad

chicken fajitas

Sheet Pan Chicken Fajitas with Mango Salsa

peanut chicken

Peanut Chicken Stir Fry

You Might Also Like

Frequently Asked Questions

Can I substitute mayonnaise with a healthier alternative?

Absolutely! If you’re looking for a healthier option, you can replace mayonnaise with Greek yogurt, avocado mayo, or even mashed avocado. These alternatives provide a creamy texture while reducing the overall calorie and fat content.


Can I add additional ingredients to the filling?

Certainly! Feel free to get creative and personalize the recipe to your liking. You can add ingredients like diced celery, chopped herbs (such as dill or parsley), minced garlic, or a touch of spicy mustard to elevate the flavor profile of the filling.


How can I make the deviled eggs spicier?

If you prefer a spicier kick, you can add ingredients such as hot sauce, cayenne pepper, or finely chopped jalapeños to the filling. Adjust the amount according to your desired level of heat.

Posted on Leave a comment

Smoked Salmon English Muffin

White round plate with open faced english muffin topped with sliced avocado, smoked salmon, and sliced cucumber.

This open-faced Smoked Salmon English Muffin is the perfect healthy meal for busy mornings or an afternoon snack. It combines delicious smoked salmon with sliced avocados and comes together in less than 10 minutes for a great start to the day!

This post may contain affiliate links. Please see our privacy policy for details.

White round plate with open faced english muffin topped with sliced avocado, smoked salmon, and sliced cucumber.

Why This Recipe is Great for Healthy Meal Prep

  • There is no cooking involved! All you need to do is slice up some ingredients and assemble it all together. Definitely a major timesaver!
  • This healthy meal is packed with great nutrients from the salmon and avocado to help you fuel up your day
  • It literally requires only 5 ingredients!

The PrepYoSelf Newsletter

Simple Ingredients You’ll Need

  • Smoked Salmon: Look for high-quality smoked salmon that has no coloring and natural smoked salmon for the best taste. If you can’t find smoked salmon, you can also use cooked salmon and serve it chilled. However, it won’t have the smoky cured flavor that smoked salmon is known for.
  • Avocado: This ingredient provides a nice buttery texture that is smooth and creamy and is a great accompaniment to the smoked salmon.
  • English Muffin: These taste even better toasted. You can also use mini bagels as an alternative option.
  • Sliced cucumber: You will often find smoked salmon paired with cucumber because it offers a light and refreshing taste to the smoked salmon .
  • Lemon Juice: Lemon adds some acidity and brightness to help cut through the saltiness of the smoked salmon.

White round plate with open faced english muffin topped with sliced avocado, smoked salmon, and sliced cucumber.

Easy Steps to Assemble This Recipe

  1. Toast the English muffin in a toaster.
  2. Slice the cucumber and avocado into thin slices.
  3. Layer the sliced avocado on the bottom slice, followed by the salmon, and cucumber.

Reference the recipe card below for detailed instructions.

Meal Prep Tips

  • To Serve: You can spread cream cheese or creme fraiche onto the English muffins. Other great toppings include capers, pickled shallots, or freshly chopped dill.
  • To Store: If you are storing this ahead of time, keep the salmon, cucumber, and avocado separate from the English muffin to prevent it from getting soggy. You will also want to wait to slice the avocado until you are ready to eat the meal to prevent it from browning early. Otherwise, you can store all the ingredients in an airtight meal prep container in the refrigerator for up to 3 days for the best quality.

Round glass meal prep containers with open faced english muffin topped with sliced avocado, smoked salmon, and sliced cucumber.

salmon muffin

Smoked Salmon and Avocado English Muffin

This Smoked Salmon English Muffin is an easy 5-minute recipe that is packed with protein, healthy fats, and tons of flavor.
No ratings yet
Prep Time 5 minutes
Cook Time 5 minutes
Course Breakfast
Cuisine American
Servings 2

Equipment

  • knife
  • cutting board

Ingredients
  

  • 4 oz smoked salmon
  • 1 each avocado
  • 1 each english muffin
  • 1/4 cup sliced cucumber
  • 1 each lemon (juiced)

Instructions
 

  • Evenly layer the salmon strips, avocado slices, and sliced cucumbers on top of the english muffins
  • Squeeze lemon juice on top

Notes

Note: Be sure to slice the avocado when you are ready to eat to prevent it from browning. You can also spread the english muffins with cream cheese or sour cream

Similar Recipes

wood plate with avocado topped with salmon salad and celery sticks

Salmon Salad Stuffed Avocado

roasted pepper sandwich with sliced avocado and roasted brussels sprouts

Roasted Red Pepper and Avocado Sandwich

round plate with celery chicken salad wrapped in flour tortilla

Celery Chicken Salad Wrap

You Might Also Like

Smartfruit Mellow Mango + Immunity, 100% Real Fruit Purée

Amazon Brand – Happy Belly Roasted and Salted Peanuts

ParmCrisps – Original Cheese Parm Crisps

Frequently Asked Questions

What is the difference between smoked salmon and lox?

Smoked salmon is cured or brined, then it is smoked. However, Lox is only cured, but not smoked.


How is salmon smoked?

Salmon can be cold-smoked or hot-smoked. Cold smoking occurs over an 18-hour stretch typically between 70 to 75F degrees, while hot smoking can take up to 8 hours at a temperature of 145 degrees.


Is it healthy to eat smoked salmon?

Smoked salmon is packed with nutrients, vitamins, and omega-3 fatty acids which all can help boost your health. It is also high in protein which can help you feel full longer.