Posted on Leave a comment

Celery Chicken Salad Wrap

round plate with celery chicken salad wrapped in flour tortilla

Here’s a twist on the classic chicken salad. We’ve got shredded chicken tossed in a creamy and tangy mayo and dijon mustard dressing with crisp, diced veggies and crunchy nuts.

This post may contain affiliate links. Please see our privacy policy for details.
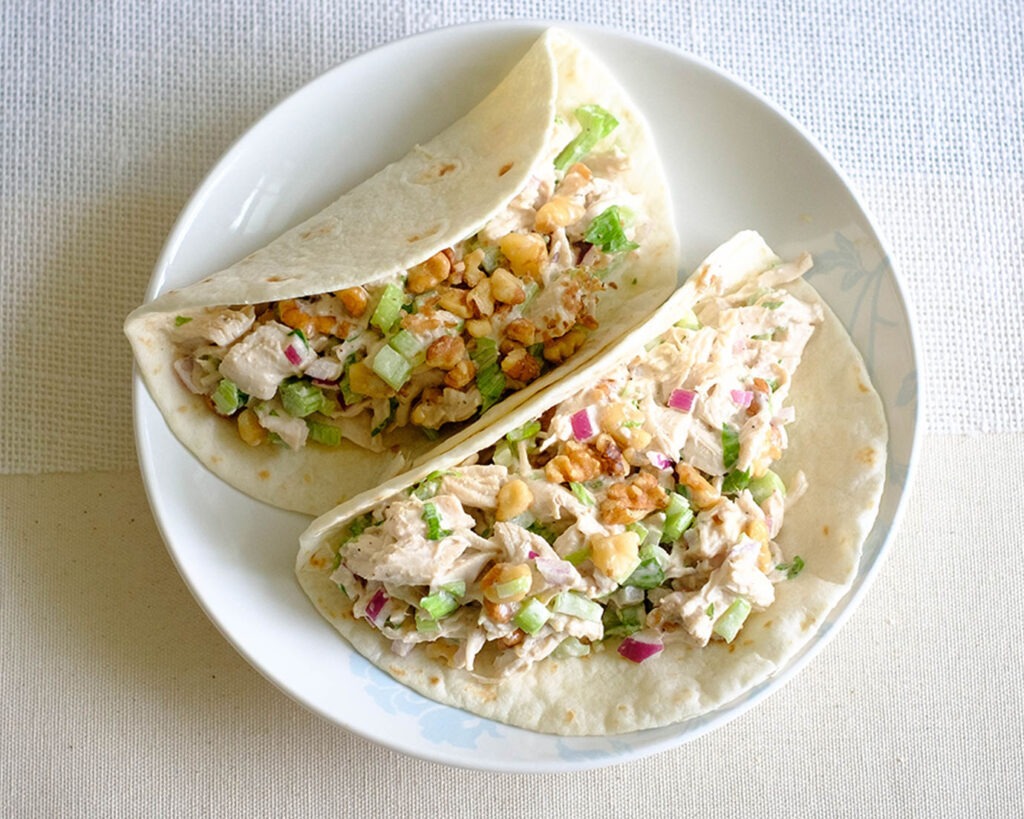
Round plate with celery chicken salad served in tortilla wraps.

Reasons We Love This Chicken Salad With Celery

  • It is filling and full of fresh and bright ingredients
  • It is high in protein
  • You can make it into a healthy wrap or serve it as a healthy chicken salad topping with baby spinach or spring mix

The PrepYoSelf Newsletter

Chicken salad is usually a blank canvas for whatever you want to add to it. Our goal was to make it easy with basic ingredients that you can easily have on hand.

To make this easy chicken salad recipe, you’ll need

  • Shredded Chicken: You can use leftover chicken breast from a pre-cooked rotisserie chicken or boil it yourself.
  • Celery: This ingredient adds a nice crisp, fresh texture to the salad. If you don’t like celery, you can use other crips veggies such as diced bell peppers.
  • Red Onions: You can use any kind of onions.
  • Green Onions: You can other herbs such as tarragon or basil.
  • Walnuts: Use any kind of nuts that you have such as pecans or almonds.
  • Mayo: If you want more added protein you can also use greek yogurt.
  • Dijon Mustard: You can also use regular mustard or spicy mustard.
  • Sugar: The sweetness adds a balance to the savory flavors of this dish.
  • Flour Tortillas: Use any kind of tortilla for your wrap. You can also use lettuce wraps for a low-carb option
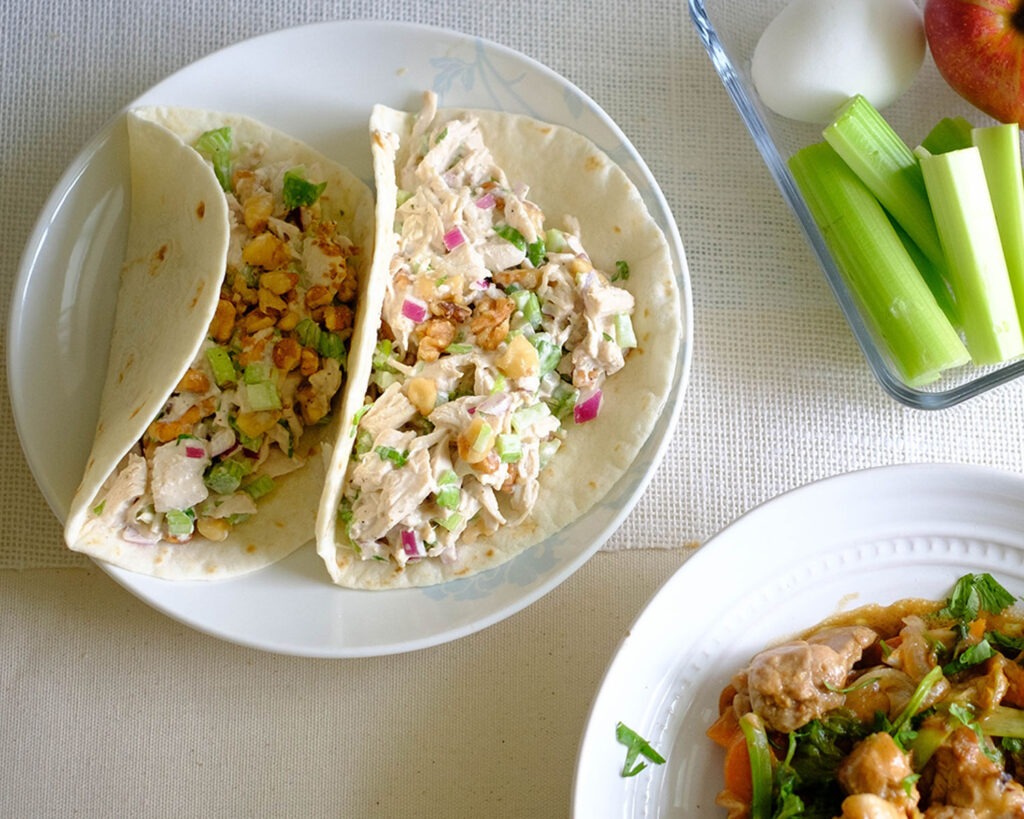
Round plate with celery chicken salad served in tortilla wraps.

Basic Steps to Prepare Celery Chicken Salad

  1. In a mixing bowl, add the shredded chicken, diced vegetables, nuts, mayo, dijon mustard, salt, pepper, and sugar.
  2. Mix it all together until the ingredients are well blended.
  3. Scoop small portions of the chicken salad into each tortilla wrap (about 1/2 cup scoop per tortilla).

Reference the recipe card below for detailed instructions.
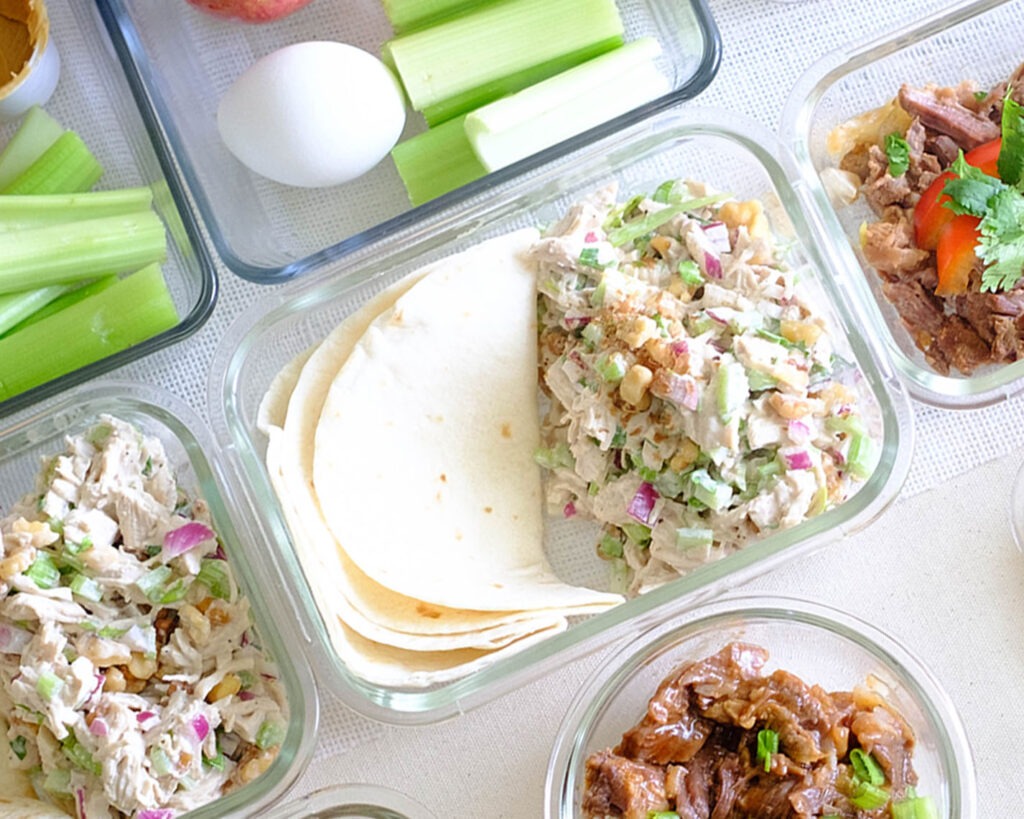
Glass meal prep containers storing celery chicken salad served in tortilla wraps.

Meal Prep Tips for A Celery Chicken Salad Wrap

  • Other Cook Methods: If you don’t have pre-cooked rotisserie chicken, you can boil chicken breasts for about 15 to 20 minutes. After it cooks, use two forks to shred the chicken and let it cool.
  • Ingredient Variations: Instead of using shredded chicken, you can use boiled eggs or canned tuna.
  • Additional Ingredients: In addition to vegetables and herbs, you can also add common fruits such as sliced grapes, diced pears or apples, and even dried fruit such as dried cranberries.
  • Storage: Store in an airtight container in the refrigerator for up to 3 to 4 days for the best quality. If you’re not eating the meal right away, keep the tortillas separate from the chicken salad mixture to prevent the tortillas from getting soggy.
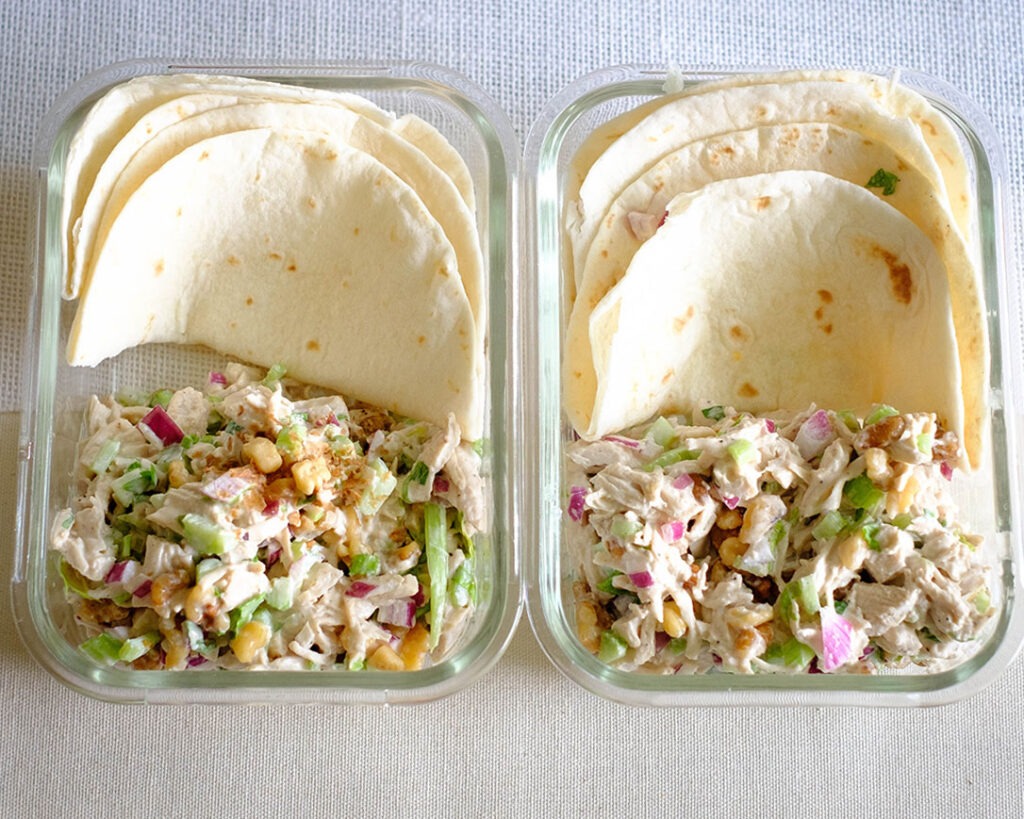
Glass meal prep containers storing celery chicken salad served in tortilla wraps.
round plate with celery chicken salad wrapped in flour tortilla

Celery Chicken Salad Wrap

This serving of chicken salad is great to utilize leftover chicken from another meal. It's filled with fresh veggies, crunchy nuts, and a creamy dressing.
No ratings yet
Prep Time 5 minutes
Cook Time 15 minutes
Course lunch, Main Course
Cuisine American
Servings 2

Equipment

  • knife
  • cutting board
  • mixing bowl

Ingredients
  

  • 1.5 cups shredded chicken (pre-cooked)
  • 2 tablespoons mayo
  • 2 tablespoons dijon mustard
  • 2 tablespoons green onions (chopped)
  • 1/2 cup celery (diced)
  • 1/4 cup red onions (diced)
  • 1/4 cup walnuts (chopped)
  • 1 teaspoon salt
  • 1/4 teaspoon pepper
  • 1 teaspoon sugar
  • 4 flour tortillas

Instructions
 

  • In a bowl, mix together the chicken, green onions, celery, red onions, walnuts, mayo, dijon mustard, salt, pepper, and sugar.
  • Scoop the chicken salad into a tortilla wrap.

Notes

Note: if you don’t have pre-cooked chicken, bring water to a boil and boil chicken breast in a pot for about 20 minutes until it fully cooks. Once it cooks, use two forks to shred it into pieces. Let it cool before mixing it with the other ingredients.

Similar Recipes

chicken kale salad

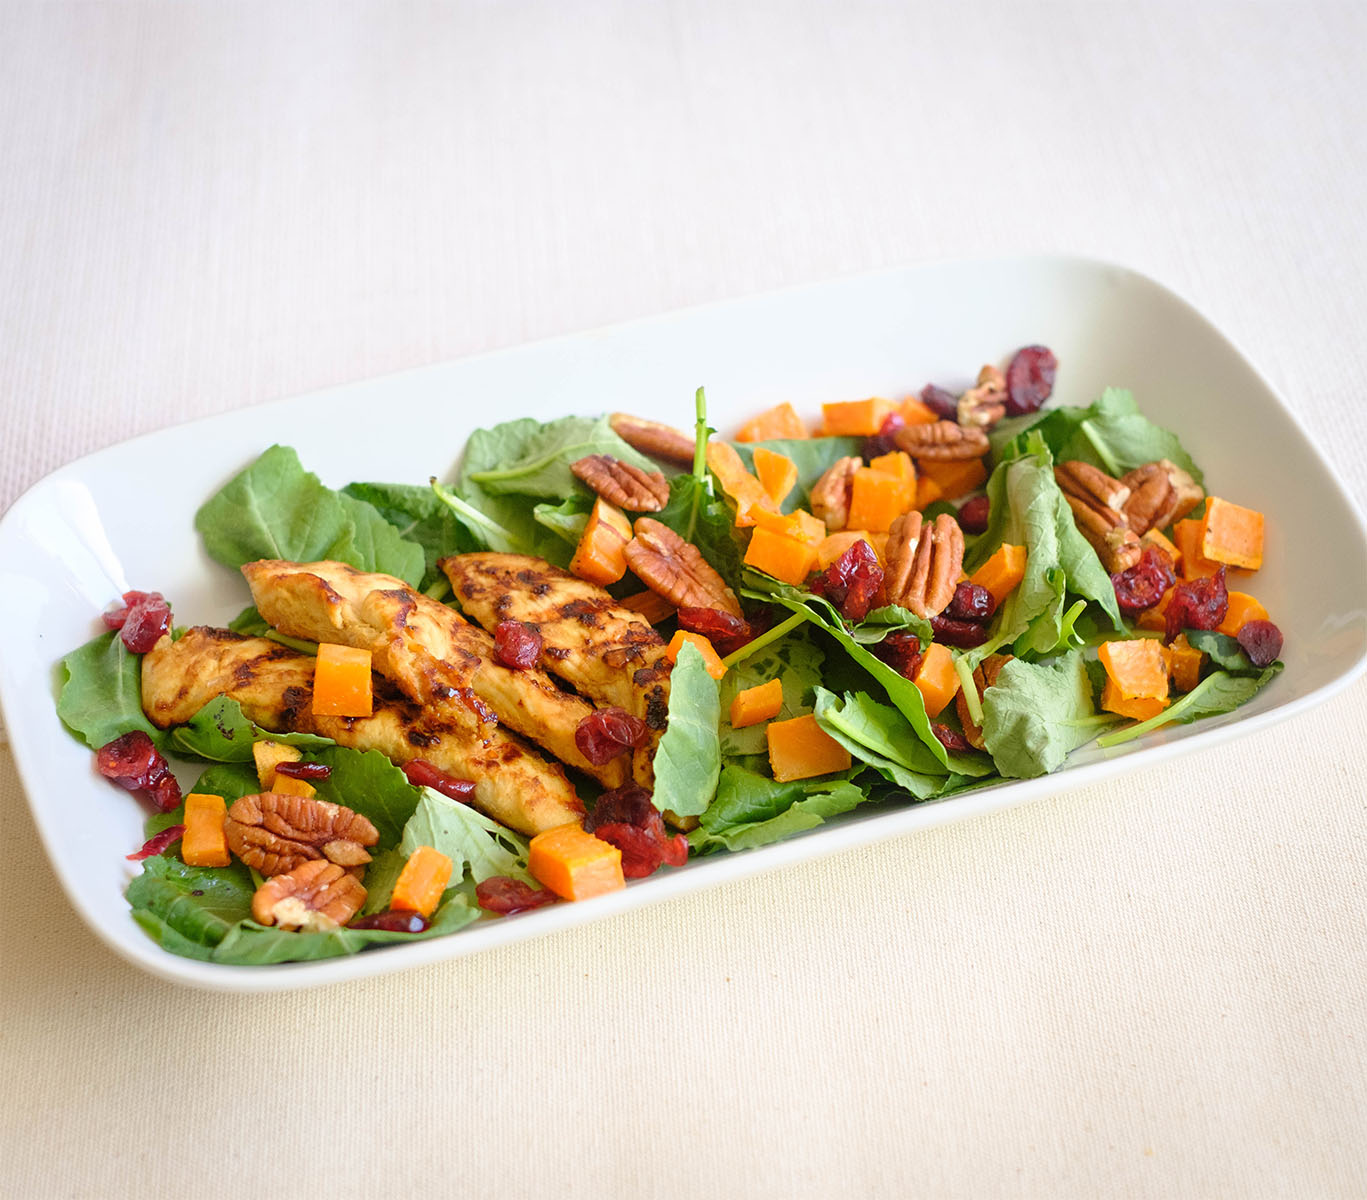
Grilled Honey Dijon Chicken and Kale Salad

chicken fajitas

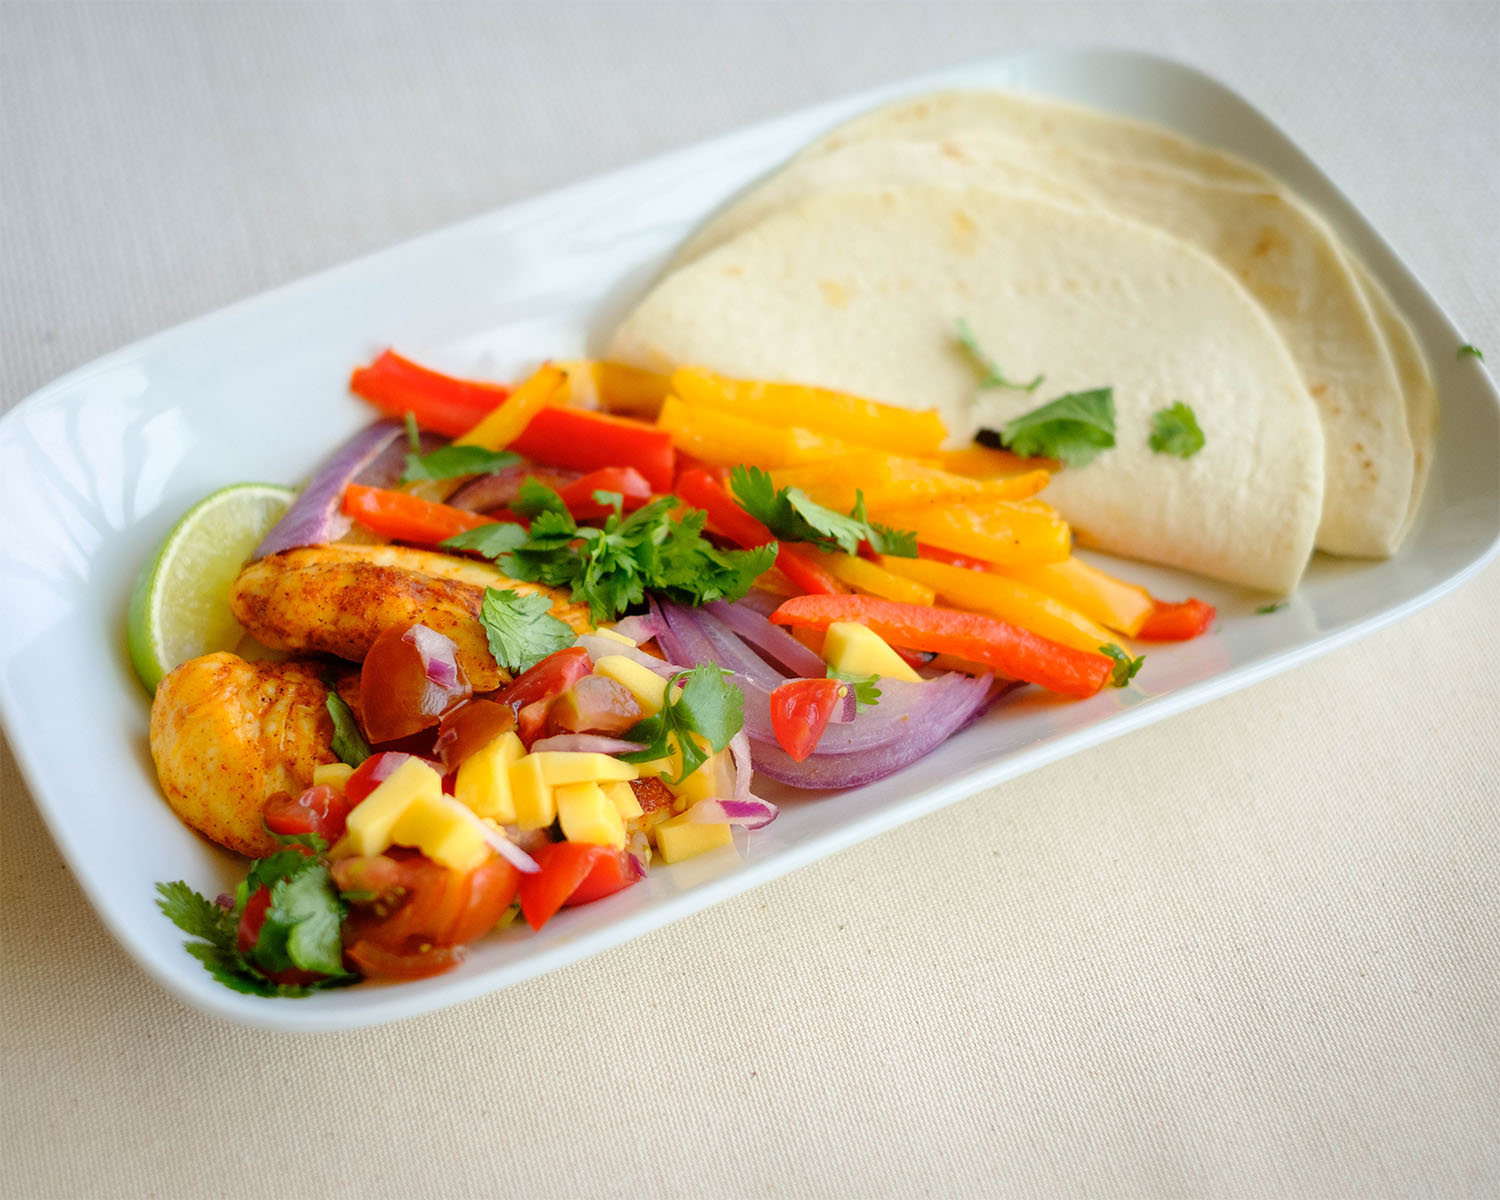
Sheet Pan Chicken Fajitas with Mango Salsa

peanut chicken

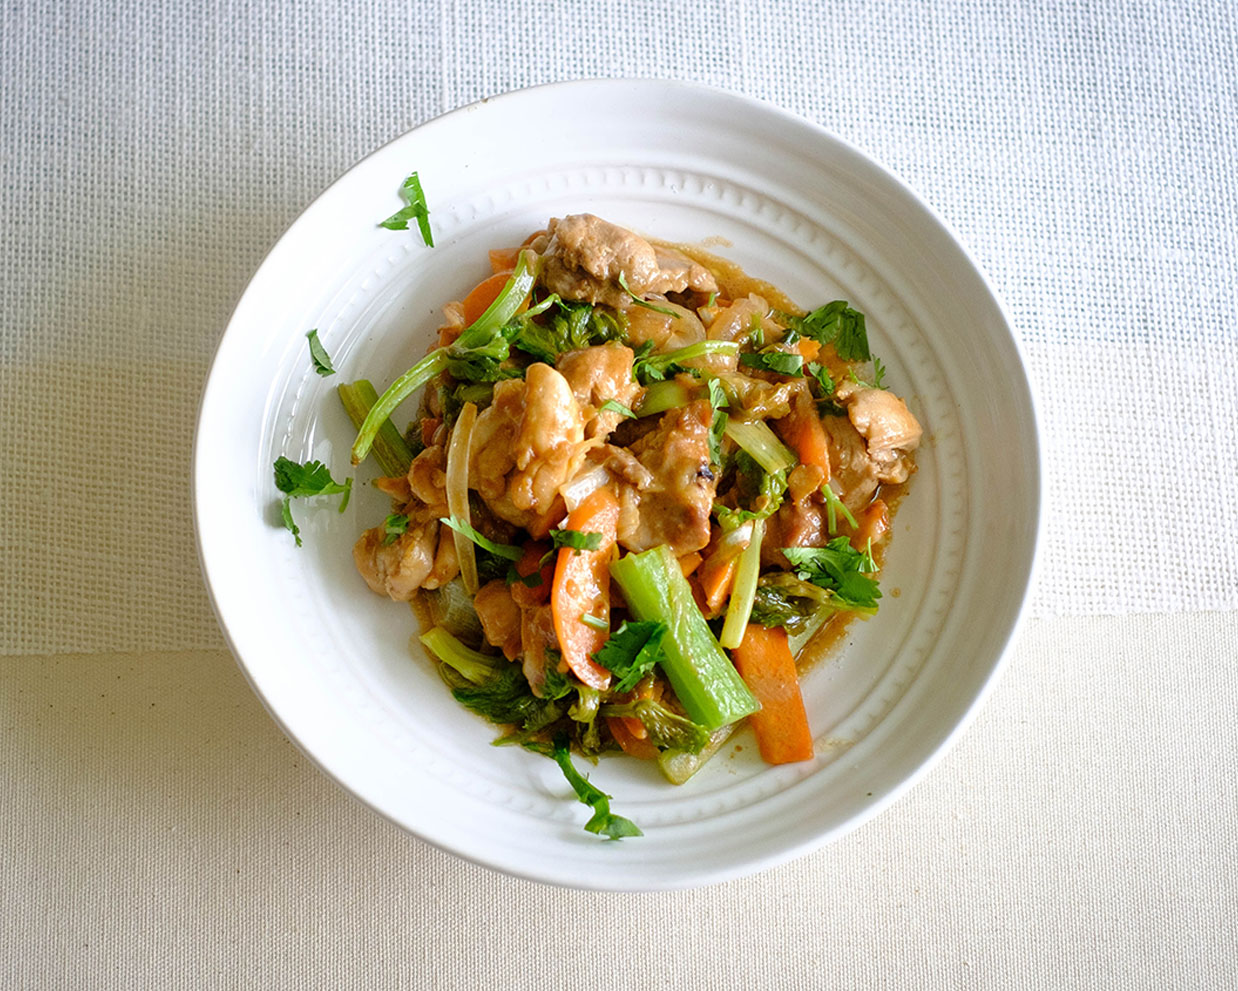
Peanut Chicken Stir Fry

You Might Also Like

Frequently Asked Questions

What to eat with chicken salad?

You can serve this with sandwich bread, in a croissant, or with lettuce wraps.


What can I use instead of celery in chicken salad?

If you need a crunch, you can use jicama, carrots, and even radish.


Can I use grilled chicken for chicken salad?

Yes! Any leftover cooked chicken works well. Just be sure to chop it up into small pieces so that it can mix well with the other ingredients.

Posted on Leave a comment

Oven Baked Balsamic Chicken with Strawberries

balsamic chicken salad

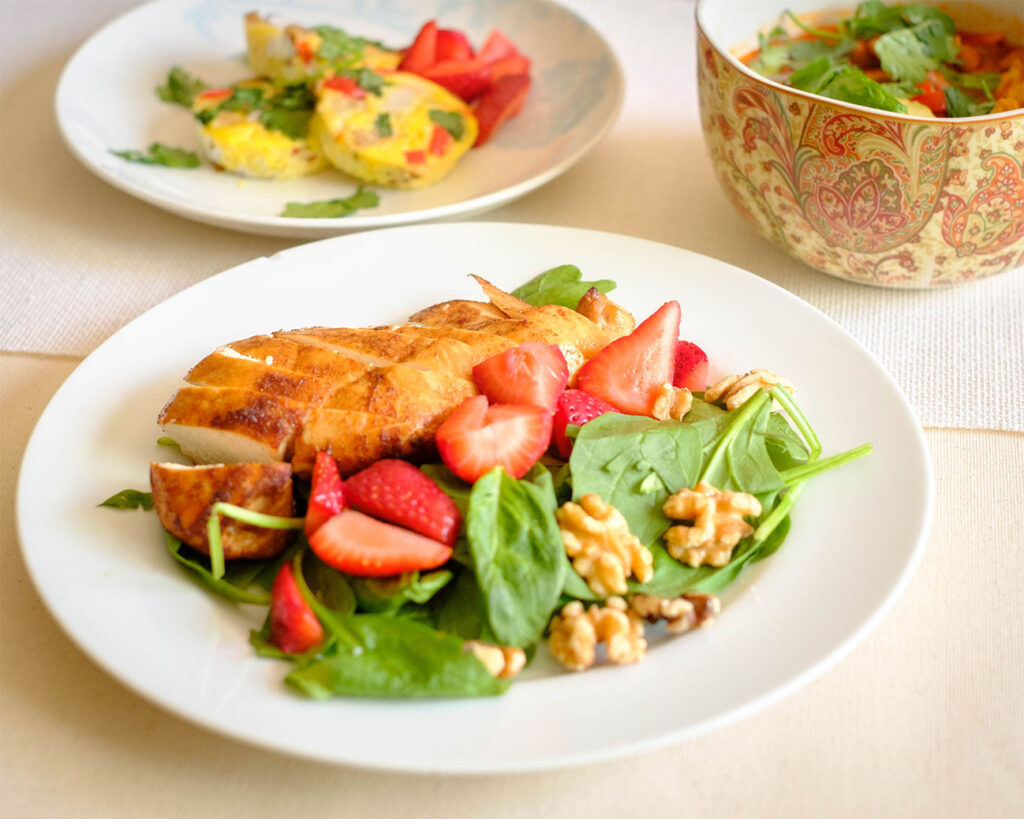
Juicy and tender chicken breast baked in sweet honey and tangy balsamic glaze. This delicious salad makes for an easy chicken lunch meal prep or weeknight dinner meal.

This post may contain affiliate links. Please see our privacy policy for details.

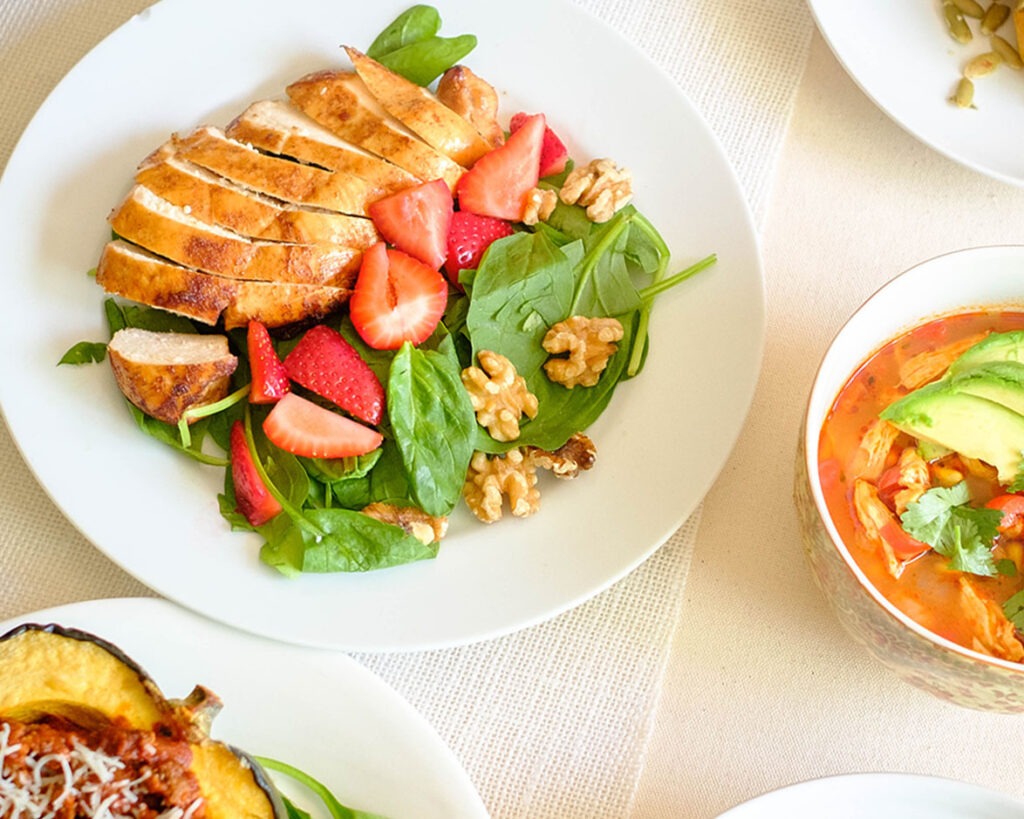
White round plate with baked balsamic chicken served with spinach, strawberries, and walnuts.

Why You’ll Enjoy This Tasty Balsamic Marinade

  • You can use this marinade for any kind of protein. It goes well with grilled pork or makes a great glaze for an Air Fryer Salmon
  • You can drizzle the marinade on top of pasta or salad
  • It also helps give a caramelized flavor to roasted veggies

The PrepYoSelf Newsletter

What You Need to Make This Balsamic Glazed Chicken

  • Chicken: We use boneless chicken breasts, but you can swap it out with other cuts of chicken such as boneless chicken thighs or chicken tenderloins.
  • Balsamic Glaze: You can find this glaze either in the condiment aisle near the salad dressings or vinegar.
  • Soy Sauce: Adding a little bit of soy sauce gives a savory and salty flavor, but you can also substitute it with regular salt.
  • Strawberries: Balsamic vinegar pairs well with strawberries giving it a sweet and tangy combination
  • Walnuts: Adding nuts to your meals is a great opportunity to add healthy fat and also provides a nice crunchy component to the salad
  • Spinach: These dark leafy greens are such a superfood that provides great nutrients and vitamins. You can also use baby kale or arugula.
  • Olive oil: You can also swap this out with avocado oil.

White round plate with baked balsamic chicken served with spinach, strawberries, and walnuts.

Simple Basic Steps to Make this Oven Baked Balsamic Chicken Breast

  1. Preheat the oven to 400F.
  2. In a bowl, mix together the ingredients for the marinade. Add the chicken to the bowl and let it marinate for at least 10 minutes.
  3. Meanwhile, prepare your salad ingredients. After the oven pre-heats, place the chicken on a sheet pan and bake it in the oven, flipping it over halfway through the process.
  4. After it cooks, let it rest before cutting them into thin strips.
  5. Enjoy the chicken with fresh spinach salad, topped with strawberries and walnuts.
Reference the recipe card below for detailed instructions.
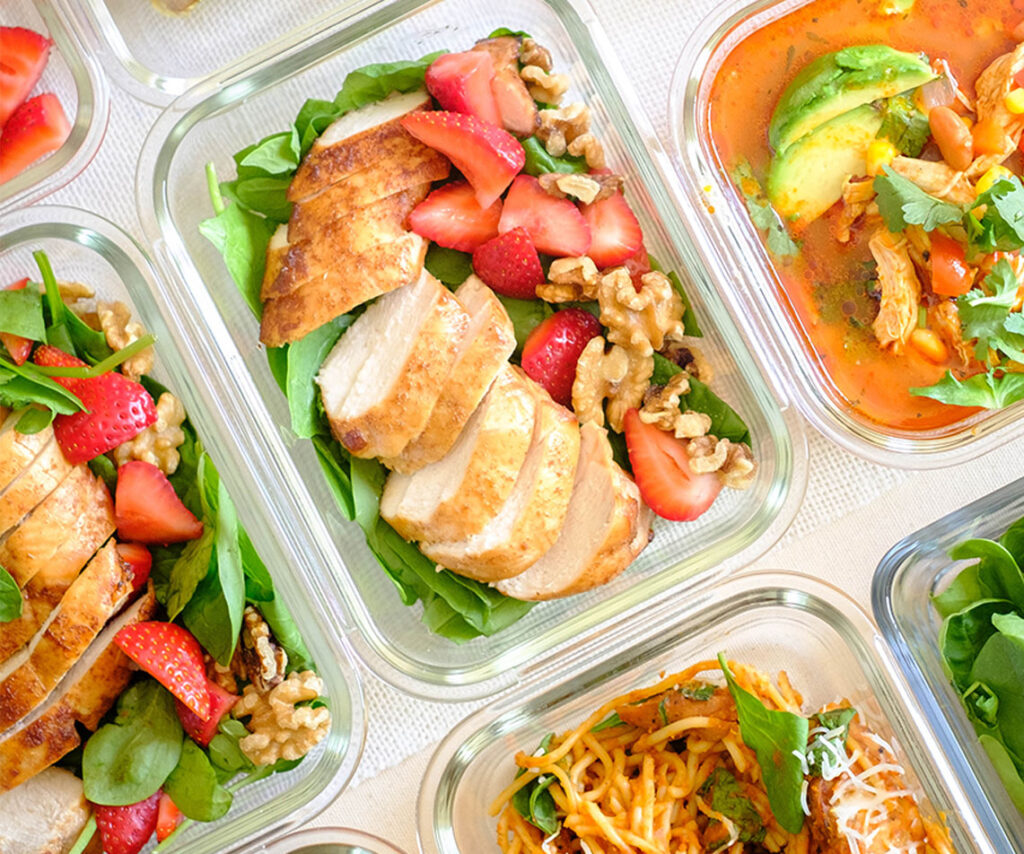
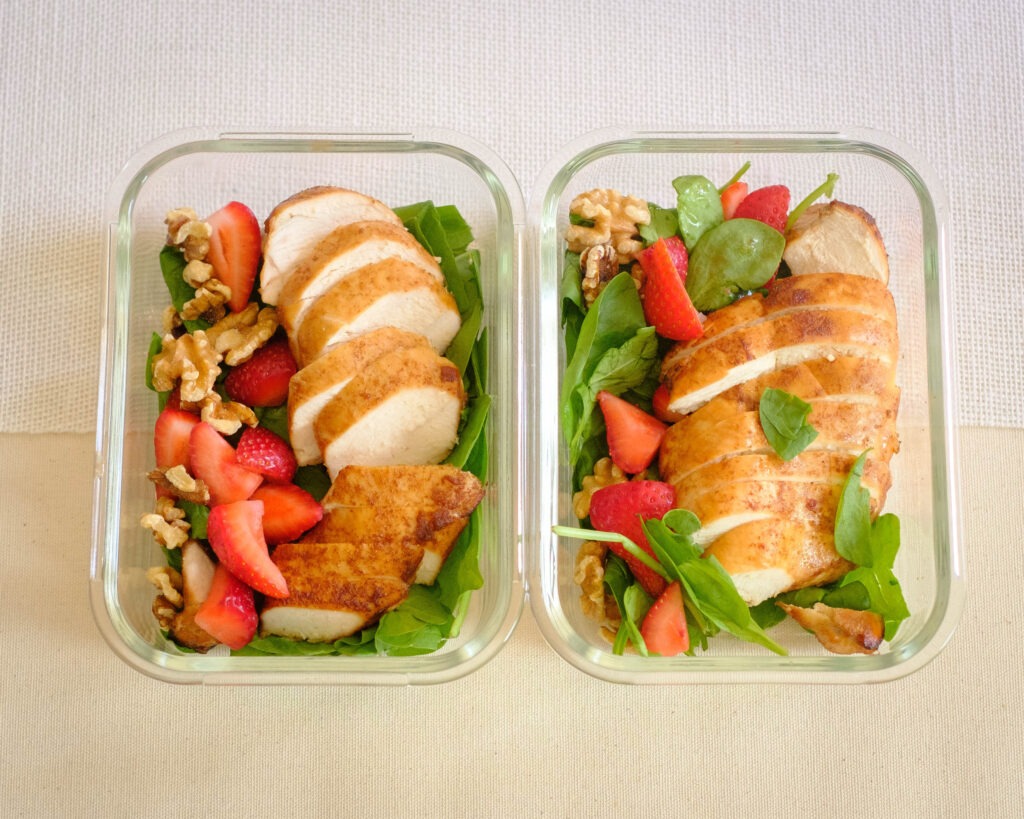
Glass meal prep containers storing baked balsamic chicken served with spinach, strawberries, and walnuts.
Meal Prep Tips for Baked Balsamic Chicken Salad

  • Cook Method Options: You can also bake the chicken in a small toaster oven or cook it in the Air Fryer (cook at 360F for 20 minutes). You can also grill the chicken on an indoor grill. Just be sure to monitor the heat level because the balsamic glaze will burn fast and may create some smoke.
  • Prep Tips: If you don’t want to wait 10 minutes to marinate the chicken, you can always marinate it the night before. Place it in the refrigerator overnight. The longer you marinate the chicken, the more flavorful and tender it will be.
  • Storage: Cooked chicken can be stored in an air-tight container in the refrigerator for up to 3 to 4 days. You can also store the chicken in a freezer-safe container or bag for up to 3 months for the best quality.
  • To Reheat: Heat them in the microwave until they warm through. However, you can also enjoy the chicken chilled.
  • Extra Ingredients: If you have leftover strawberries, freeze them and save them for smoothies or use them as a topping for your breakfast yogurt or oatmeal. Walnuts can also be eaten for afternoon snacks or you can add them to baked goods and granola.

Glass meal prep containers storing baked balsamic chicken served with spinach, strawberries, and walnuts.

baked chicken salad

Oven Baked Balsamic Chicken with Strawberries and Walnuts

This simple balsamic marinated chicken is perfect on top of a salad, with roasted veggies, or a side of rice pilaf.
No ratings yet
Prep Time 10 minutes
Cook Time 30 minutes
Course lunch, Main Course
Cuisine American, Italian
Servings 2

Equipment

  • knife
  • cutting board
  • mixing bowl
  • sheet pan
  • oven

Ingredients
  

Chicken and Marinade

  • 12 oz chicken breasts
  • 2 tabelspoons balsamic glaze
  • 1 tablespoon soy sauce
  • 1/4 teaspoon garlic powder
  • 1/4 teaspoon onion powder
  • 1/4 teaspoon italian seasoning
  • 1 tablespoon olive oil

Salad Ingredients

  • 4 cups baby spinach
  • 1/2 cup cherry tomatoes (sliced)
  • 2 tablespoon walnuts (chopped)

Balsamic Vinaigrette

  • 3 tablespoons olive oil
  • 2 tablespoons balsamic glaze
  • 1 tablespoon honey
  • 1 tablespoon apple cider vinegar
  • 1/2 teaspoon garlic powder
  • 1/2 teaspoon salt

Instructions
 

  • Preheat the oven to 400F. In a mixing bowl, whisk together the chicken marinade until well blended. Add the chicken breast into the bowl and marinate the chicken for at least 10 minutes.
  • Meanwhile, wash the strawberries, remove the green stems, and cut the strawberries into quarters. Go ahead and blend together the balsamic vinaigrette in a small bowl.
  • After the oven has pre-heated, place the chicken on a sheet pan and bake in the oven for 25-30 minutes until it reaches an internal temperature of 165F.
  • After the chicken cooks, let it rest and cool for a few minutes before slicing it into bite-size pieces. Enjoy the chicken with the spinach salad, topped with strawberries and walnuts, and a drizzle of the vinaigrette.

Similar Recipes

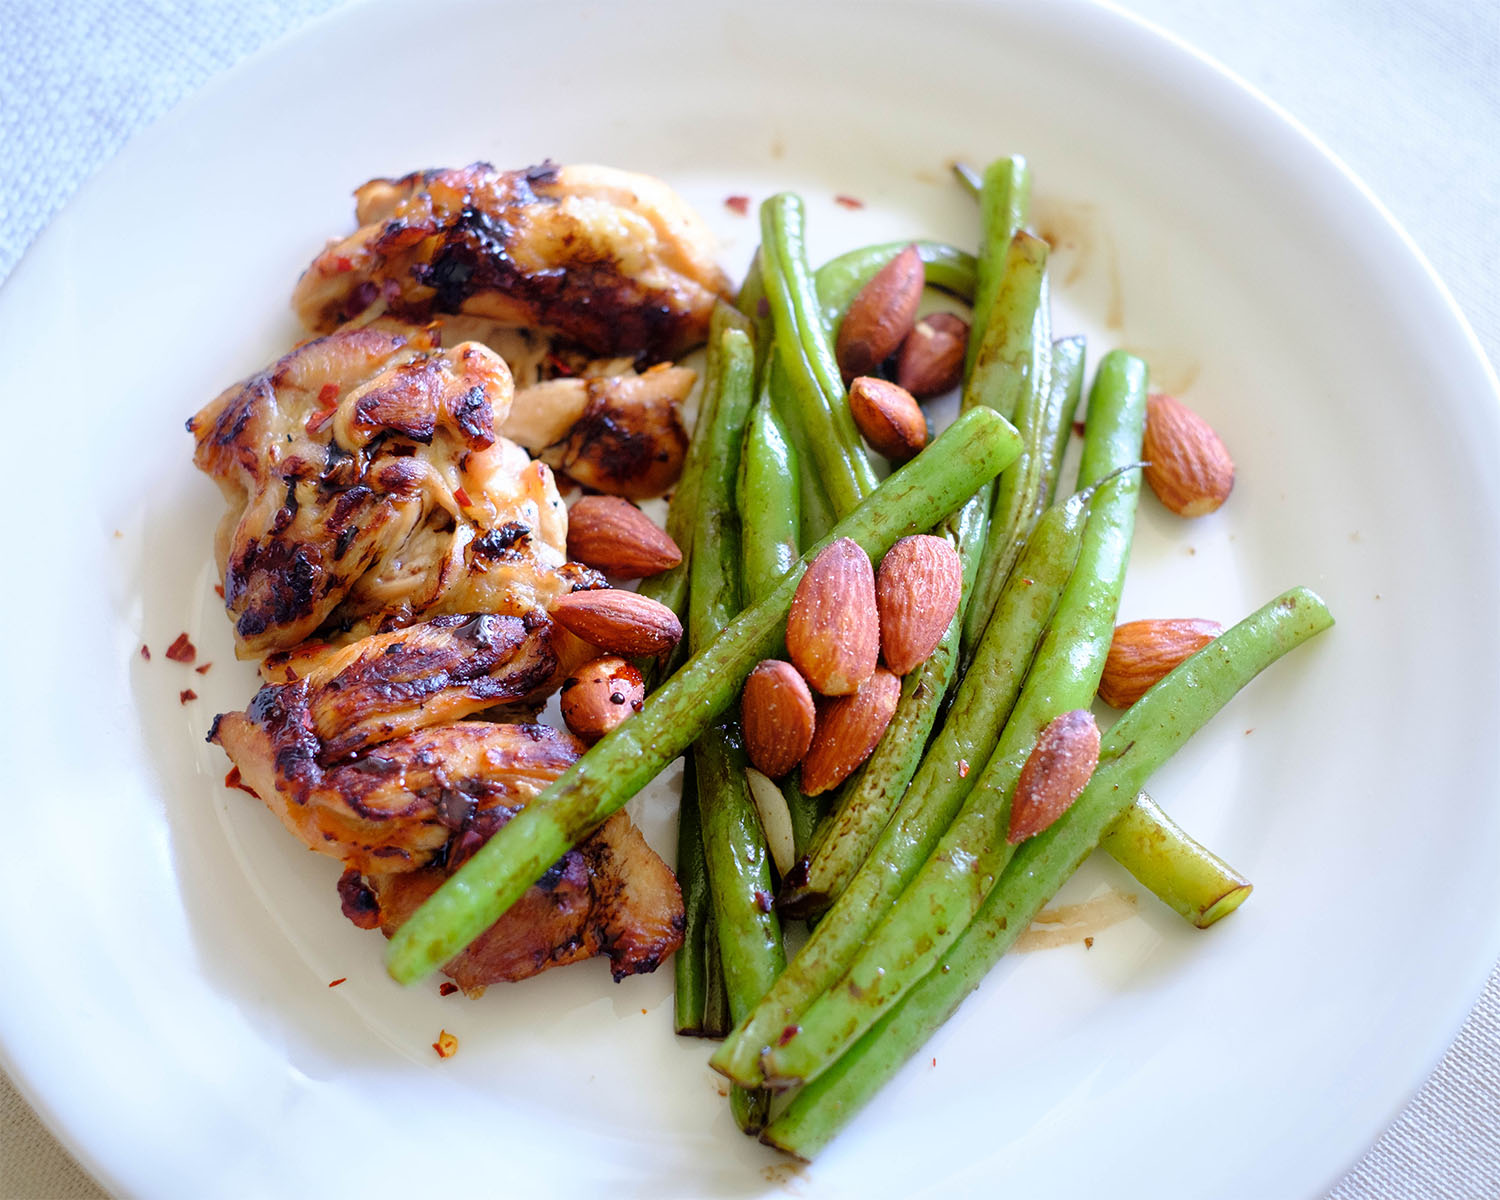
italian chicken

Italian Chicken with Green Beans and Almonds

stuffed primavera chicken

Primavera Stuffed Chicken Breasts

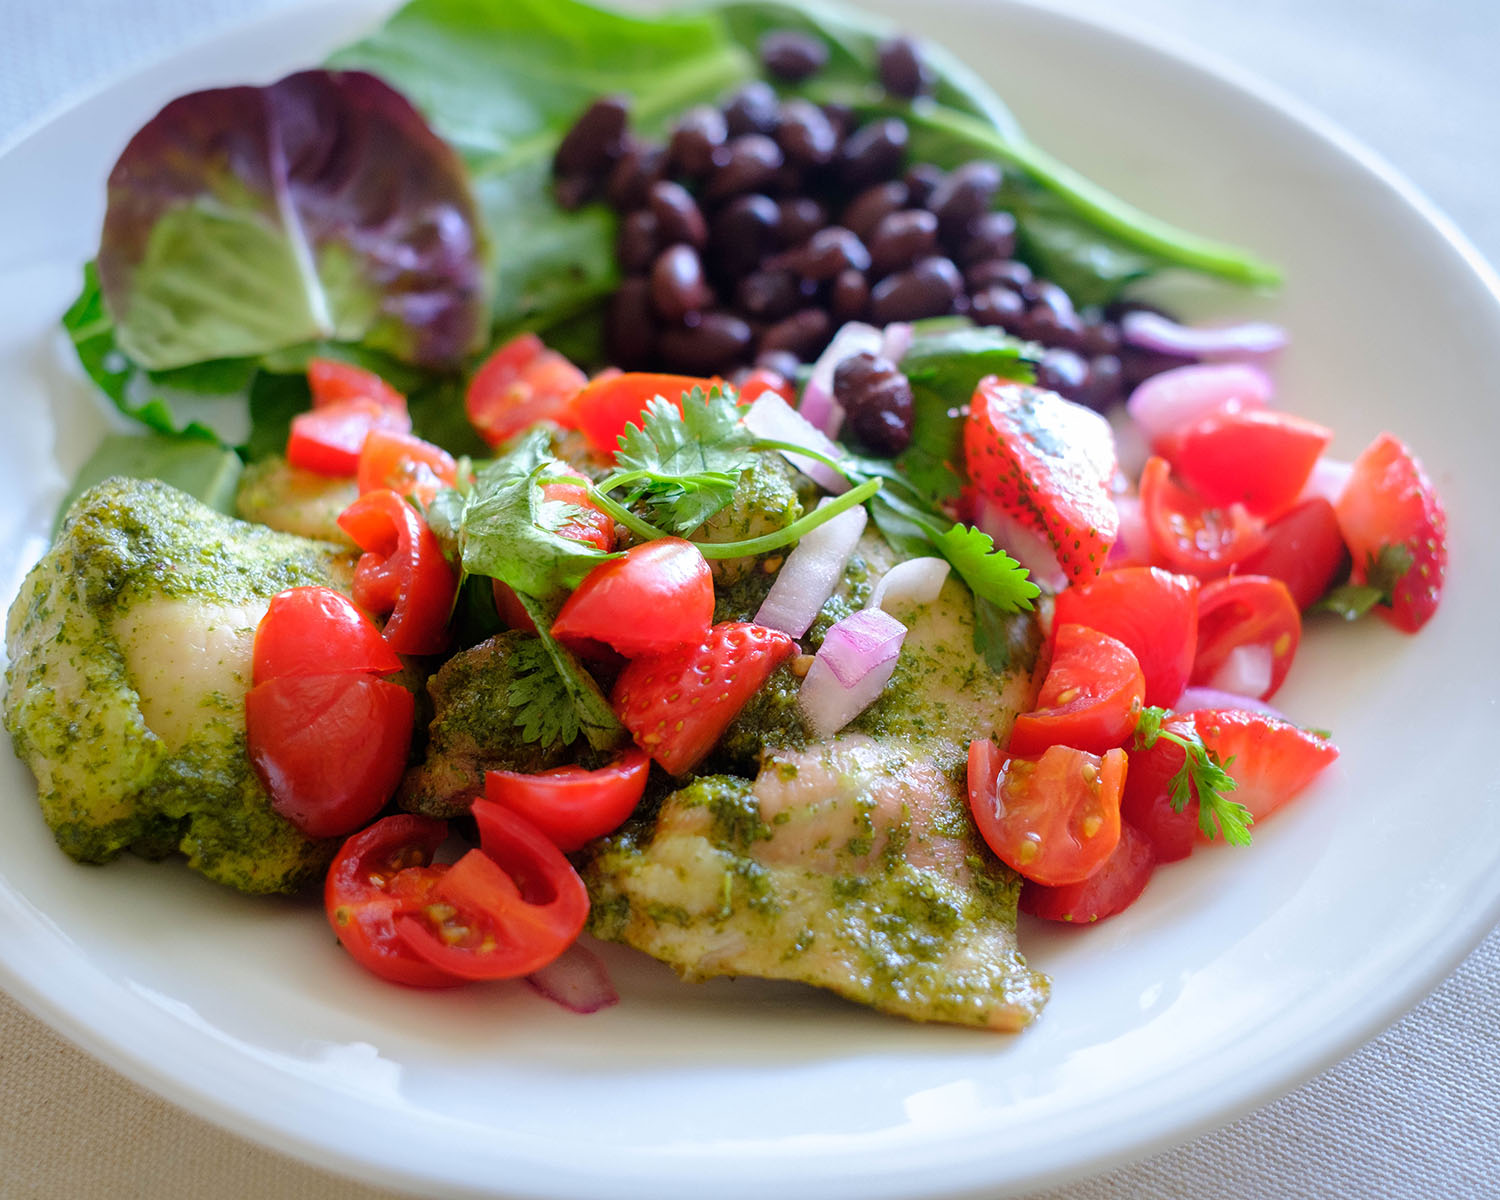
cilantro chicken

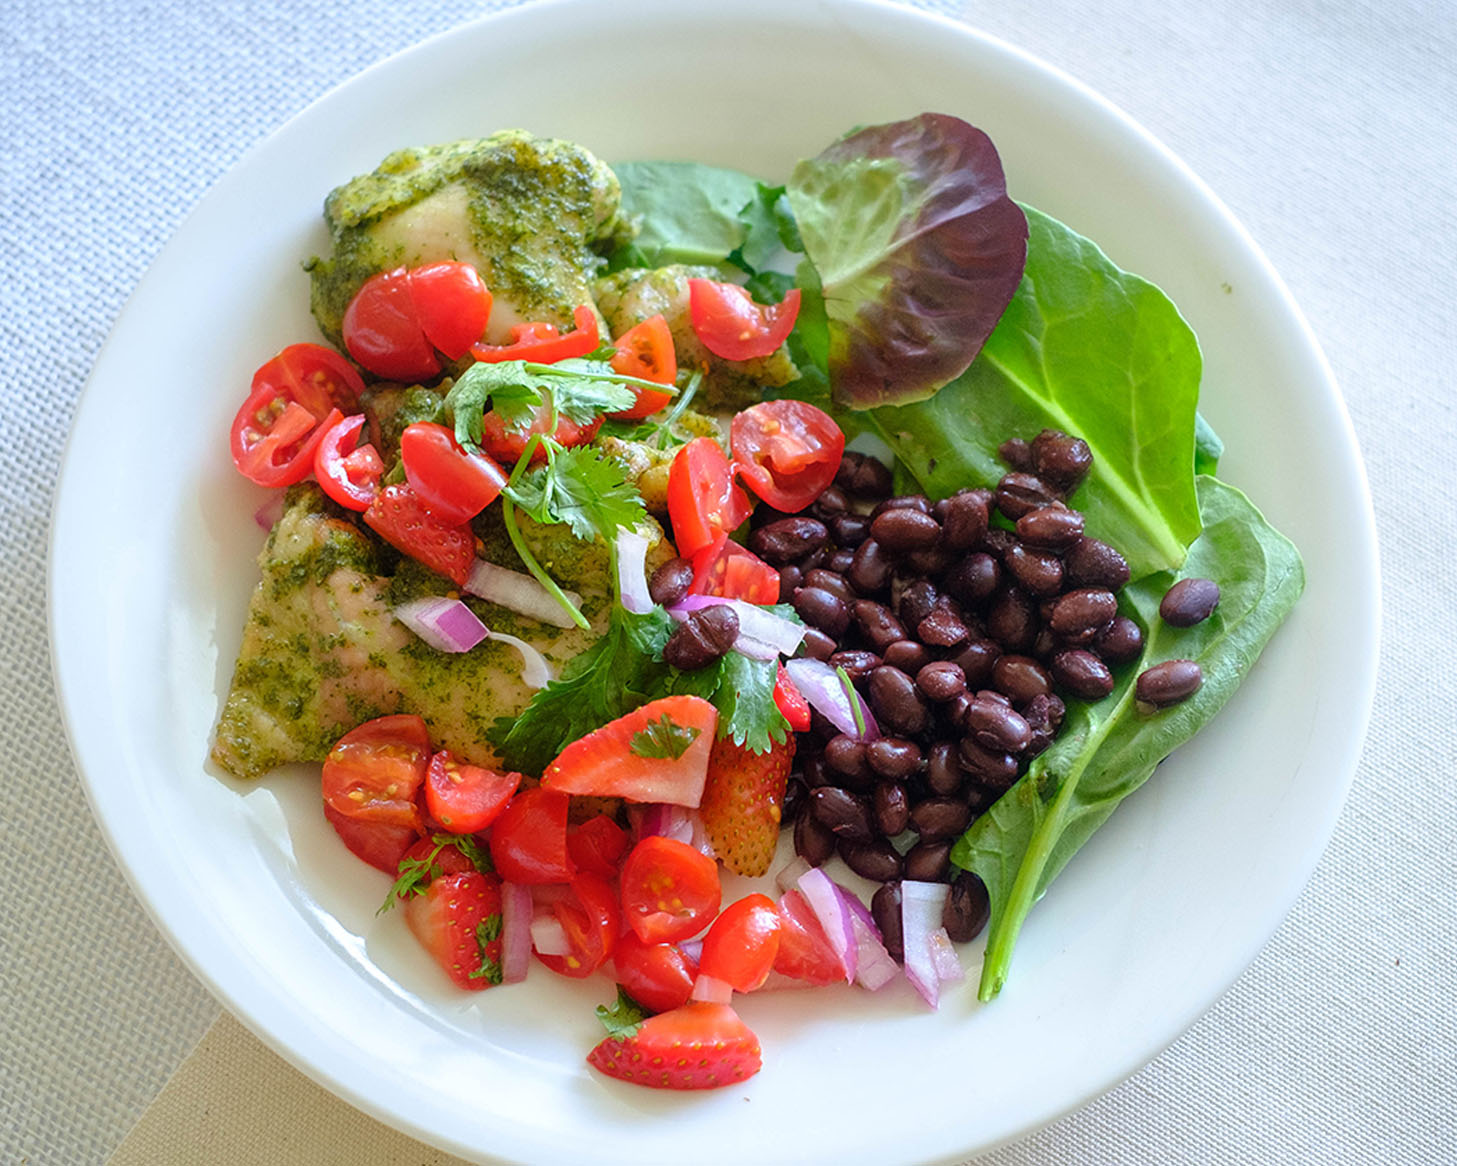
Cilantro Lime Chicken Salad with Strawberry Salsa

You Might Also Like

Frequently Asked Questions

Is there a difference between balsamic glaze and balsamic vinegar?

Balsamic glaze is the reduction of balsamic vinegar. This is done by simmering the vinegar in a saucepan until it thickens and reduces in half to achieve the thick consistency of syrup.


What else can I use balsamic glaze on?

You can drizzle balsamic glaze on slices of bruschetta, Caprese salads, roasted veggies, and even on summer berries or vanilla ice cream.


What does balsamic glaze taste like?

It has an intense sweet and tangy flavor, therefore, ad it slowly to recipes because just a little bit goes a long way.

Posted on Leave a comment

Sauteed Pesto Chicken with Artichokes and Peppers

chicken pesto

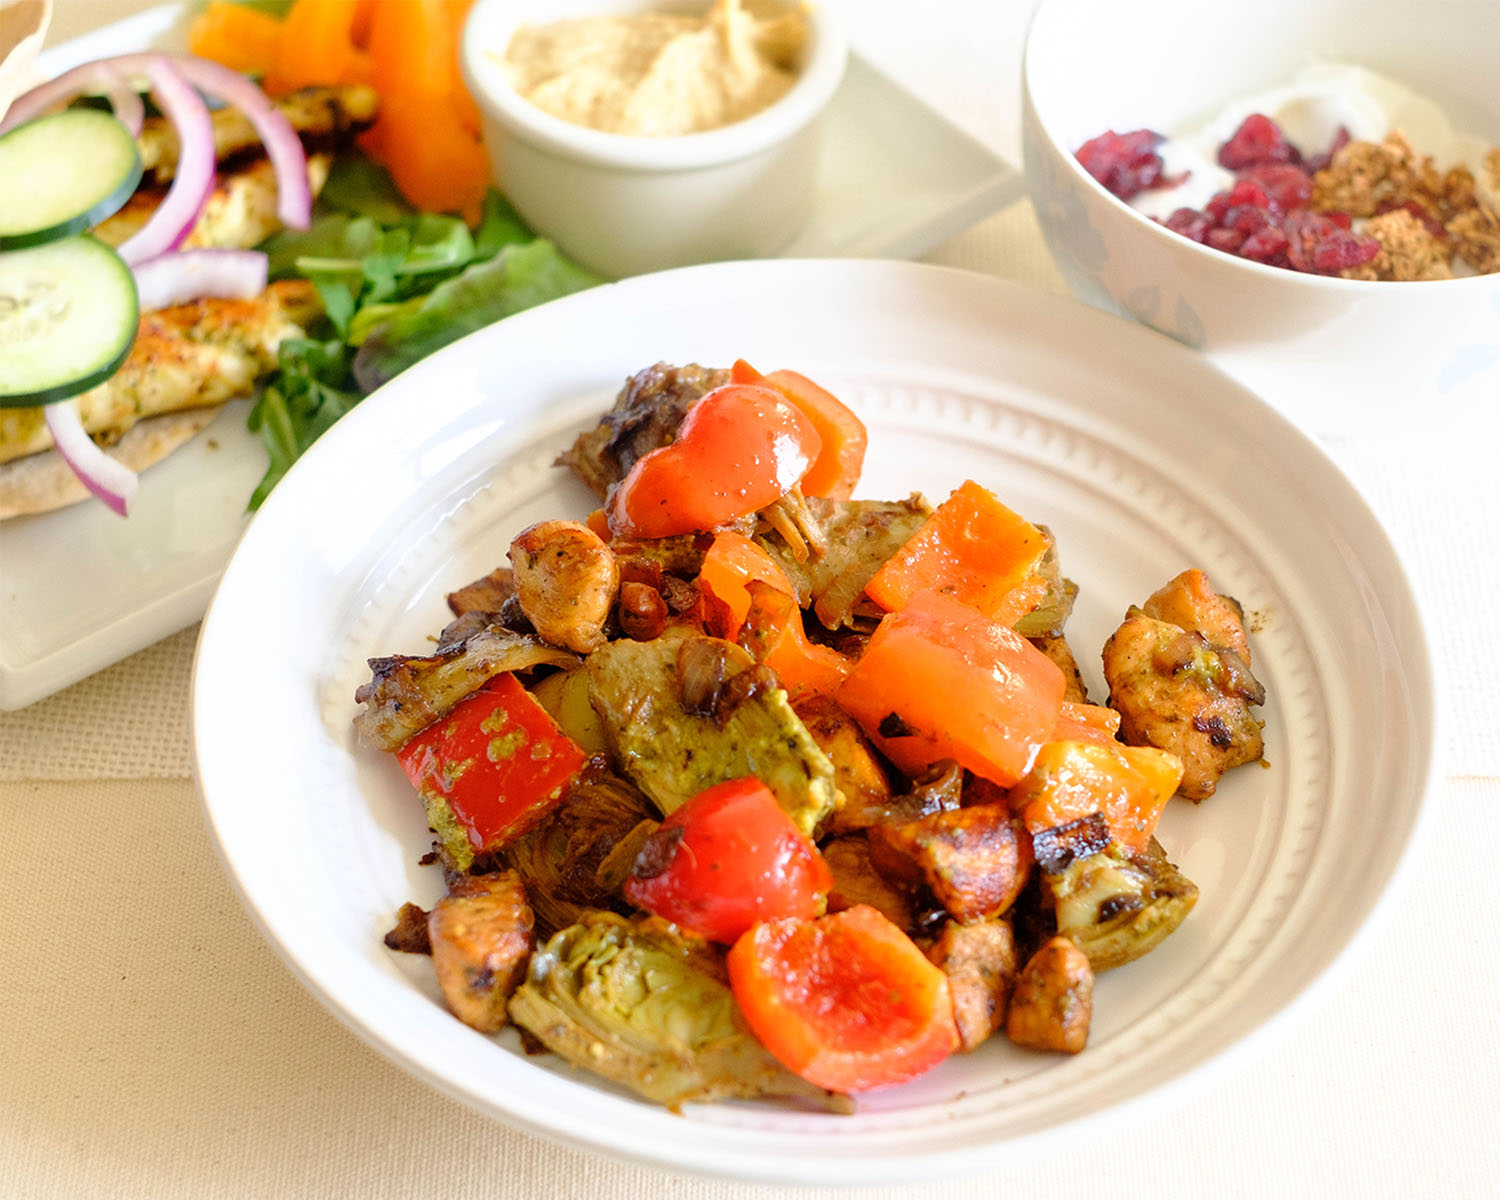
This Keto-Friendly Pesto Chicken meal prep recipe can’t get any easier. It’s flavored with basil pesto sauce and pairs perfectly with the sweetness of the red peppers and filled with “meaty” artichokes.

This post may contain affiliate links. Please see our privacy policy for details.

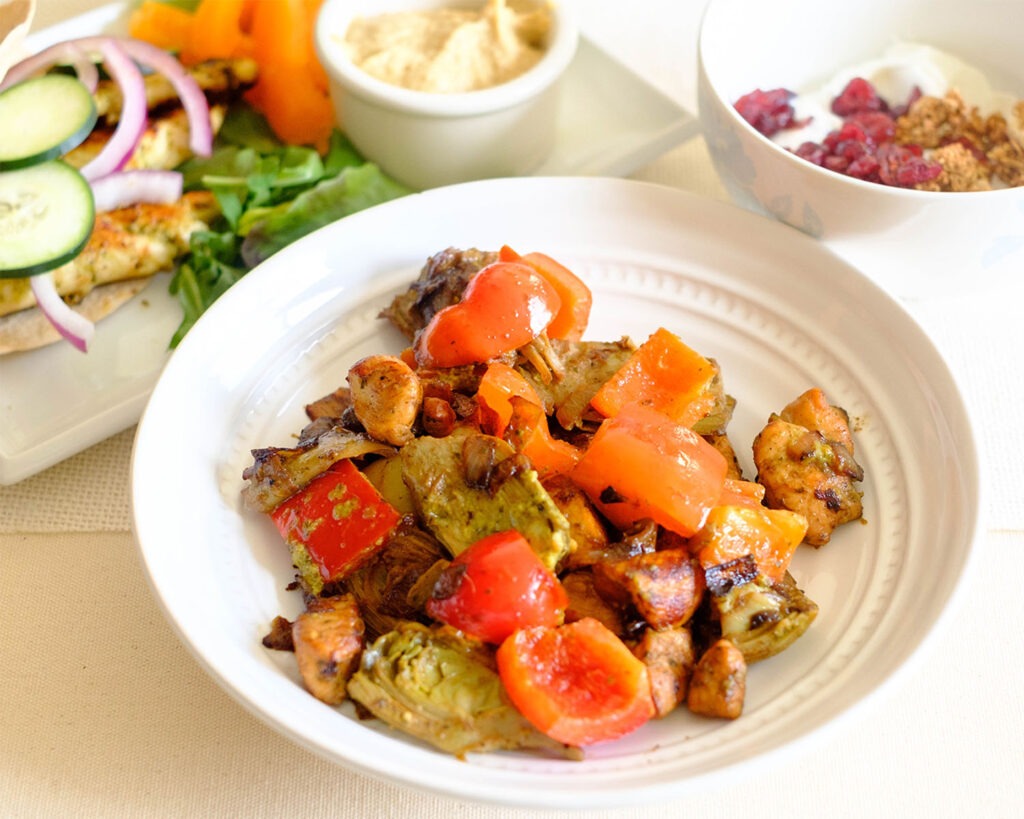
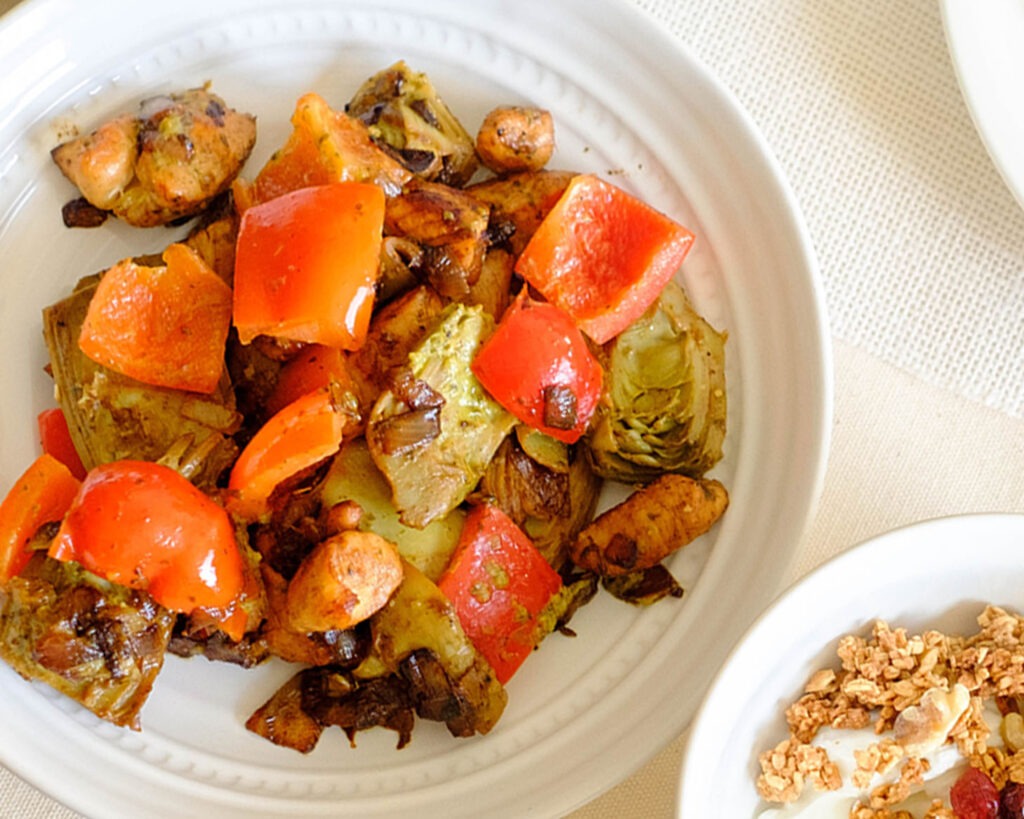
Round plate with sauteed chicken, red bell peppers, and artichokes tossed in a basil pesto sauce.

Why We love this Pesto Chicken

  • This meal can be ready in less than 20 minutes
  • It uses budget-friendly ingredients
  • It is packed with lots of flavors

Why is Pesto Sauce Great for Meal Prep?

  • When you need something easy to boost flavor for weekly meal prep, use pesto sauce. It’s a great way to boost flavor with simple and fresh ingredients
  • Pesto sauce is a healthy way to season your dishes because it contains herbs, garlic, lemon, nuts, cheese, and oil

The PrepYoSelf Newsletter

To Make this Easy Pesto Chicken, You’ll Need

  • Chicken Tenderloins: You can also use chicken breast chunks or cut up boneless chicken thighs into one-inch cubes
  • Bell Peppers: Use any color, but we prefer red because they are sweeter
  • Artichokes: You can use frozen or canned artichokes
  • Pesto Sauce: Make your own homemade pesto in a blender, but there are many options in the grocery store. You can always refrigerate it or freeze it for later use

Round plate with sauteed chicken, red bell peppers, and artichokes tossed in a basil pesto sauce.

Basic Steps to Make Sauteed Pesto Chicken

  1. Thaw out the frozen artichokes according to the packaging instructions or drain the artichokes if you are using canned.
  2. Cut the bell peppers and chicken into one-inch chunks
  3. Next, add oil to a saute pan on medium-high heat and saute the chicken for a few minutes until they are golden brown and fully cooked.
  4. Then, add the bell peppers and artichokes and cook until they are tender.
  5. At the end, add the basil pesto and mix it all together until it is fully coated with the sauce.

Reference the recipe card below for detailed instructions.

Round plate with sauteed chicken, red bell peppers, and artichokes tossed in a basil pesto sauce.

Meal Prep Tips for Pesto Chicken

  • Other Cook Methods: You can also grill the chicken and vegetables on an indoor grill pan or you can cook it in an Air Fryer
  • To reheat: Reheat it in the microwave until it is warm
  • Storage: Store in an airtight container in the refrigerator for up to 3 to 4 days for the best quality.
  • To freeze: If you want to freeze this meal, you can store it in freezer bags in the freezer for up to 3 months for the best quality. Just be sure to thaw it out in the refrigerator before reheating it

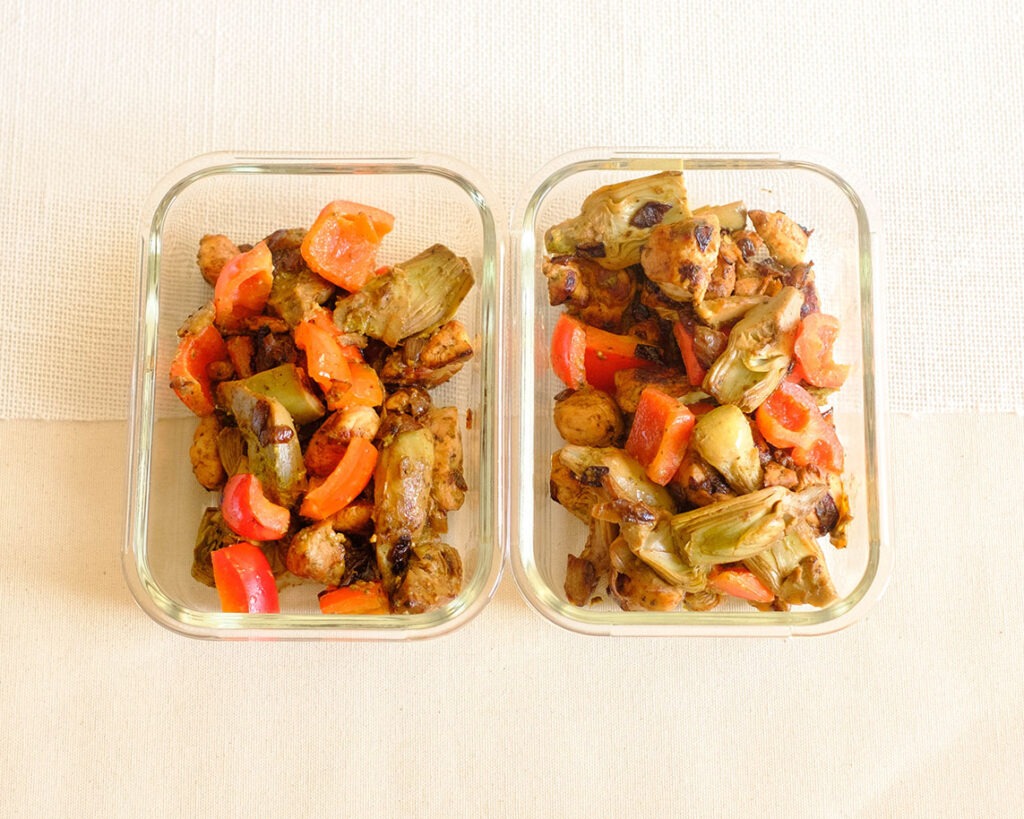
Glass meal prep containers with sauteed chicken, red bell peppers, and artichokes tossed in a basil pesto sauce.

chicken pesto

Sauteed Pesto Chicken with Artichokes and Bell Peppers

Keep a batch of pesto sauce on hand and use it in your next chicken meal prep for an easy and tasty meal solution.
No ratings yet
Prep Time 5 minutes
Cook Time 15 minutes
Course dinner
Cuisine American, Italian
Servings 2

Equipment

  • knife
  • cutting board
  • spatula
  • saute pan

Ingredients
  

  • 12 oz boneless chicken thighs
  • 1 red bell pepper
  • 2 cups artichoke hearts (frozen)
  • 3 tablespoons basil pesto sauce
  • 1 tablespoon olive oil

Instructions
 

  • Defrost the frozen artichoke hearts according to the packaging instructions or drain them if you purchased canned artichokes. Cut the bell peppers into cubes and dice the chicken in 1 inch chunks.
  • Add oil to a saute pan on medium high heat and saute the chicken for about 5 to 6 minutes until it is golden brown and fully cooked.
  • Next, add the bell peppers and artichoke hearts and let them heat through for about 2 to 3 minutes. Finish by adding the basil pesto and mixing everything well until the chicken is coated with the sauce.

Similar Recipes

sweet and sour chicken wings

Air Fryer Sweet and Sour Chicken Wings

chicken pesto wrap

Chicken Pesto Wrap with Hummus

peanut chicken

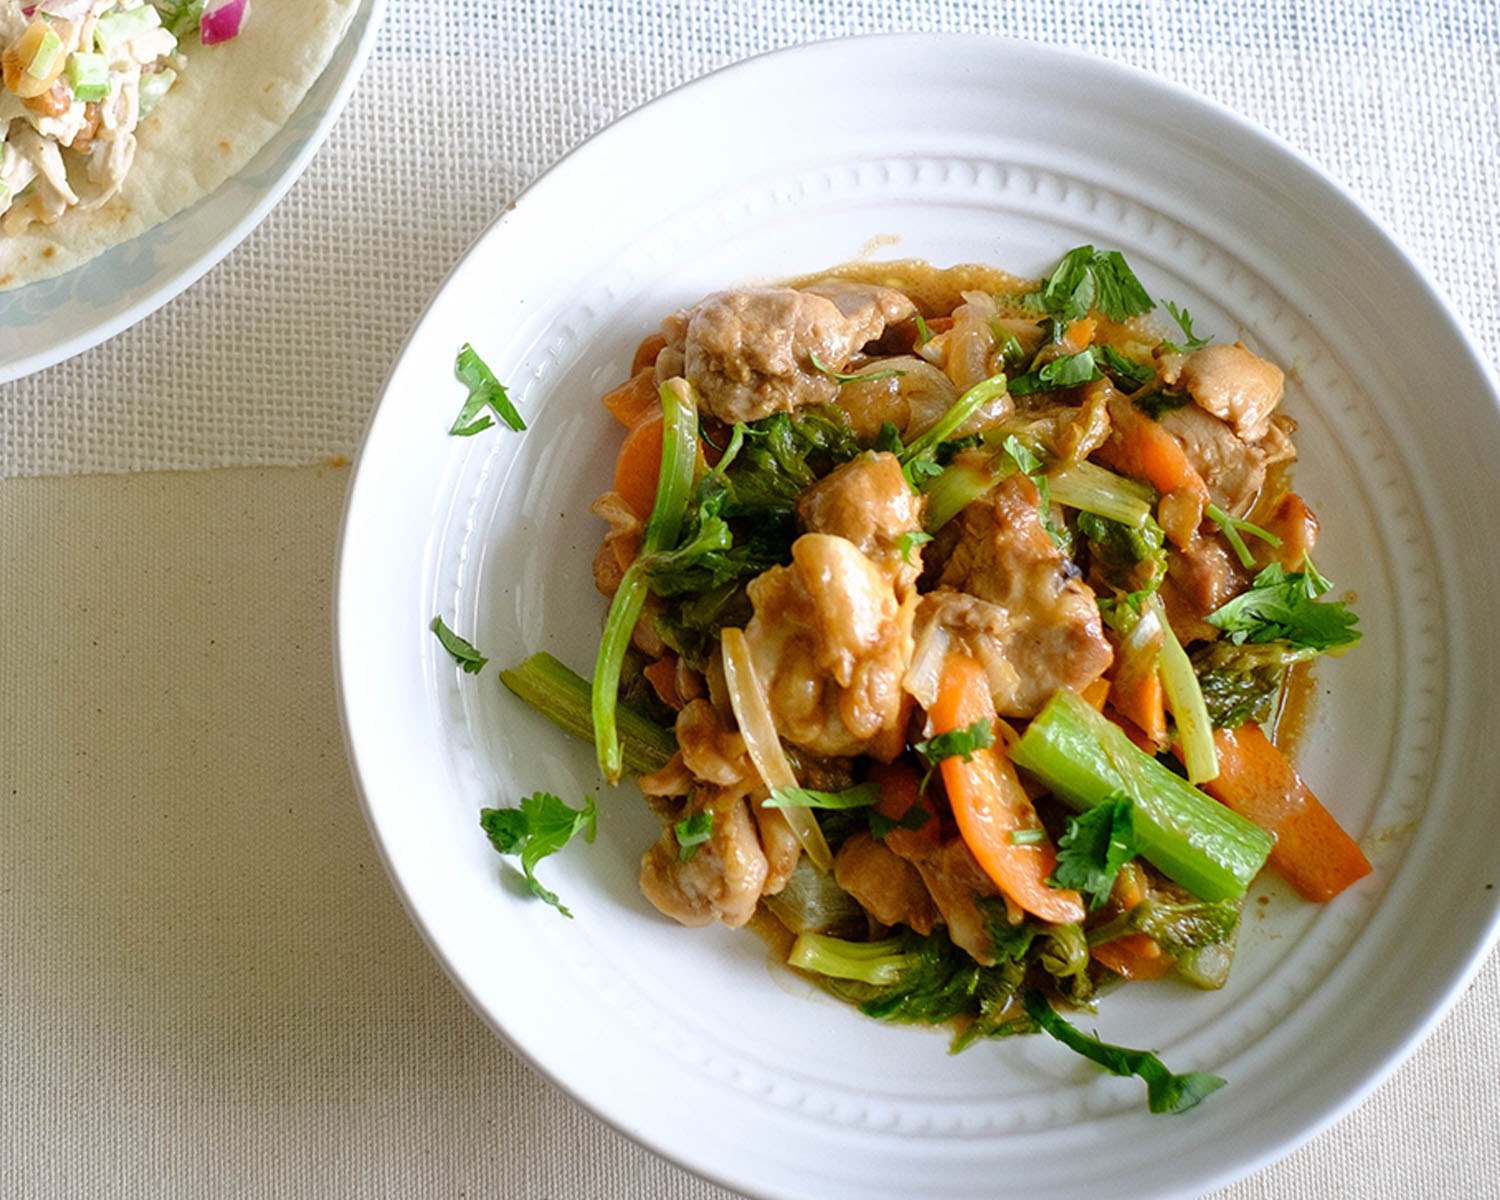
Peanut Chicken and Celery Stir Fry

You Might Also Like

Frequently Asked Questions

What kind of pesto do I use?

The most common pre-made pestos found in grocery stores are basil pesto or tomato pesto. Either flavor will work well for this recipe.


What can I serve with this pesto chicken recipe?

If you want to keep it low carb, you can serve it with cauliflower rice, otherwise, it goes well with pasta noodles or even pita bread.


Can I freeze pesto chicken?

Yes, store it in an airtight freezer bag and freeze for up to 3 months for the best quality.

Posted on Leave a comment

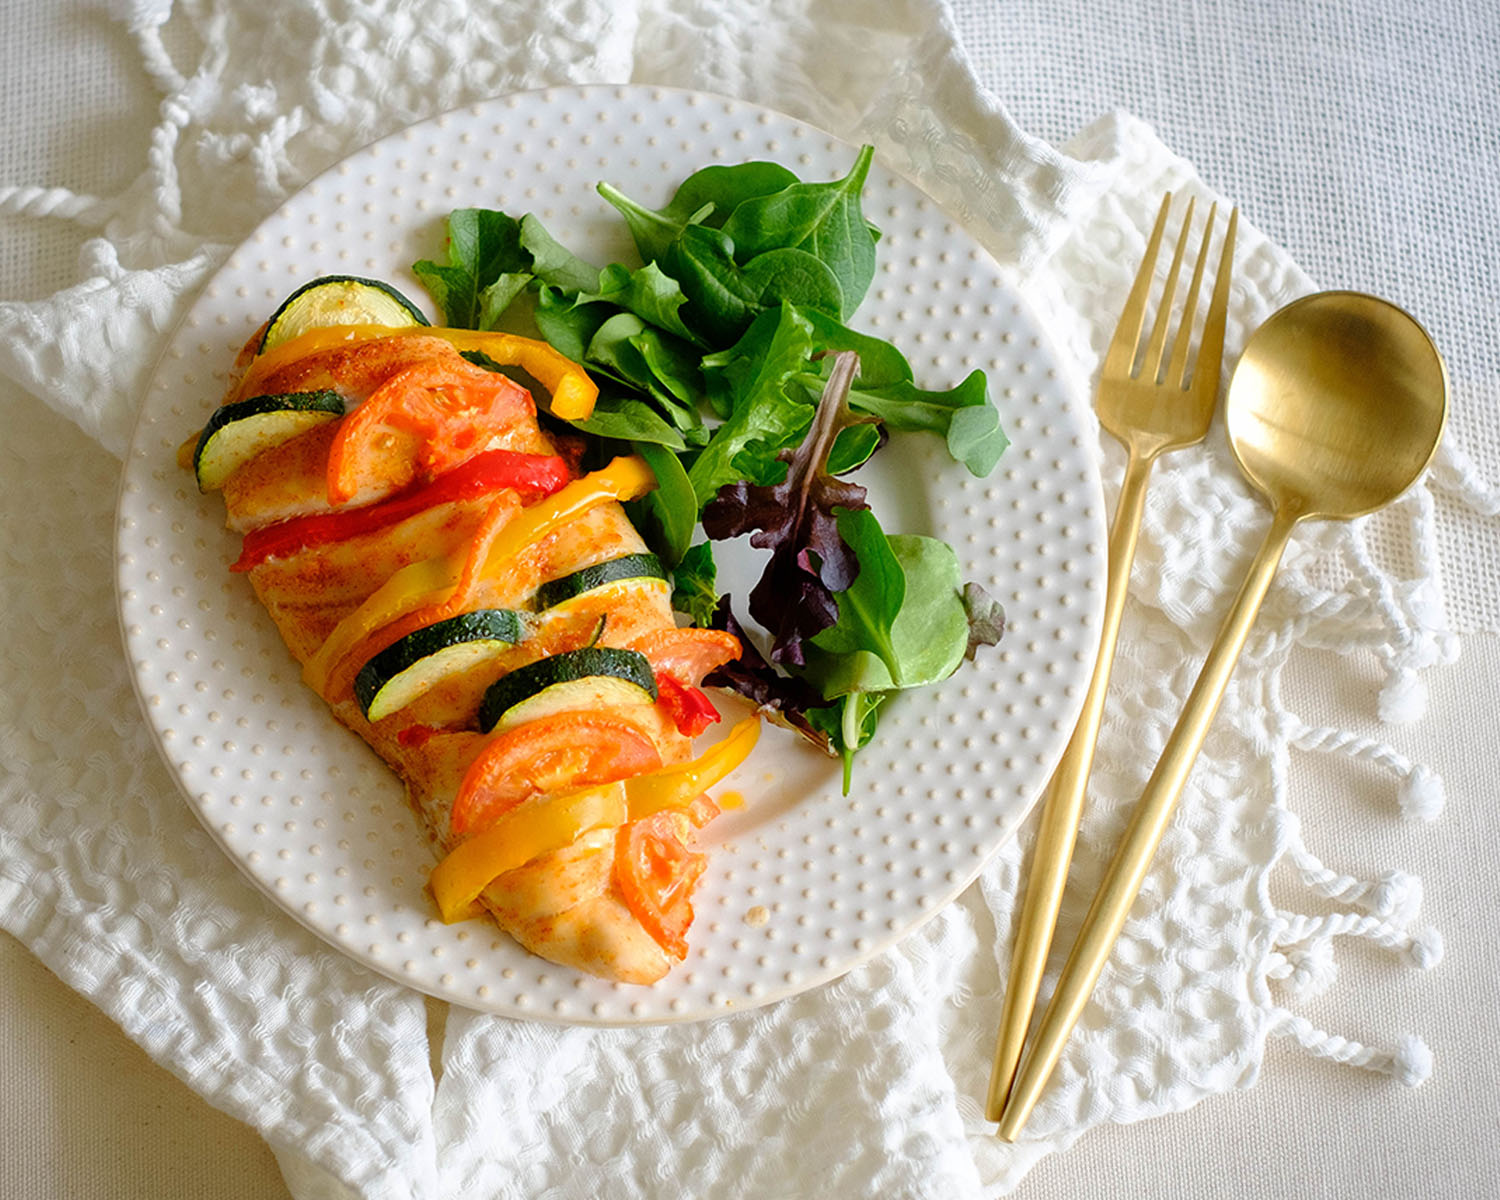
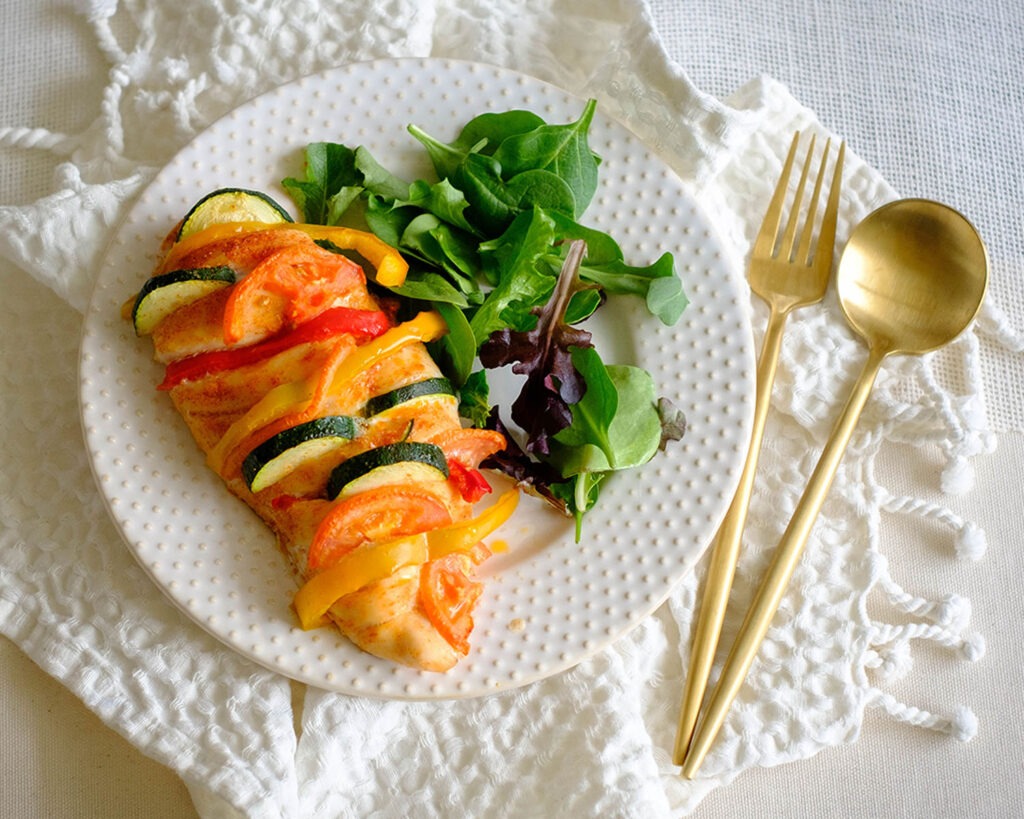
Primavera Stuffed Chicken Breasts

stuffed primavera chicken

Oven Baked and Primavera Stuffed Chicken Breasts are a great way to get more vegetables into your weekly meal prep.

This post may contain affiliate links. Please see our privacy policy for details.

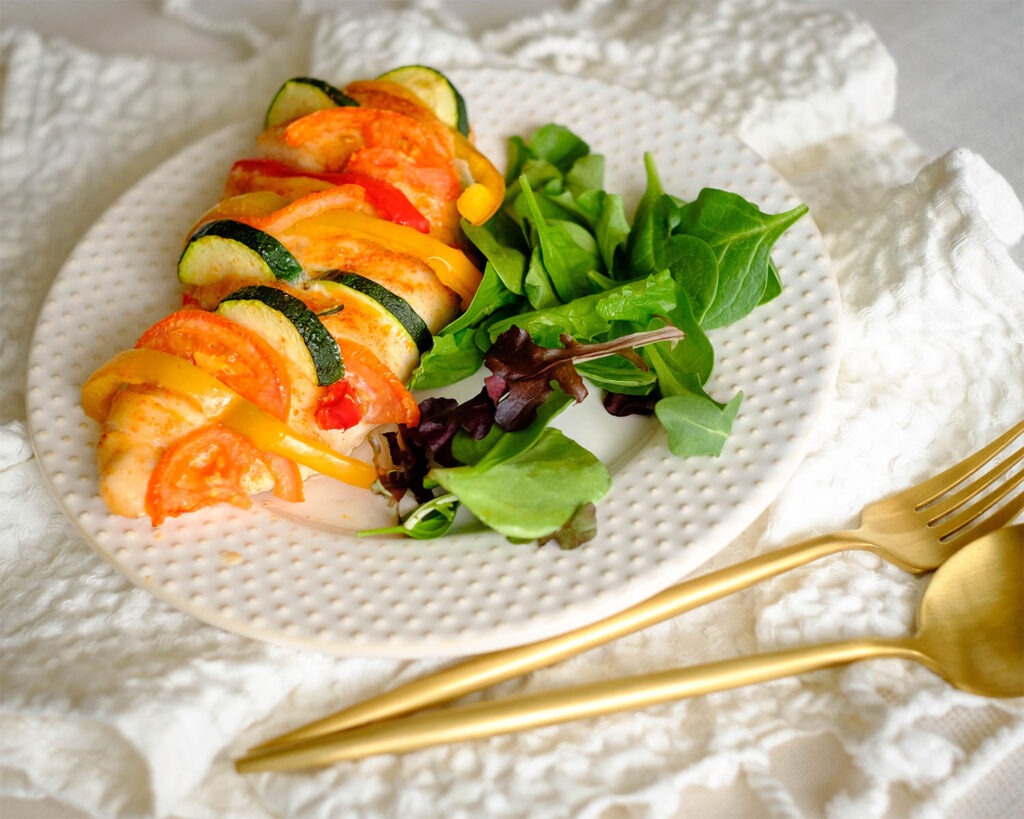
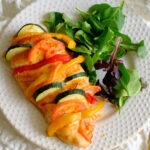
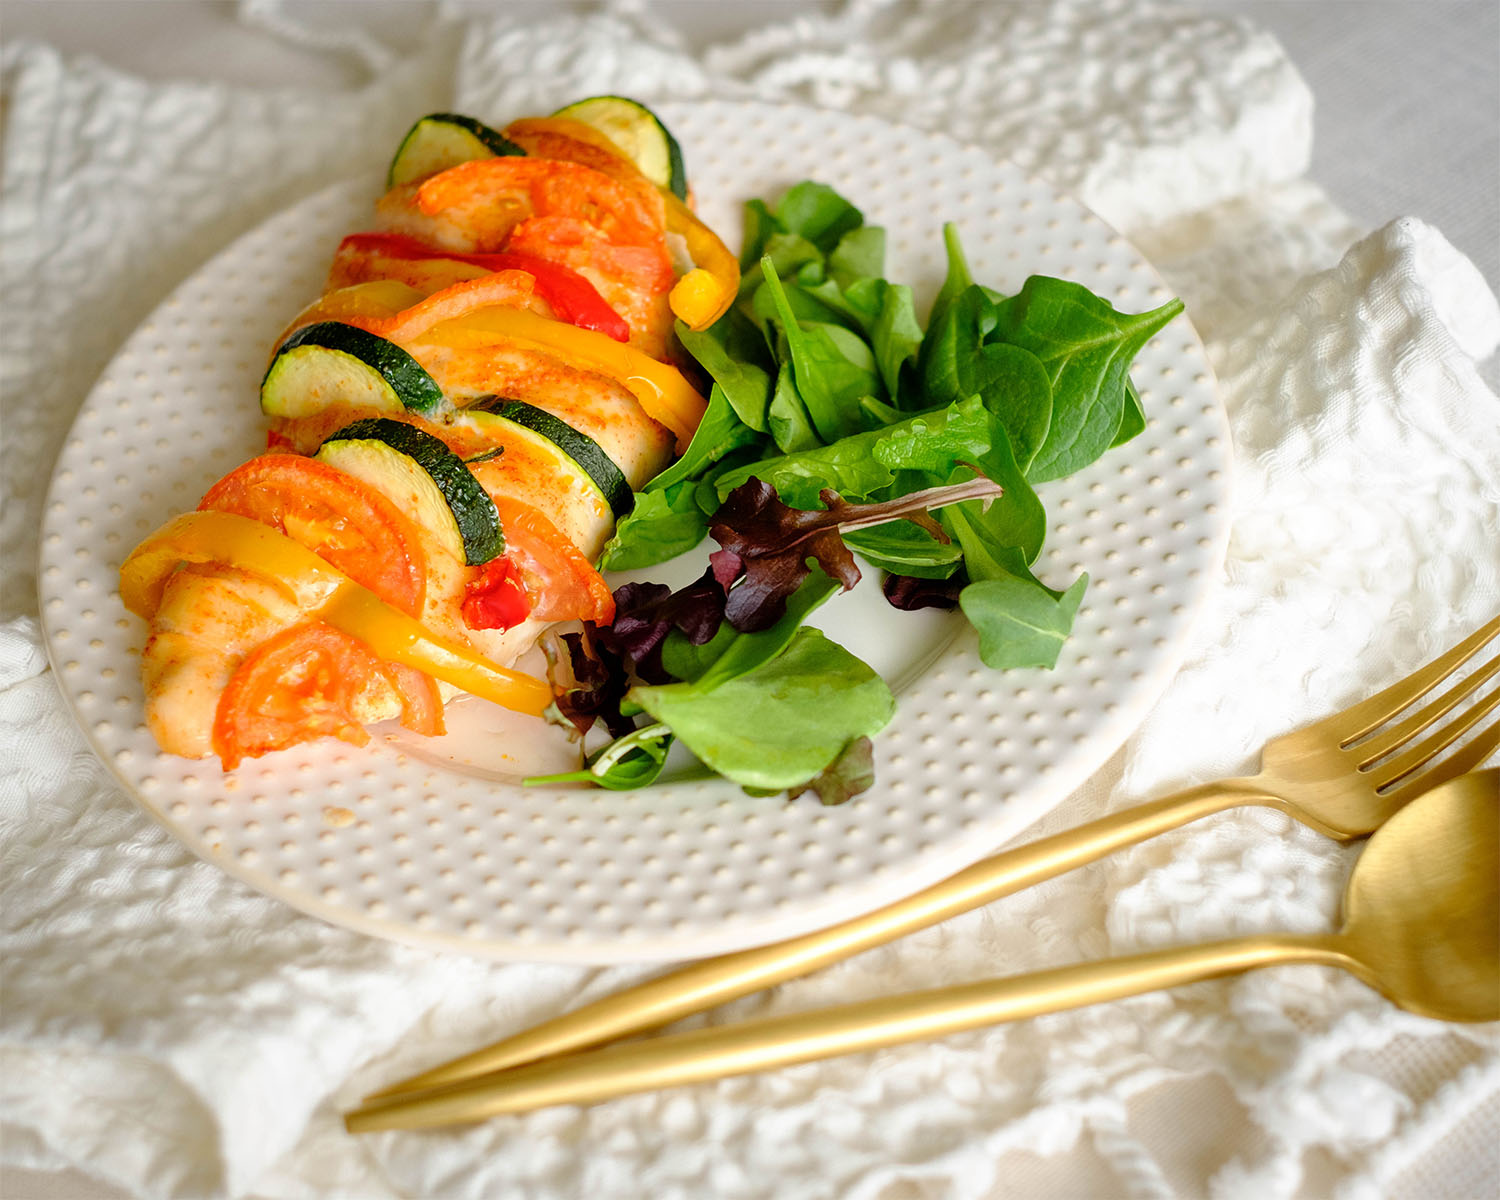
Round plate with baked chicken breasts stuffed with colorful vegetables and a side salad.

Pack chicken breast with lots of flavors, color, and nutrients with this recipe. It’s a simple, low-carb meal that requires minimal meal prep.

Why Is This Baked Chicken Breast Recipe Great for Meal Prep?

  • It is high in lean protein which will help you keep full and aid in weight loss
  • You can prep the chicken with the vegetables all in one pan with one cook method
  • You can make a larger batch and freeze it for later. You can later enjoy it with a side of mashed potatoes or fluffy rice pilaf

The PrepYoSelf Newsletter

Simple Ingredients You’ll Need to Make Stuffed Chicken Breasts

  • Chicken Breasts: We chose chicken breasts that were thick cut so that you can easily make slits in them
  • Vegetable Stuffing: Use vegetables that you can cut into thin slices. We used zucchini, yellow squash, bell peppers, and red onions
  • Seasonings: We used a pre-made Italian seasoning, garlic powder, paprika, and salt
  • Side Salad: Serve with a side salad such as spring mix and your choice of salad dressing

Round plate with baked chicken breasts stuffed with colorful vegetables and a side salad.

How to Make Stuffed Chicken Breasts With Vegetables

  1. Preheat the oven to 400F.
  2. Place the chicken breast on a cutting board.
  3. Use a sharp knife to cut slits in each chicken breast, about ½ inch apart (be careful not to cut through the bottom of the chicken completely).
  4. Sprinkle the chicken with seasonings and drizzle with olive oil.
  5. Slice the veggies into coins and stuff the slits with the mixture of veggies, alternating the veggies with each slit.
  6. Place the primavera stuffed chicken breasts on a sheet pan and bake in the oven for 25 minutes until it fully cooks.

Reference the recipe card below for detailed instructions.

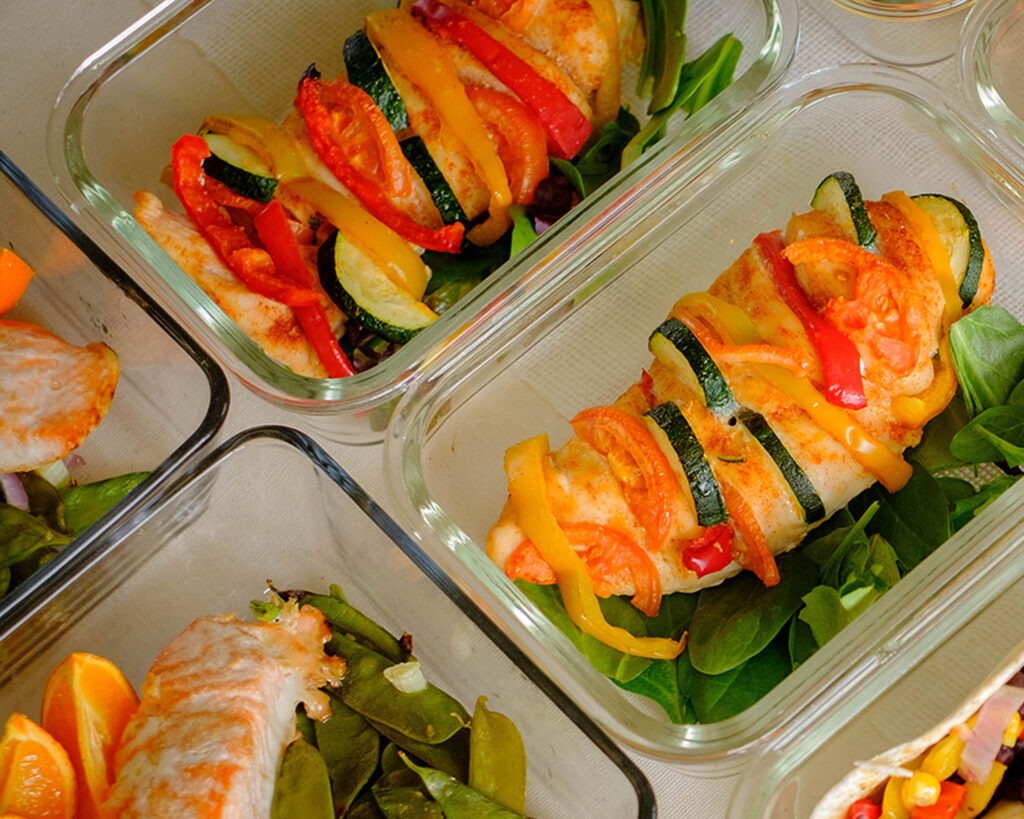
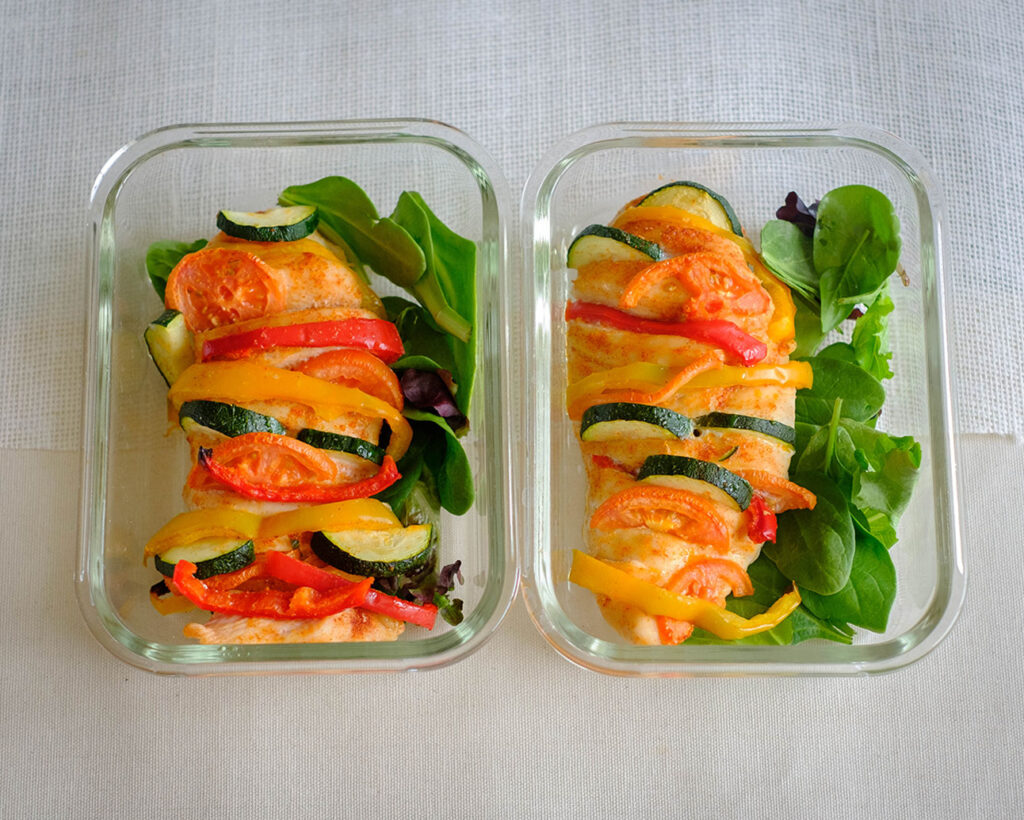
Glass meal prep containers with baked chicken breasts stuffed with colorful vegetables and a side salad.

Meal Prep Tips for Primavera Stuffed Chicken Breasts

  • If you don’t want to heat up the whole oven, you can prep this in the Air Fryer
  • If you are entertaining guests, you can cook the chicken breasts on an outdoor grill and have a fun cookout
  • To add more flavor, you can also add shredded mozzarella cheese on top or flavored panko bread crumbs for a crunch

Glass meal prep containers with baked chicken breasts stuffed with colorful vegetables and a side salad.

Stuffed Chicken

Primavera Stuffed Chicken Breasts

Colorful and vibrant stuffed primavera chicken breasts perfect for a healthy meal prep dish.
No ratings yet
Prep Time 5 minutes
Cook Time 30 minutes
Course lunch, Main Course
Cuisine American
Servings 2

Equipment

  • knife
  • cutting board
  • sheet pan
  • oven
  • mixing bowls

Ingredients
  

  • 12 oz chicken breasts
  • 1/4 cup zucchini (sliced)
  • 1/4 cup yellow squash (sliced)
  • 1/4 cup yellow bell pepper (sliced)
  • 1/4 cup red bell pepper (sliced)
  • 1/4 cup red onions (sliced)
  • 1/4 teaspoon Italian seasoning
  • 1/4 teaspoon garlic powder
  • 1/4 teaspoon paprika
  • 1/4 teaspoon salt
  • 1 tablespoon olive oil

Salad Dressing and Spring Mix

  • 1 lemon (juiced)
  • 1 teaspoon dijon mustard
  • 1 tablespoon honey
  • 4 tablespoons olive oil
  • 1/4 teaspoon garlic powder
  • 1/4 teaspoon pepper
  • 1/4 teaspoon salt
  • 4 cups spring mix

Instructions
 

  • Preheat hte oven to 400F. Using a sharp knife, cut slits in each chicken breast, about 1/2 inch apart, being careful not to cut through completely. Stuff the slits with a mixture of sliced veggies, alternating with each slit.
  • Sprinkle the chicken with the seasonings and drizzle with olive oil. Bake in the oven for about 25 to 30 minutes until the chicken is cooked through to an internal temperature of 165F. (optional) during the last 5 minutes, you can sprinkle with shredded cheese to let it melt.
  • Meanwhile, in a mixing bowl, mix together the salad dressing ingredients until it is well blended.
  • Serve the stuffed chicken breasts with a side salad and salad dressing.

Similar Recipes

chicken fajitas

Sheet Pan Chicken Fajitas with Mango Salsa

chicken kale salad

Grilled Honey Dijon Chicken and Kale Salad

balsamic chicken salad

Oven Baked Balsamic Chicken Spinach and Strawberry Salad

You Might Also Like

Frequently Asked Questions

What else can I use stuff my chicken breast with?

The options are endless, you can use black olives, cream cheese, sliced potatoes, and even sliced mushrooms.


Can I make stuffed chicken breasts ahead of time?

Yes, you can cut the chicken and stuff it in advance. Then, store it in an airtight container in the refrigerator until you are ready to bake it.


Can I freeze stuffed chicken breasts?

Yes, you can store it in an airtight, freezer-safe bag and store it in the freezer for up to 3 months for the best quality.

Posted on Leave a comment

Chicken Pesto Wrap with Hummus and Bell Peppers

chicken pesto wrap

Light and healthy Pesto Chicken Wrap with Fresh Veggie Sticks and Creamy Hummus.

This post may contain affiliate links. Please see our privacy policy for details.

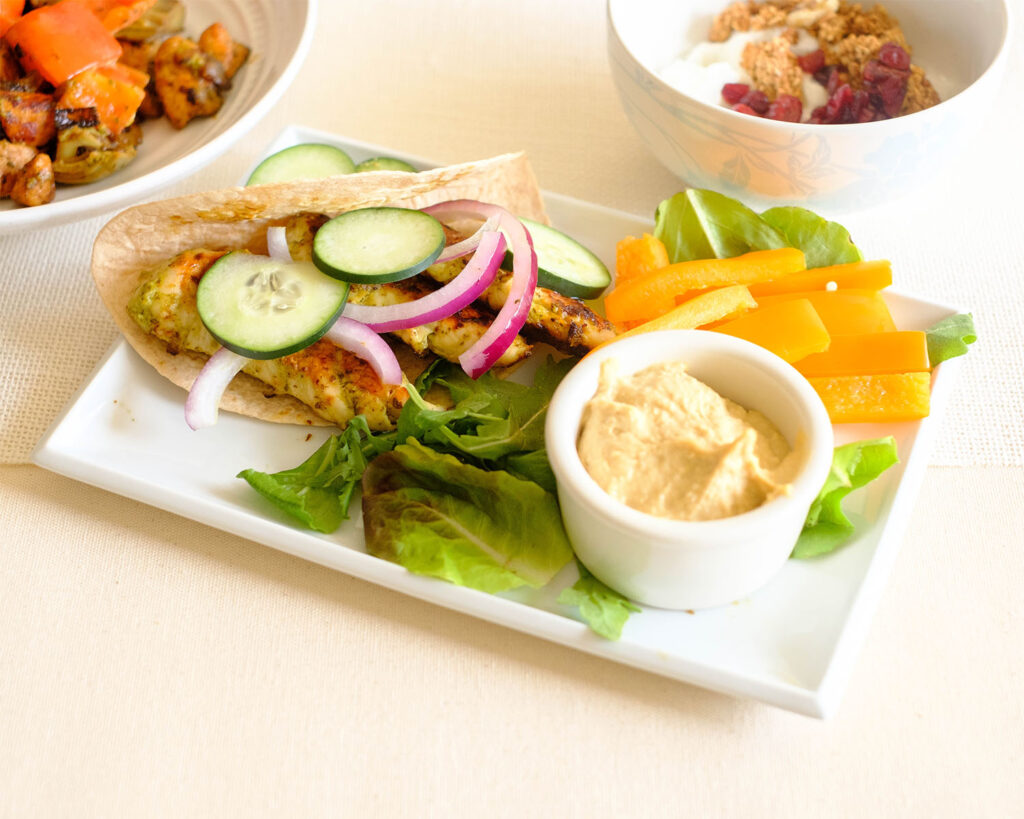
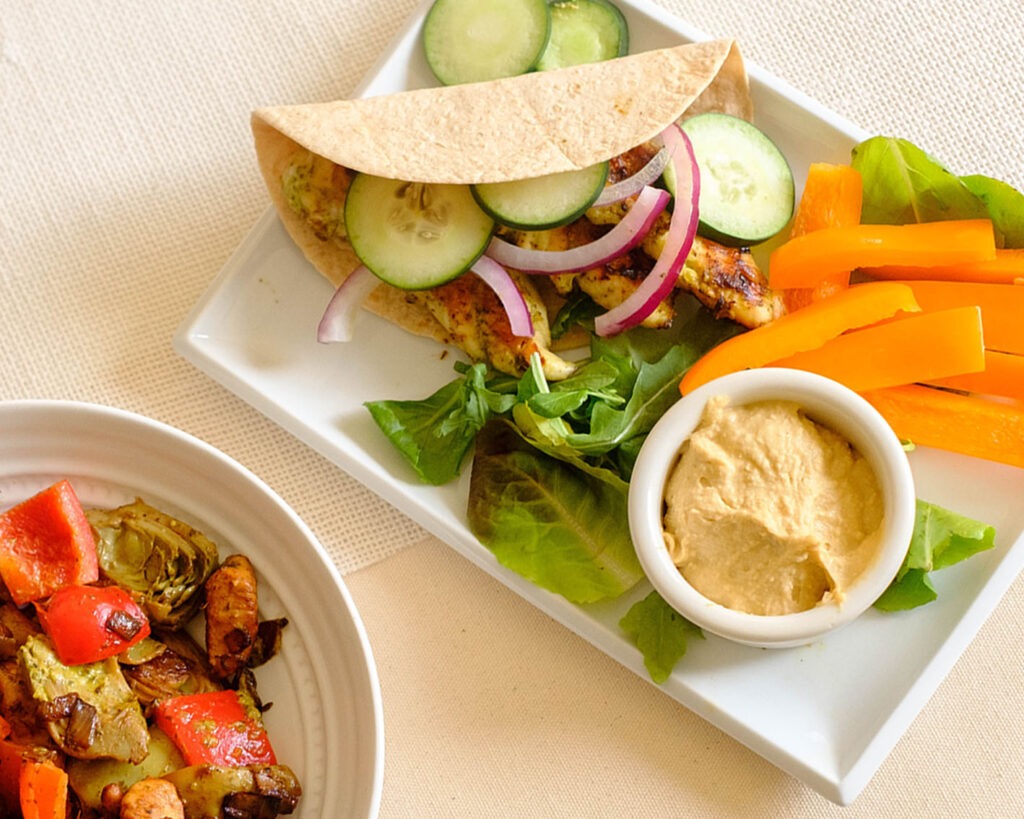
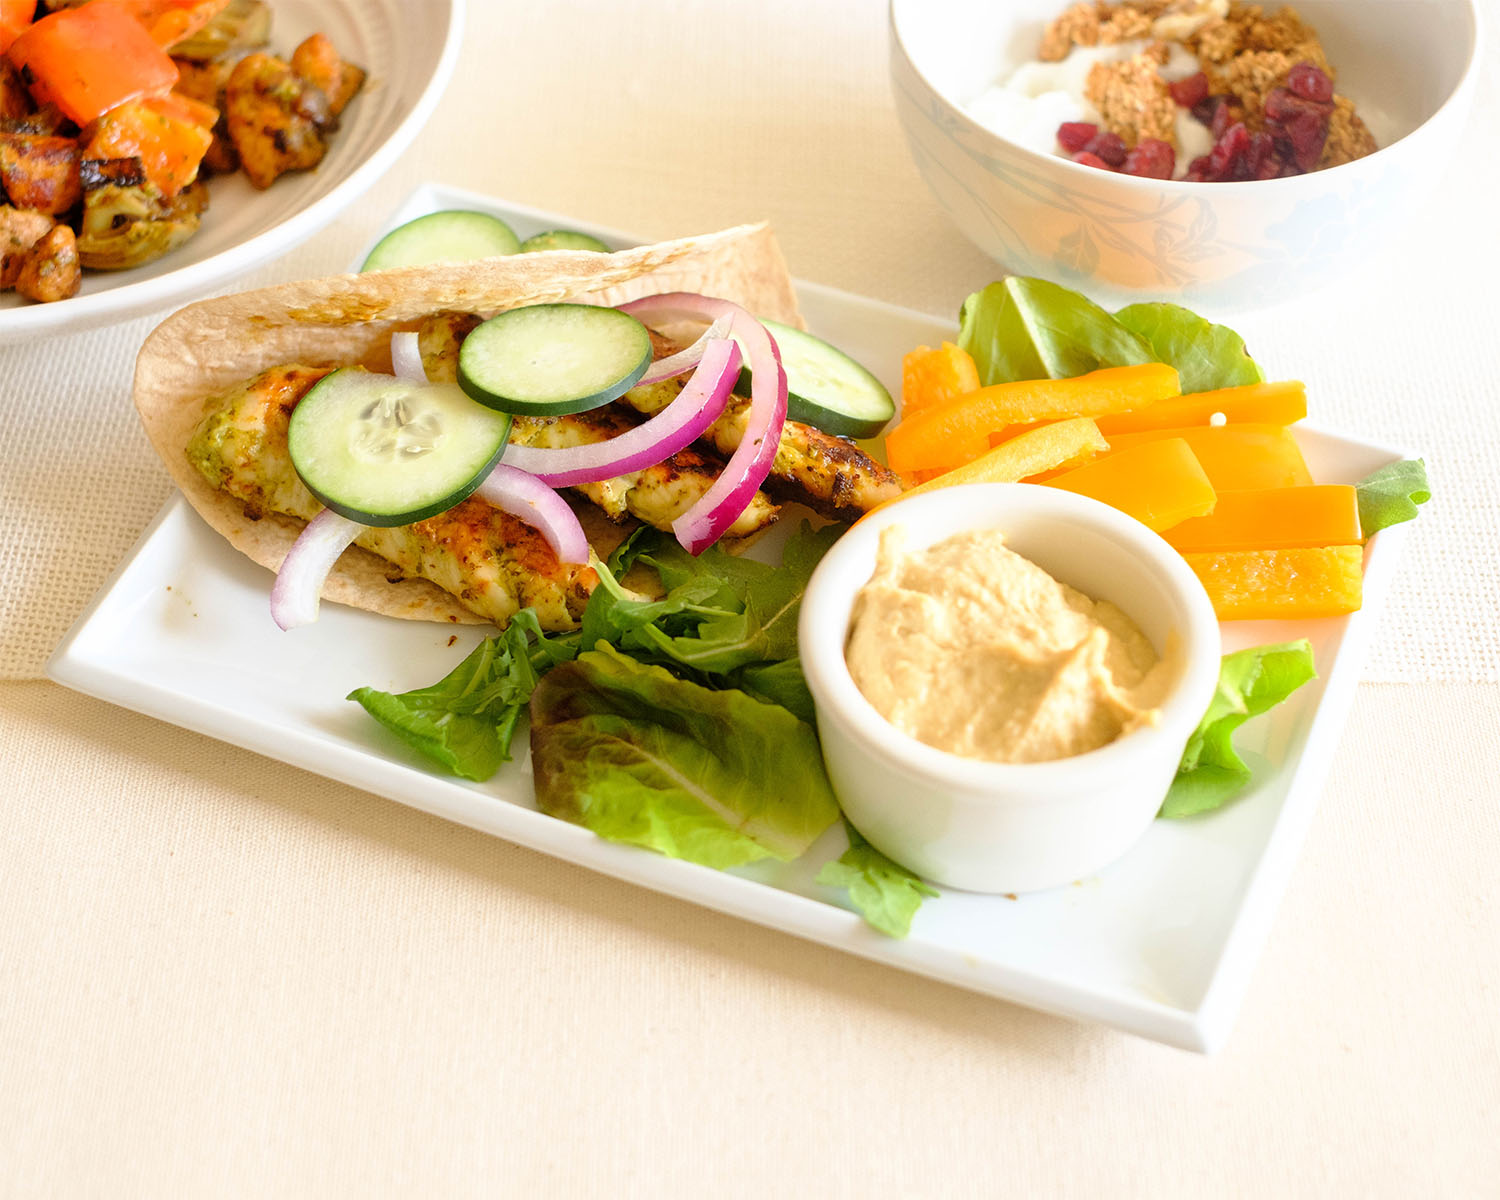
Plate with chicken pesto served with bell peppers and hummus dip.

Why You Need to Make this Healthy Chicken Tenderloin Recipe

Chicken Marinated in basil pesto sauce makes for a great lunch or quick dinner and they are so easy to make.

  • High protein meal
  • Low Calorie
  • Budget-Friendly
  • A No-Fuss Meal Prep

The PrepYoSelf Newsletter

  • Chicken Tenderloins: You can also use chicken breasts or boneless chicken thighs.
  • Tortilla: We used whole wheat, but any kind of tortilla will work just fine.
  • Fresh Veggie Sticks: We sliced up bell peppers and cucumbers, however, you can use celery or carrots. Any kind of fresh veggies will be great for dipping into the hummus.
  • Hummus: You can use this as a spread for your wrap or a dip for your fresh veggies. You can also use yogurt as an option.
  • Pesto: Basil pesto is such a great way to marinate your protein with. You can also add some to your hummus for extra flavor

Plate with chicken pesto served with bell peppers and hummus dip.

How to Prepare Chicken Pesto

  1. Preheat an indoor grill on medium-high heat.
  2. In a mixing bowl, marinate the chicken with the basil pesto sauce and make sure it is fully coated.
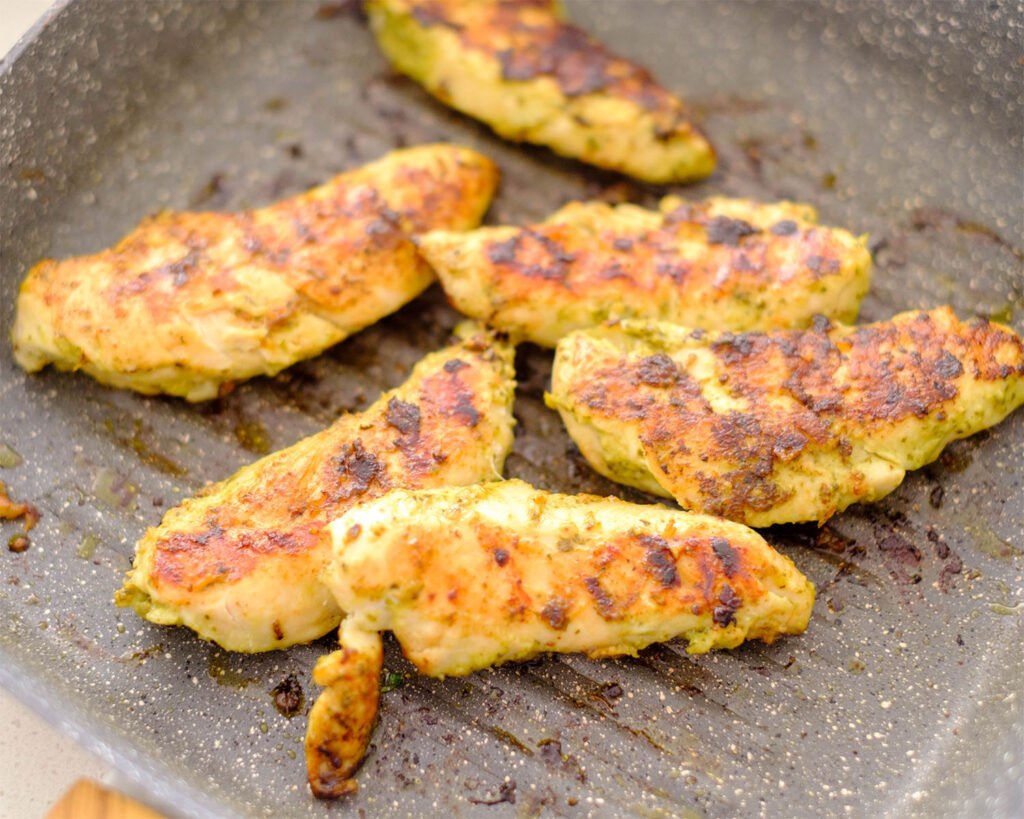
  3. Next, place the chicken on the grill and sear it on each side for a few minutes until it fully cooks.
  4. While the chicken is cooking, slice up your veggie dips and scoop up your hummus.

Reference the recipe card below for detailed instructions.

Chicken grilling on an indoor grill pan.

Meal Prep Tips for A Chicken Pesto Wrap

  • Other Cook Methods: You can also cook the chicken in a small toaster oven or cook it at 400F for 20-25minutes or in the Air Fryer at 360F for 20-22 minutes. Make sure it reaches an internal temperature of 165F
  • Storage: This meal can be stored in a meal in an air-tight container in the refrigerator for up to 3 to 4 days. The chicken can also be frozen in freezer wrap in the freezer for up to 3 months for the best quality
  • To Serve: This meal can be served chilled, or you can warm up the chicken separately in the microwave until it is heated through
  • Extra Ingredients: Leftover pesto sauce can also be frozen in the freezer or you can use it as a sauce for pasta, a spread for sandwiches, or even serve a dollop on top of your breakfast eggs.

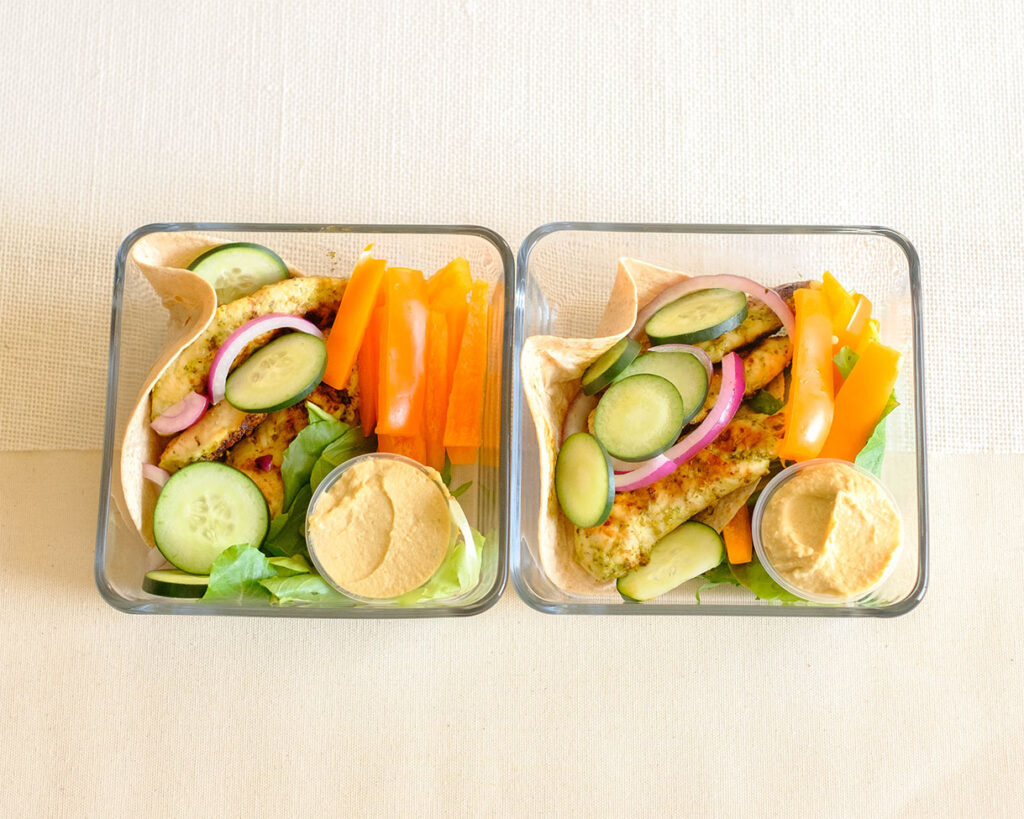
Glass meal prep containers with chicken pesto served with bell peppers and hummus dip.

pesto chicken wrap

Chicken Pesto Wrap with Hummus and Bell Peppers

Marinated chicken tenderloins in basil pesto, grilled to perfection, and served in whole wheat tortillas with sliced orange bell pepper, cucumber, and a side of hummus.
No ratings yet
Prep Time 5 minutes
Cook Time 25 minutes
Course lunch
Cuisine American
Servings 2

Equipment

  • knife
  • cutting board
  • mixing bowl
  • indoor grill pan

Ingredients
  

  • 12 oz chicken tenderloins
  • 2 tablespoons basil pesto sauce
  • 2 whole wheat tortillas
  • 1 orange bell pepper (sliced)
  • 1/4 cup cucumbers (sliced)
  • 1/2 cup hummus

Instructions
 

  • In a mixing bowl, add the chicken tenderloins with the basil pesto sauce. Mix it all together and make sure the chicken is fully coated with the sauce.
  • Heat an indoor grill pan on medium-high heat. Sear the chicken tenderloins on each side for about 4 to 5 minutes until they fully cook to an internal temperature of 165F.
  • Meanwhile, slice your veggies. Serve the chicken in the tortilla wraps and eat the fresh veggies with the hummus dip.

Notes

Note: If you don’t want to cook this recipe on the stove top, you can also cook this chicken in the oven at 400F for 20-25 minutes or in the Air Fryer at 360F for 20-22 minutes. Make sure it reaches an internal temperature of 165F

Similar Recipes

chicken pesto

Chicken Pesto with Artichokes and Bell Peppers

cilantro chicken

Cilantro Lime Chicken Salad with Strawberries

peanut chicken

Peanut Chicken and Celery Stir Fry

You Might Also Like

Frequently Asked Questions

What is a chicken tenderloin?

The chicken tenderloin is the long innermost muscle of the chicken breast next to the breast bone. It is attached by a thin membrane and is considered the most tender part of the chicken.


Are chicken tenderloins healthy?

Chicken tenderloins are lean and are a great source of protein for a low-fat diet. You can easily prep this ingredient using several different cooking methods.


How many calories are in a single chicken tenderloin?

A 4 oz portion is about 110 calories.

Posted on Leave a comment

Sausage Egg Muffins with Strawberries

easy sausage egg muffins

We love making these high-protein, low-carb egg muffins for meal prep.

This post may contain affiliate links. Please see our privacy policy for details.

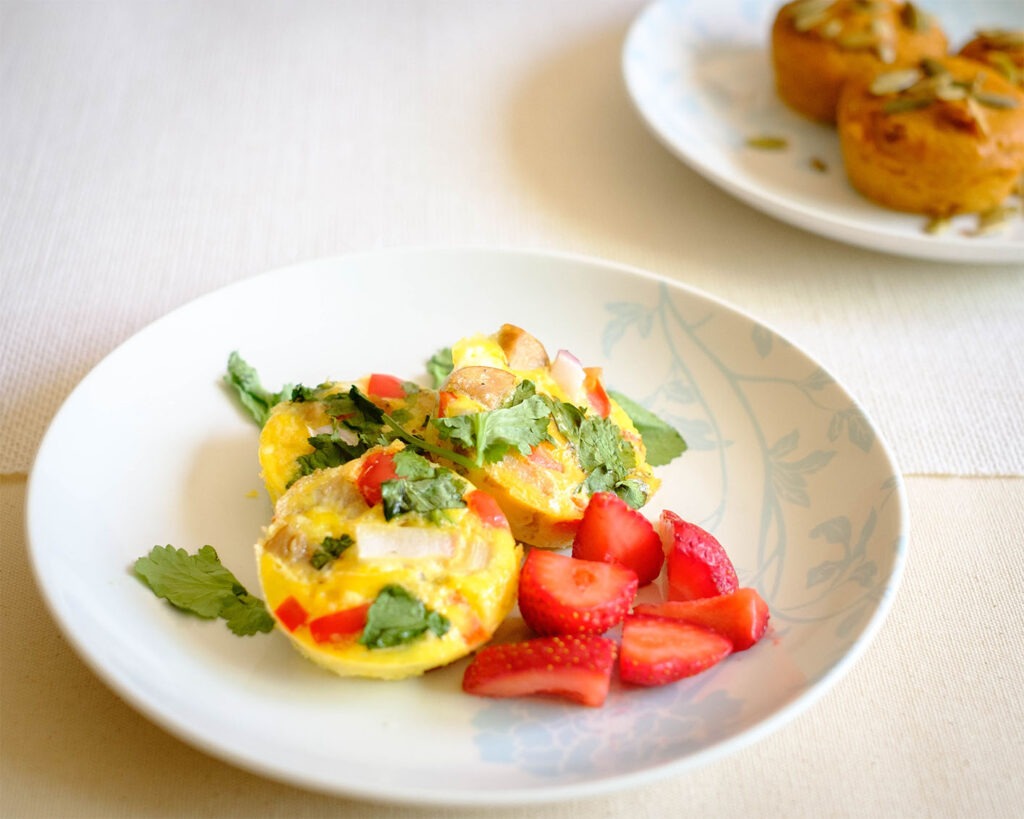
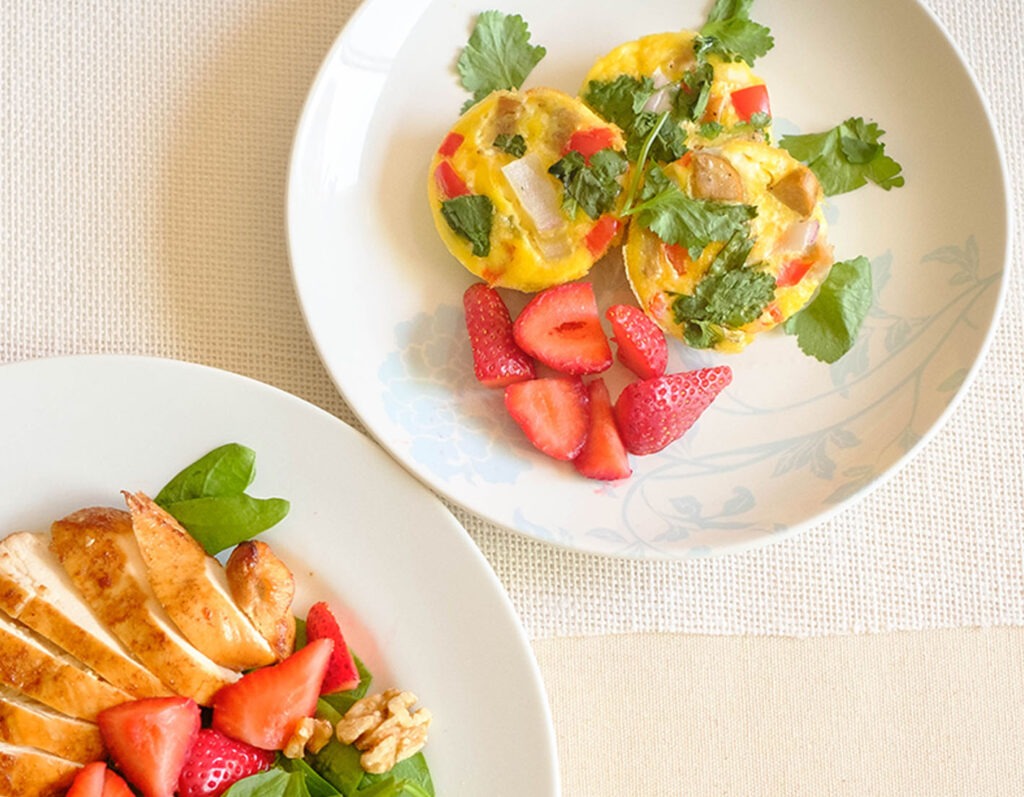
Round plate with breakfast sausage egg muffins served with strawberries and topped with fresh green herbs.

Why sausage egg muffins are great for weight loss

  • They are high in protein which will help you stay full longer
  • Egg muffins can be an easy way to pack in veggies and still be tasty
  • They are easy to make in small batches or you can make a large amount and save them for snacks

The PrepYoSelf Newsletter

Egg Muffin Ingredients & Modifications

  • Eggs: The egg is the star, but if you want to remove the yolk, you can just use the egg whites.
  • Sausage: We used diced chicken sausage for added protein. Feel free to use breakfast turkey crumbles, chopped bacon pieces, or diced deli meat.
  • Bell Peppers & Onions: We used bell peppers and onions because we always have them on hand, however, you can also use other veggies such as sliced mushrooms or chopped kale, spinach, or broccoli.
  • Seasonings: We simply seasoned our egg muffins with salt, but you can use any dried seasoning such as garlic powder, paprika, chili powder, or parsley to add flavor

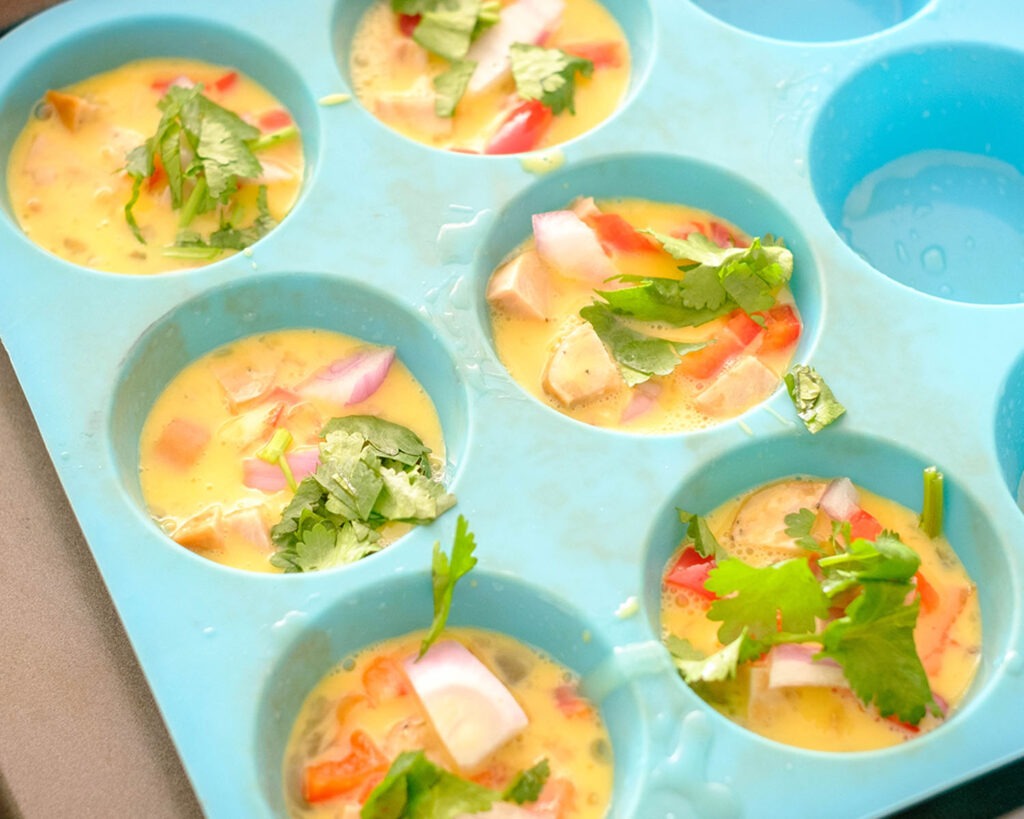
Blue silicon muffin pan with egg mixture containing chopped vegetables and sausage.

Here are the basic steps for making egg muffins:

  1. Preheat the oven to 400F. Grease your muffin wells with oil or spray with cooking spray.
  2. Next, chop your fillings into small diced pieces.
  3. In a bowl, whisk together the eggs and seasonings.
  4. Then, add the fillings to the egg mixture.
  5. Use a 1/3 cup scoop to pour the egg mixture into the muffin wells.
  6. Bake in the oven until the eggs are firmly set.

Reference the recipe card below for detailed instructions.

Round plate with breakfast sausage egg muffins served with strawberries and topped with fresh green herbs.

Meal Prep Tips for Sausage Egg Muffins:

  • Cooking tip: Don’t make the mistake of not greasing your muffin wells, the eggs will stick, let’s just say, cleaning duty will not be fun that day!
  • Other Prep Methods: If you don’t have muffin pans, you can just pour the whole mixture into a small baking dish and bake it all together. After it bakes, use a knife to cut the individual portions.
  • To Serve: Enjoy these egg muffins with a side of fruit or even roasted potatoes.
  • Storage: Store them in an air-tight container or Ziploc bags in the refrigerator for up to 3 to 4 days. You can also freeze them and store them in the freezer for up to 3 months for the best quality.
  • To Reheat: Heat them in the microwave until they warm through.

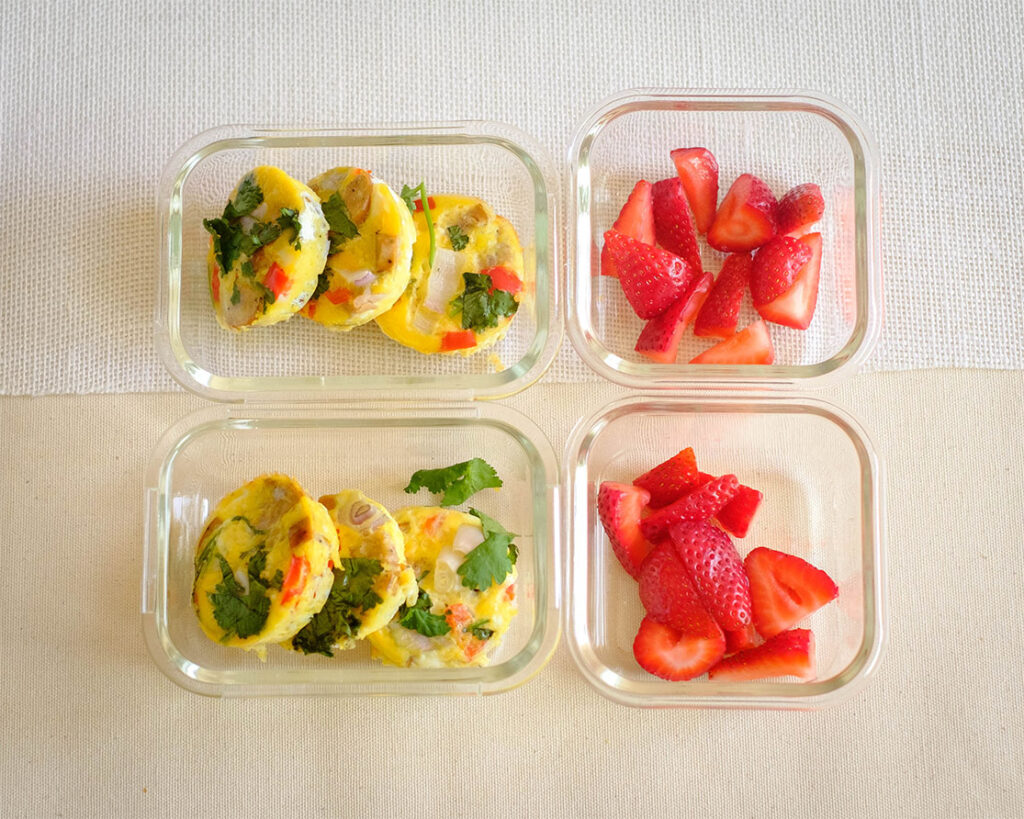
Glass meal prep containers storing sausage egg muffins and strawberries.

egg muffins

Sausage Egg Muffins with Strawberries

These high protein egg muffins are a tasty way to start of your day and help keep you satisfied until lunch time.
No ratings yet
Prep Time 5 minutes
Cook Time 15 minutes
Course Breakfast
Cuisine American
Servings 2

Equipment

  • knife
  • cutting board
  • mixing bowl
  • whisk
  • muffin pan
  • spoon
  • oven

Ingredients
  

  • 4 large egg
  • 1 chicken sausage link (3 oz)
  • 1/4 cup red bell pepper (diced)
  • 1/4 cup red onion (diced)
  • 1/4 cup cilantro (chopped)
  • 1.5 cups strawberries
  • 1 tablespoon olive oil
  • 1/4 teaspoon salt

Instructions
 

  • Pre-heat the oven to 400F
  • Dice the chicken sausage, bell peppers, and red onions into small squares. Chop the cilantro
  • In a bowl, whisk together the eggs and season with salt. Add the sausage, bell peppers, red onions, and cilantro
  • Use a 1/3 cup scoop to evenly pour the egg mixture into the wells (should be enough for 6 muffins)
  • Bake in the oven for 10-12 minutes until the eggs firmly set
  • Serve with fresh strawberries

Similar Recipes

Easy Cheese Omelette

fried egg and sausage hash

Fried Egg with Apple and Sausage Hash

egg stuffed bell peppers

Oven Baked Breakfast Egg Stuffed Peppers

You Might Also Like

Frequently Asked Questions

Can I use frozen vegetables to fill my egg muffins?

Yes, you can use any kind of veggies such as frozen, canned, cooked, or fresh. The difference will be in the texture of the vegetables. Raw vegetables will be more crunchy.


Can I use liquid egg whites?

Yes, just add a little bit more egg whites to the recipe to replace the volume of the yolks.


What else can I add to the egg muffins?

Feel free to add shredded cheese or fresh herbs such as green onions or basil.

Posted on Leave a comment

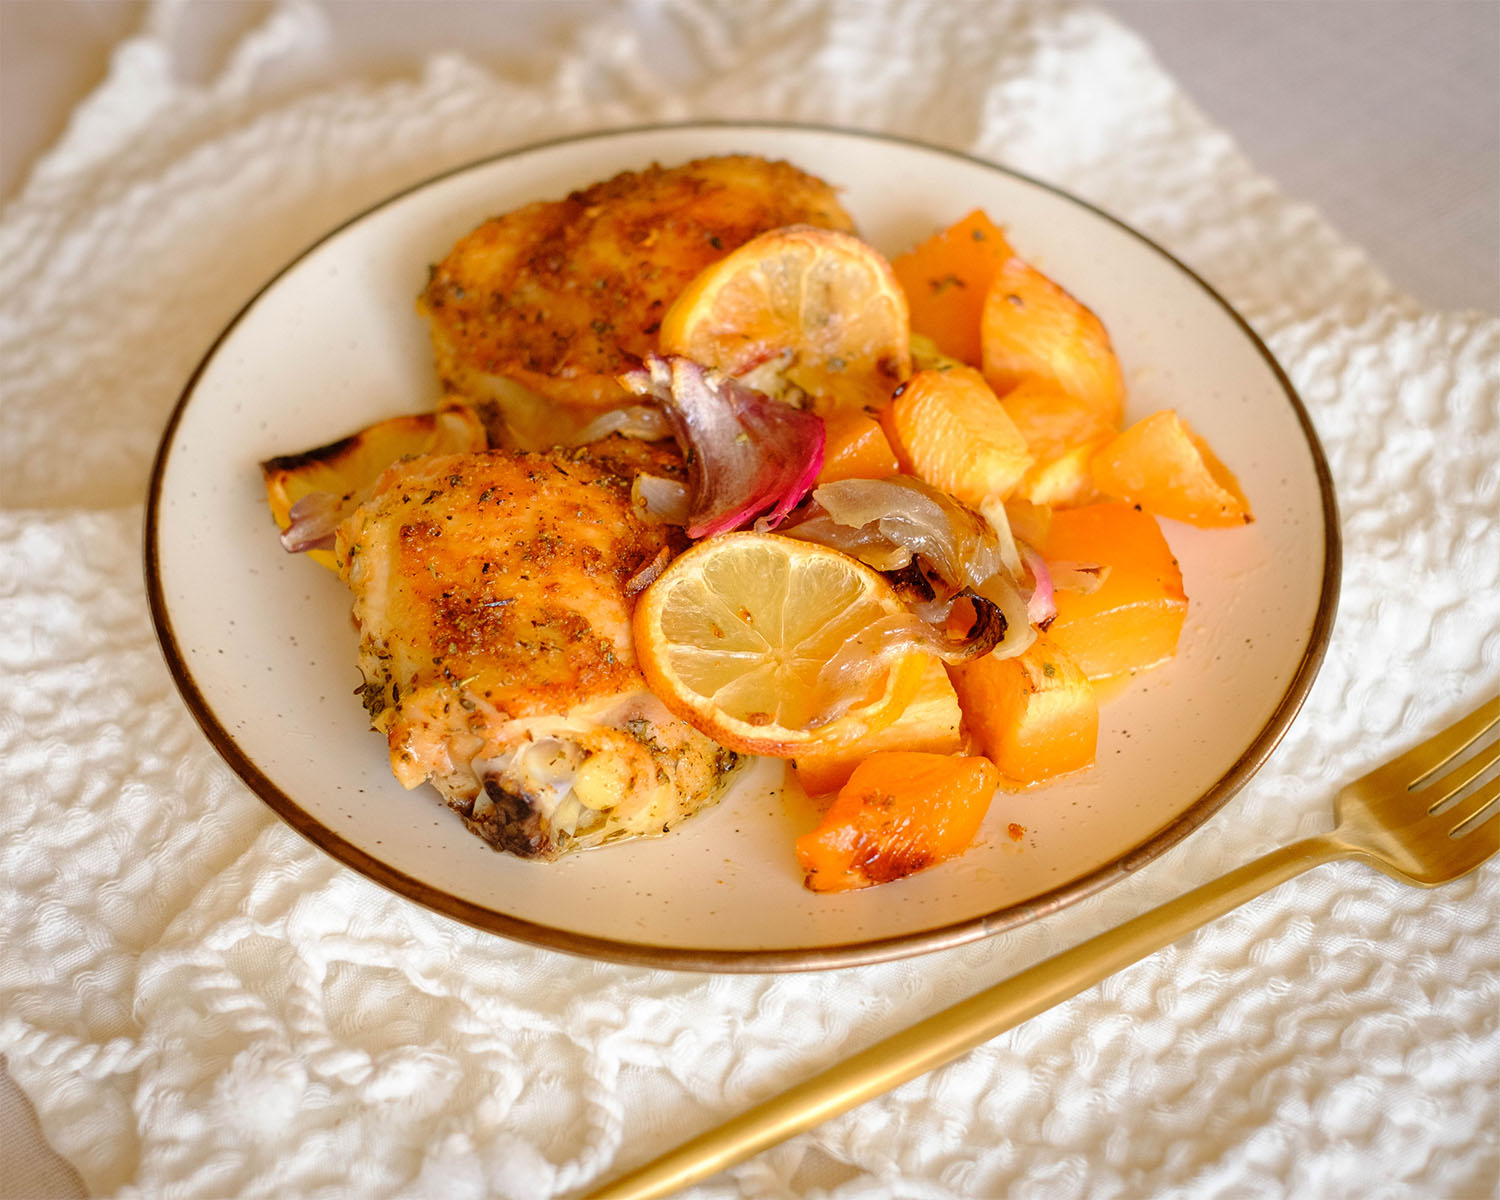
Roasted Lemon Italian Chicken with Rutabaga

roasted chicken and rutabaga

Juicy chicken thighs baked with crispy chunks of rutabaga in a warm paprika spice that is perfect for a hearty weeknight dinner.

This post may contain affiliate links. Please see our privacy policy for details.

Calories: 810kcal | Carbohydrates: 46g | Protein: 42g | Fat: 52g | Saturated Fat: 12g | Polyunsaturated Fat: 10g | Monounsaturated Fat: 26g | Trans Fat: 0.2g | Cholesterol: 221mg | Sodium: 788mg | Potassium: 1649mg | Fiber: 8g | Sugar: 12g | Vitamin A: 457IU | Vitamin C: 86mg | Calcium: 159mg | Iron: 4mg

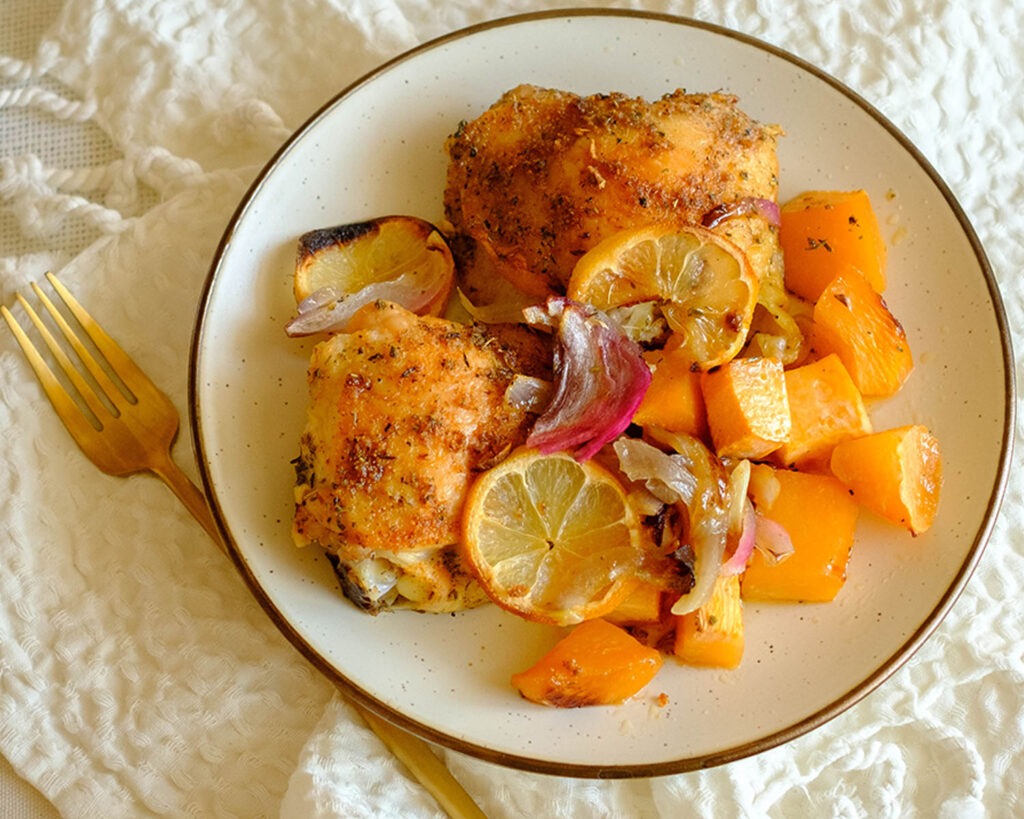
Plate with roasted chicken thighs and root vegetables, topped with lemon slices and red onions.

We love roasted chicken thighs because they are juicy, flavorful, and so simple to make.

They go really well with almost any kind of roasted vegetables such as broccoli, asparagus, bell peppers, and your classic roasted potatoes.

For this recipe, we wanted to highlight the underrated rutabaga vegetable.

The PrepYoSelf Newsletter

What is Rutabaga?

  • Rutabaga is a root vegetable that is actually a cross between a turnip and a cabbage.
  • It can be eaten raw, but it is usually roasted, mashed like potatoes, or used in stews, and in casserole dishes.
  • They look similar to turnips with brownish-yellow or purple skin that is rather tough, therefore, it is best to wash them and remove the skin before cooking them or eating them.
  • Rutabaga is also lower in calories than your other root vegetables, and also higher in fiber, and rich in Vitamin C. Adding them to your diet can help with weight loss and provide great health benefits.

Plate with roasted chicken thighs and root vegetables, topped with lemon slices and red onions.

Recipe Ingredient and Variations:

  • Chicken Thighs: We used chicken thighs in this recipe because they are budget-friendly, and we occasionally enjoy and indulge in the golden brown crispy skin from roasting the chicken thighs. However, if you want to keep this meal lean, you can also use chicken breast or chicken tenderloins.
  • Rutabaga and Potato: We made this a one-pan meal and roasted the vegetables alongside the chicken thighs for easy cleanup.
  • Lemon: Adding citrus and the zest of the peel always brightens up the flavors.
  • Aromatics: We used red onions and garlic, but you can also use shallots for this recipe.
  • Seasonings: We kept it simple with pre-made Italian seasoning, paprika, garlic powder, and salt.
  • Olive oil: Always coat your protein and vegetables when roasting them in the oven. This will help crisp up the chicken and the root vegetables.

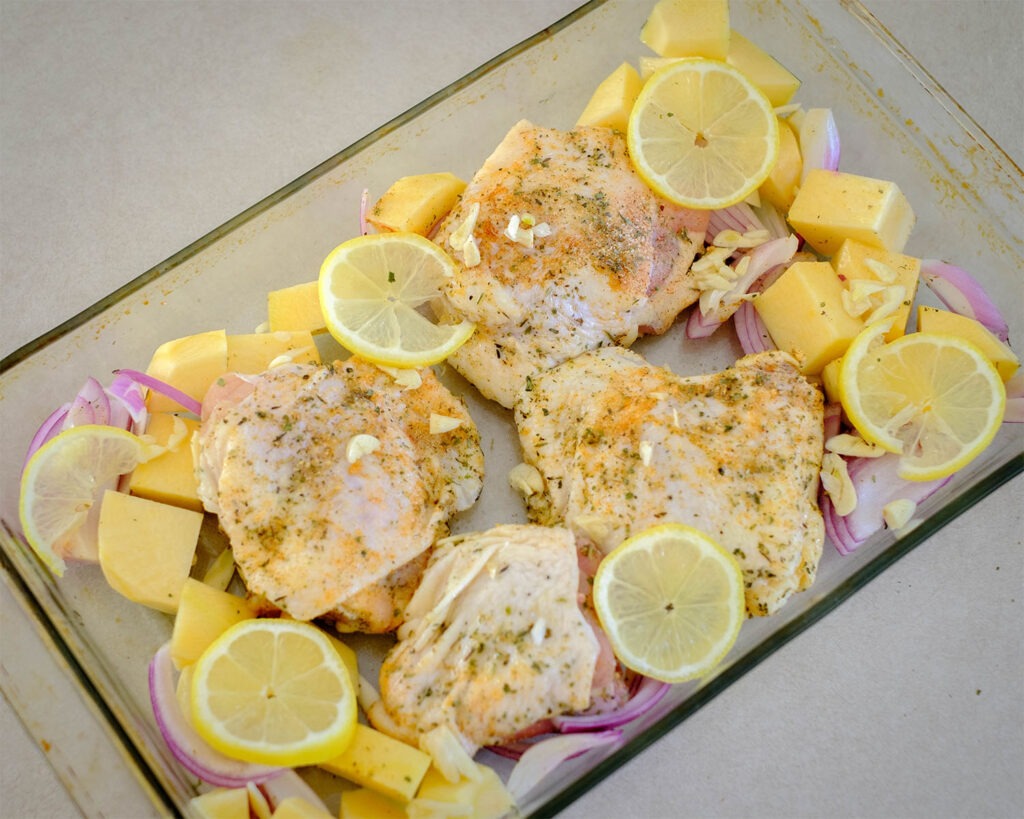
Glass casserole dish with roasted chicken thighs and root vegetables, topped with lemon slices and red onions.

Easy Basic Steps to Make Roasted Chicken and Rutabaga

  1. Preheat the oven to 400F. In a small bowl, mix together the seasonings.
  2. Place the chicken in one bowl and sprinkle it with half of the seasonings, then drizzle with some olive oil.
  3. Next, peel the rutabaga and potato and cut them into cubes. Place them in another mixing bowl and also sprinkle them with the seasonings and coat them with olive oil.
  4. Place all of the ingredients on a sheet pan and layer the lemon slices on top of the chicken.
  5. Top everything off with the diced red onions and minced garlic.
  6. Bake everything in the oven for 35 minutes until the chicken reaches an internal temperature of 165F and the chicken reaches gets your desired crispiness of the skin.

Reference the recipe card below for detailed instructions.

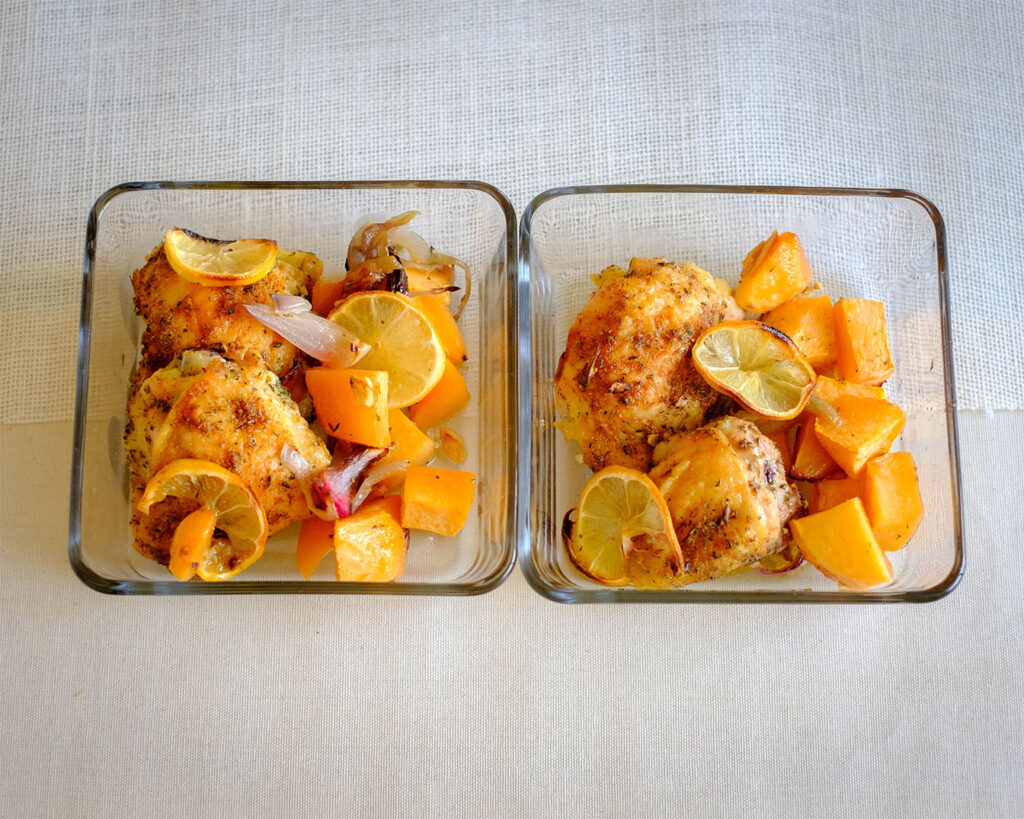
Glass meal prep containers with roasted chicken thighs and root vegetables, topped with lemon slices and red onions.

Meal Prep Tips for Roasted Chicken and Rutabaga

  • Cook method variations: You can also make this recipe in the Air Fryer (cook at 360F for 20-25 minutes).
  • To Serve: Serve with a fresh side salad or a hot roll.
  • To Store: Store it in an airtight container for up to 3 to 4 days in the refrigerator.
  • To Reheat: Warm it up in the microwave for a few minutes.

roasted chicken and rutabaga

Roasted Lemon Italian Chicken with Rutabaga

A classic roasted chicken with your new favorite root vegetable-buttery, sweet, and savory rutabaga.
No ratings yet
Prep Time 5 minutes
Cook Time 40 minutes
Course dinner, Main Course
Cuisine American, Italian
Servings 2
Calories 810 kcal

Equipment

  • knife
  • cutting board
  • sheet pan
  • oven

Ingredients
  

  • 4 chicken thighs
  • 1 large rutabaga
  • 1 russet potato
  • 1 teaspoon italian seasoning
  • 1/2 teaspoon garlic powder
  • 1/2 teaspoon paprika
  • 1/2 teaspoon salt
  • 1 lemon (sliced)
  • 1/4 cup red onion (sliced)
  • 1 tablespoon garlic (minced)
  • 2 tablespoon olive oil

Instructions
 

  • Preheat the oven to 400F. In a small bowl, mix together the italian seasoning, paprika, garlic powder, and salt.
  • Place the chicken in a mixing bowl and sprinkle the chicken with half of the seasoning mixture, then drizzle it with half of the olive oil.
  • Next, peel the rutabaga and potato and cut them into 1 inch cubes. Place the cubed rutabaga and potato in another mixing bowl and sprinkle the rest of the seasonings and drizzle with the rest of the olive oil and mix well
  • Place both the chicken and veggies on a sheet pan. Layer the lemon slices on top of the chicken. Top the veggies with the diced red onions and minced garlic
  • Bake everything in the oven for about 35 to 40 minutes until the chicken reaches an internal temperature of 165F.

Notes

Nutrition information provided is an estimate. It will vary based on cooking method and specific ingredients used. Please consult with your healthcare provider for specific dietary needs. To gain a better understanding, explore our nutrition disclaimer here

Nutrition

Calories: 810kcalCarbohydrates: 46gProtein: 42gFat: 52gSaturated Fat: 12gPolyunsaturated Fat: 10gMonounsaturated Fat: 26gTrans Fat: 0.2gCholesterol: 221mgSodium: 788mgPotassium: 1649mgFiber: 8gSugar: 12gVitamin A: 457IUVitamin C: 86mgCalcium: 159mgIron: 4mg

Similar Recipes

stuffed primavera chicken

Primavera Stuffed Chicken Breasts

pineapple bbq chicken

Oven Baked Pineapple BBQ Chicken

rosemary chicken

Rosemary Baked Chicken and Potatoes

You Might Also Like

Frequently Asked Questions

What temperature do you cook chicken thighs?

Chicken should always be cooked to at least an internal temperature of 165F.


What does roasted rutabaga taste like?

When eaten raw, they have a bit of a bitter taste similar to a turnip, however, when cooked, gain a buttery and sweet & savory combination, much like a sweet potato. 


Is rutabaga a low-carb vegetable?

Rutabaga is much lower in carbs than most root vegetables and makes for a great choice for those on low-carb diets. 1 cup of cubed rutabaga has approximately 12 grams of carbs.

Posted on Leave a comment

Oven Baked Honey Mustard Glazed Chicken Salad

chicken salad

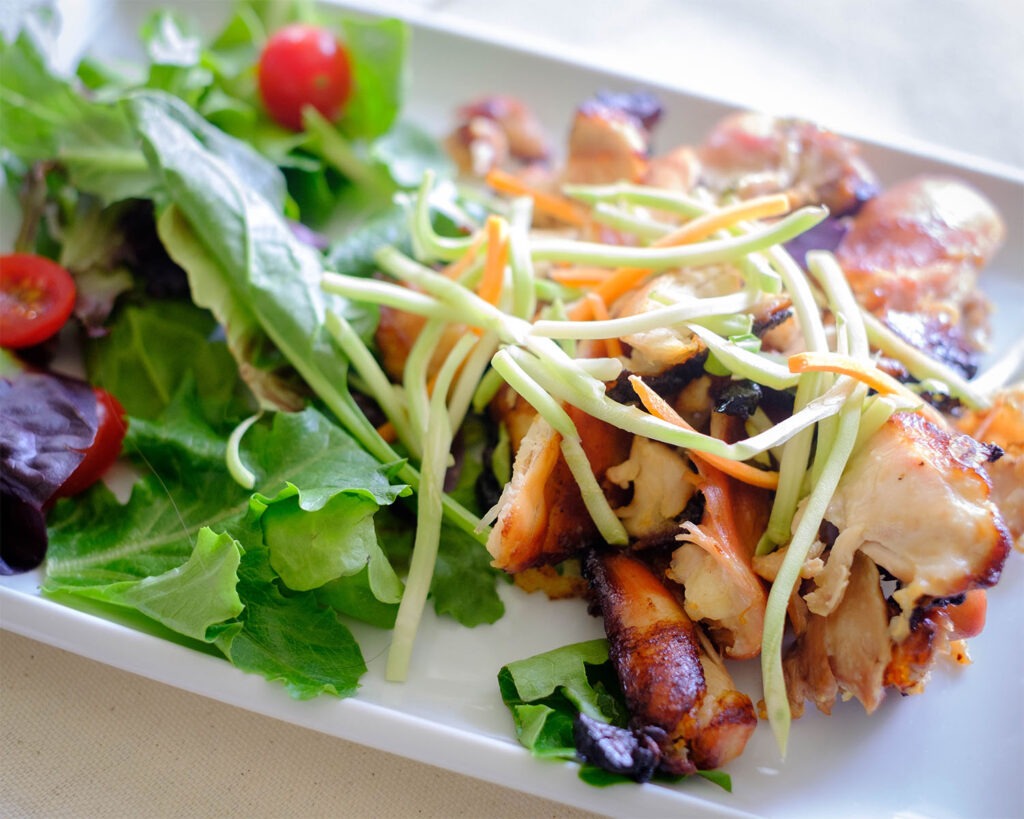
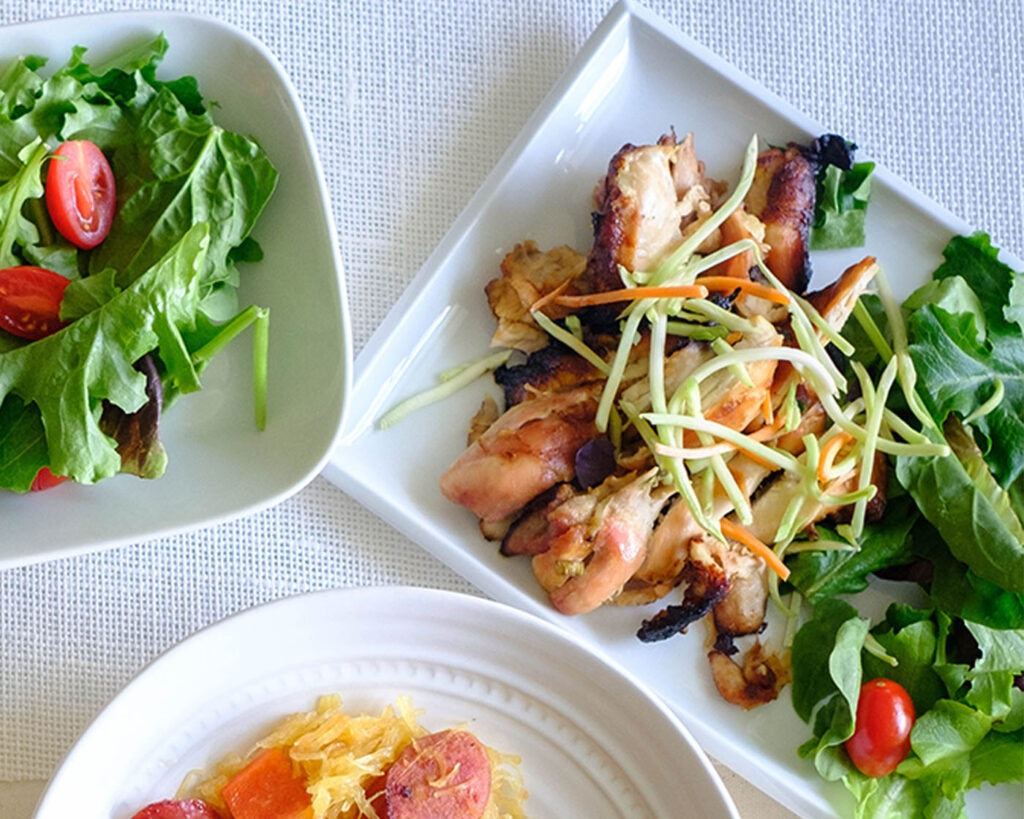
This tasty chicken lunch meal prep is baked in a sweet and savory honey mustard marinade and served on top of a fresh spring mix salad.

This post may contain affiliate links. Please see our privacy policy for details.

Baked honey mustard glazed chicken salad served with spring mix salad.

Why You Need to Make This

  • The recipe uses pantry-friendly ingredients to make this flavorful marinade for your chicken.
  • This is a sheet pan recipe that makes it easy to clean up.
  • It is also budget-friendly and saves you money during the week.

The PrepYoSelf Newsletter

  • Chicken: We use boneless chicken thighs, but you can easily swap them with chicken breasts or chicken tenderloins.
  • Green Onions: Herbs bring freshness to marinades. Easily swap it with whatever fresh herbs you have on hand such as basil or parsley.
  • Soy Sauce: This sauce adds savory flavors and gives the chicken a nice caramel color after cooking.
  • Dijon Mustard: This ingredient adds a sharp tangy flavor to the marinade.
  • Honey: The sweetness of honey pairs well with the savory and tangy flavors of the soy sauce and dijon mustard.
  • Oil: We used olive oil but you can also use coconut oil or sesame oil.

Baked honey mustard glazed chicken salad served with spring mix salad.

Easy Recipe Steps for Baking Honey Mustard Glazed Chicken

  1. Preheat the oven to 425F.
  2. Mix together the chicken marinade in a bowl and marinate the chicken for at least 10 minutes.
  3. Place the marinated chicken in a baking dish and bake until it fully cooks. (flip it halfway through the cooking process)
  4. After it cooks, let it rest before cutting them into bite-size pieces.
  5. Serve the baked honey dijon glazed chicken with the salad and dressing.

Reference the recipe card below for detailed instructions.

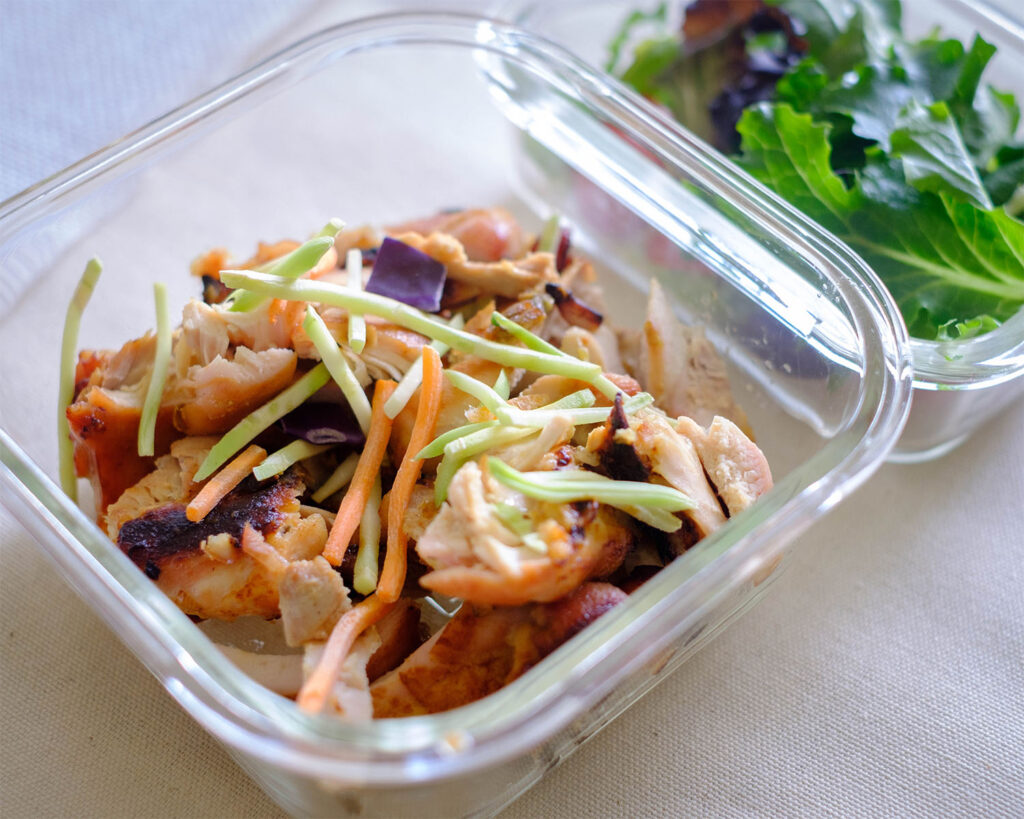
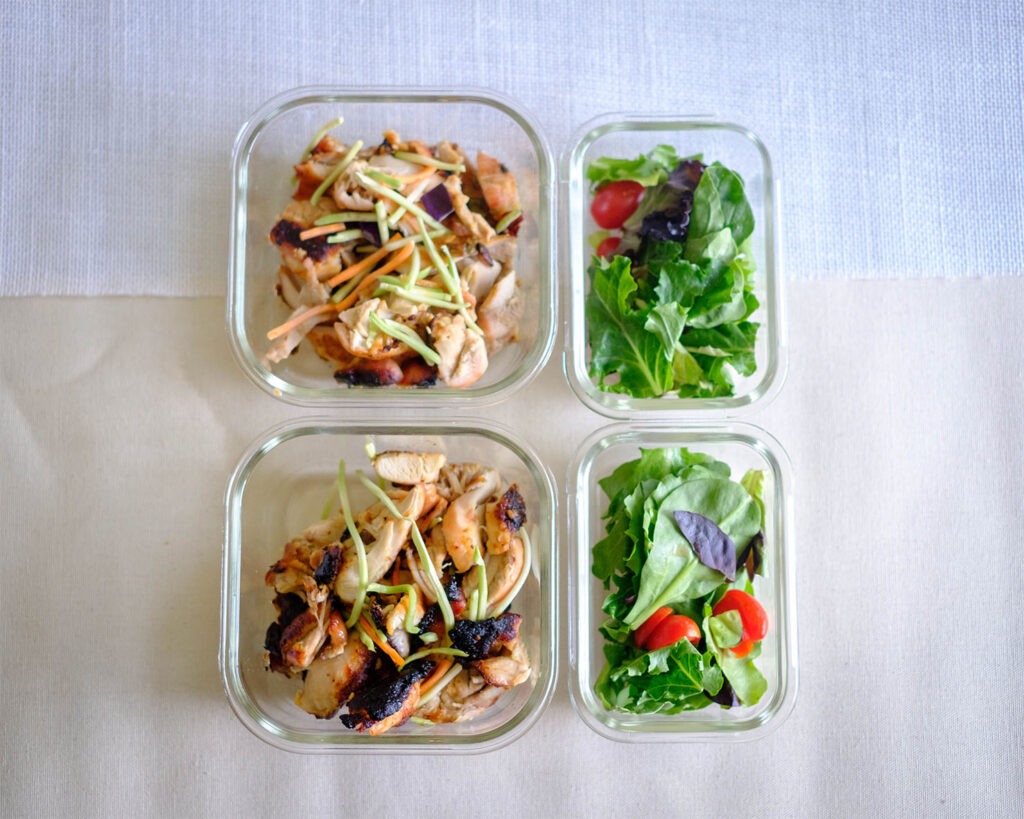
Baked honey mustard glazed chicken salad served with spring mix salad stored in a glass meal prep container.

Meal Prep Tips for Honey Mustard Glazed Chicken Salad

  • Preparation tip: If you are cooking with thick chicken breasts, you can pound the meat flat with a meat mallet until it is about 1 inch thick. This process helps tenderize the meat and also speeds up the cooking process.
  • Cooking Variations: You can also bake the chicken in a small toaster oven or cook it in the Air Fryer (cook at 360F for 20 minutes until it reaches an internal temperature of 165F). Another option is to pan-fry the chicken in a skillet or grill it on an indoor grill pan if you prefer to cook on the stovetop.
  • Storage: Store the meal in an air-tight container in the refrigerator for up to 3 to 4 days. You can also store the chicken in a freezer-safe container or bag for up to 3 months for the best quality.
  • To Reheat: Heat the chicken in the microwave until they warm through. However, you can eat the chicken chilled.

Baked honey mustard glazed chicken salad served with spring mix salad stored in a glass meal prep containers.

Chicken Salad

Oven Baked Honey Mustard Glazed Chicken Salad

Baked honey mustard chicken glazed in a sweet, tangy, and savory marinade that is cooked until juicy and tender. Easily serve it on top of fresh spring mix.
4 from 1 vote
Prep Time 15 minutes
Cook Time 30 minutes
Course lunch
Cuisine American
Servings 2

Equipment

  • knife
  • cutting board
  • baking dish
  • oven

Ingredients
  

Chicken and Marinade

  • 12 oz boneless chicken thighs
  • 1/4 cup green onions
  • 2 tablespoons soy sauce
  • 2 tablespoons dijon mustard
  • 1 tablespoon honey
  • 1/4 teaspoon garlic powder
  • 1 tablespoon olive oil

Salad Ingredients

  • 4 cups spring mix
  • 1 cup pre-cut broccoli slaw mix
  • 1/2 cup cherry tomatoes (sliced)

Salad Dressing

  • 1 tablespoon dijon mustard
  • 1 tablespoon honey
  • 4 tablespoon olive oil
  • 1 lemon (juiced)
  • 1/4 teaspoon garlic powder
  • 1/4 teaspoon salt

Instructions
 

  • Pre-heat the oven to 425F. In a mixing bowl, mix together the chicken marinade. Then, add the chicken and coat it with the marinade. Marinate for at least 10 minutes.
  • Then, place the chicken in a baking dish and bake in the oven for 20 minutes. After 20 minutes, flip the chicken and cook for another 10 minutes. Use a thermometer to ensure that the chicken has cooked to an internal temperature of 165F.
  • After the chicken has cooked, remove it from the oven and let it cool before slicing into bite size pieces.
  • Meanwhile, in a bowl, mix together the salad dressing ingredients until it is well blended. Assemble the chicken on top of the spring mix salad with broccoli slaw mix and cherry tomatoes. Drizzle everything with the salad dressing.

Similar Recipes

cilantro chicken

Cilantro Lime Chicken with Strawberry Salsa

stuffed primavera chicken

Primavera Stuffed Chicken Breasts

balsamic chicken salad

Balsamic Baked Chicken Salad

You Might Also Like

Frequently Asked Questions

What can you serve with baked honey mustard chicken?

In addition to a salad, you can serve this weeknight dish with fluffy quinoa, roasted veggies, or mashed potatoes.


Can I use another protein instead of chicken?

Absolutely, this honey dijon mustard marinade will work well with pork or salmon.


Can I use yellow mustard if I don’t have dijon mustard?

Yes! You can also use spicy brown mustard if you like some heat to your marinade.

Posted on

One-Pot Chicken Marinara with Kale and Sweet Potato

chicken marinara

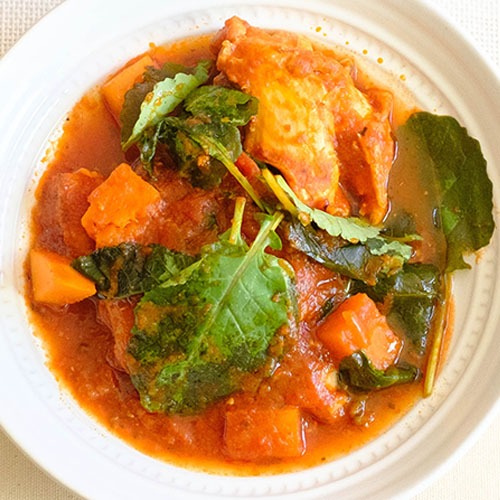
This easy one-pot dish is simply made with chicken stewed in marinara sauce and paired with sweet potatoes and kale. This is a hearty and chunky chicken recipe that is sure to warm you up on a cold night and only takes a few simple steps. One-pot chicken recipes are generally straightforward and require minimal cooking skills. They are suitable for beginners or those who are less confident in the kitchen. Even if you’re not an experienced cook, you can still create a tasty and satisfying meal with a one-pot recipe.

One-pot chicken recipes are perfect for meal prep as they’re easy on the cook and the clean up. One-pot recipes also build complex and deep flavors, incorporating a variety of ingredients including proteins, vegetables, and grains, all cooked together. This makes it easier to create well-balanced meals with a good mix of nutrients and flavors. You can experiment with different combinations and customize the recipe to suit your dietary preferences.

Meal prep tips for One-Pot Chicken Marinara

  • Chicken: We used chicken breast to keep it lean, however, if you prefer dark meat, feel free to use boneless skinless chicken thighs.
  • Sweet Potatoes: We used sweet potatoes, however, if you want to use regular potatoes, try them with red baby potaotes to cut your down your prep.
  • Vegetables: We paired it with baby kale for extra veggies and nutrients, however, you can use other vegetables such as bell peppers, baby carrots, or even spinach.
  • Marinara Sauce: If you don’t have marinara sauce, you can substitute with tomato sauce and just add some italian seasoning.
chicken marinara

One Pot Chicken Marinara with Kale & Sweet Potato

No ratings yet

Prep Time 5 minutes
Cook Time 30 minutes

Course dinner, Main Course
Cuisine American, Italian

Servings 2

Equipment

  • knife
  • cutting board
  • spatula
  • soup pot

Ingredients


  • 12 oz chicken breast
  • 1 each sweet potato
  • 1/4 cup red onions (diced)
  • 2 cups marinara sauce
  • 4 cups baby kale
  • 1 tsp garlic powder
  • 1/2 tsp salt
  • 1/4 tsp pepper
  • 1 tbsp olive oil
  • 1/2 cup water

Instructions


  • Cut the chicken breasts into 1 inch cubes
  • Wash and peel the sweet potato and cut in 1 inch cubes
  • Add oil to a soup pot on medium high heat and saute red onions until they soften
  • Next, add the chicken breasts and saute for about 3 to 5 minutes until it is golden brown
  • Then, add the marinara sauce and water in the pot and mix well
  • Add the sweet potato and bring the liquid to a boil. After it is boiling, lower the heat to low medium and cover the pot with a lid. Simmer for abot 20 minutes until the chicken fully cooks to an internal temperature of 165F
  • Finally, remove the lid and stir in the baby kale until it wilts
Posted on Leave a comment

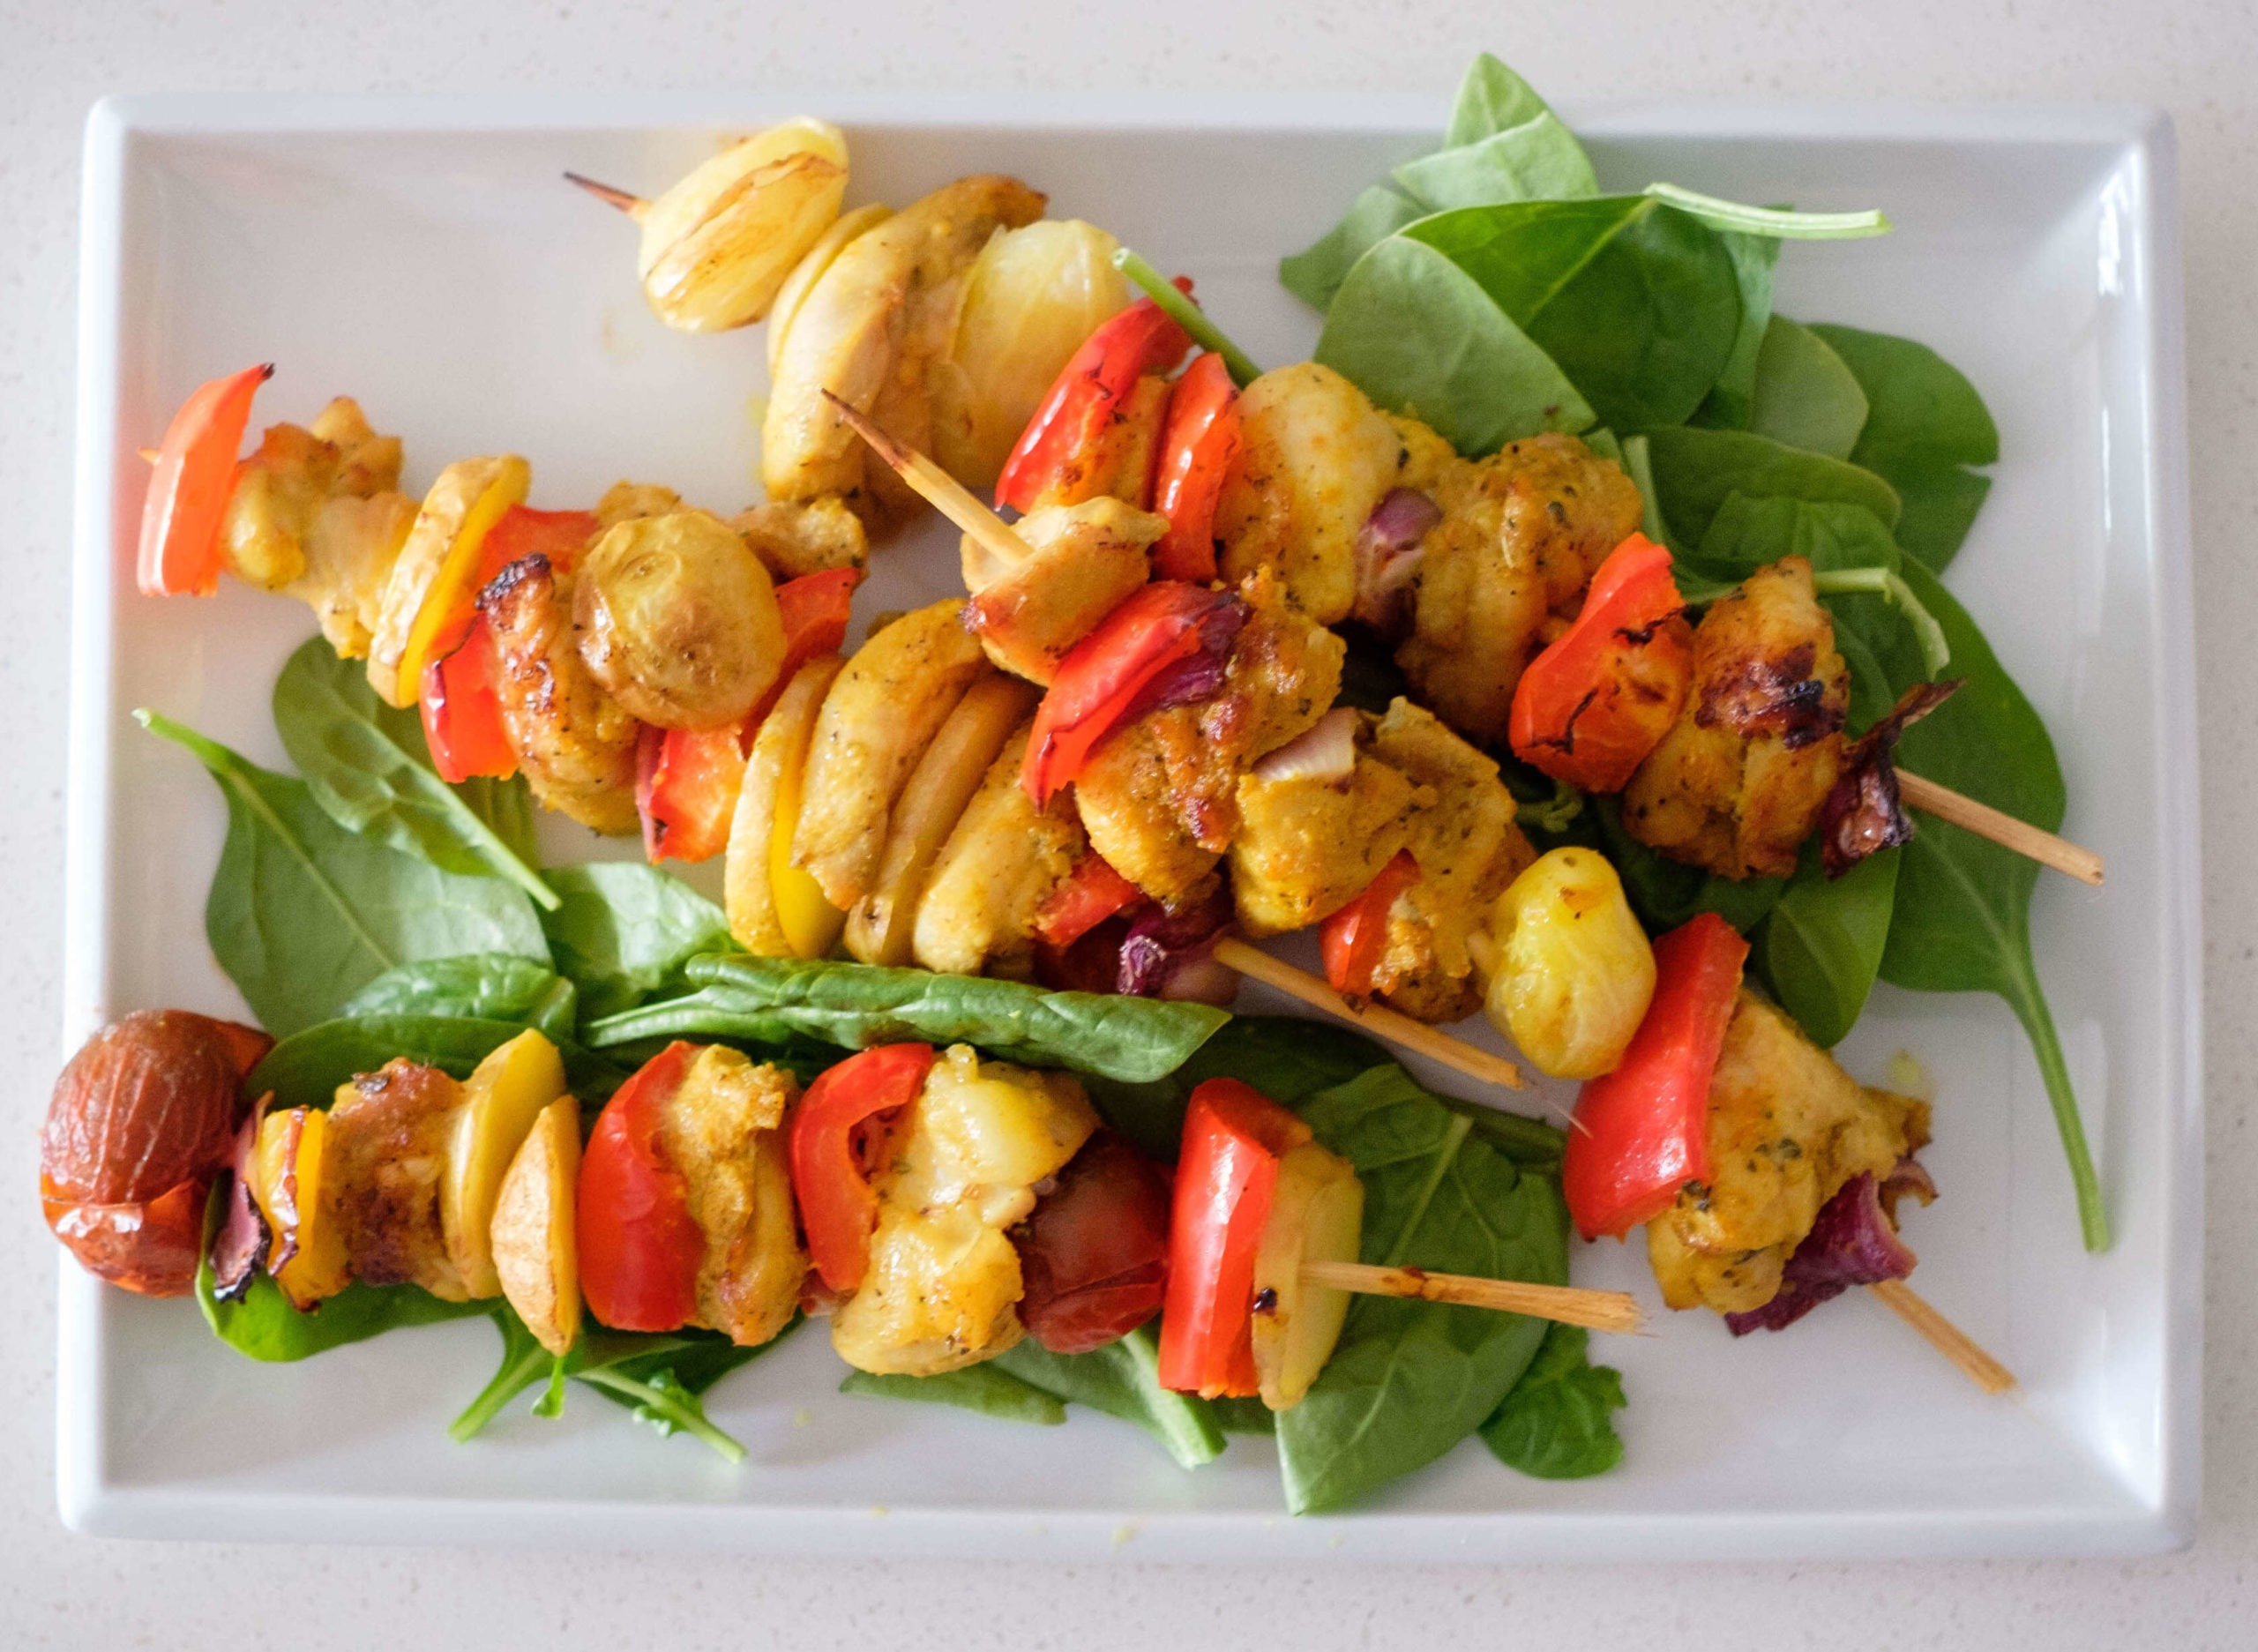
Easy Air Fryer Chicken Kebabs Recipe

Kebabs are one of the tastiest dishes stacked with tender marinated meats and bright colored veggies. Not only do bell peppers and cherry tomatoes add great flavor to this dish, but they are also full of essential nutrients that are good for your health. Bell peppers and cherry tomatoes are great sources of Vitamin A, Vitamin C, and potassium. A diet rich in vegetables can help reduce the risk of developing heart disease and certain types of cancers. The fibers help keep your digestive tract working properly. Along with being full of nutrients, they are low-calorie and deliver a satisfying bite.

Ease of Making: Easy

What I love about kebabs is that there are so many ways to make them and so many flavors from all over the world that you can incorporate. They are easy to make and can be cooked on a grill, in the oven, or in an air fryer just like these chicken kebabs. Serve them with your choice of sides such as a salad, in a pita, on top of a bed of rice pilaf, or additional veggies. 

Meal prep tips for Air Fryer Mediterranean Chicken Kebabs

The Air Fryer is great for meal prep. It is the perfect size for roasting veggies and cooks large portions of protein. Therefore, you can batch cook multiple food items without having to pre-heat the oven and waste all that oven space. 

The air fryer essentially is like an amped-up oven. The difference is that it has a fan and it utilizes a more compact space to facilitate fast cooking. The fan circulates the air around making food items crisp which is similar to what you could get from deep frying, minus the extra added fat. With normal baking ovens, there is a lot of humidity, so it’s difficult for an outer crisp to occur. 

Sometimes using a leaner cut of meat such as chicken breasts can result in dry tough meat. Which is why marinating your meats prior to cooking is a good technique to prevent it from drying out and making it chewy. Marinades have acidic components that help tenderize meats and make them juicy. They also help reduce the time of cooking. 

This recipe’s marinade incorporates some flavor spices such as paprika, cumin, turmeric powder, and minced garlic which all offer antioxidant and anti-inflammatory properties that can help boost immunity.

If you’re using wooden skewers be sure to soak them in water for at least 10 minutes to prevent them from scorching.

Layer the ingredients on the skewers and place them in the air fryer basket.

Side salads and pita bread with dip make great side dishes for kebabs.

Air Fryer Chicken Kebabs

No ratings yet

Prep Time 10 minutes
Cook Time 20 minutes

Course Main Course
Cuisine Mediterranean

Servings 4

Equipment

  • cutting board
  • knife
  • Air Fryer

Ingredients


  • 1 lb boneless chicken thighs (or chicken breasts)
  • 1 each red bell pepper
  • 1 each small red onion
  • 1 cup cherry tomatoes

Chicken marinade

  • 1/4 cup olive oil
  • 1 tbsp honey note: you can use agave nectar or sugar
  • 1/2 tsp paprika
  • 1/2 tsp cumin
  • 1/2 tsp cardamom
  • 1/2 tsp dried oregano
  • 1/2 tsp turmeric powder
  • 1 tbsp minced garlic
  • 1 tsp salt
  • 1 tsp pepper
  • 2 tbsp juice of a lemon

Instructions


  • If using wooden skewers, soak them for at least 10 minutes
  • Cut the chicken into 1.5 inch chunks. Mix together the marinade and marinate the chicken overnight or at least 30 minutes prior to cooking
  • If using the oven, preheat oven to 425F
  • Cut the bell peppers and red onion into chunks
  • Assemble the kebabs using skewers. Layer the chicken with the veggies.
  • Place in the air fryer and cook at 360F for 15-18 minutes (until internal temperature is 165F). If using the oven, cook for 20-25 minutes, until the outer edges are golden brown and chicken is cooked through an internal temperature of 165F)
  • Serve with your choice of sides and sauces. Examples: salad, pita, couscous, rice pilaf, or tortillas, etc

Video

If you love this recipe, check out these other recipes we know you’ll love too: