
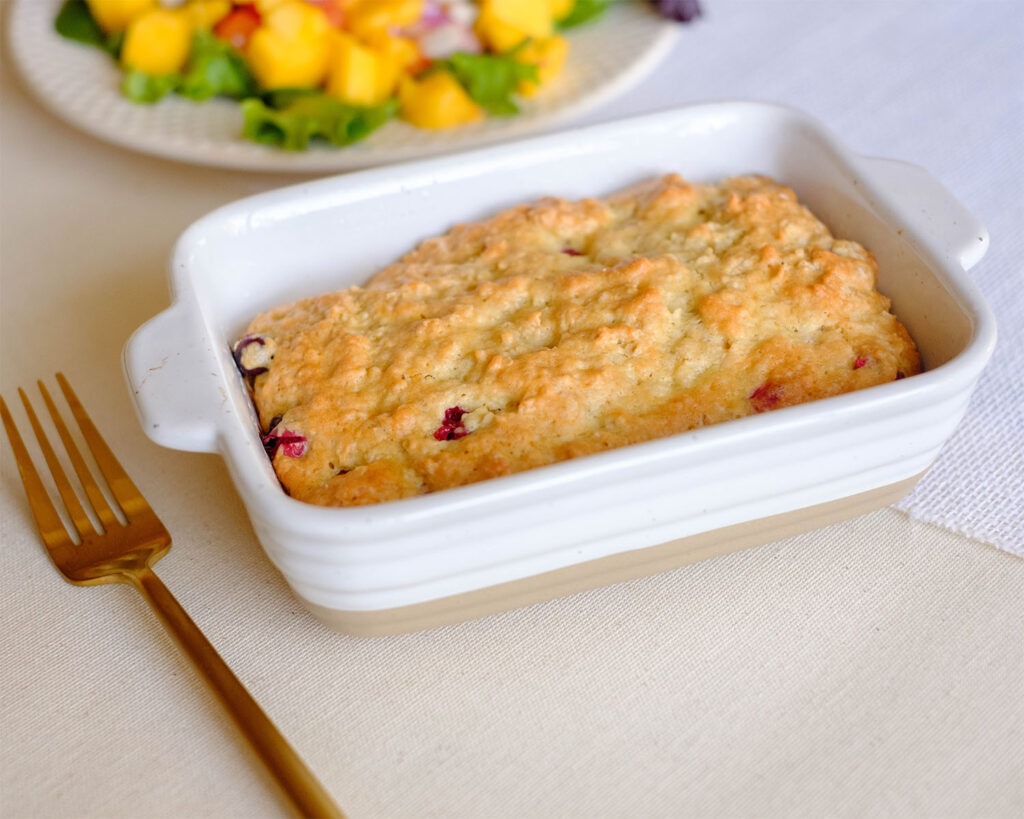
These fruity cranberry oatmeal muffin bars are a treat that you can enjoy for breakfast, snacks, and even dessert!
This post may contain affiliate links. Please see our privacy policy for details.
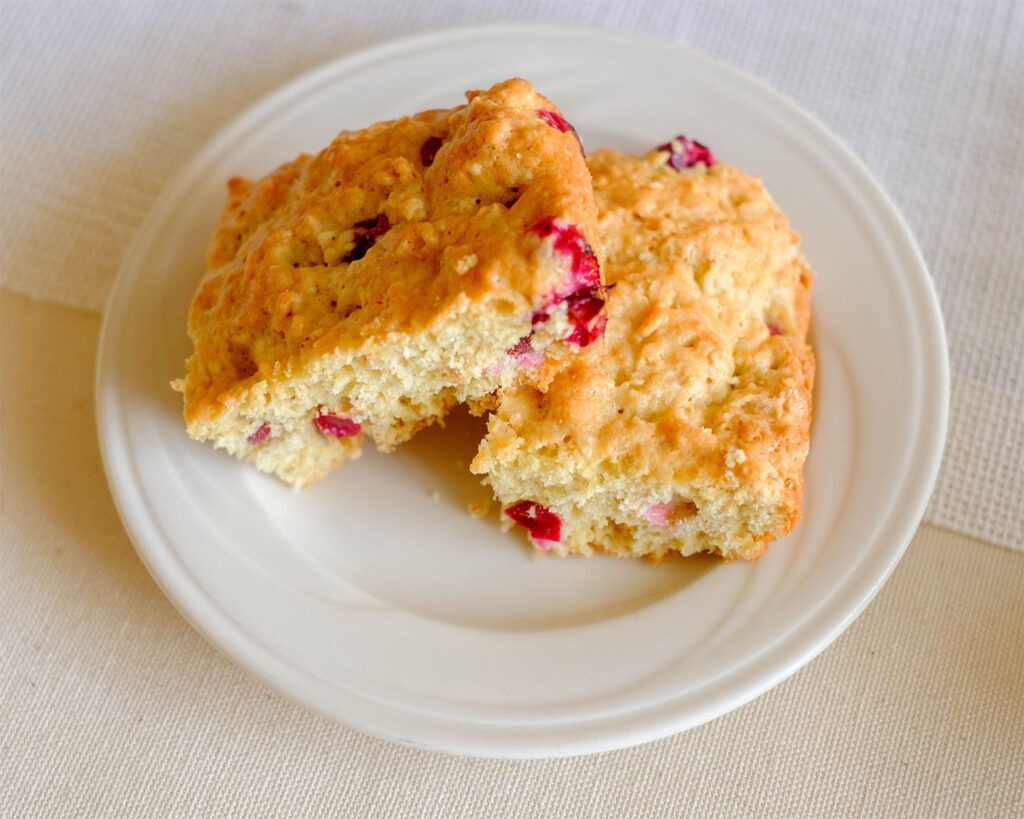
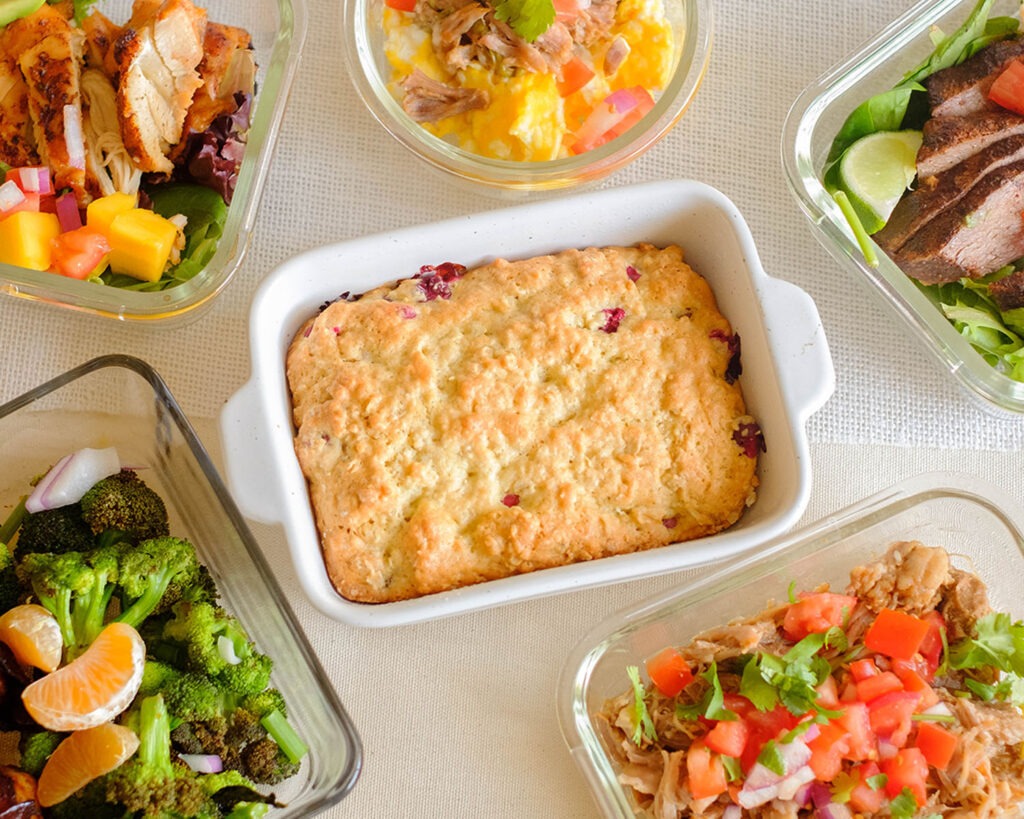
We enjoy prepping make ahead breakfasts for the week so that we always have something on hand to start off the day with fuel and energy. And actually, the cranberries, oats, and a pinch of cinnamon make this recipe enjoyable to eat any time of they day.
Why are these cranberry oat bars healthy?
- Rolled oats are a type of whole grain that provides a good source of fiber and nutrients
- Cranberries are a rich source of vitamin C which is good for your skin, muscles, and bones
- These are two healthy ingredients that you should stock up on as a solo cook

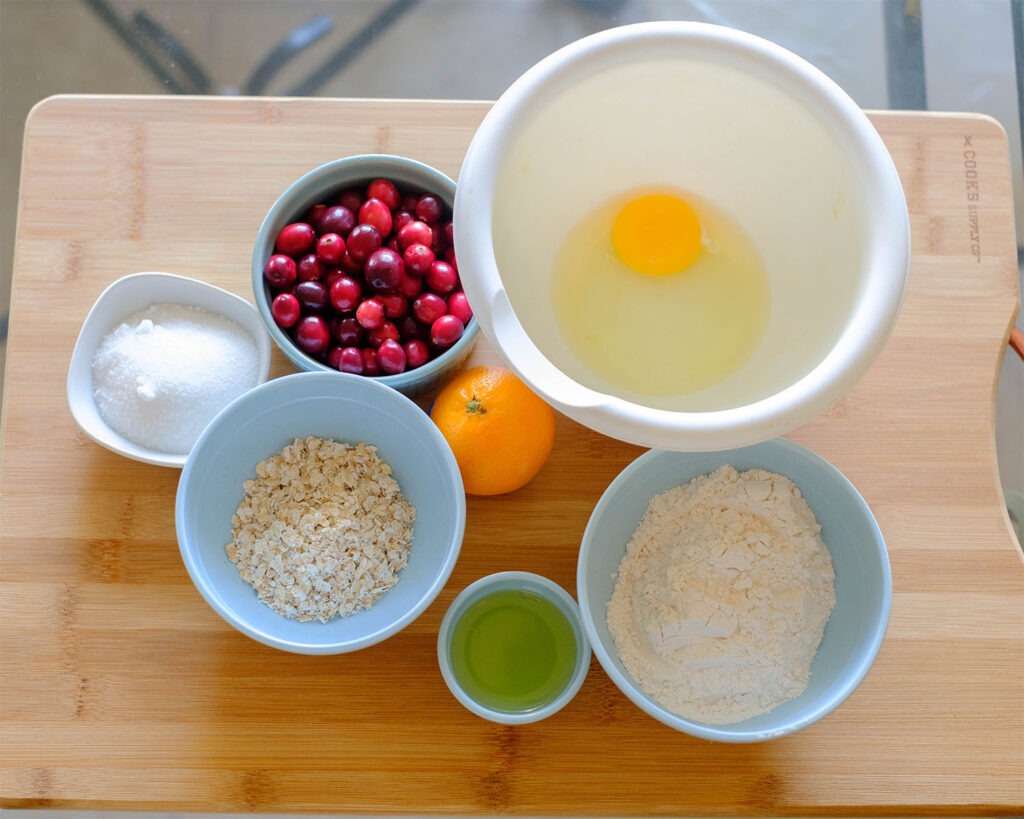
Simple Ingredients for Cranberry Oatmeal Muffin Bars
We use common ingredients that you could easily have on hand. The main ingredients are rolled oats, eggs, and some sort of liquid.
- Rolled oats: We used rolled oats for this recipe, but you could easily use quick-cooking oats. Using the oats gives some texture versus only using flour
- Flour: You could omit the flour, however, we like incorporating just a small amount because it helps provide the muffin-like texture
- Eggs: Eggs play an important role in baking since they help provide structure, add moisture, and act as a glue
- Sweetener: You can use regular sugar, honey, or maple syrup
- Applesauce: Applesauce is a great fat replacer in many baked goods. The moisture also will keep most baked goods moist and fresh longer
- Cranberries and orange juice: Adding fruit to your baked goods is a great way to add fiber and additional vitamins and nutrients
How to Prepare Oatmeal Muffin Bars for One:
- Preheat the oven to 400F. Grease your baking dish.
- In a mixing bowl, mix together your wet ingredients: egg, applesauce, orange juice, and maple syrup.
- Next add your dry ingredients: flour, oats, baking soda, and baking powder.
- Then, fold the cranberries into the batter.
- Finally, pour the batter into the baking dish and bake in the oven until the center is fully cooked.
Reference the recipe card below for detailed instructions.
Meal Prep Tips for Cranberry Oat Muffin Bars:
- Other Fillings: Add chopped nuts, dried fruit, nut butter, or chia seeds
- Other Prep Methods: You can also pour the batter into a small muffin pan and make separate portions
- To Serve: Enjoy these muffin bars with yogurt. To repurpose them, you can also crumble them up and use them as a yogurt topping
- Storage: Store them in an air-tight container or Ziploc bags in the refrigerator for up to 3 to 4 days
- To Reheat: Heat them in the microwave until they warm through


Frequently Asked Questions
Is maple sugar healthier than sugar?
Although maple sugar is still high in sugar it has a lower glycemic index than table sugar. This could raise blood sugar slower than regular sugar.
Can I use frozen fruit?
Yes, any type of fillings will work well. If using frozen fruit, you don’t have to thaw it out before you mix it into the batter.
Can I use instant oatmeal for baking?
Yes, you can use rolled oats and instant oatmeal interchangeably in most baked oatmeal recipes.


Cranberry Oatmeal Muffin Bars
Equipment
Ingredients
Instructions
Notes