So, my friends, get ready to embrace the convenience, deliciousness, and affordability of Instant Pot Beef Soft Tacos. With their tender beef, vibrant flavors, and endless possibilities for toppings and sides, these tacos are a true meal prep game-changer. Let’s make mealtime a fiesta of flavors and enjoy every single bite with a smile on our faces. Happy cooking and happy eating!
This post may contain affiliate links. Please see our privacy policy for details.
Why This Recipe is a Time and Money Saver
Time is precious, my friends, and this recipe is here to save the day. The Instant Pot works its magic by drastically reducing cooking time, which means you can whip up a batch of these delectable beef soft tacos even on the busiest of days. Whether you’re a busy professional, a parent juggling multiple responsibilities, or simply someone who values efficiency in the kitchen, this recipe is your golden ticket to a stress-free dinner.
Let me tell you, making this recipe is an absolute breeze! With the help of our trusty Instant Pot, you can have tender, flavorful beef in no time. The magic of pressure cooking ensures that even the toughest cuts of beef become melt-in-your-mouth goodness. Simply toss in the ingredients, set the timer, and let the Instant Pot work its magic while you focus on other tasks.
Now, let’s talk about the budget-friendly aspect of this recipe. We all know that beef can sometimes be a little heavy on the wallet, but fear not! By choosing cheaper cuts like chuck or round roast, you can create a mouthwatering taco filling without breaking the bank. Plus, the Instant Pot’s ability to tenderize those cuts means you don’t have to splurge on the pricier options.

Here’s What You Need to Make Instant Pot Beef Tacos
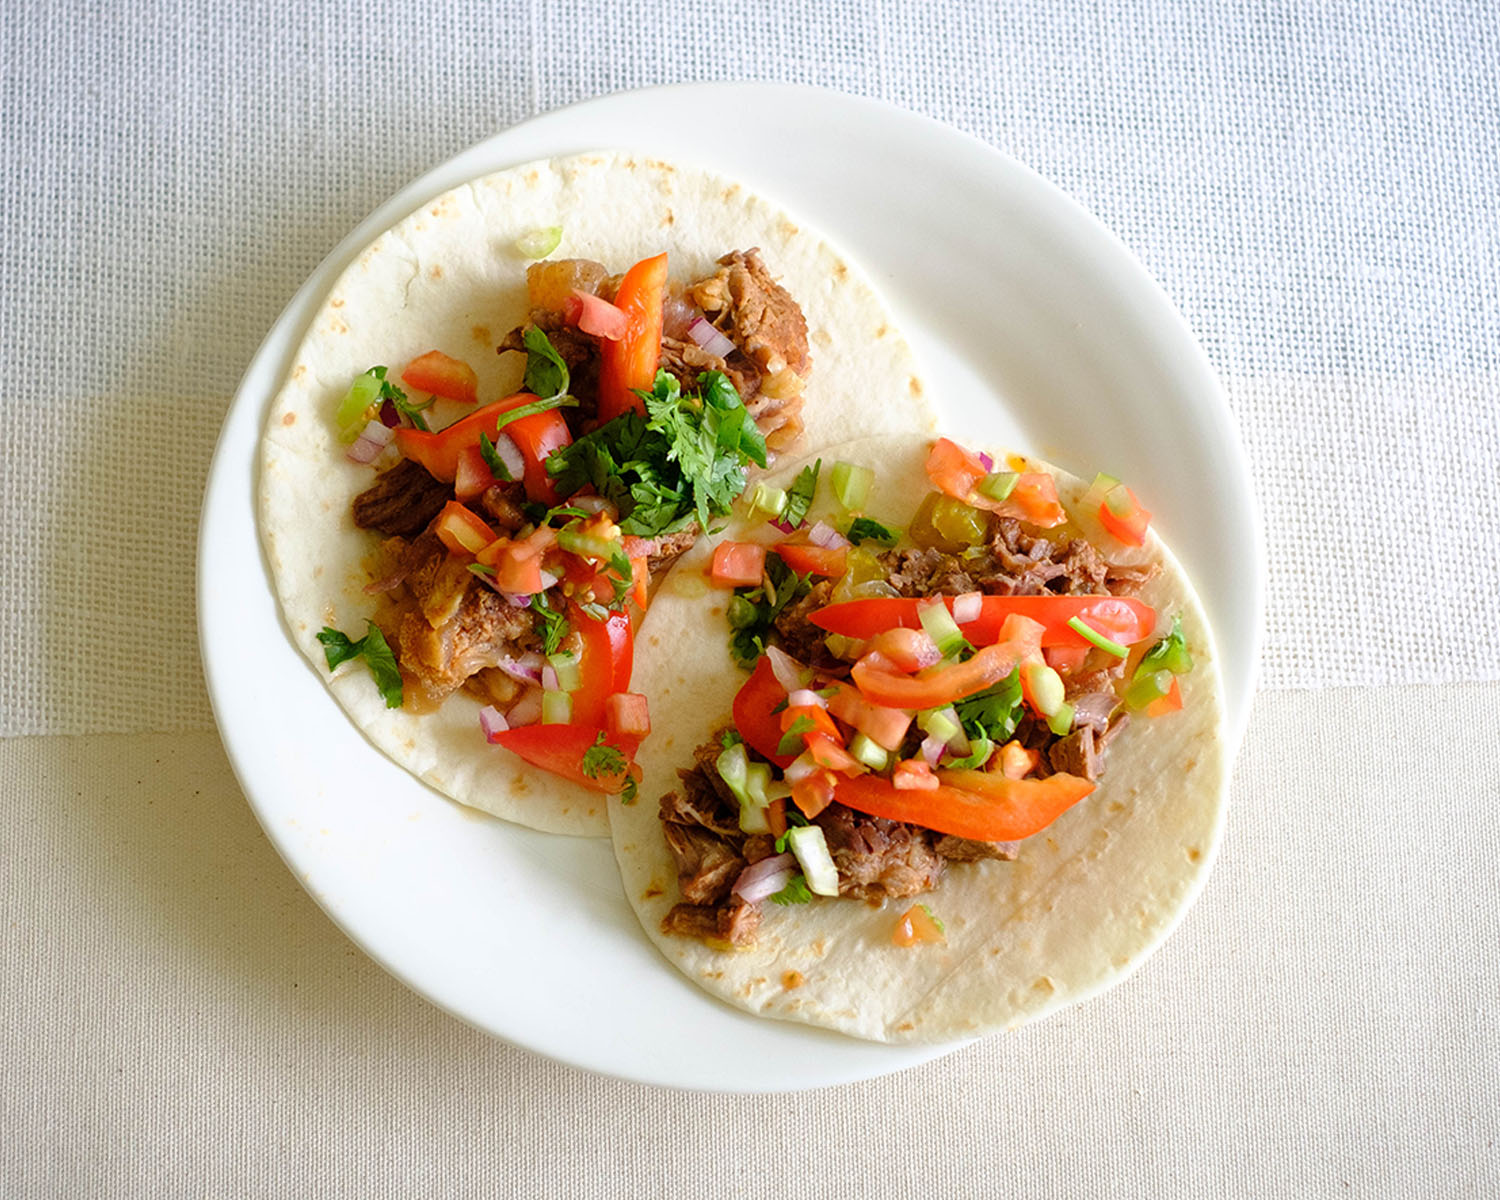
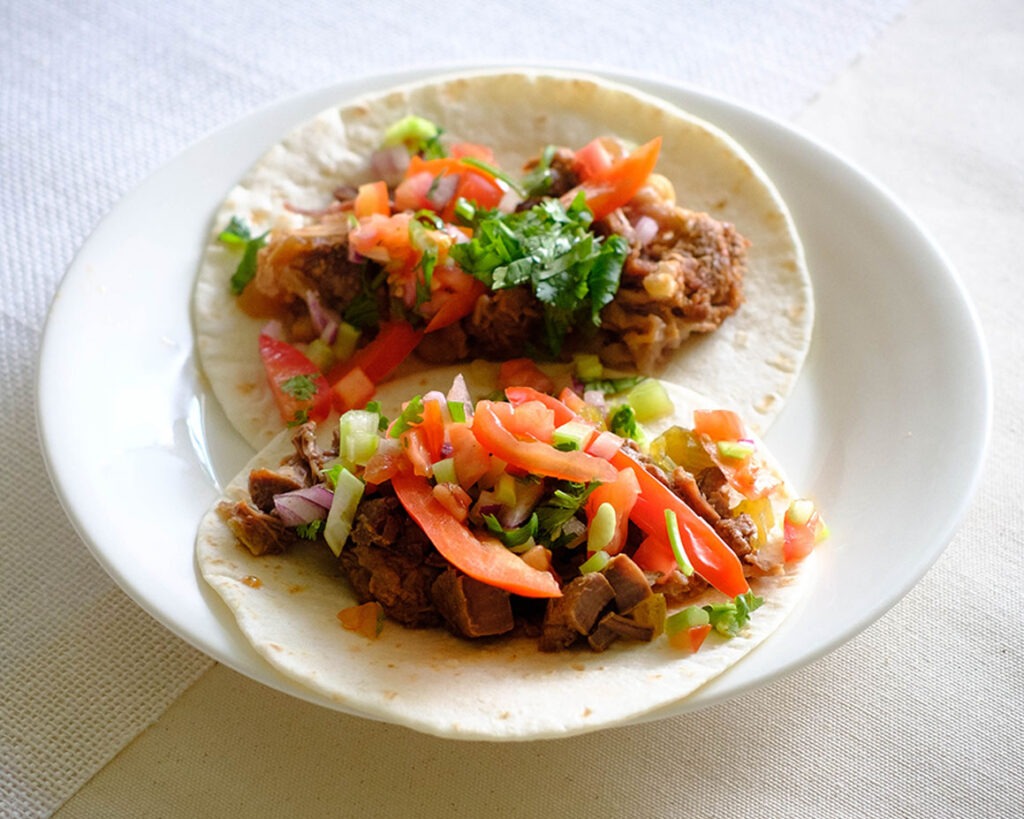
- Beef: We used chuck roast, but you can choose any cut of beef
- Aromatics: We added, garlic cloves, celery, red onions
- Liquid: We added some water and tomato sauce
- Pico de Gallo: Mixture of tomatoes, celery, red onions, lime juice, and cilantro
- Tortilla: You can use flour or corn tortillas

How to Make Instant Pot BBQ Beef
- Prepare the beef in the instant pot. Add the garlic, celery, red onions, tomato sauce, salt, and pepper.
- While the beef cooks, chop up the veggies for the pico de gallo.
- After the beef cooks, carefully release the steam and remove the lid. Drain the beef from the excess liquid and shred it with a fork.
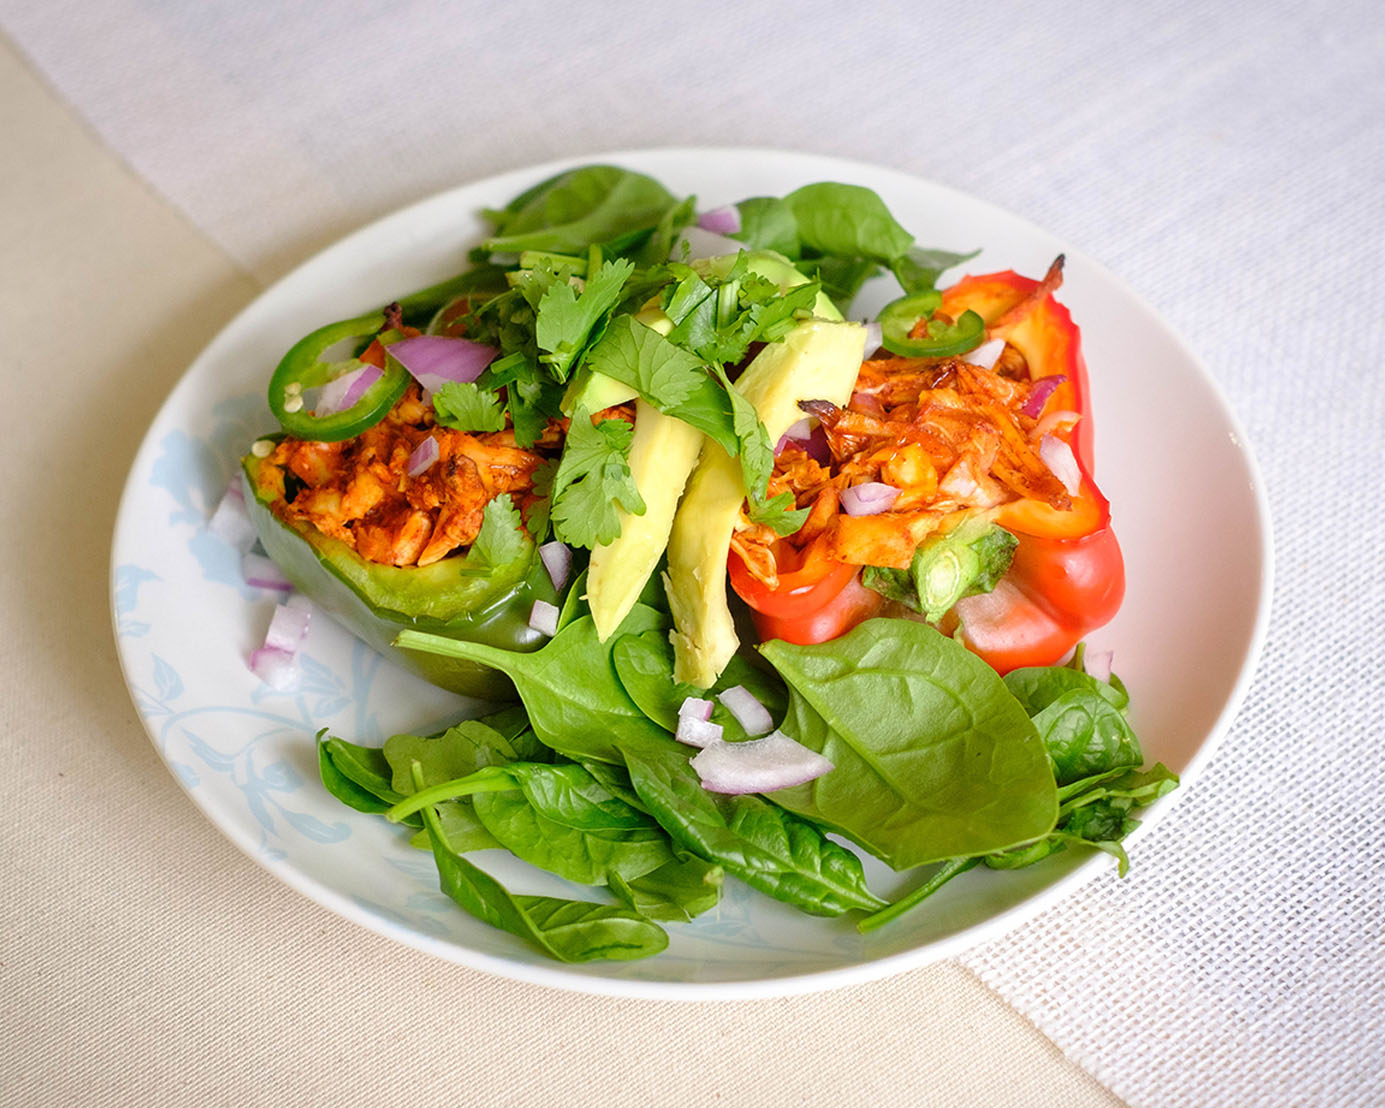
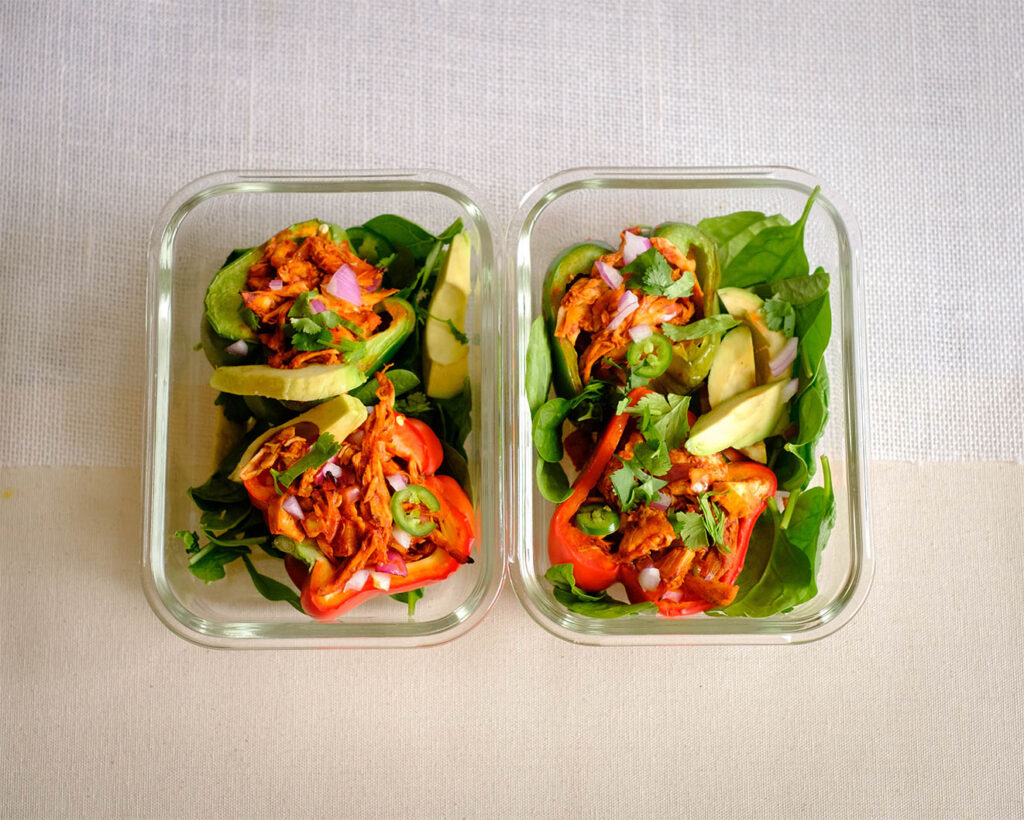
- Fill the tortillas with the shredded beef and top it off with pico de gallo and fresh pepper strips.
Reference the recipe card below for detailed instructions.
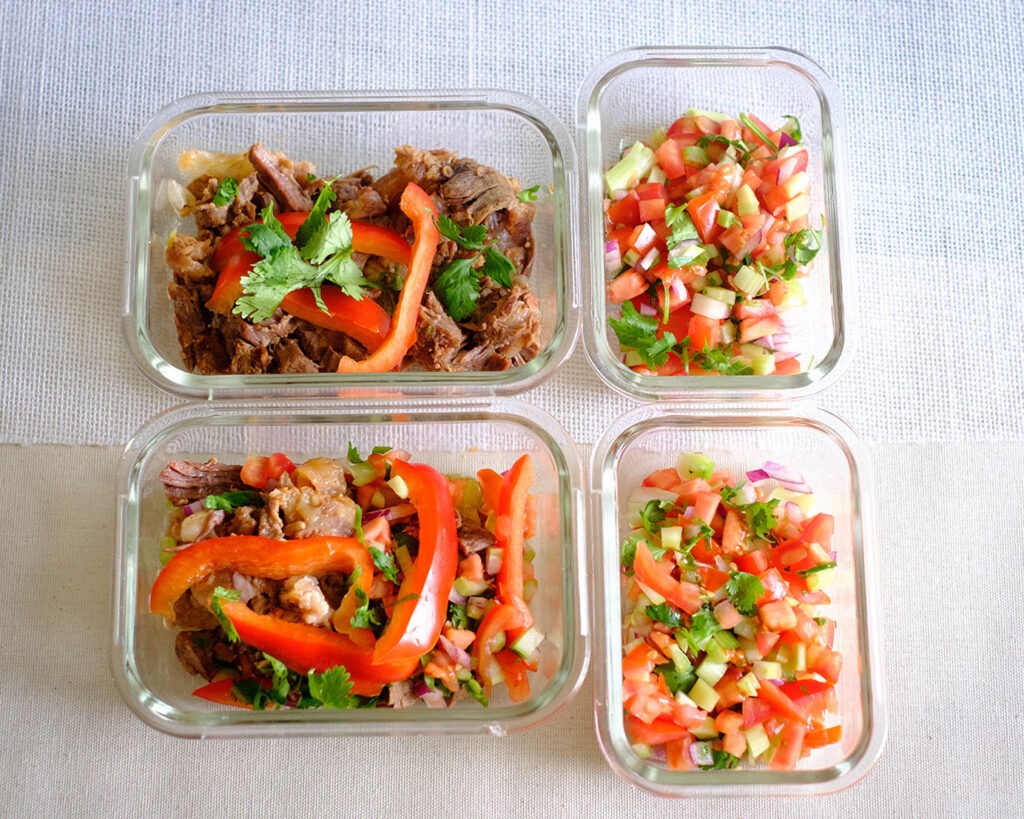
Meal Prep Tips for Instant Pot Beef Tacos
Now, let’s talk about the ultimate taco spread. While these Instant Pot Beef Soft Tacos are definitely the star of the show, they love to be accompanied by some delicious sidekicks. How about serving them with zesty salsa, creamy guacamole, tangy sour cream, and a sprinkle of fresh cilantro? You can also whip up some Mexican rice, refried beans, or a refreshing corn salad to round out the meal. The options are endless!
There are also endless possibilities of repurposing leftovers. Here are some ways to transform your beef into new and exciting meals:
- Beef Taco Salad: Transform your Instant Pot Beef Soft Tacos into a vibrant taco salad. Start with a bed of fresh lettuce, add your reheated beef, and top it off with diced tomatoes, sliced avocado, shredded cheese, and a dollop of sour cream. Drizzle your favorite dressing over the top, and you’ve got a satisfying and nutritious meal.
- Beef Enchiladas: Roll up your beef in corn tortillas, place them in a baking dish, and smother them with enchilada sauce. Sprinkle some cheese on top and bake until the cheese is bubbly and golden. Serve with a side of Mexican rice and refried beans for a comforting dinner.
- Beef Quesadillas: Grab a couple of tortillas, layer them with shredded beef and your choice of cheese. Heat them up in a skillet until the cheese is melted and the tortillas are golden and crispy. Cut them into wedges, and you’ve got a mouthwatering snack or a quick and easy lunch option.


Frequently Asked Questions
Can I use frozen beef for this recipe?
It’s generally recommended to use thawed beef for better results. Frozen beef may require a longer cooking time and could affect the texture of the meat.
Can I use a different cut of beef?
Absolutely! While the recipe suggests using a chuck or round roast, you can experiment with other cuts like brisket or even stew meat. Just keep in mind that different cuts may require slight adjustments to the cooking time.
Can I use chicken or pork instead of beef?
Of course! The beauty of tacos is their versatility. Feel free to swap the beef for chicken, pork, or even tofu for a vegetarian option. Adjust the cooking time accordingly based on the protein you choose.


Instant Pot Beef Soft Tacos
Equipment
Ingredients
Beef and Seasonings
Pico de Gallo
Sides
Instructions