Posted on

June 5 Weekly Meal Plan

hoisin chicken

Make sure to go to How this page works first if you haven’t yet.

Set Your Pace

  • If you’re a beginner at meal prep: Be prepared to set aside 2-3 hours. Once mise en place is complete, all of these recipes can be completed one by one.
  • If you’re a meal prep pro, use the sequenced steps below: These steps give you the flexibility to cook items simultaneously in a sequence of events.
  • Be sure to set timers and check on food items to avoid overcooking. Sequencing will save you time and meal prep can be done in 1-2 hours.

Meal Prep Run Down

  1. First, pre-heat the oven to 400F.
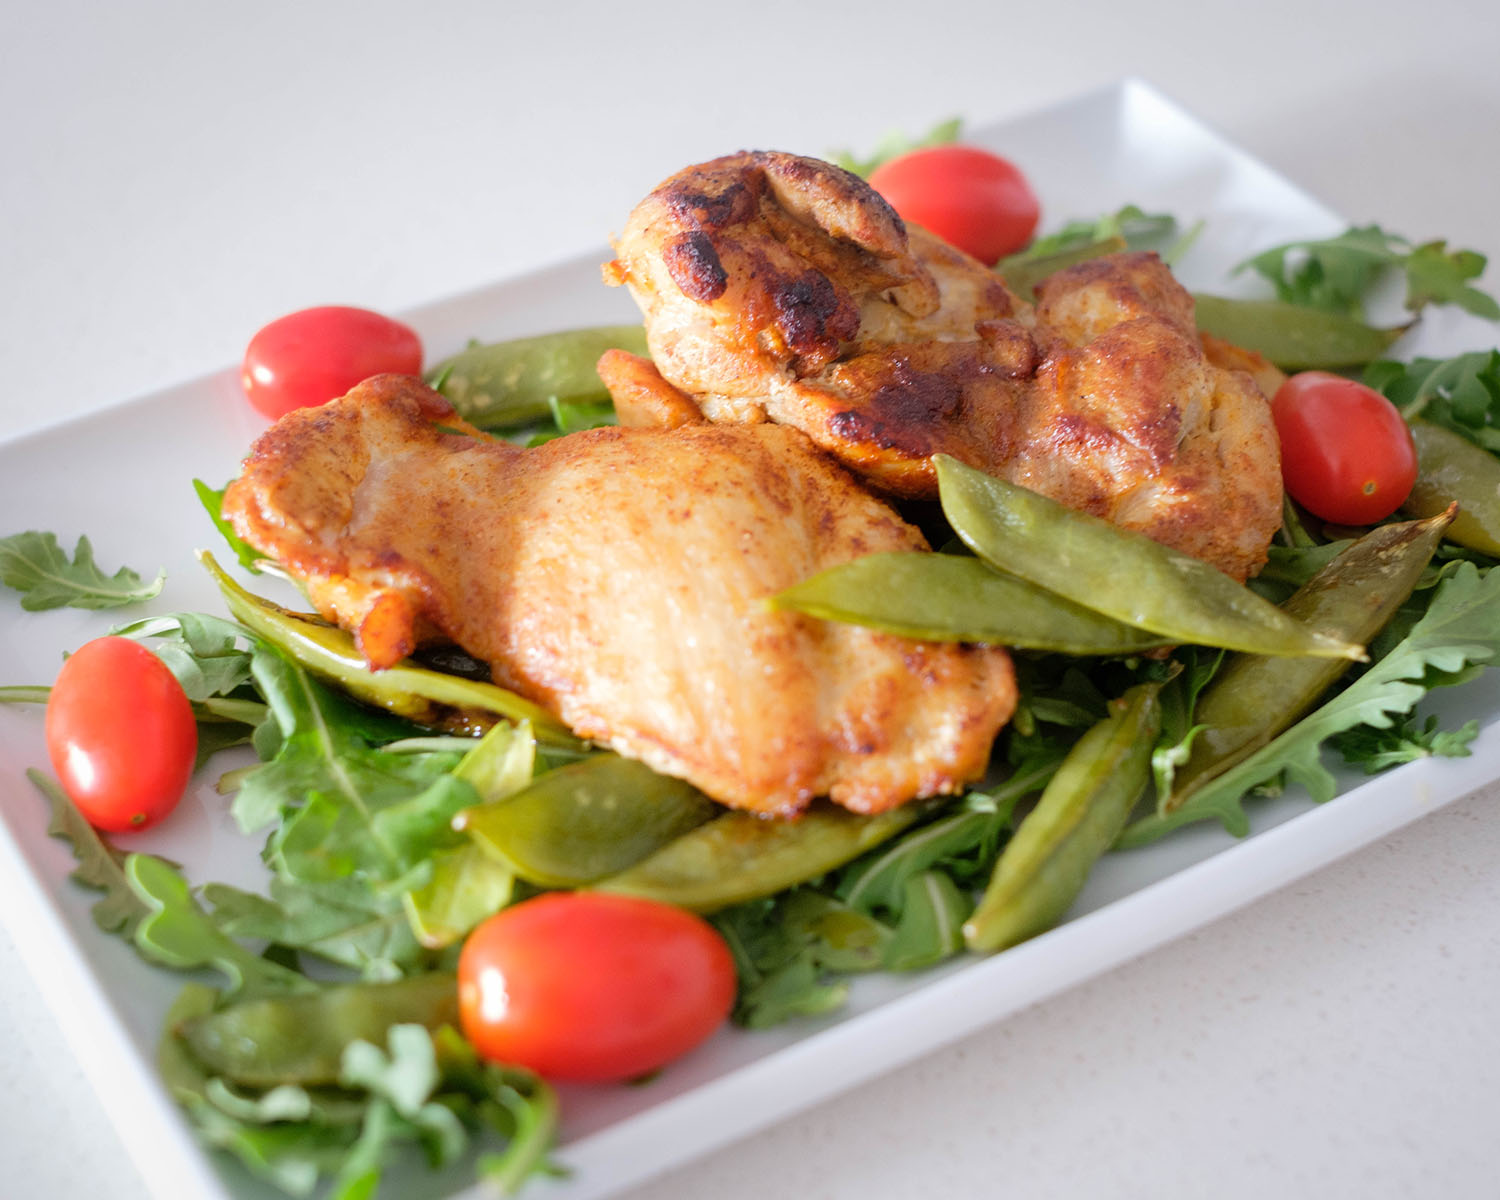
  2. Next, prepare the items that require the oven such as the hoisin glazed chicken with snap peas.
  3. Place the chicken and snow peas in the baking dishes and start baking them in the oven. Then, start preparing the Air Fryer Chicken wings and also start cooking them in the Air Fryer.
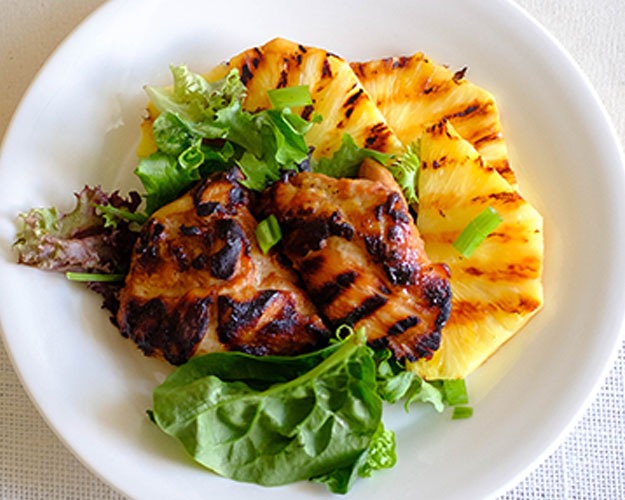
  4. Meanwhile, prepare the items on the stovetop such as grilled steak, grilled peanut butter chicken, and the peanut butter quesadillas.
  5. Finally, assemble the English muffin fruit pizza.
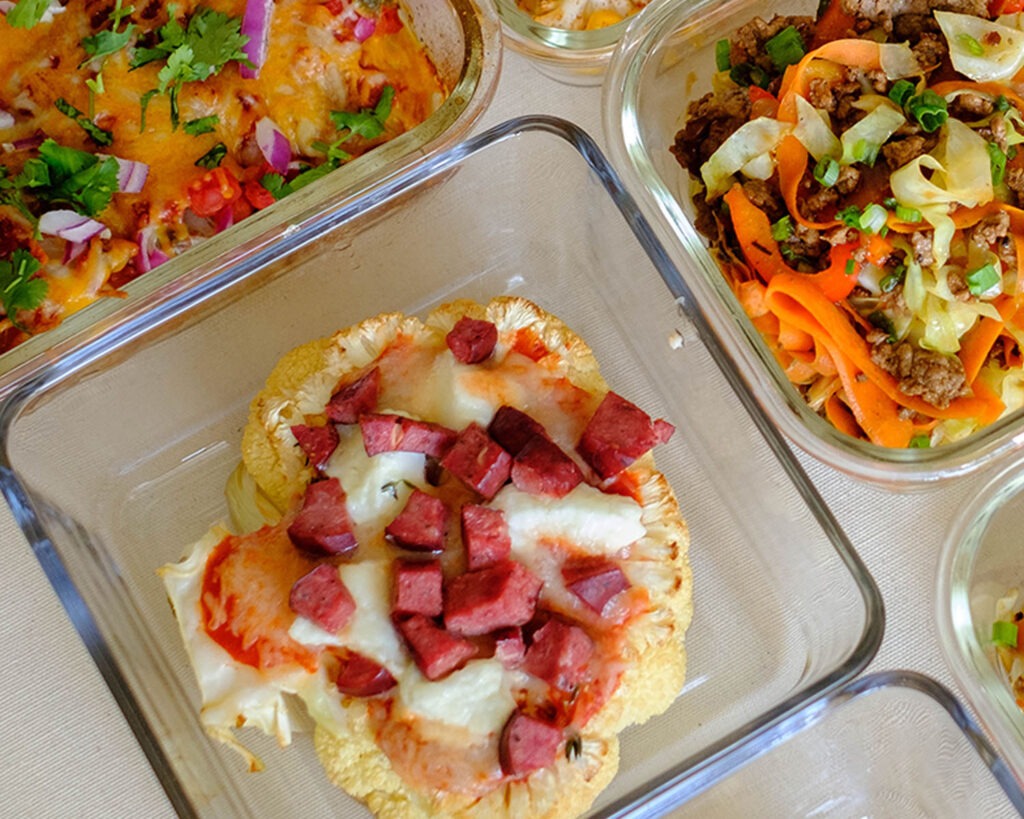
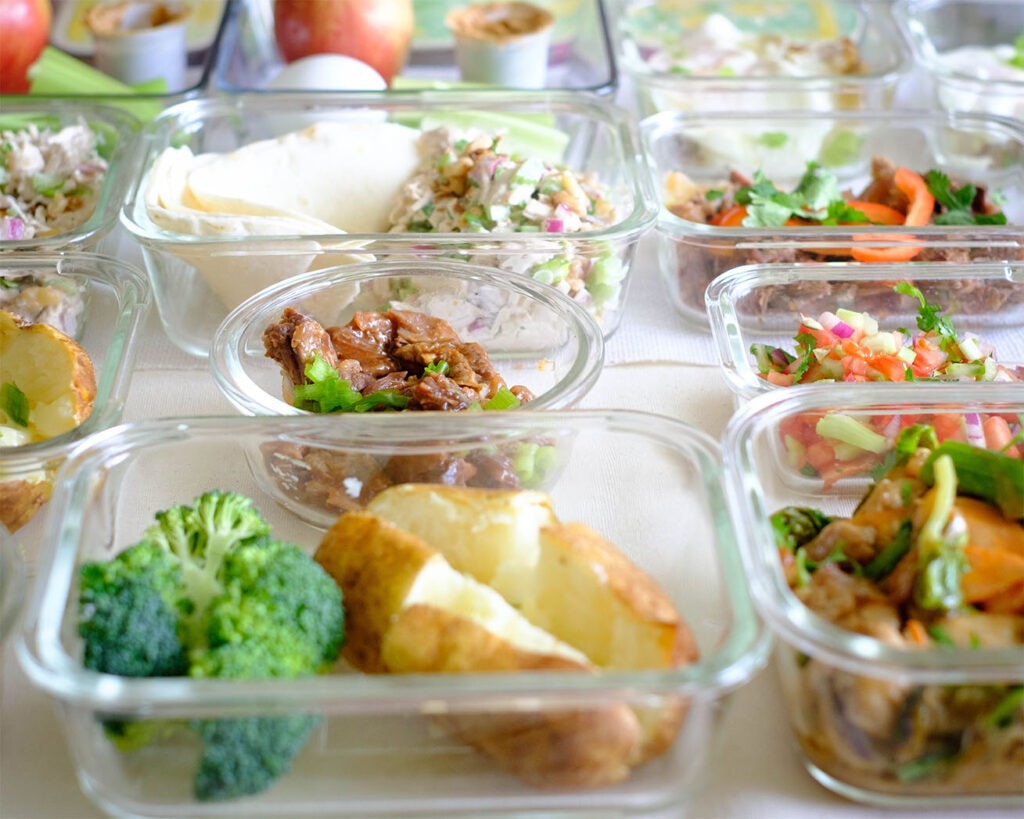
  6. When everything is finished cooking, plate everything up in containers, and let them cool before refrigerating.

If you’re sequencing your meal prep, be sure to keep an eye on everything! Make sure food is kept refrigerated under 40F degrees until ready to eat.

Assembly Tips

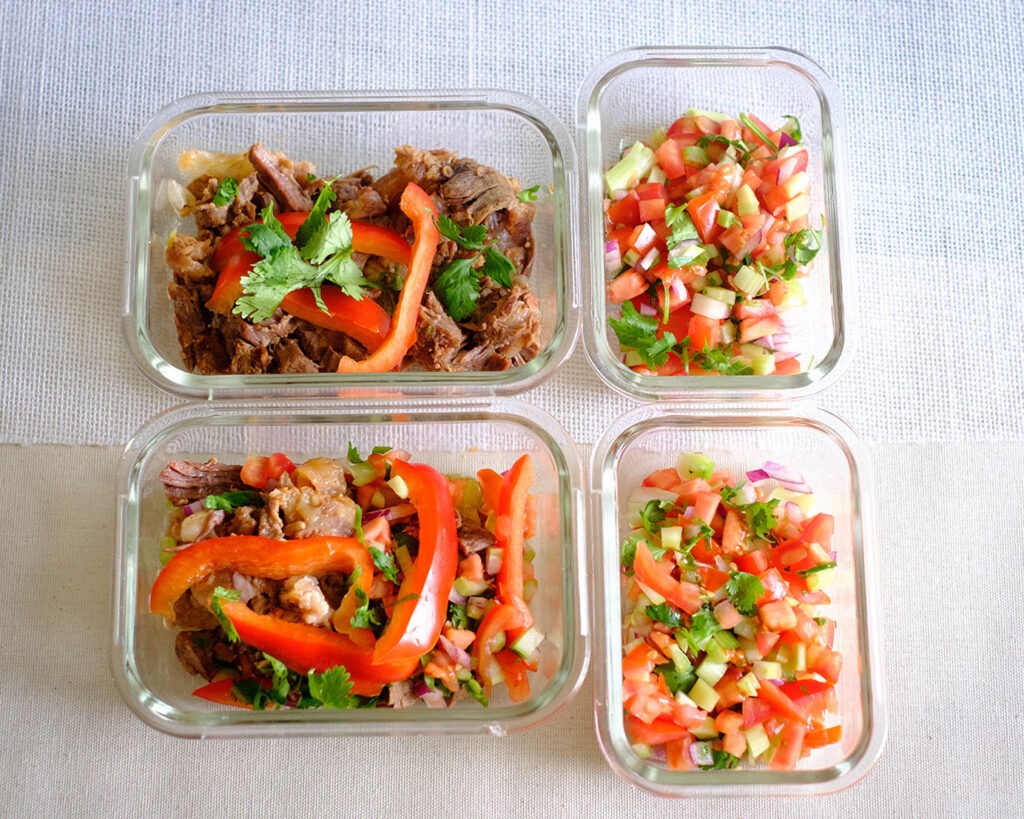
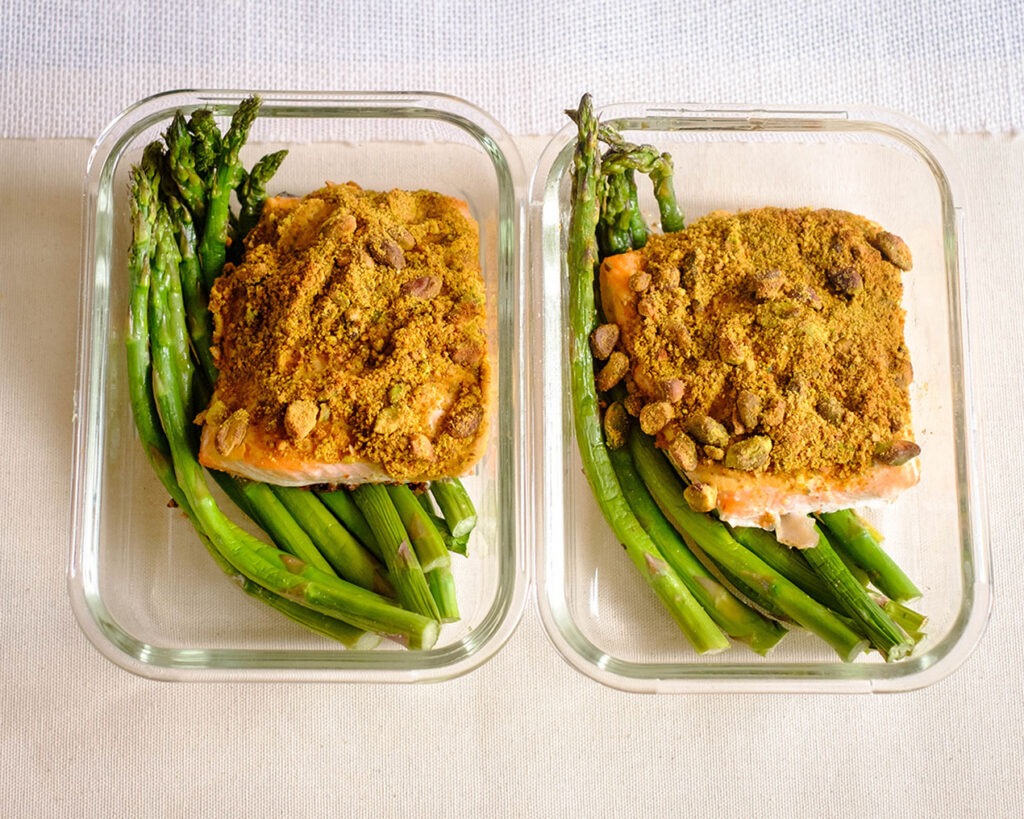
  • Evenly divide meals according to the serving size
  • Let all items cool before placing them in the refrigerator
  • Keep all items refrigerated under 40F until ready to eat or reheat
  • Breakfast: The peanut butter quesadilla can be reheated in the microwave, while the English muffin fruit pizza can be served chilled
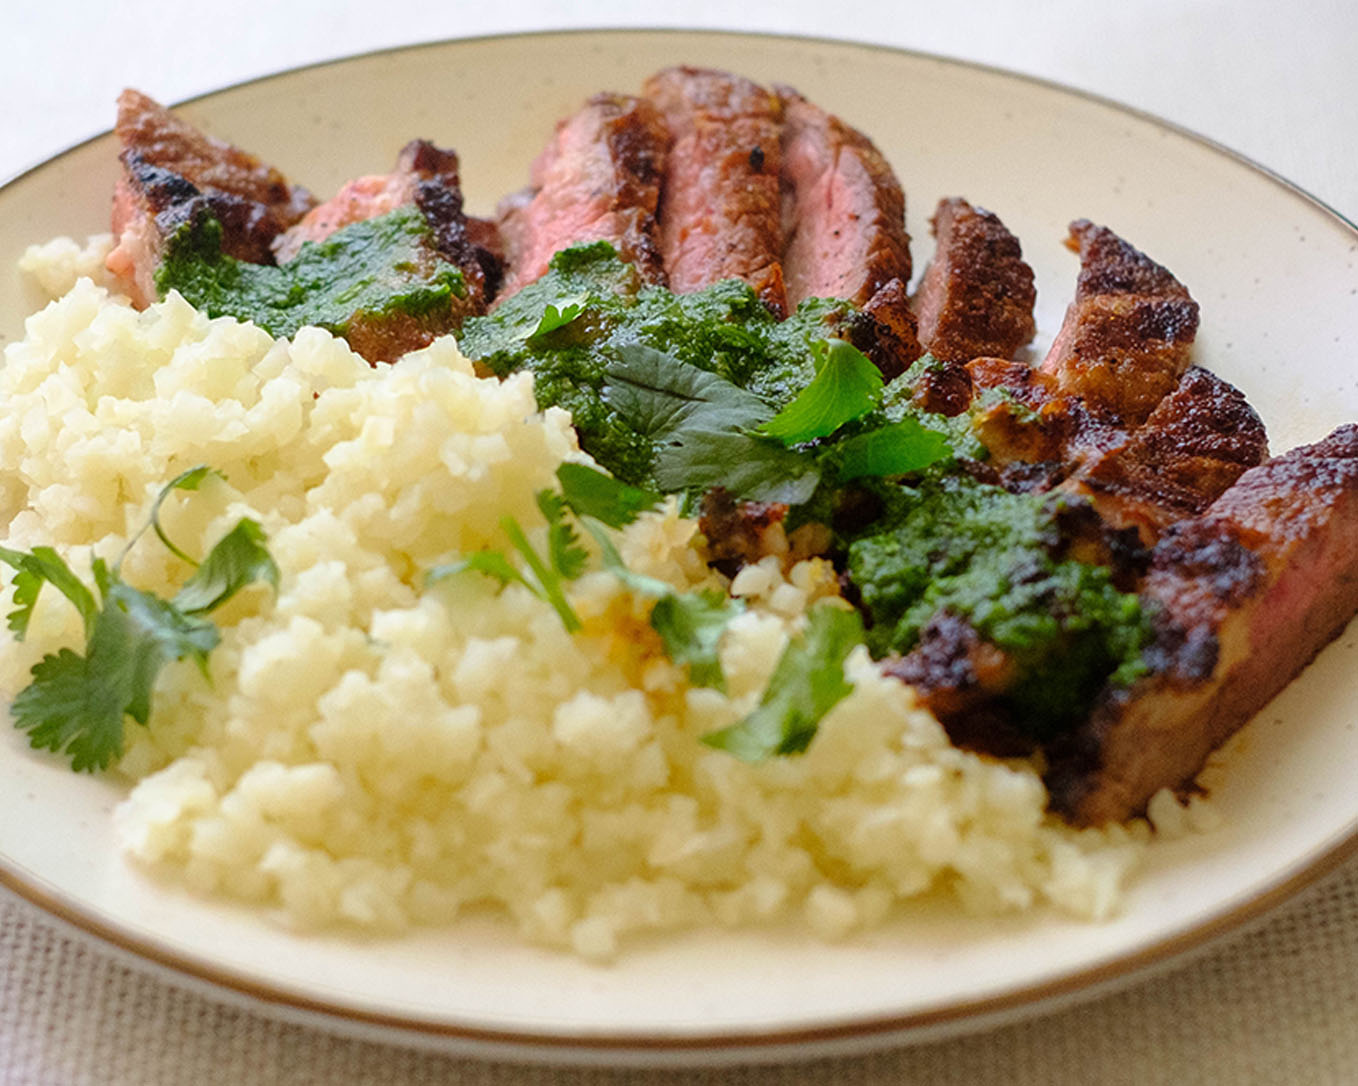
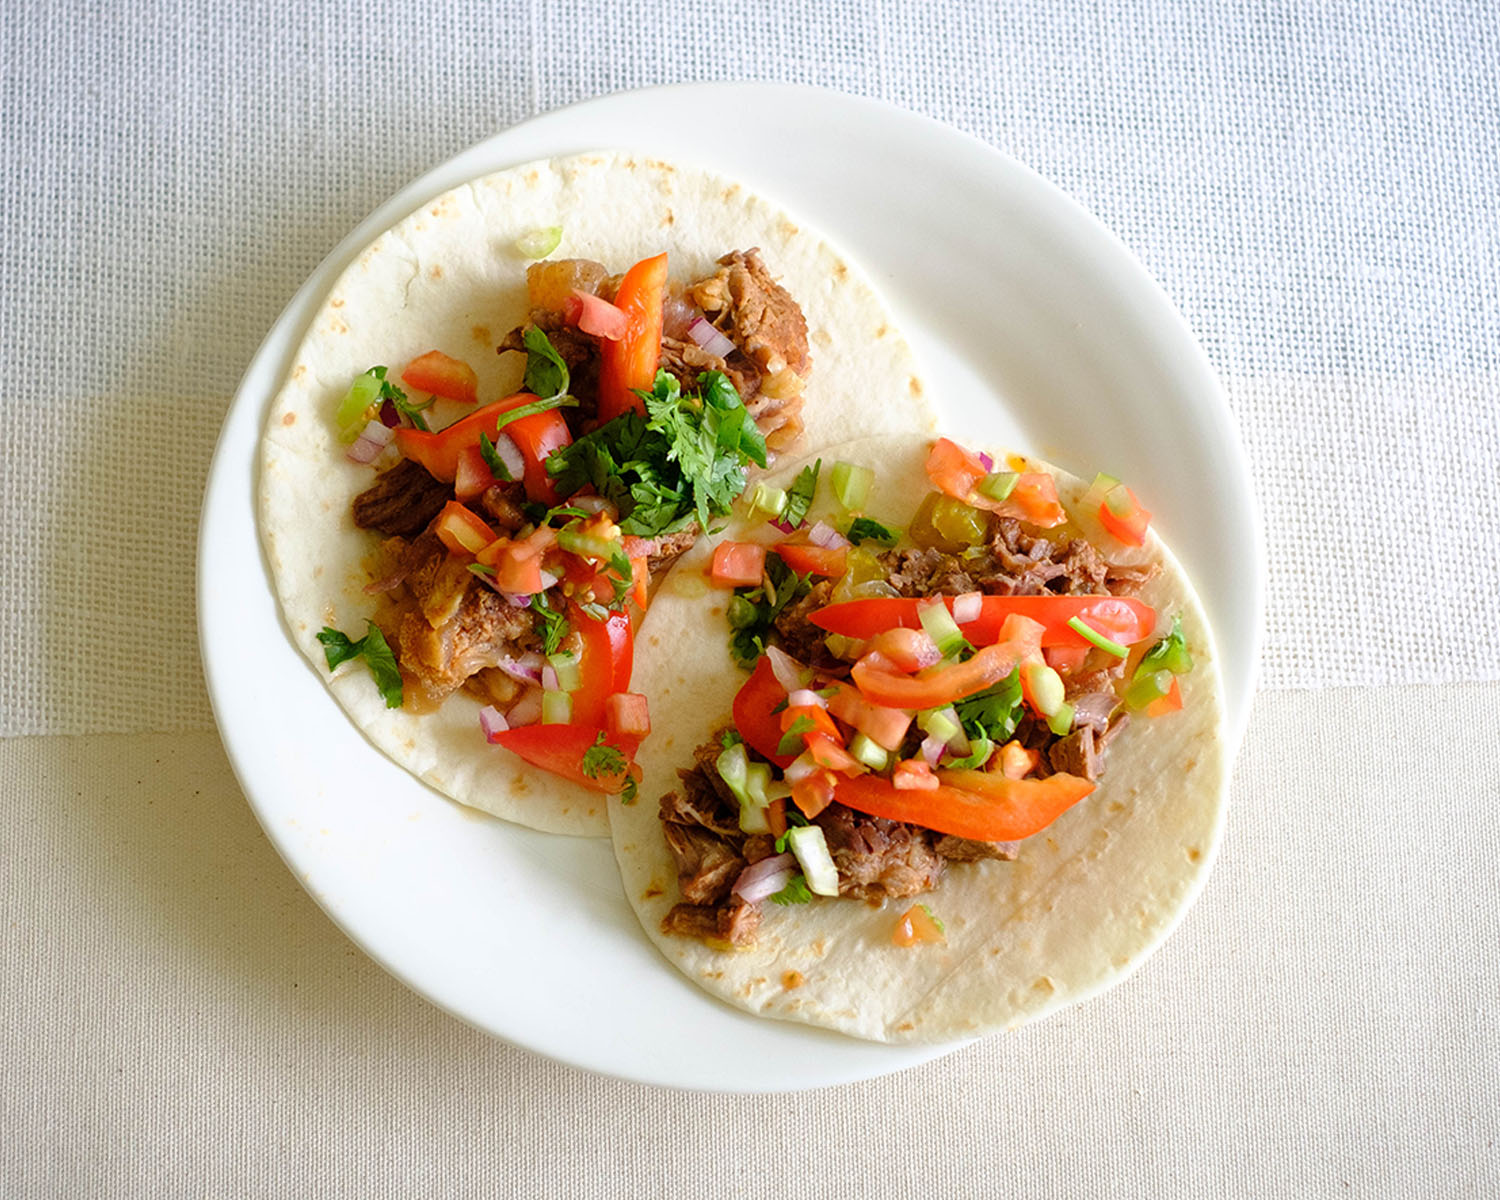
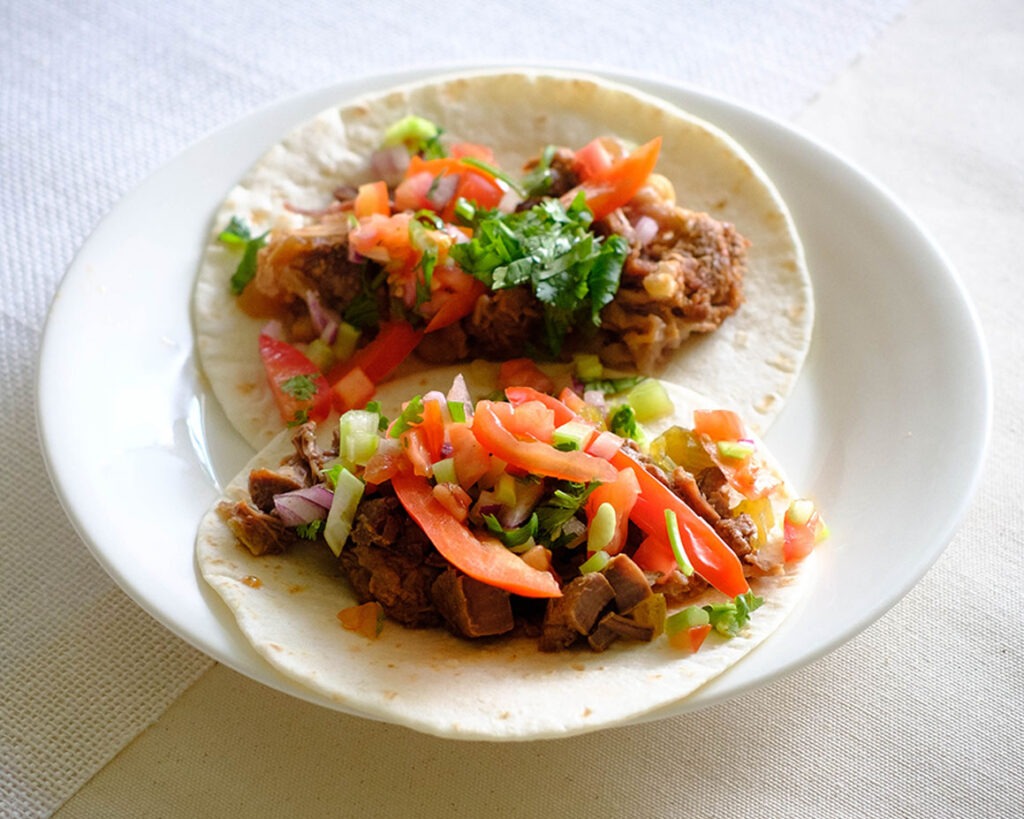
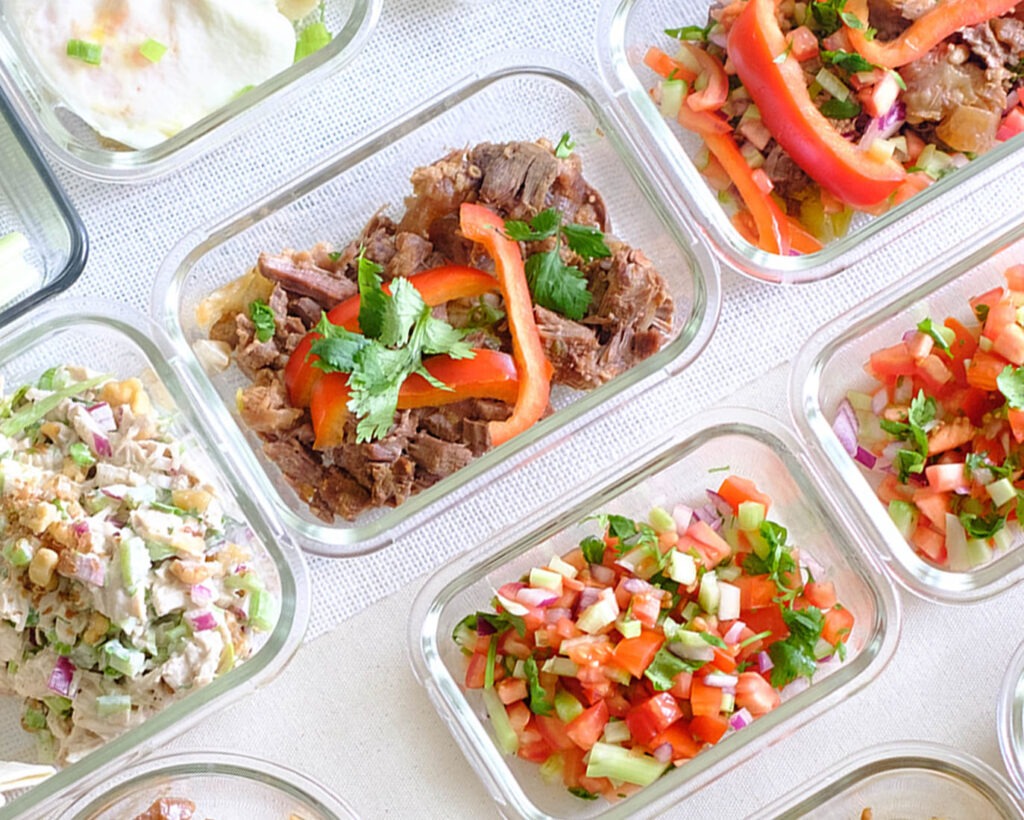
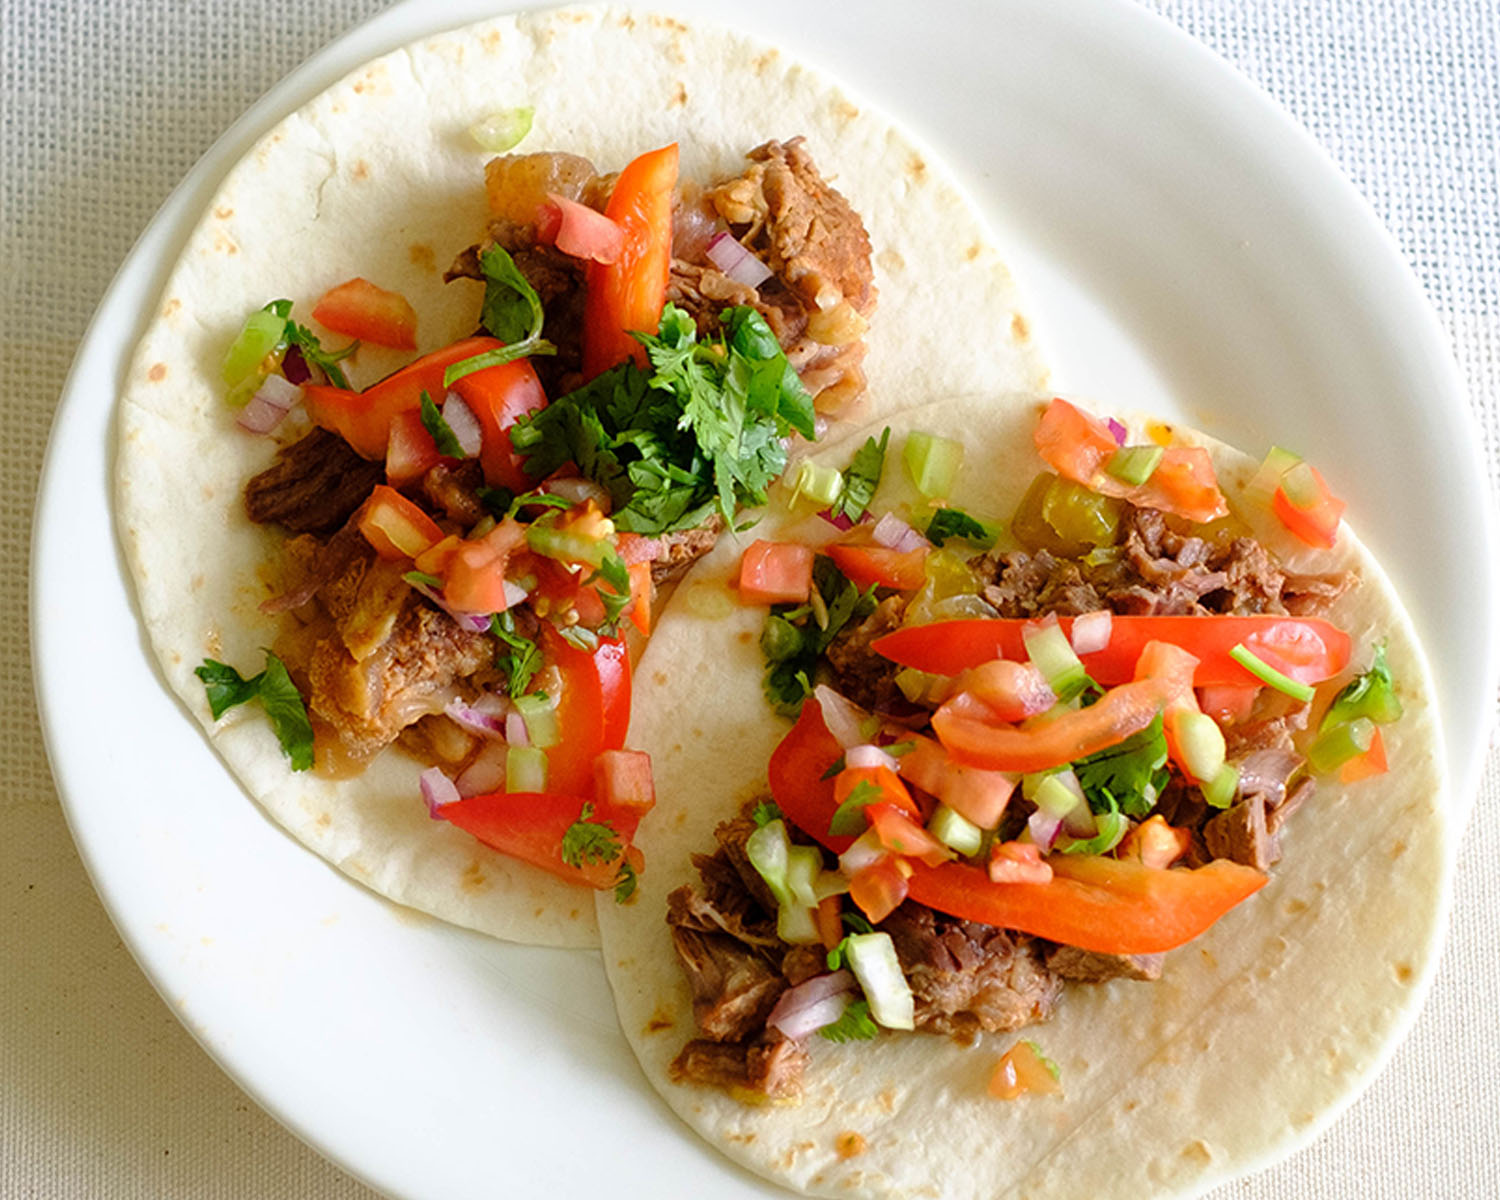
  • Lunch: The grilled steak can be reheated in the oven, while the lettuce wraps can be served chilled. The chicken can be reheated in the microwave, while the coleslaw can be served chilled. Wait to slice the avocado until you are ready to eat the meal to prevent it from browning too early
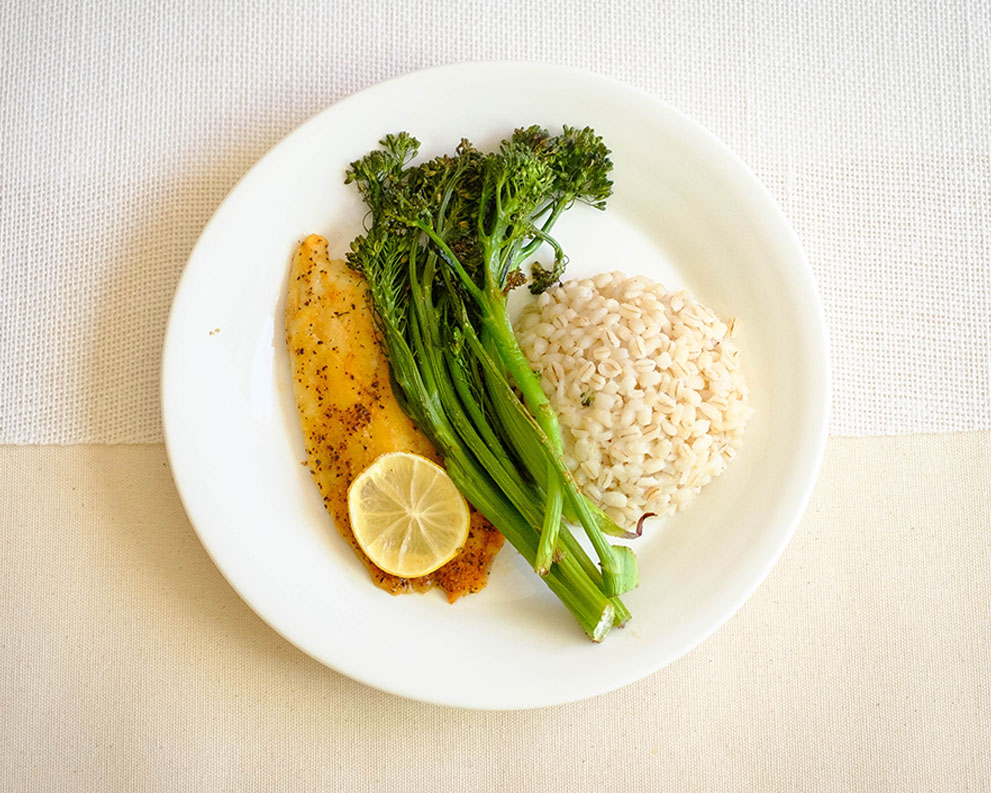
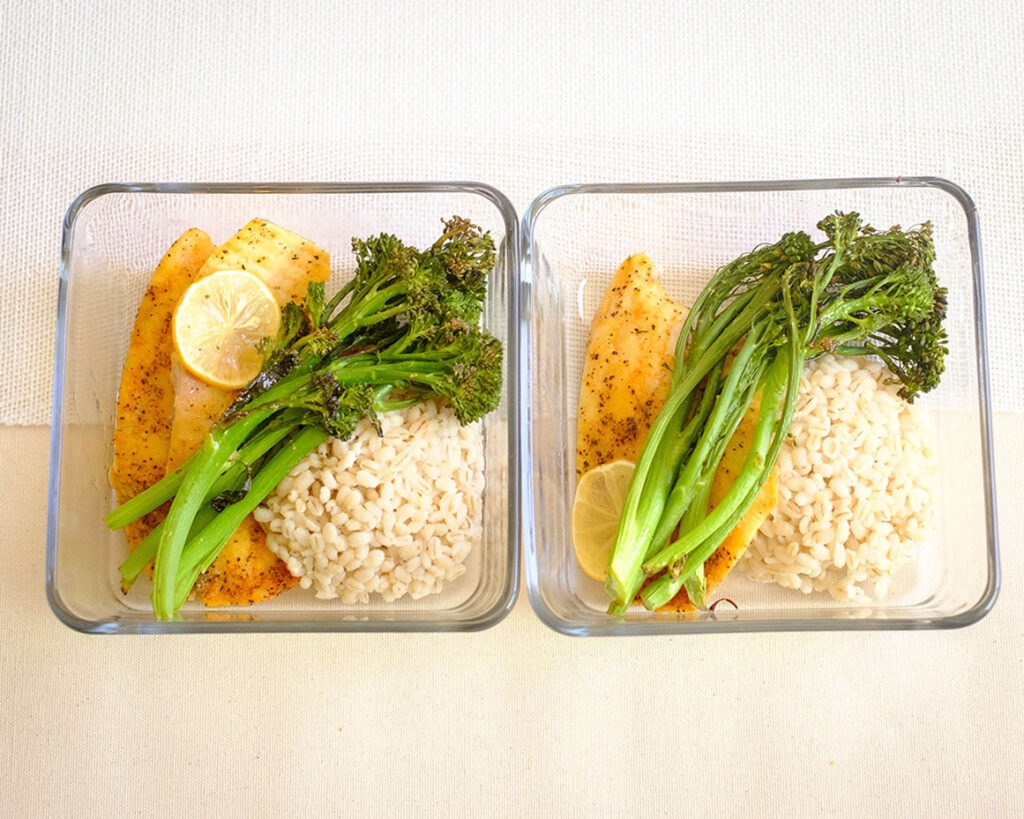
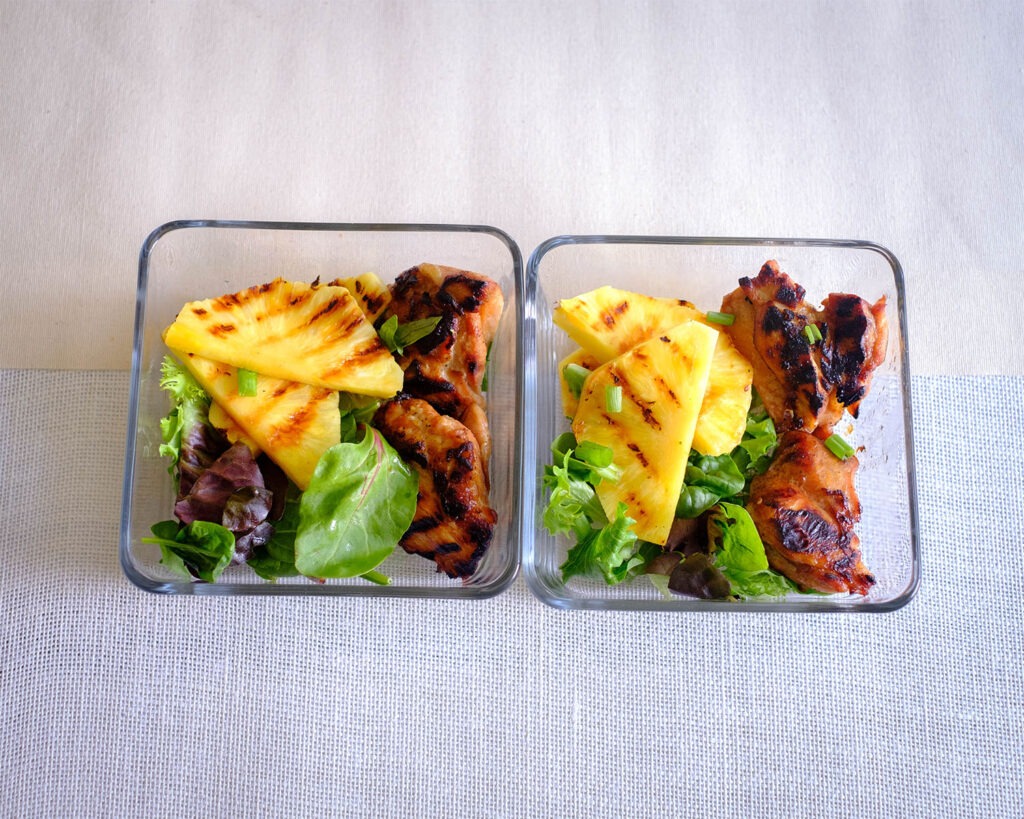
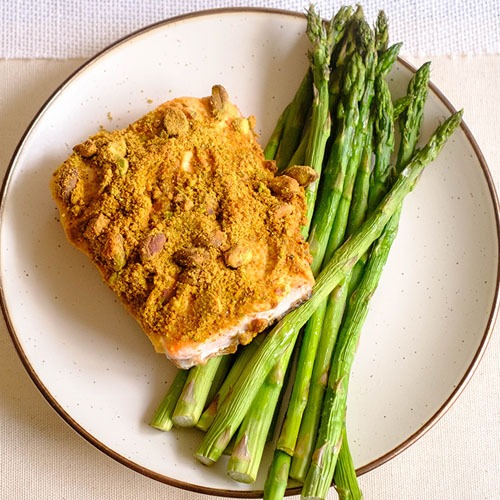
  • Dinner: Both meals can be reheated in the microwave, serve the spring mix salad chilled

Extra Flavors and Substitutions

  • Peanut Butter: Feel free to use any other kind of nut butter such as cashew or almond butter
  • Lettuce Wraps: If you can’t lettuce wraps, you can serve the grilled steak on top of spring mix
  • Parsnips: If you can’t find parsnips, you can use regular potatoes or sweet potatoes
  • Supplement meals with additional snacks such as fresh veggies and fruit for additional daily caloric needs. You can use lime/lemon and olive oil in place of salad dressing

Extra Leftover Ingredients Not Used

  • Protein: Freeze any uncooked meats and save for a later recipe, or you can cook the full amount, and freeze the portion that you do not eat, and save for later use.
  • Veggies: Freeze any leftover veggies for later use. Use leftover herbs in omelets or other dishes for the weekend
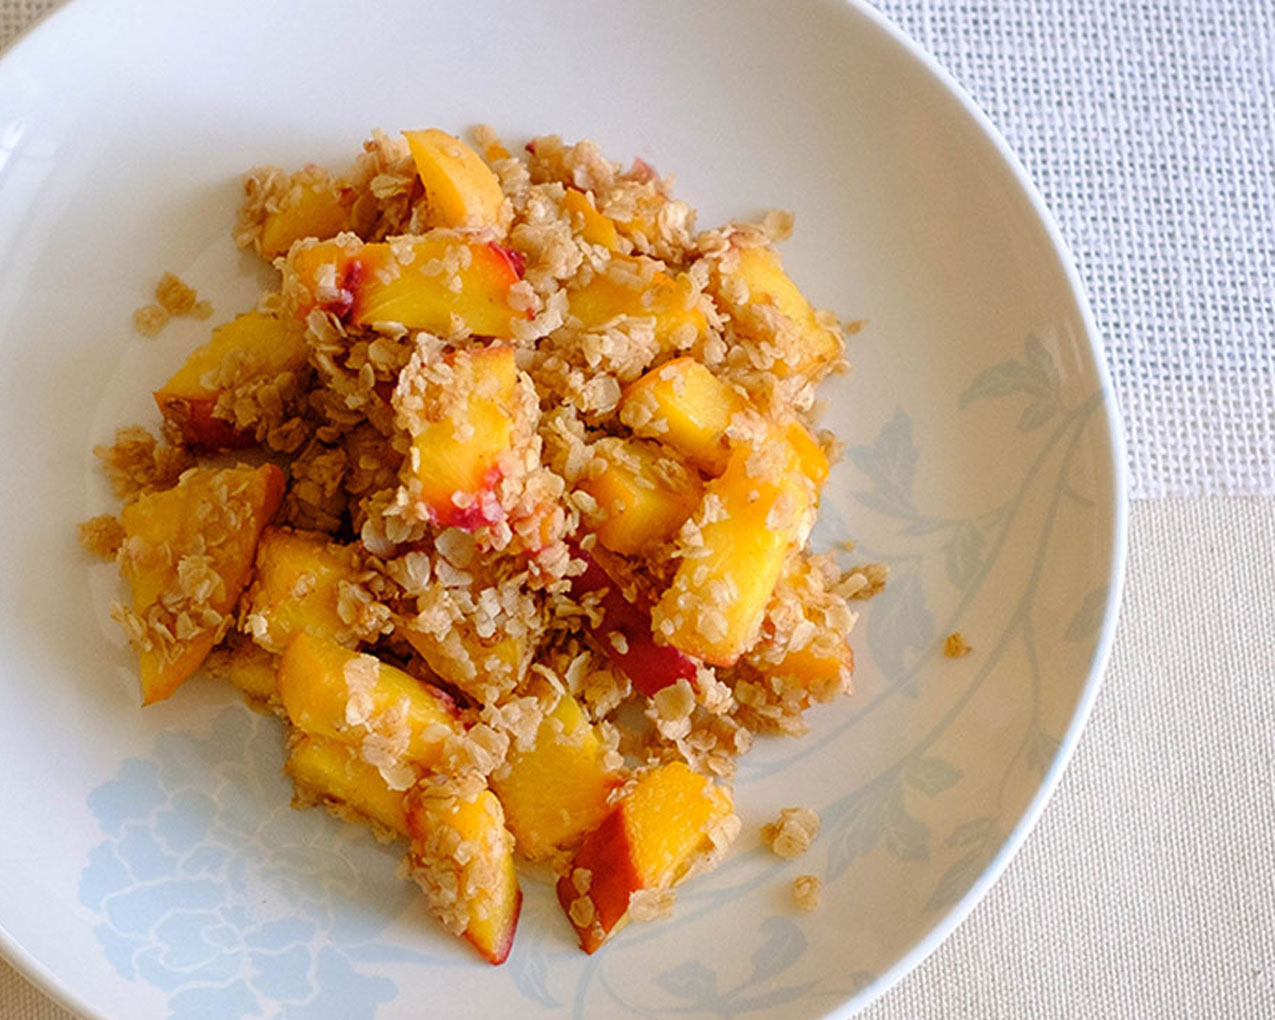
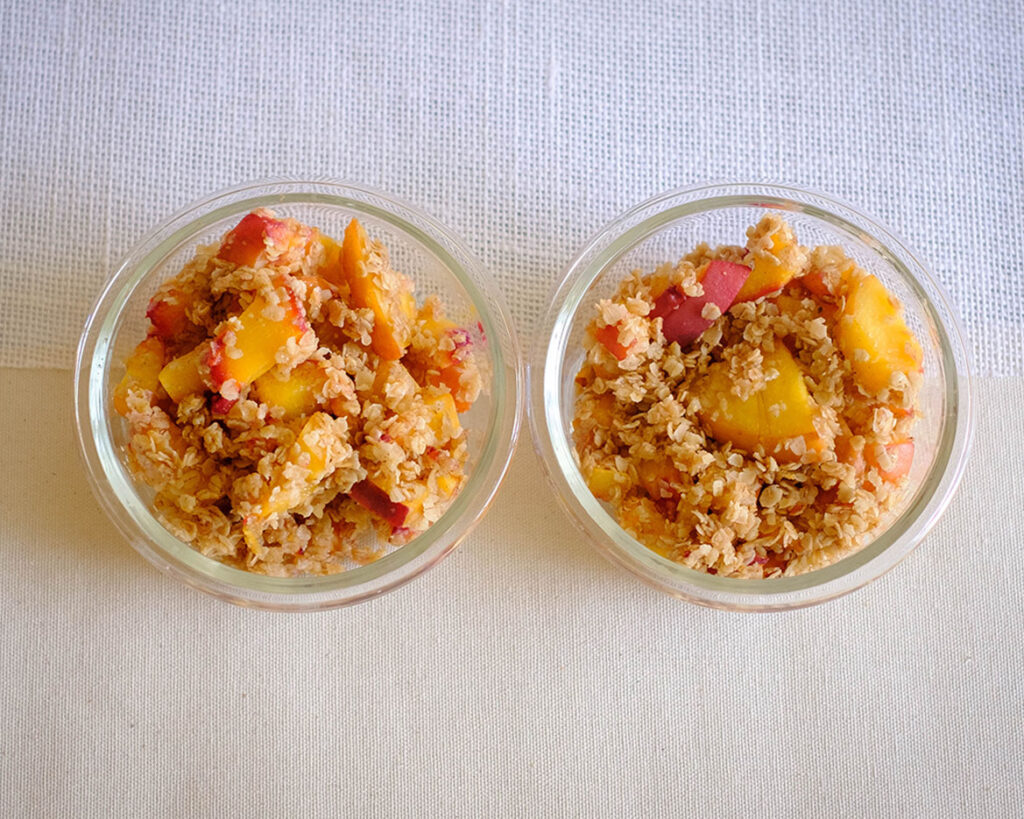
What Else

How This Page Works
Meal Prep 101
Weekly Meal Plans
Specialty Diets
Recipe Inspirations
Helpful Resources

Posted on Leave a comment

Sauteed Peach Crisp

round plate with diced peaches and rolled oats

Sauteed peach crisp is the perfect recipe for meal prep, with its luscious peaches, crunchy oats, and a touch of cinnamon magic. With its single-serving size and versatile nature, it’s an excellent choice for breakfast, snack, or dessert. Embrace the joy of healthy sweets and get ready to savor every delightful bite. Happy cooking!

This post may contain affiliate links. Please see our privacy policy for details.

round plate with diced peaches and rolled oats

Why is this peach crisp healthy?

One of the great things about this sautéed peach crisp recipe is that it’s perfectly portioned for a single serving. It’s an ideal option if you’re cooking for yourself and want a quick, delicious treat without any waste. Plus, it’s super customizable, allowing you to adjust the quantities to fit your personal preferences. Feel free to double or triple the recipe if you’re meal-prepping for the week or hosting a peach-loving party!

These juicy peach gems are diced into bite-sized pieces, adding a burst of natural sweetness to our crisp. Not only do peaches taste heavenly, but they’re also packed with vitamins, fiber, and antioxidants, making them a fantastic choice for a guilt-free indulgence.

The PrepYoSelf Newsletter

Simple Ingredients for Peach Crisp

Let’s dive into the delightful ingredients that come together to create the mouthwatering sautéed peach crisp!

  • Peaches: The star of the show! Peaches are the juicy, sweet gems that bring a burst of flavor to this recipe. Choose ripe peaches for the best taste and texture. They’re not only delicious but also packed with vitamins, fiber, and antioxidants.
  • Rolled Oats: These wholesome oats provide the delightful crunch in our crisp topping. They add a satisfying texture while offering a healthy dose of fiber, which helps keep you feeling full and promotes digestive health. Rolled oats are a pantry staple that adds heartiness and a nutty flavor to our dish.
  • Honey: Ah, nature’s golden sweetener! Honey lends its natural sweetness to the sautéed peach crisp, balancing out the tartness of the peaches. Besides being a delicious alternative to refined sugar, honey also boasts antioxidant and antibacterial properties, making it a healthier choice.
  • Olive Oil: Our crisp gets a touch of richness and healthy fats from olive oil. It adds a subtle flavor that complements the peaches and helps achieve that beautiful golden-brown crispiness. Olive oil is also a heart-healthy fat, rich in monounsaturated fatty acids, which have been associated with various health benefits.
  • Cinnamon Powder: Ah, the warm embrace of cinnamon! This aromatic spice adds a cozy and irresistible aroma to our sautéed peach crisp. Cinnamon not only enhances the flavor profile but also brings potential health benefits, such as anti-inflammatory properties and blood sugar regulation.
round plate with diced peaches and rolled oats

How to Prepare Peach Crisp

  1. Add oil to a saute pan on medium-high heat and saute the peaches for a few minutes.
  2. Next, add the rolled oats, drizzle in the honey.
  3. Sprinkle with cinnamon powder.

Reference the recipe card below for detailed instructions.

round plate with diced peaches and rolled oats

Meal Prep Tips for Peach Crisp

  • Now, let’s talk about storage and serving tips because we want to ensure that every bite of our sautéed peach crisp is as scrumptious as the first. Once prepared, allow the crisp to cool completely before transferring it to an airtight container. It can be stored in the refrigerator for up to three days, but trust me, it probably won’t last that long. When you’re ready to enjoy your peachy masterpiece, simply reheat it in the oven or microwave until warm and serve it with a dollop of Greek yogurt or a scoop of vanilla ice cream for an extra indulgent touch.
  • Let me share some delightful pairings that will have your taste buds doing a happy dance. For breakfast, top it off with a sprinkle of granola and a drizzle of almond butter, turning it into a wholesome morning treat. As a snack, enjoy it alongside a cup of herbal tea or a refreshing glass of iced coffee. And for dessert, you can’t go wrong with a generous dusting of powdered sugar or a drizzle of caramel sauce. The possibilities are endless!
round plate with diced peaches and rolled oats
peach crisp

Peach Crisp

Get ready to indulge in a healthy, sweet treat that's perfect for meal prep and will have you coming back for seconds!
No ratings yet
Prep Time 5 minutes
Cook Time 10 minutes
Course Breakfast, Snack
Cuisine American
Servings 2

Equipment

  • knife
  • cutting board
  • saute pan
  • spatula

Ingredients
  

  • 2 each small peaches
  • 1 cup rolled oats
  • 2 tbsp honey
  • 2 tbsp olive oil
  • 1/4 tsp cinnamon powder

Instructions
 

  • Dice the peaches in small squares
  • Add olive oil to a saute pan on medium high heat and saute the peaches for about 4 to 5 minutes
  • Next, add the rolled oats, drizzle in the honey, and sprinkle the cinnamon powder
  • Mix all the ingredients around until the oats are fully coated with the honey and soften (about 2 to 3 minutes)

Similar Recipes

baked oatmeal

Oven Baked Oats with Apricots and Berries

ricotta apple

Oven Baked Apple with Ricotta and Walnuts

french toast 2

Oven Baked French Toast Muffins with Strawberries

You Might Also Like

Smartfruit Mellow Mango + Immunity, 100% Real Fruit Purée

Trader Joe’s Unsalted, Dry Toasted Slivered Almonds

Trader Joe’s the Dark Chocolate Lover’s Chocolate Bar

Frequently Asked Questions

Can I use canned peaches instead of fresh ones?

Absolutely! If fresh peaches are not in season or unavailable, canned peaches can be a convenient alternative. Just make sure to drain them well before using and adjust the sweetness level accordingly, as canned peaches may already be sweetened.


Can I substitute olive oil with another type of oil?

Certainly! While olive oil adds a unique flavor profile, you can substitute it with other oils such as melted coconut oil, melted butter, or even vegetable oil. Each option will lend a slightly different taste, so choose based on your preference.


 Is it necessary to use rolled oats, or can I use instant oats instead?

Rolled oats work best for creating that classic crisp texture. Instant oats can be used as a substitute, but keep in mind that they will result in a softer texture. If you prefer a crunchier topping, stick with rolled oats.

Posted on Leave a comment

Cauliflower Sausage Pizza

round plate with cauliflower sausage pizza

Hey there, fellow foodies! Get ready to tantalize your taste buds and nourish your body with a sensational recipe that’s perfect for meal prep: Cauliflower Sausage Low Carb Pizza! With just a handful of ingredients and a little bit of culinary prowess, you’ll have a delicious pizza that’s ready to conquer your cravings in no time. The best part? It’s a one-pan wonder! No need to fuss with multiple dishes or complicated techniques. You simply top your cauliflower crusts with mouthwatering sausage and your favorite toppings and bake it to perfection. Voila! A scrumptious pizza is born.

This post may contain affiliate links. Please see our privacy policy for details.

Calories: 579kcal | Carbohydrates: 21g | Protein: 25g | Fat: 45g | Saturated Fat: 16g | Polyunsaturated Fat: 4g | Monounsaturated Fat: 23g | Cholesterol: 92mg | Sodium: 1221mg | Potassium: 1274mg | Fiber: 6g | Sugar: 7g | Vitamin A: 519IU | Vitamin C: 142mg | Calcium: 294mg | Iron: 2mg

round plate with cauliflower sausage pizza

Let’s get down to the nitty-gritty and discuss the cost factor. Cauliflower Sausage Pizza is a budget-friendly option for your meal prep repertoire. Cauliflower is often an affordable vegetable that is readily available. Sausage, with its rich and savory flavors, adds a touch of indulgence without breaking the bank. Plus, you can get creative with your toppings, utilizing leftovers or ingredients you already have on hand and saving money while satisfying your cravings.

But wait, there’s more! This low carb pizza is a healthier alternative to its traditional counterpart. By swapping out the traditional flour-based crust for a cauliflower crust, you’re reducing the carb content significantly. Cauliflower crust is not only lower in carbs but also packed with essential nutrients, fiber, and antioxidants. It’s like getting a nutritional boost while relishing your favorite comfort food. Talk about having your (pizza) pie and eating it too!

The PrepYoSelf Newsletter

Here’s What You’ll Need for Cauliflower Pizza

  • First up is the mighty cauliflower head. We’ll transform this humble vegetable into a delicious low carb pizza crust that’s high in flavor.
  • Now, let’s talk about the toppings. We’ll start with a generous spread of tomato sauce. You can use your favorite store-bought variety, or if you’re feeling adventurous, whip up a homemade version bursting with fresh flavors. Either way, make sure to cover the cauliflower crust evenly, creating a vibrant tomato canvas for the rest of the ingredients.
  • Next, we’ll add dollops of creamy ricotta cheese. Its smooth texture and subtle tanginess will provide a delightful contrast to the other ingredients. If you don’t have ricotta on hand, feel free to substitute it with goat cheese or even cream cheese for a slightly different twist.
  • Now, it’s time to introduce some protein power. Dice up some beef sausage into bite-sized pieces and scatter them over the pizza. The sausage brings a rich, savory flavor that complements the other components beautifully. If you prefer a vegetarian version, you can swap the beef sausage for your favorite meatless alternative like plant-based sausages or marinated tofu.
  • Of course, what’s a pizza without a generous layer of ooey-gooey mozzarella cheese? Sprinkle it generously over the toppings, allowing it to melt and create a golden, cheesy blanket of deliciousness. If you’re feeling adventurous, you can mix in some grated Parmesan cheese or experiment with different types of cheese like fontina or provolone.
  • To elevate the flavors even further, sprinkle some Italian seasoning over the top. This blend of aromatic herbs like oregano, basil, thyme, and rosemary adds a burst of Mediterranean goodness that will make your taste buds sing. If you don’t have Italian seasoning, feel free to use individual herbs or get creative with your own spice blend.

round plate with cauliflower sausage pizza

How to Make Cauliflower Pizza

  1. Preheat the oven to 400F.
  2. Prep your cauliflower head by removing the outer green leaves and cutting off the bottom stem.
  3. Cut through the middle of the cauliflower head and cut thick 1-inch “steak slices).
  4. Place the cauliflower slices on a sheet pan and drizzle with olive oil and bake it in the oven.
  5. After the cauliflower gets tender and finishes cooking, carefully remove it from the oven and add your toppings.
  6. Place the cauliflower pizzas back in the oven and bake for another 5 to 10 minutes until the sausage heats through and the cheese melts.

Reference the recipe card below for detailed instructions.

glass meal pep containers with cauliflower sausage pizza

Meal Prep Tips for Cauliflower Low Carb Pizza

  • Once your Cauliflower Sausage Pizza is baked to golden perfection, you can easily store the leftovers in airtight containers in the fridge. When you’re ready to enjoy it, a quick reheat in the oven or microwave will bring back its glorious flavors. If you want to freeze individual slices, make sure to wrap them tightly in plastic wrap or use freezer-safe containers. This way, you can have a tasty, ready-to-eat meal whenever the pizza cravings strike.
  • But why stop at just pizza? Cauliflower Sausage Pizza is incredibly versatile and can be served with a variety of scrumptious side dishes. How about pairing it with a fresh, vibrant salad loaded with leafy greens and your favorite veggies? The options are endless, and you’ll have a satisfying, protein-packed meal that will keep you energized and feeling fabulous.
  • If you don’t want to use your oven, you can also make this in your Air Fryer. Just keep in mind that the Air Fryer cooks much faster, so reduce the cooking time by 5 minutes and lower the temperature to 375F.

glass meal pep containers with cauliflower sausage pizza

cauliflower pizza

Cauliflower Sausage Pizza

No ratings yet
Prep Time 5 minutes
Cook Time 20 minutes
Course dinner, Main Course
Cuisine American, Italian
Servings 2
Calories 579 kcal

Equipment

  • knife
  • cutting board
  • sheet pan
  • oven

Ingredients
  

  • 1 each cauliflower head
  • 2 each beef sausage links
  • 1/2 cup ricotta cheese
  • 1/4 cup shredded mozzarella cheese
  • 1 tbsp garlic (minced)
  • 1/4 cup tomato sauce
  • 1/4 tsp thyme
  • 1/4 tsp salt
  • 2 tbsp olive oil

Instructions
 

  • Pre-heat the oven to 400F
  • Cut the outer green leaves of the cauliflower and cut off the bottom of the cauliflower stem, but make sure to keep the core intact
  • Cut through the middle of the cauliflower head to keep the florets together and cut thick "steak" slices about 1 inch thick
  • Save two thick slices and set the other floret pieces aside for another dish (you can keep it in the fridge for a few days or freeze it for a few months)
  • Place the cauliflower slices on a sheet pan and drizzle it with olive oil making sure it is fully coated
  • Bake it in the oven for about 25 minutes.
  • Meanwhile, dice the sausage in small square pieces. Mix together the tomato sauce with the thyme and salt
  • After 25 minutes, remove the cauliflower from the oven and top it off with the tomato sauce, minced garlic, shredded mozzarella, ricotta cheese, and sausage
  • Place it back in the oven to bake for another 5 to 10 minutes until the sausage heats through and the cheese melts

Notes

Nutrition information provided is an estimate. It will vary based on cooking method and specific ingredients used. Please consult with your healthcare provider for specific dietary needs. To gain a better understanding, explore our nutrition disclaimer here

Nutrition

Calories: 579kcalCarbohydrates: 21gProtein: 25gFat: 45gSaturated Fat: 16gPolyunsaturated Fat: 4gMonounsaturated Fat: 23gCholesterol: 92mgSodium: 1221mgPotassium: 1274mgFiber: 6gSugar: 7gVitamin A: 519IUVitamin C: 142mgCalcium: 294mgIron: 2mg

Similar Recipes

cilantro steak

Grilled Cilantro Skirt Steak with Cauliflower Rice

cauliflower rice

Cauliflower Fried Rice

sweet and sour chicken wings

Air Fryer Sweet and Sour Chicken Wings

You Might Also Like

Frequently Asked Questions

Can I make the pizza without cheese?

Absolutely! If you’re looking for a dairy-free option or simply prefer not to use cheese, you can omit it or try using a vegan cheese alternative.


Can I use a different sauce?

Of course! Feel free to experiment with basil pesto sauce, alfredo sauce, and even just freshly sliced tomatoes.


Can I add additional toppings to the pizza?

Definitely! Feel free to get creative with your toppings. Add your favorite vegetables, such as bell peppers, onions, or mushrooms, to enhance the flavors and add more nutritional value.

Posted on Leave a comment

Instant Pot Beef Soft Tacos

round plate with beef soft tacos

So, my friends, get ready to embrace the convenience, deliciousness, and affordability of Instant Pot Beef Soft Tacos. With their tender beef, vibrant flavors, and endless possibilities for toppings and sides, these tacos are a true meal prep game-changer. Let’s make mealtime a fiesta of flavors and enjoy every single bite with a smile on our faces. Happy cooking and happy eating!

This post may contain affiliate links. Please see our privacy policy for details.

round plate with instant pot beef soft tacos

Why This Recipe is a Time and Money Saver

Time is precious, my friends, and this recipe is here to save the day. The Instant Pot works its magic by drastically reducing cooking time, which means you can whip up a batch of these delectable beef soft tacos even on the busiest of days. Whether you’re a busy professional, a parent juggling multiple responsibilities, or simply someone who values efficiency in the kitchen, this recipe is your golden ticket to a stress-free dinner.

Let me tell you, making this recipe is an absolute breeze! With the help of our trusty Instant Pot, you can have tender, flavorful beef in no time. The magic of pressure cooking ensures that even the toughest cuts of beef become melt-in-your-mouth goodness. Simply toss in the ingredients, set the timer, and let the Instant Pot work its magic while you focus on other tasks.

Now, let’s talk about the budget-friendly aspect of this recipe. We all know that beef can sometimes be a little heavy on the wallet, but fear not! By choosing cheaper cuts like chuck or round roast, you can create a mouthwatering taco filling without breaking the bank. Plus, the Instant Pot’s ability to tenderize those cuts means you don’t have to splurge on the pricier options.

The PrepYoSelf Newsletter

Here’s What You Need to Make Instant Pot Beef Tacos

  • Beef: We used chuck roast, but you can choose any cut of beef
  • Aromatics: We added, garlic cloves, celery, red onions
  • Liquid: We added some water and tomato sauce
  • Pico de Gallo: Mixture of tomatoes, celery, red onions, lime juice, and cilantro
  • Tortilla: You can use flour or corn tortillas

round plate with instant pot beef soft tacos

How to Make Instant Pot BBQ Beef

  1. Prepare the beef in the instant pot. Add the garlic, celery, red onions, tomato sauce, salt, and pepper.
  2. While the beef cooks, chop up the veggies for the pico de gallo.
  3. After the beef cooks, carefully release the steam and remove the lid. Drain the beef from the excess liquid and shred it with a fork.
  4. Fill the tortillas with the shredded beef and top it off with pico de gallo and fresh pepper strips.

Reference the recipe card below for detailed instructions.

glass containers with instant pot beef soft tacos

Meal Prep Tips for Instant Pot Beef Tacos

Now, let’s talk about the ultimate taco spread. While these Instant Pot Beef Soft Tacos are definitely the star of the show, they love to be accompanied by some delicious sidekicks. How about serving them with zesty salsa, creamy guacamole, tangy sour cream, and a sprinkle of fresh cilantro? You can also whip up some Mexican rice, refried beans, or a refreshing corn salad to round out the meal. The options are endless!

There are also endless possibilities of repurposing leftovers. Here are some ways to transform your beef into new and exciting meals:

  • Beef Taco Salad: Transform your Instant Pot Beef Soft Tacos into a vibrant taco salad. Start with a bed of fresh lettuce, add your reheated beef, and top it off with diced tomatoes, sliced avocado, shredded cheese, and a dollop of sour cream. Drizzle your favorite dressing over the top, and you’ve got a satisfying and nutritious meal.
  • Beef Enchiladas: Roll up your beef in corn tortillas, place them in a baking dish, and smother them with enchilada sauce. Sprinkle some cheese on top and bake until the cheese is bubbly and golden. Serve with a side of Mexican rice and refried beans for a comforting dinner.
  • Beef Quesadillas: Grab a couple of tortillas, layer them with shredded beef and your choice of cheese. Heat them up in a skillet until the cheese is melted and the tortillas are golden and crispy. Cut them into wedges, and you’ve got a mouthwatering snack or a quick and easy lunch option.

glass containers with instant pot beef soft tacos

beef soft tacos

Instant Pot Beef Soft Tacos

Tender beef, vibrant flavors, and refreshing toppings make these Instant Pot Beef Soft Tacos a delicious meal.
No ratings yet
Prep Time 5 minutes
Cook Time 50 minutes
Course lunch, Main Course
Cuisine American, Latin
Servings 2

Equipment

  • knife
  • cutting board
  • Instant Pot
  • mixing bowl

Ingredients
  

Beef and Seasonings

  • 12 oz chuck roast
  • 2 each garlic cloves (peeled)
  • 1/4 cup celery (diced)
  • 1/4 cup red onions (diced)
  • 8 oz tomato sauce
  • 1 cup water
  • 1 tsp salt
  • 1/4 tsp paprika
  • 1/4 tsp chili powder
  • 1/4 tsp cumin
  • 1/4 tbsp pepper

Pico de Gallo

  • 1 each roma tomato (diced)
  • 1/4 cup celery (diced)
  • 1/4 cup red onions (diced)
  • 1 each lime (juiced)
  • 1/4 cup cilantro (chopped)
  • 1/4 tsp salt

Sides

  • 1 each red bell pepper (sliced)
  • 4 each flour tortillas

Instructions
 

  • Place the chuck roast in the instant pot and add celery, onions, garlic, tomato sauce, seasonings, and water. Cover and seal the lid and place under high pressure for 45 minutes. After it cooks, follow the manufacturer's instructions for natural release and carefully remove the lid
  • Drain the beef from the soup and shred with a fork (note: you can save the liquid and freeze it, use it for stock for soup recipes)
  • While the beef is cooking, prepare the pico de gallo
  • After the beef cooks, serve the beef in tortillas, topped with pico de gallo and bell pepper strips

Similar Recipes

chicken soup

One Pot Mexican Chicken Soup

sweet potato blt

Sweet Potato BLT Sandwich

Grilled Honey Dijon Chicken Kale Salad

You Might Also Like

Frequently Asked Questions

Can I use frozen beef for this recipe?

It’s generally recommended to use thawed beef for better results. Frozen beef may require a longer cooking time and could affect the texture of the meat.


Can I use a different cut of beef?

Absolutely! While the recipe suggests using a chuck or round roast, you can experiment with other cuts like brisket or even stew meat. Just keep in mind that different cuts may require slight adjustments to the cooking time.


Can I use chicken or pork instead of beef?

Of course! The beauty of tacos is their versatility. Feel free to swap the beef for chicken, pork, or even tofu for a vegetarian option. Adjust the cooking time accordingly based on the protein you choose.

Posted on Leave a comment

Baked Lemon Pepper Tilapia with Broccolini and Barley

round plate with tilapia fillet, broccolini, and barley

This Baked Lemon Pepper Tilapia recipe with Roasted Broccolini and Barley, is a dish that’s not only bursting with flavor but also incredibly convenient to make. With just a few simple steps, you’ll have a wholesome and delicious meal ready to go. All you need is some fresh tilapia fillets, vibrant broccolini, nutty barley, and zesty lemon pepper seasoning. It’s like a symphony of flavors and textures that come together in perfect harmony on your plate.

This post may contain affiliate links. Please see our privacy policy for details.

round plate with tilapia fillet, broccolini, and barley

What Makes This Recipe So Tasty

So, are you ready to take your tilapia recipe to a whole new level of flavor? Give it a zesty twist with lemon pepper seasoning, and let your taste buds dance with joy!

If you’re looking for a hassle-free way to add flavor to your tilapia, lemon pepper seasoning is your go-to option! It’s readily available in most grocery stores, and a simple sprinkle is all it takes to transform your tilapia into a mouthwatering masterpiece. Plus, it saves you time on measuring and combining multiple spices—talk about a win-win!

Lemon pepper seasoning is incredibly versatile and can be used in various cooking methods for tilapia. Whether you’re grilling, baking, or even pan-searing, the zesty blend of lemon and pepper adds a pop of flavor that works wonders with the delicate flesh of tilapia.

The PrepYoSelf Newsletter

Ingredients You’ll Need

  • Broccolini, a close cousin of broccoli, is a nutritional powerhouse. Packed with vitamins A, C, and K, as well as fiber, it’s a true champion of health. It not only adds a delightful crunch but also contributes to your daily veggie intake. 
  • As for barley, it’s a whole grain that provides a hearty and satisfying base for your dish. It’s high in fiber, minerals, and antioxidants, making it a stellar choice for a well-balanced meal.
  • Now, let’s talk about the heart-healthy aspect of this dish. Tilapia is a lean white fish that’s low in saturated fat and high in protein. It’s a fantastic choice for those looking to maintain a healthy heart and balanced diet. By incorporating broccolini and barley, you’re adding even more heart-healthy goodness to your plate. It’s a meal that nourishes both your body and soul!
  • Lemon pepper seasoning brings a vibrant tanginess to your tilapia that complements its delicate flavor.  The zingy notes of fresh lemon zest and the subtle kick of black pepper create a harmonious balance, elevating the taste of the fish to a whole new level of deliciousness! The aromatic citrusy notes wafting through your kitchen will have your mouth watering before you even take your first bite. The visual appeal of the golden-brown crust formed by the seasoning will make your dish Instagram-worthy.

round plate with tilapia fillet, broccolini, and barley - tilapia recipe on plate

Simple Steps to Make Lemon Pepper Tilapia Recipe

  1. Preheat the oven to 400F.
  2. Next, boil the barley on the stovetop.
  3. Meanwhile, place the broccolini and tilapia on a sheet pan. Sprinkle on the seasonings and coat with olive oil
  4. Bake the tilapia and broccolini in the oven.
  5. After the barley cooks, use a fork to fluff the barley.

Reference the recipe card below for detailed instructions.

rectangle glass containers with tilapia fillet, broccolini, and barley - tilapia recipe perfect for meal prep

Meal Prep Tips for this Tilapia Recipe

  • When it comes to storage, serving, and freezing, I’ve got you covered. To maximize freshness, store the cooked tilapia, roasted broccolini, and in airtight containers in the refrigerator. They can last up to three days, allowing you to enjoy this delicious meal throughout the week. When you’re ready to dig in, simply reheat the components and plate them together for a delightful experience.
  • As for freezing, you can freeze the cooked tilapia fillets individually, wrapped tightly in plastic wrap and placed in a freezer-safe bag. They will keep for up to three months. When you’re ready to enjoy them, let them thaw overnight in the refrigerator, then reheat them in the oven or microwave. The broccolini and barley can also be frozen, but they might lose some of their texture upon thawing.
  • To take this meal to the next level, let’s explore some options for additional side dishes or swaps. Pair it with a fresh garden salad dressed in a tangy vinaigrette. You could even serve it with a side of roasted sweet potatoes or a quinoa and vegetable medley. The possibilities are endless, and I encourage you to experiment and discover your own delightful combinations.

rectangle glass container with tilapia fillet, broccolini, and barley

tilapia

Lemon Pepper Tilapia with Roasted Broccolini and Barley

Baked Lemon Pepper Tilapia with Roasted Broccolini and Barley is a sensational choice for your meal prep adventures. It's easy to make, heart-healthy, and brimming with deliciousness.
No ratings yet
Prep Time 5 minutes
Cook Time 30 minutes
Course dinner, Main Course
Cuisine American, Mediterranean
Servings 2

Equipment

  • knife
  • cutting board
  • spatula
  • boiling pot
  • sheet pan
  • oven

Ingredients
  

Tilapia

  • 12 oz Tilapia fillets
  • 1/2 tsp lemon pepper
  • 1/2 tsp garlic powder
  • 1/4 tsp salt
  • 1 tbsp olive oil
  • 4 each broccolini spears
  • 1 each lemon (sliced)

Barley

  • 1/2 cups dry barley
  • 1/4 tsp garlic powder
  • 1/4 tsp salt
  • 1 tsp olive oil

Instructions
 

  • Pre-heat the oven to 400F
  • Place the broccolini on a sheet pan next to the tilapia. Evenly season everything with the lemon pepper, garlic powder, and salt. Drizzle both with olive oil and bake in the oven for 15-20 minutes
  • Meanwhile, boil 1.5 cups of water and add the barley, olive oil, garlic powder. Stir it around and lower the heat to low medium. Cover with a lid and let it simmer until all the liquid is absorbed, usually 30 minutes. Use a fork to fluff the barley
  • Serve the roasted broccolini and fish on top of the fish with the barley. Squeeze with fresh lemon juice

Similar Recipes

rosemary chicken

Rosemary Baked Chicken and Potatoes

salmon beet salad

Citrus Ginger Salmon Salad with Roasted Beets

shrimp and corn

Sheet Pan Shrimp with Cauliflower and Corn

You Might Also Like

Frequently Asked Questions

Can I use other types of fish instead of tilapia?

Absolutely! While tilapia works beautifully in this recipe, you can easily substitute it with other mild white fish such as cod, halibut, or sole. The cooking time may vary slightly, so keep an eye on the fish to ensure it’s cooked through.


Can I use regular broccoli instead of broccolini?

Definitely! If you can’t find broccolini, regular broccoli florets will work just fine. Simply chop them into bite-sized pieces, toss with oil and seasonings, and roast alongside the tilapia until tender and slightly caramelized.


Can I use a different grain instead of barley?

Absolutely! If you prefer a different grain or have dietary restrictions, feel free to swap barley with quinoa, brown rice, or even couscous. Adjust the cooking time according to the grain you choose and follow the package instructions for best results.

Posted on Leave a comment

Grilled Hawaiian Chicken and Pineapple Salad

If you’re looking to level up your meal prep routine with an energizing and refreshing grilled chicken salad, look no further than this Grilled Hawaiian Chicken and Pineapple Salad. Not only is this dish bursting with vibrant flavors, but it’s also a fantastic option for those who love refreshing grilled chicken salads with a tropical twist to your meal prep routine.

This post may contain affiliate links. Please see our privacy policy for details.

round plate with grilled chicken with grilled pineapple and crisp greens

Why You’ll Enjoy This Hawaiian Chicken Recipe

Now, let’s talk about the flavors that will level up your meal prep game. The grilled, Hawaiian chicken is marinated in a tantalizing blend of soy sauce, garlic, lemon, and a touch of honey, creating a delectable fusion of sweet and savory. The pineapple adds a burst of tropical sweetness, while the mixed greens provide freshness and vibrant colors. Tossed together with a zesty dressing, this salad will make your taste buds sing and leave you craving for more!

One of the reasons this recipe is perfect for meal prep is that it works well as a single serving. You can easily portion out the ingredients to fit your needs. Whether you’re preparing lunches for the week or want a quick and healthy dinner option, this recipe is a winner. The combination of grilled chicken, juicy pineapple, and crisp greens ensures you’ll enjoy a satisfying and balanced meal every time.

The PrepYoSelf Newsletter

Ingredients You’ll Need

First and foremost, let’s talk about the ease of making this recipe. It’s super simple and requires just a handful of ingredients. All you need is some boneless chicken thighs or chicken breasts, juicy pineapple slices, mixed greens, and a delightful dressing to tie it all together. With minimal effort, you can create a dazzling meal that will make your taste buds dance with joy!

Now, let’s focus on the star of the show: pineapple! This tropical fruit not only adds a sweet and tangy flavor to the salad but also brings a range of health benefits. Pineapple is an excellent source of vitamin C, which boosts your immune system and promotes healthy skin. It also contains bromelain, an enzyme that aids digestion and reduces inflammation. So, not only does pineapple add a delicious tropical twist to your meal, but it also contributes to your well-being.

How to Make Grilled Hawaiian Chicken

  1. In a mixing bowl, mix together the chicken marinade. Next, place the chicken in the marinade and soak for about 10 minutes prior to cooking
  2. Meanwhile, prepare the salad dressing in another mixing bowl. Whisk the ingredients together until well blended
  3. Heat an indoor grill pan on medium-high heat. Grill the sliced pineapple on each side. Remove from the grill and set it aside for the salad
  4. Then, add the chicken and grill on each side until the chicken is fully cooked and golden brown.
  5. After the chicken cooks, let it rest for a few minutes before slicing it into strips
  6. Serve the chicken on top of the spring mix with the pineapple. Drizzle with the honey soy dressing on top

Reference the recipe card below for detailed instructions.

round plate with grilled chicken with grilled pineapple and crisp greens

Meal Prep Tips

  • When it comes to storage, serving, and freezing, I’ve got you covered! To keep the flavors and textures intact, store the grilled chicken and pineapple separately from the greens, and dressing. This way, you can assemble a fresh salad whenever you’re ready to dig in. For optimal freshness, store the ingredients in airtight containers in the refrigerator. The grilled chicken and pineapple will keep well for up to 3-4 days.
  • If you want to freeze the grilled chicken and pineapple for future use, make sure to cool them completely before placing them in freezer-safe containers or bags. Properly frozen, they can last for up to 2-3 months. To thaw, simply transfer the containers to the refrigerator overnight and then assemble your salad as usual. Just remember not to freeze the greens and dressing as they are best enjoyed fresh.
  • Now, let’s talk about the fantastic possibilities that accompany this flavorful dish. You can serve your Grilled Hawaiian Chicken and Pineapple Salad as a standalone meal, or you can get creative and pair it with other delicious options. For example, you can add a scoop of coconut rice or quinoa on the side to enhance the tropical experience. Alternatively, serve it alongside some grilled vegetables for a wholesome and satisfying meal. The choice is yours!

round plate with grilled chicken with grilled pineapple and crisp greens

Grilled Hawaiian Chicken and Pineapple Salad

The combination of grilled chicken, juicy pineapple, and crisp green ensures you'll enjoy a satisfying and balanced meal every time.
No ratings yet
Prep Time 5 minutes
Cook Time 30 minutes
Course lunch, Main Course
Cuisine American, Hawaiian
Servings 2

Equipment

  • knife
  • cutting board
  • indoor grill pan

Ingredients
  

Chicken and Marinade

  • 12 oz boneless chicken thighs
  • 3 tbsp soy sauce
  • 2 tbsp honey
  • 1 each lemon (juiced)
  • 1 tsp garlic powder
  • 1/4 tsp pepper

Sides

  • 12 oz pineapple (cut into 1/4 inch thick half rings)
  • 4 cups spring mix

Honey Soy Salad Dressing

  • 1 tbsp soy sauce
  • 1 each lemon (juiced)
  • 2 tbsp honey
  • 4 tbsp olive oil
  • 1/4 tsp garlic powder

Instructions
 

  • Slice the fresh pineapple in half rings about 1/4 inch thick
  • In a mixing bowl, mix together the chicken marinade. Next, place the chicken in the marinade and soak for about 10 minutes prior to cooking
  • Meanwhile, prepare the salad dressing in another mixing bowl. Whisk the ingredients together until well blended
  • Heat an indoor grill pan on medium high heat. Grill the sliced pineapple on each side for about 3 to 5 minutes until you get grill marks and the pineapple has caramelized. Remove from the grill and set it aside for the salad
  • Then, add the chicken and grill on each side for about 6 to 7 minutes. Grill until the chicken is fully cooked and golden brown. It should reach an internal temperature of 165F
  • After the chicken cooks, let it rest for a few minutes before slicing it into strips
  • Serve the chicken on top of spring mix with the pineapple. Drizzle with the honey soy dressing on top

Similar Recipes

cilantro steak

Grilled Cilantro Skirt Steak with Cauliflower Rice

cauliflower rice

Cauliflower Fried Rice

sweet and sour chicken wings

Air Fryer Sweet and Sour Chicken Wings

You Might Also Like

Frequently Asked Questions

Can I substitute the chicken with another protein?

Of course! If you prefer a different protein, such as shrimp, pork, or even grilled steak, feel free to swap it out for the chicken. Adjust the cooking time accordingly to ensure your chosen protein is properly cooked.


Can I grill the chicken indoors if I don’t have access to an outdoor grill?

Yes, you can! We actually cooked ours indoors for this recipe. If you don’t have an outdoor grill, you can use a stovetop grill pan or even a regular skillet to cook the chicken indoors. Just preheat the grill pan or skillet over medium-high heat and cook the chicken until it’s nicely charred and cooked through.


Can I make the dressing in advance?

Yes, you can definitely prepare the dressing in advance. Just store it in an airtight container in the refrigerator and give it a good shake before drizzling it over your salad. However, it’s always best to dress the salad just before serving to keep the greens fresh and crisp.

Posted on Leave a comment

Baked Asparagus and Tomato Egg Frittata

white rectangular baking dish with asparagus and tomato egg frittata

Hello, my breakfast-loving friends! Let’s talk about the sheer ease of making this delightful Asparagus and Tomato Egg Frittata. With just a handful of ingredients and a few simple steps, you’ll be on your way to a delicious and satisfying meal. Get ready to savor every bite and start your day on a scrumptious note! Happy Prepping!

This post may contain affiliate links. Please see our privacy policy for details.

white rectangular baking dish with asparagus and tomato egg frittata

The PrepYoSelf Newsletter

Why This Recipe Is a Great Low-Carb Friendly Dish

This recipe also caters to those with diabetes or anyone looking to maintain a balanced blood sugar level. With its low-carb profile and nutrient-packed ingredients, the Baked Asparagus and Tomato Egg Frittata won’t send your glucose levels on a rollercoaster ride. Asparagus is a superstar vegetable with a low glycemic index, meaning it won’t cause drastic spikes in blood sugar. Combined with juicy tomatoes and protein-rich eggs, this frittata strikes the perfect balance to keep you feeling energized and satisfied throughout the day.

Simple Ingredients for Vegetarian Egg Frittata

It’s effortless to make this frittata, bursting with the goodness of asparagus, tomatoes, and eggs, and perfect for a single serving. Now let’s explore the amazing benefits of these ingredients in this recipe.

  • Asparagus, oh how I adore thee! Not only does asparagus bring a delightful crunch and vibrant green color to the frittata, but it’s also packed with essential nutrients. It’s a fantastic source of folate, vitamin C, and vitamin K, all of which contribute to a healthy and happy you.
  • Next up, tomatoes. These juicy gems add a burst of freshness to the frittata, and they’re loaded with powerful antioxidants that may help protect against certain types of cancer. Plus, they bring a delightful tartness that complements the asparagus and eggs oh-so-perfectly.
  • Speaking of eggs, they are the glue that holds everything together in this frittata extravaganza. Eggs are a fantastic source of high-quality protein, essential vitamins, and minerals. They provide a satiating boost to keep you energized throughout the day.

white rectangular baking dish with asparagus and tomato egg frittata

How to Make Breakfast Vegetarian Egg Frittata

  1. Preheat the oven to 400F.
  2. Chop the asparagus and tomatoes into small pieces.
  3. Whisk the eggs in a mixing bowl and add the veggies and cheese.
  4. Bake in the oven until the egg whites are firmly set.

Reference the recipe card below for detailed instructions.

white rectangular baking dish with asparagus and tomato egg frittata

Meal Prep Tips for Egg Frittata:

  • When it comes to storage, serving, and freezing, we’ve got you covered. Once you’ve baked the frittata, allow it to cool completely before transferring it to an airtight container. Pop it in the fridge, and it’ll stay fresh for up to four days. When you’re ready to enjoy it, you can reheat it gently in the microwave or even enjoy it cold if you prefer.
  • If you want to freeze portions for future meals, here’s a nifty tip. Slice the frittata into individual servings and wrap each piece tightly in plastic wrap or foil. Place them in a freezer-safe container or bag, and they’ll stay good for up to three months. To thaw and reheat, simply defrost it in the fridge overnight and warm it up in the oven or microwave when you’re ready to savor the goodness.
  • Now, let’s talk about what else you can serve alongside this delectable frittata. Personally, I love to pair it with a side of fresh mixed greens tossed in a zesty vinaigrette. The crispness of the salad beautifully balances the richness of the frittata. You can also serve it with some whole-grain toast or a dollop of creamy avocado for an extra dose of yumminess.

white rectangular baking dish with asparagus and tomato egg frittata

asparagus frittata

Asparagus & Tomato Egg Frittata

No ratings yet
Prep Time 5 minutes
Cook Time 15 minutes
Course Breakfast
Cuisine American
Servings 2

Equipment

  • knife
  • cutting board
  • whisk
  • mixing bowl
  • baking dish
  • oven

Ingredients
  

  • 4 each large eggs
  • 1/4 cup cherry tomatoes (sliced)
  • 4 each asparagus spears
  • 1/4 cup shredded cheddar cheese
  • 1 tbsp olive oil
  • 1/4 tsp salt

Instructions
 

  • Pre-heat the oven to 400F
  • Chop the asparagus into 1 inch pieces
  • Whisk the eggs in a mixing bowl and add the sliced tomatoes, chopped asparagus, and cheese. Mix well
  • Grease the baking dish with olive oil
  • Pour in the egg mixture and bake in the oven for 12 to 15 minutes until the eggs are firmly set

Similar Recipes

fried egg and sausage hash

Fried Egg with Apple and Sausage Hash

Easy Cheese Omelette

easy sausage egg muffins

Sausage Egg Muffins with Strawberries

You Might Also Like

Frequently Asked Questions

Can I use egg substitutes or egg whites instead of whole eggs?

Certainly! If you prefer to reduce the fat or cholesterol content, you can use egg substitutes or a combination of whole eggs and egg whites. However, keep in mind that the texture and taste may vary slightly from using whole eggs alone.


Do I need to pre-cook the vegetables before adding them to the frittata?

n most cases, pre-cooking the vegetables is not necessary. The frittata bakes in the oven for a sufficient amount of time, allowing the vegetables to cook and soften. However, if you’re using vegetables that take longer to cook, such as potatoes or carrots, it’s advisable to partially cook them beforehand to ensure they are tender.


How do I know when my frittata is fully cooked?

A good indication that your frittata is fully cooked is when the edges are set and golden brown, and the center is firm to the touch. You can also insert a toothpick or a knife into the center of the frittata, and if it comes out clean, it’s ready to be removed from the oven.

Posted on Leave a comment

Shrimp and Cabbage Stir Fry

Hey there, seafood lovers! Today, I’m here to share with you a meal prep gem that will make your taste buds dance with joy: shrimp and cabbage stir fry. Brace yourselves for a burst of flavors, because this dish is not only a delightful treat but also an absolute winner when it comes to easy and delicious meal prep.

With this marvelous recipe in your repertoire, you’ll have a tasty, nutritious, and time-saving seafood delight to enjoy whenever your heart desires. So, unleash your inner chef and let the shrimp and cabbage dance their way into your meal prep routine.

This post may contain affiliate links. Please see our privacy policy for details.

Why You’ll Love this Shrimp Stir Fry

  • Imagine succulent shrimp, perfectly cooked to tender perfection, mingling with vibrant and crunchy cabbage. As you take a bite, you’re greeted with the delightful umami of the shrimp, enhanced by the sweetness of the cabbage. Each ingredient brings its own unique taste and texture, creating a harmonious dance of flavors in your mouth.
  • Let’s start by talking about the dynamic duo: shrimp and cabbage. The shrimp, with its delicate and slightly sweet essence, provides a burst of oceanic goodness that will transport you to coastal shores. Its tender texture gives way with each bite, releasing a burst of juiciness that is simply irresistible.
  • Shrimp is not only a feast for the palate but also a great source of lean protein. Packed with essential nutrients like omega-3 fatty acids, vitamin D, and selenium, shrimp is a healthy choice that adds a burst of deliciousness to any meal. 
  • And cabbage, oh cabbage! Its subtle sweetness plays a delightful supporting role, balancing out the flavors of the shrimp and adding a satisfying crunch to every mouthful. With each bite, the cabbage brings a fresh and vibrant note that complements the shrimp perfectly.

The PrepYoSelf Newsletter

Simple Ingredients You’ll Need

  • Shrimp: Use fresh or frozen. If using frozen, just be sure to thaw it first before cooking.
  • Shredded Cabbage: You can use any kind such as napa cabbage, green cabbage, or red cabbage
  • Red Bell Peppers: Feel free to use any color bell peppers
  • Red Onions: You can use white onions or green onions as an alternative
  • Seasonings: Soy Sauce, garlic powder, ginger powder, sesame oil

shrimp and cabbage stir fry on a table with other courses

Easy Recipe Steps for Shrimp Stir Fry

Imagine the aromas wafting through your kitchen as the stir fry sizzles in the pan. The fragrance of the shrimp mingling with the earthy undertones of the cabbage creates an olfactory symphony that heightens the anticipation of the feast to come. Here’s how you can enjoy this dish in less than 10 minutes:

  1. Add oil to a hot wok and saute the onions until they soften.
  2. Next, add the shredded cabbage and season with garlic powder and ginger.
  3. Finally, add the bell peppers and shrimp and season with soy sauce and sesame oil.

Reference the recipe card below for detailed instructions.

shrimp and cabbage stir fry on a plate ready to eat

Shrimp Stir Fry Meal Prep Tips

  • When it comes to storing your shrimp and cabbage stir fry, let me share some tips that will keep your taste buds dancing. Make sure you have some airtight containers ready to rock and roll. Once your stir fry has cooled down, divide it into individual servings and pop them into the fridge. This way, you’ll have a fuss-free, grab-and-go meal that’s ready to satisfy your cravings whenever you need it.
  • And if you want to extend its shelf life, my friends, fear not! You can freeze this stir fry for later enjoyment. Just remember to thaw it overnight in the fridge before reheating it to maintain that tantalizing texture and flavor.
  • Now, let’s talk serving because the presentation is key, my seafood aficionados! When it’s time to savor your shrimp and cabbage stir fry, get creative! You can enjoy it as is, reveling in the wonderful flavors that come together in perfect harmony. Or, for an extra dose of awesomeness, pair it with some fluffy jasmine rice or a bed of zucchini noodles to make it a truly satisfying meal. And don’t forget to add a squeeze of zesty lime, a sprinkle of fresh herbs like cilantro or parsley, and maybe a drizzle of your favorite chili sauce to take it to the next level of deliciousness.

shrimp and cabbage stir fry in meal prep containers

shrimp stir fry

Shrimp and Cabbage Stir Fry

Whether you savor it as a standalone dish or pair it with fluffy rice or noodles, this shrimp and cabbage stir fry is a taste sensation that will leave you yearning for more.
No ratings yet
Prep Time 5 minutes
Cook Time 15 minutes
Course dinner, Main Course
Cuisine Asian
Servings 2

Equipment

  • knife
  • cutting board
  • wok
  • spatula

Ingredients
  

  • 12 oz shrimp (peeled and deveined)
  • 2 cups shredded cabbage
  • 1 each red bell pepper (sliced)
  • 1/4 cup red onions (diced)
  • 2 tbsp soy sauce
  • 1 tsp sesame oil
  • 1/4 tsp garlic powder
  • 1/4 tsp ginger powder
  • 1 tbsp olive oil

Instructions
 

  • Add olive oil to a wok on medium high heat and saute the onions until they soften
  • Next, add the shredded cabbage and season with garlic powder and ginger powder
  • Stir the cabbage until it gets tender (about 3 to 4 minutes)
  • Then, add the bell peppers and shrimp. Season with the soy sauce and sesame oil
  • Stir for about 2 to 3 minutes until the shrimp turns opaque and is fully cooked

Similar Recipes

shrimp kebab

Air Fryer Shrimp and Pineapple Kebabs

shrimp and corn

Sheet Pan Shrimp with Cauliflower and Corn

salmon salad

Salmon Salad Stuffed Avocado

You Might Also Like

Frequently Asked Questions

How long does it take to cook the shrimp?

Shrimp cook very quickly, usually within 2 to 3 minutes. Overcooking can result in a rubbery texture, so keep a close eye on them while they’re in the pan or wok. They should turn pink and opaque when fully cooked.


Can I use frozen shrimp for the stir fry?

Absolutely! Frozen shrimp works great for stir fry recipes. Just make sure to thaw them properly before cooking. You can do this by placing them in the refrigerator overnight or using the quick thawing method in a sealed bag under cold running water.


Can I use a different type of cabbage?

Certainly! While Napa cabbage is commonly used in stir fry recipes, you can experiment with other varieties like green cabbage, Savoy cabbage, or even bok choy. Each type will bring its own unique flavor and texture to the dish.

Posted on Leave a comment

Stuffed Baked Potato with Instant Pot BBQ Beef

Whether you’re craving the comforting flavors of a backyard barbecue or the simple pleasure of a well-executed baked potato, this Instant Pot BBQ Beef and Baked Potato recipe hits all the right notes. The rich, smoky beef combined with the buttery, fluffy potato is a combination that will have you singing its praises.

This post may contain affiliate links. Please see our privacy policy for details.

plate with baked potato and instant pot beef bbq on top with broccoli side

Why this meal is great for meal prep

Meal prepping can be a lifesaver, especially for those of us with busy schedules. With this recipe, you can prepare a batch of tender, juicy shredded beef, and perfectly baked potatoes in your trusty Instant Pot. The best part? It’s incredibly easy! Just set it and forget it while you go about your day, and voila – a delicious meal awaits you when you’re ready.

Now, let’s talk about the single-serving aspect. Sometimes, you just want a satisfying meal all to yourself, right? Well, this recipe has got you covered. You can easily adjust the portions to make a single serving, allowing you to indulge in a hearty and comforting meal without worrying about leftovers. It’s the perfect solution for those nights when you’re craving a nice warm, comfort meal.

The PrepYoSelf Newsletter

Here’s What You Need to Make Stuffed Potatoes with Instant Pot Beef BBQ

  • Beef: We used chuck roast, but you can choose any cut of beef
  • Aromatics: We added, garlic cloves, celery, white onions, and green onions
  • Liquid: We added some water to tomato sauce
  • Potatoes: You can also use sweet potatoes
  • Broccoli: For added fiber, we enjoyed this dish with broccoli, but feel free to serve it with your choice of veggies.

plate with baked potato and instant pot beef bbq on top with broccoli side

How to Make Instant Pot BBQ Beef

Now, let’s talk about why this recipe is a dream come true for BBQ lovers and baked potato enthusiasts. The Instant Pot works its magic, transforming tough cuts of beef into melt-in-your-mouth, smoky, BBQ-infused perfection. The meat becomes so tender that it practically falls apart with a gentle touch of a fork. Pair that with a perfectly baked potato – fluffy on the inside, crispy on the outside – and you’ve got a match made in heaven. Here’s how to make it:

  1. Prepare the shredded beef in the instant pot. Add the garlic, celery, white onions, tomato sauce, salt, and pepper.
  2. While the beef cooks, preheat the oven to 425F. Clean the potatoes and scrub them well. Then, place them on a sheet pan and bake them in the oven for 50-60 minutes.
  3. After the beef cooks, carefully release the steam and remove the lid. Drain the beef from the excess liquid and shred it with a fork.
  4. Mix the beef with your choice of BBQ sauce.
  5. Once the potatoes are cooked, let them cool before slicing them in half. Top it off with the BBQ beef and enjoy with a side of veggies. Garnish with fresh green onions.

Reference the recipe card below for detailed instructions.

Glass meal prep container with instant pot beef and baked potato and broccoli

Meal Prep Tips for Stuffed BBQ Beef Potatoes

  • Now, let’s dive into the nitty-gritty of storage and serving. Once you’ve prepared your Instant Pot BBQ Shredded Beef and Baked Potatoes, you’ll want to store them properly to enjoy later. I recommend dividing the shredded beef into individual airtight containers and refrigerating them. As for the baked potatoes, wrap them in foil and keep them in the fridge alongside the beef. When you’re ready to dig in, simply reheat the beef in the microwave or on the stovetop, and warm up the baked potato in the oven or microwave. Easy peasy, right?
  • When it comes to serving, get creative! Pile that luscious shredded beef on top of the fluffy baked potato, and garnish with your favorite toppings like sour cream, shredded cheese, green onions, or even some spicy BBQ sauce. The possibilities are endless, so feel free to customize it to your liking. 
  • To reheat, simply microwave the shredded beef on high for 1-2 minutes or until warmed through. For the baked potatoes, you can either reheat them in the oven at 350°F (175°C) for about 10-15 minutes or in the microwave for 2-3 minutes until heated to your liking.

glass meal prep containers with food including instant pot beef and baked potatoes

BBQ Baked Potato

BBQ Beef Stuffed Potatoes with Steamed Broccoli

A comforting stuffed baked potato with tender and juicy Instant Pot BBQ beef that is perfect for a weekday meal.
No ratings yet
Prep Time 5 minutes
Cook Time 50 minutes
Course lunch, Main Course
Cuisine American
Servings 2

Equipment

  • knife
  • cutting board
  • Instant Pot
  • mixing bowls
  • spoon
  • sheet pan
  • oven

Ingredients
  

  • 12 oz chuck roast
  • 2 each garlic cloves
  • 1/4 cup celery (diced)
  • 1/2 cup white onions (diced)
  • 8 oz tomato sauce
  • 1 tsp salt
  • 1 tsp pepper
  • 2 each small russet potatoes
  • 3 cups broccoli florets
  • 2 tbsp green onions (chopped)
  • 1/4 tsp salt
  • 1 tbsp olive oil

Condiments

  • 1/4 cup BBQ Sauce

Instructions
 

Baked Potato

  • Pre-heat the oven to 425F
  • Wash and scrub the potatoes. Poke them with a fork all around
  • Coat them with olive oil and season with salt and pepper
  • Place the potatoes on a sheet pan and bake in the oven for 50-60 minutes

Instant Pot BBQ Beef

  • Meanwhile, prepare the shredded beef in the instant pot. Add the garlic, celery, white onions, tomato sauce, salt, and pepper
  • After the beef cooks, be sure to follow the manufacturer instructions for natural release of the steam. Carefully remove the lid
  • Drain the beef from the excess liquid and shred with a fork
  • After you shred the beef, mix it with the BBQ sauce

Steamed Broccoli

  • Pour water into a boiling pot 1/4 of the way and boil the water. Place a strainer that will fit over the rim of the boiling pot
  • Carefully place the broccoli in the strainer and steam for about 5 to 6 mintues above boiling water

Assembly

  • Once the potatoes are cooked, let it cool for a few minutes before slicing it in half. Top it off with the bbq beef and serve with a side of steamed broccoli. Garnish with fresh chopped green onions

Similar Recipes

chicken soup

One Pot Mexican Chicken Soup

sweet potato blt

Sweet Potato BLT Sandwich

Grilled Honey Dijon Chicken Kale Salad

You Might Also Like

Frequently Asked Questions

Can I use any type of potato for stuffed baked potatoes?

While russet potatoes are most commonly used for stuffed baked potatoes due to their fluffy texture, you can also use other varieties like Yukon gold or sweet potatoes. Just keep in mind that the cooking times may vary slightly depending on the type of potato you choose.


Can stuffed baked potatoes be frozen?

Stuffed baked potatoes can be frozen, but it’s best to freeze them before adding the toppings. After baking and cooling the potatoes, wrap them individually in foil or place them in airtight freezer bags. They can be stored in the freezer for up to 3 months. When ready to enjoy, thaw the potatoes in the refrigerator overnight, reheat in the oven, and then add your desired toppings.


Are stuffed baked potatoes healthy?

Stuffed baked potatoes can be part of a healthy diet when prepared with nutritious toppings and enjoyed in moderation. It’s important to balance the ingredients and portion sizes to ensure a well-rounded meal.

Posted on Leave a comment

Baked Pistachio Crusted Salmon and Asparagus

Hello, my foodie friends, unleash your inner chef and get ready to turn up your culinary game because we are jumping into the realm of delectable dinners with a showstopper recipe: Crusted Pistachio Salmon with Asparagus in the oven. Get ready to elevate your meal prep game and indulge in a restaurant-quality dinner right at home! This dish is not only packed with flavor and nutrition, but it’s also the epitome of convenience. So, let’s get started and uncover why this recipe is a must-try for your next meal prep session!

This post may contain affiliate links. Please see our privacy policy for details.

Calories: 474kcal | Carbohydrates: 8g | Protein: 38g | Fat: 32g | Saturated Fat: 5g | Polyunsaturated Fat: 8g | Monounsaturated Fat: 18g | Cholesterol: 94mg | Sodium: 823mg | Potassium: 1059mg | Fiber: 3g | Sugar: 2g | Vitamin A: 189IU | Vitamin C: 4mg | Calcium: 63mg | Iron: 3mg

Baked Pistachio Crusted Salmon and Asparagus cooked on a plate

Recipe Magic

Now, let’s talk about the magic of this recipe: the restaurant-quality experience. The combination of the moist and tender salmon, the crunchy and flavorful pistachio crust, and the perfectly roasted asparagus creates a harmony of flavors and textures that rival any high-end restaurant dish. You’ll be amazed at how easily you can recreate the same level of elegance and taste right in your own kitchen.

Pistachios are delightful nuts that bring a delightful crunch and rich flavor to the salmon crust. But that’s not all—pistachios are also loaded with heart-healthy fats, protein, fiber, and an array of vitamins and minerals. By incorporating pistachios into this dish, we’re adding a nutritional boost that pairs perfectly with the omega-3 fatty acids found in salmon.

Speaking of salmon, this recipe is a fantastic option for a filling, low-carb dinner. Salmon is a great source of high-quality protein and healthy fats, making it an ideal choice for those looking to enjoy a filling meal. The pistachio crust adds an additional layer of texture and flavor, transforming an already incredible protein into a culinary masterpiece.

The PrepYoSelf Newsletter

To Prepare This Baked Salmon Recipe You’ll Need

  • Salmon: Use fresh salmon or frozen filets. If using frozen filets, be sure you thaw them out in the refrigerator in advance prior to baking.
  • Pistachios: If you can’t find pistachios, you can use pine nuts
  • Dijon Mustard: Dijon mustard adds a nice spice to the dish, but you can also use regular mustard or even mayo.
  • Asparagus: Add minced garlic and a drizzle of olive oil to add flavor

Baked Pistachio Crusted Salmon and Asparagus ready to cook

Easy Recipe Steps to Make Pistachio-Crusted Salmon

  1. Preheat the oven to 400F.
  2. Use a knife or a food processor to finely chop the pistachios.
  3. Place the salmon and asparagus on a sheet pan.
  4. Spread the Dijon mustard on the salmon and sprinkle with garlic powder and salt. Then, sprinkle the chopped pistachios on the top of the salmon making sure it is fully coated.
  5. Season the asparagus with salt, minced garlic, and drizzle it with olive oil.
  6. Bake everything in the oven for 12 to 15 minutes.
  7. Squeeze lemon juice on top of the salmon and asparagus for added citrus flavors.

Reference the recipe card below for detailed instructions.

Baked Pistachio Crusted Salmon and Asparagus on a plate with fork and knife next to it

Meal Prep Tips

  • To prevent the pistachio crust from burning, you can cover the salmon loosely with foil during the initial part of the baking process. This will allow the salmon to cook through while protecting the crust. Towards the end, remove the foil to let the crust develop a beautiful golden color.
  • You can use frozen salmon for this recipe. Thaw the salmon fillets in the refrigerator overnight before proceeding with the recipe. It’s important to ensure the salmon is completely thawed before applying the pistachio crust and baking.
  • Storage: Once the salmon and asparagus are cooked and cooled, store them separately in airtight containers in the refrigerator. You can keep them for up to three days.
  • Reheating: When ready to enjoy, gently reheat the salmon and asparagus in the oven at a low temperature to retain their texture and flavors. Alternatively, you can microwave them briefly, taking care not to overcook them.
  • Serving Suggestions: Serve the Baked Pistachio Crusted Salmon with Asparagus alongside a fresh salad, quinoa, or roasted potatoes for a complete and balanced meal. Squeeze a bit of lemon juice over the salmon just before serving to brighten the flavors.

Baked Pistachio Crusted Salmon and Asparagus in meal prep containers

salmon and asparagus

Oven Baked Pistachio Crusted Salmon with Roasted Asparagus

With its restaurant-quality appeal, this Pistachio Crusted Salmon and Asparagus recipe will make you feel like a culinary superstar. Tender salmon, with a crunch pistachio crust and perfectly roasted asparagus rivals any high-end restaurant dish.
No ratings yet
Prep Time 5 minutes
Cook Time 15 minutes
Course dinner, lunch
Cuisine American
Servings 2
Calories 474 kcal

Equipment

  • knife
  • cutting board
  • sheet pan
  • oven

Ingredients
  

Salmon and Pistachio Crust

  • 12 oz salmon
  • 1/4 cup pistachios (shelled)
  • 2 tbsp dijon mustard
  • 1 tbsp garlic cloves (minced)
  • 1/4 tsp salt
  • 1 tbsp olive oil

Asparagus

  • 12 each asparagus spears
  • 1 tbsp garlic (minced)
  • 1/4 tsp salt
  • 1 tbsp olive oil
  • 1 each lemon

Instructions
 

  • Pre-heat the oven to 400F.
  • Finely chop the pistachios with a knife (or you can use a food processor)
  • Place the salmon and asparagus on a sheet pan.
  • Use a spoon to spread the Dijon mustard on the salmon. Season the salmon and asparagus with minced garlic and salt. Then, sprinkle the pistachio crust on top of the salmon making sure it is fully coated.
  • Next drizzle the salmon and asparagus with olive oil.
  • Bake everything in the oven for 12 to 15 minutes until the salmon is fully cooked to an internal temperature of 145F
  • Cut the lemon in wedges and squeeze lemon juice on top of the fish and asparagus

Notes

Nutrition information provided is an estimate. It will vary based on cooking method and specific ingredients used. Please consult with your healthcare provider for specific dietary needs. To gain a better understanding, explore our nutrition disclaimer here

Nutrition

Calories: 474kcalCarbohydrates: 8gProtein: 38gFat: 32gSaturated Fat: 5gPolyunsaturated Fat: 8gMonounsaturated Fat: 18gCholesterol: 94mgSodium: 823mgPotassium: 1059mgFiber: 3gSugar: 2gVitamin A: 189IUVitamin C: 4mgCalcium: 63mgIron: 3mg

Similar Recipes

salmon beet salad

Citrus Ginger Salmon with Roasted Beets

salmon and watermelon salad

Grilled Salmon with Watermelon Salad

salmon salad

Salmon Stuffed Avocado Salad

You Might Also Like

Frequently Asked Questions

Can I use a different type of fish instead of salmon?

Certainly! While the recipe calls for salmon, you can experiment with other fish varieties such as trout, cod, or halibut. Keep in mind that cooking times may vary depending on the thickness of the fish, so adjust accordingly.


Can I make the pistachio crust in advance?

Absolutely! You can prepare the pistachio crust ahead of time and store it in an airtight container or sealable bag. When you’re ready to cook, simply coat the salmon fillets with the crust mixture and proceed with the recipe as directed.


Can I substitute the asparagus with another vegetable?

While asparagus pairs wonderfully with the pistachio-crusted salmon, you can swap it with other vegetables such as green beans, broccoli, or Brussels sprouts. Just adjust the cooking time accordingly to ensure they are roasted to perfection.