Welcome aboard if you’re new! Our meal planning tool is your personalized meal prep assistant – you can tweak your serving sizes or skip some recipe options, it’s all in your hands! Our meal plans are meant to be a guide, so feel free to use all recipes or just a few to get you started! Click on each recipe to learn more prep tips. Enjoy the meals at your pleasure, but here’s an example of how we plan out the meals during the week:
The meal plans are designed to serve one person and account for 4 days. This is so that you can enjoy it at it’s best quality and also allows room for flexibility just in case you get takeout or eat out during the week.
Set Your Pace
If you’re a beginner at meal prep: Be prepared to set aside 2-3 hours. Once mise en place is complete, all of these recipes can be completed one by one.
If you’re a meal prep pro, use the sequenced steps below: These steps give you the flexibility to cook items simultaneously in a sequence of events.
Be sure to set timers and check on food items to avoid overcooking. Sequencing will save you time and meal prep can be done in 1-2 hours.
Meal Prep Run Down
Preheat the oven to 425F. Start preparing the potatoes and start baking them in the oven.
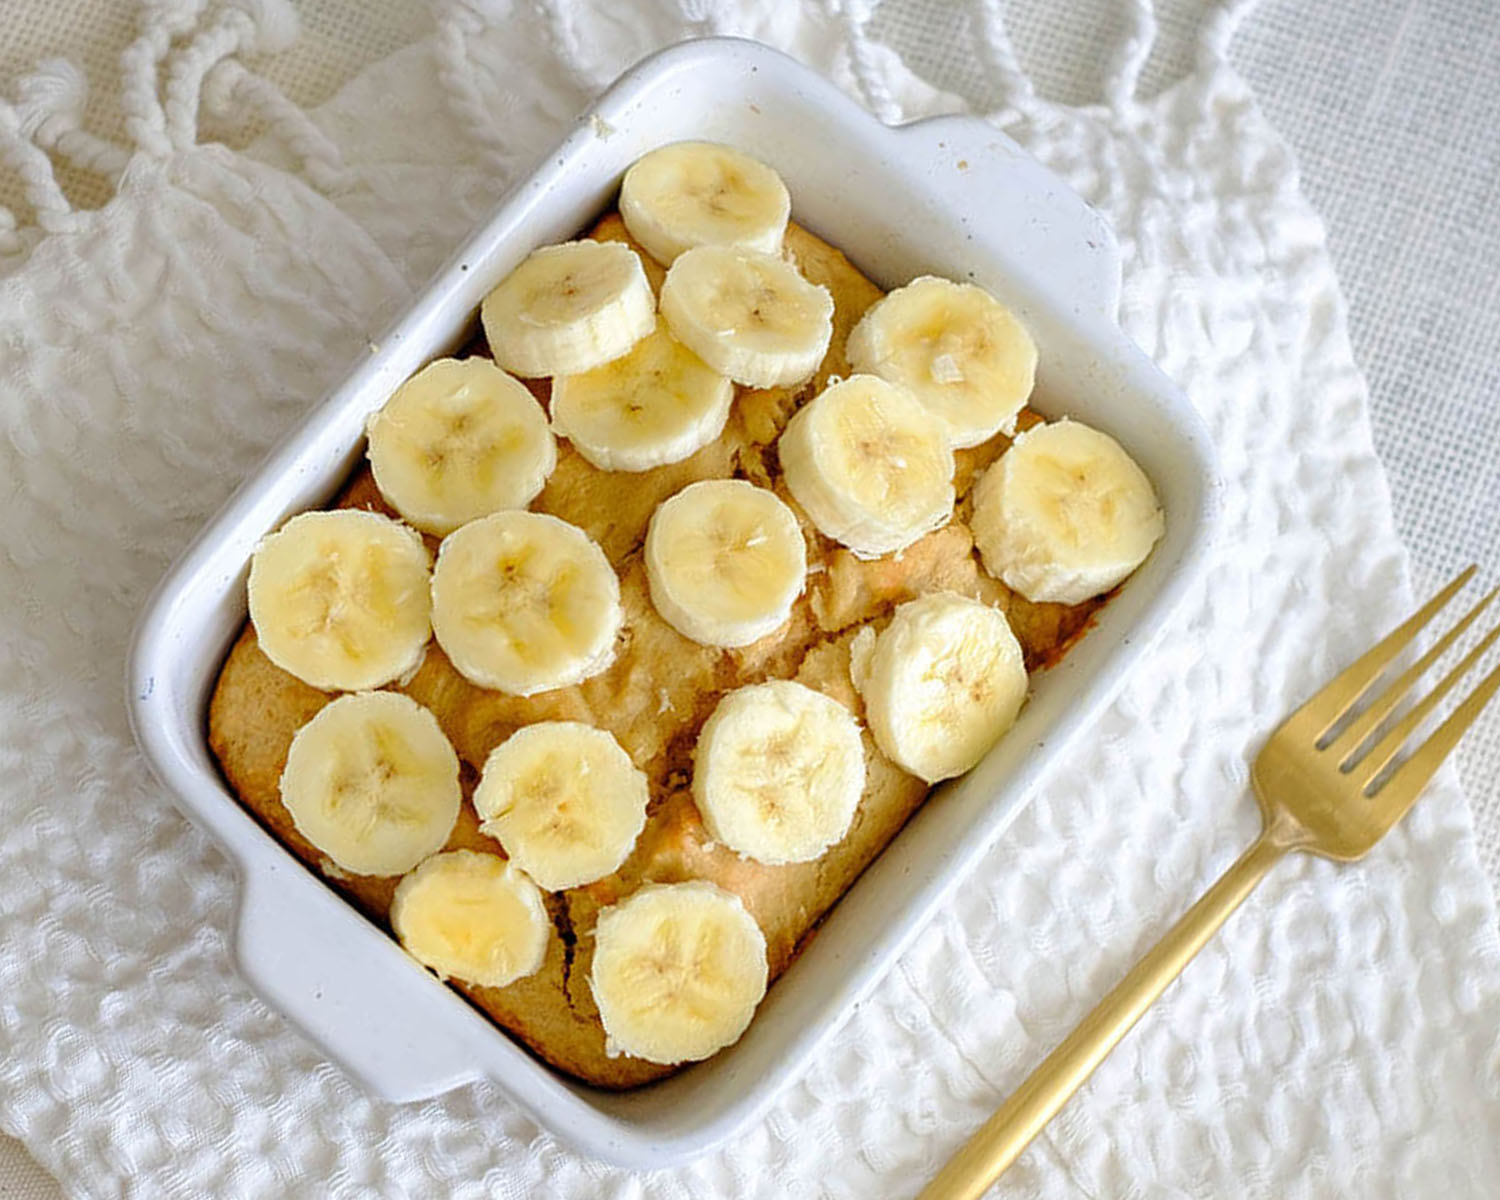
Next, prepare the batter for the peanut butter bar. Place it in a greased baking dish and bake it in the oven.
Then, prepare the beef for the instant pot.
Meanwhile, boil the chicken breasts in a pot. After cooking, remove the chicken breasts from the pot and shred them with two forks. Let them cool before assembling the celery chicken salad.
Then, prepare the peanut chicken celery stir fry, and cook the breakfast potatoes and eggs.
After the instant pot, beef is finished cooking, carefully let the steam release and open the lid. Remove the beef from the pot and shred the beef with two forks.
Separate half of the beef for the stuffed baked potato and the other half for the beef soft tacos.
When cooking is finished, plate everything up in containers, and let them cool before refrigerating.
If you’re sequencing your meal prep, be sure to keep an eye on everything! Make sure food is kept refrigerated under 40F degrees until ready to eat.
Assembly Tips
Evenly divide meals according to the serving size
Let all items cool before placing them in the refrigerator
Keep all items refrigerated under 40F until ready to eat or reheat
Breakfast: The fried eggs and potatoes and peanut butter bar can be reheated in the microwave
Lunch: The celery chicken wrap can be served chilled while the beef for the soft tacos can be reheated in the microwave
Dinner: Both meals can be reheated in the microwave
Extra Flavors and Substitutions
Bananas: If you don’t want your bananas to turn brown, wait to slice them before you
Chicken Salad: You can also use pre-cooked rotisserie chicken so that you don’t need to boil the chicken
Potato: You can also use sweet potato
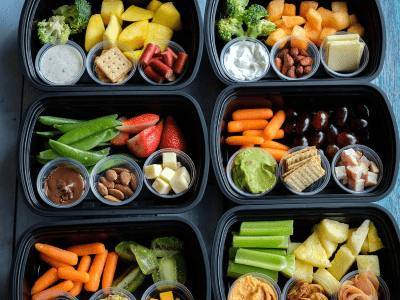
Supplement meals with additional snacks such as fresh veggies and fruit for additional daily caloric needs. You can use lime/lemon and olive oil in place of salad dressing
Extra Leftover Ingredients Not Used
Protein: Freeze any uncooked meats and save for a later recipe, or you can cook the full amount, and freeze the portion that you do not eat, and save for later use.
Fruit: Use leftover fruit in smoothies, on top of yogurt, or with your cereal
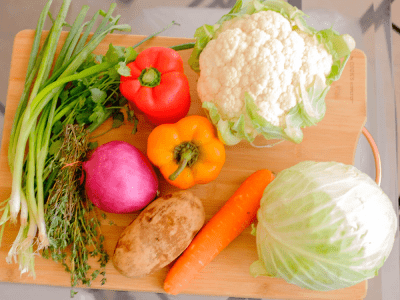
Veggies: Freeze any leftover veggies for later use. Use leftover herbs in omelets or other dishes for the weekend
If you’re all about quick, healthy, and oh-so-tasty meal prep, I’ve got a recipe that’s going to change your game: Asian Crispy Cabbage Rolls. These rolls are packed with lean protein, fresh veggies, and savory flavors that will keep you fueled and satisfied without any fuss. Let’s dive into why this recipe rocks and how it can support your health goals!
This post may contain affiliate links. Please see our privacy policy for details.
First off, these rolls are a high-protein powerhouse. Ground chicken is the star of the show, offering lean protein that helps build and repair muscle, keeps you feeling full, and supports your overall health. Paired with crunchy veggies like carrots, mushrooms, and onions, you’re getting a dose of vitamins and minerals that are just as important as your protein intake.
The napa cabbage leaves are not only a light and healthy alternative to traditional wraps, but they also add a subtle sweetness and crunch. Plus, cabbage is loaded with antioxidants and fiber, making it a fantastic choice for your gut health.
The PrepYoSelf Newsletter
Ingredient Breakdown: Why These Flavors Work So Well Together
When it comes to creating a dish that’s both flavorful and balanced, every ingredient plays its part. Let’s take a closer look at the star players in these Asian Crispy Cabbage Rolls and why they pair so perfectly together.
Ground Chicken: Ground chicken is lean, mild, and absorbs flavors beautifully. It’s a fantastic base for the savory soy sauce and fish sauce, giving you a protein-rich filling that’s light yet satisfying. Chicken’s versatility allows it to blend seamlessly with the other ingredients, letting them shine while still providing that essential protein boost.
Garlic (Minced): Garlic adds a punch of aromatic flavor to the dish. It’s a classic ingredient in Asian cuisine, known for its ability to enhance the taste of meats and vegetables. When sautéed, garlic becomes fragrant and slightly sweet, perfectly complementing the earthiness of the mushrooms and the sweetness of the carrots.
Carrot (Grated): Carrots bring a subtle sweetness and a satisfying crunch to the mix. They balance the savory notes from the soy sauce and fish sauce while adding a pop of color and texture. Carrots are also rich in beta-carotene, a powerful antioxidant, making them a nutritious addition to this dish.
Mushrooms (Diced): Mushrooms are the umami heroes of this recipe. They have a meaty texture that pairs well with the ground chicken, adding depth and richness to the filling. Mushrooms soak up the soy and fish sauces, amplifying their flavor while contributing their own earthy, savory taste that ties the dish together.
White Onions (Diced): White onions provide a sharp, sweet flavor that enhances the overall taste of the filling. When sautéed, they soften and become slightly caramelized, adding a subtle sweetness that balances the savory elements. Onions also add a nice texture contrast, keeping the filling from being too uniform.
Green Onions (Diced): Green onions bring a fresh, slightly pungent flavor that lightens up the dish. They’re milder than white onions and add a bit of crunch and brightness, making the filling taste more complex and layered. Their fresh, herbaceous notes are a great match for the richness of the chicken and mushrooms.
Soy Sauce: Soy sauce is the backbone of this dish’s flavor profile. It’s salty, savory, and rich in umami, making it the perfect seasoning for the ground chicken and vegetables. Soy sauce brings all the ingredients together, creating a cohesive taste that’s distinctly Asian and deeply satisfying.
Fish Sauce: Fish sauce adds a complex, salty depth that enhances the umami from the soy sauce and mushrooms. It’s a key ingredient in many Asian dishes, known for its ability to boost flavor without overpowering the other ingredients. Just a tablespoon brings an extra layer of richness and complexity to the filling.
Napa Cabbage Leaves: Napa cabbage leaves are the perfect wrap for this filling. They’re sturdy enough to hold everything together but tender enough to eat easily. Blanching them softens the leaves and brings out their natural sweetness, which complements the savory filling. When fried, the cabbage leaves get a delightful crispy texture that contrasts beautifully with the soft, flavorful interior.
Easy Recipe Steps for Cabbage Rolls
Imagine the aromas wafting through your kitchen as the stir fry sizzles in the pan. The fragrance of the shrimp mingling with the earthy undertones of the cabbage creates an olfactory symphony that heightens the anticipation of the feast to come. Here’s how you can enjoy this dish in less than 10 minutes:
Prep Your Cabbage Leaves: Start by blanching those vibrant nappa cabbage leaves in boiling water for a few minutes until the stems soften. This makes them pliable and easy to roll, plus it brings out their beautiful, fresh flavor. Once they’re soft, let them cool down.
Sauté & Stir: In a hot sauté pan, start with your diced onions and green onions for that aromatic base. Add in your ground chicken, grated carrots, and diced mushrooms. Stir everything together until the chicken is fully cooked and the veggies are tender. A splash of soy sauce and fish sauce will bring all those flavors together in a delicious umami blend.
Roll It Up: Now that your filling is ready and your cabbage leaves are cool, it’s time to assemble! Place a spoonful of the chicken mixture onto the white stem area of each cabbage leaf and roll it up nice and tight. If you’ve got any cabbage left over, don’t waste it—just slice it up and stir-fry it as a side dish for another meal.
Get Crispy: Heat up a non-stick frying pan with a little oil, and gently fry your cabbage rolls until they’re crispy on both sides. It only takes a few minutes, and the result is golden-brown perfection. Serve them up with your favorite dipping sauce and a sprinkle of sesame seeds for that final touch.
Reference the recipe card below for detailed instructions.
Why This Recipe is Perfect for Meal Prep
These Asian Crispy Cabbage Rolls are not just tasty—they’re perfect for meal prep. You can make a batch ahead of time, store them in the fridge, and enjoy them throughout the week. They’re easy to reheat, and that crispy texture holds up beautifully, making each bite as satisfying as the first.
With these rolls, you’re getting a balanced meal that’s low in carbs, high in protein, and full of flavor. Whether you’re looking to maintain a healthy lifestyle, fuel up after a workout, or simply enjoy a delicious meal, these cabbage rolls have got you covered.
So go ahead, give these Asian Crispy Cabbage Rolls a try, and watch how easy (and tasty!) healthy eating can be. Enjoy!
Asian Crispy Cabbage Rolls
Asian Crispy Cabbage Rolls: Savory ground chicken and veggies wrapped in tender nappa cabbage, then pan-fried to golden perfection for a delicious, high-protein meal prep.
Place a pan of boiling water on high heat. Add in your cabbage leaves. Blanch for a few minutes or until the white parts of the cabbage are soft. Remove from the pan and gently set aside to cool.
Meanwhile, add oil to a saute pan on high heat and saute the onions and green onions. Add the ground chicken, carrots, and mushrooms, and stir them around until the chicken fully cooks. Finally season with soy sauce and fish sauce and mix well. Once the ground chicken mixture is cooked, set it aside and let it cool.
Once your cabbage is drained and cooled, place one leaf on a clean surface. Add a spoonful of the filling mixture at the bottom of your cabbage leaf (on the white stem area). Roll up your cabbage leaf into a cabbage roll. Set the cabbage roll aside, and repeat this step. If you have any cabbage left, simply slice them and saute them in a wok with your choice of seasonings and enjoy them as a side dish for other meals.
Place a non-stick frying pan on medium heat and drizzle with a bit of oil. Add in your cabbage rolls . Fry for 2-3 minutes on each side. Then, flip the cabbage rolls and fry for another 1 to 2 minutes until both sides are crispy. Enjoy with your choice of dipping sauce and a sprinkle of sesame seeds.
Notes
Nutrition information provided is an estimate. It will vary based on cooking method and specific ingredients used. Please consult with your healthcare provider for specific dietary needs. To gain a better understanding, explore our nutrition disclaimer here.
Can I use a different type of meat instead of ground chicken?
Absolutely! Ground turkey, pork, or even beef would work well in this recipe. If you prefer a vegetarian option, you can substitute the meat with crumbled tofu or a meat alternative like tempeh.
How do I keep the cabbage rolls from falling apart?
The key is to blanch the cabbage leaves just enough to make them pliable but still sturdy. When rolling, make sure to tuck in the sides of the cabbage tightly around the filling. Frying them gently helps seal the rolls and keeps them intact.
What dipping sauce pairs well with these cabbage rolls?
A simple soy sauce mixed with a little rice vinegar, sesame oil, and a pinch of red pepper flakes makes a great dipping sauce. You could also try sweet chili sauce or even a peanut sauce for a different flavor profile
This Dragon Fruit Salsa with Shrimp is the perfect way to level up your salsa game. It’s not only vibrant and flavorful but also a nutrient-rich addition to your healthy lifestyle. Get ready to enjoy a dish that’s as beneficial for your body as it is delightful for your taste buds
This post may contain affiliate links. Please see our privacy policy for details.
Refreshing & Nourishing: Dragon fruit is not only beautiful with its speckled flesh, but it’s also packed with antioxidants and vitamin C, boosting your immunity and keeping your skin glowing. Paired with shrimp, a lean source of protein, this dish is as nourishing as it is refreshing.
Budget-Friendly: With just a few simple ingredients, this recipe is easy on your wallet. The dragon fruit adds a touch of exotic flair without breaking the bank, and pre-cooked shrimp saves you time and effort.
Simple & Quick: This salsa comes together in minutes! It’s perfect for a quick lunch, a light dinner, or even as an appetizer at your next gathering.
Powerhouse ingredients: You’re not just making salsa—you’re creating a dish that nourishes your body from the inside out. Each ingredient plays a vital role in boosting your health, from providing essential vitamins and minerals to delivering antioxidants and anti-inflammatory benefits.
The PrepYoSelf Newsletter
Level Up Your Salsa Game: The Nutrient Powerhouse in Every Bite!
Dragon Fruit: Dragon fruit is the star of this salsa, and for good reason! This exotic fruit isn’t just pretty; it’s packed with fiber, antioxidants, and vitamin C. Fiber helps keep your digestive system running smoothly, while the antioxidants fight off free radicals, keeping your cells healthy. Vitamin C boosts your immune system and promotes glowing skin. By adding dragon fruit to your salsa, you’re infusing your meal with a refreshing sweetness and a vibrant dose of nutrition.
Shrimp: Shrimp is a lean, low-calorie source of high-quality protein, making it a fantastic addition to this dish. Protein is essential for muscle repair, hormone production, and overall body maintenance. Plus, shrimp is rich in selenium, an important mineral that acts as a powerful antioxidant, supporting your immune system and thyroid function. With shrimp in your salsa, you’re not only adding a savory element but also giving your body the building blocks it needs to stay strong and energized.
Fresh Basil: Basil brings a burst of fresh, herbaceous flavor to this salsa, but it’s also loaded with health benefits. This aromatic herb is rich in vitamin K, which plays a key role in blood clotting and bone health. Basil also contains compounds that have anti-inflammatory and antimicrobial properties, helping to support your overall well-being. Adding basil to your salsa not only elevates the flavor but also adds a layer of health-boosting goodness.
Red Onions: Red onions add a sharp, tangy bite to your salsa, and they’re packed with nutrients like vitamin C, fiber, and antioxidants. The quercetin in red onions is known for its anti-inflammatory properties, which can help reduce inflammation in the body. Additionally, the sulfur compounds in onions support heart health by improving cholesterol levels and lowering blood pressure. Red onions are a simple way to level up the nutritional profile of your salsa while adding depth to the flavor.
Lime Juice: Lime juice not only adds a zesty, citrusy kick to your salsa but also brings a ton of vitamin C to the table. This essential vitamin boosts your immune system, aids in iron absorption, and supports healthy skin. Lime juice also has natural detoxifying properties, helping to cleanse your body and support digestive health. A squeeze of lime is all it takes to brighten up the flavors of your salsa while giving your body a nutrient boost.
Salt: A pinch of salt ties all the flavors together and enhances the natural sweetness of the dragon fruit while balancing the acidity of the lime. Just a small amount can elevate the entire dish, making each bite more satisfying.
How to Make Dragon Fruit Salsa with Shrimp
Prep the Shrimp: If your shrimp is frozen, defrost it according to the package instructions. Pat dry.
Mix the Salsa: In a mixing bowl, combine the diced dragon fruit, fresh basil, chopped red onions, lime juice, and salt. Toss everything together gently to marry the flavors.
Serve: Lay the shrimp on a plate and top with the vibrant dragon fruit salsa. Serve immediately and enjoy the burst of fresh flavors!
Reference the recipe card below for detailed instructions.
Meal Prep Tips:
Avocado: Add diced avocado for a creamy texture and an extra dose of healthy fats.
Jalapeño: For a bit of heat, finely chop a jalapeño or another chili pepper and mix it into the salsa.
Cucumber: Add diced cucumber for extra crunch and hydration, making the salsa even more refreshing.
Mint: Swap half of the basil for fresh mint to give the salsa a bright, cooling flavor.
Protein Swap: Instead of shrimp, try grilled chicken, tofu, or even black beans for a different source of protein.
Fruit Swap: Swap dragon fruit with diced mango, pineapple, or even kiwi for a different but equally delicious flavor profile.
Red Onion Swap: If you prefer a milder flavor, swap red onions for thinly sliced green onions or shallots.
Dragon Fruit Salsa with Shrimp
A vibrant and nutrient-packed Dragon Fruit Salsa with Shrimp, combining sweet and savory flavors for a refreshing and health-boosting dish.
If the shrimp is frozen, defrost it according to packaged instructions.
Combine the diced dragon fruit, basil, onions, lime juice, and salt in a mixing bowl.
Top the shrimp with the dragon fruit salsa.
Notes
Nutrition information provided is an estimate. It will vary based on cooking method and specific ingredients used. Please consult with your healthcare provider for specific dietary needs. To gain a better understanding, explore our nutrition disclaimer here.
Can I use raw shrimp instead of pre-cooked shrimp?
Absolutely! If you prefer to use raw shrimp, just cook them first by sautéing or grilling until they’re pink and opaque. Let them cool before adding to the salsa
What can I serve with this salsa?
This salsa is versatile! Serve it as an appetizer with tortilla chips, as a topping for tacos, or over a bed of greens for a light salad. It also pairs well with grilled fish or chicken.
Can I use other fruits along with dragon fruit?
Yes, you can mix in other fruits like diced mango, pineapple, or even strawberries to create a more complex and fruity salsa. It’s a great way to experiment with flavors!
Welcome aboard if you’re new! Our meal planning tool is your personalized meal prep assistant – you can tweak your serving sizes or skip some recipe options, it’s all in your hands! Our meal plans are meant to be a guide, so feel free to use all recipes or just a few to get you started! Click on each recipe to learn more prep tips. Enjoy the meals at your pleasure, but here’s an example of how we plan out the meals during the week:
The meal plans are designed to serve one person and account for 4 days. This is so that you can enjoy it at it’s best quality and also allows room for flexibility just in case you get takeout or eat out during the week.
Set Your Pace
If you’re a beginner at meal prep: Be prepared to set aside 2-3 hours. Once mise en place is complete, all of these recipes can be completed one by one.
If you’re a meal prep pro, use the sequenced steps below: These steps give you the flexibility to cook items simultaneously in a sequence of events.
Be sure to set timers and check on food items to avoid overcooking. Sequencing will save you time and meal prep can be done in 1-2 hours.
Meal Prep Run Down
First, preheat the oven and start preparing the ingredients for the recipes that require the oven. These recipes include the Bacon Egg Cups, Tilapia with Broccolini and Potatoes, Balsamic Chicken, and Sweet Potatoes.
Meanwhile, prepare the items that require the stove top such as the Grilled Balsamic Steak and Tofu Veggie Stir Fry.
Finally, assemble the yogurt recipe.
When everything is finished cooking, plate everything up in containers, and let them cool before refrigerating.
If you’re sequencing your meal prep, be sure to keep an eye on everything! Make sure food is kept refrigerated under 40F degrees until ready to eat.
Assembly Tips
Evenly divide meals according to the serving size
Let all items cool before placing them in the refrigerator
Keep all items refrigerated under 40F until ready to eat or reheat
Breakfast: Serve the yogurt chilled, while the Bacon Egg Cups can be reheated in the microwave.
Lunch: Both meals can be reheated in the microwave, and the salad ingredients chilled.
Dinner: Both meals can be reheated in the microwave.
Extra Flavors and Substitutions
Sweet Potato: You can also use regular potato
Bacon: Use your choice of bacon such as turkey bacon
Salad Mix: Feel free to serve with sliced avocados as an extra serving of healthy fats
Supplement meals with additional snacks such as fresh veggies and fruit for additional daily caloric needs. You can use lime/lemon and olive oil in place of salad dressing
Extra Leftover Ingredients Not Used
Protein: Freeze any uncooked meats and save for a later recipe, or you can cook the full amount, and freeze the portion that you do not eat, and save for later use.
Fruit: Use leftover fruit in smoothies, on top of yogurt, or with your cereal
Veggies: Freeze any leftover veggies for later use. Use leftover herbs in omelets or other dishes for the weekend
This recipe is a game-changer for busy individuals who crave fresh, high-quality meals without spending hours in the kitchen. Imagine biting into a perfectly cooked crab cake topped with a zesty mango salsa, all nestled on a bed of nutritious sautéed spinach. The best part? It’s incredibly easy to make, thanks to pre-cooked crab cakes and a few fresh ingredients!
This post may contain affiliate links. Please see our privacy policy for details.
Fresh & Flavorful: The mango salsa is a burst of tropical freshness with every bite, perfectly complementing the savory crab cakes.
Quick & Easy: Using pre-cooked crab cakes means you can whip up this gourmet meal in no time.
Nutritious: Sautéed spinach adds a nutritious and delicious base to this dish, ensuring you’re getting a good dose of greens.
Impressive Presentation: This dish looks as good as it tastes, making it perfect for impressing guests or treating yourself to a fine dining experience at home.
The PrepYoSelf Newsletter
Why the Ingredients Work Well Together:
The combination of these ingredients creates a harmonious balance of flavors and textures. The sweet, juicy mango contrasts beautifully with the crunchy red onion and zesty lime juice, while the fresh cilantro and garlic powder add depth and complexity. This vibrant salsa sits atop the rich, savory crab cakes, which are perfectly complemented by the earthy, garlicky sautéed spinach.
For busy individuals who love high-quality, fresh food, this recipe offers a quick and easy way to enjoy a gourmet meal at home. Each ingredient is thoughtfully chosen to contribute to a balanced, nutritious, and delightful dish that feels indulgent yet wholesome. Enjoy this meal prep delight that not only satisfies your taste buds but also supports a healthy lifestyle!
How to make mango salsa with crab cakes:
Cook the Crab Cakes: Remove the pre-cooked crab cakes from the package and place them in the Air Fryer basket. Cook according to the packaged instructions. Typically, this will take about 8-10 minutes at 375°F, until they’re golden and crispy.
Sauté the Spinach: While the crab cakes are cooking, add a drizzle of olive oil to a sauté pan over medium-high heat. Add the baby spinach, garlic powder, and salt. Sauté until the spinach wilts, which should take about 3-4 minutes. Remove from heat.
Prepare the Mango Salsa: In a mixing bowl, combine the diced mango, red onion, lime juice, chopped cilantro, garlic powder, and salt. Mix well until all the ingredients are evenly distributed.
Plate and Serve: Place the sautéed spinach in the center of a plate. Top with a crispy crab cake. Generously spoon the fresh mango salsa over the crab cake.
Reference the recipe card below for detailed instructions.
Ingredient Swaps:
Mango: If fresh mango is unavailable, use canned mango chunks (drained) or frozen mango (thawed). Both options still provide a sweet and tangy flavor.
Red Onion: Swap red onion with green onions or shallots for a milder taste. Green onions offer a fresh, crisp texture, while shallots add a delicate sweetness.
Cilantro: If you’re not a fan of cilantro, try using fresh parsley or basil. Parsley adds a subtle freshness, while basil introduces a sweet, aromatic flavor.
Crab Cakes: For a different protein, use pre-cooked shrimp or salmon cakes. Both options work well with the mango salsa and sautéed spinach, offering a delightful seafood alternative.
Spinach: Swap baby spinach with kale or Swiss chard for a heartier green. Both are nutrient-dense and provide a slightly different texture and flavor profile.
Add a Crunch: Top the dish with some toasted nuts or seeds, such as sliced almonds or sunflower seeds, for added texture and a nutty flavor.
Serve with a Side: Pair the dish with a simple side like quinoa or brown rice to make it more filling and add a whole grain component to your meal.
Make it Spicy: Add a diced jalapeño or a pinch of red pepper flakes to the mango salsa for a spicy kick.
Mango Salsa with Crab Cake
Indulge in a gourmet meal with pre-cooked crab cakes topped with zesty mango salsa, served on a bed of nutritious sautéed spinach.
Yes, you can use canned mango. Just make sure to drain it well before dicing. Fresh mango is preferred for its crisp texture and vibrant flavor, but canned mango works in a pinch.
What if I don’t have an air fryer?
If you don’t have an air fryer, you can bake the crab cakes in a conventional oven. Preheat the oven to 375°F (190°C) and bake for about 10-15 minutes, or until they are heated through and crispy.
Is it okay to use dried herbs instead of fresh?
Fresh herbs are preferred for their vibrant flavor, but if you must use dried herbs, reduce the quantity by half since dried herbs are more concentrated.
If you’re on the lookout for a meal that’s not only quick to prepare but also packed with flavor and nutrition, you’re in for a treat. This Air Fryer Honey Garlic Chicken with Green Beans, topped with a refreshing Peach Salsa, is the perfect balance of protein, vegetables, and fruit—all cooked to perfection in under 30 minutes!
This post may contain affiliate links. Please see our privacy policy for details.
Balanced Nutrition: This dish brings together tender chicken thighs, crisp green beans, and a fruity salsa to give you a well-rounded meal. The chicken provides a hearty dose of protein, the green beans add fiber and vitamins, and the peach salsa offers a sweet and tangy twist with a boost of fruit.
Quick and Easy: With the help of an air fryer, this recipe is incredibly efficient. You’ll save time on both prep and cooking, making it a fantastic option for busy days when you need a nutritious meal without the hassle.
Unique Peach Salsa: Forget the traditional salsa! This peach salsa is a game-changer. It’s vibrant, refreshing, and offers a delightful contrast to the savory honey garlic chicken. The combination of juicy peaches, tangy cherry tomatoes, and aromatic basil creates a salsa that’s as exciting as it is tasty.
The PrepYoSelf Newsletter
Why This Peach Salsa is a Game-Changer
This peach salsa isn’t just any salsa—it’s a flavor explosion! The sweetness of the peach pairs beautifully with the acidity of the vinegars and the slight kick from the garlic powder. It’s a refreshing, fruity twist that elevates the dish and adds a burst of color and excitement to your meal prep rotation
How to Meal Prep Peach Salsa with Honey Garlic Chicken
Season the Chicken and Green Beans: In a bowl, mix the honey, lime juice, soy sauce, garlic powder, pepper, and olive oil. Toss the chicken thighs and green beans in the marinade, ensuring they are well coated.
Preheat the Air Fryer: Set your air fryer to 400°F (200°C).
Cook the Green Beans and Chicken: Place the green beans in the air fryer basket and cook for 5-7 minutes. Remove them and set aside. Add the chicken thighs to the basket and cook for an additional 10-15 minutes, or until the chicken reaches an internal temperature of 165°F (74°C).
Prepare the Peach Salsa: While the chicken is cooking, dice the peach and chop the red onions, cherry tomatoes, and basil leaves. Combine all the ingredients in a bowl. Add the red wine vinegar, balsamic vinegar, honey, garlic powder, and salt. Mix well.
Serve: Once the chicken is cooked, place it on a plate and top with a generous spoonful of peach salsa. Serve alongside the cooked green beans and enjoy!
Reference the recipe card below for detailed instructions.
Additions and Variations
Grains: Serve the chicken and green beans over a bed of cooked quinoa, brown rice, or cauliflower rice to add more fiber and make the meal even more filling.
Additional Veggies: Add other air-fried or roasted vegetables like bell peppers, carrots, or zucchini for more variety and nutrients.
Extra Protein: If you want to up the protein content, you can add a side of Greek yogurt or a sprinkle of nuts or seeds on top of the salsa.
Spicy Kick: If you enjoy a bit of heat, add some diced jalapeños or a dash of hot sauce to the peach salsa.
Peach Salsa and Honey Garlic Chicken
Air Fryer Honey Garlic Chicken with Green Beans topped with a refreshing Peach Salsa combines juicy chicken thighs and crisp green beans with a sweet and tangy peach salsa for a quick, balanced, and flavorful meal.
For the chicken and green beans, season them with the marinade.
Preheat the Air fryer to 400F degrees.
Place the chicken and green beans in the Air Fryer Basket. Cook the green the beans for about 5 to 7 minutes and remove it from the Air Fryer. Continue cooking the chicken for another 10-15 minutes until it reaches an internal cooking temperature of 165F.
While chicken is cooking, chop peaches, red onions, cherry tomatoes, and basil leaves. Combine in a bowl and top with balsamic glaze, red wine vinegar, honey, garlic powder and salt. Mix together.
Top the chicken with peach salsa and enjoy with the green beans!
Notes
Nutrition information provided is an estimate. It will vary based on cooking method and specific ingredients used. Please consult with your healthcare provider for specific dietary needs. To gain a better understanding, explore our nutrition disclaimer here.
Can I use a different type of fruit for the salsa?
Absolutely! You can substitute peaches with mangoes, nectarines, or even strawberries for a different fruity twist.
What if I don’t have an air fryer?
You can bake the chicken and green beans in a preheated oven at 400°F (200°C). Bake the green beans for 10-15 minutes and the chicken for 20-25 minutes, or until the chicken reaches an internal temperature of 165°F (74°C).
Can I use chicken breasts instead of chicken thighs?
Yes, you can use chicken breasts. They may cook faster than thighs, so check for doneness around 10 minutes, and ensure they reach an internal temperature of 165°F (74°C)
Let me introduce you to the ultimate Shrimp Rice Paper Rolls! These little gems are light, refreshing, and packed with deliciousness. Perfect for a quick lunch or a delightful snack, they’re a must-try! Let’s dive into the recipe!
This post may contain affiliate links. Please see our privacy policy for details.
Light and Refreshing: Perfect for a hot day or when you want something satisfying but not too heavy.
Packed with Flavor: The combination of shrimp, creamy yogurt, sweet chili, and a hint of sriracha creates a taste explosion in every bite!
Nutritious and Healthy: High in protein, low in calories, and loaded with fresh veggies. It’s a win-win!
Easy to Make: With just a few simple steps, you’ll have a gourmet meal ready in no time.
The PrepYoSelf Newsletter
Ingredient Breakdown: Why They Shine in Our Shrimp Rice Paper Rolls
Shrimp: Shrimp is the star of the show! Pre-cooked shrimp is not only convenient but also a fantastic source of lean protein. Its mild, sweet flavor pairs beautifully with the tangy and spicy sauces, creating a perfect balance in every bite.
High-Protein Greek Yogurt: Greek yogurt brings a creamy texture to the filling while adding a protein boost. It’s tangy and rich, providing a healthy alternative to mayonnaise or cream-based sauces. Plus, it helps bind the ingredients together, ensuring each roll is packed with flavor.
Sweet Chili Sauce: This sauce adds a delightful sweetness with a hint of heat, enhancing the shrimp’s natural sweetness. It blends perfectly with the yogurt, creating a balanced, flavorful filling that’s neither too spicy nor too sweet.
Soy Sauce: Soy sauce introduces a savory, umami depth to the rolls. It complements the sweet chili and sriracha, adding a rich, salty undertone that enhances the overall taste. Just a tablespoon brings out the best in the shrimp and yogurt mixture.
Sriracha Sauce: Sriracha gives our rolls that irresistible kick! Its heat is perfectly balanced with garlic and vinegar, adding a spicy, tangy note that livens up the entire dish. You can always adjust the amount based on your heat preference.
Lime Wedge: A squeeze of fresh lime juice brightens up the filling, cutting through the richness of the yogurt and balancing the sweet and spicy elements. Lime adds a zesty freshness that elevates all the flavors.
Rice Spring Roll Wrappers: These delicate, translucent sheets are the perfect vessel for our delicious filling. They’re light and allow the vibrant colors and textures of the ingredients to shine through. Plus, they’re fun and easy to work with once you get the hang of it!
Carrot: Shredded carrot adds a sweet crunch and a burst of color to the rolls. It’s packed with vitamins and provides a nice contrast to the soft shrimp filling, making each bite more exciting.
Cucumber: Crisp, cool cucumber slices bring a refreshing crunch and a mild, fresh flavor that complements the shrimp perfectly. It’s hydrating and adds a lovely texture to the rolls.
Sesame Seeds: A sprinkle of sesame seeds adds a subtle nutty flavor and a slight crunch. They also bring an extra touch of visual appeal, making the rolls look even more appetizing.
How to Make Shrimp Spring Rolls
Prep the Shrimp: Chop those succulent shrimp into small pieces. If they’re frozen, defrost them in the refrigerator or follow the package instructions. We want them ready to mingle with our zesty flavors!
Veggie Time: Slice the cucumber into matchsticks and shred the carrots. Fresh and crisp, these veggies add the perfect crunch!
Mix It Up: Combine the Greek yogurt, sweet chili sauce, sriracha, soy sauce, and a squeeze of lime. Toss in the chopped shrimp and mix it all up. This creamy, tangy filling is the heart of our rolls!
Roll Call: Lightly wet 4 rice paper sheets and lay them down, slightly overlapping. These sheets are like a blank canvas, ready to be filled with goodness.
Assemble: Top the rice paper with cucumber slices, shrimp filling, shredded carrot, and a sprinkle of sesame seeds. Feel free to add a bit more sriracha if you’re feeling spicy!
Roll and Enjoy: Fold the sides of the rice paper inward and roll them up tightly. Slice into 1-inch thick pieces. Voila! You have beautiful, bite-sized rolls ready to be devoured.
Reference the recipe card below for detailed instructions.
Meal Pairing Tips:
Fresh Salad: Pair your rolls with a light, fresh salad. A simple mixed greens salad with a tangy vinaigrette complements the flavors perfectly and adds extra veggies to your meal.
Light Soup: A bowl of miso soup or a light broth-based soup works great as a side dish. It’s warm and comforting, balancing the cool, crisp rolls.
Fruit Side Dish: Fresh fruit like pineapple, mango, or watermelon adds a sweet, refreshing touch. The natural sweetness of the fruit complements the savory and spicy rolls.
Herbal Tea: Enjoy your rolls with a cup of herbal tea. Mint or ginger tea adds a soothing, aromatic element that pairs well with the flavors in the rolls.
Shrimp Rice Paper Spring Rolls
Light and refreshing Shrimp Rice Paper Rolls packed with flavorful shrimp, fresh veggies, and a zesty yogurt-based sauce, perfect for a healthy lunch or snack.
Chop the shrimp into small pieces (if frozen, defrost it in the refrigerator or according to the packaged instructions).
Meanwhile, slice the cucumber into matchsticks and shred the carrots.
Combine the Greek yogurt, sweet chilli, sriracha, soy sauce and squeeze of lime and mix in the shrimp.
Lightly wet and place down 4 rice paper sheets, slightly overlapping.
Top the rice paper with sliced cucumber, shrimp filling, carrot, spring onion and sesame seeds.
Fold and tuck in the sides inwards to create a roll. Slice into 1 inch thick pieces and enjoy!
Notes
Nutrition information provided is an estimate. It will vary based on cooking method and specific ingredients used. Please consult with your healthcare provider for specific dietary needs. To gain a better understanding, explore our nutrition disclaimer here.
Can I use fresh shrimp instead of pre-cooked shrimp?
Absolutely! Just cook the shrimp in advance and let them cool before chopping and mixing with the other ingredients. This ensures your rolls stay fresh and flavorful.
How do I keep the rice paper rolls from sticking together?
To prevent sticking, separate the rolls with parchment paper or lightly damp paper towels in between layers. This helps maintain their texture and prevents them from tearing.
Are there other protein options besides shrimp?
Definitely! You can use cooked chicken, tofu, or even tempeh as a substitute for shrimp. Just chop them into small pieces and mix with the sauce.
Welcome aboard if you’re new! Our meal planning tool is your personalized meal prep assistant – you can tweak your serving sizes or skip some recipe options, it’s all in your hands! Our meal plans are meant to be a guide, so feel free to use all recipes or just a few to get you started! Click on each recipe to learn more prep tips. Enjoy the meals at your pleasure, but here’s an example of how we plan out the meals during the week:
The meal plans are designed to serve one person and account for 4 days. This is so that you can enjoy it at it’s best quality and also allows room for flexibility just in case you get takeout or eat out during the week.
Set Your Pace
If you’re a beginner at meal prep: Be prepared to set aside 2-3 hours. Once mise en place is complete, all of these recipes can be completed one by one.
If you’re a meal prep pro, use the sequenced steps below: These steps give you the flexibility to cook items simultaneously in a sequence of events.
Be sure to set timers and check on food items to avoid overcooking. Sequencing will save you time and meal prep can be done in 1-2 hours.
Meal Prep Run Down
First, preheat the oven and start preparing the ingredients for the recipes that require the oven. These recipes include the egg frittata, sheet pan sausage and veggies, chicken wings with plantain chips, and the spaghetti squash.
Meanwhile, prepare the items that require the stove top such as the date and walnut granola.
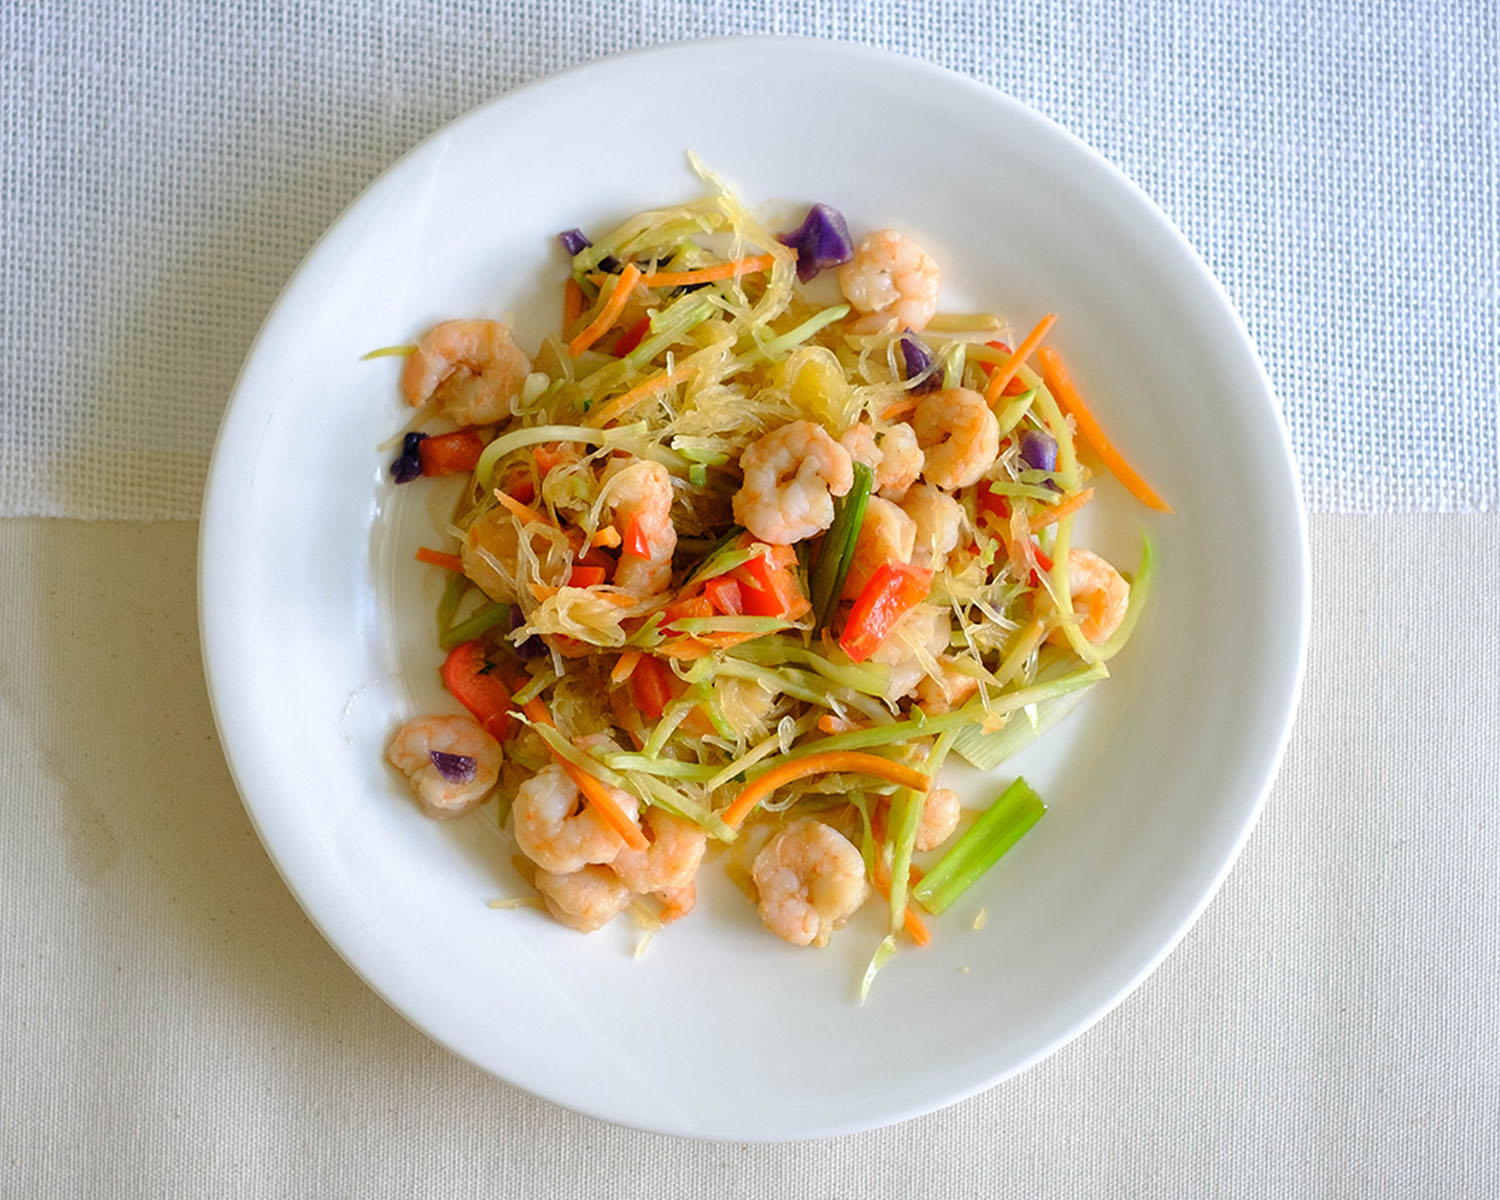
Once the spaghetti squash is cooked, let it cool before using a fork to shred the squash. Finally prepare the stir fry shrimp with the squash and the sausage and peppers with the squash.
When everything is finished cooking, plate everything up in containers, and let them cool before refrigerating.
If you’re sequencing your meal prep, be sure to keep an eye on everything! Make sure food is kept refrigerated under 40F degrees until ready to eat.
Assembly Tips
Evenly divide meals according to the serving size
Let all items cool before placing them in the refrigerator
Keep all items refrigerated under 40F until ready to eat or reheat
Breakfast: Both meals can be reheated in the microwave
Lunch: Both meals can be reheated in the microwave
Dinner: Both meals can be reheated in the microwave.
Extra Flavors and Substitutions
Sweet Potato: You can also use regular potato
Sausages: Use your choice of sausage such as chicken, pork, or turkey
Spaghetti Squash: If you don’t have time to bake spaghetti squash, you can buy the frozen version or substitute with storebought, pre-cut zucchini noodles or butternut squash noodles
Supplement meals with additional snacks such as fresh veggies and fruit for additional daily caloric needs. You can use lime/lemon and olive oil in place of salad dressing
Extra Leftover Ingredients Not Used
Protein: Freeze any uncooked meats and save for a later recipe, or you can cook the full amount, and freeze the portion that you do not eat, and save for later use.
Fruit: Use leftover fruit in smoothies, on top of yogurt, or with your cereal
Veggies: Freeze any leftover veggies for later use. Use leftover herbs in omelets or other dishes for the weekend
Looking for a high-protein, delicious, and easy-to-make meal prep option? These Egg, Cottage Cheese, and Spinach Wraps are perfect for busy mornings, quick lunches, or a satisfying snack. Packed with nutrient-dense spinach, creamy cottage cheese, and protein-rich eggs, these wraps are both nutritious and versatile. You can enjoy them plain or filled with your favorite ingredients like prosciutto, fresh veggies, and cheese. Let’s dive into this simple yet flavorful recipe that will keep you fueled and ready to tackle your day!
This post may contain affiliate links. Please see our privacy policy for details.
Protein Powerhouse: Grilled chicken strips, Avocado slices, Red bell pepper strips, Baby arugula, A drizzle of tahini sauce
Classic Breakfast: Sautéed mushrooms, Crumbled bacon or turkey bacon, Shredded cheese (cheddar or Swiss), Sliced avocado
Italian Inspired: Sliced prosciutto, Fresh mozzarella, Basil leaves, Sun-dried tomatoes, A drizzle of balsamic glaze
Veggie Lover’s: Roasted red peppers, Sliced zucchini, Red onion slices, Fresh spinach leaves, A sprinkle of goat cheese
Spread and Sauce Ideas: Cream cheese mixed with herbs, Pesto, Sriracha Mayto, Hummus
Simple Basic Steps to Make Spinach Wrap
Blend the Ingredients: Combine the baby spinach, eggs, and cottage cheese in a blender. Blend until the mixture is smooth and vibrant green.
Prepare the Skillet: Heat an 8 or 9-inch non-stick skillet over medium heat. Lightly spray with cooking spray to prevent sticking.
Cook the Wraps: Pour about ⅓ cup of the blended mixture into the heated skillet, spreading it out like a crepe. Let it cook for 2-3 minutes until the edges start to lift and you can easily flip it over. Carefully flip the wrap and cook for another 1-2 minutes on the other side until fully set.
Repeat: Repeat the process with the remaining batter. You should get about 3 to 4 wraps in total.
Fill and Enjoy: Now comes the fun part! Fill your wraps with your favorite fillings. Some great options include prosciutto slices, fresh tomatoes, onions, and sliced cheese. Roll them up and they’re ready to go!
Reference the recipe card below for detailed instructions.
Meal Prep Tips for High Protein Spinach Wrap
Non-Stick Skillet Care: Use a good quality non-stick skillet to ensure easy flipping and cooking. Avoid using metal utensils that can scratch the surface. Clean the skillet thoroughly between batches if any residue starts to build up.
Cooling and Stacking: Allow the wraps to cool completely on a wire rack before stacking. This prevents them from becoming soggy.Place a piece of parchment paper between each wrap to avoid them sticking together.
Storage: Store the cooled wraps in an airtight container in the refrigerator. They will stay fresh for up to 3-4 days. If you want to store them longer, consider freezing. Lay the wraps flat with parchment paper between each one and place them in a freezer-safe bag. They can be frozen for up to 2 months.
Reheating: If frozen, let the wraps thaw in the refrigerator overnight. Reheat the wraps in a skillet over medium heat for about 1-2 minutes on each side or until heated through. Alternatively, microwave the wraps on a microwave-safe plate for about 30 seconds to 1 minute, or until warm.
High Protein, Egg and Cottage Cheese Spinach Wrap
These high-protein Egg, Cottage Cheese, and Spinach Wraps are easy to make and perfect for meal prep, offering a nutritious and versatile option for any meal.
Combine the spinach, eggs, and cottage cheese in a blender and blend until smooth.
Heat an 8 or 9 inch non-stick skillet on medium heat and lightly spray with olive oil. Pour in ⅓ cup of the mixture into the pan and let it spread out like a crepe. Let it sit for about 2-3 minutes before carefully flipping it over with a spatula. Let it continue to cook for another 1 to 2 minutes on the other side.
Repeat the process for the remaining batter which should make about 3 to 4 wraps total.
Enjoy it with your choice of fillings such as prosciutto slices, tomatoes, onions, and sliced cheese.
Notes
Nutrition information provided is an estimate. It will vary based on cooking method and specific ingredients used. Please consult with your healthcare provider for specific dietary needs. To gain a better understanding, explore our nutrition disclaimer here.
Get ready to refresh your taste buds with this delicious Green Papaya Salad! Perfect for meal prep, this vibrant dish combines the crispness of green papaya and carrots with the sweetness of mini bell peppers, all tossed in a tangy and savory dressing. It’s not just delicious but also packed with nutrients, making it a fantastic addition to any healthy meal plan. Plus, it’s easy to customize with your favorite herbs and toppings. Let’s dive into this simple yet flavorful recipe!
This post may contain affiliate links. Please see our privacy policy for details.
Green papaya is simply the unripe version of the tropical fruit we all know and love. Unlike its ripe counterpart, green papaya is firm and not sweet, making it perfect for salads. It’s packed with enzymes that aid digestion and is rich in vitamins A, C, and E. Plus, it’s low in calories but high in fiber, so it’s a fantastic addition to any healthy diet.
Why You’ll Love This Salad:
Refreshing and Light: This salad is super refreshing, making it a great side dish or a light meal on its own. Perfect for hot summer days or whenever you need a pick-me-up!
Flavor Explosion: The combination of tangy calamansi juice, savory fish sauce, and sweet honey creates a flavor explosion in every bite. Your taste buds are in for a treat!
Versatile and Customizable: You can easily switch up the ingredients to suit your taste. Add your favorite herbs, throw in some nuts, or spice it up with chilis. The possibilities are endless!
Meal Prep Friendly: This salad stays fresh in the fridge for a few days, making it ideal for meal prepping. Just keep the dressing separate until you’re ready to eat to maintain that perfect crunch.
The PrepYoSelf Newsletter
Ingredient Breakdown:
Green Papaya: Green papaya is the star of this salad! Its crisp texture and mild flavor make it the perfect base for soaking up all the delicious dressing. Plus, it’s packed with enzymes that aid digestion and is rich in vitamins A, C, and E. If you can’t find green papaya, try using jicama or green mango for a similar crunch and freshness.
Mini Bell Peppers : Mini bell peppers add a burst of color and a sweet, mild flavor that complements the tangy dressing. Their crunch adds a satisfying texture to the salad.Regular bell peppers or even thinly sliced red cabbage can be used if mini bell peppers aren’t available.
Carrot : Carrots bring in a touch of sweetness and a vibrant orange color, enhancing both the flavor and visual appeal of the salad. They also add another layer of crunch. If you’re out of carrots, try using daikon radish or zucchini for a different but equally delightful texture.
Fish Sauce: Fish sauce adds a deep, savory umami flavor that balances the sweetness and acidity of the dressing. It’s a staple in many Southeast Asian dishes for a reason! For a vegetarian option, substitute with soy sauce or tamari. If you want a milder flavor, try using a splash of light soy sauce.
Honey: Honey adds a natural sweetness that mellows out the tartness of the calamansi or lime juice, creating a harmonious balance in the dressing. Agave syrup or maple syrup can be used as vegan alternatives, or you can use brown sugar in a pinch.
Calamansi Juice (or Lime Juice): Calamansi juice brings a unique citrusy tang that’s slightly sweeter than lime juice, adding a refreshing zing to the salad. Lime juice works just as well, providing that essential bright acidity. Lemon juice can be used if you don’t have calamansi or lime. For an extra citrusy kick, a combination of lemon and orange juice could also be interesting.
Simple Steps to Make Papaya Salad
Rinse and peel the green papaya and carrot. Use a handheld julienne tool or mandolin with a julienne attachment to shred them into beautiful, thin strips.
Slice the mini bell peppers into thin strips. Aren’t those colors just gorgeous?
Mix it up! Place the shredded papaya, carrot, and bell peppers in a small mixing bowl. Pour in the fish sauce, honey, and calamansi juice. Mix it well until everything is fully coated in that delicious dressing.
Get creative! Optional: Feel free to add fresh herbs like chopped cilantro, basil, or green onions. You can also top it off with sliced chilis for some heat or chopped peanuts for a crunchy twist.
Reference the recipe card below for detailed instructions.
Meal Prep Tips:
Prep Optional Add-Ins: Chop any fresh herbs like cilantro, basil, or green onions in advance and store them in separate containers. If you’re adding chilis or peanuts, have them ready to go as well.
Portion Control: Divide the shredded veggies into single-serving containers for easy grab-and-go lunches or quick side dishes throughout the week. This helps with portion control and makes meal prep a breeze.
Add Protein: For a more complete meal, prep some protein options like grilled chicken, shrimp, or tofu. Store them separately and add them to your salad when you’re ready to eat.
Stay Creative: Don’t be afraid to mix things up! Rotate in different add-ins like edamame, cherry tomatoes, or sliced radishes to keep the salad exciting and flavorful each time.
Refreshing Green Papaya Salad
A refreshing and crunchy Green Papaya Salad made with shredded green papaya, carrots, and mini bell peppers, tossed in a tangy, sweet, and savory dressing of fish sauce, honey, and calamansi juice
Rinse and peel the green papaya and carrot. Use a handheld julienne tool or mandolin with a julienne attachment to shred them into beautiful, thin strips.
Slice the mini bell peppers into thin strips. Aren’t those colors just gorgeous?
Mix it up! Place the shredded papaya, carrot, and bell peppers in a small mixing bowl. Pour in the fish sauce, honey, and calamansi juice. Mix it well until everything is fully coated in that delicious dressing.
Get creative! Optional: Feel free to add fresh herbs like chopped cilantro, basil, or green onions. You can also top it off with sliced chilis for some heat or chopped peanuts for a crunchy twist.
Notes
Nutrition information provided is an estimate. It will vary based on cooking method and specific ingredients used. Please consult with your healthcare provider for specific dietary needs. To gain a better understanding, explore our nutrition disclaimer here.
Amazon Brand – Happy Belly Roasted and Salted Peanuts
ParmCrisps – Original Cheese Parm Crisps
Frequently Asked Questions
Can I use ripe papaya for this salad?
Ripe papaya is too soft and sweet for this type of salad. For the best results, stick to green (unripe) papaya, which has a crisp texture and a neutral flavor.
Is there a vegetarian substitute for fish sauce?
Yes! You can use soy sauce or tamari as a vegetarian substitute. For a more authentic taste, look for vegetarian fish sauce alternatives made from seaweed or mushrooms.
Can I make this salad spicy?
Definitely! You can add sliced chilis or a pinch of chili flakes to the salad for some heat. Adjust the amount to suit your spice tolerance.
Manage Consent
To provide the best experiences, we use technologies like cookies to store and/or access device information. Consenting to these technologies will allow us to process data such as browsing behavior or unique IDs on this site. Not consenting or withdrawing consent, may adversely affect certain features and functions.
Functional
Always active
The technical storage or access is strictly necessary for the legitimate purpose of enabling the use of a specific service explicitly requested by the subscriber or user, or for the sole purpose of carrying out the transmission of a communication over an electronic communications network.
Preferences
The technical storage or access is necessary for the legitimate purpose of storing preferences that are not requested by the subscriber or user.
Statistics
The technical storage or access that is used exclusively for statistical purposes.The technical storage or access that is used exclusively for anonymous statistical purposes. Without a subpoena, voluntary compliance on the part of your Internet Service Provider, or additional records from a third party, information stored or retrieved for this purpose alone cannot usually be used to identify you.
Marketing
The technical storage or access is required to create user profiles to send advertising, or to track the user on a website or across several websites for similar marketing purposes.


Asian Crispy Cabbage Rolls
Equipment
Ingredients
Instructions
Notes
Nutrition