Posted on Leave a comment

Primavera Stuffed Chicken Breasts

stuffed primavera chicken

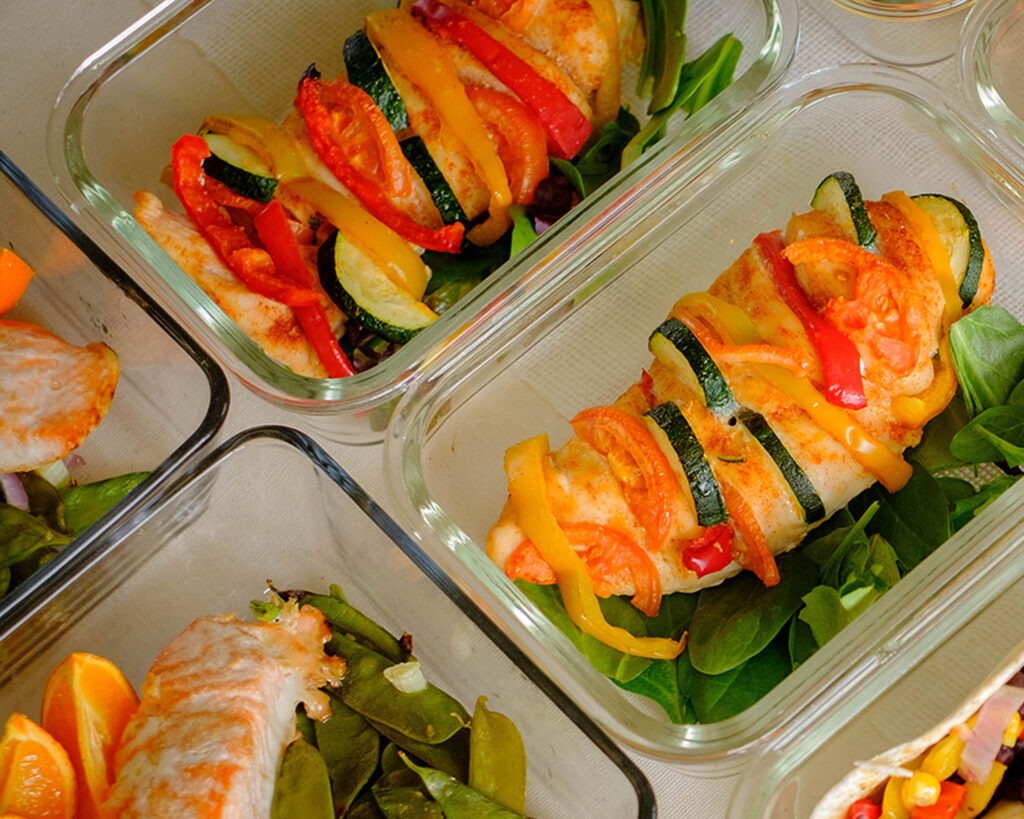
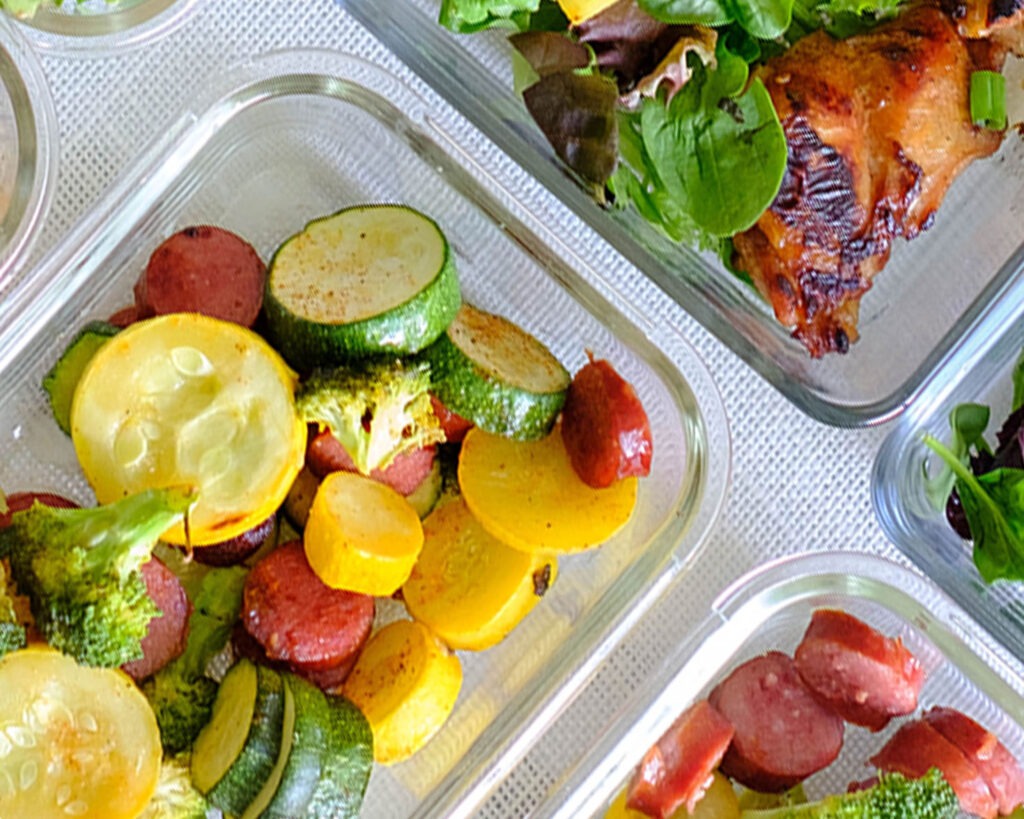
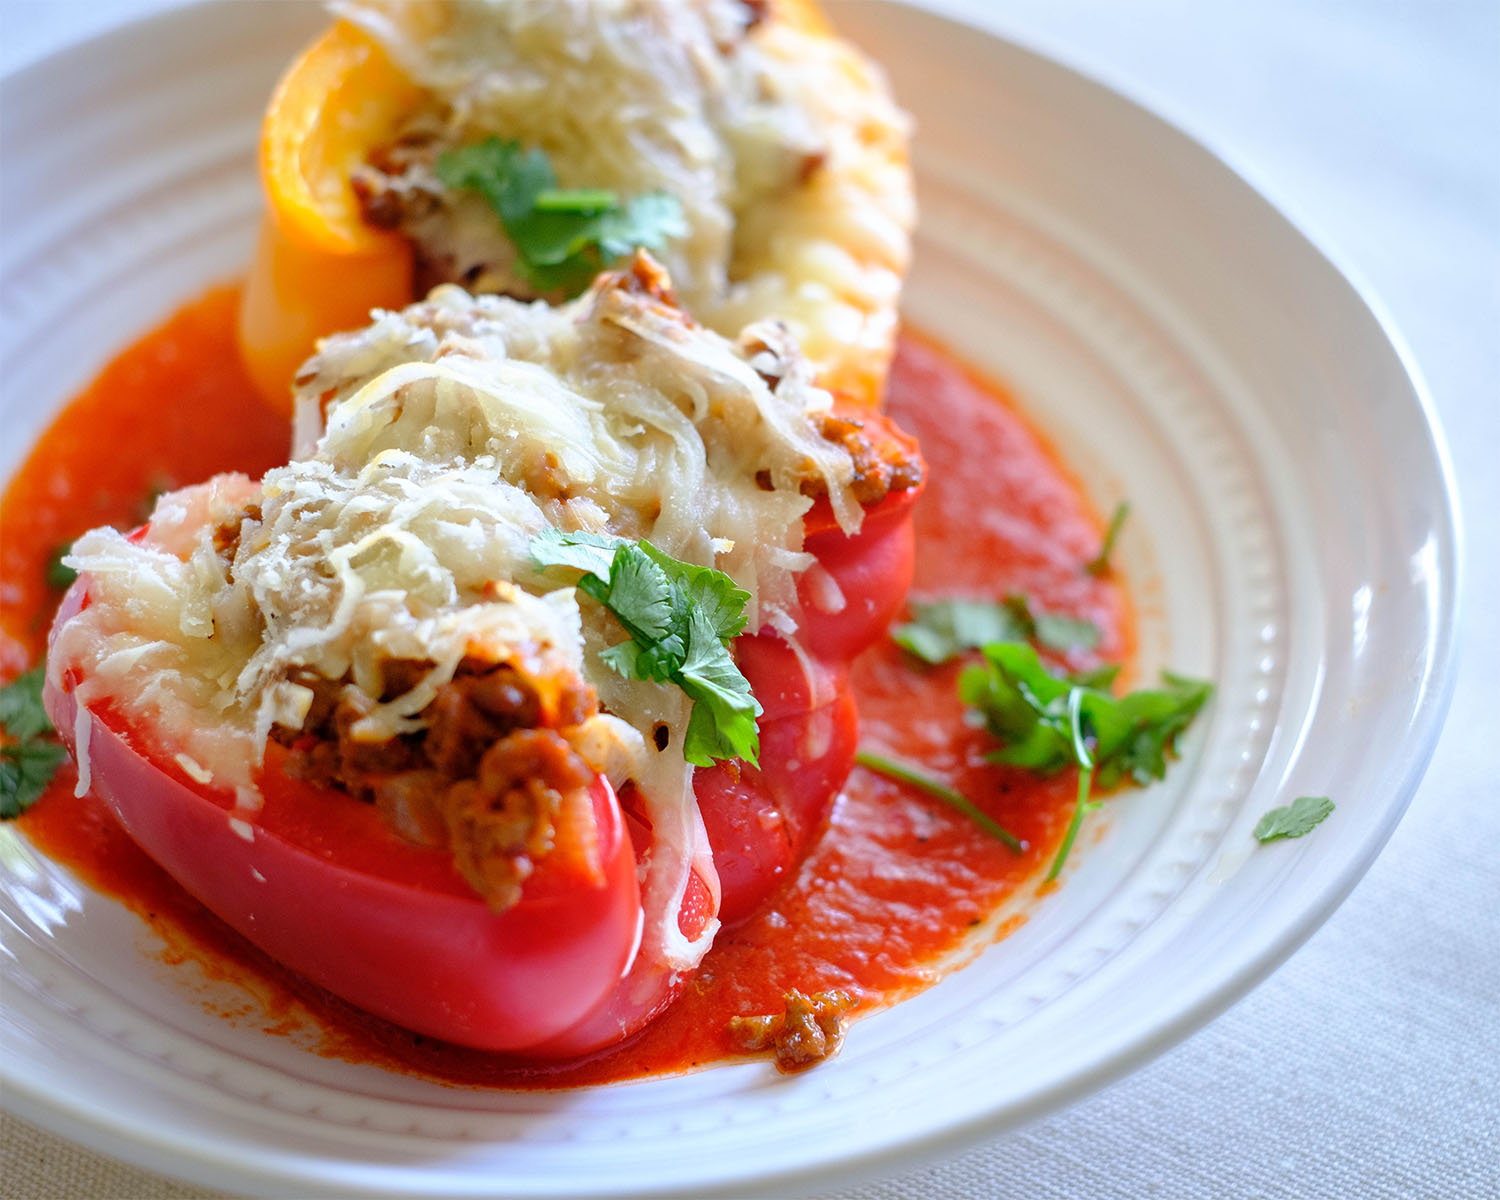
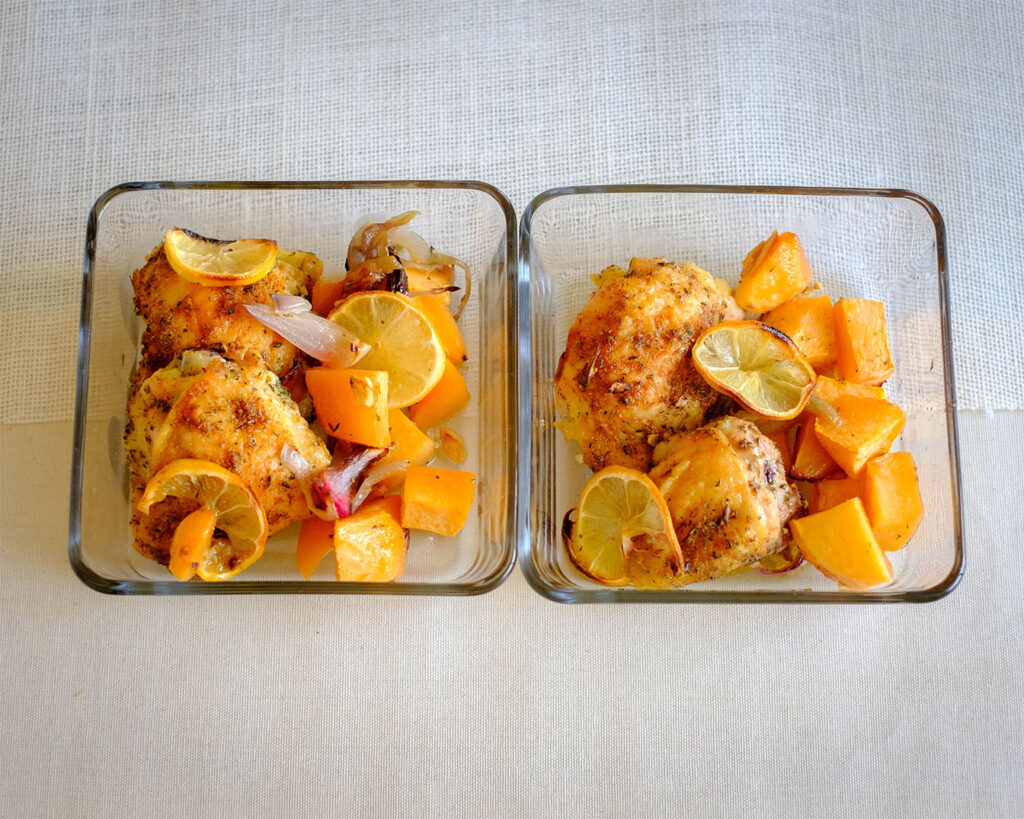
Oven Baked and Primavera Stuffed Chicken Breasts are a great way to get more vegetables into your weekly meal prep.

This post may contain affiliate links. Please see our privacy policy for details.

Round plate with baked chicken breasts stuffed with colorful vegetables and a side salad.

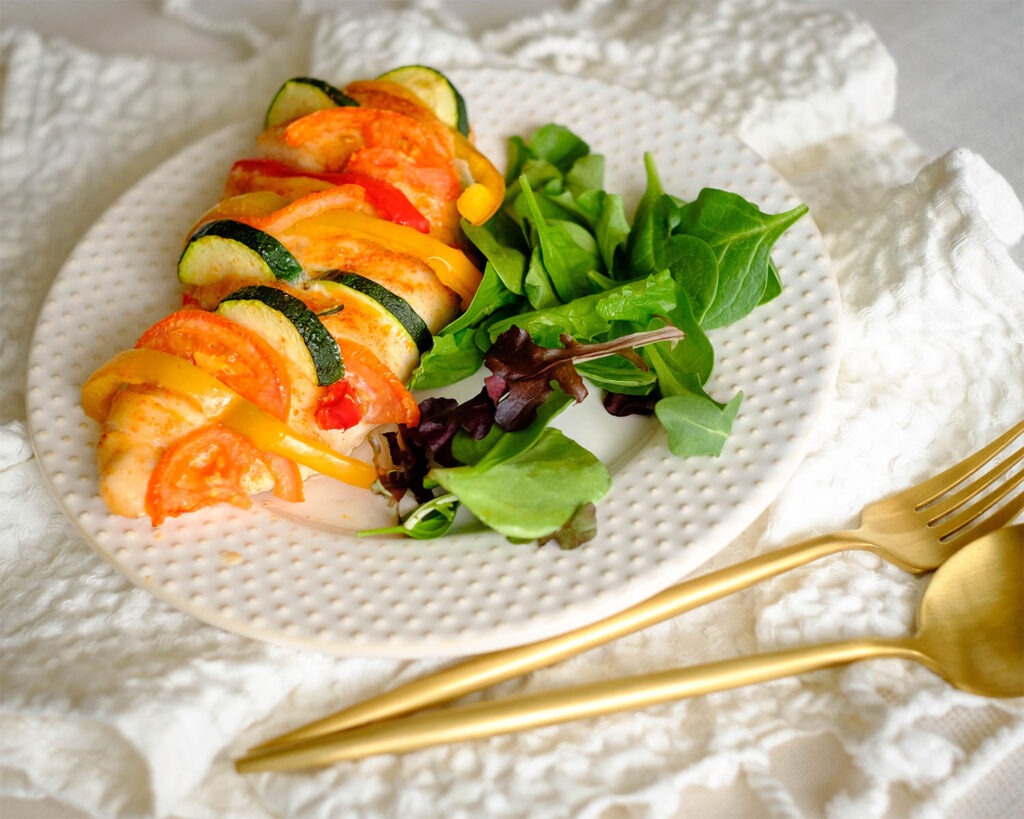
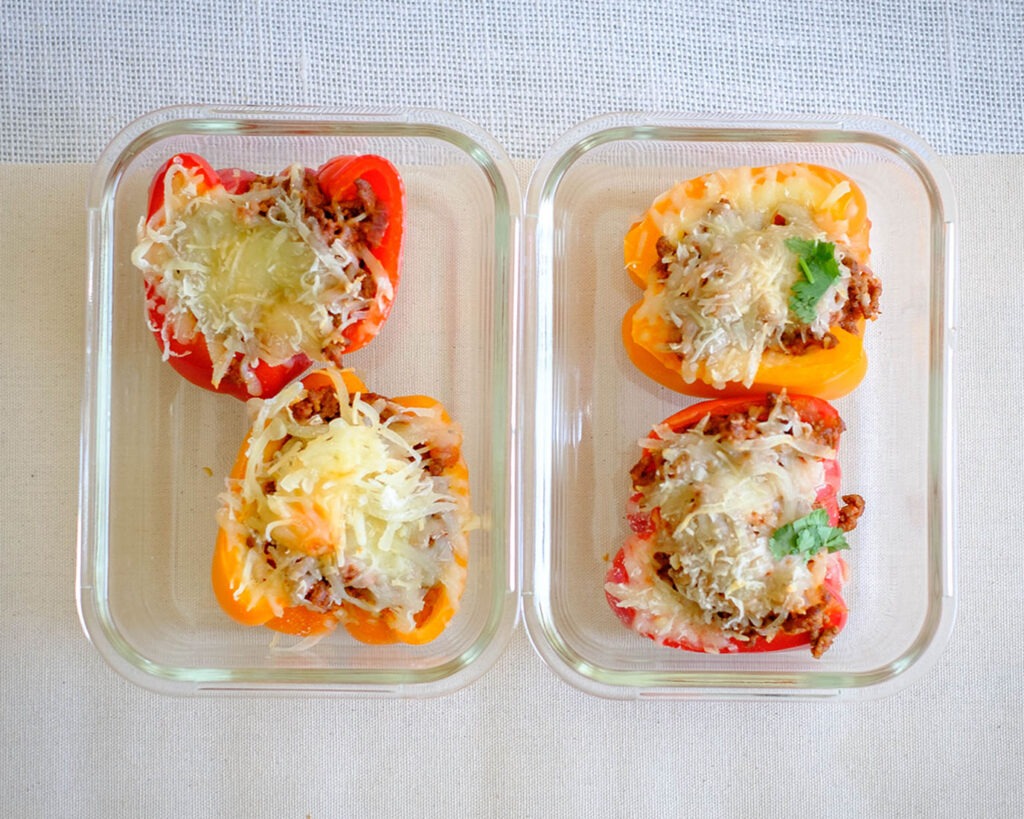
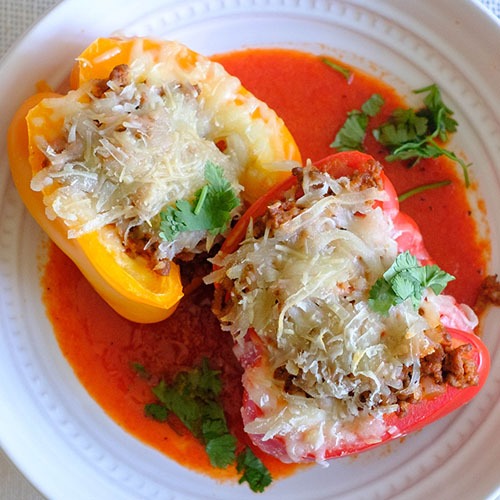
Pack chicken breast with lots of flavors, color, and nutrients with this recipe. It’s a simple, low-carb meal that requires minimal meal prep.

Why Is This Baked Chicken Breast Recipe Great for Meal Prep?

  • It is high in lean protein which will help you keep full and aid in weight loss
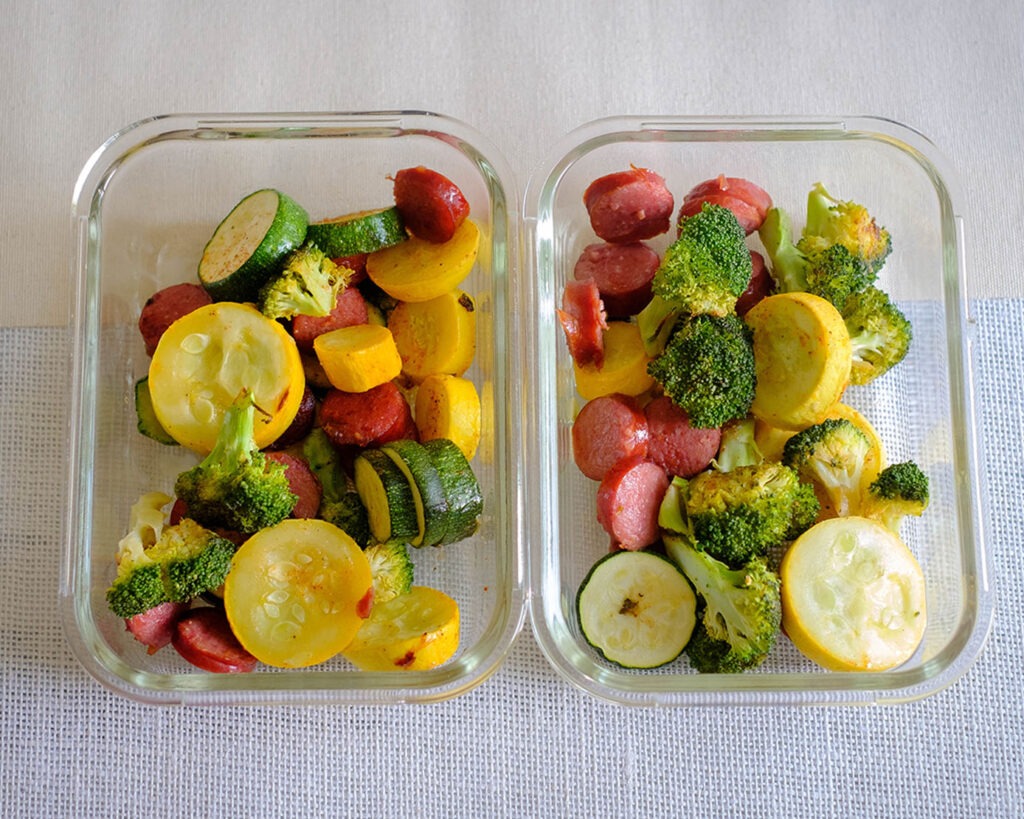
  • You can prep the chicken with the vegetables all in one pan with one cook method
  • You can make a larger batch and freeze it for later. You can later enjoy it with a side of mashed potatoes or fluffy rice pilaf

The PrepYoSelf Newsletter

Simple Ingredients You’ll Need to Make Stuffed Chicken Breasts

  • Chicken Breasts: We chose chicken breasts that were thick cut so that you can easily make slits in them
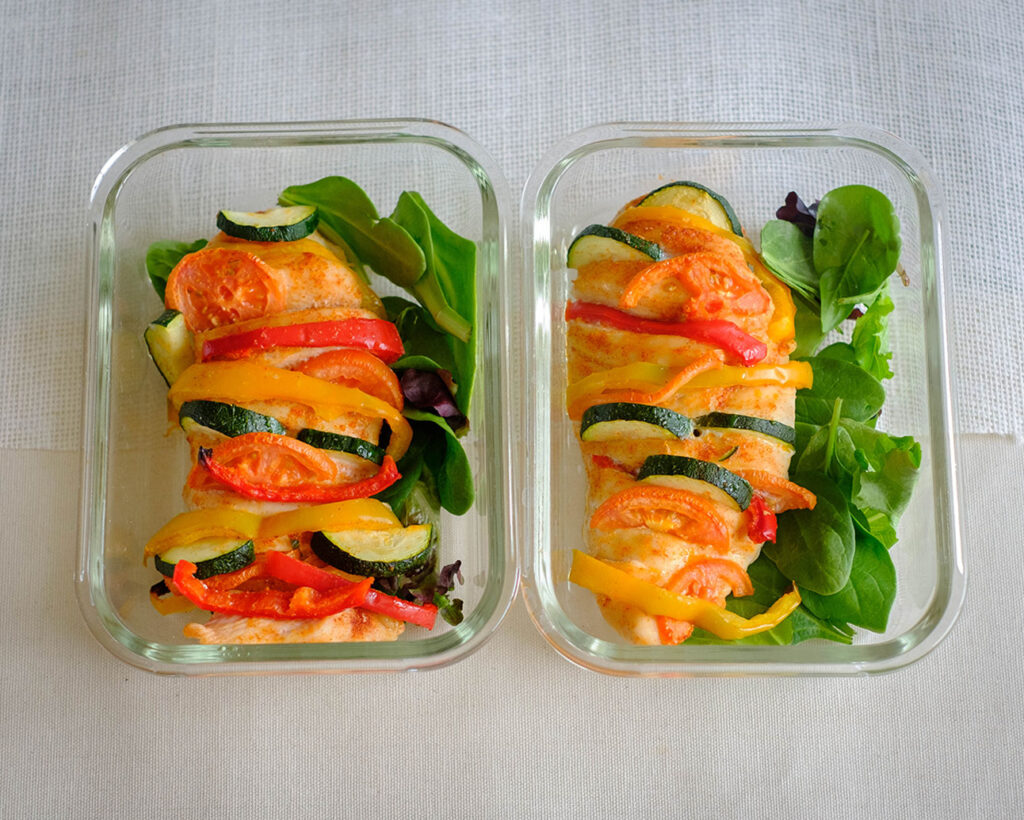
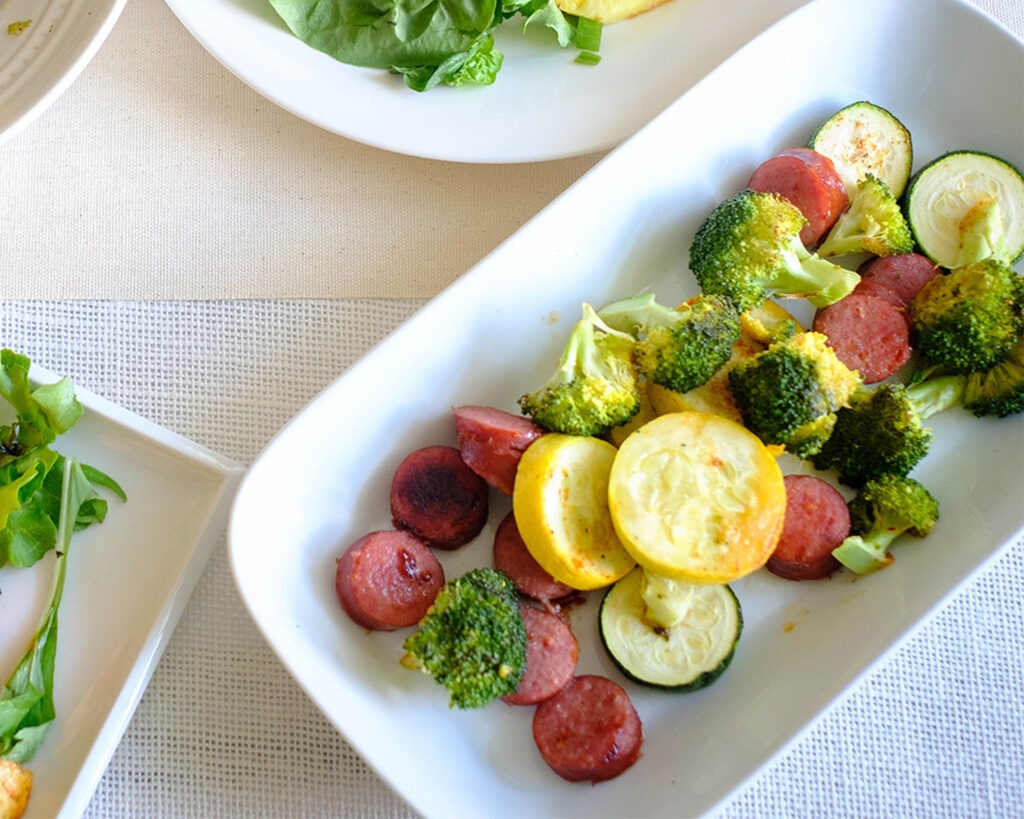
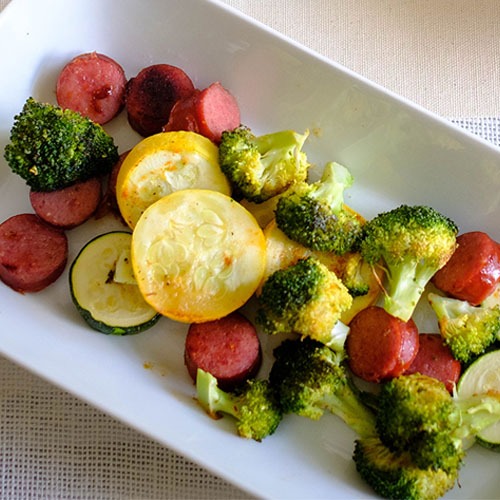
  • Vegetable Stuffing: Use vegetables that you can cut into thin slices. We used zucchini, yellow squash, bell peppers, and red onions
  • Seasonings: We used a pre-made Italian seasoning, garlic powder, paprika, and salt
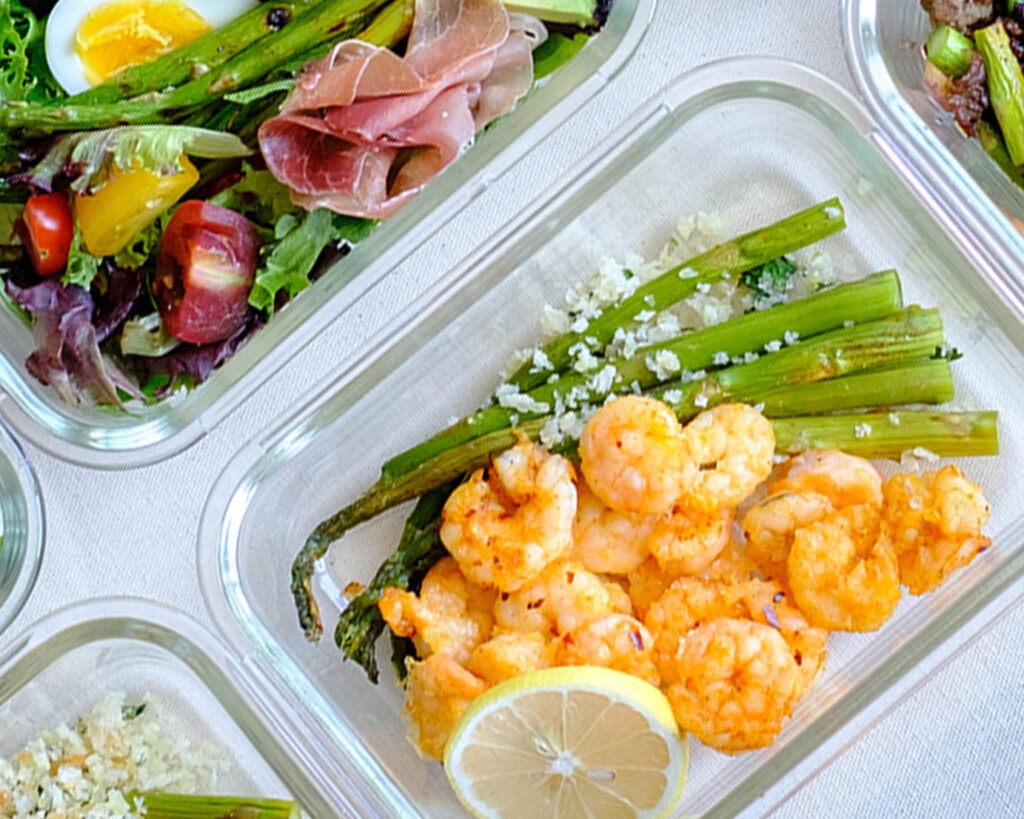
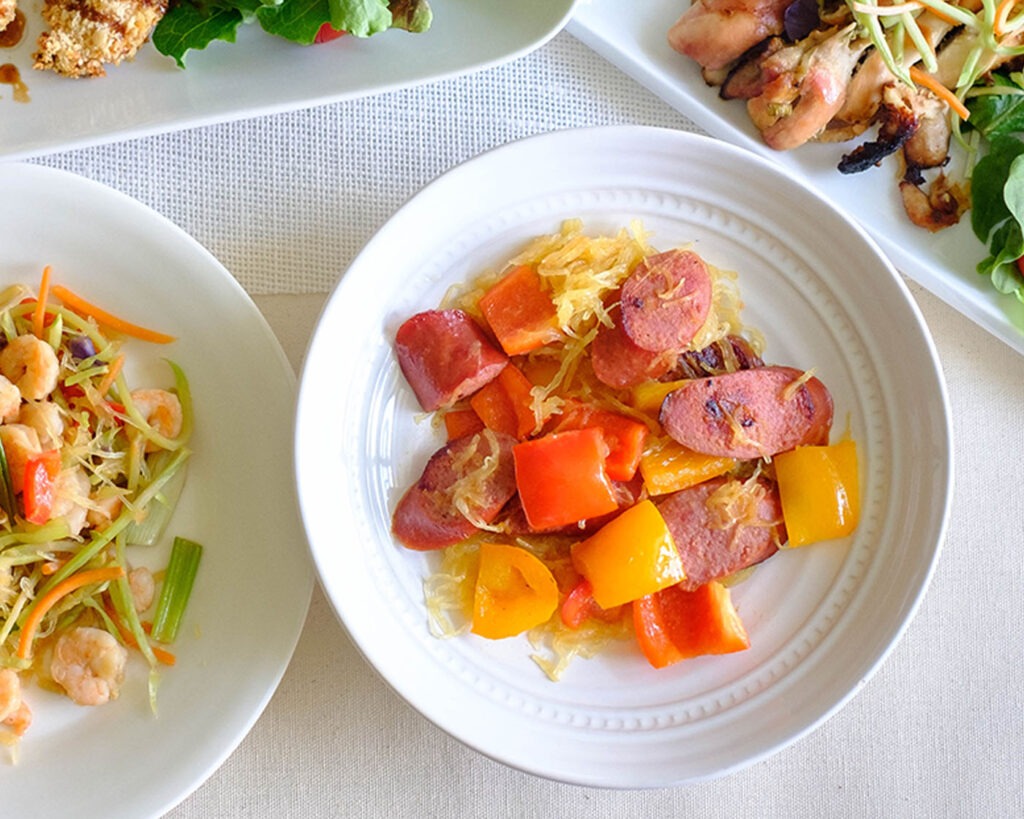
  • Side Salad: Serve with a side salad such as spring mix and your choice of salad dressing
Round plate with baked chicken breasts stuffed with colorful vegetables and a side salad.

How to Make Stuffed Chicken Breasts With Vegetables

  1. Preheat the oven to 400F.
  2. Place the chicken breast on a cutting board.
  3. Use a sharp knife to cut slits in each chicken breast, about ½ inch apart (be careful not to cut through the bottom of the chicken completely).
  4. Sprinkle the chicken with seasonings and drizzle with olive oil.
  5. Slice the veggies into coins and stuff the slits with the mixture of veggies, alternating the veggies with each slit.
  6. Place the primavera stuffed chicken breasts on a sheet pan and bake in the oven for 25 minutes until it fully cooks.

Reference the recipe card below for detailed instructions.

Glass meal prep containers with baked chicken breasts stuffed with colorful vegetables and a side salad.

Meal Prep Tips for Primavera Stuffed Chicken Breasts

  • If you don’t want to heat up the whole oven, you can prep this in the Air Fryer
  • If you are entertaining guests, you can cook the chicken breasts on an outdoor grill and have a fun cookout
  • To add more flavor, you can also add shredded mozzarella cheese on top or flavored panko bread crumbs for a crunch
Glass meal prep containers with baked chicken breasts stuffed with colorful vegetables and a side salad.
Stuffed Chicken

Primavera Stuffed Chicken Breasts

Colorful and vibrant stuffed primavera chicken breasts perfect for a healthy meal prep dish.
No ratings yet
Prep Time 5 minutes
Cook Time 30 minutes
Course lunch, Main Course
Cuisine American
Servings 2

Equipment

  • knife
  • cutting board
  • sheet pan
  • oven
  • mixing bowls

Ingredients
  

  • 12 oz chicken breasts
  • 1/4 cup zucchini (sliced)
  • 1/4 cup yellow squash (sliced)
  • 1/4 cup yellow bell pepper (sliced)
  • 1/4 cup red bell pepper (sliced)
  • 1/4 cup red onions (sliced)
  • 1/4 teaspoon Italian seasoning
  • 1/4 teaspoon garlic powder
  • 1/4 teaspoon paprika
  • 1/4 teaspoon salt
  • 1 tablespoon olive oil

Salad Dressing and Spring Mix

  • 1 lemon (juiced)
  • 1 teaspoon dijon mustard
  • 1 tablespoon honey
  • 4 tablespoons olive oil
  • 1/4 teaspoon garlic powder
  • 1/4 teaspoon pepper
  • 1/4 teaspoon salt
  • 4 cups spring mix

Instructions
 

  • Preheat hte oven to 400F. Using a sharp knife, cut slits in each chicken breast, about 1/2 inch apart, being careful not to cut through completely. Stuff the slits with a mixture of sliced veggies, alternating with each slit.
  • Sprinkle the chicken with the seasonings and drizzle with olive oil. Bake in the oven for about 25 to 30 minutes until the chicken is cooked through to an internal temperature of 165F. (optional) during the last 5 minutes, you can sprinkle with shredded cheese to let it melt.
  • Meanwhile, in a mixing bowl, mix together the salad dressing ingredients until it is well blended.
  • Serve the stuffed chicken breasts with a side salad and salad dressing.

Similar Recipes

chicken fajitas

Sheet Pan Chicken Fajitas with Mango Salsa

chicken kale salad

Grilled Honey Dijon Chicken and Kale Salad

balsamic chicken salad

Oven Baked Balsamic Chicken Spinach and Strawberry Salad

You Might Also Like

Frequently Asked Questions

What else can I use stuff my chicken breast with?

The options are endless, you can use black olives, cream cheese, sliced potatoes, and even sliced mushrooms.


Can I make stuffed chicken breasts ahead of time?

Yes, you can cut the chicken and stuff it in advance. Then, store it in an airtight container in the refrigerator until you are ready to bake it.


Can I freeze stuffed chicken breasts?

Yes, you can store it in an airtight, freezer-safe bag and store it in the freezer for up to 3 months for the best quality.

Posted on Leave a comment

Sheet Pan Sausage with Roasted Veggies

sheet pan sausage

This Sheet Pan Sausage with Veggies – including Roasted Broccoli, Yellow Squash, and Zucchini is a quick dinner idea that you can make in less than 20 minutes.

This post may contain affiliate links. Please see our privacy policy for details.

Plate with roasted sausage, zucchini, yellow squash, and broccoli florets.

Why this Recipe is Great for Meal Prep

Smoked sausage is the secret ingredient in this recipe, and the best part is that it’s already pre-cooked. So all you have to do is heat it up and it adds tons of flavor with low effort, which is perfect for a busy weeknight!

We used budget-friendly ingredients such as broccoli florets, yellow squash, and zucchini. However, you can add or switch up your choice of vegetables for your recipe and use what you have on hand.

If you’re keeping this low carb, other vegetables that will work well are bell peppers, asparagus, cauliflower, and Brussel sprouts. The important thing is to use vegetables that can roast quickly in less than 20 minutes.

The PrepYoSelf Newsletter

Here are the Essential Ingredients You’ll Need

  • Pre-Cooked Sausage: Nowadays, there are so many options for pre-cooked sausage. You can use pork, beef, turkey, or chicken sausage.
  • Broccoli: You can also use cauliflower or brussels sprouts.
  • Yellow Squash: Other squash options are diced butternut squash or delicata squash
  • Zucchini: Another non-starchy vegetable you can use are snow peas or even green beans

Plate with roasted sausage, zucchini, yellow squash, and broccoli florets.

How to Make Sheet Pan Sausage and Veggies

  1. Preheat the oven to 400F.
  2. Slice the vegetables and sausage into rounds.
  3. Place them on a sheet pan and coat them with olive oil.
  4. Sprinkle with seasonings and bake in the oven for 12 to 15 minutes.

Reference the recipe card below for detailed instructions.

Glass meal prep containers with roasted sausage, zucchini, yellow squash, and broccoli florets.

Meal Prep Tips for Sheet Pan Sausage and Veggies

  • Other Cook Method: You can definitely make this in a toaster oven or in the Air Fryer. And if you don’t want to mess with the oven, you can also saute these ingredients in a saute pan. Just add olive oil and start with the sausage first, followed by the vegetables for a few minutes.
  • Leftover sausage: If you buy a pack of sausage and have some leftover, you can store it in a freezer bag in the freezer for up to 3 months. You can also use it up in other meals such as a soup recipe, breakfast tacos, or even in a pasta dish.
  • Storage: Store in an airtight container in the refrigerator for up to 3 to 4 days for the best quality.

Glass meal prep containers with roasted sausage, zucchini, yellow squash, and broccoli florets.

sausage and veggies

Sheet Pan Sausage with Roasted Veggies

Effortless Sheet Pan Sausage and Vegetable Recipe that can be ready in less than 20 minutes.
No ratings yet
Prep Time 5 minutes
Cook Time 15 minutes
Course dinner, Main Course
Cuisine American
Servings 2

Ingredients
  

  • 4 beef sausage links (sliced)
  • 1/4 red onions (diced)
  • 2 tablespoon garlic (minced)
  • 1 yellow squash
  • 1 zucchini
  • 2 cups broccoli florets
  • 1/4 teaspoon garlic powder
  • 1/4 teaspoon salt
  • 1/4 teaspoon chili powder
  • 1/4 teaspoon paprika
  • 1 lemon (juiced)
  • 1 tablespoon olive oil

Instructions
 

  • Pre-heat oven to 400F. Cut the yellow squash and zucchini into 1/4 inch half rounds. Slice the sausage into rounds.
  • Place the sausage and veggies on a sheet pan. Sprinkle the seasonings and minced garlic on top. Coat everything with olive oil. Bake in the oven for 12 to 15 minutes.

Similar Recipes

sausage squash

Spaghetti Squash with Sausage and Peppers

orange chicken

Air Fryer Orange Soy Glazed Chicken with Broccoli

ground beef

Sauteed Ground Beef with Spring Veggies

You Might Also Like

Frequently Asked Questions

What is smoked sausage?

The most common smoked sausages are andouille or kielbasa sausage. They are exposed to burning wood smoke which gives them the smokey flavor.


Can I use raw sausage?

Yes, you can use raw sausage in this recipe, just be sure to use a thermometer to check the internal temperature of the sausage and make sure it fully cooks to the appropriate internal cooking temperature. We recommend cooking them whole and then slicing them afterward.


What can I serve with this recipe?

This recipe pairs well with rice pilaf, side salad, or even buttered noodles with grated parmesan cheese.

Posted on Leave a comment

Baked Shrimp with Panko Breaded Asparagus

shrimp and asparagus

Garlic lemon shrimp and crispy panko-crusted asparagus all baked together in one pan! This super easy baked shrimp recipe keeps the dishes to a minimum and the flavor clean and crisp.

This post may contain affiliate links. Please see our privacy policy for details.

Plate with baked shrimp recipe with asparagus topped with panko breadcrumbs and lemon slice.

Need a game plan for your midweek dinner after a long day of work? Then, you’ll want to try this quick and easy cooking method that will help you get dinner on the table in less than 30 minutes.

Sheet pan meals save time, make clean-up easier, and the oven does all the work. That’s why we love this Oven Baked Shrimp with Roasted Asparagus topped with crispy panko breadcrumbs.

The PrepYoSelf Newsletter

Easy Ingredients for this Baked Shrimp Recipe

  • Shrimp: Get shrimp that is already peeled and deveined
  • Asparagus: You can also swap this ingredient out with green beans or broccolini
  • Lemon: Lemon on seafood help to add bright flavors to the dish
  • Seasonings: We used chili red pepper flakes for a little bit of heat, paprika for smoky flavors, and garlic as an aromatic
  • Breadcrumb Mixture: This crunchy topping is the star of the show that adds a layer of crunch and flavor to the dish. This crispy and garlicky combination levels up the dish

Glass meal prep container with baked shrimp recipe with asparagus topped with panko breadcrumbs and lemon slice.

Easy Steps to Make Sheet Pan Shrimp and Asparagus

  1. Pre-heat the oven to 400F.
  2. Place the shrimp and asparagus on a sheet pan and sprinkle them with seasonings. Coat with olive oil.
  3. In a small bowl, mix together the breadcrumb mixture and top off the asparagus with the bread crumbs.
  4. Bake everything in the oven for 10-12 minutes

Reference the recipe card below for detailed instructions.

Plate with baked shrimp recipe with asparagus topped with panko breadcrumbs and lemon slice.

Meal Prep Tips for Sheet Pan Meals

  • Line the pan with foil or parchment paper to help with easy clean-up.
  • Avoid overcrowding the pan. This will help everything crisp up instead of steaming the food.
  • Pair proteins and vegetables that have similar cook times.

Glass meal prep containers with a baked shrimp recipe with asparagus topped with panko breadcrumbs and lemon slice.

shrimp and asparagus

Oven Baked Shrimp with Asparagus and Panko Breadcrumbs

Crispy, golden panko crusted asparagus paired with high-protein shrimp. An easy sheet pan meal for your busy work week.
No ratings yet
Prep Time 5 minutes
Cook Time 15 minutes
Course dinner, Main Course
Cuisine American
Servings 2

Equipment

  • knife
  • cutting board
  • sheet pan

Ingredients
  

  • 12 oz shrimp (peeled and deveined)
  • 12 asparagus spears
  • 1 lemon (sliced)
  • 1/4 teaspoon red chili pepper flakes
  • 1/4 teaspoon paprika
  • 1 tablespoon garlic (minced)
  • 1 tablespoon olive oil

Bread crumb mixture

  • 1/2 cup panko bread crumbs
  • 1 tablespoon garlic (minced)
  • 1 tablespoon olive oil
  • 1/4 teaspoon salt

Instructions
 

  • Pre-heat the oven to 400F. Be sure to trim the bottom ends of the asparagus (about 1-inch).
  • Place the shrimp and asparagus on a sheet pan and season with paprika, red chili pepper flakes, salt, and minced garlic. Drizzle with olive oil
  • In a small bowl mix together the bread crumbs, minced garlic, salt, and olive oil. Top off asparagus with the bread crumbs.
  • Bake everything in the oven for 12 minutes. After it cooks, squeeze lemon juice on top of the shrimp.

Similar Recipes

salmon beet salad

Citrus Ginger Salmon Salad with Roasted Beets

salmon and watermelon salad

Grilled Salmon with Watermelon Salad

pine nut fish and spinach

Baked Pine Nut Crusted Tilapia with Sauteed Spinach

You Might Also Like

Frequently Asked Questions

What are panko breadcrumbs?

Panko is a Japanese style of breadcrumbs that are lighter, airier, crispier, and larger than regular breadcrumbs that give a bigger crunch to deep-fried foods.


Can I use panko and breadcrumbs interchangeably?

You can use them interchangeably, the only difference is your preference in how crunchy you prefer your coating on fried foods


Which is healthier panko or breadcrumbs?

Panko is lower in calories, sodium, and fat than regular breacrumbs.

Posted on Leave a comment

Stuffed Lasagna Peppers

stuffed lasagna peppers

Here’s a low-carb, gluten-free version of lasagna that has all the hearty flavors of the classic lasagna dish. Best of all, the tasty ingredients are all packed in sweet and vibrant bell pepper cups.

This post may contain affiliate links. Please see our privacy policy for details.

Round plate with bell peppers stuffed with meat sauce and topped with melted cheese.

Now, we know that lasagna can sometimes be tedious to make, but here’s an easy meal prep version that you can make in advance for your next weeknight meal.

The PrepYoSelf Newsletter

Why is this lasagna pepper recipe great for meal prep?

  • Fewer prep steps than your traditional lasagna recipe, but has all the same flavors found in the classic dish
  • You can still add tons of flavor even without the extra pasta, and it’s a great way to incorporate more vegetables into the dish
  • You can keep it simple by using pre-made marinara sauce

Round plate with bell peppers stuffed with meat sauce and topped with melted cheese.

Super Simple Ingredients You’ll Need for Stuffed Lasagna Peppers

  • Ground Beef: We used lean ground beef, but you can also use ground turkey, ground chicken, and ground Italian pork sausage
  • Marinara Sauce: We used the store-bought sauce. Be sure to read the nutrition label and pick the one with less sugar in the ingredients
  • Bell Peppers: You can use any color, but we opted for red bell peppers because they are sweeter and enhance the flavors of the marinara sauce
  • Cheese: We used shredded mozzarella cheese, but you can use whatever you have on hand

Glass meal prep containers with bell peppers stuffed with meat sauce and topped with melted cheese.

How to Make Stuffed Lasagna Peppers

  • Start with the meat sauce: Saute your onions until they soften, then add the ground beef, and seasonings, and cook until golden brown.
  • Mix in the marinara sauce: After your beef has cooked, pour in the sauce.
  • Assemble the peppers: After you cut the peppers in half, remove the seeds, and use a scoop to fill in each half with the meat sauce.
  • Bake the peppers: Bake them until they are tender. In the last 5 minutes, top it off with shredded cheese and continue to bake until the cheese melts.

Reference the recipe card below for detailed instructions.

Glass meal prep containers with bell peppers stuffed with meat sauce and topped with melted cheese.

Meal Prep Variations

  • If you’re not a fan of bell peppers, you can also use portobello mushrooms or zucchini boats as your vegetable base for the meat sauce.
  • If you want to add more vegetables to the dish, add chopped spinach, or sliced mushrooms to the meat sauce.
  • If you’re a cheese lover, you can also layer ricotta cheese or cottage cheese in between the meat sauce when stuffing your pepper

Stuffed lasagna peppers

Stuffed Lasagna Peppers

Baked Lasagna Stuffed Peppers filled with savory meat sauce and topped with gooey melted cheese!
No ratings yet
Prep Time 5 minutes
Cook Time 25 minutes
Course dinner, Main Course
Cuisine American, Italian
Servings 2

Equipment

  • knife
  • cutting board
  • spatula
  • saute pan
  • baking dish
  • oven

Ingredients
  

  • 8 oz ground beef
  • 1/4 cup red onions (diced)
  • 1 cup marinara sauce
  • 1/4 teaspoon garlic powder
  • 1/4 teaspoon salt
  • 2 red bell peppers
  • 1 tablespoon olive oil
  • 1/2 cup shredded mozzarella cheese

Instructions
 

  • Preheat the oven to 400F. Add olive oil to a saute pan on medium-high heat. Saute the onions until they soften (about 2 to 3 minutes). Next, add the ground beef and seasonings and saute until it is fully cooked and golden brown (about 5 to 6 minutes). Then, add the marinara sauce and stir it all together.
  • Cut the bell peppers in half and remove the ribs and seeds. Stuff each bell pepper half with the marinara meat sauce. Place the stuffed peppers on a sheet pan and bake in the oven for 20 minutes.
  • In the last 5 minutes, remove the peppers from the oven and top it off with shredded cheese. Place it back in the oven for another 5 minutes until the cheese melts.

Similar Recipes

eggplant

Grilled Eggplant Steaks with Marinara Sauce

meatloaf patties

Oven Baked Meatloaf Patties and Green Beans

roasted chicken and rutabaga

Roasted Lemon Italian Chicken with Rutabaga

You Might Also Like

Frequently Asked Questions

How long to bake the bell peppers?

For this recipe, we baked it for 20 minutes because we like our peppers to still have a crunch. And if you are making this in advance for your weekly meal prep, the bell peppers will continue to get tender when you reheat them in the microwave. However, if you really like tender roasted peppers, you can pre-bake them for 20 minutes before you fill them with meat sauce.


Are these Stuffed Lasagna Peppers Keto Friendly?

Yes, just be sure the marinara sauce you get is lower in sugar. 


Can you freeze lasagna stuffed peppers?

Yes, they are freezer friendly. Just wrap them individually and store them in a freezer bag for up to 3 months for the best quality.

Posted on Leave a comment

Roasted Lemon Italian Chicken with Rutabaga

roasted chicken and rutabaga

Juicy chicken thighs baked with crispy chunks of rutabaga in a warm paprika spice that is perfect for a hearty weeknight dinner.

This post may contain affiliate links. Please see our privacy policy for details.

Calories: 810kcal | Carbohydrates: 46g | Protein: 42g | Fat: 52g | Saturated Fat: 12g | Polyunsaturated Fat: 10g | Monounsaturated Fat: 26g | Trans Fat: 0.2g | Cholesterol: 221mg | Sodium: 788mg | Potassium: 1649mg | Fiber: 8g | Sugar: 12g | Vitamin A: 457IU | Vitamin C: 86mg | Calcium: 159mg | Iron: 4mg

Plate with roasted chicken thighs and root vegetables, topped with lemon slices and red onions.

We love roasted chicken thighs because they are juicy, flavorful, and so simple to make.

They go really well with almost any kind of roasted vegetables such as broccoli, asparagus, bell peppers, and your classic roasted potatoes.

For this recipe, we wanted to highlight the underrated rutabaga vegetable.

The PrepYoSelf Newsletter

What is Rutabaga?

  • Rutabaga is a root vegetable that is actually a cross between a turnip and a cabbage.
  • It can be eaten raw, but it is usually roasted, mashed like potatoes, or used in stews, and in casserole dishes.
  • They look similar to turnips with brownish-yellow or purple skin that is rather tough, therefore, it is best to wash them and remove the skin before cooking them or eating them.
  • Rutabaga is also lower in calories than your other root vegetables, and also higher in fiber, and rich in Vitamin C. Adding them to your diet can help with weight loss and provide great health benefits.

Plate with roasted chicken thighs and root vegetables, topped with lemon slices and red onions.

Recipe Ingredient and Variations:

  • Chicken Thighs: We used chicken thighs in this recipe because they are budget-friendly, and we occasionally enjoy and indulge in the golden brown crispy skin from roasting the chicken thighs. However, if you want to keep this meal lean, you can also use chicken breast or chicken tenderloins.
  • Rutabaga and Potato: We made this a one-pan meal and roasted the vegetables alongside the chicken thighs for easy cleanup.
  • Lemon: Adding citrus and the zest of the peel always brightens up the flavors.
  • Aromatics: We used red onions and garlic, but you can also use shallots for this recipe.
  • Seasonings: We kept it simple with pre-made Italian seasoning, paprika, garlic powder, and salt.
  • Olive oil: Always coat your protein and vegetables when roasting them in the oven. This will help crisp up the chicken and the root vegetables.

Glass casserole dish with roasted chicken thighs and root vegetables, topped with lemon slices and red onions.

Easy Basic Steps to Make Roasted Chicken and Rutabaga

  1. Preheat the oven to 400F. In a small bowl, mix together the seasonings.
  2. Place the chicken in one bowl and sprinkle it with half of the seasonings, then drizzle with some olive oil.
  3. Next, peel the rutabaga and potato and cut them into cubes. Place them in another mixing bowl and also sprinkle them with the seasonings and coat them with olive oil.
  4. Place all of the ingredients on a sheet pan and layer the lemon slices on top of the chicken.
  5. Top everything off with the diced red onions and minced garlic.
  6. Bake everything in the oven for 35 minutes until the chicken reaches an internal temperature of 165F and the chicken reaches gets your desired crispiness of the skin.

Reference the recipe card below for detailed instructions.

Glass meal prep containers with roasted chicken thighs and root vegetables, topped with lemon slices and red onions.

Meal Prep Tips for Roasted Chicken and Rutabaga

  • Cook method variations: You can also make this recipe in the Air Fryer (cook at 360F for 20-25 minutes).
  • To Serve: Serve with a fresh side salad or a hot roll.
  • To Store: Store it in an airtight container for up to 3 to 4 days in the refrigerator.
  • To Reheat: Warm it up in the microwave for a few minutes.

roasted chicken and rutabaga

Roasted Lemon Italian Chicken with Rutabaga

A classic roasted chicken with your new favorite root vegetable-buttery, sweet, and savory rutabaga.
No ratings yet
Prep Time 5 minutes
Cook Time 40 minutes
Course dinner, Main Course
Cuisine American, Italian
Servings 2
Calories 810 kcal

Equipment

  • knife
  • cutting board
  • sheet pan
  • oven

Ingredients
  

  • 4 chicken thighs
  • 1 large rutabaga
  • 1 russet potato
  • 1 teaspoon italian seasoning
  • 1/2 teaspoon garlic powder
  • 1/2 teaspoon paprika
  • 1/2 teaspoon salt
  • 1 lemon (sliced)
  • 1/4 cup red onion (sliced)
  • 1 tablespoon garlic (minced)
  • 2 tablespoon olive oil

Instructions
 

  • Preheat the oven to 400F. In a small bowl, mix together the italian seasoning, paprika, garlic powder, and salt.
  • Place the chicken in a mixing bowl and sprinkle the chicken with half of the seasoning mixture, then drizzle it with half of the olive oil.
  • Next, peel the rutabaga and potato and cut them into 1 inch cubes. Place the cubed rutabaga and potato in another mixing bowl and sprinkle the rest of the seasonings and drizzle with the rest of the olive oil and mix well
  • Place both the chicken and veggies on a sheet pan. Layer the lemon slices on top of the chicken. Top the veggies with the diced red onions and minced garlic
  • Bake everything in the oven for about 35 to 40 minutes until the chicken reaches an internal temperature of 165F.

Notes

Nutrition information provided is an estimate. It will vary based on cooking method and specific ingredients used. Please consult with your healthcare provider for specific dietary needs. To gain a better understanding, explore our nutrition disclaimer here

Nutrition

Calories: 810kcalCarbohydrates: 46gProtein: 42gFat: 52gSaturated Fat: 12gPolyunsaturated Fat: 10gMonounsaturated Fat: 26gTrans Fat: 0.2gCholesterol: 221mgSodium: 788mgPotassium: 1649mgFiber: 8gSugar: 12gVitamin A: 457IUVitamin C: 86mgCalcium: 159mgIron: 4mg

Similar Recipes

stuffed primavera chicken

Primavera Stuffed Chicken Breasts

pineapple bbq chicken

Oven Baked Pineapple BBQ Chicken

rosemary chicken

Rosemary Baked Chicken and Potatoes

You Might Also Like

Frequently Asked Questions

What temperature do you cook chicken thighs?

Chicken should always be cooked to at least an internal temperature of 165F.


What does roasted rutabaga taste like?

When eaten raw, they have a bit of a bitter taste similar to a turnip, however, when cooked, gain a buttery and sweet & savory combination, much like a sweet potato. 


Is rutabaga a low-carb vegetable?

Rutabaga is much lower in carbs than most root vegetables and makes for a great choice for those on low-carb diets. 1 cup of cubed rutabaga has approximately 12 grams of carbs.

Posted on Leave a comment

Spaghetti Squash with Sausage and Peppers

sausage squash

This Spaghetti Squash with Beef Sausage and Red Bell Peppers recipe is a delightful combination of flavors, budget-friendly ingredients, and simplicity. Whether you’re a seasoned home cook or just starting your culinary journey, this recipe ensures that anyone can create a delicious and satisfying meal without breaking the bank. So, roll up your sleeves, gather your ingredients, and get ready to enjoy a tasty, budget-friendly feast!

This post may contain affiliate links. Please see our privacy policy for details.

Round bowl with spaghetti squash, sausage, and bell peppers.

Why this Recipe is Budget Friendly

Let me tell you why this Spaghetti Squash with Beef Sausage and Red Bell Peppers recipe is not only delicious but also budget-friendly! Whether you’re a student, a family on a budget, or simply looking to make economical meal choices, this Spaghetti Squash with Beef Sausage and Red Bell Peppers recipe provides a wallet-friendly option that doesn’t compromise on taste or nutrition. 

Spaghetti Squash: Spaghetti squash is often more affordable compared to other types of winter squash. It’s a great alternative to traditional pasta, offering a low-cost, nutrient-rich base for your meal.

Beef Sausage: While beef sausage can vary in price depending on the quality and brand, it is generally a more budget-friendly option compared to other cuts of meat. You can often find economical packages of beef sausage at your local grocery store, making it an accessible protein source for your meal.

Red Bell Peppers: Red bell peppers are usually reasonably priced, especially when they are in season. They are versatile vegetables that add flavor, color, and nutrients to your dish without breaking the bank.

Simple Seasonings: This recipe calls for basic seasonings like garlic powder and salt, which are affordable pantry staples found in most kitchens. These simple ingredients add flavor and depth to the dish without requiring additional expensive spices or herbs.

The PrepYoSelf Newsletter

Here’s What You’ll Need for Sausage and Spaghetti Squash

Let’s dive into the incredible ingredients that make this Spaghetti Squash with Beef Sausage and Red Bell Peppers recipe a true taste sensation!

  • Spaghetti Squash: This unique winter squash variety is a low-carb alternative to traditional pasta. When cooked, its flesh transforms into tender strands resembling spaghetti noodles. The mild and slightly nutty flavor of spaghetti squash provides a delightful base for the other ingredients to shine.
  • Beef Sausage: Made from ground beef combined with a delicious blend of spices, beef sausage adds a hearty and savory element to this dish. Its rich flavor and tender texture create a satisfying contrast with the spaghetti squash. You can use pre-cooked beef sausage links or remove the casings and crumble raw sausage for browning.
  • Red Bell Peppers: Bursting with vibrant color and sweet flavor, red bell peppers are the perfect partner for this dish. They add a refreshing crunch and a subtle touch of sweetness, balancing the richness of the beef sausage. Not only do they elevate the taste, but they also bring a pop of visual appeal to the meal.

These three key ingredients come together to create a harmonious flavor profile that’s both satisfying and nutritious. The spaghetti squash provides a lighter, low-carb base, while the beef sausage adds robustness and protein. The red bell peppers contribute freshness and a hint of natural sweetness, resulting in a well-balanced and delicious combination.

Round bowl with spaghetti squash, sausage, and bell peppers.

Easy Steps to Make Oven Baked Spaghetti Squash

  1. Pre-heat the oven to 400F.
  2. Then, cut the spaghetti squash in half and remove the seeds. Coat the flesh with olive oil and place it on a sheet pan. Roast the spaghetti squash until it becomes tender and easily strands into those delightful “noodles.”
  3. While that is happening, sauté the vibrant red bell peppers to bring out their natural sweetness and add a touch of freshness to the dish.
  4. Next, cook the beef sausage in a skillet until it’s browned.
  5. Combine it all together, sprinkle with a pinch of garlic powder and a dash of salt, and voila! You’ve got yourself a mouthwatering masterpiece.

Reference the recipe card below for detailed instructions.

Glass meal prep container with spaghetti squash, sausage, and bell peppers.

Meal Prep Tips for Sausage Spaghetti Squash

  • What I absolutely adore about this recipe is its versatility. Not only does it make for an incredible meal prep option, but it also leaves you with delightful leftovers that you can enjoy in various ways. Slice up the leftover beef sausage and use it as a pizza topping for a savory twist. You can also mix it into a frittata or scramble it with eggs for a protein-packed breakfast. The possibilities are endless! 
  • Storage: Store in an airtight container in the refrigerator for up to 3 to 4 days for the best quality.
  • To reheat, you can either use the microwave or reheat it on the stovetop. If using the microwave, place a portion in a microwave-safe dish, cover it with a microwave-safe lid or plastic wrap, and heat in 1-minute increments until it’s heated through. If reheating on the stovetop, warm it in a skillet over medium heat, stirring occasionally until it’s thoroughly heated.

Glass meal prep containers with spaghetti squash, sausage, and bell peppers.

sausage squash

Spaghetti Squash with Sausage and Peppers

Spaghetti Squash with Beef Sausage and Red Bell Peppers is a wallet-friendly option that does not compromise on tate or nutrition.
No ratings yet
Prep Time 5 minutes
Cook Time 45 minutes
Course dinner
Cuisine American
Servings 2

Equipment

  • knife
  • cutting board
  • saute pan
  • spatula
  • sheet pan
  • oven

Ingredients
  

Spaghetti Squash Bake

  • 1/2 small spaghetti squash (8 inches in length)
  • 1 tablespoon olive oil

Sausage and Bell Peppers

  • 6 oz pre-cooked beef sausage (sliced)
  • 1 red bell pepper (diced)
  • 1/4 teaspoon garlic powder
  • 1/4 teaspoon salt
  • 1 tablespoon olive oil

Instructions
 

Spaghetti Squash Bake

  • Pre-heat the oven to 400F. Carefully slice the spaghetti squash in half. Scoop out the seeds with a spoon. Place the squash, flesh side up, on a sheet pan. Coat with olive oil and bake in the oven for 40 minutes.
  • Once the squash is cooked, let it cool before shredding the squash flesh with a fork.

Sausage and Peppers

  • Slice the sausage into rounds and cut the peppers into one-inch cubes.
  • Add oil to a saute pan on medium-high heat and saute the bell peppers until they soften. Next, add the sausage and continue to stir for another 3 to 4 minutes until sausage is golden brown.
  • Finally, mix in the cooked squash and season with garlic powder and salt.

Similar Recipes

chicken pesto

Sauteed Chicken Pesto with Bell Peppers

pepper sandwich

Roasted Red Pepper and Cheese Sandwich

sheet pan sausage

Sheet Pan Sausage with Roasted Vegetables

You Might Also Like

Frequently Asked Questions

Can I use a different type of sausage?

Absolutely! While beef sausage pairs wonderfully with the flavors in this recipe, you can experiment with other types of sausage such as turkey sausage, chicken sausage, or even vegetarian sausage if you prefer.


How do I choose a ripe spaghetti squash?

Look for spaghetti squash that feels firm and heavy for its size. The skin should be smooth and free of soft spots or blemishes. A ripe spaghetti squash will have a bright yellow color.


Can I substitute the red bell peppers with other vegetables?

Certainly! If you’re not a fan of red bell peppers or prefer different vegetables, feel free to get creative. You can substitute them with zucchini, mushrooms, cherry tomatoes, or any other veggies you enjoy.

Posted on

One-Pot Chicken Marinara with Kale and Sweet Potato

chicken marinara

This easy one-pot dish is simply made with chicken stewed in marinara sauce and paired with sweet potatoes and kale. This is a hearty and chunky chicken recipe that is sure to warm you up on a cold night and only takes a few simple steps. One-pot chicken recipes are generally straightforward and require minimal cooking skills. They are suitable for beginners or those who are less confident in the kitchen. Even if you’re not an experienced cook, you can still create a tasty and satisfying meal with a one-pot recipe.

One-pot chicken recipes are perfect for meal prep as they’re easy on the cook and the clean up. One-pot recipes also build complex and deep flavors, incorporating a variety of ingredients including proteins, vegetables, and grains, all cooked together. This makes it easier to create well-balanced meals with a good mix of nutrients and flavors. You can experiment with different combinations and customize the recipe to suit your dietary preferences.

Meal prep tips for One-Pot Chicken Marinara

  • Chicken: We used chicken breast to keep it lean, however, if you prefer dark meat, feel free to use boneless skinless chicken thighs.
  • Sweet Potatoes: We used sweet potatoes, however, if you want to use regular potatoes, try them with red baby potaotes to cut your down your prep.
  • Vegetables: We paired it with baby kale for extra veggies and nutrients, however, you can use other vegetables such as bell peppers, baby carrots, or even spinach.
  • Marinara Sauce: If you don’t have marinara sauce, you can substitute with tomato sauce and just add some italian seasoning.
chicken marinara

One Pot Chicken Marinara with Kale & Sweet Potato

No ratings yet

Prep Time 5 minutes
Cook Time 30 minutes

Course dinner, Main Course
Cuisine American, Italian

Servings 2

Equipment

  • knife
  • cutting board
  • spatula
  • soup pot

Ingredients


  • 12 oz chicken breast
  • 1 each sweet potato
  • 1/4 cup red onions (diced)
  • 2 cups marinara sauce
  • 4 cups baby kale
  • 1 tsp garlic powder
  • 1/2 tsp salt
  • 1/4 tsp pepper
  • 1 tbsp olive oil
  • 1/2 cup water

Instructions


  • Cut the chicken breasts into 1 inch cubes
  • Wash and peel the sweet potato and cut in 1 inch cubes
  • Add oil to a soup pot on medium high heat and saute red onions until they soften
  • Next, add the chicken breasts and saute for about 3 to 5 minutes until it is golden brown
  • Then, add the marinara sauce and water in the pot and mix well
  • Add the sweet potato and bring the liquid to a boil. After it is boiling, lower the heat to low medium and cover the pot with a lid. Simmer for abot 20 minutes until the chicken fully cooks to an internal temperature of 165F
  • Finally, remove the lid and stir in the baby kale until it wilts
Posted on

Easy Stuffed Poblano Peppers

stuffed poblano pepper

Easy, baked southwest stuffed pepper recipe with ground beef. Bold, savory flavors are served on top of a bright and colorful cilantro sweet potato and cauliflower rice.

stuffed poblano pepper

Southwest Stuffed Poblano Peppers

No ratings yet

Prep Time 5 minutes
Cook Time 20 minutes

Course dinner, Main Course
Cuisine American, Latin, Mexican, Southwest

Servings 2

Equipment

  • knife
  • cutting board
  • sheet pan
  • saute pan

Ingredients


  • 2 each poblano peppers (cut in half, seeds removed)
  • 12 oz lean ground beef
  • 1/4 cup red onions (diced)
  • 8 oz fire roasted diced tomatoes (drained)
  • 4 oz diced green chiles (drained)
  • 1/4 tsp chili powder
  • 1/4 tsp cumin
  • 1/4 tsp garlic powder
  • 1/4 tsp salt
  • 1 tbsp olive oil
  • 3 cups sweet potato and cauliflower rice (recommend Green Giant's brand)
  • 1/4 cup cherry tomatoes (sliced)
  • 1/4 cup cilantro (chopped)

Instructions


  • Pre-heat the oven to 350F
  • Arrange the poblano peppers in a single layer on a sheet pan and bake for 10-15 minutes
  • Meanwhile, add oil to a pan on medium high heat and saute the onions until they soften
  • Next, add the ground beef and season with chili powder, cumin, garlic powder, and salt. Continue to saute for about 5 to 8 minutes until the meat is browned and cooked through
  • Then, stir in the roasted diced tomatoes and diced green chilies
  • Heat the sweet potato and cauliflower rice in the microwave according to the packaged instructions
  • Once the peppers have cooked from the oven, let them cool for a few minutes and carefully spoon in the ground beef mixture into each pepper half
  • Serve the stuffed peppers on top of the sweet potato and cauliflower rice
  • Garnish with fresh diced tomatoes and chopped cilantro

Notes

Note: Feel free to add additional toppings such as shredded cheese, guacamole, or sour cream. You can also add beans, corn, or other veggies to your ground beef mixture. 
Posted on

Creamy Cauliflower Mashed “Potatoes” with Roasted Pistachios

mashed cauliflower

This cauliflower mashed “potatoes” is so much creamier than you can ever imagine. It is filled with such great flavor and serves as a great low-carb alternative to your classic mashed potatoes.

Ease of Making: Easy

This would make a perfect side dish for any cold winter feast and will be a great addition to Thanksgiving entrees. 

If you’re looking for an easy side dish to prep for the holidays, try this dish. No need for peeling and cooks in less time than your classic mashed potatoes.

How to Cook Cauliflower Mashed “Potatoes”

  1. Start with steaming your cauliflower florets.
  2. Meanwhile, saute the garlic.
  3. After the cauliflower florets have gotten tender, add the garlic and florets into a blender.
  4. Season with salt and blend until smooth.
  5. Place the cauliflower in a heated pot and mix in the butter, sour cream, and parmesan cheese
  6. Top it off with fresh chives and roasted pistachios

Meal prep tips for Mashed Cauliflower

Does cauliflower really taste like mashed potatoes?

While the texture may be close, they will not exactly taste the same. Cauliflower will naturally be blander because of the water content. Try roasting the cauliflower instead of steaming for a firmer mash. Roasting it will also give it a sweeter and nuttier flavor. We also added the same herbs that we normally would add to mashed potatoes such as chives.

How to make mashed cauliflower creamy?

Mix in cheese, butter, sour cream, and milk to make it rich and smooth.

What can you eat with Mashed Cauliflower?

It is a great side dish to accompany any roasted or pan-fried protein such as tender roasted beef, pork chops, or roasted chicken.

mashed cauliflower

Creamy Mashed Cauliflower “Potatoes” with Roasted Pistachios

No ratings yet

Prep Time 5 minutes
Cook Time 20 minutes

Course Side Dish
Cuisine American

Servings 6

Equipment

  • boiling pot
  • steamer
  • immersion blender or food processor

Ingredients


  • 8 cups cauliflower florets
  • 1/4 cup unsalted butter
  • 1/4 cup sour cream
  • 1/4 cup parmesan cheese
  • 6 each garlic cloves (peeled)
  • 1/2 cup roasted pistachios (shelled)
  • 2 tbsp chives (chopped)
  • 1/4 tsp salt
  • 1 tbsp olive oil

Instructions


  • Boil water in a large pot. Place the cauliflower in the steamer and place it over the large pot. Steam for 15 minutes until the cauliflower is tender
  • Next, add olive oil to a medium pot and saute the garlic for about a minute until it is toasted
  • Add the cauliflower, garlic, and salt in a food processor and blend until smooth
  • Scoop the cauliflower into another heated medium sized pot and stir in the sour cream, butter, and parmesan cheese. Add salt to taste
  • Top it off with freshly chopped chives and roasted pisatchios

If you love this recipe, check out these other recipes we know you’ll love too:

Posted on

How to Make Instant Pot Beef Ragu

Beef Ragu

Tender, melt in your mouth, shredded beef that is comfortingly satisfying for the cooler weather. Make this instant pot beef ragu recipe to warm the body and soul.

Ease of Making: Easy

Here’s a savory and rich beef ragu simmered in diced tomatoes, garlic, Italian seasonings, and fresh herbs that is perfect for the fall comfort meal. Enjoy it over a bed of pasta or mashed potatoes.

This is the perfect dish to batch cook for the colder weather. It is quick and easy to make but tastes like it’s been simmering all day long. Make it a weekly staple for your family dinners or bring it to holiday gatherings and make it the new family favorite.

How to Cook Beef Ragu in the Instant Pot

It’s easy to make a tender roast in the Instant Pot, all you need to do is follow a few simple steps:

  1. Turn on the Saute Setting and start browning your meat followed by adding the aromatics such as onions and garlic.
  2. Sprinkle in the seasonings.
  3. Add any liquid. In this recipe we used diced tomatoes, tomato sauce, and dry red wine.
  4. Close the Instant Pot and seal it.
  5. Press the meat/stew setting and set your timer.
  6. After it finishes cooking, carefully release the quick release for the steam (following the manufacturer’s instructions).

Meal prep tips for Instant Pot Beef Ragu

How much meat can you cook at one time?

For a 6 quart size, you can fit 4-6 lbs of meat. However, you will need to take into consideration the other ingredients such as the cooking liquids and additional veggies. For this recipe, we kept it around 2 to 3 lbs.

Does the meat need to be completely covered in liquid?

You normally will need at least one cup of liquid. The protein itself already contains water that will sweat out, and there is additional moisture from the vegetables.

What can you serve with Beef Ragu?

We love to eat it with egg noodles, but you can also serve it with veggie noodles such as spiralized zucchini or spaghetti squash for a low-carb spin on this recipe. Creamy polenta is also a nice change from pasta or you can serve it on top of mashed potatoes or fluffy rice pilaf.

What to do with leftover beef ragu?

This Instant Pot beef ragu freezes really well and can keep up in the freezer for up to three months. However, you can also make sandwiches with the leftovers or add them as a topping to your baked potatoes.

Beef Ragu

Instant Pot Beef Ragu

No ratings yet

Prep Time 10 minutes
Cook Time 40 minutes

Course dinner, Main Course
Cuisine American, Italian

Servings 6

Equipment

  • knife
  • cutting board
  • spatula
  • Instant Pot

Ingredients


  • 2.5 lbs boneless beef chuck roast (cut into 2 inch chunks)
  • 4 each garlic cloves
  • 1/4 cup white onion (diced)
  • 1 each small carrot (diced)
  • 1/4 cup tomato paste
  • 28 oz canned diced tomatoes
  • 8 oz tomato sauce
  • 1/2 cup dry red wine
  • 1 tsp italian seasoning
  • 1/4 tsp ground cinnamon
  • 2 each bay leaves
  • 2 tbsp fresh basil (chopped)
  • 1/2 tsp salt
  • 1/2 tsp pepper
  • 1 tbsp olive oil

Instructions


  • Place the Instant Pot on the saute setting on high heat
  • Season the beef with salt and pepper and add oil to the Instant Pot
  • In small batches, add the beef and cook on all sides until evenly browned (about 3 to 4 minutes). After each batch has browned, remove it from the pot and set it aside for later.
  • Next, add the onions, carrots, and garlic. Stir it all around for 2 minutes
  • Then, add the tomato paste and stir for another minute. Afterwards, pour in the wine and scrape any of the browned bits from the bottom of the pot
  • Finally, add the diced tomatoes, tomato sauce, Italian seasonings, ground cinnamon, and bay leaves
  • Carefully add the beef chunks back into the liquid
  • Turn off the saute setting and select the manual setting to adjust the pressure to high and set the time for 30 minutes. Make sure the valve is in the sealed position
  • After it has finished cooking, follow the manufacturer's directions for quick-release of the pressure
  • Remove the beef from the Instant Pot and use two forks to shred the meat. Place it in a deep serving dish and pour the remaining sauce on top. Season with salt and pepper to taste
  • Serve with fresh pasta, rice pilaf, or mashed potatoes. Garnish with additional freshly chopped basil

If you love this recipe, check out these other recipes we know you’ll love too: