Posted on

Meal Prepping Hacks

food in meal prepping hack jars

Meal prepping hacks can save you time, money, and keep you on your meal plan for longer. There are a lot of tips and tricks that you pick up along the way so we want to share them with you to assist in your meal prepping endeavors. They’re simple but take time to work into your routine so you’ll get better as you get more experience.

Take It Slow

When you first get into meal prepping, it’s common to want to make massive meals that you portion out into an entire week’s worth of breakfast, lunch and dinners. Take it slow at first and discover recipes that you enjoy, want to eat over and over again, and can handle reheating. A big discouragement early on in your meal prepping is throwing out half of what you make because you get bored of it, don’t like it as much as you thought or it goes bad. Work into a routine with a repertoire of great meal prepping recipes.

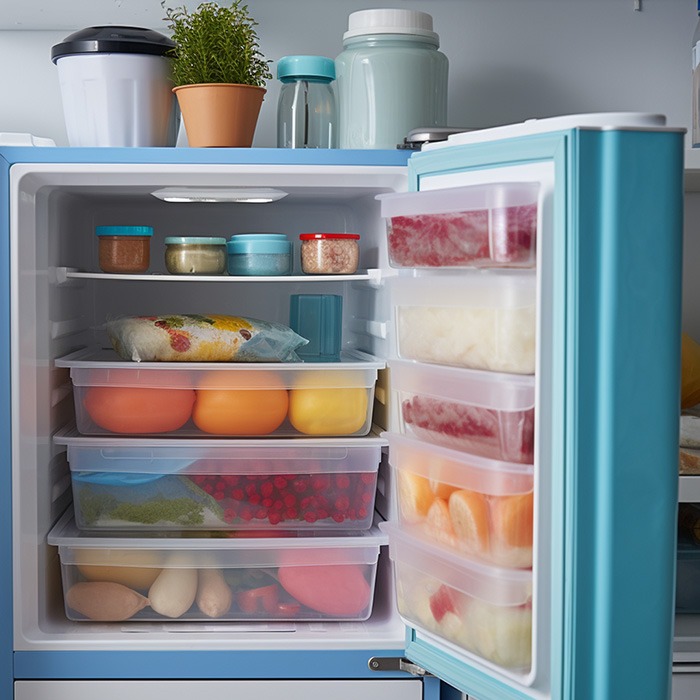
Organize Your Fridge

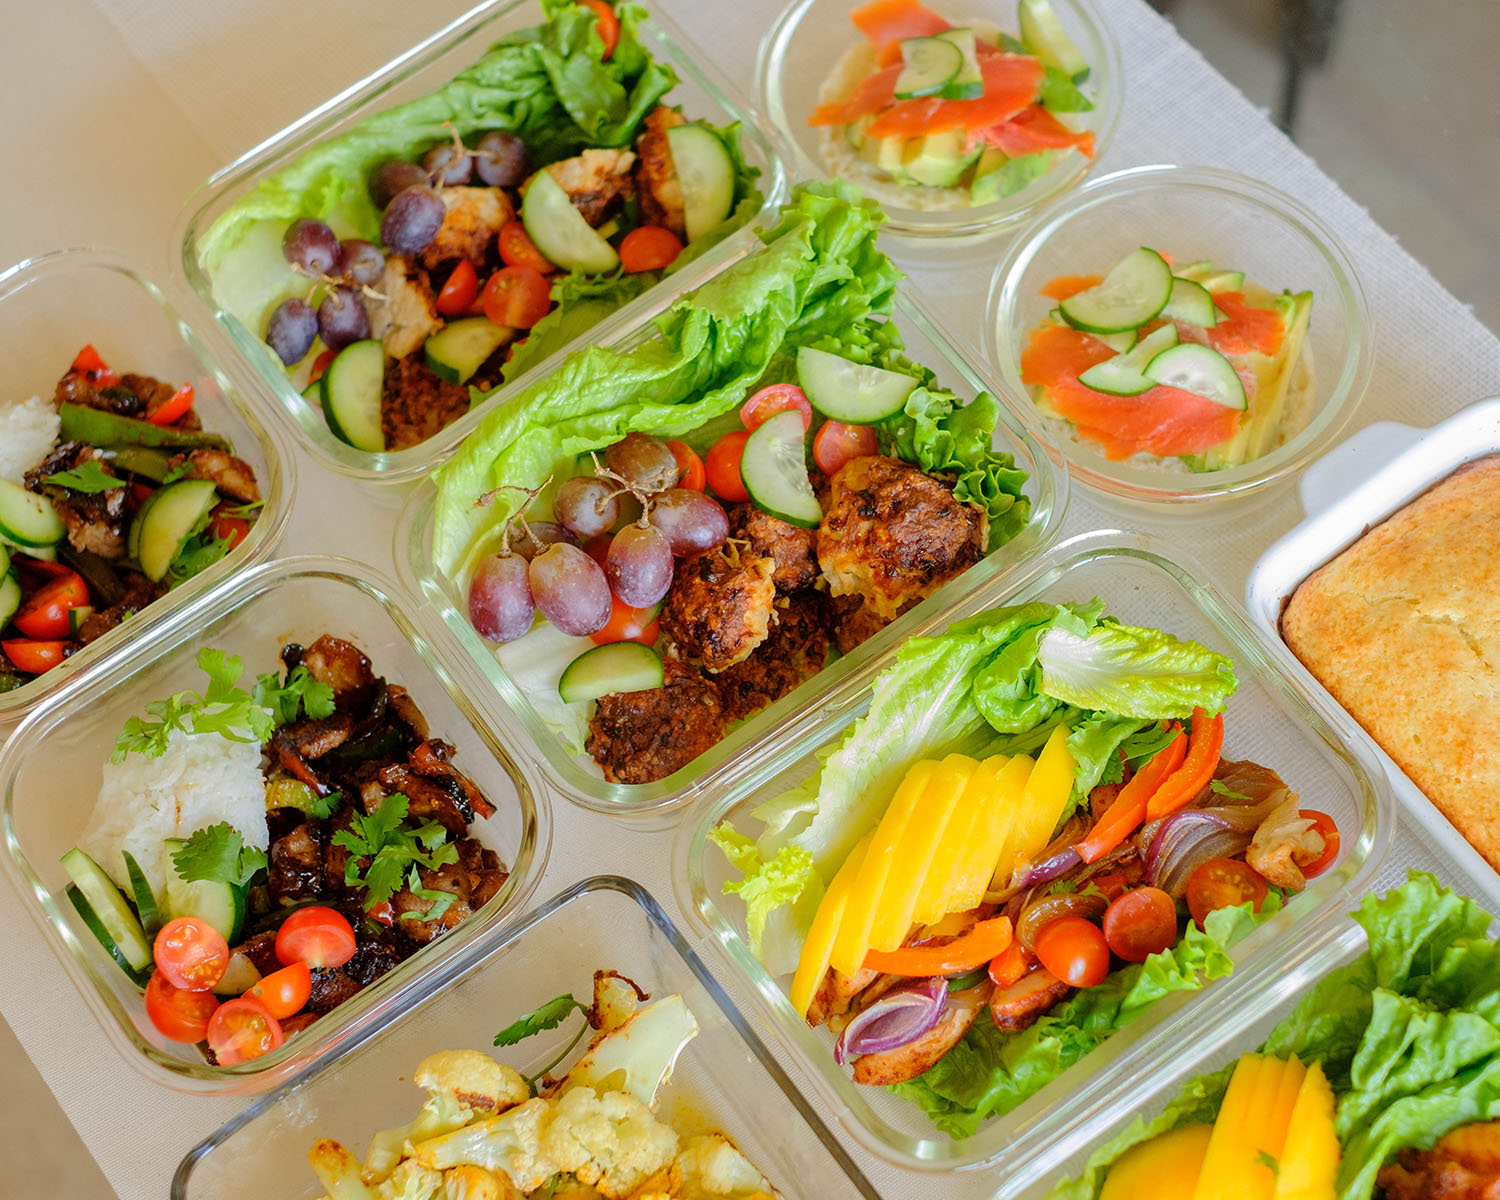
This is simple but it can make a world of difference when you’re meal prepping a lot of meals, either for yourself or for your family. Keep your fridge organized. Organize your meals, ingredients, and components so that you can keep track of your timeline, meal order, and cooking schedule. This helps avoid food waste which is discouraging in meal prep since it just wastes time and money. The opposite of your goals. Go left to right for the most recently cooked or front to back remembering “First In, First Out”. Don’t bury your older meals with newer meals up front. It’ll get confusing and make it a hassle in the mornings when you’re running out the door to work.

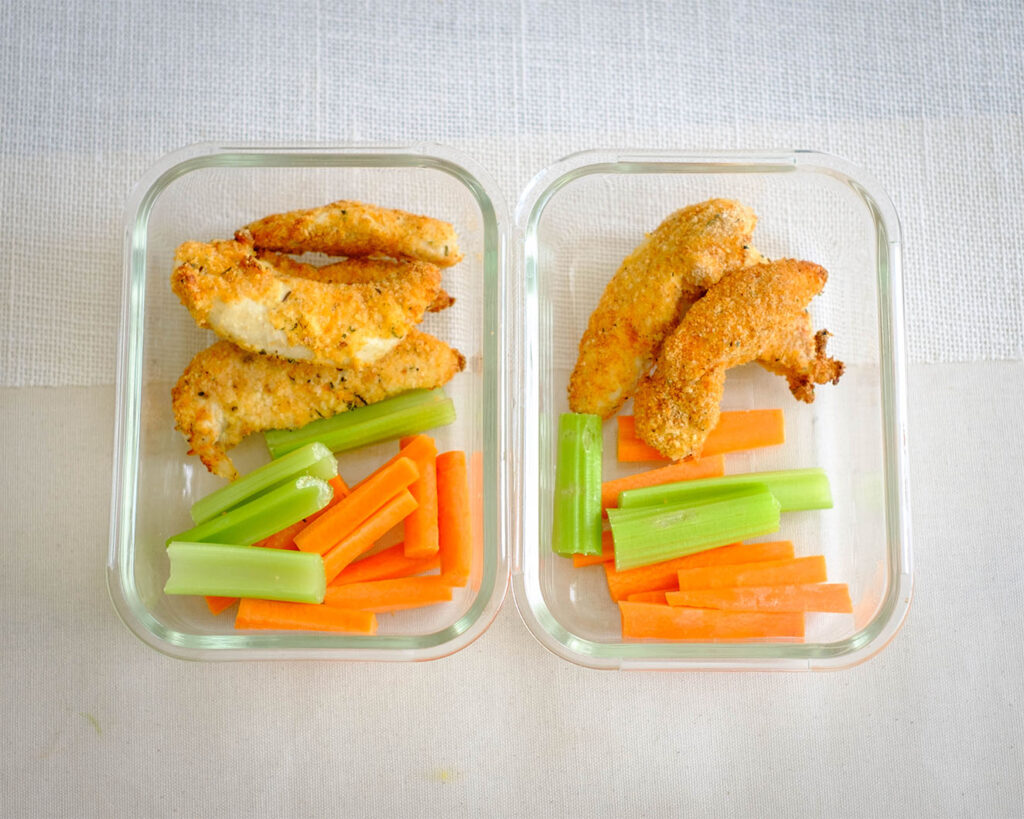
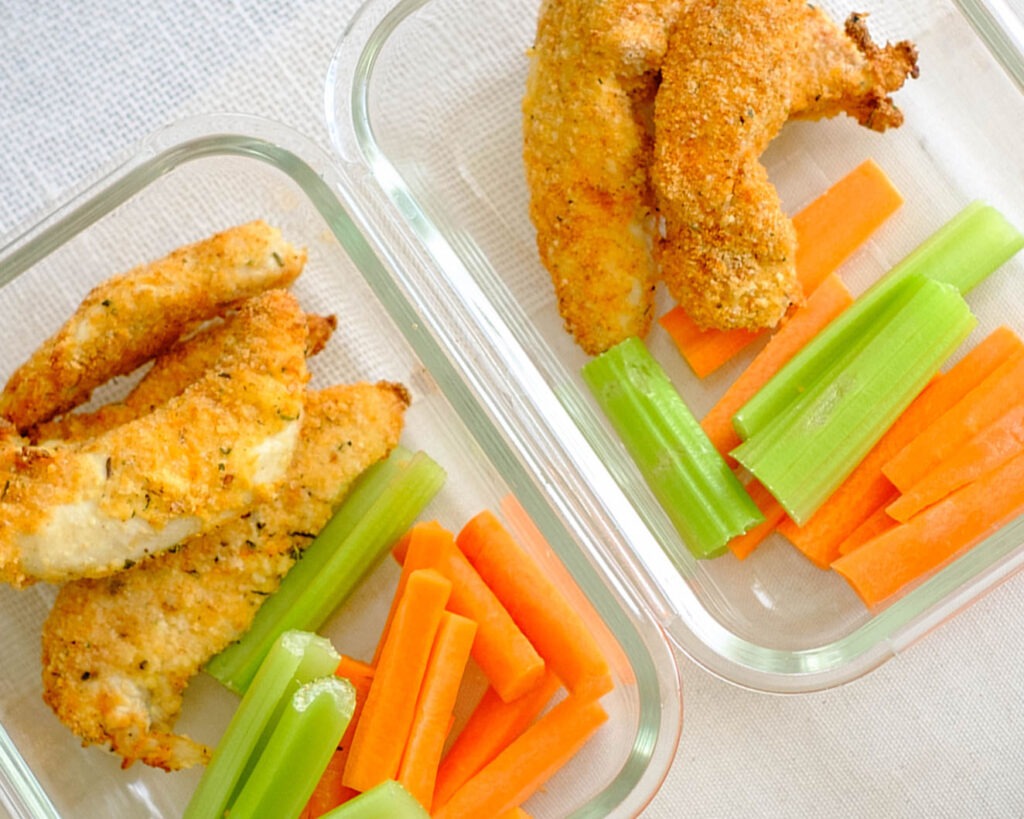
Also, as we always say at Prep Yo Self, label your containers. Once you start stacking meals and meal components in your fridge and freezer you will lose track of what’s what. Keep yourself motivated by staying organized.

Choose Good Meal Prepping Recipes

This is probably the toughest meal prepping hack to get right. Do your best to stick to recipes that work well for meal prepping. That means that the meal can be portioned out, freezes well, reheats well, and most importantly can be diversified. Some meals require specific storage arrangements while others can easily be stored in a single container. Try out different recipes and you’ll soon discover meals that you enjoy, can cook easily, and are delicious.

Write Out Your Grocery List

This is the most common meal prepping hack, and for good reason. Choose your recipes, make a list of the ingredients that you need and the amounts. This can help you design a meal prepping plan that uses the same ingredients to avoid food waste. This can also help you save money by avoiding unnecessary grocery purchases and by selecting recipes with ingredients that are affordable. Sometimes this means buying seasonal ingredients so pay attention to what you can actually find at your grocery store before picking recipes if you can.

Start A Schedule

Meal prepping works best with a plan. From the recipes that you choose to the grocery store trip, a schedule can keep you on track and running out of prepped food for the week or making too much. Portioning food out and scheduling which meal is for which day can also help you balance your nutrition and avoid burning out on the same recipes over and over again.

Make Multi-Purpose Sauces

One of the best meal prepping hacks is making sauces that work for many different recipes. A good sauce can transform a meal. If the sauce can be frozen or lasts a long time, this is a great way to improve your meals’ flavors and meal prep cooking time. Tomato sauces go great on a variety of pastas, a simple vinaigrette is a great salad dressing or chicken and roasted veggies sauce. These simple additions to your meal elevates the flavor and speeds up the prep time by removing a component that you have to make every time. Pull a jar from the fridge, pour some on top and you’ve created a whole new dish.

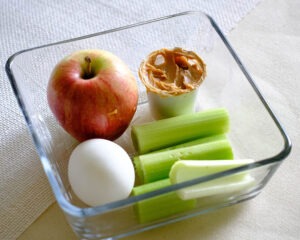
Focus on Versatile Ingredients

Proteins are easy to mix and match. Think about your vegetable choices and how you can use them for different recipes. This makes grocery shopping easier and cheaper. It also gives you the flexibility to mix up your routine mid week if you find yourself getting bored of a recipe. Try experimenting with recipes and switching out the ingredients in the list for ingredients that you know you have and like.
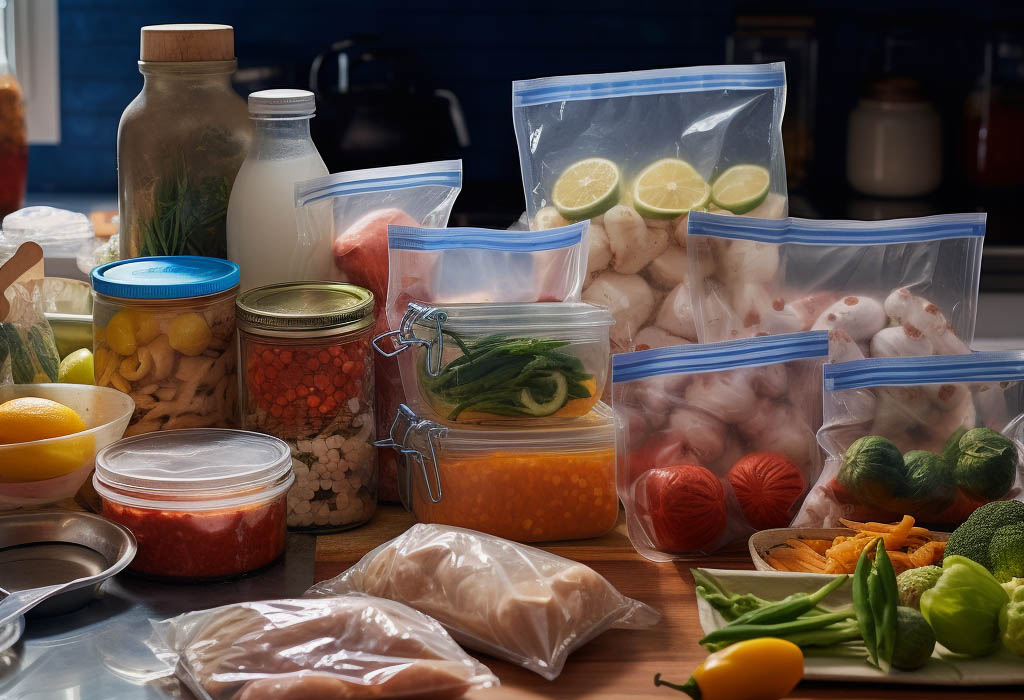
Prep Your Veggies

vegetables being prepared for meal prepping hacks

Preparing your vegetables ahead of the cook can speed up the process later. Especially if you’re planning to cook a meal in the middle of the week. Get your vegetables cleaned, chopped, or anything else that you can do ahead of time so you will be more motivated to actually cook the meal on a Wednesday night after a long day.

Consider Easy To Cook Components

This meal prepping hack can save you a lot of time and keep you on your routine when you find yourself too busy or tired to cook an entire feast. Use frozen bagged vegetables and fruits. They will keep for much longer, are generally cheaper, and if you know how to reheat them, taste just as good as fresh fruits and veggies. Bagged broccoli, carrots, pineapples, berries. These are all great choices and can be dropped into a blender for a quick and nutritious smoothie.

Also don’t forget about the offerings at your local grocery store. If they have rotisserie chickens or a deli section, use the premade options. It’s not as cheap or sometimes as healthy but it’s better than breaking your routine and eating out. It can also help you discover new recipes if you’re not comfortable cooking a certain ingredient.
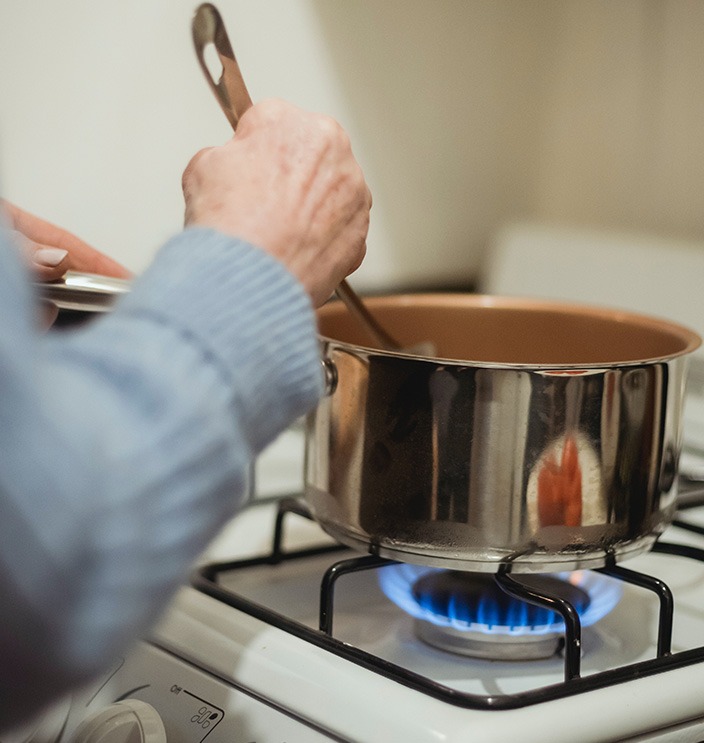
Leverage Appliances

Pressure cookers, crock pots, air fryers, and traditional ovens are all great choices. These appliances are here to make your life easier. They can help make cooking easier, faster and in some cases improve your bulk cooking options.

One Pan or Pot Recipes

A great meal prepping hack is to look for “One Pan” or “One Pot” recipes. These recipes tend to be delicious, easy to learn, and most importantly, easy to clean up. Throw some chicken and veggies on a sheet pan with a drizzle of olive oil and 40 minutes later you can dinner for a few days. The best part is that the clean up is minimal. A big part of meal prepping is to be more efficient with your time and finding hacks to decrease the boring steps in the kitchen make cooking more fun.

Bag Smoothie Mixes

Mixed smoothies only last for so long before they start to separate and go bad. The blended veggies and fruits go bad so much quicker. The solution is to prepare the smoothie mixes beforehand but don’t blend until you’re ready to drink it. This also helps with portion control.

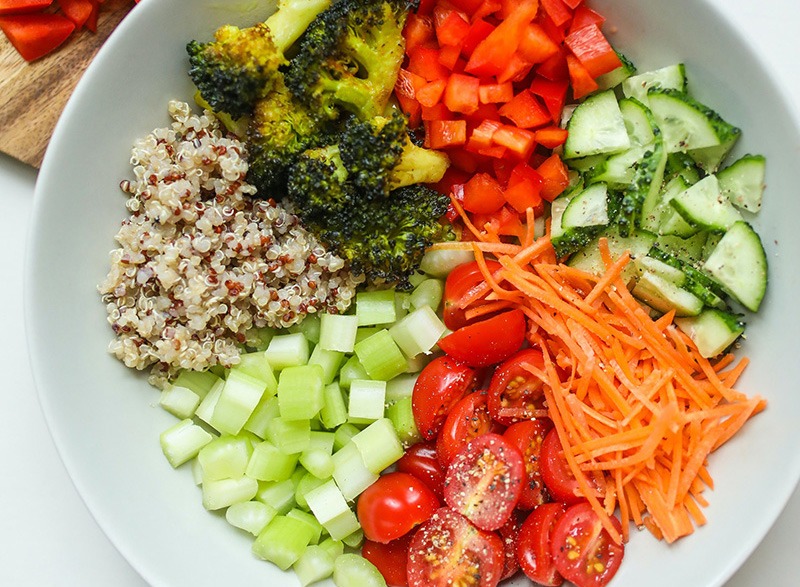
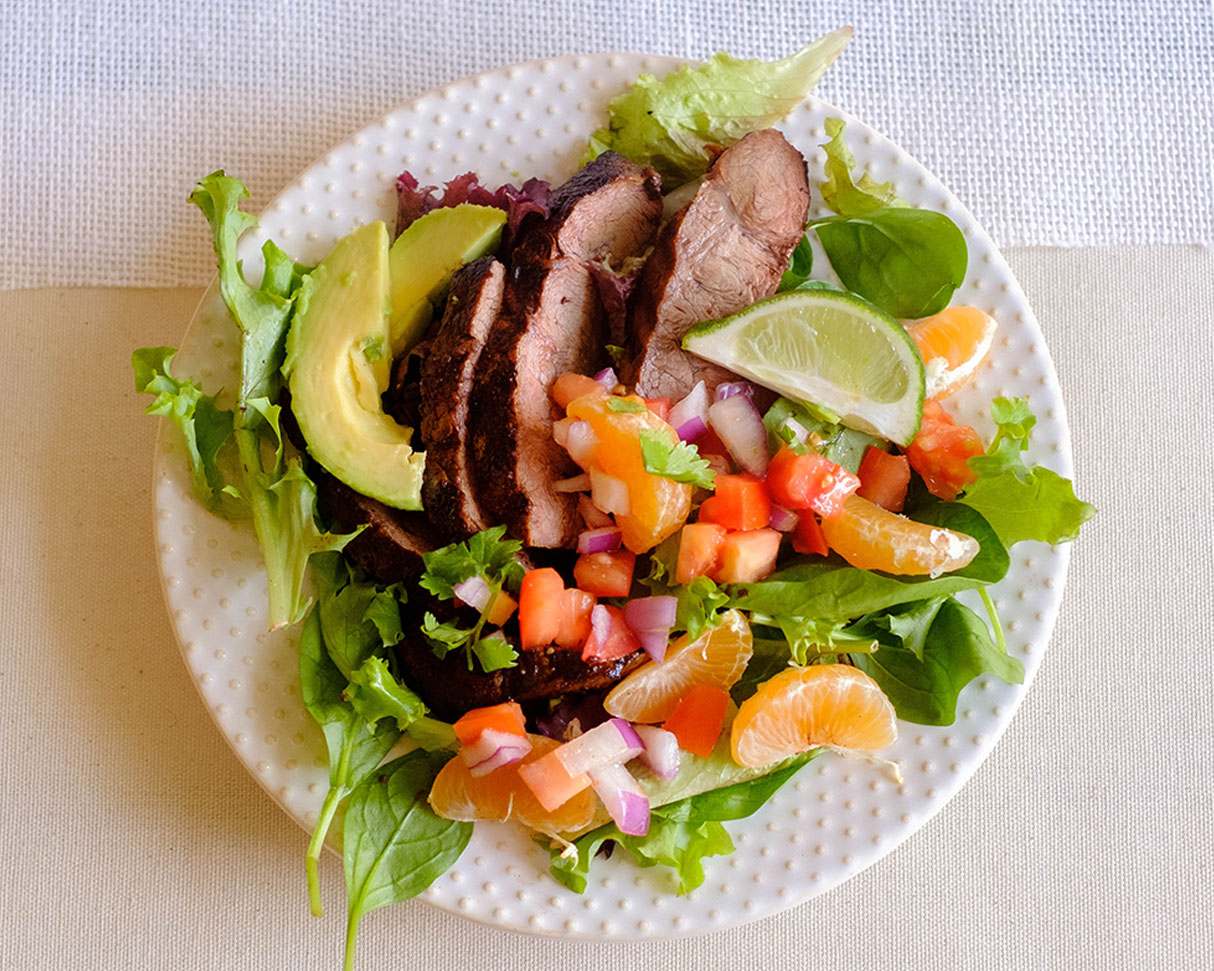
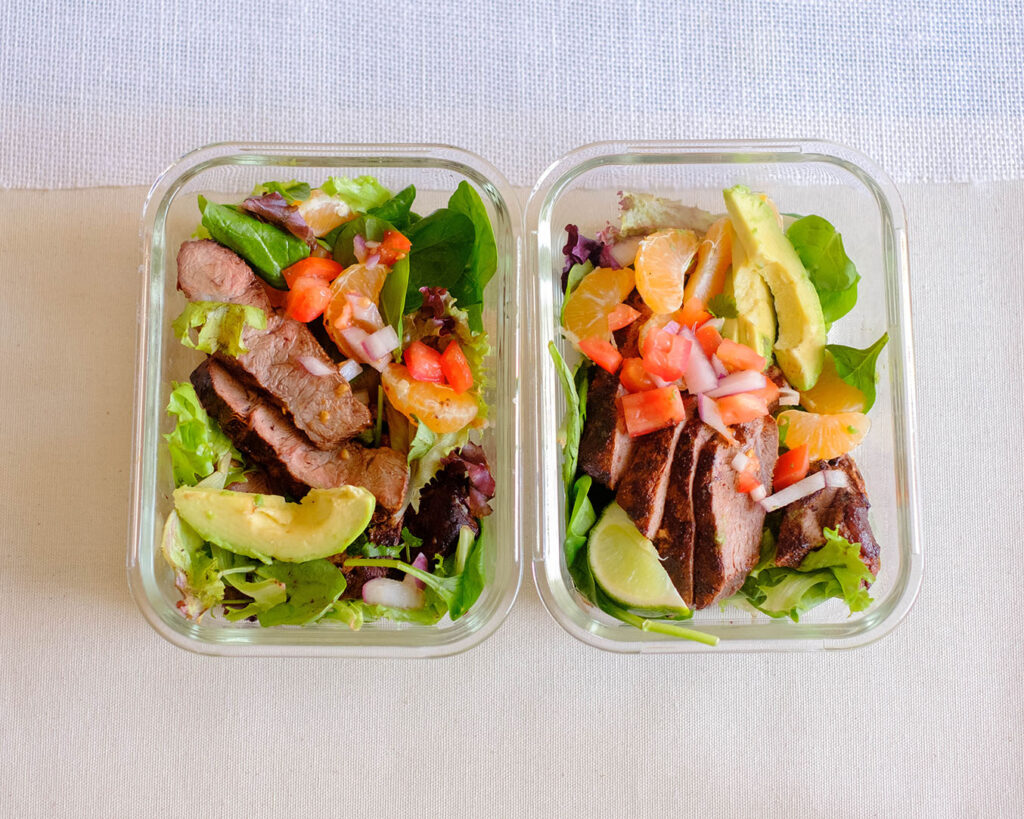
Stack Your Salads Upside Down

The last of the meal prepping hacks is a great way to store your premade salads to retain freshness. When you’re adding your salad to your food storage containers, add the dressing first. This way the dressing rests at the bottom and the rest of the ingredients can go on top. This prevents the vegetables and other components from going soggy as quickly and it’s easy to shake it up right before eating for a fresh, tossed salad.

Meal prepping hacks can make a big difference in your enjoyment of the food and greatly increase the efficiency. Both of those are more likely to make you stick with your schedule more often and for longer.

Free Weekly Meal Plans

Try out our weekly meal plans with tasty recipes. We make your shopping list and show you how to prep your meals.

Posted on

Tips For Freezing Meals

foods in freezing containers ready for storage

Knowing the tips for freezing meals is important when getting into meal prepping. Cooking meals in large batches and making food for the whole week could lead to a lot of freezing food. It’s a great way to make meals last longer for both food safety and quality. This is also very helpful for saving money as you’ll waste less money throwing old food out. Finding what works best for you and your meal preferences are key and these tips are to help get the best results. Take it easy at first to avoid throwing out a lot of meals a few months from now and this will help pick the right ingredients.

Finding The Freezer Space

You’ve probably bought or frozen your own fair share of meals already so you have a good understanding of how much you can fit in your freezer. This tip for freezing meals becomes especially important as you start cooking in larger amounts to meal prep through the weeks and months. It’s frustrating to realize that much of what you have cooked can’t fit and you’ll have to either eat it, give it away or throw it out. Before you start planning your meals, check your freezer space and remember to not absolutely fill  your freezer as it’s not good for freezing food and it’s difficult to find your meals later. Stay organized and give yourself space to move stuff around.

freezer full of meal prepped food

Alongside making sure you have the space for all of your frozen food, make sure you have the right containers ready for the types of food you are making and will also fit in your freezer. Freezer bags are a great choice since they’re cheap, can be flattened if it’s soup, reheating is easy, and you can squeeze all of the air out more easily than in a rigid container. Air tight containers are also incredibly important. One to avoid freezer burn but also to avoid your foods taking on the flavors of the other foods in your freezer. It seems weird to think about but food will absorb the flavors of other foods nearby when they’re left for days or weeks.

Remember to label your frozen meals with a name and date. Frozen foods should typically be consumed within 3 months, depending on what it is. Labeling your food will avoid so many questions and potentially harmful meals down the road. It’s easy to forget what you made and when and it’s better to be prepared than questioning. 

Reheating Foods

Never put hot food directly in your freezer for multiple reasons. Hot food can heat up the food around it in the freezer and this can lead to contamination or just a lower quality frozen meal. Portion out foods for faster cooling which can also help with freezing meal size portions which also makes reheating easier too.

Never take glass or Pyrex food containers directly from the freezer to the oven. The temperature difference can crack or shatter the glass. This is a great way to ruin the container, the meal and potentially your oven so take this tip for freezing meals to heart. Let the container sit out at room temperature or run lukewarm water over the container to warm it up at first. Thawing the food can also help retain the quality when reheating. Just like with cooking, if you have to melt the outside first, it’ll be burnt by the time you cook the insides. (Except with frozen soups, you can get away with a lot with frozen soups.)

When reheating foods, remember that you have to bring all foods back up to a safe internal temp. 

Tips For Freezing Meals

Freezing foods can be tricky if you’re not helping yourself out with recipe choices. Some recipes simply do better frozen and reheated than others. Let’s start with what not to freeze.

Do Not Freeze – Food with a lot of moisture or have a texture that is important to the experience

  • Yogurt: Yogurt has a lot of moisture and a creamy texture. Freezing yogurt will split it and create a very unpleasant experience.
  • Watery produce: Think zucchini, cucumbers, oranges, herbs and raw tomatoes for good examples. These fruits and vegetables rely on the water that they contain to impart flavor and a desirable eating experience. Freezing these will break up the flesh, leak, overall ruin the dish.
  • Leafy greens: Just like with produce, leafy greens have a lot of moisture so freezing them will dry them out as well as remove that freshness that is desired.
  • Cheese: Cheese has a lot of moisture in it. You wouldn’t necessarily think so but dried out cheese is gross and flavorless. If you’ve even left a block of cheese in the fridge for too long you’ll know what this looks like and the freezer just does it quicker.
  • Uncooked mushrooms & potatoes: If you’re going to meal prep with mushrooms and potatoes make sure to choose a recipe that uses cooked or dried mushrooms and potatoes. It’s better to do this in a controlled way as the freezer will just squeeze the juice out and leave the vegetables sitting in their own liquid.
  • Previously frozen meals: avoid adding thawed chicken to a meal that will be frozen before it’s cooked. If you’re thoroughly cooking the entire dish it will be fine. Or keep them separate and add the cooked chicken at the end.

Tips for freezing foods you should freeze

  • Proteins: Shredded proteins like pulled pork, shredded chicken or cut up steak all freeze well. The size is generally uniform, smaller and the texture that they have won’t be ruined in the freezer. Big pieces of protein won’t reheat as well and usually cost a lot of money so you’ll end up wasting the money and the food. 
  • Fruits and veggies: cook or dry your fruits and veggies before freezing. Also freeze these separately from the other parts of the meal. You want to preserve that subtle flavor and mixing it with other foods can just lead to every bite tasting the same. Also consider adding fresh fruits or veggies to a frozen meal for a better result.
  • Carbohydrates: Many people freeze bread to make it last longer and dry carbs freeze very well. Try to avoid freezing pasta noodles in a soup or sauce as the pasta noodles will fall apart. If you know you’re freezing the meal you can also undercook your pasta before freezing so reheating finishes the cooking time.
  • Sauces: Sauces can take a long time to make and are great for meal prepping since you can throw fresh veggies a protein into a sauce and have a delicious meal that takes less than 15 minutes. Sauces also don’t rely on texture and can be frozen in any container to fit the space you have in your freezer.
  • Soups: Soups freeze very well. For similar reasons as the sauces. There are more textures in soups and certain ingredients will lose some rigidity and texture (like potatoes) but for the most part most soups reheat perfectly deliciously.

Recipes That Freeze Well

Try some of our recipes that freeze and reheat well for quick, nutritious and delicious meals throughout your busy week.

Free Weekly Meal Plans

Try out our weekly meal plans with tasty recipes. We make your shopping list and show you how to prep your meals.

Posted on

July 3 Weekly Meal Plan

shrimp and pineapple kebabs

Make sure to go to How this page works first if you haven’t yet.

Set Your Pace

  • If you’re a beginner at meal prep: Be prepared to set aside 2-3 hours. Once mise en place is complete, all of these recipes can be completed one by one.
  • If you’re a meal prep pro, use the sequenced steps below: These steps give you the flexibility to cook items simultaneously in a sequence of events.
  • Be sure to set timers and check on food items to avoid overcooking. Sequencing will save you time and meal prep can be done in 1-2 hours.

Meal Prep Run Down

  1. Pre-heat the oven to 400F and roast the asparagus and red bell pepper.
  2. Next, prepare the BBQ Pork Ribs in the Air Fryer. While the ribs are cooking in the Air Fryer, start assembling the Shrimp Kebabs.
  3. After the Ribs finish cooking, cook the Shrimp Kebabs in the Air Fryer.
  4. Meanwhile, start preparing the items that require the stovetop such as the Grilled Hawaiian Chicken and Pineapple, and Grilled Steak.
  5. Then, whisk together the scrambled eggs for the omelet and prepare the batter for the oatmeal pancakes.
  6. Lastly, cook the omelette and the pancakes o the stove top
  7. When everything is finished cooking, plate everything up in containers, and let them cool before refrigerating.

If you’re sequencing your meal prep, be sure to keep an eye on everything! Make sure food is kept refrigerated under 40F degrees until ready to eat.

Assembly Tips

  • Evenly divide meals according to the serving size
  • Let all items cool before placing them in the refrigerator
  • Keep all items refrigerated under 40F until ready to eat or reheat
  • Breakfast: Both meals can be reheated in the microwave
  • Lunch: Both the shrimp and grilled chicken can be reheated in the microwave, serve the salad ingredients chilled
  • Dinner: Both meals can be reheated in the microwave

Extra Flavors and Substitutions

  • Omelet: Feel free to add other fillings to the omelet such as extra veggies or crumbled breakfast sausage
  • Kebabs: You can use also use your choice of veggies such as zucchini and mushrooms
  • BBQ Ribs: Serve with a side of green beans, salad, or even mashed potatoes
  • Supplement meals with additional snacks such as fresh veggies and fruit for additional daily caloric needs. You can use lime/lemon and olive oil in place of salad dressing

Extra Leftover Ingredients Not Used

  • Protein: Freeze any uncooked meats and save for a later recipe, or you can cook the full amount, and freeze the portion that you do not eat, and save for later use.
  • Fruit: Use leftover fruit in smoothies, on top of yogurt, or with your cereal
  • Veggies: Freeze any leftover veggies for later use. Use leftover herbs in omelets or other dishes for the weekend

What Else

How This Page Works
Meal Prep 101
Weekly Meal Plans
Specialty Diets
Recipe Inspirations
Helpful Resources

Posted on Leave a comment

BBQ Chicken Flatbread Sandwich

wood plate with salad and flatbread bbq chicken sandwich

So, my fellow foodies, it’s time to level up your meal prep game with this fantastic BBQ Chicken Flatbread recipe. It’s easy, healthy, cost-effective, and keeps your taste buds dancing all week long. Remember, food should never be boring, and this recipe ensures every bite is a celebration. Enjoy the flavors, embrace the convenience, and savor the deliciousness of this BBQ Chicken Flatbread. Happy cooking!

This post may contain affiliate links. Please see our privacy policy for details.

wood plate with salad and flatbread bbq chicken sandwich

Why You’ll Love This

  • First things first, let’s talk about how incredibly easy it is to whip up this deliciousness. When you have some leftover Instant Pot shredded BBQ chicken hanging out in your fridge, all you need is some flatbread, a handful of fresh veggies, and a drizzle of tangy barbecue sauce. Within minutes, you’ll have a scrumptious meal ready to devour. It’s like a flavor explosion on a flatbread!
  • Now, let’s get down to the nitty-gritty of why this recipe is an absolute winner for your meal prep routine. Firstly, the health benefits are worth highlighting. Using lean chicken and adding loads of fresh veggies provides you with a balanced meal that’s packed with protein and essential nutrients. It’s a guilt-free indulgence that keeps you satisfied and energized throughout the day.
  • When it comes to cost benefits, this recipe is a real money-saver. By repurposing your Instant Pot shredded beef BBQ chicken leftovers, you’re making the most of your ingredients and reducing food waste. Plus, flatbread is an affordable base that can be easily found at your local grocery store. It’s a win-win situation for your taste buds and your wallet!
  • One of the best things about incorporating this BBQ Chicken Flatbread into your meal prep routine is that it keeps things interesting and tasty. Nobody wants to eat the same boring meal every day, right? Well, this recipe adds a burst of flavors to your weekly menu, ensuring you look forward to every bite. It’s a party in your mouth!

The PrepYoSelf Newsletter

Here’s What You Need

  • Chicken: We used leftovers from our Instant Pot BBQ Chicken recipe, but you could easily use store-bought rotisserie chicken and top it off with BBQ sauce
  • Flatbread: We used flatbread, but you can use a hamburger bun, regular sliced bread, pitas, or even tortillas
wood plate with salad and flatbread bbq chicken sandwich

Easy Steps for Making this BBQ Chicken Flatbread

  1. Reheat your chicken on the stovetop or in the microwave.
  2. Slice the flatbread in half and place the chicken in between the two slices
  3. Feel free to add extra toppings or condiments of your choice.
  4. Enjoy with a side salad or fruit.
  5. Add more BBQ sauce to the chicken to your liking.

Reference the recipe card below for detailed instructions.

glass meal prep containers with salad and flatbread bbq chicken sandwich

Meal Prep Tips for BBQ Chicken Flatbread

  • Once you’ve assembled your BBQ Chicken Flatbread, wrap it tightly in foil or place it in an airtight container. It will stay fresh in the refrigerator for up to 3-4 days, making it an excellent option for busy weekdays.
  • When it’s time to reheat, simply pop it in the oven or toaster oven for a few minutes until warmed through. Oh, and did I mention it freezes like a dream? Prepare a batch, freeze the extras individually, and thaw them overnight for a quick and delicious meal anytime.
  • Now, let’s talk versatility! Apart from BBQ Chicken Flatbread, your Instant Pot shredded BBQ chicken can be used in a myriad of other mouthwatering creations. Think tacos, quesadillas, salads, stuffed sweet potatoes—the possibilities are endless! With just a few extra ingredients and a dash of creativity, you can transform your leftovers into a whole new culinary adventure.
glass meal prep containers with salad and flatbread bbq chicken sandwich
bbq chicken flatbread

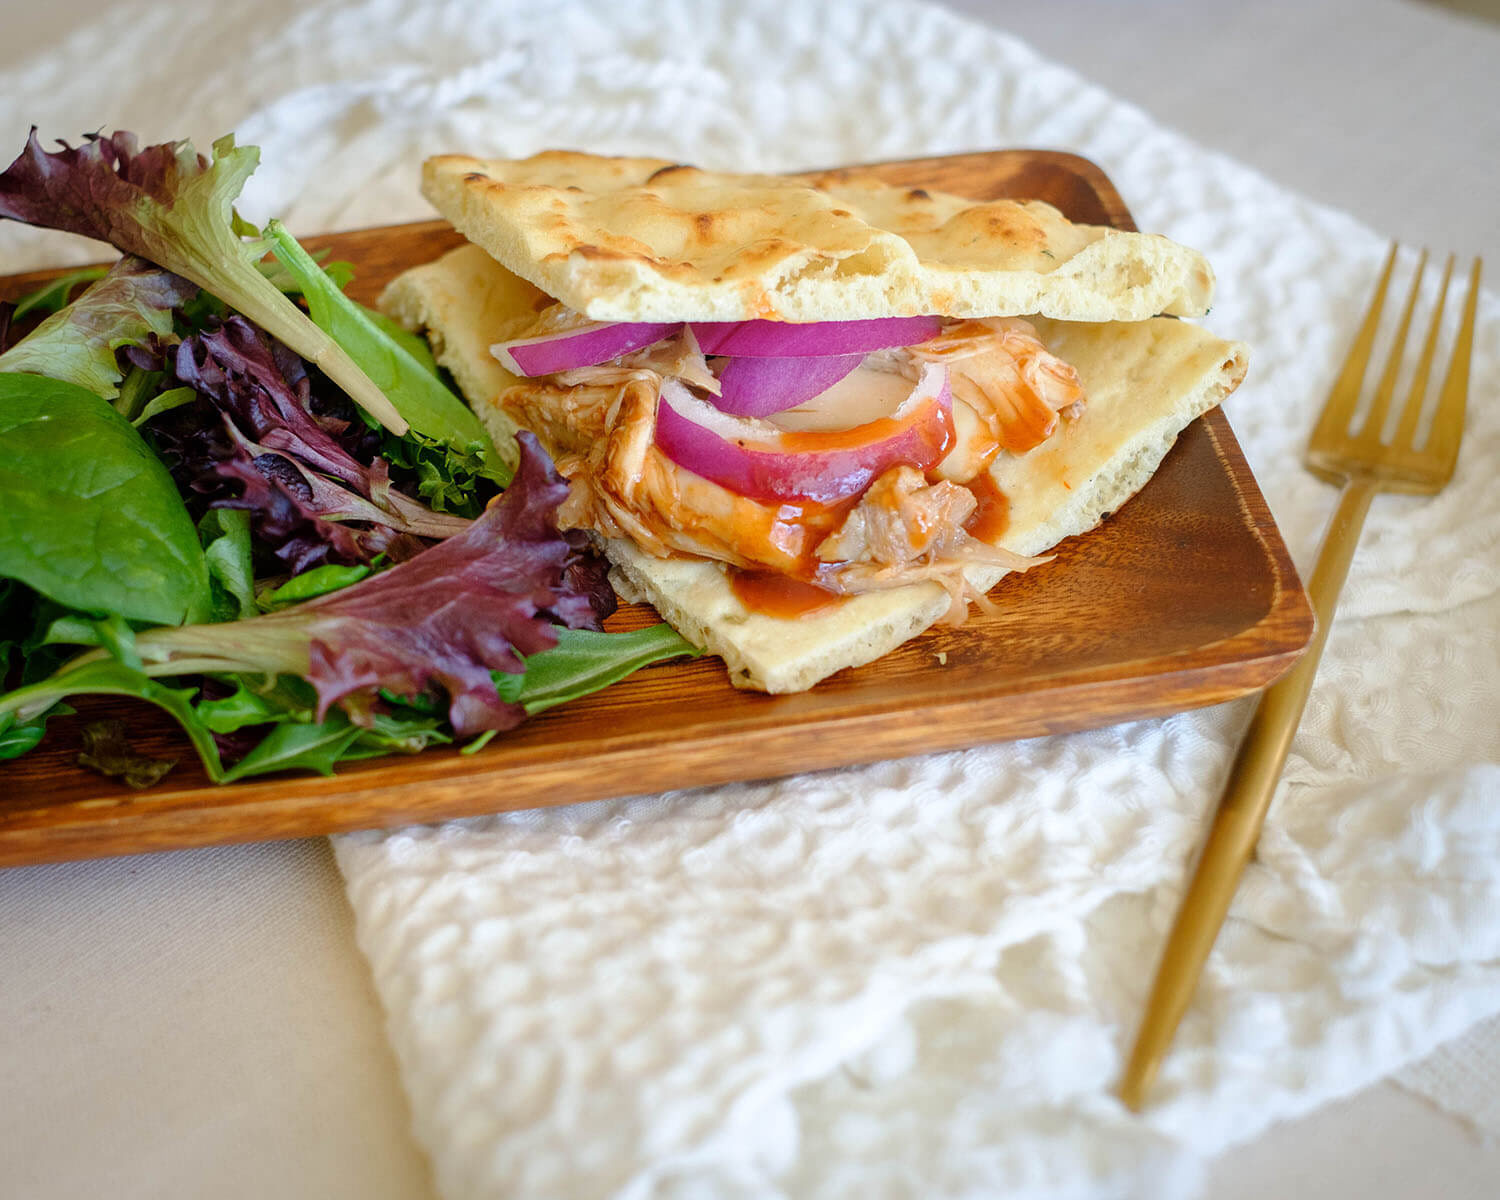
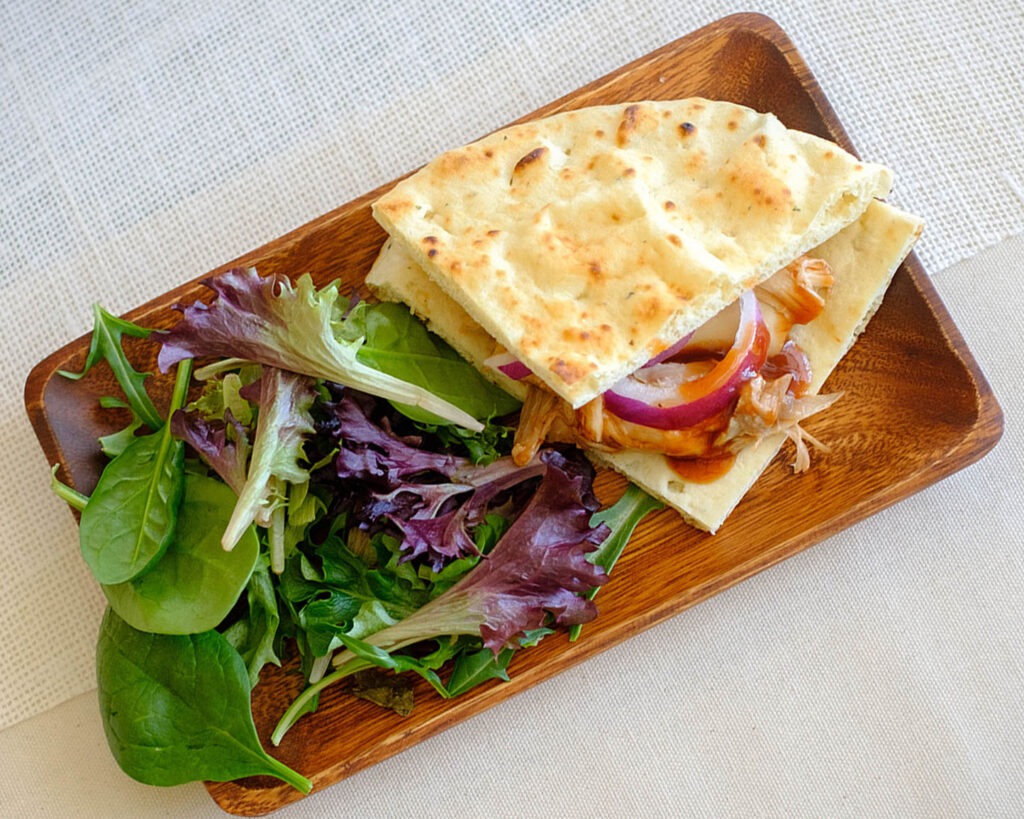
Instant Pot BBQ Chicken Flatbread Sandwich

No ratings yet
Prep Time 5 minutes
Cook Time 35 minutes
Course lunch, Main Course
Cuisine American
Servings 4

Equipment

  • knife
  • cutting board

Ingredients
  

Instructions
 

  • Re-heat the leftover shredded bbq chicken in the microwave for a few minutes until it is heated through.
  • Slice each flatbread into 4 pieces and evenly layer the chicken in between 2 slices of flatbread
  • Enjoy with a side salad

Similar Recipes

chicken soup

One Pot Mexican Chicken Soup

sweet potato blt

Sweet Potato BLT Sandwich

Grilled Honey Dijon Chicken Kale Salad

You Might Also Like

Frequently Asked Questions

Can I use leftover chicken from other cooking methods instead of Instant Pot shredded BBQ chicken? 

Absolutely! While the recipe specifically mentions Instant Pot shredded BBQ chicken, you can use any leftover shredded chicken you have on hand. The flavors may vary slightly, but it will still be delicious.


Can I use a different type of bread instead of flatbread?

Of course! Flatbread works great for this recipe, but if you prefer a different type of bread, feel free to swap it out. You can use tortillas, pita bread, or even sandwich bread if that’s what you have available.


Can I add other toppings or ingredients to the flatbread?

Absolutely! This recipe is quite versatile, so feel free to get creative with your toppings. You can add sliced tomatoes, avocado, red onions, lettuce, or even some cheese. Customize it to your liking!

Posted on Leave a comment

Honey Oat Muffin Bars

round plate with honey oat muffins and blueberries

Oven Baked Oat Muffins with Blueberries are a meal prep dream come true. They provide a healthy, tasty, and convenient breakfast option that will keep you satisfied and energized throughout the week. Get creative with your add-ins, store them properly, and enjoy a stress-free morning routine filled with scrumptious goodness. Happy baking and bon appétit!

This post may contain affiliate links. Please see our privacy policy for details.

Calories: 479kcal | Carbohydrates: 56g | Protein: 9g | Fat: 25g | Saturated Fat: 4g | Polyunsaturated Fat: 3g | Monounsaturated Fat: 17g | Trans Fat: 0.01g | Cholesterol: 82mg | Sodium: 42mg | Potassium: 166mg | Fiber: 3g | Sugar: 18g | Vitamin A: 122IU | Vitamin C: 0.04mg | Calcium: 54mg | Iron: 3mg

round plate with honey oat muffin bars and blueberries

Why You Need to Make This

Now, let’s talk about the benefits of incorporating this recipe into your meal prep routine

  • First and foremost, it saves you time and effort. By baking a batch of these muffins ahead of time, you’ll have a grab-and-go breakfast option ready for the week. No more rushing around in the morning or settling for less nutritious choices.
  • In terms of cost benefits, making your own breakfast items is much more budget-friendly than purchasing pre-packaged options. The ingredients for these oven-baked oat muffins are relatively inexpensive and readily available. You’ll be amazed at how much money you can save while still enjoying a delectable breakfast.
  • One of the most exciting things about this recipe is its versatility. You can customize it to suit your taste preferences. Add a handful of fresh blueberries to each muffin for bursts of juicy goodness and an extra dose of antioxidants. Alternatively, you can experiment with other add-ins like diced apples, chopped nuts, or even a sprinkle of chocolate chips. The possibilities are endless, ensuring your meal prep remains interesting and varied.

The PrepYoSelf Newsletter

Simple Ingredients for Honey Oat Muffin Bars

  • Let’s start by talking about the star ingredient: rolled oats. These wholesome grains are a fantastic source of dietary fiber, helping to keep you feeling fuller for longer and supporting a healthy digestive system. They also contain essential minerals like manganese, magnesium, and phosphorus. By incorporating rolled oats into your meal prep, you’re giving your body a nutritious boost.
  • Next up, we have flour, baking powder, and cinnamon. Flour provides the structure and texture to our muffins, while baking powder adds that delightful fluffiness we all love. Cinnamon, oh cinnamon! Its warm and comforting flavor enhances the taste of our muffins, making them simply irresistible.
  • Eggs come into play, bringing richness and acting as a binding agent. They add a boost of protein and essential amino acids to our muffins. Olive oil, the heart-healthy alternative to butter, adds moisture and a subtle hint of fruity goodness. It also provides those beneficial monounsaturated fats that keep our hearts happy.
  • To sweeten things up, we’ll use brown sugar. It adds a delightful caramel flavor and a touch of sweetness without going overboard. And let’s not forget about water, which helps to create a moist and tender texture in our muffins.

round plate with honey oat muffin bars and blueberries

How to Prepare Honey Oat Muffin Bars:

  1. Preheat the oven to 400F. Grease your baking dish.
  2. In a mixing bowl, whisk together the eggs, brown sugar, olive oil, and water until well combined.
  3. Add the rolled oats, flour, baking powder, and cinnamon to the bowl, and stir until the batter is smooth and all the ingredients are incorporated.
  4. Pour the batter in a greased baking dish.
  5. Bake in the preheated oven for 15-20 minutes or until a toothpick inserted into the center comes out clean.

Reference the recipe card below for detailed instructions.

round plate with honey oat muffin bars and blueberries

Meal Prep Tips for Honey Oat Muffin Bars:

  • Once your muffins have cooled, store them in an airtight container or resealable bags. They will stay fresh for up to five days at room temperature. If you want to extend their shelf life, pop them in the refrigerator for up to a week.
  • To reheat, simply microwave a muffin for about 20 seconds or pop it in a preheated oven for a few minutes until warm. They taste fantastic both ways, but the oven method will restore that lovely golden crust.
  • If you want to enjoy these muffins beyond a week, you can freeze them! Just make sure to wrap them tightly in plastic wrap or place them in freezer-friendly bags. When you’re ready to indulge, thaw them overnight in the refrigerator or reheat them straight from the freezer.

round plate with honey oat muffin bars and blueberries

Oat Muffin

Honey Oat Muffin Bars with Blueberries

These golden beauties are not only a fantastic breakfast option on their own, but they are great with a dollup of yogurt or fresh fruit.
No ratings yet
Prep Time 5 minutes
Cook Time 20 minutes
Course Breakfast, Snack
Cuisine American
Servings 2
Calories 479 kcal

Equipment

  • mixing bowl
  • whisk
  • spatula
  • baking dish
  • oven

Ingredients
  

Wet Ingredients

  • 3 tbsp olive oil
  • 3 tbsp brown sugar
  • 1 each large egg
  • 1/2 cup water

Dry Ingredients

  • 1/2 cup rolled oats
  • 1/2 cup flour
  • t tsp baking powder
  • 1 tsp cinnamon

Instructions
 

  • Pre-heat the oven to 400F
  • In a mixing bowl, whisk together the wet ingredients
  • Next, in small batches, add the dry ingredients
  • Grease the baking dish with olive oil and pour in the batter
  • Bake for 15-20 minutes (to check for doneness, stick a toothpick into the center of the muffin, it should come out clean. If it is still wet, cook for additional 5 minute increments until the toothpick comes out clean)
  • Serve with a side of fresh blueberries

Notes

Nutrition information provided is an estimate. It will vary based on cooking method and specific ingredients used. Please consult with your healthcare provider for specific dietary needs. To gain a better understanding, explore our nutrition disclaimer here

Nutrition

Calories: 479kcalCarbohydrates: 56gProtein: 9gFat: 25gSaturated Fat: 4gPolyunsaturated Fat: 3gMonounsaturated Fat: 17gTrans Fat: 0.01gCholesterol: 82mgSodium: 42mgPotassium: 166mgFiber: 3gSugar: 18gVitamin A: 122IUVitamin C: 0.04mgCalcium: 54mgIron: 3mg

Similar Recipes

baked oatmeal

Oven Baked Oats with Apricots and Berries

ricotta apple

Oven Baked Apple with Ricotta and Walnuts

french toast 2

Oven Baked French Toast Muffins with Strawberries

You Might Also Like

Smartfruit Mellow Mango + Immunity, 100% Real Fruit Purée

Trader Joe’s Unsalted, Dry Toasted Slivered Almonds

Trader Joe’s the Dark Chocolate Lover’s Chocolate Bar

Frequently Asked Questions

Can I use instant oats instead of rolled oats?

While instant oats can be used in a pinch, rolled oats provide a better texture and structure to the muffins. The chewiness and heartiness of rolled oats make them the preferred choice for this recipe.


Can I substitute whole wheat flour for all-purpose flour?

Yes, you can substitute whole wheat flour for all-purpose flour. However, keep in mind that the muffins may have a denser texture and a slightly nuttier flavor. If you prefer a lighter texture, you can use a combination of whole wheat and all-purpose flour.


Can I reduce the amount of sugar in the recipe?

Yes, you can adjust the amount of sugar to suit your taste preferences or dietary needs. Keep in mind that reducing the sugar may affect the overall sweetness and moisture of the muffins

Posted on Leave a comment

Polenta Pancakes with Berries and Nuts

Pan-fried polenta slices with mixed nuts and blueberries—a delightful, nutritious, and utterly delicious recipe that will make your meal prep a breeze. It’s a breakfast option that’ll keep you excited to dive into your meals throughout the week. So go ahead, give it a try, and enjoy a satisfying and flavor-packed start to your day! Happy cooking!

This post may contain affiliate links. Please see our privacy policy for details.

Calories: 512kcal | Carbohydrates: 69g | Protein: 9g | Fat: 26g | Saturated Fat: 3g | Polyunsaturated Fat: 5g | Monounsaturated Fat: 17g | Sodium: 9mg | Potassium: 318mg | Fiber: 5g | Sugar: 42g | Vitamin A: 81IU | Vitamin C: 8mg | Calcium: 36mg | Iron: 2mg

bowls of polenta pancakes with berries and nuts

Why This Recipe is Great for Meal Prep

  • Now, let’s dive into the benefits of including this dish in your meal prep routine. First and foremost, it saves you time and effort during busy mornings. You can whip up a batch of pan-fried polenta slices with mixed nuts and blueberries in advance and store them for the week ahead. Meal prepping allows you to maintain a balanced diet even when life gets hectic, helping you avoid unhealthy food choices.
  • Cost-wise, this recipe is a winner too. Pre-cooked polenta, mixed nuts, blueberries, and honey are all readily available ingredients that won’t break the bank. By planning your meals and buying in bulk, you can enjoy nutritious and delicious food while sticking to your budget.
  • But the benefits don’t stop there! By having this flavorful dish as part of your meal prep rotation, you’ll keep your taste buds intrigued. The combination of creamy polenta, crunchy nuts, burst-in-your-mouth blueberries, and a hint of sweetness will make you look forward to breakfast every day. It’s a fantastic way to start your morning off on a delicious note!

The PrepYoSelf Newsletter

Simple Ingredients for Polenta Pancakes

  • This pre-cooked polenta is a versatile cornmeal delight is a fantastic ingredient to have on hand for quick and easy meals. It’s naturally gluten-free, which is great news for those with dietary restrictions. Polenta is also a good source of dietary fiber and provides a steady release of energy to keep you fueled throughout the day.
  • Now, let’s talk about the delightful crunch and flavor that mixed nuts bring to the table. Not only do they add a satisfying texture, but they’re also packed with heart-healthy fats, vitamins, and minerals. Nuts are known to boost brain function and are a fantastic source of protein, making them a perfect addition to your morning routine.
  • To add a burst of fruity goodness to our dish, we’ve got vibrant blueberries. These little berries are a nutritional powerhouse, loaded with antioxidants, vitamins, and minerals. They’re known to support brain health, promote digestion, and even have anti-aging properties. Plus, their sweet-tart flavor complements the creamy polenta and nutty crunch perfectly.
  • To tie all these fantastic ingredients together, we drizzle a touch of golden honey. Apart from its heavenly taste, honey offers natural sweetness without the need for refined sugars. It also has antioxidant and antibacterial properties, making it a healthier alternative to other sweeteners.

polenta pancakes with berries and nuts in a bowl

How to Prepare Polenta Pancakes

  1. Slice the pre-cooked polenta into 1/2 inch rounds
  2. Add oil to a pan on medium high heat and place the polenta slices into the pan
  3. Cook for about 3 to 4 minutes on each side until it is golden brown

Reference the recipe card below for detailed instructions.

polenta pancakes with berries and nuts in a bowl

Meal Prep Tips for Polenta Pancakes

  • Once you’ve cooked the polenta slices, allow them to cool completely. Then, store them in an airtight container in the refrigerator for up to four days.
  • When you’re ready to enjoy, simply heat a non-stick skillet, add a touch of oil, and pan-fry the slices until they’re warm and crispy again. You can also reheat them in the microwave if you’re in a rush.
  • If you’re looking to freeze these slices, make sure to layer them with parchment paper to prevent sticking. They’ll keep well in the freezer for up to three months. To thaw, transfer them to the refrigerator overnight and then reheat as mentioned above.
  • Now, let’s talk about pairing options. These pan-fried polenta slices with mixed nuts and blueberries are fantastic on their own, but you can take them to the next level by adding a dollop of Greek yogurt or a sprinkle of chia seeds for extra protein and texture. You can also enjoy them alongside a cup of freshly brewed coffee or a refreshing glass of orange juice to kickstart your day with a burst of energy.

container with polenta pancakes with berries and nuts

polenta pancakes

Polenta Pancakes with Blueberries & Nuts

No ratings yet
Prep Time 5 minutes
Cook Time 10 minutes
Course Breakfast
Cuisine American
Servings 2
Calories 512 kcal

Equipment

  • knife
  • cutting board
  • saute pan
  • spatula

Ingredients
  

  • 8 oz pre-cooked polenta
  • 1/2 cup mixed nuts
  • 1 cup blueberries
  • 1 tbsp olive oil
  • 4 tbsp honey

Instructions
 

  • Slice the pre-cooked polenta into 1/2 inch rounds
  • Add oil to a pan on medium high heat and place the polenta slices into the pan
  • Cook for about 3 to 4 minutes on each side until it is golden brown
  • Serve with fresh bluberries, mixed nuts, and drizzle with honey to your preferred sweetness

Notes

Nutrition information provided is an estimate. It will vary based on cooking method and specific ingredients used. Please consult with your healthcare provider for specific dietary needs. To gain a better understanding, explore our nutrition disclaimer here

Nutrition

Calories: 512kcalCarbohydrates: 69gProtein: 9gFat: 26gSaturated Fat: 3gPolyunsaturated Fat: 5gMonounsaturated Fat: 17gSodium: 9mgPotassium: 318mgFiber: 5gSugar: 42gVitamin A: 81IUVitamin C: 8mgCalcium: 36mgIron: 2mg

Similar Recipes

baked oatmeal

Oven Baked Oats with Apricots and Berries

ricotta apple

Oven Baked Apple with Ricotta and Walnuts

french toast 2

Oven Baked French Toast Muffins with Strawberries

You Might Also Like

Smartfruit Mellow Mango + Immunity, 100% Real Fruit Purée

Trader Joe’s Unsalted, Dry Toasted Slivered Almonds

Trader Joe’s the Dark Chocolate Lover’s Chocolate Bar

Frequently Asked Questions

Can I use instant polenta instead of pre-cooked polenta?

Yes, you can use instant polenta. However, the cooking method will vary, so make sure to follow the instructions on the package. Once cooked, allow the polenta to cool and firm up before slicing and pan-frying.


Can I substitute honey with another sweetener?

Certainly! If you prefer a different sweetener, you can use maple syrup, agave nectar, or even a sprinkle of your favorite natural sweetener like stevia. Adjust the sweetness according to your taste


Can I use frozen blueberries instead of fresh ones?

Yes, you can use frozen blueberries if fresh ones aren’t available. Just make sure to thaw them before using and drain off any excess liquid to prevent the polenta from becoming too soggy.

Posted on Leave a comment

Chili Steak Salad with Orange Salsa

round plate with steak and orange salsa

Hey there, foodies! Today, I’m thrilled to share with you an incredible recipe that will rock your meal prep game: Grilled Steak Salad with Orange Salsa. Get ready to tantalize your taste buds with a mouthwatering steak marinade and a zesty orange salsa that will take your meal prep to the next level!

This post may contain affiliate links. Please see our privacy policy for details.

round plate with steak and orange salsa

Why you’ll enjoy this

  • Grilled Steak with Orange Salsa isn’t just incredibly delicious; it’s also packed with health benefits. The lean steak provides a generous amount of protein to fuel your muscles and keep you satisfied throughout the day. Oranges, rich in vitamin C, boost your immune system, while tomatoes and cilantro provide essential vitamins and antioxidants. With this recipe, you’re not just satisfying your taste buds; you’re nourishing your body too!
  • Meal prepping with Grilled Steak with Orange Salsa can actually save you money in the long run. By purchasing steak in bulk and preparing it ahead of time, you can take advantage of better deals and reduce food waste. Additionally, by making your own marinade and salsa, you have control over the ingredients, ensuring a budget-friendly yet incredibly flavorful meal prep option.
  • One of the greatest advantages of this recipe is that it keeps your meal prep interesting and tasty throughout the week. The marinade and salsa infuse the steak with delicious flavors that deepen over time, making each bite more satisfying than the last. Plus, the bright and vibrant colors of the orange salsa will instantly bring a pop of freshness to your plate. Trust me, you’ll be looking forward to digging into this meal every single day!

The PrepYoSelf Newsletter

Ingredients for this Zesty Steak Salad

  • Let’s start by talking about the star of the show – the steak marinade. It’s a tantalizing blend of flavors that will make your taste buds dance with joy. We combine the tangy freshness of lime juice and orange juice, the smoky kick of chili powder, the aromatic touch of garlic powder, and just the right amount of salt, pepper, and olive oil. This marinade not only enhances the flavor of the steak but also tenderizes it to perfection.
  • Now, let’s move on to the show-stopping sidekick – the orange salsa. Bursting with vibrant colors and zesty flavors, this salsa is a match made in culinary heaven. We combine juicy oranges, crisp red onions, ripe roma tomatoes, fragrant cilantro, a splash of lime juice, and a pinch of salt. The result? A refreshing and tangy salsa that perfectly complements the grilled steak.

round plate with steak and orange salsa

How to Make Chili Steak Salad

Making the Salsa: This salsa is so simple to make and it’s a great combination of fruit and veggies.

  1. Peel your oranges and separate the orange pieces.
  2. Dice the red onions and roma tomatoes.
  3. Chop the cilantro.
  4. Combine the oranges, tomatoes, red onions, and cilantro in a bowl.
  5. Squeeze lime juice all over the ingredients and season with salt to tatse.

Grilling the Steak: We want to marinate it with incredible flavors that will complement the citrus salsa:

  • Start by patting dry your steak to remove any excess moisture.
  • In a small bowl, combine the lime juice, orange juice, seasonings, and olive oil.
  • Marinate the steak for at least 10 minutes.
  • Preheat your grill or stovetop pan to medium-high heat.
  • Cook the steak for about 4-5 minutes per side, or until it reaches your desired level of doneness. Remember to adjust the cooking time based on the thickness of your steak.
  • Once cooked, let the steak rest for a few minutes before slicing it into thin strips.

Reference the recipe card below for detailed instructions.

glass meal prep containers with steak and orange salsa

Meal Prep Tips for Steak Salad

  • Storing: Once you’ve grilled the steak and prepared the orange salsa, you can store them separately in airtight containers in the refrigerator. 
  • Reheating: The steak can be reheated gently in a skillet or microwave for a quick and easy meal.
  • Side Suggestions: Oh, the possibilities are endless! Serve it alongside some corn salad, roasted vegetables, and sliced avocadoes for a well-balanced and satisfying meal. You can also slice the steak and stuff it into a warm tortilla for a delicious steak taco experience. The choice is yours.

round plate with steak and orange salsa

Steak Salad

Chili Steak Salad with Orange Salsa

Grilled Steak with Orange Salsa is a tantalizing recipe that has zesty flavors, vibrant colors, and nutritious benefits.
No ratings yet
Prep Time 5 minutes
Cook Time 15 minutes
Course lunch, Main Course
Cuisine American, Mexican
Servings 2

Equipment

  • knife
  • cutting board
  • mixing bowls
  • indoor grill pan
  • tongs

Ingredients
  

Steak & Marinade

  • 12 oz flank steak
  • 1 each lime (juiced)
  • 1 each orange (juiced)
  • 1/4 tsp chili powder
  • 1/4 tsp garlic powder
  • 1/4 tsp salt
  • 1/4 tsp pepper
  • 1 tbsp olive oil
  • 4 cups spring mix
  • 2 each avocado

Orange Salsa

  • 2 each oranges (peeled)
  • 1/4 cup red onions (diced)
  • 2 each roma tomatoes (diced)
  • 1/4 cup cilantro (chopped)
  • 1 each lime (juiced)
  • 1/4 tsp salt

Instructions
 

  • Mix together the steak marinade in a bowl and place the steak in the bowl. Make sure the steak is fully coated with the marinade and marinate for at least 10 minutes
  • Next, heat an indoor grill pan on medium high heat and grill the steak on each side for about 4 to 5 minutes until you reach the desired doness
  • Meanwhile, prepare the orange salsa
  • After the steak cooks, let it rest before slicing into small strips
  • Serve the steak on top of spring mix, topped off with the orange salsa and avocado slices

Similar Recipes

sweet potato blt

Sweet Potato BLT Sandwich

balsamic chicken salad

Oven Baked Balsamic Chicken Salad

chicken salad

Oven Baked Honey Mustard Glazed Chicken Salad

You Might Also Like

Frequently Asked Questions

Can I use a different cut of steak for this recipe?

Absolutely! While this recipe works wonderfully with cuts like ribeye or flank steak, you can use your preferred cut of steak. Just keep in mind that different cuts may require varying cooking times on the grill.


Can I marinate the steak overnight?

Yes, marinating the steak overnight will intensify the flavors and tenderize the meat even more. It’s a great option if you want to prep ahead and save time on the day of cooking.


Can I substitute lime juice or orange juice with lemon juice?

Of course! While lime and orange juices bring a unique tanginess, you can substitute them with lemon juice if that’s what you have on hand. The flavor will be slightly different, but still delicious.

Posted on

Tips For Meal Prepping in Batches

glass meal prep containers filled with chicken meatball lettuce wraps - meal prepping in batches

Cooking can be very time consuming and laborious however it doesn’t have to be. With these tips for meal prepping in batches, or batch cooking, you can be more efficient with delicious meals. 

Meal prepping in batches involves making large portions of entire meals or parts of meals so that you can enjoy them later with minimal work. Good batch cooking can benefit from proper preparation and making the right choices. From the recipes you choose to the appliances you cook with, can all make a difference. As you get more comfortable, you can discover how helpful it is to have so much food ready so easily.

Choosing the right recipes

Pick the right recipes and plan your grocery shopping around it

Some recipes lend themselves to batch cooking better than others. Recipes or ingredients that require precise cooking, attention or a lot of space may not be the best choices for batch cooking. Also foods that do not store or reheat well, are not the easiest to cook in batches.

Stew, Chili, casseroles and pasta dishes are all great choices for meal prepping in batches. These dishes can be made completely and portioned out for reheating later. They also reheat well without a worry for loss in texture. These recipes are also typically easy to scale up since as long as the ratios are the same, and you have a large enough dish to cook them in, you can easily make more than the original recipe.

Individual meal components can also be great choices for batch cooking. Roasted veggies and proteins like chicken can be a great way to cook parts of a meal that you can later mix and match. This is a great choice if you’re looking for more of a mix of textures or flavors.

Invest in quality food storage containers

Meal prepping in batches only works if you have the storage containers to store the abundant portions. There are a lot of options here, especially based on what kind of meal you decide to cook. Soups can be stored in plastic bags, remember to let it cool completely before transferring to a plastic bag. If you have more individual containers, see our article on the best meal prepping containers, you can portion out the batch meal into individual meals and store them perfectly ready to go.

Having appropriately sized storage containers can help a lot with portion control as well as reheating efficiently. Trying to reheat a large portion can lead to uneven temperatures in your food or become a pain to deal with. 

Good storage containers can last you a long time and help a lot. If you’re meal prepping in batches, it’s recommended to make the investment and get containers that can handle a lot of freezing and reheating.

Utilize your entire kitchen

A nice trick to meal prepping in batches is to leverage multiple cooking appliances at the same time. This can save you a lot of time and prepare meals that are very different. This quickly creates a lot of food so make sure you’re prepared with storage containers. Using the oven, the stove top and a slow cooker at the same time is a lot to juggle so consider your cooking times and plan out the steps carefully.

Portioning

Meal prepping in batches can also make it easier to manage portions. This is one of the most important considerations for staying healthy. Properly setting portions will assist in planning out nutrients and calories. This starts with the recipe choice and the grocery store trip. Plan early and as you get more comfortable with batch cooking you will learn how much food each recipe will make.

Freeze extra portions

The freezer is one of the best ways to store foods, especially soups. Frozen food doesn’t last forever but it can last a long while. Always be sure to check how long certain foods last, remember that it’s not an exact science, if it doesn’t smell right don’t eat it. Freezing and reheating can really affect textures as well so some foods do not handle freezing well. 

Make sure to invest in good containers that can seal air tight. Containers that leave gaps can ruin the food inside with either freezer burn or the food can pick up the flavors of the foods around it in the freezer. This can be very gross. I would also recommend that you choose a food storage container that can freeze and reheat all in one since trying to get frozen foods out of a container can be frustrating.

Label and date containers

This seems unnecessary but if you start meal prepping in batches often, you may start to overlap your meals or if you freeze soups, you can quickly lose track of what was made or when. Especially frozen meals. A quick tape label can help you keep your fridge clean down the line and avoid food waste.

Plan for variety

meal prepping in batches

Meal prepping in batches can be extremely helpful since it efficiently makes large amounts of food. Ideally with recipes that freeze well so you don’t have to eat the same meal for breakfast, lunch and dinner for the next week. The next trick is to choose recipes that can be mixed and matched. Cooking large portions of parts of meals is very helpful in avoiding meal burnout. Cooking the protein, veggies and other sides separately, storing them separately or in containers with dividers can lead to amazing discoveries in combinations you wouldn’t have normally thought of. This also makes it easier to test out what works for you.

Start meal prepping in batches with these awesome recipes

Most Popular Instant Pot Recipes

Instant Pots are a great way to cook delicious meals, so we pulled together our most popular instant pot recipes. It’s easy to cook and clean, fast and the flavors slow cooking releases are amazing. This is a fantastic addition to any kitchen as it really opens up the types of recipes that you can cook.

Top 10 Meal Prep Beef Recipes

Beef is a staple in every chef’s kitchen so we put together a list of our Top 10 Meal Prep Beef Recipes. Beef is a versatile protein that works well across cuisines and meal prep recipes as it reheats well and lasts in the kitchen. There are so many cuts of beef that there are endless possibilities. Beef is also a popular ingredient for meal prep as it’s easy to cook, making it a great option for cooks with less experience. It’s very forgiving and still tastes great!

Top 10 Meal Prep Chicken Recipes

Chicken is an amazingly versatile and healthy ingredient with a delicious flavor so we pulled our top 10 meal prep chicken recipes into a convenient list. Our chicken recipes come from many cuisines to provide a ton of variety, with easy cooking instructions. Don’t know where to start or getting fatigued on your current meal plan, discover some of the top rated Prep Yo Self meal prep chicken recipes.

Free Weekly Meal Plans

Try out our weekly meal plans with tasty recipes. We make your shopping list and show you how to prep your meals.

Posted on Leave a comment

Tuna Stuffed Deviled Eggs

round plate with deviled eggs and arugula salad

Greetings, food enthusiasts! Today, I’m excited to share with you a fabulous recipe that not only adds a burst of flavor to your meal prep routine but also offers numerous health and cost benefits. Get ready to indulge in the delectable goodness of Tuna Stuffed Deviled Eggs, a low carb meal that will keep your taste buds dancing throughout the week!

This post may contain affiliate links. Please see our privacy policy for details.

round plate with deviled eggs and arugula salad for a low carb meal

Why We Love This Recipe

  1. Health Benefits: When it comes to meal prep, it’s essential to choose recipes that offer a balance of nutrition and taste and a low carb meal. Tuna Stuffed Deviled Eggs perfectly fit the bill. Eggs are a fantastic source of protein, providing you with the energy you need to conquer your day. Additionally, eggs are rich in vitamins such as B12, selenium, and choline, which promote brain health and help maintain a healthy nervous system.
  2. The inclusion of canned tuna takes the nutritional profile up a notch. Tuna is packed with omega-3 fatty acids, which have been linked to numerous health benefits, including reducing the risk of heart disease and promoting brain function. It is also an excellent source of lean protein, making it an ideal choice for those aiming to build or maintain muscle mass.
  3. Cost Benefits: One of the major advantages of this recipe is its cost-effectiveness. Eggs and canned tuna are incredibly affordable and readily available in most grocery stores. By utilizing these budget-friendly ingredients, you can create a delicious and satisfying meal prep option without breaking the bank.

The PrepYoSelf Newsletter

Let’s delve into the simple ingredients that make Tuna Stuffed Deviled Eggs shine:

  • Eggs: A versatile and nutrient-dense ingredient, eggs provide protein, vitamins, and minerals essential for overall health and well-being. They form the sturdy base for the delightful filling.
  • Canned Tuna: Canned tuna adds a burst of umami flavor and contributes heart-healthy omega-3 fatty acids. Opt for sustainable and responsibly sourced tuna for the best quality.
  • Red Onions: You can use any kind of onions.
  • Mayonnaise: Creamy and luscious mayonnaise binds the filling together while imparting a smooth texture. Choose a high-quality mayonnaise or consider using a lighter alternative like Greek yogurt or avocado mayo.
  • Lemon: Fresh lemon juice brightens up

round plate with deviled eggs and arugula salad for a low carb meal

Basic Steps to Prepare Tuna Deviled Eggs

  1. Boil the eggs for 6 to 8 minutes. Meanwhile, in a small bowl mix together the lemon juice, dijon mustard, olive oil, garlic powder, and salt until well blended
  2. In a bowl, add the tuna and half of the egg yolks (discard the rest). Then, mix in the mayonnaise, lemon juice, green onions, salt, and mix until all the ingredients have mixed well
  3. Use a small spoon to stuff the tuna egg salad mixture back into the center of the egg whites.

Reference the recipe card below for detailed instructions.

glass meal prep containers with deviled eggs and arugula salad for a low carb meal

Low Carb Meal Prep Tips for A Tuna Stuffed Deviled Eggs

  • To ensure your Tuna Stuffed Deviled Eggs stay fresh and flavorful, here are some storage tips: Store the deviled eggs in an airtight container in the refrigerator. They can be kept for up to 3-4 days.If you plan to eat them later in the week, consider storing the filling and the egg whites separately. Assemble them just before eating to maintain the perfect texture.
  •  Freezing the deviled eggs is not recommended, as the texture and consistency may be compromised.
  • Pairing Suggestions: While Tuna Stuffed Deviled Eggs are delicious on their own, they can be paired with various sides to create a well-rounded meal. Here are some ideas: 1) Crisp salad greens with a tangy vinaigrette. 2) Sliced avocado for a creamy and nutritious addition. 3) Whole-grain bread or crackers for a satisfying crunch. 4)Pickles or olives to add a touch of brininess.

glass meal prep containers with deviled eggs and arugula salad for a low carb meal

eggs

Tuna Stuffed Deviled Eggs

The combination of creamy tua filling and the natural richness of eggs creates a savory flavor that you can enjoy for lunch!
No ratings yet
Prep Time 5 minutes
Cook Time 15 minutes
Course lunch, Main Course
Cuisine American
Servings 2

Equipment

  • knife
  • cutting board
  • boiling pot
  • mixing bowl
  • spoon

Ingredients
  

  • 6 each large eggs
  • 2.6 oz canned tuna
  • 2 tbsp mayonnaise
  • 1 each lemon (juiced)
  • 1 tbsp green onions
  • 1/4 tsp garlic powder
  • 4 cups arugula

Lemon Dressing

  • 1 each lemon (juiced)
  • 4 tbsp olive oil
  • 1 tbsp dijon mustard
  • 1/4 tsp salt
  • 1/4 tsp garlic powder

Instructions
 

  • Boil the eggs for 6 to 8 minutes
  • Meanwhile, in a small bowl mix together the lemon juice, dijon mustard, olive oil, garlic powder, and salt until well blended
  • Once the eggs have cooked, let them cool in ice water
  • Then peel the eggs and slice the eggs in half and remove the egg yolk
  • In a bowl, add the tuna and half of the egg yolks (discard the rest). Then, mix in the mayonnaise, lemon juice, green onions, salt and mix until all the ingredients have mixed well
  • Use a small spoon to stuff the tuna egg salad mixture back into the center of the egg whites
  • Toss the arugula in the lemon dressing and serve it with the tuna stuffed eggs

Similar Recipes

chicken kale salad

Grilled Honey Dijon Chicken and Kale Salad

chicken fajitas

Sheet Pan Chicken Fajitas with Mango Salsa

peanut chicken

Peanut Chicken Stir Fry

You Might Also Like

Frequently Asked Questions

Can I substitute mayonnaise with a healthier alternative?

Absolutely! If you’re looking for a healthier option, you can replace mayonnaise with Greek yogurt, avocado mayo, or even mashed avocado. These alternatives provide a creamy texture while reducing the overall calorie and fat content.


Can I add additional ingredients to the filling?

Certainly! Feel free to get creative and personalize the recipe to your liking. You can add ingredients like diced celery, chopped herbs (such as dill or parsley), minced garlic, or a touch of spicy mustard to elevate the flavor profile of the filling.


How can I make the deviled eggs spicier?

If you prefer a spicier kick, you can add ingredients such as hot sauce, cayenne pepper, or finely chopped jalapeños to the filling. Adjust the amount according to your desired level of heat.

Posted on Leave a comment

Oven Baked Crispy Chicken Tenders

round plate with panko breaded chicken tenders and carrots and celery and honey mustard

I’m excited to share with you a fabulous recipe that will surely add a crispy twist to your meal prep routine: Oven-Baked Crispy Panko Chicken Tenderloins! Not only are these tenderloins deliciously crunchy and satisfying, but they also offer numerous health benefits and cost advantages. Get ready to tantalize your taste buds and keep your meal prep exciting throughout the week!

This post may contain affiliate links. Please see our privacy policy for details.

Calories: 473kcal | Carbohydrates: 37g | Protein: 42g | Fat: 17g | Saturated Fat: 3g | Polyunsaturated Fat: 8g | Monounsaturated Fat: 4g | Trans Fat: 0.04g | Cholesterol: 117mg | Sodium: 1023mg | Potassium: 1063mg | Fiber: 5g | Sugar: 14g | Vitamin A: 11119IU | Vitamin C: 7mg | Calcium: 116mg | Iron: 3mg

round plate with panko breaded oven baked chicken tenders and carrots and celery and honey mustard

Why You Need to Make This

  • Let’s start with the health benefits. By opting for oven-baked chicken tenderloins, you’re already making a smart choice. Baking reduces the need for excessive oil, making it a healthier alternative to frying. Additionally, using lean chicken tenderloins ensures you’re getting a good source of protein without the extra fat. This recipe is perfect for those looking to maintain a balanced diet without compromising on flavor.
  • Now, let’s talk about the cost benefits. Chicken tenderloins are often more affordable compared to other cuts of chicken, making them budget-friendly for your meal prep endeavors. By utilizing panko breadcrumbs, you create a delightful crunch without breaking the bank. Panko is light, crispy, and incredibly affordable, making it a fantastic ingredient to have in your pantry.
  • One of the best aspects of this recipe is how it keeps your meal prep interesting and tasty all week long. The crispy panko coating adds a satisfying texture, while the seasonings give it a burst of flavor. Every bite will leave you wanting more! And because these tenderloins are so versatile, you can easily pair them with a variety of sides to keep your taste buds engaged.

The PrepYoSelf Newsletter

Ingredients You’ll Need

  • Let’s quickly run through the star ingredients in this recipe. First up, we have tender and juicy chicken tenderloins. They’re the perfect blank canvas for the crispy panko coating to adhere to, providing you with a delightful combination of textures.
  • Next, we have eggs, which act as a binder for the panko breadcrumbs. They help create that golden-brown and crispy exterior that we all adore. Plus, eggs are a great source of protein and provide essential vitamins and minerals.
  • Speaking of panko breadcrumbs, they are light, airy, and create an extra crunchy coating. Made from crustless bread, panko is coarser than traditional breadcrumbs, resulting in a superior crispy texture. It’s a fantastic ingredient that elevates the overall experience of your chicken tenderloins.
  • Lastly, let’s not forget about the seasonings! Feel free to get creative and experiment with different combinations of herbs and spices. You can go for a classic blend of salt, pepper, garlic powder, and paprika, or try adding some cayenne pepper for a little kick. The choice is yours, and it’s an excellent opportunity to personalize your meal prep creations.

round plate with panko breaded oven baked chicken tenders and carrots and celery and honey mustard

How to Meal Prep Crispy Chicken Tenders

  1. First, pre-heat the oven and prepare your breadcrumbs and seasonings in a mixing bowl.
  2. In another bowl, whisk the eggs.
  3. Dip each tenderloin in the egg wash. Then, dredge them in the breadcrumb mixture.
  4. Place the tenders on a sheet pan and spray them with cooking spray. Then, place them in the oven to bake.

Reference the recipe card below for detailed instructions.

glass meal prep containers with panko breaded oven baked chicken tenders and carrots and celery

Meal Prep Tips for Crispy Panko Chicken Tenders

  • Once you’ve baked your chicken tenderloins, allow them to cool completely. To store them, place them in an airtight container or wrap them tightly in aluminum foil. They can be refrigerated for up to four days, ensuring you have a delicious protein option ready to go throughout the week.
  • When it’s time to enjoy your meal prep masterpiece, reheating is a breeze! Simply pop the tenderloins into a preheated oven at 350°F (175°C) for about 10 minutes or until they are heated through and crispy once again. Alternatively, you can reheat them in a skillet over medium heat with a touch of oil for a quick and crispy revival. You can also reheat them in the microwave, however, they may not be as crispy.
  • Now, let’s talk about the fabulous pairings for these oven baked chicken tenderloins. They go wonderfully with a variety of options, such as a fresh garden salad, roasted vegetables, or a fresh veggie sticks with your favorite dipping sauce. You can also slice them up and add them to wraps, sandwiches, or top them on a bed of greens for a satisfying protein-packed salad. The possibilities are truly endless!

glass meal prep containers with panko breaded oven baked chicken tenders and carrots and celery

chicken tender and veggie sticks

Oven Baked Chicken Tenders with Veggie Sticks

Oven Baked Crispy Chicken Tenders is a tantalizing recipe you'll look forward to enjoying throughout the week.
No ratings yet
Prep Time 5 minutes
Cook Time 25 minutes
Course lunch
Cuisine American
Servings 2
Calories 473 kcal

Equipment

  • knife
  • cutting board
  • mixing bowls
  • tongs
  • oven
  • sheet pan

Ingredients
  

Chicken Tenders

  • 12 oz chicken tenderloins
  • 1 each large egg
  • 1/2 cup breadcrumbs
  • 1/4 tsp garlic powder
  • 1/4 tsp italian seasoning
  • 1/4 tsp paprika
  • 1/4 tsp salt
  • cooking spray

Veggie Sticks

  • 1 cup celery sticks
  • 1 cup carrot sticks

Honey Mustard

  • 2 tbsp mayonnaise
  • 2 tbp dijon mustard
  • 1 tbsp honey

Instructions
 

  • Pre-heat the oven to 425F
  • In a mixing bowl, mix together the breadcrumbs and seasonings
  • In another bowl, whisk together the eggs
  • Dip each tenderloin in the egg wash. Then, dredge each tenderloin in the breadcrumb mixture. Make sure it is fully coated
  • Place the tenderloins on a sheet pan. Spray both sides of the chicken tenderloins with cooking spray
  • Bake in the oven for 20-25 minutes until it reaches an internal temperature of 165F. Flip it halfway through the cooking process
  • Meanwhile, cut up the veggie sticks and mix together the ingredients for the honey mustard sauce

Notes

Nutrition information provided is an estimate. It will vary based on cooking method and specific ingredients used. Please consult with your healthcare provider for specific dietary needs. To gain a better understanding, explore our nutrition disclaimer here

Nutrition

Calories: 473kcalCarbohydrates: 37gProtein: 42gFat: 17gSaturated Fat: 3gPolyunsaturated Fat: 8gMonounsaturated Fat: 4gTrans Fat: 0.04gCholesterol: 117mgSodium: 1023mgPotassium: 1063mgFiber: 5gSugar: 14gVitamin A: 11119IUVitamin C: 7mgCalcium: 116mgIron: 3mg

Similar Recipes

orange chicken

Air Fryer Orange Soy Glazed Chicken and Broccoli

roasted chicken and rutabaga

Roasted Lemon Italian Chicken with Rutabaga

rosemary chicken

Rosemary Baked Chicken and Potatoes

You Might Also Like

Frequently Asked Questions

Can I use chicken breasts instead of chicken tenderloins?

Absolutely! Chicken breasts can be used as a substitute for tenderloins in this recipe. However, keep in mind that the cooking time may vary slightly, as chicken breasts are larger and may require a few extra minutes in the oven to ensure they are cooked through.


Can I use regular breadcrumbs instead of panko breadcrumbs?

While panko breadcrumbs provide a distinct crispy texture, you can use regular breadcrumbs if that’s what you have on hand. Just keep in mind that the final result may not be as crunchy as when using panko. To enhance the crispiness, you can add a bit of oil or butter to the regular breadcrumbs before coating the chicken.


Can I use an air fryer instead of the oven?

Absolutely! Using an air fryer is a great option for achieving a crispy exterior while keeping the chicken tender and juicy. Preheat the air fryer to the recommended temperature and cook the chicken tenderloins according to the manufacturer’s instructions. Keep a close eye on them to prevent overcooking.