
Let me introduce you to your new go-to flavor bomb: Thai-Style Turkey Burger Patties—packed with vibrant veggies, Thai-inspired flavor, and a creamy, crave-worthy peanut sauce that will have you licking the container. Whether you’re a beginner in the kitchen or just tired of boring, dry turkey burgers, this recipe is here to rescue your meal prep game with bold flavor, juicy texture, and total versatility.
So if you’re thinking, “Healthy food = bland,” let’s change that mindset with these patties.
This post may contain affiliate links. Please see our privacy policy for details.


Why These Turkey Patties are a Meal Prep Hero:
- BIG Flavor, ZERO Boredom: Let’s be real—no one wants dry turkey anything. These patties are soaked in flavor thanks to the Thai-inspired peanut-lime-ginger combo. No bland bites here!
- High Protein, Low Fuss: Each patty is protein-packed to keep you full and fueled. Perfect post-workout meal or afternoon pick-me-up. You’ll be flexin’ those lean gains in no time.
- Meal Prep Friendly: Make a batch on Sunday, and you’ve got lunch/dinner covered for days. They reheat like champs (no rubbery turkey here!).
- Beginner-Friendly: No fancy kitchen gadgets. No culinary school required. If you can mix and flip, you can definitely make these.
- Eye-Candy on a Plate: Bright red bell peppers, flecks of green basil and onion, and golden brown patties—these are the kind of meal prep containers that make you excited to eat lunch.
- Ultra-Versatile: Throw them in a whole grain bun, lettuce wrap, rice bowl, or even sliced on top of a salad. Want it spicy? Add extra sriracha. Want it sweet? Drizzle more honey in the sauce. It’s your call.
- Sneaky Veggie Boost: Packed with carrots, peppers, and green onions, you’re getting your veggies in without even trying. Bonus points for being family-friendly, too!

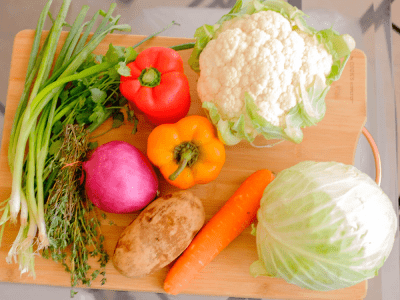
Ingredients You’ll Need:
- Ground Turkey forms the protein-rich foundation of the patties, providing a lean, satisfying base that absorbs the bold Thai-inspired flavors from the herbs, vegetables, and sauce.
- Diced Baby Carrots add subtle sweetness and a slight crunch, which balances the savory richness of the turkey and peanut sauce while keeping the patties moist and colorful.
- Red Bell Pepper brings a naturally sweet, vibrant note that complements the carrots and contrasts beautifully with the heat and saltiness in the sauce.
- Garlic deepens the savory flavor profile and enhances the umami from the soy and fish sauce, tying together the aromatic base of the patties.
- Thai Basil introduces a slightly spicy, licorice-like freshness that brightens the overall flavor and balances the richness from the peanut butter and coconut milk.
- Green Onions offer a light, zesty bite that cuts through the creamy sauce and rich turkey, adding a fresh pop that lifts each bite.
- Olive Oil is used to sauté the patties to golden perfection, creating a lightly crisp exterior that contrasts with the juicy interior and locks in the layered flavors.
- Peanut Butter forms the creamy backbone of the sauce, adding healthy fats and depth that pair beautifully with the lean turkey and aromatic veggies.
- Coconut Milk smooths and softens the sauce with a hint of natural sweetness, balancing the spice of the sriracha and the boldness of the garlic and fish sauce.
- Ginger Paste adds a warm, peppery zing that brightens the sauce and pairs seamlessly with the basil, green onions, and lime.
- Soy Sauce contributes a salty umami base that enhances the flavor of the turkey and complements the sweetness of the carrots, peppers, and honey.
- Fish Sauce brings authentic Thai character and deep savory flavor that intensifies the overall profile without overpowering the other ingredients.
- Honey adds natural sweetness that offsets the heat and salt, working in harmony with the coconut milk and vegetables to create balance.
- Sriracha delivers just the right amount of heat to energize the dish, pairing well with the ginger and garlic for a satisfying kick.
- Lime Juice adds the essential acid that cuts through the richness of the sauce and refreshes each bite, enhancing the fresh herbs and crisp vegetables.

How to Meal Prep Ground Turkey Burger Patties
- Make the Peanut Sauce: Start by preparing the sauce that gives this dish its signature flavor. In a small bowl or jar, add 1 tablespoon of peanut butter, 2 tablespoons of coconut milk, 1 tablespoon of ginger paste, 1 teaspoon of soy sauce, 1 tablespoon of fish sauce, 1 tablespoon of honey, 1 teaspoon of sriracha, and 1 tablespoon of lime juice. Use a whisk or a fork to mix everything together until the sauce is smooth and creamy. Set this aside—you’ll use half for the patties and save the other half as a dipping sauce or drizzle.
- Mix the Patties: In a large mixing bowl, add 8 ounces of ground turkey, ¼ cup of diced baby carrots, 1 diced red bell pepper, 3 minced garlic cloves, ¼ cup of chopped Thai basil leaves, and ¼ cup of chopped green onions. Pour in half of the peanut sauce you made. Using clean hands or a fork, gently combine everything until evenly mixed. Don’t overmix—just enough so all the ingredients are distributed throughout the turkey.
- Form the Patties: Once the mixture is well combined, divide it into four equal portions. Shape each portion into a round, flat patty about ½ inch thick. This helps them cook evenly and hold their shape when cooking.
- Cook the Patties (Sauté or Grill): To sauté: Heat 1 tablespoon of olive oil in a large non-stick skillet over medium-high heat. Once the oil is hot, gently place the patties in the pan. Cook each side for about 4 to 5 minutes, or until the patties are golden brown and cooked through. The inside should no longer be pink, and the internal temperature should reach 165°F : To grill: Preheat your grill to medium-high heat and make sure the grates are clean and lightly oiled to prevent sticking. Place the patties on the grill and cook for about 4 to 5 minutes on each side, flipping carefully with a spatula. Again, make sure the patties reach an internal temperature of 165°F to ensure they’re fully cooked.
- Serve and Enjoy: Let the patties rest for a few minutes after cooking. Serve them in a whole grain bun, on top of a salad, or wrapped in lettuce for a low-carb option. Don’t forget to drizzle or dip with the remaining peanut sauce—it adds a ton of flavor. These patties pair well with rice, quinoa, roasted veggies, or a crisp slaw for a full meal.
Meal Prep Pairing Tips:
- For a balanced and satisfying meal, pair your Thai-style turkey patties with jasmine or brown rice—both are great for soaking up extra peanut sauce and reheating well throughout the week. If you’re going for a lower-carb option, cauliflower rice is a light and flavorful alternative that complements the bold Thai flavors without weighing you down.
- Add a colorful veggie side like steamed or roasted broccoli, snap peas, or green beans to bring in more fiber and crunch. You can also make a quick Asian-style slaw with shredded cabbage, carrots, and a splash of rice vinegar and lime juice for a refreshing, tangy contrast to the savory patties.
- For added variety, pack the patties with lettuce wraps and sliced cucumbers or bell pepper strips to create a fresh, no-reheat lunch option. You can also toss the patties over a mixed greens salad with edamame and a drizzle of the peanut sauce for a high-protein salad bowl.
- Don’t forget to portion out the extra peanut sauce into small containers so you can dip or drizzle just before eating—this keeps your patties from getting soggy and gives you that freshly made taste with every meal.
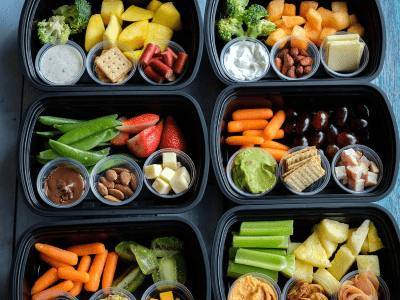
- Each meal prep container should aim for a good balance: one patty, a serving of carbs (like rice or quinoa), and a generous portion of veggies. This way, your meals stay tasty, visually appealing, and full of nutrients all week long.


Frequently Asked Questions
Can I freeze the patties?
Yes! Freeze the uncooked or cooked patties between layers of parchment paper. Thaw overnight in the fridge before cooking or reheating. Peanut sauce can be frozen separately in small containers.
Can I make these patties in the oven?
Absolutely. Bake at 375°F on a lined baking sheet for about 15–18 minutes, flipping halfway through. Always check that the internal temperature hits 165°F
Can I prep the mixture ahead of time and cook later?
Yes! You can mix and shape the patties up to a day in advance. Store them in an airtight container or wrap individually and refrigerate until you’re ready to cook..


Thai-Style Turkey Burger Patties
Equipment
Ingredients
Ground Turkey Burger and Ingredients
Peanut Sauce
Instructions
Video
Notes
Nutrition