Posted on

Creamy Cauliflower Mashed “Potatoes” with Roasted Pistachios

mashed cauliflower

This cauliflower mashed “potatoes” is so much creamier than you can ever imagine. It is filled with such great flavor and serves as a great low-carb alternative to your classic mashed potatoes.

Ease of Making: Easy

This would make a perfect side dish for any cold winter feast and will be a great addition to Thanksgiving entrees. 

If you’re looking for an easy side dish to prep for the holidays, try this dish. No need for peeling and cooks in less time than your classic mashed potatoes.

How to Cook Cauliflower Mashed “Potatoes”

  1. Start with steaming your cauliflower florets.
  2. Meanwhile, saute the garlic.
  3. After the cauliflower florets have gotten tender, add the garlic and florets into a blender.
  4. Season with salt and blend until smooth.
  5. Place the cauliflower in a heated pot and mix in the butter, sour cream, and parmesan cheese
  6. Top it off with fresh chives and roasted pistachios

Meal prep tips for Mashed Cauliflower

Does cauliflower really taste like mashed potatoes?

While the texture may be close, they will not exactly taste the same. Cauliflower will naturally be blander because of the water content. Try roasting the cauliflower instead of steaming for a firmer mash. Roasting it will also give it a sweeter and nuttier flavor. We also added the same herbs that we normally would add to mashed potatoes such as chives.

How to make mashed cauliflower creamy?

Mix in cheese, butter, sour cream, and milk to make it rich and smooth.

What can you eat with Mashed Cauliflower?

It is a great side dish to accompany any roasted or pan-fried protein such as tender roasted beef, pork chops, or roasted chicken.

mashed cauliflower

Creamy Mashed Cauliflower “Potatoes” with Roasted Pistachios

No ratings yet
Prep Time 5 minutes
Cook Time 20 minutes
Course Side Dish
Cuisine American
Servings 6

Equipment

  • boiling pot
  • steamer
  • immersion blender or food processor

Ingredients
  

  • 8 cups cauliflower florets
  • 1/4 cup unsalted butter
  • 1/4 cup sour cream
  • 1/4 cup parmesan cheese
  • 6 each garlic cloves (peeled)
  • 1/2 cup roasted pistachios (shelled)
  • 2 tbsp chives (chopped)
  • 1/4 tsp salt
  • 1 tbsp olive oil

Instructions
 

  • Boil water in a large pot. Place the cauliflower in the steamer and place it over the large pot. Steam for 15 minutes until the cauliflower is tender
  • Next, add olive oil to a medium pot and saute the garlic for about a minute until it is toasted
  • Add the cauliflower, garlic, and salt in a food processor and blend until smooth
  • Scoop the cauliflower into another heated medium sized pot and stir in the sour cream, butter, and parmesan cheese. Add salt to taste
  • Top it off with freshly chopped chives and roasted pisatchios

If you love this recipe, check out these other recipes we know you’ll love too:

Posted on

How to Make Instant Pot Beef Ragu

Beef Ragu

Tender, melt in your mouth, shredded beef that is comfortingly satisfying for the cooler weather. Make this instant pot beef ragu recipe to warm the body and soul.

Ease of Making: Easy

Here’s a savory and rich beef ragu simmered in diced tomatoes, garlic, Italian seasonings, and fresh herbs that is perfect for the fall comfort meal. Enjoy it over a bed of pasta or mashed potatoes.

This is the perfect dish to batch cook for the colder weather. It is quick and easy to make but tastes like it’s been simmering all day long. Make it a weekly staple for your family dinners or bring it to holiday gatherings and make it the new family favorite.

How to Cook Beef Ragu in the Instant Pot

It’s easy to make a tender roast in the Instant Pot, all you need to do is follow a few simple steps:

  1. Turn on the Saute Setting and start browning your meat followed by adding the aromatics such as onions and garlic.
  2. Sprinkle in the seasonings.
  3. Add any liquid. In this recipe we used diced tomatoes, tomato sauce, and dry red wine.
  4. Close the Instant Pot and seal it.
  5. Press the meat/stew setting and set your timer.
  6. After it finishes cooking, carefully release the quick release for the steam (following the manufacturer’s instructions).

Meal prep tips for Instant Pot Beef Ragu

How much meat can you cook at one time?

For a 6 quart size, you can fit 4-6 lbs of meat. However, you will need to take into consideration the other ingredients such as the cooking liquids and additional veggies. For this recipe, we kept it around 2 to 3 lbs.

Does the meat need to be completely covered in liquid?

You normally will need at least one cup of liquid. The protein itself already contains water that will sweat out, and there is additional moisture from the vegetables.

What can you serve with Beef Ragu?

We love to eat it with egg noodles, but you can also serve it with veggie noodles such as spiralized zucchini or spaghetti squash for a low-carb spin on this recipe. Creamy polenta is also a nice change from pasta or you can serve it on top of mashed potatoes or fluffy rice pilaf.

What to do with leftover beef ragu?

This Instant Pot beef ragu freezes really well and can keep up in the freezer for up to three months. However, you can also make sandwiches with the leftovers or add them as a topping to your baked potatoes.

Beef Ragu

Instant Pot Beef Ragu

No ratings yet
Prep Time 10 minutes
Cook Time 40 minutes
Course dinner, Main Course
Cuisine American, Italian
Servings 6

Equipment

  • knife
  • cutting board
  • spatula
  • Instant Pot

Ingredients
  

  • 2.5 lbs boneless beef chuck roast (cut into 2 inch chunks)
  • 4 each garlic cloves
  • 1/4 cup white onion (diced)
  • 1 each small carrot (diced)
  • 1/4 cup tomato paste
  • 28 oz canned diced tomatoes
  • 8 oz tomato sauce
  • 1/2 cup dry red wine
  • 1 tsp italian seasoning
  • 1/4 tsp ground cinnamon
  • 2 each bay leaves
  • 2 tbsp fresh basil (chopped)
  • 1/2 tsp salt
  • 1/2 tsp pepper
  • 1 tbsp olive oil

Instructions
 

  • Place the Instant Pot on the saute setting on high heat
  • Season the beef with salt and pepper and add oil to the Instant Pot
  • In small batches, add the beef and cook on all sides until evenly browned (about 3 to 4 minutes). After each batch has browned, remove it from the pot and set it aside for later.
  • Next, add the onions, carrots, and garlic. Stir it all around for 2 minutes
  • Then, add the tomato paste and stir for another minute. Afterwards, pour in the wine and scrape any of the browned bits from the bottom of the pot
  • Finally, add the diced tomatoes, tomato sauce, Italian seasonings, ground cinnamon, and bay leaves
  • Carefully add the beef chunks back into the liquid
  • Turn off the saute setting and select the manual setting to adjust the pressure to high and set the time for 30 minutes. Make sure the valve is in the sealed position
  • After it has finished cooking, follow the manufacturer's directions for quick-release of the pressure
  • Remove the beef from the Instant Pot and use two forks to shred the meat. Place it in a deep serving dish and pour the remaining sauce on top. Season with salt and pepper to taste
  • Serve with fresh pasta, rice pilaf, or mashed potatoes. Garnish with additional freshly chopped basil

If you love this recipe, check out these other recipes we know you’ll love too:

Posted on

How to Make Easy and Healthy Pan-Fried Pork Chops

Crispy golden brown pork chops ready in less than 10 minutes! These easy pan-fried pork chops come together quickly, are bursting with flavor, low carb, and make for a perfect weeknight dinner.

Ease of Making: Medium

This pork chop recipe is prepared on the stovetop and uses thinly sliced boneless cuts that sear in a hot skillet with a beautiful golden-brown crust. It’s served on top of garlic mashed rutabaga mixed with spinach, a combo superfood side dish that is also a great low carb option to use instead of potatoes.

Pork often gets a bad rap for being unhealthy, but choosing the right cut provides some health benefits. Some cuts can be high in cholesterol, saturated fat, and calories, but if you’re looking for a healthy option, always choose lean cuts such as tenderloin, loin chops, and sirloin roast. 

Lean cuts of pork are high in protein, low in fat, and have more B-Vitamins than other types of meats. B-vitamins that contribute to boosting energy by helping with metabolism and energy production. Pork also delivers iron that helps carry oxygen and potassium that helps regulate blood pressure. It provides all these essential nutrients, while still being about lean as chicken.

How to Cook Pan-Fried Pork Chops

  • Keep the seasoning simple and season both sides
  • Heat a saute pan over medium-high heat
  • Add oil and add the chops
  • Sear on each side for 3 to 5 minutes
  • Cook until it reaches an internal temperature of 145F
  • Set it aside for a few minutes before slicing the pork

Meal prep tips for Pan-Fried Pork Chops with Mashed Rutabaga and Spinach

Pan-frying is a quick and easy cooking method to get the maximum flavor on proteins and sear in the juices. 

Pork chops are known for being classic comfort food, less expensive and fatty than beef, and relatively easy to prepare. However, lean cuts can often be tough due to its lower fat content. Therefore, using the right cooking technique is key.

Marinating your protein overnight can help tenderize lean cuts just like these pork chops and actually help speed up the cooking process.

Add oil to a hot pan (medium high heat). Prior to placing the pork chops in the pan, use paper towels to wipe off any excess marinade. This will help get a good golden brown sear and avoid it from steaming in the pan.

Add the pork chops to the pan and let them cook and sizzle. Cook on the first side for 3 minutes before flipping it over. You want the meat done and cooked all the way through, but because they are so thin, it should be quickly cooked. 

Pair them with a comforting side dish just like the garlic mashed rutabagas and spinach medley or check out our:

Pork chop side dishes:

Pan-Fried Pork Chops with Mashed Rutabaga and Spinach Recipe

Crispy golden brown pork chops ready in less than 10 minutes! These easy pan-fried pork chops come together quickly, are bursting with flavor, low carb, and make for a perfect weeknight dinner.
No ratings yet
Course Main Course
Cuisine American
Servings 2

Ingredients
  

Pork Chop and Marinade

  • 4 each small boneless pork chops (thinly sliced about 3 to 4 oz each)
  • 2 tbsp balsamic vinegar
  • 1 tbsp dijon mustard
  • 2 tbsp soy sauce
  • 2 tbsp olive oil
  • 1/2 tsp garlic powder
  • 1/2 tsp onion powder
  • 1/2 tsp pepper

Rutabaga and seasonings

  • 1 each small rutabaga
  • 2 cups baby spinach
  • 2 each garlic cloves
  • 1/2 tsp paprika
  • 1/2 tsp garlic powder
  • 1/2 tsp onion powder
  • 2 tsp salt
  • 1/2 tsp pepper
  • 2 tbsp olive oil note: can use butter for more flavor

Instructions
 

Pre-Cook (Mise en Place):

  • Gather your equipment: cutting board, knife, large saucepan, skillet, tongs, fork/potato masher
  • Marinate the pork chops with the seasonings. Preferably overnight, but at least 30 minutes prior to cooking
  • Peel the rutabaga and cut into chunks. Peel the garlic

Cooking Method:

  • Place the rutabaga in a saucepan with water and 1 tsp of salt. Bring the water to a boil. Once it reaches a boil, reduce the heat to low medium and let it simmer for 25-30 minutes until it is fork tender.
  • Meanwhile, add oil to a pan on medium high heat and sear the pork chops on each side for about 3 to 5 minutes until it is fully cooked and reaches an internal temperature of 145F
  • Once the rutabaga cooks, drain it completely. Add the olive oil and seasonings and mash with a fork. Once it is mashed, mix in the spinach
  • Serve the pork chops on top of the mashed rutabaga. Eat and enjoy!

Video

Posted on Leave a comment

Easy Air Fryer Chicken Kebabs Recipe

Kebabs are one of the tastiest dishes stacked with tender marinated meats and bright colored veggies. Not only do bell peppers and cherry tomatoes add great flavor to this dish, but they are also full of essential nutrients that are good for your health. Bell peppers and cherry tomatoes are great sources of Vitamin A, Vitamin C, and potassium. A diet rich in vegetables can help reduce the risk of developing heart disease and certain types of cancers. The fibers help keep your digestive tract working properly. Along with being full of nutrients, they are low-calorie and deliver a satisfying bite.

Ease of Making: Easy

What I love about kebabs is that there are so many ways to make them and so many flavors from all over the world that you can incorporate. They are easy to make and can be cooked on a grill, in the oven, or in an air fryer just like these chicken kebabs. Serve them with your choice of sides such as a salad, in a pita, on top of a bed of rice pilaf, or additional veggies. 

Meal prep tips for Air Fryer Mediterranean Chicken Kebabs

The Air Fryer is great for meal prep. It is the perfect size for roasting veggies and cooks large portions of protein. Therefore, you can batch cook multiple food items without having to pre-heat the oven and waste all that oven space. 

The air fryer essentially is like an amped-up oven. The difference is that it has a fan and it utilizes a more compact space to facilitate fast cooking. The fan circulates the air around making food items crisp which is similar to what you could get from deep frying, minus the extra added fat. With normal baking ovens, there is a lot of humidity, so it’s difficult for an outer crisp to occur. 

Sometimes using a leaner cut of meat such as chicken breasts can result in dry tough meat. Which is why marinating your meats prior to cooking is a good technique to prevent it from drying out and making it chewy. Marinades have acidic components that help tenderize meats and make them juicy. They also help reduce the time of cooking. 

This recipe’s marinade incorporates some flavor spices such as paprika, cumin, turmeric powder, and minced garlic which all offer antioxidant and anti-inflammatory properties that can help boost immunity.

If you’re using wooden skewers be sure to soak them in water for at least 10 minutes to prevent them from scorching.

Layer the ingredients on the skewers and place them in the air fryer basket.

Side salads and pita bread with dip make great side dishes for kebabs.

Air Fryer Chicken Kebabs

No ratings yet
Prep Time 10 minutes
Cook Time 20 minutes
Course Main Course
Cuisine Mediterranean
Servings 4

Equipment

  • cutting board
  • knife
  • Air Fryer

Ingredients
  

  • 1 lb boneless chicken thighs (or chicken breasts)
  • 1 each red bell pepper
  • 1 each small red onion
  • 1 cup cherry tomatoes

Chicken marinade

  • 1/4 cup olive oil
  • 1 tbsp honey note: you can use agave nectar or sugar
  • 1/2 tsp paprika
  • 1/2 tsp cumin
  • 1/2 tsp cardamom
  • 1/2 tsp dried oregano
  • 1/2 tsp turmeric powder
  • 1 tbsp minced garlic
  • 1 tsp salt
  • 1 tsp pepper
  • 2 tbsp juice of a lemon

Instructions
 

  • If using wooden skewers, soak them for at least 10 minutes
  • Cut the chicken into 1.5 inch chunks. Mix together the marinade and marinate the chicken overnight or at least 30 minutes prior to cooking
  • If using the oven, preheat oven to 425F
  • Cut the bell peppers and red onion into chunks
  • Assemble the kebabs using skewers. Layer the chicken with the veggies.
  • Place in the air fryer and cook at 360F for 15-18 minutes (until internal temperature is 165F). If using the oven, cook for 20-25 minutes, until the outer edges are golden brown and chicken is cooked through an internal temperature of 165F)
  • Serve with your choice of sides and sauces. Examples: salad, pita, couscous, rice pilaf, or tortillas, etc

Video

If you love this recipe, check out these other recipes we know you’ll love too:

Posted on

Easy Air Fryer Steak Kebabs Recipe

Air fryer steak kebabs are such a fun and great meal that you can enjoy with friends or family. Everybody loves eating food on a stick, especially kiddos! It’s also a great way to pack flavor and healthy ingredients together on a skewer. 

Ease of Making: Easy

Kebabs are traditionally cooked on a skewer over a fire or baked in an oven so that it can roast.  Roasting is one of the healthiest ways to prepare your meals because it results in minimal losses of vitamins and nutrients.

Advantages of roasting:

  • Good quality meat is tender when roasted
  • Vegetables maintain their heart-healthy fiber and vitamins and minerals for fighting disease
  • Food is more appealing because it has a desirable texture and color by turning crispy and golden brown
  • Unlike stovetop methods such as sauteing or stir-frying, It is a cooking method that allows you to be hands-free and requires minimal involvement in the cooking process

Using a roasting pan in an oven is usually the best way to roast food because it allows the oven heat to reach as much of the surface of food as possible and allows the air to circulate. 

However, if you don’t have a roasting pan and don’t want to wait to heat up your large oven, then an air fryer will do perfectly. It has a basket that holds food similar to a roasting rack and the fan allows the air to circulate the heat evenly around the food giving it that golden brown crisp.

Meal prep tips for Air Fryer Steak Kebabs

  • Cooking air fryer steak kebabs is not only a time saver, but cleanup is also incredibly easy, and it also tastes amazing.
  • Make sure to measure your air fryer to check that your skewers you are using actually fit inside of your air fryer. 6 to 8-inch skewers tend to fit best in most air fryers. And if you are using wooden skewers, make sure to soak them in water for at least 10 minutes to keep them from burning
  • When cutting veggies, make sure they are all the same size chunks the meat so that they all cook evenly. Use a variety of colorful vegetables like bell peppers and even add fruit such as pineapple
  • One of the best cuts of beef for kebabs is the Sirloin cut. It is relatively tender, lean, and fits into a balanced diet. In addition, it is budget-friendly. Other good beef choices are flat iron, strip steak, and even tenderloin.
  • Sometimes using a leaner cut of meat can result in dry tough meat. Therefore, marinating your meats prior to cooking is a good technique to prevent it from drying out and making it chewy. This marinade combines pantry friendly items such as Worcestershire sauce, soy sauce, dijon mustard, and spices such as oregano and garlic powder. One of the tasty components that result from marinating meat is getting that distinct flavor from a good golden brown crust when the protein cooks. Adding a sweet component such as honey yields in that delicious crust when cooked at high heat.

Air Fryer Beef Kebabs

Kebabs are such a fun and great meal that you can enjoy with friends or family. Everybody loves eating food on a stick, especially kiddos! It’s also a great way to pack flavor and healthy ingredients together on a skewer.
No ratings yet
Prep Time 5 minutes
Cook Time 15 minutes
Course Appetizer, Main Course
Cuisine American
Servings 4

Equipment

  • cutting board
  • knife
  • Air Fryer

Ingredients
  

  • 1 lb lean top sirloin
  • 1 each yellow bell pepper
  • 1 each small red onion
  • 1 cup cherry tomatoes

Beef marinade:

  • 2 tbsp worchestershire sauce
  • 2 tbsp soy sauce
  • 1 tbsp olive oil
  • 1 tbsp dijon mustard
  • 1 tbsp minced garlic
  • 1/2 tsp dried oregano
  • 1/2 tsp pepper
  • 1 tbsp brown sugar note: you can use honey, agave nectar or white sugar

Instructions
 

  • If using wooden skewers, soak them for at least 10 minutes
  • Cut the beef into 1.5 inch chunks. Mix together the marinade and marinate the beef overnight or at least 30 minutes prior to cooking
  • If using the oven, preheat oven to 425F
  • Cut the bell peppers and red onion into chunks
  • Assemble the kebabs using skewers. Layer the skewer by alternating the beef with the veggies.
  • Place in the air fryer and cook at 400F for 8-10 minutes. If using the oven, cook for 10-12 minutes, until the outer edges are brown and beef is cooked to an internal temperature of 145F
  • Serve with your choice of sides and sauces. Examples: salad, pita, couscous, rice pilaf, or tortillas, etc

Video

If you love this recipe, check out these other recipes we know you’ll love too:

Posted on

Meal Prep Salmon With Butternut Squash Noodles

This meal prep Baked Salmon with Parmesan Butternut Squash Noodles is easy and simply perfect for a light and refreshing weekday lunch. It’s a great low carb meal with minimal ingredients that you can make in less than 20 minutes.

Easy of Making: Easy

When it comes to eating healthy, it’s all about including a balance of proteins, veggies, smart carbs, and healthy fats. This meal delivers a powerhouse of nutrients that will help you meet your health goals.

Salmon is a great source of protein that will help you keep full longer. It is also rich in healthy fats such as Omega-3 Fatty acids which may promote weight loss and decrease belly fat. Salmon is also high in B Vitamins which is important in helping the food you eat into energy, creating and repairing DNA, and reducing inflammation that can lead to heart disease. It is also tasty, versatile, and widely available. 

This baked salmon is paired with a superfood medley of butternut squash spirals, cherry tomatoes, and arugula. Butternut squash is a low calorie, low carb, a sweet, and nutty ingredient that makes a great addition to many savory recipes and is packed with vitamins, minerals, fiber, and antioxidants. Antioxidants help prevent cellular damage and reduce inflammation which may reduce your risk of several chronic diseases. 

To add flavor and pack it with even more nutrients, we mixed it in with arugula that has a distinctive peppery flavor and a great source of calcium and folate. The addition of tart flavors from the cherry tomatoes pair well with the savory and nutty flavors of this recipe.

So not only is this recipe tasty, but it is also packed with nutrients to help you meet a healthy and balanced diet.

Meal Prep Tips for Baked Salmon with Parmesan Butternut Squash Noodles:

How to pick the right salmon:

There are several types of salmon, such as pink salmon, red salmon, and Atlantic salmon. Any of these types can taste delicious in the oven. 

You do however want to make sure you choose a filet with firm flesh when you are buying at the store. When you gently press the fillet with your finger, it should spring back. You also want to avoid any fish that are dark around the edges or brown/yellow discoloration. And be sure to smell the fish. It should smell like saltwater or the sea smell and not have a strong fishy smell.

Baking salmon delivers soft, juicy, and tender salmon on the inside with crispy edges. 

The key to evenly cooking the fish is to let it sit on the counter for a few minutes until it comes to room temperature, otherwise, other parts of the fish might overcook while the other parts are still raw.

How to use frozen salmon:

If you are using frozen fish, be sure to let it defrost in the refrigerator overnight and also allow it to come to room temperature before baking.

The great thing about salmon is that you don’t need a lot of seasonings to make it taste good. However, you don’t want to add salt too early, otherwise, it will draw out the moisture if left for an extended period of time. For best results, salt the salmon right before you place it in the oven to cook.

Fish cooks fairly quickly, however, cook time will vary depending on the thickness. The thickest part of the salmon should look opaque and the layers within the salmon should flake apart easily.

Baked Salmon with Parmesan Butternut Squash Noodles

This Baked Salmon with Parmesan Butternut Squash Noodles is easy and simply perfect for a light and refreshing weekday lunch. It’s a great low carb meal with minimal ingredients that you can make in less than 20 minutes.
No ratings yet
Prep Time 5 minutes
Cook Time 15 minutes
Course Main Course
Cuisine American, Italian
Servings 2

Ingredients
  

Salmon

  • 12 oz salmon
  • 1/2 tsp garlic powder
  • 1/2 tsp onion powder
  • 1/2 tsp salt
  • 1/2 tsp red chili pepper flakes
  • 1 tbsp olive oil

Squash Noodles

  • 10 oz butternut squash noodles
  • 1 cup cherry tomatoes
  • 2 cups arugula
  • 1 tsp minced garlic
  • 1 tsp garlic powder
  • 1 tsp salt
  • 1 tbsp olive oil
  • 1/4 cup shredded parmesan cheese (optional)

Instructions
 

Pre-Cook (Mise En Place):

  • Gather your equipment: cutting board, knife, sheet pan, parchment paper, skillet, tongs
  • Pre-heat oven to 400F
  • Mince garlic, slice cherry tomatoes in half
  • Marinate the salmon with the seasonings and olive oil. Place on sheet pan lined with parchment paper

Cooking Method:

  • Place salmon in the oven and bake it for 10-15 minutes
  • Add olive oil to a skillet on medium high heat. Saute the garlic and butternut squash noodles for 3 to 5 minutes. Add seasonings and continue to stir until butternut squash is tender
  • Add fresh tomatoes and arugula
  • Top off the noodles with shredded parmesan cheese
  • Serve the salmon on top of the noodles. Eat and enjoy!

Video

If you love this recipe, check out these other recipes we know you’ll love too:

Posted on

How To Make Pan-Fried Eggplant With Meat Sauce

eggplant and marinara sauce

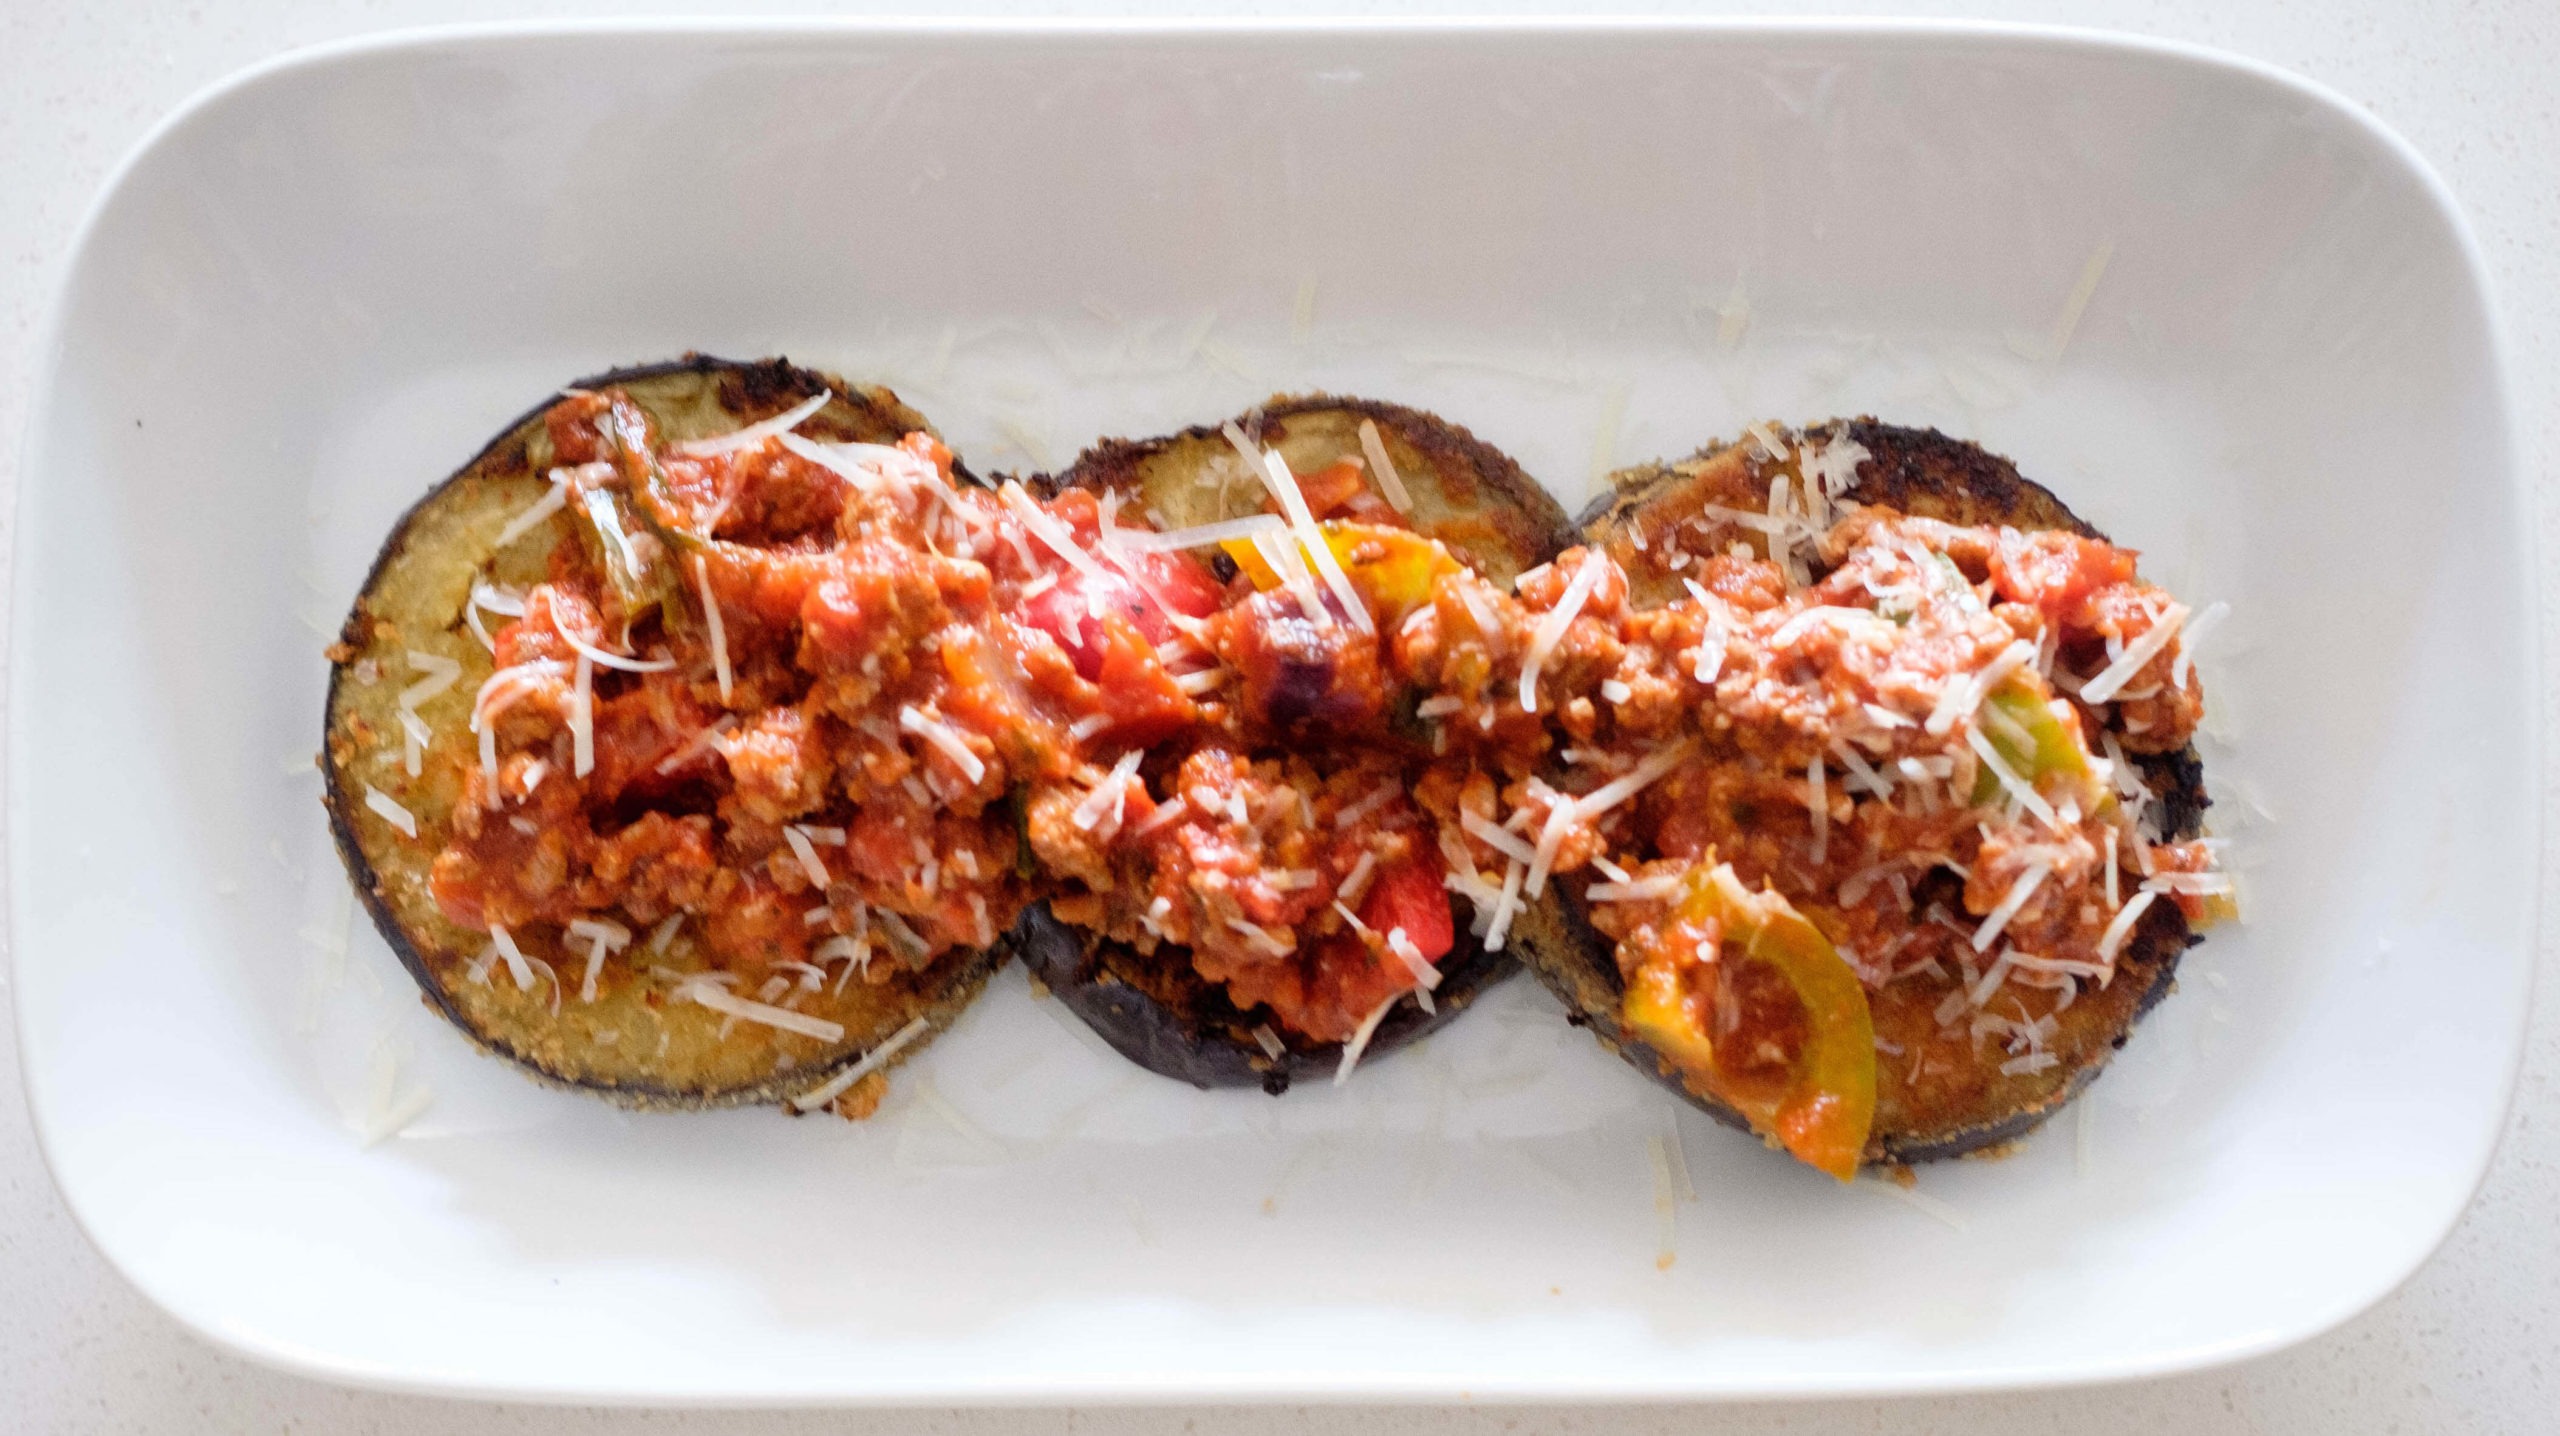
Pan-fried eggplant with meat sauce is a delicious and healthy option if you’re craving the heartiness of an Italian meat but looking to reduce the carbs you would normally find with pasta as the main ingredient. The fried eggplant slices come to a golden crisp and are topped with our homemade sauce and of course, some cheese. 

Ease of Making: Medium

This eggplant milanese is brought together by dredging your eggplant in a combination of egg wash and seasoned breadcrumbs. You don’t need any flour to fry eggplant in this recipe. If you’re concerned about your eggplant absorbing oil when cooking, you can salt the eggplant or soak it in milk ahead of time to break down the plant and break down the porous structure of the plant. 

Eggplant has many fantastic benefits like increasing brain function, preventing anemia, helping with digestion and improving heart health. It’s high fiber content can lead the way to reducing the cholesterol in your system by binding it to the bile in your digestive system and removing it naturally. 

Preparing Your Eggplant for Cooking

Before you begin your cooking process, you’ll want to remove the stem, leaves and the top and bottom of the plant. You can leave the skin on or remove it, that’s totally up to you. For this recipe it is important to salt the eggplant. Salt helps bring out the extra moisture that can provide a mushy and soggy result when cooked. Slice your eggplant into circles and salt both sides, letting it sit on a kitchen towel or paper towel  for at least twenty minutes. 

Historically, eggplant was actually salted before cooking to reduce some of the bitter flavor that came with the plant. However, the eggplants we have now have mostly bred out the bitterness. 

What are the Different Types of Eggplant

There are countless varieties of eggplant that can vary widely in shape, size and even color. Most common at American grocery stores, is you guessed it, the American eggplant. This eggplant is also known as the globe eggplant and has a tougher, meatier texture than other eggplants. 

Some other varieties of eggplant:

Graffiti Eggplant – Slightly sweeter than the traditional eggplant, the graffiti eggplant is most recognizable by its purple and white striped skin. Which is why it is also known as striped eggplants.  This variation is great for eating pureeing, eating whole or substituting in for traditional eggplant if you need. 

Japanese Eggplant – Both the Japanese and Chinese eggplants vary from traditional varieties in their long, oblong shape. The Japanese variation of eggplant is deep in it’s purple color and has a creamy flesh that works great in stir frys. 

Fairy Tale Eggplant – Similar in color to the graffiti eggplant, the purple and white striped fairy tale eggplant is small and can fit in the palm of your hand. Due to the tender nature of this variety, it is wonderful for grilling. 

White Eggplant – There isn’t a lot of difference between the classic American eggplant or  “Globe Eggplant” other than the color that the plant is wrapped in. Both the  white and American eggplant have a  smooth creamy skin and meaty flesh. These are great for both bread and protein substitutes. 

Indian Eggplant – The Indian Eggplant is a dark, reddish-purple in color and more spherical than other varieties you may come across. The texture in the Indian eggplant is different from other varieties as it is more tender, making it perfect for roasting, soups, stews and more. 

Little Green Eggplant – A fantastic eggplant for baking, the little green eggplant, is a bright green variety of this “fruit” and is most known for being mild and sweet in flavor. 

Thai Eggplant – Thai eggplant is round, small in size, and traditionally hard to find. These miniature eggplants are typically a greenish-white color with a light pink flesh. Most notably, Thai eggplant is more bitter than other varieties, to remove some of the bitterness you can try removing the seeds. If you’re able to score some at your local market, try throwing a few in our recipe for Thai Red Beef Curry.

There are countless other varieties and heirloom versions of each that are available to eggplant lovers across the world. Try experimenting with the various types when you’re making something new and see which you like best!

Eggplant FAQ

What is the best time of year for eggplant?

Eggplant is available year-round but it’s peak season runs from July to October. 

How to store eggplant?

Eggplants can’t withstand temperatures below 45 degrees Fahrenheit so storing in the refrigerator can sometimes be counterproductive. If you choose to do so, store it in the vegetable drawer or the warmest part of your fridge. Eggplants can also be kept out of the fridge, which may actually help increase their lifespan. Store in an area that is cool and away from direct sunlight. 

How to choose an eggplant?

Due to the fact that there are many varieties of eggplants and each is slightly different, a general rule of thumb is to look for a firm, shiny skin. Avoid eggplants that have started to wrinkle or have soft, brown spots on their skin.  Eggplants should feel heavy and not hollow. 

Is eggplant a fruit or vegetable?

Most people are under the assumption that eggplants are vegetables, but in fact they are fruits!

Do I need to peel eggplant before cooking?

Nope! The skin on eggplant is entirely edible and removing it is more of a preference of the person eating it.

Meal prep tips for Pan-Fried Eggplant

  • Salt your eggplant – this will help reduce moisture and prevent a soggy outcome. 
  • When reheating your pan-fried eggplant, toss it in the oven or an air fryer if you have one to crisp it back up.
  • Soak in milk – soak your eggplant for up to an hour before cooking to help reduce oil absorption when frying. 
  • Microwave before cooking – this is another tactic for reducing oil absorption when frying, as pre-cooking helps break down the spongy texture. 
eggplant and marinara

Pan-Fried Eggplant with Meat Sauce

No ratings yet
Prep Time 5 minutes
Cook Time 20 minutes
Course Main Course
Cuisine Italian
Servings 2

Equipment

  • knife
  • cutting board
  • spatula
  • saute pan

Ingredients
  

Meat Sauce

  • 10 oz lean ground beef
  • 1 cup marinara sauce
  • 1/4 cup white onions (diced)
  • 1/2 each green bell pepper (cubed)
  • 1/2 each red bell pepper (cubed)
  • 1 tbsp olive oil
  • 1/8 tsp garlic powder
  • 1/8 tsp salt
  • 1/8 tsp pepper

Eggplant

  • 1/2 each eggplant
  • 1 each large eggs
  • 1/4 cup breadcrumbs
  • 1/8 tsp garlic powder
  • 1/8 tsp onion powder
  • 1/8 tsp salt
  • 1 tbsp olive oil

Instructions
 

Meatsauce

  • Add olive oil to a saute pan on medium high heat and saute the onions and bell peppers until they soften
  • Add the ground beef and break it into pieces. Saute until it is golden brown and fully cooked (about 5 to 7 minutes)
  • Next, add the marinara sauce and mix it well. Let it simmer on low for 5 to 7 minutes

Eggplant

  • Next, slice the eggplant into 1/2 inch rounds
  • Prepare the egg wash by scrambling the eggs in a bowl large enough to fit the eggplant
  • Prepare the breadcrumbs and seasonings in another large bowl
  • Dip the eggplant slices in the egg wash, then dredge it in the breadcrumbs, making sure all sides are fully coated
  • In another pan, add oil on medium high heat and place the eggplant slices in the pan
  • Cook on each side for about 2 to 3 minutes until it is golden brown all around
  • Top off the eggplant slices with the meat sauce

Notes

Optional: Top it off with shredded parmesan cheese

Links to other recipes:
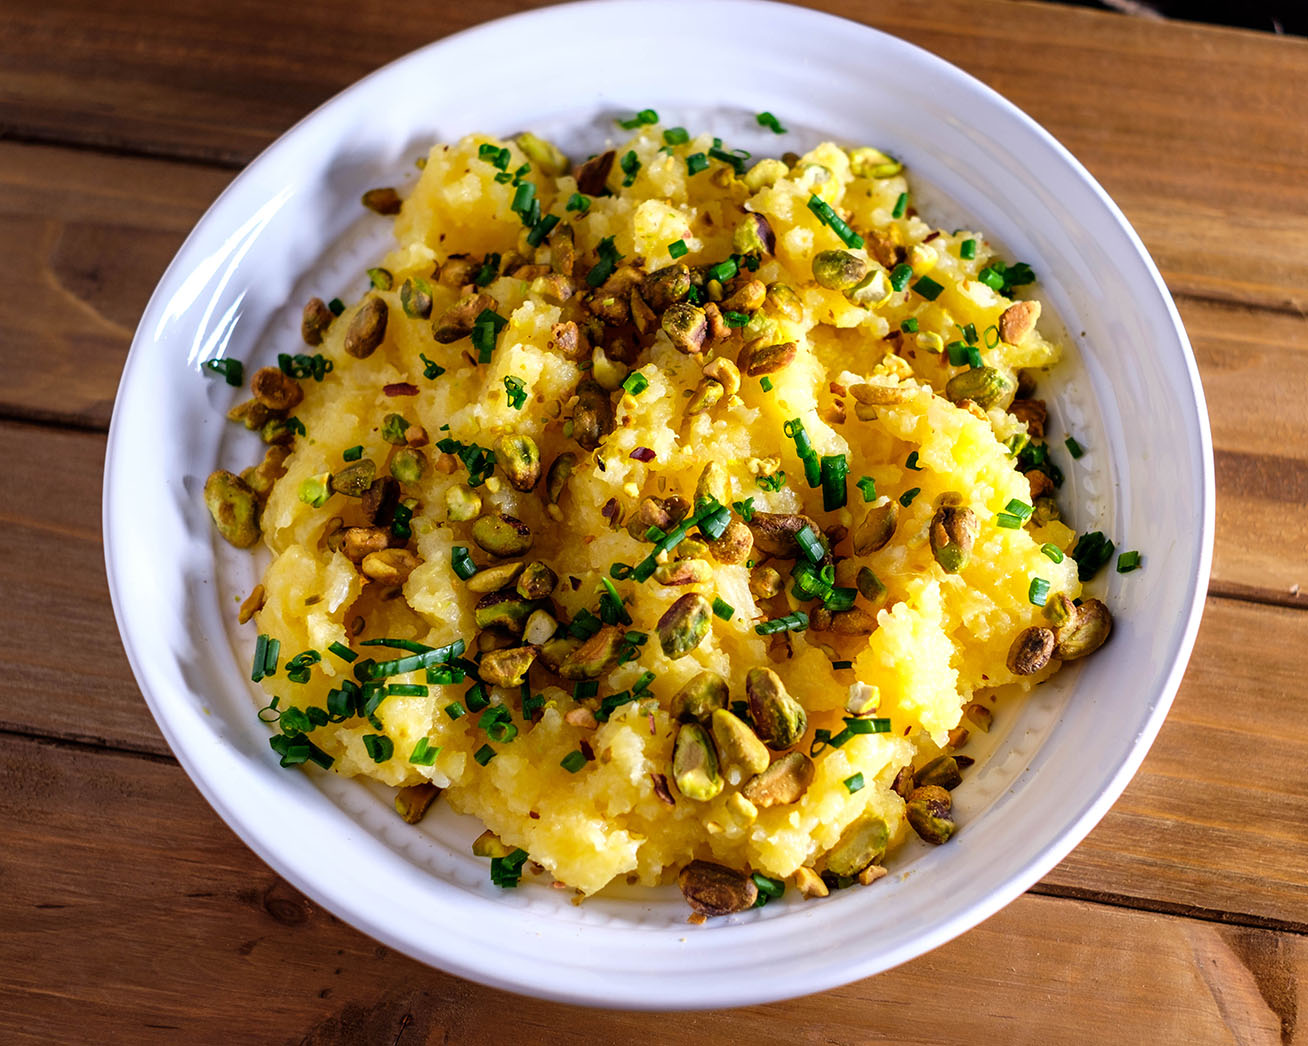
Posted on

Homemade Lemongrass Beef Stew Recipe

beef stew

Instant Pot’s can be a lifesaver when you’re short on time but want to pack big flavors into a meal. It does just that with this Vietnamese inspired lemongrass beef stew. This quick to prepare and painless to cook meal is vibrating with the flavors of lemongrass (obviously), garlic, anise, clove and bay leaves and other spices. Arguably, the instant pot is the best way to make beef stew from scratch, but if you have more time, you can make this in a clay pot or a dutch oven and let it slow cook as well. 

Ease of Making: Easy

How to Make Lemongrass Beef Stew

A take on a Vietnamese classic, Bo Kho (Vietnamese beef stew), this instant pot stew may just become an instant pot classic in your kitchen. Beef stews are known for their deeply braised beef and aromatic flavors. Traditionally they would be prepared in a clay pot that helps enrich the soup with the savory and sweet flavors. However, we will use an instant pot in this recipe. Instant pots cut the cooking time for beef from hours to under an hour. 

How to Cook Lemongrass Beef Stew

There’s not a whole lot you have to do to cook this lemongrass stew with the exception of layering in the beef, seasonings, and water. Close the lid and turn your sealing knob to the locked position. Let the soup cook for 35 minutes before turning off the heat and giving your instant pot time to release, about 10 more minutes. Add in your bok choy and other veggies or toppings you might like and serve or portion in containers to use throughout the week, 

How can I make my stew more flavorful?

Bland stew got you down? We use the Instant Pot to enrich deep flavor into our soup. Using a pressure cooker helps speed up the process of building depth. 

Meal Prep Tips for Lemongrass Beef Stew Recipe

  • Serve over noodles or rice for added heartiness or carbs needed to reach your goals. 
  • Use the beef to make a sort of beef banh mi sandwich with some pickled veggies like cucumber and carrots. 
  • Serve over a salad for a lighter variation of the meal. 
beef stew

Instant Pot Lemongrass Beef Stew

No ratings yet
Prep Time 5 minutes
Cook Time 40 minutes
Course Main Course
Cuisine Asian, Vietnamese
Servings 4

Equipment

  • knife
  • cutting board
  • mallet
  • Instant Pot

Ingredients
  

  • 1.5 lbs chuck roast chunks
  • 8 oz mushrooms (sliced)
  • 1 bunch fresh basil leaves
  • 1 bunch bok choy (rinsed, cut into chunks)
  • 1.5 cups water
  • 3 each garlic cloves (peeled)
  • 1-2 sticks lemongrass (4 inch length)
  • 1 each onion (sliced)
  • 1 each clove
  • 1 each star anise
  • 2 each bay leaves
  • 1/4 tsp cinnamon
  • 1/2 tsp garlic powder
  • 1/2 tsp onion powder
  • 1/4 tsp pepper
  • 2 tsp salt or fish sauce

Instructions
 

  • Place the beef at the bottom of the pan. Use a mallet to crush the lemon grass stick and place it in the pan
  • Next, add the bay leaves, seasonings, onions, garlic, mushrooms, and fresh basil leaves.
  • Then, pour over the water.
  • Close the lid, turning the venting knob to the sealing position. Cook on high pressure for 35 minutes.
  • After it has cooked, allow 10 minutes for natural release before doing a quick release. Carefully remove the lid.
  • Then, add the bok choy into the stew. Stir until it has wilted. Top it off with any other fresh veggies and sauces such as sriracha or hoisin sauce. Eat and enjoy!

If you love this recipe, check out these other recipes we know you’ll love too:

Posted on

Easy Steak And Mushrooms Recipe

Steak and Squash

Our steak and mushrooms with squash and chive pesto recipe, isn’t only a mouthful to say but also to eat. This well rounded meal is perfect for summer or fall when you have access to beautiful squash. If you live somewhere where you can get good quality squash year round, lucky you, you can make this recipe all year. Not only is this recipe healthy, quick and easy to make but it’s also budget friendly. Our recipe accommodates any type of beef steak you’d like. We like to stock up on good roasts when they are on sale and then slice and freeze them individually. Depending on your freezer, steak can last 4-12 months when frozen. 

Ease of Making: Easy

How to Make Steak and Mushrooms with Squash and Chive Pesto

Steak and mushrooms are two common flavors that you’ve likely seen before for most meals. You can find this combination on breakfast menus, in burgers or at your favorite steak house. To bring the flavors home and give yourself a hearty treat, we’ve paired our steak and mushrooms with a bright and refreshing zucchini squash and chive pesto. 

How to Cook Steak and Mushrooms

First, start by seasoning your steak with garlic powder and salt and add to a pan with oil. Cooking at medium high heat. For this recipe, we opt to sear the steak on both sides and then cook until done.

To cook the mushrooms for steak, remove cooked beef from the pan and place on a serving dish. Using the same pan add more oil and saute the mushrooms until brown.

How to Tell if Your Steak is Done

Nailing the perfect cook on your steak is something most chefs aim to do in the kitchen. After all, nobody who prefers their steak well done is going to be okay with a still mooing piece of rare steak when served. To test out where your steak is in the cooking process, take your finger and press firmly into the steak and look for these qualities:

  • Rare – a rare steak is extremely soft and will keep an indent after you’ve touched it with a finger.
  • Medium rare – these steaks will feel soft and springy
  • Medium – touch your steak to see if it springs back to the touch, if it has a quick spring back you’ve nailed the medium cook. 
  • Medium well – a medium-well steak will be mostly firm with a hardly noticeable spring left in it when you touch it. 
  • Well done – steaks that are completely cooked through will be firm to the touch. 

Or use a meat thermometer:

  • Rare- 140℉
  • Medium rare – 145℉
  • Medium – 160℉
  • Medium well – 165℉
  • Well done – 170℉

Please note that the USDA recommends cooking to at last 145F to avoid increased risk of food borne illness. 

How to Prepare Squash

Squash is a delicate vegetable that can get soggy when sliced too thin or combined with too much oil. We like to slice our squash into half circles that are about a quarter inch thick. Do this by trimming the ends of your squash and slicing lengthwise through the vegetable until you have two even halves. Then you’ll slice widthwise along your squash to make the half coin.

Place your squash on a baking sheet and season with garlic powder and salt. Drizzle with olive oil and bake for 10-15 minutes.

How to Make Chive Pesto

Pestos are an easy to make sauce that traditionally are found with pine nuts, salt, basil, and garlic. To make our chive pesto, add chives, garlic, olive oil, and 1 tsp of salt to a blender. Puree until smooth. If you notice the pesto is too thick you can add more olive oil and blend until you reach your desired consistency. When finished, add to your cooked squash. 

Meal Prep Tips for Steak and Mushrooms

  • If you want to spice up your steak with pepper or additional seasonings, do it after the sear to ensure the spices do not burn. 
  • Pat the steak dry before cooking to get a nice crust. 
  • Have your meat thermometer handy to prevent any overcooking. 
Steak and Squash

Steak & Mushrooms With Squash and Chive Pesto

No ratings yet
Prep Time 5 minutes
Cook Time 20 minutes
Course Main Course
Cuisine American
Servings 2

Equipment

  • knife
  • cutting board
  • tongs
  • spatula
  • blender
  • saute pan
  • indoor grill pan

Ingredients
  

Steak and vegetables

  • 12 oz sirloin steak (recommend thinly sliced)
  • 1/4 tsp garlic powder
  • 1/4 tsp salt
  • 1/4 tsp pepper
  • 1 each yellow squash (sliced)
  • 1 cup mushrooms (sliced)

Chive Pesto

  • 1 bunch chives
  • 3 cloves garlic (peeled)
  • 1 each lemon
  • 1/4 cup olive oil
  • 1 tsp garlic powder
  • 1 tsp salt

Instructions
 

  • Pre-heat oven to 400F
  • Slice squash into half coins (1/4 inch thick). Place on a sheet pan and season with a pinch of salt and garlic powder. Drizzle with 1 tbsp of olive oil
  • Place squash in the oven and bake for 10-15 minutes.
  • Meanwhile, season the steak with garlic powder, salt, and pepper. Coat it with olive oil
  • Pre-heat the indoor grill pan on medium-high heat and sear the steak on each side for about 3 to 5 minutes until it reaches your desired doneness
  • After the steak cooks, remove it from the indoor grill pan. Add the sliced mushrooms and grill them until they soften (about 3 to 5 minutes). Toss them around so that it fully cooks

Chive Pesto

  • Add chopped chives, garlic, lemon juice, olive oil, and salt to a blender. Puree until smooth. Add more olive oil if it is too thick. Add salt to preferred taste. Then, spoon some of the sauce on top of your veggies and use it as a dip for your steak

If you love this recipe, check out these other recipes we know you’ll love too:

Posted on

Easy Balsamic Baked Chicken Recipe With Zucchini

Easy Balsamic Baked Chicken Recipe With Zucchini

There’s something about the sweet tang of a balsamic glazed chicken breast that really gets our mouth watering. Our balsamic baked chicken with zucchini is easy to make and even easier to enjoy. You’ll also only use one bowl and a sheet pan when cooking which helps to keep the kitchen clean and the chef happy. Most people love to cook but we’ve never met someone that actually enjoys washing the dishes, which is why we turn to sheet pan meals quite frequently. Check these other ideas out:

Easy of Making: Easy

This baked balsamic chicken will be an instant staple in your kitchen once you get a taste of our sticky glaze, that is baked onto the chicken and caramelized. 

How to Make Balsamic Baked Chicken with Zucchini

Our juicy and tender balsamic chicken is a fan favorite and can be thrown together in a matter of minutes, giving you time to enjoy time with your family or catch up on your favorite tv show. Served alongside zucchini and roasted cherry tomatoes that will have your mouth bursting with flavor, this dish is sure to please even the pickiest of taste buds.

 How to Cook Balsamic Baked Chicken

Start by seasoning you chicken in a bowl with thyme, garlic powder, salt, and coat with olive oil. Mix well and place in a baking dish. Bake for 30 minutes and remove chicken from the oven. 

Using a basting brush, paint the chicken with balsamic glaze. For this recipe, you can use a store bought balsamic glaze or make your own. To make your own, simply simmer balsamic vinegar in a separate pan and reduce until thick enough to coat the back of a spoon. 

Once your chicken is coated, put it back in the oven to bake for another 15 minutes until the chicken reaches an internal temperature of 165F. Remove from the oven and enjoy!

How to Cook Zucchini and Roasted Tomatoes

Slice zucchini into 1/4 inch half coins or circles, by slicing the squash in half lengthwise. When you have two even halves, slice quarter inch slices across the width of the zucchini. After your zucchini is prepped, slice cherry tomatoes in half and mince your garlic. 

Add the zucchini, tomatoes, and garlic combination to the top of the chicken once you’ve removed it from the oven the first time and basted it with the balsamic glaze. 

Meal Prep Tips for Balsamic Baked Chicken with Zucchini

  • Save some of your balsamic glaze to put on top of your meal before you reheat it throughout the week. 
  • Add a starch like rice, quinoa or even cauliflower rice to round out the meal.
Easy Balsamic Baked Chicken Recipe With Zucchini

Balsamic Baked Chicken With Roasted Zucchini

Sheet-pan balsamic chicken makes for a quick, flavorful and easy meal no matter the day of the week.
No ratings yet
Prep Time 5 minutes
Cook Time 40 minutes
Course Main Course
Cuisine American, Italian
Servings 4

Equipment

  • knife
  • cutting board
  • baking dish

Ingredients
  

  • 4 each chicken thighs
  • 1 each zucchini
  • 1 cup cherry tomatoes
  • 3 cloves garlic
  • 2 tbsp balsamic glaze
  • 1 tsp dried thyme
  • 1 tsp garlic powder
  • 1 tsp salt
  • 1 tbsp olive oil

Instructions
 

  • Pre-heat oven to 400F
  • Slice zucchini into 1/4 inch half coins, slice cherry tomatoes in half, mince garlic
  • In a bowl, season chicken with thyme, garlic powder, salt, and coat with olive oil. Mix well and place in a baking dish.
  • Bake in the oven for 30 minutes. After 30 minutes remove it from the oven.
  • Using a brush, carefully baste the chicken with balsamic glaze. Add zucchinis, cherry tomatoes, and garlic on top. Season with salt.
  • Place it back in the oven to cook for another 15 minutes until the chicken reaches an internal temperature of 165F.
  • Remove from the oven. Eat and enjoy!

Notes

Note: After the chicken cooks, you can split the recipe in half and shred half of the chicken meat, and use it as your protein for a lunch salad or in a sandwich.

If you love this recipe, check out these other recipes we know you’ll love too: