Posted on

Easy Stuffed Poblano Peppers

stuffed poblano pepper

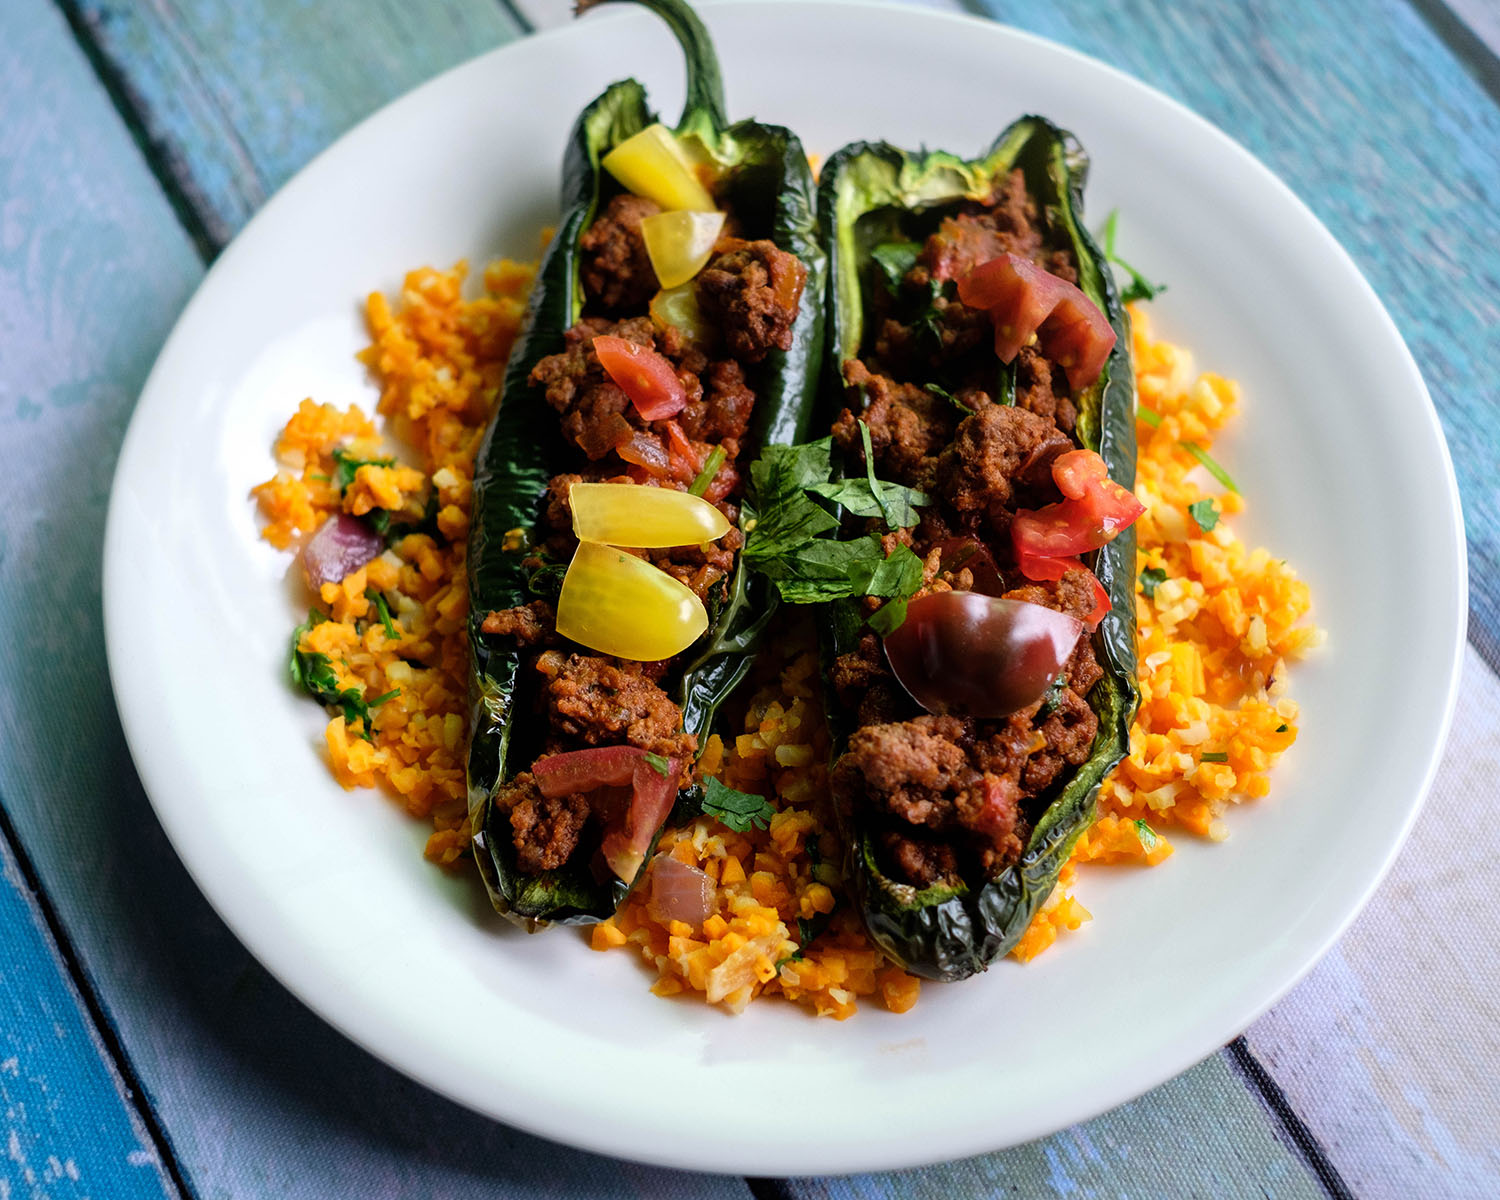
Easy, baked southwest stuffed pepper recipe with ground beef. Bold, savory flavors are served on top of a bright and colorful cilantro sweet potato and cauliflower rice.

stuffed poblano pepper

Southwest Stuffed Poblano Peppers

No ratings yet
Prep Time 5 minutes
Cook Time 20 minutes
Course dinner, Main Course
Cuisine American, Latin, Mexican, Southwest
Servings 2

Equipment

  • knife
  • cutting board
  • sheet pan
  • saute pan

Ingredients
  

  • 2 each poblano peppers (cut in half, seeds removed)
  • 12 oz lean ground beef
  • 1/4 cup red onions (diced)
  • 8 oz fire roasted diced tomatoes (drained)
  • 4 oz diced green chiles (drained)
  • 1/4 tsp chili powder
  • 1/4 tsp cumin
  • 1/4 tsp garlic powder
  • 1/4 tsp salt
  • 1 tbsp olive oil
  • 3 cups sweet potato and cauliflower rice (recommend Green Giant's brand)
  • 1/4 cup cherry tomatoes (sliced)
  • 1/4 cup cilantro (chopped)

Instructions
 

  • Pre-heat the oven to 350F
  • Arrange the poblano peppers in a single layer on a sheet pan and bake for 10-15 minutes
  • Meanwhile, add oil to a pan on medium high heat and saute the onions until they soften
  • Next, add the ground beef and season with chili powder, cumin, garlic powder, and salt. Continue to saute for about 5 to 8 minutes until the meat is browned and cooked through
  • Then, stir in the roasted diced tomatoes and diced green chilies
  • Heat the sweet potato and cauliflower rice in the microwave according to the packaged instructions
  • Once the peppers have cooked from the oven, let them cool for a few minutes and carefully spoon in the ground beef mixture into each pepper half
  • Serve the stuffed peppers on top of the sweet potato and cauliflower rice
  • Garnish with fresh diced tomatoes and chopped cilantro

Notes

Note: Feel free to add additional toppings such as shredded cheese, guacamole, or sour cream. You can also add beans, corn, or other veggies to your ground beef mixture. 
Posted on

Pumpkin Cranberry Oat Crumb Bar

cranberry crumble

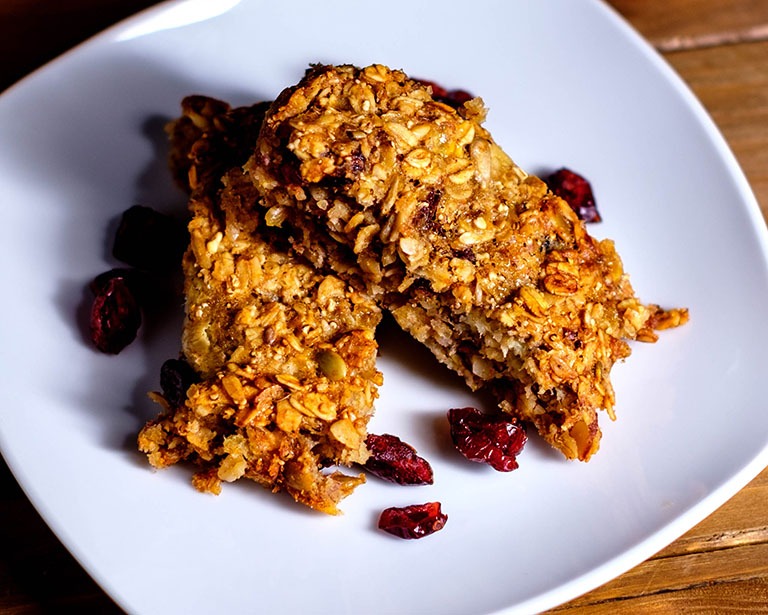
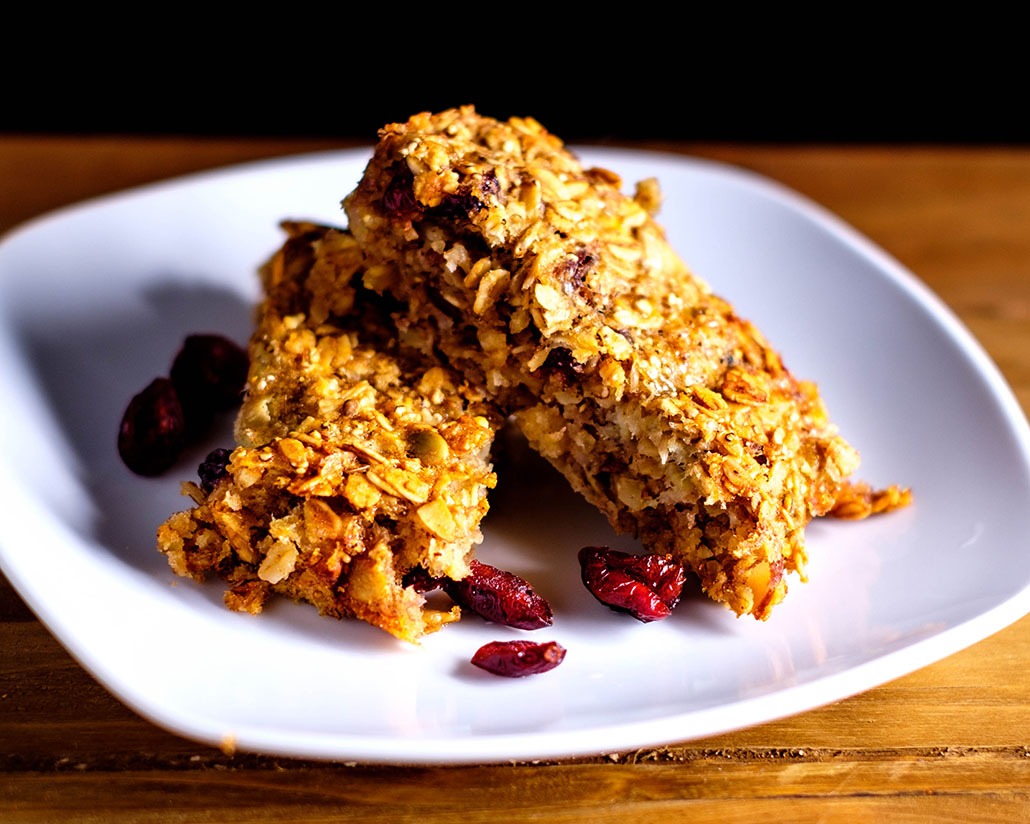
This Pumpkin Cranberry Oat Crumb Bar can easily lift your spirits with the satisfying flavor of something sweet, spicy, and warmth. 

Ease of Making: Medium

The texture is hearty with the rolled oats, chopped walnuts, and aromatic pumpkin spice. This dessert combines the best flavors of fall with pumpkin puree, dried cranberries, and vanilla extract.

Homemade oat bars are a nutritious, customizable, and cost-effective snack option that offers convenience and a sustainable alternative to store-bought bars. They are a great way to satisfy your hunger, boost your energy, and support a healthy lifestyle.

Making oat bars at home allows you to customize the recipe to suit your taste and dietary preferences. You can experiment with different flavors, textures, and add-ins like chocolate chips, coconut flakes, or spices. Oat bars can also be tailored to accommodate dietary restrictions such as gluten-free, dairy-free, or vegan options.

Oat bars are often made with nutritious ingredients like oats, nuts, seeds, dried fruits, and natural sweeteners. Oats are rich in fiber, vitamins, minerals, and antioxidants, making them a healthy choice for a snack. Store-bought granola bars or energy bars can be quite expensive, especially if you consume them regularly. Making oat bars at home is a cost-effective alternative.

Meal prep tips for Cranberry Crumb Oat Bar Desserts

  • Bring the butter to room temperature so that it is easier to cream together with the sugar
  • You can use either dried fruit or fresh cranberries with this recipe
  • Finely chop the walnuts so that they are easier to fold into the batter and no one gets a big chunk of walnut in their bite
  • Cool the crumb bar before trying to cut them
  • You can also freeze them and reheat them when you are ready to enjoy them
cranberry crumble

Pumpkin Cranberry Crumble Cake

No ratings yet
Prep Time 10 minutes
Cook Time 40 minutes
Course Dessert
Cuisine American
Servings 12

Equipment

  • mixing bowls
  • spoons
  • mixer

Ingredients
  

  • 1.25 cup all purpose flour
  • 1/4 tsp salt
  • 1/2 tsp baking soda
  • 1/2 tsp baking powder
  • 1 tsp pumpkin spice (or ground cinnamon)
  • 1/2 cup unsalted butter (softened)
  • 1/2 cup granulated sugar
  • 1/2 cup brown sugar
  • 2 tsp vanilla extract
  • 2 each eggs
  • 1 cup rolled oats
  • 3/4 cup chopped walnuts
  • 3/4 cup dried cranberries
  • 3/4 cup pumpkin puree

Instructions
 

  • Pre-heat the oven to 350F
  • In a bowl, add the softened butter and sugar and whisk them together until creamy
  • Next, add the eggs, pumpkin puree, and vanilla extract and whisk it together
  • Then, add the pumpkin spice, baking soda, baking powder, and salt. Pour in the flour in batches and continue to mix it all together
  • Afterwards, add in the rolled oats, cranberries, and chopped walnuts
  • Grease a baking dish and pour in the batter
  • Place it in the oven for 35-40 minutes until the center is fully cooked. Test it with a toothpick by inserting it into the center of the cake. If cooked, it should come out clean
  • Allow it to cool before slicing into bite size squares
Posted on

Easy Caribbean Chicken And Rice In The Oven

Oven-baked chicken and rice was a staple growing up in my household. I mean who doesn’t love baked chicken? My parents would whip up mouthwatering baked chicken thighs seasoned in a tasty rub served on top of fluffy soft rice. 

Ease of Making: Medium

This chicken and rice recipe adds an island flair using Caribbean spices such as allspice and cayenne pepper. It is served on top of turmeric-infused rice pilaf with sautéed aromatics such as onions, bell peppers, and minced garlic. 

And my favorite part of the dish is pairing it with diced pineapple. The sweet and tart flavors of the pineapple pair well the savory and spicy flavors of the Caribbean species. 

This is definitely a dish that is vibrant and full of flavor and a great twist on chicken and rice. 

Meal Prep Tips for Caribbean Chicken and Rice Recipe

Many recipes normally start with searing chicken on the stovetop and rendering out the fat to get it crispy and golden brown.

For this recipe, there is no need for that extra step because the seasoned chicken will roast in a hot oven and the oven will do all the work. 

If you want to keep it low fat, remove the skin or you can use boneless chicken breasts or boneless chicken thighs instead of chicken thighs in this recipe. Just be sure to reduce the amount of time you cook the chicken by about 10-15 minutes. Use a thermometer to make sure that the chicken has cooked to an internal temperature of 165F,

What rice should I use?

Long grained white rice is what you normally would use for rice pilaf, but you can also swap it out for brown rice or barley which are great whole grain options. If you want to keep it low carb, then use cauliflower rice as an option.

Caribbean Chicken with Turmeric Rice Pilaf

This recipe adds an island flair using Caribbean spices such as allspice and cayenne pepper. It is served on top of turmeric-infused rice pilaf with sauteed aromatics such as onions, bell peppers, and minced garlic.
No ratings yet
Prep Time 5 minutes
Cook Time 50 minutes
Course Main Course
Cuisine Caribbean
Servings 4

Equipment

  • knife
  • cutting board
  • roasting rack
  • sauce pan
  • spatula

Ingredients
  

Chicken

  • 1 cup pineapple chunks (can use fresh, frozen, or canned)
  • 4 each leg quarters
  • 1/4 tsp garlic powder
  • 1/4 tsp paprika
  • 1/4 tsp ground all spice
  • 1/4 tsp nutmeg
  • 1/8 tsp cayenne pepper
  • 1 tsp brown sugar
  • 1/2 tsp salt
  • 1/2 tsp pepper
  • 1 tbsp olive oil

Rice Pilaf

  • 1 cup uncooked long-grained rice (for low carb option: use 4 cups of cauliflower rice)
  • 2 cups water (omit if using cauliflower rice)
  • 1/2 cup white onions (diced)
  • 2 each garlic cloves (minced)
  • 1/4 cup red bell pepper (diced)
  • 1/4 cup green onions (chopped)
  • 1/4 tsp turmeric
  • 1/4 tsp garlic powder
  • 1/2 tsp salt
  • 1 tbsp olive oil

Instructions
 

  • Pre-heat oven to 400F. Marinate the chicken with the seasonings and coat with olive oil
  • Place the chicken in the oven for 35-45 minutes. Cook until it reaches an internal temperature of 165F.
  • Meanwhile, prepare the rice pilaf. Add oil to a saucepan on medium-high heat.
  • Add the onions to the pot and saute until it softens and turns translucent, then add the garlic, bell peppers.
  • Next, add the rice and seasonings. Mix well until the rice is toasted and fully coated with the seasonings. Then add the green onions.
  • Pour in the water and bring it to a boil. Once it reaches a rolling boil, reduce the leat to low heat and let it simmer. Cover the pot with a lid and let it cook for 15-20 minutes until the rice is tender. (Note: If you are using cauliflower rice, omit the water. Just saute the cauliflower rice on medium high heat for about 5 to 7 minutes until it is cooked and tender)
  • Once the rice is cooked, fluff it with a fork.
  • Serve the chicken with the rice pilaf. Top it off with fresh pineapple. Eat and enjoy!

Video

Easy Caribbean Chicken with Turmeric Rice Pilaf. This dish hits all the right spots with notes of sweet and savory flavors, coupled with a delicious rice side.

Notes

Note: After the chicken cooks, you can split the recipe in half and shred half of the chicken meat, and use it as your protein for a lunch salad or in a sandwich.

If you love this recipe, check out these other recipes we know you’ll love too:

Posted on

Mango Glazed Salmon with Red Pepper Couscous

Mango salmon is one of our favorite summertime dishes. Combining omega-3 rich salmon filets and our mango glaze, your taste buds will no doubt be wanting more. This recipe also calls for asparagus and couscous, giving you a perfectly balanced meal with healthy carbs, fats, and protein. The mango flavor pairs perfectly with salmon as the sweetness of the sauce balances the heartiness of the fish.

Asparagus is one of the best vegetables to pair with salmon because you can toss them both in the oven for the same cooking time and come out with a nicely timed meal, all on one sheet pan. Other vegetables that go well with salmon in the oven are green beans, squash, and peppers.

Easy of Making: Easy

Benefits of Salmon

Salmon boasts a wealth of nutritional benefits including B12, Vitamins A and D and Omega-3 fatty acids. While Vitamins A and D have been proven to help boost immunity and B12 keeps your body making DNA and nerves happy, the true hero of salmon is the Omega-3s. Omega-3s help keep the cardiovascular system in check, reducing artery inflammation, lowering cholesterol levels and maintaining a healthy blood pressure.

Salmon is also a fantastic option for your daily protein intake, providing high protein counts and low saturated fats. Protein is essential to the body to prevent muscle loss, and protect your bones, among various other benefits. 

Meal Prep Tips for Mango Glazed Salmon with Red Pepper Couscous

Choosing the right salmon filet:

Whether you’re shopping at your local fish market, or grocery store there are several tips for picking out the perfect filet of salmon to make for this recipe:

  1. Feel: Touch the salmon with your finger and check to make sure the flesh bounces back and does not leave a sign of your fingerprint. 
  2. Smell: Pick up your package and check for any smells that appear to be off. While salmon can have a fishy smell, ensure that your chosen package doesn’t smell spoiled or rotten. 
  3. See: Salmon should have a bright orange-red hue. Any salmon that starts to lose its color is likely past its prime. Another thing to look for is moisture, avoid any filets that appear to be dried out. 

How Long to Bake Mango Glazed Salmon

The exact timing for your salmon will depend on the thickness of your filet. We recommend starting with 10 minutes in the oven and then checking every minute thereafter. Salmon can overbake and dry out quickly so it’s important to keep an eye on it. The perfect salmon will flake to the touch of a fork or finger and be an opaque pink on the outside and slightly translucent in the center. 

Tip: When salting your salmon before baking, only do so right before adding to the oven. Doing too far in advance can draw out the moisture in the dish and leave you with a dry fish.

Mango Glazed Salmon with Red Pepper Couscous

This mango-glazed salmon recipe is quick and easy and full of flavor. It's the perfect busy weeknight meal.
No ratings yet
Prep Time 5 minutes
Cook Time 15 minutes
Course Main Course
Cuisine Asian, Mediterranean
Servings 2

Equipment

  • knife
  • cutting board
  • sauce pot
  • sheet pan

Ingredients
  

Salmon and Asparagus

  • 12 oz salmon
  • 6 oz asparagus
  • 1 tbsp hoisin sauce
  • 1 tbsp Saucy Lips Tangy Mango Sauce
  • 1/4 tsp garlic powder or 1 tbsp minced garlic
  • 1/4 tsp salt
  • 1 tbsp olive oil

Couscous

  • 1/2 cup dry couscous
  • 1 cup water
  • 1/4 cup green onions (diced)
  • 1/2 cup red bell pepper (diced)
  • 1/4 tsp salt
  • 1/4 tsp garlic powder or 1 tbsp minced garlic
  • 1 tbsp olive oil

Instructions
 

  • Pre-heat oven to 400F
  • Place salmon and asparagus on a sheet pan lined with parchment paper. Marinate salmon with hoisin sauce and mango sauce. Drizzle olive oil on the asparagus and mix well
  • Place salmon and asparagus in the oven for 10-12 minutes
  • Meanwhile, start cooking the couscous. Add oil to a heated sauce pan on medium high heat
  • Add green onions and green pepper to the sauce pan and saute until they soften.
  • Then, add water and bring it to a boil. Add the couscous and stir well. Once the water is boiling, turn off the heat and let the couscous absorb all the water (about 7 to 10 minutes)
  • Once the couscous is cooked, fluff it with a fork.
  • Remove the salmon and asparagus from the oven and serve with the couscous. Eat and enjoy!

If you love this recipe, check out these other recipes we know you’ll love too:

Posted on

Asian Glazed Salmon With Kale and Squash

There are many recipes you can use to prepare salmon, but one that never disappoints is an Asian baked salmon recipe. Our version of this is a baked sesame ginger salmon. The marinated salmon soaks up the flavors of the ginger sesame dressing and it is then baked to perfection in the oven alongside seasoned kale and butternut squash. This quick-and-easy salmon recipe also only uses one pan, which may be an even better benefit than the high sources of fiber and healthy fats you’ll find throughout this dish. We’ll take our Omega-3s with a clean kitchen any day. 

Ease of Making: Easy

All jokes aside, there truly are countless nutritional benefits to this meal. Salmon is packed with omega-3s, protein, B vitamins, potassium and more. It has also been known to reduce your risk of cancer, heart disease, joint problems and other medical issues or conditions. 

Then we have our kale and butternut squash, each nutrient dense on their own. Kale is known as one of the healthiest and nutritious foods on the planet, due to its low calorie content and high volume of vitamins and antioxidants. Kale has been linked to protection against diabetes, cancer, and heart disease and benefits digestion, skin, hair, eyes and more. 

Butternut squash didn’t want kale and salmon to have all the fun when it comes to benefiting your health, this winter vegetable is a great source of fiber, vitamins (A,C, B, E), calcium, magnesium and zinc

How to Cook Salmon

Salmon can be cooked in a multitude of ways; oven, stovetop, air fryer, broiled, etc. Each recipe may call for a different variation of cooking method. However, no matter the cooking method here’s a guide for getting your ideal doneness on the inside of the fish.

Salmon Temperature Guide

CookInternal Temperature
Rare120℉
Medium Rare125℉
Medium130℉
Medium Well135℉
Well Done140℉
Please note that the USDA recommends that salmon reaches an internal temperature of 145F to ensure food safety (measured with a cooking thermometer in the thickest part of the filet). Consuming salmon that does not reach the internal temperature of 145F can increase the risk of being exposed to foodborne illness. 

Salmon FAQ

What is a good side dish with salmon?

If kale and butternut squash doesn’t do the trick for you, try our Roasted Rainbow Carrots and Green Beans or Sautéed Brussel Sprouts.

What is the healthiest way to cook salmon?

Broiling is one of the healthiest ways to cook salmon, unlike some other fish, salmon’s natural oils prevent the fish from drying out when cooked this way. This cooking method also doesn’t require the addition of any fats like oil. 

Do you rinse salmon before cooking?

Depending on the freshness of your fish you may want to rinse it and pat dry. Fresh or hardly aged salmon is fine without a rinse. 

Do you season salmon before cooking?

Yes, but you want to season immediately before baking as salt can start to break down the proteins and draw out the moisture in salmon if it sits too long. 

Butternut Squash and Kale FAQ

How long to cook?

Cooking Time for Butternut Squash at 400F

CutTime
Butternut squash halved50-60 minutes
Butternut squash cubed35-45 minutes
Butternut squash diced15-20 minutes

Can you eat butternut squash without cooking it?

Yes, butternut squash can be consumed raw. Many people find that they like putting it in salads or smoothies. However, butternut squash contains a lot of beta-carotene which is easier to absorb once heated. 

Do I need to peel butternut squash before roasting?

Depending on the recipe you may not need to peel the butternut squash before roasting. This recipe calls for dicing the squash in small portions so that it can cook at the same pace as the salmon and kale, so it will need to be peeled.

How long does cooked butternut squash last?

Cooked squash can last 3-4 days in the refrigerator and up to 3-4 months in the freezer for best quality.

How long does fresh butternut squash last?

A whole butternut squash with the skin still on should be kept outside of the refrigerator and can last an entire month in the right conditions. 

What is kale good for?

Besides this recipe, kale makes a perfect addition to salads, smoothies, omelets, breakfast scrambles and more. 

How many calories are in kale?

There are 8 calories in one cup of chopped raw kale, and 33 calories in one cup of cooked kale. 

How much protein in kale?

There are 0.7 grams of protein in one cup of chopped raw kale, and 2.5 grams  in one cup of cooked kale. 

How to tell if kale is bad?

As kale ages you will notice the leaves start to wilt and turn brown. If the decomposition goes further, your kale will turn into a liquid brown mush and likely start to leak out it’s bag. 

Meal prep tips for Baked Sesame Ginger Salmon 

  • Switch up your sides – if there are just too many nutrient-dense ingredients in this recipe for you, try switching up the sides. Rice and broccoli would make perfect pairs with this salmon. 
  • Broil it – If you like your salmon to have a nice crisp outer layer, try broiling it for the last five minutes of the baking process.

Baked Sesame Ginger Salmon with Kale & Butternut Squash

An easy, heart-healthy recipe featuring omega 3 rich salmon, alongside butternut squash and kale
No ratings yet
Prep Time 5 minutes
Cook Time 15 minutes
Course Main Course
Cuisine Asian
Servings 2

Ingredients
  

  • 12 oz salmon
  • 5 oz baby kale
  • 5 oz butternut squash (diced small)
  • 3 tbsp sesame ginger salad dressing
  • 1 tbsp olive oil
  • 1/2 tsp garlic powder
  • 1/2 tsp salt

Instructions
 

Pre-Cook (Mise En Place):

  • Gather your equipment: sheet pan, parchment paper, cutting board, knife, mixing bowl, tongs
  • Pre-heat oven to 400F
  • if needed: dice butternut squash into small pieces
  • line sheet pan with parchment paper

Cooking Method:

  • Place salmon on a sheet pan. Marinate it with 1 tbsp of the sesame ginger salad dressing
  • In a mixing bowl, add the baby kale and squash. Add 2 tbsp of sesame ginger salad dressing, 1 tbsp of olive oil, garlic powder, and salt. Mix well until everything is fully coated.
  • Place the baby kale mix on the same sheet pan and spread it out evenly.
  • Bake everything in the oven for 10-15 minutes until the salmon has fully cooked.
  • Remove from the oven. Eat and enjoy!

If you love this recipe, check out these other recipes we know you’ll love too:

Posted on

Roasted Chicken with Green Bean Casserole

chicken and green beans

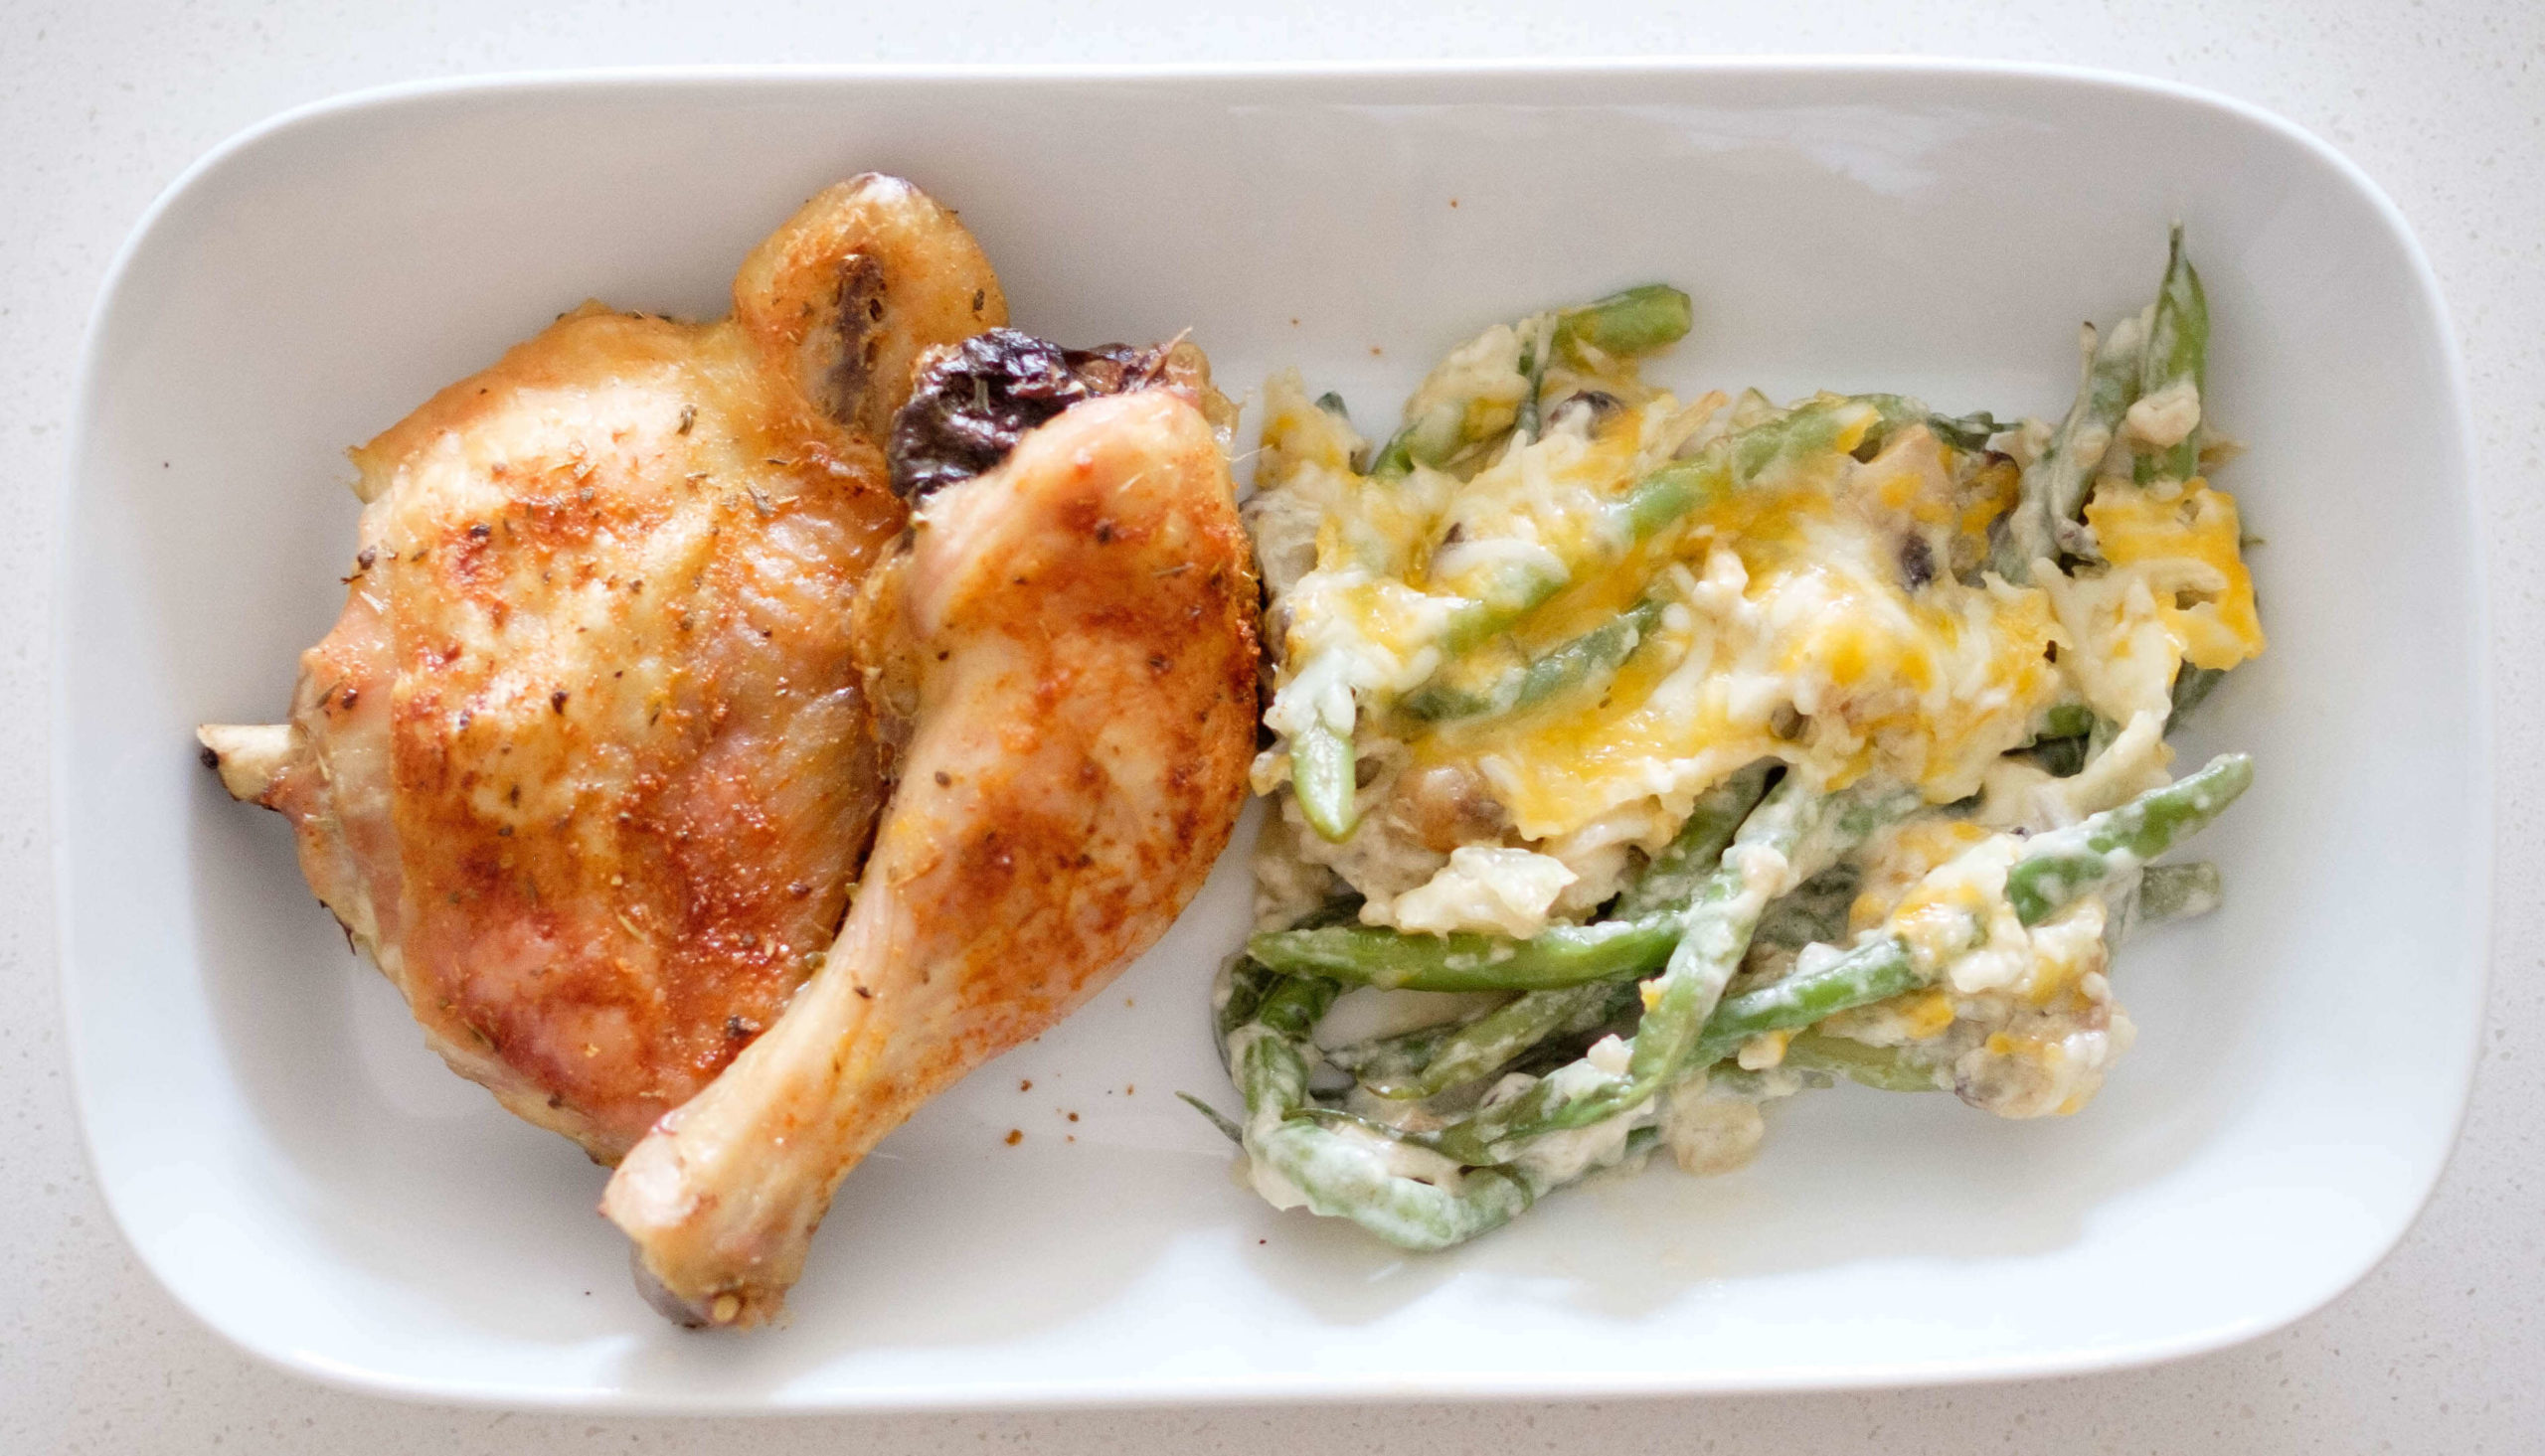
Roasted chicken and green bean casserole are two classic American dishes in and of themselves but together the two provide a nutrient-packed meal with a fantastic balance of protein, carbs, and fats. Many people often look to French’s or Campbell’s green bean casserole recipes but we prefer our, made from scratch cream base coupled with fresh oven-roasted chicken to bring delight to our weekly meal prep menu.

Green beans are a fantastic addition to your diet, providing large amounts of Vitamin C, A, and K, in addition to other valuable minerals. Green beans are also great for a heart healthy diet considering they have zero cholesterol, low sodium (6.6mg per 1 cup) and soluble fiber. 

Ease of Making: Medium

How to Cook Green Bean Casserole From Scratch

It’s easy to make our recipe for green bean casserole ahead, all you need to do is follow a few simple steps:

  1. Cook the onions, mushrooms and garlic until softened
  2. Make your roux, with butter and milk and add to onion and mushroom mixture
  3. Stir in the rest of your ingredients, except green beans and cook until the concoction has thickened
  4. Add in your green beans and stir well
  5. Finally, add to a baking dish and top with cheese to bake

Meal Prep Tips for Roasted Chicken with Green Bean Casserole

How long does roasted chicken last in the fridge?

Roasted chicken can last up to 4 days in the fridge. It can also lend itself to many other easy recipes as well like: buffalo chicken salad, regular chicken salad or add it to the top of your lunchtime greens for a quick protein.

How long to roast a chicken?

Roast times depend on the cut of chicken you are using, in this recipe we are using chicken quarters. We suggest roasting at 425° for 35 minutes or until it reaches an internal temperature of 165F.

What can I substitute for cream of mushroom soup in a green bean casserole?

  • In our green bean casserole recipe we make our cream base from scratch instead of a can but you could certainly use either.  If you’re wondering, what to substitute for cream of mushroom soup in a green bean casserole,  look no further. You’ve got several options for substitutions and can still be known for the best green bean casserole in town.
    • 1 can of cream of celery soup
    • 1 can of cream of chicken soup
    • 1 cup of sour cream
    • 4 ounces of light cream cheese, 1 12-oz pack of mushrooms sliced, 2tbls butter, and 1 cup of milk
    • 1 cup of milk and 4 oz of cream cheese
    • Play around with your favorite substitutions until you get your flavor right. You can even add chicken broth to get a chicken forward flavor if that’s what you’re looking for.

How to steam green beans for homemade green bean casserole:

Our recipe calls for fresh, not steamed green beans for our green bean casserole. This allows for the green beans to bake in the oven in the mix of the other ingredients, absorbing flavors without becoming soggy. 

How do you thicken green bean casserole?

If you notice your green bean casserole is a bit on the runny side, you can add in a cornstarch slurry (cornstarch mixed with a little bit of water), one tablespoon at a time until your mix reaches your desired consistency. 

How to freeze green bean casserole: (Does it freeze well)

Our easy green bean casserole is perfect for freezing. Should you decide to make an extra, or freeze what you have on hand, you’ll find that green bean casserole freezes well. When you’re ready to reheat your frozen casserole, simply pop it up in the oven for 40 minutes at 350°. Cook times may vary depending on the size and type of your dish.   

What to do with leftover green bean casserole

Not everyone or every family can put down an entire casserole dish of green beans in one sitting, so it’s understandable that you may be wondering what you can do with your leftovers. Here are a few ideas:

  • Potpie
  • Stuffed mushrooms
  • Add to hash
  • Soup
chicken and green beans

Roasted Chicken with Green Bean Casserole

This Roasted Chicken and Green Bean Casserole is family favorite and a Holiday crowd pleaser.
No ratings yet
Prep Time 5 minutes
Cook Time 35 minutes
Course Main Course
Cuisine American
Servings 4

Equipment

  • knife
  • cutting board
  • sheet pan
  • casserole baking dish
  • oven

Ingredients
  

Chicken Thighs and Seasonings

  • 4 each chicken leg quarters
  • 1/4 tsp oregano
  • 1/4 tsp thyme
  • 1/4 tsp paprika
  • 1/4 tsp garlic powder
  • 1/4 tsp salt
  • 1/4 tsp pepper
  • 1 tbsp olive oil

Green Bean Casserole

  • 12 oz fresh green beans
  • 1/4 cups small white onions (diced)
  • 8 oz mushrooms (sliced)
  • 1 each garlic clove (minced)
  • 1 tbsp butter
  • 1 tbsp flour
  • 1/2 cup shredded cheddar cheese
  • 1 cup heavy cream
  • 1/4 tsp paprika
  • 1/4 tsp garlic powder
  • 1/4 tsp onion powder
  • 1/4 tsp salt

Instructions
 

  • Pre-Heat oven to 425F

Chicken Thighs

  • Season chicken with oregano, thyme, paprika, garlic powder, salt, and pepper. Drizzle with olive oil. Place it in a baking dish lined with parchment paper
  • Place the chicken in the oven and bake at 425 for 30-35 minutes until it reaches an internal temperature of 165F

Green Bean Casserole

  • Meanwhile, add oil to a saute pan on medium-high heat. Saute the onions, mushrooms, and garlic until they soften (about 3 to 5 minutes)
  • Then, add butter and flour to make a roux (paste). Stir until it is completely mixed (about 2 to 3 minutes)
  • Next, add heavy cream. Season with garlic powder, onion powder, and salt. Stir it all together
  • Simmer until it thickens into half the amount.
  • Place the green beans in a baking dish that has been greased. Pour the heavy cream mixture over the green beans. Top it off with the shredded cheddar cheese
  • Bake in the oven for 15-20 minutes.
  • Carefully remove from the oven once all items have cooked. Eat and enjoy!

If you love this recipe, check out these other recipes we know you’ll love too:

Posted on

Homemade Chicken Fried Chicken With Mashed Potatoes and Gravy

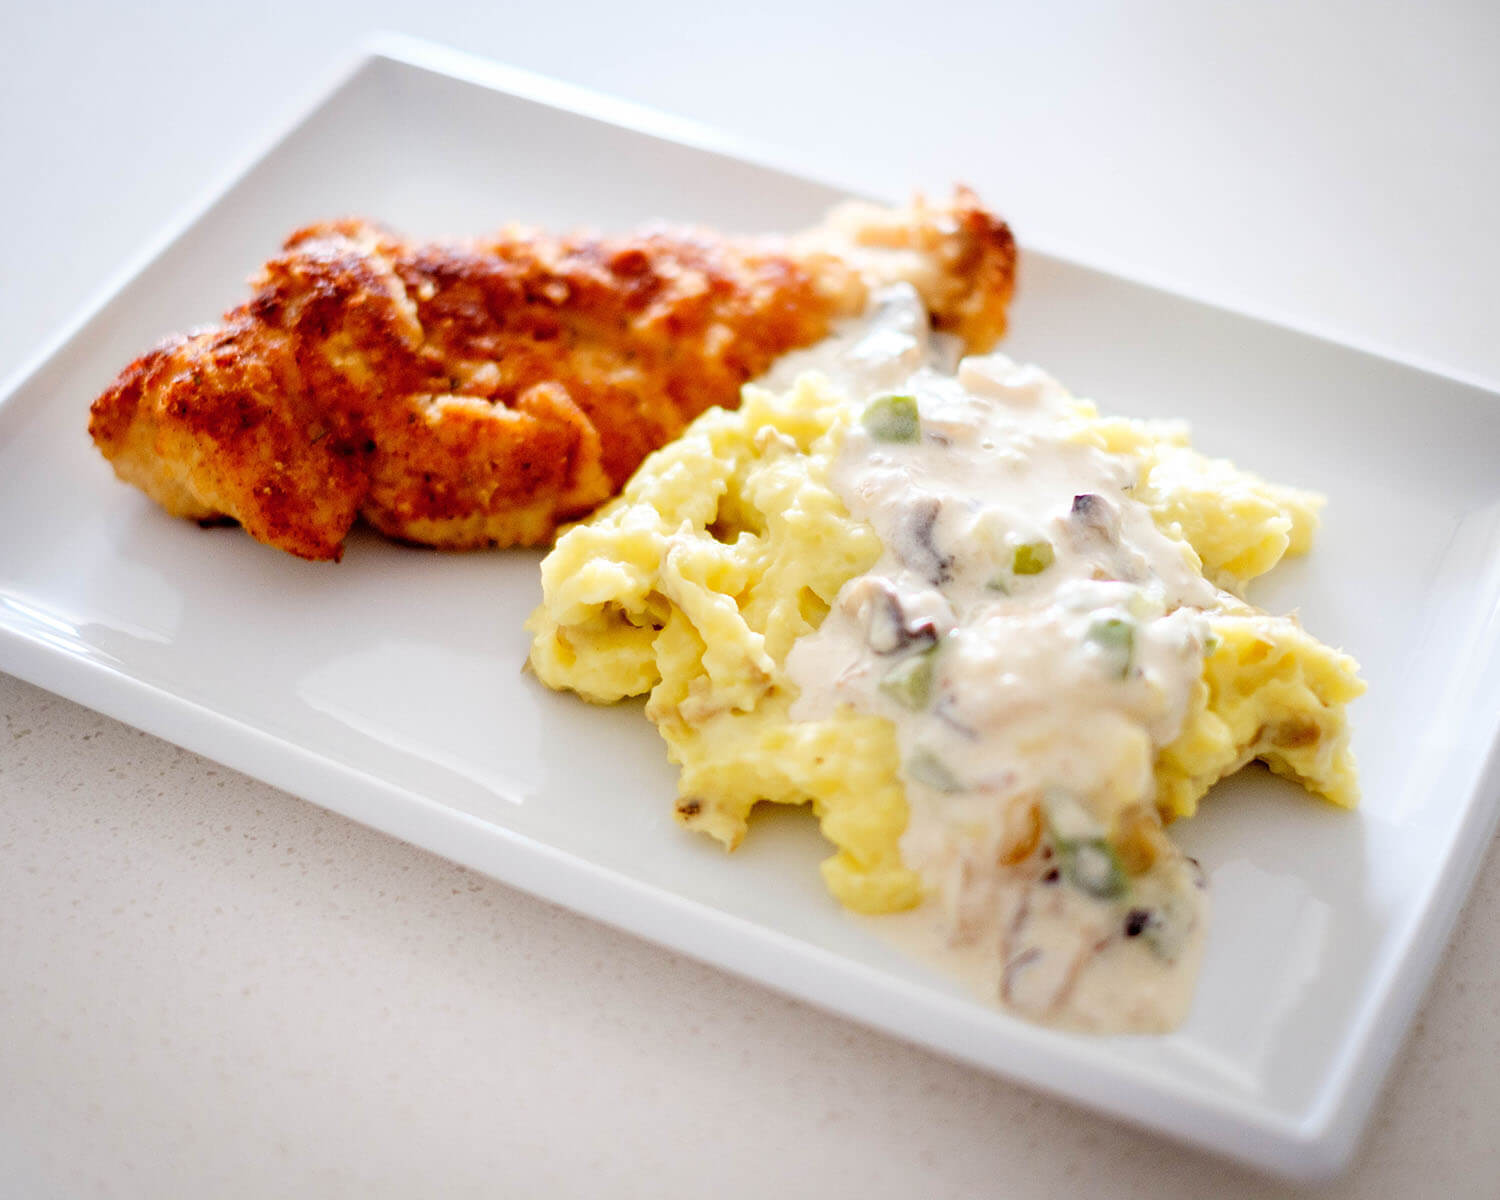
There isn’t a dish that screams comfort meal more than our crispy homemade chicken fried chicken with mashed potatoes and gravy. This southern classic serves up all the flavor, is quick to make, and can easily be doubled or tripled to feed a crowd. You might be asking yourself “what is chicken fried chicken?”, if that’s the case, you’ve missed out on life until now. Chicken fried chicken is not much different than regular fried chicken, in fact the battering process is the same. However, chicken fried chicken uses a thinner, boneless cut of meat than a traditional fried piece of chicken and is typically served with a gravy.  Using a thinner slice of chicken allows for more golden crispy outside to chicken inside per bite, yum!

Ease of Making: Medium

Ironically chicken fried chicken got its name from it’s beef predecessor the Chicken Fried Steak, which was named for its similarity in preparation and cook to fried chicken. 

Our mashed potatoes and gravy go perfectly with this chicken, providing a creamy and rich counterpart to the crispiness of the chicken. 

How to Make Chicken Fried Chicken

Making chicken fried chicken from scratch is actually much easier than most people think. The recipe calls for standard pantry items that most people would have on hand like flour, breadcrumbs and eggs. 

How do you cut the chicken for fried chicken?

The chicken that is traditionally used in chicken fried chicken is thin chicken breast. You can typically buy thinly sliced chicken breast from your local supermarket or you may choose to filet your chicken breasts or pound out a full chicken breast flat with a mallet (or rolling pin, frying pan, whatever you have on hand). 

Fileting your chicken breast is the process of slicing your chicken breast in half sideways. Do this by laying your chicken breast flat on your cutting board and with your knife parallel to the board, slice the chicken until you have two even slices of chicken. Fileting is great because you can extend your number of servings by cutting the breasts in half. Two large breasts can be made into four separate servings versus two.

How to batter chicken fried chicken?

First prepare your chicken batter by mixing flour, ice cold water and an egg. Then you will want to prepare your seasoned breadcrumbs. Set up two separate bowls that are next to each other so you can dip your chicken in the batter, followed by your seasoned breadcrumbs and then easily move to the pan. 

Batter Tips:

  • It’s easier to work in small batches if preparing multiple chicken breasts. 
  • Try and keep one hand wet and one hand dry as you are moving the chicken from batter to breadcrumb. This helps reduce the mess and give you a free hand that isn’t batter-covered if your phone starts to ring. 

 What type of flour is best for fried chicken?

All-purpose flour is the most popular in making fried chicken. It’s neutral flavor allows you to spice it up anyway you want. It can also withstand the heat and provides a consistent golden glow. 

 How to cook chicken fried chicken?

Check to ensure your oil is hot enough for your chicken breasts. You can do this by dropping a dime size amount of batter into your oil to see if it sizzles. If it does you’re good to go. If the pan doesn’t sizzle when you drop in your batter, wait until the pan has heated more. Once your pan reaches it’s “sizzle point,” start dredging your breasts in the batter and breadcrumbs.

Once your chicken has been dredged in your batter and breadcrumbs and your oil is up to temp, pan fry the breasts on each side for about 5-7 minutes on each side or it reaches an internal temperature of 165℉.  Remove from the pan but remember to save all of the scrapings from the pan to make the gravy.

How to Make Mashed Potatoes and Southern Gravy

Our southern side of mashed potatoes and gravy is the most traditional, and most delicious pairing for our homemade chicken fried chicken. Using the oil and leftover bits from the fried chicken, there’s no need to use store bought gravy when this gravy can be made from scratch in just a few minutes. 

How to cook homemade mashed potatoes

While your chicken is cooking, throw your baby potatoes in a pot of boiling water and cook until fork-tender, about 20 minutes. You want the potatoes to easily be punctured by the fork but they shouldn’t fall apart at the touch. When the potatoes are done cooking, drain and add in milk, sour cream, butter, and salt. Mash until you reach your desired consistency. We like ours somewhere between chunky and creamy. 

How to cook gravy for mashed potatoes?

To make the mashed potato gravy, use the same pan that you fried your chicken in and toss in your peppers and onions. You’ll want to saute these until soft. Then add in your mushrooms and cook until soft and golden brown. Thoroughly mix in your seasonings and follow with the butter and flour to make a roux*.  Finally, add in your heavy cream and chicken broth and let it simmer until thickened to a gravy consistency. 

Meal prep tips for Chicken Fried Chicken with Mashed Potatoes

  • Buy a 10lb bag of potatoes at the beginning of the month and prep cubes, mashed potatoes, french fries, and sliced potatoes to blanch and store in the freezer. This way you can grab the type of potato you need when cooking in an effort to reduce prep and cook times. 
  • Filet your chicken to double the servings, extend your protein, and reduce budgets.
chicken and mashed potatoes

Chicken Fried Chicken with Mashed Potatoes and Gravy

A delicious southern classic, our easy Chicken Fried Chicken will have you in a full on food coma in no time.
No ratings yet
Prep Time 10 minutes
Cook Time 30 minutes
Course Main Course
Cuisine American
Servings 4

Ingredients
  

  • 4 each chicken breasts (thinly sliced)
  • 1 each large egg
  • 1/2 cup flour
  • 1/2 cup ice cold water
  • 1 cup breadcrumbs
  • 1 lb baby potatoes
  • 1/4 cup onion (diced)
  • 1 each green bell pepper
  • 8 oz sliced mushrooms
  • 4 tbsp butter
  • 1 tbsp flour (for roux in gravy)
  • 1/2 cup heavy cream
  • 1/4 cup sour cream
  • 2 cups chicken broth
  • 3 tbsp olive oil
  • 1 tsp paprika
  • 1 tsp onion powder
  • 1 tsp garlic powder
  • 1 tsp salt

Instructions
 

Pre-Cook (Mise En Place):

  • Gather your equipment: cutting board, knife, bowls, plates, skillet, large pot, tongs spatula
  • Dice onions and bell peppers, and slice mushrooms. Cut baby potatoes in half.
  • If you can't find thinly sliced chicken breast, filet your chicken breast and slice it in half sideways. If you want it even flatter and thinner, lay it in between two layers of plastic wrap and use a meat pounder or a small frying pan to pound it out flat. This will help the chicken cook faster.
  • Prepare the batter: In a bowl, mix together the flour, ice cold water, and egg
  • Prepare the breadcrumbs: In a bowl, add half the paprika, garlic powder, onion, and salt to the breadcrumbs

Cooking Method:

  • Pre-heat a skillet with 2 tbsp of olive oil on medium high heat. Then dip the chicken breast into the batter and dredge it in the bread crumbs. When the pan is heated, pan fry the chicken breast on each side until golden brown and fully cooked (about 5 to 7 minutes on each side-check for an internal temperature of 165F).
  • Meanwhile, start boiling the potatoes in a large pot. Boil for about 20-25 minutes. When they're cooked, a fork should easily slide into the potatoes, and the potatoes should almost, but not totally, fall apart.
  • Once the chicken is fully cooked, remove it from the pan. Using the same pan, add the onions and bell peppers. Saute until they soften. Then add the mushrooms and stir until they soften and turn golden brown. Add the remainder of the seasonings and mix thoroughly.
  • Next, add the butter and flour and mix until it makes a roux (a paste). Then add the heavy cream and chicken broth. Simmer until the gravy thickens.
  • Once the potatoes are boiled, add sour cream, butter, and salt. Mash the potatoes until you have reached a creamy consistency.
  • Serve the chicken and mashed potatoes with the gravy. Eat and enjoy!

If you love this recipe, check out these other recipes we know you’ll love too:

Posted on

How To Make Beef Tamale Casserole

beef tamale

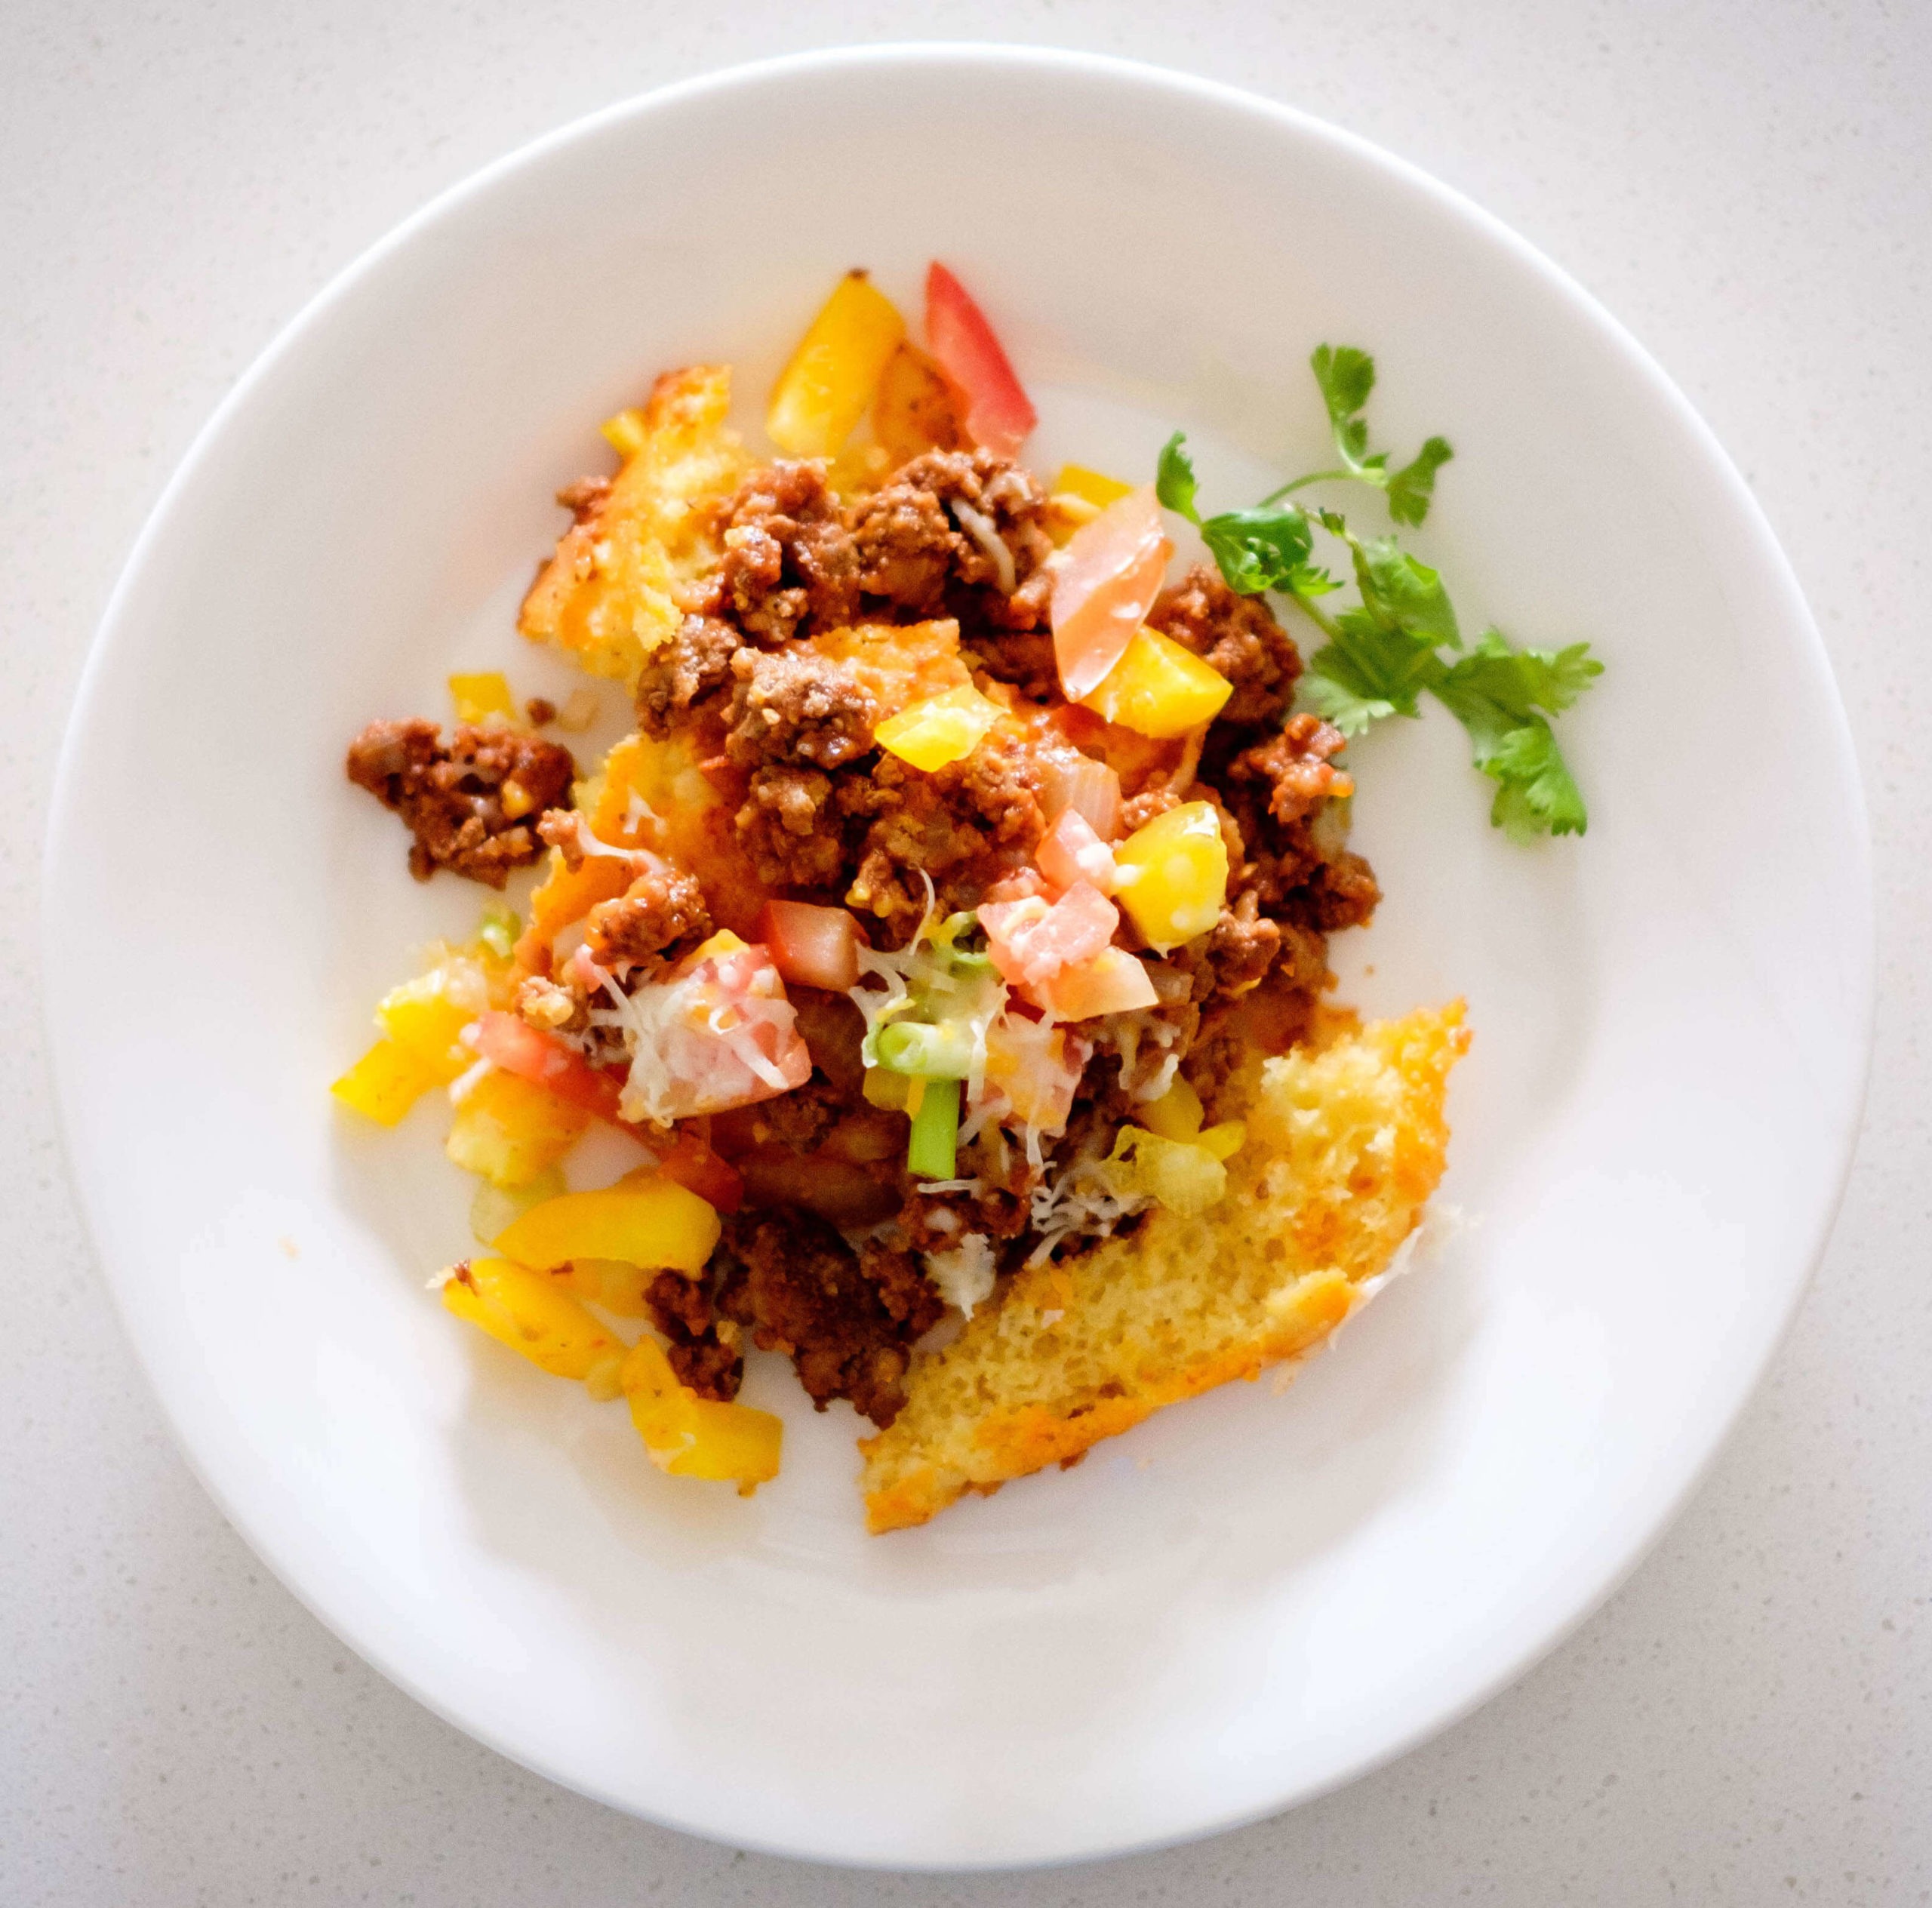
Tamales are a common and popular dish among Spanish, Mexican, and Latin cultures. Typically they are corn-filled dough that is filled with various meats and vegetables. Beef tamales are most notably the fan-favorite and let us say, we are fans. Making individual, traditional tamales can not only be time-consuming but it is also difficult. We thought we’d take these classic tamale flavors and turn them into a flavor-packed beef tamale casserole that is easy to prep and portion for your busy week ahead. 

Ease of Making: Medium

How to Make Beef Tamale Casserole

Beef tamale casserole is typically made by layering cornbread, tamale sauce and seasoned ground beef in a way that mimics the traditional tamale. Casseroles make for easy dishes to feed a family, to make ahead and freeze or to keep for the week and have a warm hearty meal every day. Casseroles are popular because you can put a variety of items in the deep baking dishes and quickly pop it in the oven. If you find that you aren’t a fan of ground beef, you can easily sub in ground chicken, turkey, or any other protein in this dish and make it to your liking. We like our dishes to be quick, easy and flexible for your cooking needs. 

Our beef tamale casserole can also be topped with some of your favorite Mexican inspired ingredients like jalapenos, sour cream, lettuce, tomatoes, salsa, or pico de gallo! 

There are three main components of a casserole: pieces of meat, vegetables, and some sort of starchy binder. Each component serves a purpose of its own. 

  • Starch  – We use a cornbread base to hold up to the flavors of the seasoned meat and vegetables but you can use a variety of starches in casseroles. Potatoes, pasta, rice, or any other grain can serve as an excellent starch in your casserole to bring it together.
  • Pieces of meat – Ground beef is used in this beef tamale casserole but when making a casserole you can use practically any type of protein. Have fun and experiment!
  • Vegetables – There’s no limit to the types of vegetables you can put inside a casserole and oftentimes, casseroles are packed with veggies and you won’t even know it. 

How to Cook Beef Tamale Casserole

Start by preheating your oven, we cook our beef tamale casserole at 400℉. Next, you will want to prep the cornbread layer of your dish, your base. Once mixed add your cornbread mixture to a greased baking dish that is deep enough to hold the rest of the casserole and bake for 20-25 minutes.

It is necessary to brown meat before stewing so that the meat is not raw when you cook and add it to the cooked cornbread layer. While the cornbread bakes, you will add your onions to a hot saute pan with oil and cook until softened. Add in the ground beef and cook until browned, breaking up into smaller pieces as it cooks. After the meat has cooked, add in your seasonings and sauce.

Remove your cornbread from the oven and carefully layer on your beef and sauce mixture, followed by the remaining vegetables and a layer of cheese to the cooked cornbread and return to the oven to finish baking. This should only take about 5-10 minutes for your cheese to melt. Once your cheese is melted on top, remove your casserole from the oven and serve.  

Meal Prep Tips for Beef Tamale Casserole

  • Reheat your casserole prep in the oven by covering tightly with foil and heating for 20 minutes at 400℉.
  • If at any point you notice your casserole getting too brown or starting to burn, you can cover your dish with tin foil for the remainder of the baking process. This helps protect the top layer of the dish and prevent scorched meat and cheese. 
beef tamale

Beef Tamale Casserole

Layers of cornbread, tamale sauce, and seasoned beef make this the perfect comfort food dish for you and your family.
No ratings yet
Prep Time 5 minutes
Cook Time 40 minutes
Course dinner, Main Course
Cuisine American, Mexican
Servings 4

Equipment

  • knife
  • cutting board
  • spatula
  • saute pan
  • baking dish

Ingredients
  

  • 1 lb lean ground beef
  • 1/2 each small white onion (diced)
  • 1 each green bell pepper (diced)
  • 1 each roma tomato (diced)
  • 1/4 cup green onions (chopped)
  • 1/2 cup shredded cheddar cheese
  • 8 oz tomato sauce
  • 1/2 tsp chili powder
  • 1/2 tsp cumin
  • 1/2 tsp paprika
  • 1/2 tsp onion powder
  • 1/2 tsp garlic powder
  • 1/4 tsp salt
  • 1 tbsp olive oil

Cornbread batter recipe:

  • 1 cup flour
  • 1 cup yellow cornmeal
  • 2/3 cup white sugar
  • 3 tsp baking powder
  • 1 cup yogurt
  • 1/3 cup oil
  • 1/3 cup water

Instructions
 

  • Pre-heat oven to 400F
  • First, prepare the cornbread. In a mixing bowl, add the egg, sugar, yogurt, and vegetable oil. Stir, until thoroughly mixed.
  • Then, add the baking powder, flour, and cornmeal. (best to mix in the dry ingredients in batches so that the mixture does not clump)
  • Place the batter in a greased baking dish and bake in the oven for 20-25 minutes until the center is fully cooked.
  • Next, prepare the taco meat. Add oil to a heated pan on medium high heat. Saute the onions until they soften.
  • Add the ground beef and break into smaller pieces. Continue to cook until it has turned golden brown. Then add the spices and tomato sauce. Continue to stir the beef until it is fully cooked.
  • Remove the cornbread from the oven. Carefully add the ground beef mixture on top. Then, layer the rest of the vegetables on top.
  • Finally, add shredded cheese on top and place it back into the oven for 5 to 10 minutes until the cheese has melted.
  • Remove from the oven, and carefully scoop out a serving. Eat and enjoy!

If you love this recipe, check out these other recipes we know you’ll love too:

Posted on

Easy Balsamic Baked Chicken Recipe With Zucchini

Easy Balsamic Baked Chicken Recipe With Zucchini

There’s something about the sweet tang of a balsamic glazed chicken breast that really gets our mouth watering. Our balsamic baked chicken with zucchini is easy to make and even easier to enjoy. You’ll also only use one bowl and a sheet pan when cooking which helps to keep the kitchen clean and the chef happy. Most people love to cook but we’ve never met someone that actually enjoys washing the dishes, which is why we turn to sheet pan meals quite frequently. Check these other ideas out:

Easy of Making: Easy

This baked balsamic chicken will be an instant staple in your kitchen once you get a taste of our sticky glaze, that is baked onto the chicken and caramelized. 

How to Make Balsamic Baked Chicken with Zucchini

Our juicy and tender balsamic chicken is a fan favorite and can be thrown together in a matter of minutes, giving you time to enjoy time with your family or catch up on your favorite tv show. Served alongside zucchini and roasted cherry tomatoes that will have your mouth bursting with flavor, this dish is sure to please even the pickiest of taste buds.

 How to Cook Balsamic Baked Chicken

Start by seasoning you chicken in a bowl with thyme, garlic powder, salt, and coat with olive oil. Mix well and place in a baking dish. Bake for 30 minutes and remove chicken from the oven. 

Using a basting brush, paint the chicken with balsamic glaze. For this recipe, you can use a store bought balsamic glaze or make your own. To make your own, simply simmer balsamic vinegar in a separate pan and reduce until thick enough to coat the back of a spoon. 

Once your chicken is coated, put it back in the oven to bake for another 15 minutes until the chicken reaches an internal temperature of 165F. Remove from the oven and enjoy!

How to Cook Zucchini and Roasted Tomatoes

Slice zucchini into 1/4 inch half coins or circles, by slicing the squash in half lengthwise. When you have two even halves, slice quarter inch slices across the width of the zucchini. After your zucchini is prepped, slice cherry tomatoes in half and mince your garlic. 

Add the zucchini, tomatoes, and garlic combination to the top of the chicken once you’ve removed it from the oven the first time and basted it with the balsamic glaze. 

Meal Prep Tips for Balsamic Baked Chicken with Zucchini

  • Save some of your balsamic glaze to put on top of your meal before you reheat it throughout the week. 
  • Add a starch like rice, quinoa or even cauliflower rice to round out the meal.
Easy Balsamic Baked Chicken Recipe With Zucchini

Balsamic Baked Chicken With Roasted Zucchini

Sheet-pan balsamic chicken makes for a quick, flavorful and easy meal no matter the day of the week.
No ratings yet
Prep Time 5 minutes
Cook Time 40 minutes
Course Main Course
Cuisine American, Italian
Servings 4

Equipment

  • knife
  • cutting board
  • baking dish

Ingredients
  

  • 4 each chicken thighs
  • 1 each zucchini
  • 1 cup cherry tomatoes
  • 3 cloves garlic
  • 2 tbsp balsamic glaze
  • 1 tsp dried thyme
  • 1 tsp garlic powder
  • 1 tsp salt
  • 1 tbsp olive oil

Instructions
 

  • Pre-heat oven to 400F
  • Slice zucchini into 1/4 inch half coins, slice cherry tomatoes in half, mince garlic
  • In a bowl, season chicken with thyme, garlic powder, salt, and coat with olive oil. Mix well and place in a baking dish.
  • Bake in the oven for 30 minutes. After 30 minutes remove it from the oven.
  • Using a brush, carefully baste the chicken with balsamic glaze. Add zucchinis, cherry tomatoes, and garlic on top. Season with salt.
  • Place it back in the oven to cook for another 15 minutes until the chicken reaches an internal temperature of 165F.
  • Remove from the oven. Eat and enjoy!

Notes

Note: After the chicken cooks, you can split the recipe in half and shred half of the chicken meat, and use it as your protein for a lunch salad or in a sandwich.

If you love this recipe, check out these other recipes we know you’ll love too:

Posted on

Oven-Baked Salsa Chicken Recipe

Oven-Baked Salsa Chicken Recipe

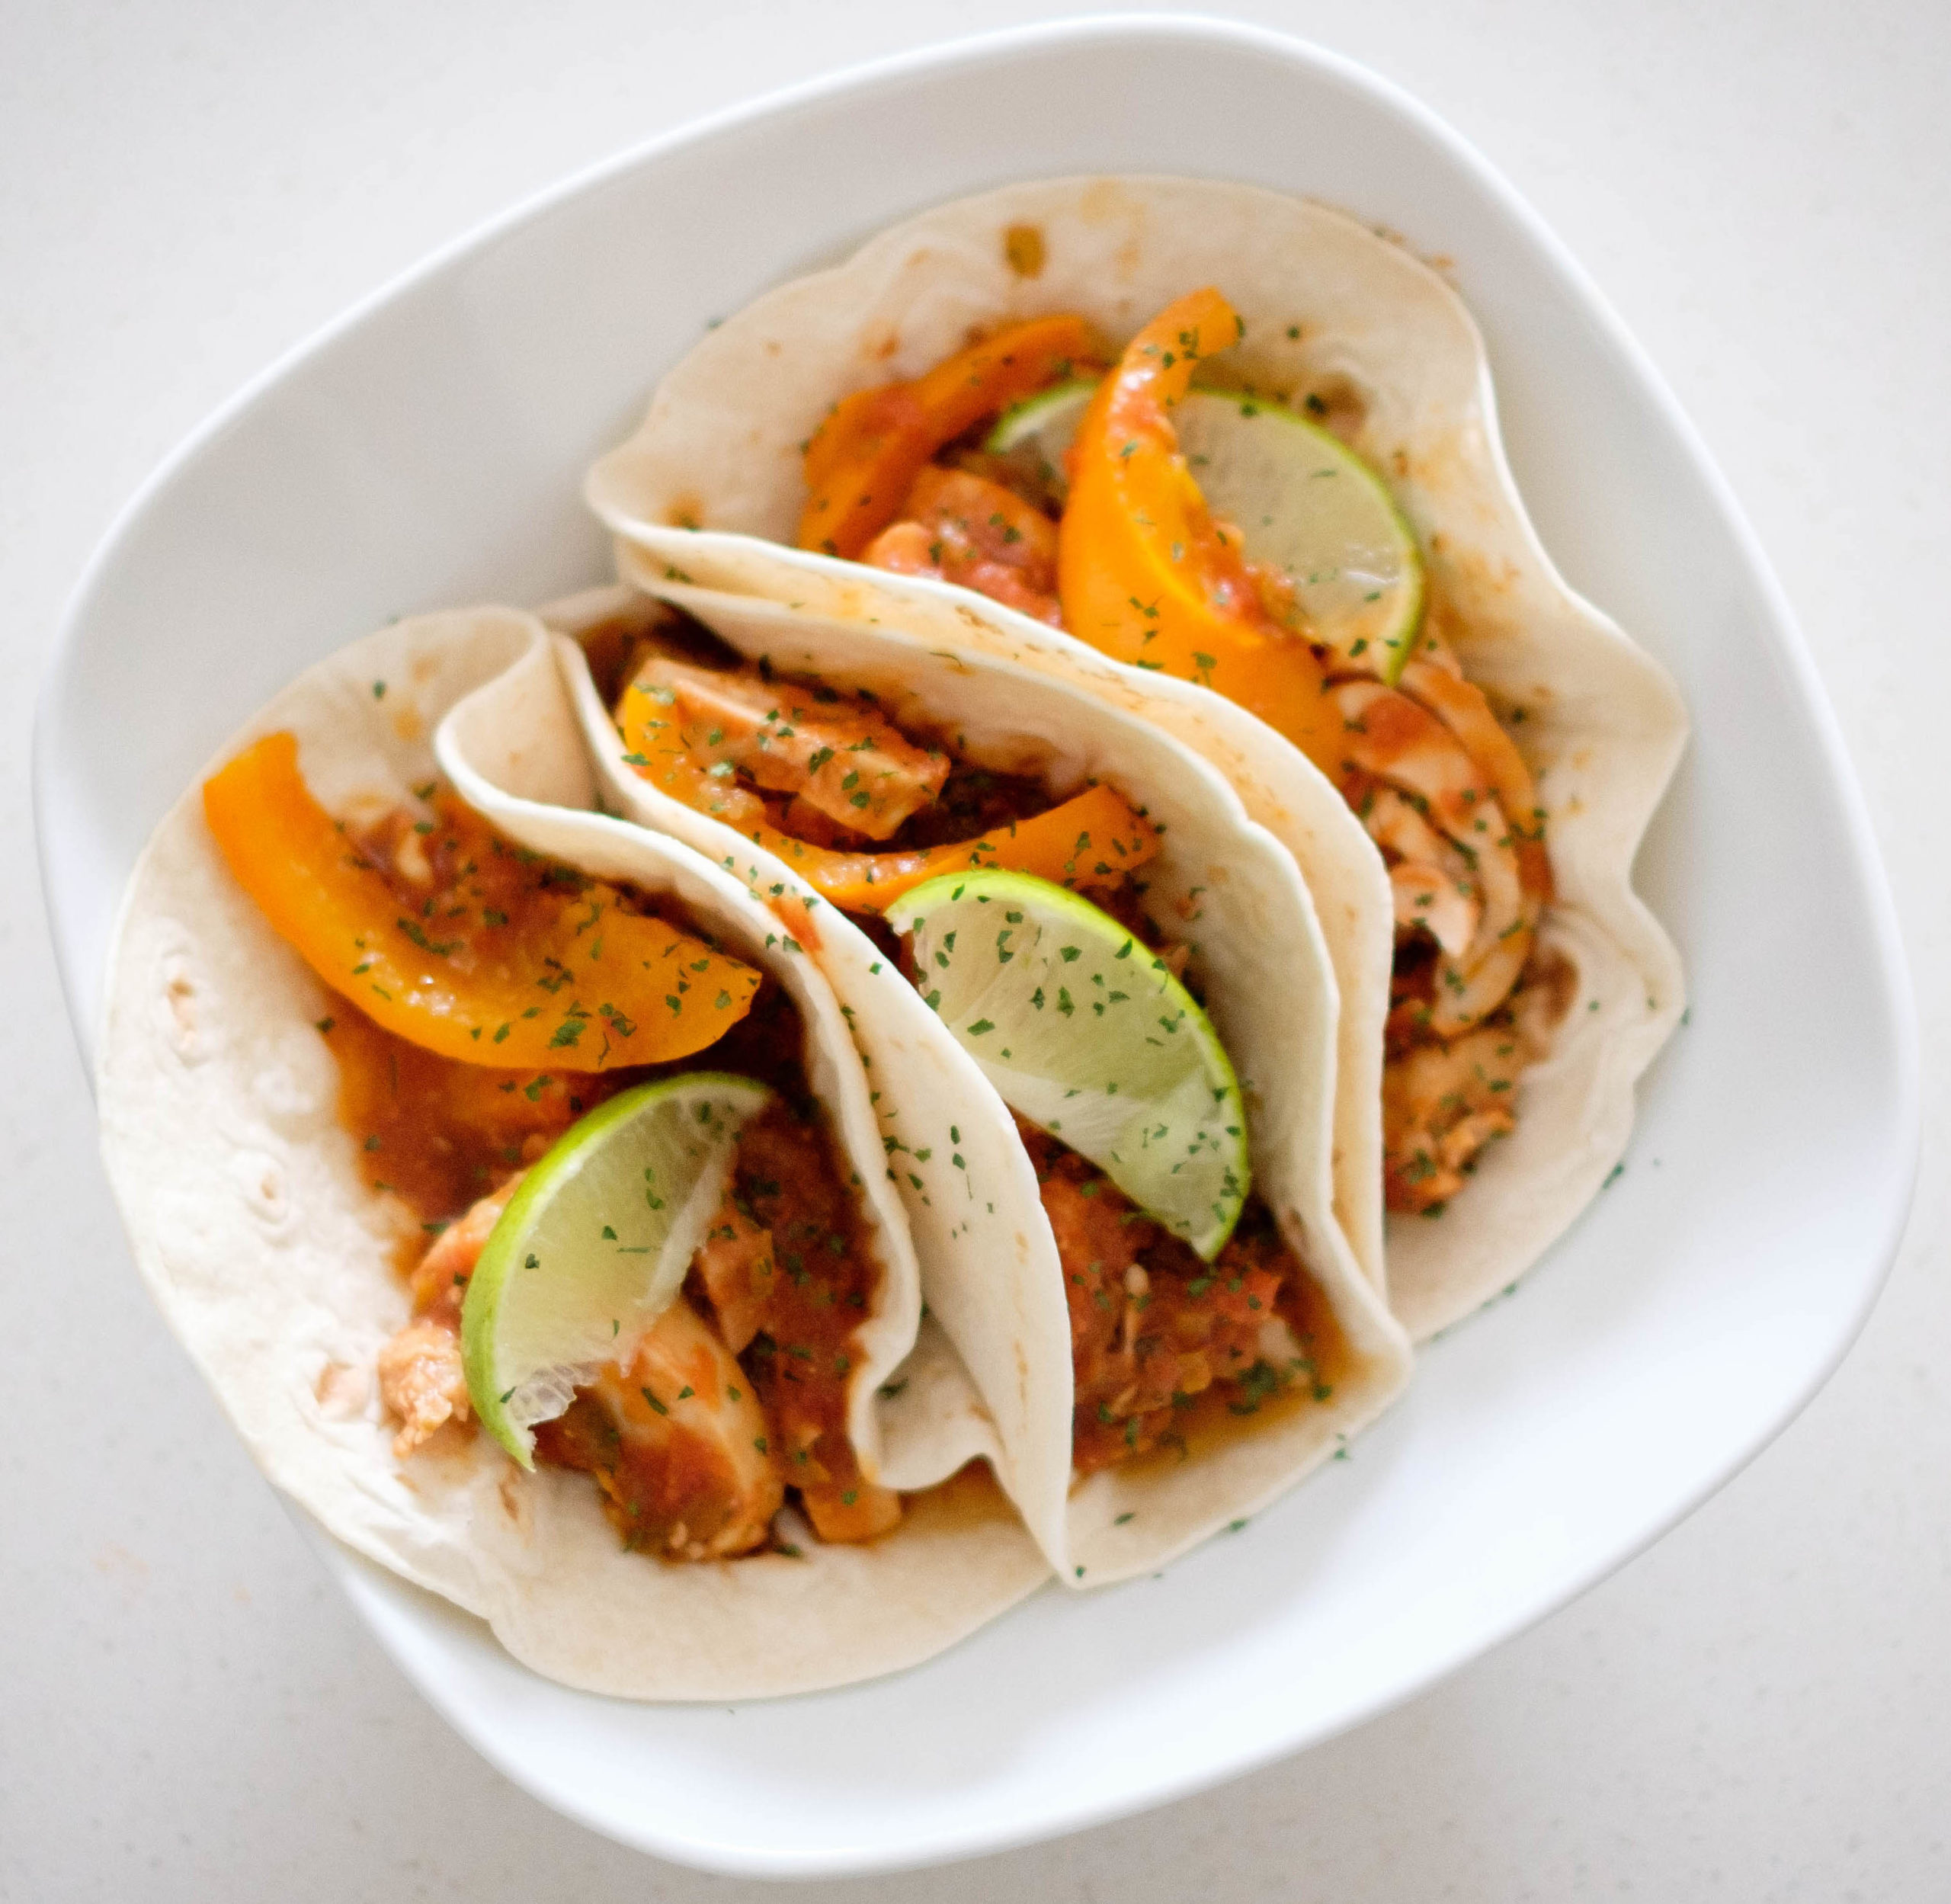
Oven baked salsa chicken really couldn’t be an easier dish to make, which is why we love it. So when you’re short on time but still craving something homemade, opt for this recipe and you won’t be disappointed. You can prep this entire meal in under ten minutes, which is fantastic for busy work nights. Another option you gave with this recipe is to pop all of it in a crock pot and let it cook for about four hours while you work and the flavors combine in a magnificent way. 

Ease of Making: Easy

However, if you have extra time, you can even try making a homemade salsa to accompany the chicken, otherwise any jar of chunky salsa will work. Simply dump and go. 

How to Make Baked Salsa Chicken

Salsa chicken can be made with most cuts of chicken but we think chicken thighs work best. Thighs provide a more tender and rich experience for this Mexican inspired dish. Another great thing about this dish is that you can use your favorite salsa and cater the heat to your liking. Mild, medium, and hot salsas will all work with this recipe. 

If you’re wondering what to serve with our baked salsa chicken, try these ideas:

How to Cook Salsa Chicken

To make our delicious salsa chicken, preheat your oven to 400℉ and prep your bell pepper by slicing into thin strips. Take your jar of salsa and cover the bottom of your baking dish with about one cup of chunky salsa. Layer on your chicken and season with garlic powder and salt. Top the entire dish with the rest of the salsa and bell peppers. 

Your salsa chicken should bake in the oven for 30-45 minutes or until the internal temperature of the chicken reaches 165F. You can also take out your chicken five minutes early and top with cheese, returning to the oven to melt over the dish.

Meal Prep Tips for Salsa Chicken

  • Salsa chicken is great for tacos, quesadillas or on top of salad. Shred the chicken and incorporate it into one of your favorites.
  • Pre-portion sides of guacamole, sour cream and pico to grab on the go with your salsa chicken.
  • Use a crockpot and cook for four hours to have a versatile shredded chicken option to throw into meals.  
Oven-Baked Salsa Chicken Recipe

Easy Baked Salsa Chicken

No ratings yet
Prep Time 5 minutes
Cook Time 45 minutes
Course dinner, Main Course
Cuisine American, Mexican
Servings 4

Equipment

  • knife
  • cutting board
  • baking dish
  • oven

Ingredients
  

  • 1 lb boneless chicken thighs
  • 2 cups salsa
  • 1 each bell pepper (sliced)
  • 1 tsp garlic powder
  • 1 tsp salt

Instructions
 

  • Pre-heat oven to 400F
  • Cover the bottom of the baking dish with half of the salsa
  • Arrange the chicken on top of the salsa. Season with garlic powder and salt
  • Pour the rest of the salsa on top of the chicken
  • Place the bell peppers on top
  • Bake in the oven for 30-45 minutes until internal temperature of the chicken reaches 165F
  • Remove from the oven. Slice into bite size pieces. Serve with tortillas or on top of a bed of rice.