Posted on

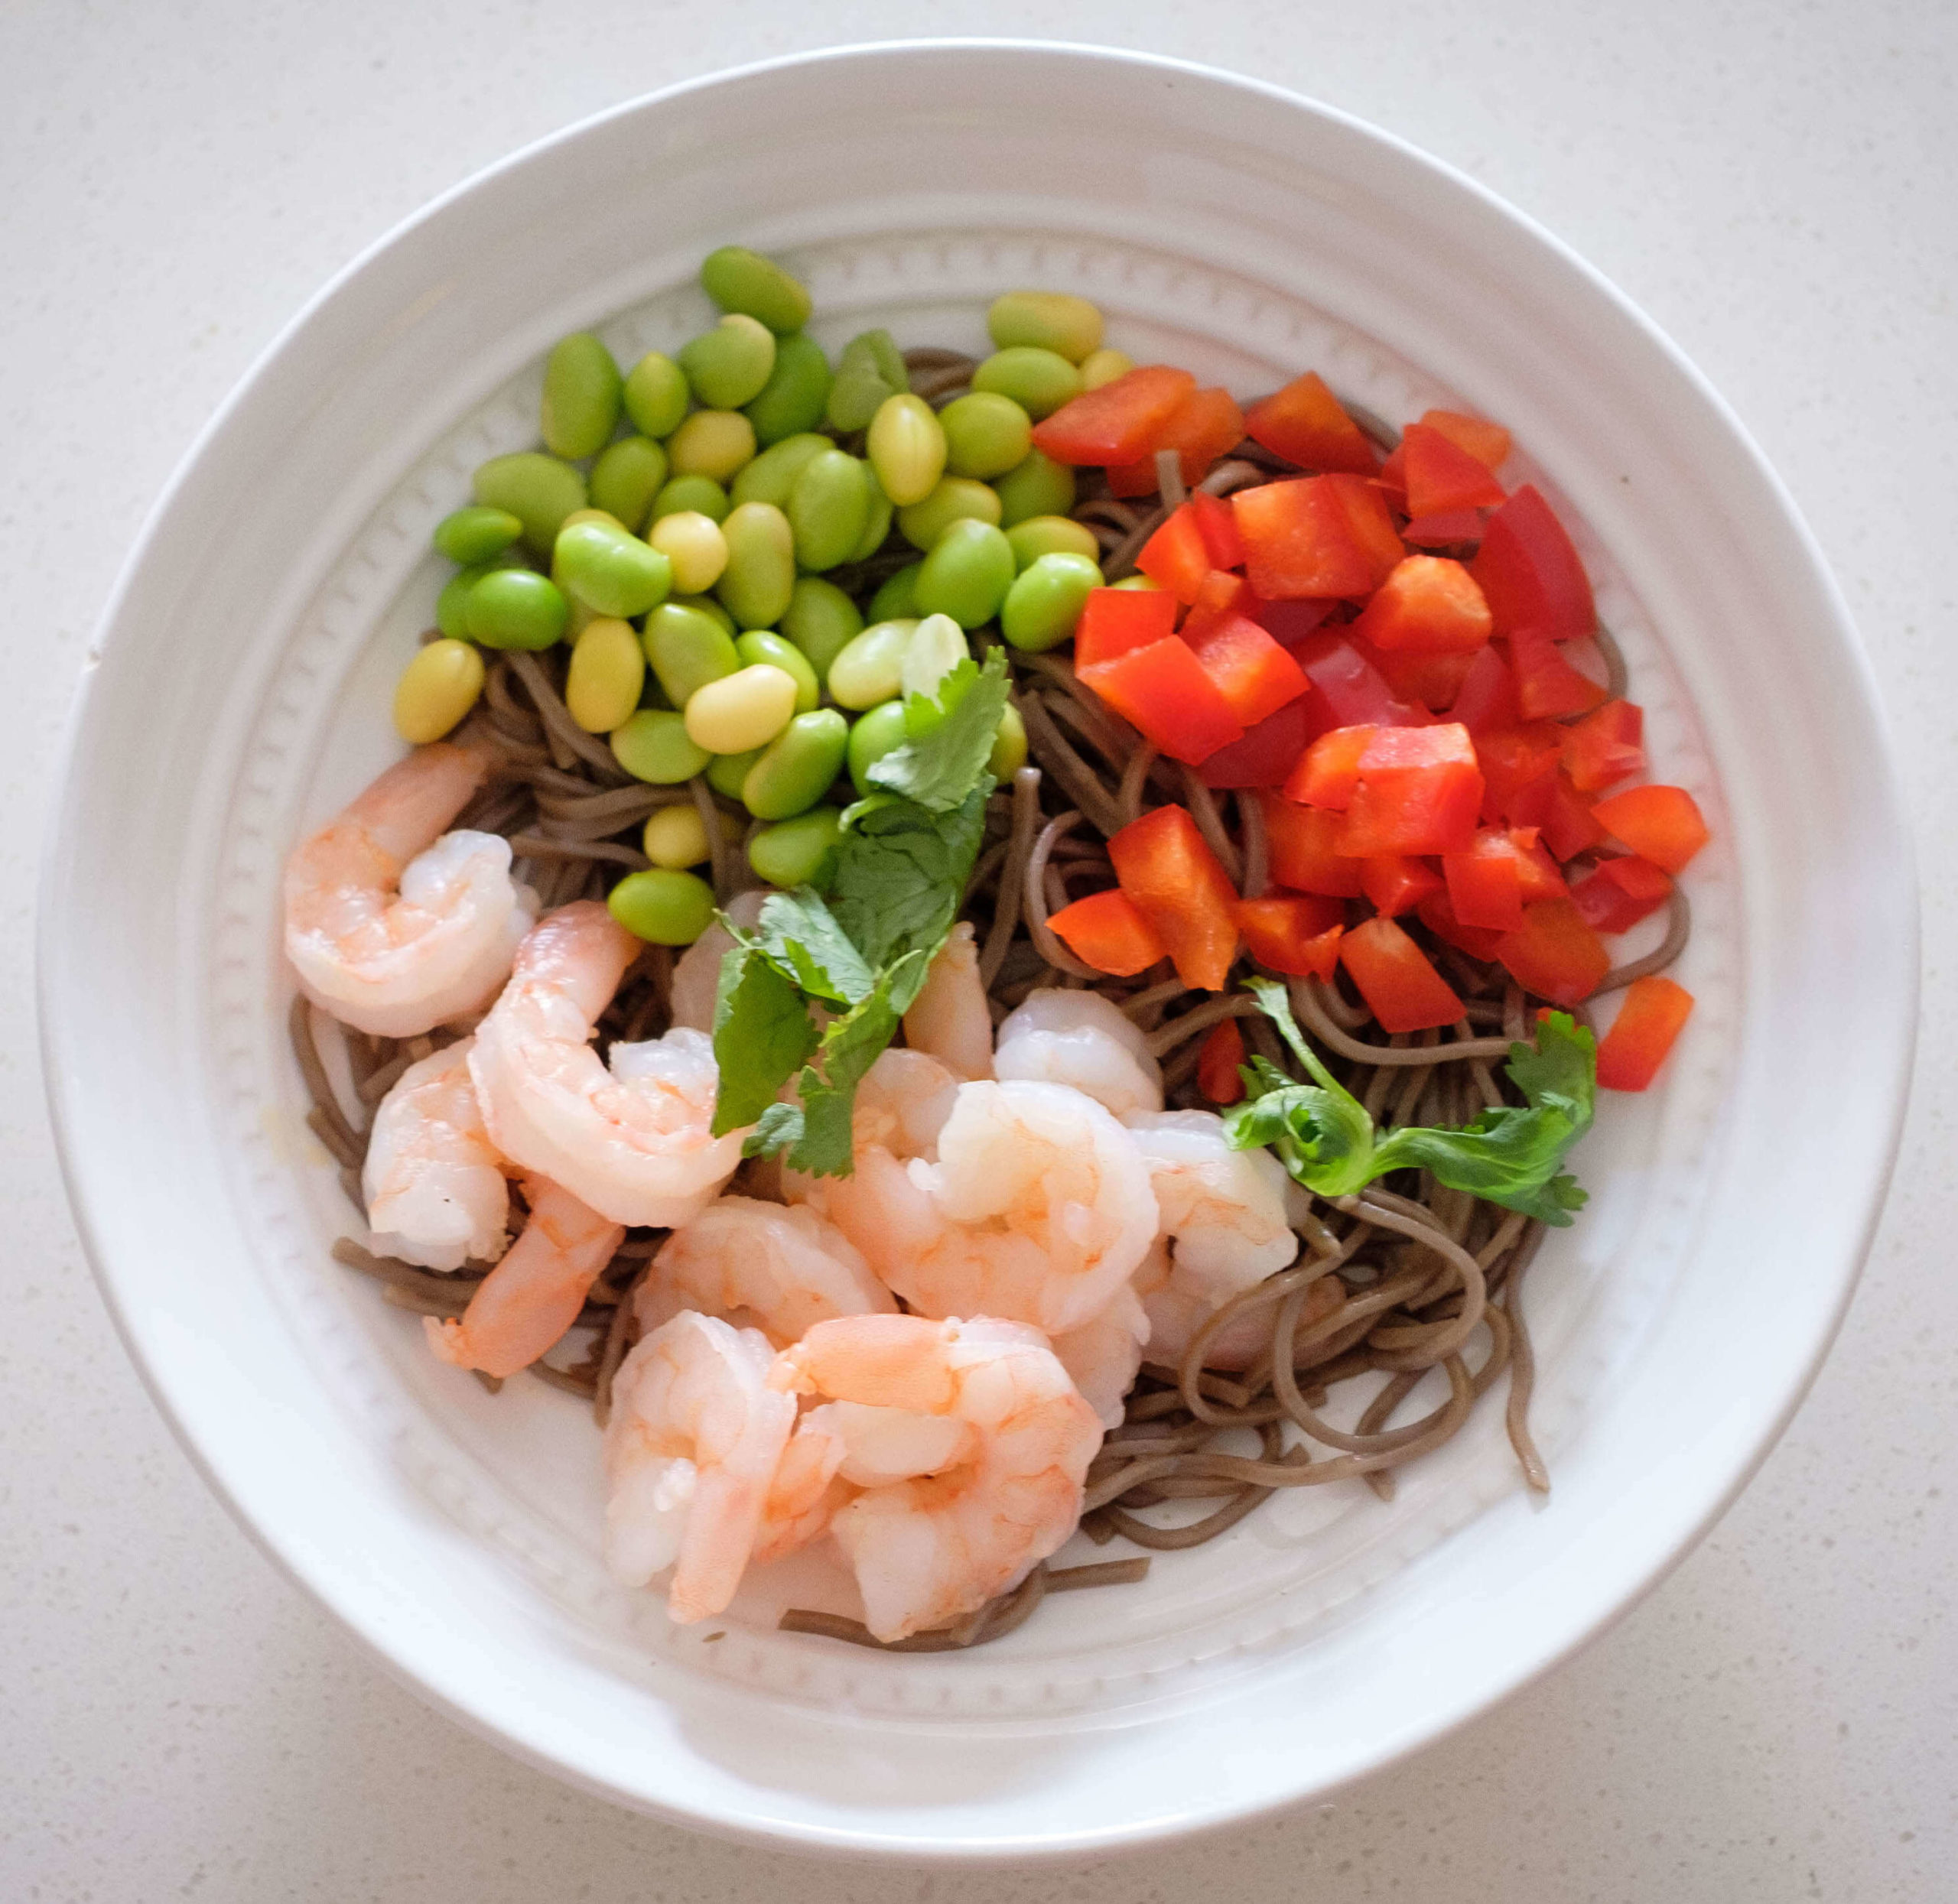
How To Make Shrimp Soba Noodle Salad

shrimp soba noodles

Shrimp soba noodle salad is one of our favorite Japanese recipes and is incredibly easy-to-make, so it’s perfect for beginners. The soba noodle is in an underrated noodle that falls second to ramen in popularity and use. However, this buckwheat based noodle is as versatile as it is healthy, move over ramen there’s a new noodle in town. 

Ease of Making: Easy

Soba noodles are one of the healthiest types of noodles as they are gluten-free, low fat and high in both protein and fiber. One cup of cooked soba noodles contains 6 grams of protein which is essential to building muscle, and producing hemoglobin to keep your immune system healthy. 

The shrimp in this recipe coupled with the soba, provides even more protein. Shrimp is a powerhouse food if you’re on a diet because it’s high in protein but low in carbs, calories and fats. Shrimp contains a wide variety of nutrients including antioxidants and omega-3 fatty acids which have shown to improve heart health. 

How to Cook Soba Noodles 

If you’re wondering how to make soba noodles, there are several steps you can take to ensure you get it right. Soba noodles are extremely versatile and can be served both hot or cold depending on which soba noodle recipe you’re following. The noodles in the recipe will be warm after cooking but will cool as you rinse them and  add in the ingredients for the sauce. You can eat this warm or chilled as a prepped item for the week. 

Step 1: Pick a big enough pot so your noodles have room to move around.

Step 2: Don’t salt your pasta water. 

Step 3: Cook for a short amount of time. Soba noodles only need a maximum of 7 minutes (depending on how much you are cooking) in the water before they should be removed. The majority of soba noodles will cook in 3-5 minutes depending on their thickness. You’re aiming for an al dente noodle. Try testing out the noodles at the five minute mark to see how they are coming along. 

Step 4: Rinse! Soba noodles can stick together and form a gummy clump of noodle mess if you don’t immediately rinse the starch from the pasta after cooking. Leave your soba noodles in a colander and rinse under cold water for at least a minute while you whirl them around your pot. Your water should run clear before stopping your rinse.

Step 5: Drain, serve your soba noodle salad and enjoy!

Soba Noodle FAQ

What are soba noodles? 

Soba noodles are noodles made from buckwheat and whole wheat flours. Soba, is the Japanese word for buckwheat, a food many consider a superfood due to its ability to improve heart health, promote weight loss, and help manage diabetes. This type of a noodle has a mild nutty, earthy taste. 

Where to buy soba noodles?

Dried soba noodles can be found in most grocery stores in the international foods aisle. Look for a noodle that is similar in appearance to spaghetti but slightly flatter and brown in color. 

If you live in an area with a specialty asian food market, keep an eye out for fresh soba noodles which are fantastic as well. 

Do soba noodles have egg in them?

As a general rule, soba noodles are considered vegan and do not have egg. However, there are brands that may include egg so always be sure to check the label. 

Should you rinse soba noodles?

Without a doubt, you want to rinse your soba noodles. This removes excess starch and prevents a big sticky mess.

Are soba noodles bad for you?

Soba noodles are a healthier option than most other pasta options. However, there are some brands that use more refined wheat flour than buckwheat and those would be considered less nutritious. 

How do you cook soba noodles so they don’t stick?

Choose a pot that is large enough to give them plenty of room to move around and rinse them immediately after cooking with cold water. 

Can you use soba noodles for spaghetti?

Sure, you could! Soba noodles are similar to spaghetti in shape and function but will have a nuttier taste than a traditional pasta. 

Meal prep tips for Shrimp Soba Noodle Salad

Our chilled soba noodle recipe is the perfect grab-and-go option for a quick, healthy meal. Here are some tips to make it even better. 

  • If you like your shrimp warm but the salad cool, store them separately in the fridge. You can then reheat the shrimp and toss them in your already chilled salad. 
  • Rinse your noodles. We’ve repeated this multiple times because it’s important.
  • Don’t overcook them. Soba noodles should be served al dente or they can become mushy. Taste your noodles as they cook in an effort to prevent this from happening. 
  • Sub low-sodium soy sauce. If you’re watching your sodium intake, this is a flawless substitution to make this recipe even healthier. 
  • Add in other vegetables like broccoli, snap peas, or carrots. These all make for a great crunch alongside the slippery noodles and shrimp.
shrimp soba noodles

Shrimp Soba Noodle Salad

No ratings yet
Prep Time 5 minutes
Cook Time 15 minutes
Course Main Course, Salad
Cuisine Asian, Japanese
Servings 2

Equipment

  • knife
  • cutting board
  • strainer
  • small boiling pot

Ingredients
  

  • 12 oz pre-cooked frozen shrimp (peeled and deveined)
  • 4 oz soba noodles
  • 1 cup shelled edamame (defrosted)
  • 1 each red bell pepper (diced)
  • 2 tbsp soy sauce
  • 1 tbsp fresh lime juice
  • 1 tsp sesame oil
  • 1 tsp olive oil

Instructions
 

  • Rinse the soba noodles in cold water and then boil it in a pot according the packaged instructions.
  • After it cooks, place the noodles in a strainer and rinse with cool water. Then, drain the noodles
  • Place the noodle mixture in a bowl. Add the soy sauce, lime juice, sesame oil, and olive oil to the bowl. Mix well
  • Then top it off with the shrimp, edamame, and bell pepper. Eat and enjoy!

If you love this recipe, check out these other recipes we know you’ll love too:

Posted on

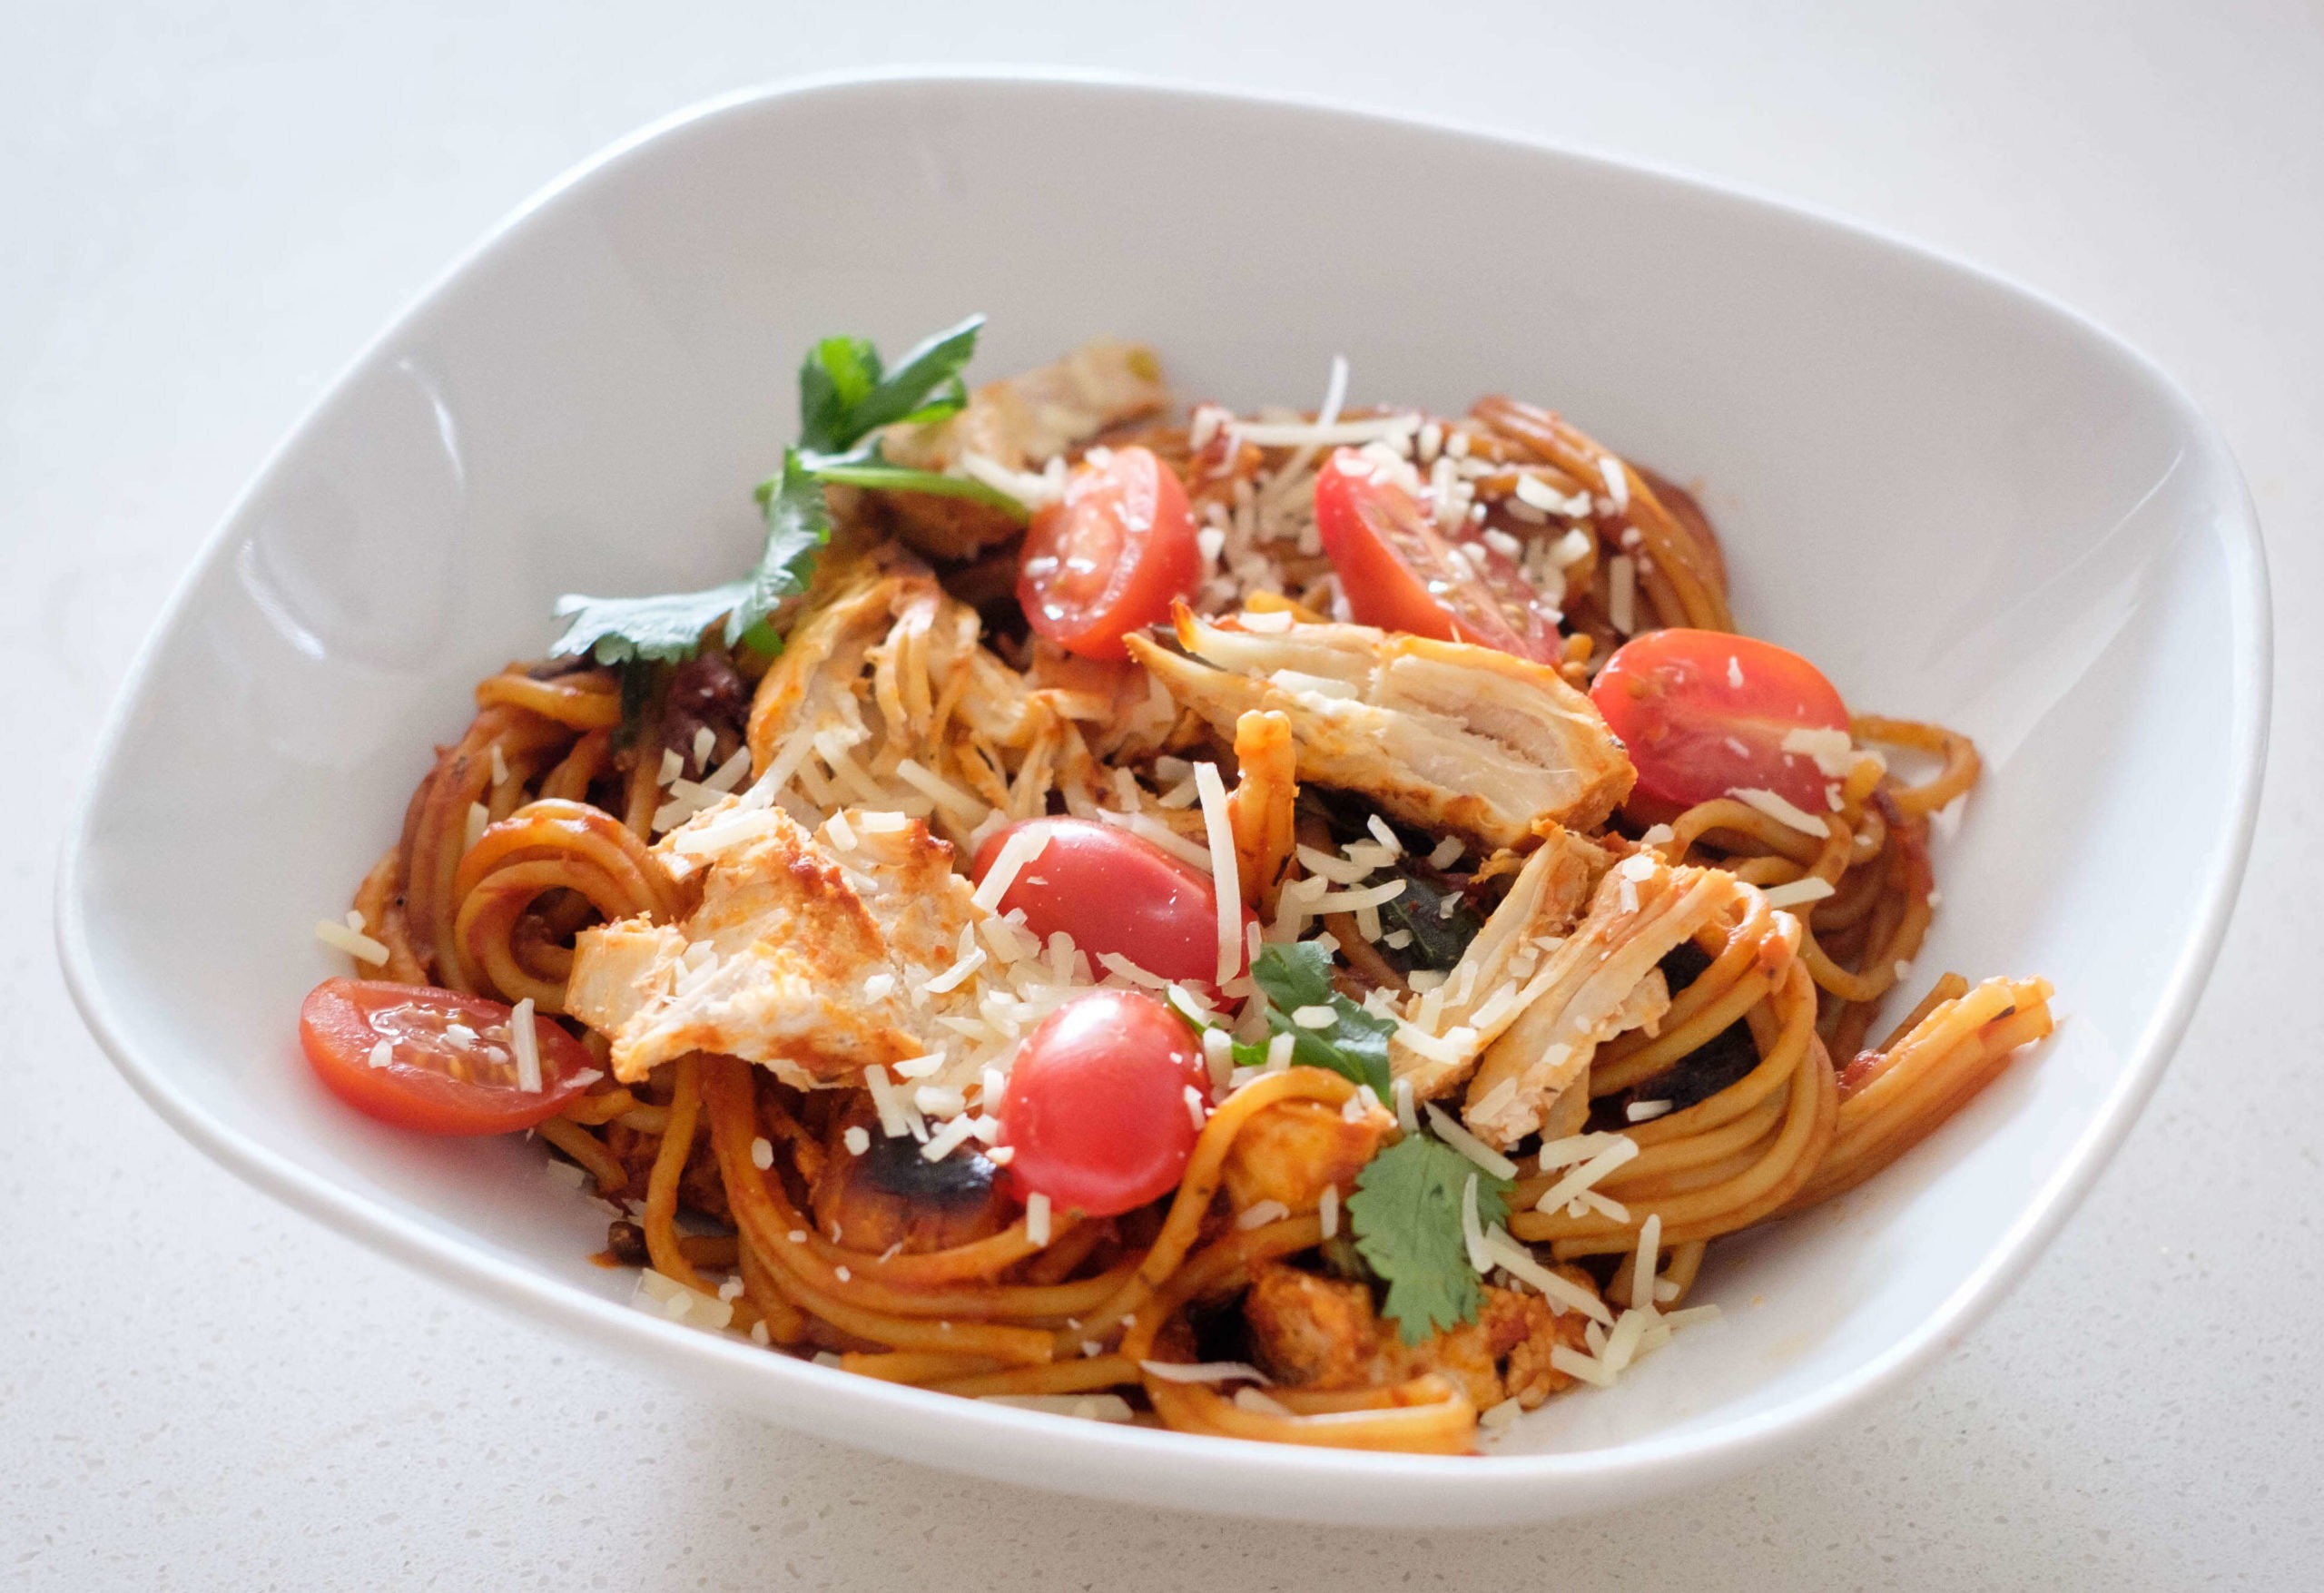
Easy One-Pot Chicken Spaghetti Recipe

Chicken Spaghetti

If there is anything more satisfying than a big serving of pasta goodness, it’s not having to clean the entire kitchen afterwards. Our healthy one-pot spaghetti & chicken recipe ticks both of those boxes. It is not only scrumptious but can be made in just one pot! 

Ease of Making: Medium

One pot pasta meals are a go-to when it comes to meal prepping because you’re reducing the amount of stovetop and oven space needed to complete it. However, this recipe will take about an hour to complete, as the chicken needs to be cooked ahead of the spaghetti in the pot in order to prevent contamination. But trust us, it’s worth the wait. 

If you’re looking for a quick one pot meal, try one of these:

How to Make One-Pot Chicken Spaghetti

There are a few steps you’ll want to take ahead of time to make sure this one-pot wonder turns out as delicious as it sounds. 

  1. Get your base boiling. Add the chicken stock and spaghetti sauce to your pot and heat it over a medium-high heat until boiling. 
  2. Meanwhile, remove your chicken breasts from the package and cut off any fat bits that may have been left in the butchering process. This will help reduce the oiliness of your pasta and sauce. 
  3. Add your chicken to the boiling broth and sauce mixture and reduce the heat to a low-medium. Cover the pot with a lid. The chicken should cook for at 30 minutes or until the internal temperature reaches 165 degrees fahrenheit, the safe cooking temperature for all chicken. 
  4. Toss in the remaining ingredients and cook for an additional 15 minutes. It’s important you make sure all of the pasta is covered so that it can cook properly.
  5. Once your pasta is cooked, turn off the heat. Leave everything but the chicken in the pot. Remove chicken and shred with a fork. At this point it will be super tender and this should be easy. 
  6. Return the chicken to the pot and mix it around with the rest of the ingredients inside of the pot. 
  7. Time to serve your creamy chicken spaghetti! Top with parmesan cheese and cherry tomatoes for an extra pop.

Chicken spaghetti is an easy go-to meal, especially in the winter, providing a hearty warm meal for days to come. 

FAQ for One-Pot Chicken Spaghetti

Can you freeze leftover chicken spaghetti?

Absolutely! We like to prep the dish the same as above and then store in a casserole dish in the freezer. This way you can pop it in the oven to reheat. 

What is a good side for chicken spaghetti?

While the chicken spaghetti dish is hearty enough on its own, you may like to have a simple garden salad on the side. 

How long is chicken spaghetti good for?

Properly stored, chicken spaghetti can last 3-5 days in the fridge or up to 3 months in the freezer.

Chicken Spaghetti

One-Pot Chicken Spaghetti

Juicy chicken, nutritious vegetables and a rich broth all cooked in one pot, make this dish an absolute wonder for weeknight meals or prep ahead entrees
No ratings yet
Prep Time 5 minutes
Cook Time 45 minutes
Course dinner, Main Course
Cuisine American, Italian
Servings 4

Equipment

  • knife
  • cutting board
  • spatula
  • large soup pot

Ingredients
  

  • 1 lb chicken breast
  • 24 oz spaghetti sauce
  • 2 cups chicken broth
  • 8 oz dry spaghetti (normally 1/2 a box)
  • 8 oz mushrooms (sliced)
  • 1 cup frozen spinach (defrosted)
  • 1/2 cup shredded parmesan cheese
  • 1 cup cherry tomatoes (sliced)

Instructions
 

  • Add chicken broth and spaghetti sauce to a large pot and bring it to a boil on medium high heat.
  • Next, add the chicken breasts. Once the pot comes a boil, reduce the heat to low to medium heat and bring it to a simmer. Then cover the pot. Cook the chicken for 30 minutes (until it reaches an internal temperature of 165F).
  • Then, add the pasta, mushrooms, and spinach. Add more water if the sauce is too dry. Mix well so that the pasta is submerged in the sauce. Cook for another 15 minutes until the pasta is fully cooked.
  • Lastly, remove the chicken from the sauce and shred it with a knife and fork into bite size pieces.
  • Assemble the spaghetti with the pasta and chicken. Top it off with fresh cherry tomatoes and parmesan cheese to your preferred amount. Eat and enjoy!

If you love this recipe, check out these other recipes we know you’ll love too:
Posted on

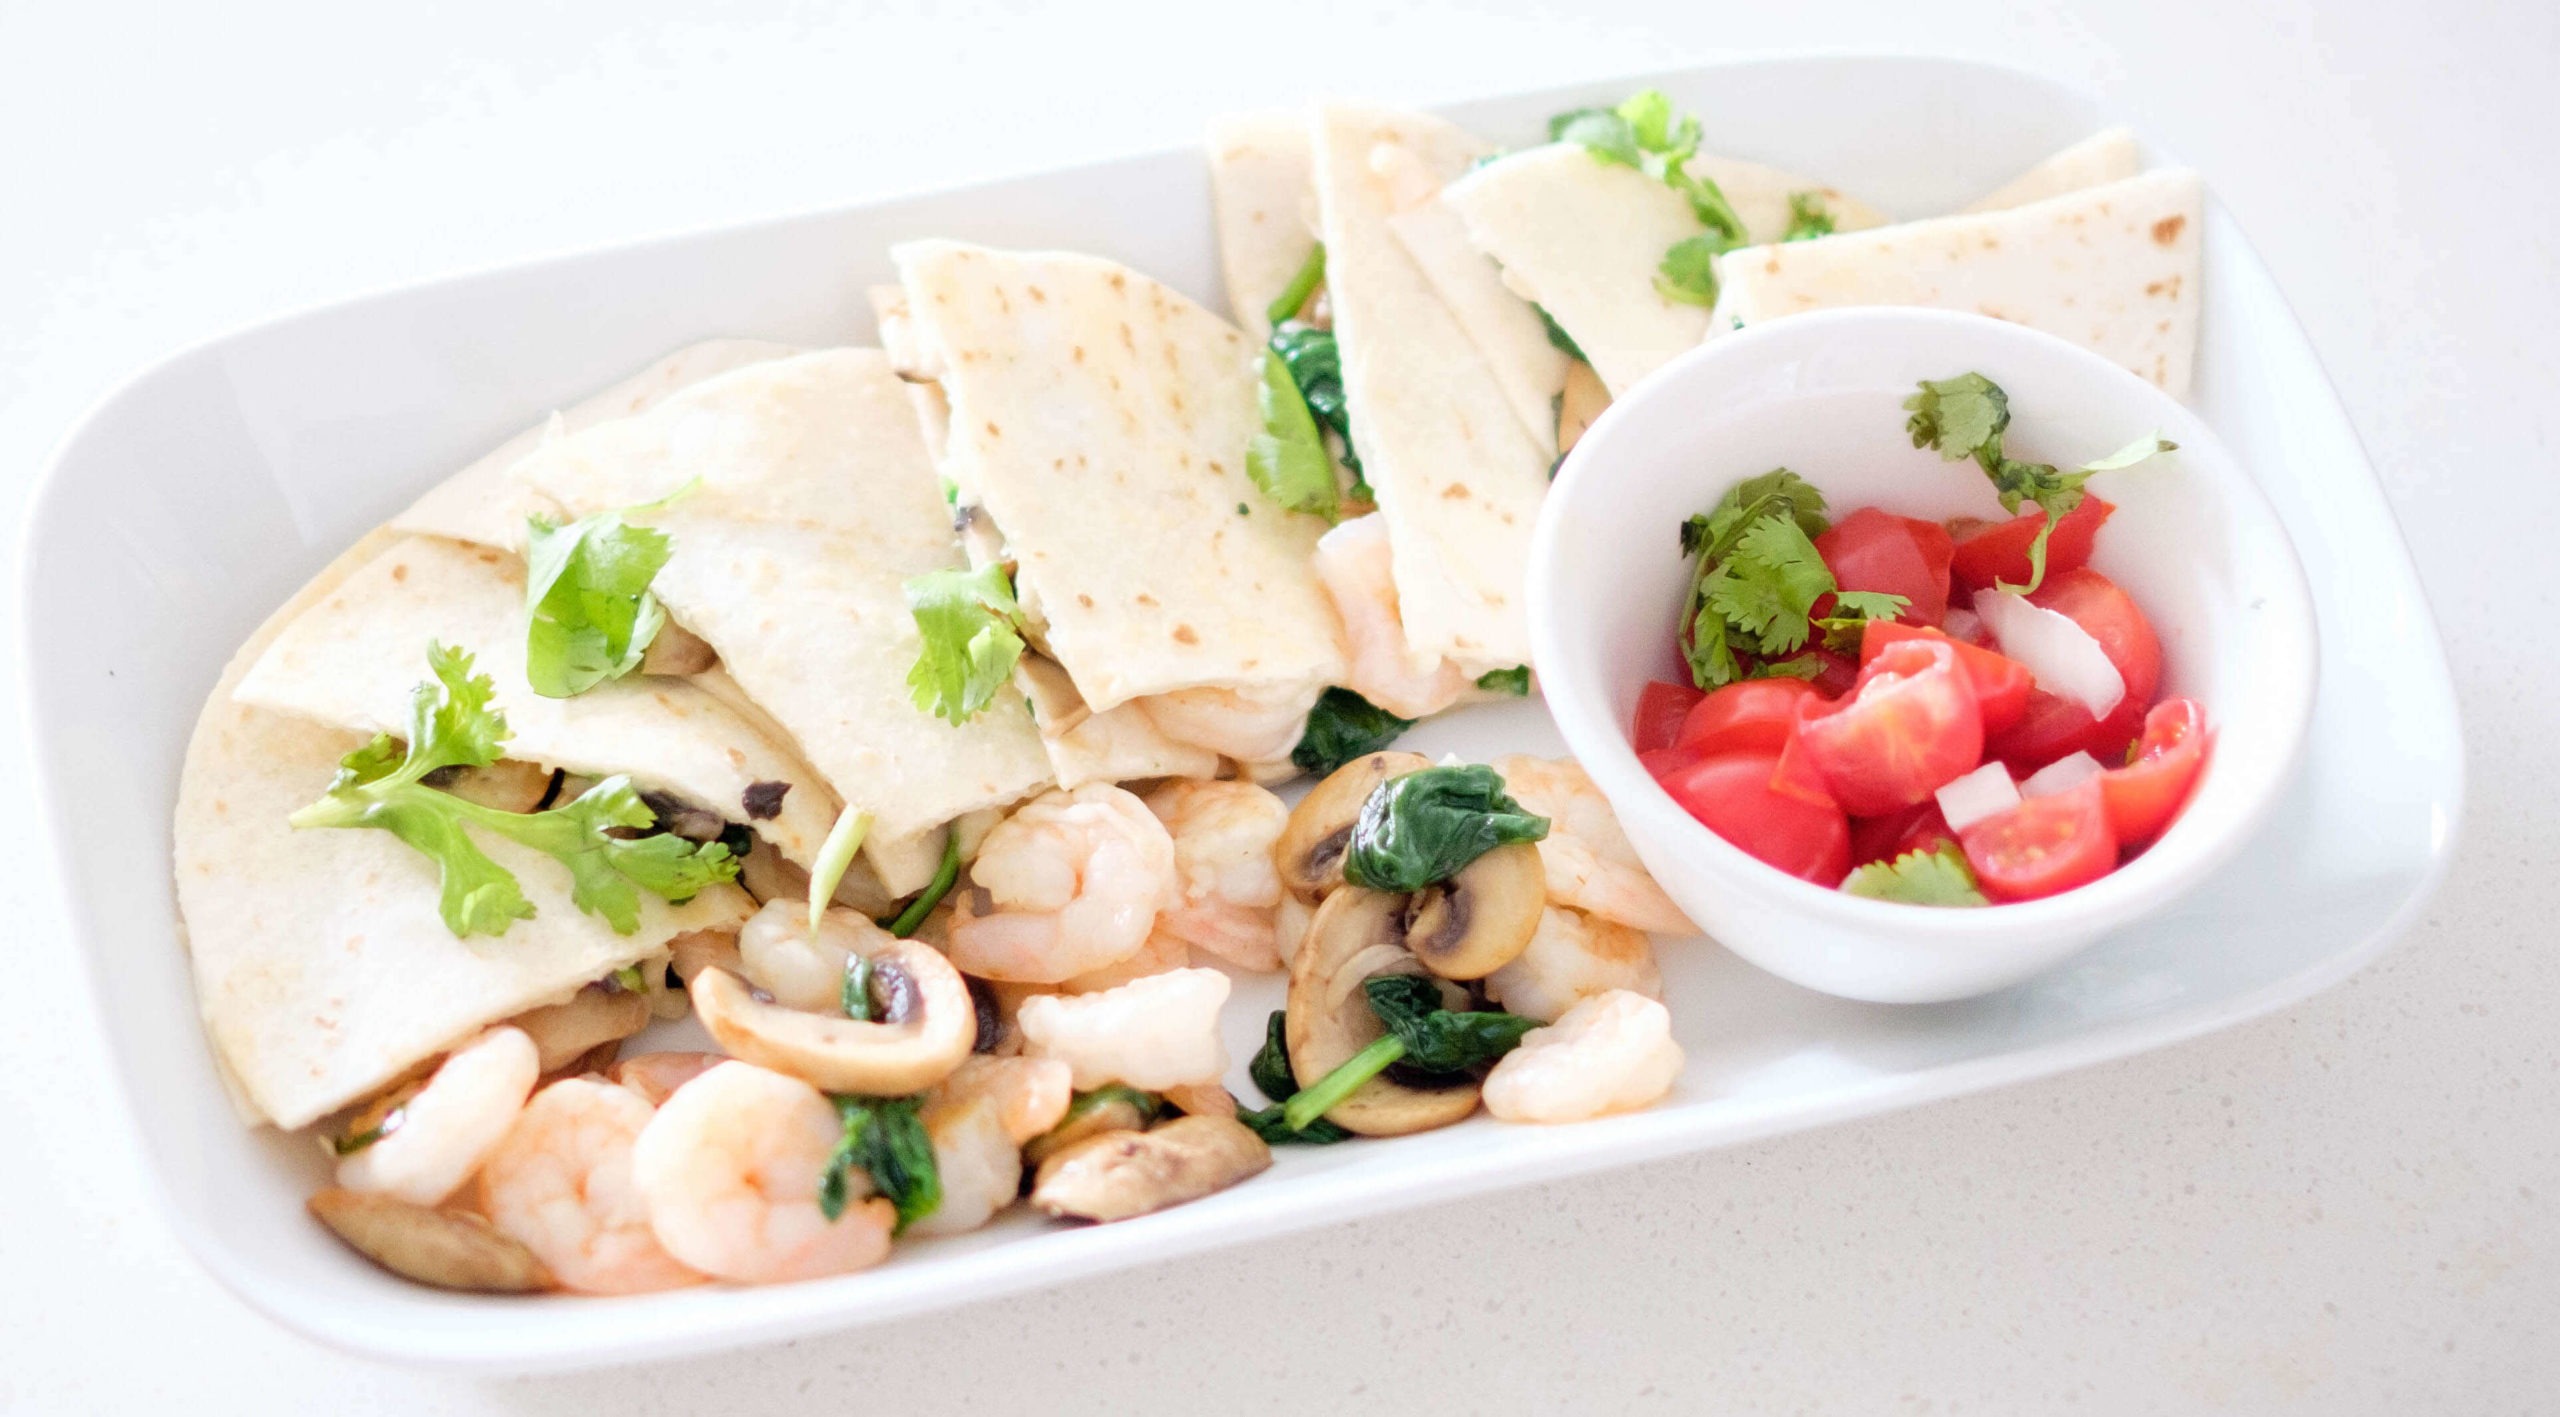
Quick & Easy Shrimp Quesadillas For Meal Prep

shrimp quesadillas

Quesadillas are a go-to option when you want something tasty and fast. Most people almost always have tortillas and cheese in the refrigerator, so quesadillas make for a great catch all meal that you can throw in whatever proteins and veggies you have on hand, heat up and enjoy. One of our favorite combinations of flavors in a quesadilla is shrimp paired with mushrooms, spinach, mozzarella cheese and a few other seasonings. 

Ease of Making: Easy

Not only do we think this is the best shrimp quesadilla recipe out there, but this entire recipe can all be made in one pan and takes less than 20 minutes to come together. No waiting, no mess. 

How to Make Shrimp Quesadillas

First, you want to start by sauteing the mushrooms and spinach together in your pan. You only need to cook these until they are softened, about 1-2 minutes. Next, the seasoning and shrimp is added and you’ll cook until the shrimp is pink in color and no longer translucent. Shrimp fully cooks in 3-5 minutes and can overcook quickly so keep an eye on them and flip halfway through.  Remove the mixture from the pan and wipe clean.

Using an oil or fat of your choice, butter, avocado oil, etc., place the tortilla in the pan and layer with cheese followed by shrimp, more cheese and the top tortilla. Once your tortilla has reached a golden brown on the bottom, use your spatula to peek under a corner of the bottom tortilla to see its progress, you can flip your quesadilla. Cook on this side until golden brown and then remove from heat and cut into halves or quarters. 

We like to top ours with all the fixings: sour cream, guacamole, pico and/or salsa, but the toppings are completely up to you and your likings! 

Shrimp Quesadilla FAQ

What can you put in a quesadilla?

You can put almost anything inside of a quesadilla, as long as it’s not a liquid, the tortilla should support most ingredients. 

What are the best tortillas for quesadillas?

Flour tortillas are best for quesadillas because they provide a nice crisp layer for your ingredients and won’t break apart if you fold them or flip them. 

How do you elevate a quesadilla?

To elevate a quesadilla you’ll want to use high quality ingredients. Think lobster, duck, etc. 

What to serve with quesadillas?

You can serve your quesadilla with a bit of lettuce, tomatoes, sour cream, guacamole, pico and/or salsa.

Meal prep tips for Shrimp Quesadillas

  • Pre-portion your selected toppings of salsa, guacamole, or sour cream ahead of time so that when it’s time to grab and go, you can in fact grab and go. 
  • Heat your quesadilla up in a toaster oven, standard oven, or air fryer to regain it’s crispiness if you’re using this as a prepped meal. 
shrimp quesadillas

Shrimp Quesadillas

A flavorful mixture of shrimp, spinach, mushrooms, and cheese in flour or corn tortillas
No ratings yet
Prep Time 5 minutes
Cook Time 11 minutes
Course Appetizer, Main Course
Cuisine American, Mexican
Servings 2

Equipment

  • knife
  • cutting board
  • spatula
  • saute pan

Ingredients
  

  • 12 oz shrimp (peeled and deveined)
  • 4 each tortillas
  • 1 cup mushrooms (sliced)
  • 2 cups baby spinach
  • 1/4 cup shredded mozzarella
  • 1 tbsp olive oil
  • 1 tbsp butter
  • 1/4 tsp chili powder
  • 1/4 tsp salt

Instructions
 

  • Add oil to a skillet on medium-high heat. Saute the mushrooms and spinach until they soften
  • Next, add the shrimp and season with chili powder and salt. Saute until the shrimp fully cooks (about 3 to 5 minutes). Remove the shrimp mixture from the skillet
  • Carefully wipe down the skillet with a paper towel to remove any excess residue. Then, heat some butter in the pan on low to medium heat. Place a tortilla in the skillet and then layer the ingredients: cheese, shrimp mixture.
  • Top with a little more cheese and the top layer tortilla. Let the bottom tortilla crisp up for about 2 minutes, then flip the quesadilla to toast the other side
  • Remove the quesadilla from the skillet and slice it into quarters. Serve with your choice of toppings such as pico de gallo, sour cream, or quacamole. Eat and enjoy!

If you love this recipe, check out these other recipes we know you’ll love too:
Posted on

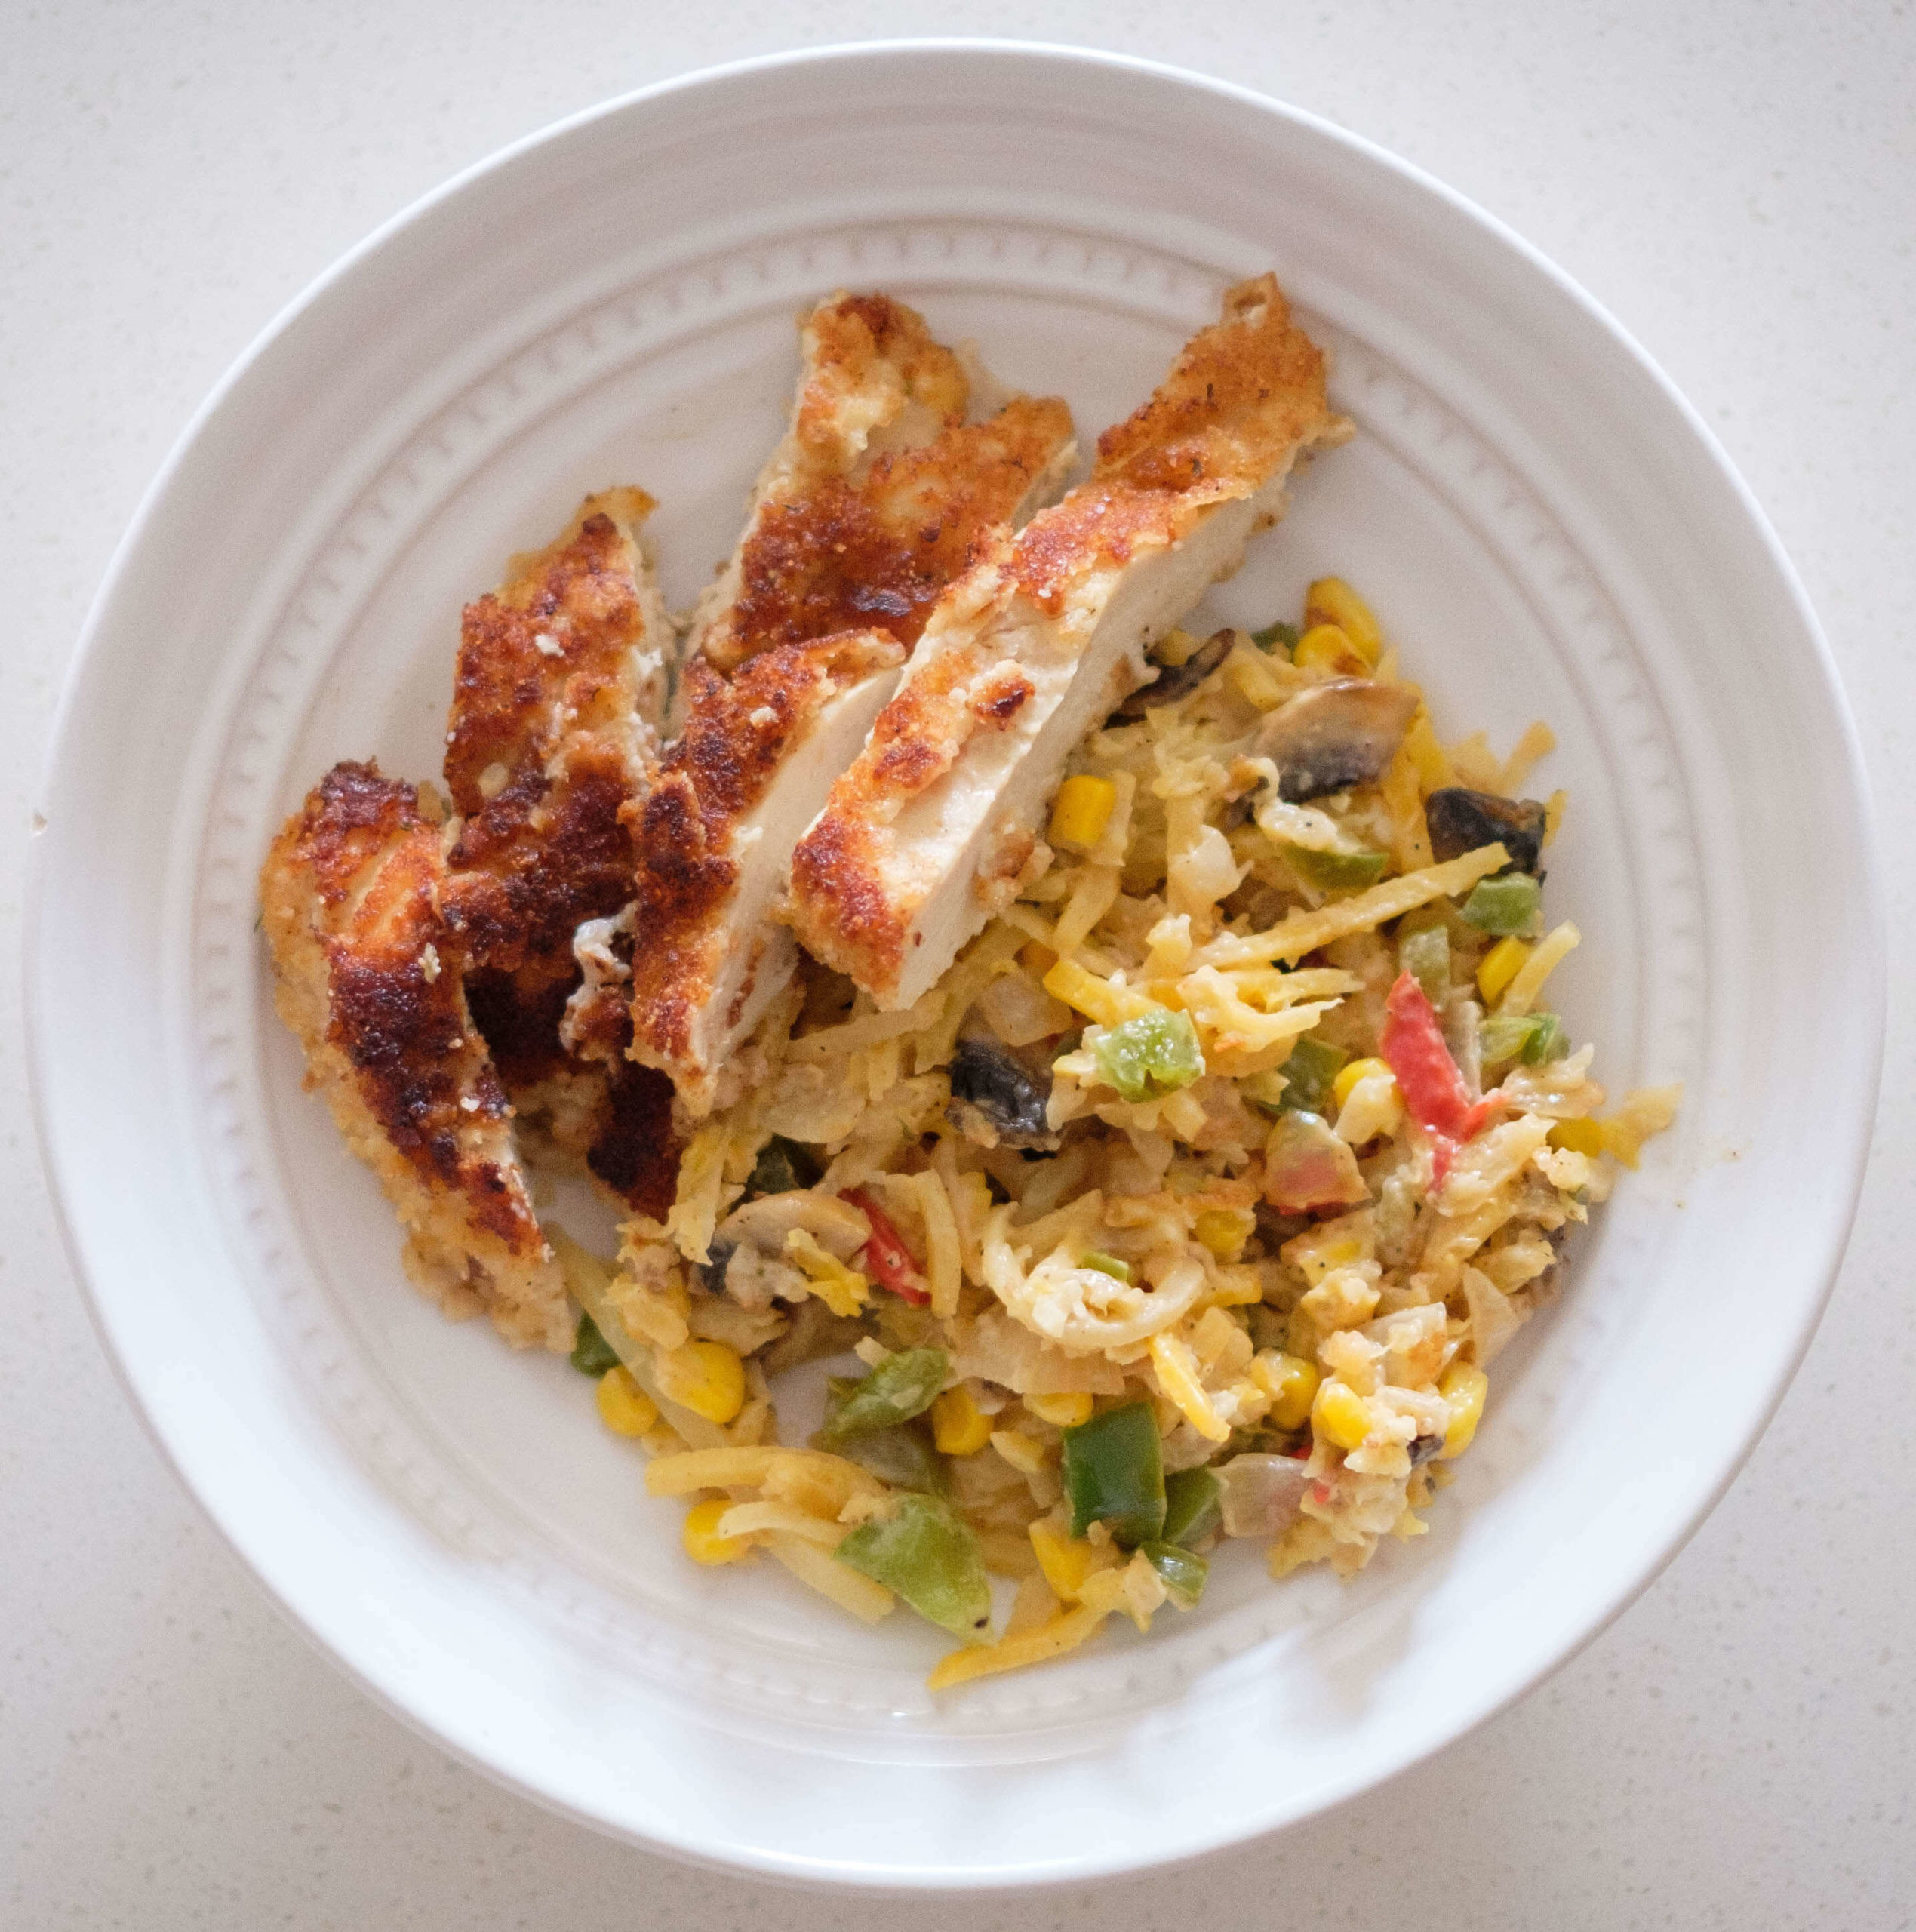
Crispy Chicken With Cajun Squash Spirals

crispy chicken and squash

Crispy Chicken With Cajun Squash Spirals

No ratings yet
Prep Time 5 minutes
Cook Time 20 minutes
Course dinner, Main Course
Cuisine American, Cajun
Servings 2

Equipment

  • knife
  • cutting board
  • mallet
  • mixing bowl
  • tongs
  • spatula
  • saute pan

Ingredients
  

  • 12 oz chicken breasts
  • 1 each large egg
  • 1/4 cup flour
  • 1/4 cup ice cold water
  • 1/2 cup breadcrumbs
  • 2 cups butternut squash spirals
  • 1/4 cup white onions (diced)
  • 1 tbsp garlic (minced)
  • 1 each green bell pepper (diced)
  • 1 cup mushrooms (sliced)
  • 1/2 cup corn kernels
  • 1 tbsp butter (extra for squash spirals)
  • 1 tbsp flour (extra for squash spirals)
  • 1/4 cup heavy cream
  • 1/4 cup parmesan cheese
  • 1 tbsp oil
  • 1/4 tsp paprika
  • 1/4 tsp dried oregano
  • 1/4 tsp dried thyme
  • 1/4 tsp onion powder
  • 1/4 tsp salt

Instructions
 

  • Prepare the cajun seasoning by mixing all the spices together (paprika, oregano, thyme, onion powder, salt)
  • Then prepare the chicken: Place plastic wrap on top of the chicken breast. Pound it flat with the flat side of a mallet (meat tenderizer), working from the inside out, until it is about 1/4 inch thick. Repeat with the remaining chicken breasts
  • Prepare the batter: In a bowl, mix together the flour, ice cold water, and egg
  • Prepare the breadcrumbs: In a bowl, add half of the cajun seasonings to the bread crumbs. Save the other half of the seasonings for the squash spirals
  • Pre-heat a skillet with olive oil on medium-high heat. Then dip the chicken breast into the batter and dredge it in the breadcrumbs. When the pan is heated, pan fry the chicken breast on each side until golden brown and fully cooked (about 3 to 5 minutes on each side).
  • Once the chicken is fully cooked, remove it from the pan. Using the same pan, add the onions and bell peppers. Saute until they soften. Then add the mushrooms and stir until they soften and turn golden brown. Add the cajun seasonings and mix thoroughly.
  • Next, add the corn. Add butter and flour and mix well until the flour turns into a paste.
  • Then, add heavy cream and let it simmer until it thickens.
  • Sprinkle in parmesan cheese and add the butternut squash spirals.
  • Mix well until the sauce completely covers the butternut squash spirals. Cook for another 4 to 5 minutes until the squash gets tender
  • Slice the chicken into bite size pieces and serve with the squash spirals. Eat and enjoy!
Posted on

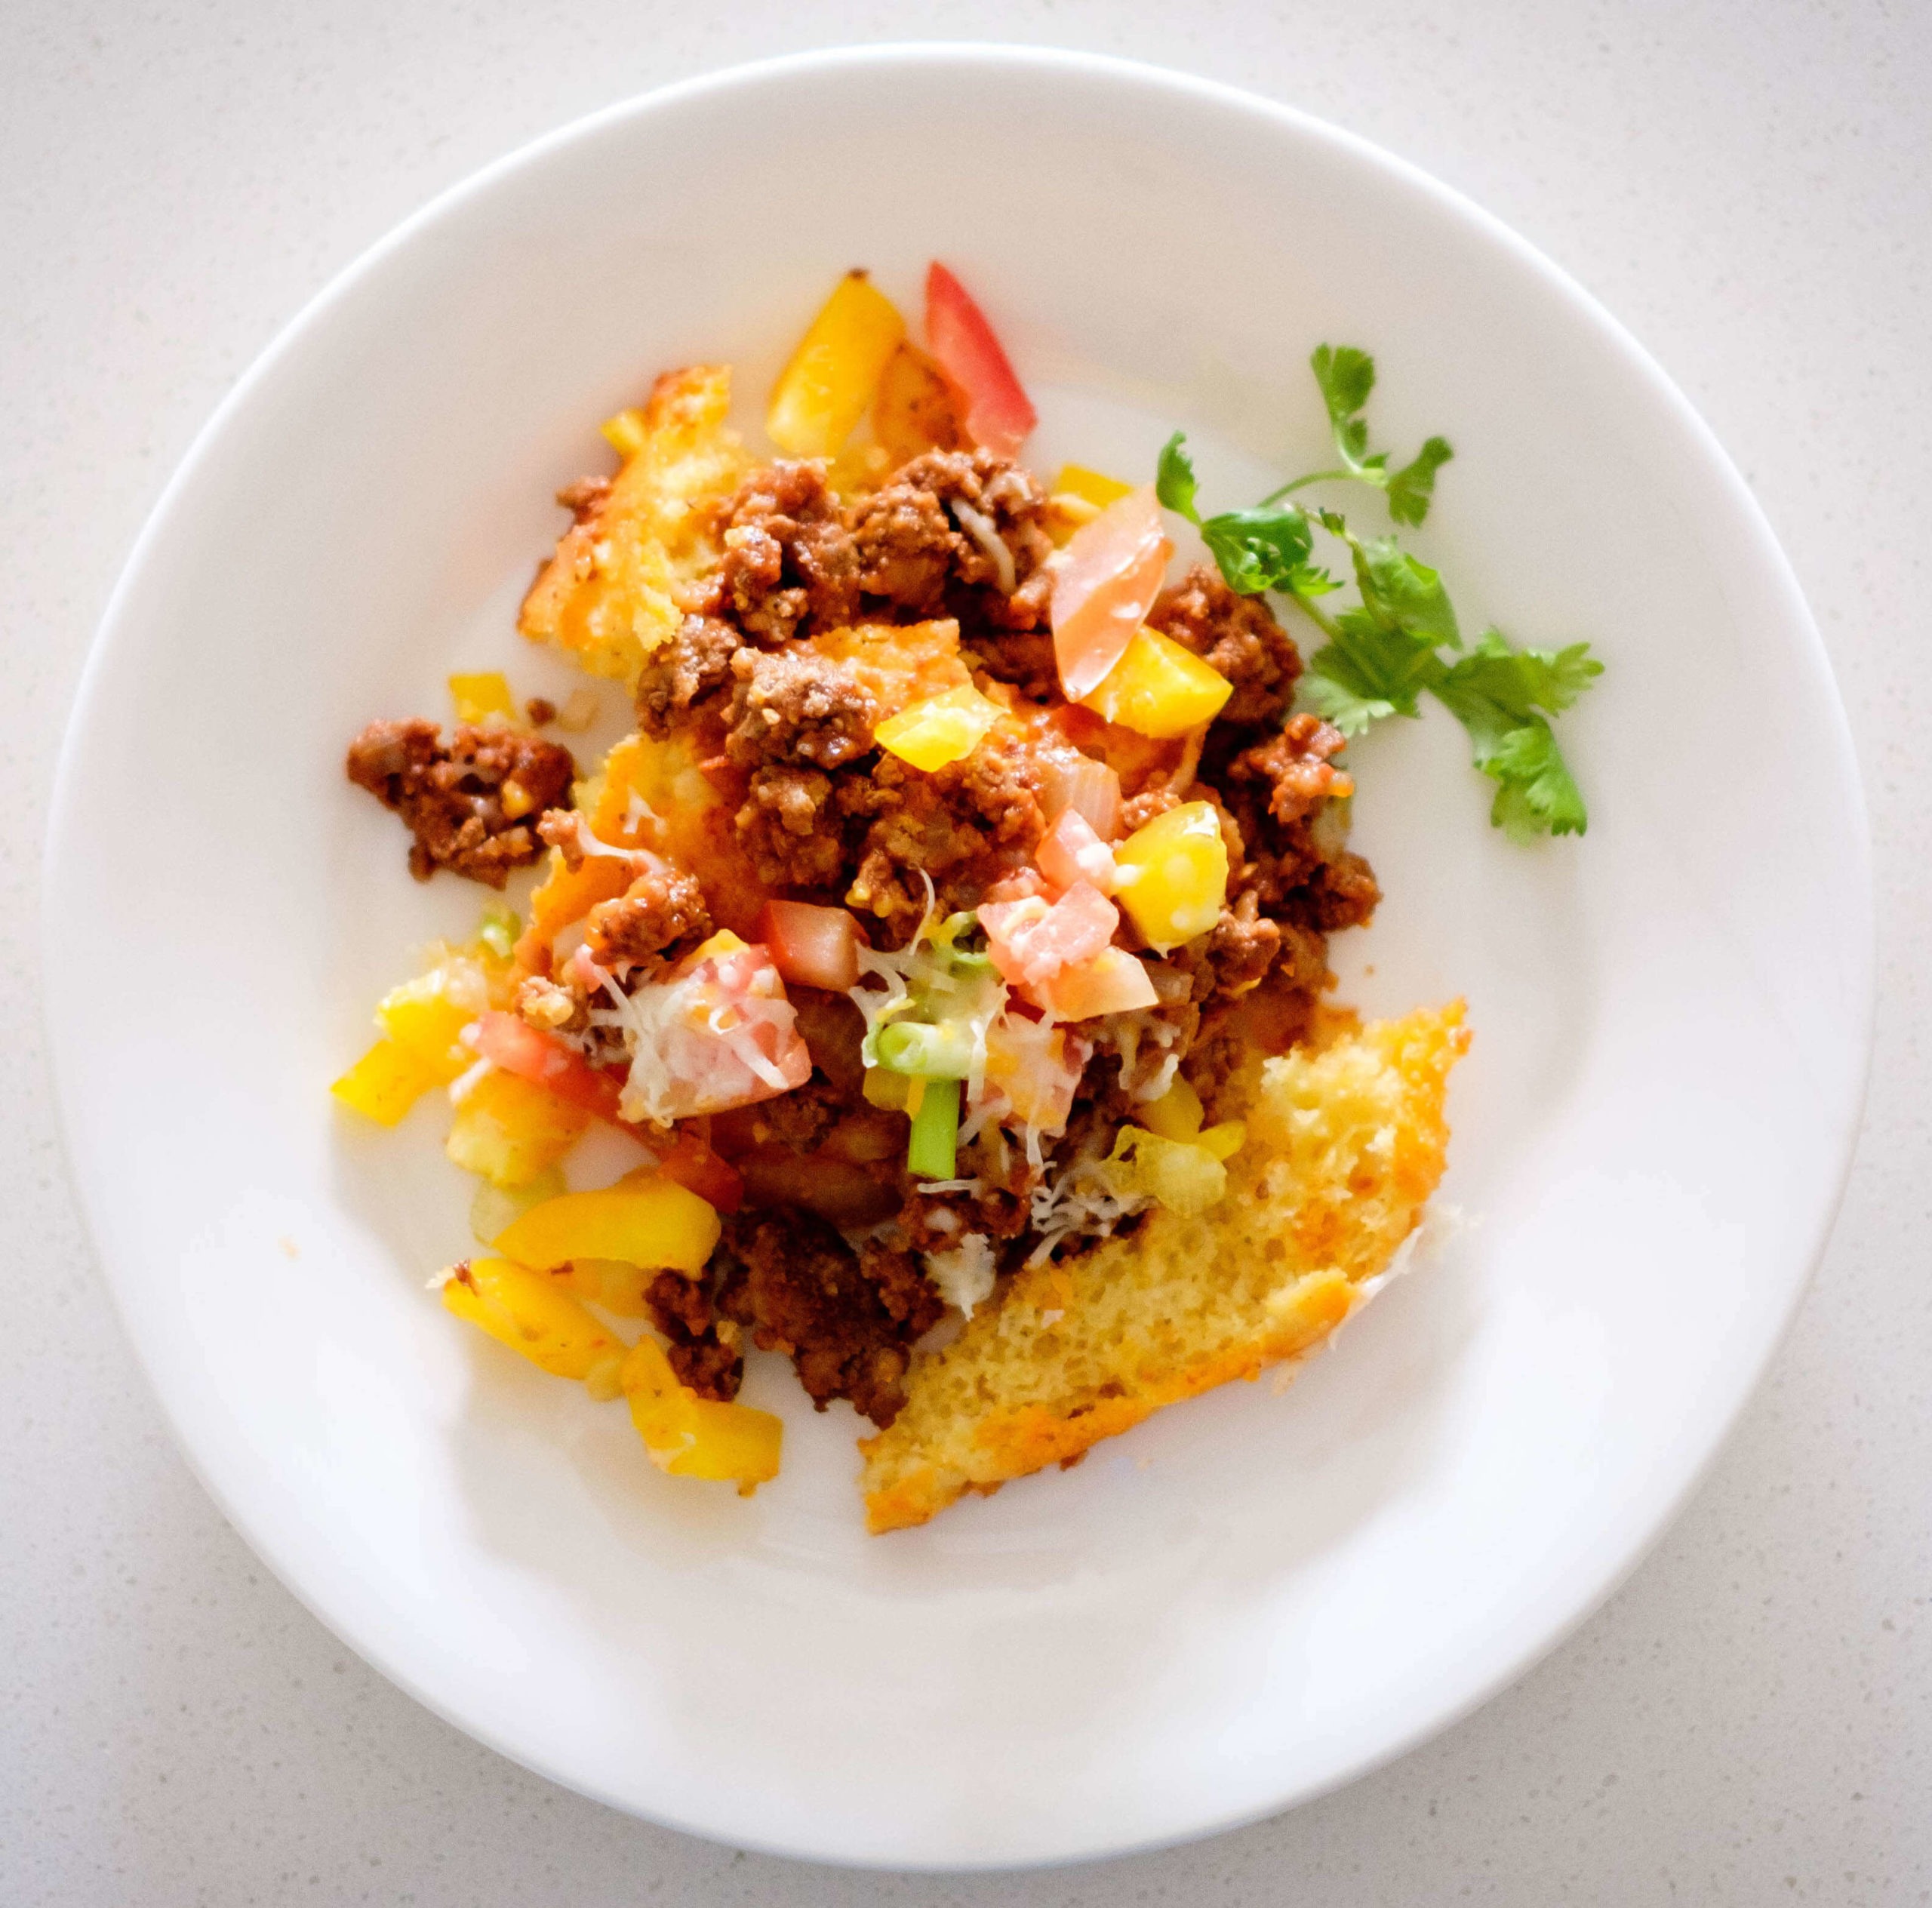
How To Make Beef Tamale Casserole

beef tamale

Tamales are a common and popular dish among Spanish, Mexican, and Latin cultures. Typically they are corn-filled dough that is filled with various meats and vegetables. Beef tamales are most notably the fan-favorite and let us say, we are fans. Making individual, traditional tamales can not only be time-consuming but it is also difficult. We thought we’d take these classic tamale flavors and turn them into a flavor-packed beef tamale casserole that is easy to prep and portion for your busy week ahead. 

Ease of Making: Medium

How to Make Beef Tamale Casserole

Beef tamale casserole is typically made by layering cornbread, tamale sauce and seasoned ground beef in a way that mimics the traditional tamale. Casseroles make for easy dishes to feed a family, to make ahead and freeze or to keep for the week and have a warm hearty meal every day. Casseroles are popular because you can put a variety of items in the deep baking dishes and quickly pop it in the oven. If you find that you aren’t a fan of ground beef, you can easily sub in ground chicken, turkey, or any other protein in this dish and make it to your liking. We like our dishes to be quick, easy and flexible for your cooking needs. 

Our beef tamale casserole can also be topped with some of your favorite Mexican inspired ingredients like jalapenos, sour cream, lettuce, tomatoes, salsa, or pico de gallo! 

There are three main components of a casserole: pieces of meat, vegetables, and some sort of starchy binder. Each component serves a purpose of its own. 

  • Starch  – We use a cornbread base to hold up to the flavors of the seasoned meat and vegetables but you can use a variety of starches in casseroles. Potatoes, pasta, rice, or any other grain can serve as an excellent starch in your casserole to bring it together.
  • Pieces of meat – Ground beef is used in this beef tamale casserole but when making a casserole you can use practically any type of protein. Have fun and experiment!
  • Vegetables – There’s no limit to the types of vegetables you can put inside a casserole and oftentimes, casseroles are packed with veggies and you won’t even know it. 

How to Cook Beef Tamale Casserole

Start by preheating your oven, we cook our beef tamale casserole at 400℉. Next, you will want to prep the cornbread layer of your dish, your base. Once mixed add your cornbread mixture to a greased baking dish that is deep enough to hold the rest of the casserole and bake for 20-25 minutes.

It is necessary to brown meat before stewing so that the meat is not raw when you cook and add it to the cooked cornbread layer. While the cornbread bakes, you will add your onions to a hot saute pan with oil and cook until softened. Add in the ground beef and cook until browned, breaking up into smaller pieces as it cooks. After the meat has cooked, add in your seasonings and sauce.

Remove your cornbread from the oven and carefully layer on your beef and sauce mixture, followed by the remaining vegetables and a layer of cheese to the cooked cornbread and return to the oven to finish baking. This should only take about 5-10 minutes for your cheese to melt. Once your cheese is melted on top, remove your casserole from the oven and serve.  

Meal Prep Tips for Beef Tamale Casserole

  • Reheat your casserole prep in the oven by covering tightly with foil and heating for 20 minutes at 400℉.
  • If at any point you notice your casserole getting too brown or starting to burn, you can cover your dish with tin foil for the remainder of the baking process. This helps protect the top layer of the dish and prevent scorched meat and cheese. 
beef tamale

Beef Tamale Casserole

Layers of cornbread, tamale sauce, and seasoned beef make this the perfect comfort food dish for you and your family.
No ratings yet
Prep Time 5 minutes
Cook Time 40 minutes
Course dinner, Main Course
Cuisine American, Mexican
Servings 4

Equipment

  • knife
  • cutting board
  • spatula
  • saute pan
  • baking dish

Ingredients
  

  • 1 lb lean ground beef
  • 1/2 each small white onion (diced)
  • 1 each green bell pepper (diced)
  • 1 each roma tomato (diced)
  • 1/4 cup green onions (chopped)
  • 1/2 cup shredded cheddar cheese
  • 8 oz tomato sauce
  • 1/2 tsp chili powder
  • 1/2 tsp cumin
  • 1/2 tsp paprika
  • 1/2 tsp onion powder
  • 1/2 tsp garlic powder
  • 1/4 tsp salt
  • 1 tbsp olive oil

Cornbread batter recipe:

  • 1 cup flour
  • 1 cup yellow cornmeal
  • 2/3 cup white sugar
  • 3 tsp baking powder
  • 1 cup yogurt
  • 1/3 cup oil
  • 1/3 cup water

Instructions
 

  • Pre-heat oven to 400F
  • First, prepare the cornbread. In a mixing bowl, add the egg, sugar, yogurt, and vegetable oil. Stir, until thoroughly mixed.
  • Then, add the baking powder, flour, and cornmeal. (best to mix in the dry ingredients in batches so that the mixture does not clump)
  • Place the batter in a greased baking dish and bake in the oven for 20-25 minutes until the center is fully cooked.
  • Next, prepare the taco meat. Add oil to a heated pan on medium high heat. Saute the onions until they soften.
  • Add the ground beef and break into smaller pieces. Continue to cook until it has turned golden brown. Then add the spices and tomato sauce. Continue to stir the beef until it is fully cooked.
  • Remove the cornbread from the oven. Carefully add the ground beef mixture on top. Then, layer the rest of the vegetables on top.
  • Finally, add shredded cheese on top and place it back into the oven for 5 to 10 minutes until the cheese has melted.
  • Remove from the oven, and carefully scoop out a serving. Eat and enjoy!

If you love this recipe, check out these other recipes we know you’ll love too:
Posted on

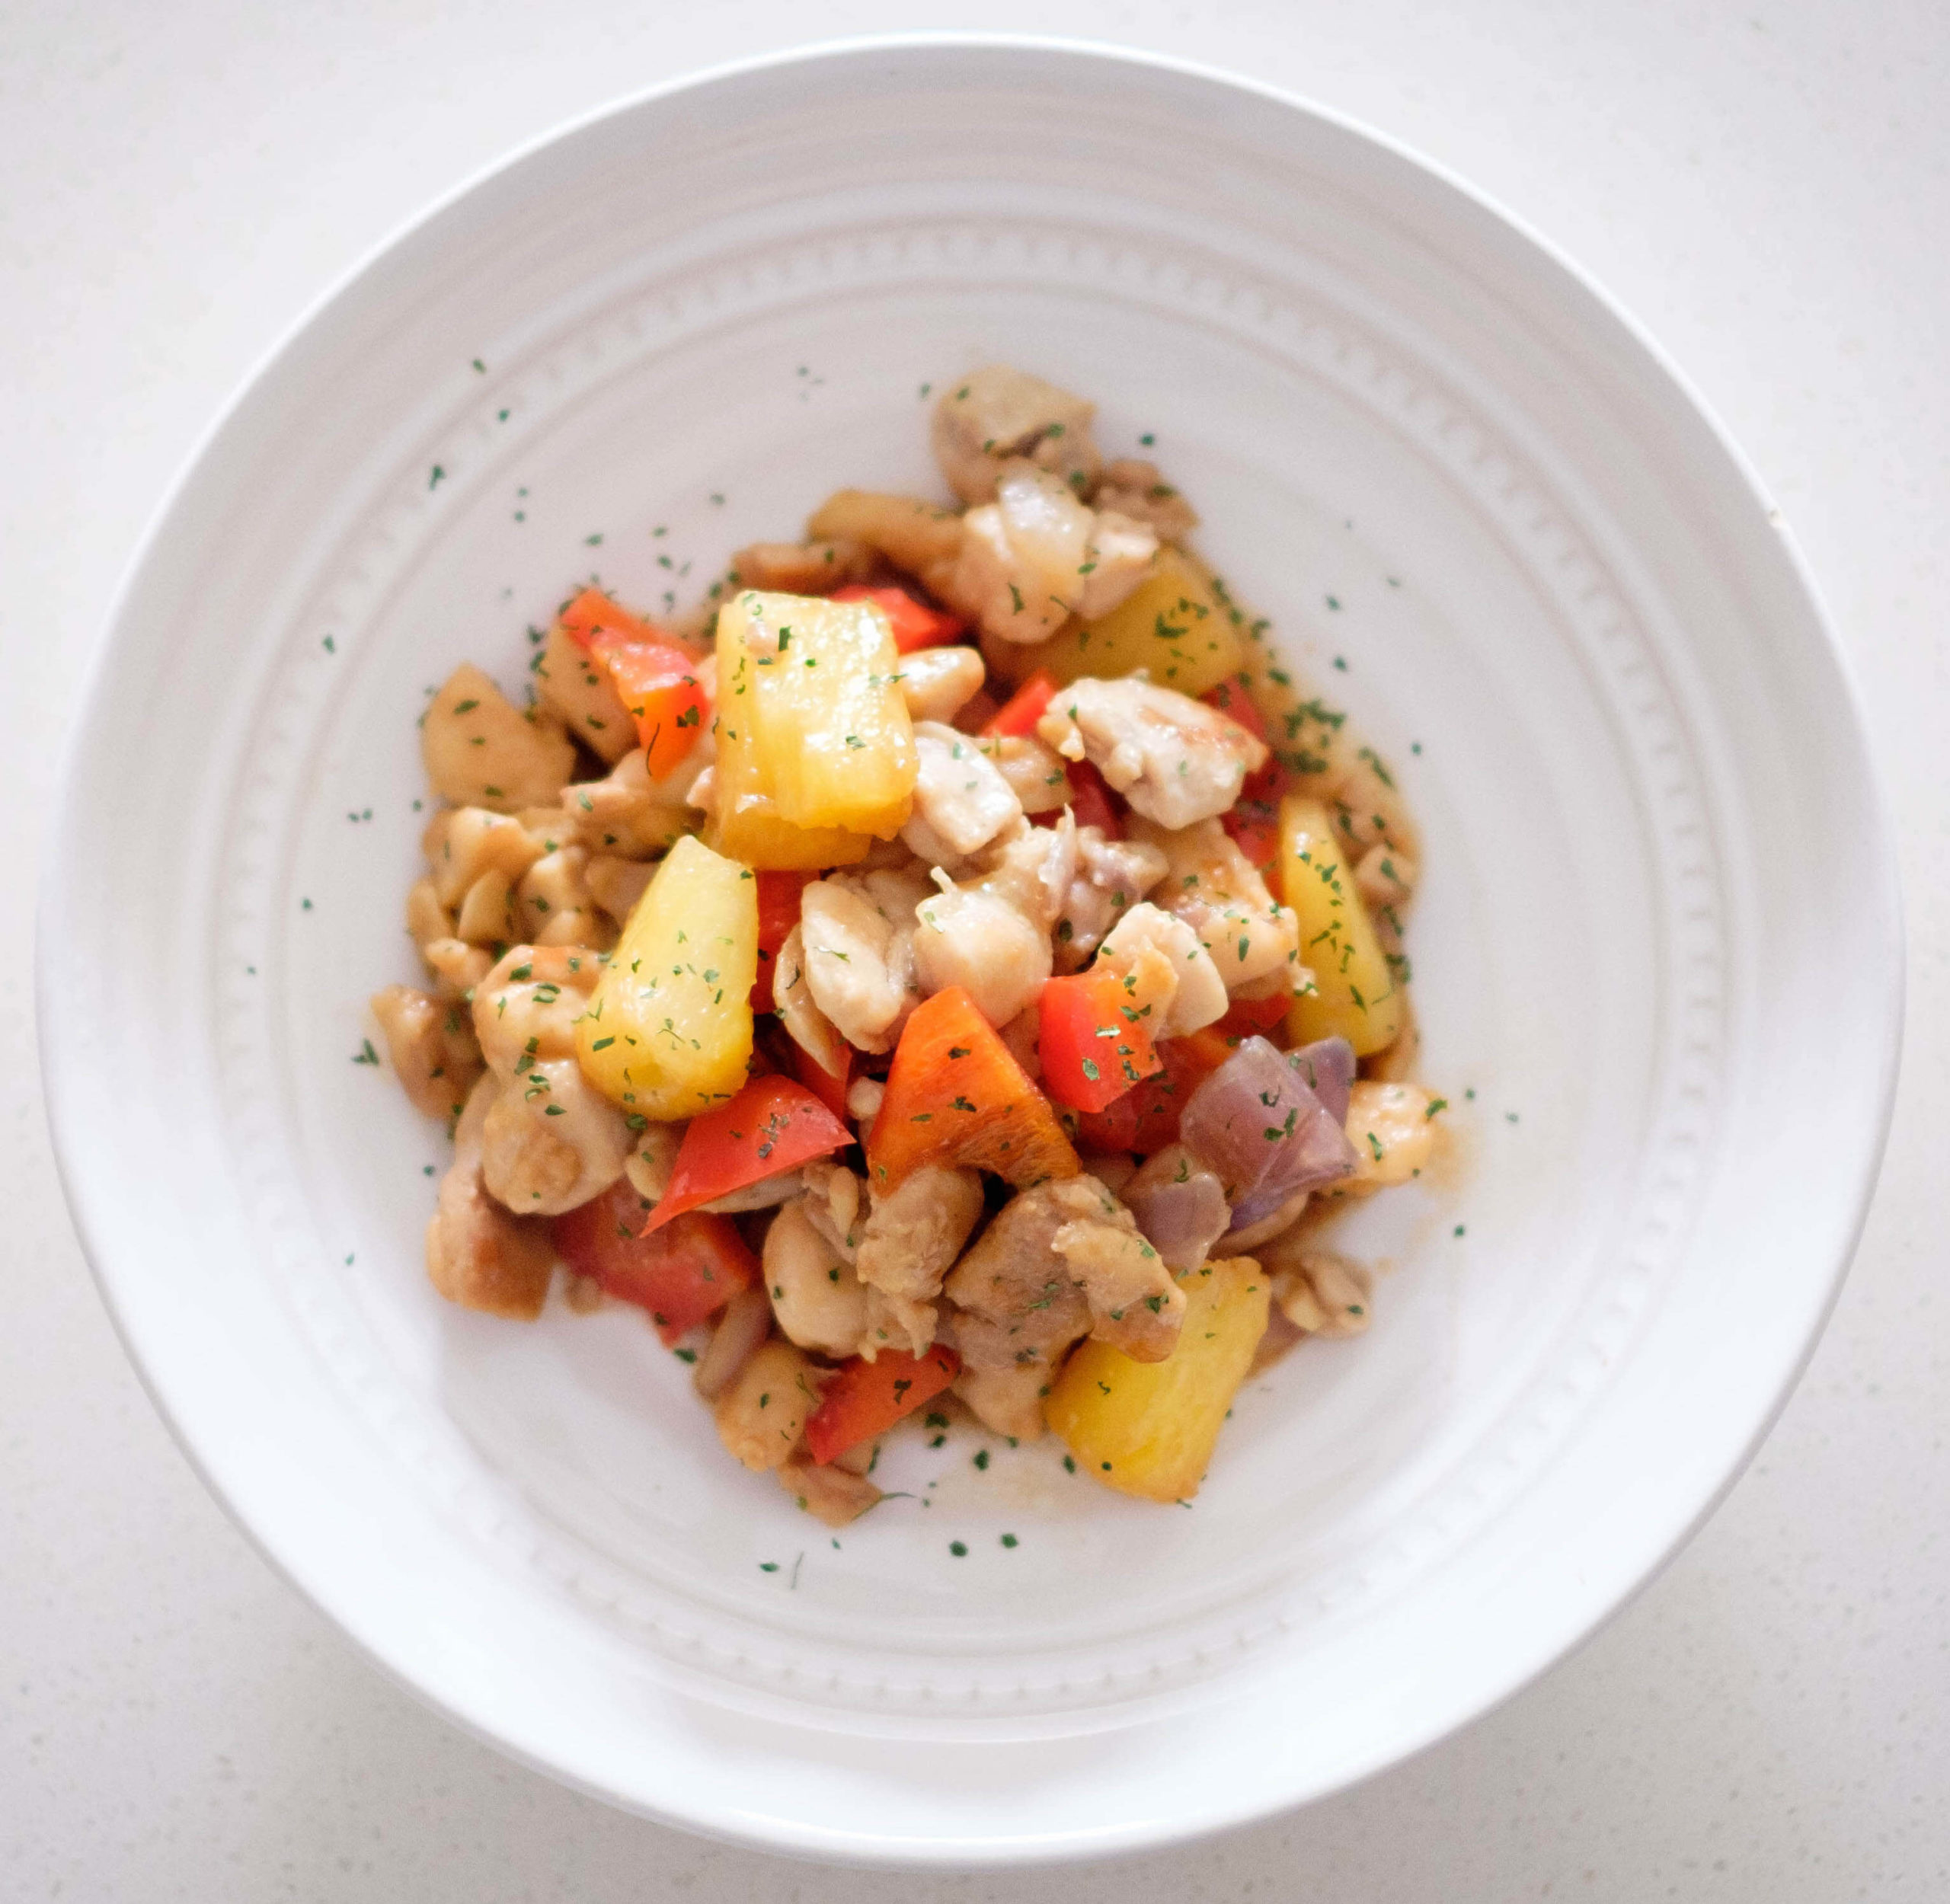
How To Make Pineapple Chicken Stir Fry

pineapple chicken stir fry

Stir-frys are a weekday favorite no matter what you put inside. They are great because you can typically take items that you have on hand, throw them in a pan to get cooking and have a quick, full meal in a matter of minutes. For this stir fry recipe, we opted to go with a tangy pineapple chicken combo that features peppers as well. Pineapple and red peppers are too flavors you see a lot together, think chicken kebabs. 

Ease of Making: Easy

Stir-frys are also great for substitutions if you don’t have one of the ingredients in your fridge or freezer. No chicken? No problem! Sub in any protein like beef, shrimp, tofu, etc to pull this dish together. 

Some of our other favorite stir fry recipes include: Soba Noodle Chicken Stir Fry, Ground Beef Stir Fry and Sheet Pan Chicken Stir Fry. 

How To Make Pineapple Chicken Stir Fry

Making chicken stir fry from scratch is as easy as throwing the chicken and vegetable you’ve got lying around in a pan and cooking until perfection. Diced chicken breast is commonly found in stir frys but we’ve opted to use a chicken thigh to impart more flavor and tenderness in our dish. 

How to Cook Pineapple Chicken Stir Fry

First, start by seasoning your chicken and cut it into small pieces. Then cook until lightly browned on all sides, about 5-7 minutes. Next, you’ll want to add in the stir fry sauce from the next step, top with your bell peppers and sesame oil and enjoy. 

How to Make Homemade Stir Fry Sauce

Making stir fry sauce from scratch is as easy as combining several classic Asian pantry items together in your dishes like hoisin, soy sauce, and sesame oil. Hoisin is a thick Chinese sauce that is salty and sweet in flavor. Many people use it to make Chinese inspired sauces or as a dipping sauce for proteins and vegetables. Sesame oil is extremely powerful in taste so it’s best to add in small amounts or you’ll end up what tastes overwhelming like sesame and coat your mouth in the oil. 

To make the sauce: simply add your hoisin and soy sauce to the pan of cooking chicken and bring to a boil while it thickens. 

Meal Prep Tips for Pineapple Chicken Stir Fry

  • Serve up our pineapple chicken stir fry with a variety of sides like rice, cauliflower rice, noodles or even put it in a lettuce wrap for a fantastic low carb option. 
  • Cut all your vegetables the same size to ensure even cooking.
  • Use a thinly cut piece of chicken or chunks of chicken. This helps reduce cook time and gets those warm pineapple bits of stir fry to your mouth even sooner. 
  • Use canned or fresh pineapple in this recipe instead of frozen. 
pineapple chicken stir fry

Pineapple Chicken Stir Fry

No ratings yet
Prep Time 5 minutes
Cook Time 15 minutes
Course dinner, Main Course
Cuisine American, Asian
Servings 2

Equipment

  • knife
  • cutting board
  • spatula
  • wok

Ingredients
  

  • 12 pz boneless chicken thighs
  • 1 each red bell pepper (diced)
  • 1/4 cup red onion (diced)
  • 1 cup pineapple chunks
  • 1 tbsp soy sauce
  • 2 tbsp hoisin sauce
  • 1 tsp sesame oil
  • 1 tbsp olive oil
  • 1/4 tsp garlic
  • 1/8 tsp salt

Instructions
 

  • Cut your chicken into 1 inch cubes
  • Add oil to a heated pan on medium high heat and add the onions. Saute the onions until they softne
  • Next, add the chicken and season with garlic powder and salt.
  • Continue to stir the chicken until it turns golden brown on all sides. (cook for 5 to 7 minutes) Then, add the soy sauce and hoisin sauce and fully coat the chicken
  • At the end, add the red bell peppers and pineapple. Sprinkle with sesame oil and mix well.
  • Enjoy with rice or noodles (use cauliflower rice or squash spirals for low carb option). You could also serve this on top of a lettuce wrap.

If you love this recipe, check out these other recipes we know you’ll love too:
Posted on

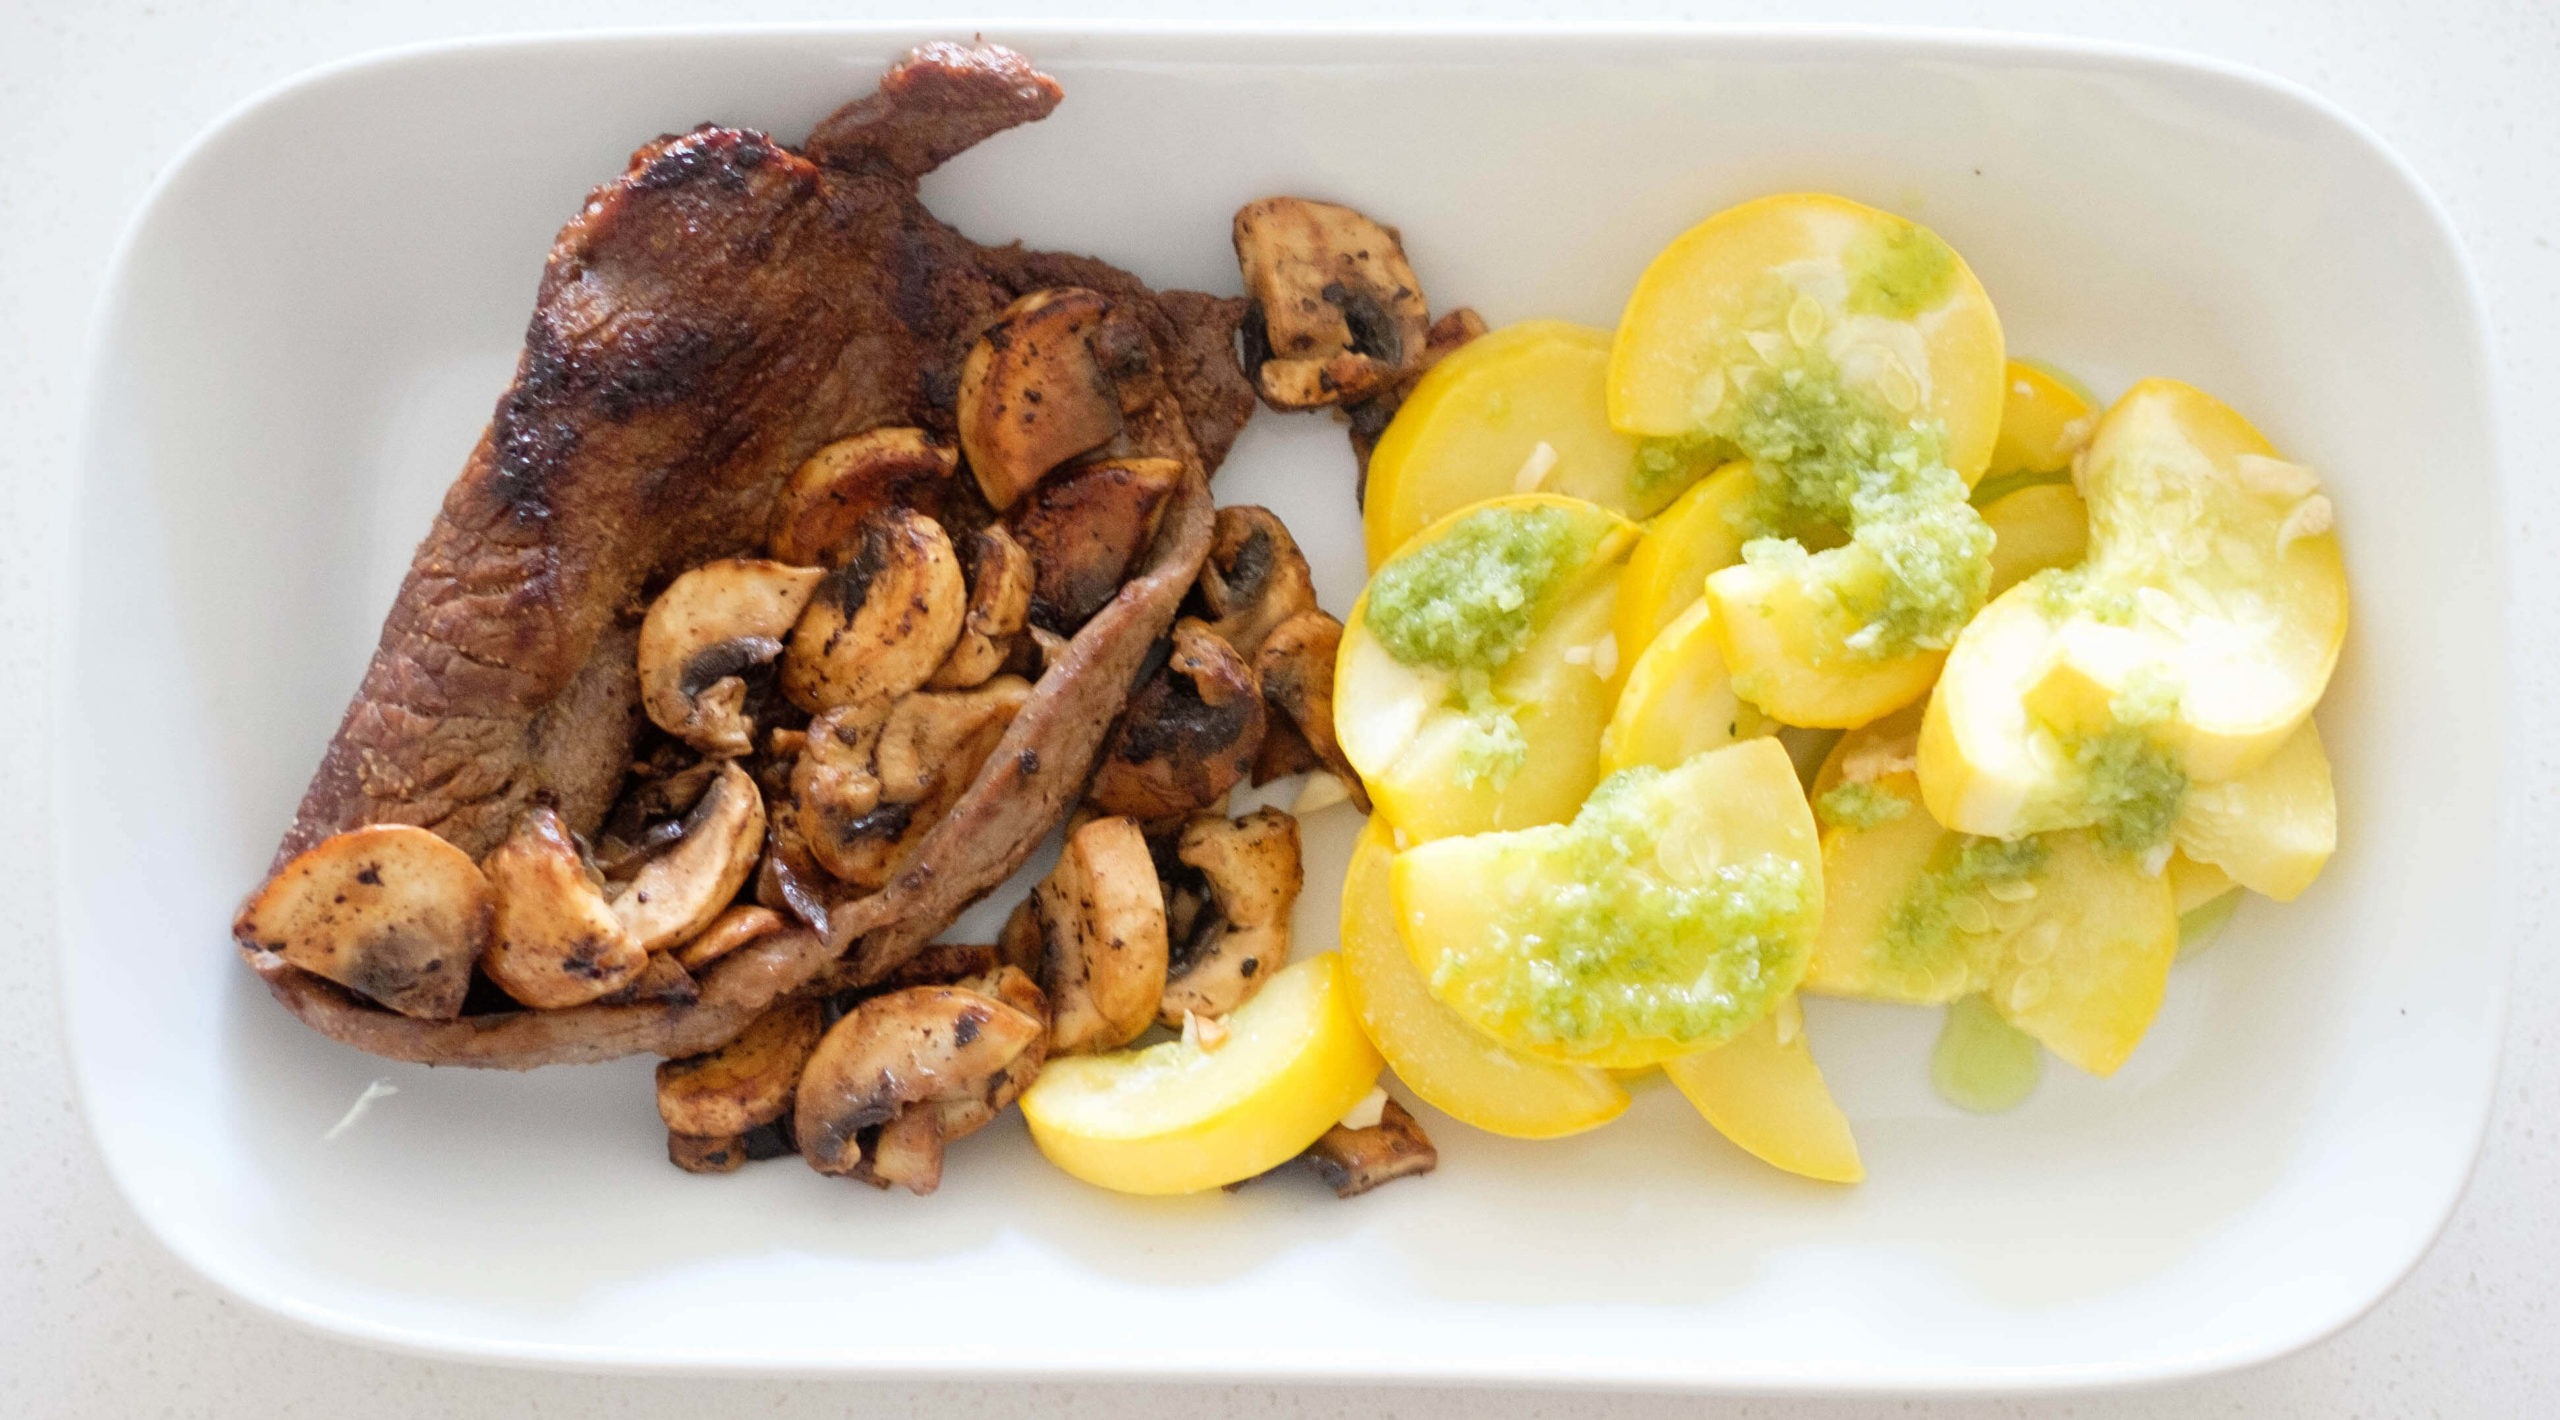
Easy Steak And Mushrooms Recipe

Steak and Squash

Our steak and mushrooms with squash and chive pesto recipe, isn’t only a mouthful to say but also to eat. This well rounded meal is perfect for summer or fall when you have access to beautiful squash. If you live somewhere where you can get good quality squash year round, lucky you, you can make this recipe all year. Not only is this recipe healthy, quick and easy to make but it’s also budget friendly. Our recipe accommodates any type of beef steak you’d like. We like to stock up on good roasts when they are on sale and then slice and freeze them individually. Depending on your freezer, steak can last 4-12 months when frozen. 

Ease of Making: Easy

How to Make Steak and Mushrooms with Squash and Chive Pesto

Steak and mushrooms are two common flavors that you’ve likely seen before for most meals. You can find this combination on breakfast menus, in burgers or at your favorite steak house. To bring the flavors home and give yourself a hearty treat, we’ve paired our steak and mushrooms with a bright and refreshing zucchini squash and chive pesto. 

How to Cook Steak and Mushrooms

First, start by seasoning your steak with garlic powder and salt and add to a pan with oil. Cooking at medium high heat. For this recipe, we opt to sear the steak on both sides and then cook until done.

To cook the mushrooms for steak, remove cooked beef from the pan and place on a serving dish. Using the same pan add more oil and saute the mushrooms until brown.

How to Tell if Your Steak is Done

Nailing the perfect cook on your steak is something most chefs aim to do in the kitchen. After all, nobody who prefers their steak well done is going to be okay with a still mooing piece of rare steak when served. To test out where your steak is in the cooking process, take your finger and press firmly into the steak and look for these qualities:

  • Rare – a rare steak is extremely soft and will keep an indent after you’ve touched it with a finger.
  • Medium rare – these steaks will feel soft and springy
  • Medium – touch your steak to see if it springs back to the touch, if it has a quick spring back you’ve nailed the medium cook. 
  • Medium well – a medium-well steak will be mostly firm with a hardly noticeable spring left in it when you touch it. 
  • Well done – steaks that are completely cooked through will be firm to the touch. 

Or use a meat thermometer:

  • Rare- 140℉
  • Medium rare – 145℉
  • Medium – 160℉
  • Medium well – 165℉
  • Well done – 170℉

Please note that the USDA recommends cooking to at last 145F to avoid increased risk of food borne illness. 

How to Prepare Squash

Squash is a delicate vegetable that can get soggy when sliced too thin or combined with too much oil. We like to slice our squash into half circles that are about a quarter inch thick. Do this by trimming the ends of your squash and slicing lengthwise through the vegetable until you have two even halves. Then you’ll slice widthwise along your squash to make the half coin.

Place your squash on a baking sheet and season with garlic powder and salt. Drizzle with olive oil and bake for 10-15 minutes.

How to Make Chive Pesto

Pestos are an easy to make sauce that traditionally are found with pine nuts, salt, basil, and garlic. To make our chive pesto, add chives, garlic, olive oil, and 1 tsp of salt to a blender. Puree until smooth. If you notice the pesto is too thick you can add more olive oil and blend until you reach your desired consistency. When finished, add to your cooked squash. 

Meal Prep Tips for Steak and Mushrooms

  • If you want to spice up your steak with pepper or additional seasonings, do it after the sear to ensure the spices do not burn. 
  • Pat the steak dry before cooking to get a nice crust. 
  • Have your meat thermometer handy to prevent any overcooking. 
Steak and Squash

Steak & Mushrooms With Squash and Chive Pesto

No ratings yet
Prep Time 5 minutes
Cook Time 20 minutes
Course Main Course
Cuisine American
Servings 2

Equipment

  • knife
  • cutting board
  • tongs
  • spatula
  • blender
  • saute pan
  • indoor grill pan

Ingredients
  

Steak and vegetables

  • 12 oz sirloin steak (recommend thinly sliced)
  • 1/4 tsp garlic powder
  • 1/4 tsp salt
  • 1/4 tsp pepper
  • 1 each yellow squash (sliced)
  • 1 cup mushrooms (sliced)

Chive Pesto

  • 1 bunch chives
  • 3 cloves garlic (peeled)
  • 1 each lemon
  • 1/4 cup olive oil
  • 1 tsp garlic powder
  • 1 tsp salt

Instructions
 

  • Pre-heat oven to 400F
  • Slice squash into half coins (1/4 inch thick). Place on a sheet pan and season with a pinch of salt and garlic powder. Drizzle with 1 tbsp of olive oil
  • Place squash in the oven and bake for 10-15 minutes.
  • Meanwhile, season the steak with garlic powder, salt, and pepper. Coat it with olive oil
  • Pre-heat the indoor grill pan on medium-high heat and sear the steak on each side for about 3 to 5 minutes until it reaches your desired doneness
  • After the steak cooks, remove it from the indoor grill pan. Add the sliced mushrooms and grill them until they soften (about 3 to 5 minutes). Toss them around so that it fully cooks

Chive Pesto

  • Add chopped chives, garlic, lemon juice, olive oil, and salt to a blender. Puree until smooth. Add more olive oil if it is too thick. Add salt to preferred taste. Then, spoon some of the sauce on top of your veggies and use it as a dip for your steak

If you love this recipe, check out these other recipes we know you’ll love too:
Posted on

How To Make Thai Red Beef Curry

red beef curry

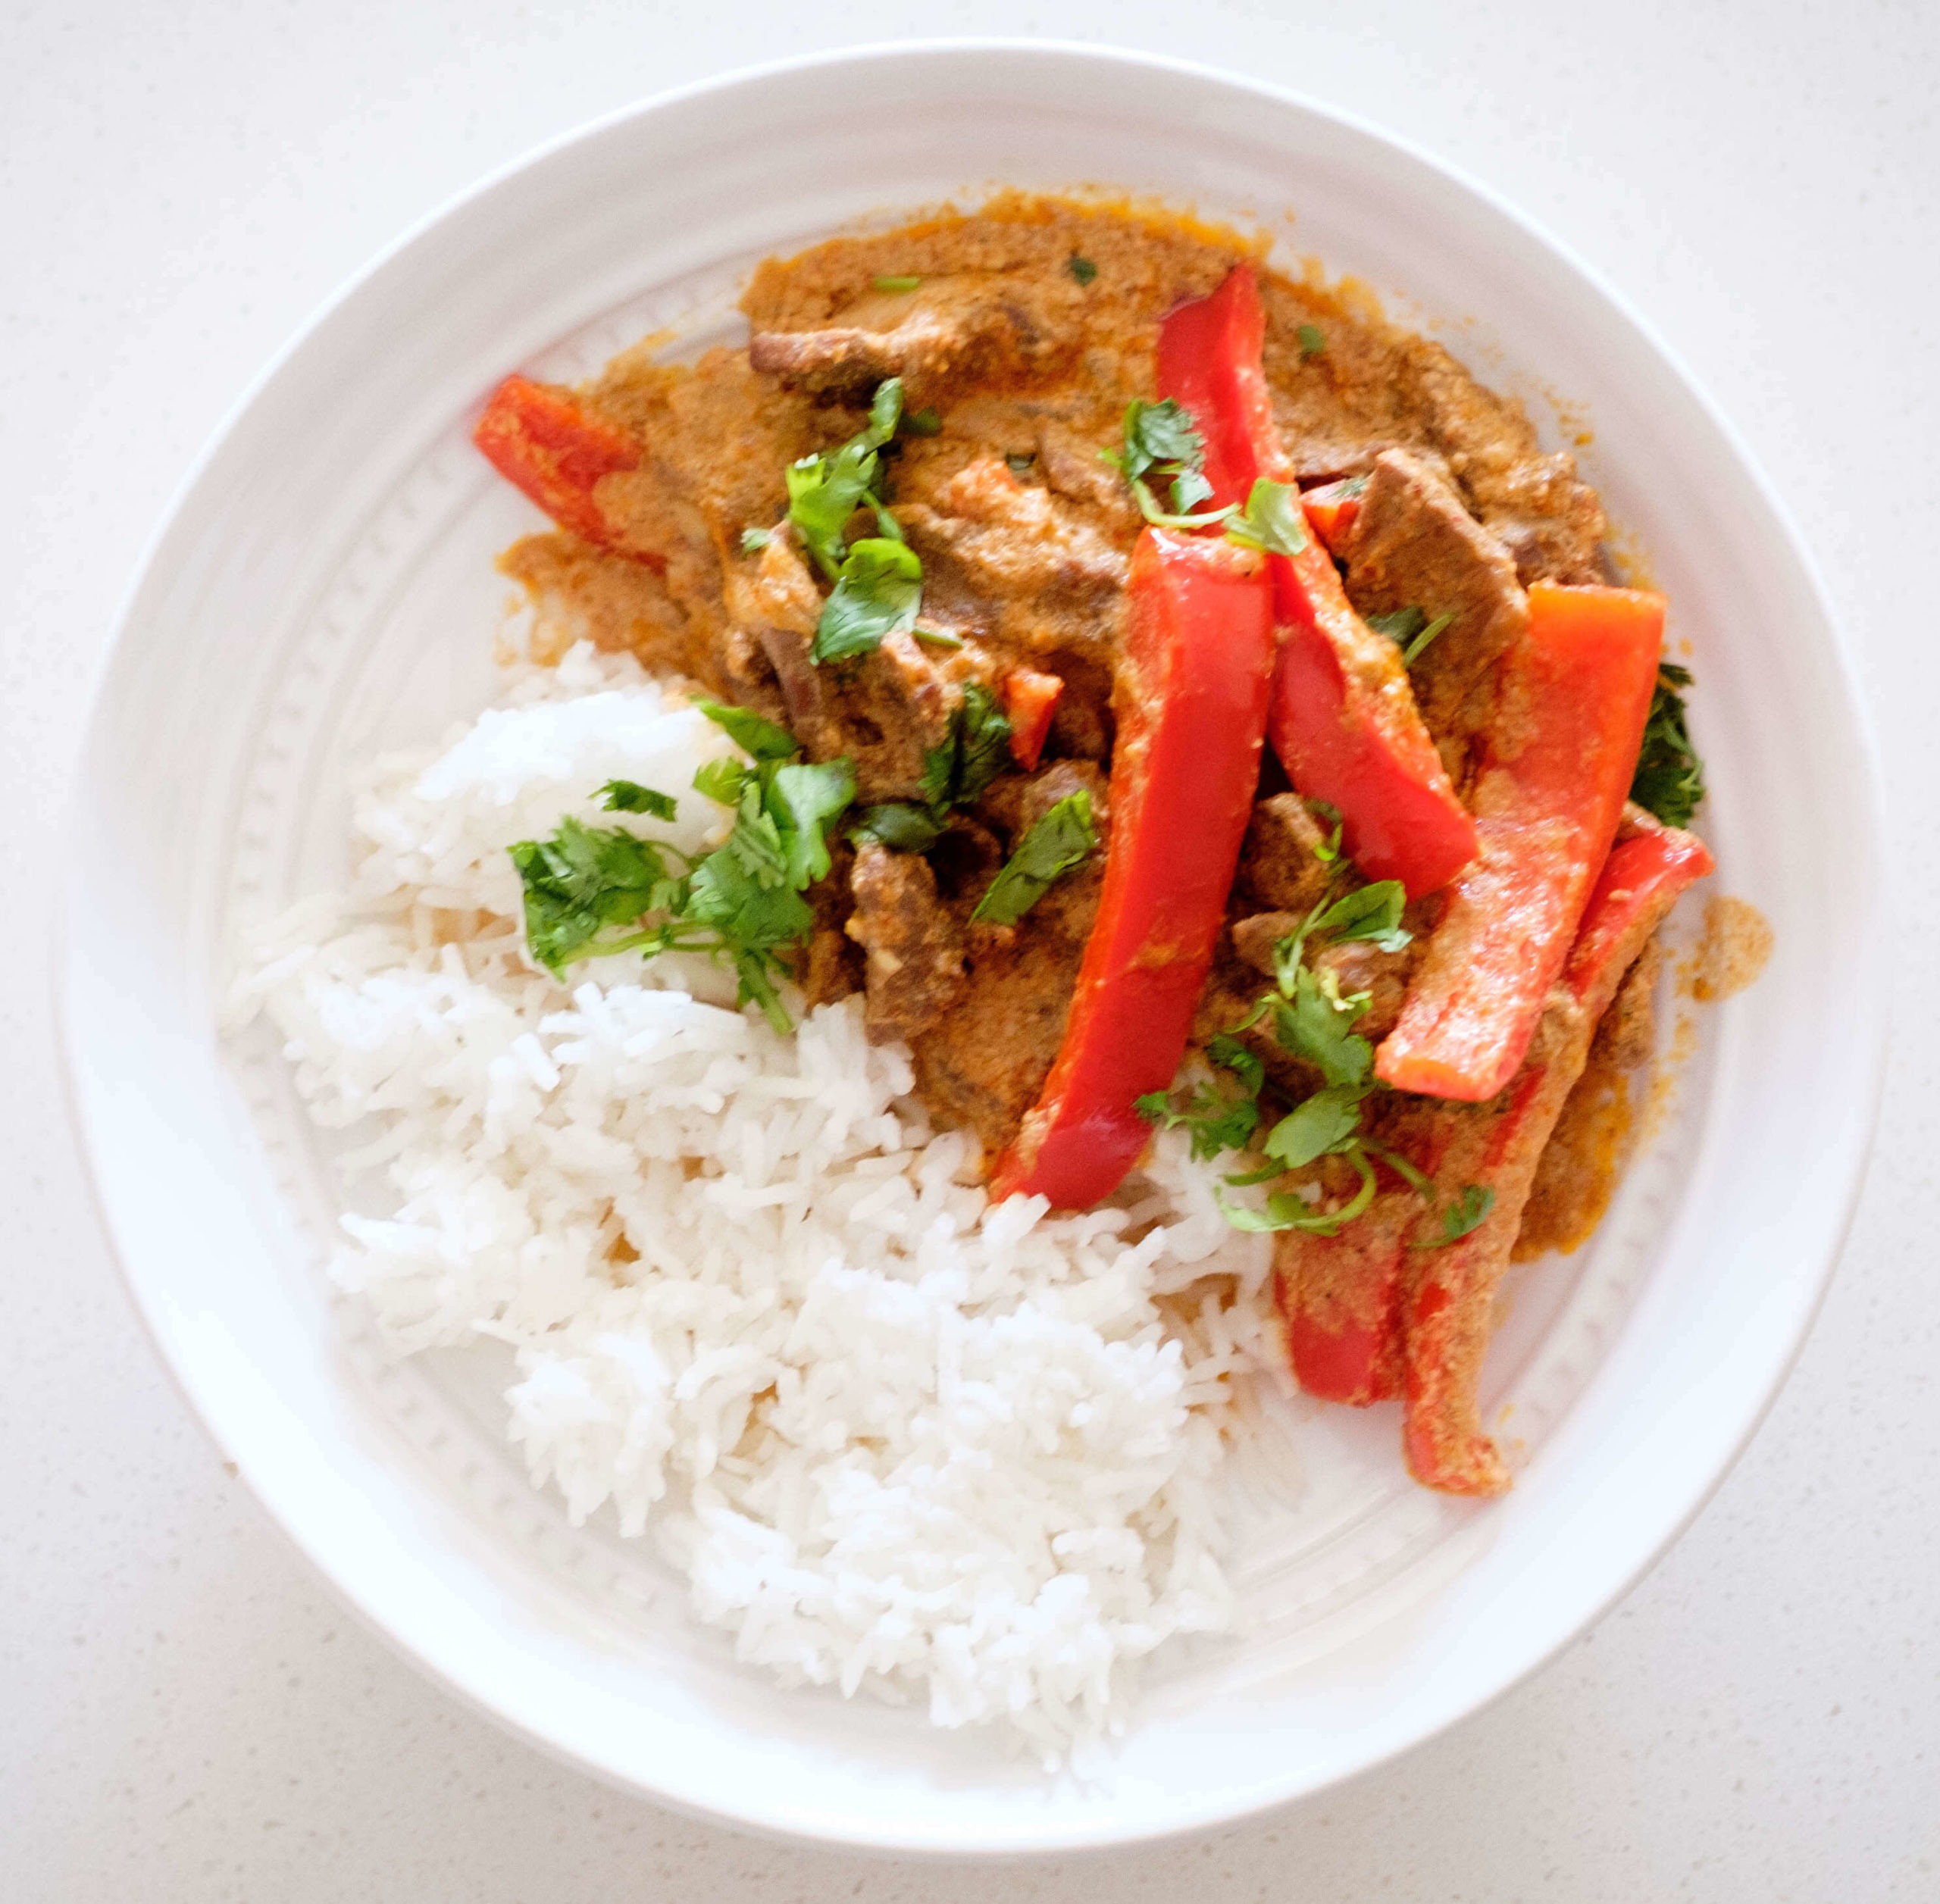
Oftentimes on weeknights we crave Asian food and the thought of ordering out definitely crosses our minds. However, with our easy Thai red beef curry recipe, we can skip the delivery fees and have a yummy Asian inspired meal in no time. Combining flavors of red curry paste, coconut milk and basil, this recipe is sure to satisfy those delivery food cravings and provide a much healthier option. 

How to Make Thai Red Beef Curry

We love a one-pot dish and this Thai red beef curry is definitely one of our favorites. By simmering the ingredients at a lower temperature for a longer period of time, you are able to break down the beef and make it super tender. The combination of sweet and heat flavors make this seriously delicious. 

Currys are also great because you can throw in whatever vegetables you have on hand and make this meal even more nutritious. This recipe doesn’t call it for it but we do like adding in green beans or squash if we’ve got it on hand. 

How to Cook Thai Red Beef Curry

Start by prepping your ingredients: slice  beef, onions and bell peppers into thin strips and mince your garlic. Once that is done, add oil to a soup pot on medium high heat and cook your onions until soft and translucent. Next, add your beef and garlic and stir well. Cook all of this for two to three minutes until golden brown. 

Once your beef is golden brown, pour in the coconut milk, brown sugar, red curry paste, and fish sauce. Ensure that everything is mixed extremely well and bring the pot to a boil, stirring carefully for one to two minutes to minimize an overflow. After your mixture has started to boil, reduce the heat and simmer your curry for another 20-30 minutes until your meat is tender.

When your steak is tender, mix in the basil leaves and top it off with fresh bell peppers. Serve with rice or cauliflower rice and the  juice of a lime wedge. 

Meal Prep Tips for Thai Red Beef Curry

  • Substitute in cauliflower rice for a lower-carb option. 
  • Double the batch and freeze it for future use when those delivery cravings hit and you’re short on time. 
red beef curry

Thai Red Beef Curry

Our Thai Red Beef Curry is fresh, flavorful, and full of healthy ingredients. A great option if you're craving take out but want to save on the ordering fees.
No ratings yet
Prep Time 5 minutes
Cook Time 35 minutes
Course Main Course
Cuisine Asian, Thai
Servings 4

Equipment

  • knife
  • cutting board
  • soup pot
  • spatula

Ingredients
  

  • 12 oz beef (any kind) thinly sliced
  • 1/4 cup white onions (sliced)
  • 1 each red bell pepper (sliced)
  • 1 each garlic cloves (minced)
  • 1 cup coconut milk
  • 2 tsp fish sauce
  • 2 tsp brown sugar
  • 1/2 cup basil leaves
  • 2 tbsp red curry paste
  • 1 each lime

Instructions
 

  • Add oil to a soup pot on medium-high heat. Saute the onions until they soften and turn translucent (about 2 to 3 minutes)
  • Next, add the beef and garlic and stir it around until they become golden brown (about 4 to 5 minutes)
  • Then, pour in the coconut milk, brown sugar, and red curry paste, and fish sauce.
  • Mix everything really well. Bring the pot to a boil and carefully continue to stir for 1 to 2 minutes (making sure it doesn't overflow)
  • Once it reaches a rolling boil, bring it down to a simmer and cook for another 20-30 minutes until meat is tender.
  • At the very end, mix in the basil leaves and top it off with fresh bell peppers. Serve with rice and juice of a lime wedge

If you love this recipe, check out these other recipes we know you’ll love too:

Posted on

How To Make Sausage Fried Rice

Sausage fried rice is a savory egg and rice dish that is simple and quick to throw together. Much like a stir fry, fried rice is a fool proof meal that can be a great option when you have proteins and veggies on hand but you aren’t sure what to do with them. Our recipe uses sausage links, and a mixture of fresh or frozen mixed vegetables. However, you can substitute in ground sausage, italian sausage, breakfast sausage or pretty much any ground meat you have on hand. 

Ease of Making: Easy

This sausage fried rice recipe uses a traditional whole grain rice but if you’re looking for a lower carb option you can substitute in cauliflower rice like we did in these recipes:

How to Make Sausage Fried Rice

There are many variations of fried rice that is influenced by cultures and meals across the country. The most popular variations are Chinese sausage fried rice, Italian sausage fried rice, and breakfast sausage fried rice. 

For the most authentic experience, try cooking this up in a wok but if you don’t have one then a skillet or frying pan will do the trick. 

How to Cook Fried Rice

Start by mincing garlic, dicing your bell pepper, and slicing sausage into quarter inch circles. If using ground sausage, simply ignore the last step. Once your ingredients are prepped, add oil to a heated wok on medium high heat and saute garlic and sausage until the sausage heats through. Then add in your vegetables and stir. When your vegetables are cooked through, add in the cooked rice and season with soy sauce and garlic powder. Stir the rice well until completely covered with the soy sauce. You can add more soy sauce if needed. 

Now that your base is complete, make a hole in the middle of the pan and crack two eggs into the center. Lightly whisk the eggs with a fork until they scramble and have cooked and firmly set. Incorporate eggs with the rest of the mixture by stirring all ingredients together.

Top off the rice with sprinkles of sesame oil, sesame seeds or sriracha for more flavor and heat. 

Meal Prep Tips for Making Sausage Fried Rice

  • Use rice you’ve already prepared for the week. Day old rice works best in our fried rice recipe. 
  • Sub in mushrooms or tofu for the sausage to make this recipe vegetarian friendly. 
sausage fried rice

Sausage Fried Rice

No ratings yet
Prep Time 5 minutes
Cook Time 15 minutes
Course dinner, Main Course
Cuisine Asian
Servings 2

Equipment

  • knife
  • cutting board
  • spatula
  • wok

Ingredients
  

  • 2 each sausage links (3 oz each)
  • 1 each large egg
  • 2 cups cooked rice (best if using day old rice)
  • 2 each garlic cloves (minced)
  • 1 each red bell pepper (diced)
  • 1 cup frozen or fresh mixed vegetables (chopped)
  • 2 tbsp soy sauce
  • 1/4 tsp pepper
  • 1 tsp sesame oil
  • 1 tbsp olive oil

Instructions
 

  • Slice sausage into 1/4 inch coins
  • Add oil to a heated pan on medium-high heat. Saute the garlic, vegetables, and sausage for about 2 to 3 minutes until the vegetables soften and sausage heats through
  • Then, add cooked rice to the wok
  • Season with soy sauce and pepper. Mix the rice well until it is completely coated with the soy sauce. (add more soy sauce if needed)
  • Then, spread the rice mixture to the edges of the pan and create a hole in the middle of the pan. Crack the egg into the middle and stir and scramble the eggs until they have cooked and firmly set. Once cooked, mix it well into the rice mixture.
  • At the end, top off the rice with sprinkles of sesame oil for more flavor. Eat and enjoy!
Posted on

How To Make Soba Noodle Chicken Stir Fry

noodle stir fry

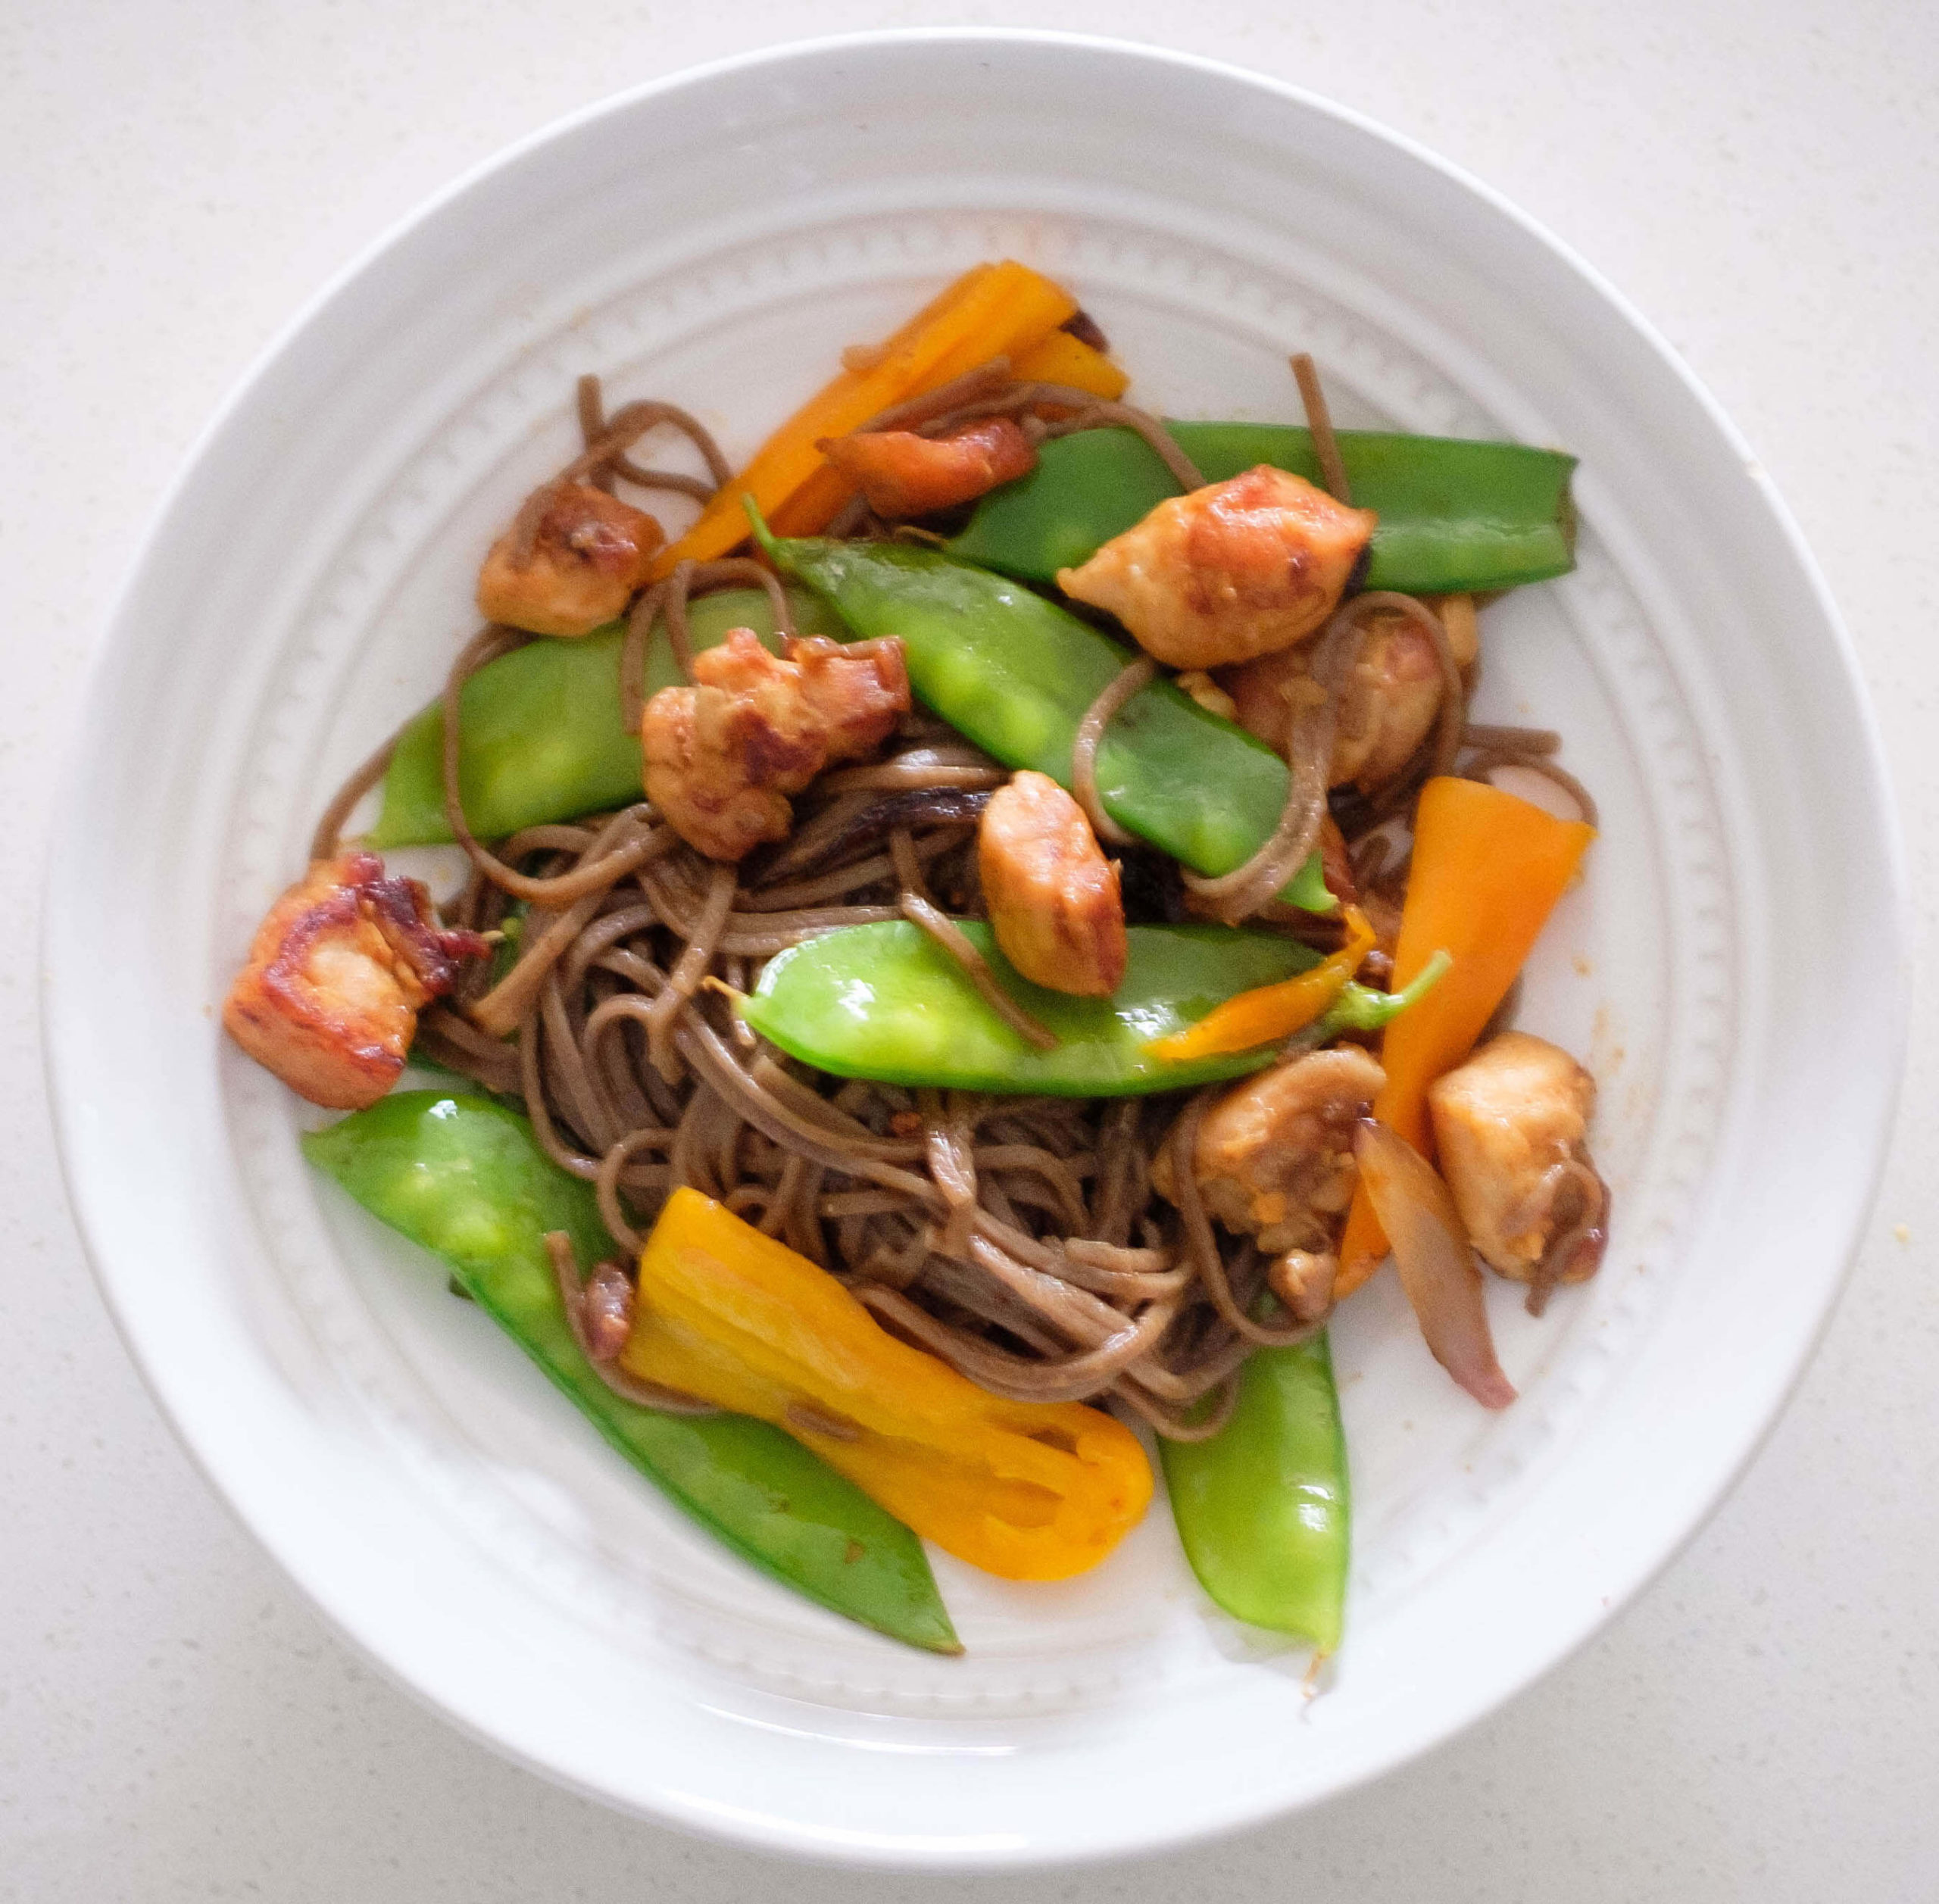
Our soba noodle chicken stir fry is a great option if you’re at home and craving a Chinese food delivery. This recipe comes together faster than you can list all of the delivery restaurants in your area. But seriously, you can whip this up in under twenty minutes. It’s also loaded with vegetables and protein that make the dish a healthy alternative to add into your clean eating routine. 

Ease of Making: Easy

How to Make Soba Noodle Chicken Stir Fry

Soba noodle stir fry is a wonderful and nutritious twist on your traditional stir fry that features rice. Soba (meaning buckwheat in Japanese) noodles, are thin noodles resembling spaghetti but are made from buckwheat flour, like the Japanese name implies. 

The best stir fry vegetables are:

  • Snow peas
  • Red peppers
  • Snap peas
  • Carrots
  • Peas
  • Onion

How to Make Soba Noodles

We love the versatility of the soba noodle. It can be served cold, warm, dripped, or drunken and more. To make soba noodles, boil the noodles according to package instructions (usually 3 to 5 minutes). It’s important when cooking soba noodles that you have plenty of room in your pot for the noodles to move around. Size up from the normal pot you might use to cook spaghetti. This helps prevent sticking and clumping. 

After your noodles have cooked, be sure to rinse them in cold water. This can help remove the excess starch in the noodle that is notorious for making the noodles stick together. Rinse for about a minute or until the water runs clear through the colander. 

Set aside. 

 How to Cook Chicken Stir Fry

Prepare your stir fry by cutting the onions, bell peppers, chicken into one-inch chunks and mincing your garlic and ginger. Heat oil to a pan over medium-high heat and add in the chicken, cooking until it is fully cooked and a nice golden brown. This should take about five to seven minutes. Once cooked, season your chicken with garlic powder and salt and add the onions, ginger, and garlic to the pan. Stir well to combine. 

When your seasonings and herbs  are thoroughly mixed, add in the hoisin, sriracha, and soy sauce. Mix until chicken is coated in the sauce. Toss in your peas, bell peppers, and your rinsed the soba noodles.

Top it off with sesame oil, sesame seeds and more sriracha if you’d like. 

Meal Prep Tips for Soba Noodle Chicken Stir Fry

  • Keep your extra takeout packets of soy sauce, sriracha, salt, and pepper to take with you on the go to add on top of your prepped meal. 
  • Rinse your soba noodles to prevent sticking. 
  • Substitute in tofu or edamame for vegetarian protein options or leftover salmon, and shrimp for you pescatarians. 
noodle stir fry

Soba Noodle Chicken Stir Fry

No ratings yet
Prep Time 5 minutes
Cook Time 15 minutes
Course Main Course
Cuisine Asian
Servings 2

Equipment

  • knife
  • cutting board
  • boiling pot
  • wok
  • spatula

Ingredients
  

  • 12 oz boneless chicken thighs
  • 4 oz soba noodles
  • 10 oz snap/snow peas
  • 1 each bell pepper (diced)
  • 1/4 cup red onions (sliced)
  • 1 tbsp ginger (minced)
  • 1 tbsp garlic (minced)
  • 1 each lime
  • 2 tbsp hoisin sauce
  • 1 tbsp sriracha sauce
  • 1 tbsp soy sauce
  • 1/4 tsp garlic powder
  • 1 tbsp olive oil
  • 1 tsp sesame oil

Instructions
 

  • Boil soba noodles according to package instructions (usually 3 to 5 minutes). Drain in a strainer and rinse under cool water, and set it aside.
  • Cut the chicken into one-inch cubes
  • Add oil to a heated pan on medium-high heat. Saute the chicken until it turns golden brown and fully cooks (5 to 7 minutes). Season with garlic powder and salt.
  • Add the onions, ginger, and garlic. Mix well for 1 to 2 minutes.
  • Then add the hoisin sauce, sriracha sauce, and soy sauce. Mix well so that the chicken is completed coated.
  • Add the snap/snow peas and bell peppers, then toss in the soba noodles (drained).
  • Finish it off with the sesame oil and fresh lime juice. Eat and enjoy!

If you love this recipe, check out these other recipes we know you’ll love too: